Ce contenu n'est pas disponible dans la langue sélectionnée.
Chapter 7. Generating playbooks and viewing playbook explanations
Using the Ansible VS Code extension, you can create Ansible playbooks using a natural language interface in English. Red Hat Ansible Lightspeed with IBM watsonx Code Assistant reads the natural language prompts and generates an entire playbook recommendation based on your intent. You can also view the explanations for new or existing playbooks. The playbook explanations describe what the playbook does and contextualize its impact.
These capabilities enable Ansible developers to use natural language prompts to create new Ansible playbooks quickly and more efficiently and also get an explanation for existing Ansible playbook, thereby reducing the overall onboarding learning period. For information about Ansible playbooks, see the Getting started with Ansible Playbooks guide.
You can generate playbooks and view playbook explanations when connecting to the Red Hat Ansible Lightspeed cloud service. These features are not yet available with Red Hat Ansible Lightspeed on-premise deployments.
7.1. Best practices to generate playbooks
Follow these guidelines for the highest quality of a playbook recommendation.
Ensure that the goal statements directly specify what the playbook must do.
Your statement should start with the goal of the playbook, for example,
Apply security patches to RHEL9. Avoid starting statements withCreate a playbook that,Please prepare a playbook that, orI need help with.- Ensure that the goal statement does not contain new lines.
Ensure that the goal statement is not more than one sentence.
You might have to repeat the details in the goal statement to produce the best results. It is recommended that you use the generated outline as feedback about whether your goal statement might benefit from more or less details, and then modify the goal statement as necessary.
Ensure the following when you edit the outline:
- Do not restate the goal of the playbook.
- Verify that the steps considered capture the key steps in the playbook. The steps need not reflect each and every task that is expected in the playbook.
- Keep the step description in one sentence without adding new lines to the outline.
7.2. Generating Ansible playbooks
You can use the natural language interface in the Ansible VS Code extension to generate an entire Ansible playbook.
Prerequisites
- You are part of an organization that has a trial or paid subscription to Red Hat Ansible Automation Platform and IBM watsonx Code Assistant both.
- You have installed and configured the Ansible VS Code extension.
Procedure
- Log in to VS Code with your Red Hat account.
- From the Activity bar, click the Ansible icon.
Under Ansible Creator, click Get started. The Ansible Content Creator page is displayed.
The following illustration displays the Ansible Content Creator page:
Figure 7.1. Settings to create Ansible playbooks

- Select the Playbook with Ansible Lightspeed tile. The Create a playbook page is displayed.
In the What do you want the playbook to accomplish? field, enter the prompts to create a playbook and click Analyze.
After a few seconds, the recommended steps for your playbook intent are displayed in the Review the suggested steps for your playbook and modify as needed field.
Perform one of the following tasks:
- If the steps match your intent: Click Generate Playbook.
- If any modifications are required: Click the editor and update the tasks or steps to suit your intent.
- If the task suggestions do not match your intent: Click Back to change the original prompt and start over.
- If you want to restore the original task suggestions: Click Reset and proceed to the next step.
After you verify the steps, click Generate playbook.
It takes a few seconds for the playbook to generate, and The following playbook was generated for you field displays the newly generated playbook.
- Click Open editor. The generated playbook opens as an untitled YAML file in the VS Code editor.
- Save the untitled YAML file.
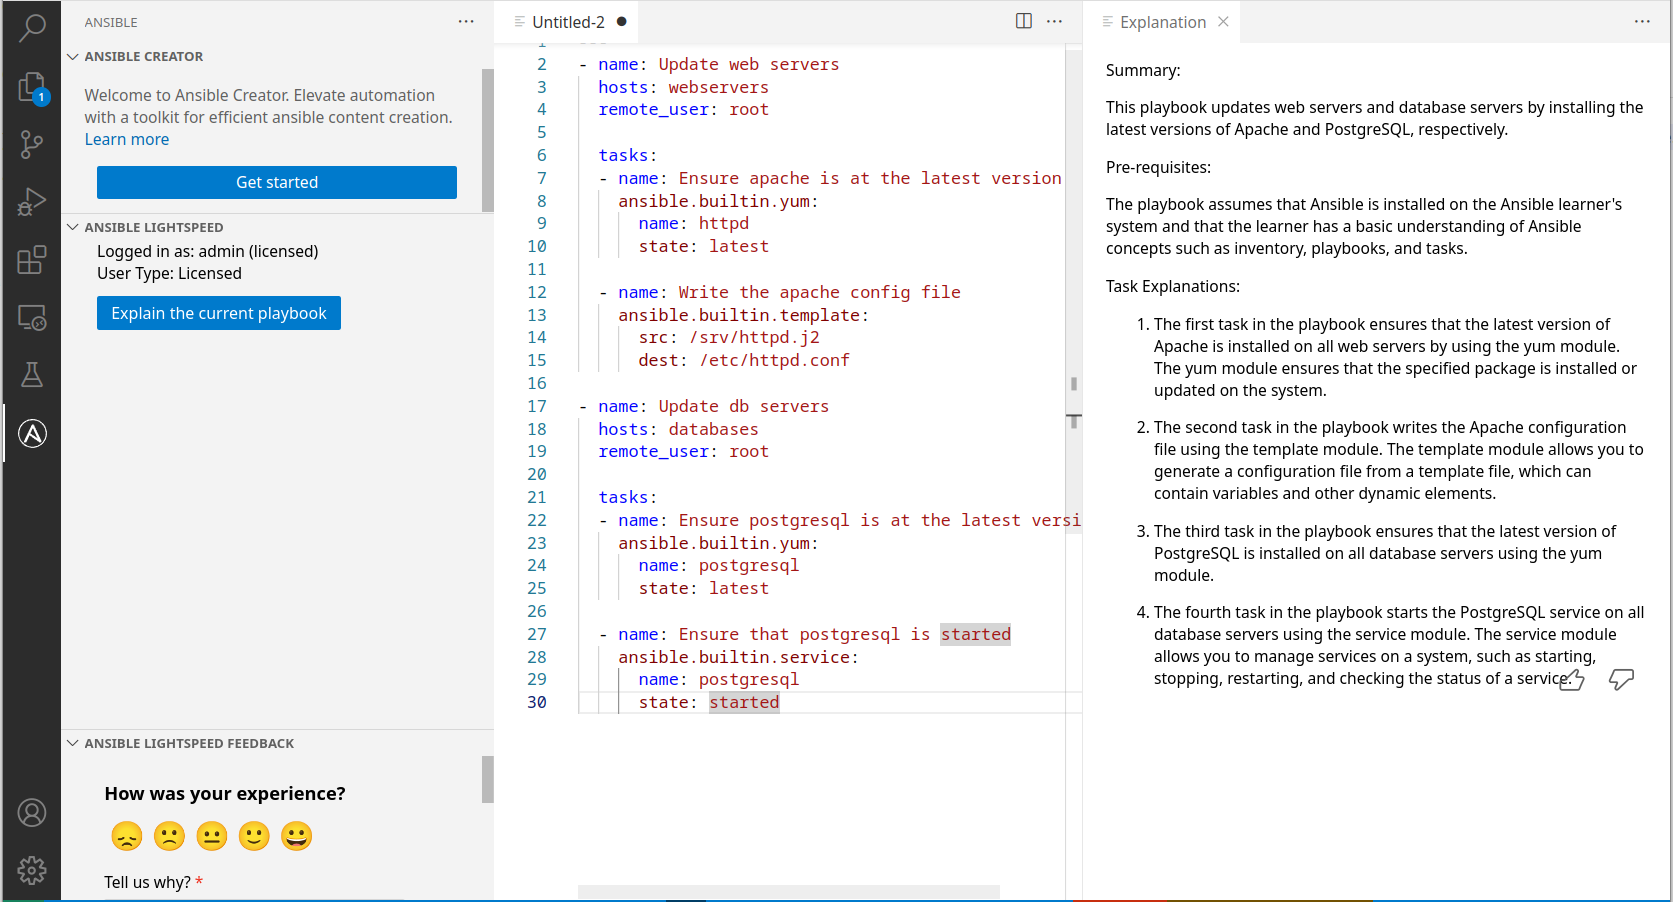
7.3. Viewing playbook explanations
You can request explanations for a newly created playbook as well as an existing Ansible playbook.
Prerequisites
- You are part of an organization that has a trial or paid subscription to Red Hat Ansible Automation Platform and IBM watsonx Code Assistant both.
- You have installed and configured the Ansible VS Code extension.
- You have opened the playbook whose explanation you want to view.
Procedure
- Log in to VS Code with your Red Hat account.
- Open an Ansible playbook YAML file in VS Code.
Use one of the following methods to view the playbook explanation:
From an active playbook YAML file:
- Place your cursor anywhere within the playbook file.
- Right-click > Select Explain the playbook with Ansible Lightspeed.
From the Ansible panel:
- From the navigation menu, click the Ansible icon.
Select Explain the current playbook.
The playbook explanation is displayed on the right panel of the VS Code screen.
The following illustration shows an example of a playbook explanation:
Figure 7.2. Example of a playbook explanation