Ce contenu n'est pas disponible dans la langue sélectionnée.
Chapter 2. Creating a JFR recording in the Cryostat web console
You can create a JFR recording that monitors the performance of your JVM located in your containerized application. After you create a JFR recording, you can start the JFR to capture real-time data for your JVM, such as heap and non-heap memory usage.
Prerequisites
- Installed Cryostat 2.4 on Red Hat OpenShift by using the OperatorHub option.
- Created a Cryostat instance in your Red Hat OpenShift project.
Logged in to your Cryostat web console.
- You can retrieve your Cryostat application’s URL by using the Red Hat OpenShift web console.
Procedure
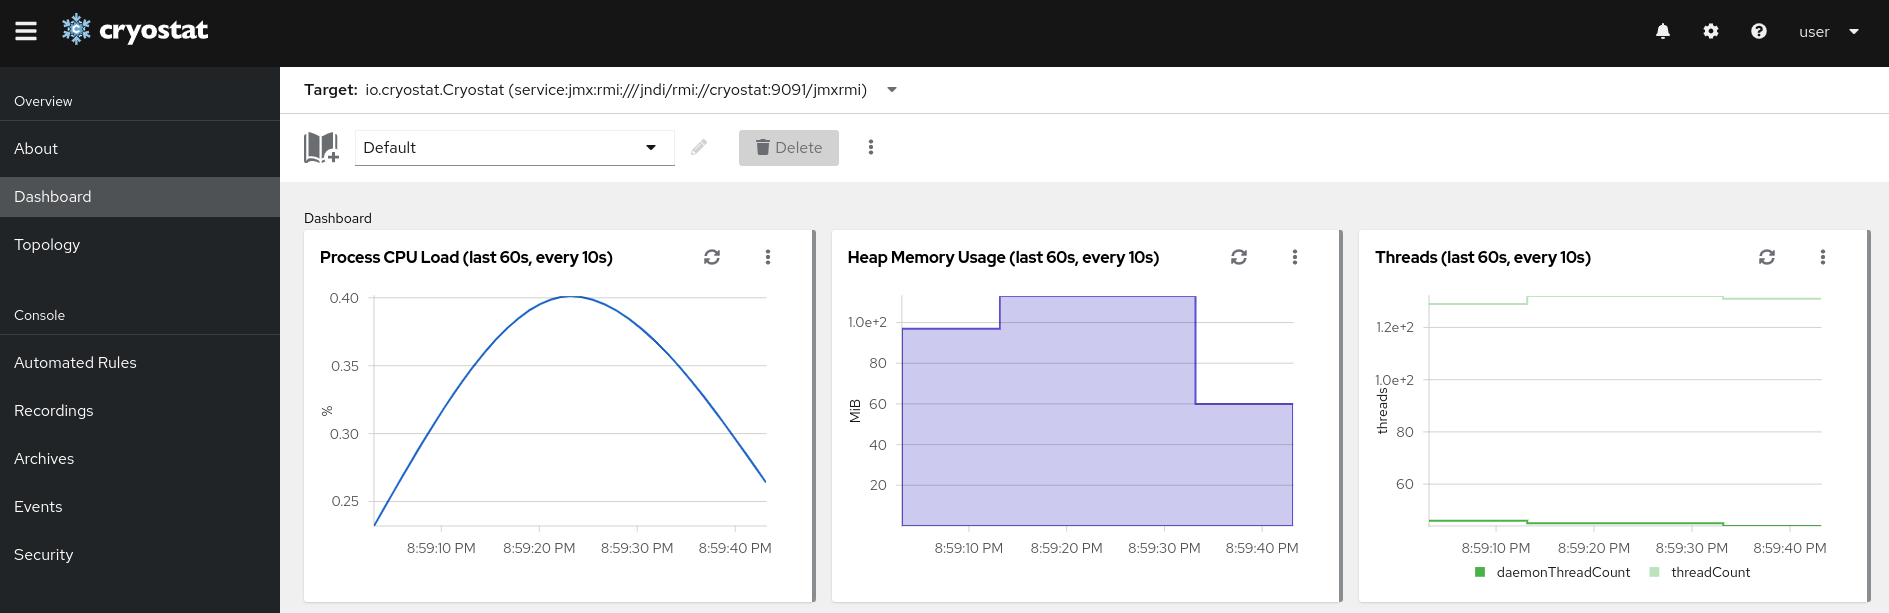
On the Dashboard panel for your Cryostat web console, select a target JVM from the Target list.
NoteDepending on how you configured your target applications, your target JVMs might be using a JMX connection or an agent HTTP connection. For more information about configuring your target applications, see Configuring Java applications.
ImportantIf your target JVM is using an agent HTTP connection, ensure that you set the
cryostat.agent.api.writes-enabledproperty totruewhen you configured your target application to load the Cryostat agent. Otherwise, the Cryostat agent cannot accept requests to start and stop JFR recordings.Figure 2.1. Example of selecting a Target JVM for your Cryostat instance
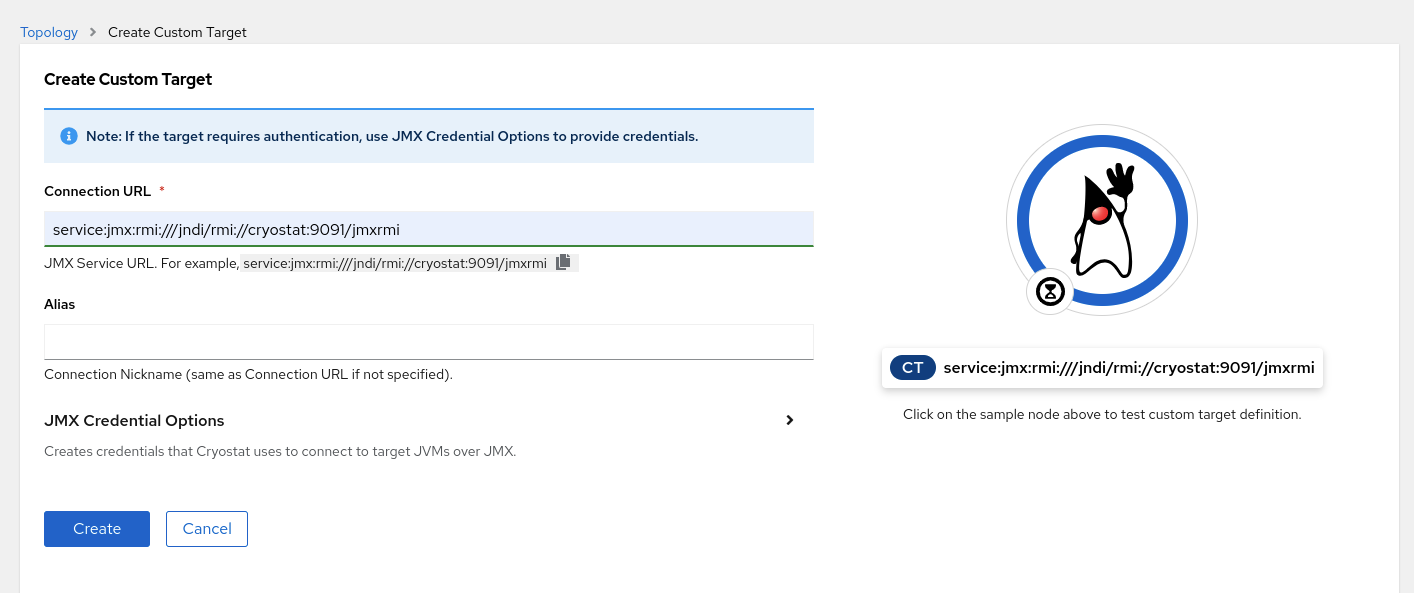
Optional: On the Dashboard panel, you can create a target JVM. From the Target list, click Create Target. The Create Custom Target window opens.
- In the Connection URL field, enter the URL for your JVM’s Java Management Extension (JMX) endpoint.
- Optional: To test if the Connection URL that you specified is valid, click the Click to test sample node image. If there is an issue with the Connection URL, an error message is displayed that provides a description of the issue and guidance to troubleshoot.
- Optional: In the Alias field, enter an alias for your JMX Service URL.
Click Create.
Figure 2.2. Create Custom Target window
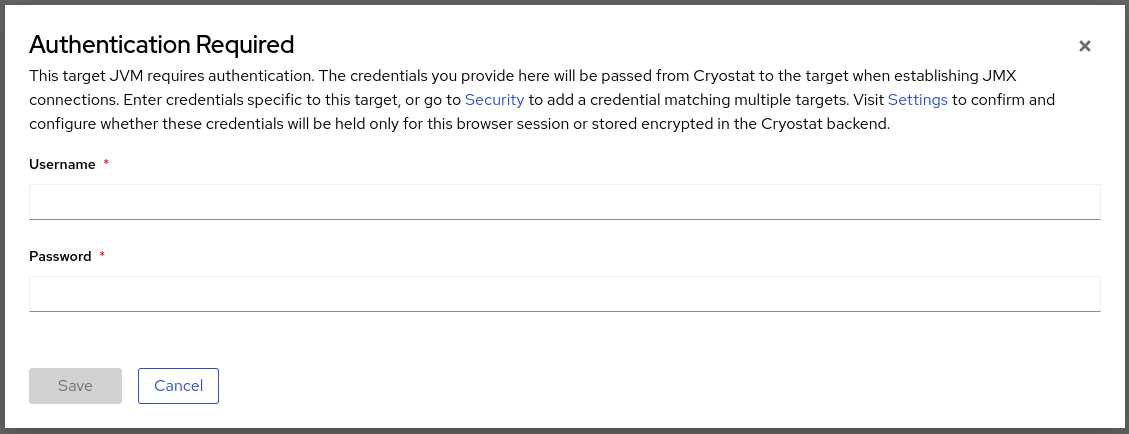
- From the navigation menu on the Cryostat web console, click Recordings.
Optional: Depending on how you configured your target JVM, an Authentication Required dialog might open on your web console. In the Authentication Required dialog box, enter your Username and Password. To provide your credentials to the target JVM, click Save.
Figure 2.3. Example of a Cryostat Authentication Required window
 Note
NoteIf the selected target JMX has Secure Socket Layer (SSL) certification enabled for JMX connections, you must add its certificate when prompted.
Cryostat encrypts and stores credentials for a target JVM application in a database that is stored on a persistent volume claim (PVC) on Red Hat OpenShift. See Storing and managing credentials (Using Cryostat to manage a JFR recording).
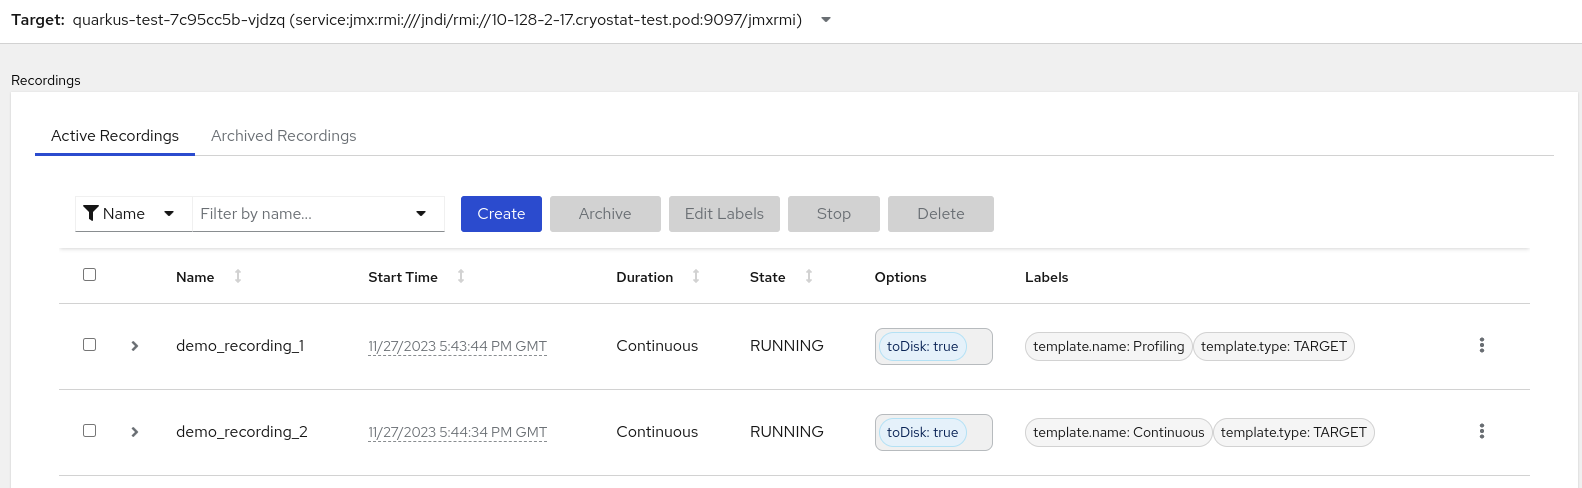
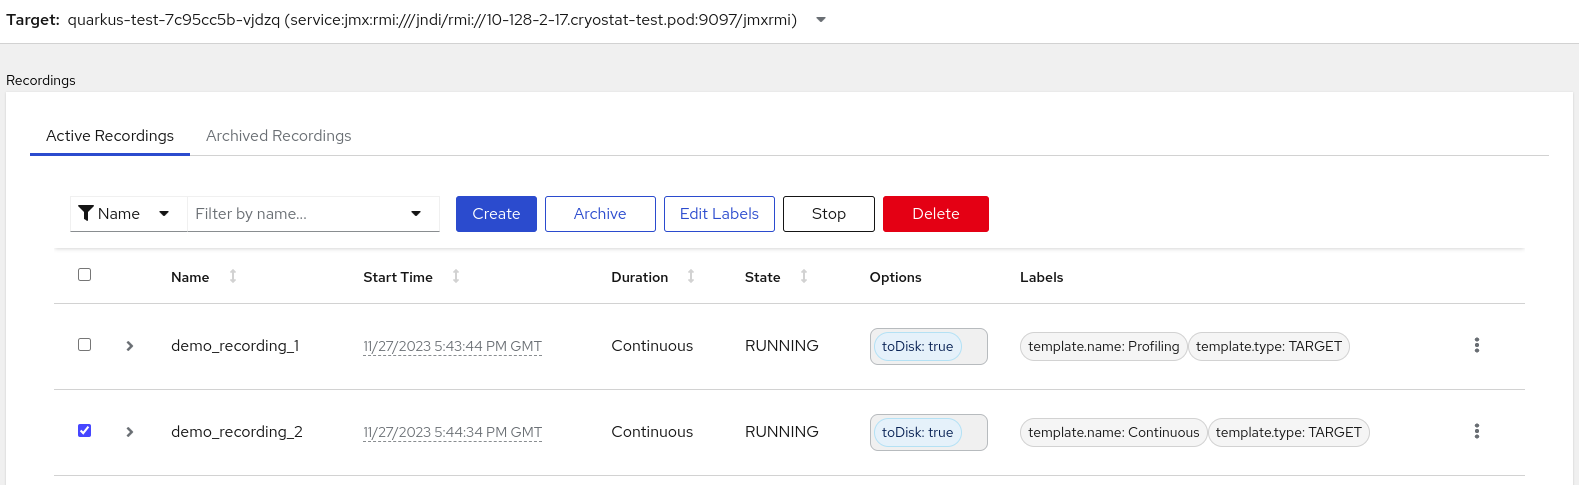
On the Active Recordings tab, click Create.
Figure 2.4. Example of creating an active recording
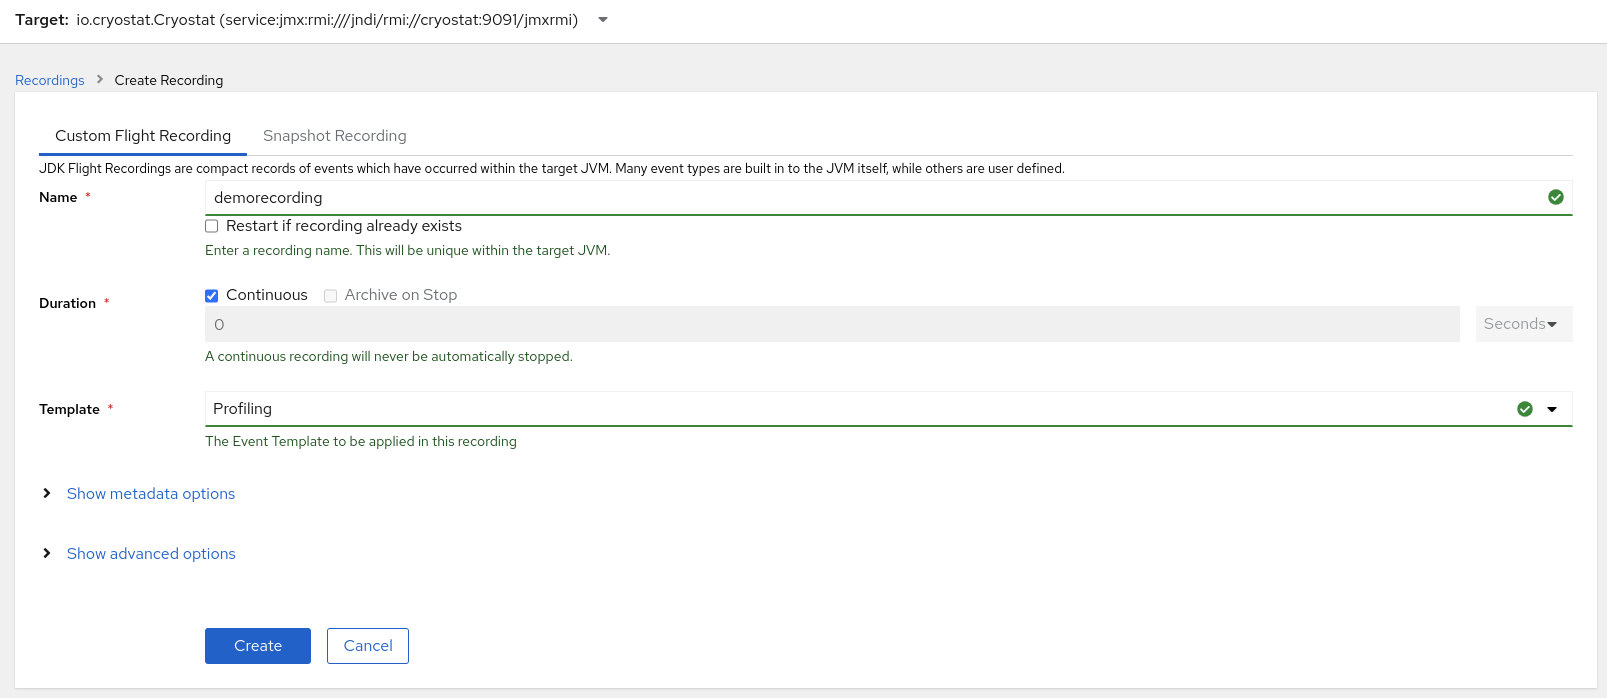
On the Custom Flight Recording tab:
- In the Name field, enter the name of the recording you want to create. If you enter a name in an invalid format, the web console displays an error message.
If you want Cryostat to automatically restart an existing recording, select the Restart if recording already exists check box.
NoteIf you enter a name that already exists but you do not select Restart if recording already exists, Cryostat refuses to create a custom recording when you click the Create button.
- In the Duration field, select whether you want this recording to stop after a specified duration or to run continuously without stopping. If you want Cryostat to automatically archive your new JFR recording after the recording stops, click Archive on Stop.
- In the Template field, select the template that you want to use for the recording.
The following example shows continuous JVM monitoring, which you can enable by selecting Continuous from above the Duration field. This setting means that the recording will continue until you manually stop the recording. The example also shows selection of the Profiling template from the Template field. This provides additional JVM information to a JFR recording for troubleshooting purposes.
Figure 2.5. Example of creating a custom flight recording
To access more options, click the following expandable hyperlinks:
- Show advanced options, where you can select additional options for customizing your JFR recording.
- Show metadata options, where you can add custom labels and metadata to your JFR recording.
To create your JFR recording, click Create. The Active Recordings tab opens and lists your JFR recording.
Your active JFR recording starts collecting data on the target JVM location inside your containerized application. If you specified a fixed duration for your JFR recordings, the target JVM stops the recording when it reaches the fixed duration setting. Otherwise, you must manually stop the recording.
Optional: On the Active Recording tab, you can also stop the recording.
- Select the checkbox next to the JFR recording’s name. On the toolbar in the Active Recordings tab, the Cryostat web console activates the Stop button.
Click Stop. The JFR adopts the
STOPPEDstatus, so it stops monitoring the target JVM. The JFR still shows under the Active Recording tab.Figure 2.6. Example of stopping an active recording
 Important
JFR recording data might be lost in the following situations:
- Target JVM fails
- Target JVM restarts
- Target JVM Red Hat OpenShift Deployment is scaled down
Archive your JFR recordings to ensure you do not lose your JFR recording’s data.
Additional resources
- See Uploading an SSL certificate (Using Cryostat to manage a JFR recording).
- See Archiving JDK Flight Recorder (JFR) recordings (Using Cryostat to manage a JFR recording).