Manage plugins
Control access to plugin administration, configure persistent storage, and manage the plugin lifecycle through the Extensions UI. Role-based access control restricts who can install, enable, or disable plugins on the platform.
Control plugin administration access
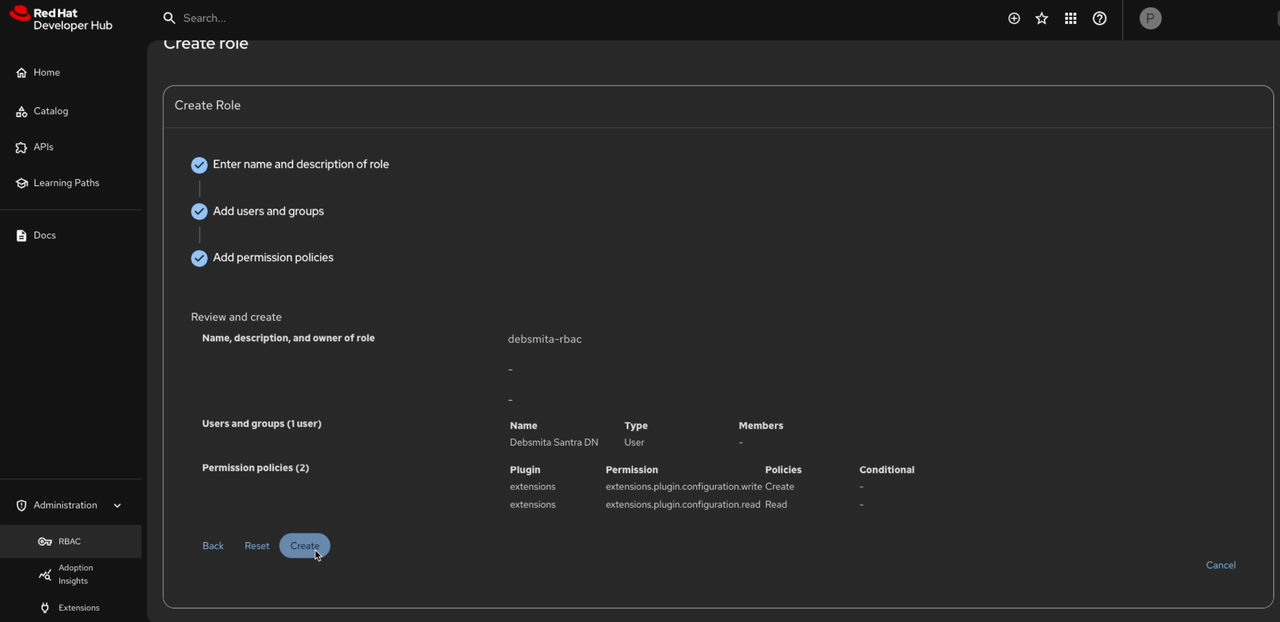
You can add Extensions permissions by creating or updating and existing RBAC role. For more information about using RBAC to manage role-based controls, see Managing role-based access controls (RBAC) using the Red Hat Developer Hub Web UI.
Before you begin
- If RBAC is enabled, you have a role with the following permissions:
policy.entity.create,policy.entity.update,policy.entity.read,catalog.entity.read.
About this task
Developer Preview features are not supported by Red Hat in any way and are not functionally complete or production-ready. Do not use Developer Preview features for production or business-critical workloads. Developer Preview features provide early access to functionality in advance of possible inclusion in a Red Hat product offering. Customers can use these features to test functionality and provide feedback during the development process. Developer Preview features might not have any documentation, are subject to change or removal at any time, and have received limited testing. Red Hat might provide ways to submit feedback on Developer Preview features without an associated SLA.
For more information about the support scope of Red Hat Developer Preview features, see Developer Preview Support Scope.
Procedure
-
Click Create to create the role.
Results
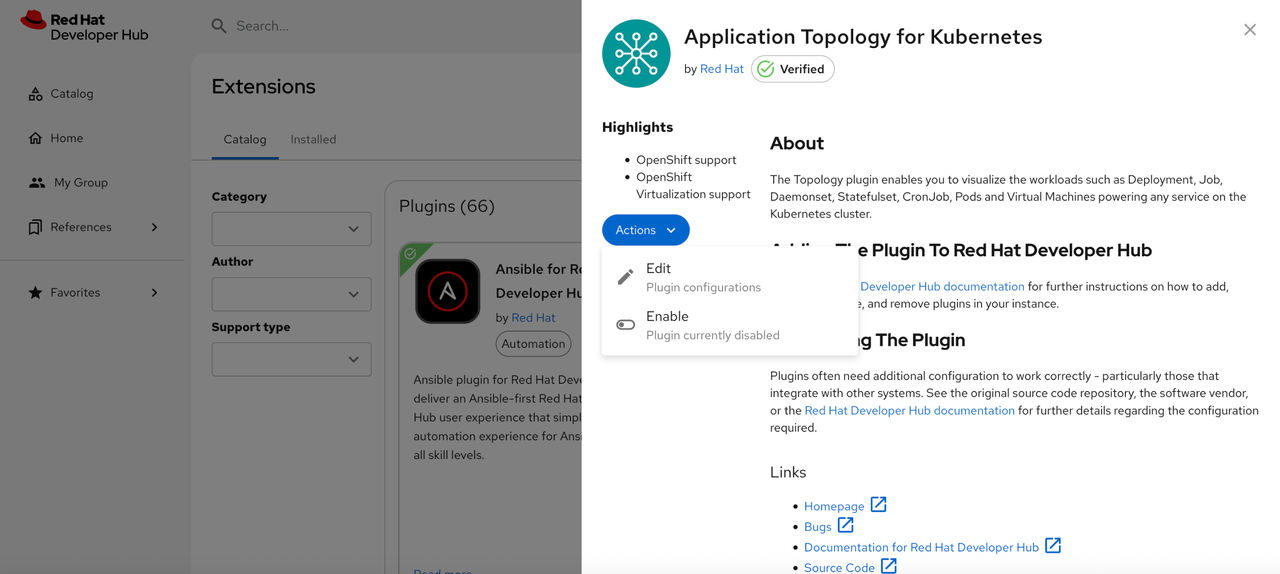
After you refresh the RHDH application and select a plugin, the Actions drop-down becomes active. Use it to:
- Edit the plugin configuration
- Enable the plugin
- Disable the plugin
Configure persistent storage for plugin installations
To retain plugins installed through the Extensions UI across application restarts, configure persistent storage for the dynamic plugin cache. A persistent volume claim (PVC) stores the Extensions configuration file.
Before you begin
- You have created a persistent volume claim (PVC) for the dynamic plugins cache with the name dynamic-plugins-root.
- You have installed Red Hat Developer Hub using the Helm chart or the Operator.
- You have installed the OpenShift CLI (
oc).
About this task
Installing plugins through Extensions is supported only in development environments. The Extensions interface prevents plugin installations in production environments.
For more information about the dynamic plugins cache, see Using the dynamic plugins cache.
Procedure
Results
Enable a plugin by using the Extensions UI, restart your RHDH application, and refresh the UI to confirm that you enabled the plugin.
View plugins
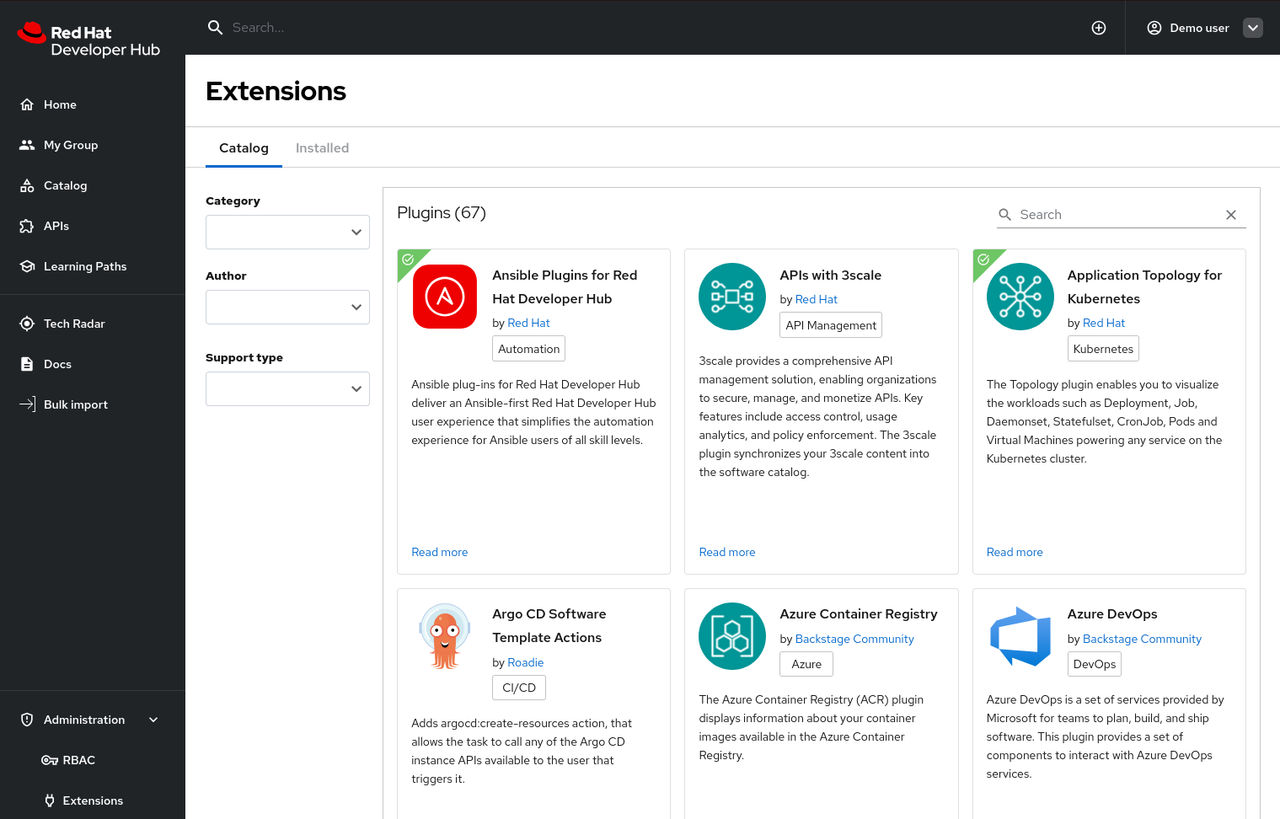
You can view available plugins for your Red Hat Developer Hub application on the Extensions page.
Procedure
- Open your RHDH application and click Administration > Extensions.
-
Go to the Catalog tab to view a list of available plugins and related information.
Search for plugins by name
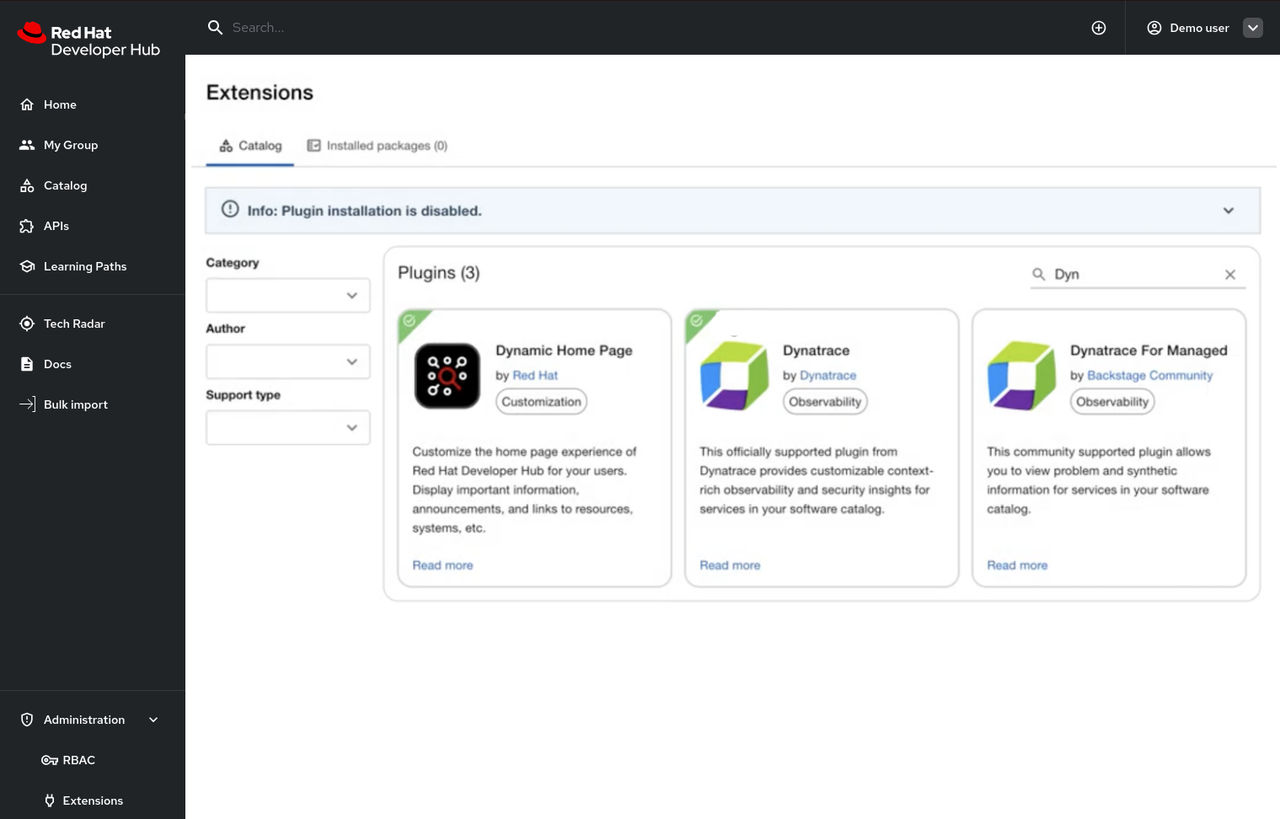
You can use the search bar in the header to filter the Extensions plugin cards by name. For example, if you type “A” into the search bar, Extensions shows only the plugins that contain the letter “A”.
Procedure
-
In the header search bar, enter a plugin search string, such as "Dyn".
-
Optional: Refine your search by selecting one of the following filters:
- Category
- Author
- Support type
Results
- The Extensions list updates to display only the plugins that match your search text and selected filters.
View installed plugins
Using the Dynamic Plugins Info front-end plugin, you can view plugins that your Red Hat Developer Hub application currently has installed. Red Hat Developer Hub enables the Dynamic Plugins Info plugin by default.
Procedure
- Open your Developer Hub application and click Administration > Extensions.
- Go to the Installed tab to view a list of installed plugins and related information.
Install and configure portal plugins
You can install and configure plugins by using Extensions.
Before you begin
- You have configured RHDH to allow plugins installation from Extensions.
- You have added a custom Developer Hub application configuration.
Procedure
-
Click the Install button.
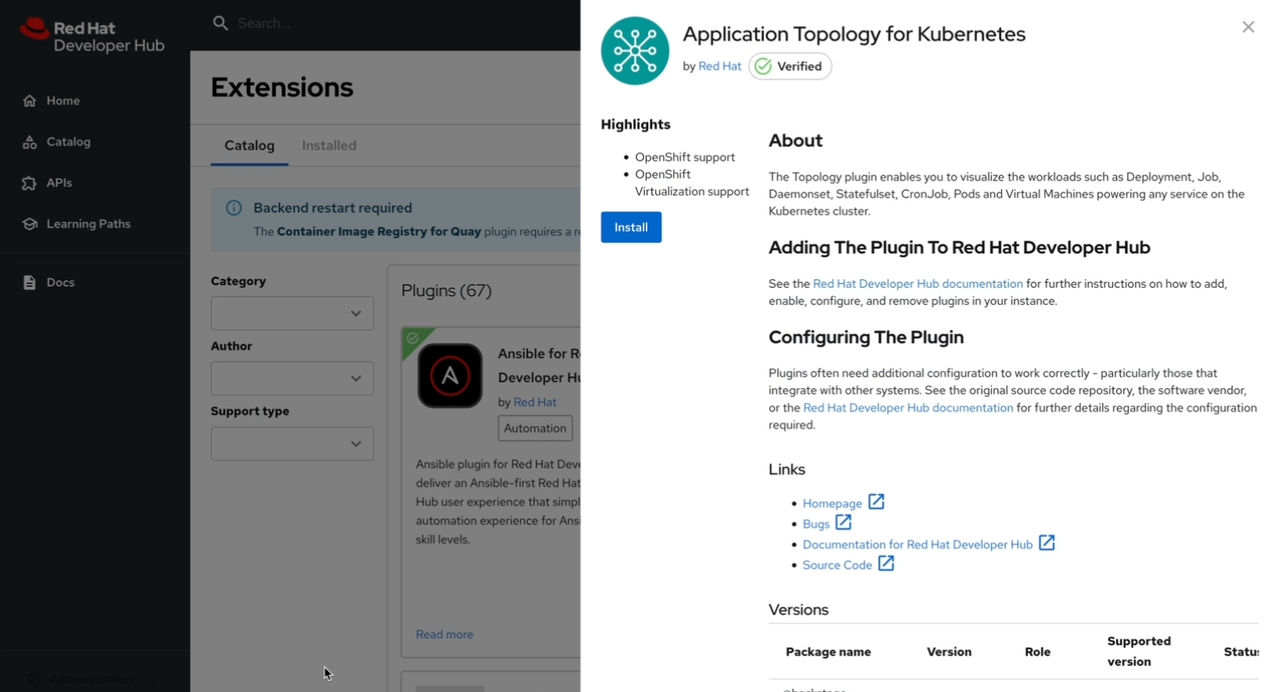
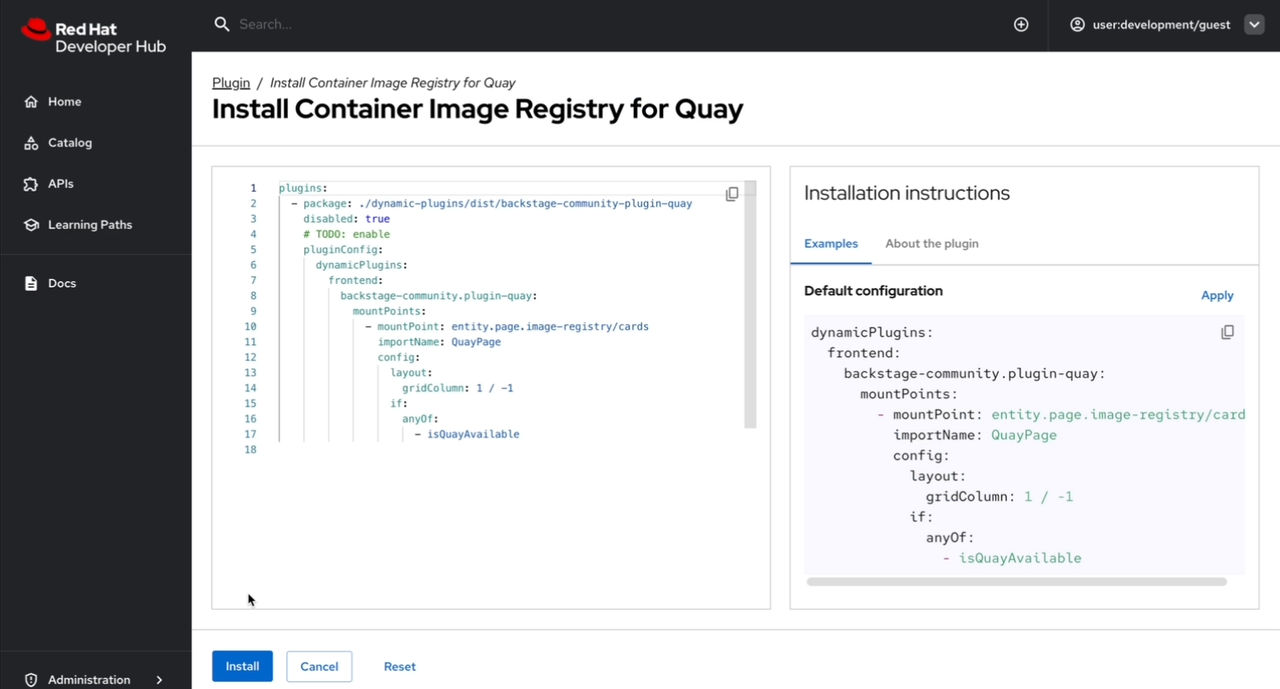
The code editor is displayed that displays the plugin default configuration.
-
Update the plugin configuration, if necessary.
-
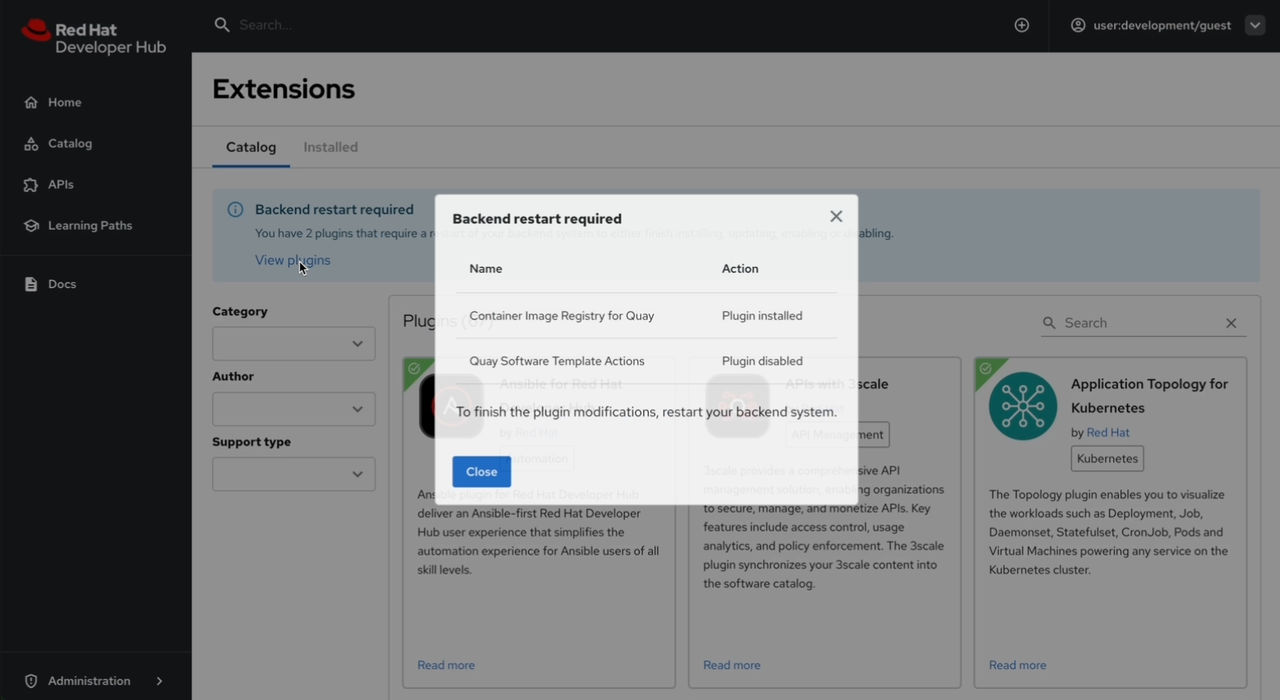
To view the plugins that require a restart, click View plugins in the alert message.
Results
- After you restart your RHDH application, navigate to Extensions.
- Select the plugin that you have installed.
- The Actions button is displayed.
Use RHDH Local to test installing plugins by using Extensions
RHDH Local provides a ready-to-use environment for testing the Extensions feature without additional configuration. Extensions is enabled by default, allowing you to install and test plugins directly from the RHDH web interface.
Red Hat maintains RHDH Local as an open source project, but does not support it or subject it to any service level agreement (SLA). There is no official, or commercial support for RHDH Local. Use RHDH Local at your own risk.
RHDH Local is NOT a substitute for Red Hat Developer Hub. It’s intended use is for development and testing purposes only, not for production use.
RHDH Local is designed for individual developers to try out various RHDH features, not for use by development teams as there is no out-of-the-box RBAC support.
For information about installing and using RHDH Local to manage plugins through the Extensions UI, see Managing plugins from the UI in the RHDH Local documentation.
Enable and disable portal plugins
Use this procedure to enable or disable plugins through the Extensions interface.
Before you begin
- You have configured RHDH to allow plugins installation from Extensions.
- You have added a custom Developer Hub application configuration.
Procedure
- Navigate to Extensions.
- Select a plugin to enable or disable.
-
Click the Enable/Disable slider.
-
To view the plugins that require a restart, click View plugins in the alert message.
- Restart your RHDH application.
Results
- After you restart your RHDH application, navigate to Extensions.
- Select the plugin that you have installed.
- Verify that the system updated the Enable/Disable slider.
Disable the Extensions UI
The Extensions feature is available by default. To remove the Extensions interface (Marketplace) from your instance, you must disable the relevant plugins.
Procedure
dynamic-plugins.yaml with the following content.
plugins:
  - package: ref://red-hat-developer-hub-backstage-plugin-extensions
    enabled: false
  - package: ref://red-hat-developer-hub-backstage-plugin-catalog-backend-module-extensions
    enabled: false
  - package: ref://red-hat-developer-hub-backstage-plugin-extensions-backend
enabled: falseDisabling these plugins removes the Catalog and Installed tabs. You can still view a basic list of installed plugins by selecting Administration > Extensions.

