Chapitre 6. Accès à distance au bureau en tant qu'utilisateur unique
Vous pouvez vous connecter à distance au bureau d'un serveur RHEL à l'aide d'applications graphiques GNOME. Un seul utilisateur peut se connecter au bureau du serveur à un moment donné.
6.1. Activation du partage de bureau sur le serveur à l'aide de GNOME
Cette procédure configure un serveur RHEL pour permettre une connexion de bureau à distance à partir d'un seul client.
Procédure
Configurez une règle de pare-feu pour permettre l'accès VNC au serveur :
# firewall-cmd --permanent --add-service=vnc-server
success
Recharger les règles du pare-feu :
# firewall-cmd --reload success- Ouvrez Settings dans GNOME.
Naviguez jusqu'au menu Sharing:
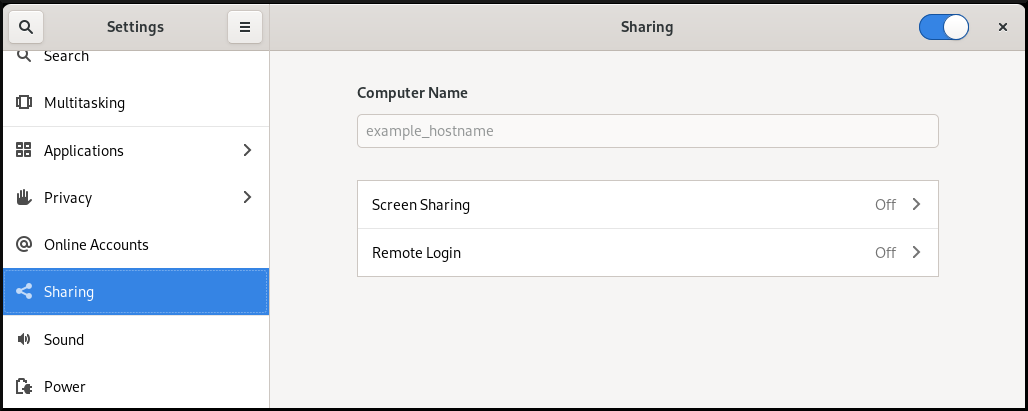
Cliquez sur Screen Sharing.
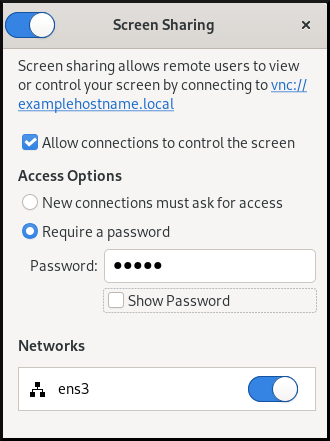
La configuration du partage d'écran s'ouvre :
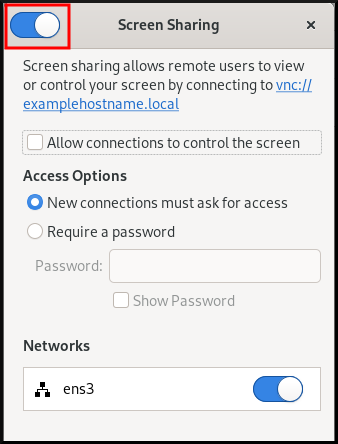
Cliquez sur le bouton de commutation dans l'en-tête de la fenêtre pour activer le partage d'écran :
- Cochez la case Allow connections to control the screen.
- Sous Access Options, sélectionnez l'option Require a password.
Définissez un mot de passe dans le champ Password.
Les clients distants doivent saisir ce mot de passe lorsqu'ils se connectent au bureau du serveur.