3.4.3. サービス間でファイルを共有する
Type Enforcement を使用すると、 プロセスが別のプロセス用のファイルにアクセスしてしまうのを防ぐのに役立ちます。たとえば、デフォルトでは Samba は
httpd_sys_content_t タイプのラベルが付いたファイルの読み込みはできません。このタイプは Apache HTTP Server での使用を目的としています。目的のファイルに public_content_t または public_content_rw_t タイプのラベルを付けると、Apache HTTP Server、FTP、rsync、Samba 間でファイルを共有することができるようになります。
以下の例では、 ディレクトリとファイルを作成し、 Apache HTTP Server、 FTP、 rsync、 Samba 経由でそのディレクトリファイルを共有 (読み取り専用) できるようにしています。
- root ユーザーで
mkdir /sharesを実行して、 複数のサービス間でファイルを共有できるよう最上位に新規のディレクトリを作成します。 - ファイルコンテキスト設定のパターンに合致しないファイルやディレクトリには
default_tタイプのラベルが付けられる場合があります。 制限のあるサービスからはこのタイプのファイルやディレクトリにはアクセスできません。$ ls -dZ /shares drwxr-xr-x root root unconfined_u:object_r:default_t:s0 /shares - root ユーザーで
/shares/index.htmlファイルを作成します。 次のコンテンツをコピーして/shares/index.htmlに貼り付けます。<html> <body> <p>Hello</p> </body> </html> /shares/にpublic_content_tタイプのラベルを付けることで、 Apache HTTP Server、 FTP、 rsync、Samba による読み取り専用アクセスを許可します。 root ユーザーで次のコマンドを実行し、 ラベルの変更をファイルコンテキスト設定に追加します。semanage fcontext -a -t public_content_t "/shares(/.*)?"- root ユーザーで
restorecon -R -v /shares/を実行しラベルの変更を適用します。# restorecon -R -v /shares/ restorecon reset /shares context unconfined_u:object_r:default_t:s0->system_u:object_r:public_content_t:s0 restorecon reset /shares/index.html context unconfined_u:object_r:default_t:s0->system_u:object_r:public_content_t:s0
Samba で
/shares/ を共有する場合
rpm -q samba samba-common samba-clientを実行して、 samba、 samba-common、 samba-client の各パッケージがインストールされているか確認します (バージョン番号は使用しているバージョンによって異なります)。$ rpm -q samba samba-common samba-client samba-3.4.0-0.41.el6.3.i686 samba-common-3.4.0-0.41.el6.3.i686 samba-client-3.4.0-0.41.el6.3.i686上記いずれのパッケージもインストールされていない場合は、 root ユーザーでyum install package-nameを実行してインストールを行ないます。- root ユーザーで
/etc/samba/smb.confを編集します。 Samba で/shares/ディレクトリを共有するため、 次のエントリをこのファイルの末尾に追加します。[shares] comment = Documents for Apache HTTP Server, FTP, rsync, and Samba path = /shares public = yes writeable = no - Samba ファイルシステムをマウントするには Samba アカウントが必要になります。 root ユーザーで
smbpasswd -a usernameを実行し、 Samba アカウントを作成します。 username の部分は既存の Linux ユーザーにします。 たとえば、smbpasswd -a testuserを実行すると、 Linux の testuser ユーザー用の Samba アカウントが作成されます。# smbpasswd -a testuser New SMB password: Enter a password Retype new SMB password: Enter the same password again Added user testuser.smbpasswd -a usernameを実行する際、 システムに存在しない Linux アカウントのユーザー名をusername に使用すると、 「Cannot locate Unix account for 'username'!」というエラーが発生する原因になります。 - root ユーザーで
service smb startを実行し Samba サービスを起動します。service smb start Starting SMB services: [ OK ] smbclient -U username -L localhostを実行し、 使用できる共有を表示させます。 username はステップ 3 で追加した Samba アカウントにします。 パスワード入力を求められたら、 ステップ 3 で Samba アカウントに割り当てたパスワードを入力します (バージョン番号は使用しているバージョンによって異なります)。$ smbclient -U username -L localhost Enter username's password: Domain=[HOSTNAME] OS=[Unix] Server=[Samba 3.4.0-0.41.el6] Sharename Type Comment --------- ---- ------- shares Disk Documents for Apache HTTP Server, FTP, rsync, and Samba IPC$ IPC IPC Service (Samba Server Version 3.4.0-0.41.el6) username Disk Home Directories Domain=[HOSTNAME] OS=[Unix] Server=[Samba 3.4.0-0.41.el6] Server Comment --------- ------- Workgroup Master --------- -------- root ユーザーで
mkdir /test/を実行し新規ディレクトリを作成します。 このディレクトリは Samba 共有のsharesをマウントする際に使用します。 - root で次のコマンドを実行して、Samba 共有の
sharesを/test/にマウントします。username はステップ 3 のユーザー名にしてください。mount //localhost/shares /test/ -o user=usernameステップ 3 で設定した username のパスワードを入力します。 cat /test/index.htmlを実行して Samba で共有しているファイルを表示させます。$ cat /test/index.html <html> <body> <p>Hello</p> </body> </html>
Apache HTTP Server で
/shares/ を共有する場合
rpm -q httpdを実行して httpd パッケージがインストールされているか確認します (バージョン番号は使用しているバージョンによって異なります)。$ rpm -q httpd httpd-2.2.11-6.i386このパッケージがインストールされていない場合は、 root ユーザーでyum install httpdを実行してインストールします。/var/www/html/ディレクトリに移動します。 root ユーザーで次のコマンドを実行して/shares/ディレクトリへのリンクを作成します。ln -s /shares/ shares- root ユーザーで
service httpd startを実行して Apache HTTP Server を起動します。service httpd start Starting httpd: [ OK ] - web ブラウザを使って
http://localhost/sharesに行きます。/shares/index.htmlが表示されます。
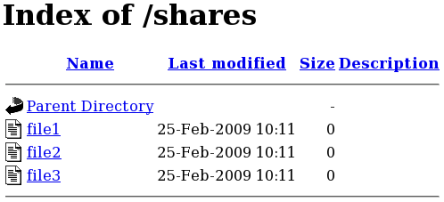
デフォルトでは、
index.html ファイルが存在していればそのファイルが Apache HTTP Server によって読み込まれます。/shares/ に file1、file2、file3 しかなく index.html がない場合、http://localhost/shares にアクセスするとディレクトリ一覧が表示されます。
- root ユーザーで
rm -i /shares/index.htmlを実行してindex.htmlファイルを削除します。 - root ユーザーで
touch /shares/file{1,2,3}を実行し、/shares/内に 3 つのファイルを作成します。# touch /shares/file{1,2,3} # ls -Z /shares/ -rw-r--r-- root root system_u:object_r:public_content_t:s0 file1 -rw-r--r-- root root unconfined_u:object_r:public_content_t:s0 file2 -rw-r--r-- root root unconfined_u:object_r:public_content_t:s0 file3 - root ユーザーで
service httpd statusを実行して Apache HTTP Server の状態を確認します。 サーバーが停止している場合は、 root ユーザーでservice httpd startを実行し再起動を行ないます。 - web ブラウザで
http://localhost/sharesに行きます。 ディレクトリ一覧が表示されます。