このコンテンツは選択した言語では利用できません。
Chapter 5. To Test a Route with JUnit
Abstract
This tutorial walks you through the process of using the New Camel Test Case wizard to create a test case for your route and using it test the route.
Overview
リンクのコピーリンクがクリップボードにコピーされました!
The New Camel JUnit Test Case wizard generates a boilerplate JUnit test case. This means that when you create or modify a route (for example, adding more processors to it), you'll need to modify the generated test case to add expectations and assertions specific to the new route you've created, so the test is valid for the route.
Goals
リンクのコピーリンクがクリップボードにコピーされました!
In this tutorial you will:
- create a Apache Camel test case
- run the route with the test case
- observe the output
Prerequisites
リンクのコピーリンクがクリップボードにコピーされました!
To complete this tutorial you will need:
- the simple-route project you created in Chapter 3, To Add a Content-Based Router
Creating the test case
リンクのコピーリンクがクリップボードにコピーされました!
To create a new test case:
- In Project Explorer, select
src/test/java. - Right-click it to open the context menu, and then select
to open the New Camel JUnit Test Case wizard, as shown in Figure 5.1, “New Camel JUnit Test Case wizard”. Figure 5.1. New Camel JUnit Test Case wizard
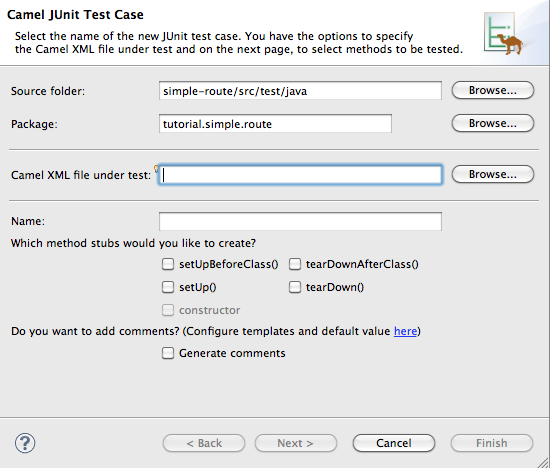
- Make sure the Source folder field contains
simple-route/src/test/java.NoteIf needed, you can click to find the proper folder.
- The Package field defaults to
tutorial.simple-route. To include the test case in a different package, enter the name of the package. - In the Camel XML file under test field, enter
src/main/resources/META-INF/spring/camelContext.xml, or use
to open a file explorer, configured to screen for XML files, to locate the file.
NoteThe Name field defaults to CamelContextXmlTest for the name of the test file. - Click to open the Test Endpoints page, shown in Figure 5.2, “Test Endpoints page”.
Figure 5.2. Test Endpoints page
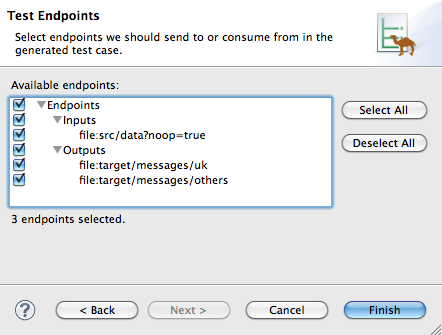
- By default, all endpoints are selected and will be included in the test case. You can select or deselect all endpoints by clicking the Select All or Deselect All button, or you can select and deselect individual endpoints by clicking the check box next to each.
- Click .NoteIf prompted, add JUnit to the build path.
The artifacts for the test are added to your project, and the class implementing the test case opens in the Java editor.
Running the test
リンクのコピーリンクがクリップボードにコピーされました!
To run the test:
- Select the project root,
simple-route, in the Project Explorer. - Open the context menu.
- Select
. The JUnit view, shown in Figure 5.3, “JUnit view”, opens in the Eclipse sidebar.Figure 5.3. JUnit view
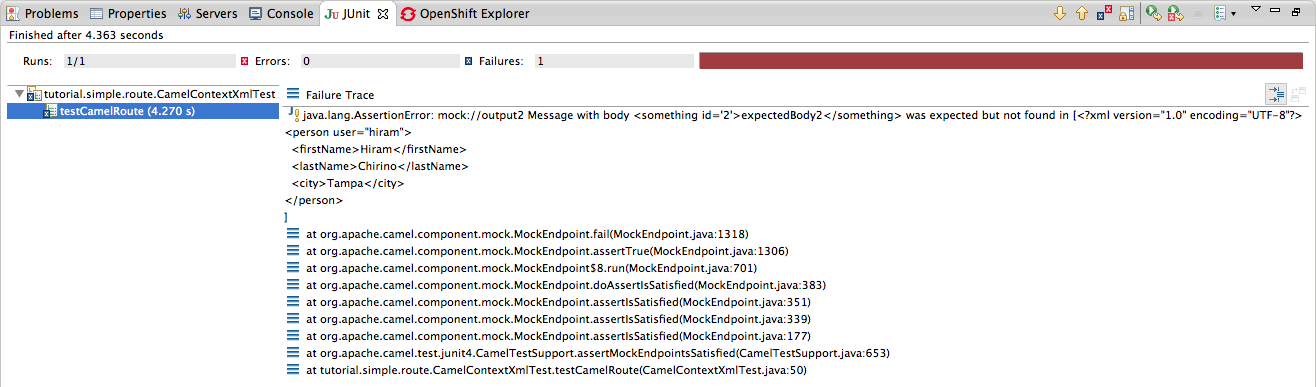
- Examine the output and take action to resolve any test failures.NoteYou may have to run this boilerplate test twice before it runs without a failure.
Further reading
リンクのコピーリンクがクリップボードにコピーされました!
To learn more about:
- see JUnit