このコンテンツは選択した言語では利用できません。
Chapter 13. Monitoring Red Hat Gluster Storage using Nagios
Red Hat Gluster Storage Console provides monitoring of Red Hat Gluster Storage trusted storage pool by building on the Nagios platform. You can view the physical and logical resource utilization and status (CPU, Memory, Disk, Network, Swap, Cluster, Volume, Brick) in Trends tab of Red Hat Gluster Storage Console. Nagios is installed and enabled in Red Hat Gluster Storage Console Server by default to monitor Red Hat Gluster Storage nodes. To monitor using Nagios, add hosts to Red Hat Gluster Storage Console and configure Nagios using auto-discovery. For more information about adding hosts, see Section 6.2.1, “Adding Hosts”. This chapter describes the procedures for deploying Nagios on Red Hat Gluster Storage Console node
For more information on Nagios, see Nagios Documentation.
For more information on Changing Nagios Password and Creating Nagios User, see the corresponding sections in Red Hat Gluster Storage Administration Guide.
The following diagram illustrates deployment of Nagios on Red Hat Gluster Storage Console Server.
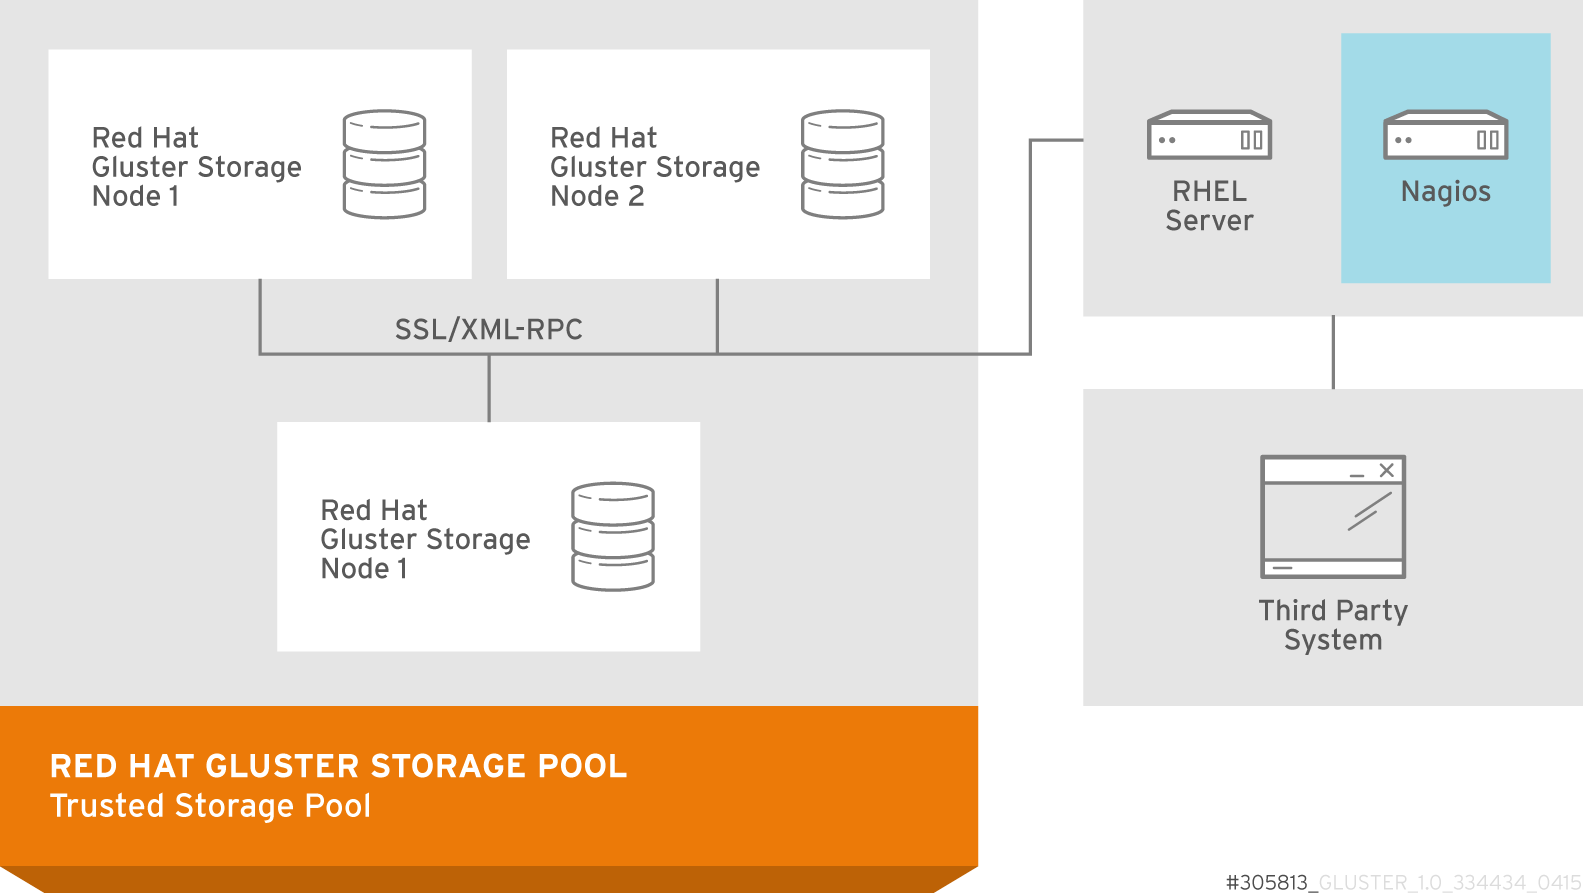
Figure 13.1. Nagios deployed on Red Hat Gluster Storage Console Server
13.1. Configuring Nagios
リンクのコピーリンクがクリップボードにコピーされました!
Auto-Discovery is a python script which automatically discovers all the nodes and volumes in the cluster. It also creates Nagios configuration to monitor them. By default, it runs once in 24 hours to synchronize the Nagios configuration from Red Hat Gluster Storage Trusted Storage Pool configuration.
For more information on Nagios Configuration files, see Section D.1, “Nagios Configuration Files”
Note
Before configuring Nagios using
configure-gluster-nagios command, ensure that all the Red Hat Gluster Storage nodes are configured.
- Execute
configure-gluster-nagioscommand manually only the first time with cluster name and host address on the Nagios server using the following command:configure-gluster-nagios -c cluster-name -H HostName-or-IP-address
# configure-gluster-nagios -c cluster-name -H HostName-or-IP-addressCopy to Clipboard Copied! Toggle word wrap Toggle overflow For-c, provide a cluster name (a logical name for the cluster) and for-H, provide the host name or ip address of a node in the Red Hat Gluster Storage trusted storage pool. - Perform the steps given below when
configure-gluster-nagioscommand runs:- Confirm the configuration when prompted.
- Enter the current Nagios server host name or IP address to be configured all the nodes.
- Confirm restarting Nagios server when prompted.
Copy to Clipboard Copied! Toggle word wrap Toggle overflow All the hosts, volumes and bricks are added and displayed.
- Login to the Nagios server GUI using the following URL.
https://NagiosServer-HostName-or-IPaddress/nagios
https://NagiosServer-HostName-or-IPaddress/nagiosCopy to Clipboard Copied! Toggle word wrap Toggle overflow Note
- The default Nagios user name and password is nagiosadmin / nagiosadmin.
- You can manually update/discover the services by executing the
configure-gluster-nagioscommand or by runningCluster Auto Configservice through Nagios Server GUI. - If the node with which auto-discovery was performed is down or removed from the cluster, run the
configure-gluster-nagioscommand with a different node address to continue discovering or monitoring the nodes and services. - If new nodes or services are added, removed, or if snapshot restore was performed on Red Hat Gluster Storage node, run
configure-gluster-nagioscommand.