第4章 Unified Push Admin UI を使用したプッシュ通知の送信


Unified Push Admin UI を使用すると、プッシュ通知を送信できます。

前提条件

  • Push Notifications サービスがプロビジョニングされていることを確認します。
  • OpenShift でルートを選択します。
  • OpenShift 認証情報でログインします。
注記

初回ログイン時に、ユーザーアカウントを読み取るために OpenShift OAuth サービスパーミッションを指定する必要があります。

管理 UI
  1. ブラウザーで Unified Push 管理 UI を開きます。
  2. ホームページからターゲットアプリケーションを選択し、Send Notification To This App をクリックします。

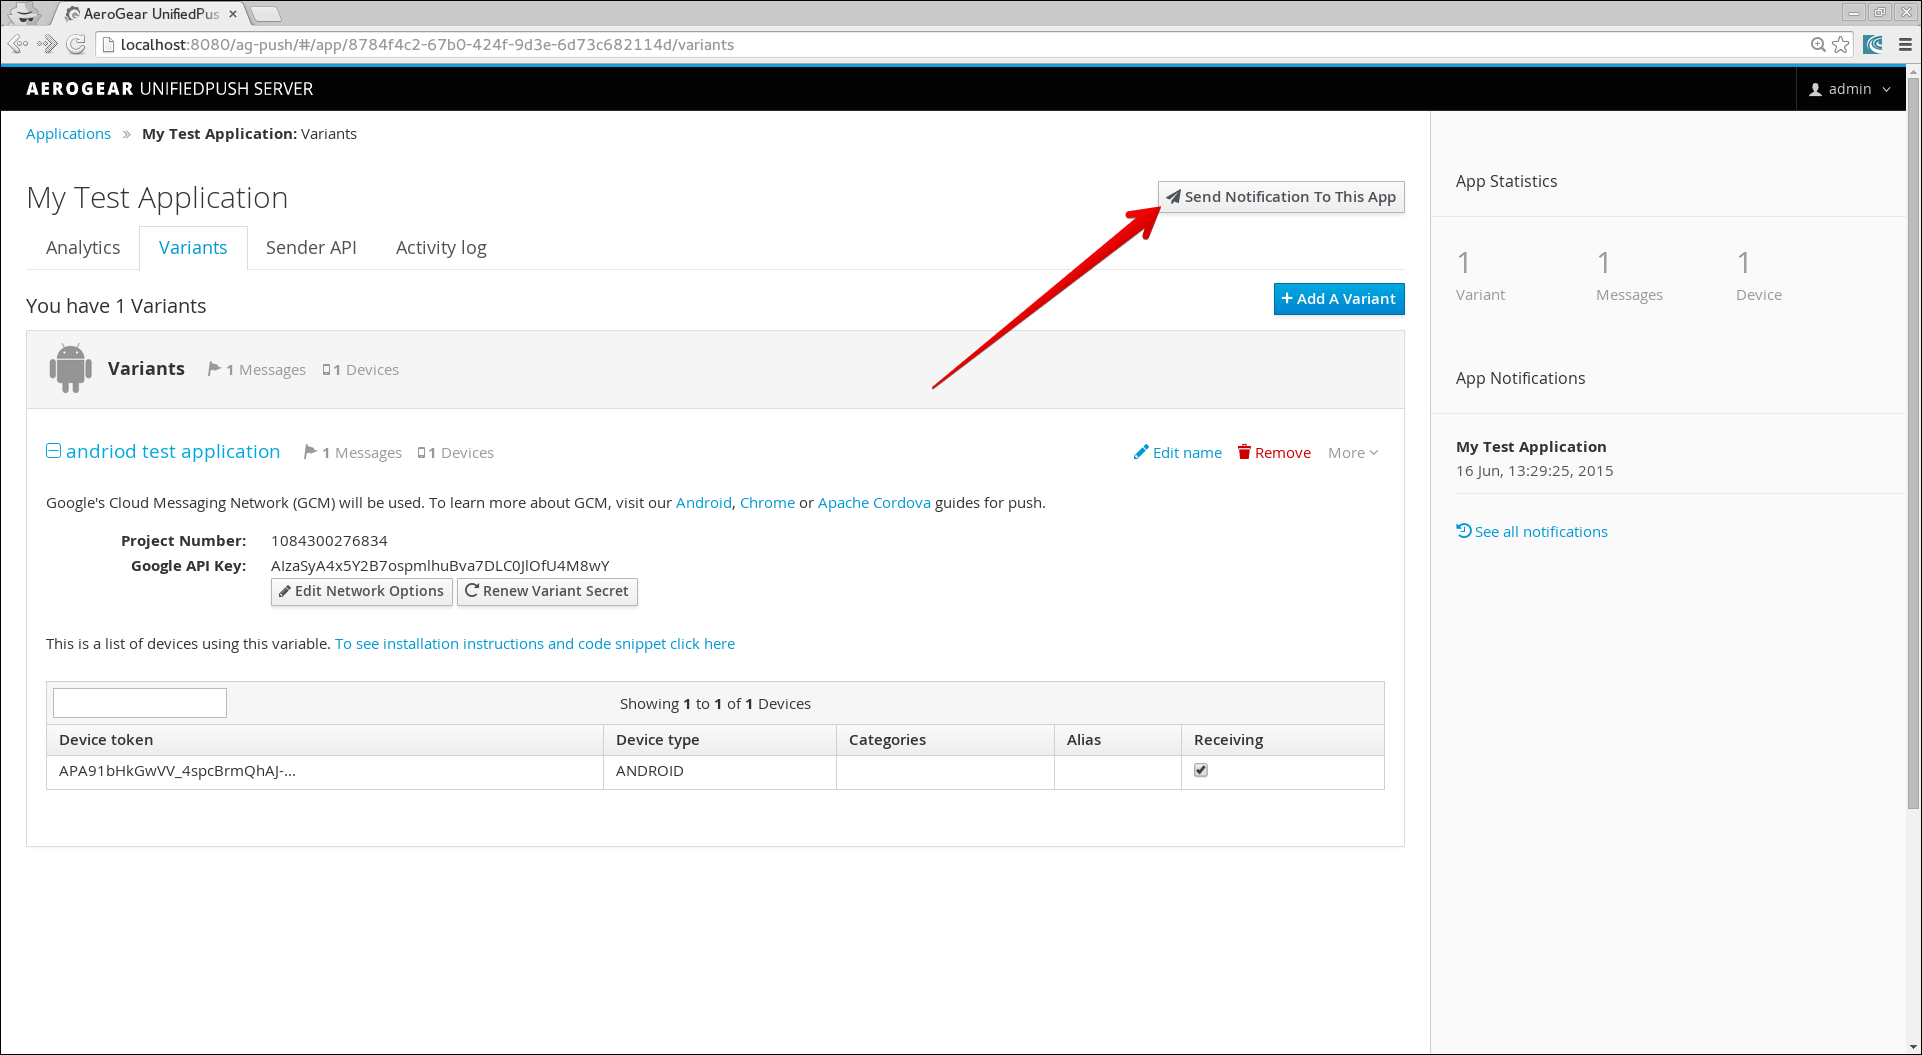
  3. Send Push ダイアログが表示されたら、Message フォームにテキストを入力します。

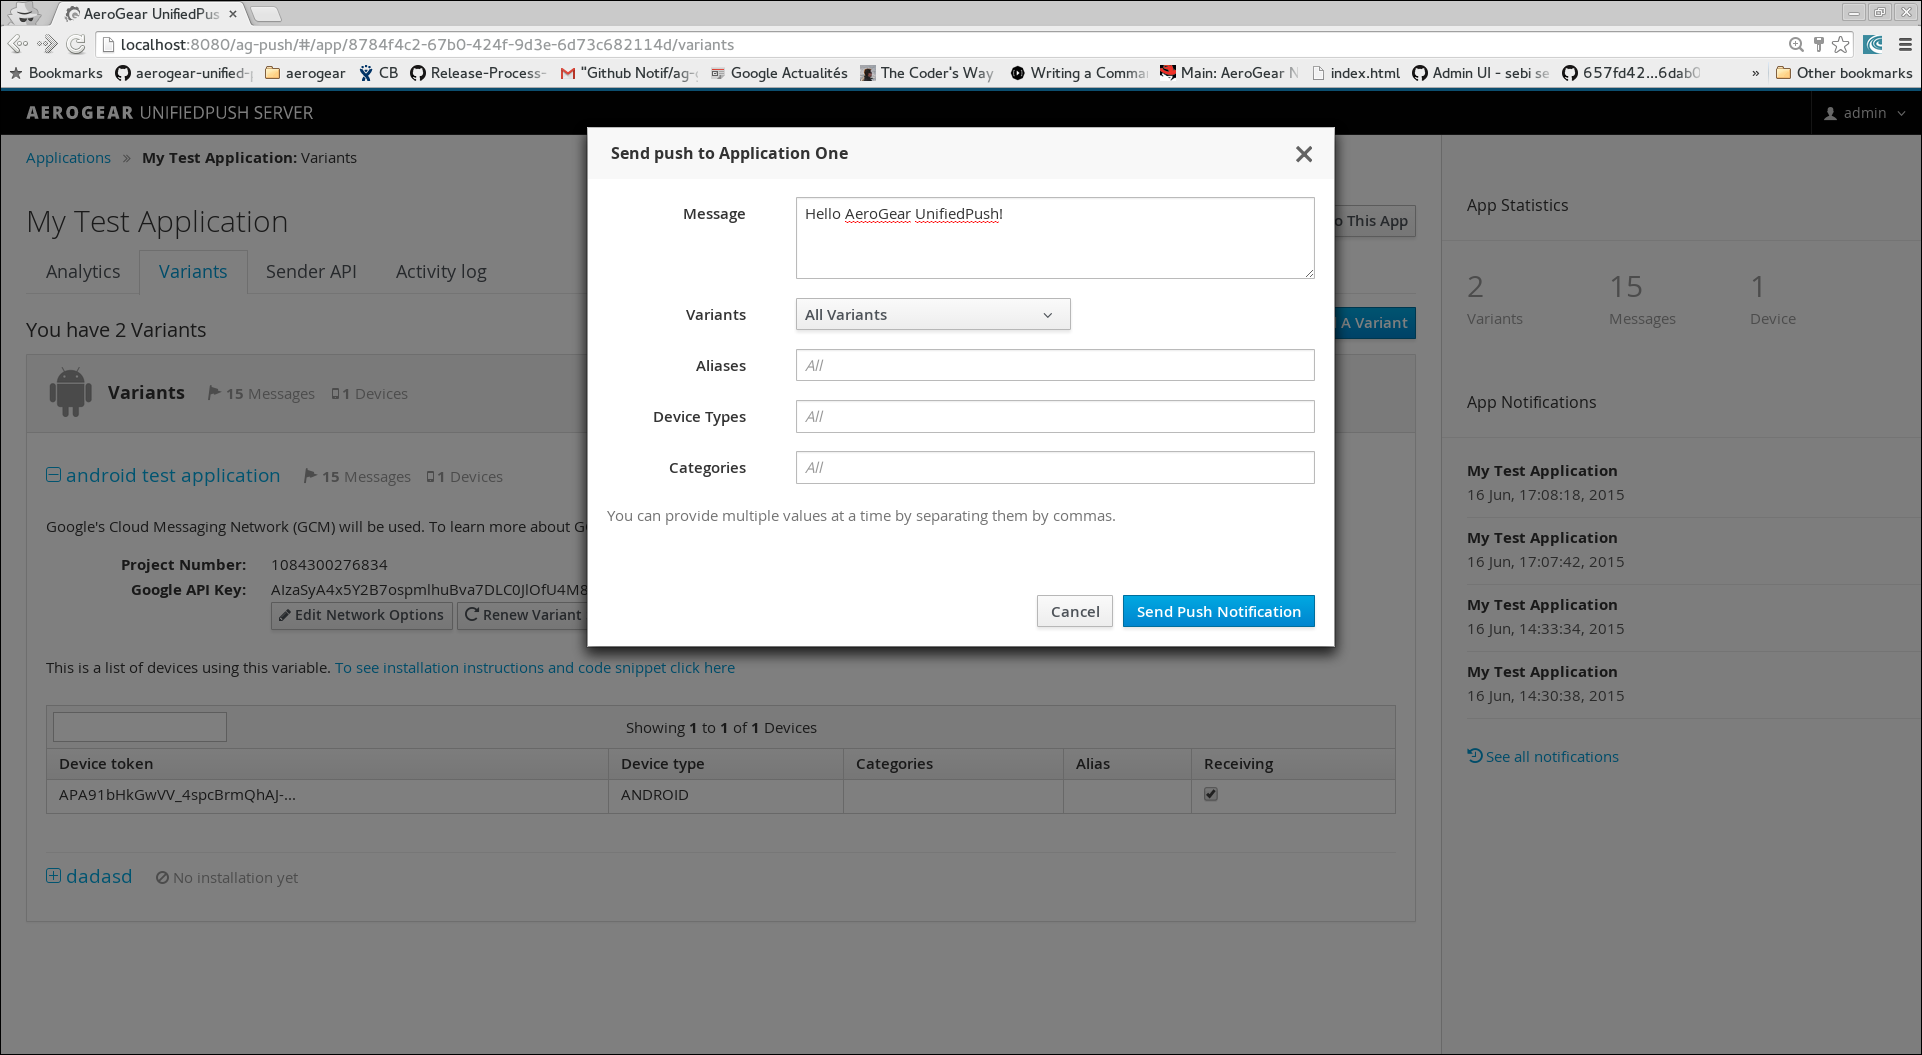
  4. Send Push Notification をクリックし、メッセージをターゲットアプリケーションに送信します。
Java API
  1. unifiedpush-java-client を依存関係としてプロジェクトに追加します。

    <dependency>
      <groupId>org.jboss.aerogear</groupId>
      <artifactId>unifiedpush-java-client</artifactId>
      <version>[version]</version>
    </dependency>
    Copy to Clipboard Toggle word wrap
  2. メッセージをターゲットアプリケーションに送信します。

    final PushSender sender = DefaultPushSender
            .withRootServerURL("<pushServerURL e.g http(s)//host:port/context>")
            .pushApplicationId("<pushApplicationId e.g. 1234456-234320>")
            .masterSecret("<masterSecret e.g. 1234456-234320>")
            .build();
    
    final UnifiedMessage unifiedMessage = UnifiedMessage
            .withMessage()
            .alert("Hello from Java Sender API!")
            .build();
    
    sender.send(unifiedMessage, () -> {
        //do cool stuff
    });
    Copy to Clipboard Toggle word wrap
Node.js API
  1. unifiedpush-node-sender を依存関係としてプロジェクトに追加します。

    npm i unifiedpush-node-sender
    Copy to Clipboard Toggle word wrap
  2. メッセージをターゲットアプリケーションに送信します。

    const agSender = require('unifiedpush-node-sender');
    
    const settings = {
      url: "<pushServerURL e.g http(s)//host:port/context>",
      applicationId: "<pushApplicationId e.g. 1234456-234320>",
      masterSecret: "<masterSecret e.g. 1234456-234320>"
    
    };
    
    const message = {
      alert: "Hello from the Node.js Sender API!"
    };
    
    const options = {
      config: {
        ttl: 3600
      }
    };
    
    agSender(settings).then((client) => {
      client.sender.send(message, options).then((response) => {
        console.log('success', response);
      }).catch((error) => {
        console.log('error', error);
      })
    });
    Copy to Clipboard Toggle word wrap
REST
  1. メッセージをターゲットアプリケーションに送信します。

    curl -u "<pushApplicationId>:<masterSecret>"  \
       -v -H "Accept: application/json" -H "Content-type: application/json"  \
       -X POST  -d \
      '{
         "message": {
          "alert": "Hello from the curl HTTP Sender!",
          "sound": "default"
         }
       }'  \
       <pushServerURL>/rest/sender
    Copy to Clipboard Toggle word wrap
注記

サードパーティーのプッシュネットワークは、ターゲットアプリケーションに Push 通知を配信します。

トップに戻る
Red Hat logoGithubredditYoutubeTwitter

詳細情報

試用、購入および販売

コミュニティー

Red Hat ドキュメントについて

Red Hat をお使いのお客様が、信頼できるコンテンツが含まれている製品やサービスを活用することで、イノベーションを行い、目標を達成できるようにします。 最新の更新を見る.

多様性を受け入れるオープンソースの強化

Red Hat では、コード、ドキュメント、Web プロパティーにおける配慮に欠ける用語の置き換えに取り組んでいます。このような変更は、段階的に実施される予定です。詳細情報: Red Hat ブログ.

会社概要

Red Hat は、企業がコアとなるデータセンターからネットワークエッジに至るまで、各種プラットフォームや環境全体で作業を簡素化できるように、強化されたソリューションを提供しています。

Theme

© 2025 Red Hat