このコンテンツは選択した言語では利用できません。
Chapter 5. Creating the MortgageApprovalProcess business process
A business process is a graph that describes the order in which a series of steps must be executed using a flow chart. A business process consists of a collection of nodes that are linked to each other using connections. Each of the nodes represents one step in the overall process while the connections specify how to transition from one node to the other.
The Mortgage Process sample project contains a predefined MortgageApprovalProcess business process. For this tutorial, you will delete the existing MortgageApprovalProcess business process and recreate it to gain a better understanding of creating a business process.
5.1. Delete the existing business process
Procedure
You must delete the sample business process before you can create your own.
Procedure
-
Log in to Business Central and click Menu
Design Projects, then click Mortgage Process. -
Input
MortgageApprovalProcess.bpmnin to the project’s asset search box and click on the MortgageApprovalProcess business process. - Select Delete from the toolbar, then click Delete to confirm that you want to delete this asset.
5.1.1. Validating the mortgage
The mortgage validation business process determines whether or not the new application contains the required data before proceeding. If all of the specified data requirements are met, the application will move on to the mortgage calculation business process.
Procedure
-
Log in to Business Central and click Menu
Design Projects, then click Mortgage Process. -
Click Add Asset
Business Process. Enter the following values:
-
Business Process:
MortgageApprovalProcess -
Package: Select
com.myspace.mortgage_app
-
Business Process:
- Click Ok. The diagram editor opens.
-
In the upper-right corner, click the Diagram properties
 icon.
icon.
-
Scroll down and expand Process Data and click
 in the Process Variables section.
Enter the following values:
-
Name:
application. -
Data Type:
Application [com.myspace.mortgage_app]
-
Name:
- Click Save, then Save, to confirm your changes.
5.1.2. Creating outgoing connections
This section describes how to create an outgoing connection from the start event to an exclusive gateway and then from the exclusive gateway to the business rule task. Exclusive gateways are used to make decisions and react to events based on the available data. A business rule task represents a set of rules that must be evaluated.
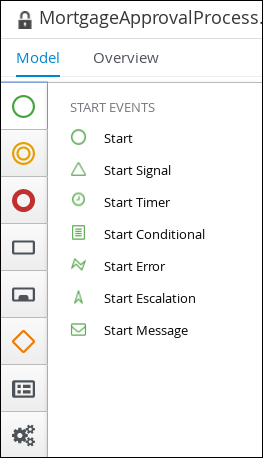
Red Hat Process Automation Manager contains a predefined selection of node types to simplify business process creation. The predefined node panel is located on the left side of the diagram editor. Click on the various node icons to reveal the available options as shown here.
Procedure
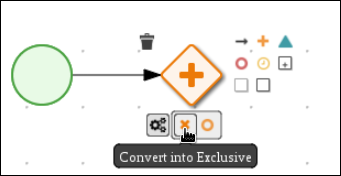
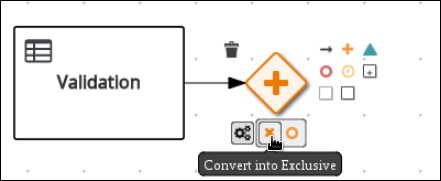
Click on the start event and create an outgoing connection from the start event to an exclusive gateway.
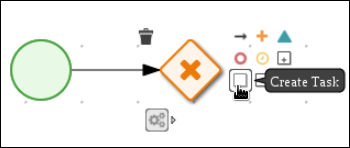
Create an outgoing connection from the exclusive gateway to a task.
Convert the new task to a business rule task.
-
Click on the business rules task and enter
Validationin the Name field of the Diagram properties panel. - Expand Implementation/Execution, select validation in the Rule Flow Group field.
Define the following Java expression in the On Exit Action field :
System.out.println(application.getProperty());
System.out.println(application.getProperty());Copy to Clipboard Copied! Toggle word wrap Toggle overflow -
Scroll down and expand the Data Assignments section and click
 next to Assignments.
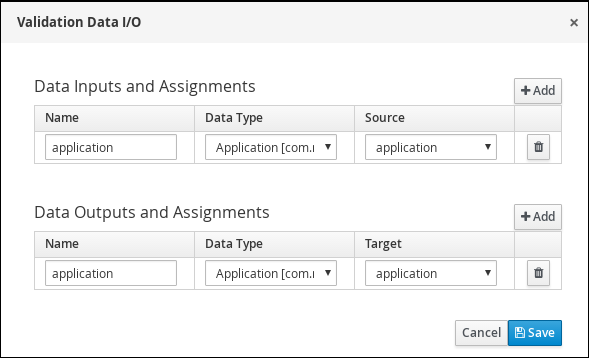
In the Validation Data I/O window, click Add to create the following assignments:
- Click Save.
- In the diagram editor, click Save, then Save, to confirm your changes.

5.1.3. Defining the validation data
This section describes how to define the data that will determine whether the application data is correct or if there is an error or any missing information.
Procedure
Click on the Validation task and create an outgoing connection to an exclusive gateway.
Create an outgoing connection from the exclusive gateway to a new business rule task.
Click the created connection.
-
In the Diagram Properties panel, input
Invalidin the Name field. Expand Implementation/Execution, and enter the following Drools condition expression:
-
Condition Expression:
ValidationErrorDO() -
Condition Expression Language:
drools
-
Condition Expression:
-
Click on the business rule task and enter
Retract Validationin the Name field of the Diagram properties panel. -
Expand Implementation/Execution and enter
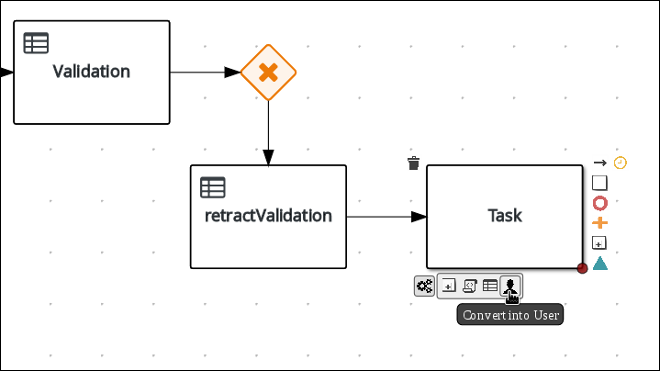
errorin the Rule Flow Group field. Create an outgoing connection from the Retract Validation task to a new user task.
-
Click the user task and in the Diagram Properties panel, input
Correct Datain the Name field. Expand Implementation/Execution and enter:
-
Task Name:
CorrectData -
Groups:
broker
-
Task Name:
-
Click
next to Assignments. In the Correct Data Data I/O window, click Add to create the following assignments:
In the Correct Data Data I/O window, click Add to create the following assignments:
- Click Save.
- In the diagram editor, click Save, then Save, to confirm your changes.
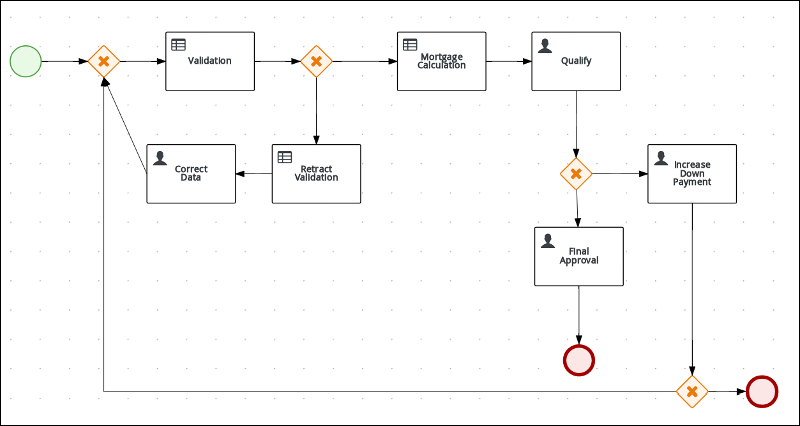
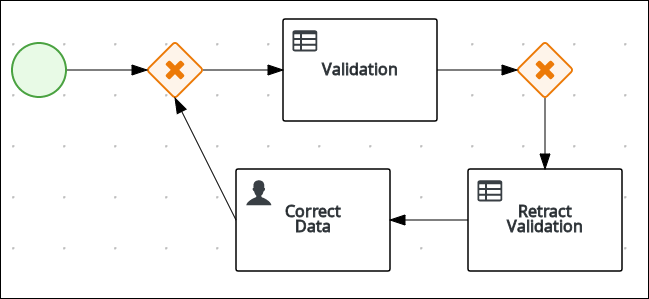
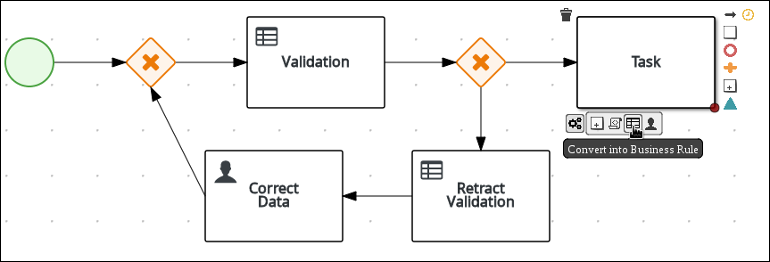
Connect the Correct Data back to the first exclusive gateway. Your workflow should look similar to the following diagram:


5.1.4. Calculating the mortgage
The mortgage calculation business process determines the applicant’s mortgage borrowing limit.
Procedure
Return to the second exclusive gateway. Create an outgoing connection to a business rule task.
-
Click the created connection and in the Diagram Properties panel, input
Validin the Name field. Expand Implementation/Execution, select and enter:
-
Condition Expression:
not ValidationErrorDO() -
Condition Expression Language:
drools
-
Condition Expression:
-
Click the created business rule task and in the Diagram Properties panel, input
Mortgage Calculationin the Name field. -
Expand Implementation/Execution, select and enter
mortgagecalculationin the Rule Flow Group field. Click
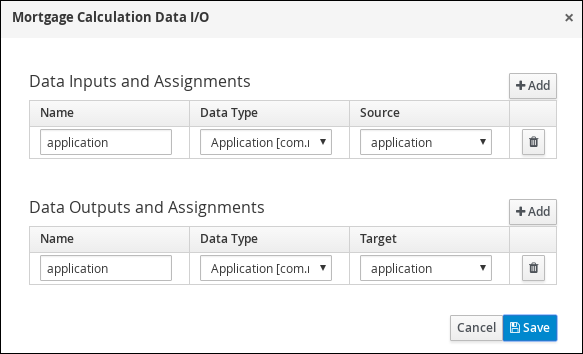
next to Assignments. In the Mortgage Calculation Data I/O window, click Add to create the following assignments:
- Click Save.
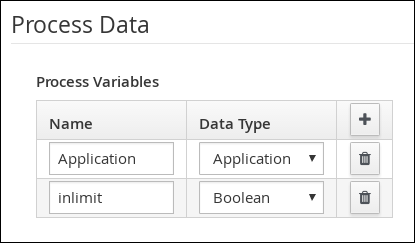
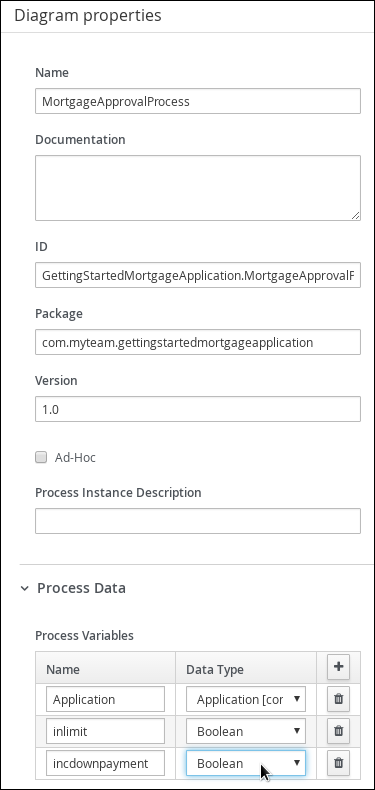
Click on an empty space on the canvas, scroll down, expand Process Data, and click
next to Process Variables. Enter the following values:
-
Name:
inlimit -
Date Type:
Boolean
-
Name:
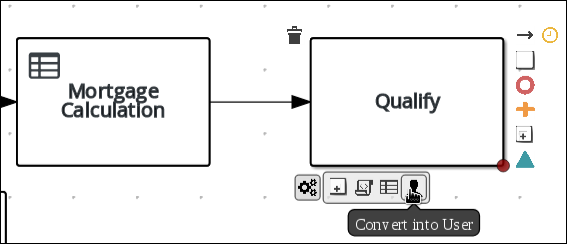
Create an outgoing connection from the Mortgage Calculation task to a user task.
-
Click on the user task and enter
Qualifyin the Name field. Expand Implementation/Execution and enter:
-
Task Name:
Qualify -
Groups:
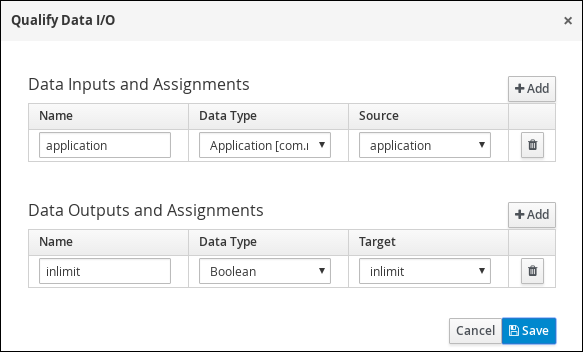
approver Click
next to Assignments. In the Qualify Data I/O window, click Add to create the following assignments:
-
Task Name:
- Click Save. Above the canvas, click Save, then Save, to confirm your changes.
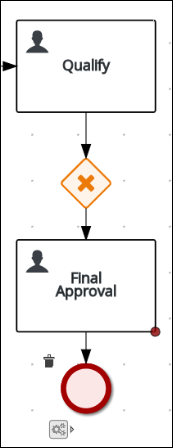
Create an outgoing connection from the Qualify task to an exclusive gateway.
- Click on the GATEWAYS icon in the node panel.
- Click on Exclusive and drag it to the right of the Qualify task.
- Create an outgoing connection from the exclusive gateway and connect it to a user task.
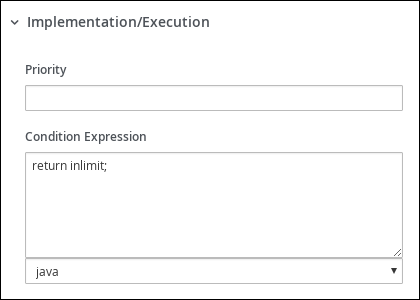
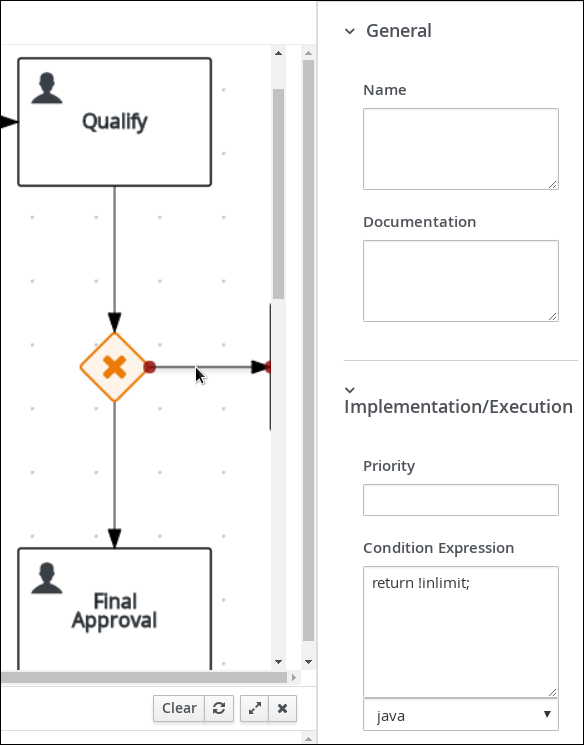
Click the connection, name it
in Limitand define the following Java Condition expression:return inlimit;
return inlimit;Copy to Clipboard Copied! Toggle word wrap Toggle overflow Click the user task and define:
-
Name:
Final Approval -
Task Name:
finalapproval -
Groups:
manager
-
Name:
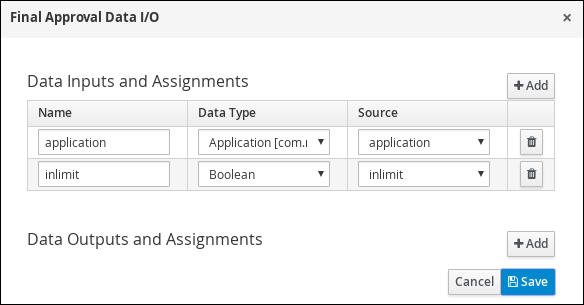
Click
next to Assignments. In the Final Approval Data I/O window, click Add to create the following assignments:
- Click Save. Above the canvas, click Save, then Save, to confirm your changes.
5.1.5. Increasing the down payment
The increasing the down payment business process checks to see if the applicant qualifies for the loan by increasing their down payment. The final result will be either the final loan approval, or loan denial based on the applicant’s inability to increase the down payment.
Procedure
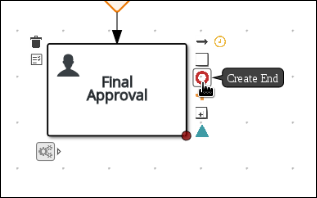
Create an outgoing connection from the Final Approval user task and connect it to an end event.
Return to the exclusive gateway that connects with the Final Approval user task. Create a second outgoing connection and connect it to a new user task.
Click the connection, name it
Not in Limitand define the following Java expression:return !inlimit;
return !inlimit;Copy to Clipboard Copied! Toggle word wrap Toggle overflow Click on an empty space on the canvas, scroll down, expand Process Data, and click
next to Process Variables. Enter the following values:
-
Name:
incdownpayment Data Type:
Boolean
-
Name:
Click the created user task and define:
-
Name:
Increase Down Payment -
Task Name:
incdown -
Groups:
broker Click
next to Assignments. In the Increase Down Payment Data I/O window, click Add to create the following assignments:
-
Name:
- Click Save. Above the canvas, click Save, then Save, to confirm your changes.
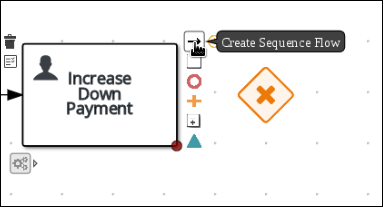
Create an outgoing connection from the Increase Down Payment task to an exclusive gateway.
- Click on the GATEWAYS icon in the node panel.
- Click on Exclusive and drag it to the right of the Increase Down Payment task.
Click on the Create Sequence Flow icon to create a connection to the exclusive gateway.
Create an outgoing connection from the exclusive gateway and connect it to an end event. Then, click the connection, name it
Down payment not increased, and create the following Java expression:return !incdownpayment;
return !incdownpayment;Copy to Clipboard Copied! Toggle word wrap Toggle overflow Create an outgoing connection from the exclusive gateway and connect it to the first exclusive gateway. Then, click the connection, name it
Down payment increased, and create the following Java expression:return incdownpayment;
return incdownpayment;Copy to Clipboard Copied! Toggle word wrap Toggle overflow - Above the canvas, click Save, then Save, to confirm your changes.


The final version of the business process: