이 콘텐츠는 선택한 언어로 제공되지 않습니다.
Chapter 2. Creating a realm and a user
The first use of the Red Hat Single Sign-On admin console is to create a realm and create a user in that realm. You use that user to log in to your new realm and visit the built-in account console, to which all users have access.
2.1. Realms and users
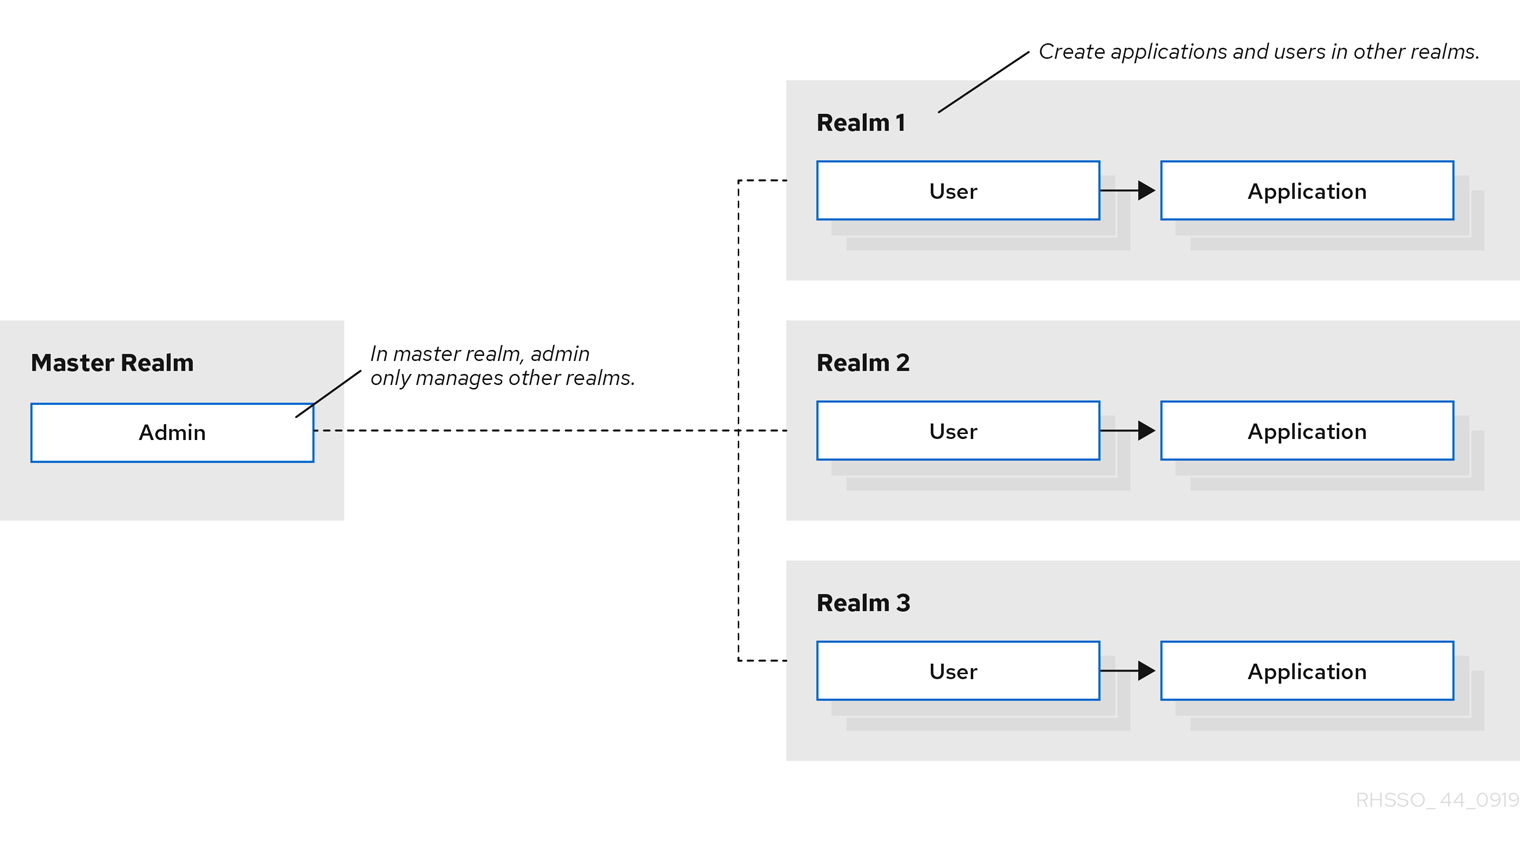
When you log in to the admin console, you work in a realm, which is a space where you manage objects. Two types of realms exist:
-
Master realm- This realm was created for you when you first started Red Hat Single Sign-On. It contains the admin account you created at the first login. You use this realm only to create other realms. -
Other realms- These realms are created by the admin in the master realm. In these realms, administrators create users and applications. The applications are owned by the users.
2.2. Creating a realm
As the admin in the master realm, you create the realms where administrators create users and applications.
Prerequisites
- Red Hat Single Sign-On is installed.
- You have the initial admin account for the admin console.
Procedure
- Go to http://localhost:8080/auth/admin/ and log in to the Red Hat Single Sign-On admin console using the admin account.
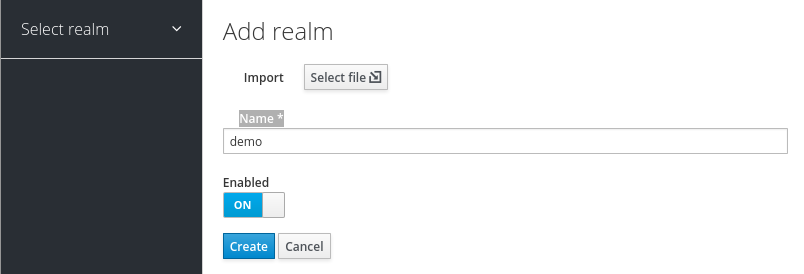
- From the Master menu, click Add Realm. When you are logged in to the master realm, this menu lists all other realms.
Type
demoin the Name field.A new realm
 Note
NoteThe realm name is case-sensitive, so make note of the case that you use.
Click Create.
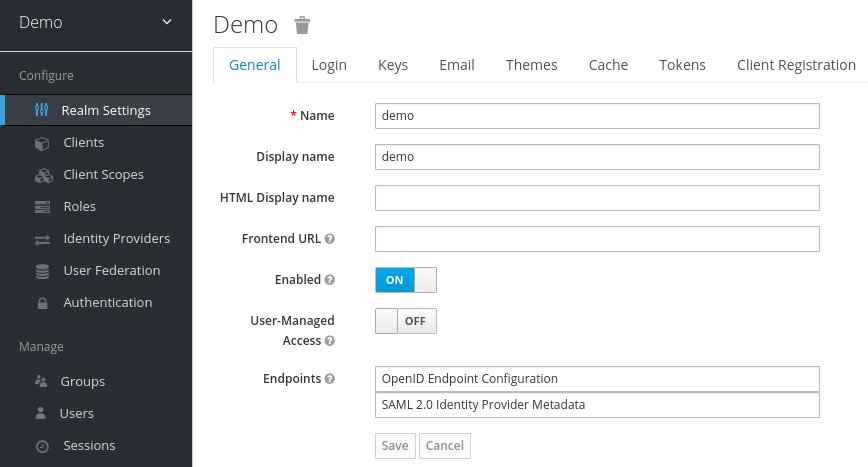
The main admin console page opens with realm set to
demo.Demo realm
-
Switch between managing the
masterrealm and the realm you just created by clicking entries in the Select realm drop-down list.
2.3. Creating a user
In the demo realm, you create a new user and a temporary password for that new user.
Procedure
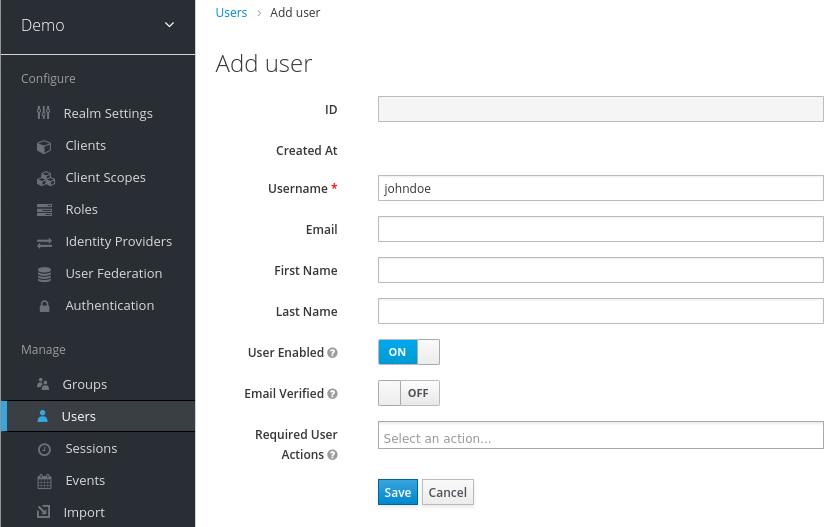
- From the menu, click Users to open the user list page.
- On the right side of the empty user list, click Add User to open the Add user page.
Enter a name in the
Usernamefield.This is the only required field.
Add user page
Flip the Email Verified switch to On and click Save.
The management page for the new user opens.
- Click the Credentials tab to set a temporary password for the new user.
- Type a new password and confirm it.
Click Set Password to set the user password to the new one you specified.
Manage Credentials page
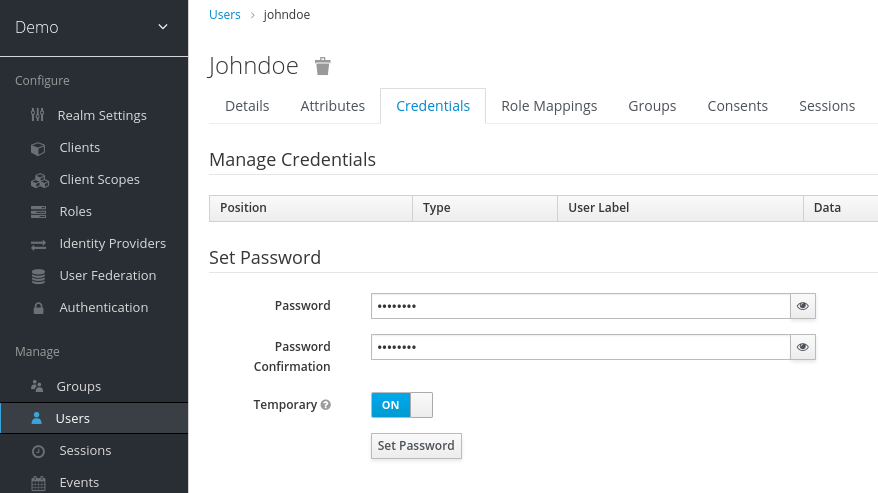 Note
NoteThis password is temporary and the user will be required to change it at the first login. If you prefer to create a password that is persistent, flip the Temporary switch to Off and click Set Password.
2.4. Logging into the Account Console
Every user in a realm has access to the account console. You use this console to update your profile information and change your credentials. You can now test logging in with that user in the realm that you created.
Procedure
- Log out of the admin console by opening the user menu and selecting Sign Out.
-
Go to http://localhost:8080/auth/realms/demo/account and log in to your
demorealm as the user that you just created. When you are asked to supply a new password, enter a password that you can remember.
Update password

The account console opens for this user.
Account console
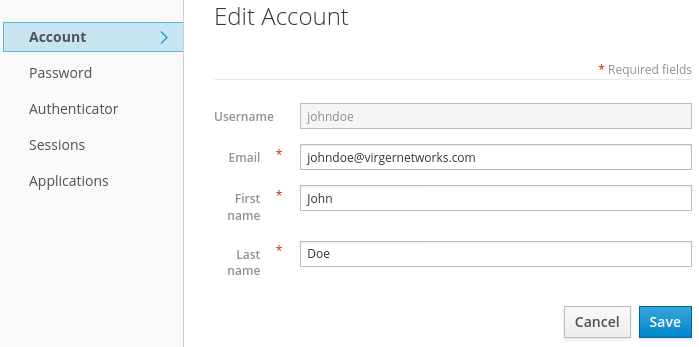
- Complete the required fields with any values to test using this page.
Next steps
You are now ready for the final procedure, which is to secure a sample application that runs on JBoss EAP. See Securing a sample application.