이 콘텐츠는 선택한 언어로 제공되지 않습니다.
6.9. Snapshots
6.9.1. Creating a Snapshot of a Virtual Machine
링크 복사링크가 클립보드에 복사되었습니다!
A snapshot is a view of a virtual machine's operating system and applications on any or all available disks at a given point in time. Take a snapshot of a virtual machine before you make a change to it that may have unintended consequences. You can use a snapshot to return a virtual machine to a previous state.
Note
Live snapshots can only be created for virtual machines running on 3.1-or-higher-compatible data centers. Virtual machines in 3.0-or-lower-compatible data centers must be shut down before a snapshot can be created.
Procedure 6.11. Creating a Snapshot of a Virtual Machine
- Click the Virtual Machines tab and select a virtual machine.
- Click the Snapshots tab in the details pane and click .
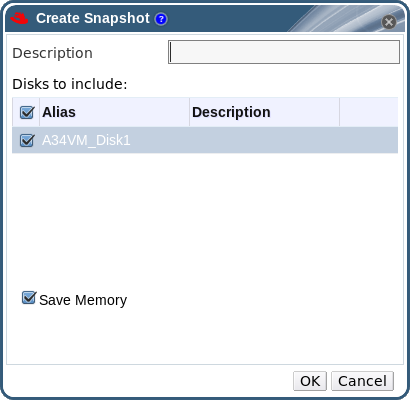
Figure 6.1. Create snapshot
- Enter a description for the snapshot.
- Select Disks to include using the check boxes.
- Use the Save Memory check box to denote whether to include the virtual machine's memory in the snapshot.
- Click .
The virtual machine's operating system and applications on the selected disk(s) are stored in a snapshot that can be previewed or restored. The snapshot is created with a status of
Locked, which changes to Ok. When you click on the snapshot, its details are shown on the General, Disks, Network Interfaces, and Installed Applications tabs in the right side-pane of the details pane.
6.9.2. Using a Snapshot to Restore a Virtual Machine
링크 복사링크가 클립보드에 복사되었습니다!
A snapshot can be used to restore a virtual machine to its previous state.
Procedure 6.12. Using Snapshots to Restore Virtual Machines
- Click the Virtual Machines tab and select a virtual machine.
- Click the Snapshots tab in the details pane to list the available snapshots.
- Select a snapshot to restore in the left side-pane. The snapshot details display in the right side-pane.
- Click the drop-down menu beside to open the Custom Preview Snapshot window.

Figure 6.2. Custom Preview Snapshot
- Use the check boxes to select the VM Configuration, Memory, and disk(s) you want to restore, then click . This allows you to create and restore from a customized snapshot using the configuration and disk(s) from multiple snapshots.
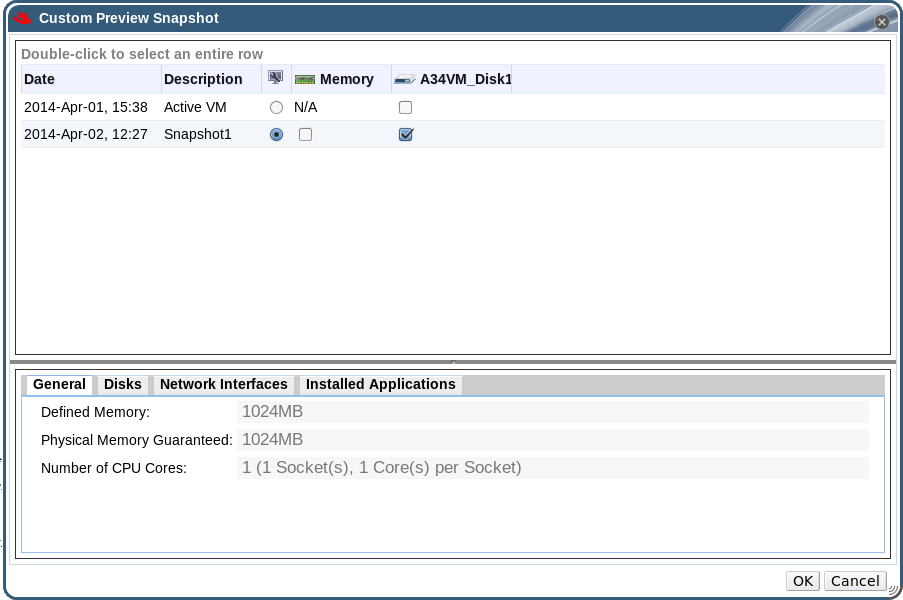
Figure 6.3. The Custom Preview Snapshot Window
The status of the snapshot changes toPreview Mode. The status of the virtual machine briefly changes toImage Lockedbefore returning toDown. - Start the virtual machine; it runs using the disk image of the snapshot.
- Click Commit to permanently restore the virtual machine to the condition of the snapshot. Any subsequent snapshots are erased.Alternatively, click the Undo button to deactivate the snapshot and return the virtual machine to its previous state.
6.9.3. Creating a Virtual Machine from a Snapshot
링크 복사링크가 클립보드에 복사되었습니다!
You have created a snapshot from a virtual machine. Now you can use that snapshot to create another virtual machine.
Procedure 6.13. Creating a virtual machine from a snapshot
- Click the Virtual Machines tab and select a virtual machine.
- Click the Snapshots tab in the details pane to list the available snapshots.
- Select a snapshot in the list displayed and click .
- Enter the Name and Description for the virtual machine.
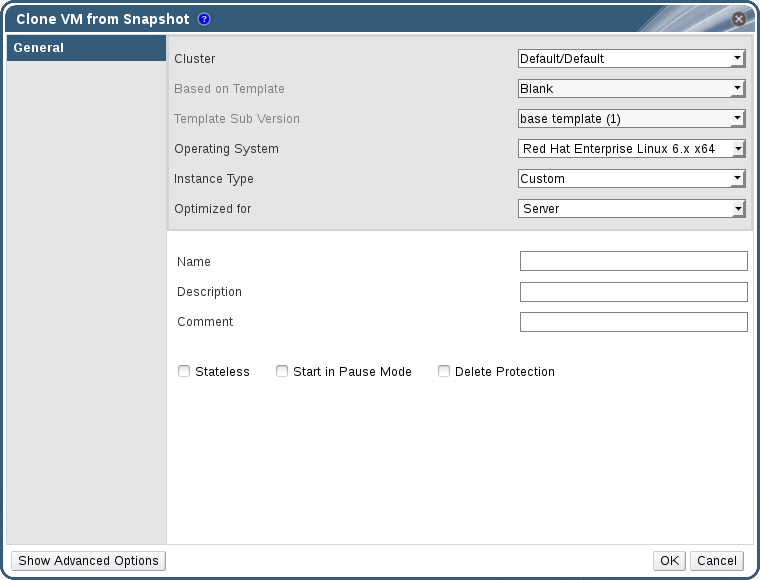
Figure 6.4. Clone a Virtual Machine from a Snapshot
- Click .
After a short time, the cloned virtual machine appears in the Virtual Machines tab in the navigation pane with a status of
Image Locked. The virtual machine will remain in this state until Red Hat Enterprise Virtualization completes the creation of the virtual machine. A virtual machine with a preallocated 20 GB hard drive takes about fifteen minutes to create. Sparsely-allocated virtual disks take less time to create than do preallocated virtual disks.
When the virtual machine is ready to use, its status changes from
Image Locked to Down in the Virtual Machines tab in the navigation pane.
6.9.4. Deleting a Snapshot
링크 복사링크가 클립보드에 복사되었습니다!
Delete a virtual machine snapshot and permanently remove it from your Red Hat Enterprise Virtualization environment. In data centers with a compatibility version of 3.5 and above and hosts running Red Hat Enterprise Linux 7.1 and above or Red Hat Enterprise Virtualization Hypervisor 7.1 and above, you can delete snapshots from a running virtual machine. This operation does not affect the current state of the virtual machine. Alternatively, shut down the virtual machine before continuing.
Important
When you delete a snapshot from an image chain, one of three things happens:
- If the snapshot being deleted is contained in a RAW (preallocated) base image, a new volume is created that is the same size as the base image.
- If the snapshot being deleted is contained in a QCOW2 (thin provisioned) base image, the volume subsequent to the volume containing the snapshot being deleted is extended to the cumulative size of the successor volume and the base volume.
- If the snapshot being deleted is contained in a QCOW2 (thin provisioned), non-base image hosted on internal storage, the successor volume is extended to the cumulative size of the successor volume and the volume containing the snapshot being deleted.
The data from the two volumes is merged in the new or resized volume. The new or resized volume grows to accommodate the total size of the two merged images; the new volume size will be, at most, the sum of the two merged images. To delete a snapshot, you must have enough free space in the storage domain to temporarily accommodate both the original volume and the newly merged volume. Otherwise, snapshot deletion will fail and you will need to export and re-import the volume to remove snapshots. For detailed information on snapshot deletion for all disk formats, see https://access.redhat.com/solutions/527613.
Procedure 6.14. Deleting a Snapshot
- Click the Virtual Machines tab and select a virtual machine.
- Click the Snapshots tab in the details pane to list the snapshots for that virtual machine.
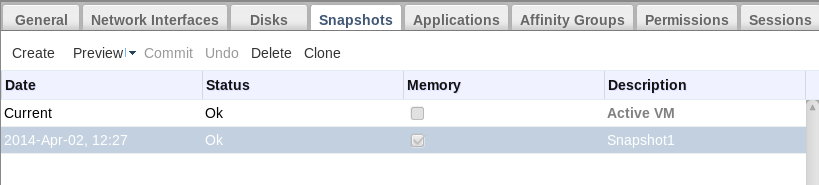
Figure 6.5. Snapshot List
- Select the snapshot to delete.
- Optionally shut down the running virtual machine associated with the snapshot to be deleted.
- Click .
- Click .