Getting started with Red Hat OpenShift Service on AWS (ROSA)
Learn how to get started on Red Hat® OpenShift® Service on AWS, including how to use AWS Security Token Service (STS) to deploy a cluster. Once you’ve finished, proceed to part two and learn how to deploy an application on your new cluster.
You can also watch this interactive demonstration on how to install ROSA, from creating an account to deploying applications.
This learning path is for operations teams or system administrators
Developers may want to check out developers.redhat.com.
Granting cluster admin rights to users in Red Hat OpenShift Service on AWS
Cluster-admin rights are not automatically granted to users that you add to the cluster. If there are users that you want to grant this level of privilege to, you will need to manually add cluster-admin rights to each user.
What will you learn?
- How to grant cluster admin rights to other users
What do you need before starting?
Grant cluster-admin rights
Let's start off with granting cluster-admin rights to ourselves using the GitHub username we created for the cluster in the Set up an IdP resource. There are two ways to do this; either from the Red Hat® OpenShift® on AWS command line interface (CLI) or the OpenShift Cluster Manager (OCM) web user interface (UI).
- Via
rosaCLIAssuming you are the user who created the cluster, you can grant cluster-admin to a user (or our GitHub user) by running:
rosa grant user cluster-admin --user <idp_user_name>--cluster=<cluster-name> Verify that we were added as a cluster-admin by running:
rosa list users --cluster=<cluster-name>You should see your GitHub ID of the user listed.
$ rosa list users --cluster=my-rosa-cluster

ID           GROUPS

rosa-user    cluster-admin
Logout and log back into the cluster to see a new perspective with the “Administrator Panel”. (You might need to try an Incognito/Private window).
You can also test this by running the following command. Only a cluster-admin user can run this without errors:
oc get all -n openshift-apiserver- Via OCM UI
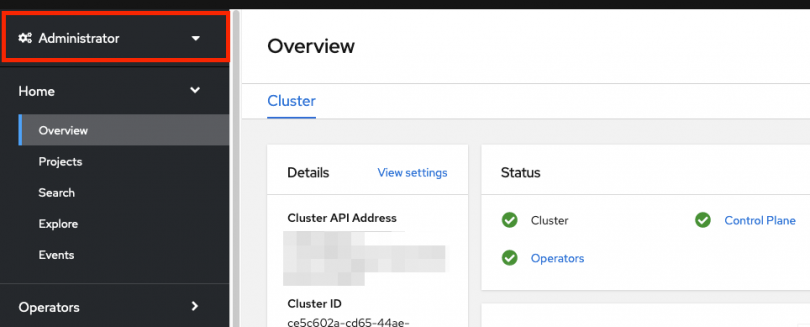
- Log into OCM from https://console.redhat.com/openshift
- Select your cluster.
- Click on the “Access Control” tab.
Towards the bottom in the “Cluster Administrative Users” section click on “Add User.”
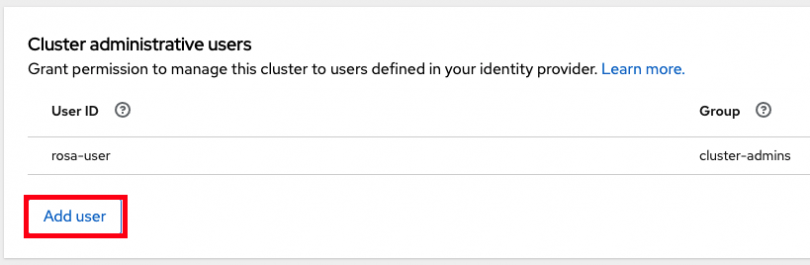
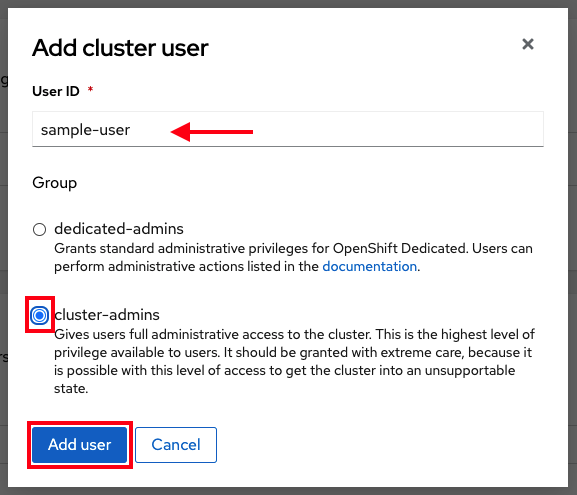
- On the pop-up screen enter the person's user ID (in our example the GitHub ID).
Select whether you want to grant them cluster-admin or dedicated-admin.
Granting dedicated-admin
ROSA has the option to set a “dedicated-admin” role, which means to create an admin user that can complete most administrative tasks but is slightly limited to prevent anything damaging. It is best practice to use dedicated-admin when elevated privileges are needed. You can read more about it here.
Enter the following command to promote your user to a dedicated-admin:
rosa grant user dedicated-admin --user <idp_user_name>--cluster=<cluster-name> Enter the following command to verify that your user now has dedicated-admin access
oc get groups dedicated-admins- You can also grant dedicated-admin rights via the OCM UI as described in the cluster-admin section, but just select the “dedicated-admins” radio button instead.
You are now ready to access your cluster.
Revoking access
In the event that you need to revoke cluster-admin or dedicated-admin access, it can be done through the following steps:
From the ROSA CLI, enter in the following command to remove cluster-admin users:
rosa revoke user cluster-admin --user=<idp_user_name> --cluster=<cluster_name>- Replace <idp_user_name> and <cluster_name> with the name of the identity provider user and your cluster name.
To remove dedicated-admin users, use this command instead:
rosa revoke user dedicated-admin --user=<idp_user_name> --cluster=<cluster_name>Once submitted, check the admin list to ensure the user is no longer listed using the following command:
rosa list users --cluster=<cluster_name>
Now the intended user no longer has admin privileges. This could be helpful to maintain your security policies and reduce any potential access problems in the future.