Validated patterns explained
Learn the basics of validated patterns, a type of flexible code architecture that allows you to go from concept to production using the same stack configuration.
This learning path is for operations teams or system administrators
Developers may want to check out the Developer Sandbox to get started with validated patterns.
Deploying a validated pattern
Now that you’ve prepared your environment, we’ll walk through how to deploy a validated pattern on your cluster.
This learning path deploys the Multicloud GitOps validated pattern, because it demonstrates the GitOps approach to managing multiple cloud deployments in both public and private clouds. As a base pattern, it’s also easy to add new products and Helm charts. Finally, it uses many common Red Hat products and shows how they work together to create a fully-integrated workload.
If another pattern better suits your needs or use case, feel free to use it instead, as the same general process will apply.
What will you learn?
- How to deploy a pattern using the Validated Patterns Operator in the OpenShift web console
- How to deploy a pattern using the
patterns.shscript in the command line interface (CLI)
What do you need before starting?
- An available cluster that meets the minimum storage requirements of your pattern
- The OpenShift CLI (
oc) - The git binary
Overview of the workflow
In general, you can deploy a validated pattern in one of two ways:
- Using a community operator called the Validated Patterns Operator
- Using the
pattern.shscript via the CLI
The Validated Patterns Operator is not supported by Red Hat, but is designed by the upstream community as an easy way to install and deploy a pattern repository via the Red Hat OpenShift web console. If using this option, you must load the secrets file separately after the pattern components have been deployed.
Fork the repository
Whether you install the validated pattern with the community operator or via CLI, you’ll need to first fork the pattern repository and edit your values files.
- Fork the Multicloud GitOps validated pattern repository on GitHub.
- Clone the forked repository:
git clone git@github.com:your-username/multicloud-gitops.git cd multicloud-gitops - Make the values changes you determined when preparing your environment. Commit and push the changes to GitHub.
git checkout -b my-branch
vim values-*.yaml
git add values-*.yaml
git commit values-*.yaml
git push origin my-branch
Do not commit the secrets file to GitHub, as it will contain confidential information that should not be publicly accessible. - Optional: If you want to customize credentials, create a local copy of the secrets values file. Again, do not push the secrets file to GitHub.
cp ./values-secret.yaml.template ~/values-secret-multicloud-gitops.yaml
vim ~/values-secret-multicloud-gitops.yaml
Deploying a pattern with the Validated Patterns Operator
Install the operator
- Access the Red Hat OpenShift web console by running
oc whoami --show-console. You’ll see the URL for the console and your login credentials. - In the left sidebar, click Operators and then OperatorHub.
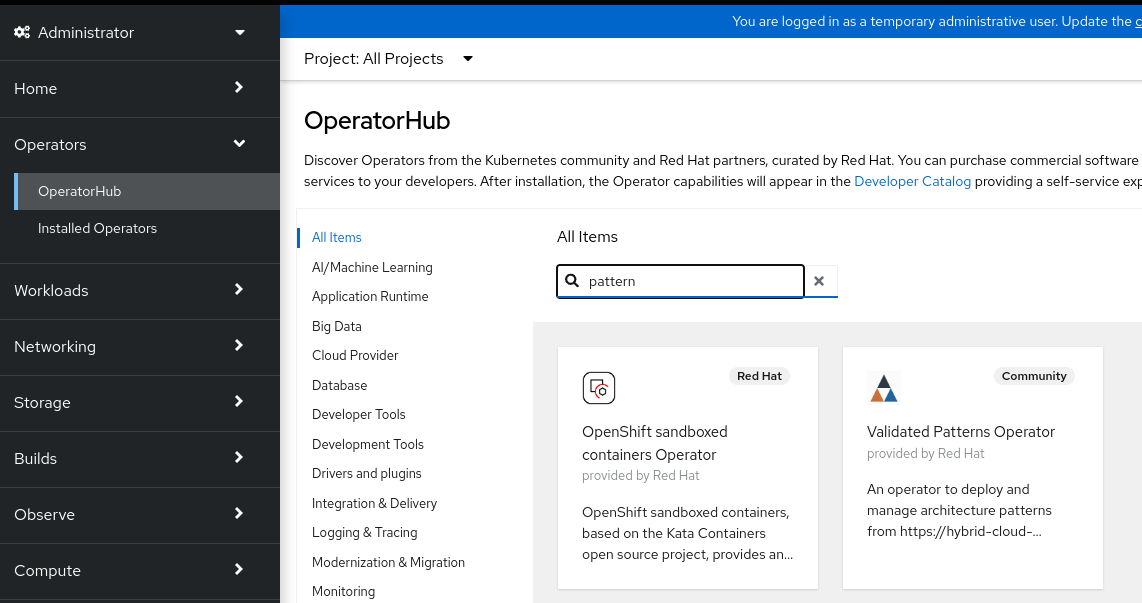
- In the Filter by box, type “pattern,” which should show you the Validated Patterns Operator. Select this operator, click Continue, then click Install.
The OperatorHub catalog search where a user will search "pattern" to find the Validated Patterns Operator - On the following Install Operator page, you can leave the defaults and click Install.
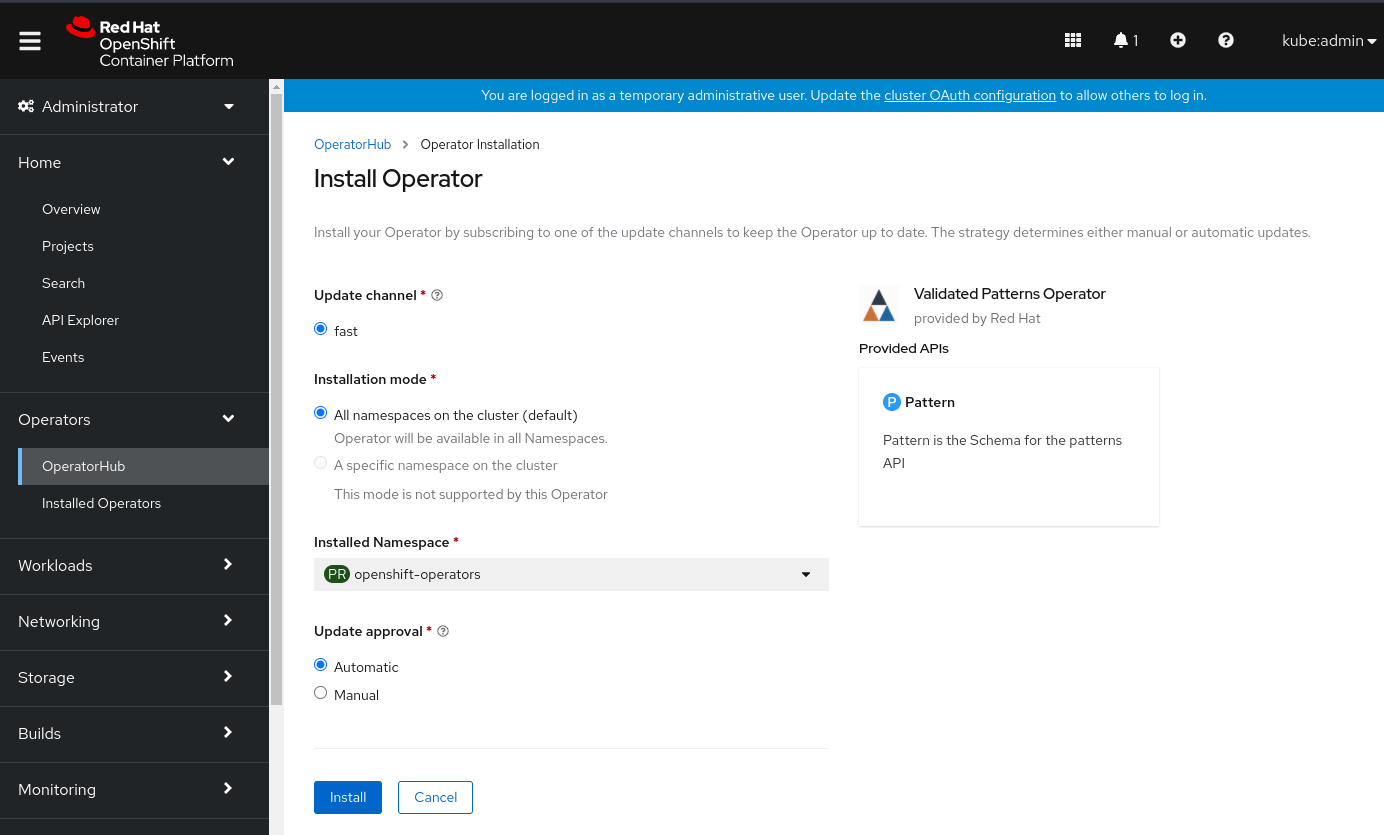
The Install Operator screen for the Validated Patterns Operator
Create the pattern
- Once you finish installing the operator, click View Operator and then Create instance.
- Fill out the Create a pattern form, including the following:
- Choose a name for the pattern deployment. This name will be used in the projects created.
- Apply any other labels you may need to this deployment.
- Choose a cluster group name. For the Multicloud GitOps pattern, we’ll use “hub” as a cluster group name. Check with your specific validated pattern to determine the correct cluster group.
- Select Git Config and change the Target Repo URL to your forked repository URL.
- You may need to change the Target Revision, depending on if you are using a specific version or branch.
- For this learning path, you don’t need to make changes to your
values-*.yamlfiles, but if you are changing any parameters, you would confirm at this point that those have been made locally and pushed to your forked repository. - Change any other form fields that require specifications.
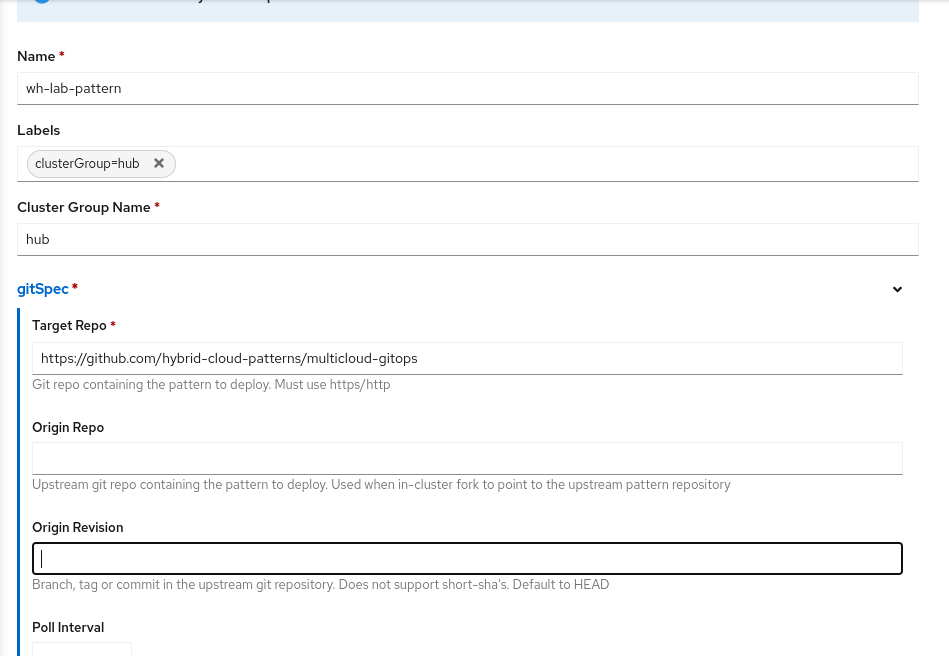
The "Create a pattern" form where you will include relevant information for your pattern installation
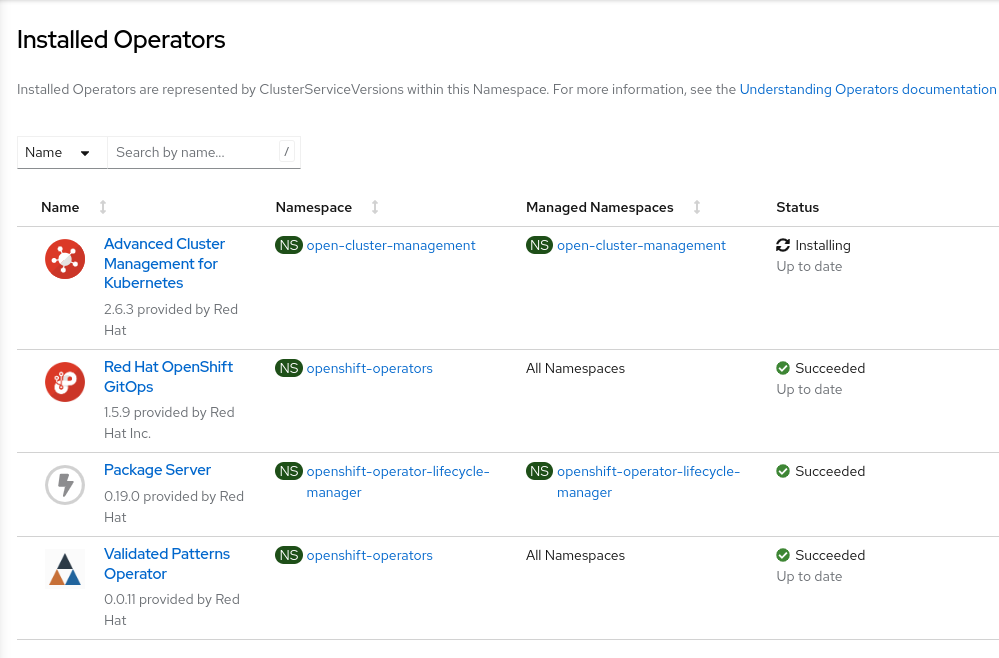
- Select Create, then go back to Installed Operators. You should soon see the OpenShift GitOps and Validated Patterns operators show up, along with any other operators and assets you will need.
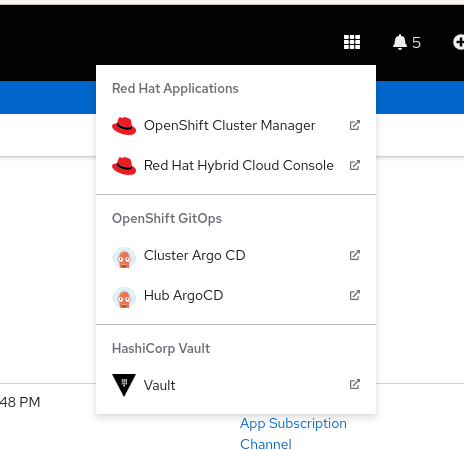
The Installed Operators screen where your installed operators and assets will populate after creating the pattern - You can monitor the progress of your application deployment by selecting the dropdown menu to the left of your console notifications and waiting for the two Argo CD applications to show up. Select Hub Argo CD, which redirects you to the Argo CD login page. Click Login using OpenShift, and enter your OpenShift credentials.
The dropdown menu that shows the status of OpenShift GitOps applications
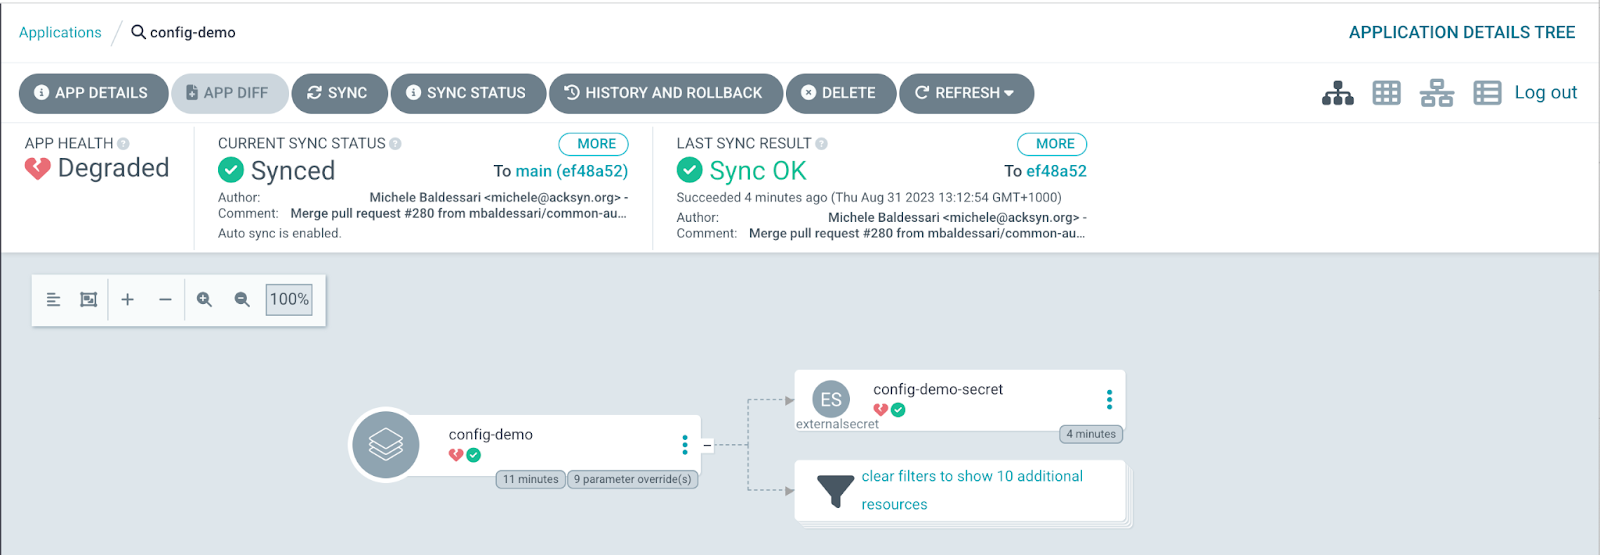
From here, OpenShift GitOps will install the rest of the assets and artifacts for the pattern, including Red Hat Advanced Cluster Manager.
Load secrets
The final step in using the Validated Patterns Operator is to load the secrets file separately. Run the following command in the CLI:
~/values-secret-multicloud-gitops.yaml> ./pattern.sh make load-secretsYou should see the secrets loading from the OpenShift GitOps hub screen. This may take some time.
Deploying a pattern with pattern.sh
- Login to your cluster using
oc login. - Run the following command to install the pattern and load the secrets at the same time:
./pattern.sh make install
Congratulations, you have now successfully deployed a validated pattern to your cluster.