Validated patterns explained
Learn the basics of validated patterns, a type of flexible code architecture that allows you to go from concept to production using the same stack configuration.
This learning path is for operations teams or system administrators
Developers may want to check out the Developer Sandbox to get started with validated patterns.
Preparing the environment for a validated pattern
In this resource, we’ll walk through how to prepare your environment to deploy a validated pattern, which will involve cluster sizing considerations and cluster creation.
If you plan on installing a cluster via the Hybrid Cloud Console, get started below.
What will you learn?
- How to plan your cluster storage for a validated pattern
- How to install your cluster for a validated pattern
What do you need before starting?
- Red Hat account
- Subscription or product trial for Red Hat® OpenShift® Container Platform
- An available cluster
- GitHub account
Checking cluster storage
Depending on the pattern you use, you’ll want to check that you have sufficient storage on your cluster.
Navigate to https://validatedpatterns.io/patterns/ and click on the validated pattern you want to deploy. In this learning path, we’ll be working with the Multicloud GitOps pattern.
Validated patterns will look like this:
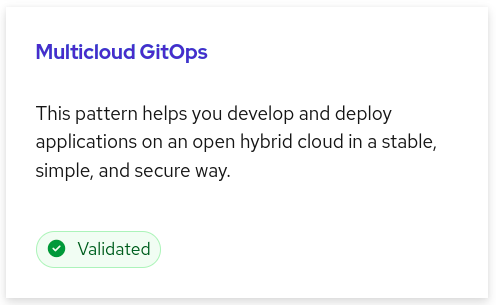
The Multicloud GitOps pattern is identified as a validated pattern by the green “Validated” button and checkmark. - In the right navigation bar, click on Cluster sizing.
- Confirm that you meet the minimum requirements for:
- General OpenShift requirements
- Datacenter HUB requirements
- Number of control plane/worker nodes
- Instance types
- Any other listed requirements
Create a cluster
- Install a new cluster with
cluster-adminpermissions if you have not already done so. You may also use an existing cluster for this learning path. There are many options for installing a cluster:- Via the Hybrid Cloud Console
- Via the command line interface (CLI) using
openshift-installer - Via an Ansible playbook
- Via your own organization’s automation tools.
- When installing your cluster, make note of the following information, which you’ll need for your
values.yamlfile in the next step:- Domain
- Cluster name
- Worker sizing
- Optional: Install a second cluster for a multicloud deployment.
Determine values
The values.yaml file is where you will specify variables for your particular deployment of the validated pattern. Here are a few examples of ways you can specify your values.
values-clusterGroupsets values of all clusters in that clusterGroup, including:- Namespaces
- Subscriptions to operators
- Argo CD applications
- Managed clusters (used on the HUB cluster only)
values-<cloud>-devsets values that are specific to the cloud provider for clusterGroupdev- You can add
-<version>to define something specific to a version.
- You can add
values-providerCloudsets values across all clusters on that cloud provider.- values-global sets values of all clusters across the pattern.
values-secretsets and loads secrets (passwords, e.g.).- This values file should never be pushed to your git repository and should only exist in your home directory.
Now that you’ve prepared your cluster, you are now ready to deploy the validated pattern.
Get more support
- Troubleshoot with Red Hat support*
- OpenShift Commons validated patterns Slack channel
- GitHub repositories for validated patterns
*Red Hat supports subscribed Red Hat products used in validated patterns. The codified patterns are distributed as community projects and no additional support beyond subscribed Red Hat products is implied.