Este conteúdo não está disponível no idioma selecionado.
Chapter 1. Deploying OpenShift Container Storage on Google Cloud
Deploying OpenShift Container Storage on OpenShift Container Platform using dynamic storage devices provided by Google Cloud installer-provisioned infrastructure (IPI) enables you to create internal cluster resources. This results in internal provisioning of the base services, which helps to make additional storage classes available to applications.
Only internal Openshift Container Storage clusters are supported on Google Cloud. See Planning your deployment for more information about deployment requirements.
1.1. Installing Red Hat OpenShift Container Storage Operator
You can install Red Hat OpenShift Container Storage Operator using the Red Hat OpenShift Container Platform Operator Hub. For information about the hardware and software requirements, see Planning your deployment.
Prerequisites
- You must be logged into the OpenShift Container Platform cluster.
- You must have at least three worker nodes in the OpenShift Container Platform cluster.
When you need to override the cluster-wide default node selector for OpenShift Container Storage, you can use the following command in command line interface to specify a blank node selector for the openshift-storage namespace:
$ oc annotate namespace openshift-storage openshift.io/node-selector=Procedure
Click Operators
OperatorHub in the left pane of the OpenShift Web Console. Figure 1.1. List of operators in the Operator Hub
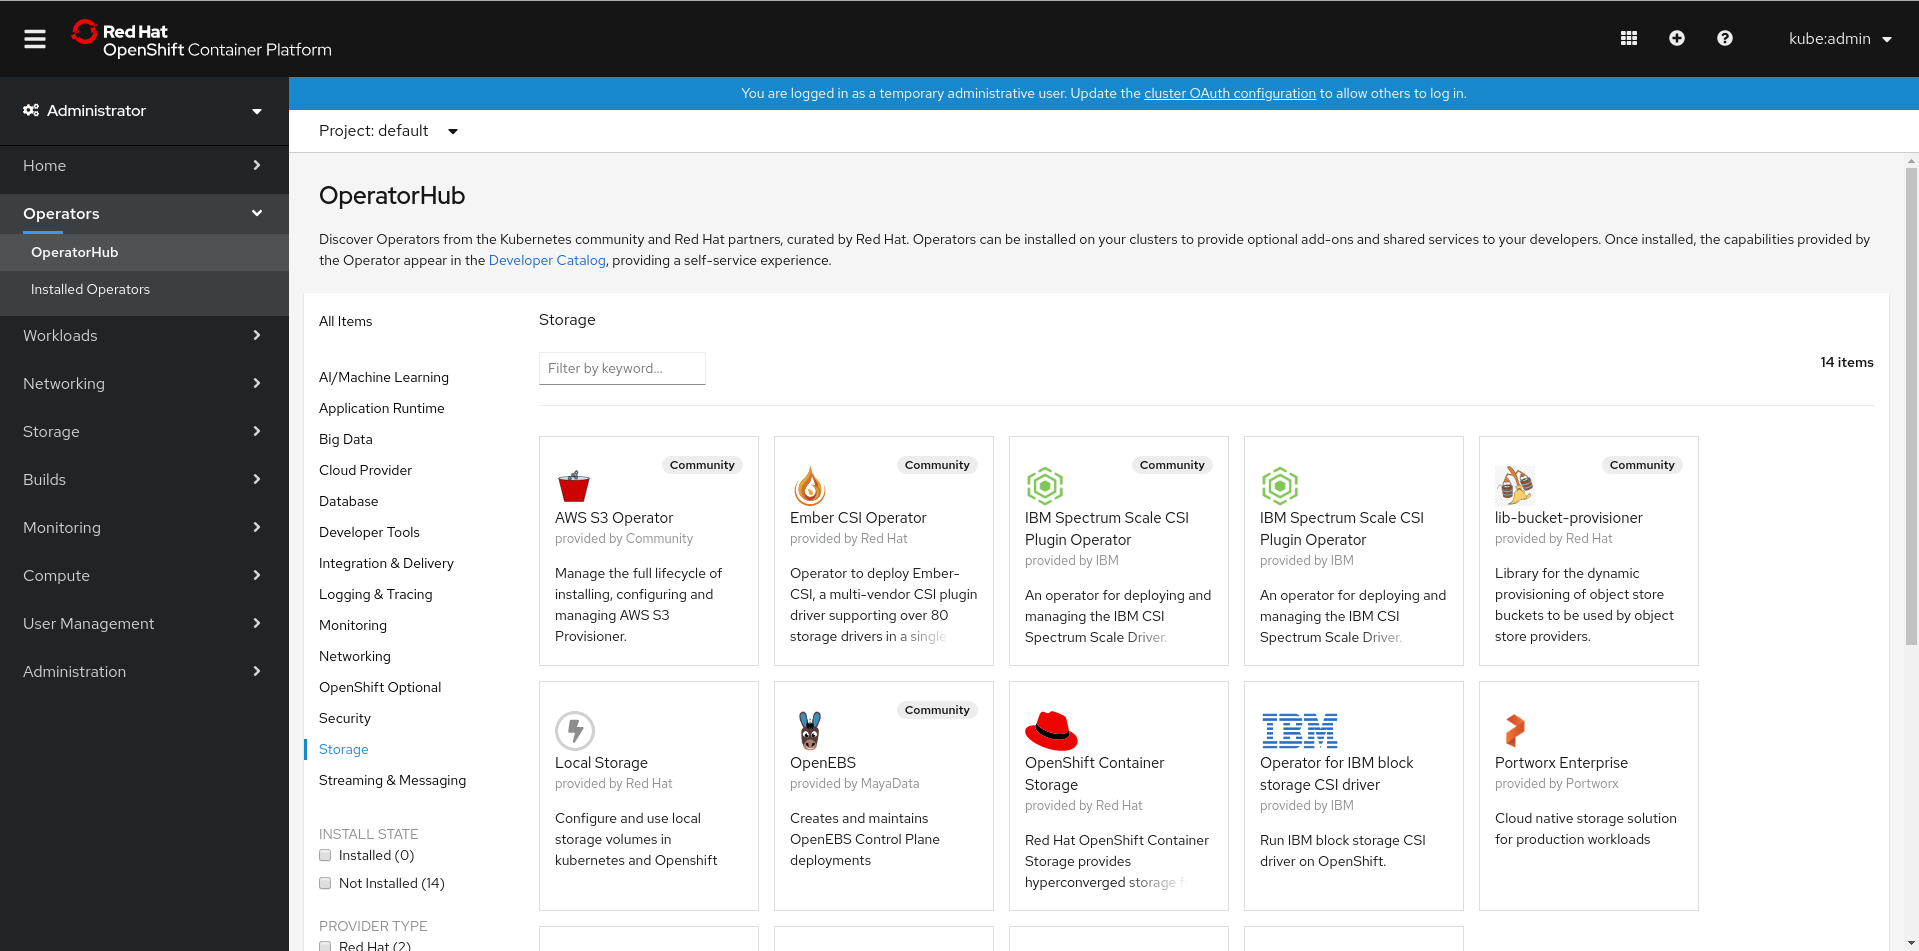
Click on OpenShift Container Storage.
You can use the Filter by keyword text box or the filter list to search for OpenShift Container Storage from the list of operators.
- On the OpenShift Container Storage operator page, click Install.
On the Install Operator page, ensure the following options are selected:
- Update Channel as stable-4.5
- Installation Mode as A specific namespace on the cluster
-
Installed Namespace as Operator recommended namespace PR openshift-storage. If Namespace
openshift-storagedoes not exist, it will be created during the operator installation. Select Approval Strategy as Automatic or Manual. Approval Strategy is set to Automatic by default.
Approval Strategy as Automatic.
NoteWhen you select the Approval Strategy as Automatic, approval is not required either during fresh installation or when updating to the latest version of OpenShift Container Storage.
- Click Install
- Wait for the install to initiate. This may take up to 20 minutes.
-
Click Operators
Installed Operators -
Ensure the Project is
openshift-storage. By default, the Project isopenshift-storage. - Wait for the Status of OpenShift Container Storage to change to Succeeded.
Approval Strategy as Manual.
NoteWhen you select the Approval Strategy as Manual, approval is required during fresh installation or when updating to the latest version of OpenShift Container Storage.
- Click Install.
- On the Installed Operators page, click ocs-operator.
- On the Subscription Details page, click the Install Plan link.
- On the InstallPlan Details page, click Preview Install Plan.
- Review the install plan and click Approve.
- Wait for the Status of the Components to change from Unknown to either Created or Present.
-
Click Operators
Installed Operators -
Ensure the Project is
openshift-storage. By default, the Project isopenshift-storage. - Wait for the Status of OpenShift Container Storage to change to Succeeded.
Verification steps
- Verify that OpenShift Container Storage Operator shows the Status as Succeeded on the Installed Operators dashboard.
1.2. Creating an OpenShift Container Storage Cluster Service in internal mode
Use this procedure to create an OpenShift Container Storage Cluster Service after you install the OpenShift Container Storage operator.
Prerequisites
- The OpenShift Container Storage operator must be installed from the Operator Hub. For more information, see Installing OpenShift Container Storage Operator using the Operator Hub.
Be aware that the default storage class of Google Cloud uses hard disk drive (HDD). To use solid state drive (SSD) based disks for better performance, you need to create a storage class, using
pd-ssdas shown in the followingssd-storeageclass.yamlexample:apiVersion: storage.k8s.io/v1 kind: StorageClass metadata: name: faster provisioner: kubernetes.io/gce-pd parameters: type: pd-ssd volumeBindingMode: WaitForFirstConsumer
Procedure
-
Click Operators
Installed Operators from the OpenShift Web Console to view the installed operators. Ensure that the Project selected is openshift-storage. On the Installed Operators page, click Openshift Container Storage.
Figure 1.2. OpenShift Container Storage Operator page

On the Installed Operators
Operator Details page, perform either of the following to create a Storage Cluster Service. On the Details tab
Provided APIs OCS Storage Cluster, click Create Instance. Figure 1.3. Operator Details Page

Alternatively, select the Storage cluster tab and click Create OCS Cluster Service.
Figure 1.4. Storage Cluster tab

On the Create Storage Cluster page, ensure that the following options are selected:
Figure 1.5. Create Storage Cluster page
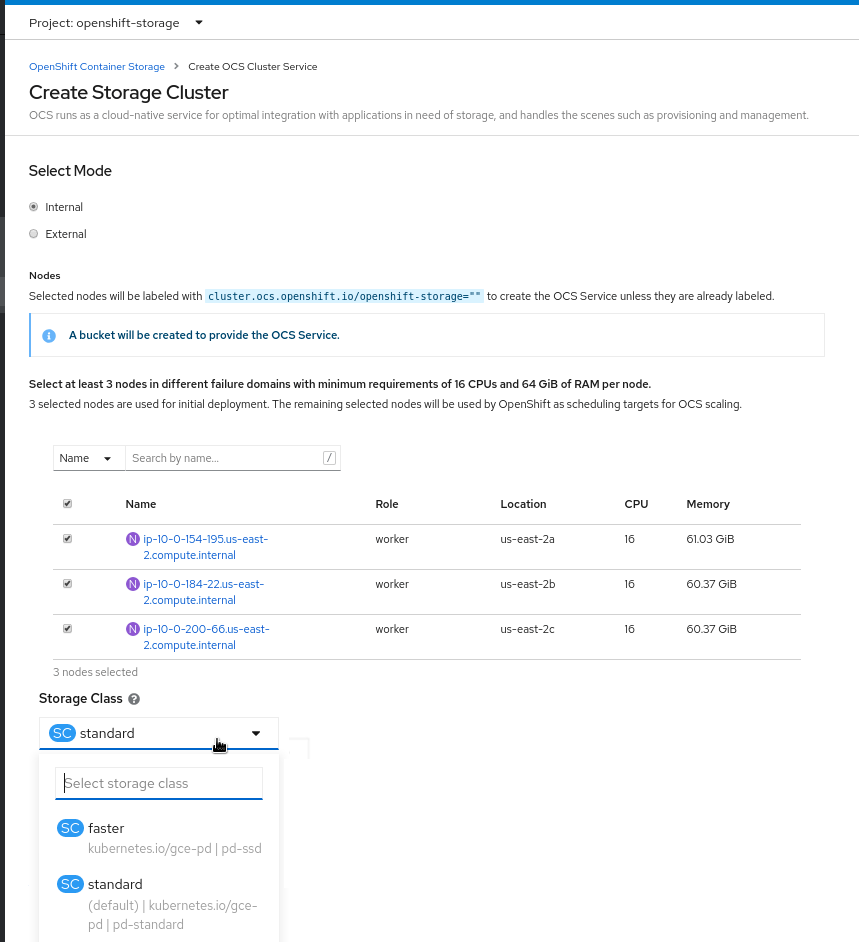
- By default, Select Mode has Internal selected.
In the Nodes section, for the use of OpenShift Container Storage service, select a minimum of three or a multiple of three worker nodes from the available list.
For cloud platforms with multiple availability zones, ensure that the Nodes are spread across different Locations/availability zones.
NoteTo find specific worker nodes in the cluster, you can filter nodes on the basis of Name or Label.
- Name allows you to search by name of the node
- Label allows you to search by selecting the predefined label
For minimum starting node requirements, see Resource requirements section in Planning guide.
-
Storage Class is set by default to
standardfor Google Cloud. However, if you created a storage class to use SSD based disks for better performance, you need to select that storage class. Select OCS Service Capacity from drop down list.
NoteOnce you select the initial storage capacity, cluster expansion will only be performed using the selected usable capacity (times 3 of raw storage).
Click Create.
NoteThe Create button is enabled only after selecting a minimum of three worker nodes.
Upon successful deployment, a storage cluster with three storage devices gets created. These devices get distributed across three of the selected nodes. The configuration uses a replication factor of 3. To scale the initial cluster, see Scaling storage nodes.
Verification steps
- To verify that OpenShift Container Storage is successfully installed, see Verifying your OpenShift Container Storage installation.
1.3. Creating a new backing store
This procedure is not mandatory. However, it is recommended to perform this procedure.
When you install OpenShift Container Storage on Google Cloud platform, noobaa-default-bucket-class places data on noobaa-default-backing-store instead of Google Cloud storage. Hence, to use OpenShift Container Storage Multicloud Object Gateway (MCG) managed object storage backed by Google Cloud storage, you need to perform the following procedure.
Before you begin
- Log in to Google Cloud web console.
Create Google Cloud storage bucket for MCG to store object data as described in Creating storage buckets documentation. Make sure to have a service account with the Storage Admin role.
It is recommended to use a separate Google Cloud project to limit this service account from accessing other data.
- Download the service account key in JSON format, which is required for the OpenShift Container Storage configuration.
Prerequisites
- Administrator access to OpenShift.
Procedure
To configure MCG to use Google Cloud storage account:
- Log in to OpenShift Container Platform web console.
-
Click Operators
Installed Operators from the left pane of the OpenShift Web Console to view the installed operators. - Click OpenShift Container Storage Operator.
On the OpenShift Container Storage Operator page, scroll right and click the Backing Store tab.
Figure 1.6. OpenShift Container Storage Operator page with backing store tab

Click Create Backing Store.
Figure 1.7. Create Backing Store page
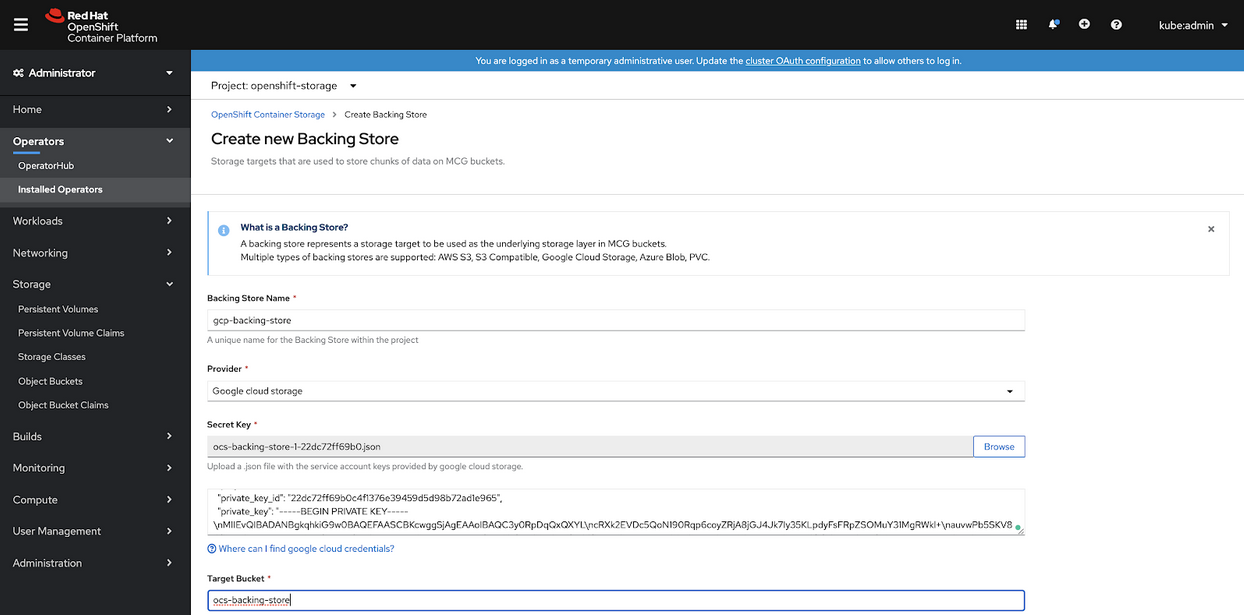
On the Create New Backing Store page, perform the following:
- Enter a name for Backing Store Name.
- Select Google Cloud Storage as the Provider.
- Upload the private key JSON file for Secret key.
- Enter the name of the storage bucket that you created inside the Google Cloud storage account for Target Bucket. This allows you to create a connection that tells MCG that it can use this bucket for the system.
- Click Create Backing Store.
-
In the OpenShift Container Platform web console, click Installed Operators
OpenShift Container Storage Bucket Class. -
Edit
noobaa-default-bucket-classYAML specification fieldspec: placementPolicy: tiers: -backingStores:to use the newly created backing store instead ofnoobaa-default-backing-store.
Verification steps
Run the following command by using the MCG command line tool
noobaa(frommcg rpmpackage) to verify that the Google Cloud storage backing store that you created is inReadystate.$ noobaa status -n openshift-storageVerify that the output shows the default bucket class in
Readystate and uses the expected backing store.. . . ------------------ - Backing Stores - ------------------ NAME TYPE TARGET-BUCKET PHASE AGE gcp-backing-store google-cloud-storage ocs-backing-store Ready 10m27s noobaa-default-backing-store pv-pool Ready 1h58m21s ------------------ - Bucket Classes - ------------------ NAME PLACEMENT PHASE AGE noobaa-default-bucket-class {Tiers:[{Placement: BackingStores:[gcp-backing-store]}]} Ready 1h58m21s