Este conteúdo não está disponível no idioma selecionado.
Chapter 6. Scaling storage nodes
To scale the storage capacity of OpenShift Container Storage, you can do either of the following:
- Scale up storage nodes - Add storage capacity to the existing OpenShift Container Storage worker nodes
- Scale out storage nodes - Add new worker nodes containing storage capacity
6.1. Requirements for scaling storage nodes
Before you proceed to scale the storage nodes, refer to the following sections to understand the node requirements for your specific Red Hat OpenShift Container Storage instance:
- Platform requirements
Storage device requirements
Always ensure that you have plenty of storage capacity.
If storage ever fills completely, it is not possible to add capacity or delete or migrate content away from the storage to free up space. Completely full storage is very difficult to recover.
Capacity alerts are issued when cluster storage capacity reaches 75% (near-full) and 85% (full) of total capacity. Always address capacity warnings promptly, and review your storage regularly to ensure that you do not run out of storage space.
If you do run out of storage space completely, contact Red Hat Customer Support.
6.2. Scaling up storage by adding capacity to your OpenShift Container Storage nodes on Google Cloud infrastructure
Use this procedure to add storage capacity and performance to your configured Red Hat OpenShift Container Storage worker nodes.
Prerequisites
- A running OpenShift Container Storage Platform
- Administrative privileges on the OpenShift Web Console
Procedure
- Navigate to the OpenShift Web Console.
- Click on Operators on the left navigation bar.
- Select Installed Operators.
In the window, click OpenShift Container Storage Operator:

In the top navigation bar, scroll right and click Storage Cluster tab.

- The visible list should have only one item. Click (⋮) on the far right to extend the options menu.
Select Add Capacity from the options menu.

From this dialog box, you can set the requested additional capacity and the storage class. Add capacity will show the capacity selected at the time of installation and will allow to add the capacity only in this increment. Set the storage class to
standardif you are using the default storage class that uses HDD. However, if you created a storage class to use SSD based disks for better performance, you need to select that storage class.NoteThe effectively provisioned capacity will be three times as much as what you see in the Raw Capacity field because OpenShift Container Storage uses a replica count of 3.
- Once you are done with your setting, click Add. You might need to wait a couple of minutes for the storage cluster to reach Ready state.
Verification steps
Navigate to Overview
Persistent Storage tab, then check the Capacity breakdown card. 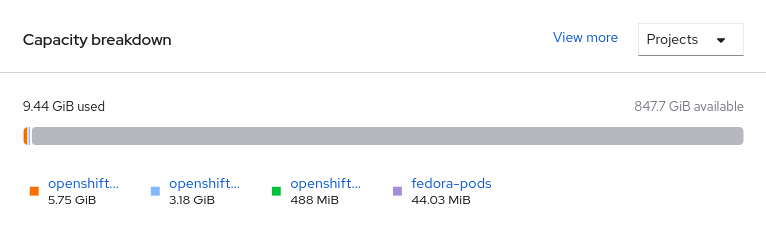
- Note that the capacity increases based on your selections.
As of OpenShift Container Storage 4.2, cluster reduction, whether by reducing OSDs or nodes, is not supported.
6.3. Scaling out storage capacity by adding new nodes
To scale out storage capacity, you need to perform the following:
- Add a new node to increase the storage capacity when existing worker nodes are already running at their maximum supported OSDs, which is the increment of 3 OSDs of the capacity selected during initial configuration.
- Verify that the new node is added successfully
- Scale up the storage capacity after the node is added
6.3.1. Adding a node on Google Cloud installer-provisioned infrastructure
Prerequisites
- You must be logged into OpenShift Container Platform (OCP) cluster.
Procedure
-
Navigate to Compute
Machine Sets. - On the machine set where you want to add nodes, select Edit Machine Count.
- Add the amount of nodes, and click Save.
-
Click Compute
Nodes and confirm if the new node is in Ready state. Apply the OpenShift Container Storage label to the new node.
-
For the new node, Action menu (⋮)
Edit Labels. - Add cluster.ocs.openshift.io/openshift-storage and click Save.
-
For the new node, Action menu (⋮)
It is recommended to add 3 nodes each in different zones. You must add 3 nodes and perform this procedure for all of them.
Verification steps
To verify that the new node is added, see Section 6.3.2, “Verifying the addition of a new node”.
6.3.2. Verifying the addition of a new node
Execute the following command and verify that the new node is present in the output:
$ oc get nodes --show-labels | grep cluster.ocs.openshift.io/openshift-storage= |cut -d' ' -f1Click Workloads
Pods, confirm that at least the following pods on the new node are in Running state: -
csi-cephfsplugin-* -
csi-rbdplugin-*
-
6.3.3. Scaling up storage capacity
After you add a new node to OpenShift Container Storage, you must scale up the storage capacity as described in Scaling up storage by adding capacity.