17.17. Creating a Virtual Network
To create a virtual network on your system:
- Open the Host Details menu (refer to 第 17.16 节 “Managing a Virtual Network”) and click the button.
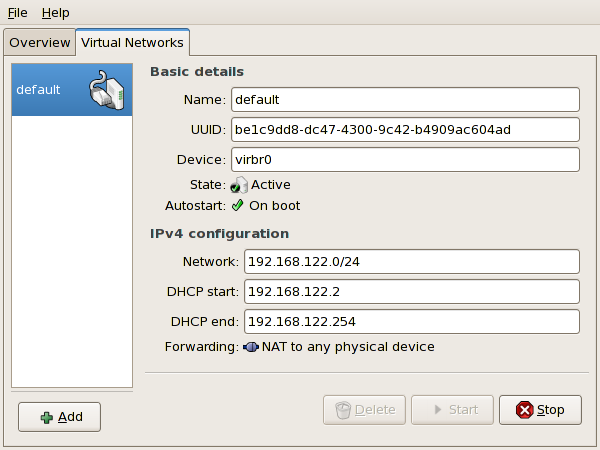
图 17.41. Virtual Network Configuration
This will open the menu. Click to continue.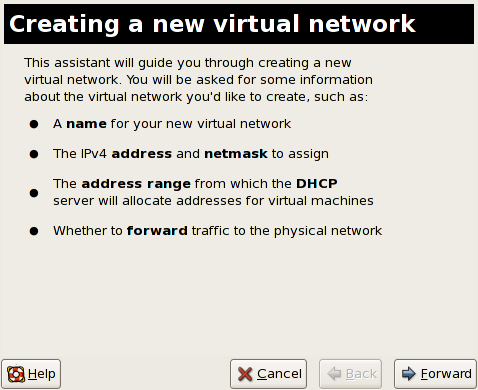
图 17.42. Creating a new virtual network
- Enter an appropriate name for your virtual network and click .
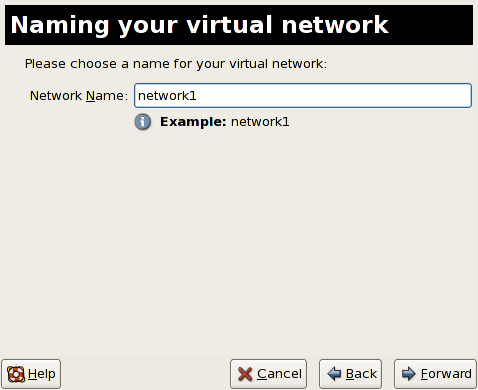
图 17.43. Naming your virtual network
- Enter an IPv4 address space for your virtual network and click .
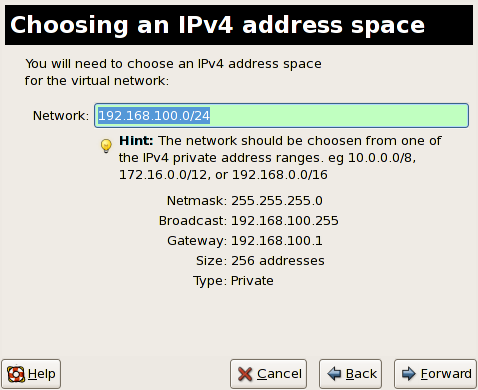
图 17.44. Choosing an IPv4 address space
- Define the DHCP range for your virtual network by specifying a Start and End range of IP addresses. Click to continue.
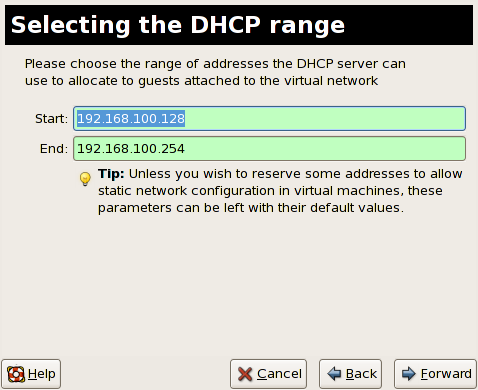
图 17.45. Selecting the DHCP range
- Select how the virtual network should connect to the physical network.
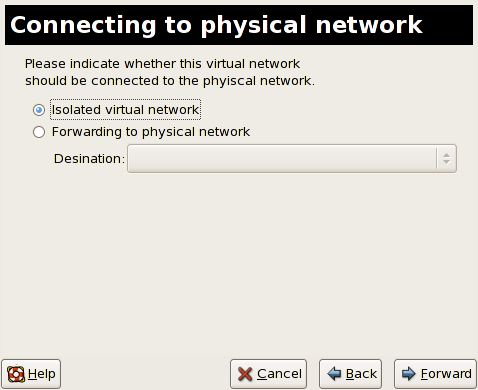
图 17.46. Connecting to physical network
If you select Forwarding to physical network, choose whether the Destination should be NAT to any physical device or NAT to physical device eth0.Click to continue. - You are now ready to create the network. Check the configuration of your network and click .
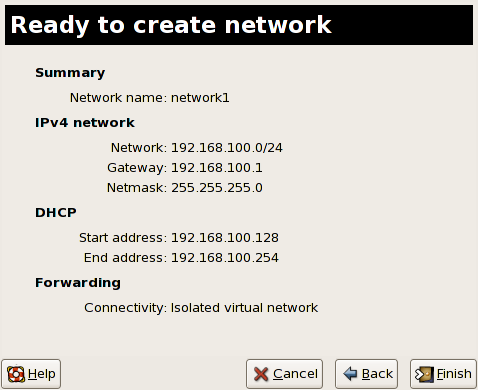
图 17.47. Ready to create network
- The new virtual network is now available in the tab of the menu.
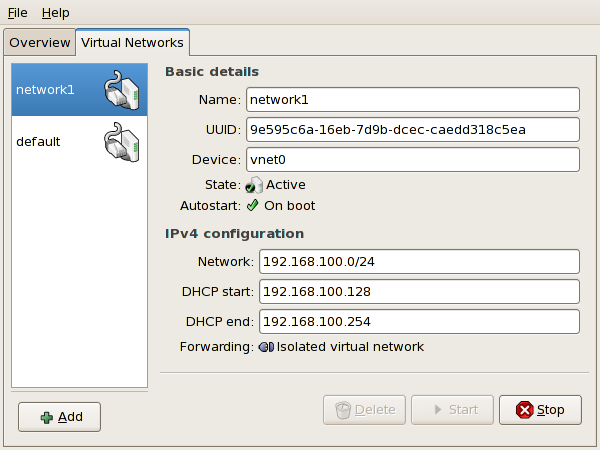
图 17.48. New virtual network is now available