Dieser Inhalt ist in der von Ihnen ausgewählten Sprache nicht verfügbar.
Chapter 6. Installing Ansible Automation Platform 2.1
The installation of Ansible Automation Platform 2.1 takes advantage of automation controller and automation mesh to provide a simple, secure and flexible method of handling your automation workloads.
Automation controller provides the control plane for automation through its UI, Restful API, RBAC workflows and CI/CD integrations.
Automation mesh is an overlay network that provides the ability to ease the distribution of work across a large and dispersed collection of workers through nodes that establish peer-to-peer connections with each other using existing networks.
With automation mesh in place, you can:
- Dynamically scale cluster capacity without downtime
- Decouple the execution and control plane
- Re-route execution to a different path when outages may exist automatically
The following steps provide a step-by-step on deploying a clustered Ansible Automation Platform 2.1 using automation mesh.
The following installation is done on Ansible Site 1 of this reference environment Ansible Automation Platform cluster. After completion, ensure to follow the same steps for Ansible Site 2.
On controlplane-1.site1.example.com, as the ansible user, perform the following:
- Download Ansible Automation Platform 2.1 Setup tar ansible-automation-platform-setup-2.1.0-1.tar.gz
Untar the ansible-automation-platform-setup-2.1.0-1.tar.gz
tar zxvf ansible-automation-platform-setup-2.1.0-1.tar.gz
$ tar zxvf ansible-automation-platform-setup-2.1.0-1.tar.gzCopy to Clipboard Copied! Toggle word wrap Toggle overflow Change directory into ansible-automation-platform-setup-2.1.0-1.tar.gz
cd ansible-automation-platform-setup-2.1.0-1/
cd ansible-automation-platform-setup-2.1.0-1/Copy to Clipboard Copied! Toggle word wrap Toggle overflow Backup the existing inventory file
cp inventory inventory.bkup
$ cp inventory inventory.bkupCopy to Clipboard Copied! Toggle word wrap Toggle overflow Install the
ansible-corepackagesudo dnf install ansible-core --assumeyes
$ sudo dnf install ansible-core --assumeyesCopy to Clipboard Copied! Toggle word wrap Toggle overflow Modify the inventory to include with the appropriate information about your environment. Below is an example of this reference environment.
Copy to Clipboard Copied! Toggle word wrap Toggle overflow - 1
- control nodes run project and inventory updates and system jobs, but not execution jobs. Execution capabilities are disabled on these nodes.
- 2
- Peer relationships define node-to-node connections. Setting peer relationship between control plane nodes and execution nodes.
- 3
- Setting peer relationships between the execution nodes.
- 4
- Set the node that will install the PostgreSQL database for the controller installation.
- 5
- Set the password for admin user to access the UI upon install completion.
- 6
- Set the PostgreSQL host (database node).
- 7
- Set the PostgreSQL port to use for the database node.
- 8
- Set the password for the PostgreSQL database.
- 9
- Execution Environment images are downloaded and included in your installation. Proper credentials required to download the images.
- 10
- User credential for access to registry_url.
- 11
- Password credential for access to registry_url.
Create a file labeled credentials.yml that will store the encrypted credentials.
cat credentials.yml
$ cat credentials.ymlCopy to Clipboard Copied! Toggle word wrap Toggle overflow admin_password: my_long_admin_pw pg_password: my_long_pg_pw registry_password: my_long_registry_pw
admin_password: my_long_admin_pw pg_password: my_long_pg_pw registry_password: my_long_registry_pwCopy to Clipboard Copied! Toggle word wrap Toggle overflow Encrypt the credentials.yml file using
ansible-vault.ansible-vault encrypt credentials.yml
$ ansible-vault encrypt credentials.ymlCopy to Clipboard Copied! Toggle word wrap Toggle overflow New Vault password: Confirm New Vault password: Encryption successful
New Vault password: Confirm New Vault password: Encryption successfulCopy to Clipboard Copied! Toggle word wrap Toggle overflow WarningStore your encrypted vault password in a safe place.
Verify the credentials.yml file is encrypted
cat credentials.yml
$ cat credentials.ymlCopy to Clipboard Copied! Toggle word wrap Toggle overflow Copy to Clipboard Copied! Toggle word wrap Toggle overflow Run the
setup.shfor installation of Ansible Automation Platform 2.1 and pass the credentials.yml, as well as, the --ask-vault-pass optionANSIBLE_BECOME_METHOD='sudo' ANSIBLE_BECOME=True ANSIBLE_HOST_KEY_CHECKING=False ./setup.sh -e @credentials.yml -- --ask-vault-pass
$ ANSIBLE_BECOME_METHOD='sudo' ANSIBLE_BECOME=True ANSIBLE_HOST_KEY_CHECKING=False ./setup.sh -e @credentials.yml -- --ask-vault-passCopy to Clipboard Copied! Toggle word wrap Toggle overflow NoteThe following ANSIBLE*_ variables are set to ensure a successful install.
NoteFor more information regarding the different values that can be set within your inventory file, visit: Setting up the inventory file
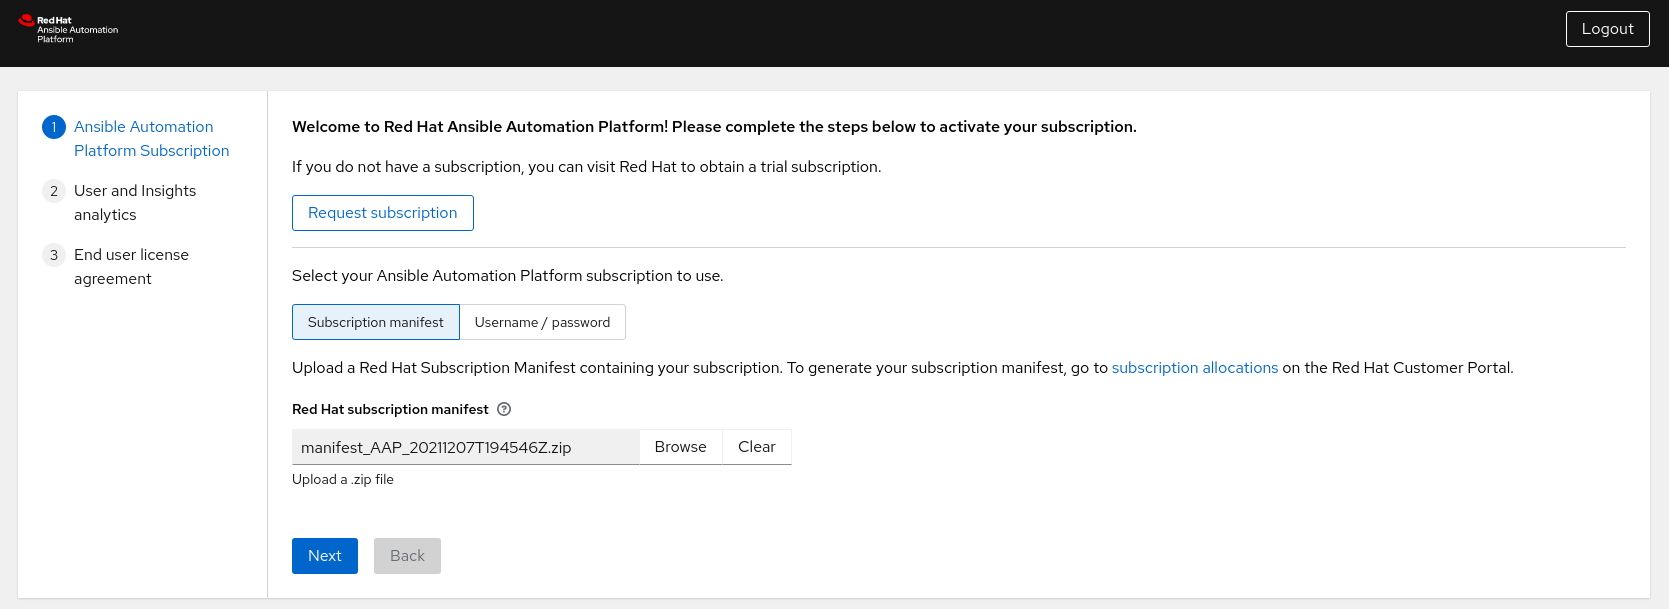
- Login to the Ansible Automation Platform dashboard, e.g. controlplane-cluster.site1.example.com
Activate your Ansible Automation Platform subscription via Subscription manifest or username/password.
NoteThe steps to generate your subscription manifest can be found Appendix D, Generate a subscription manifest
