Chapter 14. Configuring Billing Settings
This document describes how the Billing feature works in 3scale.
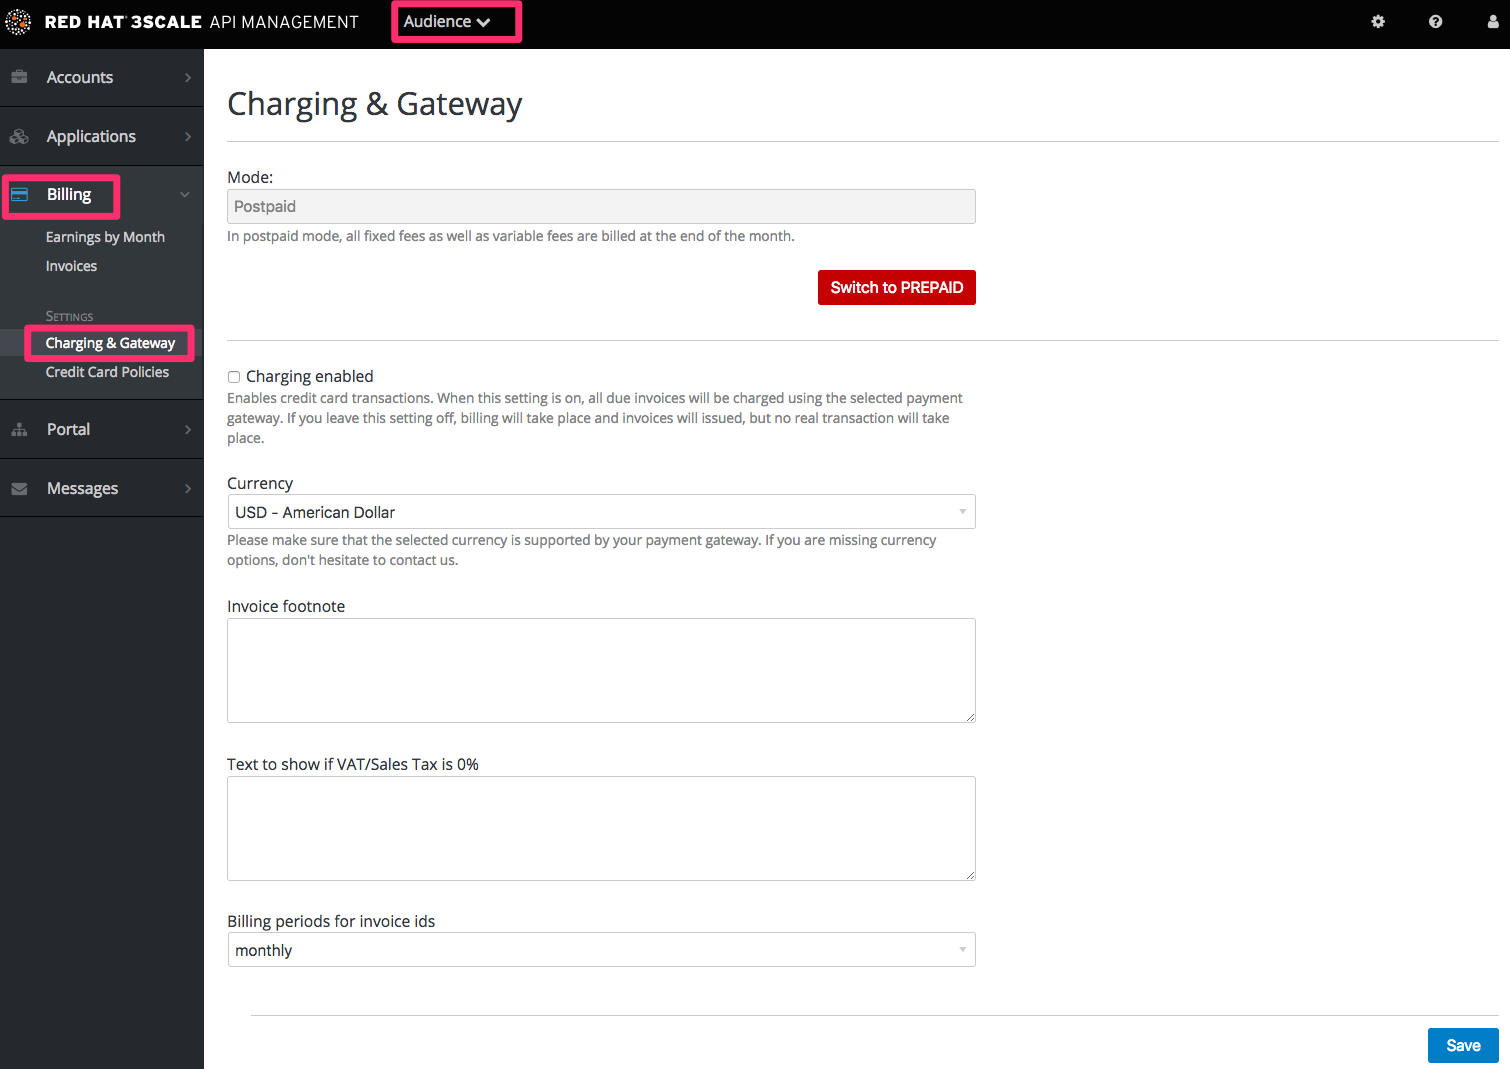
Billing settings are divided into Charging & Gateway and Credit Card Policies, both can be found in Audience > Billing in the Admin Portal.
14.1. Billing modes (Charging & Gateway)
Billing in 3scale is based on the calendar month, and can be Prepaid and *Postpaid.
- In the Prepaid mode, all fixed fees and setup fees are billed at the beginning of the month or at the beginning of any prorated billing period. Variable costs are always calculated and billed at the beginning of the following month.
- In Postpaid mode, all fixed fees as well as variable costs are billed at the beginning of the following month.
For more details see Automated billing process.
14.2. Charging enabled (Charging & Gateway)
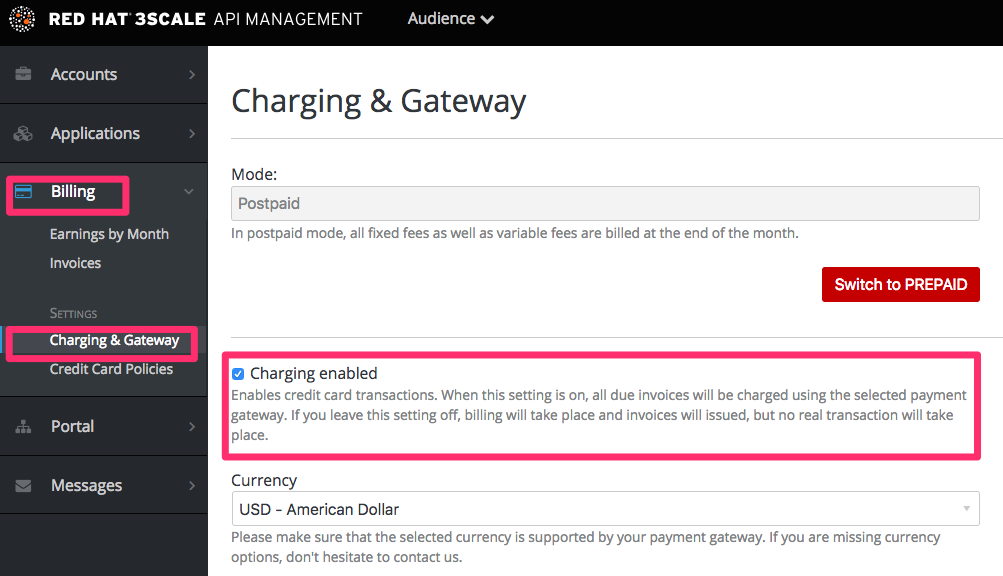
This setting enables credit card transactions. When this setting is on, all due invoices will be charged using the selected payment gateway. If you leave this setting off, billing will take place and invoices will be issued, but no real payment transaction will take place.
14.3. Currency (Charging & Gateway)
Select the currency in which billing and the credit card transactions will be made. Please make sure that the selected currency is supported by your payment gateway. This setting is global and applies to all invoices and transactions; it is not possible to set different currencies for different developer accounts.
14.4. Invoice footnote (Charging & Gateway)
The text introduced in the Invoice footnote field will appear at the bottom of every PDF invoice. You can use this field to provide additional information about the charging and billing policy for your customers.
If the text of the footnote is changed, it doesn’t automatically apply to the invoices, for which the PDF has already been generated. However, it is possible to apply the change by regenerating the PDF of the invoices.
14.5. Text to show if VAT/Sales Tax is 0% (Charging & Gateway)
This field is used to add a text message to the PDF invoice, in case VAT / Sales Tax is 0% for the billed account. This line will only appear if the VAT / Sales Tax is set to 0 explicitly, otherwise it will not be shown. This text will also appear on the Invoice page in the Admin Portal.
See more about this setting in VAT / Sales Tax section
14.6. Billing periods for invoice ids (Charging & Gateway)
Invoices in 3scale have two types of IDs:
- Actual ID
- which uniquely identifies the invoice in the database. This is a numeric ID, which appears in the invoice URL (i.e. https://<dashboard_domain>/buyers/accounts/<acount_id>/invoices/<invoice_id>) and is used as the invoice ID in the Billing API.
- Friendly ID
- which appears on the invoice, is a user-friendly identifier. It should be unique per 3scale account, although it is technically possible to have duplicated friendly ID. In case duplicate ID is identified by the system, it will show a warning: This invoice id is already in use and should probably be changed. If the friendly ID displays as fix for more than 24 hours, contact support.
This setting defines the format of the Friendly ID of the invoice:
- monthly (default)
-
YYYY-MM-XXXXXXXX, i.e. the ID includes the year, the month and the number of the invoice. Example: 2018-02-00000013 - yearly
-
YYYY-XXXXXXXX, i.e. it only includes the year and the number. Example: 2018-00000001
The only effect of changing the Billing periods for invoice ids from monthly to yearly is changing the friendly ID format; this does not modify the billing cycle period. Only monthly billing is supported by 3scale API Management. Changing the format of the invoice IDs to yearly can be used, if there is such a requirement from your accounting department.
If you need to charge the customers yearly, billing should be handled manually – you can create a new invoice and add a line item with the yearly cost. If you prefer to use yearly charging, you may also want to set your application plans to be free, to make sure the invoices are not generated and/or charged automatically each month.
14.7. Credit Card Policies
Here you can configure the path to the following pages:
- Legal Terms page
- Privacy page
- Refund page
14.8. Credit Card Gateways
3scale integrates with the following payment gateways for credit card transactions:
- Braintree
- Stripe
14.8.1. Stripe integration (recommended)
After completing these steps you will have configured Stripe as a payment gateway for your account. This will allow your developers to enter their credit card details, and you can automatically charge them through Stripe for access to your API, according to the calculated invoices.
If you enable credit card charging for your paid API, then one key step is to setup your payment gateway. There are a number of alternative payment gateways which you can use with your 3scale account. Here we cover the steps for Stripe.
14.8.1.1. Prerequisites
Before you start these steps, you will need to open an account with Stripe.
14.8.1.2. Getting your API keys from Stripe
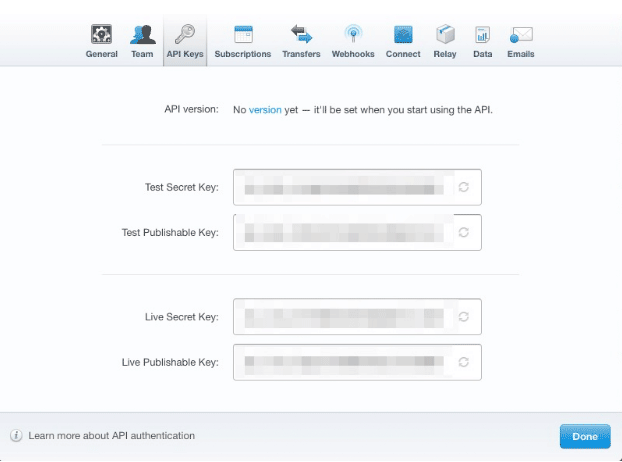
Log in to your Stripe account, and get your API keys at https://dashboard.stripe.com/account/apikeys. You will need two keys: a "secret" one, and a "publishable" one. Use the "test" set when you’re doing tests and the "live" ones when you are ready to start charging.
14.8.1.3. Configuring settings in 3scale
You need to tell 3scale to start using these API keys. To do this, log in to your 3scale Admin Portal. and go to Audience > Billing > Charging & Gateway.
If the Charging Enabled flag is not active, enable it and click Save.
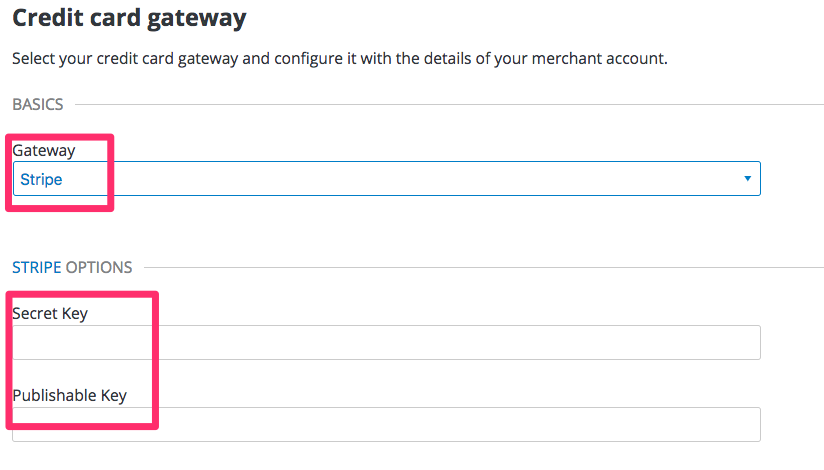
You should see a drop-down called Gateway near the bottom of the page. Change it to Stripe.
The form below the drop-down should change to show two fields. Insert your Stripe API keys and click Save.
You might see a couple of alerts when you change your payment gateway. This is expected. Read them and accept them if they appear.
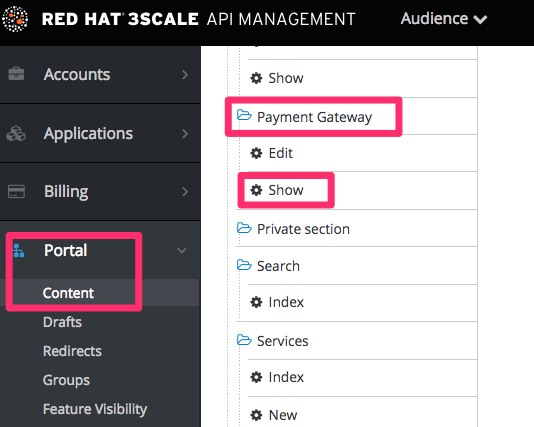
The payment gateway is now set up, but your users might not be able to use it yet since the it’s not configured in the CMS. Go to Developer portal, and click on the template called Payment Gateway / Show on the left navigation pane.
If it’s not there already, add the following code before {% when "braintree_blue" %}:
Finally click Save and Publish. Your users should now be able to pay you using the Stripe gateway.
In order to map your data from Stripe with your data on 3scale, you can use the Stripe field called metadata.3scale_account_reference which is composed of 3scale-[PROVIDER_ID]-[DEVELOPER_ACCOUNT_ID]
14.8.2. Braintree integration
These are the steps to set up the Braintree gateway in order to to charge for use of your API.
14.8.2.1. Getting your API keys from Braintree
You’ll need to open an account with Braintree. You need a Gateway and Merchant account plus Vault. As an optional extra, you can choose to allow American Express cards as a payment method.
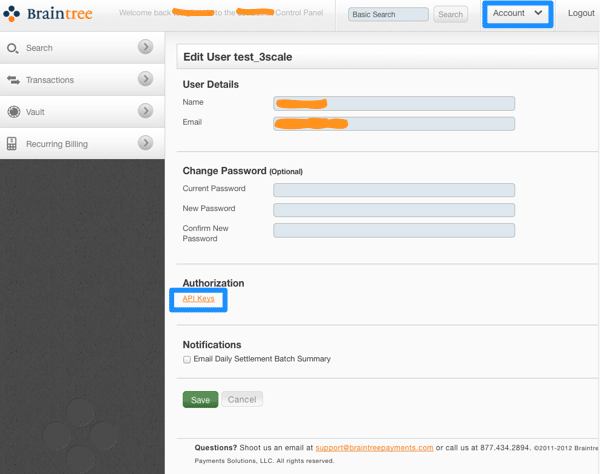
To begin, log in to your Braintree account. Then find your API keys in the Account > MyUser area:
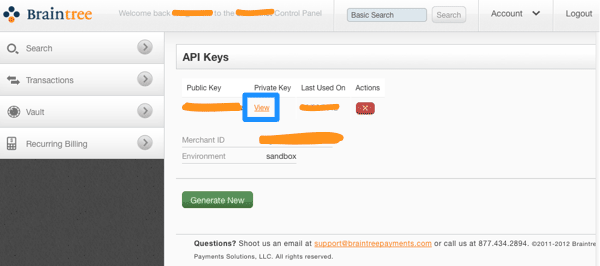
The API keys page still hides the private key, so select the option to view it:
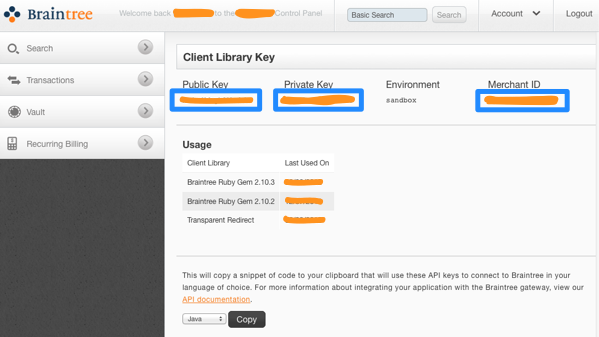
Finally you have the Public Key, Private Key, and Merchant ID that you’ll need for the 3scale billing settings:
14.8.2.2. Configuring settings in 3scale
You need to tell 3scale to start using these API keys. To do this, log in to your 3scale Admin Portal and go to Audience > Billing > Charging & Gateway.
Ensure that the currency type specified on the billing page matches the currency type used in your Braintree merchant account.
If the Charging Enabled flag is not active, enable it and click Save.
You should see a drop-down called Gateway near the bottom of the page. Change it to Braintree (Blue Platform).
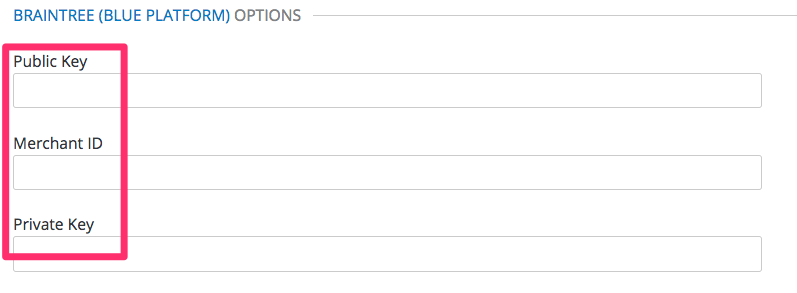
The form below the drop-down should change to show two fields. Insert your Braintree keys and click Save.
You might see a couple of alerts when you change your payment gateway. This is expected. Read and accept them if they appear.
Your users should now be able to pay you using the Braintree gateway.
In order to map your data from Braintree with your data on 3scale, you can use the Braintree field called customer.id which is composed of 3scale-[PROVIDER_ID]-[DEVELOPER_ACCOUNT_ID]
14.8.2.2.1. Troubleshooting
In case your account is in the sandbox mode and you encounter any problems, you will have to change it to production.
