 Red Hat Summit
Create and launch an Ansible development workspace
An administrator installs Red Hat OpenShift Dev Spaces. After installation, developers can use the provided OpenShift Dev Spaces dashboard to create Ansible development workspaces that include a web-based version of VS Code.
Authentication
Ansible dev spaces must be able to authenticate with your Git provider.
- If your organization has integrated Git OAuth authentication with Ansible dev spaces, you do not need to configure authentication between OpenShift Dev Spaces and your Git provider.
- If your organization has not set up OAuth authentication, you must generate personal access tokens for authentication between OpenShift Dev Spaces and your Git provider.
Configure Git personal access token authentication
You must create a personal access token (PAT) in your Git provider, and add it to OpenShift Dev Spaces to enable access to your repositories from your Ansible development workspace.
About this task
Procedure
Create a Git repository for an Ansible development workspace
To launch an Ansible development workspace, you must provide a link to a Git repository that defines the development environment. The repository also stores the automation content you create in Ansible dev spaces.
About this task
Procedure
- If your administrator provides an example repository for your team, fork the repository to create your own copy.
- If you do not have access to an example repository, you must create your own repository.
- Create a directory for your new repository and use
git initto initialize it as a Git repository. - Add a
devfile.yamlfile to the repository to define the Ansible dev spaces image that you want to use for your Ansible development workspace. See Creating a devfile for Ansible development workspaces. - Add a
.code-workspacefile to the repository to specify the VS Code extensions for your Ansible development workspace. See Creating a.code-workspacefile for Ansible development workspaces.
- Create a directory for your new repository and use
Create a devfile for an Ansible development workspace
To ensure your Ansible development workspace launches with the correct Ansible dev spaces image, you must add a devfile to your git repository. A devfile is a YAML file that defines the development environment for a project in Red Hat OpenShift Dev Spaces.
About this task
Procedure
Create a code-workspace file for an Ansible development workspace
To configure VS Code extensions that are included in your Ansible development workspace, you must add a .code-workspace JSON file to your git repository.
About this task
Procedure
Launch an Ansible dev spaces workspace
Launch your Ansible development workspace by providing the URL for your prepared Git repository in the OpenShift Dev Spaces dashboard. This opens your VS Code environment in a browser.
Before you begin
- Your administrator has provided a URL for a OpenShift Dev Spaces dashboard.
- You have prepared a git repository that contains the
devfile.yamland.code-workspacefiles that define the Ansible development workspace configuration.
About this task
Procedure
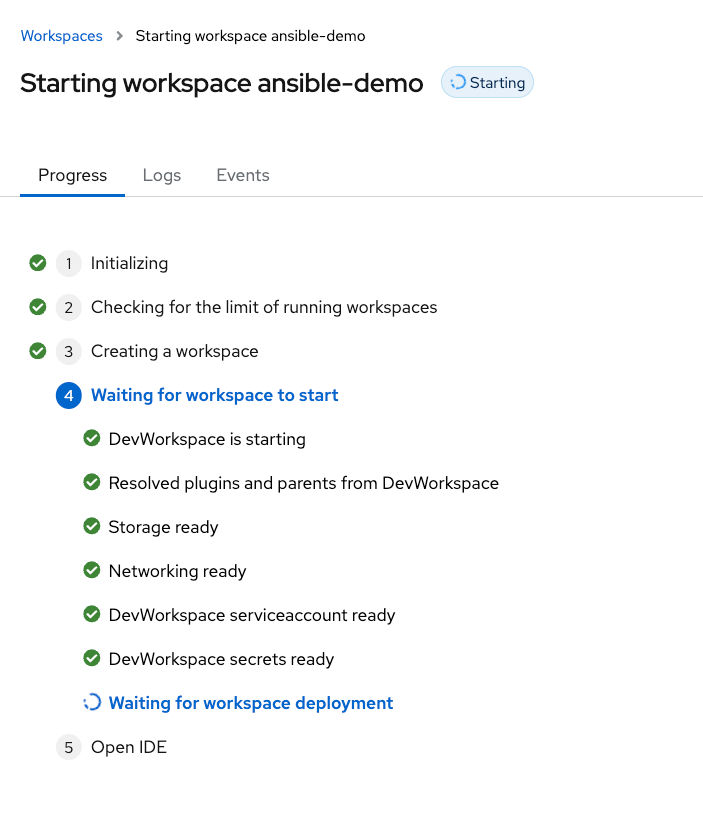
- OpenShift Dev Spaces displays the progress for the provisioning process of your Ansible development workspace.
After the Ansible development workspace launches, a VS Code environment opens in your browser.

'%20d='M201.5%20305.5c-13.8%200-24.9-11.1-24.9-24.6%200-13.8%2011.1-24.9%2024.9-24.9%2013.6%200%2024.6%2011.1%2024.6%2024.9%200%2013.6-11.1%2024.6-24.6%2024.6zM504%20256c0%20137-111%20248-248%20248S8%20393%208%20256%20119%208%20256%208s248%20111%20248%20248zm-132.3-41.2c-9.4%200-17.7%203.9-23.8%2010-22.4-15.5-52.6-25.5-86.1-26.6l17.4-78.3%2055.4%2012.5c0%2013.6%2011.1%2024.6%2024.6%2024.6%2013.8%200%2024.9-11.3%2024.9-24.9s-11.1-24.9-24.9-24.9c-9.7%200-18%205.8-22.1%2013.8l-61.2-13.6c-3-.8-6.1%201.4-6.9%204.4l-19.1%2086.4c-33.2%201.4-63.1%2011.3-85.5%2026.8-6.1-6.4-14.7-10.2-24.1-10.2-34.9%200-46.3%2046.9-14.4%2062.8-1.1%205-1.7%2010.2-1.7%2015.5%200%2052.6%2059.2%2095.2%20132%2095.2%2073.1%200%20132.3-42.6%20132.3-95.2%200-5.3-.6-10.8-1.9-15.8%2031.3-16%2019.8-62.5-14.9-62.5zM302.8%20331c-18.2%2018.2-76.1%2017.9-93.6%200-2.2-2.2-6.1-2.2-8.3%200-2.5%202.5-2.5%206.4%200%208.6%2022.8%2022.8%2087.3%2022.8%20110.2%200%202.5-2.2%202.5-6.1%200-8.6-2.2-2.2-6.1-2.2-8.3%200zm7.7-75c-13.6%200-24.6%2011.1-24.6%2024.9%200%2013.6%2011.1%2024.6%2024.6%2024.6%2013.8%200%2024.9-11.1%2024.9-24.6%200-13.8-11-24.9-24.9-24.9z'/%3e%3c/svg%3e)