Chapter 3. The rbd kernel module
As a storage administrator, you can access Ceph block devices through the rbd kernel module. You can map and unmap a block device, and displaying those mappings. Also, you can get a list of images through the rbd kernel module.
Kernel clients on Linux distributions other than Red Hat Enterprise Linux (RHEL) are permitted but not supported. If issues are found in the storage cluster when using these kernel clients, Red Hat will address them, but if the root cause is found to be on the kernel client side, the issue will have to be addressed by the software vendor.
3.1. Prerequisites
- A running Red Hat Ceph Storage cluster.
3.2. Create a Ceph Block Device and use it from a Linux kernel module client
As a storage administrator, you can create a Ceph Block Device for a Linux kernel module client in the Red Hat Ceph Storage Dashboard. As a system administrator, you can map that block device on a Linux client, and partition, format, and mount it, using the command line. After this, you can read and write files to it.
Prerequisites
- A running Red Hat Ceph Storage cluster.
- A Red Hat Enterprise Linux client.
3.2.1. Create a Ceph Block Device for a Linux kernel module client using Dashboard
You can create a Ceph Block Device specifically for a Linux kernel module client using the Dashboard web interface by enabling only the features it requires.
Prerequisites
- A running Red Hat Ceph Storage cluster.
Procedure
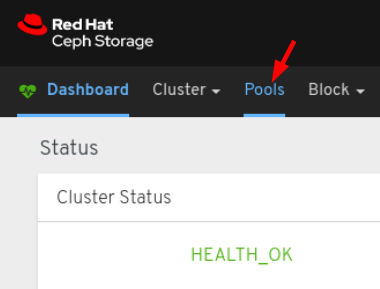
- Log in to the Dashboard.
On the navigation bar, click Pools:
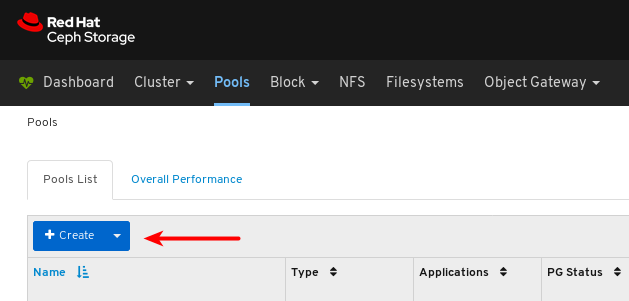
Click the Create button:
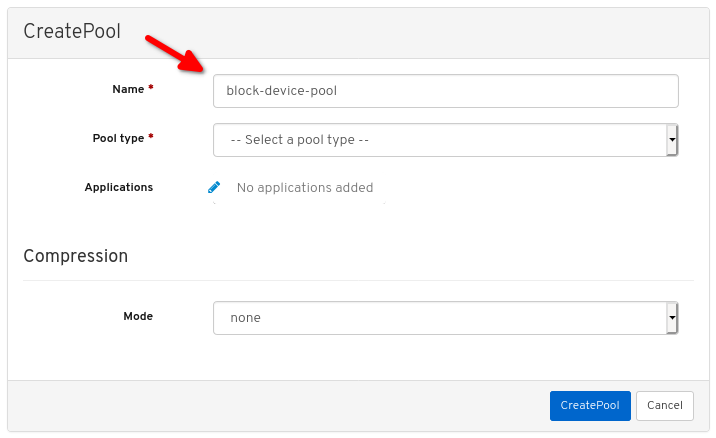
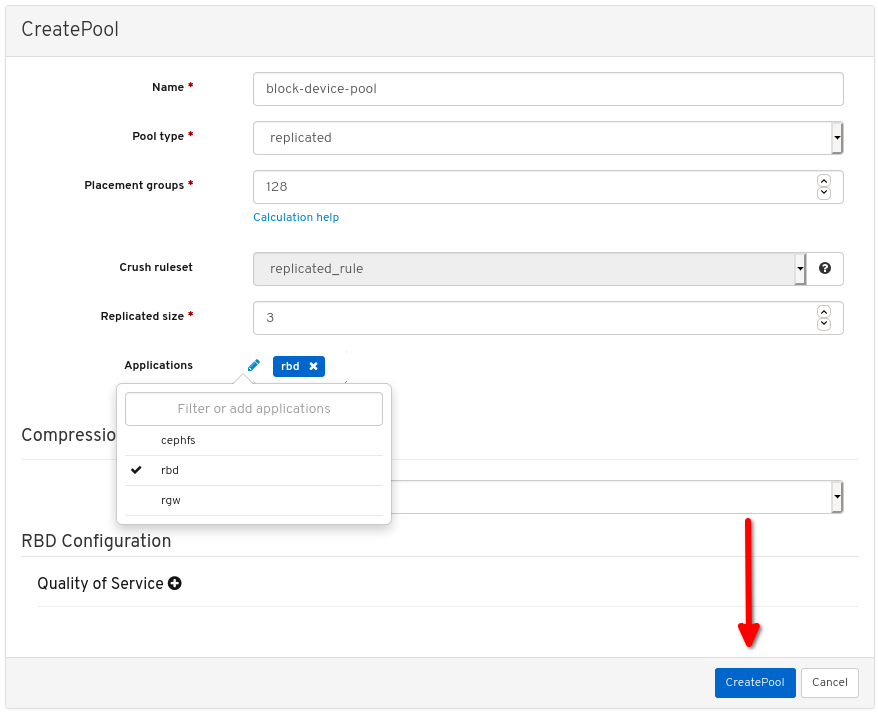
In the dialog window, set the name:
Set the Pool type to replicated:

Set the Placement Group (PG) number:
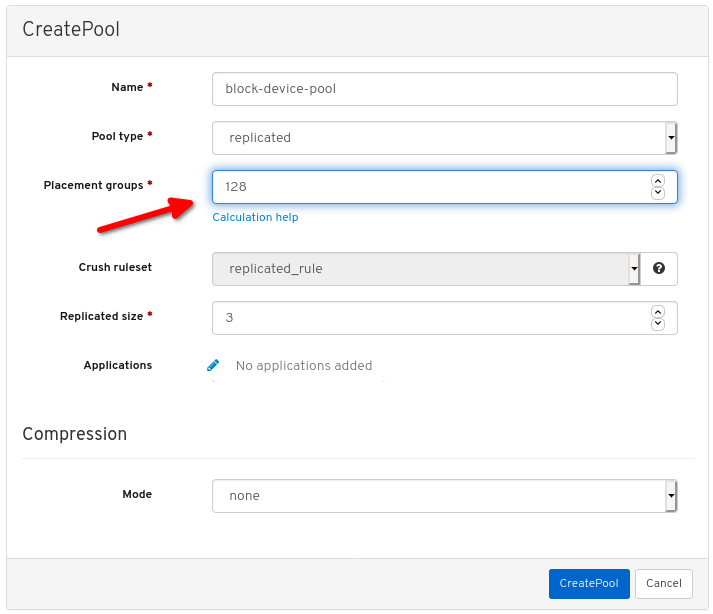
For assistance in choosing the PG number, use the PG calculator. Contact Red Hat Technical Support if unsure.
Set the replicated size:

Enable the
rbdapplication:
Click Create pool:
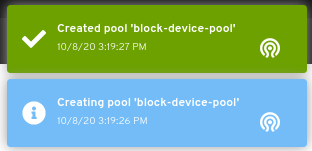
View the notifications indicating the pool was created successfully:
Click Block:
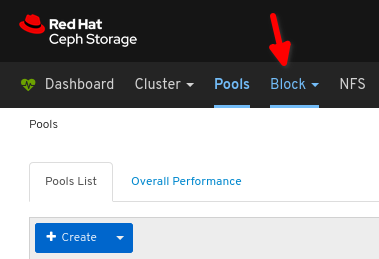
Click Images:

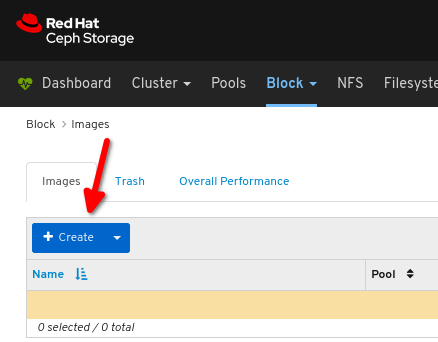
Click Create:
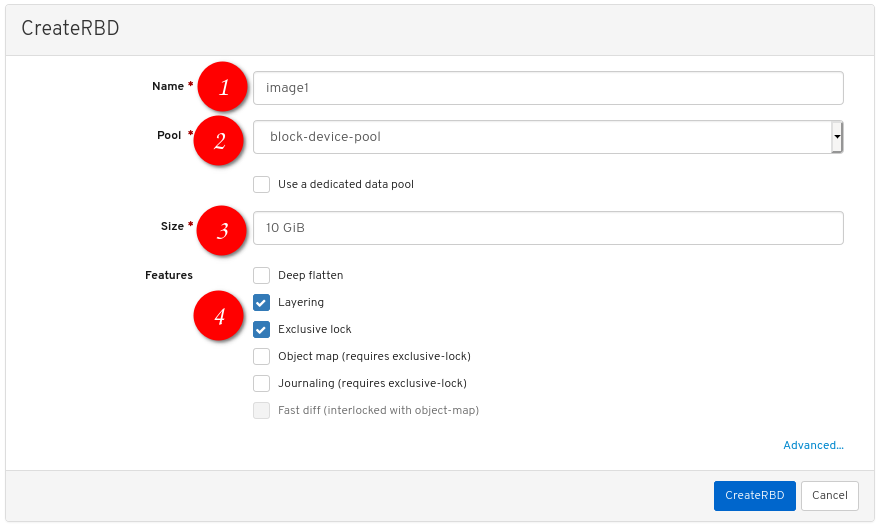
Configure the following:
 the desired image name,
 set Pool to the pool created earlier,
 set the desired size of the image,
 ensure Layering and Exclusive lock are the only enabled features:
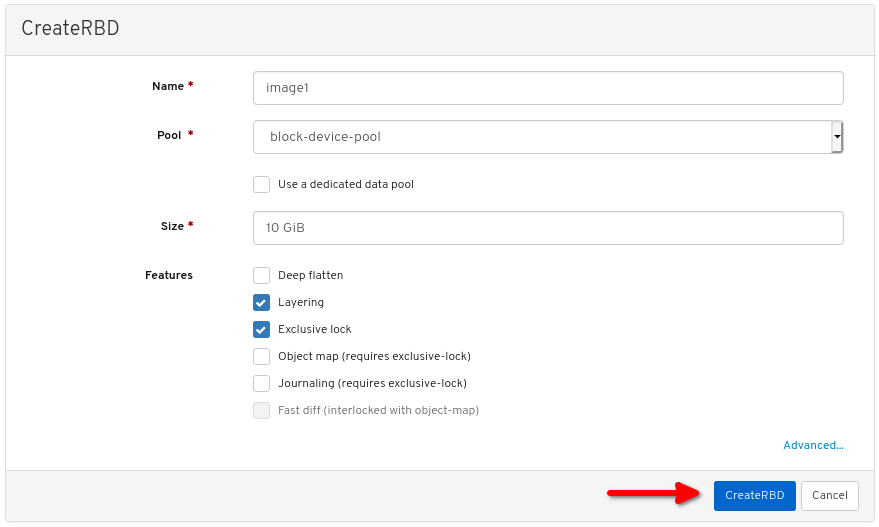
Click CreateRBD:
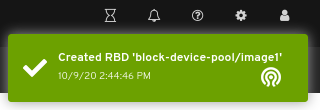
View the notification indicating the image was created successfully:
Additional Resources
- For more information, see Map and mount a Ceph Block Device on Linux using the command line.
- For more information, see the Dashboard Guide.
3.2.2. Map and mount a Ceph Block Device on Linux using the command line
You can map a Ceph Block Device from a Red Hat Enterprise Linux client using the Linux rbd kernel module. After mapping it, you can partition, format, and mount it, so you can write files to it.
Prerequisites
- A running Red Hat Ceph Storage cluster.
- A Ceph block device for a Linux kernel module client was created.
- A Red Hat Enterprise Linux client.
Procedure
On the Red Hat Enterprise Linux client node, enable the Red Hat Ceph Storage 4 Tools repository:
Red Hat Enterprise Linux 7
[root@client1 ~]# subscription-manager repos --enable=rhel-7-server-rhceph-4-tools-rpmsRed Hat Enterprise Linux 8
[root@client1 ~]# subscription-manager repos --enable=rhceph-4-tools-for-rhel-8-x86_64-rpmsInstall the
ceph-commonRPM package:Red Hat Enterprise Linux 7
[root@client1 ~]# yum install ceph-commonRed Hat Enterprise Linux 8
[root@client1 ~]# dnf install ceph-commonCopy the Ceph configuration file from a Monitor node to the Client node:
scp root@MONITOR_NODE:/etc/ceph/ceph.conf /etc/ceph/ceph.confExample
[root@client1 ~]# scp root@cluster1-node2:/etc/ceph/ceph.conf /etc/ceph/ceph.conf
root@192.168.0.32's password:
ceph.conf                                                                          100%  497   724.9KB/s   00:00
Copy the key file from a Monitor node to the Client node:
scp root@MONITOR_NODE:/etc/ceph/ceph.client.admin.keyring /etc/ceph/ceph.client.admin.keyringExample
[root@client1 ~]# scp root@cluster1-node2:/etc/ceph/ceph.client.admin.keyring /etc/ceph/ceph.client.admin.keyring
root@192.168.0.32's password:
ceph.client.admin.keyring                                                          100%  151   265.0KB/s   00:00
Map the image:
rbd map --pool POOL_NAME IMAGE_NAME --id adminExample
[root@client1 ~]# rbd map --pool block-device-pool image1 --id admin
/dev/rbd0
[root@client1 ~]#
Create a partition table on the block device:
parted /dev/MAPPED_BLOCK_DEVICE mklabel msdosExample
[root@client1 ~]# parted /dev/rbd0 mklabel msdos
Information: You may need to update /etc/fstab.
Create a partition for an XFS file system:
parted /dev/MAPPED_BLOCK_DEVICE mkpart primary xfs 0% 100%Example
[root@client1 ~]# parted /dev/rbd0 mkpart primary xfs 0% 100%
Information: You may need to update /etc/fstab.
Format the partition:
mkfs.xfs /dev/MAPPED_BLOCK_DEVICE_WITH_PARTITION_NUMBERExample
[root@client1 ~]# mkfs.xfs /dev/rbd0p1
meta-data=/dev/rbd0p1            isize=512    agcount=16, agsize=163824 blks
         =                       sectsz=512   attr=2, projid32bit=1
         =                       crc=1        finobt=1, sparse=1, rmapbt=0
         =                       reflink=1
data     =                       bsize=4096   blocks=2621184, imaxpct=25
         =                       sunit=16     swidth=16 blks
naming   =version 2              bsize=4096   ascii-ci=0, ftype=1
log      =internal log           bsize=4096   blocks=2560, version=2
         =                       sectsz=512   sunit=16 blks, lazy-count=1
realtime =none                   extsz=4096   blocks=0, rtextents=0
Create a directory to mount the new file system on:
mkdir PATH_TO_DIRECTORYExample
[root@client1 ~]# mkdir /mnt/cephMount the file system:
mount /dev/MAPPED_BLOCK_DEVICE_WITH_PARTITION_NUMBER PATH_TO_DIRECTORYExample
[root@client1 ~]# mount /dev/rbd0p1 /mnt/ceph/Verify that the file system is mounted and showing the correct size:
df -h PATH_TO_DIRECTORYExample
[root@client1 ~]# df -h /mnt/ceph/
Filesystem      Size  Used Avail Use% Mounted on
/dev/rbd0p1      10G  105M  9.9G   2% /mnt/ceph
Additional Resources
- For more information, see Create a Ceph Block Device for a Linux kernel module client using Dashboard.
- For more information, see Managing file systems for Red Hat Enterprise Linux 8.
- For more information, see Storage Administration Guide for Red Hat Enterprise Linux 7.
3.3. Getting a list of images
Get a list of Ceph block device images.
Prerequisites
- A running Red Hat Ceph Storage cluster.
- Root-level access to the node.
Procedure
To mount a block device image, first return a list of the images:
[root@rbd-client ~]# rbd list
3.4. Mapping a block device
Use rbd to map an image name to a kernel module. You must specify the image name, the pool name and the user name. rbd will load the RBD kernel module if it is not already loaded.
Prerequisites
- A running Red Hat Ceph Storage cluster.
- Root-level access to the node.
Procedure
Map an image name to a kernel module:
Syntax
rbd device map POOL_NAME/IMAGE_NAME --id USER_NAMEExample
[root@rbd-client ~]# rbd device map rbd/myimage --id adminSpecify a secret when using
cephxauthentication by either the keyring or a file containing the secret:Syntax
[root@rbd-client ~]# rbd device map POOL_NAME/IMAGE_NAME --id USER_NAME --keyring PATH_TO_KEYRINGor
[root@rbd-client ~]# rbd device map POOL_NAME/IMAGE_NAME --id USER_NAME --keyfile PATH_TO_FILE
3.5. Displaying mapped block devices
You can display which block device images are mapped to the kernel module with the rbd command.
Prerequisites
- A running Red Hat Ceph Storage cluster.
- Root-level access to the node.
Procedure
Display the mapped block devices:
[root@rbd-client ~]# rbd device list
3.6. Unmapping a block device
You can unmap a block device image with the rbd command, by using the unmap option and providing the device name.
Prerequisites
- A running Red Hat Ceph Storage cluster.
- Root-level access to the node.
Procedure
Unmap the block device image:
Syntax
rbd device unmap /dev/rbd/POOL_NAME/IMAGE_NAMEExample
[root@rbd-client ~]# rbd device unmap /dev/rbd/rbd/foo
3.7. Segregating images within isolated namespaces within the same pool
When using Ceph Block Devices directly without a higher-level system, such as OpenStack or OpenShift Container Storage, it was not possible to restrict user access to specific block device images. When combined with CephX capabilities, users can be restricted to specific pool namespaces to restrict access to the images.
You can use RADOS namespaces, a new level of identity to identify an object, to provide isolation between rados clients within a pool. For example, a client can only have full permissions on a namespace specific to them. This makes using a different RADOS client for each tenant feasible, which is particularly useful for a block device where many different tenants are accessing their own block device images.
You can segregate block device images within isolated namespaces within the same pool.
Prerequisites
- A running Red Hat Ceph Storage cluster.
- Upgrade all the kernels to 4x and to librbd and librados on all clients.
- Root-level access to the monitor and client nodes.
Procedure
Create an
rbdpool:Syntax
ceph osd pool create POOL_NAME PG_NUMExample
[root@mon ~]# ceph osd pool create mypool 100
pool 'mypool' created
Associate the
rbdpool with the RBD application:Syntax
ceph osd pool application enable POOL_NAME rbdExample
[root@mon ~]# ceph osd pool application enable mypool rbd
enabled application 'rbd' on pool 'mypool'
Initialize the pool with the RBD application:
Syntax
rbd pool init -p POOL_NAMEExample
[root@mon ~]# rbd pool init -p mypoolCreate two namespaces:
Syntax
rbd namespace create --namespace NAMESPACEExample
[root@mon ~]# rbd namespace create --namespace namespace1

[root@mon ~]# rbd namespace create --namespace namespace2

[root@mon ~]# rbd namespace ls --format=json
[{"name":"namespace2"},{"name":"namespace1"}]
Provide access to the namespaces for two users:
Syntax
ceph auth get-or-create client.USER_NAME mon 'profile rbd' osd 'profile rbd pool=rbd namespace=NAMESPACE' -o /etc/ceph/client.USER_NAME.keyringExample
[root@mon ~]# ceph auth get-or-create client.testuser mon 'profile rbd' osd 'profile rbd pool=rbd namespace=namespace1' -o /etc/ceph/client.testuser.keyring

[root@mon ~]# ceph auth get-or-create client.newuser mon 'profile rbd' osd 'profile rbd pool=rbd namespace=namespace2' -o /etc/ceph/client.newuser.keyring
Get the key of the clients:
Syntax
ceph auth get client.USER_NAMEExample
[root@mon ~]# ceph auth get client.testuser

[client.testuser]
	key = AQDMp61hBf5UKRAAgjQ2In0Z3uwAase7mrlKnQ==
	caps mon = "profile rbd"
	caps osd = "profile rbd pool=rbd namespace=namespace1"
exported keyring for client.testuser

[root@mon ~]# ceph auth get client.newuser

[client.newuser]
	key = AQDfp61hVfLFHRAA7D80ogmZl80ROY+AUG4A+Q==
	caps mon = "profile rbd"
	caps osd = "profile rbd pool=rbd namespace=namespace2"
exported keyring for client.newuser
Create the block device images and use the pre-defined namespace within a pool:
Syntax
rbd create --namespace NAMESPACE IMAGE_NAME --size SIZE_IN_GBExample
[root@mon ~]# rbd create --namespace namespace1 image01 --size 1G

[root@mon ~]# rbd create --namespace namespace2 image02 --size 1G
Optional: Get the details of the namespace and the associated image:
Syntax
rbd --namespace NAMESPACE ls --longExample
[root@mon ~]#  rbd --namespace namespace1 ls --long
NAME    SIZE  PARENT FMT PROT LOCK
image01 1 GiB          2

[root@mon ~]# rbd --namespace namespace2 ls --long
NAME    SIZE  PARENT FMT PROT LOCK
image02 1 GiB          2
Copy the Ceph configuration file from the Ceph Monitor node to the client node:
scp /etc/ceph/ceph.conf root@CLIENT_NODE:/etc/ceph/Example
[root@mon ~]# scp /etc/ceph/ceph.conf root@host02:/etc/ceph/

root@host02's password:
ceph.conf                                                                          100%  497   724.9KB/s   00:00
Copy the admin keyring from the Ceph Monitor node to the client node:
Syntax
scp /etc/ceph/ceph.client.admin.keyring root@CLIENT_NODE:/etc/cephExample
[root@mon ~]# scp /etc/ceph/ceph.client.admin.keyring root@host02:/etc/ceph/

root@host02's password:
ceph.client.admin.keyring                                                          100%  151   265.0KB/s   00:00
Copy the keyrings of the users from the Ceph Monitor node to the client node:
Syntax
scp /etc/ceph/ceph.client.USER_NAME.keyring root@CLIENT_NODE:/etc/ceph/Example
[root@mon ~]# scp /etc/ceph/client.newuser.keyring root@host02:/etc/ceph/

[root@mon ~]# scp /etc/ceph/client.testuser.keyring root@host02:/etc/ceph/
Map the block device image:
Syntax
rbd map --name NAMESPACE IMAGE_NAME -n client.USER_NAME --keyring /etc/ceph/client.USER_NAME.keyringExample
[root@mon ~]# rbd map --namespace namespace1 image01  -n  client.testuser --keyring=/etc/ceph/client.testuser.keyring

/dev/rbd0

[root@mon ~]# rbd map --namespace namespace2 image02 -n client.newuser --keyring=/etc/ceph/client.newuser.keyring

/dev/rbd1
This does not allow access to users in the other namespaces in the same pool.
Example
[root@mon ~]# rbd map --namespace namespace2 image02  -n  client.testuser --keyring=/etc/ceph/client.testuser.keyring

rbd: warning: image already mapped as /dev/rbd1
rbd: sysfs write failed
rbd: error asserting namespace: (1) Operation not permitted
In some cases useful info is found in syslog - try "dmesg | tail".
2021-12-06 02:49:08.106 7f8d4fde2500 -1 librbd::api::Namespace: exists: error asserting namespace: (1) Operation not permitted
rbd: map failed: (1) Operation not permitted

[root@mon ~]# rbd map --namespace namespace1 image01 -n client.newuser --keyring=/etc/ceph/client.newuser.keyring

rbd: warning: image already mapped as /dev/rbd0
rbd: sysfs write failed
rbd: error asserting namespace: (1) Operation not permitted
In some cases useful info is found in syslog - try "dmesg | tail".
2021-12-03 12:16:24.011 7fcad776a040 -1 librbd::api::Namespace: exists: error asserting namespace: (1) Operation not permitted
rbd: map failed: (1) Operation not permitted
Verify the device:
Example
[root@mon ~]# rbd showmapped

id pool namespace      image   snap device
0  rbd  namespace1  image01 -  /dev/rbd0
1  rbd  namespace2   image02 -  /dev/rbd1