Chapter 2. Che-Theia IDE basics
This section describes basics workflows and commands for Che-Theia: the native integrated development environment for Red Hat CodeReady Workspaces.
2.1. Defining custom commands for Che-Theia
The Che-Theia IDE allows users to define custom commands in a devfile that are then available when working in a workspace.
The following is an example of the commands section of a devfile.
commands:
- name: theia:build
  actions:
  - type: exec
    component: che-dev
    command: >
              yarn
    workdir: /projects/theia
- name: run
  actions:
  - type: vscode-task
    referenceContent: |
            {
             "version": "2.0.0",
             "tasks":
             [
              {
               "label": "theia:watch",
                "type": "shell",
                "options": {"cwd": "/projects/theia"},
                "command": "yarn",
                "args": ["watch"]
              }
             ]
            }
- name: debug
  actions:
  - type: vscode-launch
    referenceContent: |
            {
             "version": "0.2.0",
             "configurations": [
              {
               "type": "node",
               "request": "attach",
               "name": "Attach by Process ID",
               "processId": "${command:PickProcess}"
              }
             ]
}- CodeReady Workspaces commands
theia:build-
The
exectype implies that the CodeReady Workspaces runner is used for command execution. The user can specify the component in whose container the command is executed. -
The
commandfield contains the command line for execution. -
The
workdiris the working directory in which the command is executed.
-
The
- Visual Studio Code (VS Code) tasks
run-
The type is
vscode-task. -
For this type of command, the
referenceContentfield must contain content with task configurations in the VS Code format. - For more information about VS Code tasks, see the Task section on the Visual Studio User Guide page.
-
The type is
- VS Code launch configurations
debug-
The type is
vscode-launch. - It contains the launch configurations in the VS Code format.
- For more information about VS Code launch configurations, see the Debugging section on the Visual Studio documentation page.
-
The type is
For a list of available tasks and launch configurations, see the tasks.json and the launch.json configuration files in the /workspace/.theia directory where the configuration from the devfile is exported to.
2.1.1. Che-Theia task types
There are two types of tasks in a devfile: tasks in the VS Code format and CodeReady Workspaces commands. Tasks from the devfile are copied to the configuration file when the workspace is started. Depending on the type of the task, the task is then available for running:
-
CodeReady Workspaces commands: From the Terminal
Run Task menu in the configured tasks section, or from the My Workspace panel - Tasks in the VS Code format: From the Run Tasks menu
To run the task definitions provided by plug-ins, select the Terminal
2.1.2. Running and debugging
Che-Theia supports the Debug Adapter Protocol. This protocol defines a generic way for how a development tool can communicate with a debugger. It means Che-Theia works with all implementations.
Prerequisites
- A running instance of Red Hat CodeReady Workspaces. To install an instance of Red Hat CodeReady Workspaces, see the CodeReady Workspaces 2.0 Installation Guide.
Procedure
To debug an application:
Click Debug
Add Configuration to add debugging or launch configuration to the project. 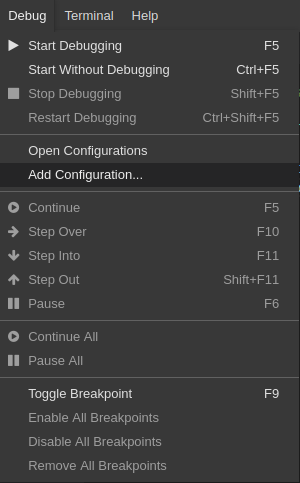
From the pop-up menu, select the appropriate configuration for the application that you want to debug.
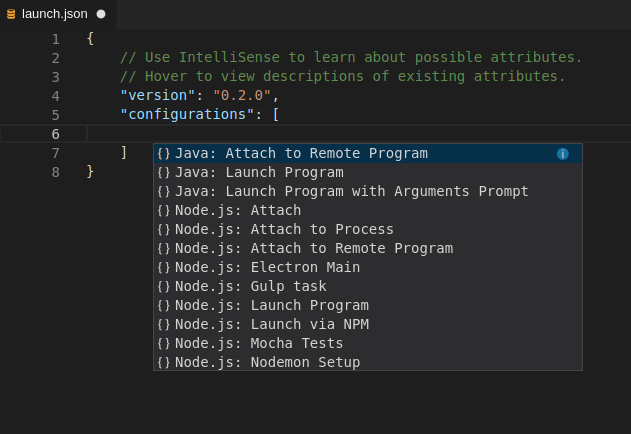
Update the configuration by modifying or adding attributes.

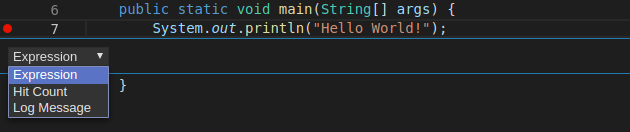
Breakpoints can be toggled by clicking the editor margin.
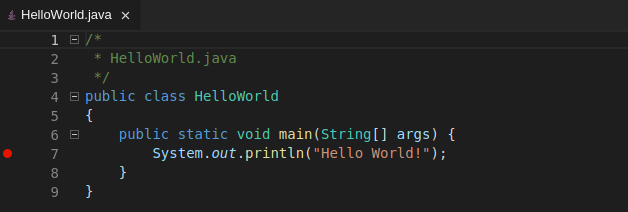
Open the context menu of the breakpoint to add conditions.
To start debugging, click View
Debug. 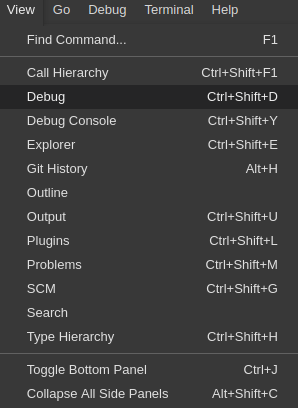
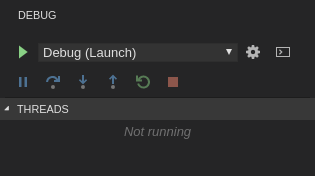
In the Debug view, select the configuration and press F5 to debug the application. Or, start the application without debugging by pressing Ctrl+F5.
2.1.3. Editing a task and launch configuration
Procedure
To customize the configuration file:
-
Edit the
tasks.jsonorlaunch.jsonconfiguration files. Add new definitions to the configuration file or modify the existing ones.
NoteThe changes are stored in the configuration file.
-
To customize the task configuration provided by plug-ins, select the Terminal
Configure TasksS menu option, and choose the task to configure. The configuration is then copied to the tasks.jsonfile and is available for editing.
2.2. Version Control
Red Hat CodeReady Workspaces natively supports the VS Code SCM model. By default, Red Hat CodeReady Workspaces includes the native VS Code Git extension as a Source Code Management (SCM) provider.
2.2.1. Managing Git configuration: identity
The first thing to do before starting to use Git is to set a user name and email address. This is important because every Git commit uses this information.
Prerequisites
- The Visual Studio Code Git extension installed.
Procedure
To configure Git identity using the CodeReady Workspaces user interface, go to in Preferences.
Open File > Settings > Open Preferences:
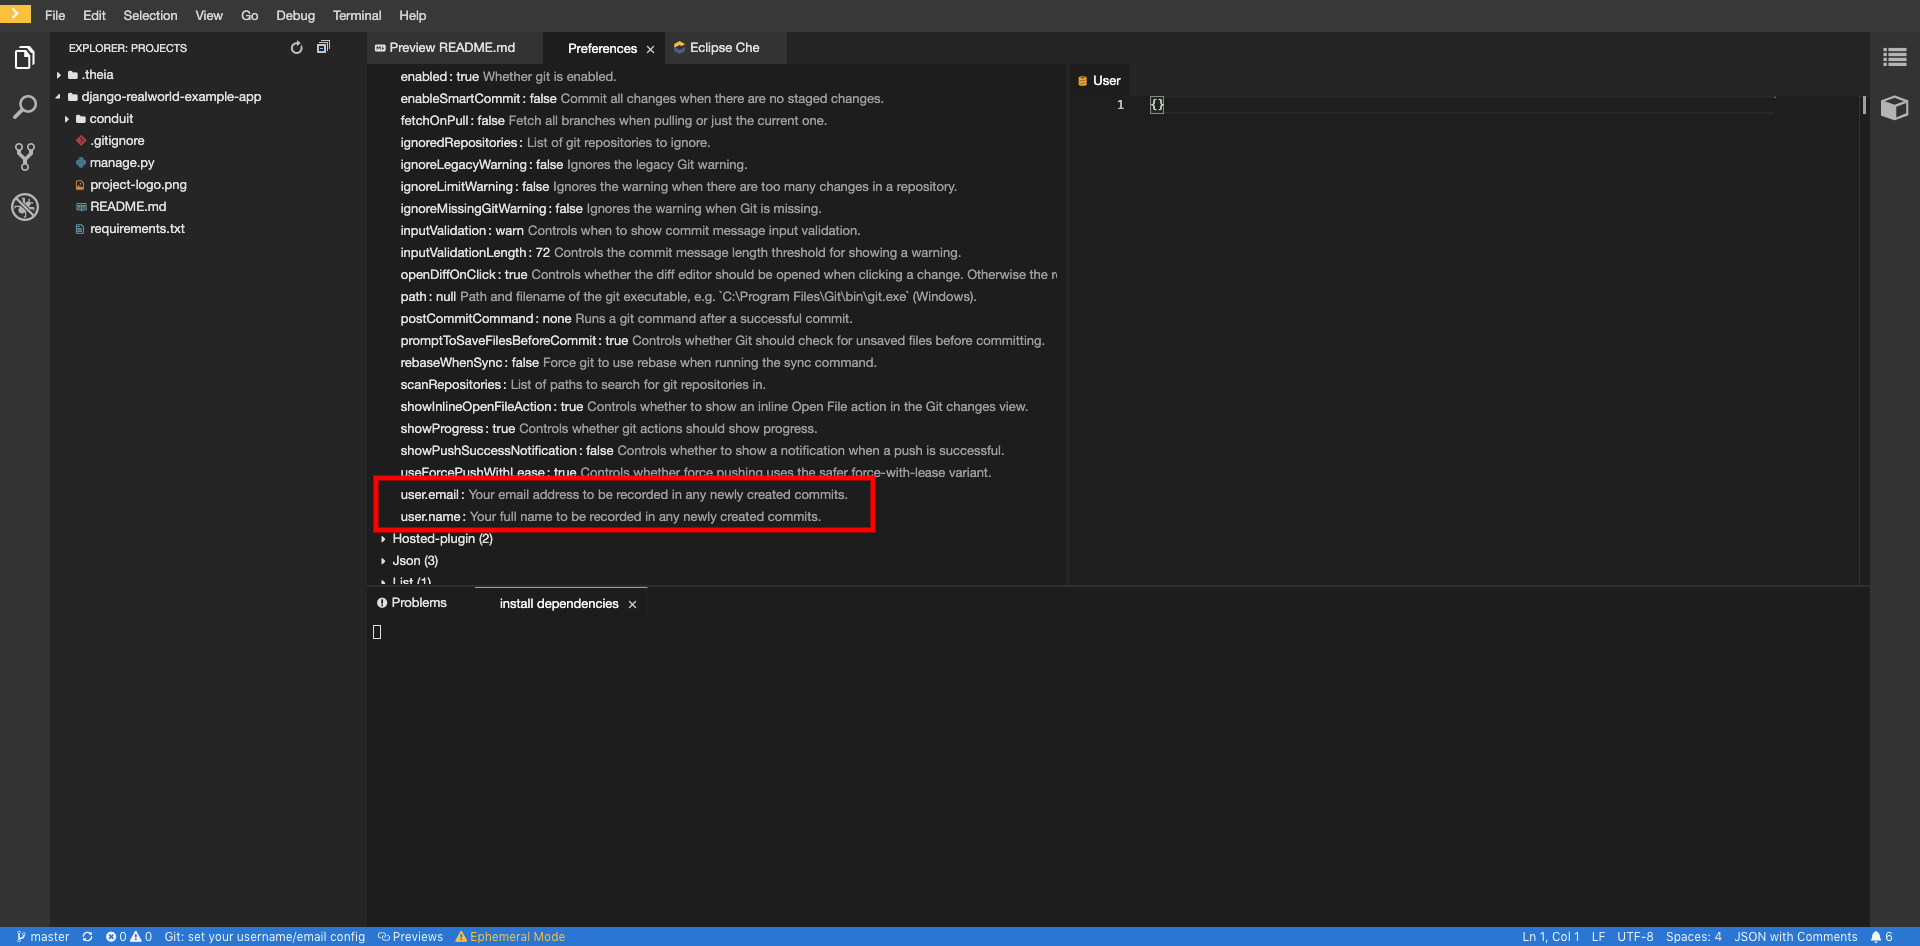
In the opened window, navigate to the Git section, and find:
 user.name
 user.email
And configure the identity.
To configure Git identity using the command line, open the terminal of the Che-Theia container.
Navigate to the My Workspace view, and open Plugins > theia-ide… > New terminal:

Execute the following commands:
$ git config --global user.name "John Doe"
$ git config --global user.email johndoe@example.com
Che-Theia permanently stores this information and restores it on future workspace starts.
2.2.2. Accessing a Git repository via HTTPS
Prerequisites
- Git is installed. Install Git if needed by following Getting Started - Installing Git.
Procedure
To clone a repository using HTTPS:
- Use the clone command provided by the Visual Studio Code Git extension.
Alternatively, use the native Git commands in the terminal to clone a project.
-
Navigate to destination folder using the
cdcommand. Use
git cloneto clone a repository:$ git clone <link>
Self-signed SSL certificates are not supported. Use SSH keys instead.
2.2.3. Accessing a Git repository via SSH
Prerequisites
- Personal GitHub account or other Git provider account created.
2.2.3.1. Generating an SSH key
A common SSH key that works with all Git providers is present by default. To start using it, add the public key to the Git provider.
To generate an SSH key pair that only works with a particular Git provider:
- Run the SSH: generate key pair for particular host command.
- After the key is generated, click the button and copy the public key from the editor.
- Add the public key to the Git provider.
2.2.3.2. Adding the associated public key to a repository or account on GitHub
To add the associated public key to a repository or account on GitHub:
- Navigate to github.com.
- Click the drop-down arrow next to the user icon in the top-right corner of the window.
-
Click Settings
SSH and GPG keys and then click the button. - In the Title field, type a title for the key, and in the Key field, paste the public key copied from CodeReady Workspaces.
Click the button.

2.2.3.3. Adding the associated public key to a Git repository or account on GitLab
To add the associated public key to a Git repository or account on GitLab:
- Navigate to gitlab.com.
- Click the user icon in the top-right corner of the window.
-
Click Settings
SSH Keys. - In the Title field, type a title for the key and in the Key field, paste the public key copied from CodeReady Workspaces.
Click the button.

2.2.4. Configuring GitHub OAuth
OAuth for Github allows users to clone projects using SSH addresses (git@) and push to repositories.
Procedure
To enable automatic SSH key upload to GitHub for users:
- On github.com, click your user icon (top right).
- Go to Settings > Developer settings > OAuth Apps.
- Click the button.
-
In the Application name field, enter, for example,
Red Hat CodeReady Workspaces. -
In the Homepage URL field, enter
http://$\{CODEREADY_HOST}:$\{CODEREADY_PORT}. In the Authorization callback URL field, enter
http://$\{CODEREADY_HOST}:$\{CODEREADY_PORT}/api/oauth/callback.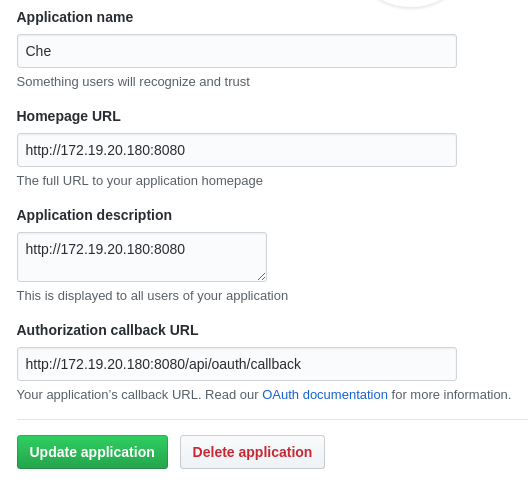
-
Substitute all occurrences of
${CODEREADY_HOST}and${CODEREADY_PORT}with the URL and port of your CodeReady Workspaces installation. -
Substitute
<your-github-client-id>and<your-github-secret>with your GitHub client ID and secret.
2.2.5. Managing pull requests using the GitHub PR plug-in
To manage GitHub pull requests, the VS Code GitHub Pull Request plug-in is available in the list of plug-ins of the workspace.
2.2.5.1. Using the GitHub Pull Requests plug-in
- Authenticate by running the GitHub Pull Requests: Manually Provide Authentication Response command and paste the GitHub token.
- Select the repository permissions when generating the token.
2.2.5.2. Creating a new pull request
- Open the GitHub repository. To be able to execute remote operations, the repository must have a remote with an SSH URL.
- Checkout a new branch and make changes that you want to publish.
- Run the GitHub Pull Requests: Create Pull Request command.
2.3. Che-Theia Troubleshooting
This section describes some of the most frequent issues with the Che-Theia IDE.
- Che-Theia shows a notification with the following message:
Plugin runtime crashed unexpectedly, all plugins are not working, please reload the page. Probably there is not enough memory for the plugins. This means that one of the Che-Theia plug-ins that are running in the Che-Theia IDE container requires more memory than the container has. To fix this problem, increase the amount of memory for the Che-Theia IDE container:
- Navigate to the CodeReady Workspaces Dashboard.
- Select the workspace in which the problem happened.
- Switch to the Devfile tab.
-
In the
componentssection of the devfile, find a component of thecheEditortype. -
Add a new property,
memoryLimit: 1024M(or increase the value if it already exists). - Save changes and restart the workspace.
Additional resources
- Asking the community for help: Mattermost channel dedicated to Red Hat CodeReady Workspaces.
- Reporting a bug: Red Hat CodeReady Workspaces repository issues.