Chapter 14. Managing firewall using the web console
A firewall is a way to protect machines from any unwanted traffic from outside. It enables users to control incoming network traffic on host machines by defining a set of firewall rules. These rules are used to sort the incoming traffic and either block it or allow it through. In RHEL, the firewalld service with the nftables back end functions as a default firewall. Through the RHEL web console, you can configure firewalld.
For details about the firewalld service, see Getting started with firewalld.
14.1. Running firewall using the web console
The following steps show where and how to run the RHEL 9 system firewall in the web console.
The RHEL 9 web console configures the firewalld service.
Procedure
- Log in to the RHEL 9 web console. For details, see Logging in to the web console.
- Open the Networking section.
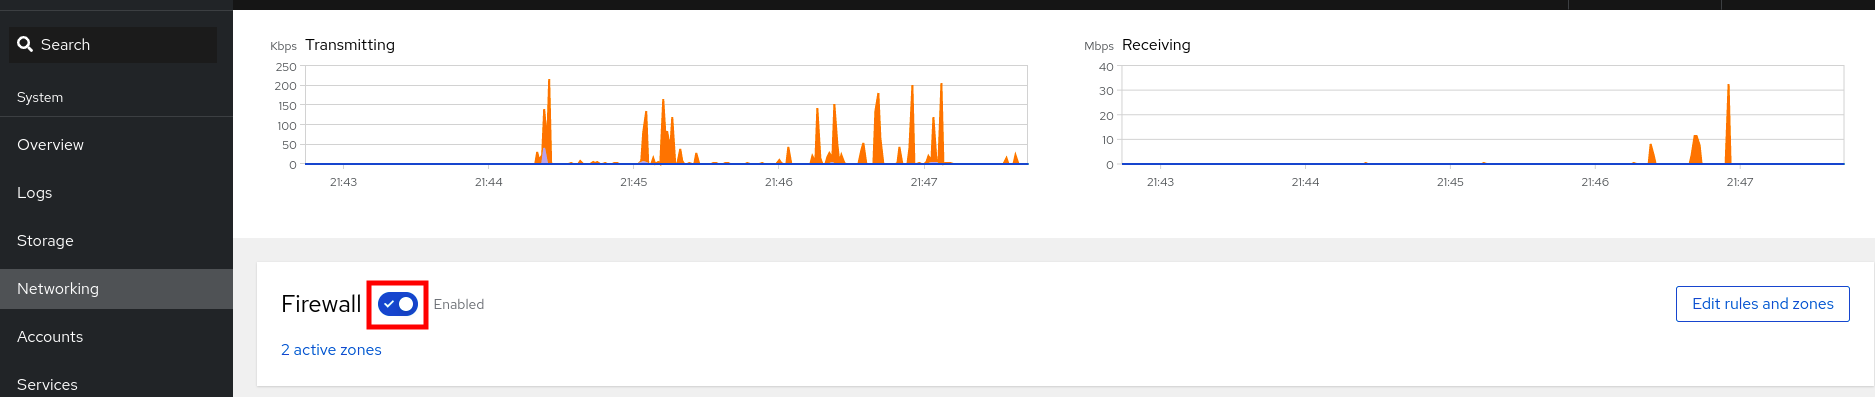
In the Firewall section, click the slider to run the firewall.

If you do not see the Firewall slider, log in to the web console with the administrative privileges.
At this stage, your firewall is running.
To configure firewall rules, see Enabling services on the firewall using the web console
14.2. Stopping firewall using the web console
The following steps show where and how to stop the RHEL 9 system firewall in the web console.
The RHEL 9 web console configures the firewalld service.
Procedure
- Log in to the RHEL 9 web console. For details, see Logging in to the web console.
- Open the Networking section.
In the Firewall section, click the slider to stop the firewall.
If you do not see the Firewall slider, log in to the web console with the administrative privileges.
At this stage, the firewall has been stopped and does not secure your system.
14.3. Firewall zones
You can use the firewalld utility to separate networks into different zones according to the level of trust that you have with the interfaces and traffic within that network. A connection can only be part of one zone, but you can use that zone for many network connections.
firewalld follows strict principles in regards to zones:
- Traffic ingresses only one zone.
- Traffic egresses only one zone.
- A zone defines a level of trust.
- Intrazone traffic (within the same zone) is allowed by default.
- Interzone traffic (from zone to zone) is denied by default.
Principles 4 and 5 are a consequence of principle 3.
Principle 4 is configurable through the zone option --remove-forward. Principle 5 is configurable by adding new policies.
NetworkManager notifies firewalld of the zone of an interface. You can assign zones to interfaces with the following utilities:
-
NetworkManager -
firewall-configutility -
firewall-cmdutility - The RHEL web console
The RHEL web console, firewall-config, and firewall-cmd can only edit the appropriate NetworkManager configuration files. If you change the zone of the interface using the web console, firewall-cmd, or firewall-config, the request is forwarded to NetworkManager and is not handled by firewalld.
The /usr/lib/firewalld/zones/ directory stores the predefined zones, and you can instantly apply them to any available network interface. These files are copied to the /etc/firewalld/zones/ directory only after they are modified. The default settings of the predefined zones are as follows:
block-
Suitable for: Any incoming network connections are rejected with an icmp-host-prohibited message for
IPv4and icmp6-adm-prohibited forIPv6. - Accepts: Only network connections initiated from within the system.
-
Suitable for: Any incoming network connections are rejected with an icmp-host-prohibited message for
dmz- Suitable for: Computers in your DMZ that are publicly-accessible with limited access to your internal network.
- Accepts: Only selected incoming connections.
dropSuitable for: Any incoming network packets are dropped without any notification.
- Accepts: Only outgoing network connections.
external- Suitable for: External networks with masquerading enabled, especially for routers. Situations when you do not trust the other computers on the network.
- Accepts: Only selected incoming connections.
home- Suitable for: Home environment where you mostly trust the other computers on the network.
- Accepts: Only selected incoming connections.
internal- Suitable for: Internal networks where you mostly trust the other computers on the network.
- Accepts: Only selected incoming connections.
public- Suitable for: Public areas where you do not trust other computers on the network.
- Accepts: Only selected incoming connections.
trusted- Accepts: All network connections.
workSuitable for: Work environment where you mostly trust the other computers on the network.
- Accepts: Only selected incoming connections.
One of these zones is set as the default zone. When interface connections are added to NetworkManager, they are assigned to the default zone. On installation, the default zone in firewalld is the public zone. You can change the default zone.
Make network zone names self-explanatory to help users understand them quickly.
To avoid any security problems, review the default zone configuration and disable any unnecessary services according to your needs and risk assessments.
Additional resources
-
firewalld.zone(5)man page
14.4. Zones in the web console
The Red Hat Enterprise Linux web console implements major features of the firewalld service and enables you to:
- Add predefined firewall zones to a particular interface or range of IP addresses
- Configure zones with selecting services into the list of enabled services
- Disable a service by removing this service from the list of enabled service
- Remove a zone from an interface
14.5. Enabling zones using the web console
You can apply predefined and existing firewall zones on a particular interface or a range of IP addresses through the RHEL web console.
Prerequisites
- The RHEL 9 web console has been installed. For details, see Installing the web console.
- The firewall must be enabled. For details, see Running firewall using the web console.
Procedure
- Log in to the RHEL web console with administrative privileges. For details, see Logging in to the web console.
- Click Networking.
Click on the button.
If you do not see the button, log in to the web console with the administrator privileges.
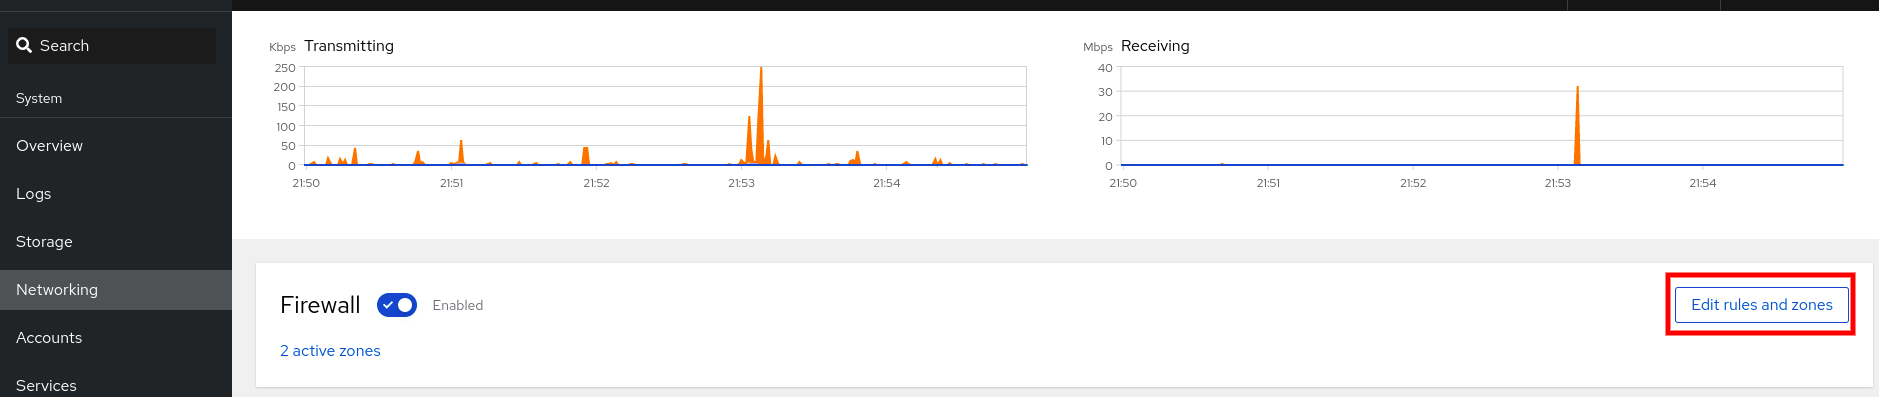
- In the Firewall section, click Add new zone.
In the Add zone dialog box, select a zone from the Trust level options.
The web console displays all zones predefined in the
firewalldservice.- In the Interfaces part, select an interface or interfaces on which the selected zone is applied.
In the Allowed Addresses part, you can select whether the zone is applied on:
- the whole subnet
or a range of IP addresses in the following format:
- 192.168.1.0
- 192.168.1.0/24
- 192.168.1.0/24, 192.168.1.0
Click on the button.

Verification
Check the configuration in the Firewall section:

14.6. Enabling services on the firewall using the web console
By default, services are added to the default firewall zone. If you use more firewall zones on more network interfaces, you must select a zone first and then add the service with port.
The RHEL 9 web console displays predefined firewalld services and you can add them to active firewall zones.
The RHEL 9 web console configures the firewalld service.
The web console does not allow generic firewalld rules which are not listed in the web console.
Prerequisites
- The RHEL 9 web console has been installed. For details, see Installing the web console.
- The firewall must be enabled. For details, see Running firewall using the web console.
Procedure
- Log in to the RHEL web console with administrator privileges. For details, see Logging in to the web console.
- Click Networking.
Click on the button.
If you do not see the button, log in to the web console with the administrator privileges.
In the Firewall section, select a zone for which you want to add the service and click Add Services.

- In the Add Services dialog box, find the service you want to enable on the firewall.
Enable services according to your scenario:
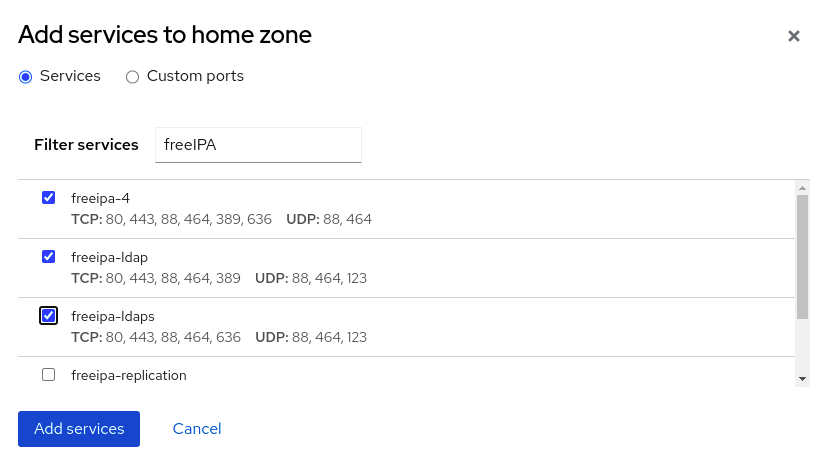
- Click Add Services.
At this point, the RHEL 9 web console displays the service in the zone’s list of Services.
14.7. Configuring custom ports using the web console
The web console allows you to add:
- Services listening on standard ports: Enabling services on the firewall using the web console
- Services listening on custom ports.
You can add services by configuring custom ports as described.
Prerequisites
- The RHEL 9 web console has been installed. For details, see Installing the web console.
- The firewall must be enabled. For details, see Running firewall using the web console.
Procedure
- Log in to the RHEL web console with administrator privileges. For details, see Logging in to the web console.
- Click Networking.
Click on the button.
If you do not see the button, log in to the web console with the administrative privileges.
In the Firewall section, select a zone for which you want to configure a custom port and click Add Services.
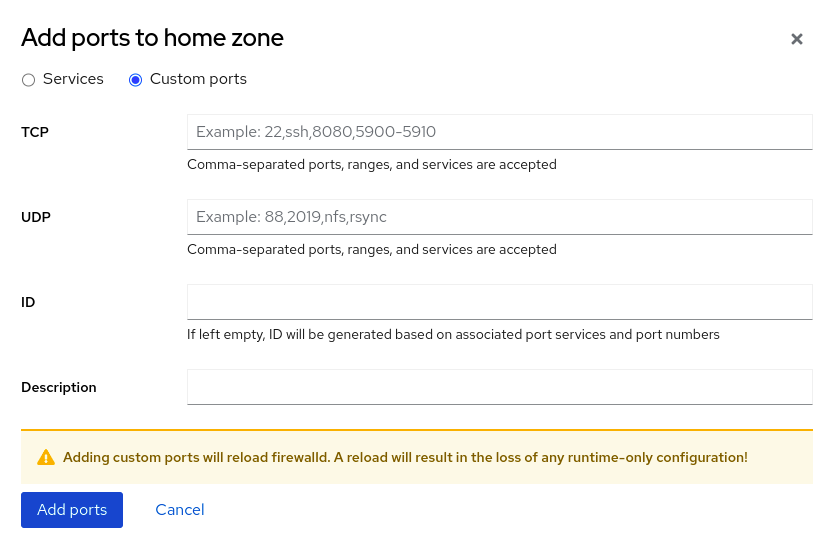
- In the Add services dialog box, click on the radio button.
In the TCP and UDP fields, add ports according to examples. You can add ports in the following formats:
- Port numbers such as 22
- Range of port numbers such as 5900-5910
- Aliases such as nfs, rsync
NoteYou can add multiple values into each field. Values must be separated with the comma and without the space, for example: 8080,8081,http
After adding the port number in the TCP filed, the UDP filed, or both, verify the service name in the Name field.
The Name field displays the name of the service for which is this port reserved. You can rewrite the name if you are sure that this port is free to use and no server needs to communicate on this port.
- In the Name field, add a name for the service including defined ports.
Click on the button.
To verify the settings, go to the Firewall page and find the service in the list of zone’s Services.
14.8. Disabling zones using the web console
You can disable a firewall zone in your firewall configuration using the web console.
Prerequisites
- The RHEL 9 web console has been installed. For details, see Installing the web console.
Procedure
- Log in to the RHEL web console with administrator privileges. For details, see Logging in to the web console.
- Click Networking.
Click on the button.
If you do not see the button, log in to the web console with the administrator privileges.
Click on the Options icon at the zone you want to remove.

- Click Delete.
The zone is now disabled and the interface does not include opened services and ports which were configured in the zone.