Chapter 20. Configuring LVM logical volumes using the web console
Red Hat Enterprise Linux 9 supports logical volume management (LVM). The RHEL 9 installer automatically creates an LVM2 volume group and installs the system on it during the installation process.
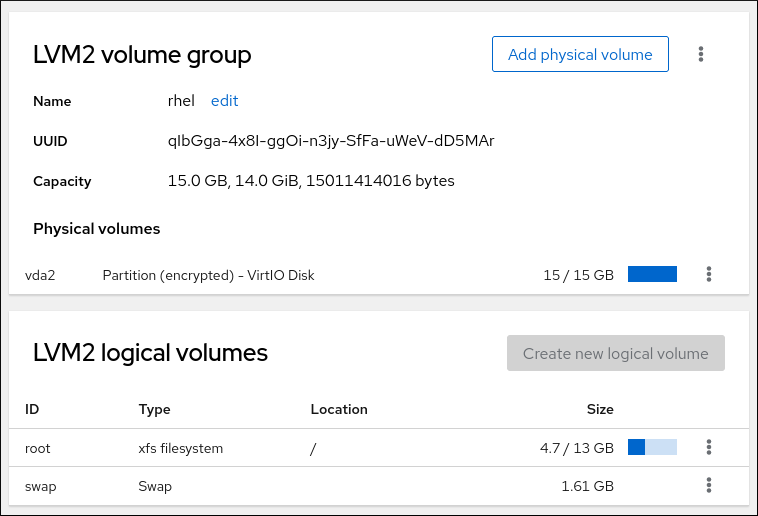
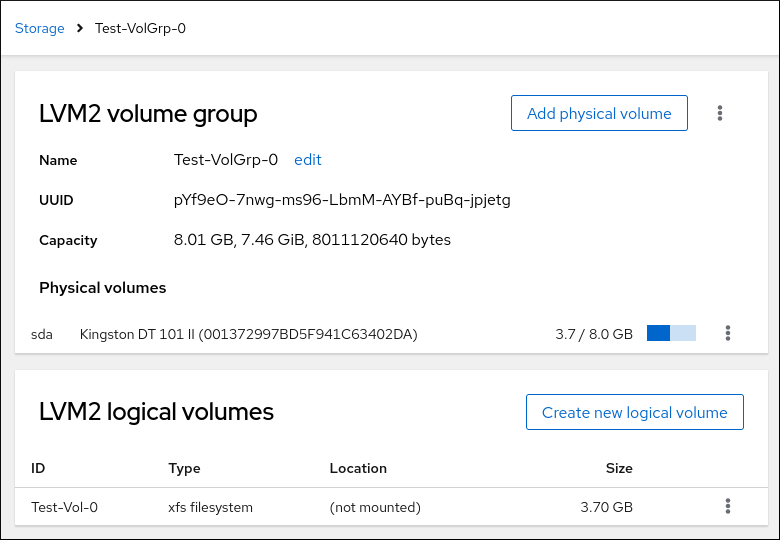
You can use the RHEL web console to manage LVM2 volume groups and volumes as demonstrated on the following example page of an LVM2 group:
Prerequisites
The RHEL 9 web console has been installed.
For instructions, see Installing and enabling the web console.
-
The
cockpit-storagedpackage is installed on your system. - Physical drives, RAID devices, or any other type of block device from which you can create the logical volume.
20.1. Logical Volume Manager in the web console
The RHEL 9 web console provides a graphical interface to create LVM volume groups and logical volumes.
Volume groups create a layer between physical and logical volumes. This layer allows additions or removals of physical volumes without influencing the logical volume itself. Volume groups appear as one drive with capacity consisting of capacities of all physical drives included in the group. You can join physical drives into volume groups in the web console.
The main advantages of logical volumes are:
- Better flexibility than the partitioning system used on your physical drive.
- Ability to connect more physical drives into one volume.
- Possibility of expanding (growing) or reducing (shrinking) capacity of the volume on-line, without restart.
- Ability to create snapshots.
Additional resources
20.2. Creating volume groups in the web console
Create volume groups from one or more physical drives or other storage devices.
Logical volumes are created from volume groups. Each volume group can include multiple logical volumes.
For details, see Managing LVM volume groups.
Prerequisites
- Physical drives or other types of storage devices from which you want to create volume groups.
Procedure
- Log in to the RHEL 9 web console.
- Click .
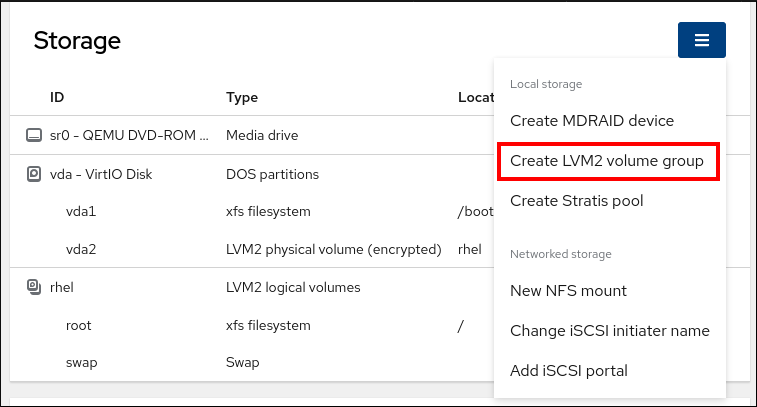
- In the Storage table, click the menu button.
From the drop-down menu, select Create LVM2 volume group.
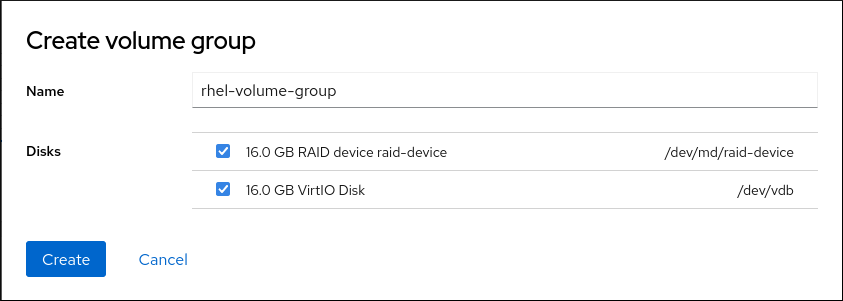
- In the Name field, enter a name for the volume group. The name must not include spaces.
Select the drives you want to combine to create the volume group.
The RHEL web console displays only unused block devices. If you do not see your device in the list, make sure that it is not being used by your system, or format it to be empty and unused. Used devices include, for example:
- Devices formatted with a file system
- Physical volumes in another volume group
- Physical volumes being a member of another software RAID device
Click .
The volume group is created.
Verification
- On the Storage page, check whether the new volume group is listed in the Storage table.
20.3. Creating logical volumes in the web console
Logical volumes act as physical drives. You can use the RHEL 9 web console to create LVM logical volumes in a volume group.
Prerequisites
-
The
cockpit-storagedpackage is installed on your system. - Volume group created. For details, see Creating volume groups in the web console.
Procedure
- Log in to the RHEL 9 web console.
- Click Storage.
- In the Storage table, click the volume group in which you want to create logical volumes.
- On the Logical volume group page, scroll to the LVM2 logical volumes section and click .
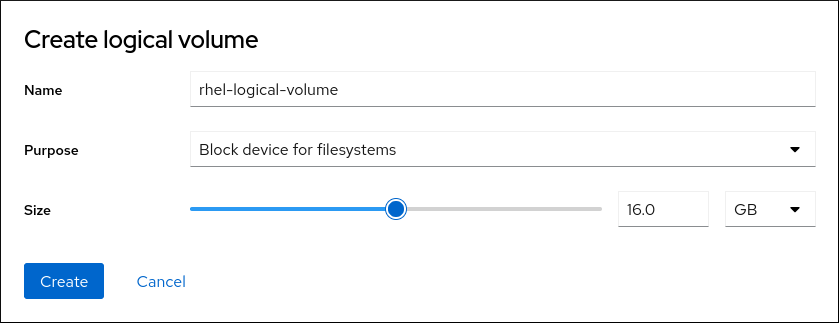
- In the Name field, enter a name for the new logical volume. Do not include spaces in the name.
In the drop-down menu, select Block device for filesystems.
This configuration enables you to create a logical volume with the maximum volume size which is equal to the sum of the capacities of all drives included in the volume group.

Define the size of the logical volume. Consider:
- How much space the system using this logical volume will need.
- How many logical volumes you want to create.
You do not have to use the whole space. If necessary, you can grow the logical volume later.
Click .
The logical volume is created. To use the logical volume you must format and mount the volume.
Verification
On the Logical volume page, scroll to the LVM2 logical volumes section and verify whether the new logical volume is listed.

20.4. Formatting logical volumes in the web console
Logical volumes act as physical drives. To use them, you must format them with a file system.
Formatting logical volumes erases all data on the volume.
The file system you select determines the configuration parameters you can use for logical volumes. For example, the XFS file system does not support shrinking volumes. For details, see Resizing logical volumes in the web console.
Prerequisites
-
The
cockpit-storagedpackage is installed on your system. - Logical volume created. For details, see Creating logical volumes in the web console.
- You have root access privileges to the system.
Procedure
- Log in to the RHEL 9 web console.
- Click .
- In the Storage table, click the volume group in the logical volumes is created.
- On the Logical volume group page, scroll to the LVM2 logical volumes section.
- Click the menu button, , next to the volume group you want to format.
From the drop-down menu, select .
- In the Name field, enter a name for the file system.
In the Mount Point field, add the mount path.
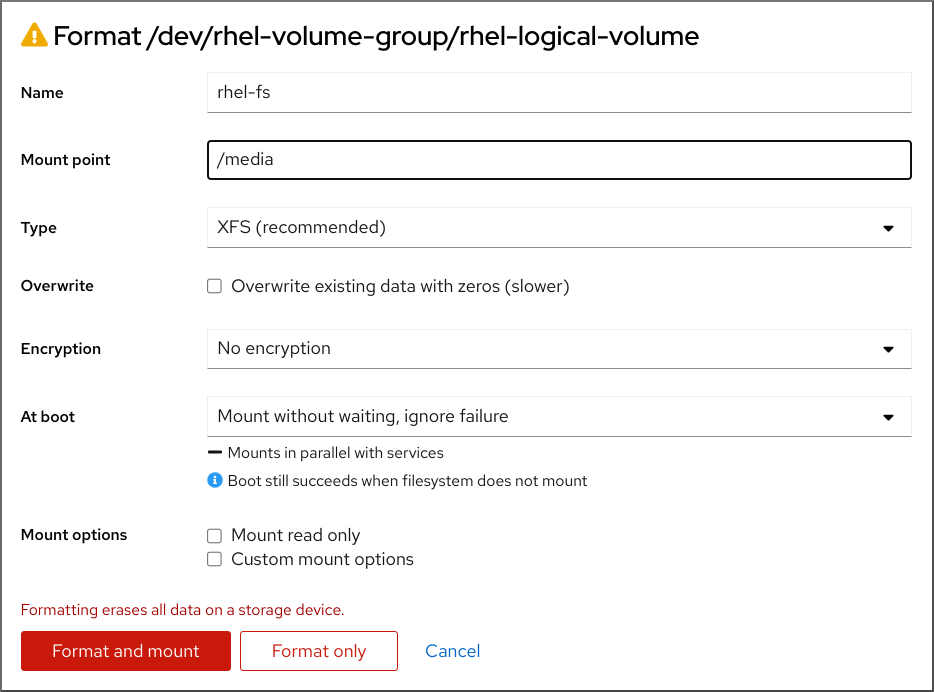
In the drop-down menu, select a file system:
XFS file system supports large logical volumes, switching physical drives online without outage, and growing an existing file system. Leave this file system selected if you do not have a different strong preference.
XFS does not support reducing the size of a volume formatted with an XFS file system
ext4 file system supports:
- Logical volumes
- Switching physical drives online without an outage
- Growing a file system
- Shrinking a file system
Select the Overwrite existing data with zeros checkbox if you want the RHEL web console to rewrite the whole disk with zeros. This option is slower because the program has to go through the whole disk, but it is more secure. Use this option if the disk includes any data and you need to overwrite it.
If you do not select the Overwrite existing data with zeros checkbox, the RHEL web console rewrites only the disk header. This increases the speed of formatting.
From the drop-down menu, select the type of encryption if you want to enable it on the logical volume.
You can select a version with either the LUKS1 (Linux Unified Key Setup) or LUKS2 encryption, which allows you to encrypt the volume with a passphrase.
- In the drop-down menu, select when you want the logical volume to mount after the system boots.
- Select the required Mount options.
Format the logical volume:
- If you want to format the volume and immediately mount it, click .
If you want to format the volume without mounting it, click .
Formatting can take several minutes depending on the volume size and which formatting options are selected.
Verification
On the Logical volume group page, scroll to the LVM2 logical volumes section and click the logical volume to check the details and additional options.
- If you selected the option, click the menu button at the end of the line of the logical volume, and select to use the logical volume.
20.5. Resizing logical volumes in the web console
Learn how to extend or reduce logical volumes in the RHEL 9 web console.
Whether you can resize a logical volume depends on which file system you are using. Most file systems enable you to extend (grow) the volume online (without outage).
You can also reduce (shrink) the size of logical volumes, if the logical volume contains a file system which supports shrinking. It should be available, for example, in the ext3/ext4 file systems.
You cannot reduce volumes that contains GFS2 or XFS filesystem.
Prerequisites
- Existing logical volume containing a file system that supports resizing logical volumes.
Procedure
The following steps provide the procedure for growing a logical volume without taking the volume offline:
- Log in to the RHEL web console.
- Click .
- In the Storage table, click the volume group in the logical volumes is created.
- On the Logical volume group page, scroll to the LVM2 logical volumes section and click the menu button, , next to volume group you want to resize.
From the menu, select Grow or Shrink to resize the volume:
Growing the Volume:
Select to increase the size of the volume.
In the Grow logical volume dialog box, adjust the size of the logical volume.
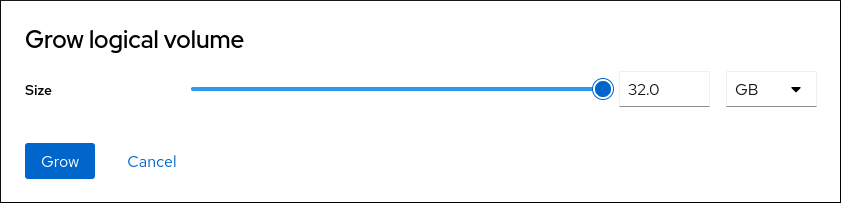
Click .
LVM grows the logical volume without causing a system outage.
Shrinking the Volume:
Select to reduce the size of the volume.
In the Shrink logical volume dialog box, adjust the size of the logical volume.
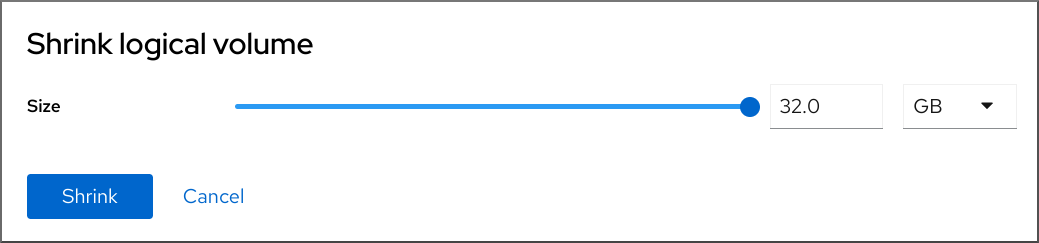
Click .
LVM shrinks the logical volume without causing a system outage.