Chapter 5. Implementing pipelines
5.1. Automating workflows with data science pipelines
In previous sections of this tutorial, you used a notebook to train and save your model. Optionally, you can automate these tasks by using Red Hat OpenShift AI pipelines. Pipelines offer a way to automate the execution of multiple notebooks and Python code. By using pipelines, you can execute long training jobs or retrain your models on a schedule without having to manually run them in a notebook.
In this section, you create a simple pipeline by using the GUI pipeline editor. The pipeline uses the notebook that you used in previous sections to train a model and then save it to S3 storage.
Your completed pipeline should look like the one in the 6 Train Save.pipeline file.
To explore the pipeline editor, complete the steps in the following procedure to create your own pipeline. Alternately, you can skip the following procedure and instead run the 6 Train Save.pipeline file.
5.1.1. Create a pipeline
Open your workbench’s JupyterLab environment. If the launcher is not visible, click + to open it.
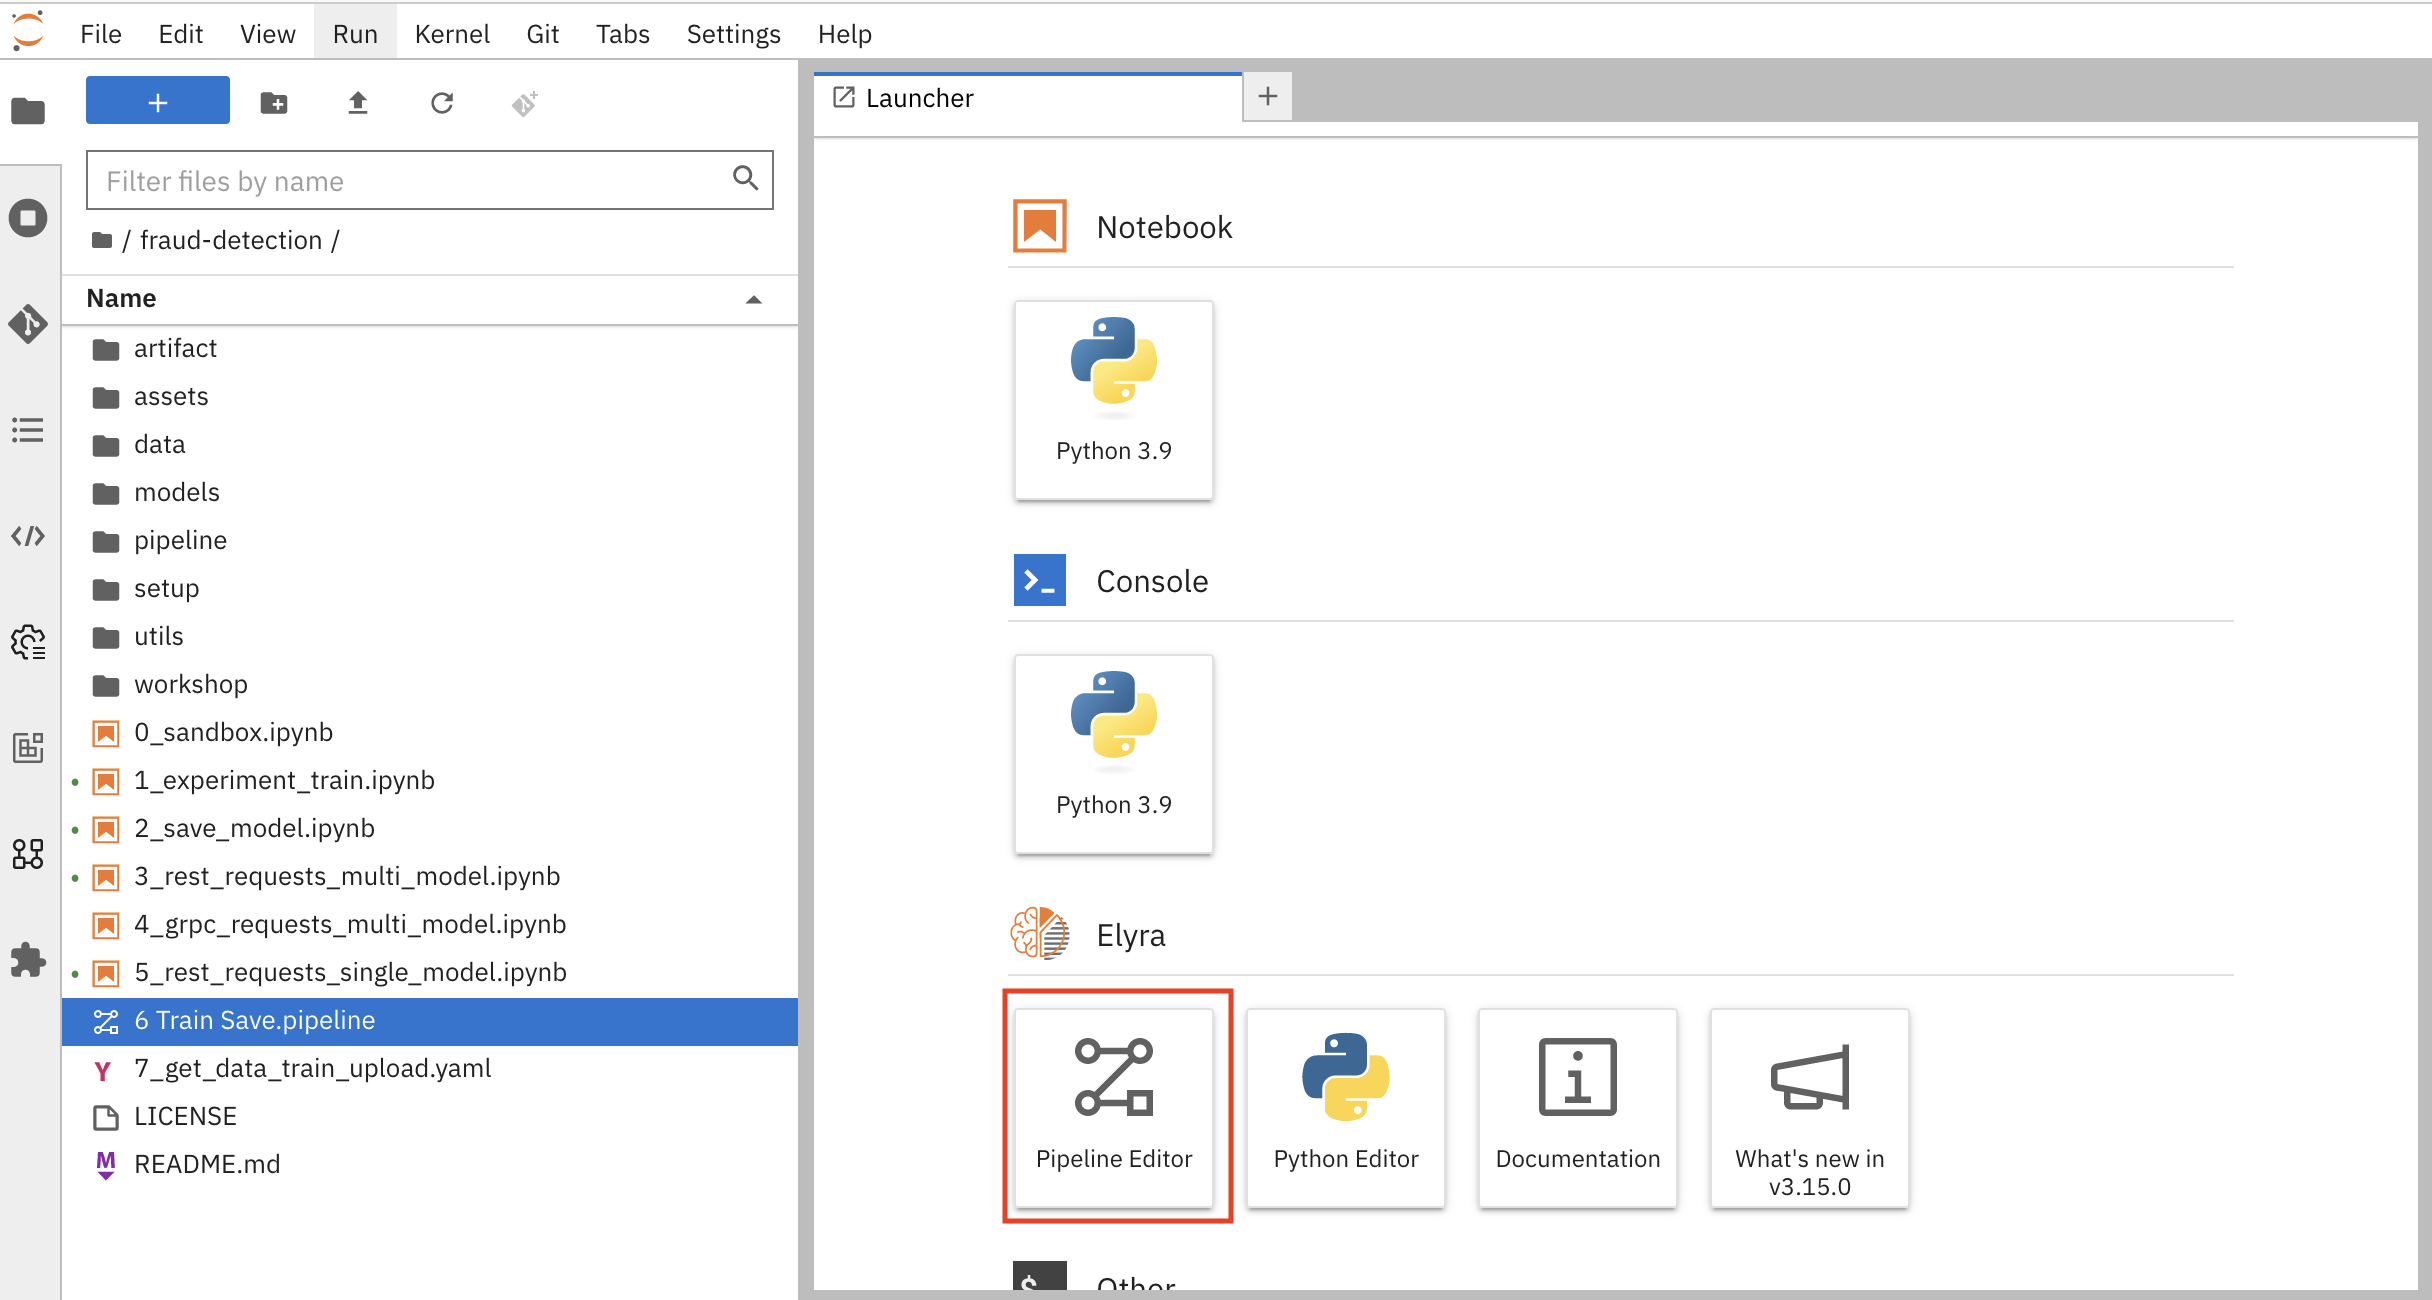
Click Pipeline Editor.
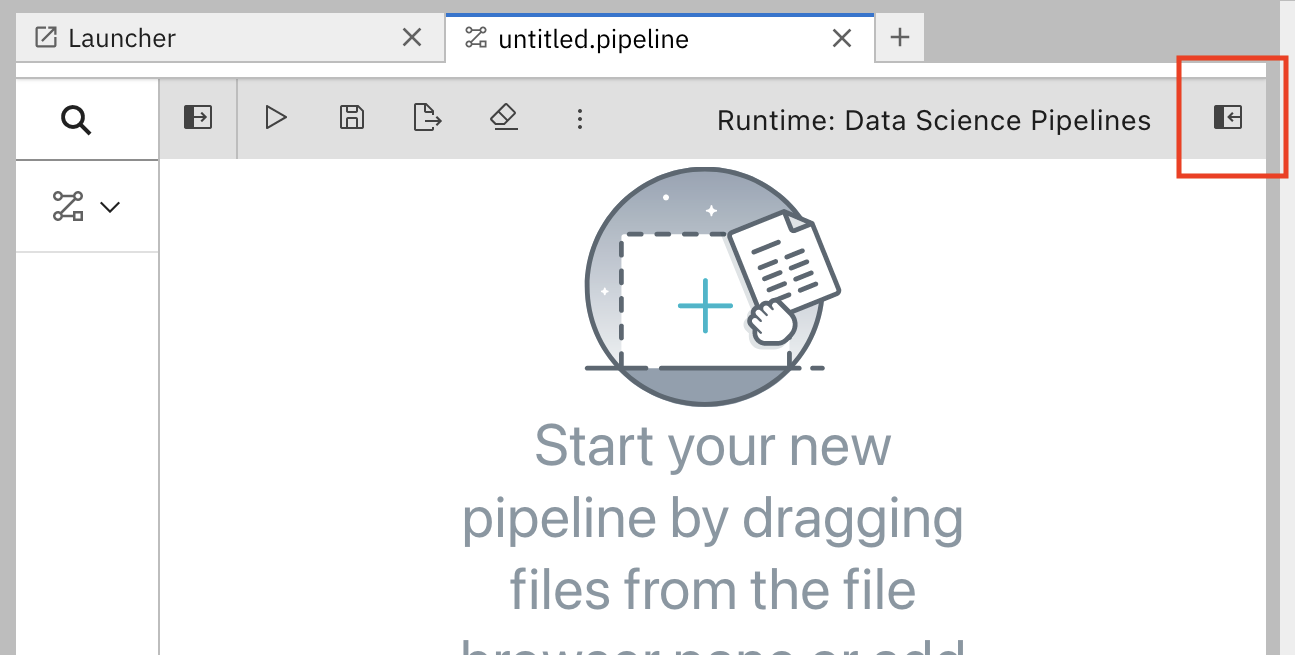
You’ve created a blank pipeline!
Set the default runtime image for when you run your notebook or Python code.
In the pipeline editor, click Open Panel.
Select the Pipeline Properties tab.

In the Pipeline Properties panel, scroll down to Generic Node Defaults and Runtime Image. Set the value to
Tensorflow with Cuda and Python 3.9 (UBI 9).
- Save the pipeline.
5.1.2. Add nodes to your pipeline
Add some steps, or nodes in your pipeline. Your two nodes will use the 1_experiment_train.ipynb and 2_save_model.ipynb notebooks.
From the file-browser panel, drag the
1_experiment_train.ipynband2_save_model.ipynbnotebooks onto the pipeline canvas.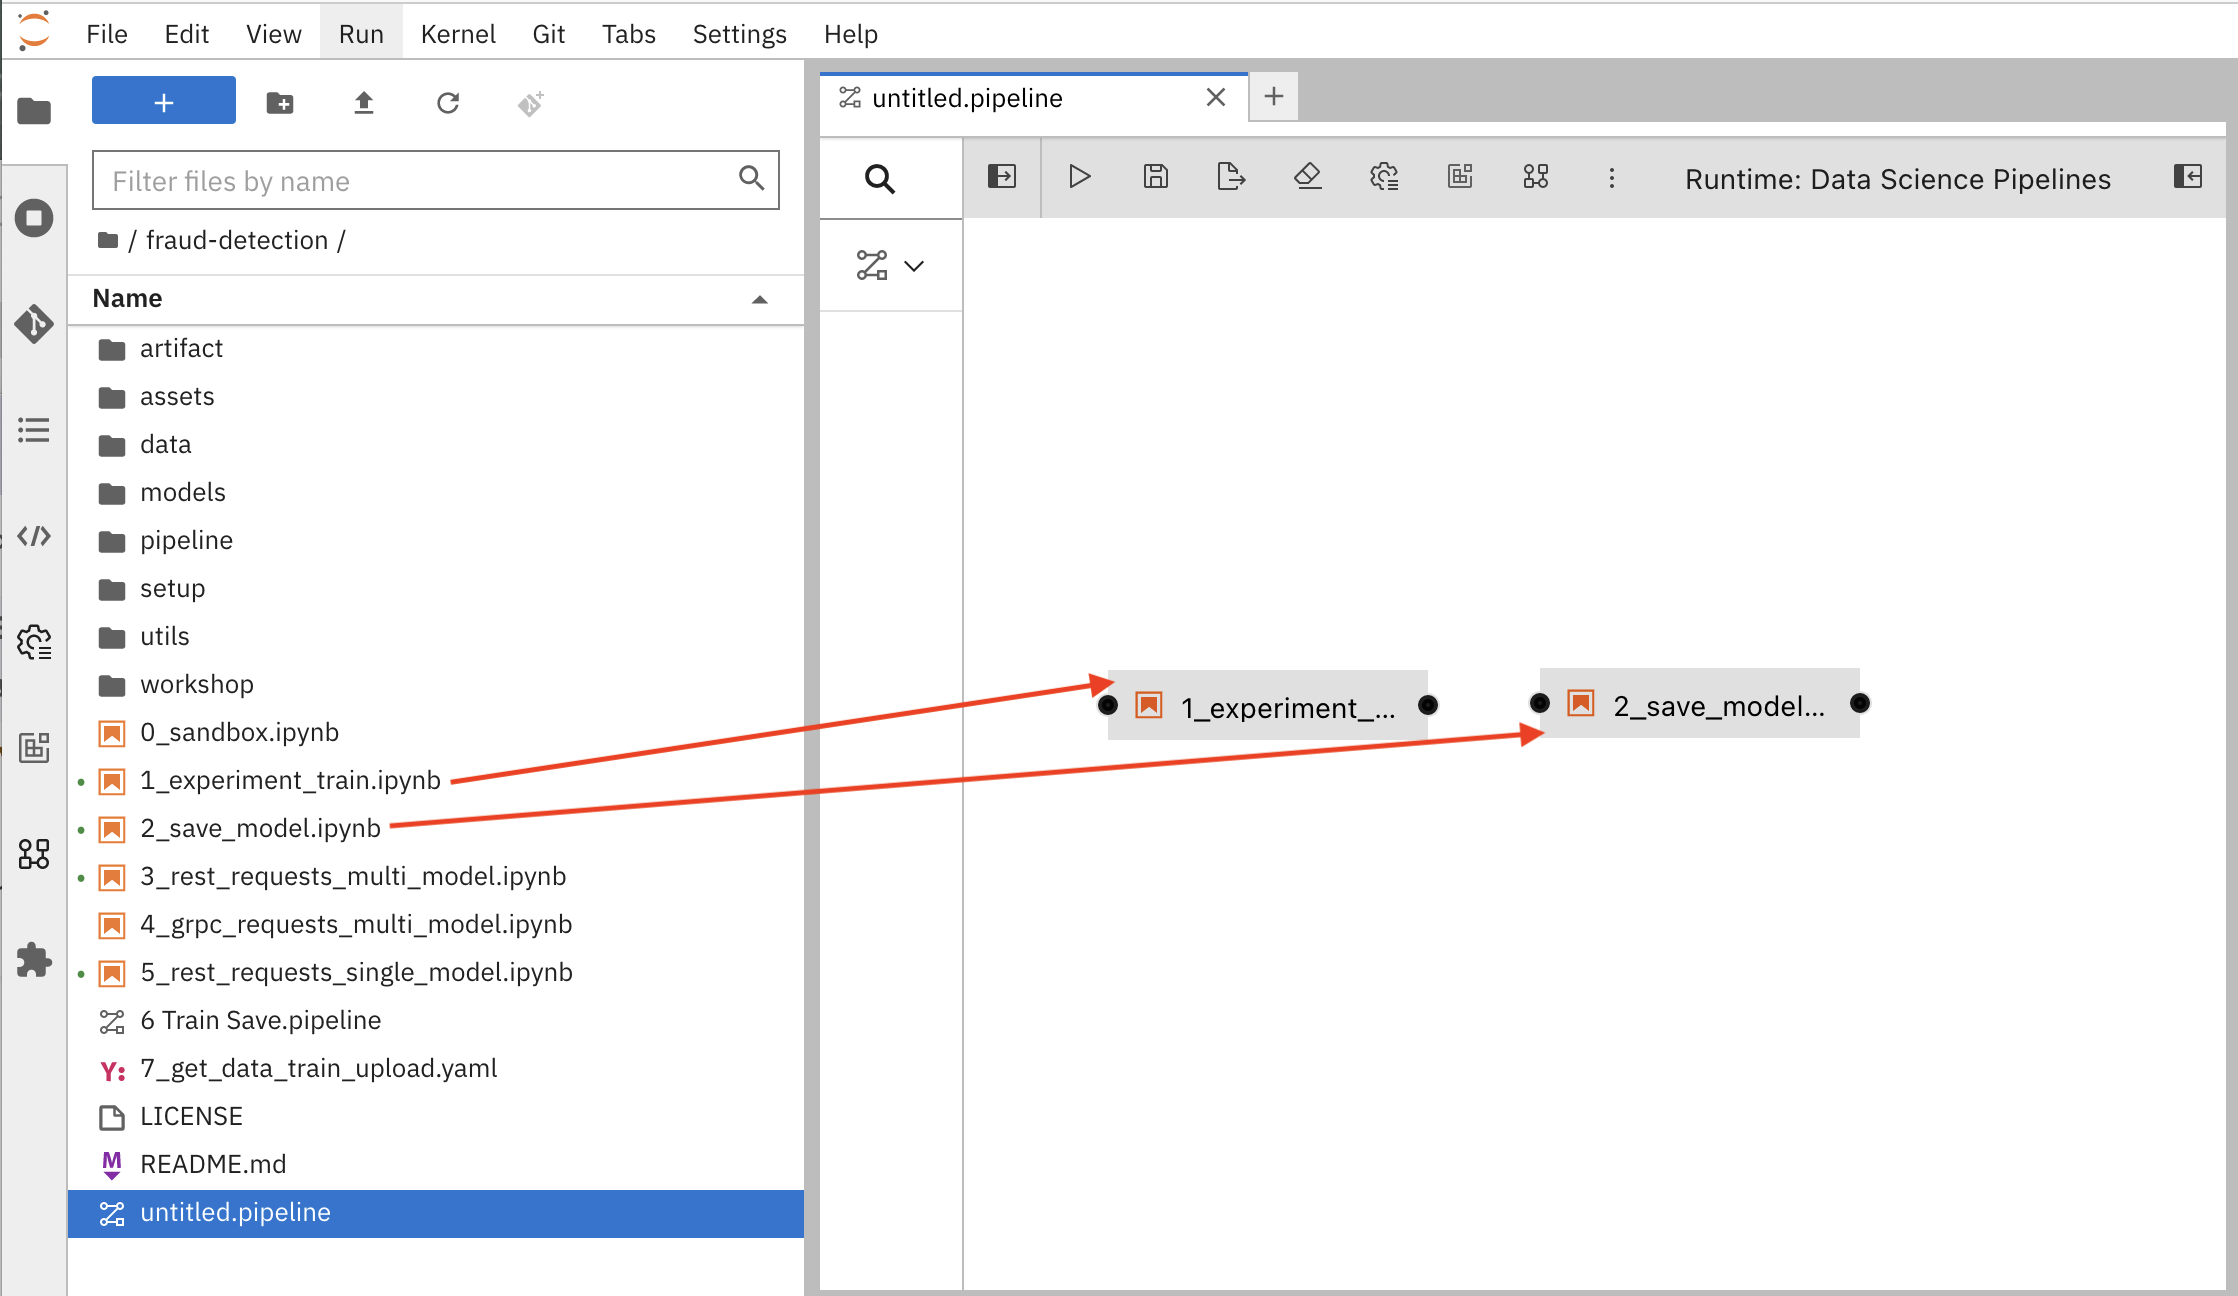
Click the output port of
1_experiment_train.ipynband drag a connecting line to the input port of2_save_model.ipynb.
- Save the pipeline.
5.1.3. Specify the training file as a dependency
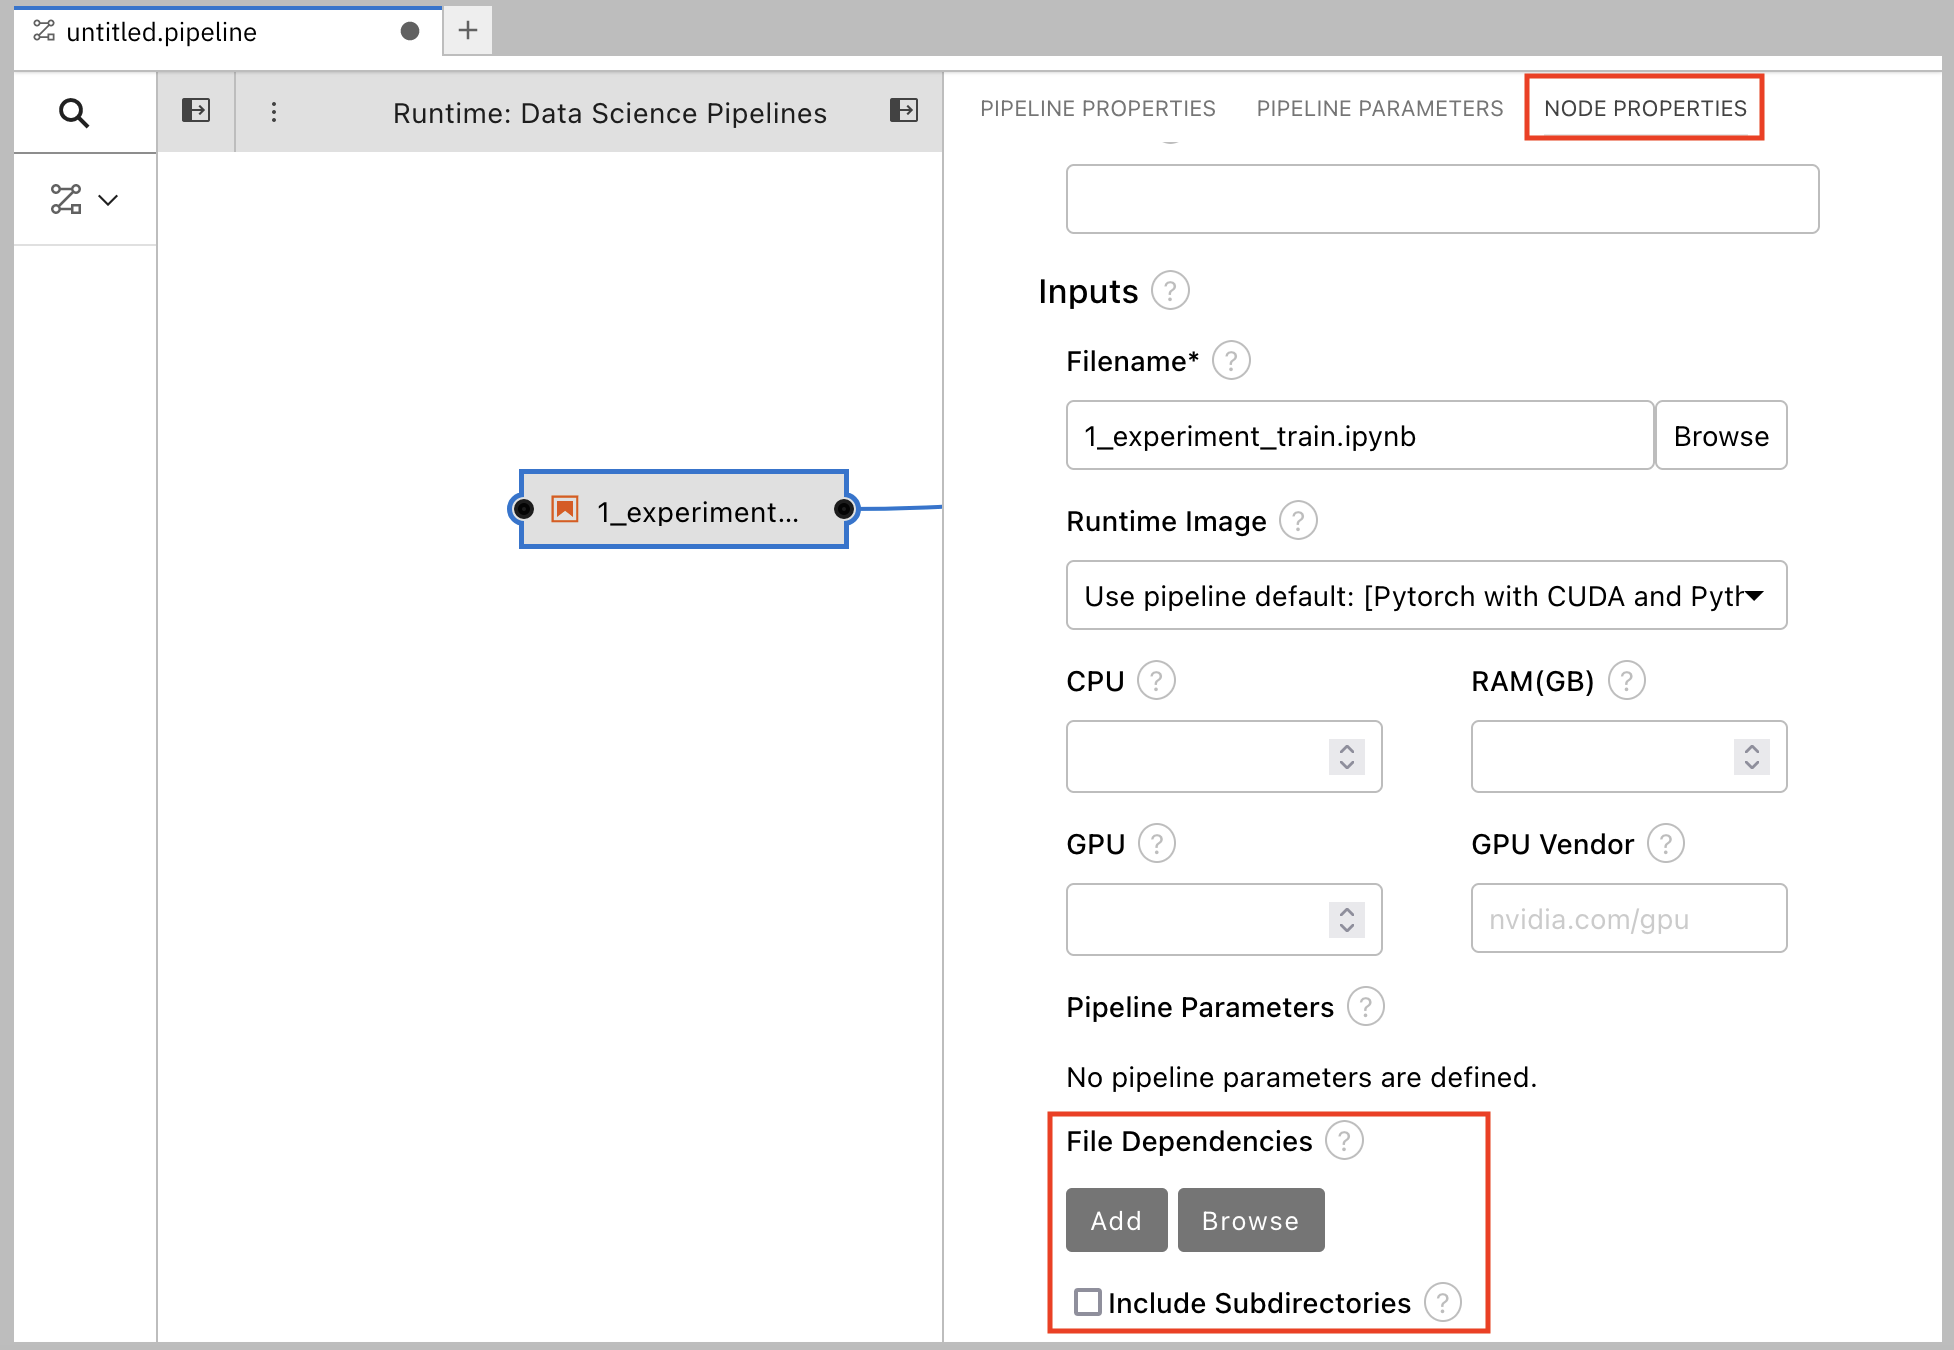
Set node properties to specify the training file as a dependency.
Note: If you don’t set this file dependency, the file is not included in the node when it runs and the training job fails.
Click the
1_experiment_train.ipynbnode.
- In the Properties panel, click the Node Properties tab.
Scroll down to the File Dependencies section and then click Add.
-
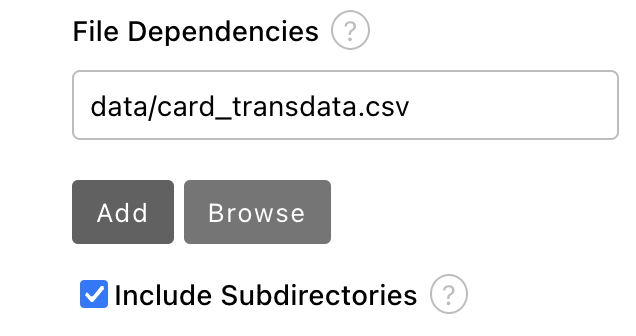
Set the value to
data/card_transdata.csvwhich contains the data to train your model. Select the Include Subdirectories option and then click Add.
- Save the pipeline.
5.1.4. Create and store the ONNX-formatted output file
In node 1, the notebook creates the models/fraud/1/model.onnx file. In node 2, the notebook uploads that file to the S3 storage bucket. You must set models/fraud/1/model.onnx file as the output file for both nodes.
- Select node 1 and then select the Node Properties tab.
- Scroll down to the Output Files section, and then click Add.
Set the value to
models/fraud/1/model.onnxand then click Add.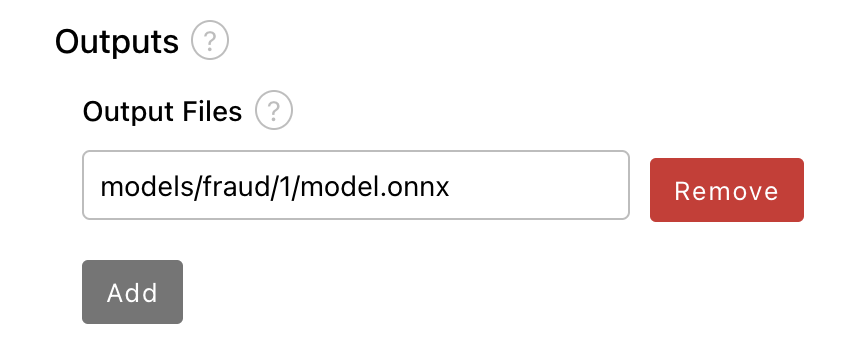
- Repeat steps 1-3 for node 2.
- Save the pipeline.
5.1.5. Configure the data connection to the S3 storage bucket
In node 2, the notebook uploads the model to the S3 storage bucket.
You must set the S3 storage bucket keys by using the secret created by the My Storage data connection that you set up in the Storing data with data connections section of this tutorial.
You can use this secret in your pipeline nodes without having to save the information in your pipeline code. This is important, for example, if you want to save your pipelines - without any secret keys - to source control.
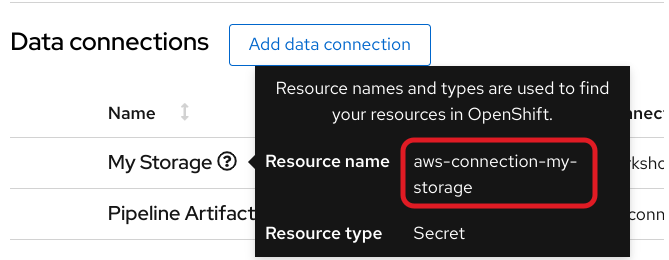
The secret is named aws-connection-my-storage.
If you named your data connection something other than My Storage, you can obtain the secret name in the OpenShift AI dashboard by hovering over the resource information icon ? in the Data Connections tab.
The aws-connection-my-storage secret includes the following fields:
-
AWS_ACCESS_KEY_ID -
AWS_DEFAULT_REGION -
AWS_S3_BUCKET -
AWS_S3_ENDPOINT -
AWS_SECRET_ACCESS_KEY
You must set the secret name and key for each of these fields.
Procedure
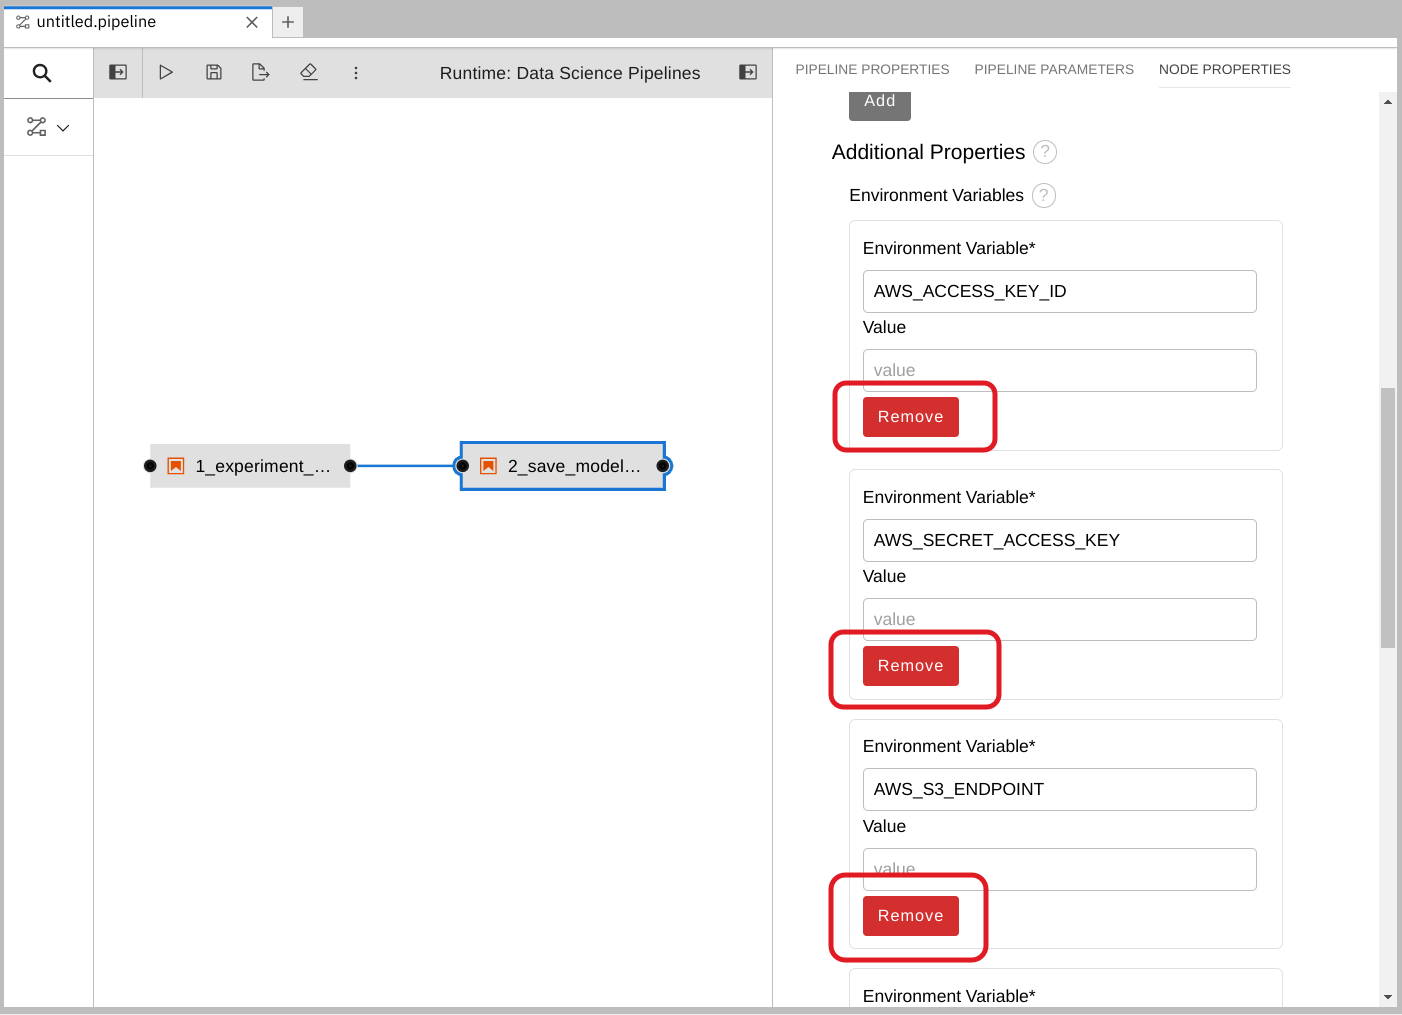
Remove any pre-filled environment variables.
Select node 2, and then select the Node Properties tab.
Under Additional Properties, note that some environment variables have been pre-filled. The pipeline editor inferred that you need them from the notebook code.
Since you don’t want to save the value in your pipelines, remove all of these environment variables.
Click Remove for each of the pre-filled environment variables.
Add the S3 bucket and keys by using the Kubernetes secret.
Under Kubernetes Secrets, click Add.
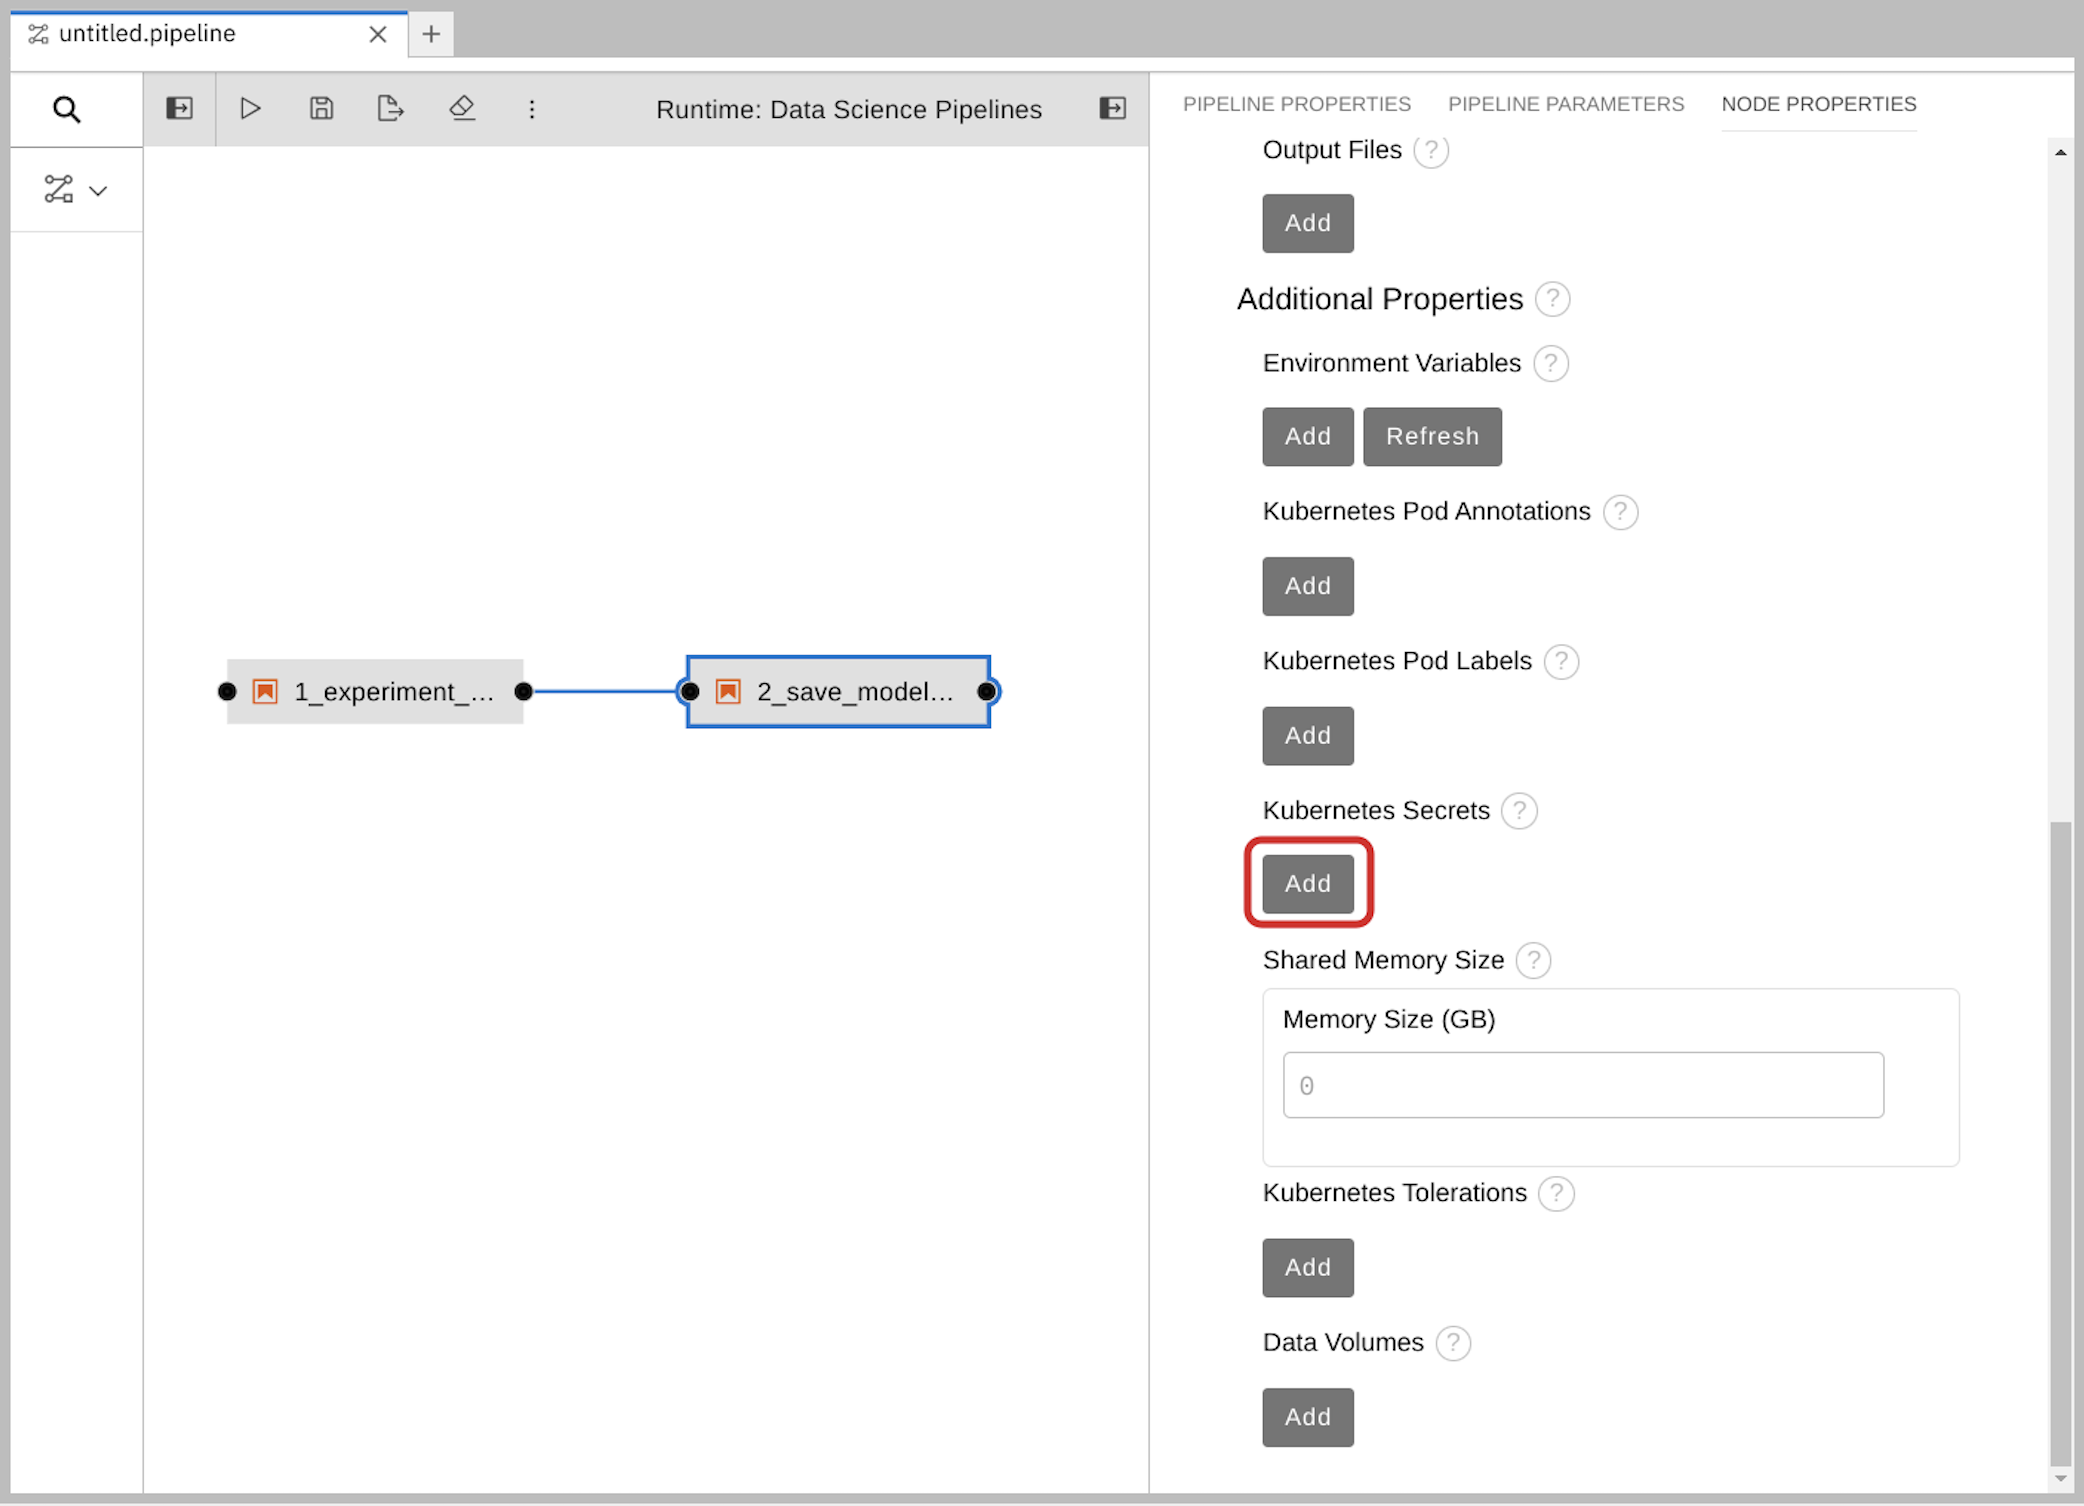
Enter the following values and then click Add.
-
Environment Variable:
AWS_ACCESS_KEY_ID -
Secret Name:
aws-connection-my-storage Secret Key:
AWS_ACCESS_KEY_ID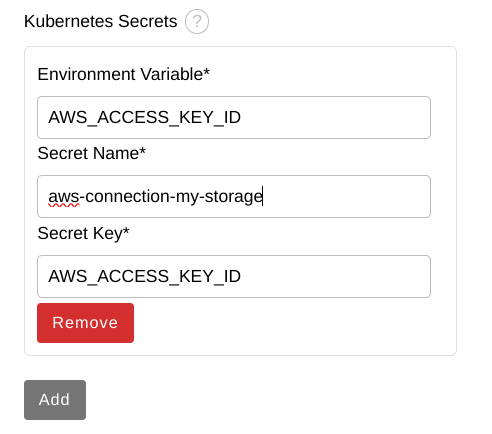
-
Environment Variable:
Repeat Steps 2a and 2b for each set of these Kubernetes secrets:
Environment Variable:
AWS_SECRET_ACCESS_KEY-
Secret Name:
aws-connection-my-storage -
Secret Key:
AWS_SECRET_ACCESS_KEY
-
Secret Name:
Environment Variable:
AWS_S3_ENDPOINT-
Secret Name:
aws-connection-my-storage -
Secret Key:
AWS_S3_ENDPOINT
-
Secret Name:
Environment Variable:
AWS_DEFAULT_REGION-
Secret Name:
aws-connection-my-storage -
Secret Key:
AWS_DEFAULT_REGION
-
Secret Name:
Environment Variable:
AWS_S3_BUCKET-
Secret Name:
aws-connection-my-storage -
Secret Key:
AWS_S3_BUCKET
-
Secret Name:
-
Save and Rename the
.pipelinefile.
5.1.6. Run the Pipeline
Upload the pipeline on your cluster and run it. You can do so directly from the pipeline editor. You can use your own newly created pipeline for this or 6 Train Save.pipeline.
Procedure
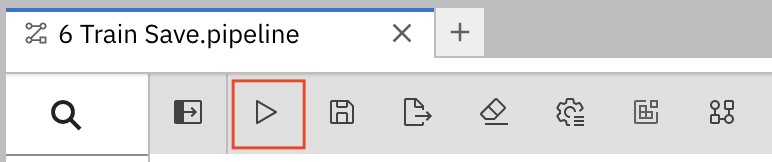
Click the play button in the toolbar of the pipeline editor.
- Enter a name for your pipeline.
-
Verify the Runtime Configuration: is set to
Data Science Pipeline. Click OK.
NoteIf
Data Science Pipelineis not available as a runtime configuration, you may have created your notebook before the pipeline server was available. You can restart your notebook after the pipeline server has been created in your data science project.Return to your data science project and expand the newly created pipeline.
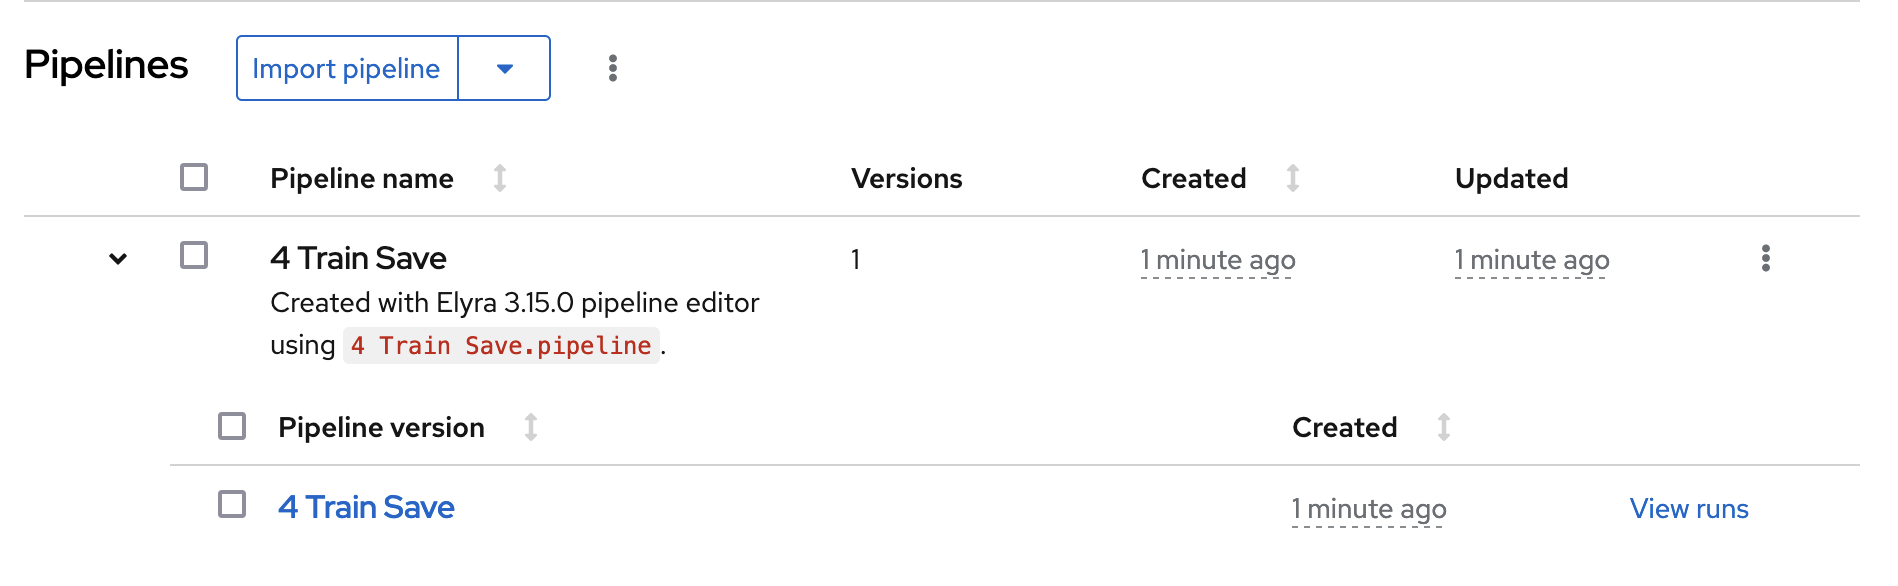
Click View runs and then view the pipeline run in progress.

The result should be a models/fraud/1/model.onnx file in your S3 bucket which you can serve, just like you did manually in the Preparing a model for deployment section.
Next step
5.2. Running a data science pipeline generated from Python code
In the previous section, you created a simple pipeline by using the GUI pipeline editor. It’s often desirable to create pipelines by using code that can be version-controlled and shared with others. The kfp SDK provides a Python API for creating pipelines. The SDK is available as a Python package that you can install by using the pip install kfp command. With this package, you can use Python code to create a pipeline and then compile it to YAML format. Then you can import the YAML code into OpenShift AI.
This tutorial does not delve into the details of how to use the SDK. Instead, it provides the files for you to view and upload.
Optionally, view the provided Python code in your Jupyter environment by navigating to the
fraud-detection-notebooksproject’spipelinedirectory. It contains the following files:-
7_get_data_train_upload.pyis the main pipeline code. -
get_data.py,train_model.py, andupload.pyare the three components of the pipeline. build.shis a script that builds the pipeline and creates the YAML file.For your convenience, the output of the
build.shscript is provided in the7_get_data_train_upload.yamlfile. The7_get_data_train_upload.yamloutput file is located in the top-levelfraud-detectiondirectory.
-
-
Right-click the
7_get_data_train_upload.yamlfile and then click Download. Upload the
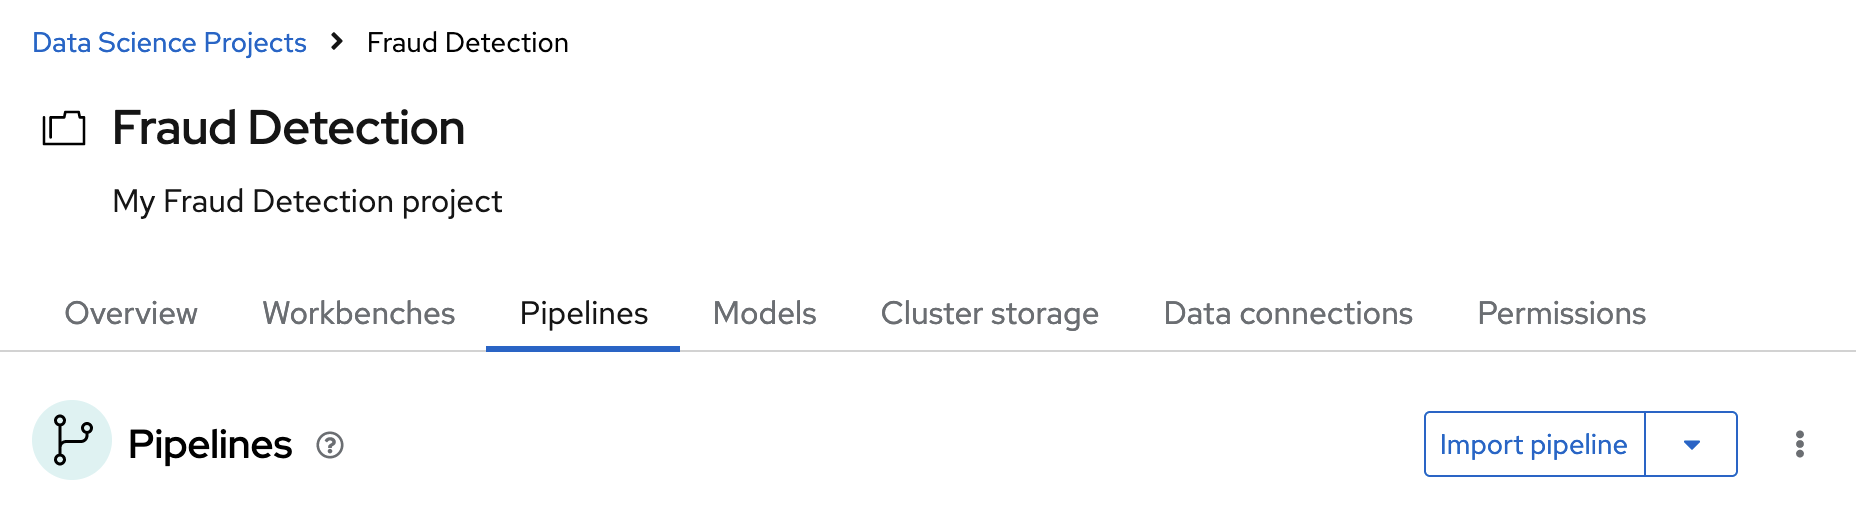
7_get_data_train_upload.yamlfile to OpenShift AI.In the OpenShift AI dashboard, navigate to your data science project page. Click the Pipelines tab and then click Import pipeline.
- Enter values for Pipeline name and Pipeline description.
Click Upload and then select
7_get_data_train_upload.yamlfrom your local files to upload the pipeline.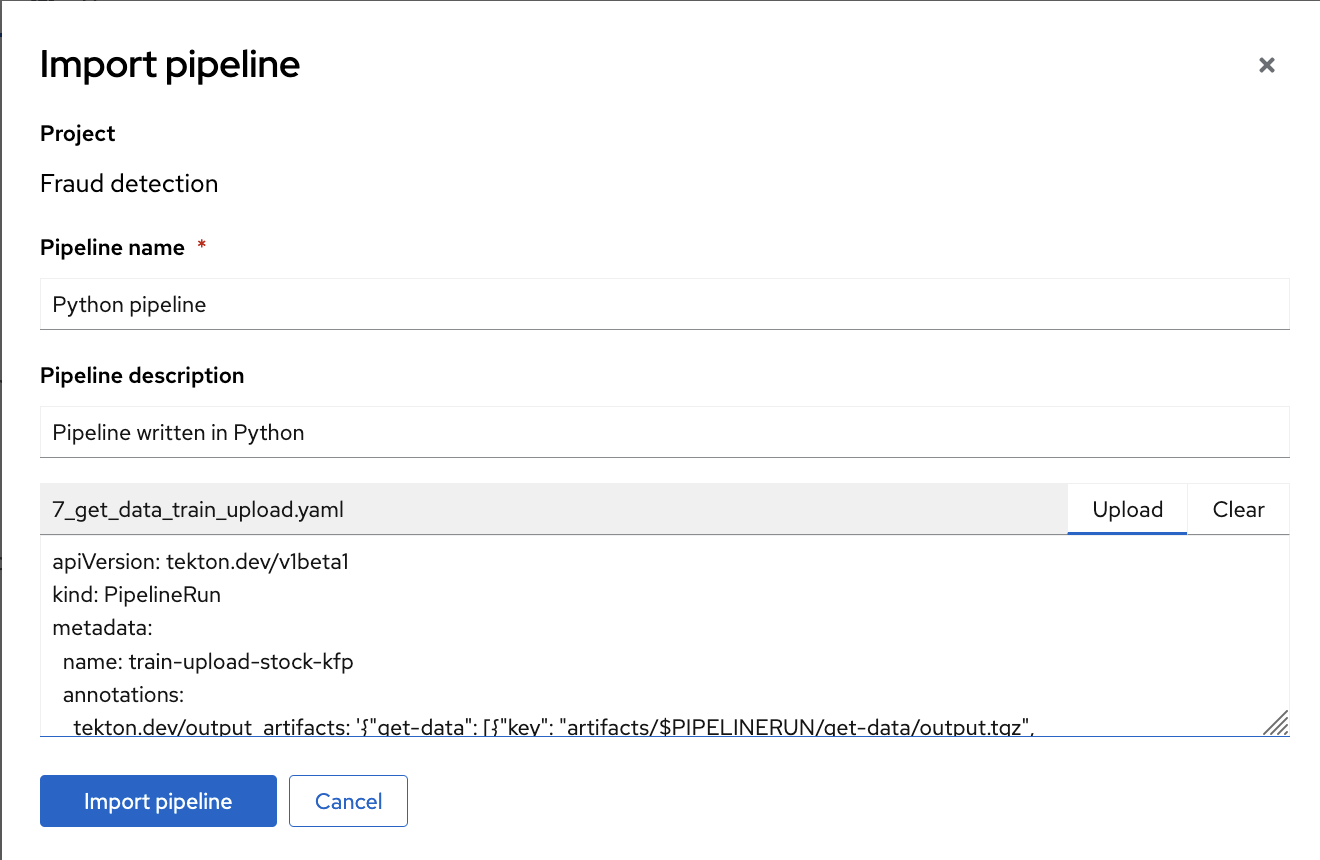
Click Import pipeline to import and save the pipeline.
The pipeline shows in the list of pipelines.
Expand the pipeline item, click the action menu (⋮), and then select View runs.

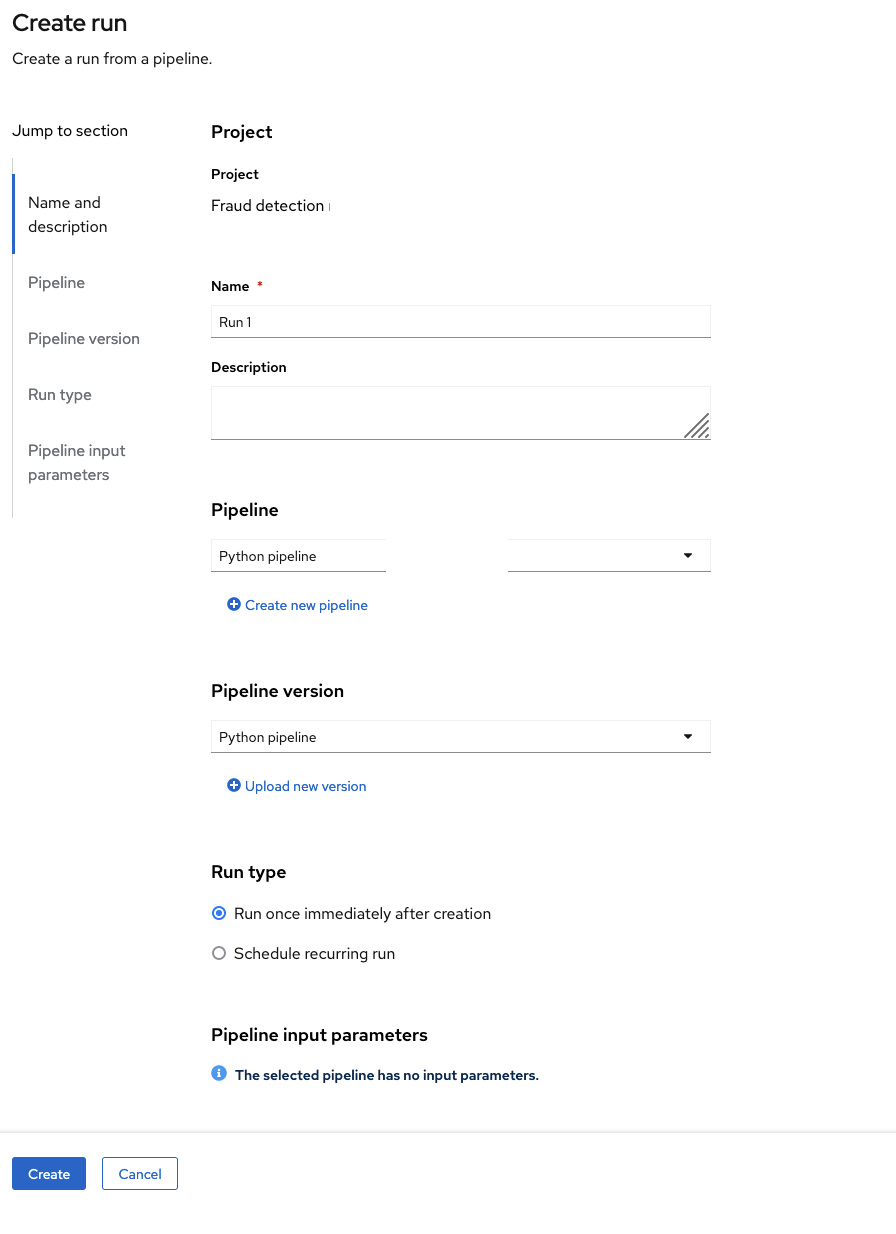
- Click Create run.
On the Create run page, provide the following values:
-
For Name, type any name, for example
Run 1. For Pipeline, select the pipeline that you uploaded.
You can leave the other fields with their default values.
-
For Name, type any name, for example
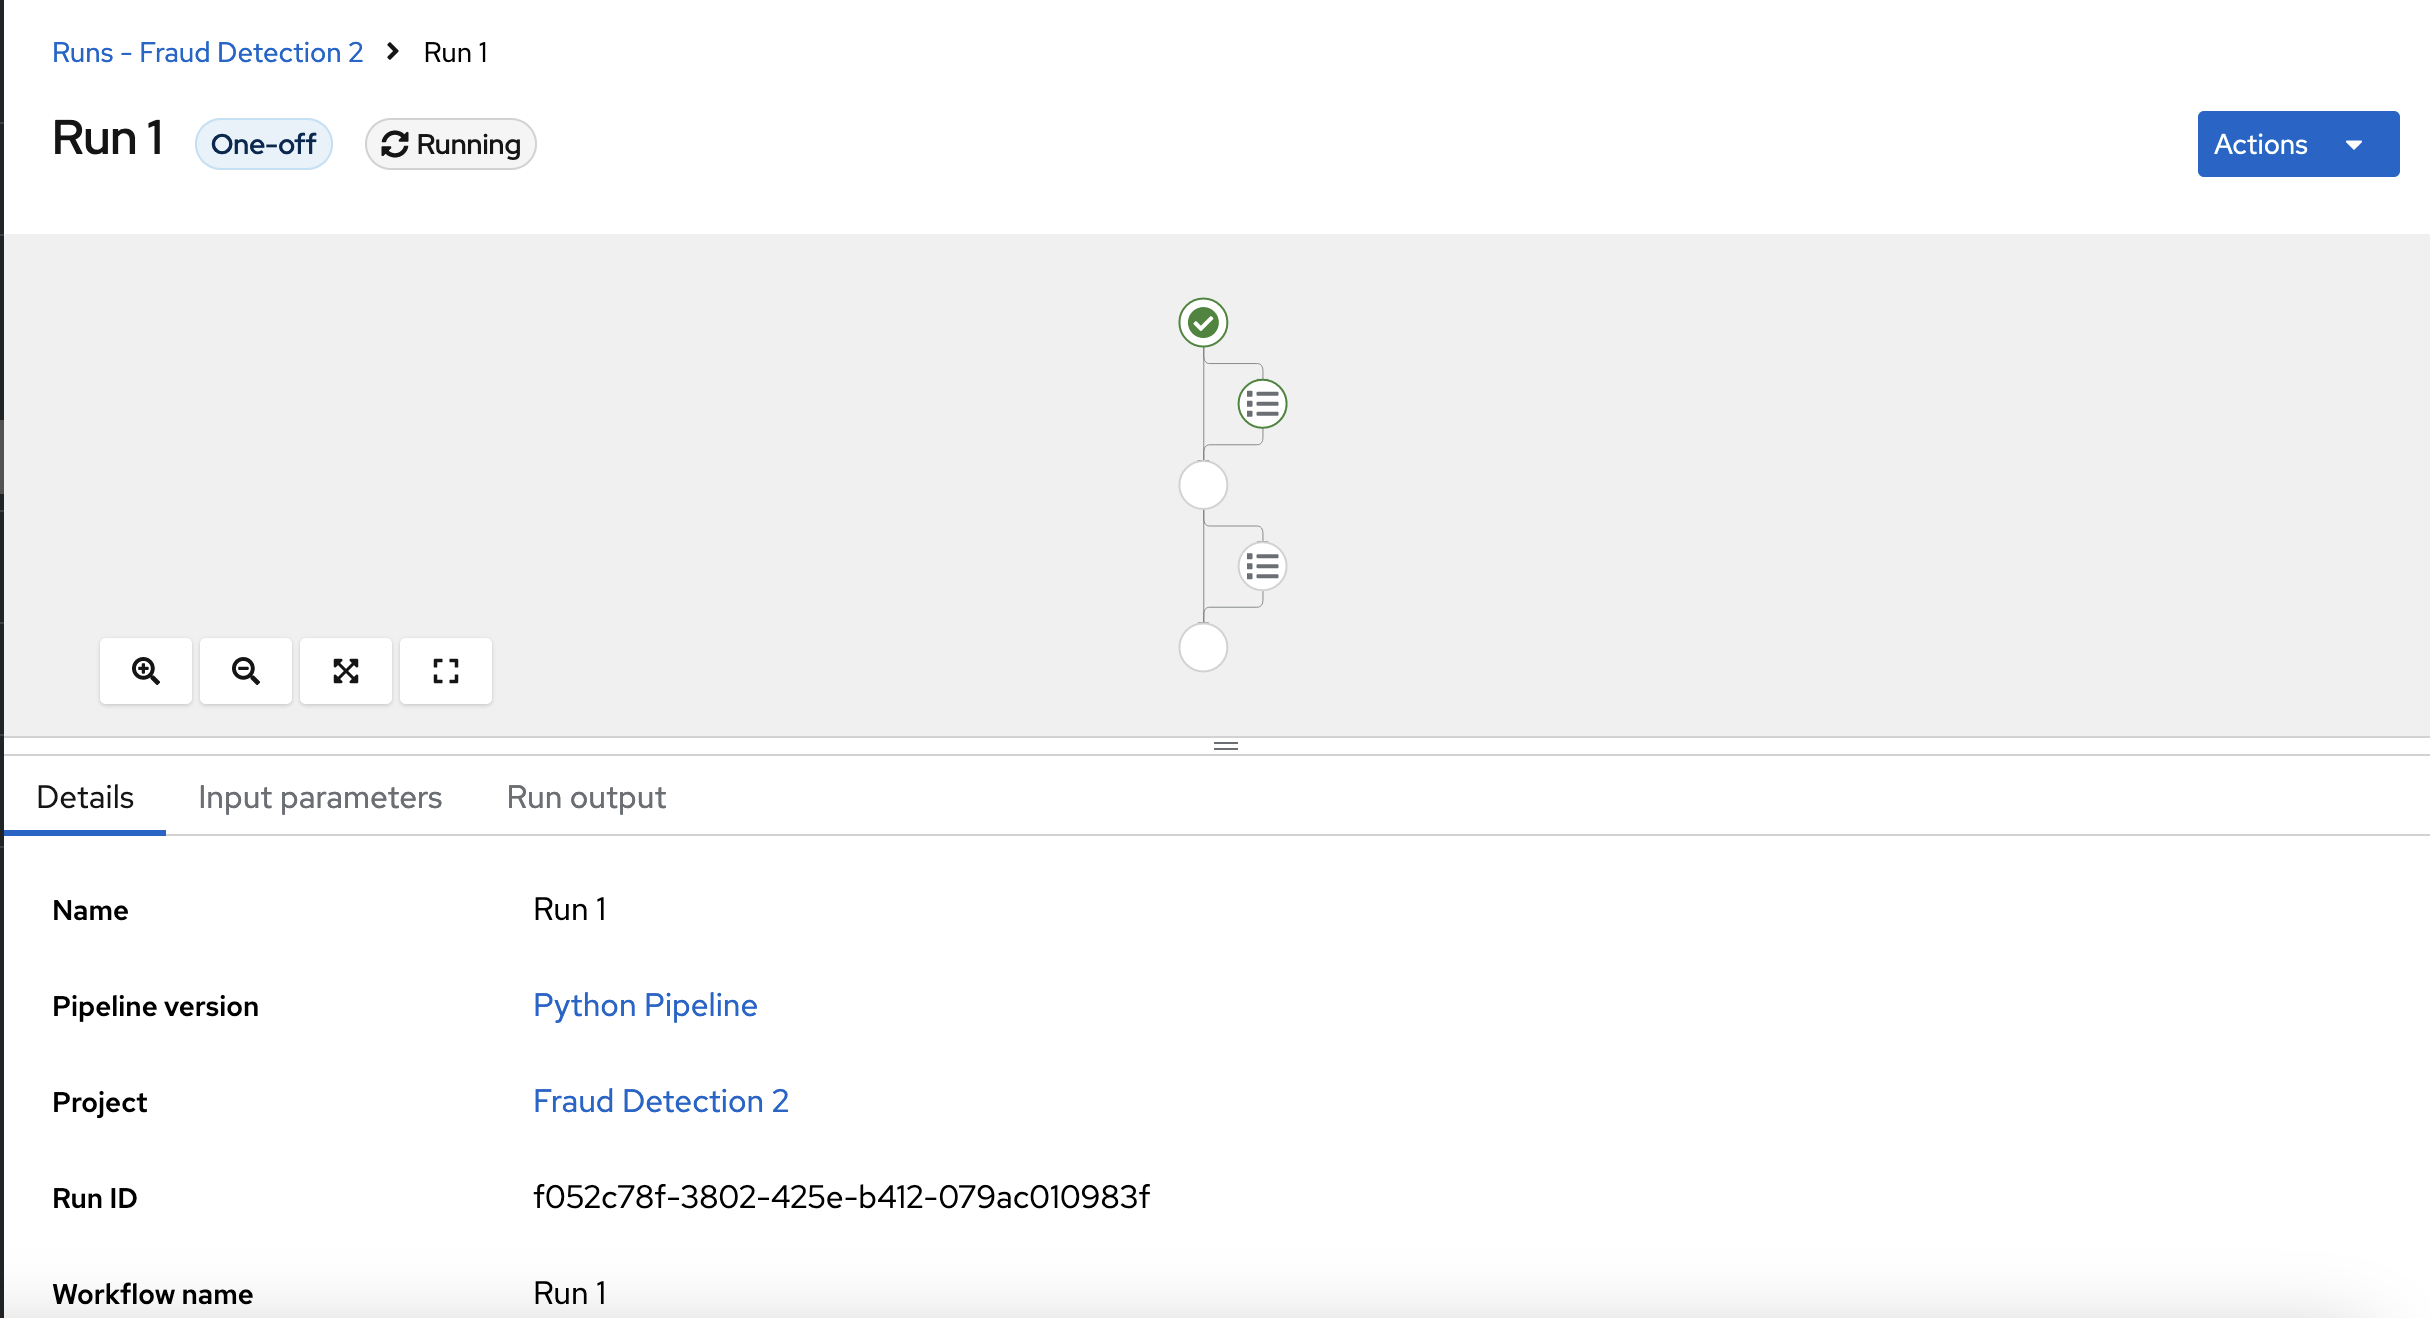
Click Create to create the run.
A new run starts immediately. The Details page shows a pipeline created in Python that is running in OpenShift AI.