Ce contenu n'est pas disponible dans la langue sélectionnée.
17.10. Creating a Virtual Network
To create a virtual network on your system using the Virtual Machine Manager (virt-manager):
- Open the Virtual Networks tab from within the Connection Details menu. Click the button, identified by a plus sign (+) icon. For more information, see Section 17.9, “Managing a Virtual Network”.
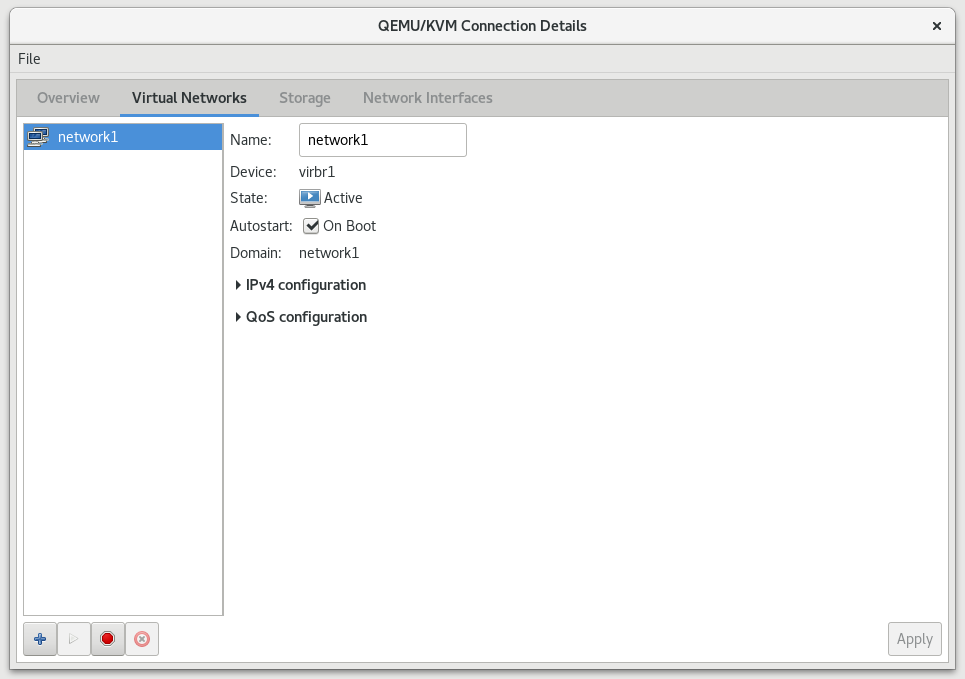
Figure 17.11. Virtual network configuration
This will open the window. Click to continue.
Figure 17.12. Naming your new virtual network
- Enter an appropriate name for your virtual network and click .
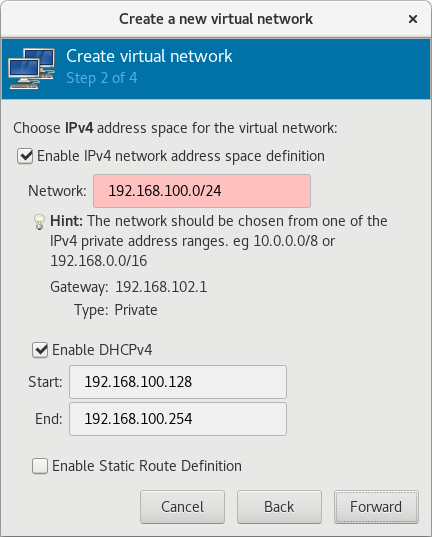
Figure 17.13. Choosing an IPv4 address space
- Check the Enable IPv4 network address space definition check box.Enter an IPv4 address space for your virtual network in the Network field.Check the Enable DHCPv4 check box.Define the DHCP range for your virtual network by specifying a Start and End range of IP addresses.

Figure 17.14. Choosing an IPv4 address space
Click to continue. - If you want to enable IPv6, check the Enable IPv6 network address space definition.

Figure 17.15. Enabling IPv6
Additional fields appear in the Create a new virtual network window.
Figure 17.16. Configuring IPv6
Enter an IPv6 address in the Network field. - If you want to enable DHCPv6, check the Enable DHCPv6 check box.Additional fields appear in the Create a new virtual network window.

Figure 17.17. Configuring DHCPv6
(Optional) Edit the start and end of the DHCPv6 range. - If you want to enable static route definitions, check the Enable Static Route Definition check box.Additional fields appear in the Create a new virtual network window.
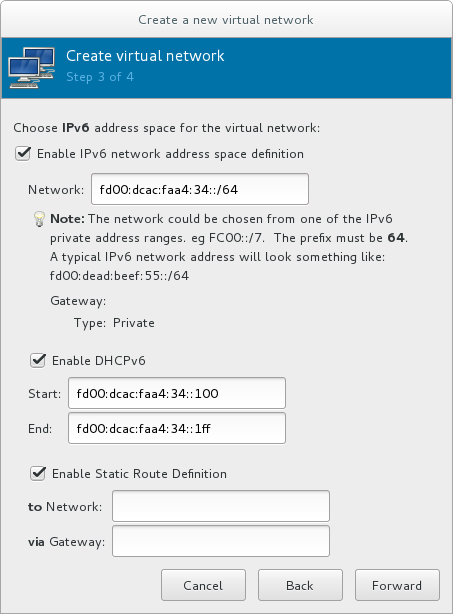
Figure 17.18. Defining static routes
Enter a network address and the gateway that will be used for the route to the network in the appropriate fields.Click . - Select how the virtual network should connect to the physical network.
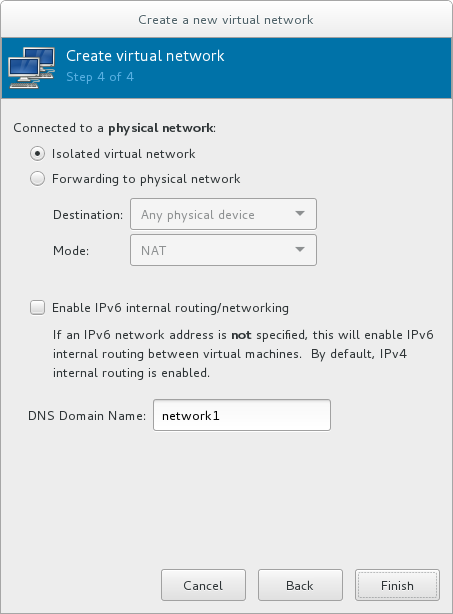
Figure 17.19. Connecting to the physical network
If you want the virtual network to be isolated, ensure that the Isolated virtual network radio button is selected.If you want the virtual network to connect to a physical network, select Forwarding to physical network, and choose whether the Destination should be Any physical device or a specific physical device. Also select whether the Mode should be NAT or Routed.If you want to enable IPv6 routing within the virtual network, check the Enable IPv6 internal routing/networking check box.Enter a DNS domain name for the virtual network.Click to create the virtual network. - The new virtual network is now available in the Virtual Networks tab of the Connection Details window.