Ce contenu n'est pas disponible dans la langue sélectionnée.
Chapter 4. Update code and view security insights
After successfully building your component with RHTAP, the next step is to make a code change and delve into the security insights.
4.1. Initiating code updates
With RHTAP, this process is straightforward.
- Select Catalog and then select an appropriate component for which you want to view security insights.
-
On the Overview tab, select View Source tab to see your project in GitLab or GitHub. Here, you can also select View Tech Docs to see your project’s documentation. The source of the documentation is the
docsdirectory in your repository. If you update these files and the pipeline runs successfully, your Tech Docs will update too.
4.2. Making changes to your code
With access to your repository, you’re ready to engage in the familiar process of working with a git repository. Here’s how to proceed:
- Clone your repository to start working on it either locally or in your development environment.
-
Modify your application, like updating technical docs or
index.html, or by adding new features or bug fixes. - Commit your changes.
- Push your changes to the repository.
- You can also use GitLab or GitHub UI, to directly update your code within the web interface.
- For GitLab users only: You have to set up webhooks and secrets in GitLab to automatically trigger pipeline run upon code updates. For information on setting up webhooks and secrets in GitLab, refer to Configuring GitLab Webhooks for automated pipeline triggers.
4.3. Viewing the pipeline run
To view the pipeline run after making changes to your code:
- Return to RHDH platform to see how your changes progressed.
- Navigate to the Catalog and select the specific component you just modified.
- Open the CI tab to access the pipeline run.
Beyond the pipeline run, RHDH offers valuable insights through other tabs:
- CD: Gain insights into deployments managed by ArgoCD and GitOps using the CD tab.
- Topology: Visualize your application’s deployment within the development namespace with the Topology tab.
4.4. View security insights
When you update your code and push the changes, the system triggers the on-push pipeline automatically. By default, RHTAP uses a standard build pipeline for quick, containerized deployment, enhancing supply chain security by meeting Software Artifacts (SLSA) level 3 specifications.
Figure 4.1. A successful pipeline run

This visual representation outlines each pipeline task. A green status indicates successful completion, streamlining your workflow without extensive oversight.
The initial build pipeline tasks comprise:
-
init: Initializes the pipeline, configuring rebuild flags and authentication, and generates an image repository secret for the PipelineRun. -
clone-repository: Clones the specified repository into the workspace, readying it for action with the git-clone Task. build-container: This task employs Buildah to convert source code into a container image, which is then pushed to a specified registry. Key actions and outcomes of this task include:- Container Image Creation and Deployment: Buildah compiles the source code into a container image. Upon successful creation, the image is pushed to the designated image registry.
- Software Bill of Materials (SBOM) Generation: As part of ensuring transparency and compliance, an SBOM is generated, detailing the components, libraries, and dependencies included in the container image. This SBOM is then embedded within the final container image for easy access and verification.
- SBOM Publishing: In addition to incorporating the SBOM into the container image, this task pushes the SBOM as an independent image using Cosign. This facilitates easier management and verification of the SBOM by security and compliance teams.
-
Artifact Creation: The task generates critical security artifacts, including the image signature (
.sig) and attestation (.att). These artifacts are essential for verifying the integrity and authenticity of the container image and its contents, providing a robust mechanism for trust and security verification within the deployment pipeline.
-
update-deployment: Updates the deployment environment with the newly built image. This update is performed in the GitOps repository in theOverlay>Developmentdirectory. -
acstasks: Conducts security assessments on the code and deployment configurations, ensuring compliance with established security policies and best practices. -
show-sbom: Creates a comprehensive list of all software components and libraries utilized in the application, improving transparency and supporting vulnerability management. -
summary: Provides a summary of the PipelineRun, includes PipelineRun information, and removes the image repository secret utilized by the PipelineRun.
You can click on any tasks within the pipeline run to access logs and additional details produced upon the successful completion of a task, indicated by a green check.
4.4.1. Red Hat Advanced Cluster Security tasks
RHTAP leverages Red Hat Advanced Cluster Security (RHACS) and its security checks within the pipeline. If RHACS is installed and configured, the pipeline runs the RHACS tasks (for example, roxctl image scan) and displays a green check upon completion. However, if RHACS is not installed or configured, pipeline skips the RHACS tasks.
- RHACS tasks in the pipeline succeed only if you already have installed and configured RHACS as part of the RHTAP installation process. For detailed instructions on installing RHACS, refer Installing Red Hat Red Hat Advanced Cluster Security for Kubernetes.
- If you did not install and configure RHACS during the RHTAP installation process, refer Configure ACS.
Figure 4.2. The RHACS tasks in the pipeline run
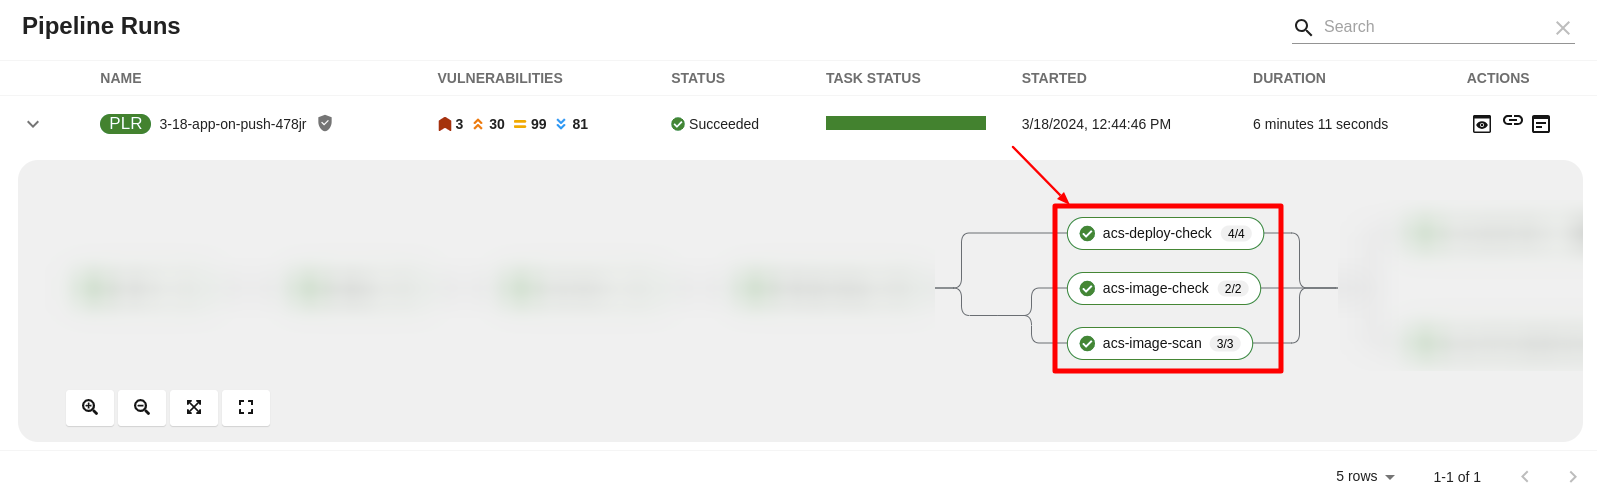
The pipeline incorporates three RHACS tasks using roxctl to perform comprehensive security checks:
-
roxctl image scan- Returns the components and vulnerabilities found in the image in JSON format. -
roxctl image check- Checks the build-time violations of your security policies in the image. For example, 'No log4j allowed' or perhaps no curl, wget nor a package manager in a production image. -
roxctl deployment check- Checks the build-time and deploy-time violations of your security policies in YAML deployment files.
These tasks ensure adherence to security policies and configurations right from the development stage.
Visualizing RHACS reports
In Red Hat Developer Hub, under the CI tab, the Pipeline Runs section offers a feature to access and interpret detailed task reports through a structured pop-up interface. The pop-up consists of the following sections:
- Red Hat Advanced Cluster Security (conditionally shown on the availability of RHACS tasks): This section displays the individual tabs all the RHACS tasks, for example, Image scan, Image check, and Deployment check, and offers an initial summary of the security issues.
-
Others: This section displays the results of a
PipelineRun, for example, IMAGE_URL, andIMAGE_DIGEST. This section displays only when there is more than one section (for example, Enterprise Contract or {RHRHACSLongName}) available in the pop-up.
To view RHACS reports:
- Select Catalog and open an appropriate component for which you want to review the RHACS reports
Select the CI tab > Actions column > View output icon and review the detailed RHACS reports in the software components.
Figure 4.3. The detailed RHACS reports

If you have appropriate permissions, you can manage vulnerabilities, policies, and review detailed vulnerability reports for a specific image by navigating to your RHACS console. For more information, refer Viewing the dashboard.
Interpreting RHACS reports
The detailed reports generated by Red Hat Advanced Cluster Security (RHACS) tasks are instrumental in providing security insights crucial for maintaining a robust security posture.
Here’s an example of how to interpret roxctl image scan (Image Scan) reports. You can apply a similar approach to interpret reports from roxctl image check (Image Check) and roxctl deployment check (Deployment Check).
- Vulnerability Breakdown: RHACS categorize detected vulnerabilities by severity (Critical, Important, Moderate, Low), status (fixable, non-fixable), and offer a summary of the scan results. This categorization includes the total number of vulnerabilities and components analyzed, alongside specific Common Vulnerabilities and Exposures (CVEs) identified.
Details Provided: For each identified vulnerability, the report includes:
- CVE ID: A unique identifier for the vulnerability.
- Severity: The level of threat posed by the vulnerability.
- Component: The software component affected by the vulnerability.
- Component Version: The version of the affected component.
- Remediation Suggestions: Recommendations for addressing the vulnerability, including the version in which the vulnerability is fixed, if applicable.
4.4.2. Understanding SBOM
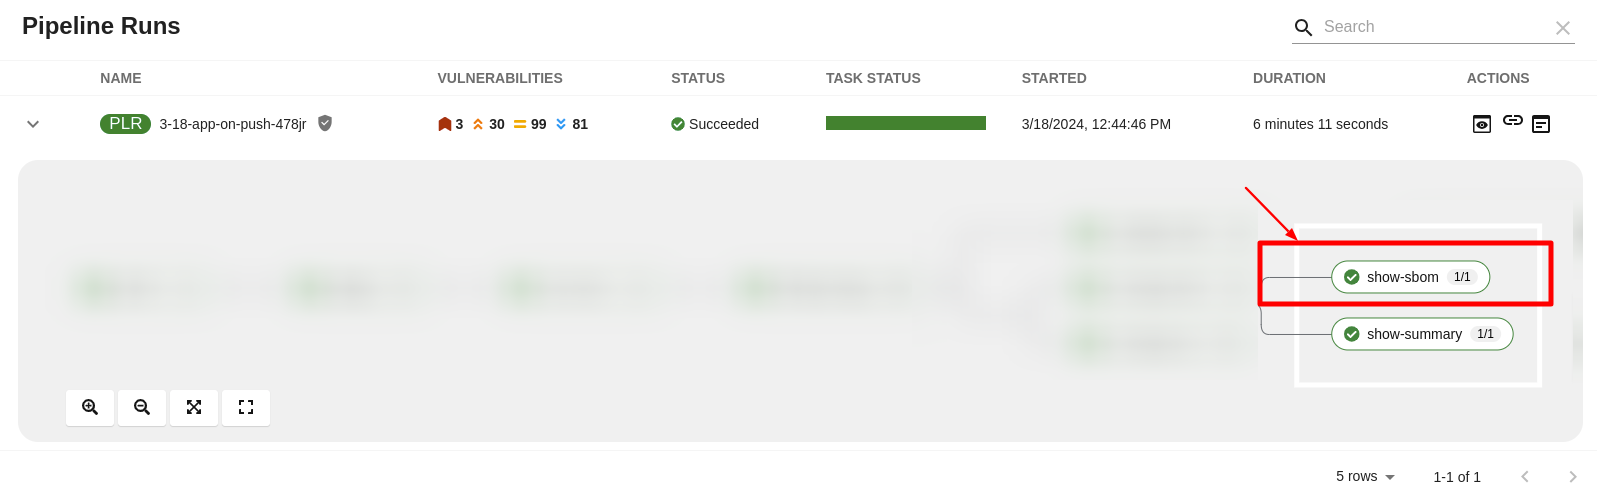
The show-sbom task contributes to software supply chain transparency by listing all software libraries a component uses, facilitating the identification of vulnerabilities and assessment of security impacts.
Figure 4.4. The show-sbom task in the pipeline run
Viewing SBOM
Procedures
- Select Catalog and open an appropriate component for which you want to view SBOM.
Select the CI tab and then select the link icon. The system displays the SBOM task logs and you can use your web browser to immediately search the SBOM for terms that indicate vulnerabilities in your software supply chain. For example, try searching for
log4j.Figure 4.5. The SBOM details

Downloading an SBOM in the CLI
Prerequisites
- You have installed the Cosign CLI tool.
-
The
build-containerandshow-sbomtasks ran successfully.
Procedures
-
Expand an appropriate successful pipeline run and select the
show-summarytask. Find and copy the SBOM image URL, and run the following command on your terminal.
Example cosign command
$ cosign download sbom <the-sbom-url-you-copied>
(Optional) To view the full SBOM in a searchable format, run the following command to redirect the output:
Example cosign command
$ cosign download sbom <the-sbom-url-you-copied> > sbom.txt
Reading the SBOM
In the SBOM, as the following sample excerpt shows, you can see four characteristics of each library that a project uses:
- Its author or publisher
- Its name
- Its version
- Its licenses
This information helps you verify that individual libraries are safely-sourced, updated, and compliant.
Example SBOM
{
    "bomFormat": "CycloneDX",
    "specVersion": "1.4",
    "serialNumber": "urn:uuid:89146fc4-342f-496b-9cc9-07a6a1554220",
    "version": 1,
    "metadata": {
        ...
    },
    "components": [
        {
            "bom-ref": "pkg:pypi/flask@2.1.0?package-id=d6ad7ed5aac04a8",
            "type": "library",
            "author": "Armin Ronacher <armin.ronacher@active-4.com>",
            "name": "Flask",
            "version": "2.1.0",
            "licenses": [
                {
                    "license": {
                        "id": "BSD-3-Clause"
                    }
                }
            ],
            "cpe": "cpe:2.3:a:armin-ronacher:python-Flask:2.1.0:*:*:*:*:*:*:*",
            "purl": "pkg:pypi/Flask@2.1.0",
            "properties": [
                {
                    "name": "syft:package:foundBy",
                    "value": "python-package-cataloger"
                    ...