このコンテンツは選択した言語では利用できません。
Chapter 3. Using Cockpit
3.1. Getting to know the Cockpit interface
Once you have logged in, you will see the tabs for the Dashboard and the individual machines added to Cockpit.
Dashboard: Shows a list of all systems added to the Cockpit server with graphs for CPU usage, memory usage, disk I/O, and network traffic.
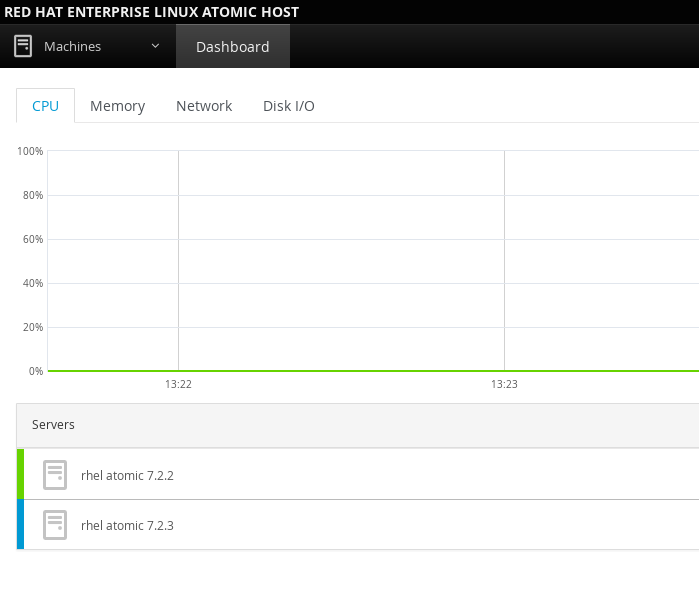
You can then select a system name, in this case "rhel atomic 7.2.3", and have a look at the side menu:
System: Shows information about the system that Cockpit is running on. This includes CPU usage, memory usage, disk I/O, and network traffic, as well as hardware and operating system details.

Services: Shows the systemd services running on the Cockpit server. You can see which are active/enabled or inactive. You can also see other systemd features: Targets, sockets, timers, and paths.
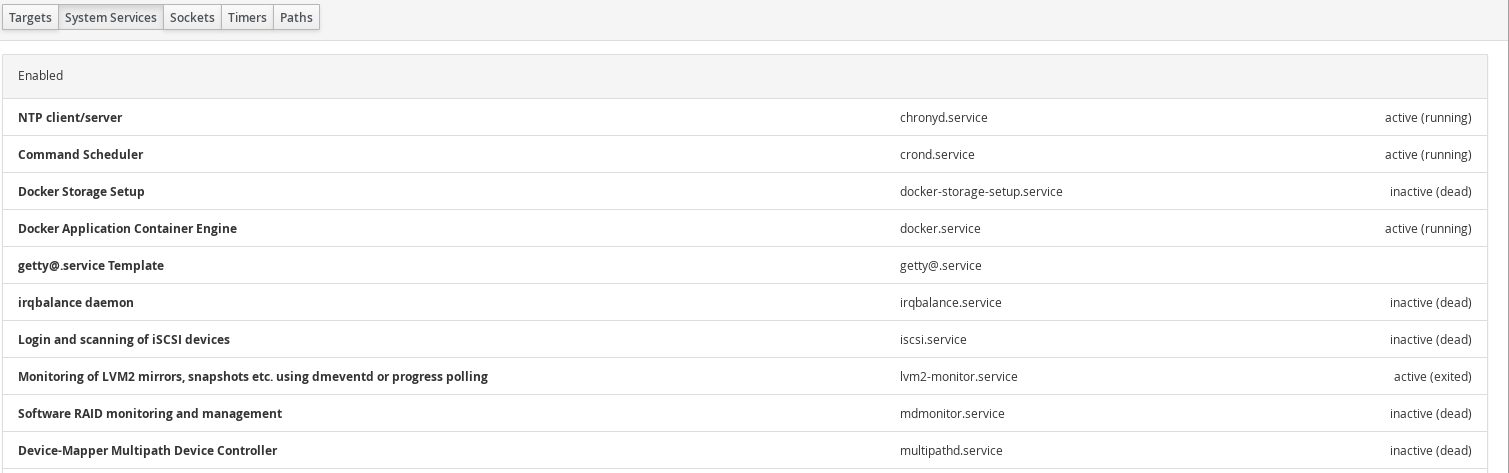
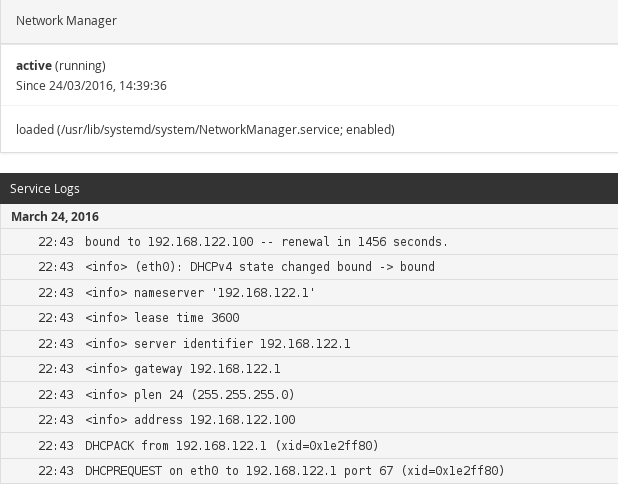
Select a service to view its details:
Containers: Lists all images available on the system, all running and non-running containers, combined CPU & memory usage graphs, and a storage usage bar.

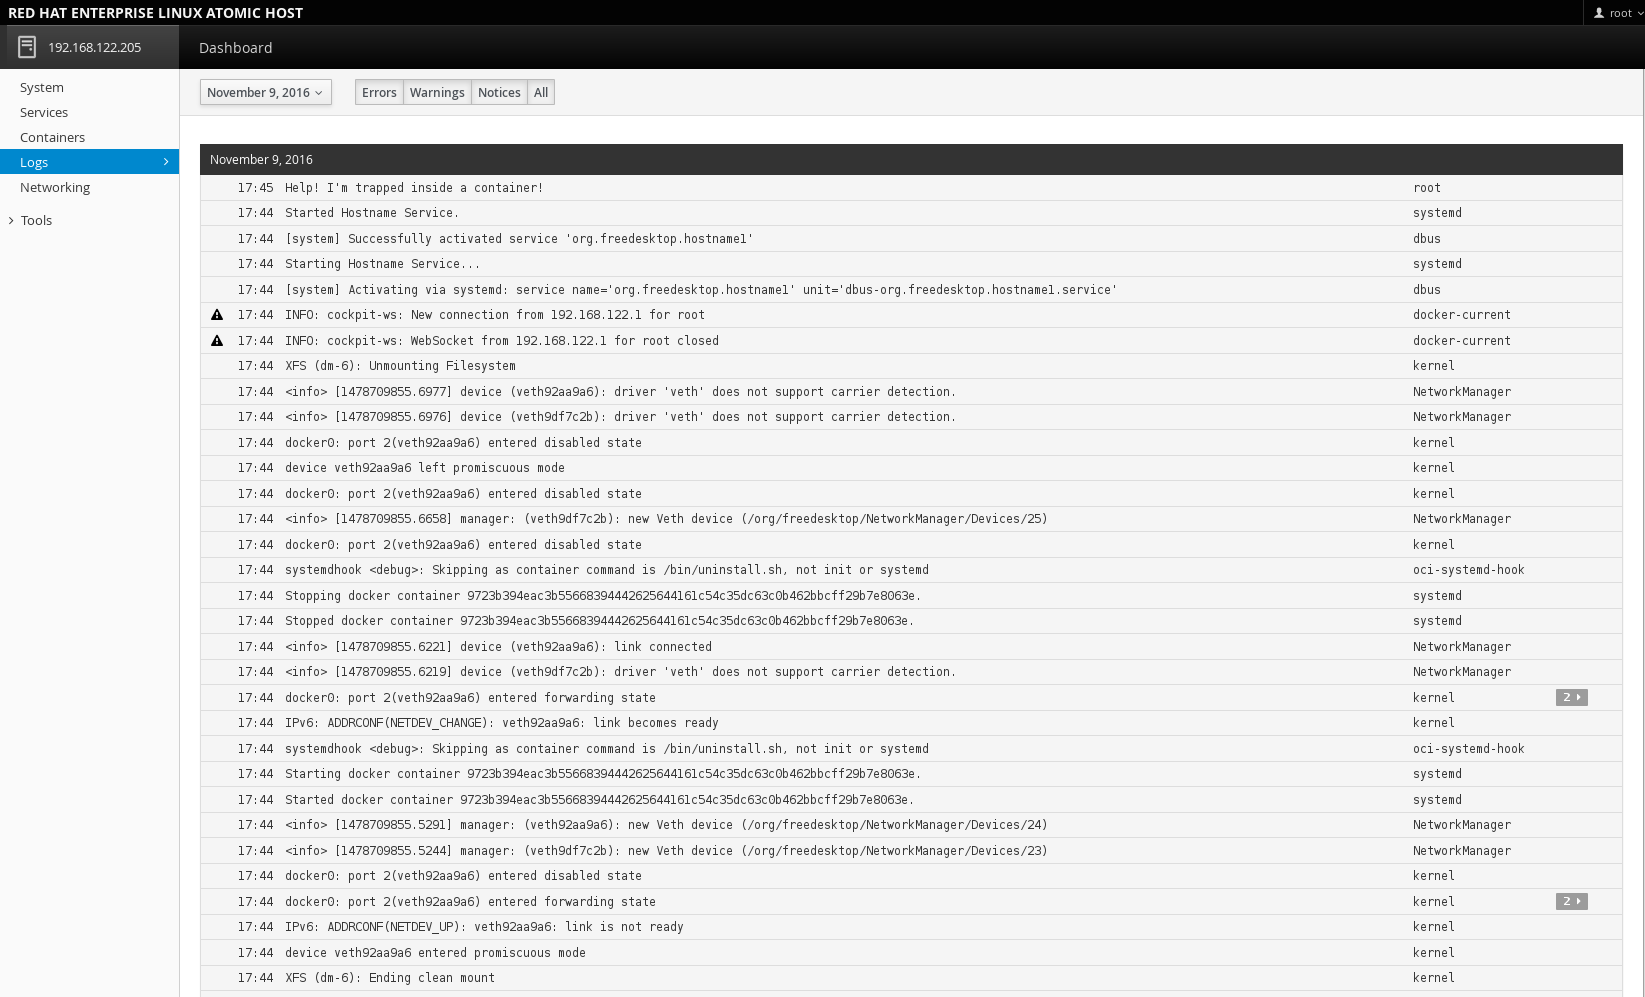
Logs: See messages produced by the systemd journal. These are errors, warnings, and notices that are generated by systemd services and gathered by the journal (like the output of the journalctl command). Errors are listed by the date they occurred. You can also view warnings, notices, or all messages.
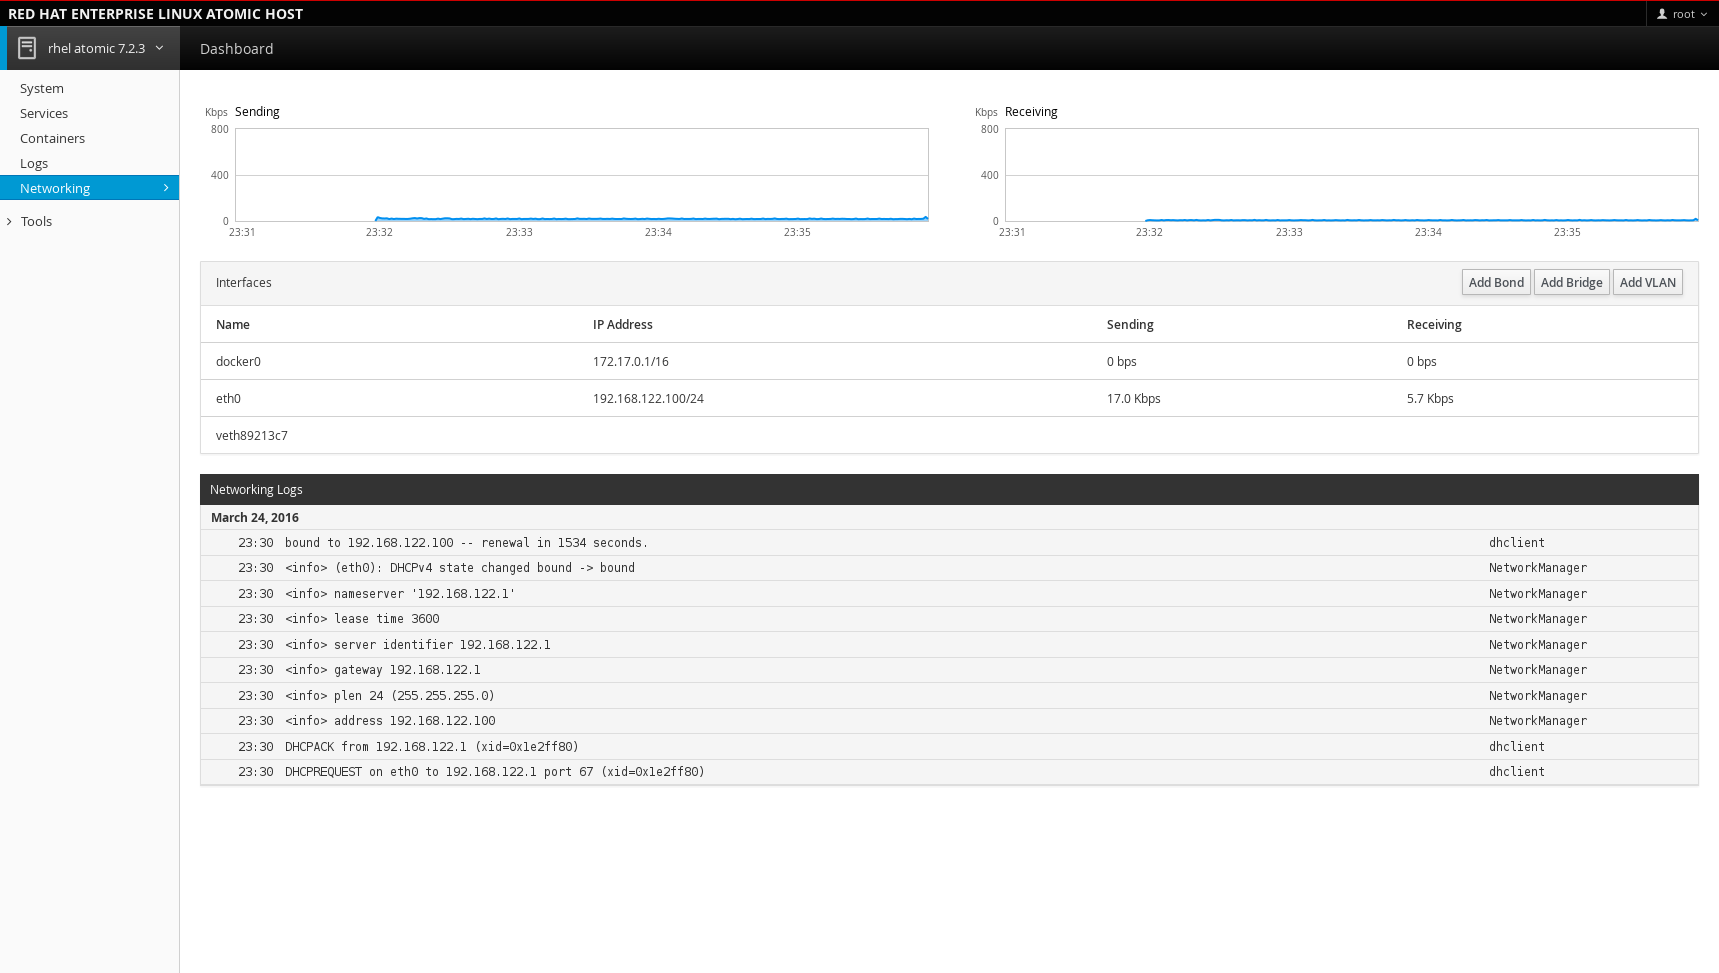
Networking: See networking interfaces (eth0, docker0, etc.) as well as the amount of data being sent and received.
Tools: View other system information:
- Subscriptions: Displays what Red Hat products are installed and subscribed.

- Accounts: Shows which administrative (root) and other users (atomic_user1, atomic_user2) have accounts on the system.

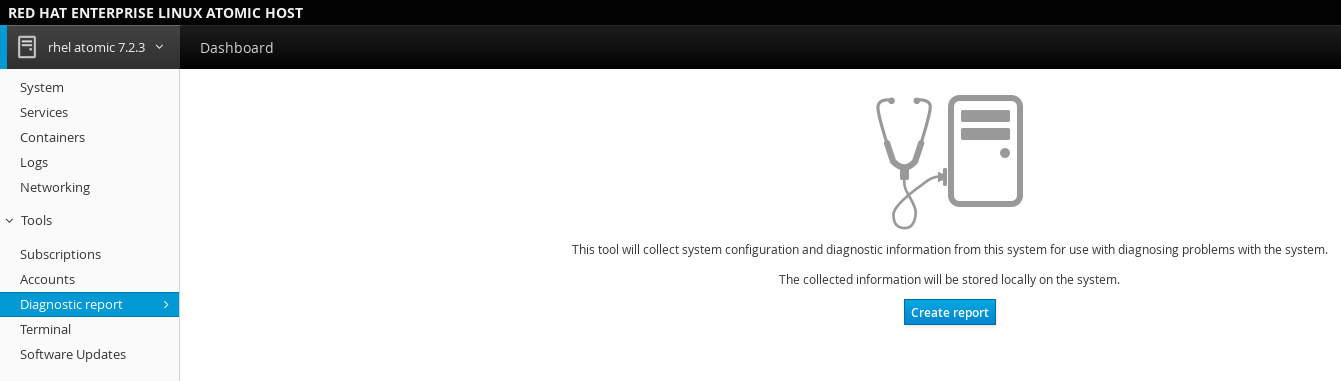
- Diagnostic report: Collects system configuration and diagnostics information and prepares a report in an XZ format.
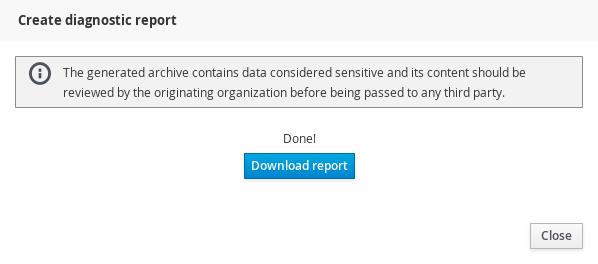
You can then download the report locally on your system:
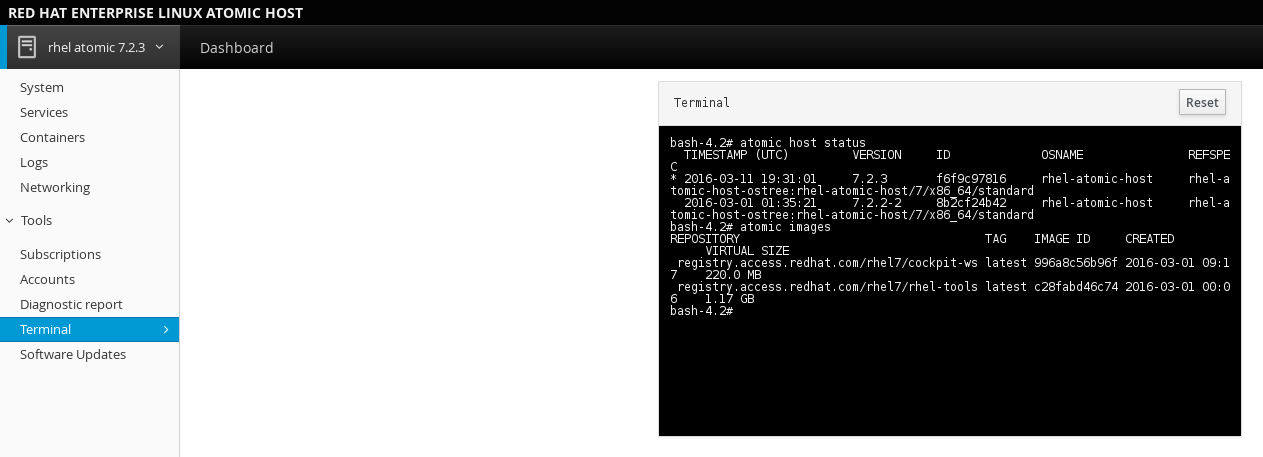
- Terminal: Opens a Terminal (command line) session to the Cockpit system. From there, you can run any commands available to the user you are logged in as. For example, as root, you could run docker or kubectl commands.
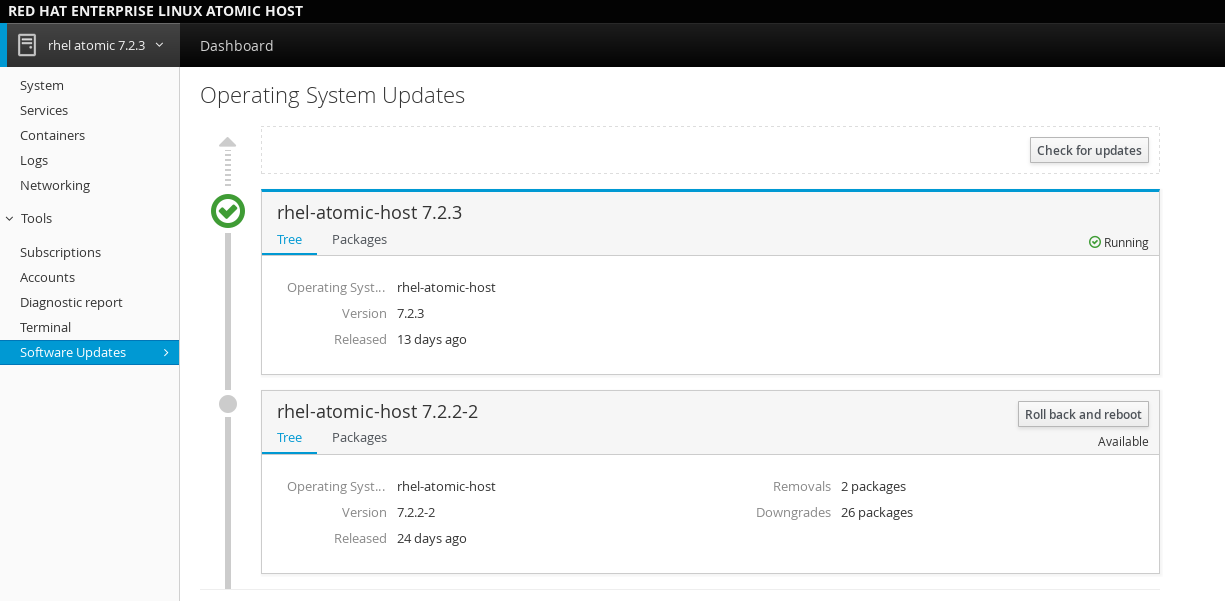
- Software Updates: Shows the available OSTrees on the system. You can also check for a newer tree, or rollback to a previous version.
3.1.1. Adding another system to monitor
Once you log in to the primary server, you will be able to connect to additional servers. These secondary systems need to have:
- The Cockpit packages installed.
- An SSH server running and available on port 22 that supports password or key-based authentication.
The cockpit-ws component is not necessary on these additional systems.
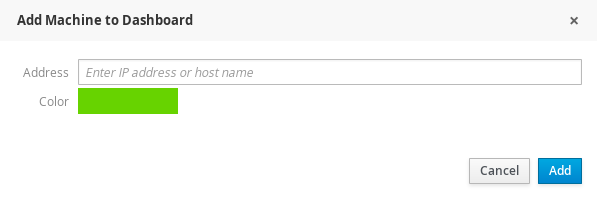
From the "Dashboard" tab next to the system name, choose the "plus" button to add a new host. You can then add the IP of the secondary machine and choose which color will represent it in the user interface.
Select the user name and type in the password:

Configuring Key-Based Authentication
If you have keys generated on the primary server, you need to add them to the target server, in the ~/.ssh/authorized_keys file. If you do not have keys, use the following command:
$ ssh-keygen
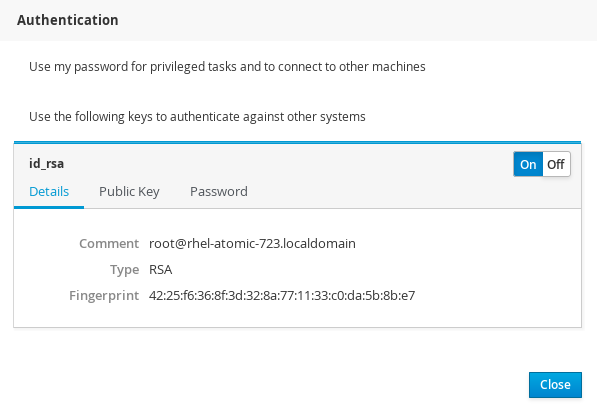
Next, copy the contents of the ~/.ssh/id_rsa.pub file to the ~/.ssh/authorized_keys file on the target server. Then, return to the user interface on the primary server, click the top right corner menu with the user name on it, choose Authentication, and enable the preloaded key.
After you type in the IP when adding the new system to the Dashboard, change the Authentication type to Use available credentials.
3.1.2. Logging to other systems through Cockpit
On the login screen, you can also choose an alternate host to connect to. Type in your username and password from that alternate host, then click Other Options, in the entry field type the IP address of the new host, and click Log In. You will be prompted for the SSH fingerprint, click Log In again, and you will be able to browse the new system. Cockpit uses SSH to authenticate you against that host, and you do not need to configure anything additionally on the new system. As a prerequisite, it will need to have SSH listening on port 443, and the cockpit-bridge package installed and the same version as in the Cockpit server.
As a prerequisite, it will need to have SSH listening on port 443, and the cockpit-bridge package installed and the same version as in the Cockpit server. If the new machine is not known to Cockpit, and you get the Refusing to connect. Host is unknown use the following command to allow connections from unknown hosts:
+
ssh-keyscan -H [ip_address] >> /var/lib/cockpit/known_hosts
3.2. Logging into a system via a Bastion Host
On the Cockpit login screen you can now choose an alternate host to connect to. Cockpit with use SSH to authenticate you against that host, and display the admin interface for that host.
Although browsers cannot use SSH directly to connect to machines or authenticate against them, Cockpit can make this happen. Only one host needs to have Cockpit listen on port 9090 available to browsers over TLS, and other hosts can only have SSH accessible on the usual port 22.
3.2.1. Working with containers
The Containers tab presents you with a UI to interact with your images and containers. Apart from the system resources graphs, there are lists of all images you have locally on the system as well as all running and non-running containers.
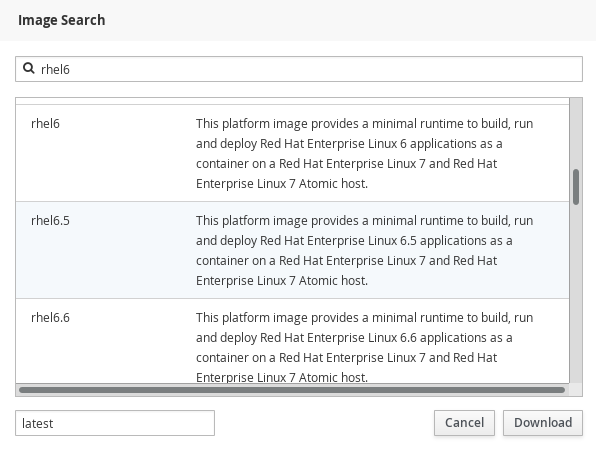
- Download an image. Click the "Get new image" button from the images list to the right and enter an image name or a keyword. Choose an image and click "Download".
- Starting and stopping containers. From the "Containers" list, you can start and stop containers using the buttons on the right-hand side. Use the drop-down menu to see all or filter out the non-running containers.

- Click on a container to inspect it. Shows the state, the command executed, the container’s and image’s IDs, a timestamp, as well as the container’s own terminal:

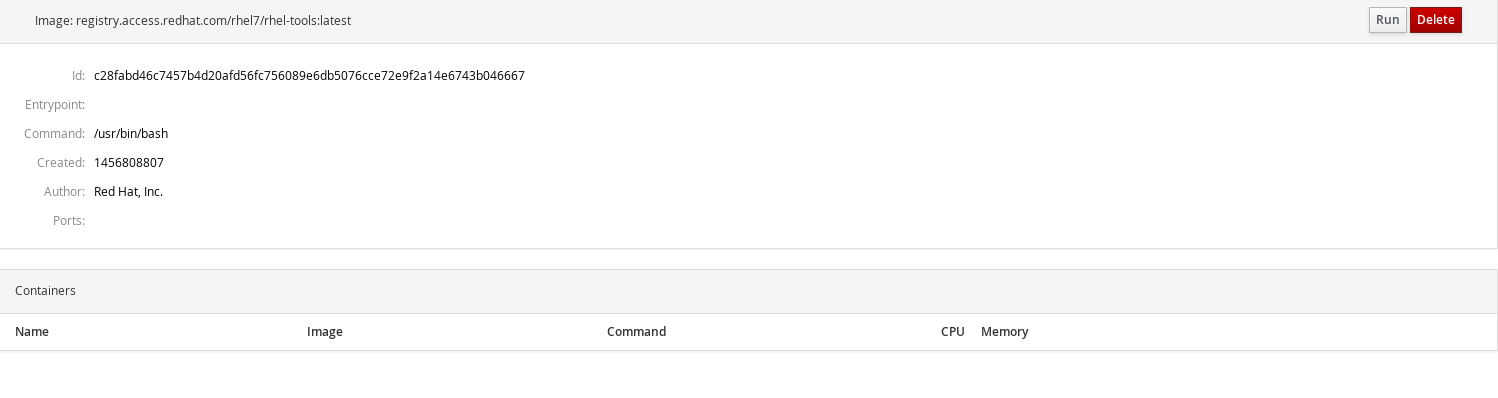
- Click on an image to inspect it. Shows the image’s ID, entrypoint and command, and a list of containers based on that image. You can also delete the image from here or run a container from it.
- Run a container. To run a container from an image, either click the triangle button from the right-hand side of the list or choose the image first and then click "Run" from the top right corner. A dialog is displayed where you can enter the required data for the new container:

You can select which command the container should run, and you can also link that container to other containers, which will allow them to interact. In addition, you can expose a port when you want a specific service to be visible from the host.
3.2.2. Changing the port
A. On Red Hat Enterprise Linux Atomic Host:
atomic run rhel7/cockpit-ws --port 9898
B: On Red Hat Enterprise Linux:
Create the /etc/systemd/system/websocket.cockpit.d/listen.conf file and, if needed, the preceding directories.
$ mkdir /etc/systemd/system/websocket.cockpit.d/
$ touch /etc/systemd/system/websocket.cockpit.d/listen.conf
The file should have the following content:
[Socket]
ListenStream=9898
Next, allow the new port through the firewall:
$ sudo firewall-cmd --add-port=9898/tcp
$ sudo firewall-cmd --permanent --add-port=9898/tcp
If you have SELinux enabled, change the default SELinux policy to allow the websm_port_t domain to listen on the TCP 9898 port:
$ sudo semanage port -a -t websm_port_t -p tcp 9898
If the port is already defined by some other part of the SELinux policy, use the -m argument instead of -a to modify the definition:
$ sudo semanage port -m -t websm_port_t -p tcp 9898
In order for the changes to take effect, run the following commands:
$ sudo systemctl daemon-reload
$ sudo systemctl restart cockpit.socket
You can now use the address with the newly assigned port in the web browser.
3.3. Enabling more features on Cockpit
You can add more features to Cockpit that are not in Atomic by default using package layering.