이 콘텐츠는 선택한 언어로 제공되지 않습니다.
Chapter 3. Inviting users and managing rights
The invite feature is only available for Pro and Enterprise customers.
In order to share the workload of administering your APIs, you may wish to invite team members from your organization to access the 3scale Admin Portal. The instructions below describe how to give access rights to the 3scale Admin Portal, to one or more team members.
With users, we refer to the members of your team. The 3scale Admin Portal has two types of users:
- Admins: Which have full access to all areas and services, and can invite other members (if your plan allows it).
- Members: Which have limited access to areas of the product (e.g. Analytics, Developer Portal) and, if you are an enterprise customer, also to services.
If you create a new 3scale user from a Single Sign-On (SSO) integration, this user has the member role by default, regardless of the SSO token content. 3scale does not map its roles to SSO roles.
3.2. Send an invitation
From the list of users, you can invite a new team member. To send the invitation:
- Click on the Invite user link, located on the upper-right side above the list.
- Enter the email address of the person you want to invite and click Send.
-
As a confirmation of the sending, on the upper-right corner of the window you will see a message:
Invitation was successfully sent..
An invitation email will be sent to the address you entered. If the email does not arrive, make sure it was not marked as spam in the recipient’s email account.
Additionally, you can find the list and status of sent invitations in Users > Invitations.
3.3. Accept the invitation
Your new administrator or member must click the link in the invitation email and complete the form to complete the process. Once the form is submitted, their account will be activated.
3.4. Give new users rights
There are two main type of rights you can give to members of your team:
- By area: Such as analytics, billing, or developer administration.
- By service: Choose which services to give access to members amongst all of your services. Note: This feature is only available for enterprise customers.
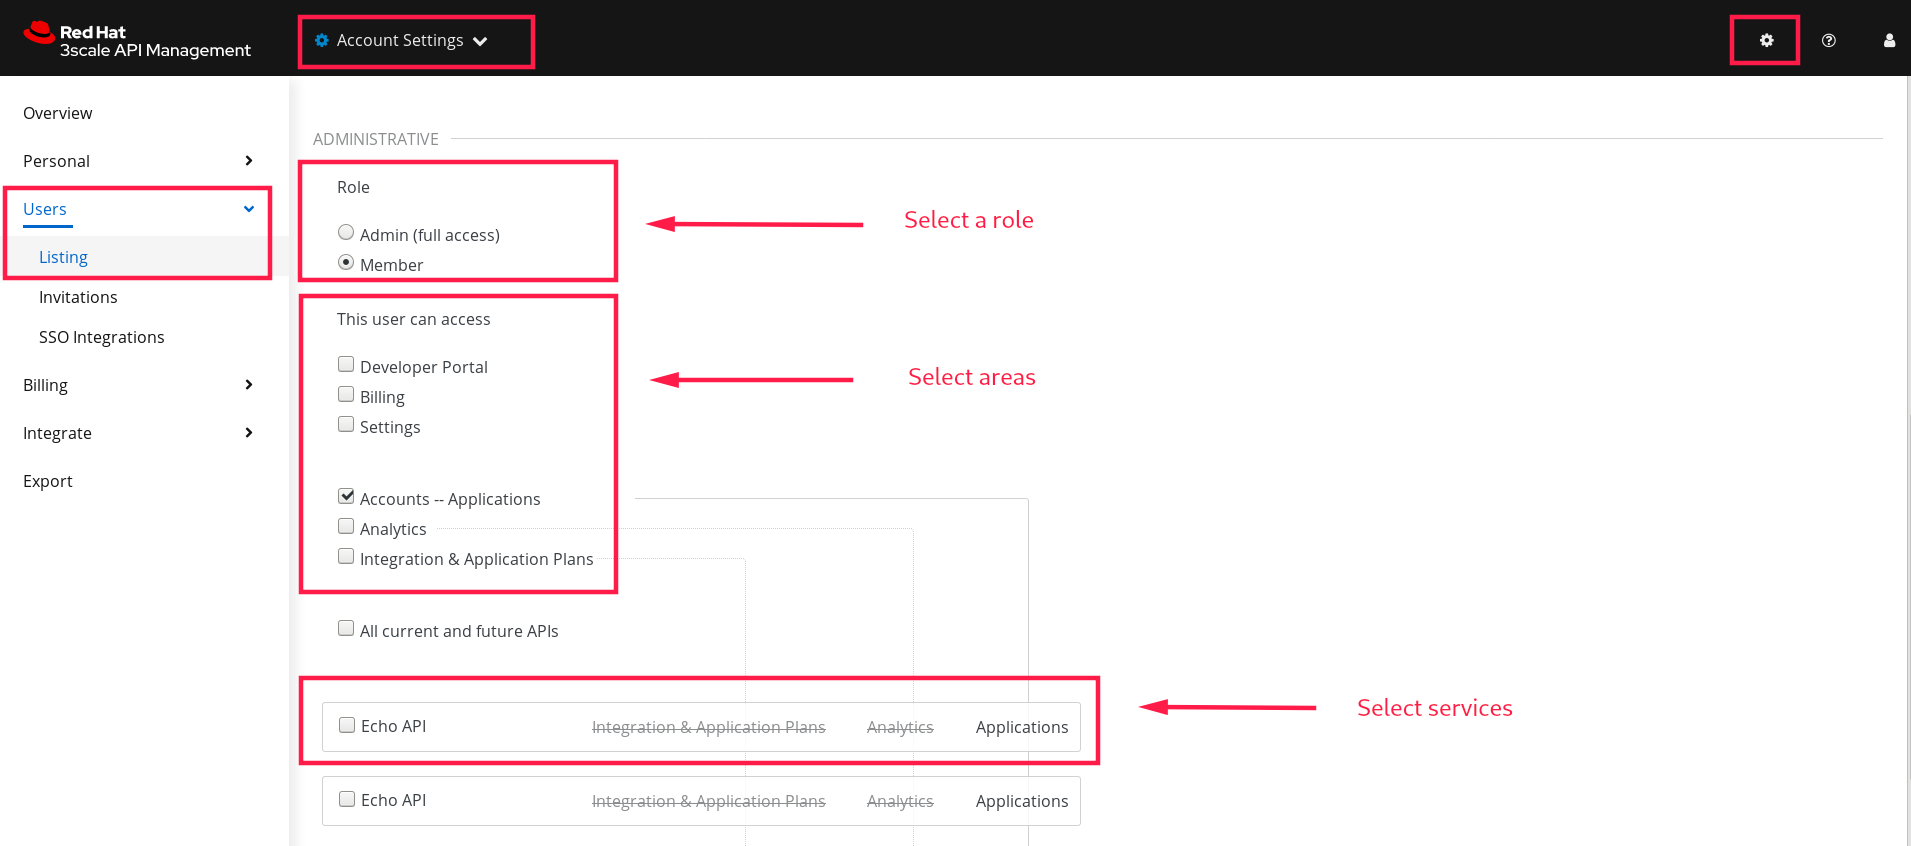
To give a new user rights, edit the new user by selecting them from the user menu and clicking on Edit. You have the following user roles:
- Changing their rights to Admin will give them full access to control the Admin Portal.
Changing their rights to Member will give you the option of choosing which areas and services the team member has access to.
- As Member, select an area to list all the available services related to said area.
Giving access to certain areas of the Admin Portal will give members access only to the equivalent API:
- Developer accounts — Applications: Gives access to the Account management API
- Analytics: Gives access to the Analytics API
- Billing: Gives access to the Billing API
