Este conteúdo não está disponível no idioma selecionado.
Chapter 6. Making temporary changes to the GRUB menu
You can modify GRUB menu entries or pass arguments to the kernel, which applies only to the current boot. On a selected menu entry in the boot loader menu, you can:
- Display the menu entry editor interface by pressing the e key.
- Discard any changes and reload the standard menu interface by pressing the Esc key.
- Load the command line by pressing the c key.
- Type any relevant GRUB commands and enter them by pressing the Enter key.
- Complete a command based on context by pressing the Tab key.
- Move to the beginning of a line by pressing the Ctrl+a key combination.
- Move to the end of a line by pressing the Ctrl+e key combination.
The following procedures provide instruction on making changes to a GRUB Menu during a single boot process.
6.1. Introduction to GRUB
You can use the GNU GRand Unified Bootloader (GRUB) to perform the following actions:
- Select an operating system or kernel to load at system boot time.
- Pass arguments to the kernel.
When booting with GRUB, you can use either a menu interface or a command-line interface, the GRUB command shell. When you start the system, the menu interface is displayed.

You can switch to the command line by pressing the c key.
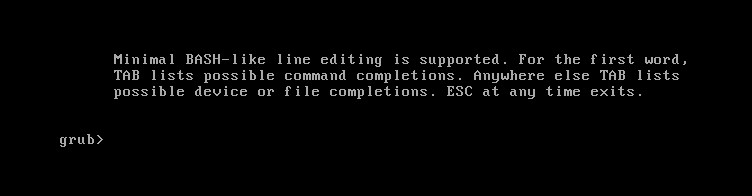
You can return to the menu interface by typing exit and pressing the Enter key.
GRUB BLS files
The boot loader menu entries are defined as Boot Loader Specification (BLS) files. This file format manages boot loader configuration for each boot option in a drop-in directory, without manipulating boot loader configuration files. The grubby utility can edit these BLS files.
GRUB configuration file
The /boot/grub2/grub.cfg configuration file does not define the menu entries.
6.3. Booting to rescue mode
Rescue mode offers a single-user environment for repairing systems that cannot boot normally. In this mode, the system attempts to mount local file systems and start essential services, but network interfaces remain inactive to ensure isolation during repairs.
Procedure
- On the GRUB boot screen, press the e key for edit.
Add the following parameter at the end of the
linuxline:systemd.unit=rescue.target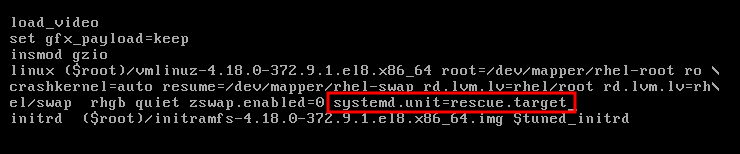
Press Ctrl+x to boot to rescue mode.

6.4. Booting to emergency mode
Emergency mode provides the most minimal environment possible in which you can repair your system even in situations when the system is unable to enter rescue mode.
In emergency mode, the system:
-
mounts the
rootfile system only for reading - starts a few essential services
However, the system does not:
- attempt to mount any other local file systems
- activate network interfaces
Procedure
- On the GRUB boot screen, press the e key for edit.
Add the following parameter at the end of the
linuxline:systemd.unit=emergency.target
Press Ctrl+x to boot to emergency mode.

6.5. Booting to the debug shell
The systemd debug shell provides a shell prompt very early in the start-up process. Once in the debug shell, you can use the systemctl commands, such as systemctl list-jobs and systemctl list-units, to search for the cause of systemd related boot-up problems.
Procedure
- On the GRUB boot screen, press the e key for edit.
Add the following parameter at the end of the
linuxline:systemd.debug-shell
Optional: Add the
debugoption.NoteAdding the
debugoption to the kernel command line increases the number of log messages. For systemd, the kernel command-line optiondebugis now a shortcut forsystemd.log_level=debug.- Press Ctrl+x to boot to the debug shell.
Permanently enabling the debug shell is a security risk because authentication is not required to use it. It is recommended to disable it when the debugging session has ended.
6.6. Connecting to the debug shell
During the boot process, the systemd-debug-generator configures the debug shell on TTY9.
Prerequisites
- You have booted to the debug shell successfully. See Booting to the debug shell.
Procedure
Press Ctrl+Alt+F9 to connect to the debug shell.
If you work with a virtual machine, sending this key combination requires support from the virtualization application. For example, if you use Virtual Machine Manager, select
from the menu. - The debug shell does not require authentication, therefore you can see a prompt similar to the following on TTY9:
sh-4.4#Verification
Enter a command as follows:
sh-4.4# systemctl status $$
- To return to the default shell, if the boot succeeded, press Ctrl+Alt+F1.
6.7. Resetting the root password using an installation disk
In case you forget or lose the root password, you can reset it.
Procedure
- Boot the host from an installation source.
In the boot menu for the installation media, select the
Troubleshootingoption.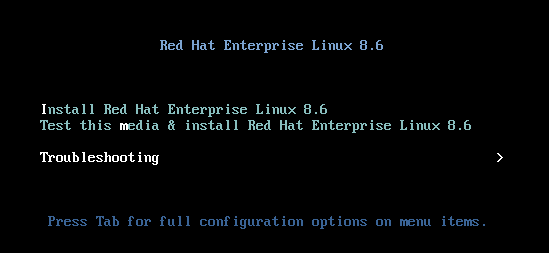
In the Troubleshooting menu, select the
Rescue a Red Hat Enterprise Linux systemoption.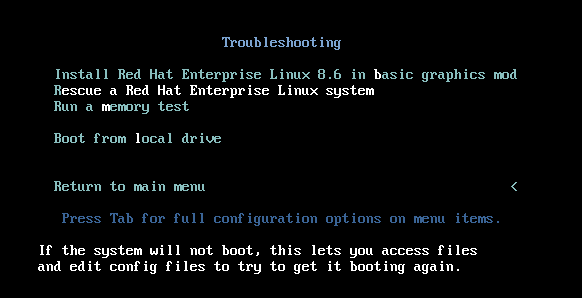
At the Rescue menu, select
1and press the Enter key to continue.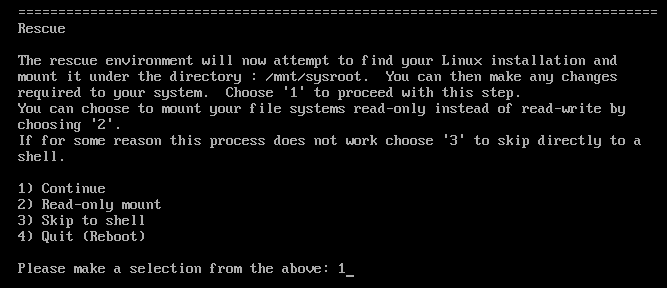
Change the file system
rootas follows:sh-4.4# chroot /mnt/sysimage
Enter the
passwdcommand and follow the instructions displayed on the command line to change therootpassword.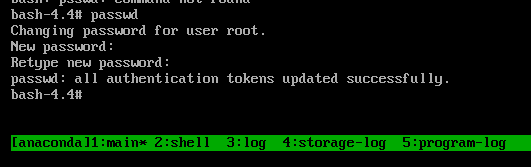
Remove the
autorelablefile to prevent a time consuming SELinux relabel of the disk:sh-4.4# rm -f /.autorelabel-
Enter the
exitcommand to exit thechrootenvironment. -
Enter the
exitcommand again to resume the initialization and finish the system boot.
6.8. Resetting the root password using rd.break
In case you forget or lose the root password, you can reset it.
Procedure
- Start the system and, on the GRUB boot screen, press the e key for edit.
Add the
rd.breakparameter at the end of thelinuxline: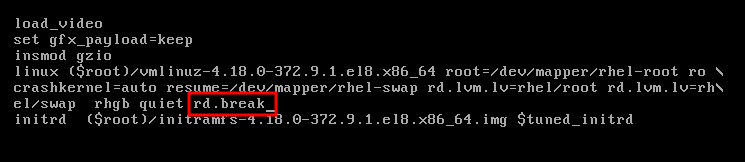
Press Ctrl+x to boot the system with the changed parameters.
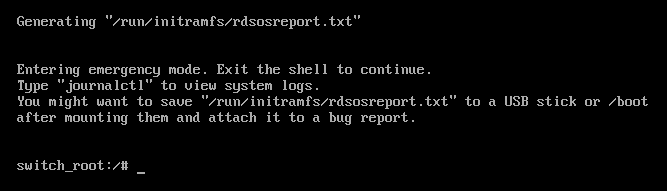
Remount the file system as writable.
switch_root:/# mount -o remount,rw /sysrootChange the file system’s
root.switch_root:/# chroot /sysrootEnter the
passwdcommand and follow the instructions displayed on the command line.
Relabel all files on the next system boot.
sh-4.4# touch /.autorelabelRemount the file system as read only:
sh-4.4# mount -o remount,ro /-
Enter the
exitcommand to exit thechrootenvironment. Enter the
exitcommand again to resume the initialization and finish the system boot.NoteThe SELinux relabeling process can take a long time. A system reboot occurs automatically when the process is complete.
You can omit the time consuming SELinux relabeling process by adding the enforcing=0 option.
Procedure
When adding the
rd.breakparameter at the end of thelinuxline, appendenforcing=0as well.rd.break enforcing=0Restore the
/etc/shadowfile’s SELinux security context.# restorecon /etc/shadowTurn SELinux policy enforcement back on and verify that it is on.
# setenforce 1
# getenforce
Enforcing
Note that if you added the enforcing=0 option in step 3 you can omit entering the touch /.autorelabel command in step 8.