This documentation is for a release that is no longer maintained
See documentation for the latest supported version 3 or the latest supported version 4.此内容没有您所选择的语言版本。
Chapter 3. Writing APBs
3.1. Writing APBs: Getting Started
3.1.1. Overview
In this tutorial, you will walk through the creation of some sample Ansible Playbook Bundles (APBs). You will create actions for them to allow provision, deprovision, bind, and unbind. You can find more information about the design of APBs in the Design topic. More in-depth information about writing APBs is available in the Reference topic.
For the remainder of this tutorial, substitute your own information for items marked in brackets; for example, <host>:<port> might need to be replaced with 172.17.0.1.nip.io:8443.
3.1.2. Before You Begin
Before getting started creating your own APBs, you must set up your development environment:
- Ensure you have access to an OpenShift Container Platform cluster. The cluster should be running both the service catalog and the OpenShift Ansible broker (OAB), which is supported starting with OpenShift Container Platform 3.7.
-
Install the APB tools as documented in the CLI Tooling topic. To verify, you can run the
apb helpcommand and check for a valid response.
3.1.3. Creating Your First APB
In this tutorial, you will create an APB for a containerized hello world application. You will work through a basic APB that will mirror the APB hello-world-apb.
Your first task is to initialize the APB using the
apbCLI tool. This creates the skeleton for your APB. The command for this is simple:apb init my-test-apb
$ apb init my-test-apbCopy to Clipboard Copied! Toggle word wrap Toggle overflow After initialization, you will see the following file structure:
Copy to Clipboard Copied! Toggle word wrap Toggle overflow Two files were created at the root directory: an apb.yml (the APB spec file) and a Dockerfile. These are the minimum files required for any APB. For more information about the APB spec file, see the Reference topic. There is also an explanation of what you can do in the Dockerfile.
apb.yml
Copy to Clipboard Copied! Toggle word wrap Toggle overflow Dockerfile
Copy to Clipboard Copied! Toggle word wrap Toggle overflow In the Dockerfile, there are two updates to make:
Change the
FROMdirective to use the image from the Red Hat Container Catalog. The first line should now read:FROM openshift3/apb-base
FROM openshift3/apb-baseCopy to Clipboard Copied! Toggle word wrap Toggle overflow Update
com.redhat.apb.specin theLABELinstruction with a base64 encoded version of apb.yml. To do this, runapb prepare:cd my-test-apb apb prepare
$ cd my-test-apb
$ apb prepare
Copy to Clipboard Copied! Toggle word wrap Toggle overflow This updates the Dockerfile as follows:
Dockerfile
Copy to Clipboard Copied! Toggle word wrap Toggle overflow
At this point, you have a fully formed APB that you can build. If you skipped using
apb prepare, theapb buildcommand will still prepare the APB before building the image:apb build
$ apb buildCopy to Clipboard Copied! Toggle word wrap Toggle overflow You can now push the new APB image to the local OpenShift Container Registry:
apb push -o
$ apb push -oCopy to Clipboard Copied! Toggle word wrap Toggle overflow Querying the OAB will now show your new APB listed:
apb list
ID                                NAME            DESCRIPTION
< ------------ ID ------------->  dh-my-test-apb  This is a sample application generated by apb init
$ apb list
ID                                NAME            DESCRIPTION
< ------------ ID ------------->  dh-my-test-apb  This is a sample application generated by apb init
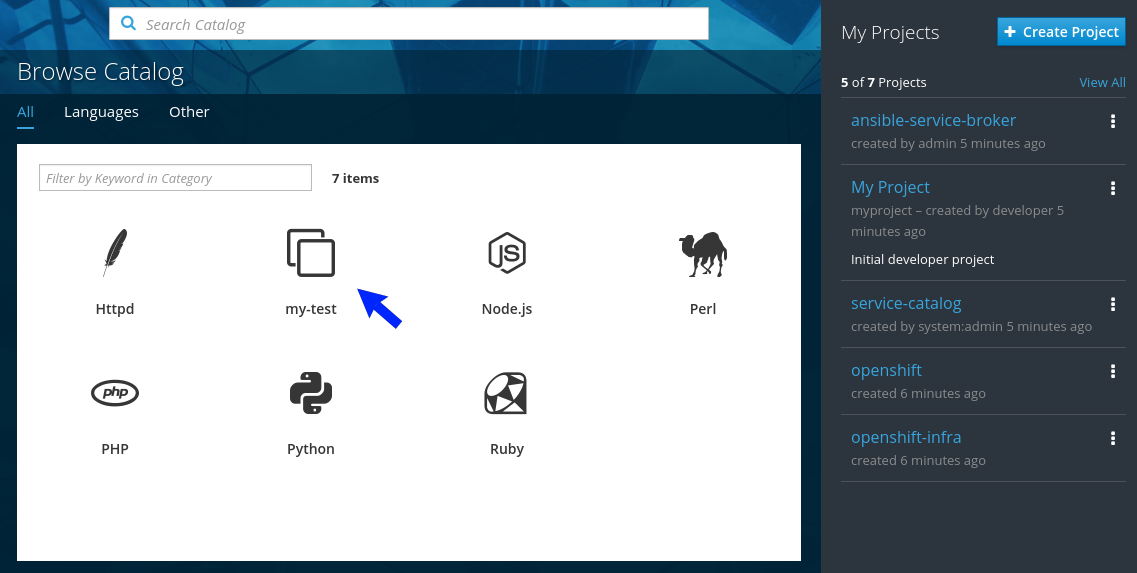
Copy to Clipboard Copied! Toggle word wrap Toggle overflow Similarly, visiting the OpenShift Container Platform web console will now display the new APB named my-test-apb in the service catalog under the All and Other tabs.
3.1.4. Adding Actions
The brand new APB created in the last section does not do much in its current state. For that, you must add some actions. The actions supported are:
- provision
- deprovision
- bind
- unbind
- test
You will add each of these actions in the following sections. But before beginning:
Ensure that you are logged in to your OpenShift Container Platform cluster via the
ocCLI. This will ensure theapbtool can interact with OpenShift Container Platform and the OAB:oc login <cluster_host>:<port> -u <user_name> -p <password>
# oc login <cluster_host>:<port> -u <user_name> -p <password>Copy to Clipboard Copied! Toggle word wrap Toggle overflow Log in to the OpenShift Container Platform web console and verify your APB listed in the catalog:
Figure 3.1. OpenShift Container Platform Web Console
Create a project named getting-started where you will deploy OpenShift Container Platform resources. You can create it using the web console or CLI:
oc new-project getting-started
$ oc new-project getting-startedCopy to Clipboard Copied! Toggle word wrap Toggle overflow
3.1.4.1. Provision
During the apb init process, two parts of the provision task were stubbed out. The playbook, playbooks/provision.yml, and the associated role in roles/provision-my-test-apb:
The playbooks/provision.yml file is the Ansible playbook that will be run when the provision action is called from the OAB. You can change the playbook, but for now you can just leave the code as is.
playbooks/provision.yml
The playbook will execute on localhost and execute the role provision-my-test-apb. This playbook works on its local container created by the service broker. The ansible.kubernetes-modules role allow you to use the kubernetes-modules to create your OpenShift Container Platform resources. The asb-modules provide additional functionality for use with the OAB.
Currently, there are no tasks in the role. The contents of the roles/provision-my-test-apb/tasks/main.yml only contains comments showing common resource creation tasks. ou can currently execute the provision task, but since there are no tasks to perform, it would simply launch the APB container and exit without deploying anything.
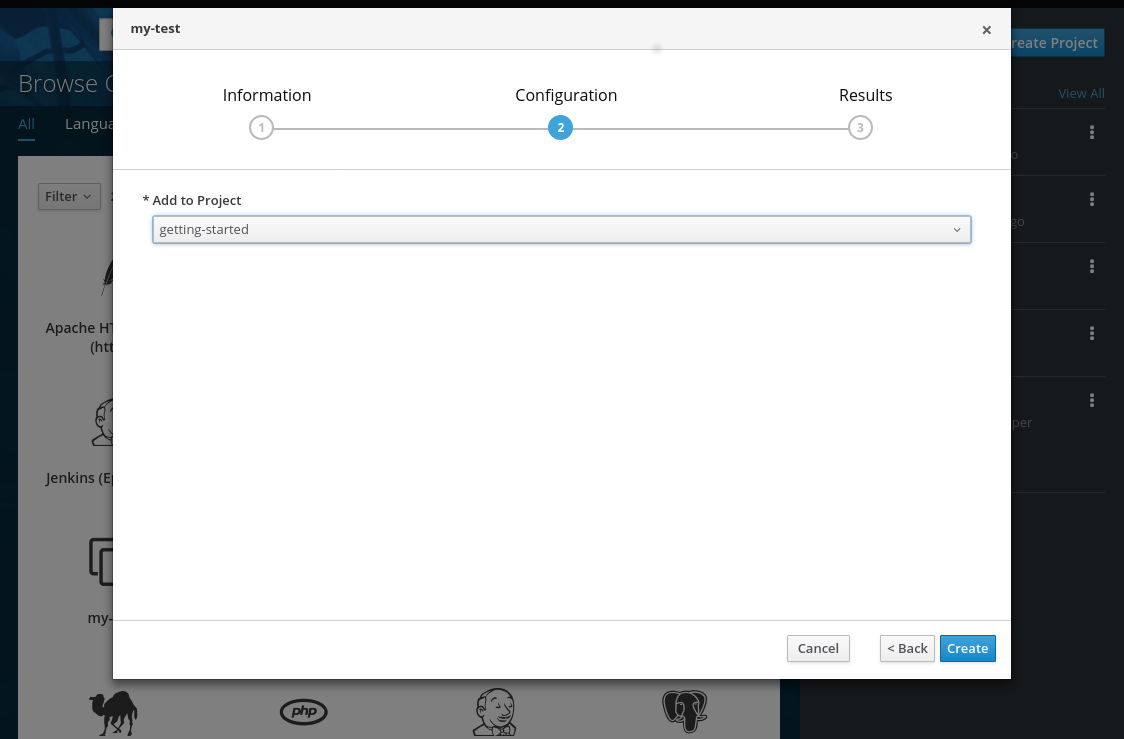
You can try this now by clicking on the my-test APB and deploying it to the getting-started project using the web console:
Figure 3.2. Provisioning my-test
When the provision is executing, a new namespace is created with the name dh-my-test-apb-prov-<random>. In development mode, it will persist, but usually this namespace would be deleted after successful completion. If the APB fails provisioning, the namespace will persist by default.
By looking at the pod resources, you can see the log for the execution of the APB. To view the pod’s logs:
Find the namespaces by either using the web console to view all namespaces and sort by creation date, or using the following command:
oc get ns
NAME                                STATUS    AGE
ansible-service-broker              Active    1h
default                             Active    1h
dh-my-test-apb-prov-<random>        Active    4m
$ oc get ns
NAME                                STATUS    AGE
ansible-service-broker              Active    1h
default                             Active    1h
dh-my-test-apb-prov-<random>        Active    4m
Copy to Clipboard Copied! Toggle word wrap Toggle overflow Switch to the project:
oc project dh-my-test-apb-prov-<random>
Now using project "dh-my-test-apb-prov-<random>" on server "<cluster_host>:<port>".
$ oc project dh-my-test-apb-prov-<random>
Now using project "dh-my-test-apb-prov-<random>" on server "<cluster_host>:<port>".
Copy to Clipboard Copied! Toggle word wrap Toggle overflow Get the pod name:
oc get pods
NAME             READY     STATUS      RESTARTS   AGE
<apb_pod_name>   0/1       Completed   0          3m
$ oc get pods
NAME             READY     STATUS      RESTARTS   AGE
<apb_pod_name>   0/1       Completed   0          3m
Copy to Clipboard Copied! Toggle word wrap Toggle overflow View the logs:
Copy to Clipboard Copied! Toggle word wrap Toggle overflow
3.1.4.1.1. Creating a Deploying Configuration
At the minimum, your APB should deploy the application pods. You can do this by specifying a deployment configuration:
One of the first tasks that is commented out in the provision-my-test-apb/tasks/main.yml file is the creation of the deployment configuration. You can uncomment it or paste the following:
NoteNormally, you would replace the
image:value with your own application image.Copy to Clipboard Copied! Toggle word wrap Toggle overflow - 1
- Designates which namespace the deployment configuration should be in.
- 2
- Used to help organize, group, and select objects.
- 3
- Specifies that you only want one pod.
- 4
- The
selectorsection is a labels query over pods. - 5
- This
containerssection specifies a container with a hello-world application running on port 8080 on TCP. The image is stored at docker.io/ansibleplaybookbundle/hello-world.
For more information, Writing APBs: Reference has more detail, and you can see the ansible-kubernetes-modules documentation for a full accounting of all fields.
Build and push the APB:
apb build
apb push -o
$ apb build
$ apb push -o
Copy to Clipboard Copied! Toggle word wrap Toggle overflow - Provision the APB using the web console.
After provisioning, there will be a new running pod and a new deployment configuration. Verify by checking your OpenShift Container Platform resources:
Copy to Clipboard Copied! Toggle word wrap Toggle overflow You will also be able to see the deployed application in the web console on the project’s Overview page.
The only way to use this pod in its current state is to use:
oc describe pods/<pod_name>
$ oc describe pods/<pod_name>to find its IP address and access it directly. If there were multiple pods, they would be accessed separately. To treat them like a single host, you need to create a service, described in the next section.
To clean up before moving on and allow you to provision again, you can delete the getting-started project and recreate it or create a new one.
3.1.4.1.2. Creating a Service
You will want to use multiple pods, load balance them, and create a service so that a user can access them as a single host:
Modify the provision-my-test-apb/tasks/main.yml file and add the following:
Copy to Clipboard Copied! Toggle word wrap Toggle overflow The
selectorsection will allow the my-test service to include the correct pods. Theportswill take the target port from the pods (8080) and expose them as a single port for the service (80). Notice the application was running on 8080 but has now been made available on the default HTTP port of 80.The
namefield of the port allows you to specify this port in the future with other resources. More information is available in the k8s_v1_service module.Build and push the APB:
apb build
apb push -o
$ apb build
$ apb push -o
Copy to Clipboard Copied! Toggle word wrap Toggle overflow - Provision the APB using the web console.
After provisioning, you will see a new service in the web console or CLI. In the web console, you can click on the new service under Networking in the application on the Overview page or under Applications
To view the service information from the command line, you can do the following:
oc project getting-started
oc get services
oc describe services/my-test
$ oc project getting-started
$ oc get services
$ oc describe services/my-test
The describe command will show the IP address to access the service. However, using an IP address for users to access your application is not generally what you want. Instead, you should create a route, described in the next section.
To clean up before moving on and allow you to provision again, you can delete the getting-started project and recreate it or create a new one.
3.1.4.1.3. Creating a Route
You can expose external access to your application through a reliable named route:
Modify the provision-my-test-apb/tasks/main.yml file and adding the following:
Copy to Clipboard Copied! Toggle word wrap Toggle overflow The
to_nameis the name of the target service. Thespec_port_target_portrefers to the name of the target service’s port. More information is available in the openshift_v1_route module.Build and push the APB:
apb build
apb push -o
$ apb build
$ apb push -o
Copy to Clipboard Copied! Toggle word wrap Toggle overflow - Provision the APB using the web console.
After provisioning, you will see the new route created. On the web console’s Overview page for the getting-started project, you will now see an active and clickable route link listed on the application. Clicking on the route or visiting the URL will bring up the hello-world application.
You can also view the route information from the CLI:
At this point, your my-test application is fully functional, load balanced, scalable, and accessible. You can compare your finished APB to the hello-world APB in the hello-world-apb example repository.
3.1.4.2. Deprovision
For the deprovision task, you must destroy all provisioned resources, usually in reverse order from how they were created.
To add the deprovision action, you need a deprovision.yml file under playbooks/ directory and related tasks in the roles/deprovision-my-test-apb/tasks/main.yml. Both these files should already be created for you:
The content of the deprovision.yml file looks the same as the provision task, except it is calling a different role:
playbooks/deprovision.yml
Edit that role in the file roles/deprovision-my-test-apb/tasks/main.yml. By uncommenting the tasks, the resulting file without comments should look like the following:
In the provision.yml file created earlier, you created a deployment configuration, service, then route. For the deprovision action, you should delete the resources in reverse order. You can do so by identifying the resource by namespace and name, and then marking it as state: absent.
To run the deprovision template, click on the menu on the list of Deployed Services and select Delete.
3.1.4.2.1. Bind
From the previous sections, you learned how to deploy a standalone application. However, in most cases applications will need to communicate with other applications, and often with a data source. In the following sections, you will create a PostgreSQL database that the hello-world application deployed from my-test-apb can use.
3.1.4.2.1.1. Preparation
For a good starting point, create the necessary files for provision and deprovisioning PostgreSQL.
A more in-depth example can be found at the PostgreSQL example APB.
Initialize the APB using the
--bindableoption:apb init my-pg-apb --bindable
$ apb init my-pg-apb --bindableCopy to Clipboard Copied! Toggle word wrap Toggle overflow This creates the normal APB file structure with a few differences:
Copy to Clipboard Copied! Toggle word wrap Toggle overflow In addition to the normal files, new playbooks bind.yml, unbind.yml, and their associated roles have been stubbed out. The bind.yml and unbind.yml files are both empty and, because you are using the default binding behavior, will remain empty.
Edit the apb.yml file. Notice the setting
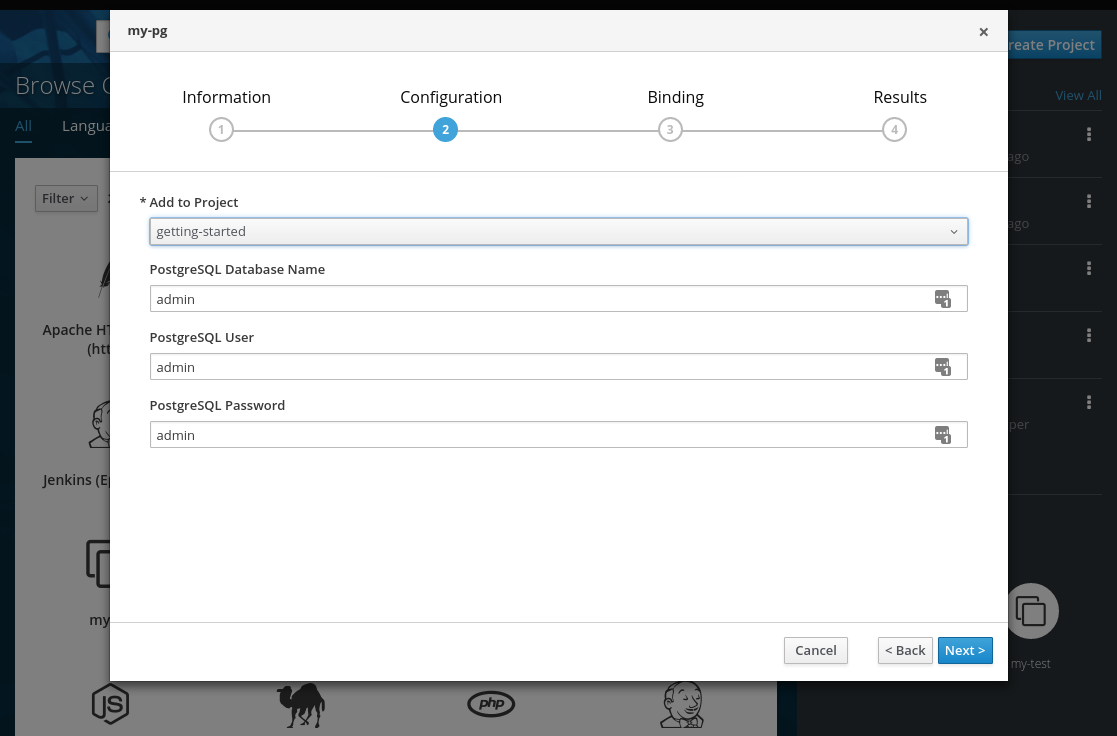
bindable: true. In addition to those changes, you must add some parameters to the apb.yml for configuring PostgreSQL. They will be available fields in the web console when provisioning your new APB:Copy to Clipboard Copied! Toggle word wrap Toggle overflow The playbooks/provision.yml will look like the following:
Copy to Clipboard Copied! Toggle word wrap Toggle overflow The playbooks/deprovision.yml will look like the following:
Copy to Clipboard Copied! Toggle word wrap Toggle overflow Edit the roles/provision-my-pg-apb/tasks/main.yml file. This file mirrors your hello-world application in many respects, but adds a persistent volume (PV) to save data between restarts and various configuration options for the deployment configuration.
In addition, a new task has been added at the the very bottom after the provision tasks. To save the credentials created during the provision process, you must encode them for retrieval by the OAB. The new task, using the module
asb_encode_binding, will do so for you.You can safely delete everything in that file and replace it with the following:
Copy to Clipboard Copied! Toggle word wrap Toggle overflow The
encode bind credentialstask will make available several fields as environment variables:DB_TYPE,DB_HOST,DB_PORT,DB_USER,DB_PASSWORD, andDB_NAME. This is the default behavior when the bind.yml file is left empty. Any application (such as hello-world) can use these environment variables to connect to the configured database after performing a bind operation.Edit the roles/deprovision-my-pg-apb/tasks/main.yml and uncomment the following lines so that the created resources will be deleted during deprovisioning:
Copy to Clipboard Copied! Toggle word wrap Toggle overflow Finally, build and push your APB:
apb build
apb push -o
$ apb build
$ apb push -o
Copy to Clipboard Copied! Toggle word wrap Toggle overflow
At this point, the APB can create a fully functional PostgreSQL database to your cluster. You can test it out in the next section.
3.1.4.2.1.2. Executing From the UI
To test your application, you can bind a hello-world application to the provisioned PostgreSQL database. You can use the application previously created in the Provision section of this tutorial, or you can use the hello-world-apb:
- First, provision my-test-apb.
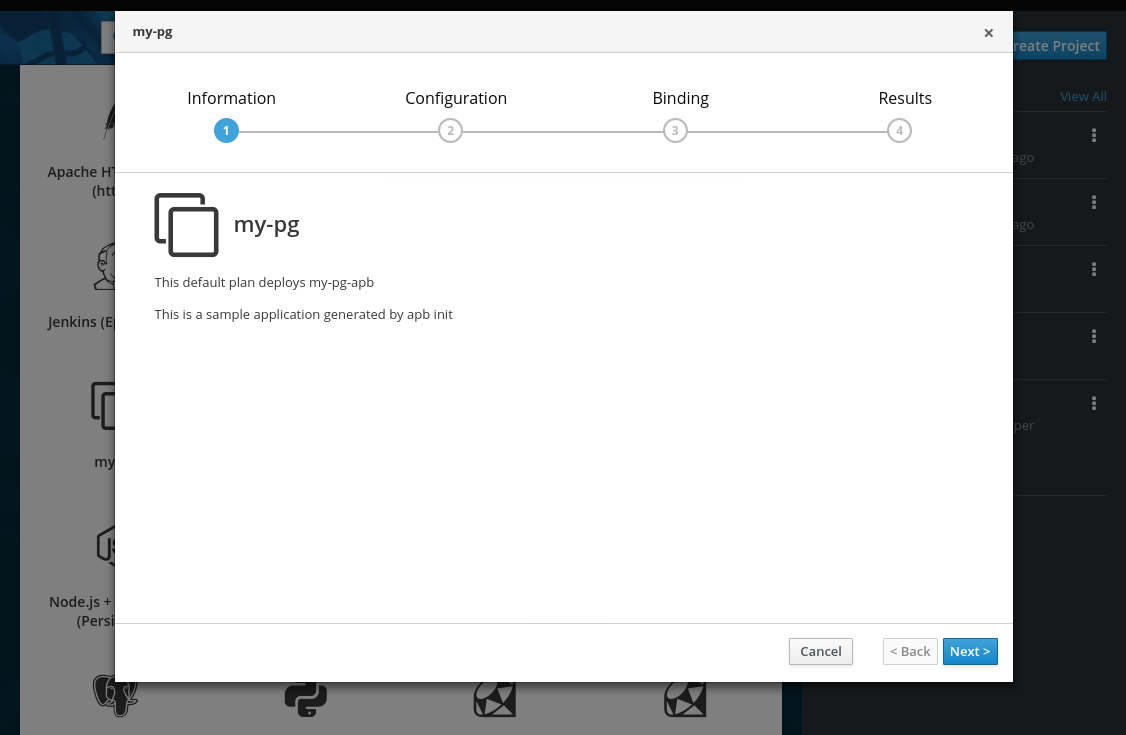
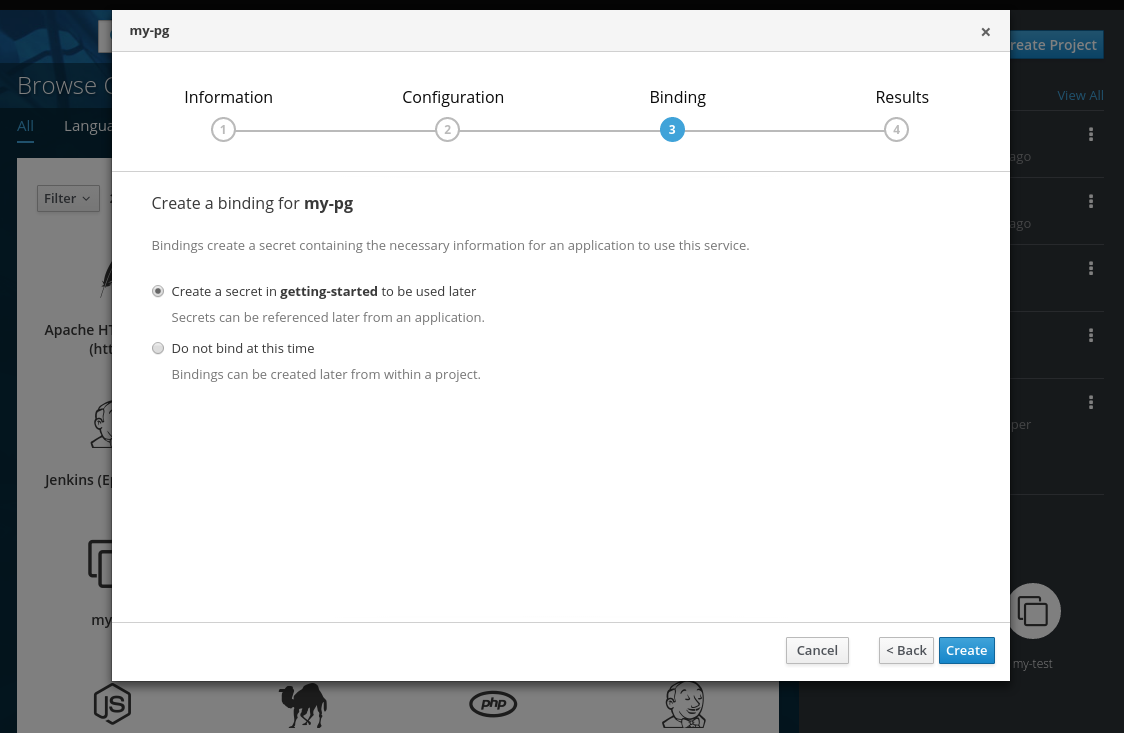
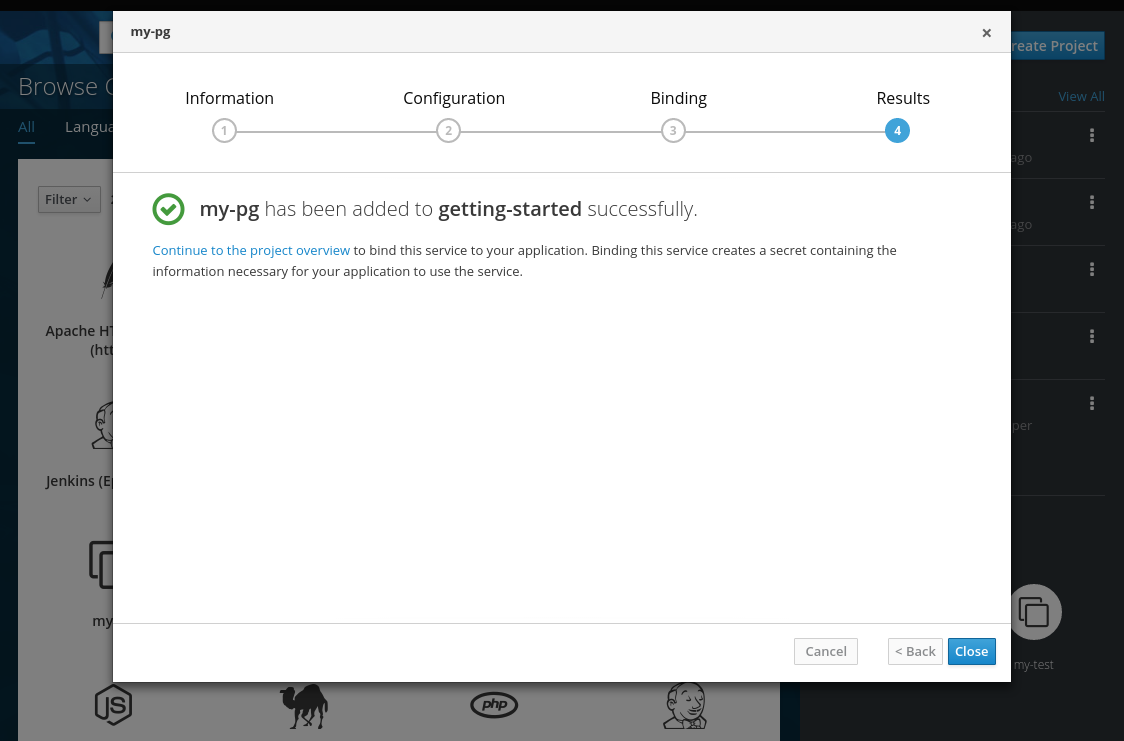
Then, provision my-pg-apb and select the option to Create a secret:
- Now, if you have not already done so, navigate to the project. You can see both your hello-world application and your PostgreSQL database. If you did not select to create a binding at provision time, you can also do so here with the Create binding link.
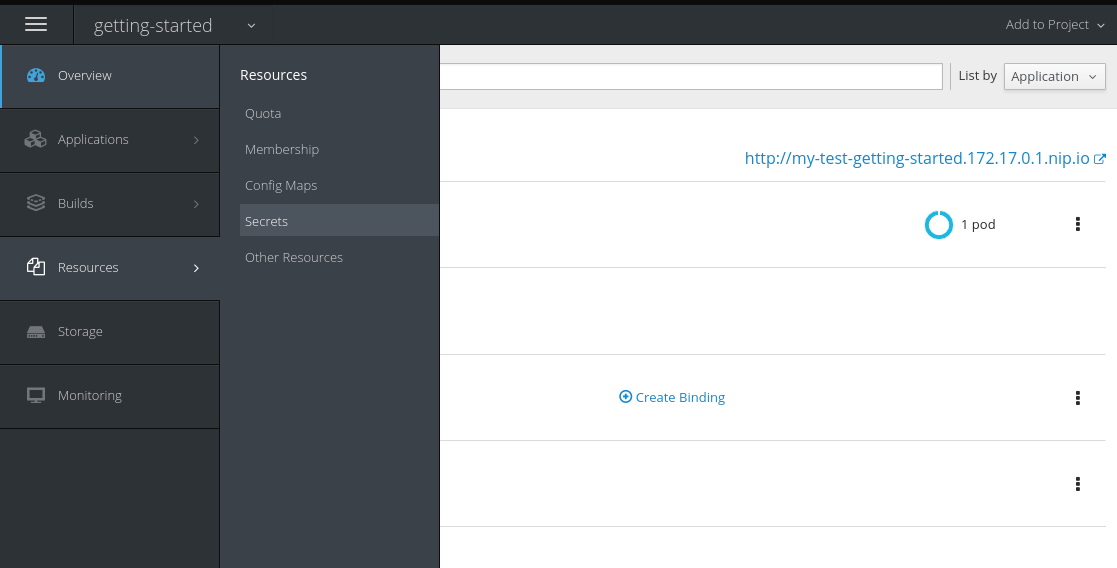
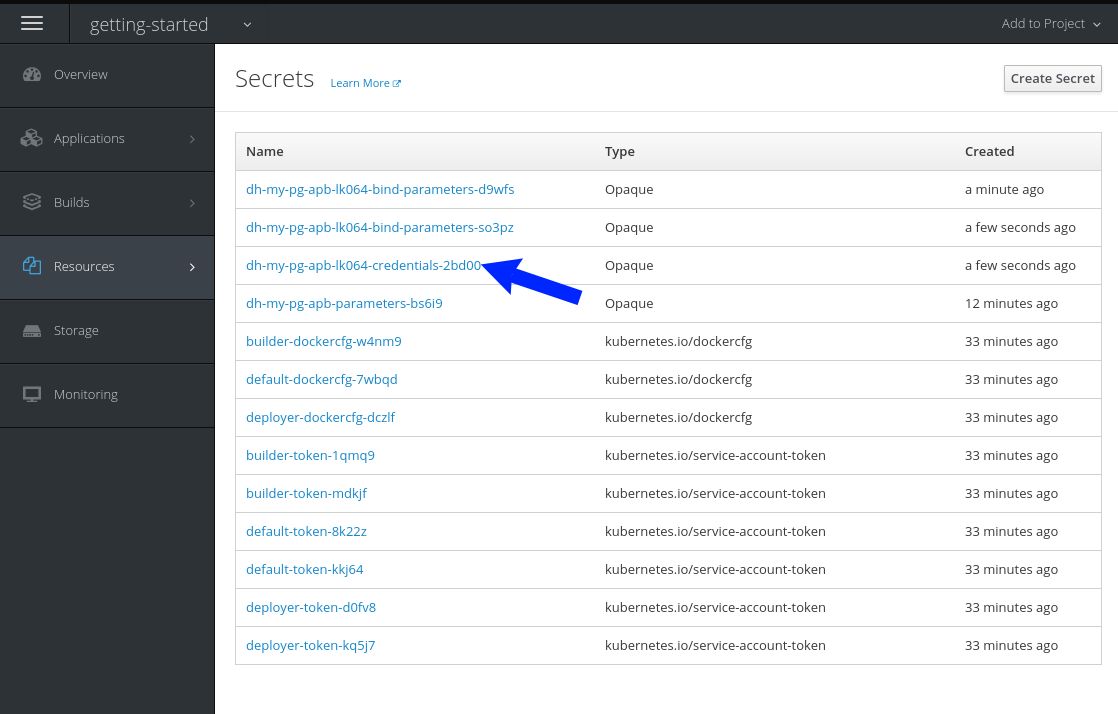
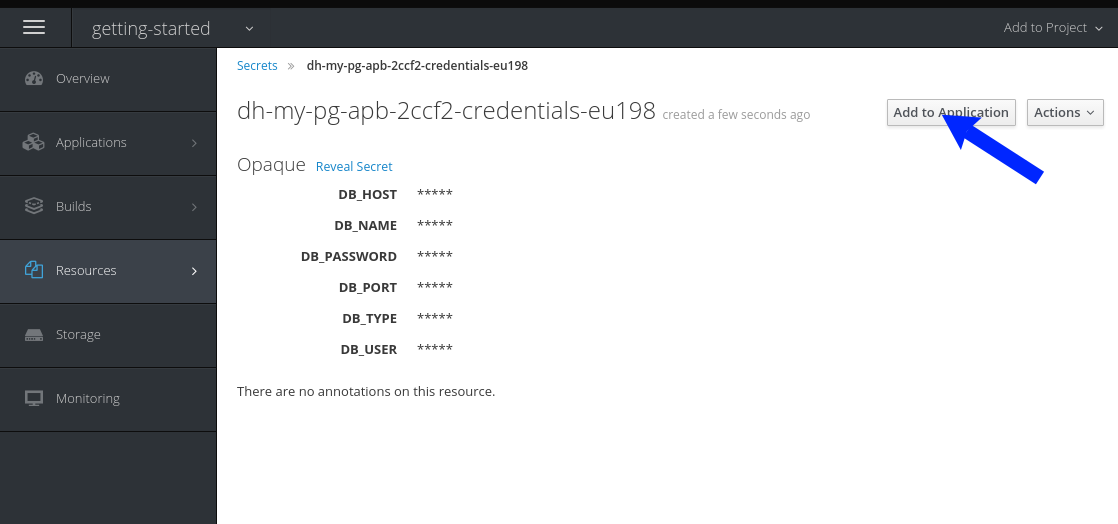
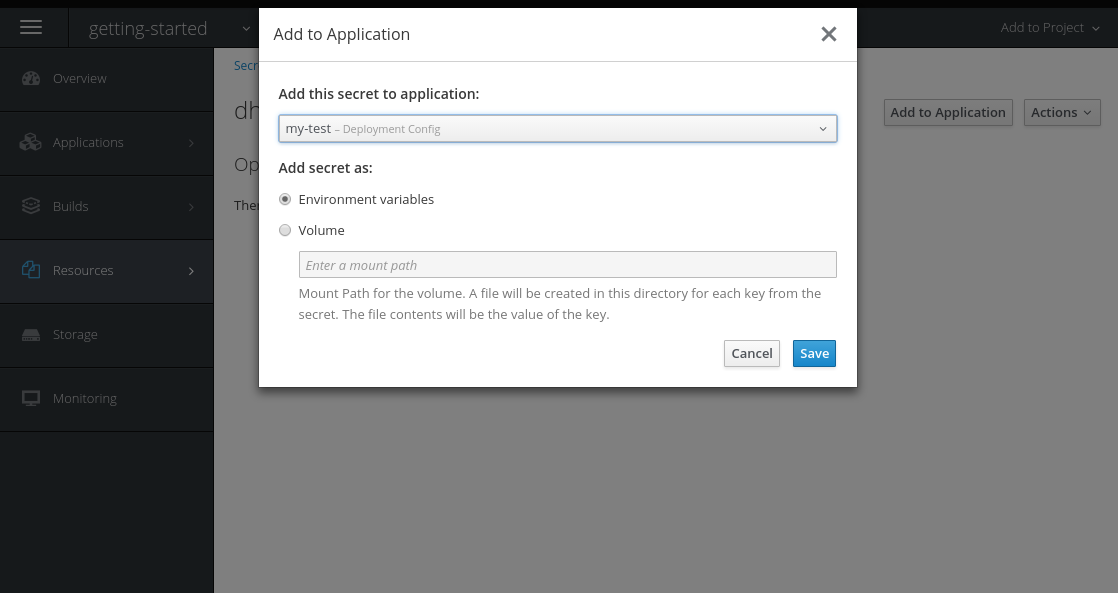
After you the binding has been created, you must add the secret created by the binding into the application. First, navigate to the secrets on the Resources
Secrets page: Add the secret as environment variables:
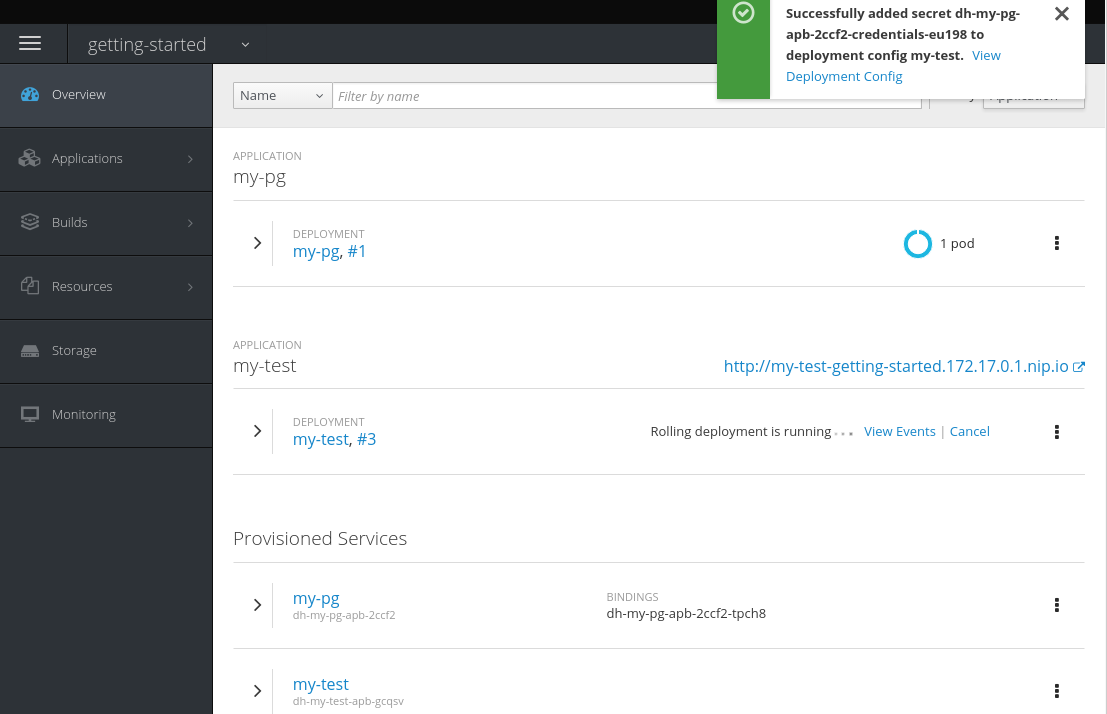
After this addition, you can return to the Overview page. The my-test application may still be redeploying from the configuration change. If so, wait until you can click on the route to view the application:
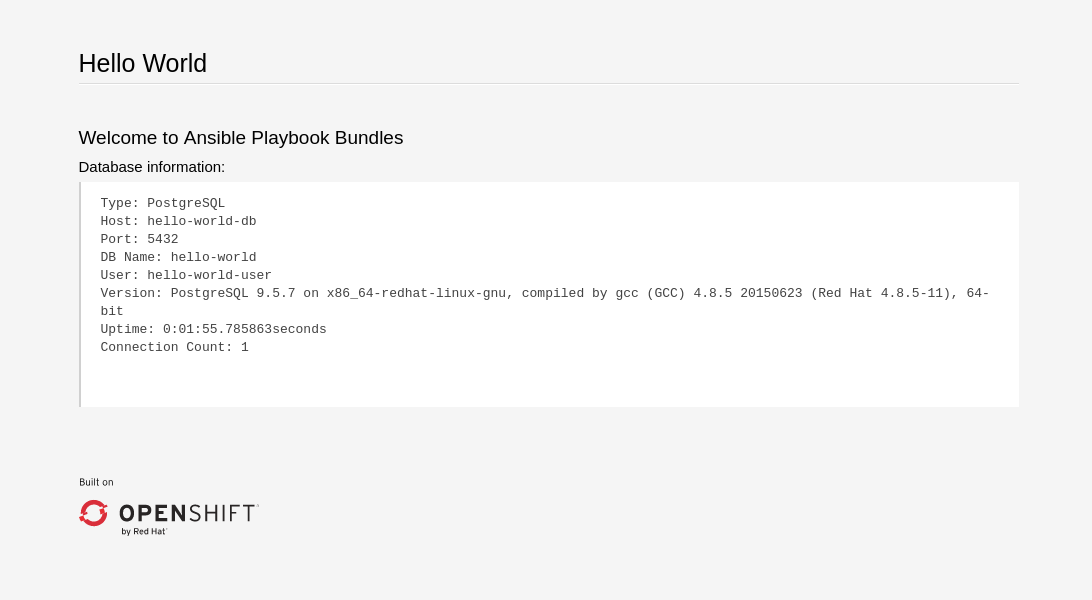
After clicking the route, you will see the hello-world application has detected and connected to the my-pg database:
3.1.4.2.2. Test
Test actions are intended to check that an APB passes a basic sanity check before publishing to the service catalog. They are not meant to test a live service. OpenShift Container Platform provides the ability to test a live service using liveness and readiness probes, which you can add when provisioning.
The actual implementation of your test is left to you as the APB author. The following sections provide guidance and best practices.
3.1.4.2.2.1. Writing a Test Action
To create a test action for your APB:
- Include a playbooks/test.yml file.
- Include defaults for the test in the playbooks/vars/ directory.
To orchestrate the testing of an APB, you should use the include_vars and include_role modules in your test.yml file:
test.yml
- 1
- Load the Ansible Kubernetes modules.
- 2
- Include the default values needed for provision from the test role.
- 3
- Include the provision role to run.
- 4
- Include the verify role to run. See Writing a Verify Role.
3.1.4.2.2.2. Writing a Verify Role
A verify role allows you to determine if the provision has failed or succeeded. The verify_<name> role should be in the roles/ directory. This should be a normal Ansible role.
An example task in the main.yml file could look like:
3.1.4.2.2.3. Saving Test Results
The asb_save_test_result module can also be used in the verify role, allowing the APB to save test results so that the apb test command can return them. The APB pod will stay alive for the tool to retrieve the test results.
For example, adding asb_save_test_result usage to the previous main.yml example:
3.1.4.2.2.4. Running a Test Action
After you have defined your test action, you can use the CLI tooling to run the test:
apb test
$ apb testThe test action will:
- build the image,
- start up a pod as if it was being run by the service broker, and
- retrieve the test results if any were saved.
The status of pod after execution has finished will determine the status of the test. If the pod is in an error state, then something failed and the command reports that the test was unsuccessful.
3.2. Writing APBs: Reference
3.2.1. Overview
While the Getting Started topic provides a step by step walkthrough on creating your first Ansible Playbook Bundle (APB), this topic provides more in-depth reference material. The fundamental components that make up an APB are explained in further detail to help an experienced APB developer get a better understanding of each individual component within an APB.
For completed APB examples, you can browse APBs in the ansibleplaybookbundle organization on GitHub.
3.2.2. Directory Structure
The following shows an example directory structure of an APB:
3.2.3. APB Spec File
The APB spec file is located at apb.yml and is where the outline of your application is declared. The following is an example APB spec:
3.2.3.1. Top-level Structure
| Field | Description |
|---|---|
|
| Version of the APB spec. See APB Spec Versioning for details. |
|
| Name of the APB. Names must be valid ASCII and may contain lowercase letters, digits, underscores, periods, and dashes. See Docker’s guidelines for valid tag names. |
|
| Short description of this APB. |
|
|
Boolean option of whether or not this APB can be bound to. Accepted fields are |
|
| Dictionary field declaring relevant metadata information. |
|
| A list of plans that can be deployed. See Plans for details. |
3.2.3.2. Metadata
| Field | Description |
|---|---|
|
| URL to the application’s documentation. |
|
| URL to an image which will be displayed in the web console for the service catalog. |
|
| List of images which are consumed from within the APB. |
|
| The name that will be displayed in the web console for this APB. |
|
| Longer description that will be displayed when the APB is clicked in the web console. |
|
| Name of who is providing this APB for consumption. |
3.2.3.3. Plans
Plans are declared as a list. This section explains what each field in a plan describes.
| Field | Description |
|---|---|
|
| Unique name of plan to deploy. This will be displayed when the APB is clicked from the service catalog. |
|
| Short description of what will be deployed from this plan. |
|
|
Boolean field to determine if this plan is free or not. Accepted fields are |
|
| Dictionary field declaring relevant plan metadata information. See Plan Metadata for details. |
|
| List of parameter dictionaries used as input to the APB. See Parameters for details. |
3.2.3.4. Plan Metadata
| Field | Description |
|---|---|
|
| Name to display for the plan in the web console. |
|
| Longer description of what this plan deploys. |
|
|
How much the plan will cost to deploy. Accepted field is |
3.2.3.5. Parameters
Each item in the parameters section can have several fields. The name field is required. The order of the parameters will be displayed in sequential order in the form in the OpenShift Container Platform web console.
| Field | Description |
|---|---|
|
| Unique name of the parameter passed into the APB. |
|
| Displayed label in the web console. |
|
|
Data type of the parameters as specified by link json-schema, such as |
|
| Whether or not the parameter is required for APB execution. Required field in the web console. |
|
| Default value assigned to the parameter. |
|
|
Display type for the web console. For example, you can override a string input as a |
|
|
Will cause a parameter to display in groups with adjacent parameters with matching |
When using a long list of parameters, it can be useful to use a shared parameter list. For an example of this, see the rhscl-postgresql-apb.
3.2.3.6. APB Spec Versioning
The APB spec uses semantic versioning with the format of x.y where x is a major release and y is a minor release.
The current spec version is 1.0.
3.2.3.6.1. Major Version
The APB spec will increment the major version whenever an API breaking change is introduced to the spec. Some examples include:
- Introduction or deletion of a required field.
- Changing the YAML format.
- New features.
3.2.3.6.2. Minor Version
The APB spec will increment the minor version whenever a non-breaking change is introduced to the spec. Some examples include:
- Introduction or deletion of an optional field.
- Spelling change.
- Introduction of new options to an existing field.
3.2.4. Dockerfile
The Dockerfile is what is used to actually build the APB image. As a result, sometimes you will need to customize it for your own needs. For example, if running a playbook that requires interactions with PostgreSQL, you may want to install the required packages by adding the yum install command:
3.2.5. APB Actions (Playbooks)
An action for an APB is the command that the APB is run with. The standard actions that are supported are:
- provision
- deprovision
- bind
- unbind
- test
For an action to be valid, there must be a valid file in the playbooks/ directory named <action>.yml. These playbooks can do anything, which also means that you can technically create any action you would like. For example, the mediawiki-apb has playbook creating an update action.
Most APBs will normally have a provision action to create resources and a deprovision action to destroy the resources when deleting the service.
The bind and unbind actions are used when the coordinates of one service needs to be made available to another service. This is often the case when creating a data service and making it available to an application. Currently, the coordinates are made available during the provision.
To properly make your coordinates available to another service, use the asb_encode_binding module. This module should be called at the end of the APB’s provision role, and it will return bind credentials to the OpenShift Ansible broker (OAB):
- name: encode bind credentials
  asb_encode_binding:
    fields:
      EXAMPLE_FIELD: foo
      EXAMPLE_FIELD2: foo2
- name: encode bind credentials
  asb_encode_binding:
    fields:
      EXAMPLE_FIELD: foo
EXAMPLE_FIELD2: foo23.2.6. Working With Common Resources
This section describes a list of common OpenShift Container Platform resources that are created when developing APBs. See the Ansible Kubernetes Module for a full list of available resource modules.
3.2.6.1. Service
The following is a sample Ansible task to create a service named hello-world. The namespace variable in an APB will be provided by the OAB when launched from the web console.
Provision
Deprovision
- k8s_v1_service:
    name: hello-world
    namespace: '{{ namespace }}'
    state: absent
- k8s_v1_service:
    name: hello-world
    namespace: '{{ namespace }}'
state: absent3.2.6.2. Deployment Configuration
The following is a sample Ansible task to create a deployment configuration for the image docker.io/ansibleplaybookbundle/hello-world which maps to service hello-world.
Provision
Deprovision
- openshift_v1_deployment_config:
    name: hello-world
    namespace: '{{ namespace }}'
    state: absent
- openshift_v1_deployment_config:
    name: hello-world
    namespace: '{{ namespace }}'
state: absent3.2.6.3. Route
The following is an example of creating a route named hello-world which maps to the service hello-world.
Provision
Deprovision
- openshift_v1_route:
    name: hello-world
    namespace: '{{ namespace }}'
    state: absent
- openshift_v1_route:
    name: hello-world
    namespace: '{{ namespace }}'
state: absent3.2.6.4. Persistent Volume
The following is an example of creating a persistent volume claim (PVC) resource and deployment configuration that uses it.
Provision
In addition to the resource, add your volume to the deployment configuration declaration:
Deprovision
3.2.7. Optional Variables
You can add optional variables to an APB by using environment variables. To pass variables into an APB, you must escape the variable substitution in your .yml files.
For example, consider the following roles/provision-etherpad-apb/tasks/main.yml file in the etherpad-apb:
Variables for the APB are defined in the roles/provision-etherpad-apb/defaults/main.yml file:
3.2.8. Working With the Restricted SCC
When building an OpenShift Container Platform image, it is important that you do not have your application running as the root user when at all possible. When running under the restriced security context, the application image is launched with a random UID. This causes problems if your application folder is owned by the root user.
A good way to work around this is to add a user to the root group and make the application folder owned by the root group. See OpenShift Container Platform-Specific Guidelines for details on supporting arbitrary user IDs.
The following is a Dockerfile example of a node application running in /usr/src. This command would be run after the application is installed in /usr/src and the associated environment variables set:
3.2.9. Using a ConfigMap Within an APB
There is a temporary workaround for creating ConfigMaps from Ansible due to a bug in the Ansible modules.
One common use case for ConfigMaps is when the parameters of an APB will be used within a configuration file of an application or service. The ConfigMap module allows you to mount a ConfigMap into a pod as a volume, which can be used to store the configuration file. This approach allows you to also leverage the power of Ansible’s template module to create a ConfigMap out of APB paramters.
The following is an example of creating a ConfigMap from a Jinja template mounted into a pod as a volume:
