4.6. Configuring Virtual NUMA
In the Administration Portal, you can configure virtual NUMA nodes on a virtual machine and pin them to physical NUMA nodes on a host. The host’s default policy is to schedule and run virtual machines on any available resources on the host. As a result, the resources backing a large virtual machine that cannot fit within a single host socket could be spread out across multiple NUMA nodes, and over time may be moved around, leading to poor and unpredictable performance. Configure and pin virtual NUMA nodes to avoid this outcome and improve performance.
Configuring virtual NUMA requires a NUMA-enabled host. To confirm whether NUMA is enabled on a host, log in to the host and run
numactl --hardware. The output of this command should show at least two NUMA nodes. You can also view the host's NUMA topology in the Administration Portal by selecting the host from the Hosts tab and clicking . This button is only available when the selected host has at least two NUMA nodes.
Procedure 4.12. Configuring Virtual NUMA
- Click the Virtual Machines tab and select a virtual machine.
- Click .
- Click the Host tab.
- Select the Specific radio button and select a host from the list. The selected host must have at least two NUMA nodes.
- Select Do not allow migration from the Migration Options drop-down list.
- Enter a number into the NUMA Node Count field to assign virtual NUMA nodes to the virtual machine.
- Select Strict, Preferred, or Interleave from the Tune Mode drop-down list. If the selected mode is Preferred, the NUMA Node Count must be set to
1. - Click .
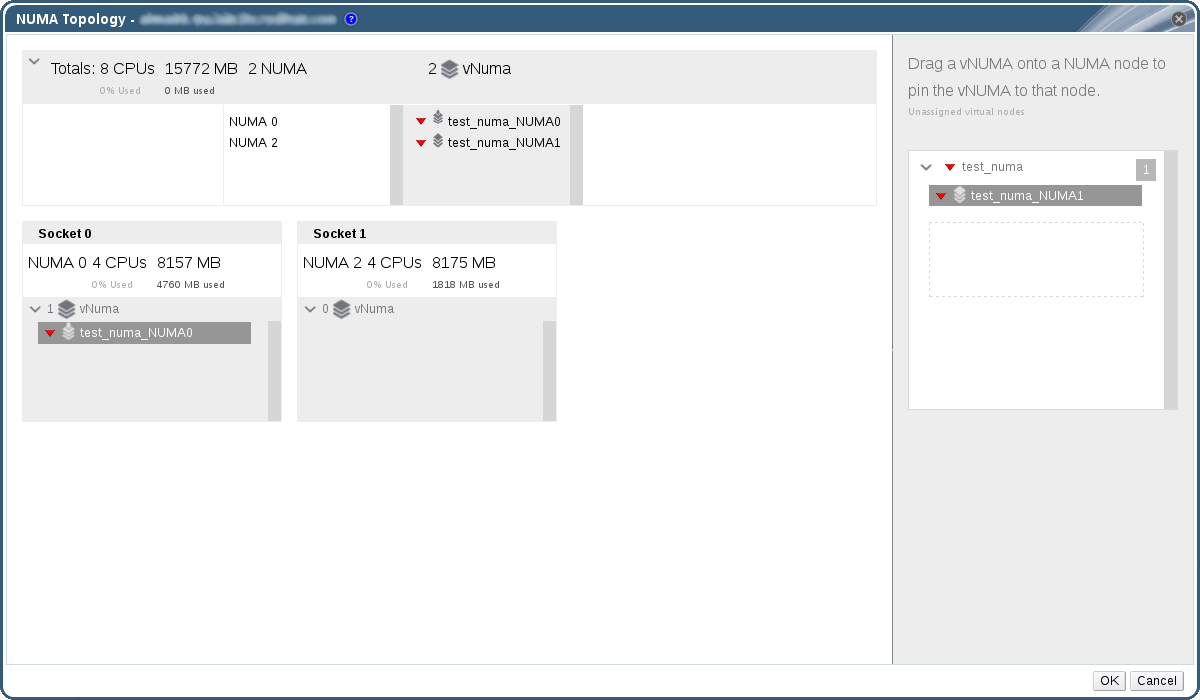
Figure 4.7. The NUMA Topology Window
- In the NUMA Topology window, click and drag virtual NUMA nodes from the box on the right to host NUMA nodes on the left as required, and click .
- Click .
Note
Automatic NUMA balancing is available in Red Hat Enterprise Linux 7, but is not currently configurable through the Red Hat Virtualization Manager.
