Este contenido no está disponible en el idioma seleccionado.
21.3. Defining sudo Rules
sudo rules are in a sense similar to access control rules: they define users who are granted access, the commands which are within the scope of the rule, and then the target hosts to which the rule applies. In IdM, additional information can be configured in the rule, such as sudoers options and run-as settings, but the basic elements always define who, what (services), and where (hosts).
21.3.1. About External Users
sudo rules define four elements: who can do what, where, and as whom. The who is the regular user, and the as whom is the system or other user identity which the user uses to perform tasks. Those tasks are system commands that can be run (or specifically not run) on a target machine.
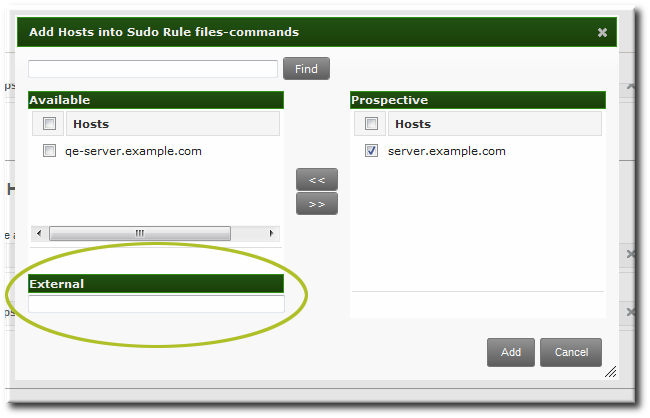
sudo policy may realistically cover. For example, sudo rules could be used to grant root access to member of the IT group in IdM, and that root user is not a user in IdM. Or, for another example, administrators may want to block access to certain hosts that are on a network but are not part of the IdM domain.
sudo rules in Identity Management support the concept of external users — meaning, users which are stored and exist outside of the IdM configuration.
Figure 21.1. External Entities
sudo rule, the user and run-as settings can point to an external identity to be included and evaluated in the sudo rule.
21.3.2. About sudo Options Format
sudo rule can be configured to use any supported sudoers options. The complete list of options is in the sudoers man page.
sudo rule configuration in Identity Management does not allow the same formatting as the configuration in the /etc/sudoers file. Specifically, Identity Management does not allow whitespaces in the options parameter, whether it is set in the UI or the CLI.
/etc/sudoers file, it is permissible to list options in a comma-separated list with spaces between:
mail_badpass, mail_no_host, mail_no_perms, syslog = local2
mail_badpass, mail_no_host, mail_no_perms, syslog = local2/etc/sudoers file are not allowed in the Identity Management configuration.
ipa sudorule-add-option readfiles
Sudo Option: env_keep="COLORS DISPLAY EDITOR HOSTNAME HISTSIZE INPUTRC KDEDIR LESSSECURE LS_COLORS MAIL PATH PS1 PS2 ... XAUTHORITY"
[jsmith@server ~]$ ipa sudorule-add-option readfiles
Sudo Option: env_keep="COLORS DISPLAY EDITOR HOSTNAME HISTSIZE INPUTRC KDEDIR LESSSECURE LS_COLORS MAIL PATH PS1 PS2 ... XAUTHORITY"sudoers options in Identity Management, configure each one as a separate option setting, rather than all on one line.
21.3.3. Defining sudo Rules in the Web UI
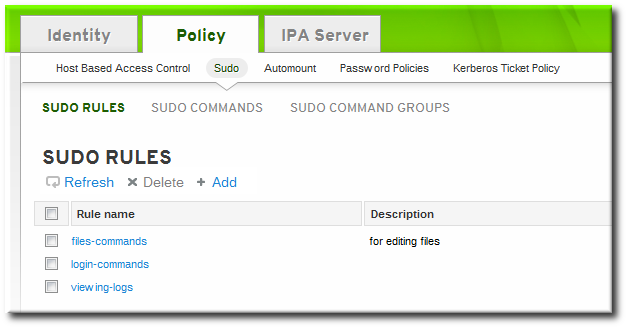
- Click the Policy tab.
- Click the Sudo subtab, and then select the Sudo Rules link.
- Click the Add link at the top of the list of sudo rules.
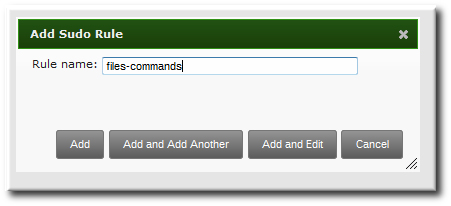
- Enter the name for the rule.
- Click the Add and Edit button to go immediately to set the configuration for the rule.There are a number of configuration areas for the rule. The most basic elements are set in the Who, Access This Host, and Run Commands areas; the others are optional and are used to refine the rule.
- Optional. In the Options area, add any
sudoersoptions. The complete list of options is in thesudoersman page.Note
As described in Section 21.3.2, “About sudo Options Format”, do not use options with whitespace in the values. Rather than adding a list of options in one line, add a single option setting for each desired option.- Click the + Add link at the right of the options list.
- Enter the
sudoersoption. - Click .
- In the Who area, select the users or user groups to which the sudo rule is applied.
- Click the + Add link at the right of the users list.
- Click the checkbox by the users to add to the rule, and click the right arrows button, , to move the users to the selection box.
- Click .
It is possible to configure both IdM users and external system users (Section 21.3.1, “About External Users”). - In the Access This Host area, select the hosts on which the sudo rule is in effect.
- Click the + Add link at the right of the hosts list.
- Click the checkbox by the hosts to include with the rule, and click the right arrows button, , to move the hosts to the selection box.
- Click .
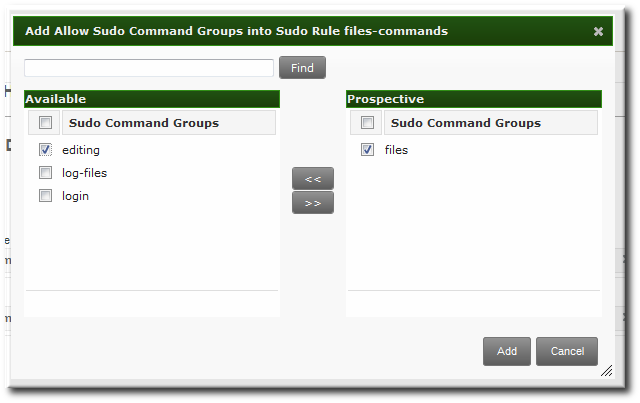
- In the Run Commands area, select the commands which are included in the sudo rule. The
sudorule can grant access or deny access to commands, and it can grant allow access to one command and also deny access to another.- In the Allow/Deny area, click the + Add link at the right of the commands list.
- Click the checkbox by the commands or command groups to include with the rule, and click the right arrows button, , to move the commands to the selection box.
- Click .
- Optional. The sudo rule can be configured to run the given commands as a specific, non-root user.
- In the As Whom area, click the + Add link at the right of the users list.
- Click the checkbox by the users to run the command as, and click the right arrows button, , to move the users to the selection box.
- Click .
21.3.4. Defining sudo Rules in the Command Line
sudo rule command is:
ipa sudorule-add* options ruleName
$ ipa sudorule-add* options ruleNameExample 21.1. Creating Basic sudo Rules
sudo configuration is going to grant the right to one user for one command on one host.
--sudocmds, or a group of commands, using --sudocmdgroups.
sudo as defined in the rule; if no "run-as" user is given, then this user will run the sudo commands as root.
Example 21.2. Allowing and Denying Commands
sudo rule can grant access or deny access to commands. For example, this rule would allow read access to files but prevent editing:
kinit admin
ipa sudorule-add-allow-command --sudocmds "/usr/bin/less" readfiles
ipa sudorule-add-allow-command --sudocmds "/usr/bin/tail" readfiles
ipa sudorule-add-deny-command --sudocmds "/usr/bin/vim" readfiles
[jsmith@server ~]$ kinit admin
[jsmith@server ~]$ ipa sudorule-add-allow-command --sudocmds "/usr/bin/less" readfiles
[jsmith@server ~]$ ipa sudorule-add-allow-command --sudocmds "/usr/bin/tail" readfiles
[jsmith@server ~]$ ipa sudorule-add-deny-command --sudocmds "/usr/bin/vim" readfilesExample 21.3. Using sudoers Options
sudoers file has a lot of potential flags that can be set to control the behavior of sudo users, like requiring (or not requiring) passwords to offer a user to authenticate to sudo or using fully-qualified domain names in the sudoers file. The complete list of options is in the sudoers man page.
sudo rule using the sudorule-add-option command. When the command is run, it prompts for the option to add:
Note
Example 21.4. Running as Other Users
sudo rule also has the option of specifying a non-root user or group to run the commands as. The initial rule has the user or group specified using the --sudorule-add-runasuser or --sudorule-add-runasgroup command, respectively.
ipa sudorule-add-runasuser --users=jsmith readfiles
ipa sudorule-add-runasgroup --groups=ITadmins readfiles
$ ipa sudorule-add-runasuser --users=jsmith readfiles
$ ipa sudorule-add-runasgroup --groups=ITadmins readfilessudorule-add-runasuser or sudorule-add-runasgroup command can only set specific users or groups. However, when editing a rule, it is possible to run sudo as all users or all groups by using the --runasusercat or --runasgroupcat option. For example:
ipa sudorule-mod --runasgroupcat=all ruleName
$ ipa sudorule-mod --runasgroupcat=all ruleNameNote
--sudorule-add-runasuser and --sudorule-add-runasgroup commands do not support an all option, only specific user or group names. Specifying all users or all groups can only be used with options with the sudorule-mod command.
Example 21.5. Referencing External Users
sudo rule can be an IdM user, but there are many logical and useful rules where one of the referents is a system user. Similarly, a rule may need to grant or deny access to a host machine on the network which is not an IdM client.
sudo policy can refer to an external user — an identity created and stored outside of IdM (Section 21.3.1, “About External Users”).
sudo rule are:
- --externaluser
- --runasexternaluser
ipa sudorule-add-user --externaluser=ITAdmin readfiles
ipa sudorule-add-runasuser --runasexternaluser=root readfiles
$ ipa sudorule-add-user --externaluser=ITAdmin readfiles
$ ipa sudorule-add-runasuser --runasexternaluser=root readfiles| Command | Description |
|---|---|
| sudorule-add | Add a sudo rule entry. |
| sudorule-add-user | Add a user or a user group to the sudo rule. This user (or every member of the group) is then entitled to sudo any of the commands in the rule. |
| sudorule-add-host | Add a target host for the rule. These are the hosts where the users are granted sudo permissions. |
| sudorule-add-runasgroup | Set a group to run the sudo commands as. This must be a specific user; to specify all users, modify the rule using sudo-rule. |
| sudorule-add-runasuser | Set a user to run the sudo commands as. This must be a specific user; to specify all users, modify the rule using sudo-rule. |
| sudorule-add-allow-command | Add a command that users in the rule have sudo permission to run. |
| sudorule-add-deny-command | Add a command that users in the rule are explicitly denied sudo permission to run. |
| sudorule-add-option | Add a sudoers flag to the sudo rule. |
| sudorule-disable | Temporarily deactivate a sudo rule entry. |
| sudorule-enable | Activate a previously suspended sudo rule. |
| sudorule-del | Remove a sudo rule entirely. |
Example 21.6. Adding and Modifying a New sudo Rule from the Command Line
sudo with any command on selected servers:
- Obtain a Kerberos ticket for the
adminuser or any other user allowed to managesudorules.kinit admin Password for admin@EXAMPLE.COM:
$ kinit admin
Password for admin@EXAMPLE.COM:
Copy to Clipboard Copied! Toggle word wrap Toggle overflow - Add a new
sudorule to IdM.Copy to Clipboard Copied! Toggle word wrap Toggle overflow - Define the who: specify the group of users who will be entitled to use the
sudorule.Copy to Clipboard Copied! Toggle word wrap Toggle overflow - Define the where: specify the group of hosts where the users will be granted the
sudopermissions.Copy to Clipboard Copied! Toggle word wrap Toggle overflow - Define the what: to allow the users to run any
sudocommand, add theallcommand category to the rule.Copy to Clipboard Copied! Toggle word wrap Toggle overflow - To let the
sudocommands be executed as root, do not specify any run-as users or groups. - Add the
!authenticatesudoersoption to specify that the users will not be required to authenticate when using thesudocommand.Copy to Clipboard Copied! Toggle word wrap Toggle overflow - Display the new
sudorule configuration to verify it is correct.Copy to Clipboard Copied! Toggle word wrap Toggle overflow
21.3.5. Suspending and Removing sudo Rules
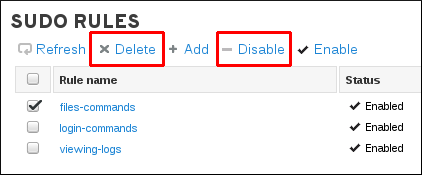
sudo rules can either be temporarily deactivated or entirely deleted from the web UI or from the command line. Suspended rules are removed from the ou=sudoers compat tree without a need for a server restart.
Suspending and Removing sudo Rules from the Web UI
sudo rules:
Figure 21.2. Suspending or Deleting a sudo Rule from the Web UI
Suspending and Removing sudo Rules from the Command Line
ipa sudorule-disable files-commands
ipa sudorule-disable files-commandsipa sudorule-del files-commands
ipa sudorule-del files-commands