Este contenido no está disponible en el idioma seleccionado.
9.2. Managing User Entries
9.2.1. About Username Formats
Copiar enlaceEnlace copiado en el portapapeles!
The default length for usernames is 32 characters.
IdM supports a wide range of username formats, based on this regular expression:
[a-zA-Z0-9_.][a-zA-Z0-9_.-]{0,252}[a-zA-Z0-9_.$-]?
[a-zA-Z0-9_.][a-zA-Z0-9_.-]{0,252}[a-zA-Z0-9_.$-]?Note
The trailing $ symbol is permitted for Samba 3.x machine support.
Any system limits — such as starting a username with a number on Unix systems — apply to the usernames in IdM.
Note
Usernames are case insensitive when they are created, meaning that any case letter can be entered but case is ignored when the username is saved.
Username are automatically normalized to be all lower case, even if the user is created with mixed case or upper case letters.
9.2.2. Adding Users
Copiar enlaceEnlace copiado en el portapapeles!
9.2.2.1. From the Web UI
Copiar enlaceEnlace copiado en el portapapeles!
- Open the Identity tab, and select the Users subtab.
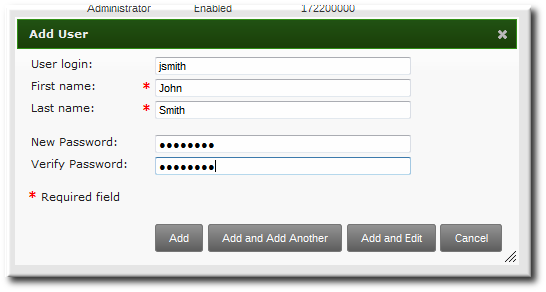
- Click the Add link at the top of the users list.
- Fill in the user's first and last names. The user login (UID) is automatically generated based on the user's full name, but this can be set manually by clicking the Optional field link.
Note
Usernames are case insensitive when they are created, meaning that case is ignored. Username are automatically normalized to be all lower case, even if the user is created with mixed case or upper case letters. - Click the Add and Edit button to go directly to the expanded entry page and fill in more attribute information, as in Section 9.2.3.1, “From the Web UI”. The user entry is created with some basic information already filled in, based on the given user information and the user entry template.
9.2.2.2. From the Command Line
Copiar enlaceEnlace copiado en el portapapeles!
New user entries are added with the
user-add command. Attributes (listed in Table 9.2, “Default Identity Management User Attributes”) can be added to the entry with specific values or the command can be run with no arguments.
ipa user-add [username] [attributes]
[bjensen@server ~]$ ipa user-add [username] [attributes]
When no arguments are used, the command prompts for the required user account information and uses the defaults for the other attributes, with the defaults printed below. For example:
Any of the user attributes can be passed with the command. This will either set values for optional attributes or override the default values for default attributes.
ipa user-add jsmith --first=John --last=Smith --manager=bjensen --email=johnls@example.com --homedir=/home/work/johns --password
[bjensen@server ~]$ ipa user-add jsmith --first=John --last=Smith --manager=bjensen --email=johnls@example.com --homedir=/home/work/johns --passwordNote
Usernames are case insensitive when they are created, meaning that case is ignored. Username are automatically normalized to be all lower case, even if the user is created with mixed case or upper case letters.
Important
When a user is created without specifying a UID or GID number, then the user account is automatically assigned an ID number that is next available in the server or replica range. (Number ranges are described more in Section 9.9, “Managing Unique UID and GID Number Assignments”.) This means that a user always has a unique number for its UID number and, if configured, for its private group.
If a number is manually assigned to a user entry, the server does not validate that the
uidNumber is unique. It will allow duplicate IDs; this is expected (though discouraged) behavior for POSIX entries.
If two entries are assigned the same ID number, only the first entry is returned in a search for that ID number. However, both entries will be returned in searches for other attributes or with
ipa user-find --all.
9.2.3. Editing Users
Copiar enlaceEnlace copiado en el portapapeles!
9.2.3.1. From the Web UI
Copiar enlaceEnlace copiado en el portapapeles!
- Open the Identity tab, and select the Users subtab.
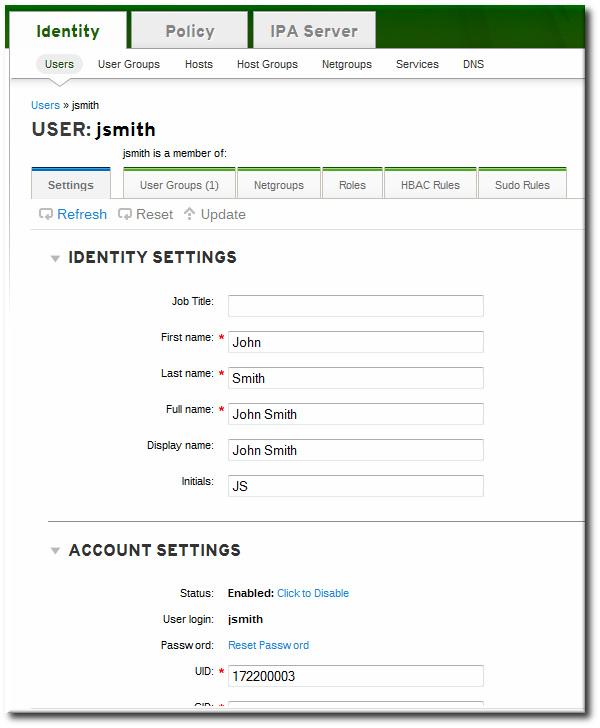
- Click the name of the user to edit.
- There are a number of different types of attributes that can be edited for the user. All of the default attributes are listed in Table 9.2, “Default Identity Management User Attributes”. Most of the attributes in the Identity Settings and Account Settings areas have default values filled in for them, based on the user information or on the user entry template.
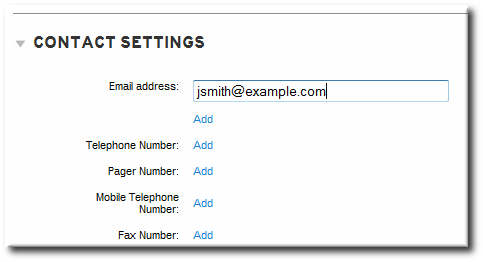
- Edit the fields or, if necessary, click the Add link by an attribute to create the attribute on the entry.
- When the edits are done, click the Update link at the top of the page.
9.2.3.2. From the Command Line
Copiar enlaceEnlace copiado en el portapapeles!
The
user-mod command edits user accounts by adding or changing attributes. At its most basic, the user-mod specifies the user account by login ID, the attribute to edit, and the new value:
ipa user-mod loginID --attributeName=newValue
[bjensen@server ~]$ ipa user-mod loginID --attributeName=newValue
For example, to change a user's work title from Editor II to Editor III:
ipa user-mod jsmith --title="Editor III"
[bjensen@server ~]$ ipa user-mod jsmith --title="Editor III"
Identity Management allows multi-valued attributes, based on attributes in LDAP that are allowed to have multiple values. For example, a person may have two email addresses, one for work and one for personal, that are both stored in the mail attribute. Managing multi-valued attributes can be done using the
--addattr option.
If an attribute allows multiple values — like mail — simply using the command-line argument will overwrite the value with the new value. This is also true for using
--setattr. However, using --addattr will add a new attribute; for a multi-valued attribute, it adds the new value in addition to any existing values.
Example 9.1. Multiple Mail Attributes
A user is created first using his work email account.
ipa user-add jsmith --first=John --last=Smith --email=johnls@example.com
[bjensen@server ~]$ ipa user-add jsmith --first=John --last=Smith --email=johnls@example.com
Then, his personal email account is added.
ipa user-mod jsmith --addattr=mail=johnnys@me.com
[bjensen@server ~]$ ipa user-mod jsmith --addattr=mail=johnnys@me.com
Both email addresses are listed for the user.
To set two values at the same time, use the
--addattr option twice:
ipa user-add jsmith --first=John --last=Smith --email=johnls@example.com --addattr=mail=johnnys@me.com --addattr=mail=admin@example.com
[bjensen@server ~]$ ipa user-add jsmith --first=John --last=Smith --email=johnls@example.com --addattr=mail=johnnys@me.com --addattr=mail=admin@example.com9.2.4. Deleting Users
Copiar enlaceEnlace copiado en el portapapeles!
Deleting a user account permanently removes the user entry and all its information from IdM, including group memberships and passwords. External configuration — like a system account and home directory — will still exist on any server or local machine where they were created, but they cannot be accessed through IdM.
Deleting a user account is permanent. The information cannot be recovered; a new account must be created.
Note
If all admin users are deleted, then you must use the Directory Manager account to create a new administrative user.
Alternatively, any user who belongs in the group management role can also add a new admin user.
9.2.4.1. With the Web UI
Copiar enlaceEnlace copiado en el portapapeles!
- Open the Identity tab, and select the Users subtab.
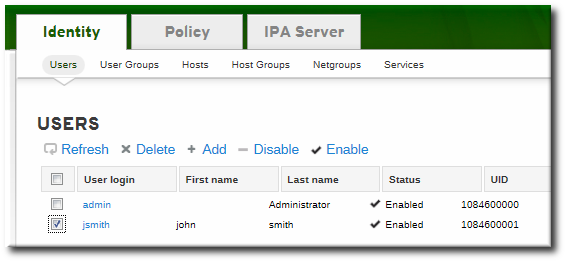
- Select the checkboxes by the names of the users to delete.
- Click the Delete link at the top of the task area.
- When prompted, confirm the delete action.
9.2.4.2. From the Command Line
Copiar enlaceEnlace copiado en el portapapeles!
Users are deleted using the
user-del command and then the user login. For example, a single user:
ipa user-del jsmith
[bjensen@server ~]$ ipa user-del jsmith
To delete multiple users, simply list the users, separated by spaces.
ipa user-del jsmith bjensen mreynolds cdickens
[bjensen@server ~]$ ipa user-del jsmith bjensen mreynolds cdickens
When deleting multiple users, use the
--continue option to force the command to continue regardless of errors. A summary of the successful and failed operations is printed to stdout when the command completes. If --continue is not used, then the command proceeds with deleting users until it encounters an error, and then it exits.


