이 콘텐츠는 선택한 언어로 제공되지 않습니다.
Chapter 29. Publishing Fuse Integration Projects to a Server
You deploy Fuse Integration projects into a server runtime using the Eclipse publishing mechanism. To do so, you must have defined and added the server to the Servers view in the Fuse Integration perspective. For a step-by-step demonstration, see .
Overview
You can set up supported servers to publish assigned Fuse projects automatically or to publish them only when you manually invoke the publish command.
Each server runtime added to the Servers view has its own Overview page that contains its configuration, connection, and publishing details:
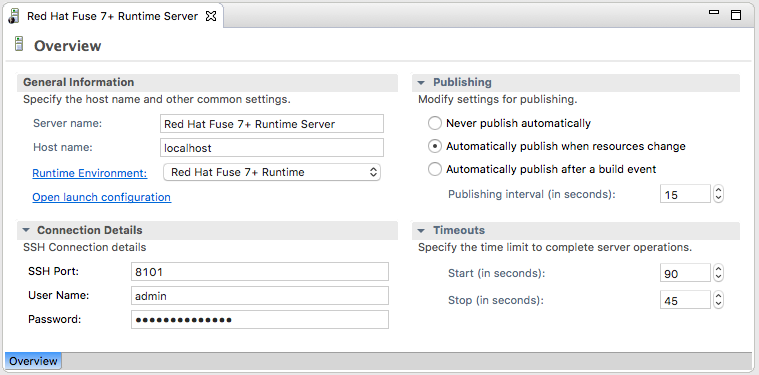
You might need to expand Publishing to expose the server runtime publishing options and default settings:
Never publish automatically — You must select this option to manually publish projects.
ImportantYou must also disable the If server started, publish changes immediately option on the server’s Add and Remove page (for details see, the section called “Publishing Fuse projects manually”.
- Automatically publish when resources change — [default] Enable this option to automatically publish or republish a Fuse project when you save changes made to it. How quickly projects are published depends on the Publishing interval (default is 15 seconds).
- Automatically publish after a build event — For Fuse projects, works the same as Automatically publish when resources change.
Publishing Fuse projects automatically when resources change
The default publishing option for server runtimes is Automatically publish when resources change.
- If necessary, start the server runtime to which you want to publish a Fuse project. For details, see Section 28.2, “Starting a Server”.
- In the Servers view, double-click the server runtime to open its Overview page.
- Expand Publishing, and then select Automatically publish when resources change.
- To increase or decrease the interval between publishing cycles, click the radio button next to Publishing interval (in seconds) up or down, as appropriate.
In the Servers view, right-click the server runtime to open the context menu, and then select Add and Remove.
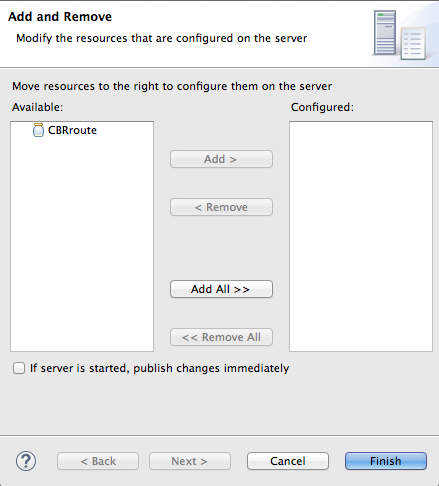
All resources available for publishing appear in the Available column.
To assign a resource (in this case, the CBRroute Fuse project) to the server runtime:
- Double-click it, or
Select it, and click Add.
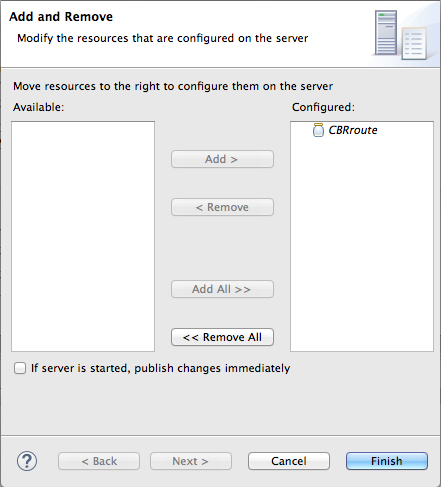
The selected resource moves to the Configured column:
At this stage, the time at which the assigned resource would actually be published depends on whether the server runtime was running and on the Publishing interval setting. However, if the server was stopped, you would have to manually publish the project after you started the server (for details, see the section called “Publishing Fuse projects manually”).
Click the If server started, publish changes immediately option to enable it:
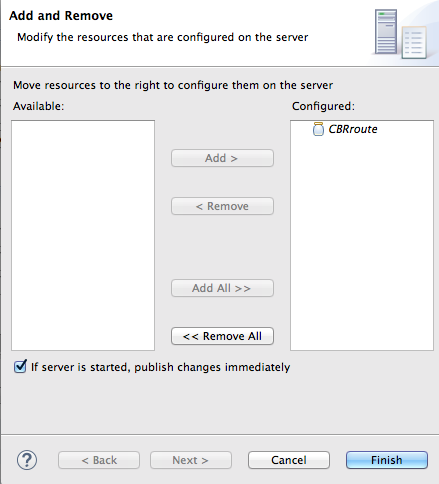
This option ensures that the configured project is published immediately once you click Finish. The Automatically publish when resources change option on the server runtime Overview page ensures that the configured project is republished whenever changes made to the local project are saved.
Click Finish.
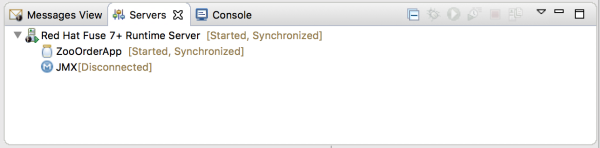
The project appears in the Servers view under the server runtime node, and the server runtime status reports [Started,Publishing…].
When publishing is done, the status of both the server runtime and the project report is [Started,Synchronized]:
 Note
NoteFor a server runtime, Synchronized means that all published resources on the server are identical to their local counterparts. For a published resource, Synchronized means that it is identical to its local counterpart.
Publishing Fuse projects manually
- If necessary, start the server runtime to which you want to publish a Fuse project. For details, see Section 28.2, “Starting a Server”.
- In the Servers view, double-click the server runtime to open its Overview page.
- Expand Publishing, and then select Never publish automatically.
-
Click File
Save to save the publishing option changes. If the Fuse project has already been assigned to the server runtime, make sure this option is disabled: If server started, publish changes immediately:
- In the Servers view, right-click the server runtime to open the context menu.
- Click Add and Remove… to open the server’s Add and Remove page.
- If the following option is enabled, disable it: If server started, publish changes immediately.
- Skip to [finish].
If the Fuse project has not been assigned to the server runtime, assign it now:
- Follow [startAssignResource] through [stopAssignResource] in the section called “Publishing Fuse projects automatically when resources change”.
- Do not enable the If server started, publish changes immediately option.
Click Finish.
The project appears in the Servers view under the server runtime node, and the server runtime status reports [Started]:
In the Servers view, right-click the project’s node. In this example, select the CBRroute Fuse project to open the context menu:
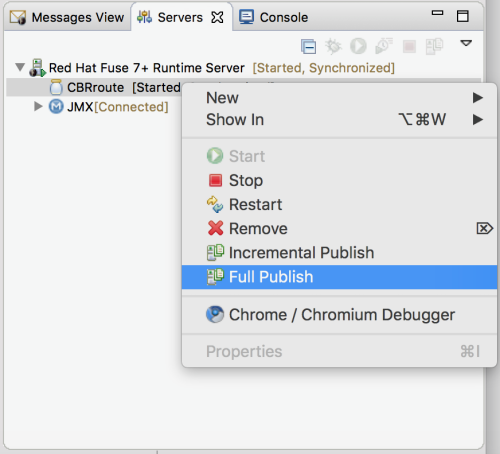
Select Full Publish.
During the publishing operation, the status of both the server runtime and the project report [Started,Republish].
When publishing is done, the status of both the server runtime and the project report [Started,Synchronized]:
NoteThe tooling does not support the Incremental Publish option. Clicking Incremental Publish results in a full publish.
Verifying the project was published to the server
After you have published a Fuse project to a server runtime, you can connect to the server and check that the project’s bundle was installed on it.
- Connect to the server runtime. For details see the section called “Connecting to a running server in the Servers view”.
In the Servers view, expand the server runtime tree to expose the Bundles node and select it.
The tooling populates the Properties view with a list of bundles that are installed on the server:
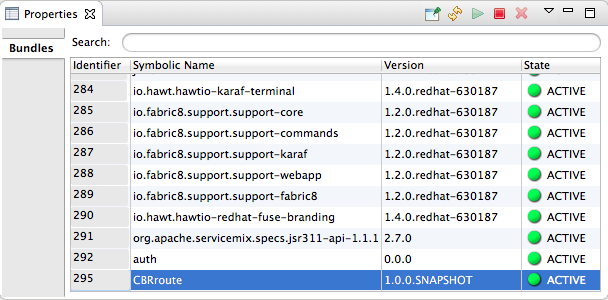
To find your project’s bundle, either scroll down to the bottom of the list, or start typing the bundle’s Symbolic Name in the Properties view’s Search box. The bundle’s Symbolic Name is the name you gave your project when you created it.
NoteAlternatively, you can issue the
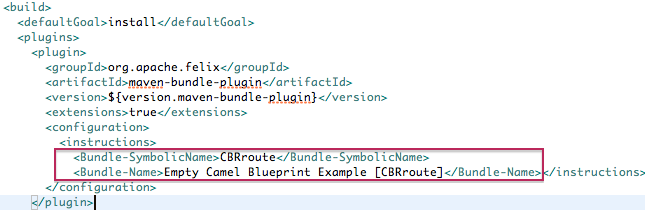
osgi:listcommand in the Terminal view to see a generated list of bundles installed on the Fuse server runtime. The tooling uses a different naming scheme for OSGi bundles displayed by theosgi:listcommand.In the
<build>section of project’spom.xmlfile, you can find the bundle’s symbolic name and its bundle name (OSGi) listed in themaven-bundle-pluginentry; for example: