Este conteúdo não está disponível no idioma selecionado.
Chapter 7. Managing logical volumes using the Web Console
7.1. Activating a logical volume using the Web Console
Follow these instructions to activate a logical volume using the Web Console.
- Log in to the Web Console.
-
Click the hostname
Storage. - Click the volume group. The Volume Group Overview page opens.
- Click the logical volume.
- Click Activate.
7.2. Creating a thinly provisioned logical volume using the Web Console
- Log in to the Web Console.
-
Click the hostname
Storage. - Click the volume group. The Volume Group Overview page opens.
Click Create Thin Volume beside the thin pool that should host the volume.
Figure 7.1. A thin pool
The Create Thin Volume window opens.
- Specify a Name for the new volume.
- Specify a Size for the new volume.
- Click Create.

The new volume appears in the list of logical volumes.
7.3. Creating a thickly provisioned logical volume using the Web Console
Follow these instructions to create a logical thin pool using the Web Console.
- Log in to the Web Console.
-
Click the hostname
Storage. - Click the volume group. The Volume Group Overview page opens.
Click + Create new Logical Volume. The Create Logical Volume window opens.
Figure 7.2. The Create Logical Volume window
- Specify a Name for your logical volume.
-
Set Purpose to
Block device for file systems. - Specify a Size for your logical volume.
- Click Create.
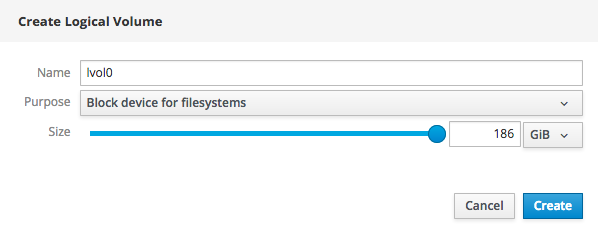
Your new logical volume appears in the list of logical volumes in this volume group.
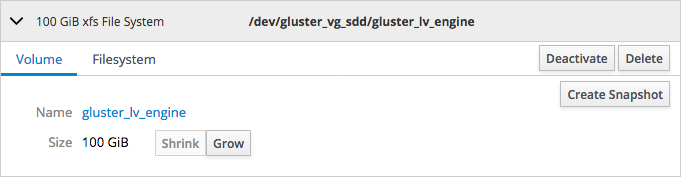
7.4. Deactivating a logical volume using the Web Console
Follow these instructions to deactivate a logical volume using the Web Console.
- Log in to the Web Console.
-
Click the hostname
Storage. - Click the volume group. The Volume Group Overview page opens.
- Click the logical volume.
Click Deactivate.
Figure 7.3. The logical volume summary
7.5. Deleting a logical volume using the Web Console
Follow these instructions to delete a thinly- or thickly-provisioned logical volume.
- Log in to the Web Console.
-
Click the hostname
Storage. - Click the volume group. The Volume Group Overview page opens.
- Click the logical volume.
- Click Delete in the logical volume summary.
- Click Delete to confirm deletion.
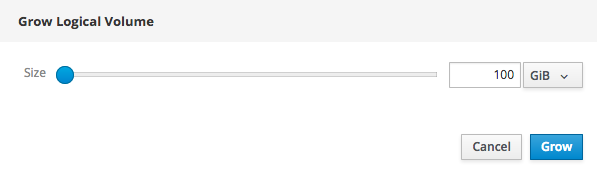
7.6. Growing a logical volume using the Web Console
Follow these instructions to increase the size of a logical volume using the Web Console.
- Log in to the Web Console.
-
Click the hostname
Storage. - Click the volume group. The Volume Group Overview page opens.
- Click the logical volume.
On the Volume subtab, click Grow.
Figure 7.4. Logical Volume section expanded
The Grow Logical Volume window opens.
Figure 7.5. The Grow Logical Volume window
- Specify the new Size of the logical volume.
- Click Grow.