此内容没有您所选择的语言版本。
18.5. Nagios Advanced Configuration
18.5.1. Creating Nagios User
复制链接链接已复制到粘贴板!
To create a new Nagios user and set permissions for that user, follow the steps given below:
- Login as
rootuser. - Run the command given below with the new user name and type the password when prompted.
# htpasswd /etc/nagios/passwd newUserName - Add permissions for the new user in
/etc/nagios/cgi.cfgfile as shown below:authorized_for_system_information=nagiosadmin,newUserName authorized_for_configuration_information=nagiosadmin,newUserName authorized_for_system_commands=nagiosadmin,newUserName authorized_for_all_services=nagiosadmin,newUserName authorized_for_all_hosts=nagiosadmin,newUserName authorized_for_all_service_commands=nagiosadmin,newUserName authorized_for_all_host_commands=nagiosadmin,newUserNameNote
To setread onlypermission for users, addauthorized_for_read_only=usernamein the/etc/nagios/cgi.cfgfile. - Start
nagiosandhttpdservices using the following commands:# service httpd restart # service nagios restart - Verify Nagios access by using the following URL in your browser, and using the user name and password.
https://NagiosServer-HostName-or-IPaddress/nagios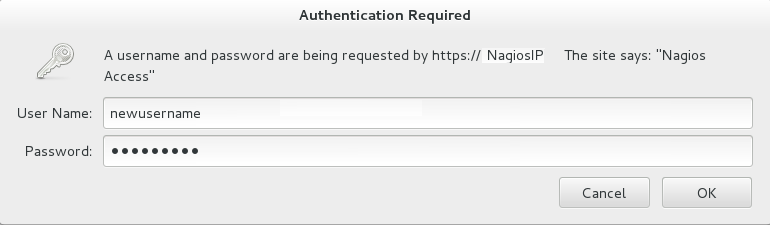
Figure 18.14. Nagios Login
18.5.2. Changing Nagios Password
复制链接链接已复制到粘贴板!
The default Nagios user name and password is
nagiosadmin. This value is available in the /etc/nagios/cgi.cfg file.
- Login as
rootuser. - To change the default password for the Nagios Administrator user, run the following command with the new password:
# htpasswd -c /etc/nagios/passwd nagiosadmin - Start
nagiosandhttpdservices using the following commands:# service httpd restart # service nagios restart - Verify Nagios access by using the following URL in your browser, and using the user name and password that was set in Step 2:
https://NagiosServer-HostName-or-IPaddress/nagios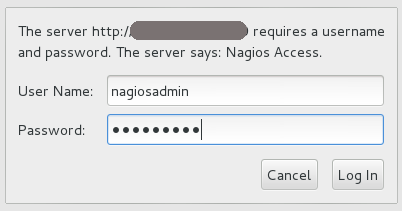
Figure 18.15. Nagios Login
18.5.3. Configuring SSL
复制链接链接已复制到粘贴板!
For secure access of Nagios URL, configure SSL:
- Create a 1024 bit RSA key using the following command:
openssl genrsa -out /etc/ssl/private/{cert-file-name.key} 1024 - Create an SSL certificate for the server using the following command:
openssl req -key nagios-ssl.key -new | openssl x509 -out nagios-ssl.crt -days 365 -signkey nagios-ssl.key -reqEnter the server's host name which is used to access the Nagios Server GUI as Common Name. - Edit the
/etc/httpd/conf.d/ssl.conffile and add path to SSL Certificate and key files correspondingly forSSLCertificateFileandSSLCertificateKeyFilefields as shown below:SSLCertificateFile /etc/pki/tls/certs/nagios-ssl.crt SSLCertificateKeyFile /etc/pki/tls/private/nagios-ssl.key - Edit the
/etc/httpd/conf/httpd.conffile and comment the port 80 listener as shown below:# Listen 80 - In
/etc/httpd/conf/httpd.conffile, ensure that the following line is not commented:<Directory "/var/www/html"> - Restart the
httpdservice on thenagiosserver using the following command:# service httpd restart
18.5.4. Integrating LDAP Authentication with Nagios
复制链接链接已复制到粘贴板!
You can integrate LDAP authentication with Nagios plug-in. To integrate LDAP authentication, follow the steps given below:
- In apache configuration file
/etc/httpd/conf/httpd.conf, ensure that LDAP is installed and LDAP apache module is enabled.The configurations are displayed as given below if the LDAP apache module is enabled.You can enable the LDAP apache module by deleting the # symbol.LoadModule ldap_module modules/mod_ldap.so LoadModule authnz_ldap_module modules/mod_authnz_ldap.so - Edit the
nagios.conffile in/etc/httpd/conf.d/nagios.confwith the corresponding values for the following:- AuthBasicProvider
- AuthLDAPURL
- AuthLDAPBindDN
- AuthLDAPBindPassword
- Edit the CGI authentication file
/etc/nagios/cgi.cfgas given below with the path where Nagios is installed.nagiosinstallationdir = /usr/local/nagios/ or /etc/nagios/ - Uncomment the lines shown below by deleting # and set permissions for specific users:
Note
Replacenagiosadminand user names with * to give any LDAP user full functionality of Nagios.authorized_for_system_information=user1,user2,user3 authorized_for_configuration_information=nagiosadmin,user1,user2,user3 authorized_for_system_commands=nagiosadmin,user1,user2,user3 authorized_for_all_services=nagiosadmin,user1,user2,user3 authorized_for_all_hosts=nagiosadmin,user1,user2,user3 authorized_for_all_service_commands=nagiosadmin,user1,user2,user3 authorized_for_all_host_commands=nagiosadmin,user1,user2,user3 - Enable the
httpd_can_connect_ldapboolean, if not enabled.# getsebool httpd_can_connect_ldap # setsebool httpd_can_connect_ldap on - Restart
httpdservice andnagiosserver using the following commands:# service httpd restart # service nagios restart