此内容没有您所选择的语言版本。
7.3. Model a JDBC Source
This section shows how to model a JDBC Source, using the Guide View action set. For this example, we will connect to a MySQL database, but you can use the same process to connect to any supported database.
Open Guides View
To open the Teiid Designer's Guides view, on the main menu, click Window >Show View > Other... and then click Teiid Designer > Guides view in the dialog.The Guides view is shown below, with the Model JDBC Source Action Set selected: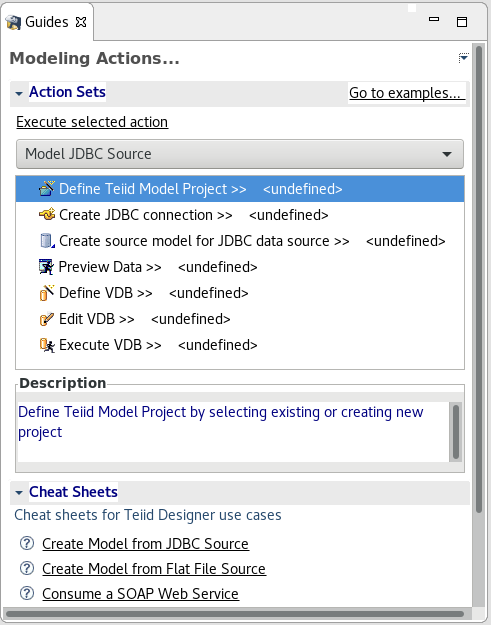
Figure 7.1. Guides View
Define Teiid Model Project
Note
First, you can see Define Model Project dialog where you can choose existing project by clicking Existing... button or create new project by clicking New... button. Next steps describe the creation of new Teiid Model Project.- The Define Teiid Model Project action launches the New Model Project wizard. In the Action Set list, double-click the action (or select the action, then click Execute selected action). The wizard is launched as shown below:Enter a project name, for example, MyProject in the Name field. Then click Next.
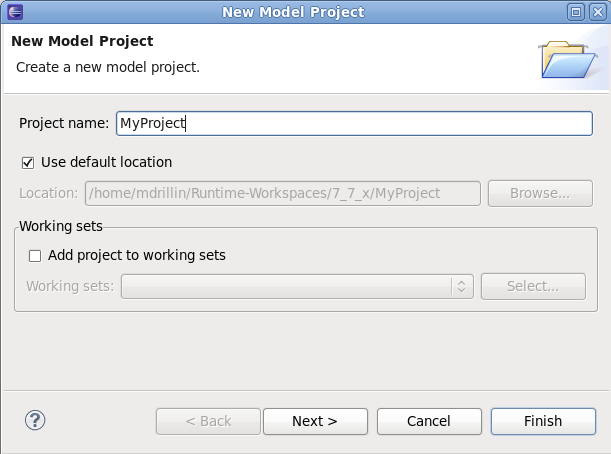
Figure 7.2. New Project Wizard
- The next page of the wizard is Project References which allows you to select other projects which this project will reference. Click Next.
- The next page of the wizard is shown below:
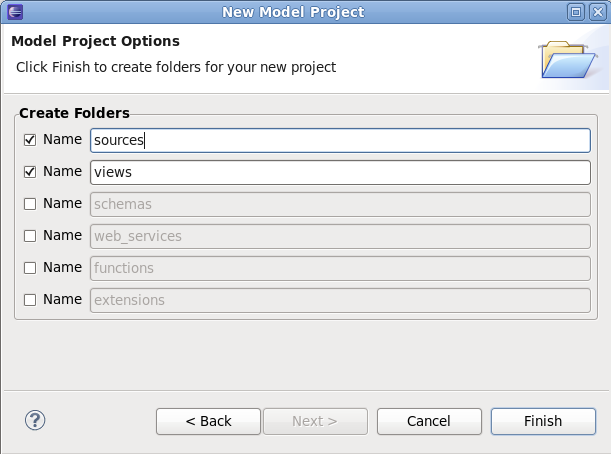
Figure 7.3. New Project Folders
- Under Create Folders, clear schemas and web_services. We will not need them for this example. Now, click Finish to exit the wizard. The project has now been created.Your Model Explorer view will look like this:
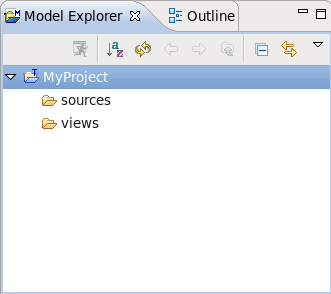
Figure 7.4. Model Explorer
Create JDBC connection
The Create JDBC connection action will create the Connection profile for your database. The connection profile defines the properties and driver to be used when connecting to the database. In the Action Set list, double-click the action (or select it, then click Execute selected action). The wizard is launched as shown below: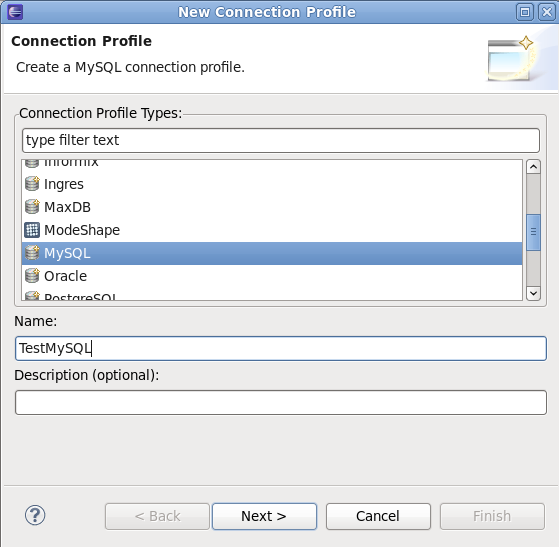
Figure 7.5. Connection Profile Name and Type
Select the type of database that you are connecting to (for example, MySQL), and enter a name for the connection profile, for example, TestMySQL. Click Next.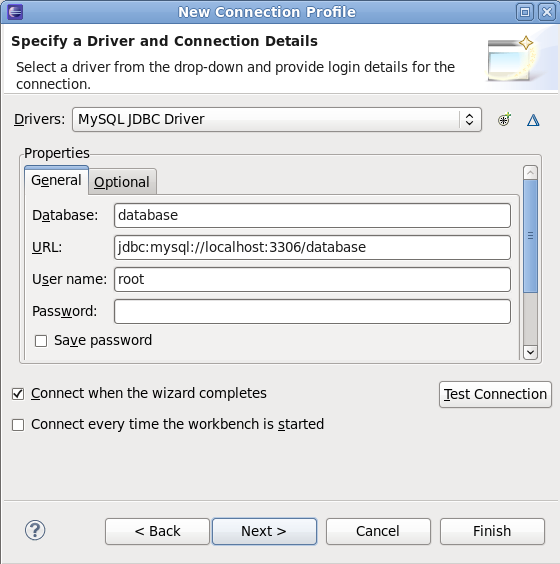
Figure 7.6. Connection Profile properties
Now, select the driver and enter the login properties for your database. Click Finish to complete the profile creation.Create source model for JDBC data source
- The Create source model for JDBC data source action will now utilize the Connection profile that you have created, to import the metadata from the database to create your Teiid Source Model. In the Action Set list, double-click the action (or select it, then click Execute selected action). The wizard is launched as shown below:
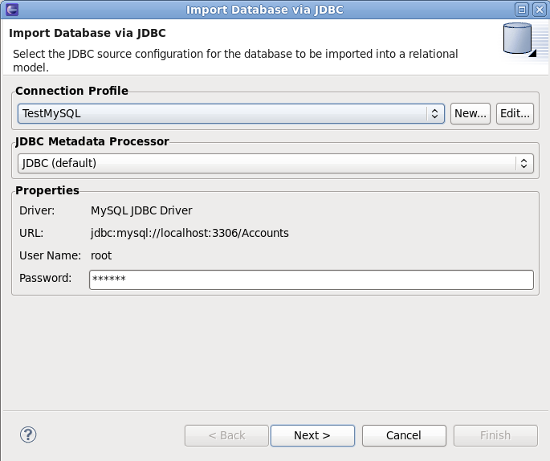
Figure 7.7. Select Connection Profile
- On this page, select the TestMySQL Connection profile that you created in the previous step. Click Next.
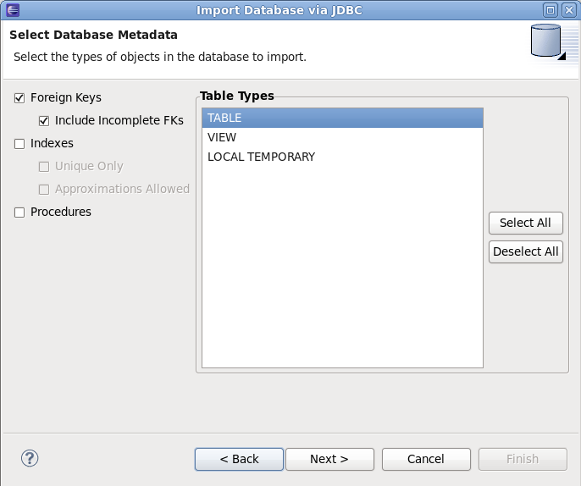
Figure 7.8. Select Database Metadata
- On this page, select the database metadata that you want to import. When finished, click Next.
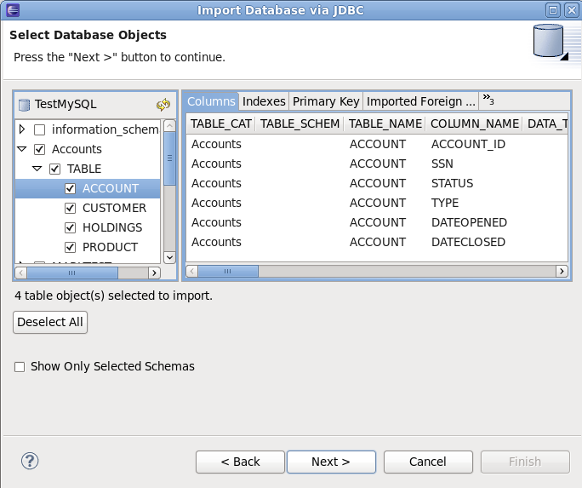
Figure 7.9. Select Database Objects
- On this page, select the specific objects from the database that you want to import. When finished, click Next.
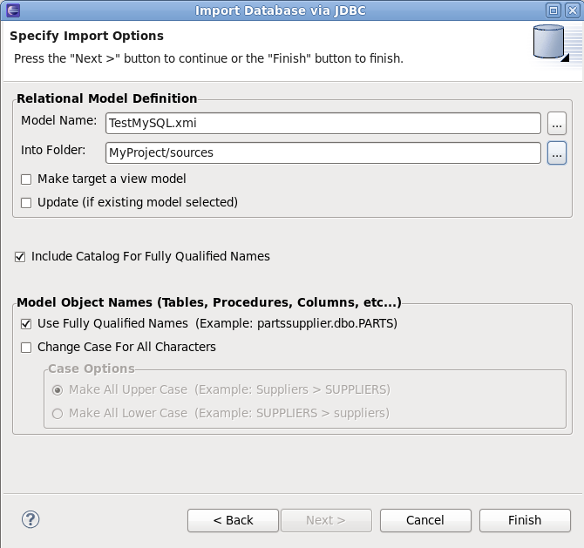
Figure 7.10. Import Options
- Finally, choose the name for the model to be created (defaults to
profileName.xmi). The Into Folder field defines the target location for your new model. Select theMyProject/sourcesfolder. Now, click Finish. The source model has now been created. Your Model Explorer view will look like this: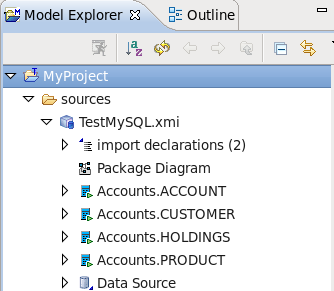
Figure 7.11. Model Explorer
Preview Data
All execution capabilities in Teiid Designer (Preview Data, VDB execution) require you to connect to a running JBoss Data Virtualization Server. See Server Management chapter for instructions on establishing a JBoss Data Virtualization Server connection. Once you are connected to a JBoss Data Virtualization Server, you can proceed with the following steps.- The Preview Data action allows you to preview a sample of data rows from your source. In the Action Set list, double-click the action (or select it, then click Execute selected action).
- In the first dialog, click ... button and then select the source table you want to preview, as shown below:
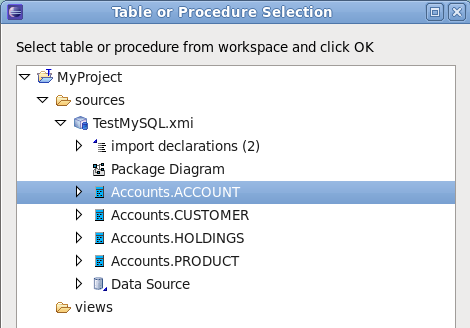
Figure 7.12. Select Preview Table
- After selecting the table, click OK button in both dialogs. After that, the Custom Preview Data dialog is shown when you can see SQL query and VDB XML Content. Click for running query.
Note
When the server is not running during creating source model, you can get Data Sources Missing dialog. Just click to for creating a new data source.
Figure 7.13. Custom Preview Data
- Now, the preview results will be displayed:
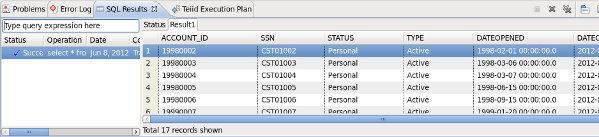
Figure 7.14. Preview Results
Define VDB
- The Define VDB action allows you to create a VDB (Virtual Database) artifact for deployment to a JBoss Data Virtualization Server. In the Action Set list, double-click the action (or select it, then click Execute selected action). If you choose to create a new VDB, the following dialog is displayed:

Figure 7.15. New VDB
- In the dialog, select the target In Folder location where the VDB will be placed. Enter a Name for the VDB, for example myVDB. Finally, select the models that will be included in the VDB. When finished, click Finish. The VDB will be created in your Teiid Model Project as shown in the following figure.
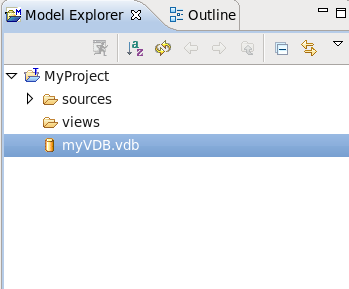
Figure 7.16. Model Explorer
Edit VDB
The Edit VDB action opens VDB editor for editing VDB.Execute VDB
The Execute VDB action allows you to execute your VDB and run sample queries against it. In the Action Set list, double-click the action (or select it, then click Execute selected action). In the dialog, select the VDB you want to execute, then click OK. The VDB will be deployed and executed, and the perspective will switch to the Database Development perspective. You can now run queries against the VDB, as show in the following example: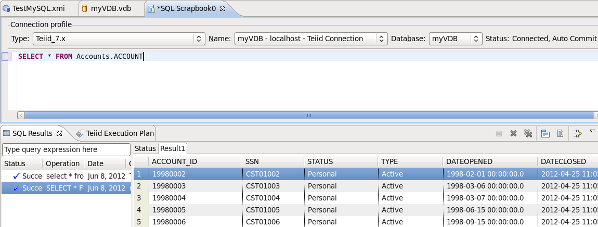
Figure 7.17. Execute VDB Example