Ce contenu n'est pas disponible dans la langue sélectionnée.
10.3. Installing Drivers during the Windows Installation
Procedure 10.3. Installing virtio drivers during the Windows installation
Install the virtio-win package
Use the following command to install the virtio-win package:# yum install virtio-winCreate the guest virtual machine
Important
Create the virtual machine, as normal, without starting the virtual machine. Follow one of the procedures below.Select one of the following guest-creation methods, and follow the instructions.Create the guest virtual machine with virsh
This method attaches the virtio driver floppy disk to a Windows guest before the installation.If the virtual machine is created from an XML definition file withvirsh, use thevirsh definecommand not thevirsh createcommand.- Create, but do not start, the virtual machine. Refer to the Red Hat Enterprise Linux Virtualization Administration Guide for details on creating virtual machines with the
virshcommand. - Add the driver disk as a virtualized floppy disk with the
virshcommand. This example can be copied and used if there are no other virtualized floppy devices attached to the guest virtual machine. Note that vm_name should be replaced with the name of the virtual machine.# virsh attach-disk vm_name /usr/share/virtio-win/virtio-win.vfd fda --type floppyYou can now continue with Step 3.
Create the guest virtual machine with virt-manager and changing the disk type
- At the final step of the virt-manager guest creation wizard, check the Customize configuration before install check box.

Figure 10.16. The virt-manager guest creation wizard
Click on the button to continue. Open the Add Hardware wizard
Click the button in the bottom left of the new panel.Select storage device
Storage is the default selection in the Hardware type list.
Figure 10.17. The Add new virtual hardware wizard
Ensure the Select managed or other existing storage radio button is selected. Click .
Figure 10.18. Select managed or existing storage
In the new window that opens, click Browse Local. Navigate to/usr/share/virtio-win/virtio-win.vfd, and click to confirm.Change Device type to Floppy disk, and click to continue.
Figure 10.19. Change the Device type
Confirm settings
Review the device settings.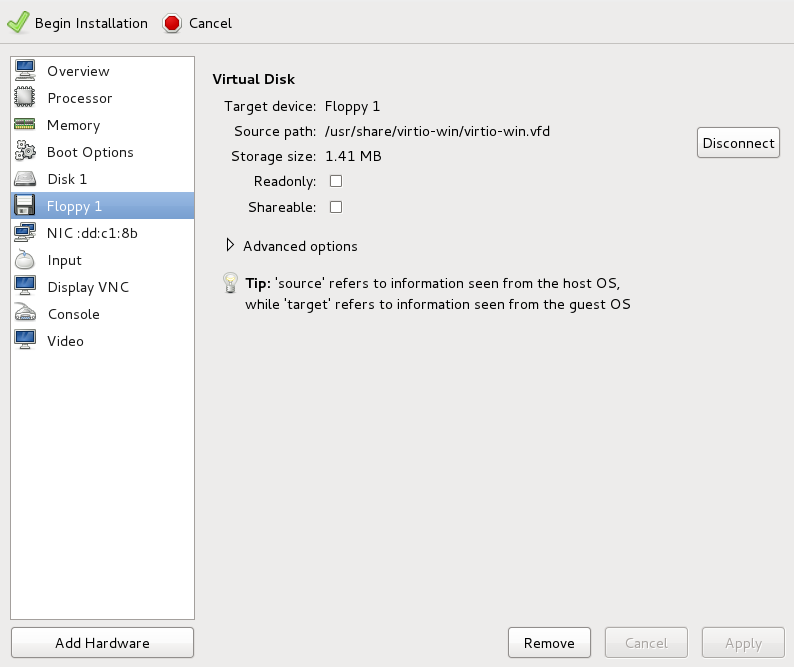
Figure 10.20. The virtual machine hardware information window
You have now created a removable device accessible by your virtual machine.Change the hard disk type
To change the hard disk type from IDE Disk to Virtio Disk, we must first remove the existing hard disk, Disk 1. Select the disk and click on the button.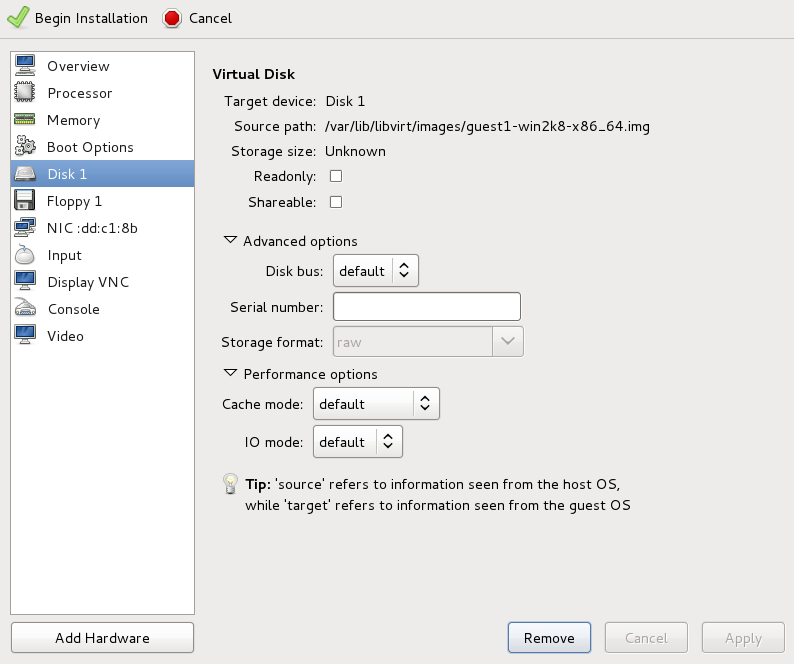
Figure 10.21. The virtual machine hardware information window
Add a new virtual storage device by clicking Add Hardware. Then, change the Device type from IDE disk to Virtio Disk. Click to confirm the operation.
Figure 10.22. The virtual machine hardware information window
Ensure settings are correct
Review the settings for VirtIO Disk 1.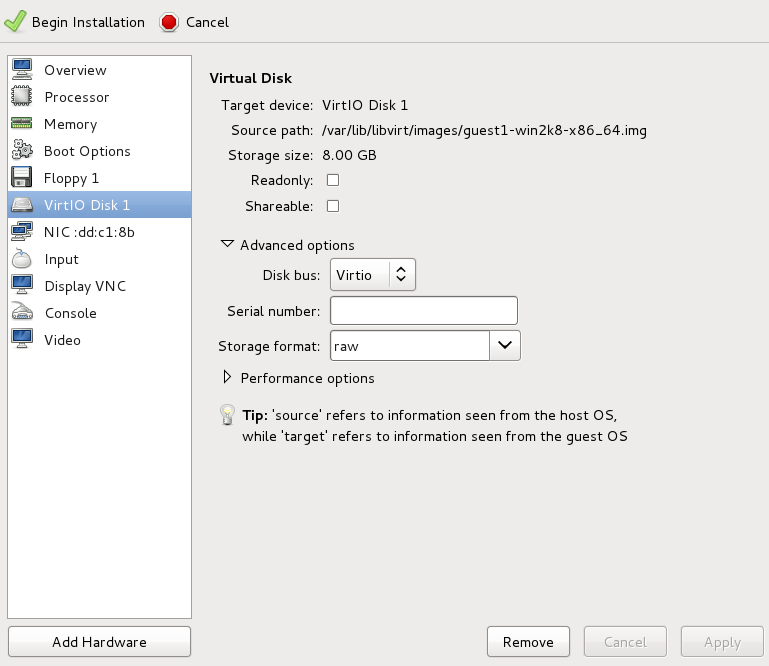
Figure 10.23. The virtual machine hardware information window
When you are satisfied with the configuration details, click the Begin Installation button.You can now continue with Step 3.
Create the guest virtual machine with virt-install
Append the following parameter exactly as listed below to add the driver disk to the installation with thevirt-installcommand:--disk path=/usr/share/virtio-win/virtio-win.vfd,device=floppyImportant
If the device you wish to add is adisk(that is, not afloppyor acdrom), you will also need to add thebus=virtiooption to the end of the--diskparameter, like so:--disk path=/usr/share/virtio-win/virtio-win.vfd,device=disk,bus=virtioAccording to the version of Windows you are installing, append one of the following options to thevirt-installcommand:--os-variant win2k3--os-variant win7You can now continue with Step 3.
Additional steps for driver installation
During the installation, additional steps are required to install drivers, depending on the type of Windows guest.Windows Server 2003
Before the installation blue screen repeatedly press F6 for third party drivers.
Figure 10.24. The Windows Setup screen
Press S to install additional device drivers.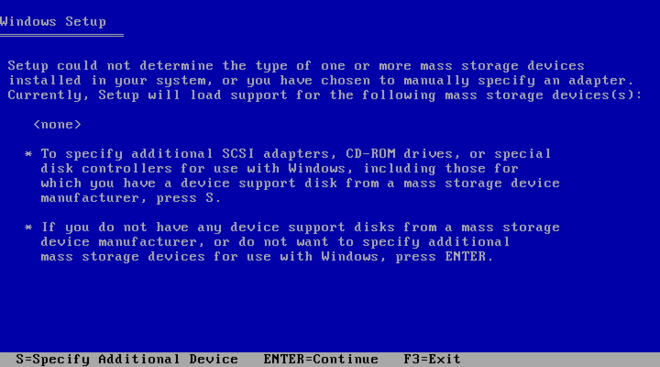
Figure 10.25. The Windows Setup screen
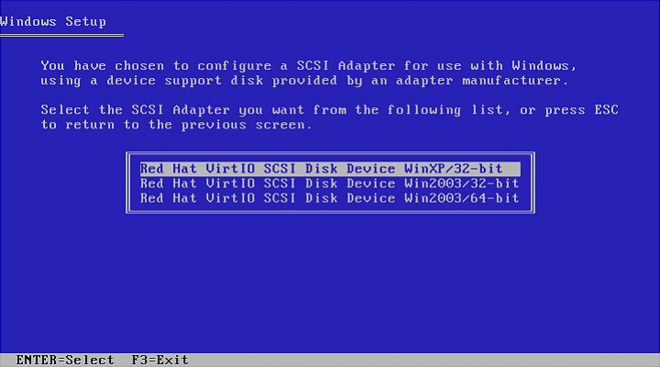
Figure 10.26. The Windows Setup screen
Press Enter to continue the installation.Windows Server 2008
Follow the same procedure for Windows Server 2003, but when the installer prompts you for the driver, click on Load Driver, point the installer toDrive A:and pick the driver that suits your guest operating system and architecture.