Manage chats
Manage your chat history and configuration in RHDH to organize your workspace, resume earlier tasks, or find past solutions.
Before you begin
- You have configured the Developer Hub Intelligent Assistant plugin in Red Hat Developer Hub.
- You have logged in to the RHDH console.
About this task
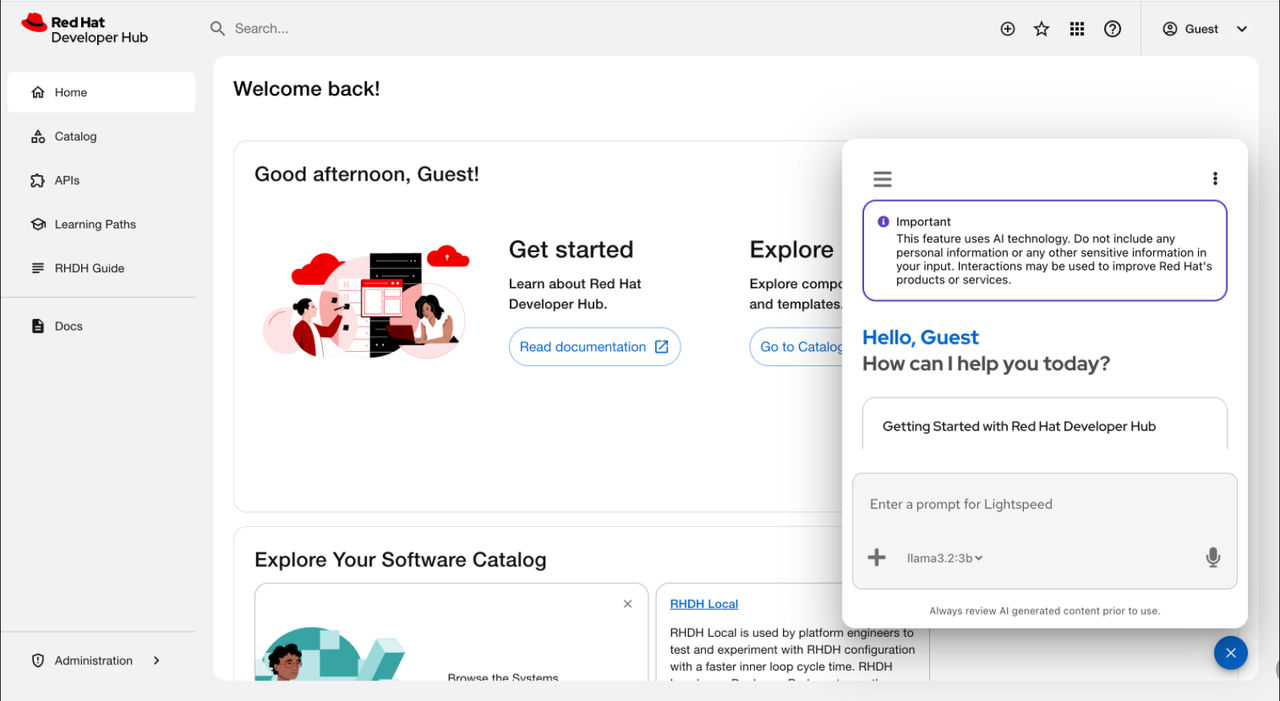
Procedure
-
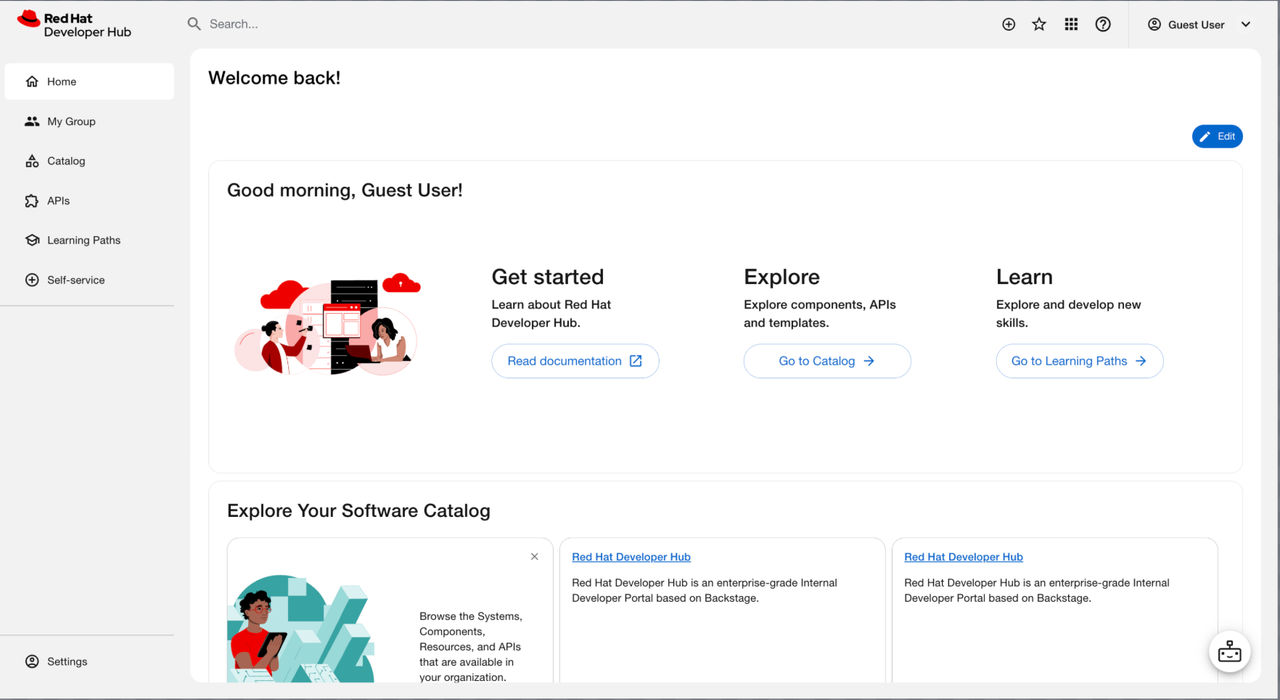
Click the Open intelligent assistant floating action button at the lower right of the screen to open the chat overlay.
-
Optional: Configure the interface display and server settings:
- Click the Chatbot options icon (⋮) in the header to open the options menu.
- In the Chatbot options menu, toggle Enable pinned chats or Disable pinned chats to show or hide the pinned chats. The system enables this option by default.
- Available only if Model Context Protocol (MCP) is configured: In the Chatbot options menu, click MCP settings to manage Model Context Protocol connections.
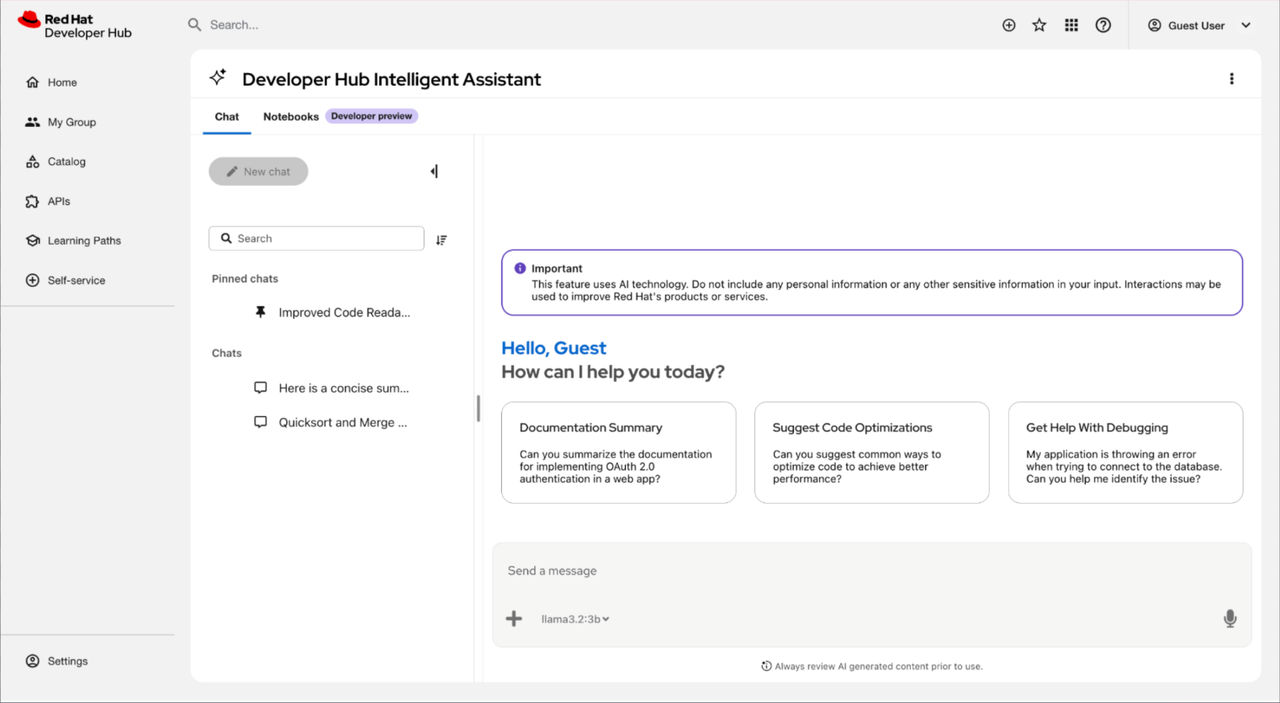
- In the Chatbot options menu, under Display mode, select any of the following views:
- Overlay: A floating window is displayed over the current page content.
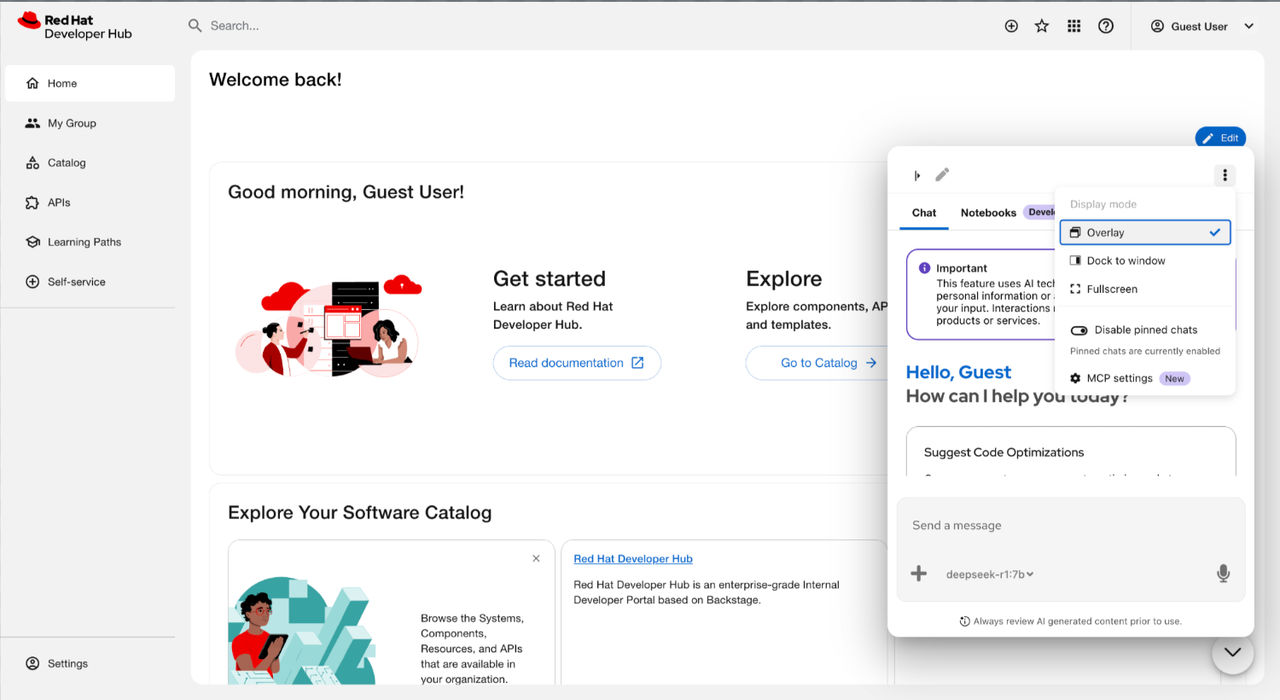
- Dock to window: A panel attaches to the right side of the screen. Activating this mode automatically closes the Quick start panel if it is already open.
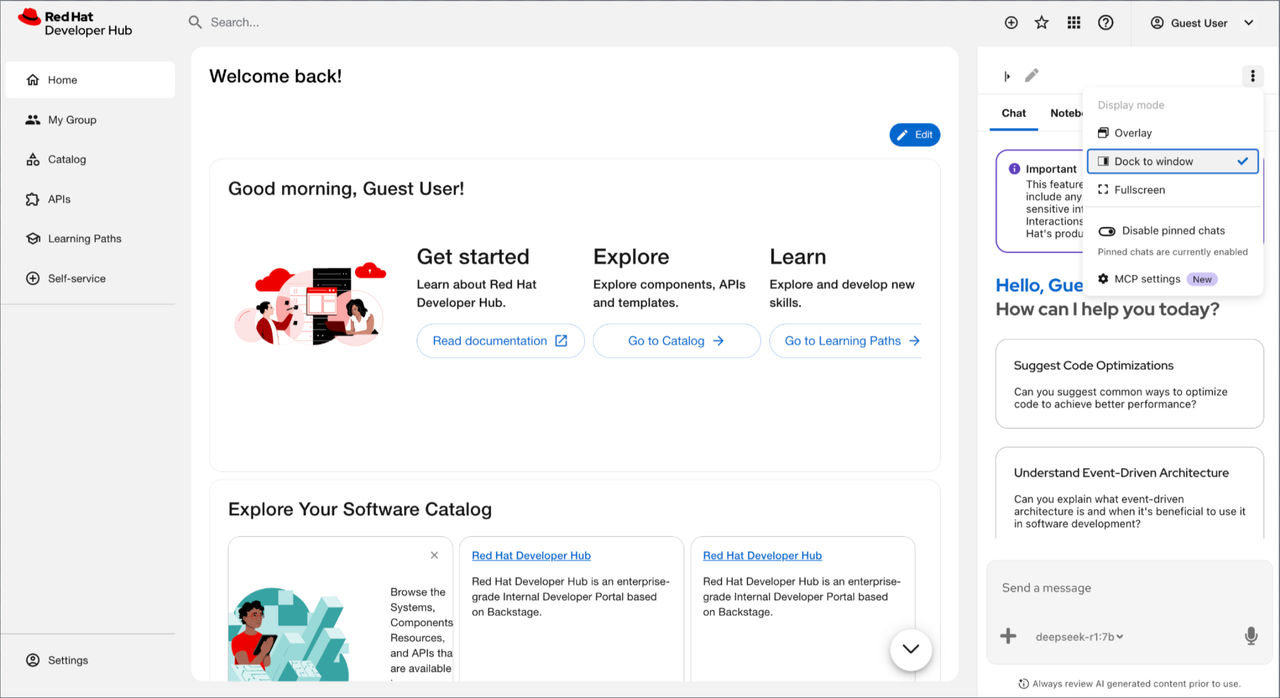
- Fullscreen: A dedicated page opens for intensive chat sessions. This mode displays a revised header containing the Intelligent Assistant logo and a horizontal tab bar, which replaces the previous main menu. Bookmark the URL in your browser to save a direct link to the chat interface.
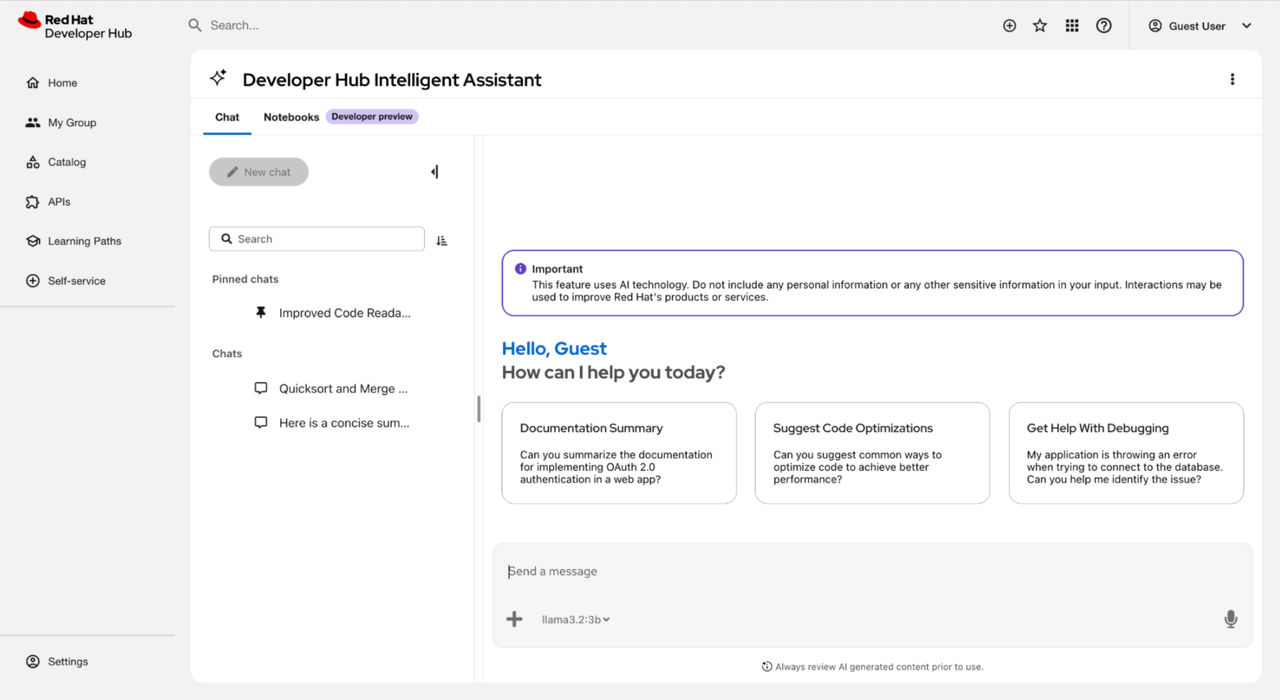
- Overlay: A floating window is displayed over the current page content.
- Click the Chatbot options icon (⋮) in the header to open the options menu.
-
Start a chat or load an earlier session:
- Enter a prompt: Type a query in the Send a message chat field and press Enter.
- Use a sample: Click a prompt tile.
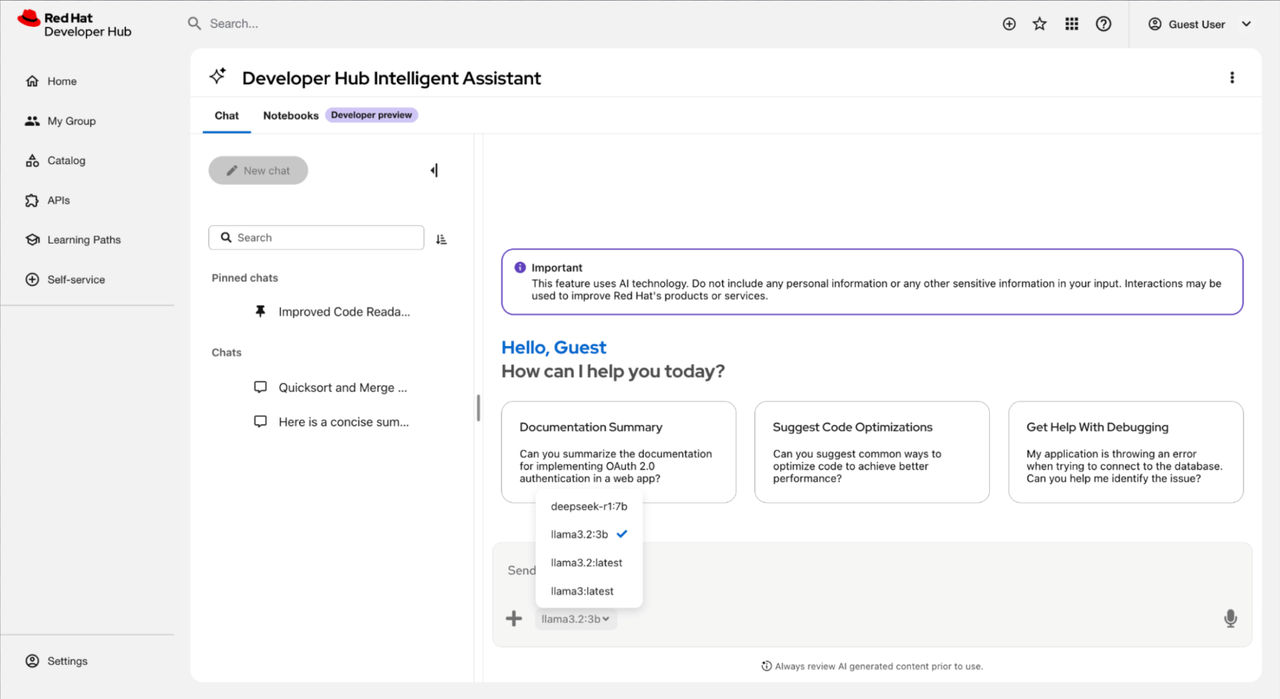
- Change the AI model: Select a model from the model selector dropdown menu inside the prompt bar.
- Attach a file: Click the (
+) icon on the left of the prompt bar to upload a.yaml,.json, or.txtfile. Descriptive text clarifies the function of the icon.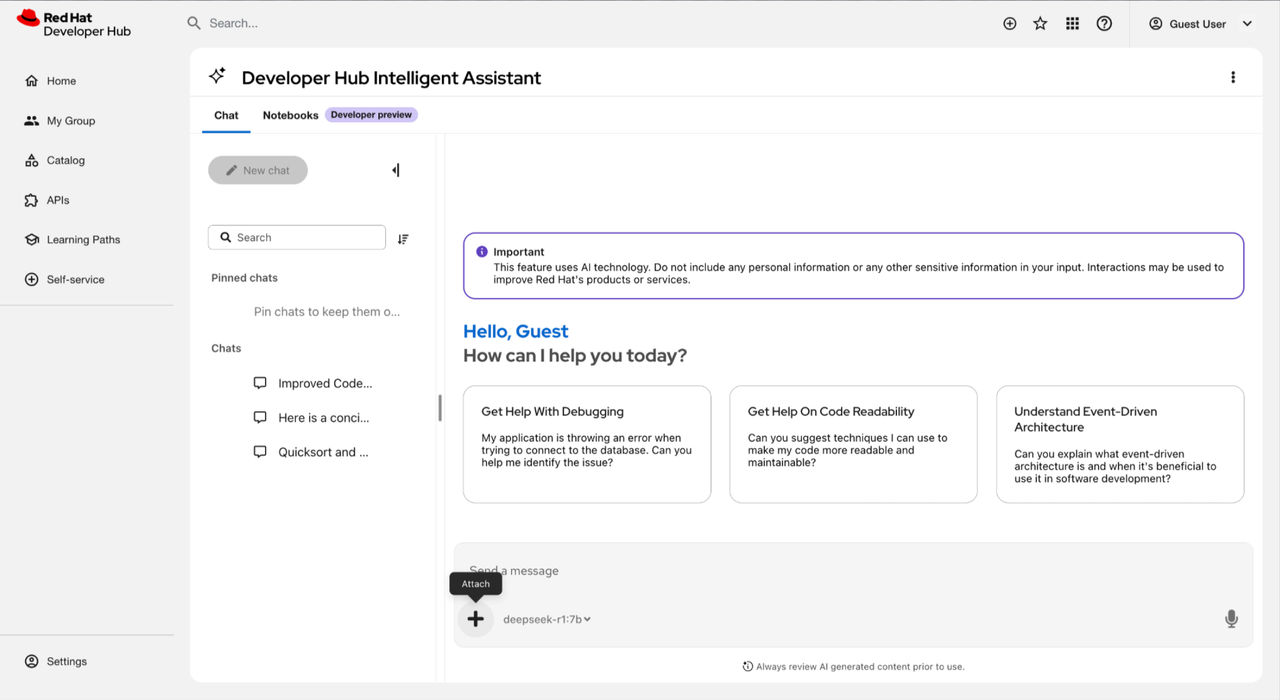
- Click the attached file name to open the Preview attachment window.
- View the read-only content, or click Edit to modify the file.
- Use voice: Click the Use microphone icon. The microphone and send buttons are located on the right side of the prompt bar.
- Control AI generation: Use the control buttons on the right side of the prompt bar. Click the Send (
>) button to submit queries, or click the Stop button to halt AI generation.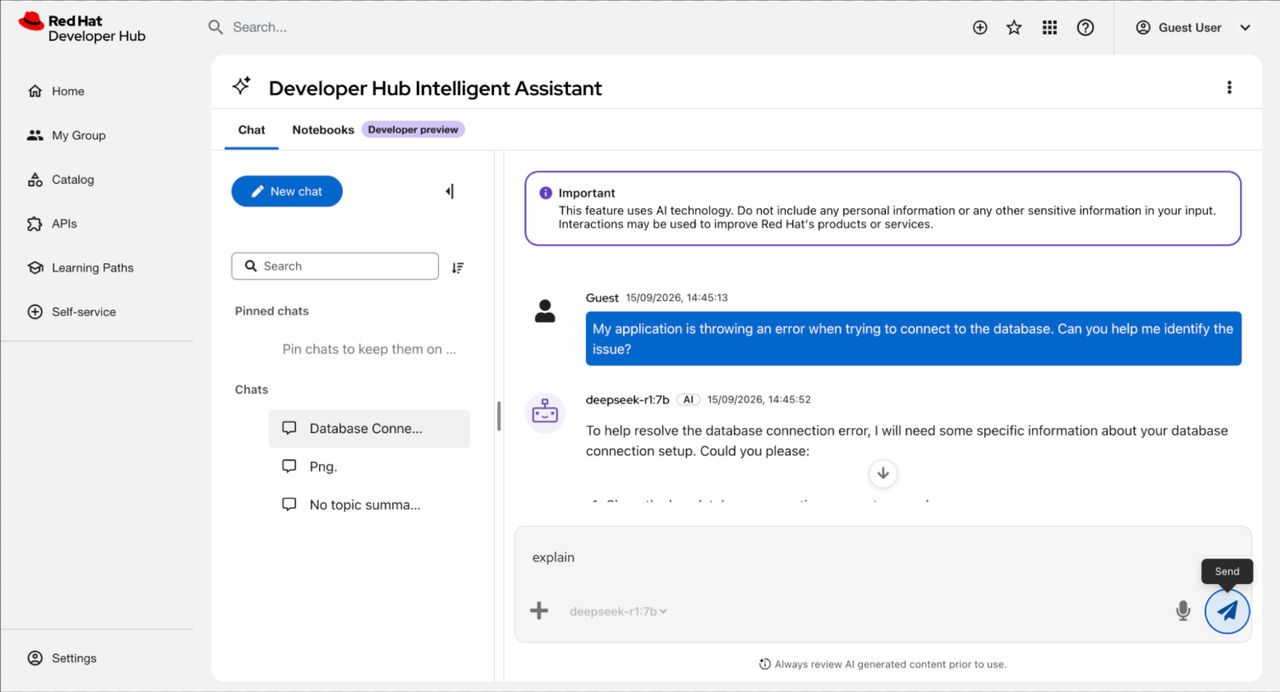
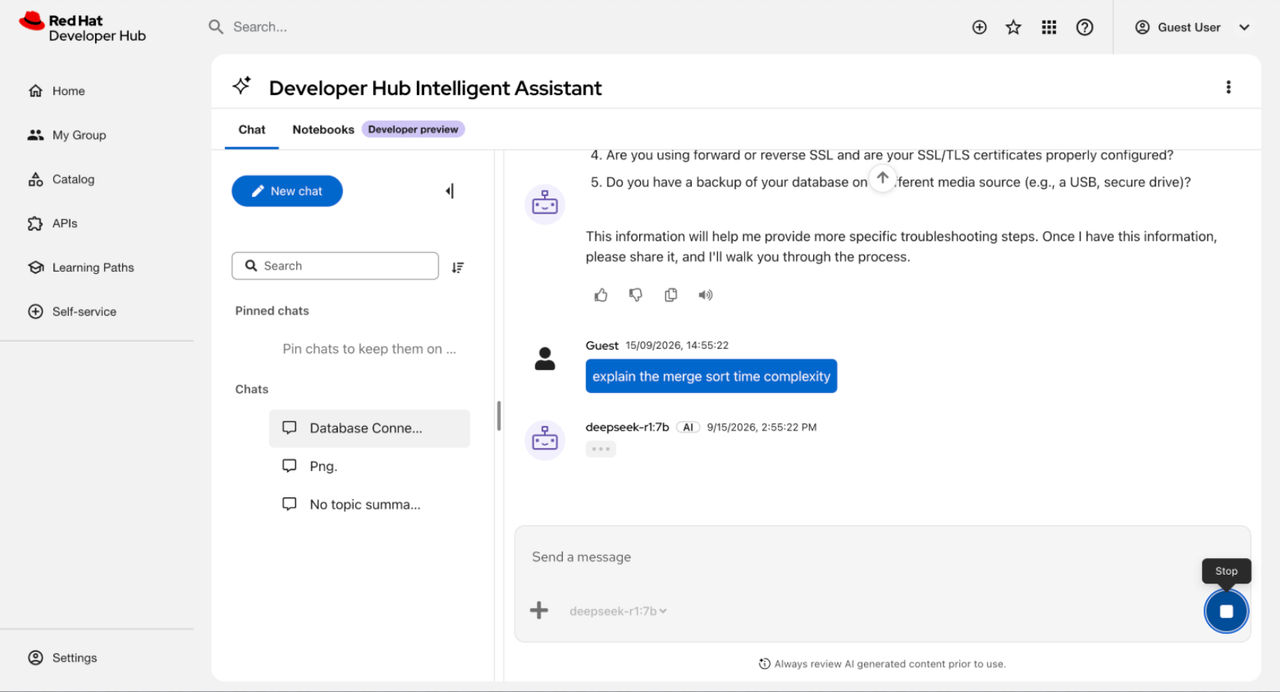
- Resume a chat: Select a title from the Chats list.
-
Organize your chat history:
- Start a new topic: Click New chat to reset the assistant’s context. When the history panel is collapsed, click the New chat icon to create a new chat.
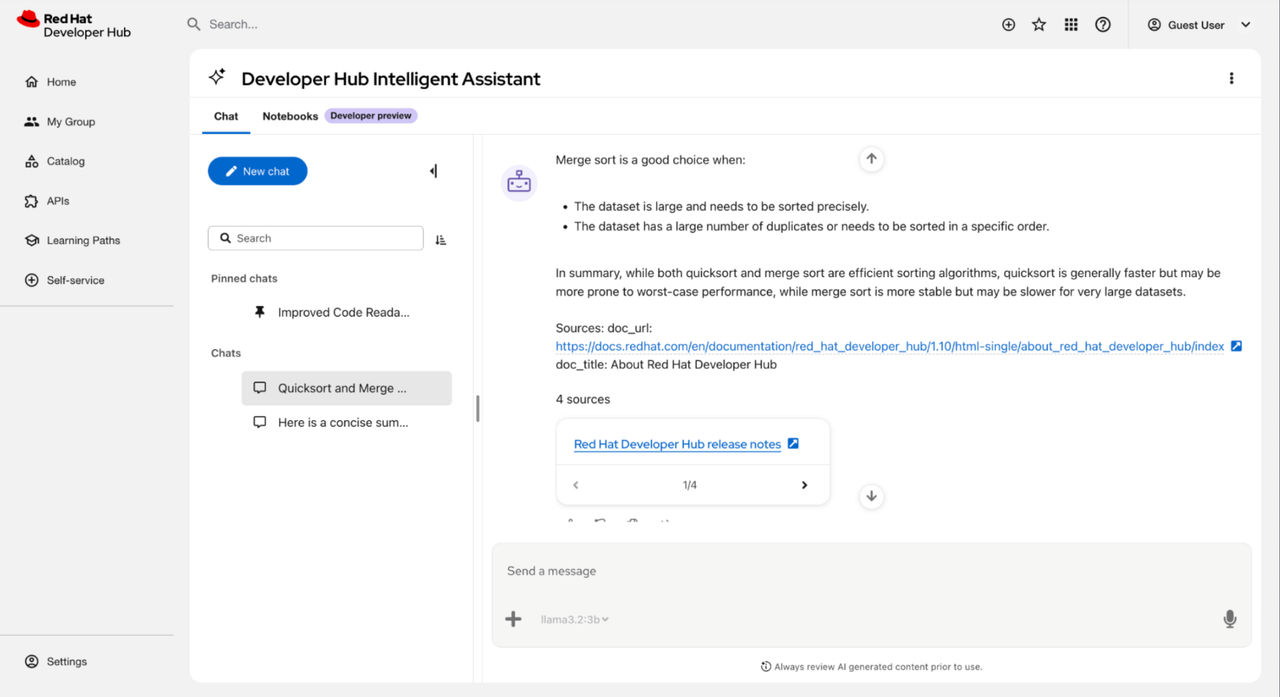
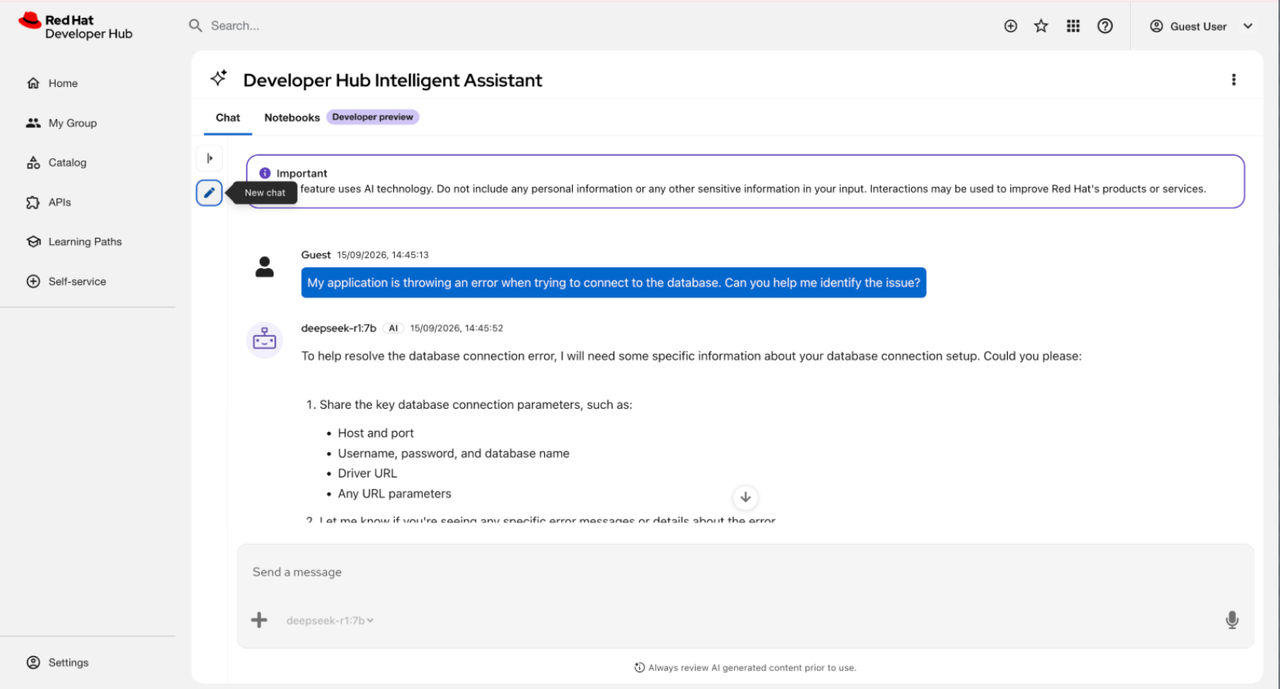
- Search history: Enter a keyword in the Search field.
- Rename a session: Click Options next to a chat title, select Rename, enter a new name in the Rename chat? dialog, and click Rename.
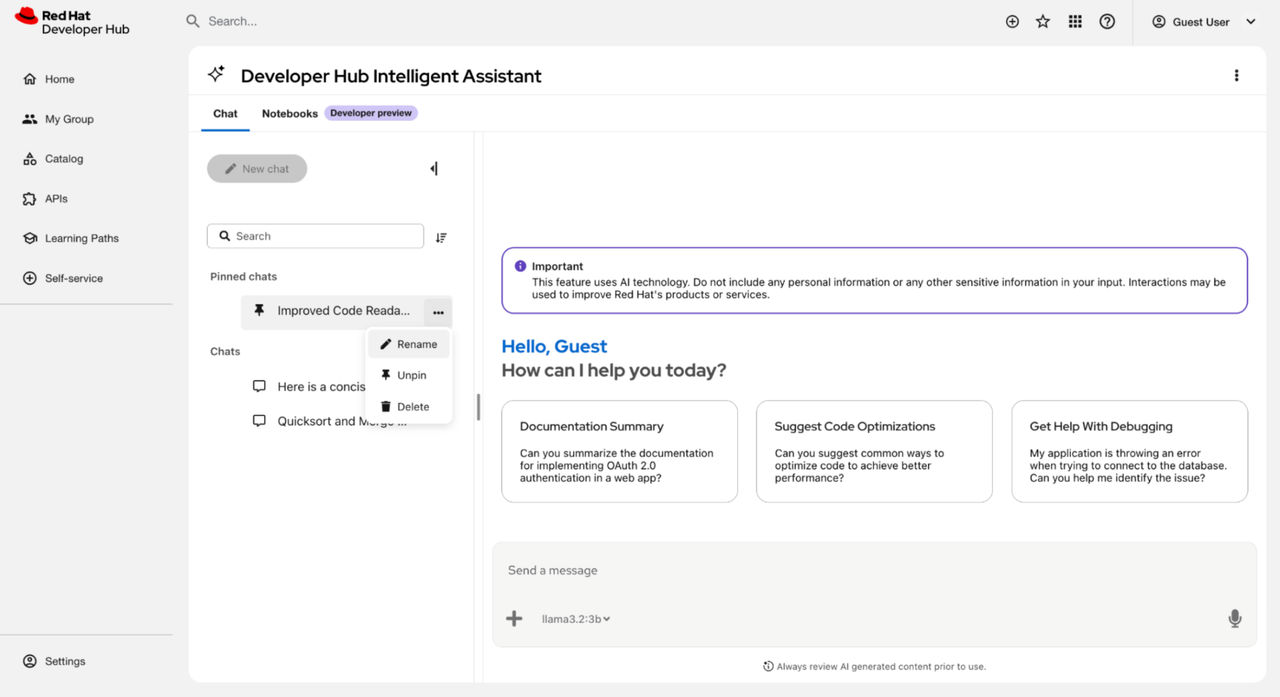
- Pin a chat: Click Options next to a chat title and select Pin. The chat moves to the Pinned group.
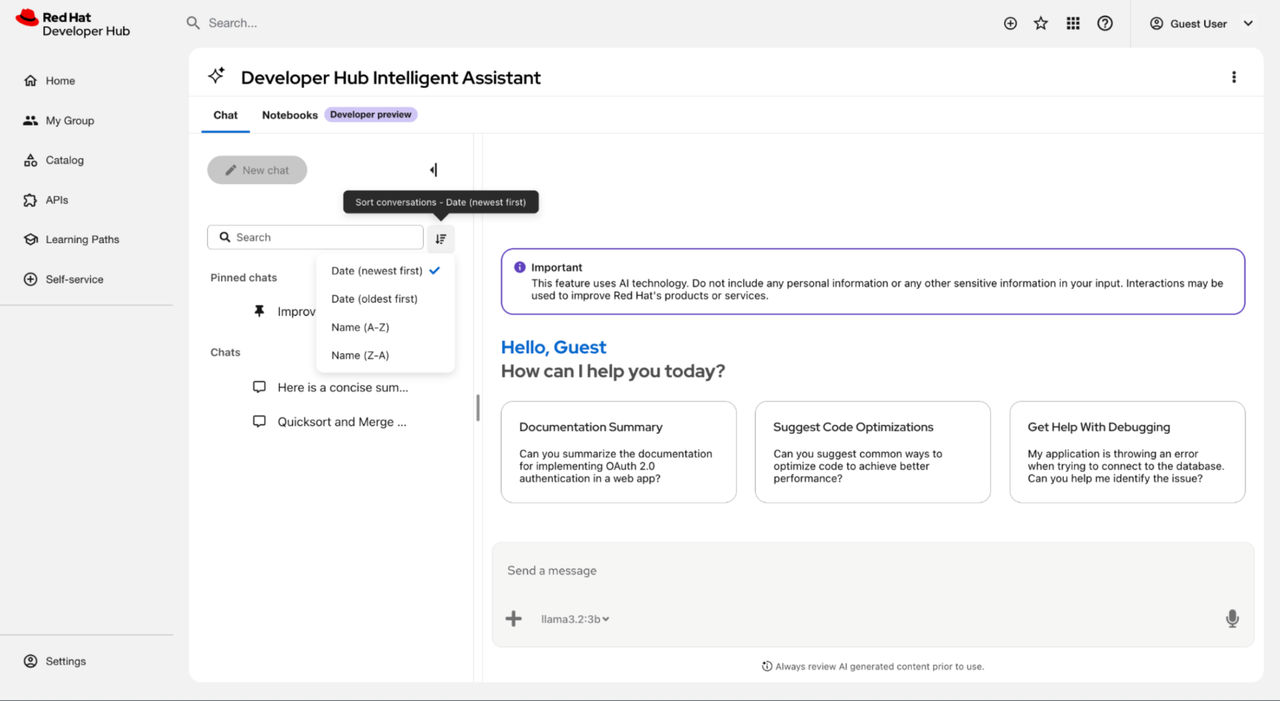
- Sort chats: Click the Sort control and choose a sorting criterion, such as Date (Newest first).
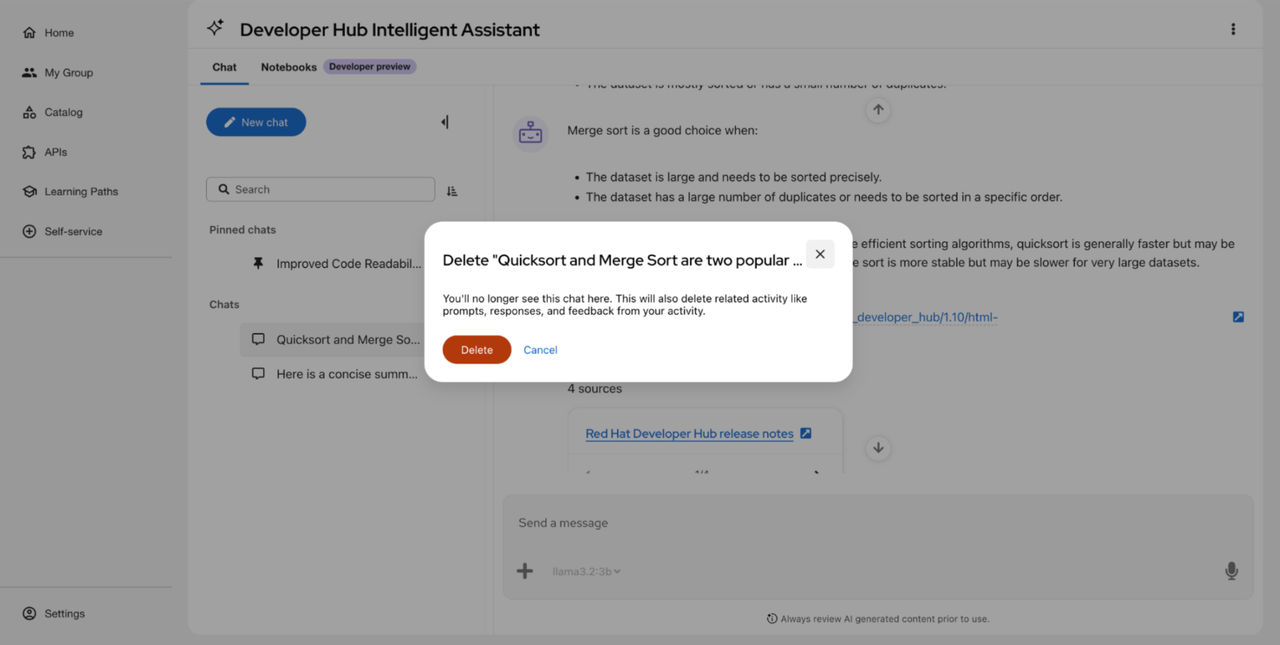
- Delete a chat: Click Options next to a chat title and select Delete.
- Collapse or expand a category: Click a category header, such as Pinned, Saved prompts, or Recent, to collapse or expand that section of the chat history sidebar.
- Expand or collapse the panel: Click the Expand/collapse icon to toggle the history panel.
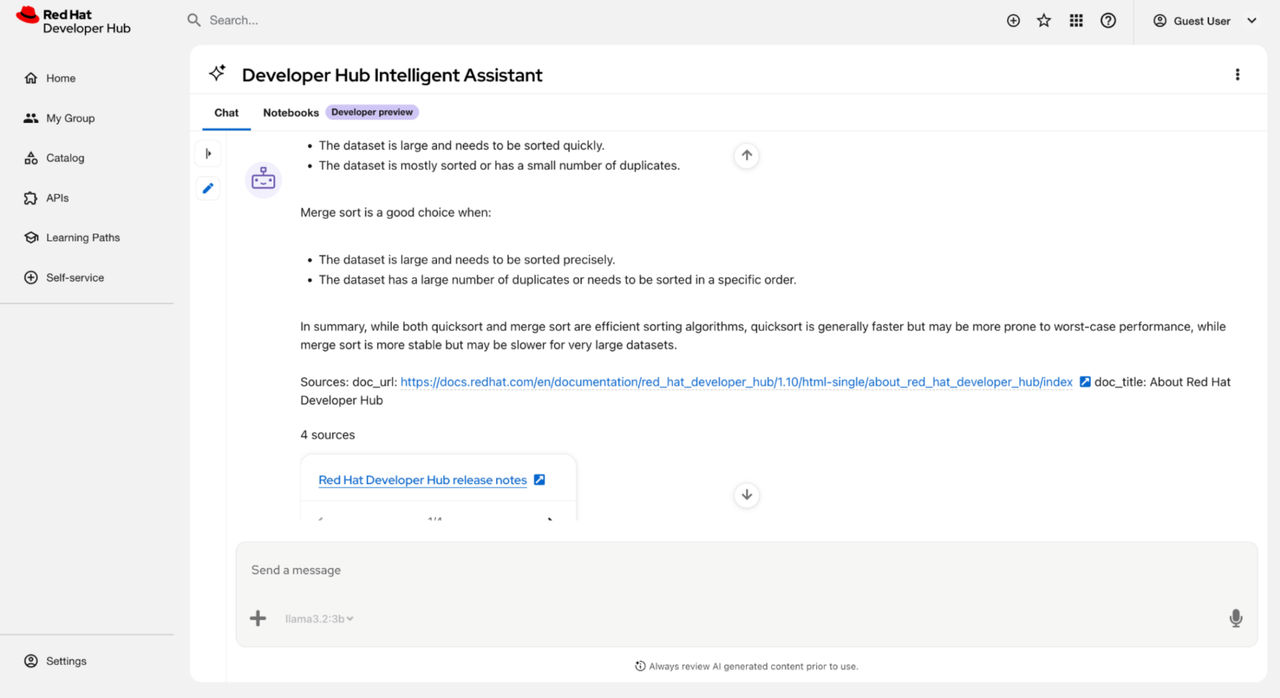
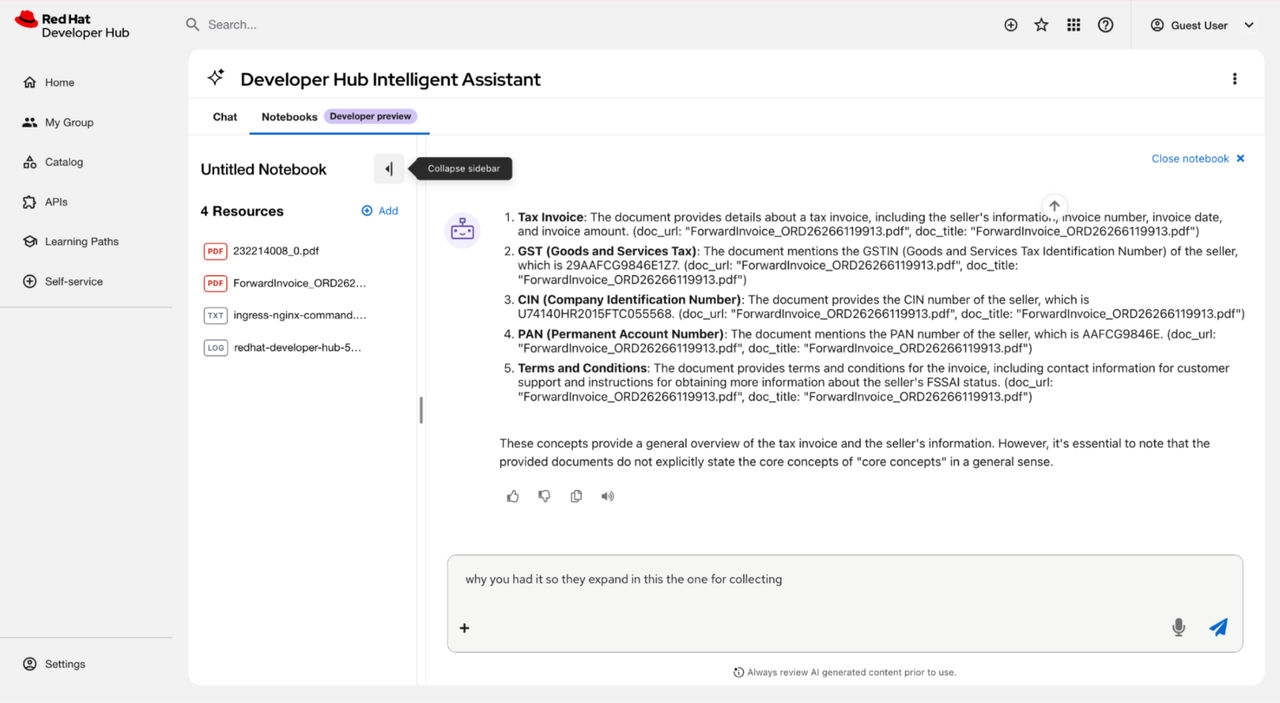
Note The expanded panel is resizable up to a defined maximum width.
- Start a new topic: Click New chat to reset the assistant’s context. When the history panel is collapsed, click the New chat icon to create a new chat.
Results
- The main window displays the active chat or selected history.
- The chat history list reflects renamed, pinned, or deleted entries.

