11.2. Adding Services and Certificates for Services
While services can use keytabs, some services require certificates for access. In that case, a service can be added (or modified) to include a certificate with its service entry.
11.2.1. Adding Services and Certificates from the Web UI
Copy linkLink copied to clipboard!
- Open the Identity tab, and select the Services subtab.
- Click the Add link at the top of the services list.
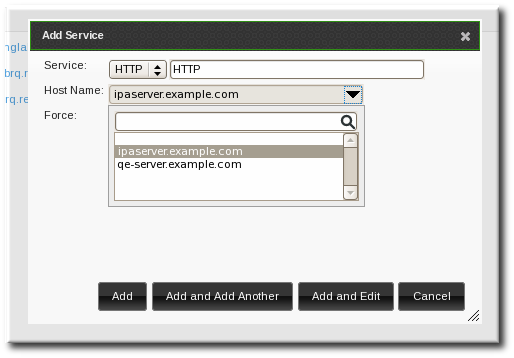
- Select the service type from the drop-down menu, and give it a name.
- Select the hostname of the IdM host on which the service is running. The hostname is used to construct the full service principal name.
- Click the Add and Edit button to go directly to the service entry page.
- Scroll to the bottom of the page, to the Service Certificate section.
- Click the New Certificate button to create the service certificate.
11.2.2. Adding Services and Certificates from the Command Line
Copy linkLink copied to clipboard!
- Create the service principal. The service is recognized through a name like service/FQDN:
kinit admin
ipa service-add serviceName/hostname
[jsmith@ipaserver ~]$ kinit admin
[jsmith@ipaserver ~]$ ipa service-add serviceName/hostname
Copy to Clipboard Copied! Toggle word wrap Toggle overflow For example:Copy to Clipboard Copied! Toggle word wrap Toggle overflow - Create a certificate for the service. Be sure to copy the keytab to the appropriate directory for the service.For example:
ipa cert-request --principal=HTTP/web.example.com example.csr
$ ipa cert-request --principal=HTTP/web.example.com example.csrCopy to Clipboard Copied! Toggle word wrap Toggle overflow Note
Use the--addoption to create the service automatically when requesting the certificate.Alternatively, use thegetcertcommand, which creates and manages the certificate throughcertmonger. The options are described more in Section B.1, “Requesting a Certificate with certmonger”.ipa-getcert request -d /etc/httpd/alias -n Server-Cert -K HTTP/client1.example.com -N 'CN=client1.example.com,O=EXAMPLE.COM'
$ ipa-getcert request -d /etc/httpd/alias -n Server-Cert -K HTTP/client1.example.com -N 'CN=client1.example.com,O=EXAMPLE.COM'Copy to Clipboard Copied! Toggle word wrap Toggle overflow


