Installing
Installing and configuring OpenShift Container Platform clusters
Abstract
Chapter 1. OpenShift Container Platform installation overview
1.1. OpenShift Container Platform installation overview
The OpenShift Container Platform installation program offers you flexibility. You can use the installation program to deploy a cluster on infrastructure that the installation program provisions and the cluster maintains or deploy a cluster on infrastructure that you prepare and maintain.
These two basic types of OpenShift Container Platform clusters are frequently called installer-provisioned infrastructure clusters and user-provisioned infrastructure clusters.
Both types of clusters have the following characteristics:
- Highly available infrastructure with no single points of failure is available by default
- Administrators maintain control over what updates are applied and when
You use the same installation program to deploy both types of clusters. The main assets generated by the installation program are the Ignition config files for the bootstrap, master, and worker machines. With these three configurations and correctly configured infrastructure, you can start an OpenShift Container Platform cluster.
The OpenShift Container Platform installation program uses a set of targets and dependencies to manage cluster installation. The installation program has a set of targets that it must achieve, and each target has a set of dependencies. Because each target is only concerned with its own dependencies, the installation program can act to achieve multiple targets in parallel. The ultimate target is a running cluster. By meeting dependencies instead of running commands, the installation program is able to recognize and use existing components instead of running the commands to create them again.
The following diagram shows a subset of the installation targets and dependencies:
Figure 1.1. OpenShift Container Platform installation targets and dependencies

After installation, each cluster machine uses Red Hat Enterprise Linux CoreOS (RHCOS) as the operating system. RHCOS is the immutable container host version of Red Hat Enterprise Linux (RHEL) and features a RHEL kernel with SELinux enabled by default. It includes the kubelet, which is the Kubernetes node agent, and the CRI-O container runtime, which is optimized for Kubernetes.
Every control plane machine in an OpenShift Container Platform 4.7 cluster must use RHCOS, which includes a critical first-boot provisioning tool called Ignition. This tool enables the cluster to configure the machines. Operating system updates are delivered as an Atomic OSTree repository that is embedded in a container image that is rolled out across the cluster by an Operator. Actual operating system changes are made in-place on each machine as an atomic operation by using rpm-ostree. Together, these technologies enable OpenShift Container Platform to manage the operating system like it manages any other application on the cluster, via in-place upgrades that keep the entire platform up-to-date. These in-place updates can reduce the burden on operations teams.
If you use RHCOS as the operating system for all cluster machines, the cluster manages all aspects of its components and machines, including the operating system. Because of this, only the installation program and the Machine Config Operator can change machines. The installation program uses Ignition config files to set the exact state of each machine, and the Machine Config Operator completes more changes to the machines, such as the application of new certificates or keys, after installation.
1.1.1. Installation process
When you install an OpenShift Container Platform cluster, you download the installation program from the appropriate Infrastructure Provider page on the OpenShift Cluster Manager site. This site manages:
- REST API for accounts
- Registry tokens, which are the pull secrets that you use to obtain the required components
- Cluster registration, which associates the cluster identity to your Red Hat account to facilitate the gathering of usage metrics
In OpenShift Container Platform 4.7, the installation program is a Go binary file that performs a series of file transformations on a set of assets. The way you interact with the installation program differs depending on your installation type.
- For clusters with installer-provisioned infrastructure, you delegate the infrastructure bootstrapping and provisioning to the installation program instead of doing it yourself. The installation program creates all of the networking, machines, and operating systems that are required to support the cluster.
- If you provision and manage the infrastructure for your cluster, you must provide all of the cluster infrastructure and resources, including the bootstrap machine, networking, load balancing, storage, and individual cluster machines.
You use three sets of files during installation: an installation configuration file that is named install-config.yaml, Kubernetes manifests, and Ignition config files for your machine types.
It is possible to modify Kubernetes and the Ignition config files that control the underlying RHCOS operating system during installation. However, no validation is available to confirm the suitability of any modifications that you make to these objects. If you modify these objects, you might render your cluster non-functional. Because of this risk, modifying Kubernetes and Ignition config files is not supported unless you are following documented procedures or are instructed to do so by Red Hat support.
The installation configuration file is transformed into Kubernetes manifests, and then the manifests are wrapped into Ignition config files. The installation program uses these Ignition config files to create the cluster.
The installation configuration files are all pruned when you run the installation program, so be sure to back up all configuration files that you want to use again.
You cannot modify the parameters that you set during installation, but you can modify many cluster attributes after installation.
The installation process with installer-provisioned infrastructure
The default installation type uses installer-provisioned infrastructure. By default, the installation program acts as an installation wizard, prompting you for values that it cannot determine on its own and providing reasonable default values for the remaining parameters. You can also customize the installation process to support advanced infrastructure scenarios. The installation program provisions the underlying infrastructure for the cluster.
You can install either a standard cluster or a customized cluster. With a standard cluster, you provide minimum details that are required to install the cluster. With a customized cluster, you can specify more details about the platform, such as the number of machines that the control plane uses, the type of virtual machine that the cluster deploys, or the CIDR range for the Kubernetes service network.
If possible, use this feature to avoid having to provision and maintain the cluster infrastructure. In all other environments, you use the installation program to generate the assets that you require to provision your cluster infrastructure.
With installer-provisioned infrastructure clusters, OpenShift Container Platform manages all aspects of the cluster, including the operating system itself. Each machine boots with a configuration that references resources hosted in the cluster that it joins. This configuration allows the cluster to manage itself as updates are applied.
The installation process with user-provisioned infrastructure
You can also install OpenShift Container Platform on infrastructure that you provide. You use the installation program to generate the assets that you require to provision the cluster infrastructure, create the cluster infrastructure, and then deploy the cluster to the infrastructure that you provided.
If you do not use infrastructure that the installation program provisioned, you must manage and maintain the cluster resources yourself, including:
- The underlying infrastructure for the control plane and compute machines that make up the cluster
- Load balancers
- Cluster networking, including the DNS records and required subnets
- Storage for the cluster infrastructure and applications
If your cluster uses user-provisioned infrastructure, you have the option of adding RHEL compute machines to your cluster.
Installation process details
Because each machine in the cluster requires information about the cluster when it is provisioned, OpenShift Container Platform uses a temporary bootstrap machine during initial configuration to provide the required information to the permanent control plane. It boots by using an Ignition config file that describes how to create the cluster. The bootstrap machine creates the control plane machines (also known as the master machines) that make up the control plane. The control plane machines then create the compute machines, which are also known as worker machines. The following figure illustrates this process:
Figure 1.2. Creating the bootstrap, control plane, and compute machines
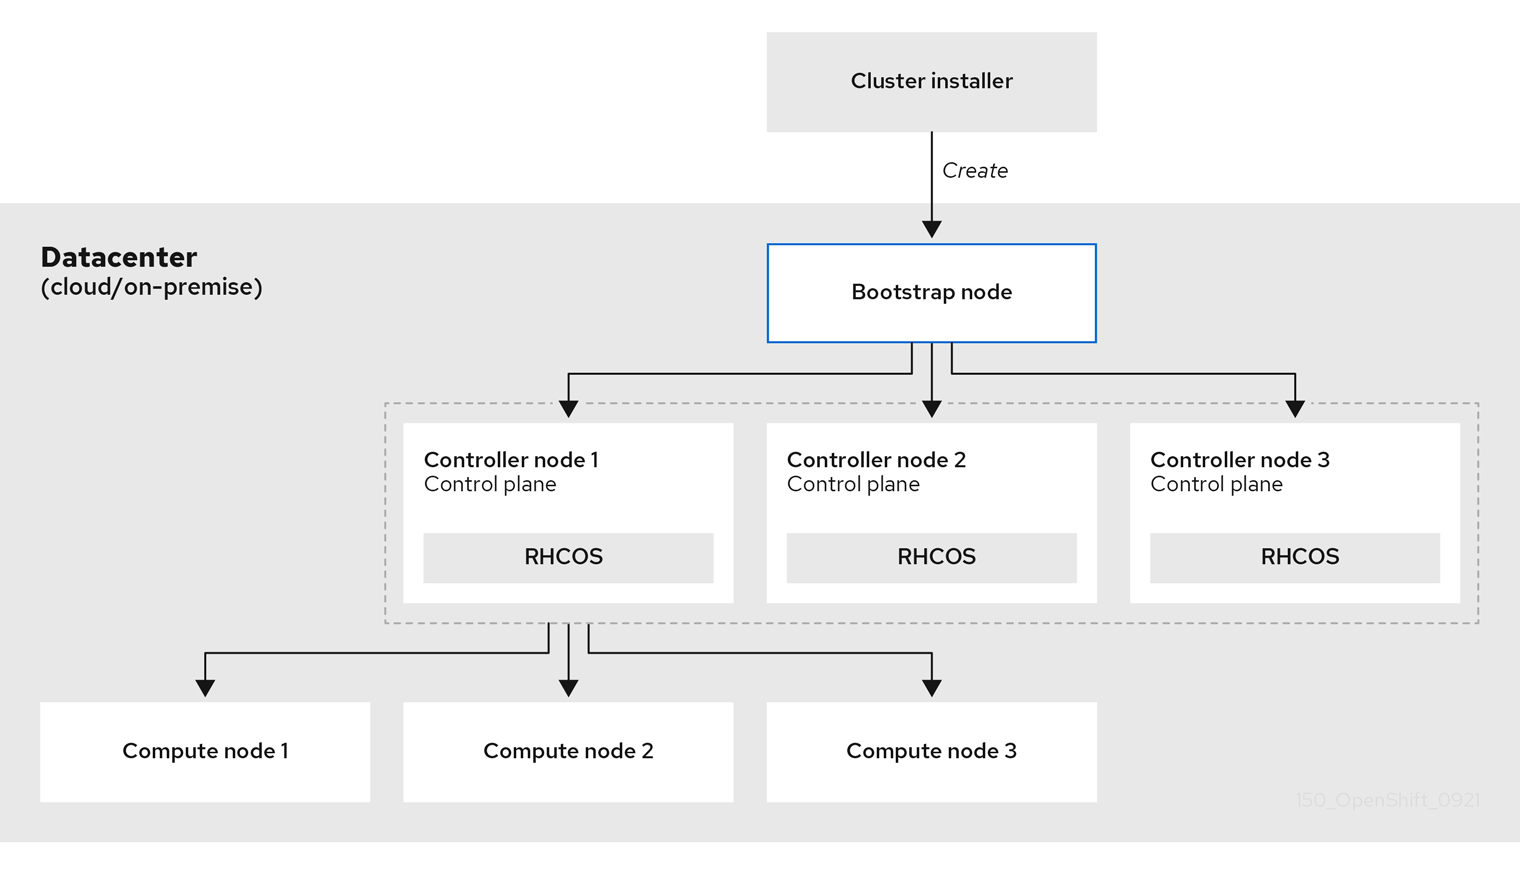
After the cluster machines initialize, the bootstrap machine is destroyed. All clusters use the bootstrap process to initialize the cluster, but if you provision the infrastructure for your cluster, you must complete many of the steps manually.
-
The Ignition config files that the installation program generates contain certificates that expire after 24 hours, which are then renewed at that time. If the cluster is shut down before renewing the certificates and the cluster is later restarted after the 24 hours have elapsed, the cluster automatically recovers the expired certificates. The exception is that you must manually approve the pending
node-bootstrappercertificate signing requests (CSRs) to recover kubelet certificates. See the documentation for Recovering from expired control plane certificates for more information. - It is recommended that you use Ignition config files within 12 hours after they are generated because the 24-hour certificate rotates from 16 to 22 hours after the cluster is installed. By using the Ignition config files within 12 hours, you can avoid installation failure if the certificate update runs during installation.
Bootstrapping a cluster involves the following steps:
- The bootstrap machine boots and starts hosting the remote resources required for the control plane machines to boot. (Requires manual intervention if you provision the infrastructure)
- The bootstrap machine starts a single-node etcd cluster and a temporary Kubernetes control plane.
- The control plane machines fetch the remote resources from the bootstrap machine and finish booting. (Requires manual intervention if you provision the infrastructure)
- The temporary control plane schedules the production control plane to the production control plane machines.
- The Cluster Version Operator (CVO) comes online and installs the etcd Operator. The etcd Operator scales up etcd on all control plane nodes.
- The temporary control plane shuts down and passes control to the production control plane.
- The bootstrap machine injects OpenShift Container Platform components into the production control plane.
- The installation program shuts down the bootstrap machine. (Requires manual intervention if you provision the infrastructure)
- The control plane sets up the compute nodes.
- The control plane installs additional services in the form of a set of Operators.
The result of this bootstrapping process is a fully running OpenShift Container Platform cluster. The cluster then downloads and configures remaining components needed for the day-to-day operation, including the creation of compute machines in supported environments.
Installation scope
The scope of the OpenShift Container Platform installation program is intentionally narrow. It is designed for simplicity and ensured success. You can complete many more configuration tasks after installation completes.
1.2. Supported platforms for OpenShift clusters
In OpenShift Container Platform 4.7, you can install a cluster that uses installer-provisioned infrastructure on the following platforms:
- Amazon Web Services (AWS)
- Google Cloud Platform (GCP)
- Microsoft Azure
Red Hat OpenStack Platform (RHOSP) version 13 and 16
- The latest OpenShift Container Platform release supports both the latest RHOSP long-life release and intermediate release. For complete RHOSP release compatibility, see the OpenShift Container Platform on RHOSP support matrix.
- Red Hat Virtualization (RHV)
- VMware vSphere
- VMware Cloud (VMC) on AWS
- Bare metal
For these clusters, all machines, including the computer that you run the installation process on, must have direct internet access to pull images for platform containers and provide telemetry data to Red Hat.
After installation, the following changes are not supported:
- Mixing cloud provider platforms
- Mixing cloud provider components, such as using a persistent storage framework from a differing platform than what the cluster is installed on
In OpenShift Container Platform 4.7, you can install a cluster that uses user-provisioned infrastructure on the following platforms:
- AWS
- Azure
- GCP
- RHOSP
- RHV
- VMware vSphere
- VMware Cloud on AWS
- Bare metal
- IBM Z or LinuxONE
- IBM Power Systems
Depending on the supported cases for the platform, installations on user-provisioned infrastructure allow you to run machines with full internet access, place your cluster behind a proxy, or perform a restricted network installation. In a restricted network installation, you can download the images that are required to install a cluster, place them in a mirror registry, and use that data to install your cluster. While you require internet access to pull images for platform containers, with a restricted network installation on vSphere or bare metal infrastructure, your cluster machines do not require direct internet access.
The OpenShift Container Platform 4.x Tested Integrations page contains details about integration testing for different platforms.
Chapter 2. Selecting a cluster installation method and preparing it for users
Before you install OpenShift Container Platform, decide what kind of installation process to follow and make sure you that you have all of the required resources to prepare the cluster for users.
2.1. Selecting a cluster installation type
Before you install an OpenShift Container Platform cluster, you need to select the best installation instructions to follow. Think about your answers to the following questions to select the best option.
2.1.1. Do you want to install and manage an OpenShift Container Platform cluster yourself?
If you want to install and manage OpenShift Container Platform yourself, you can install it on the following platforms:
- Amazon Web Services (AWS)
- Microsoft Azure
- Google Cloud Platform (GCP)
- RHOSP
- RHV
- IBM Z and LinuxONE
- IBM Power
- VMware vSphere
- VMware Cloud (VMC) on AWS
- Bare metal or other platform agnostic infrastructure
You can deploy an OpenShift Container Platform 4 cluster to both on-premise hardware and to cloud hosting services, but all of the machines in a cluster must be in the same datacenter or cloud hosting service.
If you want to use OpenShift Container Platform but do not want to manage the cluster yourself, you have several managed service options. If you want a cluster that is fully managed by Red Hat, you can use OpenShift Dedicated or OpenShift Online. You can also use OpenShift as a managed service on Azure, AWS, IBM Cloud, or Google Cloud. For more information about managed services, see the OpenShift Products page.
2.1.2. Have you used OpenShift Container Platform 3 and want to use OpenShift Container Platform 4?
If you used OpenShift Container Platform 3 and want to try OpenShift Container Platform 4, you need to understand how different OpenShift Container Platform 4 is. OpenShift Container Platform 4 weaves the Operators that package, deploy, and manage Kubernetes applications and the operating system that the platform runs on, Red Hat Enterprise Linux CoreOS (RHCOS), together seamlessly. Instead of deploying machines and configuring their operating systems so that you can install OpenShift Container Platform on them, the RHCOS operating system is an integral part of the OpenShift Container Platform cluster. Deploying the operating system for the cluster machines as part of the installation process for OpenShift Container Platform. See Comparing OpenShift Container Platform 3 and OpenShift Container Platform 4.
Because you need to provision machines as part of the OpenShift Container Platform cluster installation process, you cannot upgrade an OpenShift Container Platform 3 cluster to OpenShift Container Platform 4. Instead, you must create a new OpenShift Container Platform 4 cluster and migrate your OpenShift Container Platform 3 workloads to them. For more information about migrating, see OpenShift Migration Best Practices. Because you must migrate to OpenShift Container Platform 4, you can use any type of production cluster installation process to create your new cluster.
2.1.3. Do you want to use existing components in your cluster?
Because the operating system is integral to OpenShift Container Platform, it is easier to let the installation program for OpenShift Container Platform stand up all of the infrastructure. These are called installer provisioned infrastructure installations. In this type of installation, you can provide some existing infrastructure to the cluster, but the installation program deploys all of the machines that your cluster initially needs.
You can deploy an installer-provisioned infrastructure cluster without specifying any customizations to the cluster or its underlying machines to AWS, Azure, or GCP. These installation methods are the fastest way to deploy a production-capable OpenShift Container Platform cluster.
If you need to perform basic configuration for your installer-provisioned infrastructure cluster, such as the instance type for the cluster machines, you can customize an installation for AWS, Azure, or GCP.
For installer-provisioned infrastructure installations, you can use an existing VPC in AWS, vNet in Azure, or VPC in GCP. You can also reuse part of your networking infrastructure so that your cluster in AWS, Azure, or GCP can coexist with existing IP address allocations in your environment and integrate with existing MTU and VXLAN configurations. If you have existing accounts and credentials on these clouds, you can re-use them, but you might need to modify the accounts to have the required permissions to install OpenShift Container Platform clusters on them.
You can use the installer-provisioned infrastructure method to create appropriate machine instances on your hardware for RHV, vSphere, and bare metal.
If you want to reuse extensive cloud infrastructure, you can complete a user-provisioned infrastructure installation. With these installations, you manually deploy the machines that your cluster requires during the installation process. If you perform a user-provisioned infrastructure installation on AWS, Azure, or GCP, you can use the provided templates to help you stand up all of the required components. Otherwise, you can use the provider-agnostic installation method to deploy a cluster into other clouds.
You can also complete a user-provisioned infrastructure installation on your existing hardware. If you use RHOSP, RHV, IBM Z or LinuxONE, IBM Power, or vSphere, use the specific installation instructions to deploy your cluster. If you use other supported hardware, follow the bare metal installation procedure.
2.1.4. Do you need extra security for your cluster?
If you use a user-provisioned installation method, you can configure a proxy for your cluster. The instructions are included in each installation procedure.
If you want to prevent your cluster on a public cloud from exposing endpoints externally, you can deploy a private cluster with installer-provisioned infrastructure on AWS, Azure, or GCP.
If you need to install your cluster that has limited access to the Internet, such as a disconnected or restricted network cluster, you can mirror the installation packages and install the cluster from them. Follow detailed instructions for user provisioned infrastructure installations into restricted networks for AWS, GCP, IBM Z or LinuxONE, IBM Power, vSphere, or bare metal. You can also install a cluster into a restricted network using installer-provisioned infrastructure by following detailed instructions for AWS, GCP, RHOSP, RHV, and vSphere.
If you need to deploy your cluster to an AWS GovCloud region or Azure government region, you can configure those custom regions during an installer-provisioned infrastructure installation.
You can also configure the cluster machines to use FIPS Validated / Modules in Process cryptographic libraries during installation.
The use of FIPS Validated / Modules in Process cryptographic libraries is only supported on OpenShift Container Platform deployments on the x86_64 architecture.
2.2. Preparing your cluster for users after installation
Some configuration is not required to install the cluster but recommended before your users access the cluster. You can customize the cluster itself by customizing the Operators that make up your cluster and integrate you cluster with other required systems, such as an identity provider.
For a production cluster, you must configure the following integrations:
2.3. Preparing your cluster for workloads
Depending on your workload needs, you might need to take extra steps before you begin deploying applications. For example, after you prepare infrastructure to support your application build strategy, you might need to make provisions for low-latency workloads or to protect sensitive workloads. You can also configure monitoring for application workloads. If you plan to run Windows workloads, you must enable hybrid networking with OVN-Kubernetes during the installation process; hybrid networking cannot be enabled after your cluster is installed.
2.4. Supported installation methods for different platforms
You can perform different types of installations on different platforms.
Not all installation options are supported for all platforms, as shown in the following tables.
| AWS | Azure | GCP | OpenStack | RHV | Bare metal | vSphere | VMC | IBM Z | IBM Power | |
|---|---|---|---|---|---|---|---|---|---|---|
| Default | ||||||||||
| Custom | ||||||||||
| Network customization | ||||||||||
| Restricted network | ||||||||||
| Private clusters | ||||||||||
| Existing virtual private networks | ||||||||||
| Government regions |
Chapter 3. Mirroring images for a disconnected installation
You can use the procedures in this section to ensure your clusters only use container images that satisfy your organizational controls on external content. Before you install a cluster on infrastructure that you provision in a restricted network, you must mirror the required container images into that environment. To mirror container images, you must have a registry for mirroring.
You must have access to the internet to obtain the necessary container images. In this procedure, you place your mirror registry on a mirror host that has access to both your network and the Internet. If you do not have access to a mirror host, use the Mirroring an Operator catalog procedure to copy images to a device you can move across network boundaries with.
3.1. Prerequisites
You must have a container image registry that supports Docker v2-2 in the location that will host the OpenShift Container Platform cluster, such as one of the following registries:
If you have an entitlement to Red Hat Quay, see the documentation on deploying Red Hat Quay for proof-of-concept purposes or by using the Quay Operator. If you need additional assistance selecting and installing a registry, contact your sales representative or Red Hat support.
- If you do not already have an existing solution for a container image registry, subscribers of OpenShift Container Platform are provided a mirror registry for Red Hat OpenShift. The mirror registry for Red Hat OpenShift is included with your subscription and is a small-scale container registry that can be used to mirror the required container images of OpenShift Container Platform in disconnected installations.
3.2. About the mirror registry
You can mirror the images that are required for OpenShift Container Platform installation and subsequent product updates to a container mirror registry such as Red Hat Quay, JFrog Artifactory, Sonatype Nexus Repository, or Harbor. If you do not have access to a large-scale container registry, you can use the mirror registry for Red Hat OpenShift, a small-scale container registry included with OpenShift Container Platform subscriptions.
You can use any container registry that supports Docker v2-2, such as Red Hat Quay, the mirror registry for Red Hat OpenShift, Artifactory, Sonatype Nexus Repository, or Harbor. Regardless of your chosen registry, the procedure to mirror content from Red Hat hosted sites on the internet to an isolated image registry is the same. After you mirror the content, you configure each cluster to retrieve this content from your mirror registry.
The internal registry of the OpenShift Container Platform cluster cannot be used as the target registry because it does not support pushing without a tag, which is required during the mirroring process.
If choosing a container registry that is not the mirror registry for Red Hat OpenShift, it must be reachable by every machine in the clusters that you provision. If the registry is unreachable, installation, updating, or normal operations such as workload relocation might fail. For that reason, you must run mirror registries in a highly available way, and the mirror registries must at least match the production availability of your OpenShift Container Platform clusters.
When you populate your mirror registry with OpenShift Container Platform images, you can follow two scenarios. If you have a host that can access both the internet and your mirror registry, but not your cluster nodes, you can directly mirror the content from that machine. This process is referred to as connected mirroring. If you have no such host, you must mirror the images to a file system and then bring that host or removable media into your restricted environment. This process is referred to as disconnected mirroring.
For mirrored registries, to view the source of pulled images, you must review the Trying to access log entry in the CRI-O logs. Other methods to view the image pull source, such as using the crictl images command on a node, show the non-mirrored image name, even though the image is pulled from the mirrored location.
Red Hat does not test third party registries with OpenShift Container Platform.
Additional information
For information on viewing the CRI-O logs to view the image source, see Viewing the image pull source.
3.3. Preparing your mirror host
Before you perform the mirror procedure, you must prepare the host to retrieve content and push it to the remote location.
3.3.1. Installing the OpenShift CLI by downloading the binary
You can install the OpenShift CLI (oc) to interact with OpenShift Container Platform from a command-line interface. You can install oc on Linux, Windows, or macOS.
If you installed an earlier version of oc, you cannot use it to complete all of the commands in OpenShift Container Platform 4.7. Download and install the new version of oc.
3.3.1.1. Installing the OpenShift CLI on Linux
You can install the OpenShift CLI (oc) binary on Linux by using the following procedure.
Procedure
- Navigate to the OpenShift Container Platform downloads page on the Red Hat Customer Portal.
- Select the appropriate version in the Version drop-down menu.
- Click Download Now next to the OpenShift v4.7 Linux Client entry and save the file.
Unpack the archive:
$ tar xvzf <file>Place the
ocbinary in a directory that is on yourPATH.To check your
PATH, execute the following command:$ echo $PATH
After you install the OpenShift CLI, it is available using the oc command:
$ oc <command>3.3.1.2. Installing the OpenShift CLI on Windows
You can install the OpenShift CLI (oc) binary on Windows by using the following procedure.
Procedure
- Navigate to the OpenShift Container Platform downloads page on the Red Hat Customer Portal.
- Select the appropriate version in the Version drop-down menu.
- Click Download Now next to the OpenShift v4.7 Windows Client entry and save the file.
- Unzip the archive with a ZIP program.
Move the
ocbinary to a directory that is on yourPATH.To check your
PATH, open the command prompt and execute the following command:C:\> path
After you install the OpenShift CLI, it is available using the oc command:
C:\> oc <command>3.3.1.3. Installing the OpenShift CLI on macOS
You can install the OpenShift CLI (oc) binary on macOS by using the following procedure.
Procedure
- Navigate to the OpenShift Container Platform downloads page on the Red Hat Customer Portal.
- Select the appropriate version in the Version drop-down menu.
- Click Download Now next to the OpenShift v4.7 MacOSX Client entry and save the file.
- Unpack and unzip the archive.
Move the
ocbinary to a directory on your PATH.To check your
PATH, open a terminal and execute the following command:$ echo $PATH
After you install the OpenShift CLI, it is available using the oc command:
$ oc <command>3.4. Configuring credentials that allow images to be mirrored
Create a container image registry credentials file that allows mirroring images from Red Hat to your mirror.
Do not use this image registry credentials file as the pull secret when you install a cluster. If you provide this file when you install cluster, all of the machines in the cluster will have write access to your mirror registry.
This process requires that you have write access to a container image registry on the mirror registry and adds the credentials to a registry pull secret.
Prerequisites
- You configured a mirror registry to use in your restricted network.
- You identified an image repository location on your mirror registry to mirror images into.
- You provisioned a mirror registry account that allows images to be uploaded to that image repository.
Procedure
Complete the following steps on the installation host:
-
Download your
registry.redhat.iopull secret from the Red Hat OpenShift Cluster Manager and save it to a.jsonfile. Generate the base64-encoded user name and password or token for your mirror registry:
$ echo -n '<user_name>:<password>' | base64 -w01 BGVtbYk3ZHAtqXs=- 1
- For
<user_name>and<password>, specify the user name and password that you configured for your registry.
Make a copy of your pull secret in JSON format:
$ cat ./pull-secret.text | jq . > <path>/<pull_secret_file_in_json>1 - 1
- Specify the path to the folder to store the pull secret in and a name for the JSON file that you create.
Save the file either as
~/.docker/config.jsonor$XDG_RUNTIME_DIR/containers/auth.json.The contents of the file resemble the following example:
{ "auths": { "cloud.openshift.com": { "auth": "b3BlbnNo...", "email": "you@example.com" }, "quay.io": { "auth": "b3BlbnNo...", "email": "you@example.com" }, "registry.connect.redhat.com": { "auth": "NTE3Njg5Nj...", "email": "you@example.com" }, "registry.redhat.io": { "auth": "NTE3Njg5Nj...", "email": "you@example.com" } } }Edit the new file and add a section that describes your registry to it:
"auths": { "<mirror_registry>": {1 "auth": "<credentials>",2 "email": "you@example.com" },The file resembles the following example:
{ "auths": { "registry.example.com": { "auth": "BGVtbYk3ZHAtqXs=", "email": "you@example.com" }, "cloud.openshift.com": { "auth": "b3BlbnNo...", "email": "you@example.com" }, "quay.io": { "auth": "b3BlbnNo...", "email": "you@example.com" }, "registry.connect.redhat.com": { "auth": "NTE3Njg5Nj...", "email": "you@example.com" }, "registry.redhat.io": { "auth": "NTE3Njg5Nj...", "email": "you@example.com" } } }
3.5. Mirror registry for Red Hat OpenShift
The mirror registry for Red Hat OpenShift is a small and streamlined container registry that you can use as a target for mirroring the required container images of OpenShift Container Platform for disconnected installations.
If you already have a container image registry, such as Red Hat Quay, you can skip these steps and go straight to Mirroring the OpenShift Container Platform image repository.
Prerequisites
- An OpenShift Container Platform subscription.
- Red Hat Enterprise Linux (RHEL) 8 with Podman 3.3 and OpenSSL installed.
- Fully qualified domain name for the Red Hat Quay service, which must resolve through a DNS server.
-
Passwordless
sudoaccess on the target host. - Key-based SSH connectivity on the target host. SSH keys are automatically generated for local installs. For remote hosts, you must generate your own SSH keys.
- 2 or more vCPUs.
- 8 GB of RAM.
About 7.7 GB for OpenShift Container Platform 4.7 Release images, or about 713 GB for OpenShift Container Platform 4.7 Release images and OpenShift Container Platform 4.7 Red Hat Operator images. Up to 1 TB per stream or more is suggested.
ImportantThese requirements are based on local testing results with only Release images and Operator images tested. Storage requirements can vary based on your organization’s needs. Some users might require more space, for example, when they mirror multiple z-streams. You can use standard Red Hat Quay functionality to remove unnecessary images and free up space.
3.5.1. Mirror registry for Red Hat OpenShift introduction
For disconnected deployments of OpenShift Container Platform, a container registry is required to carry out the installation of the clusters. To run a production-grade registry service on such a cluster, you must create a separate registry deployment to install the first cluster. The mirror registry for Red Hat OpenShift addresses this need and is included in every OpenShift subscription. It is available for download on the OpenShift console Downloads page.
The mirror registry for Red Hat OpenShift allows users to install a small-scale version of Red Hat Quay and its required components using the mirror-registry command line interface (CLI) tool. The mirror registry for Red Hat OpenShift is deployed automatically with pre-configured local storage and a local database. It also includes auto-generated user credentials and access permissions with a single set of inputs and no additional configuration choices to get started.
The mirror registry for Red Hat OpenShift provides a pre-determined network configuration and reports deployed component credentials and access URLs upon success. A limited set of optional configuration inputs like fully qualified domain name (FQDN) services, superuser name and password, and custom TLS certificates are also provided. This provides users with a container registry so that they can easily create an offline mirror of all OpenShift Container Platform release content when running OpenShift Container Platform in restricted network environments.
The mirror registry for Red Hat OpenShift is limited to hosting images that are required to install a disconnected OpenShift Container Platform cluster, such as Release images or Red Hat Operator images. It uses local storage on your Red Hat Enterprise Linux (RHEL) machine, and storage supported by RHEL is supported by the mirror registry for Red Hat OpenShift. Content built by customers should not be hosted by the mirror registry for Red Hat OpenShift.
Unlike Red Hat Quay, the mirror registry for Red Hat OpenShift is not a highly-available registry and only local file system storage is supported. Using the mirror registry for Red Hat OpenShift with more than one cluster is discouraged, because multiple clusters can create a single point of failure when updating your cluster fleet. It is advised to leverage the mirror registry for Red Hat OpenShift to install a cluster that can host a production-grade, highly-available registry such as Red Hat Quay, which can serve OpenShift Container Platform content to other clusters.
Use of the mirror registry for Red Hat OpenShift is optional if another container registry is already available in the install environment.
3.5.2. Mirroring on a local host with mirror registry for Red Hat OpenShift
This procedure explains how to install the mirror registry for Red Hat OpenShift on a local host using the mirror-registry installer tool. By doing so, users can create a local host registry running on port 443 for the purpose of storing a mirror of OpenShift Container Platform images.
Installing the mirror registry for Red Hat OpenShift using the mirror-registry CLI tool makes several changes to your machine. After installation, a /etc/quay-install directory is created, which has installation files, local storage, and the configuration bundle. Trusted SSH keys are generated in case the deployment target is the local host, and systemd files on the host machine are set up to ensure that container runtimes are persistent. Additionally, an initial user named init is created with an automatically generated password. All access credentials are printed at the end of the install routine.
Procedure
-
Download the
mirror-registry.tar.gzpackage for the latest version of the mirror registry for Red Hat OpenShift found on the OpenShift console Downloads page. Install the mirror registry for Red Hat OpenShift on your local host with your current user account by using the
mirror-registrytool. For a full list of available flags, see "mirror registry for Red Hat OpenShift flags".$ sudo ./mirror-registry install \ --quayHostname <host_example_com> \ --quayRoot <example_directory_name>Use the user name and password generated during installation to log into the registry by running the following command:
$ podman login --authfile pull-secret.txt \ -u init \ -p <password> \ <host_example_com>:8443> \ --tls-verify=false1 - 1
- You can avoid running
--tls-verify=falseby configuring your system to trust the generated rootCA certificates. See "Using SSL to protect connections to Red Hat Quay" and "Configuring the system to trust the certificate authority" for more information.
NoteYou can also log in by accessing the UI at
https://<host.example.com>:8443after installation.You can mirror OpenShift Container Platform images after logging in. Depending on your needs, see either the "Mirroring the OpenShift Container Platform image repository" or the "Mirroring an Operator catalog" sections of this document.
NoteIf there are issues with images stored by the mirror registry for Red Hat OpenShift due to storage layer problems, you can remirror the OpenShift Container Platform images, or reinstall mirror registry on more stable storage.
3.5.3. Mirroring on a remote host with mirror registry for Red Hat OpenShift
This procedure explains how to install the mirror registry for Red Hat OpenShift on a remote host using the mirror-registry tool. By doing so, users can create a registry to hold a mirror of OpenShift Container Platform images.
Installing the mirror registry for Red Hat OpenShift using the mirror-registry CLI tool makes several changes to your machine. After installation, a /etc/quay-install directory is created, which has installation files, local storage, and the configuration bundle. Trusted SSH keys are generated in case the deployment target is the local host, and systemd files on the host machine are set up to ensure that container runtimes are persistent. Additionally, an initial user named init is created with an automatically generated password. All access credentials are printed at the end of the install routine.
Procedure
-
Download the
mirror-registry.tar.gzpackage for the latest version of the mirror registry for Red Hat OpenShift found on the OpenShift console Downloads page. Install the mirror registry for Red Hat OpenShift on your local host with your current user account by using the
mirror-registrytool. For a full list of available flags, see "mirror registry for Red Hat OpenShift flags".$ sudo ./mirror-registry install -v \ --targetHostname <host_example_com> \ --targetUsername <example_user> \ -k ~/.ssh/my_ssh_key \ --quayHostname <host_example_com> \ --quayRoot <example_directory_name>Use the user name and password generated during installation to log into the mirror registry by running the following command:
$ podman login --authfile pull-secret.txt \ -u init \ -p <password> \ <host_example_com>:8443> \ --tls-verify=false1 - 1
- You can avoid running
--tls-verify=falseby configuring your system to trust the generated rootCA certificates. See "Using SSL to protect connections to Red Hat Quay" and "Configuring the system to trust the certificate authority" for more information.
NoteYou can also log in by accessing the UI at
https://<host.example.com>:8443after installation.You can mirror OpenShift Container Platform images after logging in. Depending on your needs, see either the "Mirroring the OpenShift Container Platform image repository" or the "Mirroring an Operator catalog" sections of this document.
NoteIf there are issues with images stored by the mirror registry for Red Hat OpenShift due to storage layer problems, you can remirror the OpenShift Container Platform images, or reinstall mirror registry on more stable storage.
3.6. Upgrading the mirror registry for Red Hat OpenShift
You can upgrade the mirror registry for Red Hat OpenShift from your local host by running the following command:
$ sudo ./mirror-registry upgradeNote-
Users who upgrade the mirror registry for Red Hat OpenShift with the
./mirror-registry upgradeflag must include the same credentials used when creating their mirror registry. For example, if you installed the mirror registry for Red Hat OpenShift with--quayHostname <host_example_com>and--quayRoot <example_directory_name>, you must include that string to properly upgrade the mirror registry.
-
Users who upgrade the mirror registry for Red Hat OpenShift with the
3.6.1. Uninstalling the mirror registry for Red Hat OpenShift
You can uninstall the mirror registry for Red Hat OpenShift from your local host by running the following command:
$ sudo ./mirror-registry uninstall -v \ --quayRoot <example_directory_name>Note-
Deleting the mirror registry for Red Hat OpenShift will prompt the user before deletion. You can use
--autoApproveto skip this prompt. -
Users who install the mirror registry for Red Hat OpenShift with the
--quayRootflag must include the--quayRootflag when uninstalling. For example, if you installed the mirror registry for Red Hat OpenShift with--quayRoot example_directory_name, you must include that string to properly uninstall the mirror registry.
-
Deleting the mirror registry for Red Hat OpenShift will prompt the user before deletion. You can use
3.6.2. Mirror registry for Red Hat OpenShift flags
The following flags are available for the mirror registry for Red Hat OpenShift:
| Flags | Description |
|---|---|
|
|
A boolean value that disables interactive prompts. If set to |
|
| The password of the init user created during Quay installation. Must be at least eight characters and contain no whitespace. |
|
|
Shows the username of the initial user. Defaults to |
|
|
The fully-qualified domain name of the mirror registry that clients will use to contact the registry. Equivalent to |
|
|
The directory where container image layer and configuration data is saved, including |
|
|
The path of your SSH identity key. Defaults to |
|
|
The path to the SSL/TLS public key / certificate. Defaults to |
|
|
Skips the check for the certificate hostname against the |
|
|
The path to the SSL/TLS private key used for HTTPS communication. Defaults to |
|
|
The hostname of the target you want to install Quay to. Defaults to |
|
|
The user on the target host which will be used for SSH. Defaults to |
|
| Shows debug logs and Ansible playbook outputs. |
|
| Shows the version for the mirror registry for Red Hat OpenShift. |
-
--quayHostnamemust be modified if the public DNS name of your system is different from the local hostname. -
--sslCheckSkipis used in cases when the mirror registry is set behind a proxy and the exposed hostname is different from the internal Quay hostname. It can also be used when users do not want the certificates to be validated against the provided Quay hostname during installation.
3.7. Mirroring the OpenShift Container Platform image repository
Mirror the OpenShift Container Platform image repository to your registry to use during cluster installation or upgrade.
Prerequisites
- Your mirror host has access to the Internet.
- You configured a mirror registry to use in your restricted network and can access the certificate and credentials that you configured.
- You downloaded the pull secret from the Red Hat OpenShift Cluster Manager and modified it to include authentication to your mirror repository.
If you use self-signed certificates that do not set a Subject Alternative Name, you must precede the
occommands in this procedure withGODEBUG=x509ignoreCN=0. If you do not set this variable, theoccommands will fail with the following error:x509: certificate relies on legacy Common Name field, use SANs or temporarily enable Common Name matching with GODEBUG=x509ignoreCN=0
Procedure
Complete the following steps on the mirror host:
- Review the OpenShift Container Platform downloads page to determine the version of OpenShift Container Platform that you want to install and determine the corresponding tag on the Repository Tags page.
Set the required environment variables:
Export the release version:
$ OCP_RELEASE=<release_version>For
<release_version>, specify the tag that corresponds to the version of OpenShift Container Platform to install, such as4.5.4.Export the local registry name and host port:
$ LOCAL_REGISTRY='<local_registry_host_name>:<local_registry_host_port>'For
<local_registry_host_name>, specify the registry domain name for your mirror repository, and for<local_registry_host_port>, specify the port that it serves content on.Export the local repository name:
$ LOCAL_REPOSITORY='<local_repository_name>'For
<local_repository_name>, specify the name of the repository to create in your registry, such asocp4/openshift4.Export the name of the repository to mirror:
$ PRODUCT_REPO='openshift-release-dev'For a production release, you must specify
openshift-release-dev.Export the path to your registry pull secret:
$ LOCAL_SECRET_JSON='<path_to_pull_secret>'For
<path_to_pull_secret>, specify the absolute path to and file name of the pull secret for your mirror registry that you created.Export the release mirror:
$ RELEASE_NAME="ocp-release"For a production release, you must specify
ocp-release.Export the type of architecture for your server, such as
x86_64.:$ ARCHITECTURE=<server_architecture>Export the path to the directory to host the mirrored images:
$ REMOVABLE_MEDIA_PATH=<path>1 - 1
- Specify the full path, including the initial forward slash (/) character.
Mirror the version images to the mirror registry:
If your mirror host does not have internet access, take the following actions:
- Connect the removable media to a system that is connected to the internet.
Review the images and configuration manifests to mirror:
$ oc adm release mirror -a ${LOCAL_SECRET_JSON} \ --from=quay.io/${PRODUCT_REPO}/${RELEASE_NAME}:${OCP_RELEASE}-${ARCHITECTURE} \ --to=${LOCAL_REGISTRY}/${LOCAL_REPOSITORY} \ --to-release-image=${LOCAL_REGISTRY}/${LOCAL_REPOSITORY}:${OCP_RELEASE}-${ARCHITECTURE} --dry-run-
Record the entire
imageContentSourcessection from the output of the previous command. The information about your mirrors is unique to your mirrored repository, and you must add theimageContentSourcessection to theinstall-config.yamlfile during installation. Mirror the images to a directory on the removable media:
$ oc adm release mirror -a ${LOCAL_SECRET_JSON} --to-dir=${REMOVABLE_MEDIA_PATH}/mirror quay.io/${PRODUCT_REPO}/${RELEASE_NAME}:${OCP_RELEASE}-${ARCHITECTURE}Take the media to the restricted network environment and upload the images to the local container registry.
$ oc image mirror -a ${LOCAL_SECRET_JSON} --from-dir=${REMOVABLE_MEDIA_PATH}/mirror "file://openshift/release:${OCP_RELEASE}*" ${LOCAL_REGISTRY}/${LOCAL_REPOSITORY}1 - 1
- For
REMOVABLE_MEDIA_PATH, you must use the same path that you specified when you mirrored the images.
If the local container registry is connected to the mirror host, take the following actions:
Directly push the release images to the local registry by using following command:
$ oc adm release mirror -a ${LOCAL_SECRET_JSON} \ --from=quay.io/${PRODUCT_REPO}/${RELEASE_NAME}:${OCP_RELEASE}-${ARCHITECTURE} \ --to=${LOCAL_REGISTRY}/${LOCAL_REPOSITORY} \ --to-release-image=${LOCAL_REGISTRY}/${LOCAL_REPOSITORY}:${OCP_RELEASE}-${ARCHITECTURE}This command pulls the release information as a digest, and its output includes the
imageContentSourcesdata that you require when you install your cluster.Record the entire
imageContentSourcessection from the output of the previous command. The information about your mirrors is unique to your mirrored repository, and you must add theimageContentSourcessection to theinstall-config.yamlfile during installation.NoteThe image name gets patched to Quay.io during the mirroring process, and the podman images will show Quay.io in the registry on the bootstrap virtual machine.
To create the installation program that is based on the content that you mirrored, extract it and pin it to the release:
If your mirror host does not have Internet access, run the following command:
$ oc adm release extract -a ${LOCAL_SECRET_JSON} --command=openshift-install "${LOCAL_REGISTRY}/${LOCAL_REPOSITORY}:${OCP_RELEASE}"If the local container registry is connected to the mirror host, run the following command:
$ oc adm release extract -a ${LOCAL_SECRET_JSON} --command=openshift-install "${LOCAL_REGISTRY}/${LOCAL_REPOSITORY}:${OCP_RELEASE}-${ARCHITECTURE}"ImportantTo ensure that you use the correct images for the version of OpenShift Container Platform that you selected, you must extract the installation program from the mirrored content.
You must perform this step on a machine with an active Internet connection.
If you are in a disconnected environment, use the
--imageflag as part of must-gather and point to the payload image.
For clusters using installer-provisioned infrastructure, run the following command:
$ openshift-install
3.8. The Cluster Samples Operator in a disconnected environment
In a disconnected environment, you must take additional steps after you install a cluster to configure the Cluster Samples Operator. Review the following information in preparation.
3.8.1. Cluster Samples Operator assistance for mirroring
During installation, OpenShift Container Platform creates a config map named imagestreamtag-to-image in the openshift-cluster-samples-operator namespace. The imagestreamtag-to-image config map contains an entry, the populating image, for each image stream tag.
The format of the key for each entry in the data field in the config map is <image_stream_name>_<image_stream_tag_name>.
During a disconnected installation of OpenShift Container Platform, the status of the Cluster Samples Operator is set to Removed. If you choose to change it to Managed, it installs samples.
The use of samples in a network-restricted or discontinued environment may require access to services external to your network. Some example services include: Github, Maven Central, npm, RubyGems, PyPi and others. There might be additional steps to take that allow the cluster samples operators’s objects to reach the services they require.
You can use this config map as a reference for which images need to be mirrored for your image streams to import.
-
While the Cluster Samples Operator is set to
Removed, you can create your mirrored registry, or determine which existing mirrored registry you want to use. - Mirror the samples you want to the mirrored registry using the new config map as your guide.
-
Add any of the image streams you did not mirror to the
skippedImagestreamslist of the Cluster Samples Operator configuration object. -
Set
samplesRegistryof the Cluster Samples Operator configuration object to the mirrored registry. -
Then set the Cluster Samples Operator to
Managedto install the image streams you have mirrored.
3.9. Next steps
- Mirror the OperatorHub images for the Operators that you want to install in your cluster.
- Install a cluster on infrastructure that you provision in your restricted network, such as on VMware vSphere, bare metal, or Amazon Web Services.
Chapter 4. Installing on AWS
4.1. Preparing to install on AWS
4.1.1. Prerequisites
- You reviewed details about the OpenShift Container Platform installation and update processes.
- You read the documentation on selecting a cluster installation method and preparing it for users.
4.1.2. Requirements for installing OpenShift Container Platform on AWS
Before installing OpenShift Container Platform on Amazon Web Services (AWS), you must create an AWS account. See Configuring an AWS account for details about configuring an account, account limits, account permissions, IAM user setup, and supported AWS regions.
If the cloud identity and access management (IAM) APIs are not accessible in your environment, or if you do not want to store an administrator-level credential secret in the kube-system namespace, see Manually creating IAM for AWS for other options.
4.1.3. Choosing a method to install OpenShift Container Platform on AWS
You can install OpenShift Container Platform on AWS by using one of the following deployment methods.
- Installing a cluster quickly on AWS: You can install OpenShift Container Platform on AWS by using the default configuration options.
- Installing a customized cluster on AWS: You can install a customized cluster on AWS infrastructure that the installation program provisions. The installation program allows for some customization to be applied at the installation stage. Many other customization options are available post-installation.
- Installing a cluster on AWS with network customizations: You can customize your OpenShift Container Platform network configuration during installation, so that your cluster can coexist with your existing IP address allocations and adhere to your network requirements.
- Installing a cluster on an existing Virtual Private Cloud: You can install OpenShift Container Platform on an existing AWS Virtual Private Cloud (VPC). You can use this installation method if you have constraints set by the guidelines of your company, such as limits when creating new accounts or infrastructure.
- Installing a private cluster on an existing VPC: You can install a private cluster on an existing AWS VPC. You can use this method to deploy OpenShift Container Platform on an internal network that is not visible to the Internet.
- Installing a cluster on AWS into a government or secret region: OpenShift Container Platform can be deployed into AWS regions that are specifically designed for US government agencies at the federal, state, and local level, as well as contractors, educational institutions, and other US customers that must run sensitive workloads in the cloud.
- Installing a cluster on AWS infrastructure that you provide: You can install OpenShift Container Platform on AWS infrastructure that you provide. You can use the provided CloudFormation templates to create stacks of AWS resources that represent each of the components required for an OpenShift Container Platform installation.
- Installing a cluster on AWS by using an internal mirror: You can install OpenShift Container Platform on AWS infrastructure that you provide by using an internal mirror of the installation release content. You can use this method to install a cluster that does not require an active Internet connection to obtain the software components. While you can install OpenShift Container Platform by using the mirrored content, your cluster still requires Internet access to use the AWS APIs.
4.1.4. Next steps
4.2. Configuring an AWS account
Before you can install OpenShift Container Platform, you must configure an Amazon Web Services (AWS) account.
4.2.1. Configuring Route 53
To install OpenShift Container Platform, the Amazon Web Services (AWS) account you use must have a dedicated public hosted zone in your Route 53 service. This zone must be authoritative for the domain. The Route 53 service provides cluster DNS resolution and name lookup for external connections to the cluster.
Procedure
Identify your domain, or subdomain, and registrar. You can transfer an existing domain and registrar or obtain a new one through AWS or another source.
NoteIf you purchase a new domain through AWS, it takes time for the relevant DNS changes to propagate. For more information about purchasing domains through AWS, see Registering Domain Names Using Amazon Route 53 in the AWS documentation.
- If you are using an existing domain and registrar, migrate its DNS to AWS. See Making Amazon Route 53 the DNS Service for an Existing Domain in the AWS documentation.
Create a public hosted zone for your domain or subdomain. See Creating a Public Hosted Zone in the AWS documentation.
Use an appropriate root domain, such as
openshiftcorp.com, or subdomain, such asclusters.openshiftcorp.com.- Extract the new authoritative name servers from the hosted zone records. See Getting the Name Servers for a Public Hosted Zone in the AWS documentation.
- Update the registrar records for the AWS Route 53 name servers that your domain uses. For example, if you registered your domain to a Route 53 service in a different accounts, see the following topic in the AWS documentation: Adding or Changing Name Servers or Glue Records.
- If you are using a subdomain, add its delegation records to the parent domain. This gives Amazon Route 53 responsibility for the subdomain. Follow the delegation procedure outlined by the DNS provider of the parent domain. See Creating a subdomain that uses Amazon Route 53 as the DNS service without migrating the parent domain in the AWS documentation for an example high level procedure.
4.2.1.1. Ingress Operator endpoint configuration for AWS Route 53
If you install in either Amazon Web Services (AWS) GovCloud (US) US-West or US-East region, the Ingress Operator uses us-gov-west-1 region for Route53 and tagging API clients.
The Ingress Operator uses https://tagging.us-gov-west-1.amazonaws.com as the tagging API endpoint if a tagging custom endpoint is configured that includes the string 'us-gov-east-1'.
For more information on AWS GovCloud (US) endpoints, see the Service Endpoints in the AWS documentation about GovCloud (US).
Private, disconnected installations are not supported for AWS GovCloud when you install in the us-gov-east-1 region.
Example Route 53 configuration
platform:
aws:
region: us-gov-west-1
serviceEndpoints:
- name: ec2
url: https://ec2.us-gov-west-1.amazonaws.com
- name: elasticloadbalancing
url: https://elasticloadbalancing.us-gov-west-1.amazonaws.com
- name: route53
url: https://route53.us-gov.amazonaws.com
- name: tagging
url: https://tagging.us-gov-west-1.amazonaws.com - 1
- Route 53 defaults to
https://route53.us-gov.amazonaws.comfor both AWS GovCloud (US) regions. - 2
- Only the US-West region has endpoints for tagging. Omit this parameter if your cluster is in another region.
4.2.2. AWS account limits
The OpenShift Container Platform cluster uses a number of Amazon Web Services (AWS) components, and the default Service Limits affect your ability to install OpenShift Container Platform clusters. If you use certain cluster configurations, deploy your cluster in certain AWS regions, or run multiple clusters from your account, you might need to request additional resources for your AWS account.
The following table summarizes the AWS components whose limits can impact your ability to install and run OpenShift Container Platform clusters.
| Component | Number of clusters available by default | Default AWS limit | Description |
|---|---|---|---|
| Instance Limits | Varies | Varies | By default, each cluster creates the following instances:
These instance type counts are within a new account’s default limit. To deploy more worker nodes, enable autoscaling, deploy large workloads, or use a different instance type, review your account limits to ensure that your cluster can deploy the machines that you need.
In most regions, the bootstrap and worker machines uses an |
| Elastic IPs (EIPs) | 0 to 1 | 5 EIPs per account | To provision the cluster in a highly available configuration, the installation program creates a public and private subnet for each availability zone within a region. Each private subnet requires a NAT Gateway, and each NAT gateway requires a separate elastic IP. Review the AWS region map to determine how many availability zones are in each region. To take advantage of the default high availability, install the cluster in a region with at least three availability zones. To install a cluster in a region with more than five availability zones, you must increase the EIP limit. Important
To use the |
| Virtual Private Clouds (VPCs) | 5 | 5 VPCs per region | Each cluster creates its own VPC. |
| Elastic Load Balancing (ELB/NLB) | 3 | 20 per region |
By default, each cluster creates internal and external network load balancers for the master API server and a single classic elastic load balancer for the router. Deploying more Kubernetes |
| NAT Gateways | 5 | 5 per availability zone | The cluster deploys one NAT gateway in each availability zone. |
| Elastic Network Interfaces (ENIs) | At least 12 | 350 per region |
The default installation creates 21 ENIs and an ENI for each availability zone in your region. For example, the Additional ENIs are created for additional machines and elastic load balancers that are created by cluster usage and deployed workloads. |
| VPC Gateway | 20 | 20 per account | Each cluster creates a single VPC Gateway for S3 access. |
| S3 buckets | 99 | 100 buckets per account | Because the installation process creates a temporary bucket and the registry component in each cluster creates a bucket, you can create only 99 OpenShift Container Platform clusters per AWS account. |
| Security Groups | 250 | 2,500 per account | Each cluster creates 10 distinct security groups. |
4.2.3. Required AWS permissions for the IAM user
Your IAM user must have the permission tag:GetResources in the region us-east-1 to delete the base cluster resources. As part of the AWS API requirement, the OpenShift Container Platform installation program performs various actions in this region.
When you attach the AdministratorAccess policy to the IAM user that you create in Amazon Web Services (AWS), you grant that user all of the required permissions. To deploy all components of an OpenShift Container Platform cluster, the IAM user requires the following permissions:
Example 4.1. Required EC2 permissions for installation
-
ec2:AuthorizeSecurityGroupEgress -
ec2:AuthorizeSecurityGroupIngress -
ec2:CopyImage -
ec2:CreateNetworkInterface -
ec2:AttachNetworkInterface -
ec2:CreateSecurityGroup -
ec2:CreateTags -
ec2:CreateVolume -
ec2:DeleteSecurityGroup -
ec2:DeleteSnapshot -
ec2:DeleteTags -
ec2:DeregisterImage -
ec2:DescribeAccountAttributes -
ec2:DescribeAddresses -
ec2:DescribeAvailabilityZones -
ec2:DescribeDhcpOptions -
ec2:DescribeImages -
ec2:DescribeInstanceAttribute -
ec2:DescribeInstanceCreditSpecifications -
ec2:DescribeInstances -
ec2:DescribeInstanceTypes -
ec2:DescribeInternetGateways -
ec2:DescribeKeyPairs -
ec2:DescribeNatGateways -
ec2:DescribeNetworkAcls -
ec2:DescribeNetworkInterfaces -
ec2:DescribePrefixLists -
ec2:DescribeRegions -
ec2:DescribeRouteTables -
ec2:DescribeSecurityGroups -
ec2:DescribeSubnets -
ec2:DescribeTags -
ec2:DescribeVolumes -
ec2:DescribeVpcAttribute -
ec2:DescribeVpcClassicLink -
ec2:DescribeVpcClassicLinkDnsSupport -
ec2:DescribeVpcEndpoints -
ec2:DescribeVpcs -
ec2:GetEbsDefaultKmsKeyId -
ec2:ModifyInstanceAttribute -
ec2:ModifyNetworkInterfaceAttribute -
ec2:RevokeSecurityGroupEgress -
ec2:RevokeSecurityGroupIngress -
ec2:RunInstances -
ec2:TerminateInstances
Example 4.2. Required permissions for creating network resources during installation
-
ec2:AllocateAddress -
ec2:AssociateAddress -
ec2:AssociateDhcpOptions -
ec2:AssociateRouteTable -
ec2:AttachInternetGateway -
ec2:CreateDhcpOptions -
ec2:CreateInternetGateway -
ec2:CreateNatGateway -
ec2:CreateRoute -
ec2:CreateRouteTable -
ec2:CreateSubnet -
ec2:CreateVpc -
ec2:CreateVpcEndpoint -
ec2:ModifySubnetAttribute -
ec2:ModifyVpcAttribute
If you use an existing VPC, your account does not require these permissions for creating network resources.
Example 4.3. Required Elastic Load Balancing permissions (ELB) for installation
-
elasticloadbalancing:AddTags -
elasticloadbalancing:ApplySecurityGroupsToLoadBalancer -
elasticloadbalancing:AttachLoadBalancerToSubnets -
elasticloadbalancing:ConfigureHealthCheck -
elasticloadbalancing:CreateLoadBalancer -
elasticloadbalancing:CreateLoadBalancerListeners -
elasticloadbalancing:DeleteLoadBalancer -
elasticloadbalancing:DeregisterInstancesFromLoadBalancer -
elasticloadbalancing:DescribeInstanceHealth -
elasticloadbalancing:DescribeLoadBalancerAttributes -
elasticloadbalancing:DescribeLoadBalancers -
elasticloadbalancing:DescribeTags -
elasticloadbalancing:ModifyLoadBalancerAttributes -
elasticloadbalancing:RegisterInstancesWithLoadBalancer -
elasticloadbalancing:SetLoadBalancerPoliciesOfListener
Example 4.4. Required Elastic Load Balancing permissions (ELBv2) for installation
-
elasticloadbalancing:AddTags -
elasticloadbalancing:CreateListener -
elasticloadbalancing:CreateLoadBalancer -
elasticloadbalancing:CreateTargetGroup -
elasticloadbalancing:DeleteLoadBalancer -
elasticloadbalancing:DeregisterTargets -
elasticloadbalancing:DescribeListeners -
elasticloadbalancing:DescribeLoadBalancerAttributes -
elasticloadbalancing:DescribeLoadBalancers -
elasticloadbalancing:DescribeTargetGroupAttributes -
elasticloadbalancing:DescribeTargetHealth -
elasticloadbalancing:ModifyLoadBalancerAttributes -
elasticloadbalancing:ModifyTargetGroup -
elasticloadbalancing:ModifyTargetGroupAttributes -
elasticloadbalancing:RegisterTargets
Example 4.5. Required IAM permissions for installation
-
iam:AddRoleToInstanceProfile -
iam:CreateInstanceProfile -
iam:CreateRole -
iam:DeleteInstanceProfile -
iam:DeleteRole -
iam:DeleteRolePolicy -
iam:GetInstanceProfile -
iam:GetRole -
iam:GetRolePolicy -
iam:GetUser -
iam:ListInstanceProfilesForRole -
iam:ListRoles -
iam:ListUsers -
iam:PassRole -
iam:PutRolePolicy -
iam:RemoveRoleFromInstanceProfile -
iam:SimulatePrincipalPolicy -
iam:TagRole
If you have not created an elastic load balancer (ELB) in your AWS account, the IAM user also requires the iam:CreateServiceLinkedRole permission.
Example 4.6. Required Route 53 permissions for installation
-
route53:ChangeResourceRecordSets -
route53:ChangeTagsForResource -
route53:CreateHostedZone -
route53:DeleteHostedZone -
route53:GetChange -
route53:GetHostedZone -
route53:ListHostedZones -
route53:ListHostedZonesByName -
route53:ListResourceRecordSets -
route53:ListTagsForResource -
route53:UpdateHostedZoneComment
Example 4.7. Required S3 permissions for installation
-
s3:CreateBucket -
s3:DeleteBucket -
s3:GetAccelerateConfiguration -
s3:GetBucketAcl -
s3:GetBucketCors -
s3:GetBucketLocation -
s3:GetBucketLogging -
s3:GetBucketObjectLockConfiguration -
s3:GetBucketReplication -
s3:GetBucketRequestPayment -
s3:GetBucketTagging -
s3:GetBucketVersioning -
s3:GetBucketWebsite -
s3:GetEncryptionConfiguration -
s3:GetLifecycleConfiguration -
s3:GetReplicationConfiguration -
s3:ListBucket -
s3:PutBucketAcl -
s3:PutBucketTagging -
s3:PutEncryptionConfiguration
Example 4.8. S3 permissions that cluster Operators require
-
s3:DeleteObject -
s3:GetObject -
s3:GetObjectAcl -
s3:GetObjectTagging -
s3:GetObjectVersion -
s3:PutObject -
s3:PutObjectAcl -
s3:PutObjectTagging
Example 4.9. Required permissions to delete base cluster resources
-
autoscaling:DescribeAutoScalingGroups -
ec2:DeleteNetworkInterface -
ec2:DeleteVolume -
elasticloadbalancing:DeleteTargetGroup -
elasticloadbalancing:DescribeTargetGroups -
iam:DeleteAccessKey -
iam:DeleteUser -
iam:ListAttachedRolePolicies -
iam:ListInstanceProfiles -
iam:ListRolePolicies -
iam:ListUserPolicies -
s3:DeleteObject -
s3:ListBucketVersions -
tag:GetResources
Example 4.10. Required permissions to delete network resources
-
ec2:DeleteDhcpOptions -
ec2:DeleteInternetGateway -
ec2:DeleteNatGateway -
ec2:DeleteRoute -
ec2:DeleteRouteTable -
ec2:DeleteSubnet -
ec2:DeleteVpc -
ec2:DeleteVpcEndpoints -
ec2:DetachInternetGateway -
ec2:DisassociateRouteTable -
ec2:ReleaseAddress -
ec2:ReplaceRouteTableAssociation
If you use an existing VPC, your account does not require these permissions to delete network resources. Instead, your account only requires the tag:UntagResources permission to delete network resources.
Example 4.11. Required permissions to delete a cluster with shared instance roles
-
iam:UntagRole
Example 4.12. Additional IAM and S3 permissions that are required to create manifests
-
iam:DeleteAccessKey -
iam:DeleteUser -
iam:DeleteUserPolicy -
iam:GetUserPolicy -
iam:ListAccessKeys -
iam:PutUserPolicy -
iam:TagUser -
iam:GetUserPolicy -
iam:ListAccessKeys -
s3:PutBucketPublicAccessBlock -
s3:GetBucketPublicAccessBlock -
s3:PutLifecycleConfiguration -
s3:HeadBucket -
s3:ListBucketMultipartUploads -
s3:AbortMultipartUpload
If you are managing your cloud provider credentials with mint mode, the IAM user also requires the iam:CreateAccessKey and iam:CreateUser permissions.
Example 4.13. Optional permissions for instance and quota checks for installation
-
ec2:DescribeInstanceTypeOfferings -
servicequotas:ListAWSDefaultServiceQuotas
4.2.4. Creating an IAM user
Each Amazon Web Services (AWS) account contains a root user account that is based on the email address you used to create the account. This is a highly-privileged account, and it is recommended to use it for only initial account and billing configuration, creating an initial set of users, and securing the account.
Before you install OpenShift Container Platform, create a secondary IAM administrative user. As you complete the Creating an IAM User in Your AWS Account procedure in the AWS documentation, set the following options:
Procedure
-
Specify the IAM user name and select
Programmatic access. Attach the
AdministratorAccesspolicy to ensure that the account has sufficient permission to create the cluster. This policy provides the cluster with the ability to grant credentials to each OpenShift Container Platform component. The cluster grants the components only the credentials that they require.NoteWhile it is possible to create a policy that grants the all of the required AWS permissions and attach it to the user, this is not the preferred option. The cluster will not have the ability to grant additional credentials to individual components, so the same credentials are used by all components.
- Optional: Add metadata to the user by attaching tags.
-
Confirm that the user name that you specified is granted the
AdministratorAccesspolicy. Record the access key ID and secret access key values. You must use these values when you configure your local machine to run the installation program.
ImportantYou cannot use a temporary session token that you generated while using a multi-factor authentication device to authenticate to AWS when you deploy a cluster. The cluster continues to use your current AWS credentials to create AWS resources for the entire life of the cluster, so you must use key-based, long-lived credentials.
4.2.5. Required AWS permissions for IAM roles
You have the option of defining your own cloud identity and access management (IAM) roles that are applied to the instance profiles of your machines created by the installation program. You can specify existing IAM roles by defining the controlPlane.platform.aws.iamRole and compute.platform.aws.iamRoleThis fields in the install-config.yaml file. You can use these fields to match naming schemes and include predefined permissions boundaries for your IAM roles.
The control plane and compute machines require the following IAM role permissions:
Example 4.14. Required IAM role permissions for control plane instance profiles
-
sts:AssumeRole -
ec2:AttachVolume -
ec2:AuthorizeSecurityGroupIngress -
ec2:CreateSecurityGroup -
ec2:CreateTags -
ec2:CreateVolume -
ec2:DeleteSecurityGroup -
ec2:DeleteVolume -
ec2:Describe* -
ec2:DetachVolume -
ec2:ModifyInstanceAttribute -
ec2:ModifyVolume -
ec2:RevokeSecurityGroupIngress -
elasticloadbalancing:AddTags -
elasticloadbalancing:AttachLoadBalancerToSubnets -
elasticloadbalancing:ApplySecurityGroupsToLoadBalancer -
elasticloadbalancing:CreateListener -
elasticloadbalancing:CreateLoadBalancer -
elasticloadbalancing:CreateLoadBalancerPolicy -
elasticloadbalancing:CreateLoadBalancerListeners -
elasticloadbalancing:CreateTargetGroup -
elasticloadbalancing:ConfigureHealthCheck -
elasticloadbalancing:DeleteListener -
elasticloadbalancing:DeleteLoadBalancer -
elasticloadbalancing:DeleteLoadBalancerListeners -
elasticloadbalancing:DeleteTargetGroup -
elasticloadbalancing:DeregisterInstancesFromLoadBalancer -
elasticloadbalancing:DeregisterTargets -
elasticloadbalancing:Describe* -
elasticloadbalancing:DetachLoadBalancerFromSubnets -
elasticloadbalancing:ModifyListener -
elasticloadbalancing:ModifyLoadBalancerAttributes -
elasticloadbalancing:ModifyTargetGroup -
elasticloadbalancing:ModifyTargetGroupAttributes -
elasticloadbalancing:RegisterInstancesWithLoadBalancer -
elasticloadbalancing:RegisterTargets -
elasticloadbalancing:SetLoadBalancerPoliciesForBackendServer -
elasticloadbalancing:SetLoadBalancerPoliciesOfListener -
kms:DescribeKey
Example 4.15. Required IAM role permissions for compute instance profiles
-
sts:AssumeRole -
ec2:DescribeInstances -
ec2:DescribeRegions
4.2.6. Supported AWS regions
You can deploy an OpenShift Container Platform cluster to the following public regions:
Your IAM user must have the permission tag:GetResources in the region us-east-1 to delete the base cluster resources. As part of the AWS API requirement, the OpenShift Container Platform installation program performs various actions in this region.
-
af-south-1(Cape Town) -
ap-east-1(Hong Kong) -
ap-northeast-1(Tokyo) -
ap-northeast-2(Seoul) -
ap-northeast-3(Osaka) -
ap-south-1(Mumbai) -
ap-southeast-1(Singapore) -
ap-southeast-2(Sydney) -
ca-central-1(Central) -
eu-central-1(Frankfurt) -
eu-north-1(Stockholm) -
eu-south-1(Milan) -
eu-west-1(Ireland) -
eu-west-2(London) -
eu-west-3(Paris) -
me-south-1(Bahrain) -
sa-east-1(São Paulo) -
us-east-1(N. Virginia) -
us-east-2(Ohio) -
us-west-1(N. California) -
us-west-2(Oregon)
The following AWS GovCloud regions are supported:
-
us-gov-west-1 -
us-gov-east-1
The AWS C2S Secret Region is supported:
-
us-iso-east-1
4.2.7. Next steps
Install an OpenShift Container Platform cluster:
- Quickly install a cluster with default options on installer-provisioned infrastructure
- Install a cluster with cloud customizations on installer-provisioned infrastructure
- Install a cluster with network customizations on installer-provisioned infrastructure
- Installing a cluster on user-provisioned infrastructure in AWS by using CloudFormation templates
4.3. Manually creating IAM for AWS
In environments where the cloud identity and access management (IAM) APIs are not reachable, or the administrator prefers not to store an administrator-level credential secret in the cluster kube-system namespace, you can put the Cloud Credential Operator (CCO) into manual mode before you install the cluster.
4.3.1. Alternatives to storing administrator-level secrets in the kube-system project
The Cloud Credential Operator (CCO) manages cloud provider credentials as Kubernetes custom resource definitions (CRDs). You can configure the CCO to suit the security requirements of your organization by setting different values for the credentialsMode parameter in the install-config.yaml file.
If you prefer not to store an administrator-level credential secret in the cluster kube-system project, you can choose one of the following options when installing OpenShift Container Platform:
Manage cloud credentials manually:
You can set the
credentialsModeparameter for the CCO toManualto manage cloud credentials manually. Using manual mode allows each cluster component to have only the permissions it requires, without storing an administrator-level credential in the cluster. You can also use this mode if your environment does not have connectivity to the cloud provider public IAM endpoint. However, you must manually reconcile permissions with new release images for every upgrade. You must also manually supply credentials for every component that requests them.Remove the administrator-level credential secret after installing OpenShift Container Platform with mint mode:
If you are using the CCO with the
credentialsModeparameter set toMint, you can remove or rotate the administrator-level credential after installing OpenShift Container Platform. Mint mode is the default configuration for the CCO. This option requires the presence of the administrator-level credential during an installation. The administrator-level credential is used during the installation to mint other credentials with some permissions granted. The original credential secret is not stored in the cluster permanently.
Prior to a non z-stream upgrade, you must reinstate the credential secret with the administrator-level credential. If the credential is not present, the upgrade might be blocked.
4.3.2. Manually create IAM
The Cloud Credential Operator (CCO) can be put into manual mode prior to installation in environments where the cloud identity and access management (IAM) APIs are not reachable, or the administrator prefers not to store an administrator-level credential secret in the cluster kube-system namespace.
Procedure
Change to the directory that contains the installation program and create the
install-config.yamlfile:$ openshift-install create install-config --dir <installation_directory>where
<installation_directory>is the directory in which the installation program creates files.Edit the
install-config.yamlconfiguration file so that it contains thecredentialsModeparameter set toManual.Example
install-config.yamlconfiguration fileapiVersion: v1 baseDomain: cluster1.example.com credentialsMode: Manual1 compute: - architecture: amd64 hyperthreading: Enabled ...- 1
- This line is added to set the
credentialsModeparameter toManual.
To generate the manifests, run the following command from the directory that contains the installation program:
$ openshift-install create manifests --dir <installation_directory>From the directory that contains the installation program, obtain details of the OpenShift Container Platform release image that your
openshift-installbinary is built to use:$ openshift-install versionExample output
release image quay.io/openshift-release-dev/ocp-release:4.y.z-x86_64Locate all
CredentialsRequestobjects in this release image that target the cloud you are deploying on:$ oc adm release extract quay.io/openshift-release-dev/ocp-release:4.y.z-x86_64 --credentials-requests --cloud=awsThis command creates a YAML file for each
CredentialsRequestobject.Sample
CredentialsRequestobjectapiVersion: cloudcredential.openshift.io/v1 kind: CredentialsRequest metadata: name: cloud-credential-operator-iam-ro namespace: openshift-cloud-credential-operator spec: secretRef: name: cloud-credential-operator-iam-ro-creds namespace: openshift-cloud-credential-operator providerSpec: apiVersion: cloudcredential.openshift.io/v1 kind: AWSProviderSpec statementEntries: - effect: Allow action: - iam:GetUser - iam:GetUserPolicy - iam:ListAccessKeys resource: "*"-
Create YAML files for secrets in the
openshift-installmanifests directory that you generated previously. The secrets must be stored using the namespace and secret name defined in thespec.secretReffor eachCredentialsRequestobject. The format for the secret data varies for each cloud provider. From the directory that contains the installation program, proceed with your cluster creation:
$ openshift-install create cluster --dir <installation_directory>ImportantBefore upgrading a cluster that uses manually maintained credentials, you must ensure that the CCO is in an upgradeable state. For details, see the "Upgrading clusters with manually maintained credentials" section of the installation content for your cloud provider.
4.3.3. Upgrading clusters with manually maintained credentials
If credentials are added in a future release, the Cloud Credential Operator (CCO) upgradable status for a cluster with manually maintained credentials changes to false. For minor release, for example, from 4.6 to 4.7, this status prevents you from upgrading until you have addressed any updated permissions. For z-stream releases, for example, from 4.6.10 to 4.6.11, the upgrade is not blocked, but the credentials must still be updated for the new release.
Use the Administrator perspective of the web console to determine if the CCO is upgradeable.
- Navigate to Administration → Cluster Settings.
- To view the CCO status details, click cloud-credential in the Cluster Operators list.
-
If the Upgradeable status in the Conditions section is False, examine the
CredentialsRequestcustom resource for the new release and update the manually maintained credentials on your cluster to match before upgrading.
In addition to creating new credentials for the release image that you are upgrading to, you must review the required permissions for existing credentials and accommodate any new permissions requirements for existing components in the new release. The CCO cannot detect these mismatches and will not set upgradable to false in this case.
The "Manually creating IAM" section of the installation content for your cloud provider explains how to obtain and use the credentials required for your cloud.
4.3.4. Mint mode
Mint mode is the default and recommended Cloud Credential Operator (CCO) credentials mode for OpenShift Container Platform. In this mode, the CCO uses the provided administrator-level cloud credential to run the cluster. Mint mode is supported for AWS, GCP, and Azure.
In mint mode, the admin credential is stored in the kube-system namespace and then used by the CCO to process the CredentialsRequest objects in the cluster and create users for each with specific permissions.
The benefits of mint mode include:
- Each cluster component has only the permissions it requires
- Automatic, on-going reconciliation for cloud credentials, including additional credentials or permissions that might be required for upgrades
One drawback is that mint mode requires admin credential storage in a cluster kube-system secret.
4.3.5. Mint mode with removal or rotation of the administrator-level credential
Currently, this mode is only supported on AWS and GCP.
In this mode, a user installs OpenShift Container Platform with an administrator-level credential just like the normal mint mode. However, this process removes the administrator-level credential secret from the cluster post-installation.
The administrator can have the Cloud Credential Operator make its own request for a read-only credential that allows it to verify if all CredentialsRequest objects have their required permissions, thus the administrator-level credential is not required unless something needs to be changed. After the associated credential is removed, it can be deleted or deactivated on the underlying cloud, if desired.
Prior to a non z-stream upgrade, you must reinstate the credential secret with the administrator-level credential. If the credential is not present, the upgrade might be blocked.
The administrator-level credential is not stored in the cluster permanently.
Following these steps still requires the administrator-level credential in the cluster for brief periods of time. It also requires manually re-instating the secret with administrator-level credentials for each upgrade.
4.3.6. Next steps
Install an OpenShift Container Platform cluster:
- Installing a cluster quickly on AWS with default options on installer-provisioned infrastructure
- Install a cluster with cloud customizations on installer-provisioned infrastructure
- Install a cluster with network customizations on installer-provisioned infrastructure
- Installing a cluster on user-provisioned infrastructure in AWS by using CloudFormation templates
4.4. Installing a cluster quickly on AWS
In OpenShift Container Platform version 4.7, you can install a cluster on Amazon Web Services (AWS) that uses the default configuration options.
4.4.1. Prerequisites
- Review details about the OpenShift Container Platform installation and update processes.
Configure an AWS account to host the cluster.
ImportantIf you have an AWS profile stored on your computer, it must not use a temporary session token that you generated while using a multi-factor authentication device. The cluster continues to use your current AWS credentials to create AWS resources for the entire life of the cluster, so you must use key-based, long-lived credentials. To generate appropriate keys, see Managing Access Keys for IAM Users in the AWS documentation. You can supply the keys when you run the installation program.
- If you use a firewall, you must configure it to allow the sites that your cluster requires access to.
- If you do not allow the system to manage identity and access management (IAM), then a cluster administrator can manually create and maintain IAM credentials. Manual mode can also be used in environments where the cloud IAM APIs are not reachable.
4.4.2. Internet access for OpenShift Container Platform
In OpenShift Container Platform 4.7, you require access to the Internet to install your cluster.
You must have Internet access to:
- Access OpenShift Cluster Manager to download the installation program and perform subscription management. If the cluster has internet access and you do not disable Telemetry, that service automatically entitles your cluster.
- Access Quay.io to obtain the packages that are required to install your cluster.
- Obtain the packages that are required to perform cluster updates.
If your cluster cannot have direct Internet access, you can perform a restricted network installation on some types of infrastructure that you provision. During that process, you download the content that is required and use it to populate a mirror registry with the packages that you need to install a cluster and generate the installation program. With some installation types, the environment that you install your cluster in will not require Internet access. Before you update the cluster, you update the content of the mirror registry.
4.4.3. Generating an SSH private key and adding it to the agent
If you want to perform installation debugging or disaster recovery on your cluster, you must provide an SSH key to both your ssh-agent and the installation program. You can use this key to access the bootstrap machine in a public cluster to troubleshoot installation issues.
In a production environment, you require disaster recovery and debugging.
You can use this key to SSH into the master nodes as the user core. When you deploy the cluster, the key is added to the core user’s ~/.ssh/authorized_keys list.
You must use a local key, not one that you configured with platform-specific approaches such as AWS key pairs.
Procedure
If you do not have an SSH key that is configured for password-less authentication on your computer, create one. For example, on a computer that uses a Linux operating system, run the following command:
$ ssh-keygen -t ed25519 -N '' \ -f <path>/<file_name>1 - 1
- Specify the path and file name, such as
~/.ssh/id_rsa, of the new SSH key. If you have an existing key pair, ensure your public key is in the your~/.sshdirectory.
Running this command generates an SSH key that does not require a password in the location that you specified.
NoteIf you plan to install an OpenShift Container Platform cluster that uses FIPS Validated / Modules in Process cryptographic libraries on the
x86_64architecture, do not create a key that uses theed25519algorithm. Instead, create a key that uses thersaorecdsaalgorithm.Start the
ssh-agentprocess as a background task:$ eval "$(ssh-agent -s)"Example output
Agent pid 31874NoteIf your cluster is in FIPS mode, only use FIPS-compliant algorithms to generate the SSH key. The key must be either RSA or ECDSA.
Add your SSH private key to the
ssh-agent:$ ssh-add <path>/<file_name>1 Example output
Identity added: /home/<you>/<path>/<file_name> (<computer_name>)- 1
- Specify the path and file name for your SSH private key, such as
~/.ssh/id_rsa
Next steps
- When you install OpenShift Container Platform, provide the SSH public key to the installation program.
4.4.4. Obtaining the installation program
Before you install OpenShift Container Platform, download the installation file on a local computer.
Prerequisites
- You have a computer that runs Linux or macOS, with 500 MB of local disk space
Procedure
- Access the Infrastructure Provider page on the OpenShift Cluster Manager site. If you have a Red Hat account, log in with your credentials. If you do not, create an account.
- Select your infrastructure provider.
Navigate to the page for your installation type, download the installation program for your operating system, and place the file in the directory where you will store the installation configuration files.
ImportantThe installation program creates several files on the computer that you use to install your cluster. You must keep the installation program and the files that the installation program creates after you finish installing the cluster. Both files are required to delete the cluster.
ImportantDeleting the files created by the installation program does not remove your cluster, even if the cluster failed during installation. To remove your cluster, complete the OpenShift Container Platform uninstallation procedures for your specific cloud provider.
Extract the installation program. For example, on a computer that uses a Linux operating system, run the following command:
$ tar xvf openshift-install-linux.tar.gz- Download your installation pull secret from the Red Hat OpenShift Cluster Manager. This pull secret allows you to authenticate with the services that are provided by the included authorities, including Quay.io, which serves the container images for OpenShift Container Platform components.
4.4.5. Deploying the cluster
You can install OpenShift Container Platform on a compatible cloud platform.
You can run the create cluster command of the installation program only once, during initial installation.
Prerequisites
- Configure an account with the cloud platform that hosts your cluster.
- Obtain the OpenShift Container Platform installation program and the pull secret for your cluster.
Procedure
Change to the directory that contains the installation program and initialize the cluster deployment:
$ ./openshift-install create cluster --dir <installation_directory> \1 --log-level=info2 ImportantSpecify an empty directory. Some installation assets, like bootstrap X.509 certificates have short expiration intervals, so you must not reuse an installation directory. If you want to reuse individual files from another cluster installation, you can copy them into your directory. However, the file names for the installation assets might change between releases. Use caution when copying installation files from an earlier OpenShift Container Platform version.
Provide values at the prompts:
Optional: Select an SSH key to use to access your cluster machines.
NoteFor production OpenShift Container Platform clusters on which you want to perform installation debugging or disaster recovery, specify an SSH key that your
ssh-agentprocess uses.- Select aws as the platform to target.
If you do not have an Amazon Web Services (AWS) profile stored on your computer, enter the AWS access key ID and secret access key for the user that you configured to run the installation program.
NoteThe AWS access key ID and secret access key are stored in
~/.aws/credentialsin the home directory of the current user on the installation host. You are prompted for the credentials by the installation program if the credentials for the exported profile are not present in the file. Any credentials that you provide to the installation program are stored in the file.- Select the AWS region to deploy the cluster to.
- Select the base domain for the Route 53 service that you configured for your cluster.
- Enter a descriptive name for your cluster.
- Paste the pull secret from the Red Hat OpenShift Cluster Manager.
NoteIf the cloud provider account that you configured on your host does not have sufficient permissions to deploy the cluster, the installation process stops, and the missing permissions are displayed.
When the cluster deployment completes, directions for accessing your cluster, including a link to its web console and credentials for the
kubeadminuser, display in your terminal.Example output
... INFO Install complete! INFO To access the cluster as the system:admin user when using 'oc', run 'export KUBECONFIG=/home/myuser/install_dir/auth/kubeconfig' INFO Access the OpenShift web-console here: https://console-openshift-console.apps.mycluster.example.com INFO Login to the console with user: "kubeadmin", and password: "4vYBz-Ee6gm-ymBZj-Wt5AL" INFO Time elapsed: 36m22sNoteThe cluster access and credential information also outputs to
<installation_directory>/.openshift_install.logwhen an installation succeeds.Important-
The Ignition config files that the installation program generates contain certificates that expire after 24 hours, which are then renewed at that time. If the cluster is shut down before renewing the certificates and the cluster is later restarted after the 24 hours have elapsed, the cluster automatically recovers the expired certificates. The exception is that you must manually approve the pending
node-bootstrappercertificate signing requests (CSRs) to recover kubelet certificates. See the documentation for Recovering from expired control plane certificates for more information. - It is recommended that you use Ignition config files within 12 hours after they are generated because the 24-hour certificate rotates from 16 to 22 hours after the cluster is installed. By using the Ignition config files within 12 hours, you can avoid installation failure if the certificate update runs during installation.
ImportantYou must not delete the installation program or the files that the installation program creates. Both are required to delete the cluster.
Optional: Remove or disable the
AdministratorAccesspolicy from the IAM account that you used to install the cluster.NoteThe elevated permissions provided by the
AdministratorAccesspolicy are required only during installation.
4.4.6. Installing the OpenShift CLI by downloading the binary
You can install the OpenShift CLI (oc) to interact with OpenShift Container Platform from a command-line interface. You can install oc on Linux, Windows, or macOS.
If you installed an earlier version of oc, you cannot use it to complete all of the commands in OpenShift Container Platform 4.7. Download and install the new version of oc.
4.4.6.1. Installing the OpenShift CLI on Linux
You can install the OpenShift CLI (oc) binary on Linux by using the following procedure.
Procedure
- Navigate to the OpenShift Container Platform downloads page on the Red Hat Customer Portal.
- Select the appropriate version in the Version drop-down menu.
- Click Download Now next to the OpenShift v4.7 Linux Client entry and save the file.
Unpack the archive:
$ tar xvzf <file>Place the
ocbinary in a directory that is on yourPATH.To check your
PATH, execute the following command:$ echo $PATH
After you install the OpenShift CLI, it is available using the oc command:
$ oc <command>4.4.6.2. Installing the OpenShift CLI on Windows
You can install the OpenShift CLI (oc) binary on Windows by using the following procedure.
Procedure
- Navigate to the OpenShift Container Platform downloads page on the Red Hat Customer Portal.
- Select the appropriate version in the Version drop-down menu.
- Click Download Now next to the OpenShift v4.7 Windows Client entry and save the file.
- Unzip the archive with a ZIP program.
Move the
ocbinary to a directory that is on yourPATH.To check your
PATH, open the command prompt and execute the following command:C:\> path
After you install the OpenShift CLI, it is available using the oc command:
C:\> oc <command>4.4.6.3. Installing the OpenShift CLI on macOS
You can install the OpenShift CLI (oc) binary on macOS by using the following procedure.
Procedure
- Navigate to the OpenShift Container Platform downloads page on the Red Hat Customer Portal.
- Select the appropriate version in the Version drop-down menu.
- Click Download Now next to the OpenShift v4.7 MacOSX Client entry and save the file.
- Unpack and unzip the archive.
Move the
ocbinary to a directory on your PATH.To check your
PATH, open a terminal and execute the following command:$ echo $PATH
After you install the OpenShift CLI, it is available using the oc command:
$ oc <command>4.4.7. Logging in to the cluster by using the CLI
You can log in to your cluster as a default system user by exporting the cluster kubeconfig file. The kubeconfig file contains information about the cluster that is used by the CLI to connect a client to the correct cluster and API server. The file is specific to a cluster and is created during OpenShift Container Platform installation.
Prerequisites
- You deployed an OpenShift Container Platform cluster.
-
You installed the
ocCLI.
Procedure
Export the
kubeadmincredentials:$ export KUBECONFIG=<installation_directory>/auth/kubeconfig1 - 1
- For
<installation_directory>, specify the path to the directory that you stored the installation files in.
Verify you can run
occommands successfully using the exported configuration:$ oc whoamiExample output
system:admin
4.4.8. Logging in to the cluster by using the web console
The kubeadmin user exists by default after an OpenShift Container Platform installation. You can log in to your cluster as the kubeadmin user by using the OpenShift Container Platform web console.
Prerequisites
- You have access to the installation host.
- You completed a cluster installation and all cluster Operators are available.
Procedure
Obtain the password for the
kubeadminuser from thekubeadmin-passwordfile on the installation host:$ cat <installation_directory>/auth/kubeadmin-passwordNoteAlternatively, you can obtain the
kubeadminpassword from the<installation_directory>/.openshift_install.loglog file on the installation host.List the OpenShift Container Platform web console route:
$ oc get routes -n openshift-console | grep 'console-openshift'NoteAlternatively, you can obtain the OpenShift Container Platform route from the
<installation_directory>/.openshift_install.loglog file on the installation host.Example output
console console-openshift-console.apps.<cluster_name>.<base_domain> console https reencrypt/Redirect None-
Navigate to the route detailed in the output of the preceding command in a web browser and log in as the
kubeadminuser.
4.4.9. Telemetry access for OpenShift Container Platform
In OpenShift Container Platform 4.7, the Telemetry service, which runs by default to provide metrics about cluster health and the success of updates, requires internet access. If your cluster is connected to the internet, Telemetry runs automatically, and your cluster is registered to OpenShift Cluster Manager.
After you confirm that your OpenShift Cluster Manager inventory is correct, either maintained automatically by Telemetry or manually by using OpenShift Cluster Manager, use subscription watch to track your OpenShift Container Platform subscriptions at the account or multi-cluster level.
4.4.10. Next steps
- Validating an installation.
- Customize your cluster.
- If necessary, you can opt out of remote health reporting.
- If necessary, you can remove cloud provider credentials.
4.5. Installing a cluster on AWS with customizations
In OpenShift Container Platform version 4.7, you can install a customized cluster on infrastructure that the installation program provisions on Amazon Web Services (AWS). To customize the installation, you modify parameters in the install-config.yaml file before you install the cluster.
The scope of the OpenShift Container Platform installation configurations is intentionally narrow. It is designed for simplicity and ensured success. You can complete many more OpenShift Container Platform configuration tasks after an installation completes.
4.5.1. Prerequisites
- Review details about the OpenShift Container Platform installation and update processes.
Configure an AWS account to host the cluster.
ImportantIf you have an AWS profile stored on your computer, it must not use a temporary session token that you generated while using a multi-factor authentication device. The cluster continues to use your current AWS credentials to create AWS resources for the entire life of the cluster, so you must use long-lived credentials. To generate appropriate keys, see Managing Access Keys for IAM Users in the AWS documentation. You can supply the keys when you run the installation program.
- If you use a firewall, you must configure it to allow the sites that your cluster requires access to.
- If you do not allow the system to manage identity and access management (IAM), then a cluster administrator can manually create and maintain IAM credentials. Manual mode can also be used in environments where the cloud IAM APIs are not reachable.
4.5.2. Internet access for OpenShift Container Platform
In OpenShift Container Platform 4.7, you require access to the Internet to install your cluster.
You must have Internet access to:
- Access OpenShift Cluster Manager to download the installation program and perform subscription management. If the cluster has internet access and you do not disable Telemetry, that service automatically entitles your cluster.
- Access Quay.io to obtain the packages that are required to install your cluster.
- Obtain the packages that are required to perform cluster updates.
If your cluster cannot have direct Internet access, you can perform a restricted network installation on some types of infrastructure that you provision. During that process, you download the content that is required and use it to populate a mirror registry with the packages that you need to install a cluster and generate the installation program. With some installation types, the environment that you install your cluster in will not require Internet access. Before you update the cluster, you update the content of the mirror registry.
4.5.3. Generating an SSH private key and adding it to the agent
If you want to perform installation debugging or disaster recovery on your cluster, you must provide an SSH key to both your ssh-agent and the installation program. You can use this key to access the bootstrap machine in a public cluster to troubleshoot installation issues.
In a production environment, you require disaster recovery and debugging.
You can use this key to SSH into the master nodes as the user core. When you deploy the cluster, the key is added to the core user’s ~/.ssh/authorized_keys list.
You must use a local key, not one that you configured with platform-specific approaches such as AWS key pairs.
Procedure
If you do not have an SSH key that is configured for password-less authentication on your computer, create one. For example, on a computer that uses a Linux operating system, run the following command:
$ ssh-keygen -t ed25519 -N '' \ -f <path>/<file_name>1 - 1
- Specify the path and file name, such as
~/.ssh/id_rsa, of the new SSH key. If you have an existing key pair, ensure your public key is in the your~/.sshdirectory.
Running this command generates an SSH key that does not require a password in the location that you specified.
NoteIf you plan to install an OpenShift Container Platform cluster that uses FIPS Validated / Modules in Process cryptographic libraries on the
x86_64architecture, do not create a key that uses theed25519algorithm. Instead, create a key that uses thersaorecdsaalgorithm.Start the
ssh-agentprocess as a background task:$ eval "$(ssh-agent -s)"Example output
Agent pid 31874NoteIf your cluster is in FIPS mode, only use FIPS-compliant algorithms to generate the SSH key. The key must be either RSA or ECDSA.
Add your SSH private key to the
ssh-agent:$ ssh-add <path>/<file_name>1 Example output
Identity added: /home/<you>/<path>/<file_name> (<computer_name>)- 1
- Specify the path and file name for your SSH private key, such as
~/.ssh/id_rsa
Next steps
- When you install OpenShift Container Platform, provide the SSH public key to the installation program.
4.5.4. Obtaining the installation program
Before you install OpenShift Container Platform, download the installation file on a local computer.
Prerequisites
- You have a computer that runs Linux or macOS, with 500 MB of local disk space
Procedure
- Access the Infrastructure Provider page on the OpenShift Cluster Manager site. If you have a Red Hat account, log in with your credentials. If you do not, create an account.
- Select your infrastructure provider.
Navigate to the page for your installation type, download the installation program for your operating system, and place the file in the directory where you will store the installation configuration files.
ImportantThe installation program creates several files on the computer that you use to install your cluster. You must keep the installation program and the files that the installation program creates after you finish installing the cluster. Both files are required to delete the cluster.
ImportantDeleting the files created by the installation program does not remove your cluster, even if the cluster failed during installation. To remove your cluster, complete the OpenShift Container Platform uninstallation procedures for your specific cloud provider.
Extract the installation program. For example, on a computer that uses a Linux operating system, run the following command:
$ tar xvf openshift-install-linux.tar.gz- Download your installation pull secret from the Red Hat OpenShift Cluster Manager. This pull secret allows you to authenticate with the services that are provided by the included authorities, including Quay.io, which serves the container images for OpenShift Container Platform components.
4.5.5. Creating the installation configuration file
You can customize the OpenShift Container Platform cluster you install on Amazon Web Services (AWS).
Prerequisites
- Obtain the OpenShift Container Platform installation program and the pull secret for your cluster.
- Obtain service principal permissions at the subscription level.
Procedure
Create the
install-config.yamlfile.Change to the directory that contains the installation program and run the following command:
$ ./openshift-install create install-config --dir <installation_directory>1 - 1
- For
<installation_directory>, specify the directory name to store the files that the installation program creates.
ImportantSpecify an empty directory. Some installation assets, like bootstrap X.509 certificates have short expiration intervals, so you must not reuse an installation directory. If you want to reuse individual files from another cluster installation, you can copy them into your directory. However, the file names for the installation assets might change between releases. Use caution when copying installation files from an earlier OpenShift Container Platform version.
At the prompts, provide the configuration details for your cloud:
Optional: Select an SSH key to use to access your cluster machines.
NoteFor production OpenShift Container Platform clusters on which you want to perform installation debugging or disaster recovery, specify an SSH key that your
ssh-agentprocess uses.- Select AWS as the platform to target.
- If you do not have an Amazon Web Services (AWS) profile stored on your computer, enter the AWS access key ID and secret access key for the user that you configured to run the installation program.
- Select the AWS region to deploy the cluster to.
- Select the base domain for the Route 53 service that you configured for your cluster.
- Enter a descriptive name for your cluster.
- Paste the pull secret from the Red Hat OpenShift Cluster Manager.
-
Modify the
install-config.yamlfile. You can find more information about the available parameters in the "Installation configuration parameters" section. Back up the
install-config.yamlfile so that you can use it to install multiple clusters.ImportantThe
install-config.yamlfile is consumed during the installation process. If you want to reuse the file, you must back it up now.
4.5.5.1. Installation configuration parameters
Before you deploy an OpenShift Container Platform cluster, you provide parameter values to describe your account on the cloud platform that hosts your cluster and optionally customize your cluster’s platform. When you create the install-config.yaml installation configuration file, you provide values for the required parameters through the command line. If you customize your cluster, you can modify the install-config.yaml file to provide more details about the platform.
After installation, you cannot modify these parameters in the install-config.yaml file.
The openshift-install command does not validate field names for parameters. If an incorrect name is specified, the related file or object is not created, and no error is reported. Ensure that the field names for any parameters that are specified are correct.
4.5.5.1.1. Required configuration parameters
Required installation configuration parameters are described in the following table:
| Parameter | Description | Values |
|---|---|---|
|
|
The API version for the | String |
|
|
The base domain of your cloud provider. The base domain is used to create routes to your OpenShift Container Platform cluster components. The full DNS name for your cluster is a combination of the |
A fully-qualified domain or subdomain name, such as |
|
|
Kubernetes resource | Object |
|
|
The name of the cluster. DNS records for the cluster are all subdomains of |
String of lowercase letters, hyphens ( |
|
|
The configuration for the specific platform upon which to perform the installation: | Object |
|
| Get a pull secret from the Red Hat OpenShift Cluster Manager to authenticate downloading container images for OpenShift Container Platform components from services such as Quay.io. |
|
4.5.5.1.2. Network configuration parameters
You can customize your installation configuration based on the requirements of your existing network infrastructure. For example, you can expand the IP address block for the cluster network or provide different IP address blocks than the defaults.
Only IPv4 addresses are supported.
| Parameter | Description | Values |
|---|---|---|
|
| The configuration for the cluster network. | Object Note
You cannot modify parameters specified by the |
|
| The cluster network provider Container Network Interface (CNI) plug-in to install. |
Either |
|
| The IP address blocks for pods.
The default value is If you specify multiple IP address blocks, the blocks must not overlap. | An array of objects. For example: |
|
|
Required if you use An IPv4 network. |
An IP address block in Classless Inter-Domain Routing (CIDR) notation. The prefix length for an IPv4 block is between |
|
|
The subnet prefix length to assign to each individual node. For example, if | A subnet prefix.
The default value is |
|
|
The IP address block for services. The default value is The OpenShift SDN and OVN-Kubernetes network providers support only a single IP address block for the service network. | An array with an IP address block in CIDR format. For example: |
|
| The IP address blocks for machines. If you specify multiple IP address blocks, the blocks must not overlap. | An array of objects. For example: |
|
|
Required if you use | An IP network block in CIDR notation.
For example, Note
Set the |
4.5.5.1.3. Optional configuration parameters
Optional installation configuration parameters are described in the following table:
| Parameter | Description | Values |
|---|---|---|
|
| A PEM-encoded X.509 certificate bundle that is added to the nodes' trusted certificate store. This trust bundle may also be used when a proxy has been configured. | String |
|
| The configuration for the machines that comprise the compute nodes. |
Array of |
|
|
Determines the instruction set architecture of the machines in the pool. Currently, heteregeneous clusters are not supported, so all pools must specify the same architecture. Valid values are | String |
|
|
Whether to enable or disable simultaneous multithreading, or Important If you disable simultaneous multithreading, ensure that your capacity planning accounts for the dramatically decreased machine performance. |
|
|
|
Required if you use |
|
|
|
Required if you use |
|
|
| The number of compute machines, which are also known as worker machines, to provision. |
A positive integer greater than or equal to |
|
| The configuration for the machines that comprise the control plane. |
Array of |
|
|
Determines the instruction set architecture of the machines in the pool. Currently, heterogeneous clusters are not supported, so all pools must specify the same architecture. Valid values are | String |
|
|
Whether to enable or disable simultaneous multithreading, or Important If you disable simultaneous multithreading, ensure that your capacity planning accounts for the dramatically decreased machine performance. |
|
|
|
Required if you use |
|
|
|
Required if you use |
|
|
| The number of control plane machines to provision. |
The only supported value is |
|
| The Cloud Credential Operator (CCO) mode. If no mode is specified, the CCO dynamically tries to determine the capabilities of the provided credentials, with a preference for mint mode on the platforms where multiple modes are supported. Note Not all CCO modes are supported for all cloud providers. For more information on CCO modes, see the Cloud Credential Operator entry in the Cluster Operators reference content. |
|
|
|
Enable or disable FIPS mode. The default is Important
The use of FIPS Validated / Modules in Process cryptographic libraries is only supported on OpenShift Container Platform deployments on the Note If you are using Azure File storage, you cannot enable FIPS mode. |
|
|
| Sources and repositories for the release-image content. |
Array of objects. Includes a |
|
|
Required if you use | String |
|
| Specify one or more repositories that may also contain the same images. | Array of strings |
|
| How to publish or expose the user-facing endpoints of your cluster, such as the Kubernetes API, OpenShift routes. |
|
|
| The SSH key or keys to authenticate access your cluster machines. Note
For production OpenShift Container Platform clusters on which you want to perform installation debugging or disaster recovery, specify an SSH key that your | One or more keys. For example: |
4.5.5.1.4. Optional AWS configuration parameters
Optional AWS configuration parameters are described in the following table:
| Parameter | Description | Values |
|---|---|---|
|
| The AWS AMI used to boot compute machines for the cluster. This is required for regions that require a custom RHCOS AMI. | Any published or custom RHCOS AMI that belongs to the set AWS region. |
|
| A pre-existing AWS IAM role applied to the compute machine pool instance profiles. You can use these fields to match naming schemes and include predefined permissions boundaries for your IAM roles. If undefined, the installation program creates a new IAM role. | The name of a valid AWS IAM role. |
|
| The Input/Output Operations Per Second (IOPS) that is reserved for the root volume. |
Integer, for example |
|
| The size in GiB of the root volume. |
Integer, for example |
|
| The type of the root volume. |
Valid AWS EBS volume type, such as |
|
| The Amazon Resource Name (key ARN) of a KMS key. This is required to encrypt OS volumes of worker nodes with a specific KMS key. | Valid key ID or the key ARN. |
|
| The EC2 instance type for the compute machines. |
Valid AWS instance type, such as |
|
| The availability zones where the installation program creates machines for the compute machine pool. If you provide your own VPC, you must provide a subnet in that availability zone. |
A list of valid AWS availability zones, such as |
|
| The AWS region that the installation program creates compute resources in. |
Any valid AWS region, such as |
|
| The AWS AMI used to boot control plane machines for the cluster. This is required for regions that require a custom RHCOS AMI. | Any published or custom RHCOS AMI that belongs to the set AWS region. |
|
| A pre-existing AWS IAM role applied to the control plane machine pool instance profiles. You can use these fields to match naming schemes and include predefined permissions boundaries for your IAM roles. If undefined, the installation program creates a new IAM role. | The name of a valid AWS IAM role. |
|
| The Amazon Resource Name (key ARN) of a KMS key. This is required to encrypt OS volumes of control plane nodes with a specific KMS key. | Valid key ID and the key ARN. |
|
| The EC2 instance type for the control plane machines. |
Valid AWS instance type, such as |
|
| The availability zones where the installation program creates machines for the control plane machine pool. |
A list of valid AWS availability zones, such as |
|
| The AWS region that the installation program creates control plane resources in. |
Valid AWS region, such as |
|
| The AWS AMI used to boot all machines for the cluster. If set, the AMI must belong to the same region as the cluster. This is required for regions that require a custom RHCOS AMI. | Any published or custom RHCOS AMI that belongs to the set AWS region. |
|
| An existing Route 53 private hosted zone for the cluster. You can only use a pre-existing hosted zone when also supplying your own VPC. The hosted zone must already be associated with the user-provided VPC before installation. Also, the domain of the hosted zone must be the cluster domain or a parent of the cluster domain. If undefined, the installation program creates a new hosted zone. |
String, for example |
|
| The AWS service endpoint name. Custom endpoints are only required for cases where alternative AWS endpoints, like FIPS, must be used. Custom API endpoints can be specified for EC2, S3, IAM, Elastic Load Balancing, Tagging, Route 53, and STS AWS services. | Valid AWS service endpoint name. |
|
|
The AWS service endpoint URL. The URL must use the | Valid AWS service endpoint URL. |
|
| A map of keys and values that the installation program adds as tags to all resources that it creates. |
Any valid YAML map, such as key value pairs in the |
|
|
If you provide the VPC instead of allowing the installation program to create the VPC for you, specify the subnet for the cluster to use. The subnet must be part of the same | Valid subnet IDs. |
4.5.5.2. Supported AWS machine types
The following Amazon Web Services (AWS) instance types are supported with OpenShift Container Platform.
Example 4.16. Instance types for machines
| Instance type | Bootstrap | Control plane | Compute |
|---|---|---|---|
|
| x | ||
|
| x | ||
|
| x | x | |
|
| x | x | |
|
| x | x | |
|
| x | x | |
|
| x | x | |
|
| x | ||
|
| x | x | |
|
| x | x | |
|
| x | x | |
|
| x | x | |
|
| x | x | |
|
| x | x | |
|
| x | ||
|
| x | x | |
|
| x | x | |
|
| x | x | |
|
| x | x | |
|
| x | x | |
|
| x | x | |
|
| x | x | |
|
| x | x | |
|
| x | x | |
|
| x | x | |
|
| x | x | |
|
| x | x | |
|
| x | x | |
|
| x | x | |
|
| x | ||
|
| x | x | |
|
| x | x | |
|
| x | x | |
|
| x | x | |
|
| x | x | |
|
| x | x | |
|
| x | ||
|
| x | x | |
|
| x | x | |
|
| x | x | |
|
| x | x | |
|
| x | x | |
|
| x | x | |
|
| x | ||
|
| x | x | |
|
| x | x | |
|
| x | x | |
|
| x | x | |
|
| x | x | |
|
| x | ||
|
| x | x | |
|
| x | x | |
|
| x | x | |
|
| x | x | |
|
| x | x | |
|
| x | x | |
|
| x | x | |
|
| x | ||
|
| x | x | |
|
| x | x | |
|
| x | x | |
|
| x | x | |
|
| x | x | |
|
| x | x | |
|
| x | x | |
|
| x | ||
|
| x | ||
|
| x | ||
|
| x | ||
|
| x | ||
|
| x |
4.5.5.3. Sample customized install-config.yaml file for AWS
You can customize the install-config.yaml file to specify more details about your OpenShift Container Platform cluster’s platform or modify the values of the required parameters.
This sample YAML file is provided for reference only. You must obtain your install-config.yaml file by using the installation program and modify it.
apiVersion: v1
baseDomain: example.com
credentialsMode: Mint
controlPlane:
hyperthreading: Enabled
name: master
platform:
aws:
zones:
- us-west-2a
- us-west-2b
rootVolume:
iops: 4000
size: 500
type: io1
type: m5.xlarge
replicas: 3
compute:
- hyperthreading: Enabled
name: worker
platform:
aws:
rootVolume:
iops: 2000
size: 500
type: io1
type: c5.4xlarge
zones:
- us-west-2c
replicas: 3
metadata:
name: test-cluster
networking:
clusterNetwork:
- cidr: 10.128.0.0/14
hostPrefix: 23
machineNetwork:
- cidr: 10.0.0.0/16
networkType: OpenShiftSDN
serviceNetwork:
- 172.30.0.0/16
platform:
aws:
region: us-west-2
userTags:
adminContact: jdoe
costCenter: 7536
amiID: ami-96c6f8f7
serviceEndpoints:
- name: ec2
url: https://vpce-id.ec2.us-west-2.vpce.amazonaws.com
fips: false
sshKey: ssh-ed25519 AAAA...
pullSecret: '{"auths": ...}' - 1 10 11 16
- Required. The installation program prompts you for this value.
- 2
- Optional: Add this parameter to force the Cloud Credential Operator (CCO) to use the specified mode, instead of having the CCO dynamically try to determine the capabilities of the credentials. For details about CCO modes, see the Cloud Credential Operator entry in the Platform Operators reference content.
- 3 7
- If you do not provide these parameters and values, the installation program provides the default value.
- 4
- The
controlPlanesection is a single mapping, but thecomputesection is a sequence of mappings. To meet the requirements of the different data structures, the first line of thecomputesection must begin with a hyphen,-, and the first line of thecontrolPlanesection must not. Only one control plane pool is used. - 5 8
- Whether to enable or disable simultaneous multithreading, or
hyperthreading. By default, simultaneous multithreading is enabled to increase the performance of your machines' cores. You can disable it by setting the parameter value toDisabled. If you disable simultaneous multithreading in some cluster machines, you must disable it in all cluster machines.ImportantIf you disable simultaneous multithreading, ensure that your capacity planning accounts for the dramatically decreased machine performance. Use larger instance types, such as
m4.2xlargeorm5.2xlarge, for your machines if you disable simultaneous multithreading. - 6 9
- To configure faster storage for etcd, especially for larger clusters, set the storage type as
io1and setiopsto2000. - 12
- The ID of the AMI used to boot machines for the cluster. If set, the AMI must belong to the same region as the cluster.
- 13
- The AWS service endpoints. Custom endpoints are required when installing to an unknown AWS region. The endpoint URL must use the
httpsprotocol and the host must trust the certificate. - 14
- Whether to enable or disable FIPS mode. By default, FIPS mode is not enabled. If FIPS mode is enabled, the Red Hat Enterprise Linux CoreOS (RHCOS) machines that OpenShift Container Platform runs on bypass the default Kubernetes cryptography suite and use the cryptography modules that are provided with RHCOS instead.Important
The use of FIPS Validated / Modules in Process cryptographic libraries is only supported on OpenShift Container Platform deployments on the
x86_64architecture. - 15
- You can optionally provide the
sshKeyvalue that you use to access the machines in your cluster.NoteFor production OpenShift Container Platform clusters on which you want to perform installation debugging or disaster recovery, specify an SSH key that your
ssh-agentprocess uses.
4.5.5.4. Configuring the cluster-wide proxy during installation
Production environments can deny direct access to the Internet and instead have an HTTP or HTTPS proxy available. You can configure a new OpenShift Container Platform cluster to use a proxy by configuring the proxy settings in the install-config.yaml file.
Prerequisites
-
You have an existing
install-config.yamlfile. You reviewed the sites that your cluster requires access to and determined whether any of them need to bypass the proxy. By default, all cluster egress traffic is proxied, including calls to hosting cloud provider APIs. You added sites to the
Proxyobject’sspec.noProxyfield to bypass the proxy if necessary.NoteThe
Proxyobjectstatus.noProxyfield is populated with the values of thenetworking.machineNetwork[].cidr,networking.clusterNetwork[].cidr, andnetworking.serviceNetwork[]fields from your installation configuration.For installations on Amazon Web Services (AWS), Google Cloud Platform (GCP), Microsoft Azure, and Red Hat OpenStack Platform (RHOSP), the
Proxyobjectstatus.noProxyfield is also populated with the instance metadata endpoint (169.254.169.254).-
If your cluster is on AWS, you added the
ec2.<region>.amazonaws.com,elasticloadbalancing.<region>.amazonaws.com, ands3.<region>.amazonaws.comendpoints to your VPC endpoint. These endpoints are required to complete requests from the nodes to the AWS EC2 API. Because the proxy works on the container level, not the node level, you must route these requests to the AWS EC2 API through the AWS private network. Adding the public IP address of the EC2 API to your allowlist in your proxy server is not sufficient.
Procedure
Edit your
install-config.yamlfile and add the proxy settings. For example:apiVersion: v1 baseDomain: my.domain.com proxy: httpProxy: http://<username>:<pswd>@<ip>:<port>1 httpsProxy: https://<username>:<pswd>@<ip>:<port>2 noProxy: example.com3 additionalTrustBundle: |4 -----BEGIN CERTIFICATE----- <MY_TRUSTED_CA_CERT> -----END CERTIFICATE----- ...- 1
- A proxy URL to use for creating HTTP connections outside the cluster. The URL scheme must be
http. - 2
- A proxy URL to use for creating HTTPS connections outside the cluster.
- 3
- A comma-separated list of destination domain names, IP addresses, or other network CIDRs to exclude from proxying. Preface a domain with
.to match subdomains only. For example,.y.commatchesx.y.com, but noty.com. Use*to bypass the proxy for all destinations. - 4
- If provided, the installation program generates a config map that is named
user-ca-bundlein theopenshift-confignamespace to hold the additional CA certificates. If you provideadditionalTrustBundleand at least one proxy setting, theProxyobject is configured to reference theuser-ca-bundleconfig map in thetrustedCAfield. The Cluster Network Operator then creates atrusted-ca-bundleconfig map that merges the contents specified for thetrustedCAparameter with the RHCOS trust bundle. TheadditionalTrustBundlefield is required unless the proxy’s identity certificate is signed by an authority from the RHCOS trust bundle.
NoteThe installation program does not support the proxy
readinessEndpointsfield.- Save the file and reference it when installing OpenShift Container Platform.
The installation program creates a cluster-wide proxy that is named cluster that uses the proxy settings in the provided install-config.yaml file. If no proxy settings are provided, a cluster Proxy object is still created, but it will have a nil spec.
Only the Proxy object named cluster is supported, and no additional proxies can be created.
4.5.6. Deploying the cluster
You can install OpenShift Container Platform on a compatible cloud platform.
You can run the create cluster command of the installation program only once, during initial installation.
Prerequisites
- Configure an account with the cloud platform that hosts your cluster.
- Obtain the OpenShift Container Platform installation program and the pull secret for your cluster.
Procedure
Change to the directory that contains the installation program and initialize the cluster deployment:
$ ./openshift-install create cluster --dir <installation_directory> \1 --log-level=info2 NoteIf the cloud provider account that you configured on your host does not have sufficient permissions to deploy the cluster, the installation process stops, and the missing permissions are displayed.
When the cluster deployment completes, directions for accessing your cluster, including a link to its web console and credentials for the
kubeadminuser, display in your terminal.Example output
... INFO Install complete! INFO To access the cluster as the system:admin user when using 'oc', run 'export KUBECONFIG=/home/myuser/install_dir/auth/kubeconfig' INFO Access the OpenShift web-console here: https://console-openshift-console.apps.mycluster.example.com INFO Login to the console with user: "kubeadmin", and password: "4vYBz-Ee6gm-ymBZj-Wt5AL" INFO Time elapsed: 36m22sNoteThe cluster access and credential information also outputs to
<installation_directory>/.openshift_install.logwhen an installation succeeds.Important-
The Ignition config files that the installation program generates contain certificates that expire after 24 hours, which are then renewed at that time. If the cluster is shut down before renewing the certificates and the cluster is later restarted after the 24 hours have elapsed, the cluster automatically recovers the expired certificates. The exception is that you must manually approve the pending
node-bootstrappercertificate signing requests (CSRs) to recover kubelet certificates. See the documentation for Recovering from expired control plane certificates for more information. - It is recommended that you use Ignition config files within 12 hours after they are generated because the 24-hour certificate rotates from 16 to 22 hours after the cluster is installed. By using the Ignition config files within 12 hours, you can avoid installation failure if the certificate update runs during installation.
ImportantYou must not delete the installation program or the files that the installation program creates. Both are required to delete the cluster.
-
The Ignition config files that the installation program generates contain certificates that expire after 24 hours, which are then renewed at that time. If the cluster is shut down before renewing the certificates and the cluster is later restarted after the 24 hours have elapsed, the cluster automatically recovers the expired certificates. The exception is that you must manually approve the pending
Optional: Remove or disable the
AdministratorAccesspolicy from the IAM account that you used to install the cluster.NoteThe elevated permissions provided by the
AdministratorAccesspolicy are required only during installation.
4.5.7. Installing the OpenShift CLI by downloading the binary
You can install the OpenShift CLI (oc) to interact with OpenShift Container Platform from a command-line interface. You can install oc on Linux, Windows, or macOS.
If you installed an earlier version of oc, you cannot use it to complete all of the commands in OpenShift Container Platform 4.7. Download and install the new version of oc.
4.5.7.1. Installing the OpenShift CLI on Linux
You can install the OpenShift CLI (oc) binary on Linux by using the following procedure.
Procedure
- Navigate to the OpenShift Container Platform downloads page on the Red Hat Customer Portal.
- Select the appropriate version in the Version drop-down menu.
- Click Download Now next to the OpenShift v4.7 Linux Client entry and save the file.
Unpack the archive:
$ tar xvzf <file>Place the
ocbinary in a directory that is on yourPATH.To check your
PATH, execute the following command:$ echo $PATH
After you install the OpenShift CLI, it is available using the oc command:
$ oc <command>4.5.7.2. Installing the OpenShift CLI on Windows
You can install the OpenShift CLI (oc) binary on Windows by using the following procedure.
Procedure
- Navigate to the OpenShift Container Platform downloads page on the Red Hat Customer Portal.
- Select the appropriate version in the Version drop-down menu.
- Click Download Now next to the OpenShift v4.7 Windows Client entry and save the file.
- Unzip the archive with a ZIP program.
Move the
ocbinary to a directory that is on yourPATH.To check your
PATH, open the command prompt and execute the following command:C:\> path
After you install the OpenShift CLI, it is available using the oc command:
C:\> oc <command>4.5.7.3. Installing the OpenShift CLI on macOS
You can install the OpenShift CLI (oc) binary on macOS by using the following procedure.
Procedure
- Navigate to the OpenShift Container Platform downloads page on the Red Hat Customer Portal.
- Select the appropriate version in the Version drop-down menu.
- Click Download Now next to the OpenShift v4.7 MacOSX Client entry and save the file.
- Unpack and unzip the archive.
Move the
ocbinary to a directory on your PATH.To check your
PATH, open a terminal and execute the following command:$ echo $PATH
After you install the OpenShift CLI, it is available using the oc command:
$ oc <command>4.5.8. Logging in to the cluster by using the CLI
You can log in to your cluster as a default system user by exporting the cluster kubeconfig file. The kubeconfig file contains information about the cluster that is used by the CLI to connect a client to the correct cluster and API server. The file is specific to a cluster and is created during OpenShift Container Platform installation.
Prerequisites
- You deployed an OpenShift Container Platform cluster.
-
You installed the
ocCLI.
Procedure
Export the
kubeadmincredentials:$ export KUBECONFIG=<installation_directory>/auth/kubeconfig1 - 1
- For
<installation_directory>, specify the path to the directory that you stored the installation files in.
Verify you can run
occommands successfully using the exported configuration:$ oc whoamiExample output
system:admin
4.5.9. Logging in to the cluster by using the web console
The kubeadmin user exists by default after an OpenShift Container Platform installation. You can log in to your cluster as the kubeadmin user by using the OpenShift Container Platform web console.
Prerequisites
- You have access to the installation host.
- You completed a cluster installation and all cluster Operators are available.
Procedure
Obtain the password for the
kubeadminuser from thekubeadmin-passwordfile on the installation host:$ cat <installation_directory>/auth/kubeadmin-passwordNoteAlternatively, you can obtain the
kubeadminpassword from the<installation_directory>/.openshift_install.loglog file on the installation host.List the OpenShift Container Platform web console route:
$ oc get routes -n openshift-console | grep 'console-openshift'NoteAlternatively, you can obtain the OpenShift Container Platform route from the
<installation_directory>/.openshift_install.loglog file on the installation host.Example output
console console-openshift-console.apps.<cluster_name>.<base_domain> console https reencrypt/Redirect None-
Navigate to the route detailed in the output of the preceding command in a web browser and log in as the
kubeadminuser.
4.5.10. Telemetry access for OpenShift Container Platform
In OpenShift Container Platform 4.7, the Telemetry service, which runs by default to provide metrics about cluster health and the success of updates, requires internet access. If your cluster is connected to the internet, Telemetry runs automatically, and your cluster is registered to OpenShift Cluster Manager.
After you confirm that your OpenShift Cluster Manager inventory is correct, either maintained automatically by Telemetry or manually by using OpenShift Cluster Manager, use subscription watch to track your OpenShift Container Platform subscriptions at the account or multi-cluster level.
4.5.11. Next steps
- Validating an installation.
- Customize your cluster.
- If necessary, you can opt out of remote health reporting.
- If necessary, you can remove cloud provider credentials.
4.6. Installing a cluster on AWS with network customizations
In OpenShift Container Platform version 4.7, you can install a cluster on Amazon Web Services (AWS) with customized network configuration options. By customizing your network configuration, your cluster can coexist with existing IP address allocations in your environment and integrate with existing MTU and VXLAN configurations.
You must set most of the network configuration parameters during installation, and you can modify only kubeProxy configuration parameters in a running cluster.
4.6.1. Prerequisites
- Review details about the OpenShift Container Platform installation and update processes.
Configure an AWS account to host the cluster.
ImportantIf you have an AWS profile stored on your computer, it must not use a temporary session token that you generated while using a multi-factor authentication device. The cluster continues to use your current AWS credentials to create AWS resources for the entire life of the cluster, so you must use key-based, long-lived credentials. To generate appropriate keys, see Managing Access Keys for IAM Users in the AWS documentation. You can supply the keys when you run the installation program.
- If you use a firewall, you must configure it to allow the sites that your cluster requires access to.
- If you do not allow the system to manage identity and access management (IAM), then a cluster administrator can manually create and maintain IAM credentials. Manual mode can also be used in environments where the cloud IAM APIs are not reachable.
4.6.2. Internet access for OpenShift Container Platform
In OpenShift Container Platform 4.7, you require access to the Internet to install your cluster.
You must have Internet access to:
- Access OpenShift Cluster Manager to download the installation program and perform subscription management. If the cluster has internet access and you do not disable Telemetry, that service automatically entitles your cluster.
- Access Quay.io to obtain the packages that are required to install your cluster.
- Obtain the packages that are required to perform cluster updates.
If your cluster cannot have direct Internet access, you can perform a restricted network installation on some types of infrastructure that you provision. During that process, you download the content that is required and use it to populate a mirror registry with the packages that you need to install a cluster and generate the installation program. With some installation types, the environment that you install your cluster in will not require Internet access. Before you update the cluster, you update the content of the mirror registry.
4.6.3. Generating an SSH private key and adding it to the agent
If you want to perform installation debugging or disaster recovery on your cluster, you must provide an SSH key to both your ssh-agent and the installation program. You can use this key to access the bootstrap machine in a public cluster to troubleshoot installation issues.
In a production environment, you require disaster recovery and debugging.
You can use this key to SSH into the master nodes as the user core. When you deploy the cluster, the key is added to the core user’s ~/.ssh/authorized_keys list.
You must use a local key, not one that you configured with platform-specific approaches such as AWS key pairs.
Procedure
If you do not have an SSH key that is configured for password-less authentication on your computer, create one. For example, on a computer that uses a Linux operating system, run the following command:
$ ssh-keygen -t ed25519 -N '' \ -f <path>/<file_name>1 - 1
- Specify the path and file name, such as
~/.ssh/id_rsa, of the new SSH key. If you have an existing key pair, ensure your public key is in the your~/.sshdirectory.
Running this command generates an SSH key that does not require a password in the location that you specified.
NoteIf you plan to install an OpenShift Container Platform cluster that uses FIPS Validated / Modules in Process cryptographic libraries on the
x86_64architecture, do not create a key that uses theed25519algorithm. Instead, create a key that uses thersaorecdsaalgorithm.Start the
ssh-agentprocess as a background task:$ eval "$(ssh-agent -s)"Example output
Agent pid 31874NoteIf your cluster is in FIPS mode, only use FIPS-compliant algorithms to generate the SSH key. The key must be either RSA or ECDSA.
Add your SSH private key to the
ssh-agent:$ ssh-add <path>/<file_name>1 Example output
Identity added: /home/<you>/<path>/<file_name> (<computer_name>)- 1
- Specify the path and file name for your SSH private key, such as
~/.ssh/id_rsa
Next steps
- When you install OpenShift Container Platform, provide the SSH public key to the installation program.
4.6.4. Obtaining the installation program
Before you install OpenShift Container Platform, download the installation file on a local computer.
Prerequisites
- You have a computer that runs Linux or macOS, with 500 MB of local disk space
Procedure
- Access the Infrastructure Provider page on the OpenShift Cluster Manager site. If you have a Red Hat account, log in with your credentials. If you do not, create an account.
- Select your infrastructure provider.
Navigate to the page for your installation type, download the installation program for your operating system, and place the file in the directory where you will store the installation configuration files.
ImportantThe installation program creates several files on the computer that you use to install your cluster. You must keep the installation program and the files that the installation program creates after you finish installing the cluster. Both files are required to delete the cluster.
ImportantDeleting the files created by the installation program does not remove your cluster, even if the cluster failed during installation. To remove your cluster, complete the OpenShift Container Platform uninstallation procedures for your specific cloud provider.
Extract the installation program. For example, on a computer that uses a Linux operating system, run the following command:
$ tar xvf openshift-install-linux.tar.gz- Download your installation pull secret from the Red Hat OpenShift Cluster Manager. This pull secret allows you to authenticate with the services that are provided by the included authorities, including Quay.io, which serves the container images for OpenShift Container Platform components.
4.6.5. Network configuration phases
When specifying a cluster configuration prior to installation, there are several phases in the installation procedures when you can modify the network configuration:
- Phase 1
After entering the
openshift-install create install-configcommand. In theinstall-config.yamlfile, you can customize the following network-related fields:-
networking.networkType -
networking.clusterNetwork -
networking.serviceNetwork networking.machineNetworkFor more information on these fields, refer to "Installation configuration parameters".
NoteSet the
networking.machineNetworkto match the CIDR that the preferred NIC resides in.
-
- Phase 2
-
After entering the
openshift-install create manifestscommand. If you must specify advanced network configuration, during this phase you can define a customized Cluster Network Operator manifest with only the fields you want to modify.
You cannot override the values specified in phase 1 in the install-config.yaml file during phase 2. However, you can further customize the cluster network provider during phase 2.
4.6.6. Creating the installation configuration file
You can customize the OpenShift Container Platform cluster you install on Amazon Web Services (AWS).
Prerequisites
- Obtain the OpenShift Container Platform installation program and the pull secret for your cluster.
- Obtain service principal permissions at the subscription level.
Procedure
Create the
install-config.yamlfile.Change to the directory that contains the installation program and run the following command:
$ ./openshift-install create install-config --dir <installation_directory>1 - 1
- For
<installation_directory>, specify the directory name to store the files that the installation program creates.
ImportantSpecify an empty directory. Some installation assets, like bootstrap X.509 certificates have short expiration intervals, so you must not reuse an installation directory. If you want to reuse individual files from another cluster installation, you can copy them into your directory. However, the file names for the installation assets might change between releases. Use caution when copying installation files from an earlier OpenShift Container Platform version.
At the prompts, provide the configuration details for your cloud:
Optional: Select an SSH key to use to access your cluster machines.
NoteFor production OpenShift Container Platform clusters on which you want to perform installation debugging or disaster recovery, specify an SSH key that your
ssh-agentprocess uses.- Select AWS as the platform to target.
- If you do not have an Amazon Web Services (AWS) profile stored on your computer, enter the AWS access key ID and secret access key for the user that you configured to run the installation program.
- Select the AWS region to deploy the cluster to.
- Select the base domain for the Route 53 service that you configured for your cluster.
- Enter a descriptive name for your cluster.
- Paste the pull secret from the Red Hat OpenShift Cluster Manager.
-
Modify the
install-config.yamlfile. You can find more information about the available parameters in the "Installation configuration parameters" section. Back up the
install-config.yamlfile so that you can use it to install multiple clusters.ImportantThe
install-config.yamlfile is consumed during the installation process. If you want to reuse the file, you must back it up now.
4.6.6.1. Installation configuration parameters
Before you deploy an OpenShift Container Platform cluster, you provide parameter values to describe your account on the cloud platform that hosts your cluster and optionally customize your cluster’s platform. When you create the install-config.yaml installation configuration file, you provide values for the required parameters through the command line. If you customize your cluster, you can modify the install-config.yaml file to provide more details about the platform.
After installation, you cannot modify these parameters in the install-config.yaml file.
The openshift-install command does not validate field names for parameters. If an incorrect name is specified, the related file or object is not created, and no error is reported. Ensure that the field names for any parameters that are specified are correct.
4.6.6.1.1. Required configuration parameters
Required installation configuration parameters are described in the following table:
| Parameter | Description | Values |
|---|---|---|
|
|
The API version for the | String |
|
|
The base domain of your cloud provider. The base domain is used to create routes to your OpenShift Container Platform cluster components. The full DNS name for your cluster is a combination of the |
A fully-qualified domain or subdomain name, such as |
|
|
Kubernetes resource | Object |
|
|
The name of the cluster. DNS records for the cluster are all subdomains of |
String of lowercase letters, hyphens ( |
|
|
The configuration for the specific platform upon which to perform the installation: | Object |
|
| Get a pull secret from the Red Hat OpenShift Cluster Manager to authenticate downloading container images for OpenShift Container Platform components from services such as Quay.io. |
|
4.6.6.1.2. Network configuration parameters
You can customize your installation configuration based on the requirements of your existing network infrastructure. For example, you can expand the IP address block for the cluster network or provide different IP address blocks than the defaults.
Only IPv4 addresses are supported.
| Parameter | Description | Values |
|---|---|---|
|
| The configuration for the cluster network. | Object Note
You cannot modify parameters specified by the |
|
| The cluster network provider Container Network Interface (CNI) plug-in to install. |
Either |
|
| The IP address blocks for pods.
The default value is If you specify multiple IP address blocks, the blocks must not overlap. | An array of objects. For example: |
|
|
Required if you use An IPv4 network. |
An IP address block in Classless Inter-Domain Routing (CIDR) notation. The prefix length for an IPv4 block is between |
|
|
The subnet prefix length to assign to each individual node. For example, if | A subnet prefix.
The default value is |
|
|
The IP address block for services. The default value is The OpenShift SDN and OVN-Kubernetes network providers support only a single IP address block for the service network. | An array with an IP address block in CIDR format. For example: |
|
| The IP address blocks for machines. If you specify multiple IP address blocks, the blocks must not overlap. | An array of objects. For example: |
|
|
Required if you use | An IP network block in CIDR notation.
For example, Note
Set the |
4.6.6.1.3. Optional configuration parameters
Optional installation configuration parameters are described in the following table:
| Parameter | Description | Values |
|---|---|---|
|
| A PEM-encoded X.509 certificate bundle that is added to the nodes' trusted certificate store. This trust bundle may also be used when a proxy has been configured. | String |
|
| The configuration for the machines that comprise the compute nodes. |
Array of |
|
|
Determines the instruction set architecture of the machines in the pool. Currently, heteregeneous clusters are not supported, so all pools must specify the same architecture. Valid values are | String |
|
|
Whether to enable or disable simultaneous multithreading, or Important If you disable simultaneous multithreading, ensure that your capacity planning accounts for the dramatically decreased machine performance. |
|
|
|
Required if you use |
|
|
|
Required if you use |
|
|
| The number of compute machines, which are also known as worker machines, to provision. |
A positive integer greater than or equal to |
|
| The configuration for the machines that comprise the control plane. |
Array of |
|
|
Determines the instruction set architecture of the machines in the pool. Currently, heterogeneous clusters are not supported, so all pools must specify the same architecture. Valid values are | String |
|
|
Whether to enable or disable simultaneous multithreading, or Important If you disable simultaneous multithreading, ensure that your capacity planning accounts for the dramatically decreased machine performance. |
|
|
|
Required if you use |
|
|
|
Required if you use |
|
|
| The number of control plane machines to provision. |
The only supported value is |
|
| The Cloud Credential Operator (CCO) mode. If no mode is specified, the CCO dynamically tries to determine the capabilities of the provided credentials, with a preference for mint mode on the platforms where multiple modes are supported. Note Not all CCO modes are supported for all cloud providers. For more information on CCO modes, see the Cloud Credential Operator entry in the Cluster Operators reference content. |
|
|
|
Enable or disable FIPS mode. The default is Important
The use of FIPS Validated / Modules in Process cryptographic libraries is only supported on OpenShift Container Platform deployments on the Note If you are using Azure File storage, you cannot enable FIPS mode. |
|
|
| Sources and repositories for the release-image content. |
Array of objects. Includes a |
|
|
Required if you use | String |
|
| Specify one or more repositories that may also contain the same images. | Array of strings |
|
| How to publish or expose the user-facing endpoints of your cluster, such as the Kubernetes API, OpenShift routes. |
|
|
| The SSH key or keys to authenticate access your cluster machines. Note
For production OpenShift Container Platform clusters on which you want to perform installation debugging or disaster recovery, specify an SSH key that your | One or more keys. For example: |
4.6.6.1.4. Optional AWS configuration parameters
Optional AWS configuration parameters are described in the following table:
| Parameter | Description | Values |
|---|---|---|
|
| The AWS AMI used to boot compute machines for the cluster. This is required for regions that require a custom RHCOS AMI. | Any published or custom RHCOS AMI that belongs to the set AWS region. |
|
| A pre-existing AWS IAM role applied to the compute machine pool instance profiles. You can use these fields to match naming schemes and include predefined permissions boundaries for your IAM roles. If undefined, the installation program creates a new IAM role. | The name of a valid AWS IAM role. |
|
| The Input/Output Operations Per Second (IOPS) that is reserved for the root volume. |
Integer, for example |
|
| The size in GiB of the root volume. |
Integer, for example |
|
| The type of the root volume. |
Valid AWS EBS volume type, such as |
|
| The Amazon Resource Name (key ARN) of a KMS key. This is required to encrypt OS volumes of worker nodes with a specific KMS key. | Valid key ID or the key ARN. |
|
| The EC2 instance type for the compute machines. |
Valid AWS instance type, such as |
|
| The availability zones where the installation program creates machines for the compute machine pool. If you provide your own VPC, you must provide a subnet in that availability zone. |
A list of valid AWS availability zones, such as |
|
| The AWS region that the installation program creates compute resources in. |
Any valid AWS region, such as |
|
| The AWS AMI used to boot control plane machines for the cluster. This is required for regions that require a custom RHCOS AMI. | Any published or custom RHCOS AMI that belongs to the set AWS region. |
|
| A pre-existing AWS IAM role applied to the control plane machine pool instance profiles. You can use these fields to match naming schemes and include predefined permissions boundaries for your IAM roles. If undefined, the installation program creates a new IAM role. | The name of a valid AWS IAM role. |
|
| The Amazon Resource Name (key ARN) of a KMS key. This is required to encrypt OS volumes of control plane nodes with a specific KMS key. | Valid key ID and the key ARN. |
|
| The EC2 instance type for the control plane machines. |
Valid AWS instance type, such as |
|
| The availability zones where the installation program creates machines for the control plane machine pool. |
A list of valid AWS availability zones, such as |
|
| The AWS region that the installation program creates control plane resources in. |
Valid AWS region, such as |
|
| The AWS AMI used to boot all machines for the cluster. If set, the AMI must belong to the same region as the cluster. This is required for regions that require a custom RHCOS AMI. | Any published or custom RHCOS AMI that belongs to the set AWS region. |
|
| An existing Route 53 private hosted zone for the cluster. You can only use a pre-existing hosted zone when also supplying your own VPC. The hosted zone must already be associated with the user-provided VPC before installation. Also, the domain of the hosted zone must be the cluster domain or a parent of the cluster domain. If undefined, the installation program creates a new hosted zone. |
String, for example |
|
| The AWS service endpoint name. Custom endpoints are only required for cases where alternative AWS endpoints, like FIPS, must be used. Custom API endpoints can be specified for EC2, S3, IAM, Elastic Load Balancing, Tagging, Route 53, and STS AWS services. | Valid AWS service endpoint name. |
|
|
The AWS service endpoint URL. The URL must use the | Valid AWS service endpoint URL. |
|
| A map of keys and values that the installation program adds as tags to all resources that it creates. |
Any valid YAML map, such as key value pairs in the |
|
|
If you provide the VPC instead of allowing the installation program to create the VPC for you, specify the subnet for the cluster to use. The subnet must be part of the same | Valid subnet IDs. |
4.6.6.2. Supported AWS machine types
The following Amazon Web Services (AWS) instance types are supported with OpenShift Container Platform.
Example 4.17. Instance types for machines
| Instance type | Bootstrap | Control plane | Compute |
|---|---|---|---|
|
| x | ||
|
| x | ||
|
| x | x | |
|
| x | x | |
|
| x | x | |
|
| x | x | |
|
| x | x | |
|
| x | ||
|
| x | x | |
|
| x | x | |
|
| x | x | |
|
| x | x | |
|
| x | x | |
|
| x | x | |
|
| x | ||
|
| x | x | |
|
| x | x | |
|
| x | x | |
|
| x | x | |
|
| x | x | |
|
| x | x | |
|
| x | x | |
|
| x | x | |
|
| x | x | |
|
| x | x | |
|
| x | x | |
|
| x | x | |
|
| x | x | |
|
| x | x | |
|
| x | ||
|
| x | x | |
|
| x | x | |
|
| x | x | |
|
| x | x | |
|
| x | x | |
|
| x | x | |
|
| x | ||
|
| x | x | |
|
| x | x | |
|
| x | x | |
|
| x | x | |
|
| x | x | |
|
| x | x | |
|
| x | ||
|
| x | x | |
|
| x | x | |
|
| x | x | |
|
| x | x | |
|
| x | x | |
|
| x | ||
|
| x | x | |
|
| x | x | |
|
| x | x | |
|
| x | x | |
|
| x | x | |
|
| x | x | |
|
| x | x | |
|
| x | ||
|
| x | x | |
|
| x | x | |
|
| x | x | |
|
| x | x | |
|
| x | x | |
|
| x | x | |
|
| x | x | |
|
| x | ||
|
| x | ||
|
| x | ||
|
| x | ||
|
| x | ||
|
| x |
4.6.6.3. Sample customized install-config.yaml file for AWS
You can customize the install-config.yaml file to specify more details about your OpenShift Container Platform cluster’s platform or modify the values of the required parameters.
This sample YAML file is provided for reference only. You must obtain your install-config.yaml file by using the installation program and modify it.
apiVersion: v1
baseDomain: example.com
credentialsMode: Mint
controlPlane:
hyperthreading: Enabled
name: master
platform:
aws:
zones:
- us-west-2a
- us-west-2b
rootVolume:
iops: 4000
size: 500
type: io1
type: m5.xlarge
replicas: 3
compute:
- hyperthreading: Enabled
name: worker
platform:
aws:
rootVolume:
iops: 2000
size: 500
type: io1
type: c5.4xlarge
zones:
- us-west-2c
replicas: 3
metadata:
name: test-cluster
networking:
clusterNetwork:
- cidr: 10.128.0.0/14
hostPrefix: 23
machineNetwork:
- cidr: 10.0.0.0/16
networkType: OpenShiftSDN
serviceNetwork:
- 172.30.0.0/16
platform:
aws:
region: us-west-2
userTags:
adminContact: jdoe
costCenter: 7536
amiID: ami-96c6f8f7
serviceEndpoints:
- name: ec2
url: https://vpce-id.ec2.us-west-2.vpce.amazonaws.com
fips: false
sshKey: ssh-ed25519 AAAA...
pullSecret: '{"auths": ...}' - 1 10 12 17
- Required. The installation program prompts you for this value.
- 2
- Optional: Add this parameter to force the Cloud Credential Operator (CCO) to use the specified mode, instead of having the CCO dynamically try to determine the capabilities of the credentials. For details about CCO modes, see the Cloud Credential Operator entry in the Platform Operators reference content.
- 3 7 11
- If you do not provide these parameters and values, the installation program provides the default value.
- 4
- The
controlPlanesection is a single mapping, but thecomputesection is a sequence of mappings. To meet the requirements of the different data structures, the first line of thecomputesection must begin with a hyphen,-, and the first line of thecontrolPlanesection must not. Only one control plane pool is used. - 5 8
- Whether to enable or disable simultaneous multithreading, or
hyperthreading. By default, simultaneous multithreading is enabled to increase the performance of your machines' cores. You can disable it by setting the parameter value toDisabled. If you disable simultaneous multithreading in some cluster machines, you must disable it in all cluster machines.ImportantIf you disable simultaneous multithreading, ensure that your capacity planning accounts for the dramatically decreased machine performance. Use larger instance types, such as
m4.2xlargeorm5.2xlarge, for your machines if you disable simultaneous multithreading. - 6 9
- To configure faster storage for etcd, especially for larger clusters, set the storage type as
io1and setiopsto2000. - 13
- The ID of the AMI used to boot machines for the cluster. If set, the AMI must belong to the same region as the cluster.
- 14
- The AWS service endpoints. Custom endpoints are required when installing to an unknown AWS region. The endpoint URL must use the
httpsprotocol and the host must trust the certificate. - 15
- Whether to enable or disable FIPS mode. By default, FIPS mode is not enabled. If FIPS mode is enabled, the Red Hat Enterprise Linux CoreOS (RHCOS) machines that OpenShift Container Platform runs on bypass the default Kubernetes cryptography suite and use the cryptography modules that are provided with RHCOS instead.Important
The use of FIPS Validated / Modules in Process cryptographic libraries is only supported on OpenShift Container Platform deployments on the
x86_64architecture. - 16
- You can optionally provide the
sshKeyvalue that you use to access the machines in your cluster.NoteFor production OpenShift Container Platform clusters on which you want to perform installation debugging or disaster recovery, specify an SSH key that your
ssh-agentprocess uses.
4.6.6.4. Configuring the cluster-wide proxy during installation
Production environments can deny direct access to the Internet and instead have an HTTP or HTTPS proxy available. You can configure a new OpenShift Container Platform cluster to use a proxy by configuring the proxy settings in the install-config.yaml file.
Prerequisites
-
You have an existing
install-config.yamlfile. You reviewed the sites that your cluster requires access to and determined whether any of them need to bypass the proxy. By default, all cluster egress traffic is proxied, including calls to hosting cloud provider APIs. You added sites to the
Proxyobject’sspec.noProxyfield to bypass the proxy if necessary.NoteThe
Proxyobjectstatus.noProxyfield is populated with the values of thenetworking.machineNetwork[].cidr,networking.clusterNetwork[].cidr, andnetworking.serviceNetwork[]fields from your installation configuration.For installations on Amazon Web Services (AWS), Google Cloud Platform (GCP), Microsoft Azure, and Red Hat OpenStack Platform (RHOSP), the
Proxyobjectstatus.noProxyfield is also populated with the instance metadata endpoint (169.254.169.254).-
If your cluster is on AWS, you added the
ec2.<region>.amazonaws.com,elasticloadbalancing.<region>.amazonaws.com, ands3.<region>.amazonaws.comendpoints to your VPC endpoint. These endpoints are required to complete requests from the nodes to the AWS EC2 API. Because the proxy works on the container level, not the node level, you must route these requests to the AWS EC2 API through the AWS private network. Adding the public IP address of the EC2 API to your allowlist in your proxy server is not sufficient.
Procedure
Edit your
install-config.yamlfile and add the proxy settings. For example:apiVersion: v1 baseDomain: my.domain.com proxy: httpProxy: http://<username>:<pswd>@<ip>:<port>1 httpsProxy: https://<username>:<pswd>@<ip>:<port>2 noProxy: example.com3 additionalTrustBundle: |4 -----BEGIN CERTIFICATE----- <MY_TRUSTED_CA_CERT> -----END CERTIFICATE----- ...- 1
- A proxy URL to use for creating HTTP connections outside the cluster. The URL scheme must be
http. - 2
- A proxy URL to use for creating HTTPS connections outside the cluster.
- 3
- A comma-separated list of destination domain names, IP addresses, or other network CIDRs to exclude from proxying. Preface a domain with
.to match subdomains only. For example,.y.commatchesx.y.com, but noty.com. Use*to bypass the proxy for all destinations. - 4
- If provided, the installation program generates a config map that is named
user-ca-bundlein theopenshift-confignamespace to hold the additional CA certificates. If you provideadditionalTrustBundleand at least one proxy setting, theProxyobject is configured to reference theuser-ca-bundleconfig map in thetrustedCAfield. The Cluster Network Operator then creates atrusted-ca-bundleconfig map that merges the contents specified for thetrustedCAparameter with the RHCOS trust bundle. TheadditionalTrustBundlefield is required unless the proxy’s identity certificate is signed by an authority from the RHCOS trust bundle.
NoteThe installation program does not support the proxy
readinessEndpointsfield.- Save the file and reference it when installing OpenShift Container Platform.
The installation program creates a cluster-wide proxy that is named cluster that uses the proxy settings in the provided install-config.yaml file. If no proxy settings are provided, a cluster Proxy object is still created, but it will have a nil spec.
Only the Proxy object named cluster is supported, and no additional proxies can be created.
4.6.7. Cluster Network Operator configuration
The configuration for the cluster network is specified as part of the Cluster Network Operator (CNO) configuration and stored in a custom resource (CR) object that is named cluster. The CR specifies the fields for the Network API in the operator.openshift.io API group.
The CNO configuration inherits the following fields during cluster installation from the Network API in the Network.config.openshift.io API group and these fields cannot be changed:
clusterNetwork- IP address pools from which pod IP addresses are allocated.
serviceNetwork- IP address pool for services.
defaultNetwork.type- Cluster network provider, such as OpenShift SDN or OVN-Kubernetes.
You can specify the cluster network provider configuration for your cluster by setting the fields for the defaultNetwork object in the CNO object named cluster.
4.6.7.1. Cluster Network Operator configuration object
The fields for the Cluster Network Operator (CNO) are described in the following table:
| Field | Type | Description |
|---|---|---|
|
|
|
The name of the CNO object. This name is always |
|
|
| A list specifying the blocks of IP addresses from which pod IP addresses are allocated and the subnet prefix length assigned to each individual node in the cluster. For example:
This value is ready-only and specified in the |
|
|
| A block of IP addresses for services. The OpenShift SDN and OVN-Kubernetes Container Network Interface (CNI) network providers support only a single IP address block for the service network. For example:
This value is ready-only and specified in the |
|
|
| Configures the Container Network Interface (CNI) cluster network provider for the cluster network. |
|
|
| The fields for this object specify the kube-proxy configuration. If you are using the OVN-Kubernetes cluster network provider, the kube-proxy configuration has no effect. |
defaultNetwork object configuration
The values for the defaultNetwork object are defined in the following table:
| Field | Type | Description |
|---|---|---|
|
|
|
Either Note OpenShift Container Platform uses the OpenShift SDN Container Network Interface (CNI) cluster network provider by default. |
|
|
| This object is only valid for the OpenShift SDN cluster network provider. |
|
|
| This object is only valid for the OVN-Kubernetes cluster network provider. |
Configuration for the OpenShift SDN CNI cluster network provider
The following table describes the configuration fields for the OpenShift SDN Container Network Interface (CNI) cluster network provider.
| Field | Type | Description |
|---|---|---|
|
|
|
Configures the network isolation mode for OpenShift SDN. The default value is
The values |
|
|
| The maximum transmission unit (MTU) for the VXLAN overlay network. This is detected automatically based on the MTU of the primary network interface. You do not normally need to override the detected MTU. If the auto-detected value is not what you expected it to be, confirm that the MTU on the primary network interface on your nodes is correct. You cannot use this option to change the MTU value of the primary network interface on the nodes.
If your cluster requires different MTU values for different nodes, you must set this value to This value cannot be changed after cluster installation. |
|
|
|
The port to use for all VXLAN packets. The default value is If you are running in a virtualized environment with existing nodes that are part of another VXLAN network, then you might be required to change this. For example, when running an OpenShift SDN overlay on top of VMware NSX-T, you must select an alternate port for the VXLAN, because both SDNs use the same default VXLAN port number.
On Amazon Web Services (AWS), you can select an alternate port for the VXLAN between port |
Example OpenShift SDN configuration
defaultNetwork:
type: OpenShiftSDN
openshiftSDNConfig:
mode: NetworkPolicy
mtu: 1450
vxlanPort: 4789Configuration for the OVN-Kubernetes CNI cluster network provider
The following table describes the configuration fields for the OVN-Kubernetes CNI cluster network provider.
| Field | Type | Description |
|---|---|---|
|
|
| The maximum transmission unit (MTU) for the Geneve (Generic Network Virtualization Encapsulation) overlay network. This is detected automatically based on the MTU of the primary network interface. You do not normally need to override the detected MTU. If the auto-detected value is not what you expected it to be, confirm that the MTU on the primary network interface on your nodes is correct. You cannot use this option to change the MTU value of the primary network interface on the nodes.
If your cluster requires different MTU values for different nodes, you must set this value to This value cannot be changed after cluster installation. |
|
|
|
The port to use for all Geneve packets. The default value is |
|
|
| Specify an empty object to enable IPsec encryption. This value cannot be changed after cluster installation. |
Example OVN-Kubernetes configuration
defaultNetwork:
type: OVNKubernetes
ovnKubernetesConfig:
mtu: 1400
genevePort: 6081
ipsecConfig: {}kubeProxyConfig object configuration
The values for the kubeProxyConfig object are defined in the following table:
| Field | Type | Description |
|---|---|---|
|
|
|
The refresh period for Note
Because of performance improvements introduced in OpenShift Container Platform 4.3 and greater, adjusting the |
|
|
|
The minimum duration before refreshing |
4.6.8. Specifying advanced network configuration
You can use advanced configuration customization to integrate your cluster into your existing network environment by specifying additional configuration for your cluster network provider. You can specify advanced network configuration only before you install the cluster.
Modifying the OpenShift Container Platform manifest files created by the installation program is not supported. Applying a manifest file that you create, as in the following procedure, is supported.
Prerequisites
-
Create the
install-config.yamlfile and complete any modifications to it.
Procedure
Change to the directory that contains the installation program and create the manifests:
$ ./openshift-install create manifests --dir <installation_directory>where:
<installation_directory>-
Specifies the name of the directory that contains the
install-config.yamlfile for your cluster.
Create a stub manifest file for the advanced network configuration that is named
cluster-network-03-config.ymlin the<installation_directory>/manifests/directory:$ cat <<EOF > <installation_directory>/manifests/cluster-network-03-config.yml apiVersion: operator.openshift.io/v1 kind: Network metadata: name: cluster spec: EOFwhere:
<installation_directory>-
Specifies the directory name that contains the
manifests/directory for your cluster.
Open the
cluster-network-03-config.ymlfile in an editor and specify the advanced network configuration for your cluster, such as in the following examples:Specify a different VXLAN port for the OpenShift SDN network provider
apiVersion: operator.openshift.io/v1 kind: Network metadata: name: cluster spec: defaultNetwork: openshiftSDNConfig: vxlanPort: 4800Enable IPsec for the OVN-Kubernetes network provider
apiVersion: operator.openshift.io/v1 kind: Network metadata: name: cluster spec: defaultNetwork: ovnKubernetesConfig: ipsecConfig: {}-
Save the
cluster-network-03-config.ymlfile and quit the text editor. -
Optional: Back up the
manifests/cluster-network-03-config.ymlfile. The installation program deletes themanifests/directory when creating the cluster.
For more information on using a Network Load Balancer (NLB) on AWS, see Configuring Ingress cluster traffic on AWS using a Network Load Balancer.
4.6.9. Configuring an Ingress Controller Network Load Balancer on a new AWS cluster
You can create an Ingress Controller backed by an AWS Network Load Balancer (NLB) on a new cluster.
Prerequisites
-
Create the
install-config.yamlfile and complete any modifications to it.
Procedure
Create an Ingress Controller backed by an AWS NLB on a new cluster.
Change to the directory that contains the installation program and create the manifests:
$ ./openshift-install create manifests --dir <installation_directory>1 - 1
- For
<installation_directory>, specify the name of the directory that contains theinstall-config.yamlfile for your cluster.
Create a file that is named
cluster-ingress-default-ingresscontroller.yamlin the<installation_directory>/manifests/directory:$ touch <installation_directory>/manifests/cluster-ingress-default-ingresscontroller.yaml1 - 1
- For
<installation_directory>, specify the directory name that contains themanifests/directory for your cluster.
After creating the file, several network configuration files are in the
manifests/directory, as shown:$ ls <installation_directory>/manifests/cluster-ingress-default-ingresscontroller.yamlExample output
cluster-ingress-default-ingresscontroller.yamlOpen the
cluster-ingress-default-ingresscontroller.yamlfile in an editor and enter a custom resource (CR) that describes the Operator configuration you want:apiVersion: operator.openshift.io/v1 kind: IngressController metadata: creationTimestamp: null name: default namespace: openshift-ingress-operator spec: endpointPublishingStrategy: loadBalancer: scope: External providerParameters: type: AWS aws: type: NLB type: LoadBalancerService-
Save the
cluster-ingress-default-ingresscontroller.yamlfile and quit the text editor. -
Optional: Back up the
manifests/cluster-ingress-default-ingresscontroller.yamlfile. The installation program deletes themanifests/directory when creating the cluster.
4.6.10. Configuring hybrid networking with OVN-Kubernetes
You can configure your cluster to use hybrid networking with OVN-Kubernetes. This allows a hybrid cluster that supports different node networking configurations. For example, this is necessary to run both Linux and Windows nodes in a cluster.
You must configure hybrid networking with OVN-Kubernetes cluster provider during the installation of your cluster. You cannot switch to hybrid networking after the installation process.
In addition, the hybrid OVN-Kubernetes cluster network provider is a requirement for Windows Machine Config Operator (WMCO).
Prerequisites
-
You defined
OVNKubernetesfor thenetworking.networkTypeparameter in theinstall-config.yamlfile. See the installation documentation for configuring OpenShift Container Platform network customizations on your chosen cloud provider for more information.
Procedure
Change to the directory that contains the installation program and create the manifests:
$ ./openshift-install create manifests --dir <installation_directory>where:
<installation_directory>-
Specifies the name of the directory that contains the
install-config.yamlfile for your cluster.
Create a stub manifest file for the advanced network configuration that is named
cluster-network-03-config.ymlin the<installation_directory>/manifests/directory:$ cat <<EOF > <installation_directory>/manifests/cluster-network-03-config.yml apiVersion: operator.openshift.io/v1 kind: Network metadata: name: cluster spec: EOFwhere:
<installation_directory>-
Specifies the directory name that contains the
manifests/directory for your cluster.
Open the
cluster-network-03-config.ymlfile in an editor and configure OVN-Kubernetes with hybrid networking, such as in the following example:Specify a hybrid networking configuration
apiVersion: operator.openshift.io/v1 kind: Network metadata: name: cluster spec: defaultNetwork: ovnKubernetesConfig: hybridOverlayConfig: hybridClusterNetwork:1 - cidr: 10.132.0.0/14 hostPrefix: 23 hybridOverlayVXLANPort: 98982 - 1
- Specify the CIDR configuration used for nodes on the additional overlay network. The
hybridClusterNetworkCIDR cannot overlap with theclusterNetworkCIDR. - 2
- Specify a custom VXLAN port for the additional overlay network. This is required for running Windows nodes in a cluster installed on vSphere, and must not be configured for any other cloud provider. The custom port can be any open port excluding the default
4789port. For more information on this requirement, see the Microsoft documentation on Pod-to-pod connectivity between hosts is broken.
NoteWindows Server Long-Term Servicing Channel (LTSC): Windows Server 2019 is not supported on clusters with a custom
hybridOverlayVXLANPortvalue because this Windows server version does not support selecting a custom VXLAN port.-
Save the
cluster-network-03-config.ymlfile and quit the text editor. -
Optional: Back up the
manifests/cluster-network-03-config.ymlfile. The installation program deletes themanifests/directory when creating the cluster.
For more information on using Linux and Windows nodes in the same cluster, see Understanding Windows container workloads.
4.6.11. Deploying the cluster
You can install OpenShift Container Platform on a compatible cloud platform.
You can run the create cluster command of the installation program only once, during initial installation.
Prerequisites
- Configure an account with the cloud platform that hosts your cluster.
- Obtain the OpenShift Container Platform installation program and the pull secret for your cluster.
Procedure
Change to the directory that contains the installation program and initialize the cluster deployment:
$ ./openshift-install create cluster --dir <installation_directory> \1 --log-level=info2 NoteIf the cloud provider account that you configured on your host does not have sufficient permissions to deploy the cluster, the installation process stops, and the missing permissions are displayed.
When the cluster deployment completes, directions for accessing your cluster, including a link to its web console and credentials for the
kubeadminuser, display in your terminal.Example output
... INFO Install complete! INFO To access the cluster as the system:admin user when using 'oc', run 'export KUBECONFIG=/home/myuser/install_dir/auth/kubeconfig' INFO Access the OpenShift web-console here: https://console-openshift-console.apps.mycluster.example.com INFO Login to the console with user: "kubeadmin", and password: "4vYBz-Ee6gm-ymBZj-Wt5AL" INFO Time elapsed: 36m22sNoteThe cluster access and credential information also outputs to
<installation_directory>/.openshift_install.logwhen an installation succeeds.Important-
The Ignition config files that the installation program generates contain certificates that expire after 24 hours, which are then renewed at that time. If the cluster is shut down before renewing the certificates and the cluster is later restarted after the 24 hours have elapsed, the cluster automatically recovers the expired certificates. The exception is that you must manually approve the pending
node-bootstrappercertificate signing requests (CSRs) to recover kubelet certificates. See the documentation for Recovering from expired control plane certificates for more information. - It is recommended that you use Ignition config files within 12 hours after they are generated because the 24-hour certificate rotates from 16 to 22 hours after the cluster is installed. By using the Ignition config files within 12 hours, you can avoid installation failure if the certificate update runs during installation.
ImportantYou must not delete the installation program or the files that the installation program creates. Both are required to delete the cluster.
-
The Ignition config files that the installation program generates contain certificates that expire after 24 hours, which are then renewed at that time. If the cluster is shut down before renewing the certificates and the cluster is later restarted after the 24 hours have elapsed, the cluster automatically recovers the expired certificates. The exception is that you must manually approve the pending
Optional: Remove or disable the
AdministratorAccesspolicy from the IAM account that you used to install the cluster.NoteThe elevated permissions provided by the
AdministratorAccesspolicy are required only during installation.
4.6.12. Installing the OpenShift CLI by downloading the binary
You can install the OpenShift CLI (oc) to interact with OpenShift Container Platform from a command-line interface. You can install oc on Linux, Windows, or macOS.
If you installed an earlier version of oc, you cannot use it to complete all of the commands in OpenShift Container Platform 4.7. Download and install the new version of oc.
4.6.12.1. Installing the OpenShift CLI on Linux
You can install the OpenShift CLI (oc) binary on Linux by using the following procedure.
Procedure
- Navigate to the OpenShift Container Platform downloads page on the Red Hat Customer Portal.
- Select the appropriate version in the Version drop-down menu.
- Click Download Now next to the OpenShift v4.7 Linux Client entry and save the file.
Unpack the archive:
$ tar xvzf <file>Place the
ocbinary in a directory that is on yourPATH.To check your
PATH, execute the following command:$ echo $PATH
After you install the OpenShift CLI, it is available using the oc command:
$ oc <command>4.6.12.2. Installing the OpenShift CLI on Windows
You can install the OpenShift CLI (oc) binary on Windows by using the following procedure.
Procedure
- Navigate to the OpenShift Container Platform downloads page on the Red Hat Customer Portal.
- Select the appropriate version in the Version drop-down menu.
- Click Download Now next to the OpenShift v4.7 Windows Client entry and save the file.
- Unzip the archive with a ZIP program.
Move the
ocbinary to a directory that is on yourPATH.To check your
PATH, open the command prompt and execute the following command:C:\> path
After you install the OpenShift CLI, it is available using the oc command:
C:\> oc <command>4.6.12.3. Installing the OpenShift CLI on macOS
You can install the OpenShift CLI (oc) binary on macOS by using the following procedure.
Procedure
- Navigate to the OpenShift Container Platform downloads page on the Red Hat Customer Portal.
- Select the appropriate version in the Version drop-down menu.
- Click Download Now next to the OpenShift v4.7 MacOSX Client entry and save the file.
- Unpack and unzip the archive.
Move the
ocbinary to a directory on your PATH.To check your
PATH, open a terminal and execute the following command:$ echo $PATH
After you install the OpenShift CLI, it is available using the oc command:
$ oc <command>4.6.13. Logging in to the cluster by using the CLI
You can log in to your cluster as a default system user by exporting the cluster kubeconfig file. The kubeconfig file contains information about the cluster that is used by the CLI to connect a client to the correct cluster and API server. The file is specific to a cluster and is created during OpenShift Container Platform installation.
Prerequisites
- You deployed an OpenShift Container Platform cluster.
-
You installed the
ocCLI.
Procedure
Export the
kubeadmincredentials:$ export KUBECONFIG=<installation_directory>/auth/kubeconfig1 - 1
- For
<installation_directory>, specify the path to the directory that you stored the installation files in.
Verify you can run
occommands successfully using the exported configuration:$ oc whoamiExample output
system:admin
4.6.14. Logging in to the cluster by using the web console
The kubeadmin user exists by default after an OpenShift Container Platform installation. You can log in to your cluster as the kubeadmin user by using the OpenShift Container Platform web console.
Prerequisites
- You have access to the installation host.
- You completed a cluster installation and all cluster Operators are available.
Procedure
Obtain the password for the
kubeadminuser from thekubeadmin-passwordfile on the installation host:$ cat <installation_directory>/auth/kubeadmin-passwordNoteAlternatively, you can obtain the
kubeadminpassword from the<installation_directory>/.openshift_install.loglog file on the installation host.List the OpenShift Container Platform web console route:
$ oc get routes -n openshift-console | grep 'console-openshift'NoteAlternatively, you can obtain the OpenShift Container Platform route from the
<installation_directory>/.openshift_install.loglog file on the installation host.Example output
console console-openshift-console.apps.<cluster_name>.<base_domain> console https reencrypt/Redirect None-
Navigate to the route detailed in the output of the preceding command in a web browser and log in as the
kubeadminuser.
4.6.15. Telemetry access for OpenShift Container Platform
In OpenShift Container Platform 4.7, the Telemetry service, which runs by default to provide metrics about cluster health and the success of updates, requires internet access. If your cluster is connected to the internet, Telemetry runs automatically, and your cluster is registered to OpenShift Cluster Manager.
After you confirm that your OpenShift Cluster Manager inventory is correct, either maintained automatically by Telemetry or manually by using OpenShift Cluster Manager, use subscription watch to track your OpenShift Container Platform subscriptions at the account or multi-cluster level.
4.6.16. Next steps
- Validating an installation.
- Customize your cluster.
- If necessary, you can opt out of remote health reporting.
- If necessary, you can remove cloud provider credentials.
4.7. Installing a cluster on AWS in a restricted network
In OpenShift Container Platform version 4.7, you can install a cluster on Amazon Web Services (AWS) in a restricted network by creating an internal mirror of the installation release content on an existing Amazon Virtual Private Cloud (VPC).
4.7.1. Prerequisites
You mirrored the images for a disconnected installation to your registry and obtained the
imageContentSourcesdata for your version of OpenShift Container Platform.ImportantBecause the installation media is on the mirror host, you can use that computer to complete all installation steps.
You have an existing VPC in AWS. When installing to a restricted network using installer-provisioned infrastructure, you cannot use the installer-provisioned VPC. You must use a user-provisioned VPC that satisfies one of the following requirements:
- Contains the mirror registry.
- Has firewall rules or a peering connection to access the mirror registry hosted elsewhere.
- You reviewed details about the OpenShift Container Platform installation and update processes.
You configured an AWS account to host the cluster.
ImportantIf you have an AWS profile stored on your computer, it must not use a temporary session token that you generated while using a multi-factor authentication device. The cluster continues to use your current AWS credentials to create AWS resources for the entire life of the cluster, so you must use key-based, long-lived credentials. To generate appropriate keys, see Managing Access Keys for IAM Users in the AWS documentation. You can supply the keys when you run the installation program.
- You downloaded the AWS CLI and installed it on your computer. See Install the AWS CLI Using the Bundled Installer (Linux, macOS, or Unix) in the AWS documentation.
If you use a firewall and plan to use the Telemetry service, you configured the firewall to allow the sites that your cluster requires access to.
NoteIf you are configuring a proxy, be sure to also review this site list.
- If you do not allow the system to manage identity and access management (IAM), then a cluster administrator can manually create and maintain IAM credentials. Manual mode can also be used in environments where the cloud IAM APIs are not reachable.
4.7.2. About installations in restricted networks
In OpenShift Container Platform 4.7, you can perform an installation that does not require an active connection to the Internet to obtain software components. Restricted network installations can be completed using installer-provisioned infrastructure or user-provisioned infrastructure, depending on the cloud platform to which you are installing the cluster.
If you choose to perform a restricted network installation on a cloud platform, you still require access to its cloud APIs. Some cloud functions, like Amazon Web Service’s Route 53 DNS and IAM services, require internet access. Depending on your network, you might require less Internet access for an installation on bare metal hardware or on VMware vSphere.
To complete a restricted network installation, you must create a registry that mirrors the contents of the OpenShift Container Platform registry and contains the installation media. You can create this registry on a mirror host, which can access both the Internet and your closed network, or by using other methods that meet your restrictions.
4.7.2.1. Additional limits
Clusters in restricted networks have the following additional limitations and restrictions:
-
The
ClusterVersionstatus includes anUnable to retrieve available updateserror. - By default, you cannot use the contents of the Developer Catalog because you cannot access the required image stream tags.
4.7.3. About using a custom VPC
In OpenShift Container Platform 4.7, you can deploy a cluster into existing subnets in an existing Amazon Virtual Private Cloud (VPC) in Amazon Web Services (AWS). By deploying OpenShift Container Platform into an existing AWS VPC, you might be able to avoid limit constraints in new accounts or more easily abide by the operational constraints that your company’s guidelines set. If you cannot obtain the infrastructure creation permissions that are required to create the VPC yourself, use this installation option.
Because the installation program cannot know what other components are also in your existing subnets, it cannot choose subnet CIDRs and so forth on your behalf. You must configure networking for the subnets that you install your cluster to yourself.
4.7.3.1. Requirements for using your VPC
The installation program no longer creates the following components:
- Internet gateways
- NAT gateways
- Subnets
- Route tables
- VPCs
- VPC DHCP options
- VPC endpoints
The installation program requires that you use the cloud-provided DNS server. Using a custom DNS server is not supported and causes the installation to fail.
If you use a custom VPC, you must correctly configure it and its subnets for the installation program and the cluster to use. See Amazon VPC console wizard configurations and Work with VPCs and subnets in the AWS documentation for more information on creating and managing an AWS VPC.
The installation program cannot:
- Subdivide network ranges for the cluster to use.
- Set route tables for the subnets.
- Set VPC options like DHCP.
You must complete these tasks before you install the cluster. See VPC networking components and Route tables for your VPC for more information on configuring networking in an AWS VPC.
Your VPC must meet the following characteristics:
The VPC must not use the
kubernetes.io/cluster/.*: ownedtag.The installation program modifies your subnets to add the
kubernetes.io/cluster/.*: sharedtag, so your subnets must have at least one free tag slot available for it. See Tag Restrictions in the AWS documentation to confirm that the installation program can add a tag to each subnet that you specify.You must enable the
enableDnsSupportandenableDnsHostnamesattributes in your VPC, so that the cluster can use the Route 53 zones that are attached to the VPC to resolve cluster’s internal DNS records. See DNS Support in Your VPC in the AWS documentation.If you prefer to use your own Route 53 hosted private zone, you must associate the existing hosted zone with your VPC prior to installing a cluster. You can define your hosted zone using the
platform.aws.hostedZonefield in theinstall-config.yamlfile.- If you use a cluster with public access, you must create a public and a private subnet for each availability zone that your cluster uses. Each availability zone can contain no more than one public and one private subnet.
If you are working in a disconnected environment, you are unable to reach the public IP addresses for EC2 and ELB endpoints. To resolve this, you must create a VPC endpoint and attach it to the subnet that the clusters are using. The endpoints should be named as follows:
-
ec2.<region>.amazonaws.com -
elasticloadbalancing.<region>.amazonaws.com -
s3.<region>.amazonaws.com
Required VPC components
You must provide a suitable VPC and subnets that allow communication to your machines.
| Component | AWS type | Description | |
|---|---|---|---|
| VPC |
| You must provide a public VPC for the cluster to use. The VPC uses an endpoint that references the route tables for each subnet to improve communication with the registry that is hosted in S3. | |
| Public subnets |
| Your VPC must have public subnets for between 1 and 3 availability zones and associate them with appropriate Ingress rules. | |
| Internet gateway |
| You must have a public Internet gateway, with public routes, attached to the VPC. In the provided templates, each public subnet has a NAT gateway with an EIP address. These NAT gateways allow cluster resources, like private subnet instances, to reach the Internet and are not required for some restricted network or proxy scenarios. | |
| Network access control |
| You must allow the VPC to access the following ports: | |
| Port | Reason | ||
|
| Inbound HTTP traffic | ||
|
| Inbound HTTPS traffic | ||
|
| Inbound SSH traffic | ||
|
| Inbound ephemeral traffic | ||
|
| Outbound ephemeral traffic | ||
| Private subnets |
| Your VPC can have private subnets. The provided CloudFormation templates can create private subnets for between 1 and 3 availability zones. If you use private subnets, you must provide appropriate routes and tables for them. | |
4.7.3.2. VPC validation
To ensure that the subnets that you provide are suitable, the installation program confirms the following data:
- All the subnets that you specify exist.
- You provide private subnets.
- The subnet CIDRs belong to the machine CIDR that you specified.
- You provide subnets for each availability zone. Each availability zone contains no more than one public and one private subnet. If you use a private cluster, provide only a private subnet for each availability zone. Otherwise, provide exactly one public and private subnet for each availability zone.
- You provide a public subnet for each private subnet availability zone. Machines are not provisioned in availability zones that you do not provide private subnets for.
If you destroy a cluster that uses an existing VPC, the VPC is not deleted. When you remove the OpenShift Container Platform cluster from a VPC, the kubernetes.io/cluster/.*: shared tag is removed from the subnets that it used.
4.7.3.3. Division of permissions
Starting with OpenShift Container Platform 4.3, you do not need all of the permissions that are required for an installation program-provisioned infrastructure cluster to deploy a cluster. This change mimics the division of permissions that you might have at your company: some individuals can create different resource in your clouds than others. For example, you might be able to create application-specific items, like instances, buckets, and load balancers, but not networking-related components such as VPCs, subnets, or ingress rules.
The AWS credentials that you use when you create your cluster do not need the networking permissions that are required to make VPCs and core networking components within the VPC, such as subnets, routing tables, Internet gateways, NAT, and VPN. You still need permission to make the application resources that the machines within the cluster require, such as ELBs, security groups, S3 buckets, and nodes.
4.7.3.4. Isolation between clusters
If you deploy OpenShift Container Platform to an existing network, the isolation of cluster services is reduced in the following ways:
- You can install multiple OpenShift Container Platform clusters in the same VPC.
- ICMP ingress is allowed from the entire network.
- TCP 22 ingress (SSH) is allowed to the entire network.
- Control plane TCP 6443 ingress (Kubernetes API) is allowed to the entire network.
- Control plane TCP 22623 ingress (MCS) is allowed to the entire network.
4.7.4. Internet access for OpenShift Container Platform
In OpenShift Container Platform 4.7, you require access to the Internet to obtain the images that are necessary to install your cluster.
You must have Internet access to:
- Access OpenShift Cluster Manager to download the installation program and perform subscription management. If the cluster has internet access and you do not disable Telemetry, that service automatically entitles your cluster.
- Access Quay.io to obtain the packages that are required to install your cluster.
- Obtain the packages that are required to perform cluster updates.
If your cluster cannot have direct Internet access, you can perform a restricted network installation on some types of infrastructure that you provision. During that process, you download the content that is required and use it to populate a mirror registry with the packages that you need to install a cluster and generate the installation program. With some installation types, the environment that you install your cluster in will not require Internet access. Before you update the cluster, you update the content of the mirror registry.
4.7.5. Generating an SSH private key and adding it to the agent
If you want to perform installation debugging or disaster recovery on your cluster, you must provide an SSH key to both your ssh-agent and the installation program. You can use this key to access the bootstrap machine in a public cluster to troubleshoot installation issues.
In a production environment, you require disaster recovery and debugging.
You can use this key to SSH into the master nodes as the user core. When you deploy the cluster, the key is added to the core user’s ~/.ssh/authorized_keys list.
You must use a local key, not one that you configured with platform-specific approaches such as AWS key pairs.
Procedure
If you do not have an SSH key that is configured for password-less authentication on your computer, create one. For example, on a computer that uses a Linux operating system, run the following command:
$ ssh-keygen -t ed25519 -N '' \ -f <path>/<file_name>1 - 1
- Specify the path and file name, such as
~/.ssh/id_rsa, of the new SSH key. If you have an existing key pair, ensure your public key is in the your~/.sshdirectory.
Running this command generates an SSH key that does not require a password in the location that you specified.
NoteIf you plan to install an OpenShift Container Platform cluster that uses FIPS Validated / Modules in Process cryptographic libraries on the
x86_64architecture, do not create a key that uses theed25519algorithm. Instead, create a key that uses thersaorecdsaalgorithm.Start the
ssh-agentprocess as a background task:$ eval "$(ssh-agent -s)"Example output
Agent pid 31874NoteIf your cluster is in FIPS mode, only use FIPS-compliant algorithms to generate the SSH key. The key must be either RSA or ECDSA.
Add your SSH private key to the
ssh-agent:$ ssh-add <path>/<file_name>1 Example output
Identity added: /home/<you>/<path>/<file_name> (<computer_name>)- 1
- Specify the path and file name for your SSH private key, such as
~/.ssh/id_rsa
Next steps
- When you install OpenShift Container Platform, provide the SSH public key to the installation program.
4.7.6. Creating the installation configuration file
You can customize the OpenShift Container Platform cluster you install on Amazon Web Services (AWS).
Prerequisites
- Obtain the OpenShift Container Platform installation program and the pull secret for your cluster. For a restricted network installation, these files are on your mirror host.
-
Have the
imageContentSourcesvalues that were generated during mirror registry creation. - Obtain the contents of the certificate for your mirror registry.
- Obtain service principal permissions at the subscription level.
Procedure
Create the
install-config.yamlfile.Change to the directory that contains the installation program and run the following command:
$ ./openshift-install create install-config --dir <installation_directory>1 - 1
- For
<installation_directory>, specify the directory name to store the files that the installation program creates.
ImportantSpecify an empty directory. Some installation assets, like bootstrap X.509 certificates have short expiration intervals, so you must not reuse an installation directory. If you want to reuse individual files from another cluster installation, you can copy them into your directory. However, the file names for the installation assets might change between releases. Use caution when copying installation files from an earlier OpenShift Container Platform version.
At the prompts, provide the configuration details for your cloud:
Optional: Select an SSH key to use to access your cluster machines.
NoteFor production OpenShift Container Platform clusters on which you want to perform installation debugging or disaster recovery, specify an SSH key that your
ssh-agentprocess uses.- Select AWS as the platform to target.
- If you do not have an Amazon Web Services (AWS) profile stored on your computer, enter the AWS access key ID and secret access key for the user that you configured to run the installation program.
- Select the AWS region to deploy the cluster to.
- Select the base domain for the Route 53 service that you configured for your cluster.
- Enter a descriptive name for your cluster.
- Paste the pull secret from the Red Hat OpenShift Cluster Manager.
Edit the
install-config.yamlfile to provide the additional information that is required for an installation in a restricted network.Update the
pullSecretvalue to contain the authentication information for your registry:pullSecret: '{"auths":{"<mirror_host_name>:5000": {"auth": "<credentials>","email": "you@example.com"}}}'For
<mirror_host_name>, specify the registry domain name that you specified in the certificate for your mirror registry, and for<credentials>, specify the base64-encoded user name and password for your mirror registry.Add the
additionalTrustBundleparameter and value.additionalTrustBundle: | -----BEGIN CERTIFICATE----- ZZZZZZZZZZZZZZZZZZZZZZZZZZZZZZZZZZZZZZZZZZZZZZZZZZZZZZZZZZZZZZZZ -----END CERTIFICATE-----The value must be the contents of the certificate file that you used for your mirror registry, which can be an existing, trusted certificate authority or the self-signed certificate that you generated for the mirror registry.
Define the subnets for the VPC to install the cluster in:
subnets: - subnet-1 - subnet-2 - subnet-3Add the image content resources, which look like this excerpt:
imageContentSources: - mirrors: - <mirror_host_name>:5000/<repo_name>/release source: quay.example.com/openshift-release-dev/ocp-release - mirrors: - <mirror_host_name>:5000/<repo_name>/release source: registry.example.com/ocp/releaseTo complete these values, use the
imageContentSourcesthat you recorded during mirror registry creation.
-
Make any other modifications to the
install-config.yamlfile that you require. You can find more information about the available parameters in the Installation configuration parameters section. Back up the
install-config.yamlfile so that you can use it to install multiple clusters.ImportantThe
install-config.yamlfile is consumed during the installation process. If you want to reuse the file, you must back it up now.
4.7.6.1. Installation configuration parameters
Before you deploy an OpenShift Container Platform cluster, you provide parameter values to describe your account on the cloud platform that hosts your cluster and optionally customize your cluster’s platform. When you create the install-config.yaml installation configuration file, you provide values for the required parameters through the command line. If you customize your cluster, you can modify the install-config.yaml file to provide more details about the platform.
After installation, you cannot modify these parameters in the install-config.yaml file.
The openshift-install command does not validate field names for parameters. If an incorrect name is specified, the related file or object is not created, and no error is reported. Ensure that the field names for any parameters that are specified are correct.
4.7.6.1.1. Required configuration parameters
Required installation configuration parameters are described in the following table:
| Parameter | Description | Values |
|---|---|---|
|
|
The API version for the | String |
|
|
The base domain of your cloud provider. The base domain is used to create routes to your OpenShift Container Platform cluster components. The full DNS name for your cluster is a combination of the |
A fully-qualified domain or subdomain name, such as |
|
|
Kubernetes resource | Object |
|
|
The name of the cluster. DNS records for the cluster are all subdomains of |
String of lowercase letters, hyphens ( |
|
|
The configuration for the specific platform upon which to perform the installation: | Object |
|
| Get a pull secret from the Red Hat OpenShift Cluster Manager to authenticate downloading container images for OpenShift Container Platform components from services such as Quay.io. |
|
4.7.6.1.2. Network configuration parameters
You can customize your installation configuration based on the requirements of your existing network infrastructure. For example, you can expand the IP address block for the cluster network or provide different IP address blocks than the defaults.
Only IPv4 addresses are supported.
| Parameter | Description | Values |
|---|---|---|
|
| The configuration for the cluster network. | Object Note
You cannot modify parameters specified by the |
|
| The cluster network provider Container Network Interface (CNI) plug-in to install. |
Either |
|
| The IP address blocks for pods.
The default value is If you specify multiple IP address blocks, the blocks must not overlap. | An array of objects. For example: |
|
|
Required if you use An IPv4 network. |
An IP address block in Classless Inter-Domain Routing (CIDR) notation. The prefix length for an IPv4 block is between |
|
|
The subnet prefix length to assign to each individual node. For example, if | A subnet prefix.
The default value is |
|
|
The IP address block for services. The default value is The OpenShift SDN and OVN-Kubernetes network providers support only a single IP address block for the service network. | An array with an IP address block in CIDR format. For example: |
|
| The IP address blocks for machines. If you specify multiple IP address blocks, the blocks must not overlap. | An array of objects. For example: |
|
|
Required if you use | An IP network block in CIDR notation.
For example, Note
Set the |
4.7.6.1.3. Optional configuration parameters
Optional installation configuration parameters are described in the following table:
| Parameter | Description | Values |
|---|---|---|
|
| A PEM-encoded X.509 certificate bundle that is added to the nodes' trusted certificate store. This trust bundle may also be used when a proxy has been configured. | String |
|
| The configuration for the machines that comprise the compute nodes. |
Array of |
|
|
Determines the instruction set architecture of the machines in the pool. Currently, heteregeneous clusters are not supported, so all pools must specify the same architecture. Valid values are | String |
|
|
Whether to enable or disable simultaneous multithreading, or Important If you disable simultaneous multithreading, ensure that your capacity planning accounts for the dramatically decreased machine performance. |
|
|
|
Required if you use |
|
|
|
Required if you use |
|
|
| The number of compute machines, which are also known as worker machines, to provision. |
A positive integer greater than or equal to |
|
| The configuration for the machines that comprise the control plane. |
Array of |
|
|
Determines the instruction set architecture of the machines in the pool. Currently, heterogeneous clusters are not supported, so all pools must specify the same architecture. Valid values are | String |
|
|
Whether to enable or disable simultaneous multithreading, or Important If you disable simultaneous multithreading, ensure that your capacity planning accounts for the dramatically decreased machine performance. |
|
|
|
Required if you use |
|
|
|
Required if you use |
|
|
| The number of control plane machines to provision. |
The only supported value is |
|
| The Cloud Credential Operator (CCO) mode. If no mode is specified, the CCO dynamically tries to determine the capabilities of the provided credentials, with a preference for mint mode on the platforms where multiple modes are supported. Note Not all CCO modes are supported for all cloud providers. For more information on CCO modes, see the Cloud Credential Operator entry in the Cluster Operators reference content. |
|
|
|
Enable or disable FIPS mode. The default is Important
The use of FIPS Validated / Modules in Process cryptographic libraries is only supported on OpenShift Container Platform deployments on the Note If you are using Azure File storage, you cannot enable FIPS mode. |
|
|
| Sources and repositories for the release-image content. |
Array of objects. Includes a |
|
|
Required if you use | String |
|
| Specify one or more repositories that may also contain the same images. | Array of strings |
|
| How to publish or expose the user-facing endpoints of your cluster, such as the Kubernetes API, OpenShift routes. |
|
|
| The SSH key or keys to authenticate access your cluster machines. Note
For production OpenShift Container Platform clusters on which you want to perform installation debugging or disaster recovery, specify an SSH key that your | One or more keys. For example: |
4.7.6.1.4. Optional AWS configuration parameters
Optional AWS configuration parameters are described in the following table:
| Parameter | Description | Values |
|---|---|---|
|
| The AWS AMI used to boot compute machines for the cluster. This is required for regions that require a custom RHCOS AMI. | Any published or custom RHCOS AMI that belongs to the set AWS region. |
|
| A pre-existing AWS IAM role applied to the compute machine pool instance profiles. You can use these fields to match naming schemes and include predefined permissions boundaries for your IAM roles. If undefined, the installation program creates a new IAM role. | The name of a valid AWS IAM role. |
|
| The Input/Output Operations Per Second (IOPS) that is reserved for the root volume. |
Integer, for example |
|
| The size in GiB of the root volume. |
Integer, for example |
|
| The type of the root volume. |
Valid AWS EBS volume type, such as |
|
| The Amazon Resource Name (key ARN) of a KMS key. This is required to encrypt OS volumes of worker nodes with a specific KMS key. | Valid key ID or the key ARN. |
|
| The EC2 instance type for the compute machines. |
Valid AWS instance type, such as |
|
| The availability zones where the installation program creates machines for the compute machine pool. If you provide your own VPC, you must provide a subnet in that availability zone. |
A list of valid AWS availability zones, such as |
|
| The AWS region that the installation program creates compute resources in. |
Any valid AWS region, such as |
|
| The AWS AMI used to boot control plane machines for the cluster. This is required for regions that require a custom RHCOS AMI. | Any published or custom RHCOS AMI that belongs to the set AWS region. |
|
| A pre-existing AWS IAM role applied to the control plane machine pool instance profiles. You can use these fields to match naming schemes and include predefined permissions boundaries for your IAM roles. If undefined, the installation program creates a new IAM role. | The name of a valid AWS IAM role. |
|
| The Amazon Resource Name (key ARN) of a KMS key. This is required to encrypt OS volumes of control plane nodes with a specific KMS key. | Valid key ID and the key ARN. |
|
| The EC2 instance type for the control plane machines. |
Valid AWS instance type, such as |
|
| The availability zones where the installation program creates machines for the control plane machine pool. |
A list of valid AWS availability zones, such as |
|
| The AWS region that the installation program creates control plane resources in. |
Valid AWS region, such as |
|
| The AWS AMI used to boot all machines for the cluster. If set, the AMI must belong to the same region as the cluster. This is required for regions that require a custom RHCOS AMI. | Any published or custom RHCOS AMI that belongs to the set AWS region. |
|
| An existing Route 53 private hosted zone for the cluster. You can only use a pre-existing hosted zone when also supplying your own VPC. The hosted zone must already be associated with the user-provided VPC before installation. Also, the domain of the hosted zone must be the cluster domain or a parent of the cluster domain. If undefined, the installation program creates a new hosted zone. |
String, for example |
|
| The AWS service endpoint name. Custom endpoints are only required for cases where alternative AWS endpoints, like FIPS, must be used. Custom API endpoints can be specified for EC2, S3, IAM, Elastic Load Balancing, Tagging, Route 53, and STS AWS services. | Valid AWS service endpoint name. |
|
|
The AWS service endpoint URL. The URL must use the | Valid AWS service endpoint URL. |
|
| A map of keys and values that the installation program adds as tags to all resources that it creates. |
Any valid YAML map, such as key value pairs in the |
|
|
If you provide the VPC instead of allowing the installation program to create the VPC for you, specify the subnet for the cluster to use. The subnet must be part of the same | Valid subnet IDs. |
4.7.6.2. Sample customized install-config.yaml file for AWS
You can customize the install-config.yaml file to specify more details about your OpenShift Container Platform cluster’s platform or modify the values of the required parameters.
This sample YAML file is provided for reference only. You must obtain your install-config.yaml file by using the installation program and modify it.
apiVersion: v1
baseDomain: example.com
credentialsMode: Mint
controlPlane:
hyperthreading: Enabled
name: master
platform:
aws:
zones:
- us-west-2a
- us-west-2b
rootVolume:
iops: 4000
size: 500
type: io1
type: m5.xlarge
replicas: 3
compute:
- hyperthreading: Enabled
name: worker
platform:
aws:
rootVolume:
iops: 2000
size: 500
type: io1
type: c5.4xlarge
zones:
- us-west-2c
replicas: 3
metadata:
name: test-cluster
networking:
clusterNetwork:
- cidr: 10.128.0.0/14
hostPrefix: 23
machineNetwork:
- cidr: 10.0.0.0/16
networkType: OpenShiftSDN
serviceNetwork:
- 172.30.0.0/16
platform:
aws:
region: us-west-2
userTags:
adminContact: jdoe
costCenter: 7536
subnets:
- subnet-1
- subnet-2
- subnet-3
amiID: ami-96c6f8f7
serviceEndpoints:
- name: ec2
url: https://vpce-id.ec2.us-west-2.vpce.amazonaws.com
hostedZone: Z3URY6TWQ91KVV
fips: false
sshKey: ssh-ed25519 AAAA...
pullSecret: '{"auths":{"<local_registry>": {"auth": "<credentials>","email": "you@example.com"}}}'
additionalTrustBundle: |
-----BEGIN CERTIFICATE-----
<MY_TRUSTED_CA_CERT>
-----END CERTIFICATE-----
imageContentSources:
- mirrors:
- <local_registry>/<local_repository_name>/release
source: quay.io/openshift-release-dev/ocp-release
- mirrors:
- <local_registry>/<local_repository_name>/release
source: quay.io/openshift-release-dev/ocp-v4.0-art-dev- 1 10 11
- Required. The installation program prompts you for this value.
- 2
- Optional: Add this parameter to force the Cloud Credential Operator (CCO) to use the specified mode, instead of having the CCO dynamically try to determine the capabilities of the credentials. For details about CCO modes, see the Cloud Credential Operator entry in the Platform Operators reference content.
- 3 7
- If you do not provide these parameters and values, the installation program provides the default value.
- 4
- The
controlPlanesection is a single mapping, but thecomputesection is a sequence of mappings. To meet the requirements of the different data structures, the first line of thecomputesection must begin with a hyphen,-, and the first line of thecontrolPlanesection must not. Only one control plane pool is used. - 5 8
- Whether to enable or disable simultaneous multithreading, or
hyperthreading. By default, simultaneous multithreading is enabled to increase the performance of your machines' cores. You can disable it by setting the parameter value toDisabled. If you disable simultaneous multithreading in some cluster machines, you must disable it in all cluster machines.ImportantIf you disable simultaneous multithreading, ensure that your capacity planning accounts for the dramatically decreased machine performance. Use larger instance types, such as
m4.2xlargeorm5.2xlarge, for your machines if you disable simultaneous multithreading. - 6 9
- To configure faster storage for etcd, especially for larger clusters, set the storage type as
io1and setiopsto2000. - 12
- If you provide your own VPC, specify subnets for each availability zone that your cluster uses.
- 13
- The ID of the AMI used to boot machines for the cluster. If set, the AMI must belong to the same region as the cluster.
- 14
- The AWS service endpoints. Custom endpoints are required when installing to an unknown AWS region. The endpoint URL must use the
httpsprotocol and the host must trust the certificate. - 15
- The ID of your existing Route 53 private hosted zone. Providing an existing hosted zone requires that you supply your own VPC and the hosted zone is already associated with the VPC prior to installing your cluster. If undefined, the installation program creates a new hosted zone.
- 16
- Whether to enable or disable FIPS mode. By default, FIPS mode is not enabled. If FIPS mode is enabled, the Red Hat Enterprise Linux CoreOS (RHCOS) machines that OpenShift Container Platform runs on bypass the default Kubernetes cryptography suite and use the cryptography modules that are provided with RHCOS instead.Important
The use of FIPS Validated / Modules in Process cryptographic libraries is only supported on OpenShift Container Platform deployments on the
x86_64architecture. - 17
- You can optionally provide the
sshKeyvalue that you use to access the machines in your cluster.NoteFor production OpenShift Container Platform clusters on which you want to perform installation debugging or disaster recovery, specify an SSH key that your
ssh-agentprocess uses. - 18
- For
<local_registry>, specify the registry domain name, and optionally the port, that your mirror registry uses to serve content. For exampleregistry.example.comorregistry.example.com:5000. For<credentials>, specify the base64-encoded user name and password for your mirror registry. - 19
- Provide the contents of the certificate file that you used for your mirror registry.
- 20
- Provide the
imageContentSourcessection from the output of the command to mirror the repository.
4.7.6.3. Configuring the cluster-wide proxy during installation
Production environments can deny direct access to the Internet and instead have an HTTP or HTTPS proxy available. You can configure a new OpenShift Container Platform cluster to use a proxy by configuring the proxy settings in the install-config.yaml file.
Prerequisites
-
You have an existing
install-config.yamlfile. You reviewed the sites that your cluster requires access to and determined whether any of them need to bypass the proxy. By default, all cluster egress traffic is proxied, including calls to hosting cloud provider APIs. You added sites to the
Proxyobject’sspec.noProxyfield to bypass the proxy if necessary.NoteThe
Proxyobjectstatus.noProxyfield is populated with the values of thenetworking.machineNetwork[].cidr,networking.clusterNetwork[].cidr, andnetworking.serviceNetwork[]fields from your installation configuration.For installations on Amazon Web Services (AWS), Google Cloud Platform (GCP), Microsoft Azure, and Red Hat OpenStack Platform (RHOSP), the
Proxyobjectstatus.noProxyfield is also populated with the instance metadata endpoint (169.254.169.254).-
If your cluster is on AWS, you added the
ec2.<region>.amazonaws.com,elasticloadbalancing.<region>.amazonaws.com, ands3.<region>.amazonaws.comendpoints to your VPC endpoint. These endpoints are required to complete requests from the nodes to the AWS EC2 API. Because the proxy works on the container level, not the node level, you must route these requests to the AWS EC2 API through the AWS private network. Adding the public IP address of the EC2 API to your allowlist in your proxy server is not sufficient.
Procedure
Edit your
install-config.yamlfile and add the proxy settings. For example:apiVersion: v1 baseDomain: my.domain.com proxy: httpProxy: http://<username>:<pswd>@<ip>:<port>1 httpsProxy: https://<username>:<pswd>@<ip>:<port>2 noProxy: example.com3 additionalTrustBundle: |4 -----BEGIN CERTIFICATE----- <MY_TRUSTED_CA_CERT> -----END CERTIFICATE----- ...- 1
- A proxy URL to use for creating HTTP connections outside the cluster. The URL scheme must be
http. - 2
- A proxy URL to use for creating HTTPS connections outside the cluster.
- 3
- A comma-separated list of destination domain names, IP addresses, or other network CIDRs to exclude from proxying. Preface a domain with
.to match subdomains only. For example,.y.commatchesx.y.com, but noty.com. Use*to bypass the proxy for all destinations. - 4
- If provided, the installation program generates a config map that is named
user-ca-bundlein theopenshift-confignamespace to hold the additional CA certificates. If you provideadditionalTrustBundleand at least one proxy setting, theProxyobject is configured to reference theuser-ca-bundleconfig map in thetrustedCAfield. The Cluster Network Operator then creates atrusted-ca-bundleconfig map that merges the contents specified for thetrustedCAparameter with the RHCOS trust bundle. TheadditionalTrustBundlefield is required unless the proxy’s identity certificate is signed by an authority from the RHCOS trust bundle.
NoteThe installation program does not support the proxy
readinessEndpointsfield.- Save the file and reference it when installing OpenShift Container Platform.
The installation program creates a cluster-wide proxy that is named cluster that uses the proxy settings in the provided install-config.yaml file. If no proxy settings are provided, a cluster Proxy object is still created, but it will have a nil spec.
Only the Proxy object named cluster is supported, and no additional proxies can be created.
4.7.7. Deploying the cluster
You can install OpenShift Container Platform on a compatible cloud platform.
You can run the create cluster command of the installation program only once, during initial installation.
Prerequisites
- Configure an account with the cloud platform that hosts your cluster.
- Obtain the OpenShift Container Platform installation program and the pull secret for your cluster.
Procedure
Change to the directory that contains the installation program and initialize the cluster deployment:
$ ./openshift-install create cluster --dir <installation_directory> \1 --log-level=info2 NoteIf the cloud provider account that you configured on your host does not have sufficient permissions to deploy the cluster, the installation process stops, and the missing permissions are displayed.
When the cluster deployment completes, directions for accessing your cluster, including a link to its web console and credentials for the
kubeadminuser, display in your terminal.Example output
... INFO Install complete! INFO To access the cluster as the system:admin user when using 'oc', run 'export KUBECONFIG=/home/myuser/install_dir/auth/kubeconfig' INFO Access the OpenShift web-console here: https://console-openshift-console.apps.mycluster.example.com INFO Login to the console with user: "kubeadmin", and password: "4vYBz-Ee6gm-ymBZj-Wt5AL" INFO Time elapsed: 36m22sNoteThe cluster access and credential information also outputs to
<installation_directory>/.openshift_install.logwhen an installation succeeds.Important-
The Ignition config files that the installation program generates contain certificates that expire after 24 hours, which are then renewed at that time. If the cluster is shut down before renewing the certificates and the cluster is later restarted after the 24 hours have elapsed, the cluster automatically recovers the expired certificates. The exception is that you must manually approve the pending
node-bootstrappercertificate signing requests (CSRs) to recover kubelet certificates. See the documentation for Recovering from expired control plane certificates for more information. - It is recommended that you use Ignition config files within 12 hours after they are generated because the 24-hour certificate rotates from 16 to 22 hours after the cluster is installed. By using the Ignition config files within 12 hours, you can avoid installation failure if the certificate update runs during installation.
ImportantYou must not delete the installation program or the files that the installation program creates. Both are required to delete the cluster.
-
The Ignition config files that the installation program generates contain certificates that expire after 24 hours, which are then renewed at that time. If the cluster is shut down before renewing the certificates and the cluster is later restarted after the 24 hours have elapsed, the cluster automatically recovers the expired certificates. The exception is that you must manually approve the pending
Optional: Remove or disable the
AdministratorAccesspolicy from the IAM account that you used to install the cluster.NoteThe elevated permissions provided by the
AdministratorAccesspolicy are required only during installation.
4.7.8. Installing the OpenShift CLI by downloading the binary
You can install the OpenShift CLI (oc) to interact with OpenShift Container Platform from a command-line interface. You can install oc on Linux, Windows, or macOS.
If you installed an earlier version of oc, you cannot use it to complete all of the commands in OpenShift Container Platform 4.7. Download and install the new version of oc.
4.7.8.1. Installing the OpenShift CLI on Linux
You can install the OpenShift CLI (oc) binary on Linux by using the following procedure.
Procedure
- Navigate to the OpenShift Container Platform downloads page on the Red Hat Customer Portal.
- Select the appropriate version in the Version drop-down menu.
- Click Download Now next to the OpenShift v4.7 Linux Client entry and save the file.
Unpack the archive:
$ tar xvzf <file>Place the
ocbinary in a directory that is on yourPATH.To check your
PATH, execute the following command:$ echo $PATH
After you install the OpenShift CLI, it is available using the oc command:
$ oc <command>4.7.8.2. Installing the OpenShift CLI on Windows
You can install the OpenShift CLI (oc) binary on Windows by using the following procedure.
Procedure
- Navigate to the OpenShift Container Platform downloads page on the Red Hat Customer Portal.
- Select the appropriate version in the Version drop-down menu.
- Click Download Now next to the OpenShift v4.7 Windows Client entry and save the file.
- Unzip the archive with a ZIP program.
Move the
ocbinary to a directory that is on yourPATH.To check your
PATH, open the command prompt and execute the following command:C:\> path
After you install the OpenShift CLI, it is available using the oc command:
C:\> oc <command>4.7.8.3. Installing the OpenShift CLI on macOS
You can install the OpenShift CLI (oc) binary on macOS by using the following procedure.
Procedure
- Navigate to the OpenShift Container Platform downloads page on the Red Hat Customer Portal.
- Select the appropriate version in the Version drop-down menu.
- Click Download Now next to the OpenShift v4.7 MacOSX Client entry and save the file.
- Unpack and unzip the archive.
Move the
ocbinary to a directory on your PATH.To check your
PATH, open a terminal and execute the following command:$ echo $PATH
After you install the OpenShift CLI, it is available using the oc command:
$ oc <command>4.7.9. Logging in to the cluster by using the CLI
You can log in to your cluster as a default system user by exporting the cluster kubeconfig file. The kubeconfig file contains information about the cluster that is used by the CLI to connect a client to the correct cluster and API server. The file is specific to a cluster and is created during OpenShift Container Platform installation.
Prerequisites
- You deployed an OpenShift Container Platform cluster.
-
You installed the
ocCLI.
Procedure
Export the
kubeadmincredentials:$ export KUBECONFIG=<installation_directory>/auth/kubeconfig1 - 1
- For
<installation_directory>, specify the path to the directory that you stored the installation files in.
Verify you can run
occommands successfully using the exported configuration:$ oc whoamiExample output
system:admin
4.7.10. Disabling the default OperatorHub sources
Operator catalogs that source content provided by Red Hat and community projects are configured for OperatorHub by default during an OpenShift Container Platform installation. In a restricted network environment, you must disable the default catalogs as a cluster administrator.
Procedure
Disable the sources for the default catalogs by adding
disableAllDefaultSources: trueto theOperatorHubobject:$ oc patch OperatorHub cluster --type json \ -p '[{"op": "add", "path": "/spec/disableAllDefaultSources", "value": true}]'
Alternatively, you can use the web console to manage catalog sources. From the Administration → Cluster Settings → Global Configuration → OperatorHub page, click the Sources tab, where you can create, delete, disable, and enable individual sources.
4.7.11. Telemetry access for OpenShift Container Platform
In OpenShift Container Platform 4.7, the Telemetry service, which runs by default to provide metrics about cluster health and the success of updates, requires internet access. If your cluster is connected to the internet, Telemetry runs automatically, and your cluster is registered to OpenShift Cluster Manager.
After you confirm that your OpenShift Cluster Manager inventory is correct, either maintained automatically by Telemetry or manually by using OpenShift Cluster Manager, use subscription watch to track your OpenShift Container Platform subscriptions at the account or multi-cluster level.
4.7.12. Next steps
- Validate an installation.
- Customize your cluster.
-
Configure image streams for the Cluster Samples Operator and the
must-gathertool. - Learn how to use Operator Lifecycle Manager (OLM) on restricted networks.
- If the mirror registry that you used to install your cluster has a trusted CA, add it to the cluster by configuring additional trust stores.
- If necessary, you can opt out of remote health reporting.
4.8. Installing a cluster on AWS into an existing VPC
In OpenShift Container Platform version 4.7, you can install a cluster into an existing Amazon Virtual Private Cloud (VPC) on Amazon Web Services (AWS). The installation program provisions the rest of the required infrastructure, which you can further customize. To customize the installation, you modify parameters in the install-config.yaml file before you install the cluster.
4.8.1. Prerequisites
- Review details about the OpenShift Container Platform installation and update processes.
Configure an AWS account to host the cluster.
ImportantIf you have an AWS profile stored on your computer, it must not use a temporary session token that you generated while using a multi-factor authentication device. The cluster continues to use your current AWS credentials to create AWS resources for the entire life of the cluster, so you must use long-lived credentials. To generate appropriate keys, see Managing Access Keys for IAM Users in the AWS documentation. You can supply the keys when you run the installation program.
- If you use a firewall, you must configure it to allow the sites that your cluster requires access to.
- If you do not allow the system to manage identity and access management (IAM), then a cluster administrator can manually create and maintain IAM credentials. Manual mode can also be used in environments where the cloud IAM APIs are not reachable.
4.8.2. About using a custom VPC
In OpenShift Container Platform 4.7, you can deploy a cluster into existing subnets in an existing Amazon Virtual Private Cloud (VPC) in Amazon Web Services (AWS). By deploying OpenShift Container Platform into an existing AWS VPC, you might be able to avoid limit constraints in new accounts or more easily abide by the operational constraints that your company’s guidelines set. If you cannot obtain the infrastructure creation permissions that are required to create the VPC yourself, use this installation option.
Because the installation program cannot know what other components are also in your existing subnets, it cannot choose subnet CIDRs and so forth on your behalf. You must configure networking for the subnets that you install your cluster to yourself.
4.8.2.1. Requirements for using your VPC
The installation program no longer creates the following components:
- Internet gateways
- NAT gateways
- Subnets
- Route tables
- VPCs
- VPC DHCP options
- VPC endpoints
The installation program requires that you use the cloud-provided DNS server. Using a custom DNS server is not supported and causes the installation to fail.
If you use a custom VPC, you must correctly configure it and its subnets for the installation program and the cluster to use. See Amazon VPC console wizard configurations and Work with VPCs and subnets in the AWS documentation for more information on creating and managing an AWS VPC.
The installation program cannot:
- Subdivide network ranges for the cluster to use.
- Set route tables for the subnets.
- Set VPC options like DHCP.
You must complete these tasks before you install the cluster. See VPC networking components and Route tables for your VPC for more information on configuring networking in an AWS VPC.
Your VPC must meet the following characteristics:
Create a public and private subnet for each availability zone that your cluster uses. Each availability zone can contain no more than one public and one private subnet. For an example of this type of configuration, see VPC with public and private subnets (NAT) in the AWS documentation.
Record each subnet ID. Completing the installation requires that you enter these values in the
platformsection of theinstall-config.yamlfile. See Finding a subnet ID in the AWS documentation.-
The VPC’s CIDR block must contain the
Networking.MachineCIDRrange, which is the IP address pool for cluster machines. The subnet CIDR blocks must belong to the machine CIDR that you specify. The VPC must have a public internet gateway attached to it. For each availability zone:
- The public subnet requires a route to the internet gateway.
- The public subnet requires a NAT gateway with an EIP address.
- The private subnet requires a route to the NAT gateway in public subnet.
The VPC must not use the
kubernetes.io/cluster/.*: ownedtag.The installation program modifies your subnets to add the
kubernetes.io/cluster/.*: sharedtag, so your subnets must have at least one free tag slot available for it. See Tag Restrictions in the AWS documentation to confirm that the installation program can add a tag to each subnet that you specify.You must enable the
enableDnsSupportandenableDnsHostnamesattributes in your VPC, so that the cluster can use the Route 53 zones that are attached to the VPC to resolve cluster’s internal DNS records. See DNS Support in Your VPC in the AWS documentation.If you prefer to use your own Route 53 hosted private zone, you must associate the existing hosted zone with your VPC prior to installing a cluster. You can define your hosted zone using the
platform.aws.hostedZonefield in theinstall-config.yamlfile.
If you are working in a disconnected environment, you are unable to reach the public IP addresses for EC2 and ELB endpoints. To resolve this, you must create a VPC endpoint and attach it to the subnet that the clusters are using. The endpoints should be named as follows:
-
ec2.<region>.amazonaws.com -
elasticloadbalancing.<region>.amazonaws.com -
s3.<region>.amazonaws.com
Required VPC components
You must provide a suitable VPC and subnets that allow communication to your machines.
| Component | AWS type | Description | |
|---|---|---|---|
| VPC |
| You must provide a public VPC for the cluster to use. The VPC uses an endpoint that references the route tables for each subnet to improve communication with the registry that is hosted in S3. | |
| Public subnets |
| Your VPC must have public subnets for between 1 and 3 availability zones and associate them with appropriate Ingress rules. | |
| Internet gateway |
| You must have a public Internet gateway, with public routes, attached to the VPC. In the provided templates, each public subnet has a NAT gateway with an EIP address. These NAT gateways allow cluster resources, like private subnet instances, to reach the Internet and are not required for some restricted network or proxy scenarios. | |
| Network access control |
| You must allow the VPC to access the following ports: | |
| Port | Reason | ||
|
| Inbound HTTP traffic | ||
|
| Inbound HTTPS traffic | ||
|
| Inbound SSH traffic | ||
|
| Inbound ephemeral traffic | ||
|
| Outbound ephemeral traffic | ||
| Private subnets |
| Your VPC can have private subnets. The provided CloudFormation templates can create private subnets for between 1 and 3 availability zones. If you use private subnets, you must provide appropriate routes and tables for them. | |
4.8.2.2. VPC validation
To ensure that the subnets that you provide are suitable, the installation program confirms the following data:
- All the subnets that you specify exist.
- You provide private subnets.
- The subnet CIDRs belong to the machine CIDR that you specified.
- You provide subnets for each availability zone. Each availability zone contains no more than one public and one private subnet. If you use a private cluster, provide only a private subnet for each availability zone. Otherwise, provide exactly one public and private subnet for each availability zone.
- You provide a public subnet for each private subnet availability zone. Machines are not provisioned in availability zones that you do not provide private subnets for.
If you destroy a cluster that uses an existing VPC, the VPC is not deleted. When you remove the OpenShift Container Platform cluster from a VPC, the kubernetes.io/cluster/.*: shared tag is removed from the subnets that it used.
4.8.2.3. Division of permissions
Starting with OpenShift Container Platform 4.3, you do not need all of the permissions that are required for an installation program-provisioned infrastructure cluster to deploy a cluster. This change mimics the division of permissions that you might have at your company: some individuals can create different resource in your clouds than others. For example, you might be able to create application-specific items, like instances, buckets, and load balancers, but not networking-related components such as VPCs, subnets, or ingress rules.
The AWS credentials that you use when you create your cluster do not need the networking permissions that are required to make VPCs and core networking components within the VPC, such as subnets, routing tables, Internet gateways, NAT, and VPN. You still need permission to make the application resources that the machines within the cluster require, such as ELBs, security groups, S3 buckets, and nodes.
4.8.2.4. Isolation between clusters
If you deploy OpenShift Container Platform to an existing network, the isolation of cluster services is reduced in the following ways:
- You can install multiple OpenShift Container Platform clusters in the same VPC.
- ICMP ingress is allowed from the entire network.
- TCP 22 ingress (SSH) is allowed to the entire network.
- Control plane TCP 6443 ingress (Kubernetes API) is allowed to the entire network.
- Control plane TCP 22623 ingress (MCS) is allowed to the entire network.
4.8.3. Internet access for OpenShift Container Platform
In OpenShift Container Platform 4.7, you require access to the Internet to install your cluster.
You must have Internet access to:
- Access OpenShift Cluster Manager to download the installation program and perform subscription management. If the cluster has internet access and you do not disable Telemetry, that service automatically entitles your cluster.
- Access Quay.io to obtain the packages that are required to install your cluster.
- Obtain the packages that are required to perform cluster updates.
If your cluster cannot have direct Internet access, you can perform a restricted network installation on some types of infrastructure that you provision. During that process, you download the content that is required and use it to populate a mirror registry with the packages that you need to install a cluster and generate the installation program. With some installation types, the environment that you install your cluster in will not require Internet access. Before you update the cluster, you update the content of the mirror registry.
4.8.4. Generating an SSH private key and adding it to the agent
If you want to perform installation debugging or disaster recovery on your cluster, you must provide an SSH key to both your ssh-agent and the installation program. You can use this key to access the bootstrap machine in a public cluster to troubleshoot installation issues.
In a production environment, you require disaster recovery and debugging.
You can use this key to SSH into the master nodes as the user core. When you deploy the cluster, the key is added to the core user’s ~/.ssh/authorized_keys list.
You must use a local key, not one that you configured with platform-specific approaches such as AWS key pairs.
Procedure
If you do not have an SSH key that is configured for password-less authentication on your computer, create one. For example, on a computer that uses a Linux operating system, run the following command:
$ ssh-keygen -t ed25519 -N '' \ -f <path>/<file_name>1 - 1
- Specify the path and file name, such as
~/.ssh/id_rsa, of the new SSH key. If you have an existing key pair, ensure your public key is in the your~/.sshdirectory.
Running this command generates an SSH key that does not require a password in the location that you specified.
NoteIf you plan to install an OpenShift Container Platform cluster that uses FIPS Validated / Modules in Process cryptographic libraries on the
x86_64architecture, do not create a key that uses theed25519algorithm. Instead, create a key that uses thersaorecdsaalgorithm.Start the
ssh-agentprocess as a background task:$ eval "$(ssh-agent -s)"Example output
Agent pid 31874NoteIf your cluster is in FIPS mode, only use FIPS-compliant algorithms to generate the SSH key. The key must be either RSA or ECDSA.
Add your SSH private key to the
ssh-agent:$ ssh-add <path>/<file_name>1 Example output
Identity added: /home/<you>/<path>/<file_name> (<computer_name>)- 1
- Specify the path and file name for your SSH private key, such as
~/.ssh/id_rsa
Next steps
- When you install OpenShift Container Platform, provide the SSH public key to the installation program.
4.8.5. Obtaining the installation program
Before you install OpenShift Container Platform, download the installation file on a local computer.
Prerequisites
- You have a computer that runs Linux or macOS, with 500 MB of local disk space
Procedure
- Access the Infrastructure Provider page on the OpenShift Cluster Manager site. If you have a Red Hat account, log in with your credentials. If you do not, create an account.
- Select your infrastructure provider.
Navigate to the page for your installation type, download the installation program for your operating system, and place the file in the directory where you will store the installation configuration files.
ImportantThe installation program creates several files on the computer that you use to install your cluster. You must keep the installation program and the files that the installation program creates after you finish installing the cluster. Both files are required to delete the cluster.
ImportantDeleting the files created by the installation program does not remove your cluster, even if the cluster failed during installation. To remove your cluster, complete the OpenShift Container Platform uninstallation procedures for your specific cloud provider.
Extract the installation program. For example, on a computer that uses a Linux operating system, run the following command:
$ tar xvf openshift-install-linux.tar.gz- Download your installation pull secret from the Red Hat OpenShift Cluster Manager. This pull secret allows you to authenticate with the services that are provided by the included authorities, including Quay.io, which serves the container images for OpenShift Container Platform components.
4.8.6. Creating the installation configuration file
You can customize the OpenShift Container Platform cluster you install on Amazon Web Services (AWS).
Prerequisites
- Obtain the OpenShift Container Platform installation program and the pull secret for your cluster.
- Obtain service principal permissions at the subscription level.
Procedure
Create the
install-config.yamlfile.Change to the directory that contains the installation program and run the following command:
$ ./openshift-install create install-config --dir <installation_directory>1 - 1
- For
<installation_directory>, specify the directory name to store the files that the installation program creates.
ImportantSpecify an empty directory. Some installation assets, like bootstrap X.509 certificates have short expiration intervals, so you must not reuse an installation directory. If you want to reuse individual files from another cluster installation, you can copy them into your directory. However, the file names for the installation assets might change between releases. Use caution when copying installation files from an earlier OpenShift Container Platform version.
At the prompts, provide the configuration details for your cloud:
Optional: Select an SSH key to use to access your cluster machines.
NoteFor production OpenShift Container Platform clusters on which you want to perform installation debugging or disaster recovery, specify an SSH key that your
ssh-agentprocess uses.- Select AWS as the platform to target.
- If you do not have an Amazon Web Services (AWS) profile stored on your computer, enter the AWS access key ID and secret access key for the user that you configured to run the installation program.
- Select the AWS region to deploy the cluster to.
- Select the base domain for the Route 53 service that you configured for your cluster.
- Enter a descriptive name for your cluster.
- Paste the pull secret from the Red Hat OpenShift Cluster Manager.
-
Modify the
install-config.yamlfile. You can find more information about the available parameters in the "Installation configuration parameters" section. Back up the
install-config.yamlfile so that you can use it to install multiple clusters.ImportantThe
install-config.yamlfile is consumed during the installation process. If you want to reuse the file, you must back it up now.
4.8.6.1. Installation configuration parameters
Before you deploy an OpenShift Container Platform cluster, you provide parameter values to describe your account on the cloud platform that hosts your cluster and optionally customize your cluster’s platform. When you create the install-config.yaml installation configuration file, you provide values for the required parameters through the command line. If you customize your cluster, you can modify the install-config.yaml file to provide more details about the platform.
After installation, you cannot modify these parameters in the install-config.yaml file.
The openshift-install command does not validate field names for parameters. If an incorrect name is specified, the related file or object is not created, and no error is reported. Ensure that the field names for any parameters that are specified are correct.
4.8.6.1.1. Required configuration parameters
Required installation configuration parameters are described in the following table:
| Parameter | Description | Values |
|---|---|---|
|
|
The API version for the | String |
|
|
The base domain of your cloud provider. The base domain is used to create routes to your OpenShift Container Platform cluster components. The full DNS name for your cluster is a combination of the |
A fully-qualified domain or subdomain name, such as |
|
|
Kubernetes resource | Object |
|
|
The name of the cluster. DNS records for the cluster are all subdomains of |
String of lowercase letters, hyphens ( |
|
|
The configuration for the specific platform upon which to perform the installation: | Object |
|
| Get a pull secret from the Red Hat OpenShift Cluster Manager to authenticate downloading container images for OpenShift Container Platform components from services such as Quay.io. |
|
4.8.6.1.2. Network configuration parameters
You can customize your installation configuration based on the requirements of your existing network infrastructure. For example, you can expand the IP address block for the cluster network or provide different IP address blocks than the defaults.
Only IPv4 addresses are supported.
| Parameter | Description | Values |
|---|---|---|
|
| The configuration for the cluster network. | Object Note
You cannot modify parameters specified by the |
|
| The cluster network provider Container Network Interface (CNI) plug-in to install. |
Either |
|
| The IP address blocks for pods.
The default value is If you specify multiple IP address blocks, the blocks must not overlap. | An array of objects. For example: |
|
|
Required if you use An IPv4 network. |
An IP address block in Classless Inter-Domain Routing (CIDR) notation. The prefix length for an IPv4 block is between |
|
|
The subnet prefix length to assign to each individual node. For example, if | A subnet prefix.
The default value is |
|
|
The IP address block for services. The default value is The OpenShift SDN and OVN-Kubernetes network providers support only a single IP address block for the service network. | An array with an IP address block in CIDR format. For example: |
|
| The IP address blocks for machines. If you specify multiple IP address blocks, the blocks must not overlap. | An array of objects. For example: |
|
|
Required if you use | An IP network block in CIDR notation.
For example, Note
Set the |
4.8.6.1.3. Optional configuration parameters
Optional installation configuration parameters are described in the following table:
| Parameter | Description | Values |
|---|---|---|
|
| A PEM-encoded X.509 certificate bundle that is added to the nodes' trusted certificate store. This trust bundle may also be used when a proxy has been configured. | String |
|
| The configuration for the machines that comprise the compute nodes. |
Array of |
|
|
Determines the instruction set architecture of the machines in the pool. Currently, heteregeneous clusters are not supported, so all pools must specify the same architecture. Valid values are | String |
|
|
Whether to enable or disable simultaneous multithreading, or Important If you disable simultaneous multithreading, ensure that your capacity planning accounts for the dramatically decreased machine performance. |
|
|
|
Required if you use |
|
|
|
Required if you use |
|
|
| The number of compute machines, which are also known as worker machines, to provision. |
A positive integer greater than or equal to |
|
| The configuration for the machines that comprise the control plane. |
Array of |
|
|
Determines the instruction set architecture of the machines in the pool. Currently, heterogeneous clusters are not supported, so all pools must specify the same architecture. Valid values are | String |
|
|
Whether to enable or disable simultaneous multithreading, or Important If you disable simultaneous multithreading, ensure that your capacity planning accounts for the dramatically decreased machine performance. |
|
|
|
Required if you use |
|
|
|
Required if you use |
|
|
| The number of control plane machines to provision. |
The only supported value is |
|
| The Cloud Credential Operator (CCO) mode. If no mode is specified, the CCO dynamically tries to determine the capabilities of the provided credentials, with a preference for mint mode on the platforms where multiple modes are supported. Note Not all CCO modes are supported for all cloud providers. For more information on CCO modes, see the Cloud Credential Operator entry in the Cluster Operators reference content. |
|
|
|
Enable or disable FIPS mode. The default is Important
The use of FIPS Validated / Modules in Process cryptographic libraries is only supported on OpenShift Container Platform deployments on the Note If you are using Azure File storage, you cannot enable FIPS mode. |
|
|
| Sources and repositories for the release-image content. |
Array of objects. Includes a |
|
|
Required if you use | String |
|
| Specify one or more repositories that may also contain the same images. | Array of strings |
|
| How to publish or expose the user-facing endpoints of your cluster, such as the Kubernetes API, OpenShift routes. |
|
|
| The SSH key or keys to authenticate access your cluster machines. Note
For production OpenShift Container Platform clusters on which you want to perform installation debugging or disaster recovery, specify an SSH key that your | One or more keys. For example: |
4.8.6.1.4. Optional AWS configuration parameters
Optional AWS configuration parameters are described in the following table:
| Parameter | Description | Values |
|---|---|---|
|
| The AWS AMI used to boot compute machines for the cluster. This is required for regions that require a custom RHCOS AMI. | Any published or custom RHCOS AMI that belongs to the set AWS region. |
|
| A pre-existing AWS IAM role applied to the compute machine pool instance profiles. You can use these fields to match naming schemes and include predefined permissions boundaries for your IAM roles. If undefined, the installation program creates a new IAM role. | The name of a valid AWS IAM role. |
|
| The Input/Output Operations Per Second (IOPS) that is reserved for the root volume. |
Integer, for example |
|
| The size in GiB of the root volume. |
Integer, for example |
|
| The type of the root volume. |
Valid AWS EBS volume type, such as |
|
| The Amazon Resource Name (key ARN) of a KMS key. This is required to encrypt OS volumes of worker nodes with a specific KMS key. | Valid key ID or the key ARN. |
|
| The EC2 instance type for the compute machines. |
Valid AWS instance type, such as |
|
| The availability zones where the installation program creates machines for the compute machine pool. If you provide your own VPC, you must provide a subnet in that availability zone. |
A list of valid AWS availability zones, such as |
|
| The AWS region that the installation program creates compute resources in. |
Any valid AWS region, such as |
|
| The AWS AMI used to boot control plane machines for the cluster. This is required for regions that require a custom RHCOS AMI. | Any published or custom RHCOS AMI that belongs to the set AWS region. |
|
| A pre-existing AWS IAM role applied to the control plane machine pool instance profiles. You can use these fields to match naming schemes and include predefined permissions boundaries for your IAM roles. If undefined, the installation program creates a new IAM role. | The name of a valid AWS IAM role. |
|
| The Amazon Resource Name (key ARN) of a KMS key. This is required to encrypt OS volumes of control plane nodes with a specific KMS key. | Valid key ID and the key ARN. |
|
| The EC2 instance type for the control plane machines. |
Valid AWS instance type, such as |
|
| The availability zones where the installation program creates machines for the control plane machine pool. |
A list of valid AWS availability zones, such as |
|
| The AWS region that the installation program creates control plane resources in. |
Valid AWS region, such as |
|
| The AWS AMI used to boot all machines for the cluster. If set, the AMI must belong to the same region as the cluster. This is required for regions that require a custom RHCOS AMI. | Any published or custom RHCOS AMI that belongs to the set AWS region. |
|
| An existing Route 53 private hosted zone for the cluster. You can only use a pre-existing hosted zone when also supplying your own VPC. The hosted zone must already be associated with the user-provided VPC before installation. Also, the domain of the hosted zone must be the cluster domain or a parent of the cluster domain. If undefined, the installation program creates a new hosted zone. |
String, for example |
|
| The AWS service endpoint name. Custom endpoints are only required for cases where alternative AWS endpoints, like FIPS, must be used. Custom API endpoints can be specified for EC2, S3, IAM, Elastic Load Balancing, Tagging, Route 53, and STS AWS services. | Valid AWS service endpoint name. |
|
|
The AWS service endpoint URL. The URL must use the | Valid AWS service endpoint URL. |
|
| A map of keys and values that the installation program adds as tags to all resources that it creates. |
Any valid YAML map, such as key value pairs in the |
|
|
If you provide the VPC instead of allowing the installation program to create the VPC for you, specify the subnet for the cluster to use. The subnet must be part of the same | Valid subnet IDs. |
4.8.6.2. Supported AWS machine types
The following Amazon Web Services (AWS) instance types are supported with OpenShift Container Platform.
Example 4.18. Instance types for machines
| Instance type | Bootstrap | Control plane | Compute |
|---|---|---|---|
|
| x | ||
|
| x | ||
|
| x | x | |
|
| x | x | |
|
| x | x | |
|
| x | x | |
|
| x | x | |
|
| x | ||
|
| x | x | |
|
| x | x | |
|
| x | x | |
|
| x | x | |
|
| x | x | |
|
| x | x | |
|
| x | ||
|
| x | x | |
|
| x | x | |
|
| x | x | |
|
| x | x | |
|
| x | x | |
|
| x | x | |
|
| x | x | |
|
| x | x | |
|
| x | x | |
|
| x | x | |
|
| x | x | |
|
| x | x | |
|
| x | x | |
|
| x | x | |
|
| x | ||
|
| x | x | |
|
| x | x | |
|
| x | x | |
|
| x | x | |
|
| x | x | |
|
| x | x | |
|
| x | ||
|
| x | x | |
|
| x | x | |
|
| x | x | |
|
| x | x | |
|
| x | x | |
|
| x | x | |
|
| x | ||
|
| x | x | |
|
| x | x | |
|
| x | x | |
|
| x | x | |
|
| x | x | |
|
| x | ||
|
| x | x | |
|
| x | x | |
|
| x | x | |
|
| x | x | |
|
| x | x | |
|
| x | x | |
|
| x | x | |
|
| x | ||
|
| x | x | |
|
| x | x | |
|
| x | x | |
|
| x | x | |
|
| x | x | |
|
| x | x | |
|
| x | x | |
|
| x | ||
|
| x | ||
|
| x | ||
|
| x | ||
|
| x | ||
|
| x |
4.8.6.3. Sample customized install-config.yaml file for AWS
You can customize the install-config.yaml file to specify more details about your OpenShift Container Platform cluster’s platform or modify the values of the required parameters.
This sample YAML file is provided for reference only. You must obtain your install-config.yaml file by using the installation program and modify it.
apiVersion: v1
baseDomain: example.com
credentialsMode: Mint
controlPlane:
hyperthreading: Enabled
name: master
platform:
aws:
zones:
- us-west-2a
- us-west-2b
rootVolume:
iops: 4000
size: 500
type: io1
type: m5.xlarge
replicas: 3
compute:
- hyperthreading: Enabled
name: worker
platform:
aws:
rootVolume:
iops: 2000
size: 500
type: io1
type: c5.4xlarge
zones:
- us-west-2c
replicas: 3
metadata:
name: test-cluster
networking:
clusterNetwork:
- cidr: 10.128.0.0/14
hostPrefix: 23
machineNetwork:
- cidr: 10.0.0.0/16
networkType: OpenShiftSDN
serviceNetwork:
- 172.30.0.0/16
platform:
aws:
region: us-west-2
userTags:
adminContact: jdoe
costCenter: 7536
subnets:
- subnet-1
- subnet-2
- subnet-3
amiID: ami-96c6f8f7
serviceEndpoints:
- name: ec2
url: https://vpce-id.ec2.us-west-2.vpce.amazonaws.com
hostedZone: Z3URY6TWQ91KVV
fips: false
sshKey: ssh-ed25519 AAAA...
pullSecret: '{"auths": ...}' - 1 10 11 18
- Required. The installation program prompts you for this value.
- 2
- Optional: Add this parameter to force the Cloud Credential Operator (CCO) to use the specified mode, instead of having the CCO dynamically try to determine the capabilities of the credentials. For details about CCO modes, see the Cloud Credential Operator entry in the Platform Operators reference content.
- 3 7
- If you do not provide these parameters and values, the installation program provides the default value.
- 4
- The
controlPlanesection is a single mapping, but thecomputesection is a sequence of mappings. To meet the requirements of the different data structures, the first line of thecomputesection must begin with a hyphen,-, and the first line of thecontrolPlanesection must not. Only one control plane pool is used. - 5 8
- Whether to enable or disable simultaneous multithreading, or
hyperthreading. By default, simultaneous multithreading is enabled to increase the performance of your machines' cores. You can disable it by setting the parameter value toDisabled. If you disable simultaneous multithreading in some cluster machines, you must disable it in all cluster machines.ImportantIf you disable simultaneous multithreading, ensure that your capacity planning accounts for the dramatically decreased machine performance. Use larger instance types, such as
m4.2xlargeorm5.2xlarge, for your machines if you disable simultaneous multithreading. - 6 9
- To configure faster storage for etcd, especially for larger clusters, set the storage type as
io1and setiopsto2000. - 12
- If you provide your own VPC, specify subnets for each availability zone that your cluster uses.
- 13
- The ID of the AMI used to boot machines for the cluster. If set, the AMI must belong to the same region as the cluster.
- 14
- The AWS service endpoints. Custom endpoints are required when installing to an unknown AWS region. The endpoint URL must use the
httpsprotocol and the host must trust the certificate. - 15
- The ID of your existing Route 53 private hosted zone. Providing an existing hosted zone requires that you supply your own VPC and the hosted zone is already associated with the VPC prior to installing your cluster. If undefined, the installation program creates a new hosted zone.
- 16
- Whether to enable or disable FIPS mode. By default, FIPS mode is not enabled. If FIPS mode is enabled, the Red Hat Enterprise Linux CoreOS (RHCOS) machines that OpenShift Container Platform runs on bypass the default Kubernetes cryptography suite and use the cryptography modules that are provided with RHCOS instead.Important
The use of FIPS Validated / Modules in Process cryptographic libraries is only supported on OpenShift Container Platform deployments on the
x86_64architecture. - 17
- You can optionally provide the
sshKeyvalue that you use to access the machines in your cluster.NoteFor production OpenShift Container Platform clusters on which you want to perform installation debugging or disaster recovery, specify an SSH key that your
ssh-agentprocess uses.
4.8.6.4. Configuring the cluster-wide proxy during installation
Production environments can deny direct access to the Internet and instead have an HTTP or HTTPS proxy available. You can configure a new OpenShift Container Platform cluster to use a proxy by configuring the proxy settings in the install-config.yaml file.
Prerequisites
-
You have an existing
install-config.yamlfile. You reviewed the sites that your cluster requires access to and determined whether any of them need to bypass the proxy. By default, all cluster egress traffic is proxied, including calls to hosting cloud provider APIs. You added sites to the
Proxyobject’sspec.noProxyfield to bypass the proxy if necessary.NoteThe
Proxyobjectstatus.noProxyfield is populated with the values of thenetworking.machineNetwork[].cidr,networking.clusterNetwork[].cidr, andnetworking.serviceNetwork[]fields from your installation configuration.For installations on Amazon Web Services (AWS), Google Cloud Platform (GCP), Microsoft Azure, and Red Hat OpenStack Platform (RHOSP), the
Proxyobjectstatus.noProxyfield is also populated with the instance metadata endpoint (169.254.169.254).-
If your cluster is on AWS, you added the
ec2.<region>.amazonaws.com,elasticloadbalancing.<region>.amazonaws.com, ands3.<region>.amazonaws.comendpoints to your VPC endpoint. These endpoints are required to complete requests from the nodes to the AWS EC2 API. Because the proxy works on the container level, not the node level, you must route these requests to the AWS EC2 API through the AWS private network. Adding the public IP address of the EC2 API to your allowlist in your proxy server is not sufficient.
Procedure
Edit your
install-config.yamlfile and add the proxy settings. For example:apiVersion: v1 baseDomain: my.domain.com proxy: httpProxy: http://<username>:<pswd>@<ip>:<port>1 httpsProxy: https://<username>:<pswd>@<ip>:<port>2 noProxy: example.com3 additionalTrustBundle: |4 -----BEGIN CERTIFICATE----- <MY_TRUSTED_CA_CERT> -----END CERTIFICATE----- ...- 1
- A proxy URL to use for creating HTTP connections outside the cluster. The URL scheme must be
http. - 2
- A proxy URL to use for creating HTTPS connections outside the cluster.
- 3
- A comma-separated list of destination domain names, IP addresses, or other network CIDRs to exclude from proxying. Preface a domain with
.to match subdomains only. For example,.y.commatchesx.y.com, but noty.com. Use*to bypass the proxy for all destinations. - 4
- If provided, the installation program generates a config map that is named
user-ca-bundlein theopenshift-confignamespace to hold the additional CA certificates. If you provideadditionalTrustBundleand at least one proxy setting, theProxyobject is configured to reference theuser-ca-bundleconfig map in thetrustedCAfield. The Cluster Network Operator then creates atrusted-ca-bundleconfig map that merges the contents specified for thetrustedCAparameter with the RHCOS trust bundle. TheadditionalTrustBundlefield is required unless the proxy’s identity certificate is signed by an authority from the RHCOS trust bundle.
NoteThe installation program does not support the proxy
readinessEndpointsfield.- Save the file and reference it when installing OpenShift Container Platform.
The installation program creates a cluster-wide proxy that is named cluster that uses the proxy settings in the provided install-config.yaml file. If no proxy settings are provided, a cluster Proxy object is still created, but it will have a nil spec.
Only the Proxy object named cluster is supported, and no additional proxies can be created.
4.8.7. Deploying the cluster
You can install OpenShift Container Platform on a compatible cloud platform.
You can run the create cluster command of the installation program only once, during initial installation.
Prerequisites
- Configure an account with the cloud platform that hosts your cluster.
- Obtain the OpenShift Container Platform installation program and the pull secret for your cluster.
Procedure
Change to the directory that contains the installation program and initialize the cluster deployment:
$ ./openshift-install create cluster --dir <installation_directory> \1 --log-level=info2 NoteIf the cloud provider account that you configured on your host does not have sufficient permissions to deploy the cluster, the installation process stops, and the missing permissions are displayed.
When the cluster deployment completes, directions for accessing your cluster, including a link to its web console and credentials for the
kubeadminuser, display in your terminal.Example output
... INFO Install complete! INFO To access the cluster as the system:admin user when using 'oc', run 'export KUBECONFIG=/home/myuser/install_dir/auth/kubeconfig' INFO Access the OpenShift web-console here: https://console-openshift-console.apps.mycluster.example.com INFO Login to the console with user: "kubeadmin", and password: "4vYBz-Ee6gm-ymBZj-Wt5AL" INFO Time elapsed: 36m22sNoteThe cluster access and credential information also outputs to
<installation_directory>/.openshift_install.logwhen an installation succeeds.Important-
The Ignition config files that the installation program generates contain certificates that expire after 24 hours, which are then renewed at that time. If the cluster is shut down before renewing the certificates and the cluster is later restarted after the 24 hours have elapsed, the cluster automatically recovers the expired certificates. The exception is that you must manually approve the pending
node-bootstrappercertificate signing requests (CSRs) to recover kubelet certificates. See the documentation for Recovering from expired control plane certificates for more information. - It is recommended that you use Ignition config files within 12 hours after they are generated because the 24-hour certificate rotates from 16 to 22 hours after the cluster is installed. By using the Ignition config files within 12 hours, you can avoid installation failure if the certificate update runs during installation.
ImportantYou must not delete the installation program or the files that the installation program creates. Both are required to delete the cluster.
-
The Ignition config files that the installation program generates contain certificates that expire after 24 hours, which are then renewed at that time. If the cluster is shut down before renewing the certificates and the cluster is later restarted after the 24 hours have elapsed, the cluster automatically recovers the expired certificates. The exception is that you must manually approve the pending
Optional: Remove or disable the
AdministratorAccesspolicy from the IAM account that you used to install the cluster.NoteThe elevated permissions provided by the
AdministratorAccesspolicy are required only during installation.
4.8.8. Installing the OpenShift CLI by downloading the binary
You can install the OpenShift CLI (oc) to interact with OpenShift Container Platform from a command-line interface. You can install oc on Linux, Windows, or macOS.
If you installed an earlier version of oc, you cannot use it to complete all of the commands in OpenShift Container Platform 4.7. Download and install the new version of oc.
4.8.8.1. Installing the OpenShift CLI on Linux
You can install the OpenShift CLI (oc) binary on Linux by using the following procedure.
Procedure
- Navigate to the OpenShift Container Platform downloads page on the Red Hat Customer Portal.
- Select the appropriate version in the Version drop-down menu.
- Click Download Now next to the OpenShift v4.7 Linux Client entry and save the file.
Unpack the archive:
$ tar xvzf <file>Place the
ocbinary in a directory that is on yourPATH.To check your
PATH, execute the following command:$ echo $PATH
After you install the OpenShift CLI, it is available using the oc command:
$ oc <command>4.8.8.2. Installing the OpenShift CLI on Windows
You can install the OpenShift CLI (oc) binary on Windows by using the following procedure.
Procedure
- Navigate to the OpenShift Container Platform downloads page on the Red Hat Customer Portal.
- Select the appropriate version in the Version drop-down menu.
- Click Download Now next to the OpenShift v4.7 Windows Client entry and save the file.
- Unzip the archive with a ZIP program.
Move the
ocbinary to a directory that is on yourPATH.To check your
PATH, open the command prompt and execute the following command:C:\> path
After you install the OpenShift CLI, it is available using the oc command:
C:\> oc <command>4.8.8.3. Installing the OpenShift CLI on macOS
You can install the OpenShift CLI (oc) binary on macOS by using the following procedure.
Procedure
- Navigate to the OpenShift Container Platform downloads page on the Red Hat Customer Portal.
- Select the appropriate version in the Version drop-down menu.
- Click Download Now next to the OpenShift v4.7 MacOSX Client entry and save the file.
- Unpack and unzip the archive.
Move the
ocbinary to a directory on your PATH.To check your
PATH, open a terminal and execute the following command:$ echo $PATH
After you install the OpenShift CLI, it is available using the oc command:
$ oc <command>4.8.9. Logging in to the cluster by using the CLI
You can log in to your cluster as a default system user by exporting the cluster kubeconfig file. The kubeconfig file contains information about the cluster that is used by the CLI to connect a client to the correct cluster and API server. The file is specific to a cluster and is created during OpenShift Container Platform installation.
Prerequisites
- You deployed an OpenShift Container Platform cluster.
-
You installed the
ocCLI.
Procedure
Export the
kubeadmincredentials:$ export KUBECONFIG=<installation_directory>/auth/kubeconfig1 - 1
- For
<installation_directory>, specify the path to the directory that you stored the installation files in.
Verify you can run
occommands successfully using the exported configuration:$ oc whoamiExample output
system:admin
4.8.10. Logging in to the cluster by using the web console
The kubeadmin user exists by default after an OpenShift Container Platform installation. You can log in to your cluster as the kubeadmin user by using the OpenShift Container Platform web console.
Prerequisites
- You have access to the installation host.
- You completed a cluster installation and all cluster Operators are available.
Procedure
Obtain the password for the
kubeadminuser from thekubeadmin-passwordfile on the installation host:$ cat <installation_directory>/auth/kubeadmin-passwordNoteAlternatively, you can obtain the
kubeadminpassword from the<installation_directory>/.openshift_install.loglog file on the installation host.List the OpenShift Container Platform web console route:
$ oc get routes -n openshift-console | grep 'console-openshift'NoteAlternatively, you can obtain the OpenShift Container Platform route from the
<installation_directory>/.openshift_install.loglog file on the installation host.Example output
console console-openshift-console.apps.<cluster_name>.<base_domain> console https reencrypt/Redirect None-
Navigate to the route detailed in the output of the preceding command in a web browser and log in as the
kubeadminuser.
4.8.11. Telemetry access for OpenShift Container Platform
In OpenShift Container Platform 4.7, the Telemetry service, which runs by default to provide metrics about cluster health and the success of updates, requires internet access. If your cluster is connected to the internet, Telemetry runs automatically, and your cluster is registered to OpenShift Cluster Manager.
After you confirm that your OpenShift Cluster Manager inventory is correct, either maintained automatically by Telemetry or manually by using OpenShift Cluster Manager, use subscription watch to track your OpenShift Container Platform subscriptions at the account or multi-cluster level.
4.8.12. Next steps
- Validating an installation.
- Customize your cluster.
- If necessary, you can opt out of remote health reporting.
- If necessary, you can remove cloud provider credentials.
4.9. Installing a private cluster on AWS
In OpenShift Container Platform version 4.7, you can install a private cluster into an existing VPC on Amazon Web Services (AWS). The installation program provisions the rest of the required infrastructure, which you can further customize. To customize the installation, you modify parameters in the install-config.yaml file before you install the cluster.
4.9.1. Prerequisites
- Review details about the OpenShift Container Platform installation and update processes.
Configure an AWS account to host the cluster.
ImportantIf you have an AWS profile stored on your computer, it must not use a temporary session token that you generated while using a multi-factor authentication device. The cluster continues to use your current AWS credentials to create AWS resources for the entire life of the cluster, so you must use long-lived credentials. To generate appropriate keys, see Managing Access Keys for IAM Users in the AWS documentation. You can supply the keys when you run the installation program.
- If you use a firewall, you must configure it to allow the sites that your cluster requires access to.
- If you do not allow the system to manage identity and access management (IAM), then a cluster administrator can manually create and maintain IAM credentials. Manual mode can also be used in environments where the cloud IAM APIs are not reachable.
4.9.2. Private clusters
You can deploy a private OpenShift Container Platform cluster that does not expose external endpoints. Private clusters are accessible from only an internal network and are not visible to the Internet.
By default, OpenShift Container Platform is provisioned to use publicly-accessible DNS and endpoints. A private cluster sets the DNS, Ingress Controller, and API server to private when you deploy your cluster. This means that the cluster resources are only accessible from your internal network and are not visible to the internet.
To deploy a private cluster, you must use existing networking that meets your requirements. Your cluster resources might be shared between other clusters on the network.
Additionally, you must deploy a private cluster from a machine that has access the API services for the cloud you provision to, the hosts on the network that you provision, and to the internet to obtain installation media. You can use any machine that meets these access requirements and follows your company’s guidelines. For example, this machine can be a bastion host on your cloud network or a machine that has access to the network through a VPN.
4.9.2.1. Private clusters in AWS
To create a private cluster on Amazon Web Services (AWS), you must provide an existing private VPC and subnets to host the cluster. The installation program must also be able to resolve the DNS records that the cluster requires. The installation program configures the Ingress Operator and API server for access from only the private network.
The cluster still requires access to Internet to access the AWS APIs.
The following items are not required or created when you install a private cluster:
- Public subnets
- Public load balancers, which support public ingress
-
A public Route 53 zone that matches the
baseDomainfor the cluster
The installation program does use the baseDomain that you specify to create a private Route 53 zone and the required records for the cluster. The cluster is configured so that the Operators do not create public records for the cluster and all cluster machines are placed in the private subnets that you specify.
4.9.2.1.1. Limitations
The ability to add public functionality to a private cluster is limited.
- You cannot make the Kubernetes API endpoints public after installation without taking additional actions, including creating public subnets in the VPC for each availability zone in use, creating a public load balancer, and configuring the control plane security groups to allow traffic from Internet on 6443 (Kubernetes API port).
-
If you use a public Service type load balancer, you must tag a public subnet in each availability zone with
kubernetes.io/cluster/<cluster-infra-id>: sharedso that AWS can use them to create public load balancers.
4.9.3. About using a custom VPC
In OpenShift Container Platform 4.7, you can deploy a cluster into existing subnets in an existing Amazon Virtual Private Cloud (VPC) in Amazon Web Services (AWS). By deploying OpenShift Container Platform into an existing AWS VPC, you might be able to avoid limit constraints in new accounts or more easily abide by the operational constraints that your company’s guidelines set. If you cannot obtain the infrastructure creation permissions that are required to create the VPC yourself, use this installation option.
Because the installation program cannot know what other components are also in your existing subnets, it cannot choose subnet CIDRs and so forth on your behalf. You must configure networking for the subnets that you install your cluster to yourself.
4.9.3.1. Requirements for using your VPC
The installation program no longer creates the following components:
- Internet gateways
- NAT gateways
- Subnets
- Route tables
- VPCs
- VPC DHCP options
- VPC endpoints
The installation program requires that you use the cloud-provided DNS server. Using a custom DNS server is not supported and causes the installation to fail.
If you use a custom VPC, you must correctly configure it and its subnets for the installation program and the cluster to use. See Amazon VPC console wizard configurations and Work with VPCs and subnets in the AWS documentation for more information on creating and managing an AWS VPC.
The installation program cannot:
- Subdivide network ranges for the cluster to use.
- Set route tables for the subnets.
- Set VPC options like DHCP.
You must complete these tasks before you install the cluster. See VPC networking components and Route tables for your VPC for more information on configuring networking in an AWS VPC.
Your VPC must meet the following characteristics:
The VPC must not use the
kubernetes.io/cluster/.*: ownedtag.The installation program modifies your subnets to add the
kubernetes.io/cluster/.*: sharedtag, so your subnets must have at least one free tag slot available for it. See Tag Restrictions in the AWS documentation to confirm that the installation program can add a tag to each subnet that you specify.You must enable the
enableDnsSupportandenableDnsHostnamesattributes in your VPC, so that the cluster can use the Route 53 zones that are attached to the VPC to resolve cluster’s internal DNS records. See DNS Support in Your VPC in the AWS documentation.If you prefer to use your own Route 53 hosted private zone, you must associate the existing hosted zone with your VPC prior to installing a cluster. You can define your hosted zone using the
platform.aws.hostedZonefield in theinstall-config.yamlfile.- If you use a cluster with public access, you must create a public and a private subnet for each availability zone that your cluster uses. Each availability zone can contain no more than one public and one private subnet.
If you are working in a disconnected environment, you are unable to reach the public IP addresses for EC2 and ELB endpoints. To resolve this, you must create a VPC endpoint and attach it to the subnet that the clusters are using. The endpoints should be named as follows:
-
ec2.<region>.amazonaws.com -
elasticloadbalancing.<region>.amazonaws.com -
s3.<region>.amazonaws.com
Required VPC components
You must provide a suitable VPC and subnets that allow communication to your machines.
| Component | AWS type | Description | |
|---|---|---|---|
| VPC |
| You must provide a public VPC for the cluster to use. The VPC uses an endpoint that references the route tables for each subnet to improve communication with the registry that is hosted in S3. | |
| Public subnets |
| Your VPC must have public subnets for between 1 and 3 availability zones and associate them with appropriate Ingress rules. | |
| Internet gateway |
| You must have a public Internet gateway, with public routes, attached to the VPC. In the provided templates, each public subnet has a NAT gateway with an EIP address. These NAT gateways allow cluster resources, like private subnet instances, to reach the Internet and are not required for some restricted network or proxy scenarios. | |
| Network access control |
| You must allow the VPC to access the following ports: | |
| Port | Reason | ||
|
| Inbound HTTP traffic | ||
|
| Inbound HTTPS traffic | ||
|
| Inbound SSH traffic | ||
|
| Inbound ephemeral traffic | ||
|
| Outbound ephemeral traffic | ||
| Private subnets |
| Your VPC can have private subnets. The provided CloudFormation templates can create private subnets for between 1 and 3 availability zones. If you use private subnets, you must provide appropriate routes and tables for them. | |
4.9.3.2. VPC validation
To ensure that the subnets that you provide are suitable, the installation program confirms the following data:
- All the subnets that you specify exist.
- You provide private subnets.
- The subnet CIDRs belong to the machine CIDR that you specified.
- You provide subnets for each availability zone. Each availability zone contains no more than one public and one private subnet. If you use a private cluster, provide only a private subnet for each availability zone. Otherwise, provide exactly one public and private subnet for each availability zone.
- You provide a public subnet for each private subnet availability zone. Machines are not provisioned in availability zones that you do not provide private subnets for.
If you destroy a cluster that uses an existing VPC, the VPC is not deleted. When you remove the OpenShift Container Platform cluster from a VPC, the kubernetes.io/cluster/.*: shared tag is removed from the subnets that it used.
4.9.3.3. Division of permissions
Starting with OpenShift Container Platform 4.3, you do not need all of the permissions that are required for an installation program-provisioned infrastructure cluster to deploy a cluster. This change mimics the division of permissions that you might have at your company: some individuals can create different resource in your clouds than others. For example, you might be able to create application-specific items, like instances, buckets, and load balancers, but not networking-related components such as VPCs, subnets, or ingress rules.
The AWS credentials that you use when you create your cluster do not need the networking permissions that are required to make VPCs and core networking components within the VPC, such as subnets, routing tables, Internet gateways, NAT, and VPN. You still need permission to make the application resources that the machines within the cluster require, such as ELBs, security groups, S3 buckets, and nodes.
4.9.3.4. Isolation between clusters
If you deploy OpenShift Container Platform to an existing network, the isolation of cluster services is reduced in the following ways:
- You can install multiple OpenShift Container Platform clusters in the same VPC.
- ICMP ingress is allowed from the entire network.
- TCP 22 ingress (SSH) is allowed to the entire network.
- Control plane TCP 6443 ingress (Kubernetes API) is allowed to the entire network.
- Control plane TCP 22623 ingress (MCS) is allowed to the entire network.
4.9.4. Internet access for OpenShift Container Platform
In OpenShift Container Platform 4.7, you require access to the Internet to install your cluster.
You must have Internet access to:
- Access OpenShift Cluster Manager to download the installation program and perform subscription management. If the cluster has internet access and you do not disable Telemetry, that service automatically entitles your cluster.
- Access Quay.io to obtain the packages that are required to install your cluster.
- Obtain the packages that are required to perform cluster updates.
If your cluster cannot have direct Internet access, you can perform a restricted network installation on some types of infrastructure that you provision. During that process, you download the content that is required and use it to populate a mirror registry with the packages that you need to install a cluster and generate the installation program. With some installation types, the environment that you install your cluster in will not require Internet access. Before you update the cluster, you update the content of the mirror registry.
4.9.5. Generating an SSH private key and adding it to the agent
If you want to perform installation debugging or disaster recovery on your cluster, you must provide an SSH key to both your ssh-agent and the installation program. You can use this key to access the bootstrap machine in a public cluster to troubleshoot installation issues.
In a production environment, you require disaster recovery and debugging.
You can use this key to SSH into the master nodes as the user core. When you deploy the cluster, the key is added to the core user’s ~/.ssh/authorized_keys list.
You must use a local key, not one that you configured with platform-specific approaches such as AWS key pairs.
Procedure
If you do not have an SSH key that is configured for password-less authentication on your computer, create one. For example, on a computer that uses a Linux operating system, run the following command:
$ ssh-keygen -t ed25519 -N '' \ -f <path>/<file_name>1 - 1
- Specify the path and file name, such as
~/.ssh/id_rsa, of the new SSH key. If you have an existing key pair, ensure your public key is in the your~/.sshdirectory.
Running this command generates an SSH key that does not require a password in the location that you specified.
NoteIf you plan to install an OpenShift Container Platform cluster that uses FIPS Validated / Modules in Process cryptographic libraries on the
x86_64architecture, do not create a key that uses theed25519algorithm. Instead, create a key that uses thersaorecdsaalgorithm.Start the
ssh-agentprocess as a background task:$ eval "$(ssh-agent -s)"Example output
Agent pid 31874NoteIf your cluster is in FIPS mode, only use FIPS-compliant algorithms to generate the SSH key. The key must be either RSA or ECDSA.
Add your SSH private key to the
ssh-agent:$ ssh-add <path>/<file_name>1 Example output
Identity added: /home/<you>/<path>/<file_name> (<computer_name>)- 1
- Specify the path and file name for your SSH private key, such as
~/.ssh/id_rsa
Next steps
- When you install OpenShift Container Platform, provide the SSH public key to the installation program.
4.9.6. Obtaining the installation program
Before you install OpenShift Container Platform, download the installation file on a local computer.
Prerequisites
- You have a computer that runs Linux or macOS, with 500 MB of local disk space
Procedure
- Access the Infrastructure Provider page on the OpenShift Cluster Manager site. If you have a Red Hat account, log in with your credentials. If you do not, create an account.
- Select your infrastructure provider.
Navigate to the page for your installation type, download the installation program for your operating system, and place the file in the directory where you will store the installation configuration files.
ImportantThe installation program creates several files on the computer that you use to install your cluster. You must keep the installation program and the files that the installation program creates after you finish installing the cluster. Both files are required to delete the cluster.
ImportantDeleting the files created by the installation program does not remove your cluster, even if the cluster failed during installation. To remove your cluster, complete the OpenShift Container Platform uninstallation procedures for your specific cloud provider.
Extract the installation program. For example, on a computer that uses a Linux operating system, run the following command:
$ tar xvf openshift-install-linux.tar.gz- Download your installation pull secret from the Red Hat OpenShift Cluster Manager. This pull secret allows you to authenticate with the services that are provided by the included authorities, including Quay.io, which serves the container images for OpenShift Container Platform components.
4.9.7. Manually creating the installation configuration file
For installations of a private OpenShift Container Platform cluster that are only accessible from an internal network and are not visible to the Internet, you must manually generate your installation configuration file.
Prerequisites
- Obtain the OpenShift Container Platform installation program and the access token for your cluster.
Procedure
Create an installation directory to store your required installation assets in:
$ mkdir <installation_directory>ImportantYou must create a directory. Some installation assets, like bootstrap X.509 certificates have short expiration intervals, so you must not reuse an installation directory. If you want to reuse individual files from another cluster installation, you can copy them into your directory. However, the file names for the installation assets might change between releases. Use caution when copying installation files from an earlier OpenShift Container Platform version.
Customize the following
install-config.yamlfile template and save it in the<installation_directory>.NoteYou must name this configuration file
install-config.yaml.Back up the
install-config.yamlfile so that you can use it to install multiple clusters.ImportantThe
install-config.yamlfile is consumed during the next step of the installation process. You must back it up now.
4.9.7.1. Installation configuration parameters
Before you deploy an OpenShift Container Platform cluster, you provide parameter values to describe your account on the cloud platform that hosts your cluster and optionally customize your cluster’s platform. When you create the install-config.yaml installation configuration file, you provide values for the required parameters through the command line. If you customize your cluster, you can modify the install-config.yaml file to provide more details about the platform.
After installation, you cannot modify these parameters in the install-config.yaml file.
The openshift-install command does not validate field names for parameters. If an incorrect name is specified, the related file or object is not created, and no error is reported. Ensure that the field names for any parameters that are specified are correct.
4.9.7.1.1. Required configuration parameters
Required installation configuration parameters are described in the following table:
| Parameter | Description | Values |
|---|---|---|
|
|
The API version for the | String |
|
|
The base domain of your cloud provider. The base domain is used to create routes to your OpenShift Container Platform cluster components. The full DNS name for your cluster is a combination of the |
A fully-qualified domain or subdomain name, such as |
|
|
Kubernetes resource | Object |
|
|
The name of the cluster. DNS records for the cluster are all subdomains of |
String of lowercase letters, hyphens ( |
|
|
The configuration for the specific platform upon which to perform the installation: | Object |
|
| Get a pull secret from the Red Hat OpenShift Cluster Manager to authenticate downloading container images for OpenShift Container Platform components from services such as Quay.io. |
|
4.9.7.1.2. Network configuration parameters
You can customize your installation configuration based on the requirements of your existing network infrastructure. For example, you can expand the IP address block for the cluster network or provide different IP address blocks than the defaults.
Only IPv4 addresses are supported.
| Parameter | Description | Values |
|---|---|---|
|
| The configuration for the cluster network. | Object Note
You cannot modify parameters specified by the |
|
| The cluster network provider Container Network Interface (CNI) plug-in to install. |
Either |
|
| The IP address blocks for pods.
The default value is If you specify multiple IP address blocks, the blocks must not overlap. | An array of objects. For example: |
|
|
Required if you use An IPv4 network. |
An IP address block in Classless Inter-Domain Routing (CIDR) notation. The prefix length for an IPv4 block is between |
|
|
The subnet prefix length to assign to each individual node. For example, if | A subnet prefix.
The default value is |
|
|
The IP address block for services. The default value is The OpenShift SDN and OVN-Kubernetes network providers support only a single IP address block for the service network. | An array with an IP address block in CIDR format. For example: |
|
| The IP address blocks for machines. If you specify multiple IP address blocks, the blocks must not overlap. | An array of objects. For example: |
|
|
Required if you use | An IP network block in CIDR notation.
For example, Note
Set the |
4.9.7.1.3. Optional configuration parameters
Optional installation configuration parameters are described in the following table:
| Parameter | Description | Values |
|---|---|---|
|
| A PEM-encoded X.509 certificate bundle that is added to the nodes' trusted certificate store. This trust bundle may also be used when a proxy has been configured. | String |
|
| The configuration for the machines that comprise the compute nodes. |
Array of |
|
|
Determines the instruction set architecture of the machines in the pool. Currently, heteregeneous clusters are not supported, so all pools must specify the same architecture. Valid values are | String |
|
|
Whether to enable or disable simultaneous multithreading, or Important If you disable simultaneous multithreading, ensure that your capacity planning accounts for the dramatically decreased machine performance. |
|
|
|
Required if you use |
|
|
|
Required if you use |
|
|
| The number of compute machines, which are also known as worker machines, to provision. |
A positive integer greater than or equal to |
|
| The configuration for the machines that comprise the control plane. |
Array of |
|
|
Determines the instruction set architecture of the machines in the pool. Currently, heterogeneous clusters are not supported, so all pools must specify the same architecture. Valid values are | String |
|
|
Whether to enable or disable simultaneous multithreading, or Important If you disable simultaneous multithreading, ensure that your capacity planning accounts for the dramatically decreased machine performance. |
|
|
|
Required if you use |
|
|
|
Required if you use |
|
|
| The number of control plane machines to provision. |
The only supported value is |
|
| The Cloud Credential Operator (CCO) mode. If no mode is specified, the CCO dynamically tries to determine the capabilities of the provided credentials, with a preference for mint mode on the platforms where multiple modes are supported. Note Not all CCO modes are supported for all cloud providers. For more information on CCO modes, see the Cloud Credential Operator entry in the Cluster Operators reference content. |
|
|
|
Enable or disable FIPS mode. The default is Important
The use of FIPS Validated / Modules in Process cryptographic libraries is only supported on OpenShift Container Platform deployments on the Note If you are using Azure File storage, you cannot enable FIPS mode. |
|
|
| Sources and repositories for the release-image content. |
Array of objects. Includes a |
|
|
Required if you use | String |
|
| Specify one or more repositories that may also contain the same images. | Array of strings |
|
| How to publish or expose the user-facing endpoints of your cluster, such as the Kubernetes API, OpenShift routes. |
|
|
| The SSH key or keys to authenticate access your cluster machines. Note
For production OpenShift Container Platform clusters on which you want to perform installation debugging or disaster recovery, specify an SSH key that your | One or more keys. For example: |
4.9.7.1.4. Optional AWS configuration parameters
Optional AWS configuration parameters are described in the following table:
| Parameter | Description | Values |
|---|---|---|
|
| The AWS AMI used to boot compute machines for the cluster. This is required for regions that require a custom RHCOS AMI. | Any published or custom RHCOS AMI that belongs to the set AWS region. |
|
| A pre-existing AWS IAM role applied to the compute machine pool instance profiles. You can use these fields to match naming schemes and include predefined permissions boundaries for your IAM roles. If undefined, the installation program creates a new IAM role. | The name of a valid AWS IAM role. |
|
| The Input/Output Operations Per Second (IOPS) that is reserved for the root volume. |
Integer, for example |
|
| The size in GiB of the root volume. |
Integer, for example |
|
| The type of the root volume. |
Valid AWS EBS volume type, such as |
|
| The Amazon Resource Name (key ARN) of a KMS key. This is required to encrypt OS volumes of worker nodes with a specific KMS key. | Valid key ID or the key ARN. |
|
| The EC2 instance type for the compute machines. |
Valid AWS instance type, such as |
|
| The availability zones where the installation program creates machines for the compute machine pool. If you provide your own VPC, you must provide a subnet in that availability zone. |
A list of valid AWS availability zones, such as |
|
| The AWS region that the installation program creates compute resources in. |
Any valid AWS region, such as |
|
| The AWS AMI used to boot control plane machines for the cluster. This is required for regions that require a custom RHCOS AMI. | Any published or custom RHCOS AMI that belongs to the set AWS region. |
|
| A pre-existing AWS IAM role applied to the control plane machine pool instance profiles. You can use these fields to match naming schemes and include predefined permissions boundaries for your IAM roles. If undefined, the installation program creates a new IAM role. | The name of a valid AWS IAM role. |
|
| The Amazon Resource Name (key ARN) of a KMS key. This is required to encrypt OS volumes of control plane nodes with a specific KMS key. | Valid key ID and the key ARN. |
|
| The EC2 instance type for the control plane machines. |
Valid AWS instance type, such as |
|
| The availability zones where the installation program creates machines for the control plane machine pool. |
A list of valid AWS availability zones, such as |
|
| The AWS region that the installation program creates control plane resources in. |
Valid AWS region, such as |
|
| The AWS AMI used to boot all machines for the cluster. If set, the AMI must belong to the same region as the cluster. This is required for regions that require a custom RHCOS AMI. | Any published or custom RHCOS AMI that belongs to the set AWS region. |
|
| An existing Route 53 private hosted zone for the cluster. You can only use a pre-existing hosted zone when also supplying your own VPC. The hosted zone must already be associated with the user-provided VPC before installation. Also, the domain of the hosted zone must be the cluster domain or a parent of the cluster domain. If undefined, the installation program creates a new hosted zone. |
String, for example |
|
| The AWS service endpoint name. Custom endpoints are only required for cases where alternative AWS endpoints, like FIPS, must be used. Custom API endpoints can be specified for EC2, S3, IAM, Elastic Load Balancing, Tagging, Route 53, and STS AWS services. | Valid AWS service endpoint name. |
|
|
The AWS service endpoint URL. The URL must use the | Valid AWS service endpoint URL. |
|
| A map of keys and values that the installation program adds as tags to all resources that it creates. |
Any valid YAML map, such as key value pairs in the |
|
|
If you provide the VPC instead of allowing the installation program to create the VPC for you, specify the subnet for the cluster to use. The subnet must be part of the same | Valid subnet IDs. |
4.9.7.2. Supported AWS machine types
The following Amazon Web Services (AWS) instance types are supported with OpenShift Container Platform.
Example 4.19. Instance types for machines
| Instance type | Bootstrap | Control plane | Compute |
|---|---|---|---|
|
| x | ||
|
| x | ||
|
| x | x | |
|
| x | x | |
|
| x | x | |
|
| x | x | |
|
| x | x | |
|
| x | ||
|
| x | x | |
|
| x | x | |
|
| x | x | |
|
| x | x | |
|
| x | x | |
|
| x | x | |
|
| x | ||
|
| x | x | |
|
| x | x | |
|
| x | x | |
|
| x | x | |
|
| x | x | |
|
| x | x | |
|
| x | x | |
|
| x | x | |
|
| x | x | |
|
| x | x | |
|
| x | x | |
|
| x | x | |
|
| x | x | |
|
| x | x | |
|
| x | ||
|
| x | x | |
|
| x | x | |
|
| x | x | |
|
| x | x | |
|
| x | x | |
|
| x | x | |
|
| x | ||
|
| x | x | |
|
| x | x | |
|
| x | x | |
|
| x | x | |
|
| x | x | |
|
| x | x | |
|
| x | ||
|
| x | x | |
|
| x | x | |
|
| x | x | |
|
| x | x | |
|
| x | x | |
|
| x | ||
|
| x | x | |
|
| x | x | |
|
| x | x | |
|
| x | x | |
|
| x | x | |
|
| x | x | |
|
| x | x | |
|
| x | ||
|
| x | x | |
|
| x | x | |
|
| x | x | |
|
| x | x | |
|
| x | x | |
|
| x | x | |
|
| x | x | |
|
| x | ||
|
| x | ||
|
| x | ||
|
| x | ||
|
| x | ||
|
| x |
4.9.7.3. Sample customized install-config.yaml file for AWS
You can customize the install-config.yaml file to specify more details about your OpenShift Container Platform cluster’s platform or modify the values of the required parameters.
This sample YAML file is provided for reference only. You must obtain your install-config.yaml file by using the installation program and modify it.
apiVersion: v1
baseDomain: example.com
credentialsMode: Mint
controlPlane:
hyperthreading: Enabled
name: master
platform:
aws:
zones:
- us-west-2a
- us-west-2b
rootVolume:
iops: 4000
size: 500
type: io1
type: m5.xlarge
replicas: 3
compute:
- hyperthreading: Enabled
name: worker
platform:
aws:
rootVolume:
iops: 2000
size: 500
type: io1
type: c5.4xlarge
zones:
- us-west-2c
replicas: 3
metadata:
name: test-cluster
networking:
clusterNetwork:
- cidr: 10.128.0.0/14
hostPrefix: 23
machineNetwork:
- cidr: 10.0.0.0/16
networkType: OpenShiftSDN
serviceNetwork:
- 172.30.0.0/16
platform:
aws:
region: us-west-2
userTags:
adminContact: jdoe
costCenter: 7536
subnets:
- subnet-1
- subnet-2
- subnet-3
amiID: ami-96c6f8f7
serviceEndpoints:
- name: ec2
url: https://vpce-id.ec2.us-west-2.vpce.amazonaws.com
hostedZone: Z3URY6TWQ91KVV
fips: false
sshKey: ssh-ed25519 AAAA...
publish: Internal
pullSecret: '{"auths": ...}' - 1 10 11 19
- Required. The installation program prompts you for this value.
- 2
- Optional: Add this parameter to force the Cloud Credential Operator (CCO) to use the specified mode, instead of having the CCO dynamically try to determine the capabilities of the credentials. For details about CCO modes, see the Cloud Credential Operator entry in the Platform Operators reference content.
- 3 7
- If you do not provide these parameters and values, the installation program provides the default value.
- 4
- The
controlPlanesection is a single mapping, but thecomputesection is a sequence of mappings. To meet the requirements of the different data structures, the first line of thecomputesection must begin with a hyphen,-, and the first line of thecontrolPlanesection must not. Only one control plane pool is used. - 5 8
- Whether to enable or disable simultaneous multithreading, or
hyperthreading. By default, simultaneous multithreading is enabled to increase the performance of your machines' cores. You can disable it by setting the parameter value toDisabled. If you disable simultaneous multithreading in some cluster machines, you must disable it in all cluster machines.ImportantIf you disable simultaneous multithreading, ensure that your capacity planning accounts for the dramatically decreased machine performance. Use larger instance types, such as
m4.2xlargeorm5.2xlarge, for your machines if you disable simultaneous multithreading. - 6 9
- To configure faster storage for etcd, especially for larger clusters, set the storage type as
io1and setiopsto2000. - 12
- If you provide your own VPC, specify subnets for each availability zone that your cluster uses.
- 13
- The ID of the AMI used to boot machines for the cluster. If set, the AMI must belong to the same region as the cluster.
- 14
- The AWS service endpoints. Custom endpoints are required when installing to an unknown AWS region. The endpoint URL must use the
httpsprotocol and the host must trust the certificate. - 15
- The ID of your existing Route 53 private hosted zone. Providing an existing hosted zone requires that you supply your own VPC and the hosted zone is already associated with the VPC prior to installing your cluster. If undefined, the installation program creates a new hosted zone.
- 16
- Whether to enable or disable FIPS mode. By default, FIPS mode is not enabled. If FIPS mode is enabled, the Red Hat Enterprise Linux CoreOS (RHCOS) machines that OpenShift Container Platform runs on bypass the default Kubernetes cryptography suite and use the cryptography modules that are provided with RHCOS instead.Important
The use of FIPS Validated / Modules in Process cryptographic libraries is only supported on OpenShift Container Platform deployments on the
x86_64architecture. - 17
- You can optionally provide the
sshKeyvalue that you use to access the machines in your cluster.NoteFor production OpenShift Container Platform clusters on which you want to perform installation debugging or disaster recovery, specify an SSH key that your
ssh-agentprocess uses. - 18
- How to publish the user-facing endpoints of your cluster. Set
publishtoInternalto deploy a private cluster, which cannot be accessed from the Internet. The default value isExternal.
4.9.7.4. Configuring the cluster-wide proxy during installation
Production environments can deny direct access to the Internet and instead have an HTTP or HTTPS proxy available. You can configure a new OpenShift Container Platform cluster to use a proxy by configuring the proxy settings in the install-config.yaml file.
Prerequisites
-
You have an existing
install-config.yamlfile. You reviewed the sites that your cluster requires access to and determined whether any of them need to bypass the proxy. By default, all cluster egress traffic is proxied, including calls to hosting cloud provider APIs. You added sites to the
Proxyobject’sspec.noProxyfield to bypass the proxy if necessary.NoteThe
Proxyobjectstatus.noProxyfield is populated with the values of thenetworking.machineNetwork[].cidr,networking.clusterNetwork[].cidr, andnetworking.serviceNetwork[]fields from your installation configuration.For installations on Amazon Web Services (AWS), Google Cloud Platform (GCP), Microsoft Azure, and Red Hat OpenStack Platform (RHOSP), the
Proxyobjectstatus.noProxyfield is also populated with the instance metadata endpoint (169.254.169.254).-
If your cluster is on AWS, you added the
ec2.<region>.amazonaws.com,elasticloadbalancing.<region>.amazonaws.com, ands3.<region>.amazonaws.comendpoints to your VPC endpoint. These endpoints are required to complete requests from the nodes to the AWS EC2 API. Because the proxy works on the container level, not the node level, you must route these requests to the AWS EC2 API through the AWS private network. Adding the public IP address of the EC2 API to your allowlist in your proxy server is not sufficient.
Procedure
Edit your
install-config.yamlfile and add the proxy settings. For example:apiVersion: v1 baseDomain: my.domain.com proxy: httpProxy: http://<username>:<pswd>@<ip>:<port>1 httpsProxy: https://<username>:<pswd>@<ip>:<port>2 noProxy: example.com3 additionalTrustBundle: |4 -----BEGIN CERTIFICATE----- <MY_TRUSTED_CA_CERT> -----END CERTIFICATE----- ...- 1
- A proxy URL to use for creating HTTP connections outside the cluster. The URL scheme must be
http. - 2
- A proxy URL to use for creating HTTPS connections outside the cluster.
- 3
- A comma-separated list of destination domain names, IP addresses, or other network CIDRs to exclude from proxying. Preface a domain with
.to match subdomains only. For example,.y.commatchesx.y.com, but noty.com. Use*to bypass the proxy for all destinations. - 4
- If provided, the installation program generates a config map that is named
user-ca-bundlein theopenshift-confignamespace to hold the additional CA certificates. If you provideadditionalTrustBundleand at least one proxy setting, theProxyobject is configured to reference theuser-ca-bundleconfig map in thetrustedCAfield. The Cluster Network Operator then creates atrusted-ca-bundleconfig map that merges the contents specified for thetrustedCAparameter with the RHCOS trust bundle. TheadditionalTrustBundlefield is required unless the proxy’s identity certificate is signed by an authority from the RHCOS trust bundle.
NoteThe installation program does not support the proxy
readinessEndpointsfield.- Save the file and reference it when installing OpenShift Container Platform.
The installation program creates a cluster-wide proxy that is named cluster that uses the proxy settings in the provided install-config.yaml file. If no proxy settings are provided, a cluster Proxy object is still created, but it will have a nil spec.
Only the Proxy object named cluster is supported, and no additional proxies can be created.
4.9.8. Deploying the cluster
You can install OpenShift Container Platform on a compatible cloud platform.
You can run the create cluster command of the installation program only once, during initial installation.
Prerequisites
- Configure an account with the cloud platform that hosts your cluster.
- Obtain the OpenShift Container Platform installation program and the pull secret for your cluster.
Procedure
Change to the directory that contains the installation program and initialize the cluster deployment:
$ ./openshift-install create cluster --dir <installation_directory> \1 --log-level=info2 NoteIf the cloud provider account that you configured on your host does not have sufficient permissions to deploy the cluster, the installation process stops, and the missing permissions are displayed.
When the cluster deployment completes, directions for accessing your cluster, including a link to its web console and credentials for the
kubeadminuser, display in your terminal.Example output
... INFO Install complete! INFO To access the cluster as the system:admin user when using 'oc', run 'export KUBECONFIG=/home/myuser/install_dir/auth/kubeconfig' INFO Access the OpenShift web-console here: https://console-openshift-console.apps.mycluster.example.com INFO Login to the console with user: "kubeadmin", and password: "4vYBz-Ee6gm-ymBZj-Wt5AL" INFO Time elapsed: 36m22sNoteThe cluster access and credential information also outputs to
<installation_directory>/.openshift_install.logwhen an installation succeeds.Important-
The Ignition config files that the installation program generates contain certificates that expire after 24 hours, which are then renewed at that time. If the cluster is shut down before renewing the certificates and the cluster is later restarted after the 24 hours have elapsed, the cluster automatically recovers the expired certificates. The exception is that you must manually approve the pending
node-bootstrappercertificate signing requests (CSRs) to recover kubelet certificates. See the documentation for Recovering from expired control plane certificates for more information. - It is recommended that you use Ignition config files within 12 hours after they are generated because the 24-hour certificate rotates from 16 to 22 hours after the cluster is installed. By using the Ignition config files within 12 hours, you can avoid installation failure if the certificate update runs during installation.
ImportantYou must not delete the installation program or the files that the installation program creates. Both are required to delete the cluster.
-
The Ignition config files that the installation program generates contain certificates that expire after 24 hours, which are then renewed at that time. If the cluster is shut down before renewing the certificates and the cluster is later restarted after the 24 hours have elapsed, the cluster automatically recovers the expired certificates. The exception is that you must manually approve the pending
4.9.9. Installing the OpenShift CLI by downloading the binary
You can install the OpenShift CLI (oc) to interact with OpenShift Container Platform from a command-line interface. You can install oc on Linux, Windows, or macOS.
If you installed an earlier version of oc, you cannot use it to complete all of the commands in OpenShift Container Platform 4.7. Download and install the new version of oc.
4.9.9.1. Installing the OpenShift CLI on Linux
You can install the OpenShift CLI (oc) binary on Linux by using the following procedure.
Procedure
- Navigate to the OpenShift Container Platform downloads page on the Red Hat Customer Portal.
- Select the appropriate version in the Version drop-down menu.
- Click Download Now next to the OpenShift v4.7 Linux Client entry and save the file.
Unpack the archive:
$ tar xvzf <file>Place the
ocbinary in a directory that is on yourPATH.To check your
PATH, execute the following command:$ echo $PATH
After you install the OpenShift CLI, it is available using the oc command:
$ oc <command>4.9.9.2. Installing the OpenShift CLI on Windows
You can install the OpenShift CLI (oc) binary on Windows by using the following procedure.
Procedure
- Navigate to the OpenShift Container Platform downloads page on the Red Hat Customer Portal.
- Select the appropriate version in the Version drop-down menu.
- Click Download Now next to the OpenShift v4.7 Windows Client entry and save the file.
- Unzip the archive with a ZIP program.
Move the
ocbinary to a directory that is on yourPATH.To check your
PATH, open the command prompt and execute the following command:C:\> path
After you install the OpenShift CLI, it is available using the oc command:
C:\> oc <command>4.9.9.3. Installing the OpenShift CLI on macOS
You can install the OpenShift CLI (oc) binary on macOS by using the following procedure.
Procedure
- Navigate to the OpenShift Container Platform downloads page on the Red Hat Customer Portal.
- Select the appropriate version in the Version drop-down menu.
- Click Download Now next to the OpenShift v4.7 MacOSX Client entry and save the file.
- Unpack and unzip the archive.
Move the
ocbinary to a directory on your PATH.To check your
PATH, open a terminal and execute the following command:$ echo $PATH
After you install the OpenShift CLI, it is available using the oc command:
$ oc <command>4.9.10. Logging in to the cluster by using the CLI
You can log in to your cluster as a default system user by exporting the cluster kubeconfig file. The kubeconfig file contains information about the cluster that is used by the CLI to connect a client to the correct cluster and API server. The file is specific to a cluster and is created during OpenShift Container Platform installation.
Prerequisites
- You deployed an OpenShift Container Platform cluster.
-
You installed the
ocCLI.
Procedure
Export the
kubeadmincredentials:$ export KUBECONFIG=<installation_directory>/auth/kubeconfig1 - 1
- For
<installation_directory>, specify the path to the directory that you stored the installation files in.
Verify you can run
occommands successfully using the exported configuration:$ oc whoamiExample output
system:admin
4.9.11. Logging in to the cluster by using the web console
The kubeadmin user exists by default after an OpenShift Container Platform installation. You can log in to your cluster as the kubeadmin user by using the OpenShift Container Platform web console.
Prerequisites
- You have access to the installation host.
- You completed a cluster installation and all cluster Operators are available.
Procedure
Obtain the password for the
kubeadminuser from thekubeadmin-passwordfile on the installation host:$ cat <installation_directory>/auth/kubeadmin-passwordNoteAlternatively, you can obtain the
kubeadminpassword from the<installation_directory>/.openshift_install.loglog file on the installation host.List the OpenShift Container Platform web console route:
$ oc get routes -n openshift-console | grep 'console-openshift'NoteAlternatively, you can obtain the OpenShift Container Platform route from the
<installation_directory>/.openshift_install.loglog file on the installation host.Example output
console console-openshift-console.apps.<cluster_name>.<base_domain> console https reencrypt/Redirect None-
Navigate to the route detailed in the output of the preceding command in a web browser and log in as the
kubeadminuser.
4.9.12. Telemetry access for OpenShift Container Platform
In OpenShift Container Platform 4.7, the Telemetry service, which runs by default to provide metrics about cluster health and the success of updates, requires internet access. If your cluster is connected to the internet, Telemetry runs automatically, and your cluster is registered to OpenShift Cluster Manager.
After you confirm that your OpenShift Cluster Manager inventory is correct, either maintained automatically by Telemetry or manually by using OpenShift Cluster Manager, use subscription watch to track your OpenShift Container Platform subscriptions at the account or multi-cluster level.
4.9.13. Next steps
- Validating an installation.
- Customize your cluster.
- If necessary, you can opt out of remote health reporting.
- If necessary, you can remove cloud provider credentials.
4.10. Installing a cluster on AWS into a government or secret region
In OpenShift Container Platform version 4.7, you can install a cluster on Amazon Web Services (AWS) into a government or secret region. To configure the region, modify parameters in the install-config.yaml file before you install the cluster.
4.10.1. Prerequisites
- Review details about the OpenShift Container Platform installation and update processes.
Configure an AWS account to host the cluster.
ImportantIf you have an AWS profile stored on your computer, it must not use a temporary session token that you generated while using a multi-factor authentication device. The cluster continues to use your current AWS credentials to create AWS resources for the entire life of the cluster, so you must use long-lived credentials. To generate appropriate keys, see Managing Access Keys for IAM Users in the AWS documentation. You can supply the keys when you run the installation program.
- If you use a firewall, you must configure it to allow the sites that your cluster requires access to.
- If you do not allow the system to manage identity and access management (IAM), then a cluster administrator can manually create and maintain IAM credentials. Manual mode can also be used in environments where the cloud IAM APIs are not reachable.
4.10.2. AWS government and secret regions
OpenShift Container Platform supports deploying a cluster to AWS GovCloud (US) regions and the AWS Commercial Cloud Services (C2S) Secret Region. These regions are specifically designed for US government agencies at the federal, state, and local level, as well as contractors, educational institutions, and other US customers that must run sensitive workloads in the cloud.
These regions do not have published Red Hat Enterprise Linux CoreOS (RHCOS) Amazon Machine Images (AMI) to select, so you must upload a custom AMI that belongs to that region.
The following AWS GovCloud partitions are supported:
-
us-gov-west-1 -
us-gov-east-1
The following AWS Secret Region partition is supported:
-
us-iso-east-1
The maximum supported MTU in an AWS Top Secret Region is not the same as AWS commercial. For more information about configuring MTU during installation, see the Cluster Network Operator configuration object section in Installing a cluster on AWS with network customizations
The AWS government or secret region, and accompanying custom AMI, must be manually configured in the install-config.yaml file since RHCOS AMIs are not provided by Red Hat for those regions.
If you are deploying to the C2S Secret Region, you must also define a custom CA certificate in the additionalTrustBundle field of the install-config.yaml file because the AWS API requires a custom CA trust bundle. To allow the installation program to access the AWS API, the CA certificates must also be defined on the machine that runs the installation program. You must add the CA bundle to the trust store on the machine, use the AWS_CA_BUNDLE environment variable, or define the CA bundle in the ca_bundle field of the AWS config file.
4.10.3. Private clusters
You can deploy a private OpenShift Container Platform cluster that does not expose external endpoints. Private clusters are accessible from only an internal network and are not visible to the Internet.
Public zones are not supported in Route 53 in AWS GovCloud or Secret Regions. Therefore, clusters must be private if they are deployed to an AWS government or secret region.
By default, OpenShift Container Platform is provisioned to use publicly-accessible DNS and endpoints. A private cluster sets the DNS, Ingress Controller, and API server to private when you deploy your cluster. This means that the cluster resources are only accessible from your internal network and are not visible to the internet.
To deploy a private cluster, you must use existing networking that meets your requirements. Your cluster resources might be shared between other clusters on the network.
Additionally, you must deploy a private cluster from a machine that has access the API services for the cloud you provision to, the hosts on the network that you provision, and to the internet to obtain installation media. You can use any machine that meets these access requirements and follows your company’s guidelines. For example, this machine can be a bastion host on your cloud network or a machine that has access to the network through a VPN.
4.10.3.1. Private clusters in AWS
To create a private cluster on Amazon Web Services (AWS), you must provide an existing private VPC and subnets to host the cluster. The installation program must also be able to resolve the DNS records that the cluster requires. The installation program configures the Ingress Operator and API server for access from only the private network.
The cluster still requires access to Internet to access the AWS APIs.
The following items are not required or created when you install a private cluster:
- Public subnets
- Public load balancers, which support public ingress
-
A public Route 53 zone that matches the
baseDomainfor the cluster
The installation program does use the baseDomain that you specify to create a private Route 53 zone and the required records for the cluster. The cluster is configured so that the Operators do not create public records for the cluster and all cluster machines are placed in the private subnets that you specify.
4.10.3.1.1. Limitations
The ability to add public functionality to a private cluster is limited.
- You cannot make the Kubernetes API endpoints public after installation without taking additional actions, including creating public subnets in the VPC for each availability zone in use, creating a public load balancer, and configuring the control plane security groups to allow traffic from Internet on 6443 (Kubernetes API port).
-
If you use a public Service type load balancer, you must tag a public subnet in each availability zone with
kubernetes.io/cluster/<cluster-infra-id>: sharedso that AWS can use them to create public load balancers.
4.10.4. About using a custom VPC
In OpenShift Container Platform 4.7, you can deploy a cluster into existing subnets in an existing Amazon Virtual Private Cloud (VPC) in Amazon Web Services (AWS). By deploying OpenShift Container Platform into an existing AWS VPC, you might be able to avoid limit constraints in new accounts or more easily abide by the operational constraints that your company’s guidelines set. If you cannot obtain the infrastructure creation permissions that are required to create the VPC yourself, use this installation option.
Because the installation program cannot know what other components are also in your existing subnets, it cannot choose subnet CIDRs and so forth on your behalf. You must configure networking for the subnets that you install your cluster to yourself.
4.10.4.1. Requirements for using your VPC
The installation program no longer creates the following components:
- Internet gateways
- NAT gateways
- Subnets
- Route tables
- VPCs
- VPC DHCP options
- VPC endpoints
The installation program requires that you use the cloud-provided DNS server. Using a custom DNS server is not supported and causes the installation to fail.
If you use a custom VPC, you must correctly configure it and its subnets for the installation program and the cluster to use. See Amazon VPC console wizard configurations and Work with VPCs and subnets in the AWS documentation for more information on creating and managing an AWS VPC.
The installation program cannot:
- Subdivide network ranges for the cluster to use.
- Set route tables for the subnets.
- Set VPC options like DHCP.
You must complete these tasks before you install the cluster. See VPC networking components and Route tables for your VPC for more information on configuring networking in an AWS VPC.
Your VPC must meet the following characteristics:
The VPC must not use the
kubernetes.io/cluster/.*: ownedtag.The installation program modifies your subnets to add the
kubernetes.io/cluster/.*: sharedtag, so your subnets must have at least one free tag slot available for it. See Tag Restrictions in the AWS documentation to confirm that the installation program can add a tag to each subnet that you specify.You must enable the
enableDnsSupportandenableDnsHostnamesattributes in your VPC, so that the cluster can use the Route 53 zones that are attached to the VPC to resolve cluster’s internal DNS records. See DNS Support in Your VPC in the AWS documentation.If you prefer to use your own Route 53 hosted private zone, you must associate the existing hosted zone with your VPC prior to installing a cluster. You can define your hosted zone using the
platform.aws.hostedZonefield in theinstall-config.yamlfile.- If you use a cluster with public access, you must create a public and a private subnet for each availability zone that your cluster uses. Each availability zone can contain no more than one public and one private subnet.
If you are working in a disconnected environment, you are unable to reach the public IP addresses for EC2 and ELB endpoints. To resolve this, you must create a VPC endpoint and attach it to the subnet that the clusters are using. The endpoints should be named as follows:
-
ec2.<region>.amazonaws.com -
elasticloadbalancing.<region>.amazonaws.com -
s3.<region>.amazonaws.com
Required VPC components
You must provide a suitable VPC and subnets that allow communication to your machines.
| Component | AWS type | Description | |
|---|---|---|---|
| VPC |
| You must provide a public VPC for the cluster to use. The VPC uses an endpoint that references the route tables for each subnet to improve communication with the registry that is hosted in S3. | |
| Public subnets |
| Your VPC must have public subnets for between 1 and 3 availability zones and associate them with appropriate Ingress rules. | |
| Internet gateway |
| You must have a public Internet gateway, with public routes, attached to the VPC. In the provided templates, each public subnet has a NAT gateway with an EIP address. These NAT gateways allow cluster resources, like private subnet instances, to reach the Internet and are not required for some restricted network or proxy scenarios. | |
| Network access control |
| You must allow the VPC to access the following ports: | |
| Port | Reason | ||
|
| Inbound HTTP traffic | ||
|
| Inbound HTTPS traffic | ||
|
| Inbound SSH traffic | ||
|
| Inbound ephemeral traffic | ||
|
| Outbound ephemeral traffic | ||
| Private subnets |
| Your VPC can have private subnets. The provided CloudFormation templates can create private subnets for between 1 and 3 availability zones. If you use private subnets, you must provide appropriate routes and tables for them. | |
4.10.4.2. VPC validation
To ensure that the subnets that you provide are suitable, the installation program confirms the following data:
- All the subnets that you specify exist.
- You provide private subnets.
- The subnet CIDRs belong to the machine CIDR that you specified.
- You provide subnets for each availability zone. Each availability zone contains no more than one public and one private subnet. If you use a private cluster, provide only a private subnet for each availability zone. Otherwise, provide exactly one public and private subnet for each availability zone.
- You provide a public subnet for each private subnet availability zone. Machines are not provisioned in availability zones that you do not provide private subnets for.
If you destroy a cluster that uses an existing VPC, the VPC is not deleted. When you remove the OpenShift Container Platform cluster from a VPC, the kubernetes.io/cluster/.*: shared tag is removed from the subnets that it used.
4.10.4.3. Division of permissions
Starting with OpenShift Container Platform 4.3, you do not need all of the permissions that are required for an installation program-provisioned infrastructure cluster to deploy a cluster. This change mimics the division of permissions that you might have at your company: some individuals can create different resource in your clouds than others. For example, you might be able to create application-specific items, like instances, buckets, and load balancers, but not networking-related components such as VPCs, subnets, or ingress rules.
The AWS credentials that you use when you create your cluster do not need the networking permissions that are required to make VPCs and core networking components within the VPC, such as subnets, routing tables, Internet gateways, NAT, and VPN. You still need permission to make the application resources that the machines within the cluster require, such as ELBs, security groups, S3 buckets, and nodes.
4.10.4.4. Isolation between clusters
If you deploy OpenShift Container Platform to an existing network, the isolation of cluster services is reduced in the following ways:
- You can install multiple OpenShift Container Platform clusters in the same VPC.
- ICMP ingress is allowed from the entire network.
- TCP 22 ingress (SSH) is allowed to the entire network.
- Control plane TCP 6443 ingress (Kubernetes API) is allowed to the entire network.
- Control plane TCP 22623 ingress (MCS) is allowed to the entire network.
4.10.5. Internet access for OpenShift Container Platform
In OpenShift Container Platform 4.7, you require access to the Internet to install your cluster.
You must have Internet access to:
- Access OpenShift Cluster Manager to download the installation program and perform subscription management. If the cluster has internet access and you do not disable Telemetry, that service automatically entitles your cluster.
- Access Quay.io to obtain the packages that are required to install your cluster.
- Obtain the packages that are required to perform cluster updates.
If your cluster cannot have direct Internet access, you can perform a restricted network installation on some types of infrastructure that you provision. During that process, you download the content that is required and use it to populate a mirror registry with the packages that you need to install a cluster and generate the installation program. With some installation types, the environment that you install your cluster in will not require Internet access. Before you update the cluster, you update the content of the mirror registry.
4.10.6. Generating an SSH private key and adding it to the agent
If you want to perform installation debugging or disaster recovery on your cluster, you must provide an SSH key to both your ssh-agent and the installation program. You can use this key to access the bootstrap machine in a public cluster to troubleshoot installation issues.
In a production environment, you require disaster recovery and debugging.
You can use this key to SSH into the master nodes as the user core. When you deploy the cluster, the key is added to the core user’s ~/.ssh/authorized_keys list.
You must use a local key, not one that you configured with platform-specific approaches such as AWS key pairs.
Procedure
If you do not have an SSH key that is configured for password-less authentication on your computer, create one. For example, on a computer that uses a Linux operating system, run the following command:
$ ssh-keygen -t ed25519 -N '' \ -f <path>/<file_name>1 - 1
- Specify the path and file name, such as
~/.ssh/id_rsa, of the new SSH key. If you have an existing key pair, ensure your public key is in the your~/.sshdirectory.
Running this command generates an SSH key that does not require a password in the location that you specified.
NoteIf you plan to install an OpenShift Container Platform cluster that uses FIPS Validated / Modules in Process cryptographic libraries on the
x86_64architecture, do not create a key that uses theed25519algorithm. Instead, create a key that uses thersaorecdsaalgorithm.Start the
ssh-agentprocess as a background task:$ eval "$(ssh-agent -s)"Example output
Agent pid 31874NoteIf your cluster is in FIPS mode, only use FIPS-compliant algorithms to generate the SSH key. The key must be either RSA or ECDSA.
Add your SSH private key to the
ssh-agent:$ ssh-add <path>/<file_name>1 Example output
Identity added: /home/<you>/<path>/<file_name> (<computer_name>)- 1
- Specify the path and file name for your SSH private key, such as
~/.ssh/id_rsa
Next steps
- When you install OpenShift Container Platform, provide the SSH public key to the installation program.
4.10.7. Obtaining the installation program
Before you install OpenShift Container Platform, download the installation file on a local computer.
Prerequisites
- You have a computer that runs Linux or macOS, with 500 MB of local disk space
Procedure
- Access the Infrastructure Provider page on the OpenShift Cluster Manager site. If you have a Red Hat account, log in with your credentials. If you do not, create an account.
- Select your infrastructure provider.
Navigate to the page for your installation type, download the installation program for your operating system, and place the file in the directory where you will store the installation configuration files.
ImportantThe installation program creates several files on the computer that you use to install your cluster. You must keep the installation program and the files that the installation program creates after you finish installing the cluster. Both files are required to delete the cluster.
ImportantDeleting the files created by the installation program does not remove your cluster, even if the cluster failed during installation. To remove your cluster, complete the OpenShift Container Platform uninstallation procedures for your specific cloud provider.
Extract the installation program. For example, on a computer that uses a Linux operating system, run the following command:
$ tar xvf openshift-install-linux.tar.gz- Download your installation pull secret from the Red Hat OpenShift Cluster Manager. This pull secret allows you to authenticate with the services that are provided by the included authorities, including Quay.io, which serves the container images for OpenShift Container Platform components.
4.10.8. Manually creating the installation configuration file
When installing OpenShift Container Platform on Amazon Web Services (AWS) into a region requiring a custom Red Hat Enterprise Linux CoreOS (RHCOS) AMI, you must manually generate your installation configuration file.
Prerequisites
- Obtain the OpenShift Container Platform installation program and the access token for your cluster.
Procedure
Create an installation directory to store your required installation assets in:
$ mkdir <installation_directory>ImportantYou must create a directory. Some installation assets, like bootstrap X.509 certificates have short expiration intervals, so you must not reuse an installation directory. If you want to reuse individual files from another cluster installation, you can copy them into your directory. However, the file names for the installation assets might change between releases. Use caution when copying installation files from an earlier OpenShift Container Platform version.
Customize the following
install-config.yamlfile template and save it in the<installation_directory>.NoteYou must name this configuration file
install-config.yaml.Back up the
install-config.yamlfile so that you can use it to install multiple clusters.ImportantThe
install-config.yamlfile is consumed during the next step of the installation process. You must back it up now.
4.10.8.1. Installation configuration parameters
Before you deploy an OpenShift Container Platform cluster, you provide parameter values to describe your account on the cloud platform that hosts your cluster and optionally customize your cluster’s platform. When you create the install-config.yaml installation configuration file, you provide values for the required parameters through the command line. If you customize your cluster, you can modify the install-config.yaml file to provide more details about the platform.
After installation, you cannot modify these parameters in the install-config.yaml file.
The openshift-install command does not validate field names for parameters. If an incorrect name is specified, the related file or object is not created, and no error is reported. Ensure that the field names for any parameters that are specified are correct.
4.10.8.1.1. Required configuration parameters
Required installation configuration parameters are described in the following table:
| Parameter | Description | Values |
|---|---|---|
|
|
The API version for the | String |
|
|
The base domain of your cloud provider. The base domain is used to create routes to your OpenShift Container Platform cluster components. The full DNS name for your cluster is a combination of the |
A fully-qualified domain or subdomain name, such as |
|
|
Kubernetes resource | Object |
|
|
The name of the cluster. DNS records for the cluster are all subdomains of |
String of lowercase letters, hyphens ( |
|
|
The configuration for the specific platform upon which to perform the installation: | Object |
|
| Get a pull secret from the Red Hat OpenShift Cluster Manager to authenticate downloading container images for OpenShift Container Platform components from services such as Quay.io. |
|
4.10.8.1.2. Network configuration parameters
You can customize your installation configuration based on the requirements of your existing network infrastructure. For example, you can expand the IP address block for the cluster network or provide different IP address blocks than the defaults.
Only IPv4 addresses are supported.
| Parameter | Description | Values |
|---|---|---|
|
| The configuration for the cluster network. | Object Note
You cannot modify parameters specified by the |
|
| The cluster network provider Container Network Interface (CNI) plug-in to install. |
Either |
|
| The IP address blocks for pods.
The default value is If you specify multiple IP address blocks, the blocks must not overlap. | An array of objects. For example: |
|
|
Required if you use An IPv4 network. |
An IP address block in Classless Inter-Domain Routing (CIDR) notation. The prefix length for an IPv4 block is between |
|
|
The subnet prefix length to assign to each individual node. For example, if | A subnet prefix.
The default value is |
|
|
The IP address block for services. The default value is The OpenShift SDN and OVN-Kubernetes network providers support only a single IP address block for the service network. | An array with an IP address block in CIDR format. For example: |
|
| The IP address blocks for machines. If you specify multiple IP address blocks, the blocks must not overlap. | An array of objects. For example: |
|
|
Required if you use | An IP network block in CIDR notation.
For example, Note
Set the |
4.10.8.1.3. Optional configuration parameters
Optional installation configuration parameters are described in the following table:
| Parameter | Description | Values |
|---|---|---|
|
| A PEM-encoded X.509 certificate bundle that is added to the nodes' trusted certificate store. This trust bundle may also be used when a proxy has been configured. | String |
|
| The configuration for the machines that comprise the compute nodes. |
Array of |
|
|
Determines the instruction set architecture of the machines in the pool. Currently, heteregeneous clusters are not supported, so all pools must specify the same architecture. Valid values are | String |
|
|
Whether to enable or disable simultaneous multithreading, or Important If you disable simultaneous multithreading, ensure that your capacity planning accounts for the dramatically decreased machine performance. |
|
|
|
Required if you use |
|
|
|
Required if you use |
|
|
| The number of compute machines, which are also known as worker machines, to provision. |
A positive integer greater than or equal to |
|
| The configuration for the machines that comprise the control plane. |
Array of |
|
|
Determines the instruction set architecture of the machines in the pool. Currently, heterogeneous clusters are not supported, so all pools must specify the same architecture. Valid values are | String |
|
|
Whether to enable or disable simultaneous multithreading, or Important If you disable simultaneous multithreading, ensure that your capacity planning accounts for the dramatically decreased machine performance. |
|
|
|
Required if you use |
|
|
|
Required if you use |
|
|
| The number of control plane machines to provision. |
The only supported value is |
|
| The Cloud Credential Operator (CCO) mode. If no mode is specified, the CCO dynamically tries to determine the capabilities of the provided credentials, with a preference for mint mode on the platforms where multiple modes are supported. Note Not all CCO modes are supported for all cloud providers. For more information on CCO modes, see the Cloud Credential Operator entry in the Cluster Operators reference content. |
|
|
|
Enable or disable FIPS mode. The default is Important
The use of FIPS Validated / Modules in Process cryptographic libraries is only supported on OpenShift Container Platform deployments on the Note If you are using Azure File storage, you cannot enable FIPS mode. |
|
|
| Sources and repositories for the release-image content. |
Array of objects. Includes a |
|
|
Required if you use | String |
|
| Specify one or more repositories that may also contain the same images. | Array of strings |
|
| How to publish or expose the user-facing endpoints of your cluster, such as the Kubernetes API, OpenShift routes. |
|
|
| The SSH key or keys to authenticate access your cluster machines. Note
For production OpenShift Container Platform clusters on which you want to perform installation debugging or disaster recovery, specify an SSH key that your | One or more keys. For example: |
4.10.8.1.4. Optional AWS configuration parameters
Optional AWS configuration parameters are described in the following table:
| Parameter | Description | Values |
|---|---|---|
|
| The AWS AMI used to boot compute machines for the cluster. This is required for regions that require a custom RHCOS AMI. | Any published or custom RHCOS AMI that belongs to the set AWS region. |
|
| A pre-existing AWS IAM role applied to the compute machine pool instance profiles. You can use these fields to match naming schemes and include predefined permissions boundaries for your IAM roles. If undefined, the installation program creates a new IAM role. | The name of a valid AWS IAM role. |
|
| The Input/Output Operations Per Second (IOPS) that is reserved for the root volume. |
Integer, for example |
|
| The size in GiB of the root volume. |
Integer, for example |
|
| The type of the root volume. |
Valid AWS EBS volume type, such as |
|
| The Amazon Resource Name (key ARN) of a KMS key. This is required to encrypt OS volumes of worker nodes with a specific KMS key. | Valid key ID or the key ARN. |
|
| The EC2 instance type for the compute machines. |
Valid AWS instance type, such as |
|
| The availability zones where the installation program creates machines for the compute machine pool. If you provide your own VPC, you must provide a subnet in that availability zone. |
A list of valid AWS availability zones, such as |
|
| The AWS region that the installation program creates compute resources in. |
Any valid AWS region, such as |
|
| The AWS AMI used to boot control plane machines for the cluster. This is required for regions that require a custom RHCOS AMI. | Any published or custom RHCOS AMI that belongs to the set AWS region. |
|
| A pre-existing AWS IAM role applied to the control plane machine pool instance profiles. You can use these fields to match naming schemes and include predefined permissions boundaries for your IAM roles. If undefined, the installation program creates a new IAM role. | The name of a valid AWS IAM role. |
|
| The Amazon Resource Name (key ARN) of a KMS key. This is required to encrypt OS volumes of control plane nodes with a specific KMS key. | Valid key ID and the key ARN. |
|
| The EC2 instance type for the control plane machines. |
Valid AWS instance type, such as |
|
| The availability zones where the installation program creates machines for the control plane machine pool. |
A list of valid AWS availability zones, such as |
|
| The AWS region that the installation program creates control plane resources in. |
Valid AWS region, such as |
|
| The AWS AMI used to boot all machines for the cluster. If set, the AMI must belong to the same region as the cluster. This is required for regions that require a custom RHCOS AMI. | Any published or custom RHCOS AMI that belongs to the set AWS region. |
|
| An existing Route 53 private hosted zone for the cluster. You can only use a pre-existing hosted zone when also supplying your own VPC. The hosted zone must already be associated with the user-provided VPC before installation. Also, the domain of the hosted zone must be the cluster domain or a parent of the cluster domain. If undefined, the installation program creates a new hosted zone. |
String, for example |
|
| The AWS service endpoint name. Custom endpoints are only required for cases where alternative AWS endpoints, like FIPS, must be used. Custom API endpoints can be specified for EC2, S3, IAM, Elastic Load Balancing, Tagging, Route 53, and STS AWS services. | Valid AWS service endpoint name. |
|
|
The AWS service endpoint URL. The URL must use the | Valid AWS service endpoint URL. |
|
| A map of keys and values that the installation program adds as tags to all resources that it creates. |
Any valid YAML map, such as key value pairs in the |
|
|
If you provide the VPC instead of allowing the installation program to create the VPC for you, specify the subnet for the cluster to use. The subnet must be part of the same | Valid subnet IDs. |
4.10.8.2. Supported AWS machine types
The following Amazon Web Services (AWS) instance types are supported with OpenShift Container Platform.
Example 4.20. Instance types for machines
| Instance type | Bootstrap | Control plane | Compute |
|---|---|---|---|
|
| x | ||
|
| x | ||
|
| x | x | |
|
| x | x | |
|
| x | x | |
|
| x | x | |
|
| x | x | |
|
| x | ||
|
| x | x | |
|
| x | x | |
|
| x | x | |
|
| x | x | |
|
| x | x | |
|
| x | x | |
|
| x | ||
|
| x | x | |
|
| x | x | |
|
| x | x | |
|
| x | x | |
|
| x | x | |
|
| x | x | |
|
| x | x | |
|
| x | x | |
|
| x | x | |
|
| x | x | |
|
| x | x | |
|
| x | x | |
|
| x | x | |
|
| x | x | |
|
| x | ||
|
| x | x | |
|
| x | x | |
|
| x | x | |
|
| x | x | |
|
| x | x | |
|
| x | x | |
|
| x | ||
|
| x | x | |
|
| x | x | |
|
| x | x | |
|
| x | x | |
|
| x | x | |
|
| x | x | |
|
| x | ||
|
| x | x | |
|
| x | x | |
|
| x | x | |
|
| x | x | |
|
| x | x | |
|
| x | ||
|
| x | x | |
|
| x | x | |
|
| x | x | |
|
| x | x | |
|
| x | x | |
|
| x | x | |
|
| x | x | |
|
| x | ||
|
| x | x | |
|
| x | x | |
|
| x | x | |
|
| x | x | |
|
| x | x | |
|
| x | x | |
|
| x | x | |
|
| x | ||
|
| x | ||
|
| x | ||
|
| x | ||
|
| x | ||
|
| x |
4.10.8.3. Sample customized install-config.yaml file for AWS
You can customize the install-config.yaml file to specify more details about your OpenShift Container Platform cluster’s platform or modify the values of the required parameters.
This sample YAML file is provided for reference only. You must obtain your install-config.yaml file by using the installation program and modify it.
apiVersion: v1
baseDomain: example.com
credentialsMode: Mint
controlPlane:
hyperthreading: Enabled
name: master
platform:
aws:
zones:
- us-gov-west-1a
- us-gov-west-1b
rootVolume:
iops: 4000
size: 500
type: io1
type: m5.xlarge
replicas: 3
compute:
- hyperthreading: Enabled
name: worker
platform:
aws:
rootVolume:
iops: 2000
size: 500
type: io1
type: c5.4xlarge
zones:
- us-gov-west-1c
replicas: 3
metadata:
name: test-cluster
networking:
clusterNetwork:
- cidr: 10.128.0.0/14
hostPrefix: 23
machineNetwork:
- cidr: 10.0.0.0/16
networkType: OpenShiftSDN
serviceNetwork:
- 172.30.0.0/16
platform:
aws:
region: us-gov-west-1
userTags:
adminContact: jdoe
costCenter: 7536
subnets:
- subnet-1
- subnet-2
- subnet-3
amiID: ami-96c6f8f7
serviceEndpoints:
- name: ec2
url: https://vpce-id.ec2.us-west-2.vpce.amazonaws.com
hostedZone: Z3URY6TWQ91KVV
fips: false
sshKey: ssh-ed25519 AAAA...
publish: Internal
pullSecret: '{"auths": ...}'
additionalTrustBundle: |
-----BEGIN CERTIFICATE-----
<MY_TRUSTED_CA_CERT>
-----END CERTIFICATE------ 1 10 18
- Required.
- 2
- Optional: Add this parameter to force the Cloud Credential Operator (CCO) to use the specified mode, instead of having the CCO dynamically try to determine the capabilities of the credentials. For details about CCO modes, see the Cloud Credential Operator entry in the Platform Operators reference content.
- 3 7
- If you do not provide these parameters and values, the installation program provides the default value.
- 4
- The
controlPlanesection is a single mapping, but thecomputesection is a sequence of mappings. To meet the requirements of the different data structures, the first line of thecomputesection must begin with a hyphen,-, and the first line of thecontrolPlanesection must not. Only one control plane pool is used. - 5 8
- Whether to enable or disable simultaneous multithreading, or
hyperthreading. By default, simultaneous multithreading is enabled to increase the performance of your machines' cores. You can disable it by setting the parameter value toDisabled. If you disable simultaneous multithreading in some cluster machines, you must disable it in all cluster machines.ImportantIf you disable simultaneous multithreading, ensure that your capacity planning accounts for the dramatically decreased machine performance. Use larger instance types, such as
m4.2xlargeorm5.2xlarge, for your machines if you disable simultaneous multithreading. - 6 9
- To configure faster storage for etcd, especially for larger clusters, set the storage type as
io1and setiopsto2000. - 11
- If you provide your own VPC, specify subnets for each availability zone that your cluster uses.
- 12
- The ID of the AMI used to boot machines for the cluster. If set, the AMI must belong to the same region as the cluster.
- 13
- The AWS service endpoints. Custom endpoints are required when installing to an unknown AWS region. The endpoint URL must use the
httpsprotocol and the host must trust the certificate. - 14
- The ID of your existing Route 53 private hosted zone. Providing an existing hosted zone requires that you supply your own VPC and the hosted zone is already associated with the VPC prior to installing your cluster. If undefined, the installation program creates a new hosted zone.
- 15
- Whether to enable or disable FIPS mode. By default, FIPS mode is not enabled. If FIPS mode is enabled, the Red Hat Enterprise Linux CoreOS (RHCOS) machines that OpenShift Container Platform runs on bypass the default Kubernetes cryptography suite and use the cryptography modules that are provided with RHCOS instead.Important
The use of FIPS Validated / Modules in Process cryptographic libraries is only supported on OpenShift Container Platform deployments on the
x86_64architecture. - 16
- You can optionally provide the
sshKeyvalue that you use to access the machines in your cluster.NoteFor production OpenShift Container Platform clusters on which you want to perform installation debugging or disaster recovery, specify an SSH key that your
ssh-agentprocess uses. - 17
- How to publish the user-facing endpoints of your cluster. Set
publishtoInternalto deploy a private cluster, which cannot be accessed from the Internet. The default value isExternal. - 19
- The custom CA certificate. This is required when deploying to the AWS C2S Secret Region because the AWS API requires a custom CA trust bundle.
4.10.8.4. AWS regions without a published RHCOS AMI
You can deploy an OpenShift Container Platform cluster to Amazon Web Services (AWS) regions without native support for a Red Hat Enterprise Linux CoreOS (RHCOS) Amazon Machine Image (AMI) or the AWS software development kit (SDK). If a published AMI is not available for an AWS region, you can upload a custom AMI prior to installing the cluster. This is required if you are deploying your cluster to an AWS government or secret region. AWS government and secret regions are supported by the AWS SDK.
If you are deploying to a region not supported by the AWS SDK and you do not specify a custom AMI, the installation program copies the us-east-1 AMI to the user account automatically. Then the installation program creates the control plane machines with encrypted EBS volumes using the default or user-specified Key Management Service (KMS) key. This allows the AMI to follow the same process workflow as published RHCOS AMIs.
A region without native support for an RHCOS AMI is not available to select from the terminal during cluster creation because it is not published. However, you can install to this region by configuring the custom AMI in the install-config.yaml file.
4.10.8.5. Uploading a custom RHCOS AMI in AWS
If you are deploying to a custom Amazon Web Services (AWS) region, you must upload a custom Red Hat Enterprise Linux CoreOS (RHCOS) Amazon Machine Image (AMI) that belongs to that region.
Prerequisites
- You configured an AWS account.
- You created an Amazon S3 bucket with the required IAM service role.
- You uploaded your RHCOS VMDK file to Amazon S3. The RHCOS VMDK file must be the highest version that is less than or equal to the OpenShift Container Platform version you are installing.
- You downloaded the AWS CLI and installed it on your computer. See Install the AWS CLI Using the Bundled Installer.
Procedure
Export your AWS profile as an environment variable:
$ export AWS_PROFILE=<aws_profile>1 - 1
- The AWS profile name that holds your AWS credentials, like
govcloud.
Export the region to associate with your custom AMI as an environment variable:
$ export AWS_DEFAULT_REGION=<aws_region>1 - 1
- The AWS region, like
us-gov-east-1.
Export the version of RHCOS you uploaded to Amazon S3 as an environment variable:
$ export RHCOS_VERSION=<version>1 - 1
- The RHCOS VMDK version, like
4.7.0.
Export the Amazon S3 bucket name as an environment variable:
$ export VMIMPORT_BUCKET_NAME=<s3_bucket_name>Create the
containers.jsonfile and define your RHCOS VMDK file:$ cat <<EOF > containers.json { "Description": "rhcos-${RHCOS_VERSION}-x86_64-aws.x86_64", "Format": "vmdk", "UserBucket": { "S3Bucket": "${VMIMPORT_BUCKET_NAME}", "S3Key": "rhcos-${RHCOS_VERSION}-x86_64-aws.x86_64.vmdk" } } EOFImport the RHCOS disk as an Amazon EBS snapshot:
$ aws ec2 import-snapshot --region ${AWS_DEFAULT_REGION} \ --description "<description>" \1 --disk-container "file://<file_path>/containers.json"2 Check the status of the image import:
$ watch -n 5 aws ec2 describe-import-snapshot-tasks --region ${AWS_DEFAULT_REGION}Example output
{ "ImportSnapshotTasks": [ { "Description": "rhcos-4.7.0-x86_64-aws.x86_64", "ImportTaskId": "import-snap-fh6i8uil", "SnapshotTaskDetail": { "Description": "rhcos-4.7.0-x86_64-aws.x86_64", "DiskImageSize": 819056640.0, "Format": "VMDK", "SnapshotId": "snap-06331325870076318", "Status": "completed", "UserBucket": { "S3Bucket": "external-images", "S3Key": "rhcos-4.7.0-x86_64-aws.x86_64.vmdk" } } } ] }Copy the
SnapshotIdto register the image.Create a custom RHCOS AMI from the RHCOS snapshot:
$ aws ec2 register-image \ --region ${AWS_DEFAULT_REGION} \ --architecture x86_64 \1 --description "rhcos-${RHCOS_VERSION}-x86_64-aws.x86_64" \2 --ena-support \ --name "rhcos-${RHCOS_VERSION}-x86_64-aws.x86_64" \3 --virtualization-type hvm \ --root-device-name '/dev/xvda' \ --block-device-mappings 'DeviceName=/dev/xvda,Ebs={DeleteOnTermination=true,SnapshotId=<snapshot_ID>}'4
To learn more about these APIs, see the AWS documentation for importing snapshots and creating EBS-backed AMIs.
4.10.8.6. Configuring the cluster-wide proxy during installation
Production environments can deny direct access to the Internet and instead have an HTTP or HTTPS proxy available. You can configure a new OpenShift Container Platform cluster to use a proxy by configuring the proxy settings in the install-config.yaml file.
Prerequisites
-
You have an existing
install-config.yamlfile. You reviewed the sites that your cluster requires access to and determined whether any of them need to bypass the proxy. By default, all cluster egress traffic is proxied, including calls to hosting cloud provider APIs. You added sites to the
Proxyobject’sspec.noProxyfield to bypass the proxy if necessary.NoteThe
Proxyobjectstatus.noProxyfield is populated with the values of thenetworking.machineNetwork[].cidr,networking.clusterNetwork[].cidr, andnetworking.serviceNetwork[]fields from your installation configuration.For installations on Amazon Web Services (AWS), Google Cloud Platform (GCP), Microsoft Azure, and Red Hat OpenStack Platform (RHOSP), the
Proxyobjectstatus.noProxyfield is also populated with the instance metadata endpoint (169.254.169.254).-
If your cluster is on AWS, you added the
ec2.<region>.amazonaws.com,elasticloadbalancing.<region>.amazonaws.com, ands3.<region>.amazonaws.comendpoints to your VPC endpoint. These endpoints are required to complete requests from the nodes to the AWS EC2 API. Because the proxy works on the container level, not the node level, you must route these requests to the AWS EC2 API through the AWS private network. Adding the public IP address of the EC2 API to your allowlist in your proxy server is not sufficient.
Procedure
Edit your
install-config.yamlfile and add the proxy settings. For example:apiVersion: v1 baseDomain: my.domain.com proxy: httpProxy: http://<username>:<pswd>@<ip>:<port>1 httpsProxy: https://<username>:<pswd>@<ip>:<port>2 noProxy: example.com3 additionalTrustBundle: |4 -----BEGIN CERTIFICATE----- <MY_TRUSTED_CA_CERT> -----END CERTIFICATE----- ...- 1
- A proxy URL to use for creating HTTP connections outside the cluster. The URL scheme must be
http. - 2
- A proxy URL to use for creating HTTPS connections outside the cluster.
- 3
- A comma-separated list of destination domain names, IP addresses, or other network CIDRs to exclude from proxying. Preface a domain with
.to match subdomains only. For example,.y.commatchesx.y.com, but noty.com. Use*to bypass the proxy for all destinations. - 4
- If provided, the installation program generates a config map that is named
user-ca-bundlein theopenshift-confignamespace to hold the additional CA certificates. If you provideadditionalTrustBundleand at least one proxy setting, theProxyobject is configured to reference theuser-ca-bundleconfig map in thetrustedCAfield. The Cluster Network Operator then creates atrusted-ca-bundleconfig map that merges the contents specified for thetrustedCAparameter with the RHCOS trust bundle. TheadditionalTrustBundlefield is required unless the proxy’s identity certificate is signed by an authority from the RHCOS trust bundle.
NoteThe installation program does not support the proxy
readinessEndpointsfield.- Save the file and reference it when installing OpenShift Container Platform.
The installation program creates a cluster-wide proxy that is named cluster that uses the proxy settings in the provided install-config.yaml file. If no proxy settings are provided, a cluster Proxy object is still created, but it will have a nil spec.
Only the Proxy object named cluster is supported, and no additional proxies can be created.
4.10.9. Deploying the cluster
You can install OpenShift Container Platform on a compatible cloud platform.
You can run the create cluster command of the installation program only once, during initial installation.
Prerequisites
- Configure an account with the cloud platform that hosts your cluster.
- Obtain the OpenShift Container Platform installation program and the pull secret for your cluster.
Procedure
Change to the directory that contains the installation program and initialize the cluster deployment:
$ ./openshift-install create cluster --dir <installation_directory> \1 --log-level=info2 NoteIf the cloud provider account that you configured on your host does not have sufficient permissions to deploy the cluster, the installation process stops, and the missing permissions are displayed.
When the cluster deployment completes, directions for accessing your cluster, including a link to its web console and credentials for the
kubeadminuser, display in your terminal.Example output
... INFO Install complete! INFO To access the cluster as the system:admin user when using 'oc', run 'export KUBECONFIG=/home/myuser/install_dir/auth/kubeconfig' INFO Access the OpenShift web-console here: https://console-openshift-console.apps.mycluster.example.com INFO Login to the console with user: "kubeadmin", and password: "4vYBz-Ee6gm-ymBZj-Wt5AL" INFO Time elapsed: 36m22sNoteThe cluster access and credential information also outputs to
<installation_directory>/.openshift_install.logwhen an installation succeeds.Important-
The Ignition config files that the installation program generates contain certificates that expire after 24 hours, which are then renewed at that time. If the cluster is shut down before renewing the certificates and the cluster is later restarted after the 24 hours have elapsed, the cluster automatically recovers the expired certificates. The exception is that you must manually approve the pending
node-bootstrappercertificate signing requests (CSRs) to recover kubelet certificates. See the documentation for Recovering from expired control plane certificates for more information. - It is recommended that you use Ignition config files within 12 hours after they are generated because the 24-hour certificate rotates from 16 to 22 hours after the cluster is installed. By using the Ignition config files within 12 hours, you can avoid installation failure if the certificate update runs during installation.
ImportantYou must not delete the installation program or the files that the installation program creates. Both are required to delete the cluster.
-
The Ignition config files that the installation program generates contain certificates that expire after 24 hours, which are then renewed at that time. If the cluster is shut down before renewing the certificates and the cluster is later restarted after the 24 hours have elapsed, the cluster automatically recovers the expired certificates. The exception is that you must manually approve the pending
Optional: Remove or disable the
AdministratorAccesspolicy from the IAM account that you used to install the cluster.NoteThe elevated permissions provided by the
AdministratorAccesspolicy are required only during installation.
4.10.10. Installing the OpenShift CLI by downloading the binary
You can install the OpenShift CLI (oc) to interact with OpenShift Container Platform from a command-line interface. You can install oc on Linux, Windows, or macOS.
If you installed an earlier version of oc, you cannot use it to complete all of the commands in OpenShift Container Platform 4.7. Download and install the new version of oc.
4.10.10.1. Installing the OpenShift CLI on Linux
You can install the OpenShift CLI (oc) binary on Linux by using the following procedure.
Procedure
- Navigate to the OpenShift Container Platform downloads page on the Red Hat Customer Portal.
- Select the appropriate version in the Version drop-down menu.
- Click Download Now next to the OpenShift v4.7 Linux Client entry and save the file.
Unpack the archive:
$ tar xvzf <file>Place the
ocbinary in a directory that is on yourPATH.To check your
PATH, execute the following command:$ echo $PATH
After you install the OpenShift CLI, it is available using the oc command:
$ oc <command>4.10.10.2. Installing the OpenShift CLI on Windows
You can install the OpenShift CLI (oc) binary on Windows by using the following procedure.
Procedure
- Navigate to the OpenShift Container Platform downloads page on the Red Hat Customer Portal.
- Select the appropriate version in the Version drop-down menu.
- Click Download Now next to the OpenShift v4.7 Windows Client entry and save the file.
- Unzip the archive with a ZIP program.
Move the
ocbinary to a directory that is on yourPATH.To check your
PATH, open the command prompt and execute the following command:C:\> path
After you install the OpenShift CLI, it is available using the oc command:
C:\> oc <command>4.10.10.3. Installing the OpenShift CLI on macOS
You can install the OpenShift CLI (oc) binary on macOS by using the following procedure.
Procedure
- Navigate to the OpenShift Container Platform downloads page on the Red Hat Customer Portal.
- Select the appropriate version in the Version drop-down menu.
- Click Download Now next to the OpenShift v4.7 MacOSX Client entry and save the file.
- Unpack and unzip the archive.
Move the
ocbinary to a directory on your PATH.To check your
PATH, open a terminal and execute the following command:$ echo $PATH
After you install the OpenShift CLI, it is available using the oc command:
$ oc <command>4.10.11. Logging in to the cluster by using the CLI
You can log in to your cluster as a default system user by exporting the cluster kubeconfig file. The kubeconfig file contains information about the cluster that is used by the CLI to connect a client to the correct cluster and API server. The file is specific to a cluster and is created during OpenShift Container Platform installation.
Prerequisites
- You deployed an OpenShift Container Platform cluster.
-
You installed the
ocCLI.
Procedure
Export the
kubeadmincredentials:$ export KUBECONFIG=<installation_directory>/auth/kubeconfig1 - 1
- For
<installation_directory>, specify the path to the directory that you stored the installation files in.
Verify you can run
occommands successfully using the exported configuration:$ oc whoamiExample output
system:admin
4.10.12. Logging in to the cluster by using the web console
The kubeadmin user exists by default after an OpenShift Container Platform installation. You can log in to your cluster as the kubeadmin user by using the OpenShift Container Platform web console.
Prerequisites
- You have access to the installation host.
- You completed a cluster installation and all cluster Operators are available.
Procedure
Obtain the password for the
kubeadminuser from thekubeadmin-passwordfile on the installation host:$ cat <installation_directory>/auth/kubeadmin-passwordNoteAlternatively, you can obtain the
kubeadminpassword from the<installation_directory>/.openshift_install.loglog file on the installation host.List the OpenShift Container Platform web console route:
$ oc get routes -n openshift-console | grep 'console-openshift'NoteAlternatively, you can obtain the OpenShift Container Platform route from the
<installation_directory>/.openshift_install.loglog file on the installation host.Example output
console console-openshift-console.apps.<cluster_name>.<base_domain> console https reencrypt/Redirect None-
Navigate to the route detailed in the output of the preceding command in a web browser and log in as the
kubeadminuser.
4.10.13. Telemetry access for OpenShift Container Platform
In OpenShift Container Platform 4.7, the Telemetry service, which runs by default to provide metrics about cluster health and the success of updates, requires internet access. If your cluster is connected to the internet, Telemetry runs automatically, and your cluster is registered to OpenShift Cluster Manager.
After you confirm that your OpenShift Cluster Manager inventory is correct, either maintained automatically by Telemetry or manually by using OpenShift Cluster Manager, use subscription watch to track your OpenShift Container Platform subscriptions at the account or multi-cluster level.
4.10.14. Next steps
- Validating an installation.
- Customize your cluster.
- If necessary, you can opt out of remote health reporting.
- If necessary, you can remove cloud provider credentials.
4.11. Installing a cluster on user-provisioned infrastructure in AWS by using CloudFormation templates
In OpenShift Container Platform version 4.7, you can install a cluster on Amazon Web Services (AWS) that uses infrastructure that you provide.
One way to create this infrastructure is to use the provided CloudFormation templates. You can modify the templates to customize your infrastructure or use the information that they contain to create AWS objects according to your company’s policies.
The steps for performing a user-provisioned infrastructure installation are provided as an example only. Installing a cluster with infrastructure you provide requires knowledge of the cloud provider and the installation process of OpenShift Container Platform. Several CloudFormation templates are provided to assist in completing these steps or to help model your own. You are also free to create the required resources through other methods; the templates are just an example.
4.11.1. Prerequisites
- You reviewed details about the OpenShift Container Platform installation and update processes.
You configured an AWS account to host the cluster.
ImportantIf you have an AWS profile stored on your computer, it must not use a temporary session token that you generated while using a multi-factor authentication device. The cluster continues to use your current AWS credentials to create AWS resources for the entire life of the cluster, so you must use key-based, long-lived credentials. To generate appropriate keys, see Managing Access Keys for IAM Users in the AWS documentation. You can supply the keys when you run the installation program.
- You downloaded the AWS CLI and installed it on your computer. See Install the AWS CLI Using the Bundled Installer (Linux, macOS, or Unix) in the AWS documentation.
If you use a firewall, you configured it to allow the sites that your cluster requires access to.
NoteBe sure to also review this site list if you are configuring a proxy.
- If you do not allow the system to manage identity and access management (IAM), then a cluster administrator can manually create and maintain IAM credentials. Manual mode can also be used in environments where the cloud IAM APIs are not reachable.
4.11.2. Internet access for OpenShift Container Platform
In OpenShift Container Platform 4.7, you require access to the Internet to install your cluster.
You must have Internet access to:
- Access OpenShift Cluster Manager to download the installation program and perform subscription management. If the cluster has internet access and you do not disable Telemetry, that service automatically entitles your cluster.
- Access Quay.io to obtain the packages that are required to install your cluster.
- Obtain the packages that are required to perform cluster updates.
If your cluster cannot have direct Internet access, you can perform a restricted network installation on some types of infrastructure that you provision. During that process, you download the content that is required and use it to populate a mirror registry with the packages that you need to install a cluster and generate the installation program. With some installation types, the environment that you install your cluster in will not require Internet access. Before you update the cluster, you update the content of the mirror registry.
4.11.3. Required AWS infrastructure components
To install OpenShift Container Platform on user-provisioned infrastructure in Amazon Web Services (AWS), you must manually create both the machines and their supporting infrastructure.
For more information about the integration testing for different platforms, see the OpenShift Container Platform 4.x Tested Integrations page.
By using the provided CloudFormation templates, you can create stacks of AWS resources that represent the following components:
- An AWS Virtual Private Cloud (VPC)
- Networking and load balancing components
- Security groups and roles
- An OpenShift Container Platform bootstrap node
- OpenShift Container Platform control plane nodes
- An OpenShift Container Platform compute node
Alternatively, you can manually create the components or you can reuse existing infrastructure that meets the cluster requirements. Review the CloudFormation templates for more details about how the components interrelate.
4.11.3.1. Other infrastructure components
- A VPC
- DNS entries
- Load balancers (classic or network) and listeners
- A public and a private Route 53 zone
- Security groups
- IAM roles
- S3 buckets
If you are working in a disconnected environment or use a proxy, you cannot reach the public IP addresses for EC2 and ELB endpoints. To reach these endpoints, you must create a VPC endpoint and attach it to the subnet that the clusters are using. Create the following endpoints:
-
ec2.<region>.amazonaws.com -
elasticloadbalancing.<region>.amazonaws.com -
s3.<region>.amazonaws.com
Required VPC components
You must provide a suitable VPC and subnets that allow communication to your machines.
| Component | AWS type | Description | |
|---|---|---|---|
| VPC |
| You must provide a public VPC for the cluster to use. The VPC uses an endpoint that references the route tables for each subnet to improve communication with the registry that is hosted in S3. | |
| Public subnets |
| Your VPC must have public subnets for between 1 and 3 availability zones and associate them with appropriate Ingress rules. | |
| Internet gateway |
| You must have a public Internet gateway, with public routes, attached to the VPC. In the provided templates, each public subnet has a NAT gateway with an EIP address. These NAT gateways allow cluster resources, like private subnet instances, to reach the Internet and are not required for some restricted network or proxy scenarios. | |
| Network access control |
| You must allow the VPC to access the following ports: | |
| Port | Reason | ||
|
| Inbound HTTP traffic | ||
|
| Inbound HTTPS traffic | ||
|
| Inbound SSH traffic | ||
|
| Inbound ephemeral traffic | ||
|
| Outbound ephemeral traffic | ||
| Private subnets |
| Your VPC can have private subnets. The provided CloudFormation templates can create private subnets for between 1 and 3 availability zones. If you use private subnets, you must provide appropriate routes and tables for them. | |
Required DNS and load balancing components
Your DNS and load balancer configuration needs to use a public hosted zone and can use a private hosted zone similar to the one that the installation program uses if it provisions the cluster’s infrastructure. You must create a DNS entry that resolves to your load balancer. An entry for api.<cluster_name>.<domain> must point to the external load balancer, and an entry for api-int.<cluster_name>.<domain> must point to the internal load balancer.
The cluster also requires load balancers and listeners for port 6443, which are required for the Kubernetes API and its extensions, and port 22623, which are required for the Ignition config files for new machines. The targets will be the control plane nodes (also known as the master nodes). Port 6443 must be accessible to both clients external to the cluster and nodes within the cluster. Port 22623 must be accessible to nodes within the cluster.
| Component | AWS type | Description |
|---|---|---|
| DNS |
| The hosted zone for your internal DNS. |
| etcd record sets |
| The registration records for etcd for your control plane machines. |
| Public load balancer |
| The load balancer for your public subnets. |
| External API server record |
| Alias records for the external API server. |
| External listener |
| A listener on port 6443 for the external load balancer. |
| External target group |
| The target group for the external load balancer. |
| Private load balancer |
| The load balancer for your private subnets. |
| Internal API server record |
| Alias records for the internal API server. |
| Internal listener |
| A listener on port 22623 for the internal load balancer. |
| Internal target group |
| The target group for the internal load balancer. |
| Internal listener |
| A listener on port 6443 for the internal load balancer. |
| Internal target group |
| The target group for the internal load balancer. |
Security groups
The control plane and worker machines require access to the following ports:
| Group | Type | IP Protocol | Port range |
|---|---|---|---|
|
|
|
|
|
|
|
| ||
|
|
| ||
|
|
| ||
|
|
|
|
|
|
|
| ||
|
|
|
|
|
|
|
|
Control plane Ingress
The control plane machines require the following Ingress groups. Each Ingress group is a AWS::EC2::SecurityGroupIngress resource.
| Ingress group | Description | IP protocol | Port range |
|---|---|---|---|
|
| etcd |
|
|
|
| Vxlan packets |
|
|
|
| Vxlan packets |
|
|
|
| Internal cluster communication and Kubernetes proxy metrics |
|
|
|
| Internal cluster communication |
|
|
|
| Kubernetes kubelet, scheduler and controller manager |
|
|
|
| Kubernetes kubelet, scheduler and controller manager |
|
|
|
| Kubernetes Ingress services |
|
|
|
| Kubernetes Ingress services |
|
|
|
| Geneve packets |
|
|
|
| Geneve packets |
|
|
|
| IPsec IKE packets |
|
|
|
| IPsec IKE packets |
|
|
|
| IPsec NAT-T packets |
|
|
|
| IPsec NAT-T packets |
|
|
|
| IPsec ESP packets |
|
|
|
| IPsec ESP packets |
|
|
|
| Internal cluster communication |
|
|
|
| Internal cluster communication |
|
|
|
| Kubernetes Ingress services |
|
|
|
| Kubernetes Ingress services |
|
|
Worker Ingress
The worker machines require the following Ingress groups. Each Ingress group is a AWS::EC2::SecurityGroupIngress resource.
| Ingress group | Description | IP protocol | Port range |
|---|---|---|---|
|
| Vxlan packets |
|
|
|
| Vxlan packets |
|
|
|
| Internal cluster communication |
|
|
|
| Internal cluster communication |
|
|
|
| Kubernetes kubelet, scheduler, and controller manager |
|
|
|
| Kubernetes kubelet, scheduler, and controller manager |
|
|
|
| Kubernetes Ingress services |
|
|
|
| Kubernetes Ingress services |
|
|
|
| Geneve packets |
|
|
|
| Geneve packets |
|
|
|
| IPsec IKE packets |
|
|
|
| IPsec IKE packets |
|
|
|
| IPsec NAT-T packets |
|
|
|
| IPsec NAT-T packets |
|
|
|
| IPsec ESP packets |
|
|
|
| IPsec ESP packets |
|
|
|
| Internal cluster communication |
|
|
|
| Internal cluster communication |
|
|
|
| Kubernetes Ingress services |
|
|
|
| Kubernetes Ingress services |
|
|
Roles and instance profiles
You must grant the machines permissions in AWS. The provided CloudFormation templates grant the machines Allow permissions for the following AWS::IAM::Role objects and provide a AWS::IAM::InstanceProfile for each set of roles. If you do not use the templates, you can grant the machines the following broad permissions or the following individual permissions.
| Role | Effect | Action | Resource |
|---|---|---|---|
| Master |
|
|
|
|
|
|
| |
|
|
|
| |
|
|
|
| |
| Worker |
|
|
|
| Bootstrap |
|
|
|
|
|
|
| |
|
|
|
|
4.11.3.2. Cluster machines
You need AWS::EC2::Instance objects for the following machines:
- A bootstrap machine. This machine is required during installation, but you can remove it after your cluster deploys.
- Three control plane machines. The control plane machines are not governed by a machine set.
- Compute machines. You must create at least two compute machines, which are also known as worker machines, during installation. These machines are not governed by a machine set.
4.11.3.3. Certificate signing requests management
Because your cluster has limited access to automatic machine management when you use infrastructure that you provision, you must provide a mechanism for approving cluster certificate signing requests (CSRs) after installation. The kube-controller-manager only approves the kubelet client CSRs. The machine-approver cannot guarantee the validity of a serving certificate that is requested by using kubelet credentials because it cannot confirm that the correct machine issued the request. You must determine and implement a method of verifying the validity of the kubelet serving certificate requests and approving them.
4.11.3.4. Supported AWS machine types
The following Amazon Web Services (AWS) instance types are supported with OpenShift Container Platform.
Example 4.21. Instance types for machines
| Instance type | Bootstrap | Control plane | Compute |
|---|---|---|---|
|
| x | ||
|
| x | ||
|
| x | x | |
|
| x | x | |
|
| x | x | |
|
| x | x | |
|
| x | x | |
|
| x | ||
|
| x | x | |
|
| x | x | |
|
| x | x | |
|
| x | x | |
|
| x | x | |
|
| x | x | |
|
| x | ||
|
| x | x | |
|
| x | x | |
|
| x | x | |
|
| x | x | |
|
| x | x | |
|
| x | x | |
|
| x | x | |
|
| x | x | |
|
| x | x | |
|
| x | x | |
|
| x | x | |
|
| x | x | |
|
| x | x | |
|
| x | x | |
|
| x | ||
|
| x | x | |
|
| x | x | |
|
| x | x | |
|
| x | x | |
|
| x | x | |
|
| x | x | |
|
| x | ||
|
| x | x | |
|
| x | x | |
|
| x | x | |
|
| x | x | |
|
| x | x | |
|
| x | x | |
|
| x | ||
|
| x | x | |
|
| x | x | |
|
| x | x | |
|
| x | x | |
|
| x | x | |
|
| x | ||
|
| x | x | |
|
| x | x | |
|
| x | x | |
|
| x | x | |
|
| x | x | |
|
| x | x | |
|
| x | x | |
|
| x | ||
|
| x | x | |
|
| x | x | |
|
| x | x | |
|
| x | x | |
|
| x | x | |
|
| x | x | |
|
| x | x | |
|
| x | ||
|
| x | ||
|
| x | ||
|
| x | ||
|
| x | ||
|
| x |
4.11.3.5. Required AWS permissions for the IAM user
Your IAM user must have the permission tag:GetResources in the region us-east-1 to delete the base cluster resources. As part of the AWS API requirement, the OpenShift Container Platform installation program performs various actions in this region.
When you attach the AdministratorAccess policy to the IAM user that you create in Amazon Web Services (AWS), you grant that user all of the required permissions. To deploy all components of an OpenShift Container Platform cluster, the IAM user requires the following permissions:
Example 4.22. Required EC2 permissions for installation
-
ec2:AuthorizeSecurityGroupEgress -
ec2:AuthorizeSecurityGroupIngress -
ec2:CopyImage -
ec2:CreateNetworkInterface -
ec2:AttachNetworkInterface -
ec2:CreateSecurityGroup -
ec2:CreateTags -
ec2:CreateVolume -
ec2:DeleteSecurityGroup -
ec2:DeleteSnapshot -
ec2:DeleteTags -
ec2:DeregisterImage -
ec2:DescribeAccountAttributes -
ec2:DescribeAddresses -
ec2:DescribeAvailabilityZones -
ec2:DescribeDhcpOptions -
ec2:DescribeImages -
ec2:DescribeInstanceAttribute -
ec2:DescribeInstanceCreditSpecifications -
ec2:DescribeInstances -
ec2:DescribeInstanceTypes -
ec2:DescribeInternetGateways -
ec2:DescribeKeyPairs -
ec2:DescribeNatGateways -
ec2:DescribeNetworkAcls -
ec2:DescribeNetworkInterfaces -
ec2:DescribePrefixLists -
ec2:DescribeRegions -
ec2:DescribeRouteTables -
ec2:DescribeSecurityGroups -
ec2:DescribeSubnets -
ec2:DescribeTags -
ec2:DescribeVolumes -
ec2:DescribeVpcAttribute -
ec2:DescribeVpcClassicLink -
ec2:DescribeVpcClassicLinkDnsSupport -
ec2:DescribeVpcEndpoints -
ec2:DescribeVpcs -
ec2:GetEbsDefaultKmsKeyId -
ec2:ModifyInstanceAttribute -
ec2:ModifyNetworkInterfaceAttribute -
ec2:RevokeSecurityGroupEgress -
ec2:RevokeSecurityGroupIngress -
ec2:RunInstances -
ec2:TerminateInstances
Example 4.23. Required permissions for creating network resources during installation
-
ec2:AllocateAddress -
ec2:AssociateAddress -
ec2:AssociateDhcpOptions -
ec2:AssociateRouteTable -
ec2:AttachInternetGateway -
ec2:CreateDhcpOptions -
ec2:CreateInternetGateway -
ec2:CreateNatGateway -
ec2:CreateRoute -
ec2:CreateRouteTable -
ec2:CreateSubnet -
ec2:CreateVpc -
ec2:CreateVpcEndpoint -
ec2:ModifySubnetAttribute -
ec2:ModifyVpcAttribute
If you use an existing VPC, your account does not require these permissions for creating network resources.
Example 4.24. Required Elastic Load Balancing permissions (ELB) for installation
-
elasticloadbalancing:AddTags -
elasticloadbalancing:ApplySecurityGroupsToLoadBalancer -
elasticloadbalancing:AttachLoadBalancerToSubnets -
elasticloadbalancing:ConfigureHealthCheck -
elasticloadbalancing:CreateLoadBalancer -
elasticloadbalancing:CreateLoadBalancerListeners -
elasticloadbalancing:DeleteLoadBalancer -
elasticloadbalancing:DeregisterInstancesFromLoadBalancer -
elasticloadbalancing:DescribeInstanceHealth -
elasticloadbalancing:DescribeLoadBalancerAttributes -
elasticloadbalancing:DescribeLoadBalancers -
elasticloadbalancing:DescribeTags -
elasticloadbalancing:ModifyLoadBalancerAttributes -
elasticloadbalancing:RegisterInstancesWithLoadBalancer -
elasticloadbalancing:SetLoadBalancerPoliciesOfListener
Example 4.25. Required Elastic Load Balancing permissions (ELBv2) for installation
-
elasticloadbalancing:AddTags -
elasticloadbalancing:CreateListener -
elasticloadbalancing:CreateLoadBalancer -
elasticloadbalancing:CreateTargetGroup -
elasticloadbalancing:DeleteLoadBalancer -
elasticloadbalancing:DeregisterTargets -
elasticloadbalancing:DescribeListeners -
elasticloadbalancing:DescribeLoadBalancerAttributes -
elasticloadbalancing:DescribeLoadBalancers -
elasticloadbalancing:DescribeTargetGroupAttributes -
elasticloadbalancing:DescribeTargetHealth -
elasticloadbalancing:ModifyLoadBalancerAttributes -
elasticloadbalancing:ModifyTargetGroup -
elasticloadbalancing:ModifyTargetGroupAttributes -
elasticloadbalancing:RegisterTargets
Example 4.26. Required IAM permissions for installation
-
iam:AddRoleToInstanceProfile -
iam:CreateInstanceProfile -
iam:CreateRole -
iam:DeleteInstanceProfile -
iam:DeleteRole -
iam:DeleteRolePolicy -
iam:GetInstanceProfile -
iam:GetRole -
iam:GetRolePolicy -
iam:GetUser -
iam:ListInstanceProfilesForRole -
iam:ListRoles -
iam:ListUsers -
iam:PassRole -
iam:PutRolePolicy -
iam:RemoveRoleFromInstanceProfile -
iam:SimulatePrincipalPolicy -
iam:TagRole
If you have not created an elastic load balancer (ELB) in your AWS account, the IAM user also requires the iam:CreateServiceLinkedRole permission.
Example 4.27. Required Route 53 permissions for installation
-
route53:ChangeResourceRecordSets -
route53:ChangeTagsForResource -
route53:CreateHostedZone -
route53:DeleteHostedZone -
route53:GetChange -
route53:GetHostedZone -
route53:ListHostedZones -
route53:ListHostedZonesByName -
route53:ListResourceRecordSets -
route53:ListTagsForResource -
route53:UpdateHostedZoneComment
Example 4.28. Required S3 permissions for installation
-
s3:CreateBucket -
s3:DeleteBucket -
s3:GetAccelerateConfiguration -
s3:GetBucketAcl -
s3:GetBucketCors -
s3:GetBucketLocation -
s3:GetBucketLogging -
s3:GetBucketObjectLockConfiguration -
s3:GetBucketReplication -
s3:GetBucketRequestPayment -
s3:GetBucketTagging -
s3:GetBucketVersioning -
s3:GetBucketWebsite -
s3:GetEncryptionConfiguration -
s3:GetLifecycleConfiguration -
s3:GetReplicationConfiguration -
s3:ListBucket -
s3:PutBucketAcl -
s3:PutBucketTagging -
s3:PutEncryptionConfiguration
Example 4.29. S3 permissions that cluster Operators require
-
s3:DeleteObject -
s3:GetObject -
s3:GetObjectAcl -
s3:GetObjectTagging -
s3:GetObjectVersion -
s3:PutObject -
s3:PutObjectAcl -
s3:PutObjectTagging
Example 4.30. Required permissions to delete base cluster resources
-
autoscaling:DescribeAutoScalingGroups -
ec2:DeleteNetworkInterface -
ec2:DeleteVolume -
elasticloadbalancing:DeleteTargetGroup -
elasticloadbalancing:DescribeTargetGroups -
iam:DeleteAccessKey -
iam:DeleteUser -
iam:ListAttachedRolePolicies -
iam:ListInstanceProfiles -
iam:ListRolePolicies -
iam:ListUserPolicies -
s3:DeleteObject -
s3:ListBucketVersions -
tag:GetResources
Example 4.31. Required permissions to delete network resources
-
ec2:DeleteDhcpOptions -
ec2:DeleteInternetGateway -
ec2:DeleteNatGateway -
ec2:DeleteRoute -
ec2:DeleteRouteTable -
ec2:DeleteSubnet -
ec2:DeleteVpc -
ec2:DeleteVpcEndpoints -
ec2:DetachInternetGateway -
ec2:DisassociateRouteTable -
ec2:ReleaseAddress -
ec2:ReplaceRouteTableAssociation
If you use an existing VPC, your account does not require these permissions to delete network resources. Instead, your account only requires the tag:UntagResources permission to delete network resources.
Example 4.32. Required permissions to delete a cluster with shared instance roles
-
iam:UntagRole
Example 4.33. Additional IAM and S3 permissions that are required to create manifests
-
iam:DeleteAccessKey -
iam:DeleteUser -
iam:DeleteUserPolicy -
iam:GetUserPolicy -
iam:ListAccessKeys -
iam:PutUserPolicy -
iam:TagUser -
iam:GetUserPolicy -
iam:ListAccessKeys -
s3:PutBucketPublicAccessBlock -
s3:GetBucketPublicAccessBlock -
s3:PutLifecycleConfiguration -
s3:HeadBucket -
s3:ListBucketMultipartUploads -
s3:AbortMultipartUpload
If you are managing your cloud provider credentials with mint mode, the IAM user also requires the iam:CreateAccessKey and iam:CreateUser permissions.
Example 4.34. Optional permissions for instance and quota checks for installation
-
ec2:DescribeInstanceTypeOfferings -
servicequotas:ListAWSDefaultServiceQuotas
4.11.4. Obtaining the installation program
Before you install OpenShift Container Platform, download the installation file on a local computer.
Prerequisites
- You have a computer that runs Linux or macOS, with 500 MB of local disk space
Procedure
- Access the Infrastructure Provider page on the OpenShift Cluster Manager site. If you have a Red Hat account, log in with your credentials. If you do not, create an account.
- Select your infrastructure provider.
Navigate to the page for your installation type, download the installation program for your operating system, and place the file in the directory where you will store the installation configuration files.
ImportantThe installation program creates several files on the computer that you use to install your cluster. You must keep the installation program and the files that the installation program creates after you finish installing the cluster. Both files are required to delete the cluster.
ImportantDeleting the files created by the installation program does not remove your cluster, even if the cluster failed during installation. To remove your cluster, complete the OpenShift Container Platform uninstallation procedures for your specific cloud provider.
Extract the installation program. For example, on a computer that uses a Linux operating system, run the following command:
$ tar xvf openshift-install-linux.tar.gz- Download your installation pull secret from the Red Hat OpenShift Cluster Manager. This pull secret allows you to authenticate with the services that are provided by the included authorities, including Quay.io, which serves the container images for OpenShift Container Platform components.
4.11.5. Generating an SSH private key and adding it to the agent
If you want to perform installation debugging or disaster recovery on your cluster, you must provide an SSH key to both your ssh-agent and the installation program. You can use this key to access the bootstrap machine in a public cluster to troubleshoot installation issues.
In a production environment, you require disaster recovery and debugging.
You can use this key to SSH into the master nodes as the user core. When you deploy the cluster, the key is added to the core user’s ~/.ssh/authorized_keys list.
You must use a local key, not one that you configured with platform-specific approaches such as AWS key pairs.
Procedure
If you do not have an SSH key that is configured for password-less authentication on your computer, create one. For example, on a computer that uses a Linux operating system, run the following command:
$ ssh-keygen -t ed25519 -N '' \ -f <path>/<file_name>1 - 1
- Specify the path and file name, such as
~/.ssh/id_rsa, of the new SSH key. If you have an existing key pair, ensure your public key is in the your~/.sshdirectory.
Running this command generates an SSH key that does not require a password in the location that you specified.
NoteIf you plan to install an OpenShift Container Platform cluster that uses FIPS Validated / Modules in Process cryptographic libraries on the
x86_64architecture, do not create a key that uses theed25519algorithm. Instead, create a key that uses thersaorecdsaalgorithm.Start the
ssh-agentprocess as a background task:$ eval "$(ssh-agent -s)"Example output
Agent pid 31874NoteIf your cluster is in FIPS mode, only use FIPS-compliant algorithms to generate the SSH key. The key must be either RSA or ECDSA.
Add your SSH private key to the
ssh-agent:$ ssh-add <path>/<file_name>1 Example output
Identity added: /home/<you>/<path>/<file_name> (<computer_name>)- 1
- Specify the path and file name for your SSH private key, such as
~/.ssh/id_rsa
Next steps
- When you install OpenShift Container Platform, provide the SSH public key to the installation program. If you install a cluster on infrastructure that you provision, you must provide this key to your cluster’s machines.
4.11.6. Creating the installation files for AWS
To install OpenShift Container Platform on Amazon Web Services (AWS) using user-provisioned infrastructure, you must generate the files that the installation program needs to deploy your cluster and modify them so that the cluster creates only the machines that it will use. You generate and customize the install-config.yaml file, Kubernetes manifests, and Ignition config files. You also have the option to first set up a separate var partition during the preparation phases of installation.
4.11.6.1. Optional: Creating a separate /var partition
It is recommended that disk partitioning for OpenShift Container Platform be left to the installer. However, there are cases where you might want to create separate partitions in a part of the filesystem that you expect to grow.
OpenShift Container Platform supports the addition of a single partition to attach storage to either the /var partition or a subdirectory of /var. For example:
-
/var/lib/containers: Holds container-related content that can grow as more images and containers are added to a system. -
/var/lib/etcd: Holds data that you might want to keep separate for purposes such as performance optimization of etcd storage. -
/var: Holds data that you might want to keep separate for purposes such as auditing.
Storing the contents of a /var directory separately makes it easier to grow storage for those areas as needed and reinstall OpenShift Container Platform at a later date and keep that data intact. With this method, you will not have to pull all your containers again, nor will you have to copy massive log files when you update systems.
Because /var must be in place before a fresh installation of Red Hat Enterprise Linux CoreOS (RHCOS), the following procedure sets up the separate /var partition by creating a machine config that is inserted during the openshift-install preparation phases of an OpenShift Container Platform installation.
If you follow the steps to create a separate /var partition in this procedure, it is not necessary to create the Kubernetes manifest and Ignition config files again as described later in this section.
Procedure
Create a directory to hold the OpenShift Container Platform installation files:
$ mkdir $HOME/clusterconfigRun
openshift-installto create a set of files in themanifestandopenshiftsubdirectories. Answer the system questions as you are prompted:$ openshift-install create manifests --dir $HOME/clusterconfigExample output
? SSH Public Key ... INFO Credentials loaded from the "myprofile" profile in file "/home/myuser/.aws/credentials" INFO Consuming Install Config from target directory INFO Manifests created in: $HOME/clusterconfig/manifests and $HOME/clusterconfig/openshiftOptional: Confirm that the installation program created manifests in the
clusterconfig/openshiftdirectory:$ ls $HOME/clusterconfig/openshift/Example output
99_kubeadmin-password-secret.yaml 99_openshift-cluster-api_master-machines-0.yaml 99_openshift-cluster-api_master-machines-1.yaml 99_openshift-cluster-api_master-machines-2.yaml ...Create a
MachineConfigobject and add it to a file in theopenshiftdirectory. For example, name the file98-var-partition.yaml, change the disk device name to the name of the storage device on theworkersystems, and set the storage size as appropriate. This example places the/vardirectory on a separate partition:apiVersion: machineconfiguration.openshift.io/v1 kind: MachineConfig metadata: labels: machineconfiguration.openshift.io/role: worker name: 98-var-partition spec: config: ignition: version: 3.2.0 storage: disks: - device: /dev/<device_name>1 partitions: - label: var startMiB: <partition_start_offset>2 sizeMiB: <partition_size>3 filesystems: - device: /dev/disk/by-partlabel/var path: /var format: xfs systemd: units: - name: var.mount4 enabled: true contents: | [Unit] Before=local-fs.target [Mount] What=/dev/disk/by-partlabel/var Where=/var Options=defaults,prjquota5 [Install] WantedBy=local-fs.target- 1
- The storage device name of the disk that you want to partition.
- 2
- When adding a data partition to the boot disk, a minimum value of 25000 MiB (Mebibytes) is recommended. The root file system is automatically resized to fill all available space up to the specified offset. If no value is specified, or if the specified value is smaller than the recommended minimum, the resulting root file system will be too small, and future reinstalls of RHCOS might overwrite the beginning of the data partition.
- 3
- The size of the data partition in mebibytes.
- 4
- The name of the mount unit must match the directory specified in the
Where=directive. For example, for a filesystem mounted on/var/lib/containers, the unit must be namedvar-lib-containers.mount. - 5
- The
prjquotamount option must be enabled for filesystems used for container storage.
NoteWhen creating a separate
/varpartition, you cannot use different instance types for worker nodes, if the different instance types do not have the same device name.Run
openshift-installagain to create Ignition configs from a set of files in themanifestandopenshiftsubdirectories:$ openshift-install create ignition-configs --dir $HOME/clusterconfig $ ls $HOME/clusterconfig/ auth bootstrap.ign master.ign metadata.json worker.ign
Now you can use the Ignition config files as input to the installation procedures to install Red Hat Enterprise Linux CoreOS (RHCOS) systems.
4.11.6.2. Creating the installation configuration file
Generate and customize the installation configuration file that the installation program needs to deploy your cluster.
Prerequisites
- You obtained the OpenShift Container Platform installation program for user-provisioned infrastructure and the pull secret for your cluster.
-
You checked that you are deploying your cluster to a region with an accompanying Red Hat Enterprise Linux CoreOS (RHCOS) AMI published by Red Hat. If you are deploying to a region that requires a custom AMI, such as an AWS GovCloud region, you must create the
install-config.yamlfile manually.
Procedure
Create the
install-config.yamlfile.Change to the directory that contains the installation program and run the following command:
$ ./openshift-install create install-config --dir <installation_directory>1 - 1
- For
<installation_directory>, specify the directory name to store the files that the installation program creates.
ImportantSpecify an empty directory. Some installation assets, like bootstrap X.509 certificates have short expiration intervals, so you must not reuse an installation directory. If you want to reuse individual files from another cluster installation, you can copy them into your directory. However, the file names for the installation assets might change between releases. Use caution when copying installation files from an earlier OpenShift Container Platform version.
At the prompts, provide the configuration details for your cloud:
Optional: Select an SSH key to use to access your cluster machines.
NoteFor production OpenShift Container Platform clusters on which you want to perform installation debugging or disaster recovery, specify an SSH key that your
ssh-agentprocess uses.- Select aws as the platform to target.
If you do not have an AWS profile stored on your computer, enter the AWS access key ID and secret access key for the user that you configured to run the installation program.
NoteThe AWS access key ID and secret access key are stored in
~/.aws/credentialsin the home directory of the current user on the installation host. You are prompted for the credentials by the installation program if the credentials for the exported profile are not present in the file. Any credentials that you provide to the installation program are stored in the file.- Select the AWS region to deploy the cluster to.
- Select the base domain for the Route 53 service that you configured for your cluster.
- Enter a descriptive name for your cluster.
- Paste the pull secret from the Red Hat OpenShift Cluster Manager.
Optional: Back up the
install-config.yamlfile.ImportantThe
install-config.yamlfile is consumed during the installation process. If you want to reuse the file, you must back it up now.
4.11.6.3. Configuring the cluster-wide proxy during installation
Production environments can deny direct access to the Internet and instead have an HTTP or HTTPS proxy available. You can configure a new OpenShift Container Platform cluster to use a proxy by configuring the proxy settings in the install-config.yaml file.
Prerequisites
-
You have an existing
install-config.yamlfile. You reviewed the sites that your cluster requires access to and determined whether any of them need to bypass the proxy. By default, all cluster egress traffic is proxied, including calls to hosting cloud provider APIs. You added sites to the
Proxyobject’sspec.noProxyfield to bypass the proxy if necessary.NoteThe
Proxyobjectstatus.noProxyfield is populated with the values of thenetworking.machineNetwork[].cidr,networking.clusterNetwork[].cidr, andnetworking.serviceNetwork[]fields from your installation configuration.For installations on Amazon Web Services (AWS), Google Cloud Platform (GCP), Microsoft Azure, and Red Hat OpenStack Platform (RHOSP), the
Proxyobjectstatus.noProxyfield is also populated with the instance metadata endpoint (169.254.169.254).-
If your cluster is on AWS, you added the
ec2.<region>.amazonaws.com,elasticloadbalancing.<region>.amazonaws.com, ands3.<region>.amazonaws.comendpoints to your VPC endpoint. These endpoints are required to complete requests from the nodes to the AWS EC2 API. Because the proxy works on the container level, not the node level, you must route these requests to the AWS EC2 API through the AWS private network. Adding the public IP address of the EC2 API to your allowlist in your proxy server is not sufficient.
Procedure
Edit your
install-config.yamlfile and add the proxy settings. For example:apiVersion: v1 baseDomain: my.domain.com proxy: httpProxy: http://<username>:<pswd>@<ip>:<port>1 httpsProxy: https://<username>:<pswd>@<ip>:<port>2 noProxy: example.com3 additionalTrustBundle: |4 -----BEGIN CERTIFICATE----- <MY_TRUSTED_CA_CERT> -----END CERTIFICATE----- ...- 1
- A proxy URL to use for creating HTTP connections outside the cluster. The URL scheme must be
http. - 2
- A proxy URL to use for creating HTTPS connections outside the cluster.
- 3
- A comma-separated list of destination domain names, IP addresses, or other network CIDRs to exclude from proxying. Preface a domain with
.to match subdomains only. For example,.y.commatchesx.y.com, but noty.com. Use*to bypass the proxy for all destinations. - 4
- If provided, the installation program generates a config map that is named
user-ca-bundlein theopenshift-confignamespace to hold the additional CA certificates. If you provideadditionalTrustBundleand at least one proxy setting, theProxyobject is configured to reference theuser-ca-bundleconfig map in thetrustedCAfield. The Cluster Network Operator then creates atrusted-ca-bundleconfig map that merges the contents specified for thetrustedCAparameter with the RHCOS trust bundle. TheadditionalTrustBundlefield is required unless the proxy’s identity certificate is signed by an authority from the RHCOS trust bundle.
NoteThe installation program does not support the proxy
readinessEndpointsfield.- Save the file and reference it when installing OpenShift Container Platform.
The installation program creates a cluster-wide proxy that is named cluster that uses the proxy settings in the provided install-config.yaml file. If no proxy settings are provided, a cluster Proxy object is still created, but it will have a nil spec.
Only the Proxy object named cluster is supported, and no additional proxies can be created.
4.11.6.4. Creating the Kubernetes manifest and Ignition config files
Because you must modify some cluster definition files and manually start the cluster machines, you must generate the Kubernetes manifest and Ignition config files that the cluster needs to make its machines.
The installation configuration file transforms into the Kubernetes manifests. The manifests wrap into the Ignition configuration files, which are later used to create the cluster.
The Ignition config files that the installation program generates contain certificates that expire after 24 hours, which are then renewed at that time. If the cluster is shut down before renewing the certificates and the cluster is later restarted after the 24 hours have elapsed, the cluster automatically recovers the expired certificates. The exception is that you must manually approve the pending node-bootstrapper certificate signing requests (CSRs) to recover kubelet certificates. See the documentation for Recovering from expired control plane certificates for more information.
Prerequisites
- You obtained the OpenShift Container Platform installation program.
-
You created the
install-config.yamlinstallation configuration file.
Procedure
Change to the directory that contains the installation program and generate the Kubernetes manifests for the cluster:
$ ./openshift-install create manifests --dir <installation_directory>1 - 1
- For
<installation_directory>, specify the installation directory that contains theinstall-config.yamlfile you created.
Remove the Kubernetes manifest files that define the control plane machines:
$ rm -f <installation_directory>/openshift/99_openshift-cluster-api_master-machines-*.yamlBy removing these files, you prevent the cluster from automatically generating control plane machines.
Remove the Kubernetes manifest files that define the worker machines:
$ rm -f <installation_directory>/openshift/99_openshift-cluster-api_worker-machineset-*.yamlBecause you create and manage the worker machines yourself, you do not need to initialize these machines.
Check that the
mastersSchedulableparameter in the<installation_directory>/manifests/cluster-scheduler-02-config.ymlKubernetes manifest file is set tofalse. This setting prevents pods from being scheduled on the control plane machines:-
Open the
<installation_directory>/manifests/cluster-scheduler-02-config.ymlfile. -
Locate the
mastersSchedulableparameter and ensure that it is set tofalse. - Save and exit the file.
-
Open the
Optional: If you do not want the Ingress Operator to create DNS records on your behalf, remove the
privateZoneandpublicZonesections from the<installation_directory>/manifests/cluster-dns-02-config.ymlDNS configuration file:apiVersion: config.openshift.io/v1 kind: DNS metadata: creationTimestamp: null name: cluster spec: baseDomain: example.openshift.com privateZone:1 id: mycluster-100419-private-zone publicZone:2 id: example.openshift.com status: {}If you do so, you must add ingress DNS records manually in a later step.
To create the Ignition configuration files, run the following command from the directory that contains the installation program:
$ ./openshift-install create ignition-configs --dir <installation_directory>1 - 1
- For
<installation_directory>, specify the same installation directory.
The following files are generated in the directory:
. ├── auth │ ├── kubeadmin-password │ └── kubeconfig ├── bootstrap.ign ├── master.ign ├── metadata.json └── worker.ign
4.11.7. Extracting the infrastructure name
The Ignition config files contain a unique cluster identifier that you can use to uniquely identify your cluster in Amazon Web Services (AWS). The infrastructure name is also used to locate the appropriate AWS resources during an OpenShift Container Platform installation. The provided CloudFormation templates contain references to this infrastructure name, so you must extract it.
Prerequisites
- You obtained the OpenShift Container Platform installation program and the pull secret for your cluster.
- You generated the Ignition config files for your cluster.
-
You installed the
jqpackage.
Procedure
To extract and view the infrastructure name from the Ignition config file metadata, run the following command:
$ jq -r .infraID <installation_directory>/metadata.json1 - 1
- For
<installation_directory>, specify the path to the directory that you stored the installation files in.
Example output
openshift-vw9j61 - 1
- The output of this command is your cluster name and a random string.
4.11.8. Creating a VPC in AWS
You must create a Virtual Private Cloud (VPC) in Amazon Web Services (AWS) for your OpenShift Container Platform cluster to use. You can customize the VPC to meet your requirements, including VPN and route tables.
You can use the provided CloudFormation template and a custom parameter file to create a stack of AWS resources that represent the VPC.
If you do not use the provided CloudFormation template to create your AWS infrastructure, you must review the provided information and manually create the infrastructure. If your cluster does not initialize correctly, you might have to contact Red Hat support with your installation logs.
Prerequisites
- You configured an AWS account.
-
You added your AWS keys and region to your local AWS profile by running
aws configure. - You generated the Ignition config files for your cluster.
Procedure
Create a JSON file that contains the parameter values that the template requires:
[ { "ParameterKey": "VpcCidr",1 "ParameterValue": "10.0.0.0/16"2 }, { "ParameterKey": "AvailabilityZoneCount",3 "ParameterValue": "1"4 }, { "ParameterKey": "SubnetBits",5 "ParameterValue": "12"6 } ]- Copy the template from the CloudFormation template for the VPC section of this topic and save it as a YAML file on your computer. This template describes the VPC that your cluster requires.
Launch the CloudFormation template to create a stack of AWS resources that represent the VPC:
ImportantYou must enter the command on a single line.
$ aws cloudformation create-stack --stack-name <name>1 --template-body file://<template>.yaml2 --parameters file://<parameters>.json3 - 1
<name>is the name for the CloudFormation stack, such ascluster-vpc. You need the name of this stack if you remove the cluster.- 2
<template>is the relative path to and name of the CloudFormation template YAML file that you saved.- 3
<parameters>is the relative path to and name of the CloudFormation parameters JSON file.
Example output
arn:aws:cloudformation:us-east-1:269333783861:stack/cluster-vpc/dbedae40-2fd3-11eb-820e-12a48460849fConfirm that the template components exist:
$ aws cloudformation describe-stacks --stack-name <name>After the
StackStatusdisplaysCREATE_COMPLETE, the output displays values for the following parameters. You must provide these parameter values to the other CloudFormation templates that you run to create your cluster:VpcIdThe ID of your VPC.
PublicSubnetIdsThe IDs of the new public subnets.
PrivateSubnetIdsThe IDs of the new private subnets.
4.11.8.1. CloudFormation template for the VPC
You can use the following CloudFormation template to deploy the VPC that you need for your OpenShift Container Platform cluster.
Example 4.35. CloudFormation template for the VPC
AWSTemplateFormatVersion: 2010-09-09
Description: Template for Best Practice VPC with 1-3 AZs
Parameters:
VpcCidr:
AllowedPattern: ^(([0-9]|[1-9][0-9]|1[0-9]{2}|2[0-4][0-9]|25[0-5])\.){3}([0-9]|[1-9][0-9]|1[0-9]{2}|2[0-4][0-9]|25[0-5])(\/(1[6-9]|2[0-4]))$
ConstraintDescription: CIDR block parameter must be in the form x.x.x.x/16-24.
Default: 10.0.0.0/16
Description: CIDR block for VPC.
Type: String
AvailabilityZoneCount:
ConstraintDescription: "The number of availability zones. (Min: 1, Max: 3)"
MinValue: 1
MaxValue: 3
Default: 1
Description: "How many AZs to create VPC subnets for. (Min: 1, Max: 3)"
Type: Number
SubnetBits:
ConstraintDescription: CIDR block parameter must be in the form x.x.x.x/19-27.
MinValue: 5
MaxValue: 13
Default: 12
Description: "Size of each subnet to create within the availability zones. (Min: 5 = /27, Max: 13 = /19)"
Type: Number
Metadata:
AWS::CloudFormation::Interface:
ParameterGroups:
- Label:
default: "Network Configuration"
Parameters:
- VpcCidr
- SubnetBits
- Label:
default: "Availability Zones"
Parameters:
- AvailabilityZoneCount
ParameterLabels:
AvailabilityZoneCount:
default: "Availability Zone Count"
VpcCidr:
default: "VPC CIDR"
SubnetBits:
default: "Bits Per Subnet"
Conditions:
DoAz3: !Equals [3, !Ref AvailabilityZoneCount]
DoAz2: !Or [!Equals [2, !Ref AvailabilityZoneCount], Condition: DoAz3]
Resources:
VPC:
Type: "AWS::EC2::VPC"
Properties:
EnableDnsSupport: "true"
EnableDnsHostnames: "true"
CidrBlock: !Ref VpcCidr
PublicSubnet:
Type: "AWS::EC2::Subnet"
Properties:
VpcId: !Ref VPC
CidrBlock: !Select [0, !Cidr [!Ref VpcCidr, 6, !Ref SubnetBits]]
AvailabilityZone: !Select
- 0
- Fn::GetAZs: !Ref "AWS::Region"
PublicSubnet2:
Type: "AWS::EC2::Subnet"
Condition: DoAz2
Properties:
VpcId: !Ref VPC
CidrBlock: !Select [1, !Cidr [!Ref VpcCidr, 6, !Ref SubnetBits]]
AvailabilityZone: !Select
- 1
- Fn::GetAZs: !Ref "AWS::Region"
PublicSubnet3:
Type: "AWS::EC2::Subnet"
Condition: DoAz3
Properties:
VpcId: !Ref VPC
CidrBlock: !Select [2, !Cidr [!Ref VpcCidr, 6, !Ref SubnetBits]]
AvailabilityZone: !Select
- 2
- Fn::GetAZs: !Ref "AWS::Region"
InternetGateway:
Type: "AWS::EC2::InternetGateway"
GatewayToInternet:
Type: "AWS::EC2::VPCGatewayAttachment"
Properties:
VpcId: !Ref VPC
InternetGatewayId: !Ref InternetGateway
PublicRouteTable:
Type: "AWS::EC2::RouteTable"
Properties:
VpcId: !Ref VPC
PublicRoute:
Type: "AWS::EC2::Route"
DependsOn: GatewayToInternet
Properties:
RouteTableId: !Ref PublicRouteTable
DestinationCidrBlock: 0.0.0.0/0
GatewayId: !Ref InternetGateway
PublicSubnetRouteTableAssociation:
Type: "AWS::EC2::SubnetRouteTableAssociation"
Properties:
SubnetId: !Ref PublicSubnet
RouteTableId: !Ref PublicRouteTable
PublicSubnetRouteTableAssociation2:
Type: "AWS::EC2::SubnetRouteTableAssociation"
Condition: DoAz2
Properties:
SubnetId: !Ref PublicSubnet2
RouteTableId: !Ref PublicRouteTable
PublicSubnetRouteTableAssociation3:
Condition: DoAz3
Type: "AWS::EC2::SubnetRouteTableAssociation"
Properties:
SubnetId: !Ref PublicSubnet3
RouteTableId: !Ref PublicRouteTable
PrivateSubnet:
Type: "AWS::EC2::Subnet"
Properties:
VpcId: !Ref VPC
CidrBlock: !Select [3, !Cidr [!Ref VpcCidr, 6, !Ref SubnetBits]]
AvailabilityZone: !Select
- 0
- Fn::GetAZs: !Ref "AWS::Region"
PrivateRouteTable:
Type: "AWS::EC2::RouteTable"
Properties:
VpcId: !Ref VPC
PrivateSubnetRouteTableAssociation:
Type: "AWS::EC2::SubnetRouteTableAssociation"
Properties:
SubnetId: !Ref PrivateSubnet
RouteTableId: !Ref PrivateRouteTable
NAT:
DependsOn:
- GatewayToInternet
Type: "AWS::EC2::NatGateway"
Properties:
AllocationId:
"Fn::GetAtt":
- EIP
- AllocationId
SubnetId: !Ref PublicSubnet
EIP:
Type: "AWS::EC2::EIP"
Properties:
Domain: vpc
Route:
Type: "AWS::EC2::Route"
Properties:
RouteTableId:
Ref: PrivateRouteTable
DestinationCidrBlock: 0.0.0.0/0
NatGatewayId:
Ref: NAT
PrivateSubnet2:
Type: "AWS::EC2::Subnet"
Condition: DoAz2
Properties:
VpcId: !Ref VPC
CidrBlock: !Select [4, !Cidr [!Ref VpcCidr, 6, !Ref SubnetBits]]
AvailabilityZone: !Select
- 1
- Fn::GetAZs: !Ref "AWS::Region"
PrivateRouteTable2:
Type: "AWS::EC2::RouteTable"
Condition: DoAz2
Properties:
VpcId: !Ref VPC
PrivateSubnetRouteTableAssociation2:
Type: "AWS::EC2::SubnetRouteTableAssociation"
Condition: DoAz2
Properties:
SubnetId: !Ref PrivateSubnet2
RouteTableId: !Ref PrivateRouteTable2
NAT2:
DependsOn:
- GatewayToInternet
Type: "AWS::EC2::NatGateway"
Condition: DoAz2
Properties:
AllocationId:
"Fn::GetAtt":
- EIP2
- AllocationId
SubnetId: !Ref PublicSubnet2
EIP2:
Type: "AWS::EC2::EIP"
Condition: DoAz2
Properties:
Domain: vpc
Route2:
Type: "AWS::EC2::Route"
Condition: DoAz2
Properties:
RouteTableId:
Ref: PrivateRouteTable2
DestinationCidrBlock: 0.0.0.0/0
NatGatewayId:
Ref: NAT2
PrivateSubnet3:
Type: "AWS::EC2::Subnet"
Condition: DoAz3
Properties:
VpcId: !Ref VPC
CidrBlock: !Select [5, !Cidr [!Ref VpcCidr, 6, !Ref SubnetBits]]
AvailabilityZone: !Select
- 2
- Fn::GetAZs: !Ref "AWS::Region"
PrivateRouteTable3:
Type: "AWS::EC2::RouteTable"
Condition: DoAz3
Properties:
VpcId: !Ref VPC
PrivateSubnetRouteTableAssociation3:
Type: "AWS::EC2::SubnetRouteTableAssociation"
Condition: DoAz3
Properties:
SubnetId: !Ref PrivateSubnet3
RouteTableId: !Ref PrivateRouteTable3
NAT3:
DependsOn:
- GatewayToInternet
Type: "AWS::EC2::NatGateway"
Condition: DoAz3
Properties:
AllocationId:
"Fn::GetAtt":
- EIP3
- AllocationId
SubnetId: !Ref PublicSubnet3
EIP3:
Type: "AWS::EC2::EIP"
Condition: DoAz3
Properties:
Domain: vpc
Route3:
Type: "AWS::EC2::Route"
Condition: DoAz3
Properties:
RouteTableId:
Ref: PrivateRouteTable3
DestinationCidrBlock: 0.0.0.0/0
NatGatewayId:
Ref: NAT3
S3Endpoint:
Type: AWS::EC2::VPCEndpoint
Properties:
PolicyDocument:
Version: 2012-10-17
Statement:
- Effect: Allow
Principal: '*'
Action:
- '*'
Resource:
- '*'
RouteTableIds:
- !Ref PublicRouteTable
- !Ref PrivateRouteTable
- !If [DoAz2, !Ref PrivateRouteTable2, !Ref "AWS::NoValue"]
- !If [DoAz3, !Ref PrivateRouteTable3, !Ref "AWS::NoValue"]
ServiceName: !Join
- ''
- - com.amazonaws.
- !Ref 'AWS::Region'
- .s3
VpcId: !Ref VPC
Outputs:
VpcId:
Description: ID of the new VPC.
Value: !Ref VPC
PublicSubnetIds:
Description: Subnet IDs of the public subnets.
Value:
!Join [
",",
[!Ref PublicSubnet, !If [DoAz2, !Ref PublicSubnet2, !Ref "AWS::NoValue"], !If [DoAz3, !Ref PublicSubnet3, !Ref "AWS::NoValue"]]
]
PrivateSubnetIds:
Description: Subnet IDs of the private subnets.
Value:
!Join [
",",
[!Ref PrivateSubnet, !If [DoAz2, !Ref PrivateSubnet2, !Ref "AWS::NoValue"], !If [DoAz3, !Ref PrivateSubnet3, !Ref "AWS::NoValue"]]
]4.11.9. Creating networking and load balancing components in AWS
You must configure networking and classic or network load balancing in Amazon Web Services (AWS) that your OpenShift Container Platform cluster can use.
You can use the provided CloudFormation template and a custom parameter file to create a stack of AWS resources. The stack represents the networking and load balancing components that your OpenShift Container Platform cluster requires. The template also creates a hosted zone and subnet tags.
You can run the template multiple times within a single Virtual Private Cloud (VPC).
If you do not use the provided CloudFormation template to create your AWS infrastructure, you must review the provided information and manually create the infrastructure. If your cluster does not initialize correctly, you might have to contact Red Hat support with your installation logs.
Prerequisites
- You configured an AWS account.
-
You added your AWS keys and region to your local AWS profile by running
aws configure. - You generated the Ignition config files for your cluster.
- You created and configured a VPC and associated subnets in AWS.
Procedure
Obtain the hosted zone ID for the Route 53 base domain that you specified in the
install-config.yamlfile for your cluster. You can obtain details about your hosted zone by running the following command:$ aws route53 list-hosted-zones-by-name --dns-name <route53_domain>1 - 1
- For the
<route53_domain>, specify the Route 53 base domain that you used when you generated theinstall-config.yamlfile for the cluster.
Example output
mycluster.example.com. False 100 HOSTEDZONES 65F8F38E-2268-B835-E15C-AB55336FCBFA /hostedzone/Z21IXYZABCZ2A4 mycluster.example.com. 10In the example output, the hosted zone ID is
Z21IXYZABCZ2A4.Create a JSON file that contains the parameter values that the template requires:
[ { "ParameterKey": "ClusterName",1 "ParameterValue": "mycluster"2 }, { "ParameterKey": "InfrastructureName",3 "ParameterValue": "mycluster-<random_string>"4 }, { "ParameterKey": "HostedZoneId",5 "ParameterValue": "<random_string>"6 }, { "ParameterKey": "HostedZoneName",7 "ParameterValue": "example.com"8 }, { "ParameterKey": "PublicSubnets",9 "ParameterValue": "subnet-<random_string>"10 }, { "ParameterKey": "PrivateSubnets",11 "ParameterValue": "subnet-<random_string>"12 }, { "ParameterKey": "VpcId",13 "ParameterValue": "vpc-<random_string>"14 } ]- 1
- A short, representative cluster name to use for hostnames, etc.
- 2
- Specify the cluster name that you used when you generated the
install-config.yamlfile for the cluster. - 3
- The name for your cluster infrastructure that is encoded in your Ignition config files for the cluster.
- 4
- Specify the infrastructure name that you extracted from the Ignition config file metadata, which has the format
<cluster-name>-<random-string>. - 5
- The Route 53 public zone ID to register the targets with.
- 6
- Specify the Route 53 public zone ID, which as a format similar to
Z21IXYZABCZ2A4. You can obtain this value from the AWS console. - 7
- The Route 53 zone to register the targets with.
- 8
- Specify the Route 53 base domain that you used when you generated the
install-config.yamlfile for the cluster. Do not include the trailing period (.) that is displayed in the AWS console. - 9
- The public subnets that you created for your VPC.
- 10
- Specify the
PublicSubnetIdsvalue from the output of the CloudFormation template for the VPC. - 11
- The private subnets that you created for your VPC.
- 12
- Specify the
PrivateSubnetIdsvalue from the output of the CloudFormation template for the VPC. - 13
- The VPC that you created for the cluster.
- 14
- Specify the
VpcIdvalue from the output of the CloudFormation template for the VPC.
Copy the template from the CloudFormation template for the network and load balancers section of this topic and save it as a YAML file on your computer. This template describes the networking and load balancing objects that your cluster requires.
ImportantIf you are deploying your cluster to an AWS government or secret region, you must update the
InternalApiServerRecordin the CloudFormation template to useCNAMErecords. Records of typeALIASare not supported for AWS government regions.Launch the CloudFormation template to create a stack of AWS resources that provide the networking and load balancing components:
ImportantYou must enter the command on a single line.
$ aws cloudformation create-stack --stack-name <name>1 --template-body file://<template>.yaml2 --parameters file://<parameters>.json3 --capabilities CAPABILITY_NAMED_IAM4 - 1
<name>is the name for the CloudFormation stack, such ascluster-dns. You need the name of this stack if you remove the cluster.- 2
<template>is the relative path to and name of the CloudFormation template YAML file that you saved.- 3
<parameters>is the relative path to and name of the CloudFormation parameters JSON file.- 4
- You must explicitly declare the
CAPABILITY_NAMED_IAMcapability because the provided template creates someAWS::IAM::Roleresources.
Example output
arn:aws:cloudformation:us-east-1:269333783861:stack/cluster-dns/cd3e5de0-2fd4-11eb-5cf0-12be5c33a183Confirm that the template components exist:
$ aws cloudformation describe-stacks --stack-name <name>After the
StackStatusdisplaysCREATE_COMPLETE, the output displays values for the following parameters. You must provide these parameter values to the other CloudFormation templates that you run to create your cluster:PrivateHostedZoneIdHosted zone ID for the private DNS.
ExternalApiLoadBalancerNameFull name of the external API load balancer.
InternalApiLoadBalancerNameFull name of the internal API load balancer.
ApiServerDnsNameFull hostname of the API server.
RegisterNlbIpTargetsLambdaLambda ARN useful to help register/deregister IP targets for these load balancers.
ExternalApiTargetGroupArnARN of external API target group.
InternalApiTargetGroupArnARN of internal API target group.
InternalServiceTargetGroupArnARN of internal service target group.
4.11.9.1. CloudFormation template for the network and load balancers
You can use the following CloudFormation template to deploy the networking objects and load balancers that you need for your OpenShift Container Platform cluster.
Example 4.36. CloudFormation template for the network and load balancers
AWSTemplateFormatVersion: 2010-09-09
Description: Template for OpenShift Cluster Network Elements (Route53 & LBs)
Parameters:
ClusterName:
AllowedPattern: ^([a-zA-Z][a-zA-Z0-9\-]{0,26})$
MaxLength: 27
MinLength: 1
ConstraintDescription: Cluster name must be alphanumeric, start with a letter, and have a maximum of 27 characters.
Description: A short, representative cluster name to use for host names and other identifying names.
Type: String
InfrastructureName:
AllowedPattern: ^([a-zA-Z][a-zA-Z0-9\-]{0,26})$
MaxLength: 27
MinLength: 1
ConstraintDescription: Infrastructure name must be alphanumeric, start with a letter, and have a maximum of 27 characters.
Description: A short, unique cluster ID used to tag cloud resources and identify items owned or used by the cluster.
Type: String
HostedZoneId:
Description: The Route53 public zone ID to register the targets with, such as Z21IXYZABCZ2A4.
Type: String
HostedZoneName:
Description: The Route53 zone to register the targets with, such as example.com. Omit the trailing period.
Type: String
Default: "example.com"
PublicSubnets:
Description: The internet-facing subnets.
Type: List<AWS::EC2::Subnet::Id>
PrivateSubnets:
Description: The internal subnets.
Type: List<AWS::EC2::Subnet::Id>
VpcId:
Description: The VPC-scoped resources will belong to this VPC.
Type: AWS::EC2::VPC::Id
Metadata:
AWS::CloudFormation::Interface:
ParameterGroups:
- Label:
default: "Cluster Information"
Parameters:
- ClusterName
- InfrastructureName
- Label:
default: "Network Configuration"
Parameters:
- VpcId
- PublicSubnets
- PrivateSubnets
- Label:
default: "DNS"
Parameters:
- HostedZoneName
- HostedZoneId
ParameterLabels:
ClusterName:
default: "Cluster Name"
InfrastructureName:
default: "Infrastructure Name"
VpcId:
default: "VPC ID"
PublicSubnets:
default: "Public Subnets"
PrivateSubnets:
default: "Private Subnets"
HostedZoneName:
default: "Public Hosted Zone Name"
HostedZoneId:
default: "Public Hosted Zone ID"
Resources:
ExtApiElb:
Type: AWS::ElasticLoadBalancingV2::LoadBalancer
Properties:
Name: !Join ["-", [!Ref InfrastructureName, "ext"]]
IpAddressType: ipv4
Subnets: !Ref PublicSubnets
Type: network
IntApiElb:
Type: AWS::ElasticLoadBalancingV2::LoadBalancer
Properties:
Name: !Join ["-", [!Ref InfrastructureName, "int"]]
Scheme: internal
IpAddressType: ipv4
Subnets: !Ref PrivateSubnets
Type: network
IntDns:
Type: "AWS::Route53::HostedZone"
Properties:
HostedZoneConfig:
Comment: "Managed by CloudFormation"
Name: !Join [".", [!Ref ClusterName, !Ref HostedZoneName]]
HostedZoneTags:
- Key: Name
Value: !Join ["-", [!Ref InfrastructureName, "int"]]
- Key: !Join ["", ["kubernetes.io/cluster/", !Ref InfrastructureName]]
Value: "owned"
VPCs:
- VPCId: !Ref VpcId
VPCRegion: !Ref "AWS::Region"
ExternalApiServerRecord:
Type: AWS::Route53::RecordSetGroup
Properties:
Comment: Alias record for the API server
HostedZoneId: !Ref HostedZoneId
RecordSets:
- Name:
!Join [
".",
["api", !Ref ClusterName, !Join ["", [!Ref HostedZoneName, "."]]],
]
Type: A
AliasTarget:
HostedZoneId: !GetAtt ExtApiElb.CanonicalHostedZoneID
DNSName: !GetAtt ExtApiElb.DNSName
InternalApiServerRecord:
Type: AWS::Route53::RecordSetGroup
Properties:
Comment: Alias record for the API server
HostedZoneId: !Ref IntDns
RecordSets:
- Name:
!Join [
".",
["api", !Ref ClusterName, !Join ["", [!Ref HostedZoneName, "."]]],
]
Type: A
AliasTarget:
HostedZoneId: !GetAtt IntApiElb.CanonicalHostedZoneID
DNSName: !GetAtt IntApiElb.DNSName
- Name:
!Join [
".",
["api-int", !Ref ClusterName, !Join ["", [!Ref HostedZoneName, "."]]],
]
Type: A
AliasTarget:
HostedZoneId: !GetAtt IntApiElb.CanonicalHostedZoneID
DNSName: !GetAtt IntApiElb.DNSName
ExternalApiListener:
Type: AWS::ElasticLoadBalancingV2::Listener
Properties:
DefaultActions:
- Type: forward
TargetGroupArn:
Ref: ExternalApiTargetGroup
LoadBalancerArn:
Ref: ExtApiElb
Port: 6443
Protocol: TCP
ExternalApiTargetGroup:
Type: AWS::ElasticLoadBalancingV2::TargetGroup
Properties:
HealthCheckIntervalSeconds: 10
HealthCheckPath: "/readyz"
HealthCheckPort: 6443
HealthCheckProtocol: HTTPS
HealthyThresholdCount: 2
UnhealthyThresholdCount: 2
Port: 6443
Protocol: TCP
TargetType: ip
VpcId:
Ref: VpcId
TargetGroupAttributes:
- Key: deregistration_delay.timeout_seconds
Value: 60
InternalApiListener:
Type: AWS::ElasticLoadBalancingV2::Listener
Properties:
DefaultActions:
- Type: forward
TargetGroupArn:
Ref: InternalApiTargetGroup
LoadBalancerArn:
Ref: IntApiElb
Port: 6443
Protocol: TCP
InternalApiTargetGroup:
Type: AWS::ElasticLoadBalancingV2::TargetGroup
Properties:
HealthCheckIntervalSeconds: 10
HealthCheckPath: "/readyz"
HealthCheckPort: 6443
HealthCheckProtocol: HTTPS
HealthyThresholdCount: 2
UnhealthyThresholdCount: 2
Port: 6443
Protocol: TCP
TargetType: ip
VpcId:
Ref: VpcId
TargetGroupAttributes:
- Key: deregistration_delay.timeout_seconds
Value: 60
InternalServiceInternalListener:
Type: AWS::ElasticLoadBalancingV2::Listener
Properties:
DefaultActions:
- Type: forward
TargetGroupArn:
Ref: InternalServiceTargetGroup
LoadBalancerArn:
Ref: IntApiElb
Port: 22623
Protocol: TCP
InternalServiceTargetGroup:
Type: AWS::ElasticLoadBalancingV2::TargetGroup
Properties:
HealthCheckIntervalSeconds: 10
HealthCheckPath: "/healthz"
HealthCheckPort: 22623
HealthCheckProtocol: HTTPS
HealthyThresholdCount: 2
UnhealthyThresholdCount: 2
Port: 22623
Protocol: TCP
TargetType: ip
VpcId:
Ref: VpcId
TargetGroupAttributes:
- Key: deregistration_delay.timeout_seconds
Value: 60
RegisterTargetLambdaIamRole:
Type: AWS::IAM::Role
Properties:
RoleName: !Join ["-", [!Ref InfrastructureName, "nlb", "lambda", "role"]]
AssumeRolePolicyDocument:
Version: "2012-10-17"
Statement:
- Effect: "Allow"
Principal:
Service:
- "lambda.amazonaws.com"
Action:
- "sts:AssumeRole"
Path: "/"
Policies:
- PolicyName: !Join ["-", [!Ref InfrastructureName, "master", "policy"]]
PolicyDocument:
Version: "2012-10-17"
Statement:
- Effect: "Allow"
Action:
[
"elasticloadbalancing:RegisterTargets",
"elasticloadbalancing:DeregisterTargets",
]
Resource: !Ref InternalApiTargetGroup
- Effect: "Allow"
Action:
[
"elasticloadbalancing:RegisterTargets",
"elasticloadbalancing:DeregisterTargets",
]
Resource: !Ref InternalServiceTargetGroup
- Effect: "Allow"
Action:
[
"elasticloadbalancing:RegisterTargets",
"elasticloadbalancing:DeregisterTargets",
]
Resource: !Ref ExternalApiTargetGroup
RegisterNlbIpTargets:
Type: "AWS::Lambda::Function"
Properties:
Handler: "index.handler"
Role:
Fn::GetAtt:
- "RegisterTargetLambdaIamRole"
- "Arn"
Code:
ZipFile: |
import json
import boto3
import cfnresponse
def handler(event, context):
elb = boto3.client('elbv2')
if event['RequestType'] == 'Delete':
elb.deregister_targets(TargetGroupArn=event['ResourceProperties']['TargetArn'],Targets=[{'Id': event['ResourceProperties']['TargetIp']}])
elif event['RequestType'] == 'Create':
elb.register_targets(TargetGroupArn=event['ResourceProperties']['TargetArn'],Targets=[{'Id': event['ResourceProperties']['TargetIp']}])
responseData = {}
cfnresponse.send(event, context, cfnresponse.SUCCESS, responseData, event['ResourceProperties']['TargetArn']+event['ResourceProperties']['TargetIp'])
Runtime: "python3.7"
Timeout: 120
RegisterSubnetTagsLambdaIamRole:
Type: AWS::IAM::Role
Properties:
RoleName: !Join ["-", [!Ref InfrastructureName, "subnet-tags-lambda-role"]]
AssumeRolePolicyDocument:
Version: "2012-10-17"
Statement:
- Effect: "Allow"
Principal:
Service:
- "lambda.amazonaws.com"
Action:
- "sts:AssumeRole"
Path: "/"
Policies:
- PolicyName: !Join ["-", [!Ref InfrastructureName, "subnet-tagging-policy"]]
PolicyDocument:
Version: "2012-10-17"
Statement:
- Effect: "Allow"
Action:
[
"ec2:DeleteTags",
"ec2:CreateTags"
]
Resource: "arn:aws:ec2:*:*:subnet/*"
- Effect: "Allow"
Action:
[
"ec2:DescribeSubnets",
"ec2:DescribeTags"
]
Resource: "*"
RegisterSubnetTags:
Type: "AWS::Lambda::Function"
Properties:
Handler: "index.handler"
Role:
Fn::GetAtt:
- "RegisterSubnetTagsLambdaIamRole"
- "Arn"
Code:
ZipFile: |
import json
import boto3
import cfnresponse
def handler(event, context):
ec2_client = boto3.client('ec2')
if event['RequestType'] == 'Delete':
for subnet_id in event['ResourceProperties']['Subnets']:
ec2_client.delete_tags(Resources=[subnet_id], Tags=[{'Key': 'kubernetes.io/cluster/' + event['ResourceProperties']['InfrastructureName']}]);
elif event['RequestType'] == 'Create':
for subnet_id in event['ResourceProperties']['Subnets']:
ec2_client.create_tags(Resources=[subnet_id], Tags=[{'Key': 'kubernetes.io/cluster/' + event['ResourceProperties']['InfrastructureName'], 'Value': 'shared'}]);
responseData = {}
cfnresponse.send(event, context, cfnresponse.SUCCESS, responseData, event['ResourceProperties']['InfrastructureName']+event['ResourceProperties']['Subnets'][0])
Runtime: "python3.7"
Timeout: 120
RegisterPublicSubnetTags:
Type: Custom::SubnetRegister
Properties:
ServiceToken: !GetAtt RegisterSubnetTags.Arn
InfrastructureName: !Ref InfrastructureName
Subnets: !Ref PublicSubnets
RegisterPrivateSubnetTags:
Type: Custom::SubnetRegister
Properties:
ServiceToken: !GetAtt RegisterSubnetTags.Arn
InfrastructureName: !Ref InfrastructureName
Subnets: !Ref PrivateSubnets
Outputs:
PrivateHostedZoneId:
Description: Hosted zone ID for the private DNS, which is required for private records.
Value: !Ref IntDns
ExternalApiLoadBalancerName:
Description: Full name of the external API load balancer.
Value: !GetAtt ExtApiElb.LoadBalancerFullName
InternalApiLoadBalancerName:
Description: Full name of the internal API load balancer.
Value: !GetAtt IntApiElb.LoadBalancerFullName
ApiServerDnsName:
Description: Full hostname of the API server, which is required for the Ignition config files.
Value: !Join [".", ["api-int", !Ref ClusterName, !Ref HostedZoneName]]
RegisterNlbIpTargetsLambda:
Description: Lambda ARN useful to help register or deregister IP targets for these load balancers.
Value: !GetAtt RegisterNlbIpTargets.Arn
ExternalApiTargetGroupArn:
Description: ARN of the external API target group.
Value: !Ref ExternalApiTargetGroup
InternalApiTargetGroupArn:
Description: ARN of the internal API target group.
Value: !Ref InternalApiTargetGroup
InternalServiceTargetGroupArn:
Description: ARN of the internal service target group.
Value: !Ref InternalServiceTargetGroup
If you are deploying your cluster to an AWS government or secret region, you must update the InternalApiServerRecord to use CNAME records. Records of type ALIAS are not supported for AWS government regions. For example:
Type: CNAME
TTL: 10
ResourceRecords:
- !GetAtt IntApiElb.DNSName4.11.10. Creating security group and roles in AWS
You must create security groups and roles in Amazon Web Services (AWS) for your OpenShift Container Platform cluster to use.
You can use the provided CloudFormation template and a custom parameter file to create a stack of AWS resources. The stack represents the security groups and roles that your OpenShift Container Platform cluster requires.
If you do not use the provided CloudFormation template to create your AWS infrastructure, you must review the provided information and manually create the infrastructure. If your cluster does not initialize correctly, you might have to contact Red Hat support with your installation logs.
Prerequisites
- You configured an AWS account.
-
You added your AWS keys and region to your local AWS profile by running
aws configure. - You generated the Ignition config files for your cluster.
- You created and configured a VPC and associated subnets in AWS.
Procedure
Create a JSON file that contains the parameter values that the template requires:
[ { "ParameterKey": "InfrastructureName",1 "ParameterValue": "mycluster-<random_string>"2 }, { "ParameterKey": "VpcCidr",3 "ParameterValue": "10.0.0.0/16"4 }, { "ParameterKey": "PrivateSubnets",5 "ParameterValue": "subnet-<random_string>"6 }, { "ParameterKey": "VpcId",7 "ParameterValue": "vpc-<random_string>"8 } ]- 1
- The name for your cluster infrastructure that is encoded in your Ignition config files for the cluster.
- 2
- Specify the infrastructure name that you extracted from the Ignition config file metadata, which has the format
<cluster-name>-<random-string>. - 3
- The CIDR block for the VPC.
- 4
- Specify the CIDR block parameter that you used for the VPC that you defined in the form
x.x.x.x/16-24. - 5
- The private subnets that you created for your VPC.
- 6
- Specify the
PrivateSubnetIdsvalue from the output of the CloudFormation template for the VPC. - 7
- The VPC that you created for the cluster.
- 8
- Specify the
VpcIdvalue from the output of the CloudFormation template for the VPC.
- Copy the template from the CloudFormation template for security objects section of this topic and save it as a YAML file on your computer. This template describes the security groups and roles that your cluster requires.
Launch the CloudFormation template to create a stack of AWS resources that represent the security groups and roles:
ImportantYou must enter the command on a single line.
$ aws cloudformation create-stack --stack-name <name>1 --template-body file://<template>.yaml2 --parameters file://<parameters>.json3 --capabilities CAPABILITY_NAMED_IAM4 - 1
<name>is the name for the CloudFormation stack, such ascluster-sec. You need the name of this stack if you remove the cluster.- 2
<template>is the relative path to and name of the CloudFormation template YAML file that you saved.- 3
<parameters>is the relative path to and name of the CloudFormation parameters JSON file.- 4
- You must explicitly declare the
CAPABILITY_NAMED_IAMcapability because the provided template creates someAWS::IAM::RoleandAWS::IAM::InstanceProfileresources.
Example output
arn:aws:cloudformation:us-east-1:269333783861:stack/cluster-sec/03bd4210-2ed7-11eb-6d7a-13fc0b61e9dbConfirm that the template components exist:
$ aws cloudformation describe-stacks --stack-name <name>After the
StackStatusdisplaysCREATE_COMPLETE, the output displays values for the following parameters. You must provide these parameter values to the other CloudFormation templates that you run to create your cluster:MasterSecurityGroupIdMaster Security Group ID
WorkerSecurityGroupIdWorker Security Group ID
MasterInstanceProfileMaster IAM Instance Profile
WorkerInstanceProfileWorker IAM Instance Profile
4.11.10.1. CloudFormation template for security objects
You can use the following CloudFormation template to deploy the security objects that you need for your OpenShift Container Platform cluster.
Example 4.37. CloudFormation template for security objects
AWSTemplateFormatVersion: 2010-09-09
Description: Template for OpenShift Cluster Security Elements (Security Groups & IAM)
Parameters:
InfrastructureName:
AllowedPattern: ^([a-zA-Z][a-zA-Z0-9\-]{0,26})$
MaxLength: 27
MinLength: 1
ConstraintDescription: Infrastructure name must be alphanumeric, start with a letter, and have a maximum of 27 characters.
Description: A short, unique cluster ID used to tag cloud resources and identify items owned or used by the cluster.
Type: String
VpcCidr:
AllowedPattern: ^(([0-9]|[1-9][0-9]|1[0-9]{2}|2[0-4][0-9]|25[0-5])\.){3}([0-9]|[1-9][0-9]|1[0-9]{2}|2[0-4][0-9]|25[0-5])(\/(1[6-9]|2[0-4]))$
ConstraintDescription: CIDR block parameter must be in the form x.x.x.x/16-24.
Default: 10.0.0.0/16
Description: CIDR block for VPC.
Type: String
VpcId:
Description: The VPC-scoped resources will belong to this VPC.
Type: AWS::EC2::VPC::Id
PrivateSubnets:
Description: The internal subnets.
Type: List<AWS::EC2::Subnet::Id>
Metadata:
AWS::CloudFormation::Interface:
ParameterGroups:
- Label:
default: "Cluster Information"
Parameters:
- InfrastructureName
- Label:
default: "Network Configuration"
Parameters:
- VpcId
- VpcCidr
- PrivateSubnets
ParameterLabels:
InfrastructureName:
default: "Infrastructure Name"
VpcId:
default: "VPC ID"
VpcCidr:
default: "VPC CIDR"
PrivateSubnets:
default: "Private Subnets"
Resources:
MasterSecurityGroup:
Type: AWS::EC2::SecurityGroup
Properties:
GroupDescription: Cluster Master Security Group
SecurityGroupIngress:
- IpProtocol: icmp
FromPort: 0
ToPort: 0
CidrIp: !Ref VpcCidr
- IpProtocol: tcp
FromPort: 22
ToPort: 22
CidrIp: !Ref VpcCidr
- IpProtocol: tcp
ToPort: 6443
FromPort: 6443
CidrIp: !Ref VpcCidr
- IpProtocol: tcp
FromPort: 22623
ToPort: 22623
CidrIp: !Ref VpcCidr
VpcId: !Ref VpcId
WorkerSecurityGroup:
Type: AWS::EC2::SecurityGroup
Properties:
GroupDescription: Cluster Worker Security Group
SecurityGroupIngress:
- IpProtocol: icmp
FromPort: 0
ToPort: 0
CidrIp: !Ref VpcCidr
- IpProtocol: tcp
FromPort: 22
ToPort: 22
CidrIp: !Ref VpcCidr
VpcId: !Ref VpcId
MasterIngressEtcd:
Type: AWS::EC2::SecurityGroupIngress
Properties:
GroupId: !GetAtt MasterSecurityGroup.GroupId
SourceSecurityGroupId: !GetAtt MasterSecurityGroup.GroupId
Description: etcd
FromPort: 2379
ToPort: 2380
IpProtocol: tcp
MasterIngressVxlan:
Type: AWS::EC2::SecurityGroupIngress
Properties:
GroupId: !GetAtt MasterSecurityGroup.GroupId
SourceSecurityGroupId: !GetAtt MasterSecurityGroup.GroupId
Description: Vxlan packets
FromPort: 4789
ToPort: 4789
IpProtocol: udp
MasterIngressWorkerVxlan:
Type: AWS::EC2::SecurityGroupIngress
Properties:
GroupId: !GetAtt MasterSecurityGroup.GroupId
SourceSecurityGroupId: !GetAtt WorkerSecurityGroup.GroupId
Description: Vxlan packets
FromPort: 4789
ToPort: 4789
IpProtocol: udp
MasterIngressGeneve:
Type: AWS::EC2::SecurityGroupIngress
Properties:
GroupId: !GetAtt MasterSecurityGroup.GroupId
SourceSecurityGroupId: !GetAtt MasterSecurityGroup.GroupId
Description: Geneve packets
FromPort: 6081
ToPort: 6081
IpProtocol: udp
MasterIngressWorkerGeneve:
Type: AWS::EC2::SecurityGroupIngress
Properties:
GroupId: !GetAtt MasterSecurityGroup.GroupId
SourceSecurityGroupId: !GetAtt WorkerSecurityGroup.GroupId
Description: Geneve packets
FromPort: 6081
ToPort: 6081
IpProtocol: udp
MasterIngressIpsecIke:
Type: AWS::EC2::SecurityGroupIngress
Properties:
GroupId: !GetAtt MasterSecurityGroup.GroupId
SourceSecurityGroupId: !GetAtt MasterSecurityGroup.GroupId
Description: IPsec IKE packets
FromPort: 500
ToPort: 500
IpProtocol: udp
MasterIngressIpsecNat:
Type: AWS::EC2::SecurityGroupIngress
Properties:
GroupId: !GetAtt MasterSecurityGroup.GroupId
SourceSecurityGroupId: !GetAtt MasterSecurityGroup.GroupId
Description: IPsec NAT-T packets
FromPort: 4500
ToPort: 4500
IpProtocol: udp
MasterIngressIpsecEsp:
Type: AWS::EC2::SecurityGroupIngress
Properties:
GroupId: !GetAtt MasterSecurityGroup.GroupId
SourceSecurityGroupId: !GetAtt MasterSecurityGroup.GroupId
Description: IPsec ESP packets
IpProtocol: 50
MasterIngressWorkerIpsecIke:
Type: AWS::EC2::SecurityGroupIngress
Properties:
GroupId: !GetAtt MasterSecurityGroup.GroupId
SourceSecurityGroupId: !GetAtt WorkerSecurityGroup.GroupId
Description: IPsec IKE packets
FromPort: 500
ToPort: 500
IpProtocol: udp
MasterIngressWorkerIpsecNat:
Type: AWS::EC2::SecurityGroupIngress
Properties:
GroupId: !GetAtt MasterSecurityGroup.GroupId
SourceSecurityGroupId: !GetAtt WorkerSecurityGroup.GroupId
Description: IPsec NAT-T packets
FromPort: 4500
ToPort: 4500
IpProtocol: udp
MasterIngressWorkerIpsecEsp:
Type: AWS::EC2::SecurityGroupIngress
Properties:
GroupId: !GetAtt MasterSecurityGroup.GroupId
SourceSecurityGroupId: !GetAtt WorkerSecurityGroup.GroupId
Description: IPsec ESP packets
IpProtocol: 50
MasterIngressInternal:
Type: AWS::EC2::SecurityGroupIngress
Properties:
GroupId: !GetAtt MasterSecurityGroup.GroupId
SourceSecurityGroupId: !GetAtt MasterSecurityGroup.GroupId
Description: Internal cluster communication
FromPort: 9000
ToPort: 9999
IpProtocol: tcp
MasterIngressWorkerInternal:
Type: AWS::EC2::SecurityGroupIngress
Properties:
GroupId: !GetAtt MasterSecurityGroup.GroupId
SourceSecurityGroupId: !GetAtt WorkerSecurityGroup.GroupId
Description: Internal cluster communication
FromPort: 9000
ToPort: 9999
IpProtocol: tcp
MasterIngressInternalUDP:
Type: AWS::EC2::SecurityGroupIngress
Properties:
GroupId: !GetAtt MasterSecurityGroup.GroupId
SourceSecurityGroupId: !GetAtt MasterSecurityGroup.GroupId
Description: Internal cluster communication
FromPort: 9000
ToPort: 9999
IpProtocol: udp
MasterIngressWorkerInternalUDP:
Type: AWS::EC2::SecurityGroupIngress
Properties:
GroupId: !GetAtt MasterSecurityGroup.GroupId
SourceSecurityGroupId: !GetAtt WorkerSecurityGroup.GroupId
Description: Internal cluster communication
FromPort: 9000
ToPort: 9999
IpProtocol: udp
MasterIngressKube:
Type: AWS::EC2::SecurityGroupIngress
Properties:
GroupId: !GetAtt MasterSecurityGroup.GroupId
SourceSecurityGroupId: !GetAtt MasterSecurityGroup.GroupId
Description: Kubernetes kubelet, scheduler and controller manager
FromPort: 10250
ToPort: 10259
IpProtocol: tcp
MasterIngressWorkerKube:
Type: AWS::EC2::SecurityGroupIngress
Properties:
GroupId: !GetAtt MasterSecurityGroup.GroupId
SourceSecurityGroupId: !GetAtt WorkerSecurityGroup.GroupId
Description: Kubernetes kubelet, scheduler and controller manager
FromPort: 10250
ToPort: 10259
IpProtocol: tcp
MasterIngressIngressServices:
Type: AWS::EC2::SecurityGroupIngress
Properties:
GroupId: !GetAtt MasterSecurityGroup.GroupId
SourceSecurityGroupId: !GetAtt MasterSecurityGroup.GroupId
Description: Kubernetes ingress services
FromPort: 30000
ToPort: 32767
IpProtocol: tcp
MasterIngressWorkerIngressServices:
Type: AWS::EC2::SecurityGroupIngress
Properties:
GroupId: !GetAtt MasterSecurityGroup.GroupId
SourceSecurityGroupId: !GetAtt WorkerSecurityGroup.GroupId
Description: Kubernetes ingress services
FromPort: 30000
ToPort: 32767
IpProtocol: tcp
MasterIngressIngressServicesUDP:
Type: AWS::EC2::SecurityGroupIngress
Properties:
GroupId: !GetAtt MasterSecurityGroup.GroupId
SourceSecurityGroupId: !GetAtt MasterSecurityGroup.GroupId
Description: Kubernetes ingress services
FromPort: 30000
ToPort: 32767
IpProtocol: udp
MasterIngressWorkerIngressServicesUDP:
Type: AWS::EC2::SecurityGroupIngress
Properties:
GroupId: !GetAtt MasterSecurityGroup.GroupId
SourceSecurityGroupId: !GetAtt WorkerSecurityGroup.GroupId
Description: Kubernetes ingress services
FromPort: 30000
ToPort: 32767
IpProtocol: udp
WorkerIngressVxlan:
Type: AWS::EC2::SecurityGroupIngress
Properties:
GroupId: !GetAtt WorkerSecurityGroup.GroupId
SourceSecurityGroupId: !GetAtt WorkerSecurityGroup.GroupId
Description: Vxlan packets
FromPort: 4789
ToPort: 4789
IpProtocol: udp
WorkerIngressMasterVxlan:
Type: AWS::EC2::SecurityGroupIngress
Properties:
GroupId: !GetAtt WorkerSecurityGroup.GroupId
SourceSecurityGroupId: !GetAtt MasterSecurityGroup.GroupId
Description: Vxlan packets
FromPort: 4789
ToPort: 4789
IpProtocol: udp
WorkerIngressGeneve:
Type: AWS::EC2::SecurityGroupIngress
Properties:
GroupId: !GetAtt WorkerSecurityGroup.GroupId
SourceSecurityGroupId: !GetAtt WorkerSecurityGroup.GroupId
Description: Geneve packets
FromPort: 6081
ToPort: 6081
IpProtocol: udp
WorkerIngressMasterGeneve:
Type: AWS::EC2::SecurityGroupIngress
Properties:
GroupId: !GetAtt WorkerSecurityGroup.GroupId
SourceSecurityGroupId: !GetAtt MasterSecurityGroup.GroupId
Description: Geneve packets
FromPort: 6081
ToPort: 6081
IpProtocol: udp
WorkerIngressIpsecIke:
Type: AWS::EC2::SecurityGroupIngress
Properties:
GroupId: !GetAtt WorkerSecurityGroup.GroupId
SourceSecurityGroupId: !GetAtt WorkerSecurityGroup.GroupId
Description: IPsec IKE packets
FromPort: 500
ToPort: 500
IpProtocol: udp
WorkerIngressIpsecNat:
Type: AWS::EC2::SecurityGroupIngress
Properties:
GroupId: !GetAtt WorkerSecurityGroup.GroupId
SourceSecurityGroupId: !GetAtt WorkerSecurityGroup.GroupId
Description: IPsec NAT-T packets
FromPort: 4500
ToPort: 4500
IpProtocol: udp
WorkerIngressIpsecEsp:
Type: AWS::EC2::SecurityGroupIngress
Properties:
GroupId: !GetAtt WorkerSecurityGroup.GroupId
SourceSecurityGroupId: !GetAtt WorkerSecurityGroup.GroupId
Description: IPsec ESP packets
IpProtocol: 50
WorkerIngressMasterIpsecIke:
Type: AWS::EC2::SecurityGroupIngress
Properties:
GroupId: !GetAtt WorkerSecurityGroup.GroupId
SourceSecurityGroupId: !GetAtt MasterSecurityGroup.GroupId
Description: IPsec IKE packets
FromPort: 500
ToPort: 500
IpProtocol: udp
WorkerIngressMasterIpsecNat:
Type: AWS::EC2::SecurityGroupIngress
Properties:
GroupId: !GetAtt WorkerSecurityGroup.GroupId
SourceSecurityGroupId: !GetAtt MasterSecurityGroup.GroupId
Description: IPsec NAT-T packets
FromPort: 4500
ToPort: 4500
IpProtocol: udp
WorkerIngressMasterIpsecEsp:
Type: AWS::EC2::SecurityGroupIngress
Properties:
GroupId: !GetAtt WorkerSecurityGroup.GroupId
SourceSecurityGroupId: !GetAtt MasterSecurityGroup.GroupId
Description: IPsec ESP packets
IpProtocol: 50
WorkerIngressInternal:
Type: AWS::EC2::SecurityGroupIngress
Properties:
GroupId: !GetAtt WorkerSecurityGroup.GroupId
SourceSecurityGroupId: !GetAtt WorkerSecurityGroup.GroupId
Description: Internal cluster communication
FromPort: 9000
ToPort: 9999
IpProtocol: tcp
WorkerIngressMasterInternal:
Type: AWS::EC2::SecurityGroupIngress
Properties:
GroupId: !GetAtt WorkerSecurityGroup.GroupId
SourceSecurityGroupId: !GetAtt MasterSecurityGroup.GroupId
Description: Internal cluster communication
FromPort: 9000
ToPort: 9999
IpProtocol: tcp
WorkerIngressInternalUDP:
Type: AWS::EC2::SecurityGroupIngress
Properties:
GroupId: !GetAtt WorkerSecurityGroup.GroupId
SourceSecurityGroupId: !GetAtt WorkerSecurityGroup.GroupId
Description: Internal cluster communication
FromPort: 9000
ToPort: 9999
IpProtocol: udp
WorkerIngressMasterInternalUDP:
Type: AWS::EC2::SecurityGroupIngress
Properties:
GroupId: !GetAtt WorkerSecurityGroup.GroupId
SourceSecurityGroupId: !GetAtt MasterSecurityGroup.GroupId
Description: Internal cluster communication
FromPort: 9000
ToPort: 9999
IpProtocol: udp
WorkerIngressKube:
Type: AWS::EC2::SecurityGroupIngress
Properties:
GroupId: !GetAtt WorkerSecurityGroup.GroupId
SourceSecurityGroupId: !GetAtt WorkerSecurityGroup.GroupId
Description: Kubernetes secure kubelet port
FromPort: 10250
ToPort: 10250
IpProtocol: tcp
WorkerIngressWorkerKube:
Type: AWS::EC2::SecurityGroupIngress
Properties:
GroupId: !GetAtt WorkerSecurityGroup.GroupId
SourceSecurityGroupId: !GetAtt MasterSecurityGroup.GroupId
Description: Internal Kubernetes communication
FromPort: 10250
ToPort: 10250
IpProtocol: tcp
WorkerIngressIngressServices:
Type: AWS::EC2::SecurityGroupIngress
Properties:
GroupId: !GetAtt WorkerSecurityGroup.GroupId
SourceSecurityGroupId: !GetAtt WorkerSecurityGroup.GroupId
Description: Kubernetes ingress services
FromPort: 30000
ToPort: 32767
IpProtocol: tcp
WorkerIngressMasterIngressServices:
Type: AWS::EC2::SecurityGroupIngress
Properties:
GroupId: !GetAtt WorkerSecurityGroup.GroupId
SourceSecurityGroupId: !GetAtt MasterSecurityGroup.GroupId
Description: Kubernetes ingress services
FromPort: 30000
ToPort: 32767
IpProtocol: tcp
WorkerIngressIngressServicesUDP:
Type: AWS::EC2::SecurityGroupIngress
Properties:
GroupId: !GetAtt WorkerSecurityGroup.GroupId
SourceSecurityGroupId: !GetAtt WorkerSecurityGroup.GroupId
Description: Kubernetes ingress services
FromPort: 30000
ToPort: 32767
IpProtocol: udp
WorkerIngressMasterIngressServicesUDP:
Type: AWS::EC2::SecurityGroupIngress
Properties:
GroupId: !GetAtt WorkerSecurityGroup.GroupId
SourceSecurityGroupId: !GetAtt MasterSecurityGroup.GroupId
Description: Kubernetes ingress services
FromPort: 30000
ToPort: 32767
IpProtocol: udp
MasterIamRole:
Type: AWS::IAM::Role
Properties:
AssumeRolePolicyDocument:
Version: "2012-10-17"
Statement:
- Effect: "Allow"
Principal:
Service:
- "ec2.amazonaws.com"
Action:
- "sts:AssumeRole"
Policies:
- PolicyName: !Join ["-", [!Ref InfrastructureName, "master", "policy"]]
PolicyDocument:
Version: "2012-10-17"
Statement:
- Effect: "Allow"
Action:
- "ec2:AttachVolume"
- "ec2:AuthorizeSecurityGroupIngress"
- "ec2:CreateSecurityGroup"
- "ec2:CreateTags"
- "ec2:CreateVolume"
- "ec2:DeleteSecurityGroup"
- "ec2:DeleteVolume"
- "ec2:Describe*"
- "ec2:DetachVolume"
- "ec2:ModifyInstanceAttribute"
- "ec2:ModifyVolume"
- "ec2:RevokeSecurityGroupIngress"
- "elasticloadbalancing:AddTags"
- "elasticloadbalancing:AttachLoadBalancerToSubnets"
- "elasticloadbalancing:ApplySecurityGroupsToLoadBalancer"
- "elasticloadbalancing:CreateListener"
- "elasticloadbalancing:CreateLoadBalancer"
- "elasticloadbalancing:CreateLoadBalancerPolicy"
- "elasticloadbalancing:CreateLoadBalancerListeners"
- "elasticloadbalancing:CreateTargetGroup"
- "elasticloadbalancing:ConfigureHealthCheck"
- "elasticloadbalancing:DeleteListener"
- "elasticloadbalancing:DeleteLoadBalancer"
- "elasticloadbalancing:DeleteLoadBalancerListeners"
- "elasticloadbalancing:DeleteTargetGroup"
- "elasticloadbalancing:DeregisterInstancesFromLoadBalancer"
- "elasticloadbalancing:DeregisterTargets"
- "elasticloadbalancing:Describe*"
- "elasticloadbalancing:DetachLoadBalancerFromSubnets"
- "elasticloadbalancing:ModifyListener"
- "elasticloadbalancing:ModifyLoadBalancerAttributes"
- "elasticloadbalancing:ModifyTargetGroup"
- "elasticloadbalancing:ModifyTargetGroupAttributes"
- "elasticloadbalancing:RegisterInstancesWithLoadBalancer"
- "elasticloadbalancing:RegisterTargets"
- "elasticloadbalancing:SetLoadBalancerPoliciesForBackendServer"
- "elasticloadbalancing:SetLoadBalancerPoliciesOfListener"
- "kms:DescribeKey"
Resource: "*"
MasterInstanceProfile:
Type: "AWS::IAM::InstanceProfile"
Properties:
Roles:
- Ref: "MasterIamRole"
WorkerIamRole:
Type: AWS::IAM::Role
Properties:
AssumeRolePolicyDocument:
Version: "2012-10-17"
Statement:
- Effect: "Allow"
Principal:
Service:
- "ec2.amazonaws.com"
Action:
- "sts:AssumeRole"
Policies:
- PolicyName: !Join ["-", [!Ref InfrastructureName, "worker", "policy"]]
PolicyDocument:
Version: "2012-10-17"
Statement:
- Effect: "Allow"
Action:
- "ec2:DescribeInstances"
- "ec2:DescribeRegions"
Resource: "*"
WorkerInstanceProfile:
Type: "AWS::IAM::InstanceProfile"
Properties:
Roles:
- Ref: "WorkerIamRole"
Outputs:
MasterSecurityGroupId:
Description: Master Security Group ID
Value: !GetAtt MasterSecurityGroup.GroupId
WorkerSecurityGroupId:
Description: Worker Security Group ID
Value: !GetAtt WorkerSecurityGroup.GroupId
MasterInstanceProfile:
Description: Master IAM Instance Profile
Value: !Ref MasterInstanceProfile
WorkerInstanceProfile:
Description: Worker IAM Instance Profile
Value: !Ref WorkerInstanceProfile4.11.11. RHCOS AMIs for the AWS infrastructure
Red Hat provides Red Hat Enterprise Linux CoreOS (RHCOS) AMIs valid for the various Amazon Web Services (AWS) zones you can specify for your OpenShift Container Platform nodes.
You can also install to regions that do not have a RHCOS AMI published by importing your own AMI.
| AWS zone | AWS AMI |
|---|---|
|
|
|
|
|
|
|
|
|
|
|
|
|
|
|
|
|
|
|
|
|
|
|
|
|
|
|
|
|
|
|
|
|
|
|
|
|
|
|
|
|
|
|
|
|
|
|
|
|
|
|
|
|
|
|
|
|
|
|
|
4.11.11.1. AWS regions without a published RHCOS AMI
You can deploy an OpenShift Container Platform cluster to Amazon Web Services (AWS) regions without native support for a Red Hat Enterprise Linux CoreOS (RHCOS) Amazon Machine Image (AMI) or the AWS software development kit (SDK). If a published AMI is not available for an AWS region, you can upload a custom AMI prior to installing the cluster. This is required if you are deploying your cluster to an AWS government or secret region. AWS government and secret regions are supported by the AWS SDK.
If you are deploying to a region not supported by the AWS SDK and you do not specify a custom AMI, the installation program copies the us-east-1 AMI to the user account automatically. Then the installation program creates the control plane machines with encrypted EBS volumes using the default or user-specified Key Management Service (KMS) key. This allows the AMI to follow the same process workflow as published RHCOS AMIs.
A region without native support for an RHCOS AMI is not available to select from the terminal during cluster creation because it is not published. However, you can install to this region by configuring the custom AMI in the install-config.yaml file.
4.11.11.2. Uploading a custom RHCOS AMI in AWS
If you are deploying to a custom Amazon Web Services (AWS) region, you must upload a custom Red Hat Enterprise Linux CoreOS (RHCOS) Amazon Machine Image (AMI) that belongs to that region.
Prerequisites
- You configured an AWS account.
- You created an Amazon S3 bucket with the required IAM service role.
- You uploaded your RHCOS VMDK file to Amazon S3. The RHCOS VMDK file must be the highest version that is less than or equal to the OpenShift Container Platform version you are installing.
- You downloaded the AWS CLI and installed it on your computer. See Install the AWS CLI Using the Bundled Installer.
Procedure
Export your AWS profile as an environment variable:
$ export AWS_PROFILE=<aws_profile>1 - 1
- The AWS profile name that holds your AWS credentials, like
govcloud.
Export the region to associate with your custom AMI as an environment variable:
$ export AWS_DEFAULT_REGION=<aws_region>1 - 1
- The AWS region, like
us-gov-east-1.
Export the version of RHCOS you uploaded to Amazon S3 as an environment variable:
$ export RHCOS_VERSION=<version>1 - 1
- The RHCOS VMDK version, like
4.7.0.
Export the Amazon S3 bucket name as an environment variable:
$ export VMIMPORT_BUCKET_NAME=<s3_bucket_name>Create the
containers.jsonfile and define your RHCOS VMDK file:$ cat <<EOF > containers.json { "Description": "rhcos-${RHCOS_VERSION}-x86_64-aws.x86_64", "Format": "vmdk", "UserBucket": { "S3Bucket": "${VMIMPORT_BUCKET_NAME}", "S3Key": "rhcos-${RHCOS_VERSION}-x86_64-aws.x86_64.vmdk" } } EOFImport the RHCOS disk as an Amazon EBS snapshot:
$ aws ec2 import-snapshot --region ${AWS_DEFAULT_REGION} \ --description "<description>" \1 --disk-container "file://<file_path>/containers.json"2 Check the status of the image import:
$ watch -n 5 aws ec2 describe-import-snapshot-tasks --region ${AWS_DEFAULT_REGION}Example output
{ "ImportSnapshotTasks": [ { "Description": "rhcos-4.7.0-x86_64-aws.x86_64", "ImportTaskId": "import-snap-fh6i8uil", "SnapshotTaskDetail": { "Description": "rhcos-4.7.0-x86_64-aws.x86_64", "DiskImageSize": 819056640.0, "Format": "VMDK", "SnapshotId": "snap-06331325870076318", "Status": "completed", "UserBucket": { "S3Bucket": "external-images", "S3Key": "rhcos-4.7.0-x86_64-aws.x86_64.vmdk" } } } ] }Copy the
SnapshotIdto register the image.Create a custom RHCOS AMI from the RHCOS snapshot:
$ aws ec2 register-image \ --region ${AWS_DEFAULT_REGION} \ --architecture x86_64 \1 --description "rhcos-${RHCOS_VERSION}-x86_64-aws.x86_64" \2 --ena-support \ --name "rhcos-${RHCOS_VERSION}-x86_64-aws.x86_64" \3 --virtualization-type hvm \ --root-device-name '/dev/xvda' \ --block-device-mappings 'DeviceName=/dev/xvda,Ebs={DeleteOnTermination=true,SnapshotId=<snapshot_ID>}'4
To learn more about these APIs, see the AWS documentation for importing snapshots and creating EBS-backed AMIs.
4.11.12. Creating the bootstrap node in AWS
You must create the bootstrap node in Amazon Web Services (AWS) to use during OpenShift Container Platform cluster initialization.
You can use the provided CloudFormation template and a custom parameter file to create a stack of AWS resources. The stack represents the bootstrap node that your OpenShift Container Platform installation requires.
If you do not use the provided CloudFormation template to create your bootstrap node, you must review the provided information and manually create the infrastructure. If your cluster does not initialize correctly, you might have to contact Red Hat support with your installation logs.
Prerequisites
- You configured an AWS account.
-
You added your AWS keys and region to your local AWS profile by running
aws configure. - You generated the Ignition config files for your cluster.
- You created and configured a VPC and associated subnets in AWS.
- You created and configured DNS, load balancers, and listeners in AWS.
- You created the security groups and roles required for your cluster in AWS.
Procedure
Provide a location to serve the
bootstrap.ignIgnition config file to your cluster. This file is located in your installation directory. One way to do this is to create an S3 bucket in your cluster’s region and upload the Ignition config file to it.ImportantThe provided CloudFormation Template assumes that the Ignition config files for your cluster are served from an S3 bucket. If you choose to serve the files from another location, you must modify the templates.
ImportantIf you are deploying to a region that has endpoints that differ from the AWS SDK, or you are providing your own custom endpoints, you must use a presigned URL for your S3 bucket instead of the
s3://schema.NoteThe bootstrap Ignition config file does contain secrets, like X.509 keys. The following steps provide basic security for the S3 bucket. To provide additional security, you can enable an S3 bucket policy to allow only certain users, such as the OpenShift IAM user, to access objects that the bucket contains. You can avoid S3 entirely and serve your bootstrap Ignition config file from any address that the bootstrap machine can reach.
Create the bucket:
$ aws s3 mb s3://<cluster-name>-infra1 - 1
<cluster-name>-infrais the bucket name. When creating theinstall-config.yamlfile, replace<cluster-name>with the name specified for the cluster.
Upload the
bootstrap.ignIgnition config file to the bucket:$ aws s3 cp <installation_directory>/bootstrap.ign s3://<cluster-name>-infra/bootstrap.ign1 - 1
- For
<installation_directory>, specify the path to the directory that you stored the installation files in.
Verify that the file uploaded:
$ aws s3 ls s3://<cluster-name>-infra/Example output
2019-04-03 16:15:16 314878 bootstrap.ign
Create a JSON file that contains the parameter values that the template requires:
[ { "ParameterKey": "InfrastructureName",1 "ParameterValue": "mycluster-<random_string>"2 }, { "ParameterKey": "RhcosAmi",3 "ParameterValue": "ami-<random_string>"4 }, { "ParameterKey": "AllowedBootstrapSshCidr",5 "ParameterValue": "0.0.0.0/0"6 }, { "ParameterKey": "PublicSubnet",7 "ParameterValue": "subnet-<random_string>"8 }, { "ParameterKey": "MasterSecurityGroupId",9 "ParameterValue": "sg-<random_string>"10 }, { "ParameterKey": "VpcId",11 "ParameterValue": "vpc-<random_string>"12 }, { "ParameterKey": "BootstrapIgnitionLocation",13 "ParameterValue": "s3://<bucket_name>/bootstrap.ign"14 }, { "ParameterKey": "AutoRegisterELB",15 "ParameterValue": "yes"16 }, { "ParameterKey": "RegisterNlbIpTargetsLambdaArn",17 "ParameterValue": "arn:aws:lambda:<region>:<account_number>:function:<dns_stack_name>-RegisterNlbIpTargets-<random_string>"18 }, { "ParameterKey": "ExternalApiTargetGroupArn",19 "ParameterValue": "arn:aws:elasticloadbalancing:<region>:<account_number>:targetgroup/<dns_stack_name>-Exter-<random_string>"20 }, { "ParameterKey": "InternalApiTargetGroupArn",21 "ParameterValue": "arn:aws:elasticloadbalancing:<region>:<account_number>:targetgroup/<dns_stack_name>-Inter-<random_string>"22 }, { "ParameterKey": "InternalServiceTargetGroupArn",23 "ParameterValue": "arn:aws:elasticloadbalancing:<region>:<account_number>:targetgroup/<dns_stack_name>-Inter-<random_string>"24 } ]- 1
- The name for your cluster infrastructure that is encoded in your Ignition config files for the cluster.
- 2
- Specify the infrastructure name that you extracted from the Ignition config file metadata, which has the format
<cluster-name>-<random-string>. - 3
- Current Red Hat Enterprise Linux CoreOS (RHCOS) AMI to use for the bootstrap node.
- 4
- Specify a valid
AWS::EC2::Image::Idvalue. - 5
- CIDR block to allow SSH access to the bootstrap node.
- 6
- Specify a CIDR block in the format
x.x.x.x/16-24. - 7
- The public subnet that is associated with your VPC to launch the bootstrap node into.
- 8
- Specify the
PublicSubnetIdsvalue from the output of the CloudFormation template for the VPC. - 9
- The master security group ID (for registering temporary rules)
- 10
- Specify the
MasterSecurityGroupIdvalue from the output of the CloudFormation template for the security group and roles. - 11
- The VPC created resources will belong to.
- 12
- Specify the
VpcIdvalue from the output of the CloudFormation template for the VPC. - 13
- Location to fetch bootstrap Ignition config file from.
- 14
- Specify the S3 bucket and file name in the form
s3://<bucket_name>/bootstrap.ign. - 15
- Whether or not to register a network load balancer (NLB).
- 16
- Specify
yesorno. If you specifyyes, you must provide a Lambda Amazon Resource Name (ARN) value. - 17
- The ARN for NLB IP target registration lambda group.
- 18
- Specify the
RegisterNlbIpTargetsLambdavalue from the output of the CloudFormation template for DNS and load balancing. Usearn:aws-us-govif deploying the cluster to an AWS GovCloud region. - 19
- The ARN for external API load balancer target group.
- 20
- Specify the
ExternalApiTargetGroupArnvalue from the output of the CloudFormation template for DNS and load balancing. Usearn:aws-us-govif deploying the cluster to an AWS GovCloud region. - 21
- The ARN for internal API load balancer target group.
- 22
- Specify the
InternalApiTargetGroupArnvalue from the output of the CloudFormation template for DNS and load balancing. Usearn:aws-us-govif deploying the cluster to an AWS GovCloud region. - 23
- The ARN for internal service load balancer target group.
- 24
- Specify the
InternalServiceTargetGroupArnvalue from the output of the CloudFormation template for DNS and load balancing. Usearn:aws-us-govif deploying the cluster to an AWS GovCloud region.
- Copy the template from the CloudFormation template for the bootstrap machine section of this topic and save it as a YAML file on your computer. This template describes the bootstrap machine that your cluster requires.
Launch the CloudFormation template to create a stack of AWS resources that represent the bootstrap node:
ImportantYou must enter the command on a single line.
$ aws cloudformation create-stack --stack-name <name>1 --template-body file://<template>.yaml2 --parameters file://<parameters>.json3 --capabilities CAPABILITY_NAMED_IAM4 - 1
<name>is the name for the CloudFormation stack, such ascluster-bootstrap. You need the name of this stack if you remove the cluster.- 2
<template>is the relative path to and name of the CloudFormation template YAML file that you saved.- 3
<parameters>is the relative path to and name of the CloudFormation parameters JSON file.- 4
- You must explicitly declare the
CAPABILITY_NAMED_IAMcapability because the provided template creates someAWS::IAM::RoleandAWS::IAM::InstanceProfileresources.
Example output
arn:aws:cloudformation:us-east-1:269333783861:stack/cluster-bootstrap/12944486-2add-11eb-9dee-12dace8e3a83Confirm that the template components exist:
$ aws cloudformation describe-stacks --stack-name <name>After the
StackStatusdisplaysCREATE_COMPLETE, the output displays values for the following parameters. You must provide these parameter values to the other CloudFormation templates that you run to create your cluster:BootstrapInstanceIdThe bootstrap Instance ID.
BootstrapPublicIpThe bootstrap node public IP address.
BootstrapPrivateIpThe bootstrap node private IP address.
4.11.12.1. CloudFormation template for the bootstrap machine
You can use the following CloudFormation template to deploy the bootstrap machine that you need for your OpenShift Container Platform cluster.
Example 4.38. CloudFormation template for the bootstrap machine
AWSTemplateFormatVersion: 2010-09-09
Description: Template for OpenShift Cluster Bootstrap (EC2 Instance, Security Groups and IAM)
Parameters:
InfrastructureName:
AllowedPattern: ^([a-zA-Z][a-zA-Z0-9\-]{0,26})$
MaxLength: 27
MinLength: 1
ConstraintDescription: Infrastructure name must be alphanumeric, start with a letter, and have a maximum of 27 characters.
Description: A short, unique cluster ID used to tag cloud resources and identify items owned or used by the cluster.
Type: String
RhcosAmi:
Description: Current Red Hat Enterprise Linux CoreOS AMI to use for bootstrap.
Type: AWS::EC2::Image::Id
AllowedBootstrapSshCidr:
AllowedPattern: ^(([0-9]|[1-9][0-9]|1[0-9]{2}|2[0-4][0-9]|25[0-5])\.){3}([0-9]|[1-9][0-9]|1[0-9]{2}|2[0-4][0-9]|25[0-5])(\/([0-9]|1[0-9]|2[0-9]|3[0-2]))$
ConstraintDescription: CIDR block parameter must be in the form x.x.x.x/0-32.
Default: 0.0.0.0/0
Description: CIDR block to allow SSH access to the bootstrap node.
Type: String
PublicSubnet:
Description: The public subnet to launch the bootstrap node into.
Type: AWS::EC2::Subnet::Id
MasterSecurityGroupId:
Description: The master security group ID for registering temporary rules.
Type: AWS::EC2::SecurityGroup::Id
VpcId:
Description: The VPC-scoped resources will belong to this VPC.
Type: AWS::EC2::VPC::Id
BootstrapIgnitionLocation:
Default: s3://my-s3-bucket/bootstrap.ign
Description: Ignition config file location.
Type: String
AutoRegisterELB:
Default: "yes"
AllowedValues:
- "yes"
- "no"
Description: Do you want to invoke NLB registration, which requires a Lambda ARN parameter?
Type: String
RegisterNlbIpTargetsLambdaArn:
Description: ARN for NLB IP target registration lambda.
Type: String
ExternalApiTargetGroupArn:
Description: ARN for external API load balancer target group.
Type: String
InternalApiTargetGroupArn:
Description: ARN for internal API load balancer target group.
Type: String
InternalServiceTargetGroupArn:
Description: ARN for internal service load balancer target group.
Type: String
Metadata:
AWS::CloudFormation::Interface:
ParameterGroups:
- Label:
default: "Cluster Information"
Parameters:
- InfrastructureName
- Label:
default: "Host Information"
Parameters:
- RhcosAmi
- BootstrapIgnitionLocation
- MasterSecurityGroupId
- Label:
default: "Network Configuration"
Parameters:
- VpcId
- AllowedBootstrapSshCidr
- PublicSubnet
- Label:
default: "Load Balancer Automation"
Parameters:
- AutoRegisterELB
- RegisterNlbIpTargetsLambdaArn
- ExternalApiTargetGroupArn
- InternalApiTargetGroupArn
- InternalServiceTargetGroupArn
ParameterLabels:
InfrastructureName:
default: "Infrastructure Name"
VpcId:
default: "VPC ID"
AllowedBootstrapSshCidr:
default: "Allowed SSH Source"
PublicSubnet:
default: "Public Subnet"
RhcosAmi:
default: "Red Hat Enterprise Linux CoreOS AMI ID"
BootstrapIgnitionLocation:
default: "Bootstrap Ignition Source"
MasterSecurityGroupId:
default: "Master Security Group ID"
AutoRegisterELB:
default: "Use Provided ELB Automation"
Conditions:
DoRegistration: !Equals ["yes", !Ref AutoRegisterELB]
Resources:
BootstrapIamRole:
Type: AWS::IAM::Role
Properties:
AssumeRolePolicyDocument:
Version: "2012-10-17"
Statement:
- Effect: "Allow"
Principal:
Service:
- "ec2.amazonaws.com"
Action:
- "sts:AssumeRole"
Path: "/"
Policies:
- PolicyName: !Join ["-", [!Ref InfrastructureName, "bootstrap", "policy"]]
PolicyDocument:
Version: "2012-10-17"
Statement:
- Effect: "Allow"
Action: "ec2:Describe*"
Resource: "*"
- Effect: "Allow"
Action: "ec2:AttachVolume"
Resource: "*"
- Effect: "Allow"
Action: "ec2:DetachVolume"
Resource: "*"
- Effect: "Allow"
Action: "s3:GetObject"
Resource: "*"
BootstrapInstanceProfile:
Type: "AWS::IAM::InstanceProfile"
Properties:
Path: "/"
Roles:
- Ref: "BootstrapIamRole"
BootstrapSecurityGroup:
Type: AWS::EC2::SecurityGroup
Properties:
GroupDescription: Cluster Bootstrap Security Group
SecurityGroupIngress:
- IpProtocol: tcp
FromPort: 22
ToPort: 22
CidrIp: !Ref AllowedBootstrapSshCidr
- IpProtocol: tcp
ToPort: 19531
FromPort: 19531
CidrIp: 0.0.0.0/0
VpcId: !Ref VpcId
BootstrapInstance:
Type: AWS::EC2::Instance
Properties:
ImageId: !Ref RhcosAmi
IamInstanceProfile: !Ref BootstrapInstanceProfile
InstanceType: "i3.large"
NetworkInterfaces:
- AssociatePublicIpAddress: "true"
DeviceIndex: "0"
GroupSet:
- !Ref "BootstrapSecurityGroup"
- !Ref "MasterSecurityGroupId"
SubnetId: !Ref "PublicSubnet"
UserData:
Fn::Base64: !Sub
- '{"ignition":{"config":{"replace":{"source":"${S3Loc}"}},"version":"3.1.0"}}'
- {
S3Loc: !Ref BootstrapIgnitionLocation
}
RegisterBootstrapApiTarget:
Condition: DoRegistration
Type: Custom::NLBRegister
Properties:
ServiceToken: !Ref RegisterNlbIpTargetsLambdaArn
TargetArn: !Ref ExternalApiTargetGroupArn
TargetIp: !GetAtt BootstrapInstance.PrivateIp
RegisterBootstrapInternalApiTarget:
Condition: DoRegistration
Type: Custom::NLBRegister
Properties:
ServiceToken: !Ref RegisterNlbIpTargetsLambdaArn
TargetArn: !Ref InternalApiTargetGroupArn
TargetIp: !GetAtt BootstrapInstance.PrivateIp
RegisterBootstrapInternalServiceTarget:
Condition: DoRegistration
Type: Custom::NLBRegister
Properties:
ServiceToken: !Ref RegisterNlbIpTargetsLambdaArn
TargetArn: !Ref InternalServiceTargetGroupArn
TargetIp: !GetAtt BootstrapInstance.PrivateIp
Outputs:
BootstrapInstanceId:
Description: Bootstrap Instance ID.
Value: !Ref BootstrapInstance
BootstrapPublicIp:
Description: The bootstrap node public IP address.
Value: !GetAtt BootstrapInstance.PublicIp
BootstrapPrivateIp:
Description: The bootstrap node private IP address.
Value: !GetAtt BootstrapInstance.PrivateIp4.11.13. Creating the control plane machines in AWS
You must create the control plane machines in Amazon Web Services (AWS) that your cluster will use.
You can use the provided CloudFormation template and a custom parameter file to create a stack of AWS resources that represent the control plane nodes.
The CloudFormation template creates a stack that represents three control plane nodes.
If you do not use the provided CloudFormation template to create your control plane nodes, you must review the provided information and manually create the infrastructure. If your cluster does not initialize correctly, you might have to contact Red Hat support with your installation logs.
Prerequisites
- You configured an AWS account.
-
You added your AWS keys and region to your local AWS profile by running
aws configure. - You generated the Ignition config files for your cluster.
- You created and configured a VPC and associated subnets in AWS.
- You created and configured DNS, load balancers, and listeners in AWS.
- You created the security groups and roles required for your cluster in AWS.
- You created the bootstrap machine.
Procedure
Create a JSON file that contains the parameter values that the template requires:
[ { "ParameterKey": "InfrastructureName",1 "ParameterValue": "mycluster-<random_string>"2 }, { "ParameterKey": "RhcosAmi",3 "ParameterValue": "ami-<random_string>"4 }, { "ParameterKey": "AutoRegisterDNS",5 "ParameterValue": "yes"6 }, { "ParameterKey": "PrivateHostedZoneId",7 "ParameterValue": "<random_string>"8 }, { "ParameterKey": "PrivateHostedZoneName",9 "ParameterValue": "mycluster.example.com"10 }, { "ParameterKey": "Master0Subnet",11 "ParameterValue": "subnet-<random_string>"12 }, { "ParameterKey": "Master1Subnet",13 "ParameterValue": "subnet-<random_string>"14 }, { "ParameterKey": "Master2Subnet",15 "ParameterValue": "subnet-<random_string>"16 }, { "ParameterKey": "MasterSecurityGroupId",17 "ParameterValue": "sg-<random_string>"18 }, { "ParameterKey": "IgnitionLocation",19 "ParameterValue": "https://api-int.<cluster_name>.<domain_name>:22623/config/master"20 }, { "ParameterKey": "CertificateAuthorities",21 "ParameterValue": "data:text/plain;charset=utf-8;base64,ABC...xYz=="22 }, { "ParameterKey": "MasterInstanceProfileName",23 "ParameterValue": "<roles_stack>-MasterInstanceProfile-<random_string>"24 }, { "ParameterKey": "MasterInstanceType",25 "ParameterValue": "m5.xlarge"26 }, { "ParameterKey": "AutoRegisterELB",27 "ParameterValue": "yes"28 }, { "ParameterKey": "RegisterNlbIpTargetsLambdaArn",29 "ParameterValue": "arn:aws:lambda:<region>:<account_number>:function:<dns_stack_name>-RegisterNlbIpTargets-<random_string>"30 }, { "ParameterKey": "ExternalApiTargetGroupArn",31 "ParameterValue": "arn:aws:elasticloadbalancing:<region>:<account_number>:targetgroup/<dns_stack_name>-Exter-<random_string>"32 }, { "ParameterKey": "InternalApiTargetGroupArn",33 "ParameterValue": "arn:aws:elasticloadbalancing:<region>:<account_number>:targetgroup/<dns_stack_name>-Inter-<random_string>"34 }, { "ParameterKey": "InternalServiceTargetGroupArn",35 "ParameterValue": "arn:aws:elasticloadbalancing:<region>:<account_number>:targetgroup/<dns_stack_name>-Inter-<random_string>"36 } ]- 1
- The name for your cluster infrastructure that is encoded in your Ignition config files for the cluster.
- 2
- Specify the infrastructure name that you extracted from the Ignition config file metadata, which has the format
<cluster-name>-<random-string>. - 3
- CurrentRed Hat Enterprise Linux CoreOS (RHCOS) AMI to use for the control plane machines.
- 4
- Specify an
AWS::EC2::Image::Idvalue. - 5
- Whether or not to perform DNS etcd registration.
- 6
- Specify
yesorno. If you specifyyes, you must provide hosted zone information. - 7
- The Route 53 private zone ID to register the etcd targets with.
- 8
- Specify the
PrivateHostedZoneIdvalue from the output of the CloudFormation template for DNS and load balancing. - 9
- The Route 53 zone to register the targets with.
- 10
- Specify
<cluster_name>.<domain_name>where<domain_name>is the Route 53 base domain that you used when you generatedinstall-config.yamlfile for the cluster. Do not include the trailing period (.) that is displayed in the AWS console. - 11 13 15
- A subnet, preferably private, to launch the control plane machines on.
- 12 14 16
- Specify a subnet from the
PrivateSubnetsvalue from the output of the CloudFormation template for DNS and load balancing. - 17
- The master security group ID to associate with control plane nodes (also known as the master nodes).
- 18
- Specify the
MasterSecurityGroupIdvalue from the output of the CloudFormation template for the security group and roles. - 19
- The location to fetch control plane Ignition config file from.
- 20
- Specify the generated Ignition config file location,
https://api-int.<cluster_name>.<domain_name>:22623/config/master. - 21
- The base64 encoded certificate authority string to use.
- 22
- Specify the value from the
master.ignfile that is in the installation directory. This value is the long string with the formatdata:text/plain;charset=utf-8;base64,ABC…xYz==. - 23
- The IAM profile to associate with control plane nodes.
- 24
- Specify the
MasterInstanceProfileparameter value from the output of the CloudFormation template for the security group and roles. - 25
- The type of AWS instance to use for the control plane machines.
- 26
- Allowed values:
-
m4.xlarge -
m4.2xlarge -
m4.4xlarge -
m4.10xlarge -
m4.16xlarge -
m5.xlarge -
m5.2xlarge -
m5.4xlarge -
m5.8xlarge -
m5.12xlarge -
m5.16xlarge -
m5a.xlarge -
m5a.2xlarge -
m5a.4xlarge -
m5a.8xlarge -
m5a.10xlarge -
m5a.16xlarge -
c4.2xlarge -
c4.4xlarge -
c4.8xlarge -
c5.2xlarge -
c5.4xlarge -
c5.9xlarge -
c5.12xlarge -
c5.18xlarge -
c5.24xlarge -
c5a.2xlarge -
c5a.4xlarge -
c5a.8xlarge -
c5a.12xlarge -
c5a.16xlarge -
c5a.24xlarge -
r4.xlarge -
r4.2xlarge -
r4.4xlarge -
r4.8xlarge -
r4.16xlarge -
r5.xlarge -
r5.2xlarge -
r5.4xlarge -
r5.8xlarge -
r5.12xlarge -
r5.16xlarge -
r5.24xlarge -
r5a.xlarge -
r5a.2xlarge -
r5a.4xlarge -
r5a.8xlarge -
r5a.12xlarge -
r5a.16xlarge -
r5a.24xlarge
-
- 27
- Whether or not to register a network load balancer (NLB).
- 28
- Specify
yesorno. If you specifyyes, you must provide a Lambda Amazon Resource Name (ARN) value. - 29
- The ARN for NLB IP target registration lambda group.
- 30
- Specify the
RegisterNlbIpTargetsLambdavalue from the output of the CloudFormation template for DNS and load balancing. Usearn:aws-us-govif deploying the cluster to an AWS GovCloud region. - 31
- The ARN for external API load balancer target group.
- 32
- Specify the
ExternalApiTargetGroupArnvalue from the output of the CloudFormation template for DNS and load balancing. Usearn:aws-us-govif deploying the cluster to an AWS GovCloud region. - 33
- The ARN for internal API load balancer target group.
- 34
- Specify the
InternalApiTargetGroupArnvalue from the output of the CloudFormation template for DNS and load balancing. Usearn:aws-us-govif deploying the cluster to an AWS GovCloud region. - 35
- The ARN for internal service load balancer target group.
- 36
- Specify the
InternalServiceTargetGroupArnvalue from the output of the CloudFormation template for DNS and load balancing. Usearn:aws-us-govif deploying the cluster to an AWS GovCloud region.
- Copy the template from the CloudFormation template for control plane machines section of this topic and save it as a YAML file on your computer. This template describes the control plane machines that your cluster requires.
-
If you specified an
m5instance type as the value forMasterInstanceType, add that instance type to theMasterInstanceType.AllowedValuesparameter in the CloudFormation template. Launch the CloudFormation template to create a stack of AWS resources that represent the control plane nodes:
ImportantYou must enter the command on a single line.
$ aws cloudformation create-stack --stack-name <name>1 --template-body file://<template>.yaml2 --parameters file://<parameters>.json3 - 1
<name>is the name for the CloudFormation stack, such ascluster-control-plane. You need the name of this stack if you remove the cluster.- 2
<template>is the relative path to and name of the CloudFormation template YAML file that you saved.- 3
<parameters>is the relative path to and name of the CloudFormation parameters JSON file.
Example output
arn:aws:cloudformation:us-east-1:269333783861:stack/cluster-control-plane/21c7e2b0-2ee2-11eb-c6f6-0aa34627df4bNoteThe CloudFormation template creates a stack that represents three control plane nodes.
Confirm that the template components exist:
$ aws cloudformation describe-stacks --stack-name <name>
4.11.13.1. CloudFormation template for control plane machines
You can use the following CloudFormation template to deploy the control plane machines that you need for your OpenShift Container Platform cluster.
Example 4.39. CloudFormation template for control plane machines
AWSTemplateFormatVersion: 2010-09-09
Description: Template for OpenShift Cluster Node Launch (EC2 master instances)
Parameters:
InfrastructureName:
AllowedPattern: ^([a-zA-Z][a-zA-Z0-9\-]{0,26})$
MaxLength: 27
MinLength: 1
ConstraintDescription: Infrastructure name must be alphanumeric, start with a letter, and have a maximum of 27 characters.
Description: A short, unique cluster ID used to tag nodes for the kubelet cloud provider.
Type: String
RhcosAmi:
Description: Current Red Hat Enterprise Linux CoreOS AMI to use for bootstrap.
Type: AWS::EC2::Image::Id
AutoRegisterDNS:
Default: "yes"
AllowedValues:
- "yes"
- "no"
Description: Do you want to invoke DNS etcd registration, which requires Hosted Zone information?
Type: String
PrivateHostedZoneId:
Description: The Route53 private zone ID to register the etcd targets with, such as Z21IXYZABCZ2A4.
Type: String
PrivateHostedZoneName:
Description: The Route53 zone to register the targets with, such as cluster.example.com. Omit the trailing period.
Type: String
Master0Subnet:
Description: The subnets, recommend private, to launch the master nodes into.
Type: AWS::EC2::Subnet::Id
Master1Subnet:
Description: The subnets, recommend private, to launch the master nodes into.
Type: AWS::EC2::Subnet::Id
Master2Subnet:
Description: The subnets, recommend private, to launch the master nodes into.
Type: AWS::EC2::Subnet::Id
MasterSecurityGroupId:
Description: The master security group ID to associate with master nodes.
Type: AWS::EC2::SecurityGroup::Id
IgnitionLocation:
Default: https://api-int.$CLUSTER_NAME.$DOMAIN:22623/config/master
Description: Ignition config file location.
Type: String
CertificateAuthorities:
Default: data:text/plain;charset=utf-8;base64,ABC...xYz==
Description: Base64 encoded certificate authority string to use.
Type: String
MasterInstanceProfileName:
Description: IAM profile to associate with master nodes.
Type: String
MasterInstanceType:
Default: m5.xlarge
Type: String
AllowedValues:
- "m4.xlarge"
- "m4.2xlarge"
- "m4.4xlarge"
- "m4.10xlarge"
- "m4.16xlarge"
- "m5.xlarge"
- "m5.2xlarge"
- "m5.4xlarge"
- "m5.8xlarge"
- "m5.12xlarge"
- "m5.16xlarge"
- "m5a.xlarge"
- "m5a.2xlarge"
- "m5a.4xlarge"
- "m5a.8xlarge"
- "m5a.10xlarge"
- "m5a.16xlarge"
- "c4.2xlarge"
- "c4.4xlarge"
- "c4.8xlarge"
- "c5.2xlarge"
- "c5.4xlarge"
- "c5.9xlarge"
- "c5.12xlarge"
- "c5.18xlarge"
- "c5.24xlarge"
- "c5a.2xlarge"
- "c5a.4xlarge"
- "c5a.8xlarge"
- "c5a.12xlarge"
- "c5a.16xlarge"
- "c5a.24xlarge"
- "r4.xlarge"
- "r4.2xlarge"
- "r4.4xlarge"
- "r4.8xlarge"
- "r4.16xlarge"
- "r5.xlarge"
- "r5.2xlarge"
- "r5.4xlarge"
- "r5.8xlarge"
- "r5.12xlarge"
- "r5.16xlarge"
- "r5.24xlarge"
- "r5a.xlarge"
- "r5a.2xlarge"
- "r5a.4xlarge"
- "r5a.8xlarge"
- "r5a.12xlarge"
- "r5a.16xlarge"
- "r5a.24xlarge"
AutoRegisterELB:
Default: "yes"
AllowedValues:
- "yes"
- "no"
Description: Do you want to invoke NLB registration, which requires a Lambda ARN parameter?
Type: String
RegisterNlbIpTargetsLambdaArn:
Description: ARN for NLB IP target registration lambda. Supply the value from the cluster infrastructure or select "no" for AutoRegisterELB.
Type: String
ExternalApiTargetGroupArn:
Description: ARN for external API load balancer target group. Supply the value from the cluster infrastructure or select "no" for AutoRegisterELB.
Type: String
InternalApiTargetGroupArn:
Description: ARN for internal API load balancer target group. Supply the value from the cluster infrastructure or select "no" for AutoRegisterELB.
Type: String
InternalServiceTargetGroupArn:
Description: ARN for internal service load balancer target group. Supply the value from the cluster infrastructure or select "no" for AutoRegisterELB.
Type: String
Metadata:
AWS::CloudFormation::Interface:
ParameterGroups:
- Label:
default: "Cluster Information"
Parameters:
- InfrastructureName
- Label:
default: "Host Information"
Parameters:
- MasterInstanceType
- RhcosAmi
- IgnitionLocation
- CertificateAuthorities
- MasterSecurityGroupId
- MasterInstanceProfileName
- Label:
default: "Network Configuration"
Parameters:
- VpcId
- AllowedBootstrapSshCidr
- Master0Subnet
- Master1Subnet
- Master2Subnet
- Label:
default: "DNS"
Parameters:
- AutoRegisterDNS
- PrivateHostedZoneName
- PrivateHostedZoneId
- Label:
default: "Load Balancer Automation"
Parameters:
- AutoRegisterELB
- RegisterNlbIpTargetsLambdaArn
- ExternalApiTargetGroupArn
- InternalApiTargetGroupArn
- InternalServiceTargetGroupArn
ParameterLabels:
InfrastructureName:
default: "Infrastructure Name"
VpcId:
default: "VPC ID"
Master0Subnet:
default: "Master-0 Subnet"
Master1Subnet:
default: "Master-1 Subnet"
Master2Subnet:
default: "Master-2 Subnet"
MasterInstanceType:
default: "Master Instance Type"
MasterInstanceProfileName:
default: "Master Instance Profile Name"
RhcosAmi:
default: "Red Hat Enterprise Linux CoreOS AMI ID"
BootstrapIgnitionLocation:
default: "Master Ignition Source"
CertificateAuthorities:
default: "Ignition CA String"
MasterSecurityGroupId:
default: "Master Security Group ID"
AutoRegisterDNS:
default: "Use Provided DNS Automation"
AutoRegisterELB:
default: "Use Provided ELB Automation"
PrivateHostedZoneName:
default: "Private Hosted Zone Name"
PrivateHostedZoneId:
default: "Private Hosted Zone ID"
Conditions:
DoRegistration: !Equals ["yes", !Ref AutoRegisterELB]
DoDns: !Equals ["yes", !Ref AutoRegisterDNS]
Resources:
Master0:
Type: AWS::EC2::Instance
Properties:
ImageId: !Ref RhcosAmi
BlockDeviceMappings:
- DeviceName: /dev/xvda
Ebs:
VolumeSize: "120"
VolumeType: "gp2"
IamInstanceProfile: !Ref MasterInstanceProfileName
InstanceType: !Ref MasterInstanceType
NetworkInterfaces:
- AssociatePublicIpAddress: "false"
DeviceIndex: "0"
GroupSet:
- !Ref "MasterSecurityGroupId"
SubnetId: !Ref "Master0Subnet"
UserData:
Fn::Base64: !Sub
- '{"ignition":{"config":{"merge":[{"source":"${SOURCE}"}]},"security":{"tls":{"certificateAuthorities":[{"source":"${CA_BUNDLE}"}]}},"version":"3.1.0"}}'
- {
SOURCE: !Ref IgnitionLocation,
CA_BUNDLE: !Ref CertificateAuthorities,
}
Tags:
- Key: !Join ["", ["kubernetes.io/cluster/", !Ref InfrastructureName]]
Value: "shared"
RegisterMaster0:
Condition: DoRegistration
Type: Custom::NLBRegister
Properties:
ServiceToken: !Ref RegisterNlbIpTargetsLambdaArn
TargetArn: !Ref ExternalApiTargetGroupArn
TargetIp: !GetAtt Master0.PrivateIp
RegisterMaster0InternalApiTarget:
Condition: DoRegistration
Type: Custom::NLBRegister
Properties:
ServiceToken: !Ref RegisterNlbIpTargetsLambdaArn
TargetArn: !Ref InternalApiTargetGroupArn
TargetIp: !GetAtt Master0.PrivateIp
RegisterMaster0InternalServiceTarget:
Condition: DoRegistration
Type: Custom::NLBRegister
Properties:
ServiceToken: !Ref RegisterNlbIpTargetsLambdaArn
TargetArn: !Ref InternalServiceTargetGroupArn
TargetIp: !GetAtt Master0.PrivateIp
Master1:
Type: AWS::EC2::Instance
Properties:
ImageId: !Ref RhcosAmi
BlockDeviceMappings:
- DeviceName: /dev/xvda
Ebs:
VolumeSize: "120"
VolumeType: "gp2"
IamInstanceProfile: !Ref MasterInstanceProfileName
InstanceType: !Ref MasterInstanceType
NetworkInterfaces:
- AssociatePublicIpAddress: "false"
DeviceIndex: "0"
GroupSet:
- !Ref "MasterSecurityGroupId"
SubnetId: !Ref "Master1Subnet"
UserData:
Fn::Base64: !Sub
- '{"ignition":{"config":{"merge":[{"source":"${SOURCE}"}]},"security":{"tls":{"certificateAuthorities":[{"source":"${CA_BUNDLE}"}]}},"version":"3.1.0"}}'
- {
SOURCE: !Ref IgnitionLocation,
CA_BUNDLE: !Ref CertificateAuthorities,
}
Tags:
- Key: !Join ["", ["kubernetes.io/cluster/", !Ref InfrastructureName]]
Value: "shared"
RegisterMaster1:
Condition: DoRegistration
Type: Custom::NLBRegister
Properties:
ServiceToken: !Ref RegisterNlbIpTargetsLambdaArn
TargetArn: !Ref ExternalApiTargetGroupArn
TargetIp: !GetAtt Master1.PrivateIp
RegisterMaster1InternalApiTarget:
Condition: DoRegistration
Type: Custom::NLBRegister
Properties:
ServiceToken: !Ref RegisterNlbIpTargetsLambdaArn
TargetArn: !Ref InternalApiTargetGroupArn
TargetIp: !GetAtt Master1.PrivateIp
RegisterMaster1InternalServiceTarget:
Condition: DoRegistration
Type: Custom::NLBRegister
Properties:
ServiceToken: !Ref RegisterNlbIpTargetsLambdaArn
TargetArn: !Ref InternalServiceTargetGroupArn
TargetIp: !GetAtt Master1.PrivateIp
Master2:
Type: AWS::EC2::Instance
Properties:
ImageId: !Ref RhcosAmi
BlockDeviceMappings:
- DeviceName: /dev/xvda
Ebs:
VolumeSize: "120"
VolumeType: "gp2"
IamInstanceProfile: !Ref MasterInstanceProfileName
InstanceType: !Ref MasterInstanceType
NetworkInterfaces:
- AssociatePublicIpAddress: "false"
DeviceIndex: "0"
GroupSet:
- !Ref "MasterSecurityGroupId"
SubnetId: !Ref "Master2Subnet"
UserData:
Fn::Base64: !Sub
- '{"ignition":{"config":{"merge":[{"source":"${SOURCE}"}]},"security":{"tls":{"certificateAuthorities":[{"source":"${CA_BUNDLE}"}]}},"version":"3.1.0"}}'
- {
SOURCE: !Ref IgnitionLocation,
CA_BUNDLE: !Ref CertificateAuthorities,
}
Tags:
- Key: !Join ["", ["kubernetes.io/cluster/", !Ref InfrastructureName]]
Value: "shared"
RegisterMaster2:
Condition: DoRegistration
Type: Custom::NLBRegister
Properties:
ServiceToken: !Ref RegisterNlbIpTargetsLambdaArn
TargetArn: !Ref ExternalApiTargetGroupArn
TargetIp: !GetAtt Master2.PrivateIp
RegisterMaster2InternalApiTarget:
Condition: DoRegistration
Type: Custom::NLBRegister
Properties:
ServiceToken: !Ref RegisterNlbIpTargetsLambdaArn
TargetArn: !Ref InternalApiTargetGroupArn
TargetIp: !GetAtt Master2.PrivateIp
RegisterMaster2InternalServiceTarget:
Condition: DoRegistration
Type: Custom::NLBRegister
Properties:
ServiceToken: !Ref RegisterNlbIpTargetsLambdaArn
TargetArn: !Ref InternalServiceTargetGroupArn
TargetIp: !GetAtt Master2.PrivateIp
EtcdSrvRecords:
Condition: DoDns
Type: AWS::Route53::RecordSet
Properties:
HostedZoneId: !Ref PrivateHostedZoneId
Name: !Join [".", ["_etcd-server-ssl._tcp", !Ref PrivateHostedZoneName]]
ResourceRecords:
- !Join [
" ",
["0 10 2380", !Join [".", ["etcd-0", !Ref PrivateHostedZoneName]]],
]
- !Join [
" ",
["0 10 2380", !Join [".", ["etcd-1", !Ref PrivateHostedZoneName]]],
]
- !Join [
" ",
["0 10 2380", !Join [".", ["etcd-2", !Ref PrivateHostedZoneName]]],
]
TTL: 60
Type: SRV
Etcd0Record:
Condition: DoDns
Type: AWS::Route53::RecordSet
Properties:
HostedZoneId: !Ref PrivateHostedZoneId
Name: !Join [".", ["etcd-0", !Ref PrivateHostedZoneName]]
ResourceRecords:
- !GetAtt Master0.PrivateIp
TTL: 60
Type: A
Etcd1Record:
Condition: DoDns
Type: AWS::Route53::RecordSet
Properties:
HostedZoneId: !Ref PrivateHostedZoneId
Name: !Join [".", ["etcd-1", !Ref PrivateHostedZoneName]]
ResourceRecords:
- !GetAtt Master1.PrivateIp
TTL: 60
Type: A
Etcd2Record:
Condition: DoDns
Type: AWS::Route53::RecordSet
Properties:
HostedZoneId: !Ref PrivateHostedZoneId
Name: !Join [".", ["etcd-2", !Ref PrivateHostedZoneName]]
ResourceRecords:
- !GetAtt Master2.PrivateIp
TTL: 60
Type: A
Outputs:
PrivateIPs:
Description: The control-plane node private IP addresses.
Value:
!Join [
",",
[!GetAtt Master0.PrivateIp, !GetAtt Master1.PrivateIp, !GetAtt Master2.PrivateIp]
]4.11.14. Creating the worker nodes in AWS
You can create worker nodes in Amazon Web Services (AWS) for your cluster to use.
You can use the provided CloudFormation template and a custom parameter file to create a stack of AWS resources that represent a worker node.
The CloudFormation template creates a stack that represents one worker node. You must create a stack for each worker node.
If you do not use the provided CloudFormation template to create your worker nodes, you must review the provided information and manually create the infrastructure. If your cluster does not initialize correctly, you might have to contact Red Hat support with your installation logs.
Prerequisites
- You configured an AWS account.
-
You added your AWS keys and region to your local AWS profile by running
aws configure. - You generated the Ignition config files for your cluster.
- You created and configured a VPC and associated subnets in AWS.
- You created and configured DNS, load balancers, and listeners in AWS.
- You created the security groups and roles required for your cluster in AWS.
- You created the bootstrap machine.
- You created the control plane machines.
Procedure
Create a JSON file that contains the parameter values that the CloudFormation template requires:
[ { "ParameterKey": "InfrastructureName",1 "ParameterValue": "mycluster-<random_string>"2 }, { "ParameterKey": "RhcosAmi",3 "ParameterValue": "ami-<random_string>"4 }, { "ParameterKey": "Subnet",5 "ParameterValue": "subnet-<random_string>"6 }, { "ParameterKey": "WorkerSecurityGroupId",7 "ParameterValue": "sg-<random_string>"8 }, { "ParameterKey": "IgnitionLocation",9 "ParameterValue": "https://api-int.<cluster_name>.<domain_name>:22623/config/worker"10 }, { "ParameterKey": "CertificateAuthorities",11 "ParameterValue": ""12 }, { "ParameterKey": "WorkerInstanceProfileName",13 "ParameterValue": ""14 }, { "ParameterKey": "WorkerInstanceType",15 "ParameterValue": "m4.2xlarge"16 } ]- 1
- The name for your cluster infrastructure that is encoded in your Ignition config files for the cluster.
- 2
- Specify the infrastructure name that you extracted from the Ignition config file metadata, which has the format
<cluster-name>-<random-string>. - 3
- Current Red Hat Enterprise Linux CoreOS (RHCOS) AMI to use for the worker nodes.
- 4
- Specify an
AWS::EC2::Image::Idvalue. - 5
- A subnet, preferably private, to launch the worker nodes on.
- 6
- Specify a subnet from the
PrivateSubnetsvalue from the output of the CloudFormation template for DNS and load balancing. - 7
- The worker security group ID to associate with worker nodes.
- 8
- Specify the
WorkerSecurityGroupIdvalue from the output of the CloudFormation template for the security group and roles. - 9
- The location to fetch bootstrap Ignition config file from.
- 10
- Specify the generated Ignition config location,
https://api-int.<cluster_name>.<domain_name>:22623/config/worker. - 11
- Base64 encoded certificate authority string to use.
- 12
- Specify the value from the
worker.ignfile that is in the installation directory. This value is the long string with the formatdata:text/plain;charset=utf-8;base64,ABC…xYz==. - 13
- The IAM profile to associate with worker nodes.
- 14
- Specify the
WorkerInstanceProfileparameter value from the output of the CloudFormation template for the security group and roles. - 15
- The type of AWS instance to use for the control plane machines.
- 16
- Allowed values:
-
m4.large -
m4.xlarge -
m4.2xlarge -
m4.4xlarge -
m4.10xlarge -
m4.16xlarge -
m5.large -
m5.xlarge -
m5.2xlarge -
m5.4xlarge -
m5.8xlarge -
m5.12xlarge -
m5.16xlarge -
m5a.large -
m5a.xlarge -
m5a.2xlarge -
m5a.4xlarge -
m5a.8xlarge -
m5a.10xlarge -
m5a.16xlarge -
c4.large -
c4.xlarge -
c4.2xlarge -
c4.4xlarge -
c4.8xlarge -
c5.large -
c5.xlarge -
c5.2xlarge -
c5.4xlarge -
c5.9xlarge -
c5.12xlarge -
c5.18xlarge -
c5.24xlarge -
c5a.large -
c5a.xlarge -
c5a.2xlarge -
c5a.4xlarge -
c5a.8xlarge -
c5a.12xlarge -
c5a.16xlarge -
c5a.24xlarge -
r4.large -
r4.xlarge -
r4.2xlarge -
r4.4xlarge -
r4.8xlarge -
r4.16xlarge -
r5.large -
r5.xlarge -
r5.2xlarge -
r5.4xlarge -
r5.8xlarge -
r5.12xlarge -
r5.16xlarge -
r5.24xlarge -
r5a.large -
r5a.xlarge -
r5a.2xlarge -
r5a.4xlarge -
r5a.8xlarge -
r5a.12xlarge -
r5a.16xlarge -
r5a.24xlarge -
t3.large -
t3.xlarge -
t3.2xlarge -
t3a.large -
t3a.xlarge -
t3a.2xlarge
-
- Copy the template from the CloudFormation template for worker machines section of this topic and save it as a YAML file on your computer. This template describes the networking objects and load balancers that your cluster requires.
-
If you specified an
m5instance type as the value forWorkerInstanceType, add that instance type to theWorkerInstanceType.AllowedValuesparameter in the CloudFormation template. Launch the CloudFormation template to create a stack of AWS resources that represent a worker node:
ImportantYou must enter the command on a single line.
$ aws cloudformation create-stack --stack-name <name>1 --template-body file://<template>.yaml \2 --parameters file://<parameters>.json3 - 1
<name>is the name for the CloudFormation stack, such ascluster-worker-1. You need the name of this stack if you remove the cluster.- 2
<template>is the relative path to and name of the CloudFormation template YAML file that you saved.- 3
<parameters>is the relative path to and name of the CloudFormation parameters JSON file.
Example output
arn:aws:cloudformation:us-east-1:269333783861:stack/cluster-worker-1/729ee301-1c2a-11eb-348f-sd9888c65b59NoteThe CloudFormation template creates a stack that represents one worker node.
Confirm that the template components exist:
$ aws cloudformation describe-stacks --stack-name <name>Continue to create worker stacks until you have created enough worker machines for your cluster. You can create additional worker stacks by referencing the same template and parameter files and specifying a different stack name.
ImportantYou must create at least two worker machines, so you must create at least two stacks that use this CloudFormation template.
4.11.14.1. CloudFormation template for worker machines
You can use the following CloudFormation template to deploy the worker machines that you need for your OpenShift Container Platform cluster.
Example 4.40. CloudFormation template for worker machines
AWSTemplateFormatVersion: 2010-09-09
Description: Template for OpenShift Cluster Node Launch (EC2 worker instance)
Parameters:
InfrastructureName:
AllowedPattern: ^([a-zA-Z][a-zA-Z0-9\-]{0,26})$
MaxLength: 27
MinLength: 1
ConstraintDescription: Infrastructure name must be alphanumeric, start with a letter, and have a maximum of 27 characters.
Description: A short, unique cluster ID used to tag nodes for the kubelet cloud provider.
Type: String
RhcosAmi:
Description: Current Red Hat Enterprise Linux CoreOS AMI to use for bootstrap.
Type: AWS::EC2::Image::Id
Subnet:
Description: The subnets, recommend private, to launch the master nodes into.
Type: AWS::EC2::Subnet::Id
WorkerSecurityGroupId:
Description: The master security group ID to associate with master nodes.
Type: AWS::EC2::SecurityGroup::Id
IgnitionLocation:
Default: https://api-int.$CLUSTER_NAME.$DOMAIN:22623/config/worker
Description: Ignition config file location.
Type: String
CertificateAuthorities:
Default: data:text/plain;charset=utf-8;base64,ABC...xYz==
Description: Base64 encoded certificate authority string to use.
Type: String
WorkerInstanceProfileName:
Description: IAM profile to associate with master nodes.
Type: String
WorkerInstanceType:
Default: m5.large
Type: String
AllowedValues:
- "m4.large"
- "m4.xlarge"
- "m4.2xlarge"
- "m4.4xlarge"
- "m4.10xlarge"
- "m4.16xlarge"
- "m5.large"
- "m5.xlarge"
- "m5.2xlarge"
- "m5.4xlarge"
- "m5.8xlarge"
- "m5.12xlarge"
- "m5.16xlarge"
- "m5a.large"
- "m5a.xlarge"
- "m5a.2xlarge"
- "m5a.4xlarge"
- "m5a.8xlarge"
- "m5a.10xlarge"
- "m5a.16xlarge"
- "c4.large"
- "c4.xlarge"
- "c4.2xlarge"
- "c4.4xlarge"
- "c4.8xlarge"
- "c5.large"
- "c5.xlarge"
- "c5.2xlarge"
- "c5.4xlarge"
- "c5.9xlarge"
- "c5.12xlarge"
- "c5.18xlarge"
- "c5.24xlarge"
- "c5a.large"
- "c5a.xlarge"
- "c5a.2xlarge"
- "c5a.4xlarge"
- "c5a.8xlarge"
- "c5a.12xlarge"
- "c5a.16xlarge"
- "c5a.24xlarge"
- "r4.large"
- "r4.xlarge"
- "r4.2xlarge"
- "r4.4xlarge"
- "r4.8xlarge"
- "r4.16xlarge"
- "r5.large"
- "r5.xlarge"
- "r5.2xlarge"
- "r5.4xlarge"
- "r5.8xlarge"
- "r5.12xlarge"
- "r5.16xlarge"
- "r5.24xlarge"
- "r5a.large"
- "r5a.xlarge"
- "r5a.2xlarge"
- "r5a.4xlarge"
- "r5a.8xlarge"
- "r5a.12xlarge"
- "r5a.16xlarge"
- "r5a.24xlarge"
- "t3.large"
- "t3.xlarge"
- "t3.2xlarge"
- "t3a.large"
- "t3a.xlarge"
- "t3a.2xlarge"
Metadata:
AWS::CloudFormation::Interface:
ParameterGroups:
- Label:
default: "Cluster Information"
Parameters:
- InfrastructureName
- Label:
default: "Host Information"
Parameters:
- WorkerInstanceType
- RhcosAmi
- IgnitionLocation
- CertificateAuthorities
- WorkerSecurityGroupId
- WorkerInstanceProfileName
- Label:
default: "Network Configuration"
Parameters:
- Subnet
ParameterLabels:
Subnet:
default: "Subnet"
InfrastructureName:
default: "Infrastructure Name"
WorkerInstanceType:
default: "Worker Instance Type"
WorkerInstanceProfileName:
default: "Worker Instance Profile Name"
RhcosAmi:
default: "Red Hat Enterprise Linux CoreOS AMI ID"
IgnitionLocation:
default: "Worker Ignition Source"
CertificateAuthorities:
default: "Ignition CA String"
WorkerSecurityGroupId:
default: "Worker Security Group ID"
Resources:
Worker0:
Type: AWS::EC2::Instance
Properties:
ImageId: !Ref RhcosAmi
BlockDeviceMappings:
- DeviceName: /dev/xvda
Ebs:
VolumeSize: "120"
VolumeType: "gp2"
IamInstanceProfile: !Ref WorkerInstanceProfileName
InstanceType: !Ref WorkerInstanceType
NetworkInterfaces:
- AssociatePublicIpAddress: "false"
DeviceIndex: "0"
GroupSet:
- !Ref "WorkerSecurityGroupId"
SubnetId: !Ref "Subnet"
UserData:
Fn::Base64: !Sub
- '{"ignition":{"config":{"merge":[{"source":"${SOURCE}"}]},"security":{"tls":{"certificateAuthorities":[{"source":"${CA_BUNDLE}"}]}},"version":"3.1.0"}}'
- {
SOURCE: !Ref IgnitionLocation,
CA_BUNDLE: !Ref CertificateAuthorities,
}
Tags:
- Key: !Join ["", ["kubernetes.io/cluster/", !Ref InfrastructureName]]
Value: "shared"
Outputs:
PrivateIP:
Description: The compute node private IP address.
Value: !GetAtt Worker0.PrivateIp4.11.15. Initializing the bootstrap sequence on AWS with user-provisioned infrastructure
After you create all of the required infrastructure in Amazon Web Services (AWS), you can start the bootstrap sequence that initializes the OpenShift Container Platform control plane.
Prerequisites
- You configured an AWS account.
-
You added your AWS keys and region to your local AWS profile by running
aws configure. - You generated the Ignition config files for your cluster.
- You created and configured a VPC and associated subnets in AWS.
- You created and configured DNS, load balancers, and listeners in AWS.
- You created the security groups and roles required for your cluster in AWS.
- You created the bootstrap machine.
- You created the control plane machines.
- You created the worker nodes.
Procedure
Change to the directory that contains the installation program and start the bootstrap process that initializes the OpenShift Container Platform control plane:
$ ./openshift-install wait-for bootstrap-complete --dir <installation_directory> \1 --log-level=info2 Example output
INFO Waiting up to 20m0s for the Kubernetes API at https://api.mycluster.example.com:6443... INFO API v1.19.0+9f84db3 up INFO Waiting up to 30m0s for bootstrapping to complete... INFO It is now safe to remove the bootstrap resources INFO Time elapsed: 1sIf the command exits without a
FATALwarning, your OpenShift Container Platform control plane has initialized.NoteAfter the control plane initializes, it sets up the compute nodes and installs additional services in the form of Operators.
4.11.16. Installing the OpenShift CLI by downloading the binary
You can install the OpenShift CLI (oc) to interact with OpenShift Container Platform from a command-line interface. You can install oc on Linux, Windows, or macOS.
If you installed an earlier version of oc, you cannot use it to complete all of the commands in OpenShift Container Platform 4.7. Download and install the new version of oc.
4.11.16.1. Installing the OpenShift CLI on Linux
You can install the OpenShift CLI (oc) binary on Linux by using the following procedure.
Procedure
- Navigate to the OpenShift Container Platform downloads page on the Red Hat Customer Portal.
- Select the appropriate version in the Version drop-down menu.
- Click Download Now next to the OpenShift v4.7 Linux Client entry and save the file.
Unpack the archive:
$ tar xvzf <file>Place the
ocbinary in a directory that is on yourPATH.To check your
PATH, execute the following command:$ echo $PATH
After you install the OpenShift CLI, it is available using the oc command:
$ oc <command>4.11.16.2. Installing the OpenShift CLI on Windows
You can install the OpenShift CLI (oc) binary on Windows by using the following procedure.
Procedure
- Navigate to the OpenShift Container Platform downloads page on the Red Hat Customer Portal.
- Select the appropriate version in the Version drop-down menu.
- Click Download Now next to the OpenShift v4.7 Windows Client entry and save the file.
- Unzip the archive with a ZIP program.
Move the
ocbinary to a directory that is on yourPATH.To check your
PATH, open the command prompt and execute the following command:C:\> path
After you install the OpenShift CLI, it is available using the oc command:
C:\> oc <command>4.11.16.3. Installing the OpenShift CLI on macOS
You can install the OpenShift CLI (oc) binary on macOS by using the following procedure.
Procedure
- Navigate to the OpenShift Container Platform downloads page on the Red Hat Customer Portal.
- Select the appropriate version in the Version drop-down menu.
- Click Download Now next to the OpenShift v4.7 MacOSX Client entry and save the file.
- Unpack and unzip the archive.
Move the
ocbinary to a directory on your PATH.To check your
PATH, open a terminal and execute the following command:$ echo $PATH
After you install the OpenShift CLI, it is available using the oc command:
$ oc <command>4.11.17. Logging in to the cluster by using the CLI
You can log in to your cluster as a default system user by exporting the cluster kubeconfig file. The kubeconfig file contains information about the cluster that is used by the CLI to connect a client to the correct cluster and API server. The file is specific to a cluster and is created during OpenShift Container Platform installation.
Prerequisites
- You deployed an OpenShift Container Platform cluster.
-
You installed the
ocCLI.
Procedure
Export the
kubeadmincredentials:$ export KUBECONFIG=<installation_directory>/auth/kubeconfig1 - 1
- For
<installation_directory>, specify the path to the directory that you stored the installation files in.
Verify you can run
occommands successfully using the exported configuration:$ oc whoamiExample output
system:admin
4.11.18. Approving the certificate signing requests for your machines
When you add machines to a cluster, two pending certificate signing requests (CSRs) are generated for each machine that you added. You must confirm that these CSRs are approved or, if necessary, approve them yourself. The client requests must be approved first, followed by the server requests.
Prerequisites
- You added machines to your cluster.
Procedure
Confirm that the cluster recognizes the machines:
$ oc get nodesExample output
NAME STATUS ROLES AGE VERSION master-0 Ready master 63m v1.20.0 master-1 Ready master 63m v1.20.0 master-2 Ready master 64m v1.20.0The output lists all of the machines that you created.
NoteThe preceding output might not include the compute nodes, also known as worker nodes, until some CSRs are approved.
Review the pending CSRs and ensure that you see the client requests with the
PendingorApprovedstatus for each machine that you added to the cluster:$ oc get csrExample output
NAME AGE REQUESTOR CONDITION csr-8b2br 15m system:serviceaccount:openshift-machine-config-operator:node-bootstrapper Pending csr-8vnps 15m system:serviceaccount:openshift-machine-config-operator:node-bootstrapper Pending ...In this example, two machines are joining the cluster. You might see more approved CSRs in the list.
If the CSRs were not approved, after all of the pending CSRs for the machines you added are in
Pendingstatus, approve the CSRs for your cluster machines:NoteBecause the CSRs rotate automatically, approve your CSRs within an hour of adding the machines to the cluster. If you do not approve them within an hour, the certificates will rotate, and more than two certificates will be present for each node. You must approve all of these certificates. Once the client CSR is approved, the Kubelet creates a secondary CSR for the serving certificate, which requires manual approval. Then, subsequent serving certificate renewal requests are automatically approved by the
machine-approverif the Kubelet requests a new certificate with identical parameters.NoteFor clusters running on platforms that are not machine API enabled, such as bare metal and other user-provisioned infrastructure, you must implement a method of automatically approving the kubelet serving certificate requests (CSRs). If a request is not approved, then the
oc exec,oc rsh, andoc logscommands cannot succeed, because a serving certificate is required when the API server connects to the kubelet. Any operation that contacts the Kubelet endpoint requires this certificate approval to be in place. The method must watch for new CSRs, confirm that the CSR was submitted by thenode-bootstrapperservice account in thesystem:nodeorsystem:admingroups, and confirm the identity of the node.To approve them individually, run the following command for each valid CSR:
$ oc adm certificate approve <csr_name>1 - 1
<csr_name>is the name of a CSR from the list of current CSRs.
To approve all pending CSRs, run the following command:
$ oc get csr -o go-template='{{range .items}}{{if not .status}}{{.metadata.name}}{{"\n"}}{{end}}{{end}}' | xargs --no-run-if-empty oc adm certificate approveNoteSome Operators might not become available until some CSRs are approved.
Now that your client requests are approved, you must review the server requests for each machine that you added to the cluster:
$ oc get csrExample output
NAME AGE REQUESTOR CONDITION csr-bfd72 5m26s system:node:ip-10-0-50-126.us-east-2.compute.internal Pending csr-c57lv 5m26s system:node:ip-10-0-95-157.us-east-2.compute.internal Pending ...If the remaining CSRs are not approved, and are in the
Pendingstatus, approve the CSRs for your cluster machines:To approve them individually, run the following command for each valid CSR:
$ oc adm certificate approve <csr_name>1 - 1
<csr_name>is the name of a CSR from the list of current CSRs.
To approve all pending CSRs, run the following command:
$ oc get csr -o go-template='{{range .items}}{{if not .status}}{{.metadata.name}}{{"\n"}}{{end}}{{end}}' | xargs oc adm certificate approve
After all client and server CSRs have been approved, the machines have the
Readystatus. Verify this by running the following command:$ oc get nodesExample output
NAME STATUS ROLES AGE VERSION master-0 Ready master 73m v1.20.0 master-1 Ready master 73m v1.20.0 master-2 Ready master 74m v1.20.0 worker-0 Ready worker 11m v1.20.0 worker-1 Ready worker 11m v1.20.0NoteIt can take a few minutes after approval of the server CSRs for the machines to transition to the
Readystatus.
Additional information
- For more information on CSRs, see Certificate Signing Requests.
4.11.19. Initial Operator configuration
After the control plane initializes, you must immediately configure some Operators so that they all become available.
Prerequisites
- Your control plane has initialized.
Procedure
Watch the cluster components come online:
$ watch -n5 oc get clusteroperatorsExample output
NAME VERSION AVAILABLE PROGRESSING DEGRADED SINCE authentication 4.7.0 True False False 3h56m baremetal 4.7.0 True False False 29h cloud-credential 4.7.0 True False False 29h cluster-autoscaler 4.7.0 True False False 29h config-operator 4.7.0 True False False 6h39m console 4.7.0 True False False 3h59m csi-snapshot-controller 4.7.0 True False False 4h12m dns 4.7.0 True False False 4h15m etcd 4.7.0 True False False 29h image-registry 4.7.0 True False False 3h59m ingress 4.7.0 True False False 4h30m insights 4.7.0 True False False 29h kube-apiserver 4.7.0 True False False 29h kube-controller-manager 4.7.0 True False False 29h kube-scheduler 4.7.0 True False False 29h kube-storage-version-migrator 4.7.0 True False False 4h2m machine-api 4.7.0 True False False 29h machine-approver 4.7.0 True False False 6h34m machine-config 4.7.0 True False False 3h56m marketplace 4.7.0 True False False 4h2m monitoring 4.7.0 True False False 6h31m network 4.7.0 True False False 29h node-tuning 4.7.0 True False False 4h30m openshift-apiserver 4.7.0 True False False 3h56m openshift-controller-manager 4.7.0 True False False 4h36m openshift-samples 4.7.0 True False False 4h30m operator-lifecycle-manager 4.7.0 True False False 29h operator-lifecycle-manager-catalog 4.7.0 True False False 29h operator-lifecycle-manager-packageserver 4.7.0 True False False 3h59m service-ca 4.7.0 True False False 29h storage 4.7.0 True False False 4h30m- Configure the Operators that are not available.
4.11.19.1. Image registry storage configuration
Amazon Web Services provides default storage, which means the Image Registry Operator is available after installation. However, if the Registry Operator cannot create an S3 bucket and automatically configure storage, you must manually configure registry storage.
Instructions are shown for configuring a persistent volume, which is required for production clusters. Where applicable, instructions are shown for configuring an empty directory as the storage location, which is available for only non-production clusters.
Additional instructions are provided for allowing the image registry to use block storage types by using the Recreate rollout strategy during upgrades.
You can configure registry storage for user-provisioned infrastructure in AWS to deploy OpenShift Container Platform to hidden regions. See Configuring the registry for AWS user-provisioned infrastructure for more information.
4.11.19.1.1. Configuring registry storage for AWS with user-provisioned infrastructure
During installation, your cloud credentials are sufficient to create an Amazon S3 bucket and the Registry Operator will automatically configure storage.
If the Registry Operator cannot create an S3 bucket and automatically configure storage, you can create an S3 bucket and configure storage with the following procedure.
Prerequisites
- You have a cluster on AWS with user-provisioned infrastructure.
For Amazon S3 storage, the secret is expected to contain two keys:
-
REGISTRY_STORAGE_S3_ACCESSKEY -
REGISTRY_STORAGE_S3_SECRETKEY
-
Procedure
Use the following procedure if the Registry Operator cannot create an S3 bucket and automatically configure storage.
- Set up a Bucket Lifecycle Policy to abort incomplete multipart uploads that are one day old.
Fill in the storage configuration in
configs.imageregistry.operator.openshift.io/cluster:$ oc edit configs.imageregistry.operator.openshift.io/clusterExample configuration
storage: s3: bucket: <bucket-name> region: <region-name>
To secure your registry images in AWS, block public access to the S3 bucket.
4.11.19.1.2. Configuring storage for the image registry in non-production clusters
You must configure storage for the Image Registry Operator. For non-production clusters, you can set the image registry to an empty directory. If you do so, all images are lost if you restart the registry.
Procedure
To set the image registry storage to an empty directory:
$ oc patch configs.imageregistry.operator.openshift.io cluster --type merge --patch '{"spec":{"storage":{"emptyDir":{}}}}'WarningConfigure this option for only non-production clusters.
If you run this command before the Image Registry Operator initializes its components, the
oc patchcommand fails with the following error:Error from server (NotFound): configs.imageregistry.operator.openshift.io "cluster" not foundWait a few minutes and run the command again.
4.11.20. Deleting the bootstrap resources
After you complete the initial Operator configuration for the cluster, remove the bootstrap resources from Amazon Web Services (AWS).
Prerequisites
- You completed the initial Operator configuration for your cluster.
Procedure
Delete the bootstrap resources. If you used the CloudFormation template, delete its stack:
Delete the stack by using the AWS CLI:
$ aws cloudformation delete-stack --stack-name <name>1 - 1
<name>is the name of your bootstrap stack.
- Delete the stack by using the AWS CloudFormation console.
4.11.21. Creating the Ingress DNS Records
If you removed the DNS Zone configuration, manually create DNS records that point to the Ingress load balancer. You can create either a wildcard record or specific records. While the following procedure uses A records, you can use other record types that you require, such as CNAME or alias.
Prerequisites
- You deployed an OpenShift Container Platform cluster on Amazon Web Services (AWS) that uses infrastructure that you provisioned.
-
You installed the OpenShift CLI (
oc). -
You installed the
jqpackage. - You downloaded the AWS CLI and installed it on your computer. See Install the AWS CLI Using the Bundled Installer (Linux, macOS, or Unix).
Procedure
Determine the routes to create.
-
To create a wildcard record, use
*.apps.<cluster_name>.<domain_name>, where<cluster_name>is your cluster name, and<domain_name>is the Route 53 base domain for your OpenShift Container Platform cluster. To create specific records, you must create a record for each route that your cluster uses, as shown in the output of the following command:
$ oc get --all-namespaces -o jsonpath='{range .items[*]}{range .status.ingress[*]}{.host}{"\n"}{end}{end}' routesExample output
oauth-openshift.apps.<cluster_name>.<domain_name> console-openshift-console.apps.<cluster_name>.<domain_name> downloads-openshift-console.apps.<cluster_name>.<domain_name> alertmanager-main-openshift-monitoring.apps.<cluster_name>.<domain_name> grafana-openshift-monitoring.apps.<cluster_name>.<domain_name> prometheus-k8s-openshift-monitoring.apps.<cluster_name>.<domain_name>
-
To create a wildcard record, use
Retrieve the Ingress Operator load balancer status and note the value of the external IP address that it uses, which is shown in the
EXTERNAL-IPcolumn:$ oc -n openshift-ingress get service router-defaultExample output
NAME TYPE CLUSTER-IP EXTERNAL-IP PORT(S) AGE router-default LoadBalancer 172.30.62.215 ab3...28.us-east-2.elb.amazonaws.com 80:31499/TCP,443:30693/TCP 5mLocate the hosted zone ID for the load balancer:
$ aws elb describe-load-balancers | jq -r '.LoadBalancerDescriptions[] | select(.DNSName == "<external_ip>").CanonicalHostedZoneNameID'1 - 1
- For
<external_ip>, specify the value of the external IP address of the Ingress Operator load balancer that you obtained.
Example output
Z3AADJGX6KTTL2The output of this command is the load balancer hosted zone ID.
Obtain the public hosted zone ID for your cluster’s domain:
$ aws route53 list-hosted-zones-by-name \ --dns-name "<domain_name>" \1 --query 'HostedZones[? Config.PrivateZone != `true` && Name == `<domain_name>.`].Id'2 --output textExample output
/hostedzone/Z3URY6TWQ91KVVThe public hosted zone ID for your domain is shown in the command output. In this example, it is
Z3URY6TWQ91KVV.Add the alias records to your private zone:
$ aws route53 change-resource-record-sets --hosted-zone-id "<private_hosted_zone_id>" --change-batch '{1 > "Changes": [ > { > "Action": "CREATE", > "ResourceRecordSet": { > "Name": "\\052.apps.<cluster_domain>",2 > "Type": "A", > "AliasTarget":{ > "HostedZoneId": "<hosted_zone_id>",3 > "DNSName": "<external_ip>.",4 > "EvaluateTargetHealth": false > } > } > } > ] > }'- 1
- For
<private_hosted_zone_id>, specify the value from the output of the CloudFormation template for DNS and load balancing. - 2
- For
<cluster_domain>, specify the domain or subdomain that you use with your OpenShift Container Platform cluster. - 3
- For
<hosted_zone_id>, specify the public hosted zone ID for the load balancer that you obtained. - 4
- For
<external_ip>, specify the value of the external IP address of the Ingress Operator load balancer. Ensure that you include the trailing period (.) in this parameter value.
Add the records to your public zone:
$ aws route53 change-resource-record-sets --hosted-zone-id "<public_hosted_zone_id>"" --change-batch '{1 > "Changes": [ > { > "Action": "CREATE", > "ResourceRecordSet": { > "Name": "\\052.apps.<cluster_domain>",2 > "Type": "A", > "AliasTarget":{ > "HostedZoneId": "<hosted_zone_id>",3 > "DNSName": "<external_ip>.",4 > "EvaluateTargetHealth": false > } > } > } > ] > }'- 1
- For
<public_hosted_zone_id>, specify the public hosted zone for your domain. - 2
- For
<cluster_domain>, specify the domain or subdomain that you use with your OpenShift Container Platform cluster. - 3
- For
<hosted_zone_id>, specify the public hosted zone ID for the load balancer that you obtained. - 4
- For
<external_ip>, specify the value of the external IP address of the Ingress Operator load balancer. Ensure that you include the trailing period (.) in this parameter value.
4.11.22. Completing an AWS installation on user-provisioned infrastructure
After you start the OpenShift Container Platform installation on Amazon Web Service (AWS) user-provisioned infrastructure, monitor the deployment to completion.
Prerequisites
- You removed the bootstrap node for an OpenShift Container Platform cluster on user-provisioned AWS infrastructure.
-
You installed the
ocCLI.
Procedure
From the directory that contains the installation program, complete the cluster installation:
$ ./openshift-install --dir <installation_directory> wait-for install-complete1 - 1
- For
<installation_directory>, specify the path to the directory that you stored the installation files in.
Example output
INFO Waiting up to 40m0s for the cluster at https://api.mycluster.example.com:6443 to initialize... INFO Waiting up to 10m0s for the openshift-console route to be created... INFO Install complete! INFO To access the cluster as the system:admin user when using 'oc', run 'export KUBECONFIG=/home/myuser/install_dir/auth/kubeconfig' INFO Access the OpenShift web-console here: https://console-openshift-console.apps.mycluster.example.com INFO Login to the console with user: "kubeadmin", and password: "4vYBz-Fe5en-ymBEc-Wt6NL" INFO Time elapsed: 1sImportant-
The Ignition config files that the installation program generates contain certificates that expire after 24 hours, which are then renewed at that time. If the cluster is shut down before renewing the certificates and the cluster is later restarted after the 24 hours have elapsed, the cluster automatically recovers the expired certificates. The exception is that you must manually approve the pending
node-bootstrappercertificate signing requests (CSRs) to recover kubelet certificates. See the documentation for Recovering from expired control plane certificates for more information. - It is recommended that you use Ignition config files within 12 hours after they are generated because the 24-hour certificate rotates from 16 to 22 hours after the cluster is installed. By using the Ignition config files within 12 hours, you can avoid installation failure if the certificate update runs during installation.
4.11.23. Logging in to the cluster by using the web console
The kubeadmin user exists by default after an OpenShift Container Platform installation. You can log in to your cluster as the kubeadmin user by using the OpenShift Container Platform web console.
Prerequisites
- You have access to the installation host.
- You completed a cluster installation and all cluster Operators are available.
Procedure
Obtain the password for the
kubeadminuser from thekubeadmin-passwordfile on the installation host:$ cat <installation_directory>/auth/kubeadmin-passwordNoteAlternatively, you can obtain the
kubeadminpassword from the<installation_directory>/.openshift_install.loglog file on the installation host.List the OpenShift Container Platform web console route:
$ oc get routes -n openshift-console | grep 'console-openshift'NoteAlternatively, you can obtain the OpenShift Container Platform route from the
<installation_directory>/.openshift_install.loglog file on the installation host.Example output
console console-openshift-console.apps.<cluster_name>.<base_domain> console https reencrypt/Redirect None-
Navigate to the route detailed in the output of the preceding command in a web browser and log in as the
kubeadminuser.
4.11.24. Telemetry access for OpenShift Container Platform
In OpenShift Container Platform 4.7, the Telemetry service, which runs by default to provide metrics about cluster health and the success of updates, requires internet access. If your cluster is connected to the internet, Telemetry runs automatically, and your cluster is registered to OpenShift Cluster Manager.
After you confirm that your OpenShift Cluster Manager inventory is correct, either maintained automatically by Telemetry or manually by using OpenShift Cluster Manager, use subscription watch to track your OpenShift Container Platform subscriptions at the account or multi-cluster level.
4.11.26. Next steps
- Validating an installation.
- Customize your cluster.
- If necessary, you can opt out of remote health reporting.
- If necessary, you can remove cloud provider credentials.
4.12. Installing a cluster on AWS in a restricted network with user-provisioned infrastructure
In OpenShift Container Platform version 4.7, you can install a cluster on Amazon Web Services (AWS) using infrastructure that you provide and an internal mirror of the installation release content.
While you can install an OpenShift Container Platform cluster by using mirrored installation release content, your cluster still requires Internet access to use the AWS APIs.
One way to create this infrastructure is to use the provided CloudFormation templates. You can modify the templates to customize your infrastructure or use the information that they contain to create AWS objects according to your company’s policies.
The steps for performing a user-provisioned infrastructure installation are provided as an example only. Installing a cluster with infrastructure you provide requires knowledge of the cloud provider and the installation process of OpenShift Container Platform. Several CloudFormation templates are provided to assist in completing these steps or to help model your own. You are also free to create the required resources through other methods; the templates are just an example.
4.12.1. Prerequisites
You created a mirror registry on your mirror host and obtained the
imageContentSourcesdata for your version of OpenShift Container Platform.ImportantBecause the installation media is on the mirror host, you can use that computer to complete all installation steps.
- You reviewed details about the OpenShift Container Platform installation and update processes.
You configured an AWS account to host the cluster.
ImportantIf you have an AWS profile stored on your computer, it must not use a temporary session token that you generated while using a multi-factor authentication device. The cluster continues to use your current AWS credentials to create AWS resources for the entire life of the cluster, so you must use key-based, long-lived credentials. To generate appropriate keys, see Managing Access Keys for IAM Users in the AWS documentation. You can supply the keys when you run the installation program.
- You downloaded the AWS CLI and installed it on your computer. See Install the AWS CLI Using the Bundled Installer (Linux, macOS, or Unix) in the AWS documentation.
If you use a firewall and plan to use the Telemetry service, you configured the firewall to allow the sites that your cluster requires access to.
NoteBe sure to also review this site list if you are configuring a proxy.
- If you do not allow the system to manage identity and access management (IAM), then a cluster administrator can manually create and maintain IAM credentials. Manual mode can also be used in environments where the cloud IAM APIs are not reachable.
4.12.2. About installations in restricted networks
In OpenShift Container Platform 4.7, you can perform an installation that does not require an active connection to the Internet to obtain software components. Restricted network installations can be completed using installer-provisioned infrastructure or user-provisioned infrastructure, depending on the cloud platform to which you are installing the cluster.
If you choose to perform a restricted network installation on a cloud platform, you still require access to its cloud APIs. Some cloud functions, like Amazon Web Service’s Route 53 DNS and IAM services, require internet access. Depending on your network, you might require less Internet access for an installation on bare metal hardware or on VMware vSphere.
To complete a restricted network installation, you must create a registry that mirrors the contents of the OpenShift Container Platform registry and contains the installation media. You can create this registry on a mirror host, which can access both the Internet and your closed network, or by using other methods that meet your restrictions.
Because of the complexity of the configuration for user-provisioned installations, consider completing a standard user-provisioned infrastructure installation before you attempt a restricted network installation using user-provisioned infrastructure. Completing this test installation might make it easier to isolate and troubleshoot any issues that might arise during your installation in a restricted network.
4.12.2.1. Additional limits
Clusters in restricted networks have the following additional limitations and restrictions:
-
The
ClusterVersionstatus includes anUnable to retrieve available updateserror. - By default, you cannot use the contents of the Developer Catalog because you cannot access the required image stream tags.
4.12.3. Internet access for OpenShift Container Platform
In OpenShift Container Platform 4.7, you require access to the Internet to obtain the images that are necessary to install your cluster.
You must have Internet access to:
- Access OpenShift Cluster Manager to download the installation program and perform subscription management. If the cluster has internet access and you do not disable Telemetry, that service automatically entitles your cluster.
- Access Quay.io to obtain the packages that are required to install your cluster.
- Obtain the packages that are required to perform cluster updates.
If your cluster cannot have direct Internet access, you can perform a restricted network installation on some types of infrastructure that you provision. During that process, you download the content that is required and use it to populate a mirror registry with the packages that you need to install a cluster and generate the installation program. With some installation types, the environment that you install your cluster in will not require Internet access. Before you update the cluster, you update the content of the mirror registry.
4.12.4. Required AWS infrastructure components
To install OpenShift Container Platform on user-provisioned infrastructure in Amazon Web Services (AWS), you must manually create both the machines and their supporting infrastructure.
For more information about the integration testing for different platforms, see the OpenShift Container Platform 4.x Tested Integrations page.
By using the provided CloudFormation templates, you can create stacks of AWS resources that represent the following components:
- An AWS Virtual Private Cloud (VPC)
- Networking and load balancing components
- Security groups and roles
- An OpenShift Container Platform bootstrap node
- OpenShift Container Platform control plane nodes
- An OpenShift Container Platform compute node
Alternatively, you can manually create the components or you can reuse existing infrastructure that meets the cluster requirements. Review the CloudFormation templates for more details about how the components interrelate.
4.12.4.1. Other infrastructure components
- A VPC
- DNS entries
- Load balancers (classic or network) and listeners
- A public and a private Route 53 zone
- Security groups
- IAM roles
- S3 buckets
If you are working in a disconnected environment or use a proxy, you cannot reach the public IP addresses for EC2 and ELB endpoints. To reach these endpoints, you must create a VPC endpoint and attach it to the subnet that the clusters are using. Create the following endpoints:
-
ec2.<region>.amazonaws.com -
elasticloadbalancing.<region>.amazonaws.com -
s3.<region>.amazonaws.com
Required VPC components
You must provide a suitable VPC and subnets that allow communication to your machines.
| Component | AWS type | Description | |
|---|---|---|---|
| VPC |
| You must provide a public VPC for the cluster to use. The VPC uses an endpoint that references the route tables for each subnet to improve communication with the registry that is hosted in S3. | |
| Public subnets |
| Your VPC must have public subnets for between 1 and 3 availability zones and associate them with appropriate Ingress rules. | |
| Internet gateway |
| You must have a public Internet gateway, with public routes, attached to the VPC. In the provided templates, each public subnet has a NAT gateway with an EIP address. These NAT gateways allow cluster resources, like private subnet instances, to reach the Internet and are not required for some restricted network or proxy scenarios. | |
| Network access control |
| You must allow the VPC to access the following ports: | |
| Port | Reason | ||
|
| Inbound HTTP traffic | ||
|
| Inbound HTTPS traffic | ||
|
| Inbound SSH traffic | ||
|
| Inbound ephemeral traffic | ||
|
| Outbound ephemeral traffic | ||
| Private subnets |
| Your VPC can have private subnets. The provided CloudFormation templates can create private subnets for between 1 and 3 availability zones. If you use private subnets, you must provide appropriate routes and tables for them. | |
Required DNS and load balancing components
Your DNS and load balancer configuration needs to use a public hosted zone and can use a private hosted zone similar to the one that the installation program uses if it provisions the cluster’s infrastructure. You must create a DNS entry that resolves to your load balancer. An entry for api.<cluster_name>.<domain> must point to the external load balancer, and an entry for api-int.<cluster_name>.<domain> must point to the internal load balancer.
The cluster also requires load balancers and listeners for port 6443, which are required for the Kubernetes API and its extensions, and port 22623, which are required for the Ignition config files for new machines. The targets will be the control plane nodes (also known as the master nodes). Port 6443 must be accessible to both clients external to the cluster and nodes within the cluster. Port 22623 must be accessible to nodes within the cluster.
| Component | AWS type | Description |
|---|---|---|
| DNS |
| The hosted zone for your internal DNS. |
| etcd record sets |
| The registration records for etcd for your control plane machines. |
| Public load balancer |
| The load balancer for your public subnets. |
| External API server record |
| Alias records for the external API server. |
| External listener |
| A listener on port 6443 for the external load balancer. |
| External target group |
| The target group for the external load balancer. |
| Private load balancer |
| The load balancer for your private subnets. |
| Internal API server record |
| Alias records for the internal API server. |
| Internal listener |
| A listener on port 22623 for the internal load balancer. |
| Internal target group |
| The target group for the internal load balancer. |
| Internal listener |
| A listener on port 6443 for the internal load balancer. |
| Internal target group |
| The target group for the internal load balancer. |
Security groups
The control plane and worker machines require access to the following ports:
| Group | Type | IP Protocol | Port range |
|---|---|---|---|
|
|
|
|
|
|
|
| ||
|
|
| ||
|
|
| ||
|
|
|
|
|
|
|
| ||
|
|
|
|
|
|
|
|
Control plane Ingress
The control plane machines require the following Ingress groups. Each Ingress group is a AWS::EC2::SecurityGroupIngress resource.
| Ingress group | Description | IP protocol | Port range |
|---|---|---|---|
|
| etcd |
|
|
|
| Vxlan packets |
|
|
|
| Vxlan packets |
|
|
|
| Internal cluster communication and Kubernetes proxy metrics |
|
|
|
| Internal cluster communication |
|
|
|
| Kubernetes kubelet, scheduler and controller manager |
|
|
|
| Kubernetes kubelet, scheduler and controller manager |
|
|
|
| Kubernetes Ingress services |
|
|
|
| Kubernetes Ingress services |
|
|
|
| Geneve packets |
|
|
|
| Geneve packets |
|
|
|
| IPsec IKE packets |
|
|
|
| IPsec IKE packets |
|
|
|
| IPsec NAT-T packets |
|
|
|
| IPsec NAT-T packets |
|
|
|
| IPsec ESP packets |
|
|
|
| IPsec ESP packets |
|
|
|
| Internal cluster communication |
|
|
|
| Internal cluster communication |
|
|
|
| Kubernetes Ingress services |
|
|
|
| Kubernetes Ingress services |
|
|
Worker Ingress
The worker machines require the following Ingress groups. Each Ingress group is a AWS::EC2::SecurityGroupIngress resource.
| Ingress group | Description | IP protocol | Port range |
|---|---|---|---|
|
| Vxlan packets |
|
|
|
| Vxlan packets |
|
|
|
| Internal cluster communication |
|
|
|
| Internal cluster communication |
|
|
|
| Kubernetes kubelet, scheduler, and controller manager |
|
|
|
| Kubernetes kubelet, scheduler, and controller manager |
|
|
|
| Kubernetes Ingress services |
|
|
|
| Kubernetes Ingress services |
|
|
|
| Geneve packets |
|
|
|
| Geneve packets |
|
|
|
| IPsec IKE packets |
|
|
|
| IPsec IKE packets |
|
|
|
| IPsec NAT-T packets |
|
|
|
| IPsec NAT-T packets |
|
|
|
| IPsec ESP packets |
|
|
|
| IPsec ESP packets |
|
|
|
| Internal cluster communication |
|
|
|
| Internal cluster communication |
|
|
|
| Kubernetes Ingress services |
|
|
|
| Kubernetes Ingress services |
|
|
Roles and instance profiles
You must grant the machines permissions in AWS. The provided CloudFormation templates grant the machines Allow permissions for the following AWS::IAM::Role objects and provide a AWS::IAM::InstanceProfile for each set of roles. If you do not use the templates, you can grant the machines the following broad permissions or the following individual permissions.
| Role | Effect | Action | Resource |
|---|---|---|---|
| Master |
|
|
|
|
|
|
| |
|
|
|
| |
|
|
|
| |
| Worker |
|
|
|
| Bootstrap |
|
|
|
|
|
|
| |
|
|
|
|
4.12.4.2. Cluster machines
You need AWS::EC2::Instance objects for the following machines:
- A bootstrap machine. This machine is required during installation, but you can remove it after your cluster deploys.
- Three control plane machines. The control plane machines are not governed by a machine set.
- Compute machines. You must create at least two compute machines, which are also known as worker machines, during installation. These machines are not governed by a machine set.
4.12.4.3. Certificate signing requests management
Because your cluster has limited access to automatic machine management when you use infrastructure that you provision, you must provide a mechanism for approving cluster certificate signing requests (CSRs) after installation. The kube-controller-manager only approves the kubelet client CSRs. The machine-approver cannot guarantee the validity of a serving certificate that is requested by using kubelet credentials because it cannot confirm that the correct machine issued the request. You must determine and implement a method of verifying the validity of the kubelet serving certificate requests and approving them.
4.12.4.4. Supported AWS machine types
The following Amazon Web Services (AWS) instance types are supported with OpenShift Container Platform.
Example 4.41. Instance types for machines
| Instance type | Bootstrap | Control plane | Compute |
|---|---|---|---|
|
| x | ||
|
| x | ||
|
| x | x | |
|
| x | x | |
|
| x | x | |
|
| x | x | |
|
| x | x | |
|
| x | ||
|
| x | x | |
|
| x | x | |
|
| x | x | |
|
| x | x | |
|
| x | x | |
|
| x | x | |
|
| x | ||
|
| x | x | |
|
| x | x | |
|
| x | x | |
|
| x | x | |
|
| x | x | |
|
| x | x | |
|
| x | x | |
|
| x | x | |
|
| x | x | |
|
| x | x | |
|
| x | x | |
|
| x | x | |
|
| x | x | |
|
| x | x | |
|
| x | ||
|
| x | x | |
|
| x | x | |
|
| x | x | |
|
| x | x | |
|
| x | x | |
|
| x | x | |
|
| x | ||
|
| x | x | |
|
| x | x | |
|
| x | x | |
|
| x | x | |
|
| x | x | |
|
| x | x | |
|
| x | ||
|
| x | x | |
|
| x | x | |
|
| x | x | |
|
| x | x | |
|
| x | x | |
|
| x | ||
|
| x | x | |
|
| x | x | |
|
| x | x | |
|
| x | x | |
|
| x | x | |
|
| x | x | |
|
| x | x | |
|
| x | ||
|
| x | x | |
|
| x | x | |
|
| x | x | |
|
| x | x | |
|
| x | x | |
|
| x | x | |
|
| x | x | |
|
| x | ||
|
| x | ||
|
| x | ||
|
| x | ||
|
| x | ||
|
| x |
4.12.4.5. Required AWS permissions for the IAM user
Your IAM user must have the permission tag:GetResources in the region us-east-1 to delete the base cluster resources. As part of the AWS API requirement, the OpenShift Container Platform installation program performs various actions in this region.
When you attach the AdministratorAccess policy to the IAM user that you create in Amazon Web Services (AWS), you grant that user all of the required permissions. To deploy all components of an OpenShift Container Platform cluster, the IAM user requires the following permissions:
Example 4.42. Required EC2 permissions for installation
-
ec2:AuthorizeSecurityGroupEgress -
ec2:AuthorizeSecurityGroupIngress -
ec2:CopyImage -
ec2:CreateNetworkInterface -
ec2:AttachNetworkInterface -
ec2:CreateSecurityGroup -
ec2:CreateTags -
ec2:CreateVolume -
ec2:DeleteSecurityGroup -
ec2:DeleteSnapshot -
ec2:DeleteTags -
ec2:DeregisterImage -
ec2:DescribeAccountAttributes -
ec2:DescribeAddresses -
ec2:DescribeAvailabilityZones -
ec2:DescribeDhcpOptions -
ec2:DescribeImages -
ec2:DescribeInstanceAttribute -
ec2:DescribeInstanceCreditSpecifications -
ec2:DescribeInstances -
ec2:DescribeInstanceTypes -
ec2:DescribeInternetGateways -
ec2:DescribeKeyPairs -
ec2:DescribeNatGateways -
ec2:DescribeNetworkAcls -
ec2:DescribeNetworkInterfaces -
ec2:DescribePrefixLists -
ec2:DescribeRegions -
ec2:DescribeRouteTables -
ec2:DescribeSecurityGroups -
ec2:DescribeSubnets -
ec2:DescribeTags -
ec2:DescribeVolumes -
ec2:DescribeVpcAttribute -
ec2:DescribeVpcClassicLink -
ec2:DescribeVpcClassicLinkDnsSupport -
ec2:DescribeVpcEndpoints -
ec2:DescribeVpcs -
ec2:GetEbsDefaultKmsKeyId -
ec2:ModifyInstanceAttribute -
ec2:ModifyNetworkInterfaceAttribute -
ec2:RevokeSecurityGroupEgress -
ec2:RevokeSecurityGroupIngress -
ec2:RunInstances -
ec2:TerminateInstances
Example 4.43. Required permissions for creating network resources during installation
-
ec2:AllocateAddress -
ec2:AssociateAddress -
ec2:AssociateDhcpOptions -
ec2:AssociateRouteTable -
ec2:AttachInternetGateway -
ec2:CreateDhcpOptions -
ec2:CreateInternetGateway -
ec2:CreateNatGateway -
ec2:CreateRoute -
ec2:CreateRouteTable -
ec2:CreateSubnet -
ec2:CreateVpc -
ec2:CreateVpcEndpoint -
ec2:ModifySubnetAttribute -
ec2:ModifyVpcAttribute
If you use an existing VPC, your account does not require these permissions for creating network resources.
Example 4.44. Required Elastic Load Balancing permissions (ELB) for installation
-
elasticloadbalancing:AddTags -
elasticloadbalancing:ApplySecurityGroupsToLoadBalancer -
elasticloadbalancing:AttachLoadBalancerToSubnets -
elasticloadbalancing:ConfigureHealthCheck -
elasticloadbalancing:CreateLoadBalancer -
elasticloadbalancing:CreateLoadBalancerListeners -
elasticloadbalancing:DeleteLoadBalancer -
elasticloadbalancing:DeregisterInstancesFromLoadBalancer -
elasticloadbalancing:DescribeInstanceHealth -
elasticloadbalancing:DescribeLoadBalancerAttributes -
elasticloadbalancing:DescribeLoadBalancers -
elasticloadbalancing:DescribeTags -
elasticloadbalancing:ModifyLoadBalancerAttributes -
elasticloadbalancing:RegisterInstancesWithLoadBalancer -
elasticloadbalancing:SetLoadBalancerPoliciesOfListener
Example 4.45. Required Elastic Load Balancing permissions (ELBv2) for installation
-
elasticloadbalancing:AddTags -
elasticloadbalancing:CreateListener -
elasticloadbalancing:CreateLoadBalancer -
elasticloadbalancing:CreateTargetGroup -
elasticloadbalancing:DeleteLoadBalancer -
elasticloadbalancing:DeregisterTargets -
elasticloadbalancing:DescribeListeners -
elasticloadbalancing:DescribeLoadBalancerAttributes -
elasticloadbalancing:DescribeLoadBalancers -
elasticloadbalancing:DescribeTargetGroupAttributes -
elasticloadbalancing:DescribeTargetHealth -
elasticloadbalancing:ModifyLoadBalancerAttributes -
elasticloadbalancing:ModifyTargetGroup -
elasticloadbalancing:ModifyTargetGroupAttributes -
elasticloadbalancing:RegisterTargets
Example 4.46. Required IAM permissions for installation
-
iam:AddRoleToInstanceProfile -
iam:CreateInstanceProfile -
iam:CreateRole -
iam:DeleteInstanceProfile -
iam:DeleteRole -
iam:DeleteRolePolicy -
iam:GetInstanceProfile -
iam:GetRole -
iam:GetRolePolicy -
iam:GetUser -
iam:ListInstanceProfilesForRole -
iam:ListRoles -
iam:ListUsers -
iam:PassRole -
iam:PutRolePolicy -
iam:RemoveRoleFromInstanceProfile -
iam:SimulatePrincipalPolicy -
iam:TagRole
If you have not created an elastic load balancer (ELB) in your AWS account, the IAM user also requires the iam:CreateServiceLinkedRole permission.
Example 4.47. Required Route 53 permissions for installation
-
route53:ChangeResourceRecordSets -
route53:ChangeTagsForResource -
route53:CreateHostedZone -
route53:DeleteHostedZone -
route53:GetChange -
route53:GetHostedZone -
route53:ListHostedZones -
route53:ListHostedZonesByName -
route53:ListResourceRecordSets -
route53:ListTagsForResource -
route53:UpdateHostedZoneComment
Example 4.48. Required S3 permissions for installation
-
s3:CreateBucket -
s3:DeleteBucket -
s3:GetAccelerateConfiguration -
s3:GetBucketAcl -
s3:GetBucketCors -
s3:GetBucketLocation -
s3:GetBucketLogging -
s3:GetBucketObjectLockConfiguration -
s3:GetBucketReplication -
s3:GetBucketRequestPayment -
s3:GetBucketTagging -
s3:GetBucketVersioning -
s3:GetBucketWebsite -
s3:GetEncryptionConfiguration -
s3:GetLifecycleConfiguration -
s3:GetReplicationConfiguration -
s3:ListBucket -
s3:PutBucketAcl -
s3:PutBucketTagging -
s3:PutEncryptionConfiguration
Example 4.49. S3 permissions that cluster Operators require
-
s3:DeleteObject -
s3:GetObject -
s3:GetObjectAcl -
s3:GetObjectTagging -
s3:GetObjectVersion -
s3:PutObject -
s3:PutObjectAcl -
s3:PutObjectTagging
Example 4.50. Required permissions to delete base cluster resources
-
autoscaling:DescribeAutoScalingGroups -
ec2:DeleteNetworkInterface -
ec2:DeleteVolume -
elasticloadbalancing:DeleteTargetGroup -
elasticloadbalancing:DescribeTargetGroups -
iam:DeleteAccessKey -
iam:DeleteUser -
iam:ListAttachedRolePolicies -
iam:ListInstanceProfiles -
iam:ListRolePolicies -
iam:ListUserPolicies -
s3:DeleteObject -
s3:ListBucketVersions -
tag:GetResources
Example 4.51. Required permissions to delete network resources
-
ec2:DeleteDhcpOptions -
ec2:DeleteInternetGateway -
ec2:DeleteNatGateway -
ec2:DeleteRoute -
ec2:DeleteRouteTable -
ec2:DeleteSubnet -
ec2:DeleteVpc -
ec2:DeleteVpcEndpoints -
ec2:DetachInternetGateway -
ec2:DisassociateRouteTable -
ec2:ReleaseAddress -
ec2:ReplaceRouteTableAssociation
If you use an existing VPC, your account does not require these permissions to delete network resources. Instead, your account only requires the tag:UntagResources permission to delete network resources.
Example 4.52. Required permissions to delete a cluster with shared instance roles
-
iam:UntagRole
Example 4.53. Additional IAM and S3 permissions that are required to create manifests
-
iam:DeleteAccessKey -
iam:DeleteUser -
iam:DeleteUserPolicy -
iam:GetUserPolicy -
iam:ListAccessKeys -
iam:PutUserPolicy -
iam:TagUser -
iam:GetUserPolicy -
iam:ListAccessKeys -
s3:PutBucketPublicAccessBlock -
s3:GetBucketPublicAccessBlock -
s3:PutLifecycleConfiguration -
s3:HeadBucket -
s3:ListBucketMultipartUploads -
s3:AbortMultipartUpload
If you are managing your cloud provider credentials with mint mode, the IAM user also requires the iam:CreateAccessKey and iam:CreateUser permissions.
Example 4.54. Optional permissions for instance and quota checks for installation
-
ec2:DescribeInstanceTypeOfferings -
servicequotas:ListAWSDefaultServiceQuotas
4.12.5. Generating an SSH private key and adding it to the agent
If you want to perform installation debugging or disaster recovery on your cluster, you must provide an SSH key to both your ssh-agent and the installation program. You can use this key to access the bootstrap machine in a public cluster to troubleshoot installation issues.
In a production environment, you require disaster recovery and debugging.
You can use this key to SSH into the master nodes as the user core. When you deploy the cluster, the key is added to the core user’s ~/.ssh/authorized_keys list.
You must use a local key, not one that you configured with platform-specific approaches such as AWS key pairs.
Procedure
If you do not have an SSH key that is configured for password-less authentication on your computer, create one. For example, on a computer that uses a Linux operating system, run the following command:
$ ssh-keygen -t ed25519 -N '' \ -f <path>/<file_name>1 - 1
- Specify the path and file name, such as
~/.ssh/id_rsa, of the new SSH key. If you have an existing key pair, ensure your public key is in the your~/.sshdirectory.
Running this command generates an SSH key that does not require a password in the location that you specified.
NoteIf you plan to install an OpenShift Container Platform cluster that uses FIPS Validated / Modules in Process cryptographic libraries on the
x86_64architecture, do not create a key that uses theed25519algorithm. Instead, create a key that uses thersaorecdsaalgorithm.Start the
ssh-agentprocess as a background task:$ eval "$(ssh-agent -s)"Example output
Agent pid 31874NoteIf your cluster is in FIPS mode, only use FIPS-compliant algorithms to generate the SSH key. The key must be either RSA or ECDSA.
Add your SSH private key to the
ssh-agent:$ ssh-add <path>/<file_name>1 Example output
Identity added: /home/<you>/<path>/<file_name> (<computer_name>)- 1
- Specify the path and file name for your SSH private key, such as
~/.ssh/id_rsa
Next steps
- When you install OpenShift Container Platform, provide the SSH public key to the installation program. If you install a cluster on infrastructure that you provision, you must provide this key to your cluster’s machines.
4.12.6. Creating the installation files for AWS
To install OpenShift Container Platform on Amazon Web Services (AWS) using user-provisioned infrastructure, you must generate the files that the installation program needs to deploy your cluster and modify them so that the cluster creates only the machines that it will use. You generate and customize the install-config.yaml file, Kubernetes manifests, and Ignition config files. You also have the option to first set up a separate var partition during the preparation phases of installation.
4.12.6.1. Optional: Creating a separate /var partition
It is recommended that disk partitioning for OpenShift Container Platform be left to the installer. However, there are cases where you might want to create separate partitions in a part of the filesystem that you expect to grow.
OpenShift Container Platform supports the addition of a single partition to attach storage to either the /var partition or a subdirectory of /var. For example:
-
/var/lib/containers: Holds container-related content that can grow as more images and containers are added to a system. -
/var/lib/etcd: Holds data that you might want to keep separate for purposes such as performance optimization of etcd storage. -
/var: Holds data that you might want to keep separate for purposes such as auditing.
Storing the contents of a /var directory separately makes it easier to grow storage for those areas as needed and reinstall OpenShift Container Platform at a later date and keep that data intact. With this method, you will not have to pull all your containers again, nor will you have to copy massive log files when you update systems.
Because /var must be in place before a fresh installation of Red Hat Enterprise Linux CoreOS (RHCOS), the following procedure sets up the separate /var partition by creating a machine config that is inserted during the openshift-install preparation phases of an OpenShift Container Platform installation.
If you follow the steps to create a separate /var partition in this procedure, it is not necessary to create the Kubernetes manifest and Ignition config files again as described later in this section.
Procedure
Create a directory to hold the OpenShift Container Platform installation files:
$ mkdir $HOME/clusterconfigRun
openshift-installto create a set of files in themanifestandopenshiftsubdirectories. Answer the system questions as you are prompted:$ openshift-install create manifests --dir $HOME/clusterconfigExample output
? SSH Public Key ... INFO Credentials loaded from the "myprofile" profile in file "/home/myuser/.aws/credentials" INFO Consuming Install Config from target directory INFO Manifests created in: $HOME/clusterconfig/manifests and $HOME/clusterconfig/openshiftOptional: Confirm that the installation program created manifests in the
clusterconfig/openshiftdirectory:$ ls $HOME/clusterconfig/openshift/Example output
99_kubeadmin-password-secret.yaml 99_openshift-cluster-api_master-machines-0.yaml 99_openshift-cluster-api_master-machines-1.yaml 99_openshift-cluster-api_master-machines-2.yaml ...Create a
MachineConfigobject and add it to a file in theopenshiftdirectory. For example, name the file98-var-partition.yaml, change the disk device name to the name of the storage device on theworkersystems, and set the storage size as appropriate. This example places the/vardirectory on a separate partition:apiVersion: machineconfiguration.openshift.io/v1 kind: MachineConfig metadata: labels: machineconfiguration.openshift.io/role: worker name: 98-var-partition spec: config: ignition: version: 3.2.0 storage: disks: - device: /dev/<device_name>1 partitions: - label: var startMiB: <partition_start_offset>2 sizeMiB: <partition_size>3 filesystems: - device: /dev/disk/by-partlabel/var path: /var format: xfs systemd: units: - name: var.mount4 enabled: true contents: | [Unit] Before=local-fs.target [Mount] What=/dev/disk/by-partlabel/var Where=/var Options=defaults,prjquota5 [Install] WantedBy=local-fs.target- 1
- The storage device name of the disk that you want to partition.
- 2
- When adding a data partition to the boot disk, a minimum value of 25000 MiB (Mebibytes) is recommended. The root file system is automatically resized to fill all available space up to the specified offset. If no value is specified, or if the specified value is smaller than the recommended minimum, the resulting root file system will be too small, and future reinstalls of RHCOS might overwrite the beginning of the data partition.
- 3
- The size of the data partition in mebibytes.
- 4
- The name of the mount unit must match the directory specified in the
Where=directive. For example, for a filesystem mounted on/var/lib/containers, the unit must be namedvar-lib-containers.mount. - 5
- The
prjquotamount option must be enabled for filesystems used for container storage.
NoteWhen creating a separate
/varpartition, you cannot use different instance types for worker nodes, if the different instance types do not have the same device name.Run
openshift-installagain to create Ignition configs from a set of files in themanifestandopenshiftsubdirectories:$ openshift-install create ignition-configs --dir $HOME/clusterconfig $ ls $HOME/clusterconfig/ auth bootstrap.ign master.ign metadata.json worker.ign
Now you can use the Ignition config files as input to the installation procedures to install Red Hat Enterprise Linux CoreOS (RHCOS) systems.
4.12.6.2. Creating the installation configuration file
Generate and customize the installation configuration file that the installation program needs to deploy your cluster.
Prerequisites
- You obtained the OpenShift Container Platform installation program for user-provisioned infrastructure and the pull secret for your cluster. For a restricted network installation, these files are on your mirror host.
-
You checked that you are deploying your cluster to a region with an accompanying Red Hat Enterprise Linux CoreOS (RHCOS) AMI published by Red Hat. If you are deploying to a region that requires a custom AMI, such as an AWS GovCloud region, you must create the
install-config.yamlfile manually.
Procedure
Create the
install-config.yamlfile.Change to the directory that contains the installation program and run the following command:
$ ./openshift-install create install-config --dir <installation_directory>1 - 1
- For
<installation_directory>, specify the directory name to store the files that the installation program creates.
ImportantSpecify an empty directory. Some installation assets, like bootstrap X.509 certificates have short expiration intervals, so you must not reuse an installation directory. If you want to reuse individual files from another cluster installation, you can copy them into your directory. However, the file names for the installation assets might change between releases. Use caution when copying installation files from an earlier OpenShift Container Platform version.
At the prompts, provide the configuration details for your cloud:
Optional: Select an SSH key to use to access your cluster machines.
NoteFor production OpenShift Container Platform clusters on which you want to perform installation debugging or disaster recovery, specify an SSH key that your
ssh-agentprocess uses.- Select aws as the platform to target.
If you do not have an AWS profile stored on your computer, enter the AWS access key ID and secret access key for the user that you configured to run the installation program.
NoteThe AWS access key ID and secret access key are stored in
~/.aws/credentialsin the home directory of the current user on the installation host. You are prompted for the credentials by the installation program if the credentials for the exported profile are not present in the file. Any credentials that you provide to the installation program are stored in the file.- Select the AWS region to deploy the cluster to.
- Select the base domain for the Route 53 service that you configured for your cluster.
- Enter a descriptive name for your cluster.
- Paste the pull secret from the Red Hat OpenShift Cluster Manager.
Edit the
install-config.yamlfile to provide the additional information that is required for an installation in a restricted network.Update the
pullSecretvalue to contain the authentication information for your registry:pullSecret: '{"auths":{"<local_registry>": {"auth": "<credentials>","email": "you@example.com"}}}'For
<local_registry>, specify the registry domain name, and optionally the port, that your mirror registry uses to serve content. For exampleregistry.example.comorregistry.example.com:5000. For<credentials>, specify the base64-encoded user name and password for your mirror registry.Add the
additionalTrustBundleparameter and value. The value must be the contents of the certificate file that you used for your mirror registry, which can be an existing, trusted certificate authority or the self-signed certificate that you generated for the mirror registry.additionalTrustBundle: | -----BEGIN CERTIFICATE----- ZZZZZZZZZZZZZZZZZZZZZZZZZZZZZZZZZZZZZZZZZZZZZZZZZZZZZZZZZZZZZZZZ -----END CERTIFICATE-----Add the image content resources:
imageContentSources: - mirrors: - <local_registry>/<local_repository_name>/release source: quay.io/openshift-release-dev/ocp-release - mirrors: - <local_registry>/<local_repository_name>/release source: quay.io/openshift-release-dev/ocp-v4.0-art-devUse the
imageContentSourcessection from the output of the command to mirror the repository or the values that you used when you mirrored the content from the media that you brought into your restricted network.Optional: Set the publishing strategy to
Internal:publish: InternalBy setting this option, you create an internal Ingress Controller and a private load balancer.
Optional: Back up the
install-config.yamlfile.ImportantThe
install-config.yamlfile is consumed during the installation process. If you want to reuse the file, you must back it up now.
4.12.6.3. Configuring the cluster-wide proxy during installation
Production environments can deny direct access to the Internet and instead have an HTTP or HTTPS proxy available. You can configure a new OpenShift Container Platform cluster to use a proxy by configuring the proxy settings in the install-config.yaml file.
Prerequisites
-
You have an existing
install-config.yamlfile. You reviewed the sites that your cluster requires access to and determined whether any of them need to bypass the proxy. By default, all cluster egress traffic is proxied, including calls to hosting cloud provider APIs. You added sites to the
Proxyobject’sspec.noProxyfield to bypass the proxy if necessary.NoteThe
Proxyobjectstatus.noProxyfield is populated with the values of thenetworking.machineNetwork[].cidr,networking.clusterNetwork[].cidr, andnetworking.serviceNetwork[]fields from your installation configuration.For installations on Amazon Web Services (AWS), Google Cloud Platform (GCP), Microsoft Azure, and Red Hat OpenStack Platform (RHOSP), the
Proxyobjectstatus.noProxyfield is also populated with the instance metadata endpoint (169.254.169.254).-
If your cluster is on AWS, you added the
ec2.<region>.amazonaws.com,elasticloadbalancing.<region>.amazonaws.com, ands3.<region>.amazonaws.comendpoints to your VPC endpoint. These endpoints are required to complete requests from the nodes to the AWS EC2 API. Because the proxy works on the container level, not the node level, you must route these requests to the AWS EC2 API through the AWS private network. Adding the public IP address of the EC2 API to your allowlist in your proxy server is not sufficient.
Procedure
Edit your
install-config.yamlfile and add the proxy settings. For example:apiVersion: v1 baseDomain: my.domain.com proxy: httpProxy: http://<username>:<pswd>@<ip>:<port>1 httpsProxy: https://<username>:<pswd>@<ip>:<port>2 noProxy: example.com3 additionalTrustBundle: |4 -----BEGIN CERTIFICATE----- <MY_TRUSTED_CA_CERT> -----END CERTIFICATE----- ...- 1
- A proxy URL to use for creating HTTP connections outside the cluster. The URL scheme must be
http. - 2
- A proxy URL to use for creating HTTPS connections outside the cluster.
- 3
- A comma-separated list of destination domain names, IP addresses, or other network CIDRs to exclude from proxying. Preface a domain with
.to match subdomains only. For example,.y.commatchesx.y.com, but noty.com. Use*to bypass the proxy for all destinations. - 4
- If provided, the installation program generates a config map that is named
user-ca-bundlein theopenshift-confignamespace to hold the additional CA certificates. If you provideadditionalTrustBundleand at least one proxy setting, theProxyobject is configured to reference theuser-ca-bundleconfig map in thetrustedCAfield. The Cluster Network Operator then creates atrusted-ca-bundleconfig map that merges the contents specified for thetrustedCAparameter with the RHCOS trust bundle. TheadditionalTrustBundlefield is required unless the proxy’s identity certificate is signed by an authority from the RHCOS trust bundle.
NoteThe installation program does not support the proxy
readinessEndpointsfield.- Save the file and reference it when installing OpenShift Container Platform.
The installation program creates a cluster-wide proxy that is named cluster that uses the proxy settings in the provided install-config.yaml file. If no proxy settings are provided, a cluster Proxy object is still created, but it will have a nil spec.
Only the Proxy object named cluster is supported, and no additional proxies can be created.
4.12.6.4. Creating the Kubernetes manifest and Ignition config files
Because you must modify some cluster definition files and manually start the cluster machines, you must generate the Kubernetes manifest and Ignition config files that the cluster needs to make its machines.
The installation configuration file transforms into the Kubernetes manifests. The manifests wrap into the Ignition configuration files, which are later used to create the cluster.
The Ignition config files that the installation program generates contain certificates that expire after 24 hours, which are then renewed at that time. If the cluster is shut down before renewing the certificates and the cluster is later restarted after the 24 hours have elapsed, the cluster automatically recovers the expired certificates. The exception is that you must manually approve the pending node-bootstrapper certificate signing requests (CSRs) to recover kubelet certificates. See the documentation for Recovering from expired control plane certificates for more information.
Prerequisites
- You obtained the OpenShift Container Platform installation program. For a restricted network installation, these files are on your mirror host.
-
You created the
install-config.yamlinstallation configuration file.
Procedure
Change to the directory that contains the installation program and generate the Kubernetes manifests for the cluster:
$ ./openshift-install create manifests --dir <installation_directory>1 - 1
- For
<installation_directory>, specify the installation directory that contains theinstall-config.yamlfile you created.
Remove the Kubernetes manifest files that define the control plane machines:
$ rm -f <installation_directory>/openshift/99_openshift-cluster-api_master-machines-*.yamlBy removing these files, you prevent the cluster from automatically generating control plane machines.
Remove the Kubernetes manifest files that define the worker machines:
$ rm -f <installation_directory>/openshift/99_openshift-cluster-api_worker-machineset-*.yamlBecause you create and manage the worker machines yourself, you do not need to initialize these machines.
Check that the
mastersSchedulableparameter in the<installation_directory>/manifests/cluster-scheduler-02-config.ymlKubernetes manifest file is set tofalse. This setting prevents pods from being scheduled on the control plane machines:-
Open the
<installation_directory>/manifests/cluster-scheduler-02-config.ymlfile. -
Locate the
mastersSchedulableparameter and ensure that it is set tofalse. - Save and exit the file.
-
Open the
Optional: If you do not want the Ingress Operator to create DNS records on your behalf, remove the
privateZoneandpublicZonesections from the<installation_directory>/manifests/cluster-dns-02-config.ymlDNS configuration file:apiVersion: config.openshift.io/v1 kind: DNS metadata: creationTimestamp: null name: cluster spec: baseDomain: example.openshift.com privateZone:1 id: mycluster-100419-private-zone publicZone:2 id: example.openshift.com status: {}If you do so, you must add ingress DNS records manually in a later step.
To create the Ignition configuration files, run the following command from the directory that contains the installation program:
$ ./openshift-install create ignition-configs --dir <installation_directory>1 - 1
- For
<installation_directory>, specify the same installation directory.
The following files are generated in the directory:
. ├── auth │ ├── kubeadmin-password │ └── kubeconfig ├── bootstrap.ign ├── master.ign ├── metadata.json └── worker.ign
4.12.7. Extracting the infrastructure name
The Ignition config files contain a unique cluster identifier that you can use to uniquely identify your cluster in Amazon Web Services (AWS). The infrastructure name is also used to locate the appropriate AWS resources during an OpenShift Container Platform installation. The provided CloudFormation templates contain references to this infrastructure name, so you must extract it.
Prerequisites
- You obtained the OpenShift Container Platform installation program and the pull secret for your cluster.
- You generated the Ignition config files for your cluster.
-
You installed the
jqpackage.
Procedure
To extract and view the infrastructure name from the Ignition config file metadata, run the following command:
$ jq -r .infraID <installation_directory>/metadata.json1 - 1
- For
<installation_directory>, specify the path to the directory that you stored the installation files in.
Example output
openshift-vw9j61 - 1
- The output of this command is your cluster name and a random string.
4.12.8. Creating a VPC in AWS
You must create a Virtual Private Cloud (VPC) in Amazon Web Services (AWS) for your OpenShift Container Platform cluster to use. You can customize the VPC to meet your requirements, including VPN and route tables.
You can use the provided CloudFormation template and a custom parameter file to create a stack of AWS resources that represent the VPC.
If you do not use the provided CloudFormation template to create your AWS infrastructure, you must review the provided information and manually create the infrastructure. If your cluster does not initialize correctly, you might have to contact Red Hat support with your installation logs.
Prerequisites
- You configured an AWS account.
-
You added your AWS keys and region to your local AWS profile by running
aws configure. - You generated the Ignition config files for your cluster.
Procedure
Create a JSON file that contains the parameter values that the template requires:
[ { "ParameterKey": "VpcCidr",1 "ParameterValue": "10.0.0.0/16"2 }, { "ParameterKey": "AvailabilityZoneCount",3 "ParameterValue": "1"4 }, { "ParameterKey": "SubnetBits",5 "ParameterValue": "12"6 } ]- Copy the template from the CloudFormation template for the VPC section of this topic and save it as a YAML file on your computer. This template describes the VPC that your cluster requires.
Launch the CloudFormation template to create a stack of AWS resources that represent the VPC:
ImportantYou must enter the command on a single line.
$ aws cloudformation create-stack --stack-name <name>1 --template-body file://<template>.yaml2 --parameters file://<parameters>.json3 - 1
<name>is the name for the CloudFormation stack, such ascluster-vpc. You need the name of this stack if you remove the cluster.- 2
<template>is the relative path to and name of the CloudFormation template YAML file that you saved.- 3
<parameters>is the relative path to and name of the CloudFormation parameters JSON file.
Example output
arn:aws:cloudformation:us-east-1:269333783861:stack/cluster-vpc/dbedae40-2fd3-11eb-820e-12a48460849fConfirm that the template components exist:
$ aws cloudformation describe-stacks --stack-name <name>After the
StackStatusdisplaysCREATE_COMPLETE, the output displays values for the following parameters. You must provide these parameter values to the other CloudFormation templates that you run to create your cluster:VpcIdThe ID of your VPC.
PublicSubnetIdsThe IDs of the new public subnets.
PrivateSubnetIdsThe IDs of the new private subnets.
4.12.8.1. CloudFormation template for the VPC
You can use the following CloudFormation template to deploy the VPC that you need for your OpenShift Container Platform cluster.
Example 4.55. CloudFormation template for the VPC
AWSTemplateFormatVersion: 2010-09-09
Description: Template for Best Practice VPC with 1-3 AZs
Parameters:
VpcCidr:
AllowedPattern: ^(([0-9]|[1-9][0-9]|1[0-9]{2}|2[0-4][0-9]|25[0-5])\.){3}([0-9]|[1-9][0-9]|1[0-9]{2}|2[0-4][0-9]|25[0-5])(\/(1[6-9]|2[0-4]))$
ConstraintDescription: CIDR block parameter must be in the form x.x.x.x/16-24.
Default: 10.0.0.0/16
Description: CIDR block for VPC.
Type: String
AvailabilityZoneCount:
ConstraintDescription: "The number of availability zones. (Min: 1, Max: 3)"
MinValue: 1
MaxValue: 3
Default: 1
Description: "How many AZs to create VPC subnets for. (Min: 1, Max: 3)"
Type: Number
SubnetBits:
ConstraintDescription: CIDR block parameter must be in the form x.x.x.x/19-27.
MinValue: 5
MaxValue: 13
Default: 12
Description: "Size of each subnet to create within the availability zones. (Min: 5 = /27, Max: 13 = /19)"
Type: Number
Metadata:
AWS::CloudFormation::Interface:
ParameterGroups:
- Label:
default: "Network Configuration"
Parameters:
- VpcCidr
- SubnetBits
- Label:
default: "Availability Zones"
Parameters:
- AvailabilityZoneCount
ParameterLabels:
AvailabilityZoneCount:
default: "Availability Zone Count"
VpcCidr:
default: "VPC CIDR"
SubnetBits:
default: "Bits Per Subnet"
Conditions:
DoAz3: !Equals [3, !Ref AvailabilityZoneCount]
DoAz2: !Or [!Equals [2, !Ref AvailabilityZoneCount], Condition: DoAz3]
Resources:
VPC:
Type: "AWS::EC2::VPC"
Properties:
EnableDnsSupport: "true"
EnableDnsHostnames: "true"
CidrBlock: !Ref VpcCidr
PublicSubnet:
Type: "AWS::EC2::Subnet"
Properties:
VpcId: !Ref VPC
CidrBlock: !Select [0, !Cidr [!Ref VpcCidr, 6, !Ref SubnetBits]]
AvailabilityZone: !Select
- 0
- Fn::GetAZs: !Ref "AWS::Region"
PublicSubnet2:
Type: "AWS::EC2::Subnet"
Condition: DoAz2
Properties:
VpcId: !Ref VPC
CidrBlock: !Select [1, !Cidr [!Ref VpcCidr, 6, !Ref SubnetBits]]
AvailabilityZone: !Select
- 1
- Fn::GetAZs: !Ref "AWS::Region"
PublicSubnet3:
Type: "AWS::EC2::Subnet"
Condition: DoAz3
Properties:
VpcId: !Ref VPC
CidrBlock: !Select [2, !Cidr [!Ref VpcCidr, 6, !Ref SubnetBits]]
AvailabilityZone: !Select
- 2
- Fn::GetAZs: !Ref "AWS::Region"
InternetGateway:
Type: "AWS::EC2::InternetGateway"
GatewayToInternet:
Type: "AWS::EC2::VPCGatewayAttachment"
Properties:
VpcId: !Ref VPC
InternetGatewayId: !Ref InternetGateway
PublicRouteTable:
Type: "AWS::EC2::RouteTable"
Properties:
VpcId: !Ref VPC
PublicRoute:
Type: "AWS::EC2::Route"
DependsOn: GatewayToInternet
Properties:
RouteTableId: !Ref PublicRouteTable
DestinationCidrBlock: 0.0.0.0/0
GatewayId: !Ref InternetGateway
PublicSubnetRouteTableAssociation:
Type: "AWS::EC2::SubnetRouteTableAssociation"
Properties:
SubnetId: !Ref PublicSubnet
RouteTableId: !Ref PublicRouteTable
PublicSubnetRouteTableAssociation2:
Type: "AWS::EC2::SubnetRouteTableAssociation"
Condition: DoAz2
Properties:
SubnetId: !Ref PublicSubnet2
RouteTableId: !Ref PublicRouteTable
PublicSubnetRouteTableAssociation3:
Condition: DoAz3
Type: "AWS::EC2::SubnetRouteTableAssociation"
Properties:
SubnetId: !Ref PublicSubnet3
RouteTableId: !Ref PublicRouteTable
PrivateSubnet:
Type: "AWS::EC2::Subnet"
Properties:
VpcId: !Ref VPC
CidrBlock: !Select [3, !Cidr [!Ref VpcCidr, 6, !Ref SubnetBits]]
AvailabilityZone: !Select
- 0
- Fn::GetAZs: !Ref "AWS::Region"
PrivateRouteTable:
Type: "AWS::EC2::RouteTable"
Properties:
VpcId: !Ref VPC
PrivateSubnetRouteTableAssociation:
Type: "AWS::EC2::SubnetRouteTableAssociation"
Properties:
SubnetId: !Ref PrivateSubnet
RouteTableId: !Ref PrivateRouteTable
NAT:
DependsOn:
- GatewayToInternet
Type: "AWS::EC2::NatGateway"
Properties:
AllocationId:
"Fn::GetAtt":
- EIP
- AllocationId
SubnetId: !Ref PublicSubnet
EIP:
Type: "AWS::EC2::EIP"
Properties:
Domain: vpc
Route:
Type: "AWS::EC2::Route"
Properties:
RouteTableId:
Ref: PrivateRouteTable
DestinationCidrBlock: 0.0.0.0/0
NatGatewayId:
Ref: NAT
PrivateSubnet2:
Type: "AWS::EC2::Subnet"
Condition: DoAz2
Properties:
VpcId: !Ref VPC
CidrBlock: !Select [4, !Cidr [!Ref VpcCidr, 6, !Ref SubnetBits]]
AvailabilityZone: !Select
- 1
- Fn::GetAZs: !Ref "AWS::Region"
PrivateRouteTable2:
Type: "AWS::EC2::RouteTable"
Condition: DoAz2
Properties:
VpcId: !Ref VPC
PrivateSubnetRouteTableAssociation2:
Type: "AWS::EC2::SubnetRouteTableAssociation"
Condition: DoAz2
Properties:
SubnetId: !Ref PrivateSubnet2
RouteTableId: !Ref PrivateRouteTable2
NAT2:
DependsOn:
- GatewayToInternet
Type: "AWS::EC2::NatGateway"
Condition: DoAz2
Properties:
AllocationId:
"Fn::GetAtt":
- EIP2
- AllocationId
SubnetId: !Ref PublicSubnet2
EIP2:
Type: "AWS::EC2::EIP"
Condition: DoAz2
Properties:
Domain: vpc
Route2:
Type: "AWS::EC2::Route"
Condition: DoAz2
Properties:
RouteTableId:
Ref: PrivateRouteTable2
DestinationCidrBlock: 0.0.0.0/0
NatGatewayId:
Ref: NAT2
PrivateSubnet3:
Type: "AWS::EC2::Subnet"
Condition: DoAz3
Properties:
VpcId: !Ref VPC
CidrBlock: !Select [5, !Cidr [!Ref VpcCidr, 6, !Ref SubnetBits]]
AvailabilityZone: !Select
- 2
- Fn::GetAZs: !Ref "AWS::Region"
PrivateRouteTable3:
Type: "AWS::EC2::RouteTable"
Condition: DoAz3
Properties:
VpcId: !Ref VPC
PrivateSubnetRouteTableAssociation3:
Type: "AWS::EC2::SubnetRouteTableAssociation"
Condition: DoAz3
Properties:
SubnetId: !Ref PrivateSubnet3
RouteTableId: !Ref PrivateRouteTable3
NAT3:
DependsOn:
- GatewayToInternet
Type: "AWS::EC2::NatGateway"
Condition: DoAz3
Properties:
AllocationId:
"Fn::GetAtt":
- EIP3
- AllocationId
SubnetId: !Ref PublicSubnet3
EIP3:
Type: "AWS::EC2::EIP"
Condition: DoAz3
Properties:
Domain: vpc
Route3:
Type: "AWS::EC2::Route"
Condition: DoAz3
Properties:
RouteTableId:
Ref: PrivateRouteTable3
DestinationCidrBlock: 0.0.0.0/0
NatGatewayId:
Ref: NAT3
S3Endpoint:
Type: AWS::EC2::VPCEndpoint
Properties:
PolicyDocument:
Version: 2012-10-17
Statement:
- Effect: Allow
Principal: '*'
Action:
- '*'
Resource:
- '*'
RouteTableIds:
- !Ref PublicRouteTable
- !Ref PrivateRouteTable
- !If [DoAz2, !Ref PrivateRouteTable2, !Ref "AWS::NoValue"]
- !If [DoAz3, !Ref PrivateRouteTable3, !Ref "AWS::NoValue"]
ServiceName: !Join
- ''
- - com.amazonaws.
- !Ref 'AWS::Region'
- .s3
VpcId: !Ref VPC
Outputs:
VpcId:
Description: ID of the new VPC.
Value: !Ref VPC
PublicSubnetIds:
Description: Subnet IDs of the public subnets.
Value:
!Join [
",",
[!Ref PublicSubnet, !If [DoAz2, !Ref PublicSubnet2, !Ref "AWS::NoValue"], !If [DoAz3, !Ref PublicSubnet3, !Ref "AWS::NoValue"]]
]
PrivateSubnetIds:
Description: Subnet IDs of the private subnets.
Value:
!Join [
",",
[!Ref PrivateSubnet, !If [DoAz2, !Ref PrivateSubnet2, !Ref "AWS::NoValue"], !If [DoAz3, !Ref PrivateSubnet3, !Ref "AWS::NoValue"]]
]4.12.9. Creating networking and load balancing components in AWS
You must configure networking and classic or network load balancing in Amazon Web Services (AWS) that your OpenShift Container Platform cluster can use.
You can use the provided CloudFormation template and a custom parameter file to create a stack of AWS resources. The stack represents the networking and load balancing components that your OpenShift Container Platform cluster requires. The template also creates a hosted zone and subnet tags.
You can run the template multiple times within a single Virtual Private Cloud (VPC).
If you do not use the provided CloudFormation template to create your AWS infrastructure, you must review the provided information and manually create the infrastructure. If your cluster does not initialize correctly, you might have to contact Red Hat support with your installation logs.
Prerequisites
- You configured an AWS account.
-
You added your AWS keys and region to your local AWS profile by running
aws configure. - You generated the Ignition config files for your cluster.
- You created and configured a VPC and associated subnets in AWS.
Procedure
Obtain the hosted zone ID for the Route 53 base domain that you specified in the
install-config.yamlfile for your cluster. You can obtain details about your hosted zone by running the following command:$ aws route53 list-hosted-zones-by-name --dns-name <route53_domain>1 - 1
- For the
<route53_domain>, specify the Route 53 base domain that you used when you generated theinstall-config.yamlfile for the cluster.
Example output
mycluster.example.com. False 100 HOSTEDZONES 65F8F38E-2268-B835-E15C-AB55336FCBFA /hostedzone/Z21IXYZABCZ2A4 mycluster.example.com. 10In the example output, the hosted zone ID is
Z21IXYZABCZ2A4.Create a JSON file that contains the parameter values that the template requires:
[ { "ParameterKey": "ClusterName",1 "ParameterValue": "mycluster"2 }, { "ParameterKey": "InfrastructureName",3 "ParameterValue": "mycluster-<random_string>"4 }, { "ParameterKey": "HostedZoneId",5 "ParameterValue": "<random_string>"6 }, { "ParameterKey": "HostedZoneName",7 "ParameterValue": "example.com"8 }, { "ParameterKey": "PublicSubnets",9 "ParameterValue": "subnet-<random_string>"10 }, { "ParameterKey": "PrivateSubnets",11 "ParameterValue": "subnet-<random_string>"12 }, { "ParameterKey": "VpcId",13 "ParameterValue": "vpc-<random_string>"14 } ]- 1
- A short, representative cluster name to use for hostnames, etc.
- 2
- Specify the cluster name that you used when you generated the
install-config.yamlfile for the cluster. - 3
- The name for your cluster infrastructure that is encoded in your Ignition config files for the cluster.
- 4
- Specify the infrastructure name that you extracted from the Ignition config file metadata, which has the format
<cluster-name>-<random-string>. - 5
- The Route 53 public zone ID to register the targets with.
- 6
- Specify the Route 53 public zone ID, which as a format similar to
Z21IXYZABCZ2A4. You can obtain this value from the AWS console. - 7
- The Route 53 zone to register the targets with.
- 8
- Specify the Route 53 base domain that you used when you generated the
install-config.yamlfile for the cluster. Do not include the trailing period (.) that is displayed in the AWS console. - 9
- The public subnets that you created for your VPC.
- 10
- Specify the
PublicSubnetIdsvalue from the output of the CloudFormation template for the VPC. - 11
- The private subnets that you created for your VPC.
- 12
- Specify the
PrivateSubnetIdsvalue from the output of the CloudFormation template for the VPC. - 13
- The VPC that you created for the cluster.
- 14
- Specify the
VpcIdvalue from the output of the CloudFormation template for the VPC.
Copy the template from the CloudFormation template for the network and load balancers section of this topic and save it as a YAML file on your computer. This template describes the networking and load balancing objects that your cluster requires.
ImportantIf you are deploying your cluster to an AWS government or secret region, you must update the
InternalApiServerRecordin the CloudFormation template to useCNAMErecords. Records of typeALIASare not supported for AWS government regions.Launch the CloudFormation template to create a stack of AWS resources that provide the networking and load balancing components:
ImportantYou must enter the command on a single line.
$ aws cloudformation create-stack --stack-name <name>1 --template-body file://<template>.yaml2 --parameters file://<parameters>.json3 --capabilities CAPABILITY_NAMED_IAM4 - 1
<name>is the name for the CloudFormation stack, such ascluster-dns. You need the name of this stack if you remove the cluster.- 2
<template>is the relative path to and name of the CloudFormation template YAML file that you saved.- 3
<parameters>is the relative path to and name of the CloudFormation parameters JSON file.- 4
- You must explicitly declare the
CAPABILITY_NAMED_IAMcapability because the provided template creates someAWS::IAM::Roleresources.
Example output
arn:aws:cloudformation:us-east-1:269333783861:stack/cluster-dns/cd3e5de0-2fd4-11eb-5cf0-12be5c33a183Confirm that the template components exist:
$ aws cloudformation describe-stacks --stack-name <name>After the
StackStatusdisplaysCREATE_COMPLETE, the output displays values for the following parameters. You must provide these parameter values to the other CloudFormation templates that you run to create your cluster:PrivateHostedZoneIdHosted zone ID for the private DNS.
ExternalApiLoadBalancerNameFull name of the external API load balancer.
InternalApiLoadBalancerNameFull name of the internal API load balancer.
ApiServerDnsNameFull hostname of the API server.
RegisterNlbIpTargetsLambdaLambda ARN useful to help register/deregister IP targets for these load balancers.
ExternalApiTargetGroupArnARN of external API target group.
InternalApiTargetGroupArnARN of internal API target group.
InternalServiceTargetGroupArnARN of internal service target group.
4.12.9.1. CloudFormation template for the network and load balancers
You can use the following CloudFormation template to deploy the networking objects and load balancers that you need for your OpenShift Container Platform cluster.
Example 4.56. CloudFormation template for the network and load balancers
AWSTemplateFormatVersion: 2010-09-09
Description: Template for OpenShift Cluster Network Elements (Route53 & LBs)
Parameters:
ClusterName:
AllowedPattern: ^([a-zA-Z][a-zA-Z0-9\-]{0,26})$
MaxLength: 27
MinLength: 1
ConstraintDescription: Cluster name must be alphanumeric, start with a letter, and have a maximum of 27 characters.
Description: A short, representative cluster name to use for host names and other identifying names.
Type: String
InfrastructureName:
AllowedPattern: ^([a-zA-Z][a-zA-Z0-9\-]{0,26})$
MaxLength: 27
MinLength: 1
ConstraintDescription: Infrastructure name must be alphanumeric, start with a letter, and have a maximum of 27 characters.
Description: A short, unique cluster ID used to tag cloud resources and identify items owned or used by the cluster.
Type: String
HostedZoneId:
Description: The Route53 public zone ID to register the targets with, such as Z21IXYZABCZ2A4.
Type: String
HostedZoneName:
Description: The Route53 zone to register the targets with, such as example.com. Omit the trailing period.
Type: String
Default: "example.com"
PublicSubnets:
Description: The internet-facing subnets.
Type: List<AWS::EC2::Subnet::Id>
PrivateSubnets:
Description: The internal subnets.
Type: List<AWS::EC2::Subnet::Id>
VpcId:
Description: The VPC-scoped resources will belong to this VPC.
Type: AWS::EC2::VPC::Id
Metadata:
AWS::CloudFormation::Interface:
ParameterGroups:
- Label:
default: "Cluster Information"
Parameters:
- ClusterName
- InfrastructureName
- Label:
default: "Network Configuration"
Parameters:
- VpcId
- PublicSubnets
- PrivateSubnets
- Label:
default: "DNS"
Parameters:
- HostedZoneName
- HostedZoneId
ParameterLabels:
ClusterName:
default: "Cluster Name"
InfrastructureName:
default: "Infrastructure Name"
VpcId:
default: "VPC ID"
PublicSubnets:
default: "Public Subnets"
PrivateSubnets:
default: "Private Subnets"
HostedZoneName:
default: "Public Hosted Zone Name"
HostedZoneId:
default: "Public Hosted Zone ID"
Resources:
ExtApiElb:
Type: AWS::ElasticLoadBalancingV2::LoadBalancer
Properties:
Name: !Join ["-", [!Ref InfrastructureName, "ext"]]
IpAddressType: ipv4
Subnets: !Ref PublicSubnets
Type: network
IntApiElb:
Type: AWS::ElasticLoadBalancingV2::LoadBalancer
Properties:
Name: !Join ["-", [!Ref InfrastructureName, "int"]]
Scheme: internal
IpAddressType: ipv4
Subnets: !Ref PrivateSubnets
Type: network
IntDns:
Type: "AWS::Route53::HostedZone"
Properties:
HostedZoneConfig:
Comment: "Managed by CloudFormation"
Name: !Join [".", [!Ref ClusterName, !Ref HostedZoneName]]
HostedZoneTags:
- Key: Name
Value: !Join ["-", [!Ref InfrastructureName, "int"]]
- Key: !Join ["", ["kubernetes.io/cluster/", !Ref InfrastructureName]]
Value: "owned"
VPCs:
- VPCId: !Ref VpcId
VPCRegion: !Ref "AWS::Region"
ExternalApiServerRecord:
Type: AWS::Route53::RecordSetGroup
Properties:
Comment: Alias record for the API server
HostedZoneId: !Ref HostedZoneId
RecordSets:
- Name:
!Join [
".",
["api", !Ref ClusterName, !Join ["", [!Ref HostedZoneName, "."]]],
]
Type: A
AliasTarget:
HostedZoneId: !GetAtt ExtApiElb.CanonicalHostedZoneID
DNSName: !GetAtt ExtApiElb.DNSName
InternalApiServerRecord:
Type: AWS::Route53::RecordSetGroup
Properties:
Comment: Alias record for the API server
HostedZoneId: !Ref IntDns
RecordSets:
- Name:
!Join [
".",
["api", !Ref ClusterName, !Join ["", [!Ref HostedZoneName, "."]]],
]
Type: A
AliasTarget:
HostedZoneId: !GetAtt IntApiElb.CanonicalHostedZoneID
DNSName: !GetAtt IntApiElb.DNSName
- Name:
!Join [
".",
["api-int", !Ref ClusterName, !Join ["", [!Ref HostedZoneName, "."]]],
]
Type: A
AliasTarget:
HostedZoneId: !GetAtt IntApiElb.CanonicalHostedZoneID
DNSName: !GetAtt IntApiElb.DNSName
ExternalApiListener:
Type: AWS::ElasticLoadBalancingV2::Listener
Properties:
DefaultActions:
- Type: forward
TargetGroupArn:
Ref: ExternalApiTargetGroup
LoadBalancerArn:
Ref: ExtApiElb
Port: 6443
Protocol: TCP
ExternalApiTargetGroup:
Type: AWS::ElasticLoadBalancingV2::TargetGroup
Properties:
HealthCheckIntervalSeconds: 10
HealthCheckPath: "/readyz"
HealthCheckPort: 6443
HealthCheckProtocol: HTTPS
HealthyThresholdCount: 2
UnhealthyThresholdCount: 2
Port: 6443
Protocol: TCP
TargetType: ip
VpcId:
Ref: VpcId
TargetGroupAttributes:
- Key: deregistration_delay.timeout_seconds
Value: 60
InternalApiListener:
Type: AWS::ElasticLoadBalancingV2::Listener
Properties:
DefaultActions:
- Type: forward
TargetGroupArn:
Ref: InternalApiTargetGroup
LoadBalancerArn:
Ref: IntApiElb
Port: 6443
Protocol: TCP
InternalApiTargetGroup:
Type: AWS::ElasticLoadBalancingV2::TargetGroup
Properties:
HealthCheckIntervalSeconds: 10
HealthCheckPath: "/readyz"
HealthCheckPort: 6443
HealthCheckProtocol: HTTPS
HealthyThresholdCount: 2
UnhealthyThresholdCount: 2
Port: 6443
Protocol: TCP
TargetType: ip
VpcId:
Ref: VpcId
TargetGroupAttributes:
- Key: deregistration_delay.timeout_seconds
Value: 60
InternalServiceInternalListener:
Type: AWS::ElasticLoadBalancingV2::Listener
Properties:
DefaultActions:
- Type: forward
TargetGroupArn:
Ref: InternalServiceTargetGroup
LoadBalancerArn:
Ref: IntApiElb
Port: 22623
Protocol: TCP
InternalServiceTargetGroup:
Type: AWS::ElasticLoadBalancingV2::TargetGroup
Properties:
HealthCheckIntervalSeconds: 10
HealthCheckPath: "/healthz"
HealthCheckPort: 22623
HealthCheckProtocol: HTTPS
HealthyThresholdCount: 2
UnhealthyThresholdCount: 2
Port: 22623
Protocol: TCP
TargetType: ip
VpcId:
Ref: VpcId
TargetGroupAttributes:
- Key: deregistration_delay.timeout_seconds
Value: 60
RegisterTargetLambdaIamRole:
Type: AWS::IAM::Role
Properties:
RoleName: !Join ["-", [!Ref InfrastructureName, "nlb", "lambda", "role"]]
AssumeRolePolicyDocument:
Version: "2012-10-17"
Statement:
- Effect: "Allow"
Principal:
Service:
- "lambda.amazonaws.com"
Action:
- "sts:AssumeRole"
Path: "/"
Policies:
- PolicyName: !Join ["-", [!Ref InfrastructureName, "master", "policy"]]
PolicyDocument:
Version: "2012-10-17"
Statement:
- Effect: "Allow"
Action:
[
"elasticloadbalancing:RegisterTargets",
"elasticloadbalancing:DeregisterTargets",
]
Resource: !Ref InternalApiTargetGroup
- Effect: "Allow"
Action:
[
"elasticloadbalancing:RegisterTargets",
"elasticloadbalancing:DeregisterTargets",
]
Resource: !Ref InternalServiceTargetGroup
- Effect: "Allow"
Action:
[
"elasticloadbalancing:RegisterTargets",
"elasticloadbalancing:DeregisterTargets",
]
Resource: !Ref ExternalApiTargetGroup
RegisterNlbIpTargets:
Type: "AWS::Lambda::Function"
Properties:
Handler: "index.handler"
Role:
Fn::GetAtt:
- "RegisterTargetLambdaIamRole"
- "Arn"
Code:
ZipFile: |
import json
import boto3
import cfnresponse
def handler(event, context):
elb = boto3.client('elbv2')
if event['RequestType'] == 'Delete':
elb.deregister_targets(TargetGroupArn=event['ResourceProperties']['TargetArn'],Targets=[{'Id': event['ResourceProperties']['TargetIp']}])
elif event['RequestType'] == 'Create':
elb.register_targets(TargetGroupArn=event['ResourceProperties']['TargetArn'],Targets=[{'Id': event['ResourceProperties']['TargetIp']}])
responseData = {}
cfnresponse.send(event, context, cfnresponse.SUCCESS, responseData, event['ResourceProperties']['TargetArn']+event['ResourceProperties']['TargetIp'])
Runtime: "python3.7"
Timeout: 120
RegisterSubnetTagsLambdaIamRole:
Type: AWS::IAM::Role
Properties:
RoleName: !Join ["-", [!Ref InfrastructureName, "subnet-tags-lambda-role"]]
AssumeRolePolicyDocument:
Version: "2012-10-17"
Statement:
- Effect: "Allow"
Principal:
Service:
- "lambda.amazonaws.com"
Action:
- "sts:AssumeRole"
Path: "/"
Policies:
- PolicyName: !Join ["-", [!Ref InfrastructureName, "subnet-tagging-policy"]]
PolicyDocument:
Version: "2012-10-17"
Statement:
- Effect: "Allow"
Action:
[
"ec2:DeleteTags",
"ec2:CreateTags"
]
Resource: "arn:aws:ec2:*:*:subnet/*"
- Effect: "Allow"
Action:
[
"ec2:DescribeSubnets",
"ec2:DescribeTags"
]
Resource: "*"
RegisterSubnetTags:
Type: "AWS::Lambda::Function"
Properties:
Handler: "index.handler"
Role:
Fn::GetAtt:
- "RegisterSubnetTagsLambdaIamRole"
- "Arn"
Code:
ZipFile: |
import json
import boto3
import cfnresponse
def handler(event, context):
ec2_client = boto3.client('ec2')
if event['RequestType'] == 'Delete':
for subnet_id in event['ResourceProperties']['Subnets']:
ec2_client.delete_tags(Resources=[subnet_id], Tags=[{'Key': 'kubernetes.io/cluster/' + event['ResourceProperties']['InfrastructureName']}]);
elif event['RequestType'] == 'Create':
for subnet_id in event['ResourceProperties']['Subnets']:
ec2_client.create_tags(Resources=[subnet_id], Tags=[{'Key': 'kubernetes.io/cluster/' + event['ResourceProperties']['InfrastructureName'], 'Value': 'shared'}]);
responseData = {}
cfnresponse.send(event, context, cfnresponse.SUCCESS, responseData, event['ResourceProperties']['InfrastructureName']+event['ResourceProperties']['Subnets'][0])
Runtime: "python3.7"
Timeout: 120
RegisterPublicSubnetTags:
Type: Custom::SubnetRegister
Properties:
ServiceToken: !GetAtt RegisterSubnetTags.Arn
InfrastructureName: !Ref InfrastructureName
Subnets: !Ref PublicSubnets
RegisterPrivateSubnetTags:
Type: Custom::SubnetRegister
Properties:
ServiceToken: !GetAtt RegisterSubnetTags.Arn
InfrastructureName: !Ref InfrastructureName
Subnets: !Ref PrivateSubnets
Outputs:
PrivateHostedZoneId:
Description: Hosted zone ID for the private DNS, which is required for private records.
Value: !Ref IntDns
ExternalApiLoadBalancerName:
Description: Full name of the external API load balancer.
Value: !GetAtt ExtApiElb.LoadBalancerFullName
InternalApiLoadBalancerName:
Description: Full name of the internal API load balancer.
Value: !GetAtt IntApiElb.LoadBalancerFullName
ApiServerDnsName:
Description: Full hostname of the API server, which is required for the Ignition config files.
Value: !Join [".", ["api-int", !Ref ClusterName, !Ref HostedZoneName]]
RegisterNlbIpTargetsLambda:
Description: Lambda ARN useful to help register or deregister IP targets for these load balancers.
Value: !GetAtt RegisterNlbIpTargets.Arn
ExternalApiTargetGroupArn:
Description: ARN of the external API target group.
Value: !Ref ExternalApiTargetGroup
InternalApiTargetGroupArn:
Description: ARN of the internal API target group.
Value: !Ref InternalApiTargetGroup
InternalServiceTargetGroupArn:
Description: ARN of the internal service target group.
Value: !Ref InternalServiceTargetGroup
If you are deploying your cluster to an AWS government or secret region, you must update the InternalApiServerRecord to use CNAME records. Records of type ALIAS are not supported for AWS government regions. For example:
Type: CNAME
TTL: 10
ResourceRecords:
- !GetAtt IntApiElb.DNSName4.12.10. Creating security group and roles in AWS
You must create security groups and roles in Amazon Web Services (AWS) for your OpenShift Container Platform cluster to use.
You can use the provided CloudFormation template and a custom parameter file to create a stack of AWS resources. The stack represents the security groups and roles that your OpenShift Container Platform cluster requires.
If you do not use the provided CloudFormation template to create your AWS infrastructure, you must review the provided information and manually create the infrastructure. If your cluster does not initialize correctly, you might have to contact Red Hat support with your installation logs.
Prerequisites
- You configured an AWS account.
-
You added your AWS keys and region to your local AWS profile by running
aws configure. - You generated the Ignition config files for your cluster.
- You created and configured a VPC and associated subnets in AWS.
Procedure
Create a JSON file that contains the parameter values that the template requires:
[ { "ParameterKey": "InfrastructureName",1 "ParameterValue": "mycluster-<random_string>"2 }, { "ParameterKey": "VpcCidr",3 "ParameterValue": "10.0.0.0/16"4 }, { "ParameterKey": "PrivateSubnets",5 "ParameterValue": "subnet-<random_string>"6 }, { "ParameterKey": "VpcId",7 "ParameterValue": "vpc-<random_string>"8 } ]- 1
- The name for your cluster infrastructure that is encoded in your Ignition config files for the cluster.
- 2
- Specify the infrastructure name that you extracted from the Ignition config file metadata, which has the format
<cluster-name>-<random-string>. - 3
- The CIDR block for the VPC.
- 4
- Specify the CIDR block parameter that you used for the VPC that you defined in the form
x.x.x.x/16-24. - 5
- The private subnets that you created for your VPC.
- 6
- Specify the
PrivateSubnetIdsvalue from the output of the CloudFormation template for the VPC. - 7
- The VPC that you created for the cluster.
- 8
- Specify the
VpcIdvalue from the output of the CloudFormation template for the VPC.
- Copy the template from the CloudFormation template for security objects section of this topic and save it as a YAML file on your computer. This template describes the security groups and roles that your cluster requires.
Launch the CloudFormation template to create a stack of AWS resources that represent the security groups and roles:
ImportantYou must enter the command on a single line.
$ aws cloudformation create-stack --stack-name <name>1 --template-body file://<template>.yaml2 --parameters file://<parameters>.json3 --capabilities CAPABILITY_NAMED_IAM4 - 1
<name>is the name for the CloudFormation stack, such ascluster-sec. You need the name of this stack if you remove the cluster.- 2
<template>is the relative path to and name of the CloudFormation template YAML file that you saved.- 3
<parameters>is the relative path to and name of the CloudFormation parameters JSON file.- 4
- You must explicitly declare the
CAPABILITY_NAMED_IAMcapability because the provided template creates someAWS::IAM::RoleandAWS::IAM::InstanceProfileresources.
Example output
arn:aws:cloudformation:us-east-1:269333783861:stack/cluster-sec/03bd4210-2ed7-11eb-6d7a-13fc0b61e9dbConfirm that the template components exist:
$ aws cloudformation describe-stacks --stack-name <name>After the
StackStatusdisplaysCREATE_COMPLETE, the output displays values for the following parameters. You must provide these parameter values to the other CloudFormation templates that you run to create your cluster:MasterSecurityGroupIdMaster Security Group ID
WorkerSecurityGroupIdWorker Security Group ID
MasterInstanceProfileMaster IAM Instance Profile
WorkerInstanceProfileWorker IAM Instance Profile
4.12.10.1. CloudFormation template for security objects
You can use the following CloudFormation template to deploy the security objects that you need for your OpenShift Container Platform cluster.
Example 4.57. CloudFormation template for security objects
AWSTemplateFormatVersion: 2010-09-09
Description: Template for OpenShift Cluster Security Elements (Security Groups & IAM)
Parameters:
InfrastructureName:
AllowedPattern: ^([a-zA-Z][a-zA-Z0-9\-]{0,26})$
MaxLength: 27
MinLength: 1
ConstraintDescription: Infrastructure name must be alphanumeric, start with a letter, and have a maximum of 27 characters.
Description: A short, unique cluster ID used to tag cloud resources and identify items owned or used by the cluster.
Type: String
VpcCidr:
AllowedPattern: ^(([0-9]|[1-9][0-9]|1[0-9]{2}|2[0-4][0-9]|25[0-5])\.){3}([0-9]|[1-9][0-9]|1[0-9]{2}|2[0-4][0-9]|25[0-5])(\/(1[6-9]|2[0-4]))$
ConstraintDescription: CIDR block parameter must be in the form x.x.x.x/16-24.
Default: 10.0.0.0/16
Description: CIDR block for VPC.
Type: String
VpcId:
Description: The VPC-scoped resources will belong to this VPC.
Type: AWS::EC2::VPC::Id
PrivateSubnets:
Description: The internal subnets.
Type: List<AWS::EC2::Subnet::Id>
Metadata:
AWS::CloudFormation::Interface:
ParameterGroups:
- Label:
default: "Cluster Information"
Parameters:
- InfrastructureName
- Label:
default: "Network Configuration"
Parameters:
- VpcId
- VpcCidr
- PrivateSubnets
ParameterLabels:
InfrastructureName:
default: "Infrastructure Name"
VpcId:
default: "VPC ID"
VpcCidr:
default: "VPC CIDR"
PrivateSubnets:
default: "Private Subnets"
Resources:
MasterSecurityGroup:
Type: AWS::EC2::SecurityGroup
Properties:
GroupDescription: Cluster Master Security Group
SecurityGroupIngress:
- IpProtocol: icmp
FromPort: 0
ToPort: 0
CidrIp: !Ref VpcCidr
- IpProtocol: tcp
FromPort: 22
ToPort: 22
CidrIp: !Ref VpcCidr
- IpProtocol: tcp
ToPort: 6443
FromPort: 6443
CidrIp: !Ref VpcCidr
- IpProtocol: tcp
FromPort: 22623
ToPort: 22623
CidrIp: !Ref VpcCidr
VpcId: !Ref VpcId
WorkerSecurityGroup:
Type: AWS::EC2::SecurityGroup
Properties:
GroupDescription: Cluster Worker Security Group
SecurityGroupIngress:
- IpProtocol: icmp
FromPort: 0
ToPort: 0
CidrIp: !Ref VpcCidr
- IpProtocol: tcp
FromPort: 22
ToPort: 22
CidrIp: !Ref VpcCidr
VpcId: !Ref VpcId
MasterIngressEtcd:
Type: AWS::EC2::SecurityGroupIngress
Properties:
GroupId: !GetAtt MasterSecurityGroup.GroupId
SourceSecurityGroupId: !GetAtt MasterSecurityGroup.GroupId
Description: etcd
FromPort: 2379
ToPort: 2380
IpProtocol: tcp
MasterIngressVxlan:
Type: AWS::EC2::SecurityGroupIngress
Properties:
GroupId: !GetAtt MasterSecurityGroup.GroupId
SourceSecurityGroupId: !GetAtt MasterSecurityGroup.GroupId
Description: Vxlan packets
FromPort: 4789
ToPort: 4789
IpProtocol: udp
MasterIngressWorkerVxlan:
Type: AWS::EC2::SecurityGroupIngress
Properties:
GroupId: !GetAtt MasterSecurityGroup.GroupId
SourceSecurityGroupId: !GetAtt WorkerSecurityGroup.GroupId
Description: Vxlan packets
FromPort: 4789
ToPort: 4789
IpProtocol: udp
MasterIngressGeneve:
Type: AWS::EC2::SecurityGroupIngress
Properties:
GroupId: !GetAtt MasterSecurityGroup.GroupId
SourceSecurityGroupId: !GetAtt MasterSecurityGroup.GroupId
Description: Geneve packets
FromPort: 6081
ToPort: 6081
IpProtocol: udp
MasterIngressWorkerGeneve:
Type: AWS::EC2::SecurityGroupIngress
Properties:
GroupId: !GetAtt MasterSecurityGroup.GroupId
SourceSecurityGroupId: !GetAtt WorkerSecurityGroup.GroupId
Description: Geneve packets
FromPort: 6081
ToPort: 6081
IpProtocol: udp
MasterIngressIpsecIke:
Type: AWS::EC2::SecurityGroupIngress
Properties:
GroupId: !GetAtt MasterSecurityGroup.GroupId
SourceSecurityGroupId: !GetAtt MasterSecurityGroup.GroupId
Description: IPsec IKE packets
FromPort: 500
ToPort: 500
IpProtocol: udp
MasterIngressIpsecNat:
Type: AWS::EC2::SecurityGroupIngress
Properties:
GroupId: !GetAtt MasterSecurityGroup.GroupId
SourceSecurityGroupId: !GetAtt MasterSecurityGroup.GroupId
Description: IPsec NAT-T packets
FromPort: 4500
ToPort: 4500
IpProtocol: udp
MasterIngressIpsecEsp:
Type: AWS::EC2::SecurityGroupIngress
Properties:
GroupId: !GetAtt MasterSecurityGroup.GroupId
SourceSecurityGroupId: !GetAtt MasterSecurityGroup.GroupId
Description: IPsec ESP packets
IpProtocol: 50
MasterIngressWorkerIpsecIke:
Type: AWS::EC2::SecurityGroupIngress
Properties:
GroupId: !GetAtt MasterSecurityGroup.GroupId
SourceSecurityGroupId: !GetAtt WorkerSecurityGroup.GroupId
Description: IPsec IKE packets
FromPort: 500
ToPort: 500
IpProtocol: udp
MasterIngressWorkerIpsecNat:
Type: AWS::EC2::SecurityGroupIngress
Properties:
GroupId: !GetAtt MasterSecurityGroup.GroupId
SourceSecurityGroupId: !GetAtt WorkerSecurityGroup.GroupId
Description: IPsec NAT-T packets
FromPort: 4500
ToPort: 4500
IpProtocol: udp
MasterIngressWorkerIpsecEsp:
Type: AWS::EC2::SecurityGroupIngress
Properties:
GroupId: !GetAtt MasterSecurityGroup.GroupId
SourceSecurityGroupId: !GetAtt WorkerSecurityGroup.GroupId
Description: IPsec ESP packets
IpProtocol: 50
MasterIngressInternal:
Type: AWS::EC2::SecurityGroupIngress
Properties:
GroupId: !GetAtt MasterSecurityGroup.GroupId
SourceSecurityGroupId: !GetAtt MasterSecurityGroup.GroupId
Description: Internal cluster communication
FromPort: 9000
ToPort: 9999
IpProtocol: tcp
MasterIngressWorkerInternal:
Type: AWS::EC2::SecurityGroupIngress
Properties:
GroupId: !GetAtt MasterSecurityGroup.GroupId
SourceSecurityGroupId: !GetAtt WorkerSecurityGroup.GroupId
Description: Internal cluster communication
FromPort: 9000
ToPort: 9999
IpProtocol: tcp
MasterIngressInternalUDP:
Type: AWS::EC2::SecurityGroupIngress
Properties:
GroupId: !GetAtt MasterSecurityGroup.GroupId
SourceSecurityGroupId: !GetAtt MasterSecurityGroup.GroupId
Description: Internal cluster communication
FromPort: 9000
ToPort: 9999
IpProtocol: udp
MasterIngressWorkerInternalUDP:
Type: AWS::EC2::SecurityGroupIngress
Properties:
GroupId: !GetAtt MasterSecurityGroup.GroupId
SourceSecurityGroupId: !GetAtt WorkerSecurityGroup.GroupId
Description: Internal cluster communication
FromPort: 9000
ToPort: 9999
IpProtocol: udp
MasterIngressKube:
Type: AWS::EC2::SecurityGroupIngress
Properties:
GroupId: !GetAtt MasterSecurityGroup.GroupId
SourceSecurityGroupId: !GetAtt MasterSecurityGroup.GroupId
Description: Kubernetes kubelet, scheduler and controller manager
FromPort: 10250
ToPort: 10259
IpProtocol: tcp
MasterIngressWorkerKube:
Type: AWS::EC2::SecurityGroupIngress
Properties:
GroupId: !GetAtt MasterSecurityGroup.GroupId
SourceSecurityGroupId: !GetAtt WorkerSecurityGroup.GroupId
Description: Kubernetes kubelet, scheduler and controller manager
FromPort: 10250
ToPort: 10259
IpProtocol: tcp
MasterIngressIngressServices:
Type: AWS::EC2::SecurityGroupIngress
Properties:
GroupId: !GetAtt MasterSecurityGroup.GroupId
SourceSecurityGroupId: !GetAtt MasterSecurityGroup.GroupId
Description: Kubernetes ingress services
FromPort: 30000
ToPort: 32767
IpProtocol: tcp
MasterIngressWorkerIngressServices:
Type: AWS::EC2::SecurityGroupIngress
Properties:
GroupId: !GetAtt MasterSecurityGroup.GroupId
SourceSecurityGroupId: !GetAtt WorkerSecurityGroup.GroupId
Description: Kubernetes ingress services
FromPort: 30000
ToPort: 32767
IpProtocol: tcp
MasterIngressIngressServicesUDP:
Type: AWS::EC2::SecurityGroupIngress
Properties:
GroupId: !GetAtt MasterSecurityGroup.GroupId
SourceSecurityGroupId: !GetAtt MasterSecurityGroup.GroupId
Description: Kubernetes ingress services
FromPort: 30000
ToPort: 32767
IpProtocol: udp
MasterIngressWorkerIngressServicesUDP:
Type: AWS::EC2::SecurityGroupIngress
Properties:
GroupId: !GetAtt MasterSecurityGroup.GroupId
SourceSecurityGroupId: !GetAtt WorkerSecurityGroup.GroupId
Description: Kubernetes ingress services
FromPort: 30000
ToPort: 32767
IpProtocol: udp
WorkerIngressVxlan:
Type: AWS::EC2::SecurityGroupIngress
Properties:
GroupId: !GetAtt WorkerSecurityGroup.GroupId
SourceSecurityGroupId: !GetAtt WorkerSecurityGroup.GroupId
Description: Vxlan packets
FromPort: 4789
ToPort: 4789
IpProtocol: udp
WorkerIngressMasterVxlan:
Type: AWS::EC2::SecurityGroupIngress
Properties:
GroupId: !GetAtt WorkerSecurityGroup.GroupId
SourceSecurityGroupId: !GetAtt MasterSecurityGroup.GroupId
Description: Vxlan packets
FromPort: 4789
ToPort: 4789
IpProtocol: udp
WorkerIngressGeneve:
Type: AWS::EC2::SecurityGroupIngress
Properties:
GroupId: !GetAtt WorkerSecurityGroup.GroupId
SourceSecurityGroupId: !GetAtt WorkerSecurityGroup.GroupId
Description: Geneve packets
FromPort: 6081
ToPort: 6081
IpProtocol: udp
WorkerIngressMasterGeneve:
Type: AWS::EC2::SecurityGroupIngress
Properties:
GroupId: !GetAtt WorkerSecurityGroup.GroupId
SourceSecurityGroupId: !GetAtt MasterSecurityGroup.GroupId
Description: Geneve packets
FromPort: 6081
ToPort: 6081
IpProtocol: udp
WorkerIngressIpsecIke:
Type: AWS::EC2::SecurityGroupIngress
Properties:
GroupId: !GetAtt WorkerSecurityGroup.GroupId
SourceSecurityGroupId: !GetAtt WorkerSecurityGroup.GroupId
Description: IPsec IKE packets
FromPort: 500
ToPort: 500
IpProtocol: udp
WorkerIngressIpsecNat:
Type: AWS::EC2::SecurityGroupIngress
Properties:
GroupId: !GetAtt WorkerSecurityGroup.GroupId
SourceSecurityGroupId: !GetAtt WorkerSecurityGroup.GroupId
Description: IPsec NAT-T packets
FromPort: 4500
ToPort: 4500
IpProtocol: udp
WorkerIngressIpsecEsp:
Type: AWS::EC2::SecurityGroupIngress
Properties:
GroupId: !GetAtt WorkerSecurityGroup.GroupId
SourceSecurityGroupId: !GetAtt WorkerSecurityGroup.GroupId
Description: IPsec ESP packets
IpProtocol: 50
WorkerIngressMasterIpsecIke:
Type: AWS::EC2::SecurityGroupIngress
Properties:
GroupId: !GetAtt WorkerSecurityGroup.GroupId
SourceSecurityGroupId: !GetAtt MasterSecurityGroup.GroupId
Description: IPsec IKE packets
FromPort: 500
ToPort: 500
IpProtocol: udp
WorkerIngressMasterIpsecNat:
Type: AWS::EC2::SecurityGroupIngress
Properties:
GroupId: !GetAtt WorkerSecurityGroup.GroupId
SourceSecurityGroupId: !GetAtt MasterSecurityGroup.GroupId
Description: IPsec NAT-T packets
FromPort: 4500
ToPort: 4500
IpProtocol: udp
WorkerIngressMasterIpsecEsp:
Type: AWS::EC2::SecurityGroupIngress
Properties:
GroupId: !GetAtt WorkerSecurityGroup.GroupId
SourceSecurityGroupId: !GetAtt MasterSecurityGroup.GroupId
Description: IPsec ESP packets
IpProtocol: 50
WorkerIngressInternal:
Type: AWS::EC2::SecurityGroupIngress
Properties:
GroupId: !GetAtt WorkerSecurityGroup.GroupId
SourceSecurityGroupId: !GetAtt WorkerSecurityGroup.GroupId
Description: Internal cluster communication
FromPort: 9000
ToPort: 9999
IpProtocol: tcp
WorkerIngressMasterInternal:
Type: AWS::EC2::SecurityGroupIngress
Properties:
GroupId: !GetAtt WorkerSecurityGroup.GroupId
SourceSecurityGroupId: !GetAtt MasterSecurityGroup.GroupId
Description: Internal cluster communication
FromPort: 9000
ToPort: 9999
IpProtocol: tcp
WorkerIngressInternalUDP:
Type: AWS::EC2::SecurityGroupIngress
Properties:
GroupId: !GetAtt WorkerSecurityGroup.GroupId
SourceSecurityGroupId: !GetAtt WorkerSecurityGroup.GroupId
Description: Internal cluster communication
FromPort: 9000
ToPort: 9999
IpProtocol: udp
WorkerIngressMasterInternalUDP:
Type: AWS::EC2::SecurityGroupIngress
Properties:
GroupId: !GetAtt WorkerSecurityGroup.GroupId
SourceSecurityGroupId: !GetAtt MasterSecurityGroup.GroupId
Description: Internal cluster communication
FromPort: 9000
ToPort: 9999
IpProtocol: udp
WorkerIngressKube:
Type: AWS::EC2::SecurityGroupIngress
Properties:
GroupId: !GetAtt WorkerSecurityGroup.GroupId
SourceSecurityGroupId: !GetAtt WorkerSecurityGroup.GroupId
Description: Kubernetes secure kubelet port
FromPort: 10250
ToPort: 10250
IpProtocol: tcp
WorkerIngressWorkerKube:
Type: AWS::EC2::SecurityGroupIngress
Properties:
GroupId: !GetAtt WorkerSecurityGroup.GroupId
SourceSecurityGroupId: !GetAtt MasterSecurityGroup.GroupId
Description: Internal Kubernetes communication
FromPort: 10250
ToPort: 10250
IpProtocol: tcp
WorkerIngressIngressServices:
Type: AWS::EC2::SecurityGroupIngress
Properties:
GroupId: !GetAtt WorkerSecurityGroup.GroupId
SourceSecurityGroupId: !GetAtt WorkerSecurityGroup.GroupId
Description: Kubernetes ingress services
FromPort: 30000
ToPort: 32767
IpProtocol: tcp
WorkerIngressMasterIngressServices:
Type: AWS::EC2::SecurityGroupIngress
Properties:
GroupId: !GetAtt WorkerSecurityGroup.GroupId
SourceSecurityGroupId: !GetAtt MasterSecurityGroup.GroupId
Description: Kubernetes ingress services
FromPort: 30000
ToPort: 32767
IpProtocol: tcp
WorkerIngressIngressServicesUDP:
Type: AWS::EC2::SecurityGroupIngress
Properties:
GroupId: !GetAtt WorkerSecurityGroup.GroupId
SourceSecurityGroupId: !GetAtt WorkerSecurityGroup.GroupId
Description: Kubernetes ingress services
FromPort: 30000
ToPort: 32767
IpProtocol: udp
WorkerIngressMasterIngressServicesUDP:
Type: AWS::EC2::SecurityGroupIngress
Properties:
GroupId: !GetAtt WorkerSecurityGroup.GroupId
SourceSecurityGroupId: !GetAtt MasterSecurityGroup.GroupId
Description: Kubernetes ingress services
FromPort: 30000
ToPort: 32767
IpProtocol: udp
MasterIamRole:
Type: AWS::IAM::Role
Properties:
AssumeRolePolicyDocument:
Version: "2012-10-17"
Statement:
- Effect: "Allow"
Principal:
Service:
- "ec2.amazonaws.com"
Action:
- "sts:AssumeRole"
Policies:
- PolicyName: !Join ["-", [!Ref InfrastructureName, "master", "policy"]]
PolicyDocument:
Version: "2012-10-17"
Statement:
- Effect: "Allow"
Action:
- "ec2:AttachVolume"
- "ec2:AuthorizeSecurityGroupIngress"
- "ec2:CreateSecurityGroup"
- "ec2:CreateTags"
- "ec2:CreateVolume"
- "ec2:DeleteSecurityGroup"
- "ec2:DeleteVolume"
- "ec2:Describe*"
- "ec2:DetachVolume"
- "ec2:ModifyInstanceAttribute"
- "ec2:ModifyVolume"
- "ec2:RevokeSecurityGroupIngress"
- "elasticloadbalancing:AddTags"
- "elasticloadbalancing:AttachLoadBalancerToSubnets"
- "elasticloadbalancing:ApplySecurityGroupsToLoadBalancer"
- "elasticloadbalancing:CreateListener"
- "elasticloadbalancing:CreateLoadBalancer"
- "elasticloadbalancing:CreateLoadBalancerPolicy"
- "elasticloadbalancing:CreateLoadBalancerListeners"
- "elasticloadbalancing:CreateTargetGroup"
- "elasticloadbalancing:ConfigureHealthCheck"
- "elasticloadbalancing:DeleteListener"
- "elasticloadbalancing:DeleteLoadBalancer"
- "elasticloadbalancing:DeleteLoadBalancerListeners"
- "elasticloadbalancing:DeleteTargetGroup"
- "elasticloadbalancing:DeregisterInstancesFromLoadBalancer"
- "elasticloadbalancing:DeregisterTargets"
- "elasticloadbalancing:Describe*"
- "elasticloadbalancing:DetachLoadBalancerFromSubnets"
- "elasticloadbalancing:ModifyListener"
- "elasticloadbalancing:ModifyLoadBalancerAttributes"
- "elasticloadbalancing:ModifyTargetGroup"
- "elasticloadbalancing:ModifyTargetGroupAttributes"
- "elasticloadbalancing:RegisterInstancesWithLoadBalancer"
- "elasticloadbalancing:RegisterTargets"
- "elasticloadbalancing:SetLoadBalancerPoliciesForBackendServer"
- "elasticloadbalancing:SetLoadBalancerPoliciesOfListener"
- "kms:DescribeKey"
Resource: "*"
MasterInstanceProfile:
Type: "AWS::IAM::InstanceProfile"
Properties:
Roles:
- Ref: "MasterIamRole"
WorkerIamRole:
Type: AWS::IAM::Role
Properties:
AssumeRolePolicyDocument:
Version: "2012-10-17"
Statement:
- Effect: "Allow"
Principal:
Service:
- "ec2.amazonaws.com"
Action:
- "sts:AssumeRole"
Policies:
- PolicyName: !Join ["-", [!Ref InfrastructureName, "worker", "policy"]]
PolicyDocument:
Version: "2012-10-17"
Statement:
- Effect: "Allow"
Action:
- "ec2:DescribeInstances"
- "ec2:DescribeRegions"
Resource: "*"
WorkerInstanceProfile:
Type: "AWS::IAM::InstanceProfile"
Properties:
Roles:
- Ref: "WorkerIamRole"
Outputs:
MasterSecurityGroupId:
Description: Master Security Group ID
Value: !GetAtt MasterSecurityGroup.GroupId
WorkerSecurityGroupId:
Description: Worker Security Group ID
Value: !GetAtt WorkerSecurityGroup.GroupId
MasterInstanceProfile:
Description: Master IAM Instance Profile
Value: !Ref MasterInstanceProfile
WorkerInstanceProfile:
Description: Worker IAM Instance Profile
Value: !Ref WorkerInstanceProfile4.12.11. RHCOS AMIs for the AWS infrastructure
Red Hat provides Red Hat Enterprise Linux CoreOS (RHCOS) AMIs valid for the various Amazon Web Services (AWS) zones you can specify for your OpenShift Container Platform nodes.
You can also install to regions that do not have a RHCOS AMI published by importing your own AMI.
| AWS zone | AWS AMI |
|---|---|
|
|
|
|
|
|
|
|
|
|
|
|
|
|
|
|
|
|
|
|
|
|
|
|
|
|
|
|
|
|
|
|
|
|
|
|
|
|
|
|
|
|
|
|
|
|
|
|
|
|
|
|
|
|
|
|
|
|
|
|
4.12.12. Creating the bootstrap node in AWS
You must create the bootstrap node in Amazon Web Services (AWS) to use during OpenShift Container Platform cluster initialization.
You can use the provided CloudFormation template and a custom parameter file to create a stack of AWS resources. The stack represents the bootstrap node that your OpenShift Container Platform installation requires.
If you do not use the provided CloudFormation template to create your bootstrap node, you must review the provided information and manually create the infrastructure. If your cluster does not initialize correctly, you might have to contact Red Hat support with your installation logs.
Prerequisites
- You configured an AWS account.
-
You added your AWS keys and region to your local AWS profile by running
aws configure. - You generated the Ignition config files for your cluster.
- You created and configured a VPC and associated subnets in AWS.
- You created and configured DNS, load balancers, and listeners in AWS.
- You created the security groups and roles required for your cluster in AWS.
Procedure
Provide a location to serve the
bootstrap.ignIgnition config file to your cluster. This file is located in your installation directory. One way to do this is to create an S3 bucket in your cluster’s region and upload the Ignition config file to it.ImportantThe provided CloudFormation Template assumes that the Ignition config files for your cluster are served from an S3 bucket. If you choose to serve the files from another location, you must modify the templates.
ImportantIf you are deploying to a region that has endpoints that differ from the AWS SDK, or you are providing your own custom endpoints, you must use a presigned URL for your S3 bucket instead of the
s3://schema.NoteThe bootstrap Ignition config file does contain secrets, like X.509 keys. The following steps provide basic security for the S3 bucket. To provide additional security, you can enable an S3 bucket policy to allow only certain users, such as the OpenShift IAM user, to access objects that the bucket contains. You can avoid S3 entirely and serve your bootstrap Ignition config file from any address that the bootstrap machine can reach.
Create the bucket:
$ aws s3 mb s3://<cluster-name>-infra1 - 1
<cluster-name>-infrais the bucket name. When creating theinstall-config.yamlfile, replace<cluster-name>with the name specified for the cluster.
Upload the
bootstrap.ignIgnition config file to the bucket:$ aws s3 cp <installation_directory>/bootstrap.ign s3://<cluster-name>-infra/bootstrap.ign1 - 1
- For
<installation_directory>, specify the path to the directory that you stored the installation files in.
Verify that the file uploaded:
$ aws s3 ls s3://<cluster-name>-infra/Example output
2019-04-03 16:15:16 314878 bootstrap.ign
Create a JSON file that contains the parameter values that the template requires:
[ { "ParameterKey": "InfrastructureName",1 "ParameterValue": "mycluster-<random_string>"2 }, { "ParameterKey": "RhcosAmi",3 "ParameterValue": "ami-<random_string>"4 }, { "ParameterKey": "AllowedBootstrapSshCidr",5 "ParameterValue": "0.0.0.0/0"6 }, { "ParameterKey": "PublicSubnet",7 "ParameterValue": "subnet-<random_string>"8 }, { "ParameterKey": "MasterSecurityGroupId",9 "ParameterValue": "sg-<random_string>"10 }, { "ParameterKey": "VpcId",11 "ParameterValue": "vpc-<random_string>"12 }, { "ParameterKey": "BootstrapIgnitionLocation",13 "ParameterValue": "s3://<bucket_name>/bootstrap.ign"14 }, { "ParameterKey": "AutoRegisterELB",15 "ParameterValue": "yes"16 }, { "ParameterKey": "RegisterNlbIpTargetsLambdaArn",17 "ParameterValue": "arn:aws:lambda:<region>:<account_number>:function:<dns_stack_name>-RegisterNlbIpTargets-<random_string>"18 }, { "ParameterKey": "ExternalApiTargetGroupArn",19 "ParameterValue": "arn:aws:elasticloadbalancing:<region>:<account_number>:targetgroup/<dns_stack_name>-Exter-<random_string>"20 }, { "ParameterKey": "InternalApiTargetGroupArn",21 "ParameterValue": "arn:aws:elasticloadbalancing:<region>:<account_number>:targetgroup/<dns_stack_name>-Inter-<random_string>"22 }, { "ParameterKey": "InternalServiceTargetGroupArn",23 "ParameterValue": "arn:aws:elasticloadbalancing:<region>:<account_number>:targetgroup/<dns_stack_name>-Inter-<random_string>"24 } ]- 1
- The name for your cluster infrastructure that is encoded in your Ignition config files for the cluster.
- 2
- Specify the infrastructure name that you extracted from the Ignition config file metadata, which has the format
<cluster-name>-<random-string>. - 3
- Current Red Hat Enterprise Linux CoreOS (RHCOS) AMI to use for the bootstrap node.
- 4
- Specify a valid
AWS::EC2::Image::Idvalue. - 5
- CIDR block to allow SSH access to the bootstrap node.
- 6
- Specify a CIDR block in the format
x.x.x.x/16-24. - 7
- The public subnet that is associated with your VPC to launch the bootstrap node into.
- 8
- Specify the
PublicSubnetIdsvalue from the output of the CloudFormation template for the VPC. - 9
- The master security group ID (for registering temporary rules)
- 10
- Specify the
MasterSecurityGroupIdvalue from the output of the CloudFormation template for the security group and roles. - 11
- The VPC created resources will belong to.
- 12
- Specify the
VpcIdvalue from the output of the CloudFormation template for the VPC. - 13
- Location to fetch bootstrap Ignition config file from.
- 14
- Specify the S3 bucket and file name in the form
s3://<bucket_name>/bootstrap.ign. - 15
- Whether or not to register a network load balancer (NLB).
- 16
- Specify
yesorno. If you specifyyes, you must provide a Lambda Amazon Resource Name (ARN) value. - 17
- The ARN for NLB IP target registration lambda group.
- 18
- Specify the
RegisterNlbIpTargetsLambdavalue from the output of the CloudFormation template for DNS and load balancing. Usearn:aws-us-govif deploying the cluster to an AWS GovCloud region. - 19
- The ARN for external API load balancer target group.
- 20
- Specify the
ExternalApiTargetGroupArnvalue from the output of the CloudFormation template for DNS and load balancing. Usearn:aws-us-govif deploying the cluster to an AWS GovCloud region. - 21
- The ARN for internal API load balancer target group.
- 22
- Specify the
InternalApiTargetGroupArnvalue from the output of the CloudFormation template for DNS and load balancing. Usearn:aws-us-govif deploying the cluster to an AWS GovCloud region. - 23
- The ARN for internal service load balancer target group.
- 24
- Specify the
InternalServiceTargetGroupArnvalue from the output of the CloudFormation template for DNS and load balancing. Usearn:aws-us-govif deploying the cluster to an AWS GovCloud region.
- Copy the template from the CloudFormation template for the bootstrap machine section of this topic and save it as a YAML file on your computer. This template describes the bootstrap machine that your cluster requires.
Launch the CloudFormation template to create a stack of AWS resources that represent the bootstrap node:
ImportantYou must enter the command on a single line.
$ aws cloudformation create-stack --stack-name <name>1 --template-body file://<template>.yaml2 --parameters file://<parameters>.json3 --capabilities CAPABILITY_NAMED_IAM4 - 1
<name>is the name for the CloudFormation stack, such ascluster-bootstrap. You need the name of this stack if you remove the cluster.- 2
<template>is the relative path to and name of the CloudFormation template YAML file that you saved.- 3
<parameters>is the relative path to and name of the CloudFormation parameters JSON file.- 4
- You must explicitly declare the
CAPABILITY_NAMED_IAMcapability because the provided template creates someAWS::IAM::RoleandAWS::IAM::InstanceProfileresources.
Example output
arn:aws:cloudformation:us-east-1:269333783861:stack/cluster-bootstrap/12944486-2add-11eb-9dee-12dace8e3a83Confirm that the template components exist:
$ aws cloudformation describe-stacks --stack-name <name>After the
StackStatusdisplaysCREATE_COMPLETE, the output displays values for the following parameters. You must provide these parameter values to the other CloudFormation templates that you run to create your cluster:BootstrapInstanceIdThe bootstrap Instance ID.
BootstrapPublicIpThe bootstrap node public IP address.
BootstrapPrivateIpThe bootstrap node private IP address.
4.12.12.1. CloudFormation template for the bootstrap machine
You can use the following CloudFormation template to deploy the bootstrap machine that you need for your OpenShift Container Platform cluster.
Example 4.58. CloudFormation template for the bootstrap machine
AWSTemplateFormatVersion: 2010-09-09
Description: Template for OpenShift Cluster Bootstrap (EC2 Instance, Security Groups and IAM)
Parameters:
InfrastructureName:
AllowedPattern: ^([a-zA-Z][a-zA-Z0-9\-]{0,26})$
MaxLength: 27
MinLength: 1
ConstraintDescription: Infrastructure name must be alphanumeric, start with a letter, and have a maximum of 27 characters.
Description: A short, unique cluster ID used to tag cloud resources and identify items owned or used by the cluster.
Type: String
RhcosAmi:
Description: Current Red Hat Enterprise Linux CoreOS AMI to use for bootstrap.
Type: AWS::EC2::Image::Id
AllowedBootstrapSshCidr:
AllowedPattern: ^(([0-9]|[1-9][0-9]|1[0-9]{2}|2[0-4][0-9]|25[0-5])\.){3}([0-9]|[1-9][0-9]|1[0-9]{2}|2[0-4][0-9]|25[0-5])(\/([0-9]|1[0-9]|2[0-9]|3[0-2]))$
ConstraintDescription: CIDR block parameter must be in the form x.x.x.x/0-32.
Default: 0.0.0.0/0
Description: CIDR block to allow SSH access to the bootstrap node.
Type: String
PublicSubnet:
Description: The public subnet to launch the bootstrap node into.
Type: AWS::EC2::Subnet::Id
MasterSecurityGroupId:
Description: The master security group ID for registering temporary rules.
Type: AWS::EC2::SecurityGroup::Id
VpcId:
Description: The VPC-scoped resources will belong to this VPC.
Type: AWS::EC2::VPC::Id
BootstrapIgnitionLocation:
Default: s3://my-s3-bucket/bootstrap.ign
Description: Ignition config file location.
Type: String
AutoRegisterELB:
Default: "yes"
AllowedValues:
- "yes"
- "no"
Description: Do you want to invoke NLB registration, which requires a Lambda ARN parameter?
Type: String
RegisterNlbIpTargetsLambdaArn:
Description: ARN for NLB IP target registration lambda.
Type: String
ExternalApiTargetGroupArn:
Description: ARN for external API load balancer target group.
Type: String
InternalApiTargetGroupArn:
Description: ARN for internal API load balancer target group.
Type: String
InternalServiceTargetGroupArn:
Description: ARN for internal service load balancer target group.
Type: String
Metadata:
AWS::CloudFormation::Interface:
ParameterGroups:
- Label:
default: "Cluster Information"
Parameters:
- InfrastructureName
- Label:
default: "Host Information"
Parameters:
- RhcosAmi
- BootstrapIgnitionLocation
- MasterSecurityGroupId
- Label:
default: "Network Configuration"
Parameters:
- VpcId
- AllowedBootstrapSshCidr
- PublicSubnet
- Label:
default: "Load Balancer Automation"
Parameters:
- AutoRegisterELB
- RegisterNlbIpTargetsLambdaArn
- ExternalApiTargetGroupArn
- InternalApiTargetGroupArn
- InternalServiceTargetGroupArn
ParameterLabels:
InfrastructureName:
default: "Infrastructure Name"
VpcId:
default: "VPC ID"
AllowedBootstrapSshCidr:
default: "Allowed SSH Source"
PublicSubnet:
default: "Public Subnet"
RhcosAmi:
default: "Red Hat Enterprise Linux CoreOS AMI ID"
BootstrapIgnitionLocation:
default: "Bootstrap Ignition Source"
MasterSecurityGroupId:
default: "Master Security Group ID"
AutoRegisterELB:
default: "Use Provided ELB Automation"
Conditions:
DoRegistration: !Equals ["yes", !Ref AutoRegisterELB]
Resources:
BootstrapIamRole:
Type: AWS::IAM::Role
Properties:
AssumeRolePolicyDocument:
Version: "2012-10-17"
Statement:
- Effect: "Allow"
Principal:
Service:
- "ec2.amazonaws.com"
Action:
- "sts:AssumeRole"
Path: "/"
Policies:
- PolicyName: !Join ["-", [!Ref InfrastructureName, "bootstrap", "policy"]]
PolicyDocument:
Version: "2012-10-17"
Statement:
- Effect: "Allow"
Action: "ec2:Describe*"
Resource: "*"
- Effect: "Allow"
Action: "ec2:AttachVolume"
Resource: "*"
- Effect: "Allow"
Action: "ec2:DetachVolume"
Resource: "*"
- Effect: "Allow"
Action: "s3:GetObject"
Resource: "*"
BootstrapInstanceProfile:
Type: "AWS::IAM::InstanceProfile"
Properties:
Path: "/"
Roles:
- Ref: "BootstrapIamRole"
BootstrapSecurityGroup:
Type: AWS::EC2::SecurityGroup
Properties:
GroupDescription: Cluster Bootstrap Security Group
SecurityGroupIngress:
- IpProtocol: tcp
FromPort: 22
ToPort: 22
CidrIp: !Ref AllowedBootstrapSshCidr
- IpProtocol: tcp
ToPort: 19531
FromPort: 19531
CidrIp: 0.0.0.0/0
VpcId: !Ref VpcId
BootstrapInstance:
Type: AWS::EC2::Instance
Properties:
ImageId: !Ref RhcosAmi
IamInstanceProfile: !Ref BootstrapInstanceProfile
InstanceType: "i3.large"
NetworkInterfaces:
- AssociatePublicIpAddress: "true"
DeviceIndex: "0"
GroupSet:
- !Ref "BootstrapSecurityGroup"
- !Ref "MasterSecurityGroupId"
SubnetId: !Ref "PublicSubnet"
UserData:
Fn::Base64: !Sub
- '{"ignition":{"config":{"replace":{"source":"${S3Loc}"}},"version":"3.1.0"}}'
- {
S3Loc: !Ref BootstrapIgnitionLocation
}
RegisterBootstrapApiTarget:
Condition: DoRegistration
Type: Custom::NLBRegister
Properties:
ServiceToken: !Ref RegisterNlbIpTargetsLambdaArn
TargetArn: !Ref ExternalApiTargetGroupArn
TargetIp: !GetAtt BootstrapInstance.PrivateIp
RegisterBootstrapInternalApiTarget:
Condition: DoRegistration
Type: Custom::NLBRegister
Properties:
ServiceToken: !Ref RegisterNlbIpTargetsLambdaArn
TargetArn: !Ref InternalApiTargetGroupArn
TargetIp: !GetAtt BootstrapInstance.PrivateIp
RegisterBootstrapInternalServiceTarget:
Condition: DoRegistration
Type: Custom::NLBRegister
Properties:
ServiceToken: !Ref RegisterNlbIpTargetsLambdaArn
TargetArn: !Ref InternalServiceTargetGroupArn
TargetIp: !GetAtt BootstrapInstance.PrivateIp
Outputs:
BootstrapInstanceId:
Description: Bootstrap Instance ID.
Value: !Ref BootstrapInstance
BootstrapPublicIp:
Description: The bootstrap node public IP address.
Value: !GetAtt BootstrapInstance.PublicIp
BootstrapPrivateIp:
Description: The bootstrap node private IP address.
Value: !GetAtt BootstrapInstance.PrivateIp4.12.13. Creating the control plane machines in AWS
You must create the control plane machines in Amazon Web Services (AWS) that your cluster will use.
You can use the provided CloudFormation template and a custom parameter file to create a stack of AWS resources that represent the control plane nodes.
The CloudFormation template creates a stack that represents three control plane nodes.
If you do not use the provided CloudFormation template to create your control plane nodes, you must review the provided information and manually create the infrastructure. If your cluster does not initialize correctly, you might have to contact Red Hat support with your installation logs.
Prerequisites
- You configured an AWS account.
-
You added your AWS keys and region to your local AWS profile by running
aws configure. - You generated the Ignition config files for your cluster.
- You created and configured a VPC and associated subnets in AWS.
- You created and configured DNS, load balancers, and listeners in AWS.
- You created the security groups and roles required for your cluster in AWS.
- You created the bootstrap machine.
Procedure
Create a JSON file that contains the parameter values that the template requires:
[ { "ParameterKey": "InfrastructureName",1 "ParameterValue": "mycluster-<random_string>"2 }, { "ParameterKey": "RhcosAmi",3 "ParameterValue": "ami-<random_string>"4 }, { "ParameterKey": "AutoRegisterDNS",5 "ParameterValue": "yes"6 }, { "ParameterKey": "PrivateHostedZoneId",7 "ParameterValue": "<random_string>"8 }, { "ParameterKey": "PrivateHostedZoneName",9 "ParameterValue": "mycluster.example.com"10 }, { "ParameterKey": "Master0Subnet",11 "ParameterValue": "subnet-<random_string>"12 }, { "ParameterKey": "Master1Subnet",13 "ParameterValue": "subnet-<random_string>"14 }, { "ParameterKey": "Master2Subnet",15 "ParameterValue": "subnet-<random_string>"16 }, { "ParameterKey": "MasterSecurityGroupId",17 "ParameterValue": "sg-<random_string>"18 }, { "ParameterKey": "IgnitionLocation",19 "ParameterValue": "https://api-int.<cluster_name>.<domain_name>:22623/config/master"20 }, { "ParameterKey": "CertificateAuthorities",21 "ParameterValue": "data:text/plain;charset=utf-8;base64,ABC...xYz=="22 }, { "ParameterKey": "MasterInstanceProfileName",23 "ParameterValue": "<roles_stack>-MasterInstanceProfile-<random_string>"24 }, { "ParameterKey": "MasterInstanceType",25 "ParameterValue": "m5.xlarge"26 }, { "ParameterKey": "AutoRegisterELB",27 "ParameterValue": "yes"28 }, { "ParameterKey": "RegisterNlbIpTargetsLambdaArn",29 "ParameterValue": "arn:aws:lambda:<region>:<account_number>:function:<dns_stack_name>-RegisterNlbIpTargets-<random_string>"30 }, { "ParameterKey": "ExternalApiTargetGroupArn",31 "ParameterValue": "arn:aws:elasticloadbalancing:<region>:<account_number>:targetgroup/<dns_stack_name>-Exter-<random_string>"32 }, { "ParameterKey": "InternalApiTargetGroupArn",33 "ParameterValue": "arn:aws:elasticloadbalancing:<region>:<account_number>:targetgroup/<dns_stack_name>-Inter-<random_string>"34 }, { "ParameterKey": "InternalServiceTargetGroupArn",35 "ParameterValue": "arn:aws:elasticloadbalancing:<region>:<account_number>:targetgroup/<dns_stack_name>-Inter-<random_string>"36 } ]- 1
- The name for your cluster infrastructure that is encoded in your Ignition config files for the cluster.
- 2
- Specify the infrastructure name that you extracted from the Ignition config file metadata, which has the format
<cluster-name>-<random-string>. - 3
- CurrentRed Hat Enterprise Linux CoreOS (RHCOS) AMI to use for the control plane machines.
- 4
- Specify an
AWS::EC2::Image::Idvalue. - 5
- Whether or not to perform DNS etcd registration.
- 6
- Specify
yesorno. If you specifyyes, you must provide hosted zone information. - 7
- The Route 53 private zone ID to register the etcd targets with.
- 8
- Specify the
PrivateHostedZoneIdvalue from the output of the CloudFormation template for DNS and load balancing. - 9
- The Route 53 zone to register the targets with.
- 10
- Specify
<cluster_name>.<domain_name>where<domain_name>is the Route 53 base domain that you used when you generatedinstall-config.yamlfile for the cluster. Do not include the trailing period (.) that is displayed in the AWS console. - 11 13 15
- A subnet, preferably private, to launch the control plane machines on.
- 12 14 16
- Specify a subnet from the
PrivateSubnetsvalue from the output of the CloudFormation template for DNS and load balancing. - 17
- The master security group ID to associate with control plane nodes (also known as the master nodes).
- 18
- Specify the
MasterSecurityGroupIdvalue from the output of the CloudFormation template for the security group and roles. - 19
- The location to fetch control plane Ignition config file from.
- 20
- Specify the generated Ignition config file location,
https://api-int.<cluster_name>.<domain_name>:22623/config/master. - 21
- The base64 encoded certificate authority string to use.
- 22
- Specify the value from the
master.ignfile that is in the installation directory. This value is the long string with the formatdata:text/plain;charset=utf-8;base64,ABC…xYz==. - 23
- The IAM profile to associate with control plane nodes.
- 24
- Specify the
MasterInstanceProfileparameter value from the output of the CloudFormation template for the security group and roles. - 25
- The type of AWS instance to use for the control plane machines.
- 26
- Allowed values:
-
m4.xlarge -
m4.2xlarge -
m4.4xlarge -
m4.10xlarge -
m4.16xlarge -
m5.xlarge -
m5.2xlarge -
m5.4xlarge -
m5.8xlarge -
m5.12xlarge -
m5.16xlarge -
m5a.xlarge -
m5a.2xlarge -
m5a.4xlarge -
m5a.8xlarge -
m5a.10xlarge -
m5a.16xlarge -
c4.2xlarge -
c4.4xlarge -
c4.8xlarge -
c5.2xlarge -
c5.4xlarge -
c5.9xlarge -
c5.12xlarge -
c5.18xlarge -
c5.24xlarge -
c5a.2xlarge -
c5a.4xlarge -
c5a.8xlarge -
c5a.12xlarge -
c5a.16xlarge -
c5a.24xlarge -
r4.xlarge -
r4.2xlarge -
r4.4xlarge -
r4.8xlarge -
r4.16xlarge -
r5.xlarge -
r5.2xlarge -
r5.4xlarge -
r5.8xlarge -
r5.12xlarge -
r5.16xlarge -
r5.24xlarge -
r5a.xlarge -
r5a.2xlarge -
r5a.4xlarge -
r5a.8xlarge -
r5a.12xlarge -
r5a.16xlarge -
r5a.24xlarge
-
- 27
- Whether or not to register a network load balancer (NLB).
- 28
- Specify
yesorno. If you specifyyes, you must provide a Lambda Amazon Resource Name (ARN) value. - 29
- The ARN for NLB IP target registration lambda group.
- 30
- Specify the
RegisterNlbIpTargetsLambdavalue from the output of the CloudFormation template for DNS and load balancing. Usearn:aws-us-govif deploying the cluster to an AWS GovCloud region. - 31
- The ARN for external API load balancer target group.
- 32
- Specify the
ExternalApiTargetGroupArnvalue from the output of the CloudFormation template for DNS and load balancing. Usearn:aws-us-govif deploying the cluster to an AWS GovCloud region. - 33
- The ARN for internal API load balancer target group.
- 34
- Specify the
InternalApiTargetGroupArnvalue from the output of the CloudFormation template for DNS and load balancing. Usearn:aws-us-govif deploying the cluster to an AWS GovCloud region. - 35
- The ARN for internal service load balancer target group.
- 36
- Specify the
InternalServiceTargetGroupArnvalue from the output of the CloudFormation template for DNS and load balancing. Usearn:aws-us-govif deploying the cluster to an AWS GovCloud region.
- Copy the template from the CloudFormation template for control plane machines section of this topic and save it as a YAML file on your computer. This template describes the control plane machines that your cluster requires.
-
If you specified an
m5instance type as the value forMasterInstanceType, add that instance type to theMasterInstanceType.AllowedValuesparameter in the CloudFormation template. Launch the CloudFormation template to create a stack of AWS resources that represent the control plane nodes:
ImportantYou must enter the command on a single line.
$ aws cloudformation create-stack --stack-name <name>1 --template-body file://<template>.yaml2 --parameters file://<parameters>.json3 - 1
<name>is the name for the CloudFormation stack, such ascluster-control-plane. You need the name of this stack if you remove the cluster.- 2
<template>is the relative path to and name of the CloudFormation template YAML file that you saved.- 3
<parameters>is the relative path to and name of the CloudFormation parameters JSON file.
Example output
arn:aws:cloudformation:us-east-1:269333783861:stack/cluster-control-plane/21c7e2b0-2ee2-11eb-c6f6-0aa34627df4bNoteThe CloudFormation template creates a stack that represents three control plane nodes.
Confirm that the template components exist:
$ aws cloudformation describe-stacks --stack-name <name>
4.12.13.1. CloudFormation template for control plane machines
You can use the following CloudFormation template to deploy the control plane machines that you need for your OpenShift Container Platform cluster.
Example 4.59. CloudFormation template for control plane machines
AWSTemplateFormatVersion: 2010-09-09
Description: Template for OpenShift Cluster Node Launch (EC2 master instances)
Parameters:
InfrastructureName:
AllowedPattern: ^([a-zA-Z][a-zA-Z0-9\-]{0,26})$
MaxLength: 27
MinLength: 1
ConstraintDescription: Infrastructure name must be alphanumeric, start with a letter, and have a maximum of 27 characters.
Description: A short, unique cluster ID used to tag nodes for the kubelet cloud provider.
Type: String
RhcosAmi:
Description: Current Red Hat Enterprise Linux CoreOS AMI to use for bootstrap.
Type: AWS::EC2::Image::Id
AutoRegisterDNS:
Default: "yes"
AllowedValues:
- "yes"
- "no"
Description: Do you want to invoke DNS etcd registration, which requires Hosted Zone information?
Type: String
PrivateHostedZoneId:
Description: The Route53 private zone ID to register the etcd targets with, such as Z21IXYZABCZ2A4.
Type: String
PrivateHostedZoneName:
Description: The Route53 zone to register the targets with, such as cluster.example.com. Omit the trailing period.
Type: String
Master0Subnet:
Description: The subnets, recommend private, to launch the master nodes into.
Type: AWS::EC2::Subnet::Id
Master1Subnet:
Description: The subnets, recommend private, to launch the master nodes into.
Type: AWS::EC2::Subnet::Id
Master2Subnet:
Description: The subnets, recommend private, to launch the master nodes into.
Type: AWS::EC2::Subnet::Id
MasterSecurityGroupId:
Description: The master security group ID to associate with master nodes.
Type: AWS::EC2::SecurityGroup::Id
IgnitionLocation:
Default: https://api-int.$CLUSTER_NAME.$DOMAIN:22623/config/master
Description: Ignition config file location.
Type: String
CertificateAuthorities:
Default: data:text/plain;charset=utf-8;base64,ABC...xYz==
Description: Base64 encoded certificate authority string to use.
Type: String
MasterInstanceProfileName:
Description: IAM profile to associate with master nodes.
Type: String
MasterInstanceType:
Default: m5.xlarge
Type: String
AllowedValues:
- "m4.xlarge"
- "m4.2xlarge"
- "m4.4xlarge"
- "m4.10xlarge"
- "m4.16xlarge"
- "m5.xlarge"
- "m5.2xlarge"
- "m5.4xlarge"
- "m5.8xlarge"
- "m5.12xlarge"
- "m5.16xlarge"
- "m5a.xlarge"
- "m5a.2xlarge"
- "m5a.4xlarge"
- "m5a.8xlarge"
- "m5a.10xlarge"
- "m5a.16xlarge"
- "c4.2xlarge"
- "c4.4xlarge"
- "c4.8xlarge"
- "c5.2xlarge"
- "c5.4xlarge"
- "c5.9xlarge"
- "c5.12xlarge"
- "c5.18xlarge"
- "c5.24xlarge"
- "c5a.2xlarge"
- "c5a.4xlarge"
- "c5a.8xlarge"
- "c5a.12xlarge"
- "c5a.16xlarge"
- "c5a.24xlarge"
- "r4.xlarge"
- "r4.2xlarge"
- "r4.4xlarge"
- "r4.8xlarge"
- "r4.16xlarge"
- "r5.xlarge"
- "r5.2xlarge"
- "r5.4xlarge"
- "r5.8xlarge"
- "r5.12xlarge"
- "r5.16xlarge"
- "r5.24xlarge"
- "r5a.xlarge"
- "r5a.2xlarge"
- "r5a.4xlarge"
- "r5a.8xlarge"
- "r5a.12xlarge"
- "r5a.16xlarge"
- "r5a.24xlarge"
AutoRegisterELB:
Default: "yes"
AllowedValues:
- "yes"
- "no"
Description: Do you want to invoke NLB registration, which requires a Lambda ARN parameter?
Type: String
RegisterNlbIpTargetsLambdaArn:
Description: ARN for NLB IP target registration lambda. Supply the value from the cluster infrastructure or select "no" for AutoRegisterELB.
Type: String
ExternalApiTargetGroupArn:
Description: ARN for external API load balancer target group. Supply the value from the cluster infrastructure or select "no" for AutoRegisterELB.
Type: String
InternalApiTargetGroupArn:
Description: ARN for internal API load balancer target group. Supply the value from the cluster infrastructure or select "no" for AutoRegisterELB.
Type: String
InternalServiceTargetGroupArn:
Description: ARN for internal service load balancer target group. Supply the value from the cluster infrastructure or select "no" for AutoRegisterELB.
Type: String
Metadata:
AWS::CloudFormation::Interface:
ParameterGroups:
- Label:
default: "Cluster Information"
Parameters:
- InfrastructureName
- Label:
default: "Host Information"
Parameters:
- MasterInstanceType
- RhcosAmi
- IgnitionLocation
- CertificateAuthorities
- MasterSecurityGroupId
- MasterInstanceProfileName
- Label:
default: "Network Configuration"
Parameters:
- VpcId
- AllowedBootstrapSshCidr
- Master0Subnet
- Master1Subnet
- Master2Subnet
- Label:
default: "DNS"
Parameters:
- AutoRegisterDNS
- PrivateHostedZoneName
- PrivateHostedZoneId
- Label:
default: "Load Balancer Automation"
Parameters:
- AutoRegisterELB
- RegisterNlbIpTargetsLambdaArn
- ExternalApiTargetGroupArn
- InternalApiTargetGroupArn
- InternalServiceTargetGroupArn
ParameterLabels:
InfrastructureName:
default: "Infrastructure Name"
VpcId:
default: "VPC ID"
Master0Subnet:
default: "Master-0 Subnet"
Master1Subnet:
default: "Master-1 Subnet"
Master2Subnet:
default: "Master-2 Subnet"
MasterInstanceType:
default: "Master Instance Type"
MasterInstanceProfileName:
default: "Master Instance Profile Name"
RhcosAmi:
default: "Red Hat Enterprise Linux CoreOS AMI ID"
BootstrapIgnitionLocation:
default: "Master Ignition Source"
CertificateAuthorities:
default: "Ignition CA String"
MasterSecurityGroupId:
default: "Master Security Group ID"
AutoRegisterDNS:
default: "Use Provided DNS Automation"
AutoRegisterELB:
default: "Use Provided ELB Automation"
PrivateHostedZoneName:
default: "Private Hosted Zone Name"
PrivateHostedZoneId:
default: "Private Hosted Zone ID"
Conditions:
DoRegistration: !Equals ["yes", !Ref AutoRegisterELB]
DoDns: !Equals ["yes", !Ref AutoRegisterDNS]
Resources:
Master0:
Type: AWS::EC2::Instance
Properties:
ImageId: !Ref RhcosAmi
BlockDeviceMappings:
- DeviceName: /dev/xvda
Ebs:
VolumeSize: "120"
VolumeType: "gp2"
IamInstanceProfile: !Ref MasterInstanceProfileName
InstanceType: !Ref MasterInstanceType
NetworkInterfaces:
- AssociatePublicIpAddress: "false"
DeviceIndex: "0"
GroupSet:
- !Ref "MasterSecurityGroupId"
SubnetId: !Ref "Master0Subnet"
UserData:
Fn::Base64: !Sub
- '{"ignition":{"config":{"merge":[{"source":"${SOURCE}"}]},"security":{"tls":{"certificateAuthorities":[{"source":"${CA_BUNDLE}"}]}},"version":"3.1.0"}}'
- {
SOURCE: !Ref IgnitionLocation,
CA_BUNDLE: !Ref CertificateAuthorities,
}
Tags:
- Key: !Join ["", ["kubernetes.io/cluster/", !Ref InfrastructureName]]
Value: "shared"
RegisterMaster0:
Condition: DoRegistration
Type: Custom::NLBRegister
Properties:
ServiceToken: !Ref RegisterNlbIpTargetsLambdaArn
TargetArn: !Ref ExternalApiTargetGroupArn
TargetIp: !GetAtt Master0.PrivateIp
RegisterMaster0InternalApiTarget:
Condition: DoRegistration
Type: Custom::NLBRegister
Properties:
ServiceToken: !Ref RegisterNlbIpTargetsLambdaArn
TargetArn: !Ref InternalApiTargetGroupArn
TargetIp: !GetAtt Master0.PrivateIp
RegisterMaster0InternalServiceTarget:
Condition: DoRegistration
Type: Custom::NLBRegister
Properties:
ServiceToken: !Ref RegisterNlbIpTargetsLambdaArn
TargetArn: !Ref InternalServiceTargetGroupArn
TargetIp: !GetAtt Master0.PrivateIp
Master1:
Type: AWS::EC2::Instance
Properties:
ImageId: !Ref RhcosAmi
BlockDeviceMappings:
- DeviceName: /dev/xvda
Ebs:
VolumeSize: "120"
VolumeType: "gp2"
IamInstanceProfile: !Ref MasterInstanceProfileName
InstanceType: !Ref MasterInstanceType
NetworkInterfaces:
- AssociatePublicIpAddress: "false"
DeviceIndex: "0"
GroupSet:
- !Ref "MasterSecurityGroupId"
SubnetId: !Ref "Master1Subnet"
UserData:
Fn::Base64: !Sub
- '{"ignition":{"config":{"merge":[{"source":"${SOURCE}"}]},"security":{"tls":{"certificateAuthorities":[{"source":"${CA_BUNDLE}"}]}},"version":"3.1.0"}}'
- {
SOURCE: !Ref IgnitionLocation,
CA_BUNDLE: !Ref CertificateAuthorities,
}
Tags:
- Key: !Join ["", ["kubernetes.io/cluster/", !Ref InfrastructureName]]
Value: "shared"
RegisterMaster1:
Condition: DoRegistration
Type: Custom::NLBRegister
Properties:
ServiceToken: !Ref RegisterNlbIpTargetsLambdaArn
TargetArn: !Ref ExternalApiTargetGroupArn
TargetIp: !GetAtt Master1.PrivateIp
RegisterMaster1InternalApiTarget:
Condition: DoRegistration
Type: Custom::NLBRegister
Properties:
ServiceToken: !Ref RegisterNlbIpTargetsLambdaArn
TargetArn: !Ref InternalApiTargetGroupArn
TargetIp: !GetAtt Master1.PrivateIp
RegisterMaster1InternalServiceTarget:
Condition: DoRegistration
Type: Custom::NLBRegister
Properties:
ServiceToken: !Ref RegisterNlbIpTargetsLambdaArn
TargetArn: !Ref InternalServiceTargetGroupArn
TargetIp: !GetAtt Master1.PrivateIp
Master2:
Type: AWS::EC2::Instance
Properties:
ImageId: !Ref RhcosAmi
BlockDeviceMappings:
- DeviceName: /dev/xvda
Ebs:
VolumeSize: "120"
VolumeType: "gp2"
IamInstanceProfile: !Ref MasterInstanceProfileName
InstanceType: !Ref MasterInstanceType
NetworkInterfaces:
- AssociatePublicIpAddress: "false"
DeviceIndex: "0"
GroupSet:
- !Ref "MasterSecurityGroupId"
SubnetId: !Ref "Master2Subnet"
UserData:
Fn::Base64: !Sub
- '{"ignition":{"config":{"merge":[{"source":"${SOURCE}"}]},"security":{"tls":{"certificateAuthorities":[{"source":"${CA_BUNDLE}"}]}},"version":"3.1.0"}}'
- {
SOURCE: !Ref IgnitionLocation,
CA_BUNDLE: !Ref CertificateAuthorities,
}
Tags:
- Key: !Join ["", ["kubernetes.io/cluster/", !Ref InfrastructureName]]
Value: "shared"
RegisterMaster2:
Condition: DoRegistration
Type: Custom::NLBRegister
Properties:
ServiceToken: !Ref RegisterNlbIpTargetsLambdaArn
TargetArn: !Ref ExternalApiTargetGroupArn
TargetIp: !GetAtt Master2.PrivateIp
RegisterMaster2InternalApiTarget:
Condition: DoRegistration
Type: Custom::NLBRegister
Properties:
ServiceToken: !Ref RegisterNlbIpTargetsLambdaArn
TargetArn: !Ref InternalApiTargetGroupArn
TargetIp: !GetAtt Master2.PrivateIp
RegisterMaster2InternalServiceTarget:
Condition: DoRegistration
Type: Custom::NLBRegister
Properties:
ServiceToken: !Ref RegisterNlbIpTargetsLambdaArn
TargetArn: !Ref InternalServiceTargetGroupArn
TargetIp: !GetAtt Master2.PrivateIp
EtcdSrvRecords:
Condition: DoDns
Type: AWS::Route53::RecordSet
Properties:
HostedZoneId: !Ref PrivateHostedZoneId
Name: !Join [".", ["_etcd-server-ssl._tcp", !Ref PrivateHostedZoneName]]
ResourceRecords:
- !Join [
" ",
["0 10 2380", !Join [".", ["etcd-0", !Ref PrivateHostedZoneName]]],
]
- !Join [
" ",
["0 10 2380", !Join [".", ["etcd-1", !Ref PrivateHostedZoneName]]],
]
- !Join [
" ",
["0 10 2380", !Join [".", ["etcd-2", !Ref PrivateHostedZoneName]]],
]
TTL: 60
Type: SRV
Etcd0Record:
Condition: DoDns
Type: AWS::Route53::RecordSet
Properties:
HostedZoneId: !Ref PrivateHostedZoneId
Name: !Join [".", ["etcd-0", !Ref PrivateHostedZoneName]]
ResourceRecords:
- !GetAtt Master0.PrivateIp
TTL: 60
Type: A
Etcd1Record:
Condition: DoDns
Type: AWS::Route53::RecordSet
Properties:
HostedZoneId: !Ref PrivateHostedZoneId
Name: !Join [".", ["etcd-1", !Ref PrivateHostedZoneName]]
ResourceRecords:
- !GetAtt Master1.PrivateIp
TTL: 60
Type: A
Etcd2Record:
Condition: DoDns
Type: AWS::Route53::RecordSet
Properties:
HostedZoneId: !Ref PrivateHostedZoneId
Name: !Join [".", ["etcd-2", !Ref PrivateHostedZoneName]]
ResourceRecords:
- !GetAtt Master2.PrivateIp
TTL: 60
Type: A
Outputs:
PrivateIPs:
Description: The control-plane node private IP addresses.
Value:
!Join [
",",
[!GetAtt Master0.PrivateIp, !GetAtt Master1.PrivateIp, !GetAtt Master2.PrivateIp]
]4.12.14. Creating the worker nodes in AWS
You can create worker nodes in Amazon Web Services (AWS) for your cluster to use.
You can use the provided CloudFormation template and a custom parameter file to create a stack of AWS resources that represent a worker node.
The CloudFormation template creates a stack that represents one worker node. You must create a stack for each worker node.
If you do not use the provided CloudFormation template to create your worker nodes, you must review the provided information and manually create the infrastructure. If your cluster does not initialize correctly, you might have to contact Red Hat support with your installation logs.
Prerequisites
- You configured an AWS account.
-
You added your AWS keys and region to your local AWS profile by running
aws configure. - You generated the Ignition config files for your cluster.
- You created and configured a VPC and associated subnets in AWS.
- You created and configured DNS, load balancers, and listeners in AWS.
- You created the security groups and roles required for your cluster in AWS.
- You created the bootstrap machine.
- You created the control plane machines.
Procedure
Create a JSON file that contains the parameter values that the CloudFormation template requires:
[ { "ParameterKey": "InfrastructureName",1 "ParameterValue": "mycluster-<random_string>"2 }, { "ParameterKey": "RhcosAmi",3 "ParameterValue": "ami-<random_string>"4 }, { "ParameterKey": "Subnet",5 "ParameterValue": "subnet-<random_string>"6 }, { "ParameterKey": "WorkerSecurityGroupId",7 "ParameterValue": "sg-<random_string>"8 }, { "ParameterKey": "IgnitionLocation",9 "ParameterValue": "https://api-int.<cluster_name>.<domain_name>:22623/config/worker"10 }, { "ParameterKey": "CertificateAuthorities",11 "ParameterValue": ""12 }, { "ParameterKey": "WorkerInstanceProfileName",13 "ParameterValue": ""14 }, { "ParameterKey": "WorkerInstanceType",15 "ParameterValue": "m4.2xlarge"16 } ]- 1
- The name for your cluster infrastructure that is encoded in your Ignition config files for the cluster.
- 2
- Specify the infrastructure name that you extracted from the Ignition config file metadata, which has the format
<cluster-name>-<random-string>. - 3
- Current Red Hat Enterprise Linux CoreOS (RHCOS) AMI to use for the worker nodes.
- 4
- Specify an
AWS::EC2::Image::Idvalue. - 5
- A subnet, preferably private, to launch the worker nodes on.
- 6
- Specify a subnet from the
PrivateSubnetsvalue from the output of the CloudFormation template for DNS and load balancing. - 7
- The worker security group ID to associate with worker nodes.
- 8
- Specify the
WorkerSecurityGroupIdvalue from the output of the CloudFormation template for the security group and roles. - 9
- The location to fetch bootstrap Ignition config file from.
- 10
- Specify the generated Ignition config location,
https://api-int.<cluster_name>.<domain_name>:22623/config/worker. - 11
- Base64 encoded certificate authority string to use.
- 12
- Specify the value from the
worker.ignfile that is in the installation directory. This value is the long string with the formatdata:text/plain;charset=utf-8;base64,ABC…xYz==. - 13
- The IAM profile to associate with worker nodes.
- 14
- Specify the
WorkerInstanceProfileparameter value from the output of the CloudFormation template for the security group and roles. - 15
- The type of AWS instance to use for the control plane machines.
- 16
- Allowed values:
-
m4.large -
m4.xlarge -
m4.2xlarge -
m4.4xlarge -
m4.10xlarge -
m4.16xlarge -
m5.large -
m5.xlarge -
m5.2xlarge -
m5.4xlarge -
m5.8xlarge -
m5.12xlarge -
m5.16xlarge -
m5a.large -
m5a.xlarge -
m5a.2xlarge -
m5a.4xlarge -
m5a.8xlarge -
m5a.10xlarge -
m5a.16xlarge -
c4.large -
c4.xlarge -
c4.2xlarge -
c4.4xlarge -
c4.8xlarge -
c5.large -
c5.xlarge -
c5.2xlarge -
c5.4xlarge -
c5.9xlarge -
c5.12xlarge -
c5.18xlarge -
c5.24xlarge -
c5a.large -
c5a.xlarge -
c5a.2xlarge -
c5a.4xlarge -
c5a.8xlarge -
c5a.12xlarge -
c5a.16xlarge -
c5a.24xlarge -
r4.large -
r4.xlarge -
r4.2xlarge -
r4.4xlarge -
r4.8xlarge -
r4.16xlarge -
r5.large -
r5.xlarge -
r5.2xlarge -
r5.4xlarge -
r5.8xlarge -
r5.12xlarge -
r5.16xlarge -
r5.24xlarge -
r5a.large -
r5a.xlarge -
r5a.2xlarge -
r5a.4xlarge -
r5a.8xlarge -
r5a.12xlarge -
r5a.16xlarge -
r5a.24xlarge -
t3.large -
t3.xlarge -
t3.2xlarge -
t3a.large -
t3a.xlarge -
t3a.2xlarge
-
- Copy the template from the CloudFormation template for worker machines section of this topic and save it as a YAML file on your computer. This template describes the networking objects and load balancers that your cluster requires.
-
If you specified an
m5instance type as the value forWorkerInstanceType, add that instance type to theWorkerInstanceType.AllowedValuesparameter in the CloudFormation template. Launch the CloudFormation template to create a stack of AWS resources that represent a worker node:
ImportantYou must enter the command on a single line.
$ aws cloudformation create-stack --stack-name <name>1 --template-body file://<template>.yaml \2 --parameters file://<parameters>.json3 - 1
<name>is the name for the CloudFormation stack, such ascluster-worker-1. You need the name of this stack if you remove the cluster.- 2
<template>is the relative path to and name of the CloudFormation template YAML file that you saved.- 3
<parameters>is the relative path to and name of the CloudFormation parameters JSON file.
Example output
arn:aws:cloudformation:us-east-1:269333783861:stack/cluster-worker-1/729ee301-1c2a-11eb-348f-sd9888c65b59NoteThe CloudFormation template creates a stack that represents one worker node.
Confirm that the template components exist:
$ aws cloudformation describe-stacks --stack-name <name>Continue to create worker stacks until you have created enough worker machines for your cluster. You can create additional worker stacks by referencing the same template and parameter files and specifying a different stack name.
ImportantYou must create at least two worker machines, so you must create at least two stacks that use this CloudFormation template.
4.12.14.1. CloudFormation template for worker machines
You can use the following CloudFormation template to deploy the worker machines that you need for your OpenShift Container Platform cluster.
Example 4.60. CloudFormation template for worker machines
AWSTemplateFormatVersion: 2010-09-09
Description: Template for OpenShift Cluster Node Launch (EC2 worker instance)
Parameters:
InfrastructureName:
AllowedPattern: ^([a-zA-Z][a-zA-Z0-9\-]{0,26})$
MaxLength: 27
MinLength: 1
ConstraintDescription: Infrastructure name must be alphanumeric, start with a letter, and have a maximum of 27 characters.
Description: A short, unique cluster ID used to tag nodes for the kubelet cloud provider.
Type: String
RhcosAmi:
Description: Current Red Hat Enterprise Linux CoreOS AMI to use for bootstrap.
Type: AWS::EC2::Image::Id
Subnet:
Description: The subnets, recommend private, to launch the master nodes into.
Type: AWS::EC2::Subnet::Id
WorkerSecurityGroupId:
Description: The master security group ID to associate with master nodes.
Type: AWS::EC2::SecurityGroup::Id
IgnitionLocation:
Default: https://api-int.$CLUSTER_NAME.$DOMAIN:22623/config/worker
Description: Ignition config file location.
Type: String
CertificateAuthorities:
Default: data:text/plain;charset=utf-8;base64,ABC...xYz==
Description: Base64 encoded certificate authority string to use.
Type: String
WorkerInstanceProfileName:
Description: IAM profile to associate with master nodes.
Type: String
WorkerInstanceType:
Default: m5.large
Type: String
AllowedValues:
- "m4.large"
- "m4.xlarge"
- "m4.2xlarge"
- "m4.4xlarge"
- "m4.10xlarge"
- "m4.16xlarge"
- "m5.large"
- "m5.xlarge"
- "m5.2xlarge"
- "m5.4xlarge"
- "m5.8xlarge"
- "m5.12xlarge"
- "m5.16xlarge"
- "m5a.large"
- "m5a.xlarge"
- "m5a.2xlarge"
- "m5a.4xlarge"
- "m5a.8xlarge"
- "m5a.10xlarge"
- "m5a.16xlarge"
- "c4.large"
- "c4.xlarge"
- "c4.2xlarge"
- "c4.4xlarge"
- "c4.8xlarge"
- "c5.large"
- "c5.xlarge"
- "c5.2xlarge"
- "c5.4xlarge"
- "c5.9xlarge"
- "c5.12xlarge"
- "c5.18xlarge"
- "c5.24xlarge"
- "c5a.large"
- "c5a.xlarge"
- "c5a.2xlarge"
- "c5a.4xlarge"
- "c5a.8xlarge"
- "c5a.12xlarge"
- "c5a.16xlarge"
- "c5a.24xlarge"
- "r4.large"
- "r4.xlarge"
- "r4.2xlarge"
- "r4.4xlarge"
- "r4.8xlarge"
- "r4.16xlarge"
- "r5.large"
- "r5.xlarge"
- "r5.2xlarge"
- "r5.4xlarge"
- "r5.8xlarge"
- "r5.12xlarge"
- "r5.16xlarge"
- "r5.24xlarge"
- "r5a.large"
- "r5a.xlarge"
- "r5a.2xlarge"
- "r5a.4xlarge"
- "r5a.8xlarge"
- "r5a.12xlarge"
- "r5a.16xlarge"
- "r5a.24xlarge"
- "t3.large"
- "t3.xlarge"
- "t3.2xlarge"
- "t3a.large"
- "t3a.xlarge"
- "t3a.2xlarge"
Metadata:
AWS::CloudFormation::Interface:
ParameterGroups:
- Label:
default: "Cluster Information"
Parameters:
- InfrastructureName
- Label:
default: "Host Information"
Parameters:
- WorkerInstanceType
- RhcosAmi
- IgnitionLocation
- CertificateAuthorities
- WorkerSecurityGroupId
- WorkerInstanceProfileName
- Label:
default: "Network Configuration"
Parameters:
- Subnet
ParameterLabels:
Subnet:
default: "Subnet"
InfrastructureName:
default: "Infrastructure Name"
WorkerInstanceType:
default: "Worker Instance Type"
WorkerInstanceProfileName:
default: "Worker Instance Profile Name"
RhcosAmi:
default: "Red Hat Enterprise Linux CoreOS AMI ID"
IgnitionLocation:
default: "Worker Ignition Source"
CertificateAuthorities:
default: "Ignition CA String"
WorkerSecurityGroupId:
default: "Worker Security Group ID"
Resources:
Worker0:
Type: AWS::EC2::Instance
Properties:
ImageId: !Ref RhcosAmi
BlockDeviceMappings:
- DeviceName: /dev/xvda
Ebs:
VolumeSize: "120"
VolumeType: "gp2"
IamInstanceProfile: !Ref WorkerInstanceProfileName
InstanceType: !Ref WorkerInstanceType
NetworkInterfaces:
- AssociatePublicIpAddress: "false"
DeviceIndex: "0"
GroupSet:
- !Ref "WorkerSecurityGroupId"
SubnetId: !Ref "Subnet"
UserData:
Fn::Base64: !Sub
- '{"ignition":{"config":{"merge":[{"source":"${SOURCE}"}]},"security":{"tls":{"certificateAuthorities":[{"source":"${CA_BUNDLE}"}]}},"version":"3.1.0"}}'
- {
SOURCE: !Ref IgnitionLocation,
CA_BUNDLE: !Ref CertificateAuthorities,
}
Tags:
- Key: !Join ["", ["kubernetes.io/cluster/", !Ref InfrastructureName]]
Value: "shared"
Outputs:
PrivateIP:
Description: The compute node private IP address.
Value: !GetAtt Worker0.PrivateIp4.12.15. Initializing the bootstrap sequence on AWS with user-provisioned infrastructure
After you create all of the required infrastructure in Amazon Web Services (AWS), you can start the bootstrap sequence that initializes the OpenShift Container Platform control plane.
Prerequisites
- You configured an AWS account.
-
You added your AWS keys and region to your local AWS profile by running
aws configure. - You generated the Ignition config files for your cluster.
- You created and configured a VPC and associated subnets in AWS.
- You created and configured DNS, load balancers, and listeners in AWS.
- You created the security groups and roles required for your cluster in AWS.
- You created the bootstrap machine.
- You created the control plane machines.
- You created the worker nodes.
Procedure
Change to the directory that contains the installation program and start the bootstrap process that initializes the OpenShift Container Platform control plane:
$ ./openshift-install wait-for bootstrap-complete --dir <installation_directory> \1 --log-level=info2 Example output
INFO Waiting up to 20m0s for the Kubernetes API at https://api.mycluster.example.com:6443... INFO API v1.19.0+9f84db3 up INFO Waiting up to 30m0s for bootstrapping to complete... INFO It is now safe to remove the bootstrap resources INFO Time elapsed: 1sIf the command exits without a
FATALwarning, your OpenShift Container Platform control plane has initialized.NoteAfter the control plane initializes, it sets up the compute nodes and installs additional services in the form of Operators.
4.12.16. Logging in to the cluster by using the CLI
You can log in to your cluster as a default system user by exporting the cluster kubeconfig file. The kubeconfig file contains information about the cluster that is used by the CLI to connect a client to the correct cluster and API server. The file is specific to a cluster and is created during OpenShift Container Platform installation.
Prerequisites
- You deployed an OpenShift Container Platform cluster.
-
You installed the
ocCLI.
Procedure
Export the
kubeadmincredentials:$ export KUBECONFIG=<installation_directory>/auth/kubeconfig1 - 1
- For
<installation_directory>, specify the path to the directory that you stored the installation files in.
Verify you can run
occommands successfully using the exported configuration:$ oc whoamiExample output
system:admin
4.12.17. Approving the certificate signing requests for your machines
When you add machines to a cluster, two pending certificate signing requests (CSRs) are generated for each machine that you added. You must confirm that these CSRs are approved or, if necessary, approve them yourself. The client requests must be approved first, followed by the server requests.
Prerequisites
- You added machines to your cluster.
Procedure
Confirm that the cluster recognizes the machines:
$ oc get nodesExample output
NAME STATUS ROLES AGE VERSION master-0 Ready master 63m v1.20.0 master-1 Ready master 63m v1.20.0 master-2 Ready master 64m v1.20.0The output lists all of the machines that you created.
NoteThe preceding output might not include the compute nodes, also known as worker nodes, until some CSRs are approved.
Review the pending CSRs and ensure that you see the client requests with the
PendingorApprovedstatus for each machine that you added to the cluster:$ oc get csrExample output
NAME AGE REQUESTOR CONDITION csr-8b2br 15m system:serviceaccount:openshift-machine-config-operator:node-bootstrapper Pending csr-8vnps 15m system:serviceaccount:openshift-machine-config-operator:node-bootstrapper Pending ...In this example, two machines are joining the cluster. You might see more approved CSRs in the list.
If the CSRs were not approved, after all of the pending CSRs for the machines you added are in
Pendingstatus, approve the CSRs for your cluster machines:NoteBecause the CSRs rotate automatically, approve your CSRs within an hour of adding the machines to the cluster. If you do not approve them within an hour, the certificates will rotate, and more than two certificates will be present for each node. You must approve all of these certificates. Once the client CSR is approved, the Kubelet creates a secondary CSR for the serving certificate, which requires manual approval. Then, subsequent serving certificate renewal requests are automatically approved by the
machine-approverif the Kubelet requests a new certificate with identical parameters.NoteFor clusters running on platforms that are not machine API enabled, such as bare metal and other user-provisioned infrastructure, you must implement a method of automatically approving the kubelet serving certificate requests (CSRs). If a request is not approved, then the
oc exec,oc rsh, andoc logscommands cannot succeed, because a serving certificate is required when the API server connects to the kubelet. Any operation that contacts the Kubelet endpoint requires this certificate approval to be in place. The method must watch for new CSRs, confirm that the CSR was submitted by thenode-bootstrapperservice account in thesystem:nodeorsystem:admingroups, and confirm the identity of the node.To approve them individually, run the following command for each valid CSR:
$ oc adm certificate approve <csr_name>1 - 1
<csr_name>is the name of a CSR from the list of current CSRs.
To approve all pending CSRs, run the following command:
$ oc get csr -o go-template='{{range .items}}{{if not .status}}{{.metadata.name}}{{"\n"}}{{end}}{{end}}' | xargs --no-run-if-empty oc adm certificate approveNoteSome Operators might not become available until some CSRs are approved.
Now that your client requests are approved, you must review the server requests for each machine that you added to the cluster:
$ oc get csrExample output
NAME AGE REQUESTOR CONDITION csr-bfd72 5m26s system:node:ip-10-0-50-126.us-east-2.compute.internal Pending csr-c57lv 5m26s system:node:ip-10-0-95-157.us-east-2.compute.internal Pending ...If the remaining CSRs are not approved, and are in the
Pendingstatus, approve the CSRs for your cluster machines:To approve them individually, run the following command for each valid CSR:
$ oc adm certificate approve <csr_name>1 - 1
<csr_name>is the name of a CSR from the list of current CSRs.
To approve all pending CSRs, run the following command:
$ oc get csr -o go-template='{{range .items}}{{if not .status}}{{.metadata.name}}{{"\n"}}{{end}}{{end}}' | xargs oc adm certificate approve
After all client and server CSRs have been approved, the machines have the
Readystatus. Verify this by running the following command:$ oc get nodesExample output
NAME STATUS ROLES AGE VERSION master-0 Ready master 73m v1.20.0 master-1 Ready master 73m v1.20.0 master-2 Ready master 74m v1.20.0 worker-0 Ready worker 11m v1.20.0 worker-1 Ready worker 11m v1.20.0NoteIt can take a few minutes after approval of the server CSRs for the machines to transition to the
Readystatus.
Additional information
- For more information on CSRs, see Certificate Signing Requests.
4.12.18. Initial Operator configuration
After the control plane initializes, you must immediately configure some Operators so that they all become available.
Prerequisites
- Your control plane has initialized.
Procedure
Watch the cluster components come online:
$ watch -n5 oc get clusteroperatorsExample output
NAME VERSION AVAILABLE PROGRESSING DEGRADED SINCE authentication 4.7.0 True False False 3h56m baremetal 4.7.0 True False False 29h cloud-credential 4.7.0 True False False 29h cluster-autoscaler 4.7.0 True False False 29h config-operator 4.7.0 True False False 6h39m console 4.7.0 True False False 3h59m csi-snapshot-controller 4.7.0 True False False 4h12m dns 4.7.0 True False False 4h15m etcd 4.7.0 True False False 29h image-registry 4.7.0 True False False 3h59m ingress 4.7.0 True False False 4h30m insights 4.7.0 True False False 29h kube-apiserver 4.7.0 True False False 29h kube-controller-manager 4.7.0 True False False 29h kube-scheduler 4.7.0 True False False 29h kube-storage-version-migrator 4.7.0 True False False 4h2m machine-api 4.7.0 True False False 29h machine-approver 4.7.0 True False False 6h34m machine-config 4.7.0 True False False 3h56m marketplace 4.7.0 True False False 4h2m monitoring 4.7.0 True False False 6h31m network 4.7.0 True False False 29h node-tuning 4.7.0 True False False 4h30m openshift-apiserver 4.7.0 True False False 3h56m openshift-controller-manager 4.7.0 True False False 4h36m openshift-samples 4.7.0 True False False 4h30m operator-lifecycle-manager 4.7.0 True False False 29h operator-lifecycle-manager-catalog 4.7.0 True False False 29h operator-lifecycle-manager-packageserver 4.7.0 True False False 3h59m service-ca 4.7.0 True False False 29h storage 4.7.0 True False False 4h30m- Configure the Operators that are not available.
4.12.18.1. Disabling the default OperatorHub sources
Operator catalogs that source content provided by Red Hat and community projects are configured for OperatorHub by default during an OpenShift Container Platform installation. In a restricted network environment, you must disable the default catalogs as a cluster administrator.
Procedure
Disable the sources for the default catalogs by adding
disableAllDefaultSources: trueto theOperatorHubobject:$ oc patch OperatorHub cluster --type json \ -p '[{"op": "add", "path": "/spec/disableAllDefaultSources", "value": true}]'
Alternatively, you can use the web console to manage catalog sources. From the Administration → Cluster Settings → Global Configuration → OperatorHub page, click the Sources tab, where you can create, delete, disable, and enable individual sources.
4.12.18.2. Image registry storage configuration
Amazon Web Services provides default storage, which means the Image Registry Operator is available after installation. However, if the Registry Operator cannot create an S3 bucket and automatically configure storage, you must manually configure registry storage.
Instructions are shown for configuring a persistent volume, which is required for production clusters. Where applicable, instructions are shown for configuring an empty directory as the storage location, which is available for only non-production clusters.
Additional instructions are provided for allowing the image registry to use block storage types by using the Recreate rollout strategy during upgrades.
4.12.18.2.1. Configuring registry storage for AWS with user-provisioned infrastructure
During installation, your cloud credentials are sufficient to create an Amazon S3 bucket and the Registry Operator will automatically configure storage.
If the Registry Operator cannot create an S3 bucket and automatically configure storage, you can create an S3 bucket and configure storage with the following procedure.
Prerequisites
- You have a cluster on AWS with user-provisioned infrastructure.
For Amazon S3 storage, the secret is expected to contain two keys:
-
REGISTRY_STORAGE_S3_ACCESSKEY -
REGISTRY_STORAGE_S3_SECRETKEY
-
Procedure
Use the following procedure if the Registry Operator cannot create an S3 bucket and automatically configure storage.
- Set up a Bucket Lifecycle Policy to abort incomplete multipart uploads that are one day old.
Fill in the storage configuration in
configs.imageregistry.operator.openshift.io/cluster:$ oc edit configs.imageregistry.operator.openshift.io/clusterExample configuration
storage: s3: bucket: <bucket-name> region: <region-name>
To secure your registry images in AWS, block public access to the S3 bucket.
4.12.18.2.2. Configuring storage for the image registry in non-production clusters
You must configure storage for the Image Registry Operator. For non-production clusters, you can set the image registry to an empty directory. If you do so, all images are lost if you restart the registry.
Procedure
To set the image registry storage to an empty directory:
$ oc patch configs.imageregistry.operator.openshift.io cluster --type merge --patch '{"spec":{"storage":{"emptyDir":{}}}}'WarningConfigure this option for only non-production clusters.
If you run this command before the Image Registry Operator initializes its components, the
oc patchcommand fails with the following error:Error from server (NotFound): configs.imageregistry.operator.openshift.io "cluster" not foundWait a few minutes and run the command again.
4.12.19. Deleting the bootstrap resources
After you complete the initial Operator configuration for the cluster, remove the bootstrap resources from Amazon Web Services (AWS).
Prerequisites
- You completed the initial Operator configuration for your cluster.
Procedure
Delete the bootstrap resources. If you used the CloudFormation template, delete its stack:
Delete the stack by using the AWS CLI:
$ aws cloudformation delete-stack --stack-name <name>1 - 1
<name>is the name of your bootstrap stack.
- Delete the stack by using the AWS CloudFormation console.
4.12.20. Creating the Ingress DNS Records
If you removed the DNS Zone configuration, manually create DNS records that point to the Ingress load balancer. You can create either a wildcard record or specific records. While the following procedure uses A records, you can use other record types that you require, such as CNAME or alias.
Prerequisites
- You deployed an OpenShift Container Platform cluster on Amazon Web Services (AWS) that uses infrastructure that you provisioned.
-
You installed the OpenShift CLI (
oc). -
You installed the
jqpackage. - You downloaded the AWS CLI and installed it on your computer. See Install the AWS CLI Using the Bundled Installer (Linux, macOS, or Unix).
Procedure
Determine the routes to create.
-
To create a wildcard record, use
*.apps.<cluster_name>.<domain_name>, where<cluster_name>is your cluster name, and<domain_name>is the Route 53 base domain for your OpenShift Container Platform cluster. To create specific records, you must create a record for each route that your cluster uses, as shown in the output of the following command:
$ oc get --all-namespaces -o jsonpath='{range .items[*]}{range .status.ingress[*]}{.host}{"\n"}{end}{end}' routesExample output
oauth-openshift.apps.<cluster_name>.<domain_name> console-openshift-console.apps.<cluster_name>.<domain_name> downloads-openshift-console.apps.<cluster_name>.<domain_name> alertmanager-main-openshift-monitoring.apps.<cluster_name>.<domain_name> grafana-openshift-monitoring.apps.<cluster_name>.<domain_name> prometheus-k8s-openshift-monitoring.apps.<cluster_name>.<domain_name>
-
To create a wildcard record, use
Retrieve the Ingress Operator load balancer status and note the value of the external IP address that it uses, which is shown in the
EXTERNAL-IPcolumn:$ oc -n openshift-ingress get service router-defaultExample output
NAME TYPE CLUSTER-IP EXTERNAL-IP PORT(S) AGE router-default LoadBalancer 172.30.62.215 ab3...28.us-east-2.elb.amazonaws.com 80:31499/TCP,443:30693/TCP 5mLocate the hosted zone ID for the load balancer:
$ aws elb describe-load-balancers | jq -r '.LoadBalancerDescriptions[] | select(.DNSName == "<external_ip>").CanonicalHostedZoneNameID'1 - 1
- For
<external_ip>, specify the value of the external IP address of the Ingress Operator load balancer that you obtained.
Example output
Z3AADJGX6KTTL2The output of this command is the load balancer hosted zone ID.
Obtain the public hosted zone ID for your cluster’s domain:
$ aws route53 list-hosted-zones-by-name \ --dns-name "<domain_name>" \1 --query 'HostedZones[? Config.PrivateZone != `true` && Name == `<domain_name>.`].Id'2 --output textExample output
/hostedzone/Z3URY6TWQ91KVVThe public hosted zone ID for your domain is shown in the command output. In this example, it is
Z3URY6TWQ91KVV.Add the alias records to your private zone:
$ aws route53 change-resource-record-sets --hosted-zone-id "<private_hosted_zone_id>" --change-batch '{1 > "Changes": [ > { > "Action": "CREATE", > "ResourceRecordSet": { > "Name": "\\052.apps.<cluster_domain>",2 > "Type": "A", > "AliasTarget":{ > "HostedZoneId": "<hosted_zone_id>",3 > "DNSName": "<external_ip>.",4 > "EvaluateTargetHealth": false > } > } > } > ] > }'- 1
- For
<private_hosted_zone_id>, specify the value from the output of the CloudFormation template for DNS and load balancing. - 2
- For
<cluster_domain>, specify the domain or subdomain that you use with your OpenShift Container Platform cluster. - 3
- For
<hosted_zone_id>, specify the public hosted zone ID for the load balancer that you obtained. - 4
- For
<external_ip>, specify the value of the external IP address of the Ingress Operator load balancer. Ensure that you include the trailing period (.) in this parameter value.
Add the records to your public zone:
$ aws route53 change-resource-record-sets --hosted-zone-id "<public_hosted_zone_id>"" --change-batch '{1 > "Changes": [ > { > "Action": "CREATE", > "ResourceRecordSet": { > "Name": "\\052.apps.<cluster_domain>",2 > "Type": "A", > "AliasTarget":{ > "HostedZoneId": "<hosted_zone_id>",3 > "DNSName": "<external_ip>.",4 > "EvaluateTargetHealth": false > } > } > } > ] > }'- 1
- For
<public_hosted_zone_id>, specify the public hosted zone for your domain. - 2
- For
<cluster_domain>, specify the domain or subdomain that you use with your OpenShift Container Platform cluster. - 3
- For
<hosted_zone_id>, specify the public hosted zone ID for the load balancer that you obtained. - 4
- For
<external_ip>, specify the value of the external IP address of the Ingress Operator load balancer. Ensure that you include the trailing period (.) in this parameter value.
4.12.21. Completing an AWS installation on user-provisioned infrastructure
After you start the OpenShift Container Platform installation on Amazon Web Service (AWS) user-provisioned infrastructure, monitor the deployment to completion.
Prerequisites
- You removed the bootstrap node for an OpenShift Container Platform cluster on user-provisioned AWS infrastructure.
-
You installed the
ocCLI.
Procedure
From the directory that contains the installation program, complete the cluster installation:
$ ./openshift-install --dir <installation_directory> wait-for install-complete1 - 1
- For
<installation_directory>, specify the path to the directory that you stored the installation files in.
Example output
INFO Waiting up to 40m0s for the cluster at https://api.mycluster.example.com:6443 to initialize... INFO Waiting up to 10m0s for the openshift-console route to be created... INFO Install complete! INFO To access the cluster as the system:admin user when using 'oc', run 'export KUBECONFIG=/home/myuser/install_dir/auth/kubeconfig' INFO Access the OpenShift web-console here: https://console-openshift-console.apps.mycluster.example.com INFO Login to the console with user: "kubeadmin", and password: "4vYBz-Fe5en-ymBEc-Wt6NL" INFO Time elapsed: 1sImportant-
The Ignition config files that the installation program generates contain certificates that expire after 24 hours, which are then renewed at that time. If the cluster is shut down before renewing the certificates and the cluster is later restarted after the 24 hours have elapsed, the cluster automatically recovers the expired certificates. The exception is that you must manually approve the pending
node-bootstrappercertificate signing requests (CSRs) to recover kubelet certificates. See the documentation for Recovering from expired control plane certificates for more information. - It is recommended that you use Ignition config files within 12 hours after they are generated because the 24-hour certificate rotates from 16 to 22 hours after the cluster is installed. By using the Ignition config files within 12 hours, you can avoid installation failure if the certificate update runs during installation.
- Register your cluster on the Cluster registration page.
4.12.22. Logging in to the cluster by using the web console
The kubeadmin user exists by default after an OpenShift Container Platform installation. You can log in to your cluster as the kubeadmin user by using the OpenShift Container Platform web console.
Prerequisites
- You have access to the installation host.
- You completed a cluster installation and all cluster Operators are available.
Procedure
Obtain the password for the
kubeadminuser from thekubeadmin-passwordfile on the installation host:$ cat <installation_directory>/auth/kubeadmin-passwordNoteAlternatively, you can obtain the
kubeadminpassword from the<installation_directory>/.openshift_install.loglog file on the installation host.List the OpenShift Container Platform web console route:
$ oc get routes -n openshift-console | grep 'console-openshift'NoteAlternatively, you can obtain the OpenShift Container Platform route from the
<installation_directory>/.openshift_install.loglog file on the installation host.Example output
console console-openshift-console.apps.<cluster_name>.<base_domain> console https reencrypt/Redirect None-
Navigate to the route detailed in the output of the preceding command in a web browser and log in as the
kubeadminuser.
4.12.23. Telemetry access for OpenShift Container Platform
In OpenShift Container Platform 4.7, the Telemetry service, which runs by default to provide metrics about cluster health and the success of updates, requires internet access. If your cluster is connected to the internet, Telemetry runs automatically, and your cluster is registered to OpenShift Cluster Manager.
After you confirm that your OpenShift Cluster Manager inventory is correct, either maintained automatically by Telemetry or manually by using OpenShift Cluster Manager, use subscription watch to track your OpenShift Container Platform subscriptions at the account or multi-cluster level.
4.12.25. Next steps
- Validate an installation.
- Customize your cluster.
-
Configure image streams for the Cluster Samples Operator and the
must-gathertool. - Learn how to use Operator Lifecycle Manager (OLM) on restricted networks.
- If the mirror registry that you used to install your cluster has a trusted CA, add it to the cluster by configuring additional trust stores.
- If necessary, you can opt out of remote health reporting.
- If necessary, you can remove cloud provider credentials.
4.13. Uninstalling a cluster on AWS
You can remove a cluster that you deployed to Amazon Web Services (AWS).
4.13.1. Removing a cluster that uses installer-provisioned infrastructure
You can remove a cluster that uses installer-provisioned infrastructure from your cloud.
After uninstallation, check your cloud provider for any resources not removed properly, especially with User Provisioned Infrastructure (UPI) clusters. There might be resources that the installer did not create or that the installer is unable to access.
Prerequisites
- Have a copy of the installation program that you used to deploy the cluster.
- Have the files that the installation program generated when you created your cluster.
Procedure
From the directory that contains the installation program on the computer that you used to install the cluster, run the following command:
$ ./openshift-install destroy cluster \ --dir <installation_directory> --log-level info1 2 NoteYou must specify the directory that contains the cluster definition files for your cluster. The installation program requires the
metadata.jsonfile in this directory to delete the cluster.-
Optional: Delete the
<installation_directory>directory and the OpenShift Container Platform installation program.
Chapter 5. Installing on Azure
5.1. Configuring an Azure account
Before you can install OpenShift Container Platform, you must configure a Microsoft Azure account.
All Azure resources that are available through public endpoints are subject to resource name restrictions, and you cannot create resources that use certain terms. For a list of terms that Azure restricts, see Resolve reserved resource name errors in the Azure documentation.
5.1.1. Azure account limits
The OpenShift Container Platform cluster uses a number of Microsoft Azure components, and the default Azure subscription and service limits, quotas, and constraints affect your ability to install OpenShift Container Platform clusters.
Default limits vary by offer category types, such as Free Trial and Pay-As-You-Go, and by series, such as Dv2, F, and G. For example, the default for Enterprise Agreement subscriptions is 350 cores.
Check the limits for your subscription type and if necessary, increase quota limits for your account before you install a default cluster on Azure.
The following table summarizes the Azure components whose limits can impact your ability to install and run OpenShift Container Platform clusters.
| Component | Number of components required by default | Default Azure limit | Description | ||||||
|---|---|---|---|---|---|---|---|---|---|
| vCPU | 40 | 20 per region | A default cluster requires 40 vCPUs, so you must increase the account limit. By default, each cluster creates the following instances:
Because the bootstrap machine uses To deploy more worker nodes, enable autoscaling, deploy large workloads, or use a different instance type, you must further increase the vCPU limit for your account to ensure that your cluster can deploy the machines that you require. By default, the installation program distributes control plane and compute machines across all availability zones within a region. To ensure high availability for your cluster, select a region with at least three availability zones. If your region contains fewer than three availability zones, the installation program places more than one control plane machine in the available zones. | ||||||
| OS Disk | 7 |
VM OS disk must be able to sustain a minimum throughput of 5000 IOPS / 200MBps. This throughput can be provided by having a minimum of 1 TiB Premium SSD (P30). In Azure, disk performance is directly dependent on SSD disk sizes, so to achieve the throughput supported by
Host caching must be set to | |||||||
| VNet | 1 | 1000 per region | Each default cluster requires one Virtual Network (VNet), which contains two subnets. | ||||||
| Network interfaces | 6 | 65,536 per region | Each default cluster requires six network interfaces. If you create more machines or your deployed workloads create load balancers, your cluster uses more network interfaces. | ||||||
| Network security groups | 2 | 5000 | Each default cluster Each cluster creates network security groups for each subnet in the VNet. The default cluster creates network security groups for the control plane and for the compute node subnets:
| ||||||
| Network load balancers | 3 | 1000 per region | Each cluster creates the following load balancers:
If your applications create more Kubernetes | ||||||
| Public IP addresses | 3 | Each of the two public load balancers uses a public IP address. The bootstrap machine also uses a public IP address so that you can SSH into the machine to troubleshoot issues during installation. The IP address for the bootstrap node is used only during installation. | |||||||
| Private IP addresses | 7 | The internal load balancer, each of the three control plane machines, and each of the three worker machines each use a private IP address. | |||||||
| Spot VM vCPUs (optional) | 0 If you configure spot VMs, your cluster must have two spot VM vCPUs for every compute node. | 20 per region | This is an optional component. To use spot VMs, you must increase the Azure default limit to at least twice the number of compute nodes in your cluster. Note Using spot VMs for control plane nodes is not recommended. |
5.1.2. Configuring a public DNS zone in Azure
To install OpenShift Container Platform, the Microsoft Azure account you use must have a dedicated public hosted DNS zone in your account. This zone must be authoritative for the domain. This service provides cluster DNS resolution and name lookup for external connections to the cluster.
Procedure
Identify your domain, or subdomain, and registrar. You can transfer an existing domain and registrar or obtain a new one through Azure or another source.
NoteFor more information about purchasing domains through Azure, see Buy a custom domain name for Azure App Service in the Azure documentation.
- If you are using an existing domain and registrar, migrate its DNS to Azure. See Migrate an active DNS name to Azure App Service in the Azure documentation.
Configure DNS for your domain. Follow the steps in the Tutorial: Host your domain in Azure DNS in the Azure documentation to create a public hosted zone for your domain or subdomain, extract the new authoritative name servers, and update the registrar records for the name servers that your domain uses.
Use an appropriate root domain, such as
openshiftcorp.com, or subdomain, such asclusters.openshiftcorp.com.- If you use a subdomain, follow your company’s procedures to add its delegation records to the parent domain.
5.1.3. Increasing Azure account limits
To increase an account limit, file a support request on the Azure portal.
You can increase only one type of quota per support request.
Procedure
- From the Azure portal, click Help + support in the lower left corner.
Click New support request and then select the required values:
- From the Issue type list, select Service and subscription limits (quotas).
- From the Subscription list, select the subscription to modify.
- From the Quota type list, select the quota to increase. For example, select Compute-VM (cores-vCPUs) subscription limit increases to increase the number of vCPUs, which is required to install a cluster.
- Click Next: Solutions.
On the Problem Details page, provide the required information for your quota increase:
- Click Provide details and provide the required details in the Quota details window.
- In the SUPPORT METHOD and CONTACT INFO sections, provide the issue severity and your contact details.
- Click Next: Review + create and then click Create.
5.1.4. Required Azure roles
OpenShift Container Platform needs a service principal so it can manage Microsoft Azure resources. Before you can create a service principal, your Azure account subscription must have the following roles:
-
User Access Administrator -
Owner
To set roles on the Azure portal, see the Manage access to Azure resources using RBAC and the Azure portal in the Azure documentation.
5.1.5. Creating a service principal
Because OpenShift Container Platform and its installation program must create Microsoft Azure resources through Azure Resource Manager, you must create a service principal to represent it.
Prerequisites
- Install or update the Azure CLI.
-
Install the
jqpackage. - Your Azure account has the required roles for the subscription that you use.
Procedure
Log in to the Azure CLI:
$ az loginLog in to Azure in the web console by using your credentials.
If your Azure account uses subscriptions, ensure that you are using the right subscription.
View the list of available accounts and record the
tenantIdvalue for the subscription you want to use for your cluster:$ az account list --refreshExample output
[ { "cloudName": "AzureCloud", "id": "9bab1460-96d5-40b3-a78e-17b15e978a80", "isDefault": true, "name": "Subscription Name", "state": "Enabled", "tenantId": "6057c7e9-b3ae-489d-a54e-de3f6bf6a8ee", "user": { "name": "you@example.com", "type": "user" } } ]View your active account details and confirm that the
tenantIdvalue matches the subscription you want to use:$ az account showExample output
{ "environmentName": "AzureCloud", "id": "9bab1460-96d5-40b3-a78e-17b15e978a80", "isDefault": true, "name": "Subscription Name", "state": "Enabled", "tenantId": "6057c7e9-b3ae-489d-a54e-de3f6bf6a8ee",1 "user": { "name": "you@example.com", "type": "user" } }- 1
- Ensure that the value of the
tenantIdparameter is the UUID of the correct subscription.
If you are not using the right subscription, change the active subscription:
$ az account set -s <id>1 - 1
- Substitute the value of the
idfor the subscription that you want to use for<id>.
If you changed the active subscription, display your account information again:
$ az account showExample output
{ "environmentName": "AzureCloud", "id": "33212d16-bdf6-45cb-b038-f6565b61edda", "isDefault": true, "name": "Subscription Name", "state": "Enabled", "tenantId": "8049c7e9-c3de-762d-a54e-dc3f6be6a7ee", "user": { "name": "you@example.com", "type": "user" } }
-
Record the values of the
tenantIdandidparameters from the previous output. You need these values during OpenShift Container Platform installation. Create the service principal for your account:
$ az ad sp create-for-rbac --role Contributor --name <service_principal>1 - 1
- Replace
<service_principal>with the name to assign to the service principal.
Example output
Changing "<service_principal>" to a valid URI of "http://<service_principal>", which is the required format used for service principal names Retrying role assignment creation: 1/36 Retrying role assignment creation: 2/36 Retrying role assignment creation: 3/36 Retrying role assignment creation: 4/36 { "appId": "8bd0d04d-0ac2-43a8-928d-705c598c6956", "displayName": "<service_principal>", "name": "http://<service_principal>", "password": "ac461d78-bf4b-4387-ad16-7e32e328aec6", "tenant": "6048c7e9-b2ad-488d-a54e-dc3f6be6a7ee" }-
Record the values of the
appIdandpasswordparameters from the previous output. You need these values during OpenShift Container Platform installation. Grant additional permissions to the service principal.
-
You must always add the
ContributorandUser Access Administratorroles to the app registration service principal so the cluster can assign credentials for its components. -
To operate the Cloud Credential Operator (CCO) in mint mode, the app registration service principal also requires the
Azure Active Directory Graph/Application.ReadWrite.OwnedByAPI permission. - To operate the CCO in passthrough mode, the app registration service principal does not require additional API permissions.
For more information about CCO modes, see "About the Cloud Credential Operator" in the "Managing cloud provider credentials" section of the Authentication and authorization guide.
To assign the
User Access Administratorrole, run the following command:$ az role assignment create --role "User Access Administrator" \ --assignee-object-id $(az ad sp list --filter "appId eq '<appId>'" \ | jq '.[0].id' -r)1 - 1
- Replace
<appId>with theappIdparameter value for your service principal.
To assign the
Azure Active Directory Graphpermission, run the following command:$ az ad app permission add --id <appId> \1 --api 00000002-0000-0000-c000-000000000000 \ --api-permissions 824c81eb-e3f8-4ee6-8f6d-de7f50d565b7=Role- 1
- Replace
<appId>with theappIdparameter value for your service principal.
Example output
Invoking "az ad app permission grant --id 46d33abc-b8a3-46d8-8c84-f0fd58177435 --api 00000002-0000-0000-c000-000000000000" is needed to make the change effectiveFor more information about the specific permissions that you grant with this command, see the GUID Table for Windows Azure Active Directory Permissions.
Approve the permissions request. If your account does not have the Azure Active Directory tenant administrator role, follow the guidelines for your organization to request that the tenant administrator approve your permissions request.
$ az ad app permission grant --id <appId> \1 --api 00000002-0000-0000-c000-000000000000- 1
- Replace
<appId>with theappIdparameter value for your service principal.
-
You must always add the
5.1.6. Supported Azure regions
The installation program dynamically generates the list of available Microsoft Azure regions based on your subscription.
Supported Azure public regions
-
australiacentral(Australia Central) -
australiaeast(Australia East) -
australiasoutheast(Australia South East) -
brazilsouth(Brazil South) -
canadacentral(Canada Central) -
canadaeast(Canada East) -
centralindia(Central India) -
centralus(Central US) -
eastasia(East Asia) -
eastus(East US) -
eastus2(East US 2) -
francecentral(France Central) -
germanywestcentral(Germany West Central) -
japaneast(Japan East) -
japanwest(Japan West) -
koreacentral(Korea Central) -
koreasouth(Korea South) -
northcentralus(North Central US) -
northeurope(North Europe) -
norwayeast(Norway East) -
southafricanorth(South Africa North) -
southcentralus(South Central US) -
southeastasia(Southeast Asia) -
southindia(South India) -
switzerlandnorth(Switzerland North) -
uaenorth(UAE North) -
uksouth(UK South) -
ukwest(UK West) -
westcentralus(West Central US) -
westeurope(West Europe) -
westindia(West India) -
westus(West US) -
westus2(West US 2)
Supported Azure Government regions
Support for the following Microsoft Azure Government (MAG) regions was added in OpenShift Container Platform version 4.6:
-
usgovtexas(US Gov Texas) -
usgovvirginia(US Gov Virginia)
You can reference all available MAG regions in the Azure documentation. Other provided MAG regions are expected to work with OpenShift Container Platform, but have not been tested.
5.1.7. Next steps
- Install an OpenShift Container Platform cluster on Azure. You can install a customized cluster or quickly install a cluster with default options.
5.2. Manually creating IAM for Azure
In environments where the cloud identity and access management (IAM) APIs are not reachable, or the administrator prefers not to store an administrator-level credential secret in the cluster kube-system namespace, you can put the Cloud Credential Operator (CCO) into manual mode before you install the cluster.
5.2.1. Alternatives to storing administrator-level secrets in the kube-system project
The Cloud Credential Operator (CCO) manages cloud provider credentials as Kubernetes custom resource definitions (CRDs). You can configure the CCO to suit the security requirements of your organization by setting different values for the credentialsMode parameter in the install-config.yaml file.
If you prefer not to store an administrator-level credential secret in the cluster kube-system project, you can set the credentialsMode parameter for the CCO to Manual when installing OpenShift Container Platform and manage your cloud credentials manually.
Using manual mode allows each cluster component to have only the permissions it requires, without storing an administrator-level credential in the cluster. You can also use this mode if your environment does not have connectivity to the cloud provider public IAM endpoint. However, you must manually reconcile permissions with new release images for every upgrade. You must also manually supply credentials for every component that requests them.
5.2.2. Manually create IAM
The Cloud Credential Operator (CCO) can be put into manual mode prior to installation in environments where the cloud identity and access management (IAM) APIs are not reachable, or the administrator prefers not to store an administrator-level credential secret in the cluster kube-system namespace.
Procedure
Change to the directory that contains the installation program and create the
install-config.yamlfile:$ openshift-install create install-config --dir <installation_directory>where
<installation_directory>is the directory in which the installation program creates files.Edit the
install-config.yamlconfiguration file so that it contains thecredentialsModeparameter set toManual.Example
install-config.yamlconfiguration fileapiVersion: v1 baseDomain: cluster1.example.com credentialsMode: Manual1 compute: - architecture: amd64 hyperthreading: Enabled ...- 1
- This line is added to set the
credentialsModeparameter toManual.
To generate the manifests, run the following command from the directory that contains the installation program:
$ openshift-install create manifests --dir <installation_directory>From the directory that contains the installation program, obtain details of the OpenShift Container Platform release image that your
openshift-installbinary is built to use:$ openshift-install versionExample output
release image quay.io/openshift-release-dev/ocp-release:4.y.z-x86_64Locate all
CredentialsRequestobjects in this release image that target the cloud you are deploying on:$ oc adm release extract quay.io/openshift-release-dev/ocp-release:4.y.z-x86_64 --credentials-requests --cloud=azureThis command creates a YAML file for each
CredentialsRequestobject.Sample
CredentialsRequestobjectapiVersion: cloudcredential.openshift.io/v1 kind: CredentialsRequest metadata: labels: controller-tools.k8s.io: "1.0" name: openshift-image-registry-azure namespace: openshift-cloud-credential-operator spec: secretRef: name: installer-cloud-credentials namespace: openshift-image-registry providerSpec: apiVersion: cloudcredential.openshift.io/v1 kind: AzureProviderSpec roleBindings: - role: Contributor-
Create YAML files for secrets in the
openshift-installmanifests directory that you generated previously. The secrets must be stored using the namespace and secret name defined in thespec.secretReffor eachCredentialsRequestobject. The format for the secret data varies for each cloud provider. From the directory that contains the installation program, proceed with your cluster creation:
$ openshift-install create cluster --dir <installation_directory>ImportantBefore upgrading a cluster that uses manually maintained credentials, you must ensure that the CCO is in an upgradeable state. For details, see the "Upgrading clusters with manually maintained credentials" section of the installation content for your cloud provider.
5.2.3. Upgrading clusters with manually maintained credentials
If credentials are added in a future release, the Cloud Credential Operator (CCO) upgradable status for a cluster with manually maintained credentials changes to false. For minor release, for example, from 4.6 to 4.7, this status prevents you from upgrading until you have addressed any updated permissions. For z-stream releases, for example, from 4.6.10 to 4.6.11, the upgrade is not blocked, but the credentials must still be updated for the new release.
Use the Administrator perspective of the web console to determine if the CCO is upgradeable.
- Navigate to Administration → Cluster Settings.
- To view the CCO status details, click cloud-credential in the Cluster Operators list.
-
If the Upgradeable status in the Conditions section is False, examine the
CredentialsRequestcustom resource for the new release and update the manually maintained credentials on your cluster to match before upgrading.
In addition to creating new credentials for the release image that you are upgrading to, you must review the required permissions for existing credentials and accommodate any new permissions requirements for existing components in the new release. The CCO cannot detect these mismatches and will not set upgradable to false in this case.
The "Manually creating IAM" section of the installation content for your cloud provider explains how to obtain and use the credentials required for your cloud.
5.2.4. Mint mode
Mint mode is the default and recommended Cloud Credential Operator (CCO) credentials mode for OpenShift Container Platform. In this mode, the CCO uses the provided administrator-level cloud credential to run the cluster. Mint mode is supported for AWS, GCP, and Azure.
In mint mode, the admin credential is stored in the kube-system namespace and then used by the CCO to process the CredentialsRequest objects in the cluster and create users for each with specific permissions.
The benefits of mint mode include:
- Each cluster component has only the permissions it requires
- Automatic, on-going reconciliation for cloud credentials, including additional credentials or permissions that might be required for upgrades
One drawback is that mint mode requires admin credential storage in a cluster kube-system secret.
5.2.5. Next steps
Install an OpenShift Container Platform cluster:
- Installing a cluster quickly on Azure with default options on installer-provisioned infrastructure
- Install a cluster with cloud customizations on installer-provisioned infrastructure
- Install a cluster with network customizations on installer-provisioned infrastructure
5.3. Installing a cluster quickly on Azure
In OpenShift Container Platform version 4.7, you can install a cluster on Microsoft Azure that uses the default configuration options.
5.3.1. Prerequisites
- Review details about the OpenShift Container Platform installation and update processes.
- Configure an Azure account to host the cluster and determine the tested and validated region to deploy the cluster to.
- If you use a firewall, you must configure it to allow the sites that your cluster requires access to.
- If you do not allow the system to manage identity and access management (IAM), then a cluster administrator can manually create and maintain IAM credentials. Manual mode can also be used in environments where the cloud IAM APIs are not reachable.
5.3.2. Internet access for OpenShift Container Platform
In OpenShift Container Platform 4.7, you require access to the Internet to install your cluster.
You must have Internet access to:
- Access OpenShift Cluster Manager to download the installation program and perform subscription management. If the cluster has internet access and you do not disable Telemetry, that service automatically entitles your cluster.
- Access Quay.io to obtain the packages that are required to install your cluster.
- Obtain the packages that are required to perform cluster updates.
If your cluster cannot have direct Internet access, you can perform a restricted network installation on some types of infrastructure that you provision. During that process, you download the content that is required and use it to populate a mirror registry with the packages that you need to install a cluster and generate the installation program. With some installation types, the environment that you install your cluster in will not require Internet access. Before you update the cluster, you update the content of the mirror registry.
5.3.3. Generating an SSH private key and adding it to the agent
If you want to perform installation debugging or disaster recovery on your cluster, you must provide an SSH key to both your ssh-agent and the installation program. You can use this key to access the bootstrap machine in a public cluster to troubleshoot installation issues.
In a production environment, you require disaster recovery and debugging.
You can use this key to SSH into the master nodes as the user core. When you deploy the cluster, the key is added to the core user’s ~/.ssh/authorized_keys list.
You must use a local key, not one that you configured with platform-specific approaches such as AWS key pairs.
Procedure
If you do not have an SSH key that is configured for password-less authentication on your computer, create one. For example, on a computer that uses a Linux operating system, run the following command:
$ ssh-keygen -t ed25519 -N '' \ -f <path>/<file_name>1 - 1
- Specify the path and file name, such as
~/.ssh/id_rsa, of the new SSH key. If you have an existing key pair, ensure your public key is in the your~/.sshdirectory.
Running this command generates an SSH key that does not require a password in the location that you specified.
NoteIf you plan to install an OpenShift Container Platform cluster that uses FIPS Validated / Modules in Process cryptographic libraries on the
x86_64architecture, do not create a key that uses theed25519algorithm. Instead, create a key that uses thersaorecdsaalgorithm.Start the
ssh-agentprocess as a background task:$ eval "$(ssh-agent -s)"Example output
Agent pid 31874NoteIf your cluster is in FIPS mode, only use FIPS-compliant algorithms to generate the SSH key. The key must be either RSA or ECDSA.
Add your SSH private key to the
ssh-agent:$ ssh-add <path>/<file_name>1 Example output
Identity added: /home/<you>/<path>/<file_name> (<computer_name>)- 1
- Specify the path and file name for your SSH private key, such as
~/.ssh/id_rsa
Next steps
- When you install OpenShift Container Platform, provide the SSH public key to the installation program.
5.3.4. Obtaining the installation program
Before you install OpenShift Container Platform, download the installation file on a local computer.
Prerequisites
- You have a computer that runs Linux or macOS, with 500 MB of local disk space
Procedure
- Access the Infrastructure Provider page on the OpenShift Cluster Manager site. If you have a Red Hat account, log in with your credentials. If you do not, create an account.
- Select your infrastructure provider.
Navigate to the page for your installation type, download the installation program for your operating system, and place the file in the directory where you will store the installation configuration files.
ImportantThe installation program creates several files on the computer that you use to install your cluster. You must keep the installation program and the files that the installation program creates after you finish installing the cluster. Both files are required to delete the cluster.
ImportantDeleting the files created by the installation program does not remove your cluster, even if the cluster failed during installation. To remove your cluster, complete the OpenShift Container Platform uninstallation procedures for your specific cloud provider.
Extract the installation program. For example, on a computer that uses a Linux operating system, run the following command:
$ tar xvf openshift-install-linux.tar.gz- Download your installation pull secret from the Red Hat OpenShift Cluster Manager. This pull secret allows you to authenticate with the services that are provided by the included authorities, including Quay.io, which serves the container images for OpenShift Container Platform components.
5.3.5. Deploying the cluster
You can install OpenShift Container Platform on a compatible cloud platform.
You can run the create cluster command of the installation program only once, during initial installation.
Prerequisites
- Configure an account with the cloud platform that hosts your cluster.
- Obtain the OpenShift Container Platform installation program and the pull secret for your cluster.
Procedure
Change to the directory that contains the installation program and initialize the cluster deployment:
$ ./openshift-install create cluster --dir <installation_directory> \1 --log-level=info2 ImportantSpecify an empty directory. Some installation assets, like bootstrap X.509 certificates have short expiration intervals, so you must not reuse an installation directory. If you want to reuse individual files from another cluster installation, you can copy them into your directory. However, the file names for the installation assets might change between releases. Use caution when copying installation files from an earlier OpenShift Container Platform version.
Provide values at the prompts:
Optional: Select an SSH key to use to access your cluster machines.
NoteFor production OpenShift Container Platform clusters on which you want to perform installation debugging or disaster recovery, specify an SSH key that your
ssh-agentprocess uses.- Select azure as the platform to target.
If you do not have a Microsoft Azure profile stored on your computer, specify the following Azure parameter values for your subscription and service principal:
-
azure subscription id: The subscription ID to use for the cluster. Specify the
idvalue in your account output. -
azure tenant id: The tenant ID. Specify the
tenantIdvalue in your account output. -
azure service principal client id: The value of the
appIdparameter for the service principal. -
azure service principal client secret: The value of the
passwordparameter for the service principal.
-
azure subscription id: The subscription ID to use for the cluster. Specify the
- Select the region to deploy the cluster to.
- Select the base domain to deploy the cluster to. The base domain corresponds to the Azure DNS Zone that you created for your cluster.
Enter a descriptive name for your cluster.
ImportantAll Azure resources that are available through public endpoints are subject to resource name restrictions, and you cannot create resources that use certain terms. For a list of terms that Azure restricts, see Resolve reserved resource name errors in the Azure documentation.
- Paste the pull secret from the Red Hat OpenShift Cluster Manager.
NoteIf the cloud provider account that you configured on your host does not have sufficient permissions to deploy the cluster, the installation process stops, and the missing permissions are displayed.
When the cluster deployment completes, directions for accessing your cluster, including a link to its web console and credentials for the
kubeadminuser, display in your terminal.Example output
... INFO Install complete! INFO To access the cluster as the system:admin user when using 'oc', run 'export KUBECONFIG=/home/myuser/install_dir/auth/kubeconfig' INFO Access the OpenShift web-console here: https://console-openshift-console.apps.mycluster.example.com INFO Login to the console with user: "kubeadmin", and password: "4vYBz-Ee6gm-ymBZj-Wt5AL" INFO Time elapsed: 36m22sNoteThe cluster access and credential information also outputs to
<installation_directory>/.openshift_install.logwhen an installation succeeds.Important-
The Ignition config files that the installation program generates contain certificates that expire after 24 hours, which are then renewed at that time. If the cluster is shut down before renewing the certificates and the cluster is later restarted after the 24 hours have elapsed, the cluster automatically recovers the expired certificates. The exception is that you must manually approve the pending
node-bootstrappercertificate signing requests (CSRs) to recover kubelet certificates. See the documentation for Recovering from expired control plane certificates for more information. - It is recommended that you use Ignition config files within 12 hours after they are generated because the 24-hour certificate rotates from 16 to 22 hours after the cluster is installed. By using the Ignition config files within 12 hours, you can avoid installation failure if the certificate update runs during installation.
ImportantYou must not delete the installation program or the files that the installation program creates. Both are required to delete the cluster.
5.3.6. Installing the OpenShift CLI by downloading the binary
You can install the OpenShift CLI (oc) to interact with OpenShift Container Platform from a command-line interface. You can install oc on Linux, Windows, or macOS.
If you installed an earlier version of oc, you cannot use it to complete all of the commands in OpenShift Container Platform 4.7. Download and install the new version of oc.
5.3.6.1. Installing the OpenShift CLI on Linux
You can install the OpenShift CLI (oc) binary on Linux by using the following procedure.
Procedure
- Navigate to the OpenShift Container Platform downloads page on the Red Hat Customer Portal.
- Select the appropriate version in the Version drop-down menu.
- Click Download Now next to the OpenShift v4.7 Linux Client entry and save the file.
Unpack the archive:
$ tar xvzf <file>Place the
ocbinary in a directory that is on yourPATH.To check your
PATH, execute the following command:$ echo $PATH
After you install the OpenShift CLI, it is available using the oc command:
$ oc <command>5.3.6.2. Installing the OpenShift CLI on Windows
You can install the OpenShift CLI (oc) binary on Windows by using the following procedure.
Procedure
- Navigate to the OpenShift Container Platform downloads page on the Red Hat Customer Portal.
- Select the appropriate version in the Version drop-down menu.
- Click Download Now next to the OpenShift v4.7 Windows Client entry and save the file.
- Unzip the archive with a ZIP program.
Move the
ocbinary to a directory that is on yourPATH.To check your
PATH, open the command prompt and execute the following command:C:\> path
After you install the OpenShift CLI, it is available using the oc command:
C:\> oc <command>5.3.6.3. Installing the OpenShift CLI on macOS
You can install the OpenShift CLI (oc) binary on macOS by using the following procedure.
Procedure
- Navigate to the OpenShift Container Platform downloads page on the Red Hat Customer Portal.
- Select the appropriate version in the Version drop-down menu.
- Click Download Now next to the OpenShift v4.7 MacOSX Client entry and save the file.
- Unpack and unzip the archive.
Move the
ocbinary to a directory on your PATH.To check your
PATH, open a terminal and execute the following command:$ echo $PATH
After you install the OpenShift CLI, it is available using the oc command:
$ oc <command>5.3.7. Logging in to the cluster by using the CLI
You can log in to your cluster as a default system user by exporting the cluster kubeconfig file. The kubeconfig file contains information about the cluster that is used by the CLI to connect a client to the correct cluster and API server. The file is specific to a cluster and is created during OpenShift Container Platform installation.
Prerequisites
- You deployed an OpenShift Container Platform cluster.
-
You installed the
ocCLI.
Procedure
Export the
kubeadmincredentials:$ export KUBECONFIG=<installation_directory>/auth/kubeconfig1 - 1
- For
<installation_directory>, specify the path to the directory that you stored the installation files in.
Verify you can run
occommands successfully using the exported configuration:$ oc whoamiExample output
system:admin
5.3.8. Telemetry access for OpenShift Container Platform
In OpenShift Container Platform 4.7, the Telemetry service, which runs by default to provide metrics about cluster health and the success of updates, requires internet access. If your cluster is connected to the internet, Telemetry runs automatically, and your cluster is registered to OpenShift Cluster Manager.
After you confirm that your OpenShift Cluster Manager inventory is correct, either maintained automatically by Telemetry or manually by using OpenShift Cluster Manager, use subscription watch to track your OpenShift Container Platform subscriptions at the account or multi-cluster level.
5.3.9. Next steps
- Customize your cluster.
- If necessary, you can opt out of remote health reporting.
5.4. Installing a cluster on Azure with customizations
In OpenShift Container Platform version 4.7, you can install a customized cluster on infrastructure that the installation program provisions on Microsoft Azure. To customize the installation, you modify parameters in the install-config.yaml file before you install the cluster.
5.4.1. Prerequisites
- Review details about the OpenShift Container Platform installation and update processes.
- Configure an Azure account to host the cluster and determine the tested and validated region to deploy the cluster to.
- If you use a firewall, you must configure it to allow the sites that your cluster requires access to.
- If you do not allow the system to manage identity and access management (IAM), then a cluster administrator can manually create and maintain IAM credentials. Manual mode can also be used in environments where the cloud IAM APIs are not reachable.
5.4.2. Internet access for OpenShift Container Platform
In OpenShift Container Platform 4.7, you require access to the Internet to install your cluster.
You must have Internet access to:
- Access OpenShift Cluster Manager to download the installation program and perform subscription management. If the cluster has internet access and you do not disable Telemetry, that service automatically entitles your cluster.
- Access Quay.io to obtain the packages that are required to install your cluster.
- Obtain the packages that are required to perform cluster updates.
If your cluster cannot have direct Internet access, you can perform a restricted network installation on some types of infrastructure that you provision. During that process, you download the content that is required and use it to populate a mirror registry with the packages that you need to install a cluster and generate the installation program. With some installation types, the environment that you install your cluster in will not require Internet access. Before you update the cluster, you update the content of the mirror registry.
5.4.3. Generating an SSH private key and adding it to the agent
If you want to perform installation debugging or disaster recovery on your cluster, you must provide an SSH key to both your ssh-agent and the installation program. You can use this key to access the bootstrap machine in a public cluster to troubleshoot installation issues.
In a production environment, you require disaster recovery and debugging.
You can use this key to SSH into the master nodes as the user core. When you deploy the cluster, the key is added to the core user’s ~/.ssh/authorized_keys list.
You must use a local key, not one that you configured with platform-specific approaches such as AWS key pairs.
Procedure
If you do not have an SSH key that is configured for password-less authentication on your computer, create one. For example, on a computer that uses a Linux operating system, run the following command:
$ ssh-keygen -t ed25519 -N '' \ -f <path>/<file_name>1 - 1
- Specify the path and file name, such as
~/.ssh/id_rsa, of the new SSH key. If you have an existing key pair, ensure your public key is in the your~/.sshdirectory.
Running this command generates an SSH key that does not require a password in the location that you specified.
NoteIf you plan to install an OpenShift Container Platform cluster that uses FIPS Validated / Modules in Process cryptographic libraries on the
x86_64architecture, do not create a key that uses theed25519algorithm. Instead, create a key that uses thersaorecdsaalgorithm.Start the
ssh-agentprocess as a background task:$ eval "$(ssh-agent -s)"Example output
Agent pid 31874NoteIf your cluster is in FIPS mode, only use FIPS-compliant algorithms to generate the SSH key. The key must be either RSA or ECDSA.
Add your SSH private key to the
ssh-agent:$ ssh-add <path>/<file_name>1 Example output
Identity added: /home/<you>/<path>/<file_name> (<computer_name>)- 1
- Specify the path and file name for your SSH private key, such as
~/.ssh/id_rsa
Next steps
- When you install OpenShift Container Platform, provide the SSH public key to the installation program.
5.4.4. Obtaining the installation program
Before you install OpenShift Container Platform, download the installation file on a local computer.
Prerequisites
- You have a computer that runs Linux or macOS, with 500 MB of local disk space
Procedure
- Access the Infrastructure Provider page on the OpenShift Cluster Manager site. If you have a Red Hat account, log in with your credentials. If you do not, create an account.
- Select your infrastructure provider.
Navigate to the page for your installation type, download the installation program for your operating system, and place the file in the directory where you will store the installation configuration files.
ImportantThe installation program creates several files on the computer that you use to install your cluster. You must keep the installation program and the files that the installation program creates after you finish installing the cluster. Both files are required to delete the cluster.
ImportantDeleting the files created by the installation program does not remove your cluster, even if the cluster failed during installation. To remove your cluster, complete the OpenShift Container Platform uninstallation procedures for your specific cloud provider.
Extract the installation program. For example, on a computer that uses a Linux operating system, run the following command:
$ tar xvf openshift-install-linux.tar.gz- Download your installation pull secret from the Red Hat OpenShift Cluster Manager. This pull secret allows you to authenticate with the services that are provided by the included authorities, including Quay.io, which serves the container images for OpenShift Container Platform components.
5.4.5. Creating the installation configuration file
You can customize the OpenShift Container Platform cluster you install on Microsoft Azure.
Prerequisites
- Obtain the OpenShift Container Platform installation program and the pull secret for your cluster.
- Obtain service principal permissions at the subscription level.
Procedure
Create the
install-config.yamlfile.Change to the directory that contains the installation program and run the following command:
$ ./openshift-install create install-config --dir <installation_directory>1 - 1
- For
<installation_directory>, specify the directory name to store the files that the installation program creates.
ImportantSpecify an empty directory. Some installation assets, like bootstrap X.509 certificates have short expiration intervals, so you must not reuse an installation directory. If you want to reuse individual files from another cluster installation, you can copy them into your directory. However, the file names for the installation assets might change between releases. Use caution when copying installation files from an earlier OpenShift Container Platform version.
At the prompts, provide the configuration details for your cloud:
Optional: Select an SSH key to use to access your cluster machines.
NoteFor production OpenShift Container Platform clusters on which you want to perform installation debugging or disaster recovery, specify an SSH key that your
ssh-agentprocess uses.- Select azure as the platform to target.
If you do not have a Microsoft Azure profile stored on your computer, specify the following Azure parameter values for your subscription and service principal:
-
azure subscription id: The subscription ID to use for the cluster. Specify the
idvalue in your account output. -
azure tenant id: The tenant ID. Specify the
tenantIdvalue in your account output. -
azure service principal client id: The value of the
appIdparameter for the service principal. -
azure service principal client secret: The value of the
passwordparameter for the service principal.
-
azure subscription id: The subscription ID to use for the cluster. Specify the
- Select the region to deploy the cluster to.
- Select the base domain to deploy the cluster to. The base domain corresponds to the Azure DNS Zone that you created for your cluster.
Enter a descriptive name for your cluster.
ImportantAll Azure resources that are available through public endpoints are subject to resource name restrictions, and you cannot create resources that use certain terms. For a list of terms that Azure restricts, see Resolve reserved resource name errors in the Azure documentation.
- Paste the pull secret from the Red Hat OpenShift Cluster Manager.
-
Modify the
install-config.yamlfile. You can find more information about the available parameters in the "Installation configuration parameters" section. Back up the
install-config.yamlfile so that you can use it to install multiple clusters.ImportantThe
install-config.yamlfile is consumed during the installation process. If you want to reuse the file, you must back it up now.
5.4.5.1. Installation configuration parameters
Before you deploy an OpenShift Container Platform cluster, you provide parameter values to describe your account on the cloud platform that hosts your cluster and optionally customize your cluster’s platform. When you create the install-config.yaml installation configuration file, you provide values for the required parameters through the command line. If you customize your cluster, you can modify the install-config.yaml file to provide more details about the platform.
After installation, you cannot modify these parameters in the install-config.yaml file.
The openshift-install command does not validate field names for parameters. If an incorrect name is specified, the related file or object is not created, and no error is reported. Ensure that the field names for any parameters that are specified are correct.
5.4.5.1.1. Required configuration parameters
Required installation configuration parameters are described in the following table:
| Parameter | Description | Values |
|---|---|---|
|
|
The API version for the | String |
|
|
The base domain of your cloud provider. The base domain is used to create routes to your OpenShift Container Platform cluster components. The full DNS name for your cluster is a combination of the |
A fully-qualified domain or subdomain name, such as |
|
|
Kubernetes resource | Object |
|
|
The name of the cluster. DNS records for the cluster are all subdomains of |
String of lowercase letters, hyphens ( |
|
|
The configuration for the specific platform upon which to perform the installation: | Object |
|
| Get a pull secret from the Red Hat OpenShift Cluster Manager to authenticate downloading container images for OpenShift Container Platform components from services such as Quay.io. |
|
5.4.5.1.2. Network configuration parameters
You can customize your installation configuration based on the requirements of your existing network infrastructure. For example, you can expand the IP address block for the cluster network or provide different IP address blocks than the defaults.
Only IPv4 addresses are supported.
| Parameter | Description | Values |
|---|---|---|
|
| The configuration for the cluster network. | Object Note
You cannot modify parameters specified by the |
|
| The cluster network provider Container Network Interface (CNI) plug-in to install. |
Either |
|
| The IP address blocks for pods.
The default value is If you specify multiple IP address blocks, the blocks must not overlap. | An array of objects. For example: |
|
|
Required if you use An IPv4 network. |
An IP address block in Classless Inter-Domain Routing (CIDR) notation. The prefix length for an IPv4 block is between |
|
|
The subnet prefix length to assign to each individual node. For example, if | A subnet prefix.
The default value is |
|
|
The IP address block for services. The default value is The OpenShift SDN and OVN-Kubernetes network providers support only a single IP address block for the service network. | An array with an IP address block in CIDR format. For example: |
|
| The IP address blocks for machines. If you specify multiple IP address blocks, the blocks must not overlap. | An array of objects. For example: |
|
|
Required if you use | An IP network block in CIDR notation.
For example, Note
Set the |
5.4.5.1.3. Optional configuration parameters
Optional installation configuration parameters are described in the following table:
| Parameter | Description | Values |
|---|---|---|
|
| A PEM-encoded X.509 certificate bundle that is added to the nodes' trusted certificate store. This trust bundle may also be used when a proxy has been configured. | String |
|
| The configuration for the machines that comprise the compute nodes. |
Array of |
|
|
Determines the instruction set architecture of the machines in the pool. Currently, heteregeneous clusters are not supported, so all pools must specify the same architecture. Valid values are | String |
|
|
Whether to enable or disable simultaneous multithreading, or Important If you disable simultaneous multithreading, ensure that your capacity planning accounts for the dramatically decreased machine performance. |
|
|
|
Required if you use |
|
|
|
Required if you use |
|
|
| The number of compute machines, which are also known as worker machines, to provision. |
A positive integer greater than or equal to |
|
| The configuration for the machines that comprise the control plane. |
Array of |
|
|
Determines the instruction set architecture of the machines in the pool. Currently, heterogeneous clusters are not supported, so all pools must specify the same architecture. Valid values are | String |
|
|
Whether to enable or disable simultaneous multithreading, or Important If you disable simultaneous multithreading, ensure that your capacity planning accounts for the dramatically decreased machine performance. |
|
|
|
Required if you use |
|
|
|
Required if you use |
|
|
| The number of control plane machines to provision. |
The only supported value is |
|
| The Cloud Credential Operator (CCO) mode. If no mode is specified, the CCO dynamically tries to determine the capabilities of the provided credentials, with a preference for mint mode on the platforms where multiple modes are supported. Note Not all CCO modes are supported for all cloud providers. For more information on CCO modes, see the Cloud Credential Operator entry in the Cluster Operators reference content. |
|
|
|
Enable or disable FIPS mode. The default is Important
The use of FIPS Validated / Modules in Process cryptographic libraries is only supported on OpenShift Container Platform deployments on the Note If you are using Azure File storage, you cannot enable FIPS mode. |
|
|
| Sources and repositories for the release-image content. |
Array of objects. Includes a |
|
|
Required if you use | String |
|
| Specify one or more repositories that may also contain the same images. | Array of strings |
|
| How to publish or expose the user-facing endpoints of your cluster, such as the Kubernetes API, OpenShift routes. |
|
|
| The SSH key or keys to authenticate access your cluster machines. Note
For production OpenShift Container Platform clusters on which you want to perform installation debugging or disaster recovery, specify an SSH key that your | One or more keys. For example: |
5.4.5.1.4. Additional Azure configuration parameters
Additional Azure configuration parameters are described in the following table:
| Parameter | Description | Values |
|---|---|---|
|
| The Azure disk size for the VM. |
Integer that represents the size of the disk in GB. The default is |
|
| Defines the type of disk. |
|
|
| The Azure disk size for the VM. |
Integer that represents the size of the disk in GB. The default is |
|
| Defines the type of disk. |
|
|
| The name of the resource group that contains the DNS zone for your base domain. |
String, for example |
|
| The outbound routing strategy used to connect your cluster to the internet. If you are using user-defined routing, you must have pre-existing networking available where the outbound routing has already been configured prior to installing a cluster. The installation program is not responsible for configuring user-defined routing. |
|
|
| The name of the Azure region that hosts your cluster. |
Any valid region name, such as |
|
| List of availability zones to place machines in. For high availability, specify at least two zones. |
List of zones, for example |
|
|
The name of the resource group that contains the existing VNet that you want to deploy your cluster to. This name cannot be the same as the | String. |
|
| The name of the existing VNet that you want to deploy your cluster to. | String. |
|
| The name of the existing subnet in your VNet that you want to deploy your control plane machines to. |
Valid CIDR, for example |
|
| The name of the existing subnet in your VNet that you want to deploy your compute machines to. |
Valid CIDR, for example |
|
|
The name of the Azure cloud environment that is used to configure the Azure SDK with the appropriate Azure API endpoints. If empty, the default value |
Any valid cloud environment, such as |
You cannot customize Azure Availability Zones or Use tags to organize your Azure resources with an Azure cluster.
5.4.5.2. Sample customized install-config.yaml file for Azure
You can customize the install-config.yaml file to specify more details about your OpenShift Container Platform cluster’s platform or modify the values of the required parameters.
This sample YAML file is provided for reference only. You must obtain your install-config.yaml file by using the installation program and modify it.
apiVersion: v1
baseDomain: example.com
controlPlane:
hyperthreading: Enabled
name: master
platform:
azure:
osDisk:
diskSizeGB: 1024
diskType: Premium_LRS
type: Standard_D8s_v3
replicas: 3
compute:
- hyperthreading: Enabled
name: worker
platform:
azure:
type: Standard_D2s_v3
osDisk:
diskSizeGB: 512
diskType: Standard_LRS
zones:
- "1"
- "2"
- "3"
replicas: 5
metadata:
name: test-cluster
networking:
clusterNetwork:
- cidr: 10.128.0.0/14
hostPrefix: 23
machineNetwork:
- cidr: 10.0.0.0/16
networkType: OpenShiftSDN
serviceNetwork:
- 172.30.0.0/16
platform:
azure:
region: centralus
baseDomainResourceGroupName: resource_group
cloudName: AzurePublicCloud
pullSecret: '{"auths": ...}'
fips: false
sshKey: ssh-ed25519 AAAA... - 1 10 11 13
- Required. The installation program prompts you for this value.
- 2 6
- If you do not provide these parameters and values, the installation program provides the default value.
- 3 7
- The
controlPlanesection is a single mapping, but thecomputesection is a sequence of mappings. To meet the requirements of the different data structures, the first line of thecomputesection must begin with a hyphen,-, and the first line of thecontrolPlanesection must not. Only one control plane pool is used. - 4
- Whether to enable or disable simultaneous multithreading, or
hyperthreading. By default, simultaneous multithreading is enabled to increase the performance of your machines' cores. You can disable it by setting the parameter value toDisabled. If you disable simultaneous multithreading in some cluster machines, you must disable it in all cluster machines.ImportantIf you disable simultaneous multithreading, ensure that your capacity planning accounts for the dramatically decreased machine performance. Use larger virtual machine types, such as
Standard_D8s_v3, for your machines if you disable simultaneous multithreading. - 5 8
- You can specify the size of the disk to use in GB. Minimum recommendation for control plane nodes (also known as the master nodes) is 1024 GB.
- 9
- Specify a list of zones to deploy your machines to. For high availability, specify at least two zones.
- 12
- Specify the name of the resource group that contains the DNS zone for your base domain.
- 14
- Whether to enable or disable FIPS mode. By default, FIPS mode is not enabled. If FIPS mode is enabled, the Red Hat Enterprise Linux CoreOS (RHCOS) machines that OpenShift Container Platform runs on bypass the default Kubernetes cryptography suite and use the cryptography modules that are provided with RHCOS instead.Important
The use of FIPS Validated / Modules in Process cryptographic libraries is only supported on OpenShift Container Platform deployments on the
x86_64architecture. - 15
- You can optionally provide the
sshKeyvalue that you use to access the machines in your cluster.NoteFor production OpenShift Container Platform clusters on which you want to perform installation debugging or disaster recovery, specify an SSH key that your
ssh-agentprocess uses.
5.4.5.3. Configuring the cluster-wide proxy during installation
Production environments can deny direct access to the Internet and instead have an HTTP or HTTPS proxy available. You can configure a new OpenShift Container Platform cluster to use a proxy by configuring the proxy settings in the install-config.yaml file.
Prerequisites
-
You have an existing
install-config.yamlfile. You reviewed the sites that your cluster requires access to and determined whether any of them need to bypass the proxy. By default, all cluster egress traffic is proxied, including calls to hosting cloud provider APIs. You added sites to the
Proxyobject’sspec.noProxyfield to bypass the proxy if necessary.NoteThe
Proxyobjectstatus.noProxyfield is populated with the values of thenetworking.machineNetwork[].cidr,networking.clusterNetwork[].cidr, andnetworking.serviceNetwork[]fields from your installation configuration.For installations on Amazon Web Services (AWS), Google Cloud Platform (GCP), Microsoft Azure, and Red Hat OpenStack Platform (RHOSP), the
Proxyobjectstatus.noProxyfield is also populated with the instance metadata endpoint (169.254.169.254).
Procedure
Edit your
install-config.yamlfile and add the proxy settings. For example:apiVersion: v1 baseDomain: my.domain.com proxy: httpProxy: http://<username>:<pswd>@<ip>:<port>1 httpsProxy: https://<username>:<pswd>@<ip>:<port>2 noProxy: example.com3 additionalTrustBundle: |4 -----BEGIN CERTIFICATE----- <MY_TRUSTED_CA_CERT> -----END CERTIFICATE----- ...- 1
- A proxy URL to use for creating HTTP connections outside the cluster. The URL scheme must be
http. - 2
- A proxy URL to use for creating HTTPS connections outside the cluster.
- 3
- A comma-separated list of destination domain names, IP addresses, or other network CIDRs to exclude from proxying. Preface a domain with
.to match subdomains only. For example,.y.commatchesx.y.com, but noty.com. Use*to bypass the proxy for all destinations. - 4
- If provided, the installation program generates a config map that is named
user-ca-bundlein theopenshift-confignamespace to hold the additional CA certificates. If you provideadditionalTrustBundleand at least one proxy setting, theProxyobject is configured to reference theuser-ca-bundleconfig map in thetrustedCAfield. The Cluster Network Operator then creates atrusted-ca-bundleconfig map that merges the contents specified for thetrustedCAparameter with the RHCOS trust bundle. TheadditionalTrustBundlefield is required unless the proxy’s identity certificate is signed by an authority from the RHCOS trust bundle.
NoteThe installation program does not support the proxy
readinessEndpointsfield.- Save the file and reference it when installing OpenShift Container Platform.
The installation program creates a cluster-wide proxy that is named cluster that uses the proxy settings in the provided install-config.yaml file. If no proxy settings are provided, a cluster Proxy object is still created, but it will have a nil spec.
Only the Proxy object named cluster is supported, and no additional proxies can be created.
5.4.6. Deploying the cluster
You can install OpenShift Container Platform on a compatible cloud platform.
You can run the create cluster command of the installation program only once, during initial installation.
Prerequisites
- Configure an account with the cloud platform that hosts your cluster.
- Obtain the OpenShift Container Platform installation program and the pull secret for your cluster.
Procedure
Change to the directory that contains the installation program and initialize the cluster deployment:
$ ./openshift-install create cluster --dir <installation_directory> \1 --log-level=info2 NoteIf the cloud provider account that you configured on your host does not have sufficient permissions to deploy the cluster, the installation process stops, and the missing permissions are displayed.
When the cluster deployment completes, directions for accessing your cluster, including a link to its web console and credentials for the
kubeadminuser, display in your terminal.Example output
... INFO Install complete! INFO To access the cluster as the system:admin user when using 'oc', run 'export KUBECONFIG=/home/myuser/install_dir/auth/kubeconfig' INFO Access the OpenShift web-console here: https://console-openshift-console.apps.mycluster.example.com INFO Login to the console with user: "kubeadmin", and password: "4vYBz-Ee6gm-ymBZj-Wt5AL" INFO Time elapsed: 36m22sNoteThe cluster access and credential information also outputs to
<installation_directory>/.openshift_install.logwhen an installation succeeds.Important-
The Ignition config files that the installation program generates contain certificates that expire after 24 hours, which are then renewed at that time. If the cluster is shut down before renewing the certificates and the cluster is later restarted after the 24 hours have elapsed, the cluster automatically recovers the expired certificates. The exception is that you must manually approve the pending
node-bootstrappercertificate signing requests (CSRs) to recover kubelet certificates. See the documentation for Recovering from expired control plane certificates for more information. - It is recommended that you use Ignition config files within 12 hours after they are generated because the 24-hour certificate rotates from 16 to 22 hours after the cluster is installed. By using the Ignition config files within 12 hours, you can avoid installation failure if the certificate update runs during installation.
ImportantYou must not delete the installation program or the files that the installation program creates. Both are required to delete the cluster.
-
The Ignition config files that the installation program generates contain certificates that expire after 24 hours, which are then renewed at that time. If the cluster is shut down before renewing the certificates and the cluster is later restarted after the 24 hours have elapsed, the cluster automatically recovers the expired certificates. The exception is that you must manually approve the pending
5.4.7. Installing the OpenShift CLI by downloading the binary
You can install the OpenShift CLI (oc) to interact with OpenShift Container Platform from a command-line interface. You can install oc on Linux, Windows, or macOS.
If you installed an earlier version of oc, you cannot use it to complete all of the commands in OpenShift Container Platform 4.7. Download and install the new version of oc.
5.4.7.1. Installing the OpenShift CLI on Linux
You can install the OpenShift CLI (oc) binary on Linux by using the following procedure.
Procedure
- Navigate to the OpenShift Container Platform downloads page on the Red Hat Customer Portal.
- Select the appropriate version in the Version drop-down menu.
- Click Download Now next to the OpenShift v4.7 Linux Client entry and save the file.
Unpack the archive:
$ tar xvzf <file>Place the
ocbinary in a directory that is on yourPATH.To check your
PATH, execute the following command:$ echo $PATH
After you install the OpenShift CLI, it is available using the oc command:
$ oc <command>5.4.7.2. Installing the OpenShift CLI on Windows
You can install the OpenShift CLI (oc) binary on Windows by using the following procedure.
Procedure
- Navigate to the OpenShift Container Platform downloads page on the Red Hat Customer Portal.
- Select the appropriate version in the Version drop-down menu.
- Click Download Now next to the OpenShift v4.7 Windows Client entry and save the file.
- Unzip the archive with a ZIP program.
Move the
ocbinary to a directory that is on yourPATH.To check your
PATH, open the command prompt and execute the following command:C:\> path
After you install the OpenShift CLI, it is available using the oc command:
C:\> oc <command>5.4.7.3. Installing the OpenShift CLI on macOS
You can install the OpenShift CLI (oc) binary on macOS by using the following procedure.
Procedure
- Navigate to the OpenShift Container Platform downloads page on the Red Hat Customer Portal.
- Select the appropriate version in the Version drop-down menu.
- Click Download Now next to the OpenShift v4.7 MacOSX Client entry and save the file.
- Unpack and unzip the archive.
Move the
ocbinary to a directory on your PATH.To check your
PATH, open a terminal and execute the following command:$ echo $PATH
After you install the OpenShift CLI, it is available using the oc command:
$ oc <command>5.4.8. Logging in to the cluster by using the CLI
You can log in to your cluster as a default system user by exporting the cluster kubeconfig file. The kubeconfig file contains information about the cluster that is used by the CLI to connect a client to the correct cluster and API server. The file is specific to a cluster and is created during OpenShift Container Platform installation.
Prerequisites
- You deployed an OpenShift Container Platform cluster.
-
You installed the
ocCLI.
Procedure
Export the
kubeadmincredentials:$ export KUBECONFIG=<installation_directory>/auth/kubeconfig1 - 1
- For
<installation_directory>, specify the path to the directory that you stored the installation files in.
Verify you can run
occommands successfully using the exported configuration:$ oc whoamiExample output
system:admin
5.4.9. Telemetry access for OpenShift Container Platform
In OpenShift Container Platform 4.7, the Telemetry service, which runs by default to provide metrics about cluster health and the success of updates, requires internet access. If your cluster is connected to the internet, Telemetry runs automatically, and your cluster is registered to OpenShift Cluster Manager.
After you confirm that your OpenShift Cluster Manager inventory is correct, either maintained automatically by Telemetry or manually by using OpenShift Cluster Manager, use subscription watch to track your OpenShift Container Platform subscriptions at the account or multi-cluster level.
5.4.10. Next steps
- Customize your cluster.
- If necessary, you can opt out of remote health reporting.
5.5. Installing a cluster on Azure with network customizations
In OpenShift Container Platform version 4.7, you can install a cluster with a customized network configuration on infrastructure that the installation program provisions on Microsoft Azure. By customizing your network configuration, your cluster can coexist with existing IP address allocations in your environment and integrate with existing MTU and VXLAN configurations.
You must set most of the network configuration parameters during installation, and you can modify only kubeProxy configuration parameters in a running cluster.
5.5.1. Prerequisites
- Review details about the OpenShift Container Platform installation and update processes.
- Configure an Azure account to host the cluster and determine the tested and validated region to deploy the cluster to.
- If you use a firewall, you must configure it to allow the sites that your cluster requires access to.
- If you do not allow the system to manage identity and access management (IAM), then a cluster administrator can manually create and maintain IAM credentials. Manual mode can also be used in environments where the cloud IAM APIs are not reachable.
5.5.2. Internet access for OpenShift Container Platform
In OpenShift Container Platform 4.7, you require access to the Internet to install your cluster.
You must have Internet access to:
- Access OpenShift Cluster Manager to download the installation program and perform subscription management. If the cluster has internet access and you do not disable Telemetry, that service automatically entitles your cluster.
- Access Quay.io to obtain the packages that are required to install your cluster.
- Obtain the packages that are required to perform cluster updates.
If your cluster cannot have direct Internet access, you can perform a restricted network installation on some types of infrastructure that you provision. During that process, you download the content that is required and use it to populate a mirror registry with the packages that you need to install a cluster and generate the installation program. With some installation types, the environment that you install your cluster in will not require Internet access. Before you update the cluster, you update the content of the mirror registry.
5.5.3. Generating an SSH private key and adding it to the agent
If you want to perform installation debugging or disaster recovery on your cluster, you must provide an SSH key to both your ssh-agent and the installation program. You can use this key to access the bootstrap machine in a public cluster to troubleshoot installation issues.
In a production environment, you require disaster recovery and debugging.
You can use this key to SSH into the master nodes as the user core. When you deploy the cluster, the key is added to the core user’s ~/.ssh/authorized_keys list.
You must use a local key, not one that you configured with platform-specific approaches such as AWS key pairs.
Procedure
If you do not have an SSH key that is configured for password-less authentication on your computer, create one. For example, on a computer that uses a Linux operating system, run the following command:
$ ssh-keygen -t ed25519 -N '' \ -f <path>/<file_name>1 - 1
- Specify the path and file name, such as
~/.ssh/id_rsa, of the new SSH key. If you have an existing key pair, ensure your public key is in the your~/.sshdirectory.
Running this command generates an SSH key that does not require a password in the location that you specified.
NoteIf you plan to install an OpenShift Container Platform cluster that uses FIPS Validated / Modules in Process cryptographic libraries on the
x86_64architecture, do not create a key that uses theed25519algorithm. Instead, create a key that uses thersaorecdsaalgorithm.Start the
ssh-agentprocess as a background task:$ eval "$(ssh-agent -s)"Example output
Agent pid 31874NoteIf your cluster is in FIPS mode, only use FIPS-compliant algorithms to generate the SSH key. The key must be either RSA or ECDSA.
Add your SSH private key to the
ssh-agent:$ ssh-add <path>/<file_name>1 Example output
Identity added: /home/<you>/<path>/<file_name> (<computer_name>)- 1
- Specify the path and file name for your SSH private key, such as
~/.ssh/id_rsa
Next steps
- When you install OpenShift Container Platform, provide the SSH public key to the installation program.
5.5.4. Obtaining the installation program
Before you install OpenShift Container Platform, download the installation file on a local computer.
Prerequisites
- You have a computer that runs Linux or macOS, with 500 MB of local disk space
Procedure
- Access the Infrastructure Provider page on the OpenShift Cluster Manager site. If you have a Red Hat account, log in with your credentials. If you do not, create an account.
- Select your infrastructure provider.
Navigate to the page for your installation type, download the installation program for your operating system, and place the file in the directory where you will store the installation configuration files.
ImportantThe installation program creates several files on the computer that you use to install your cluster. You must keep the installation program and the files that the installation program creates after you finish installing the cluster. Both files are required to delete the cluster.
ImportantDeleting the files created by the installation program does not remove your cluster, even if the cluster failed during installation. To remove your cluster, complete the OpenShift Container Platform uninstallation procedures for your specific cloud provider.
Extract the installation program. For example, on a computer that uses a Linux operating system, run the following command:
$ tar xvf openshift-install-linux.tar.gz- Download your installation pull secret from the Red Hat OpenShift Cluster Manager. This pull secret allows you to authenticate with the services that are provided by the included authorities, including Quay.io, which serves the container images for OpenShift Container Platform components.
5.5.5. Creating the installation configuration file
You can customize the OpenShift Container Platform cluster you install on Microsoft Azure.
Prerequisites
- Obtain the OpenShift Container Platform installation program and the pull secret for your cluster.
- Obtain service principal permissions at the subscription level.
Procedure
Create the
install-config.yamlfile.Change to the directory that contains the installation program and run the following command:
$ ./openshift-install create install-config --dir <installation_directory>1 - 1
- For
<installation_directory>, specify the directory name to store the files that the installation program creates.
ImportantSpecify an empty directory. Some installation assets, like bootstrap X.509 certificates have short expiration intervals, so you must not reuse an installation directory. If you want to reuse individual files from another cluster installation, you can copy them into your directory. However, the file names for the installation assets might change between releases. Use caution when copying installation files from an earlier OpenShift Container Platform version.
At the prompts, provide the configuration details for your cloud:
Optional: Select an SSH key to use to access your cluster machines.
NoteFor production OpenShift Container Platform clusters on which you want to perform installation debugging or disaster recovery, specify an SSH key that your
ssh-agentprocess uses.- Select azure as the platform to target.
If you do not have a Microsoft Azure profile stored on your computer, specify the following Azure parameter values for your subscription and service principal:
-
azure subscription id: The subscription ID to use for the cluster. Specify the
idvalue in your account output. -
azure tenant id: The tenant ID. Specify the
tenantIdvalue in your account output. -
azure service principal client id: The value of the
appIdparameter for the service principal. -
azure service principal client secret: The value of the
passwordparameter for the service principal.
-
azure subscription id: The subscription ID to use for the cluster. Specify the
- Select the region to deploy the cluster to.
- Select the base domain to deploy the cluster to. The base domain corresponds to the Azure DNS Zone that you created for your cluster.
Enter a descriptive name for your cluster.
ImportantAll Azure resources that are available through public endpoints are subject to resource name restrictions, and you cannot create resources that use certain terms. For a list of terms that Azure restricts, see Resolve reserved resource name errors in the Azure documentation.
- Paste the pull secret from the Red Hat OpenShift Cluster Manager.
-
Modify the
install-config.yamlfile. You can find more information about the available parameters in the "Installation configuration parameters" section. Back up the
install-config.yamlfile so that you can use it to install multiple clusters.ImportantThe
install-config.yamlfile is consumed during the installation process. If you want to reuse the file, you must back it up now.
5.5.5.1. Installation configuration parameters
Before you deploy an OpenShift Container Platform cluster, you provide parameter values to describe your account on the cloud platform that hosts your cluster and optionally customize your cluster’s platform. When you create the install-config.yaml installation configuration file, you provide values for the required parameters through the command line. If you customize your cluster, you can modify the install-config.yaml file to provide more details about the platform.
After installation, you cannot modify these parameters in the install-config.yaml file.
The openshift-install command does not validate field names for parameters. If an incorrect name is specified, the related file or object is not created, and no error is reported. Ensure that the field names for any parameters that are specified are correct.
5.5.5.1.1. Required configuration parameters
Required installation configuration parameters are described in the following table:
| Parameter | Description | Values |
|---|---|---|
|
|
The API version for the | String |
|
|
The base domain of your cloud provider. The base domain is used to create routes to your OpenShift Container Platform cluster components. The full DNS name for your cluster is a combination of the |
A fully-qualified domain or subdomain name, such as |
|
|
Kubernetes resource | Object |
|
|
The name of the cluster. DNS records for the cluster are all subdomains of |
String of lowercase letters, hyphens ( |
|
|
The configuration for the specific platform upon which to perform the installation: | Object |
|
| Get a pull secret from the Red Hat OpenShift Cluster Manager to authenticate downloading container images for OpenShift Container Platform components from services such as Quay.io. |
|
5.5.5.1.2. Network configuration parameters
You can customize your installation configuration based on the requirements of your existing network infrastructure. For example, you can expand the IP address block for the cluster network or provide different IP address blocks than the defaults.
Only IPv4 addresses are supported.
| Parameter | Description | Values |
|---|---|---|
|
| The configuration for the cluster network. | Object Note
You cannot modify parameters specified by the |
|
| The cluster network provider Container Network Interface (CNI) plug-in to install. |
Either |
|
| The IP address blocks for pods.
The default value is If you specify multiple IP address blocks, the blocks must not overlap. | An array of objects. For example: |
|
|
Required if you use An IPv4 network. |
An IP address block in Classless Inter-Domain Routing (CIDR) notation. The prefix length for an IPv4 block is between |
|
|
The subnet prefix length to assign to each individual node. For example, if | A subnet prefix.
The default value is |
|
|
The IP address block for services. The default value is The OpenShift SDN and OVN-Kubernetes network providers support only a single IP address block for the service network. | An array with an IP address block in CIDR format. For example: |
|
| The IP address blocks for machines. If you specify multiple IP address blocks, the blocks must not overlap. | An array of objects. For example: |
|
|
Required if you use | An IP network block in CIDR notation.
For example, Note
Set the |
5.5.5.1.3. Optional configuration parameters
Optional installation configuration parameters are described in the following table:
| Parameter | Description | Values |
|---|---|---|
|
| A PEM-encoded X.509 certificate bundle that is added to the nodes' trusted certificate store. This trust bundle may also be used when a proxy has been configured. | String |
|
| The configuration for the machines that comprise the compute nodes. |
Array of |
|
|
Determines the instruction set architecture of the machines in the pool. Currently, heteregeneous clusters are not supported, so all pools must specify the same architecture. Valid values are | String |
|
|
Whether to enable or disable simultaneous multithreading, or Important If you disable simultaneous multithreading, ensure that your capacity planning accounts for the dramatically decreased machine performance. |
|
|
|
Required if you use |
|
|
|
Required if you use |
|
|
| The number of compute machines, which are also known as worker machines, to provision. |
A positive integer greater than or equal to |
|
| The configuration for the machines that comprise the control plane. |
Array of |
|
|
Determines the instruction set architecture of the machines in the pool. Currently, heterogeneous clusters are not supported, so all pools must specify the same architecture. Valid values are | String |
|
|
Whether to enable or disable simultaneous multithreading, or Important If you disable simultaneous multithreading, ensure that your capacity planning accounts for the dramatically decreased machine performance. |
|
|
|
Required if you use |
|
|
|
Required if you use |
|
|
| The number of control plane machines to provision. |
The only supported value is |
|
| The Cloud Credential Operator (CCO) mode. If no mode is specified, the CCO dynamically tries to determine the capabilities of the provided credentials, with a preference for mint mode on the platforms where multiple modes are supported. Note Not all CCO modes are supported for all cloud providers. For more information on CCO modes, see the Cloud Credential Operator entry in the Cluster Operators reference content. |
|
|
|
Enable or disable FIPS mode. The default is Important
The use of FIPS Validated / Modules in Process cryptographic libraries is only supported on OpenShift Container Platform deployments on the Note If you are using Azure File storage, you cannot enable FIPS mode. |
|
|
| Sources and repositories for the release-image content. |
Array of objects. Includes a |
|
|
Required if you use | String |
|
| Specify one or more repositories that may also contain the same images. | Array of strings |
|
| How to publish or expose the user-facing endpoints of your cluster, such as the Kubernetes API, OpenShift routes. |
|
|
| The SSH key or keys to authenticate access your cluster machines. Note
For production OpenShift Container Platform clusters on which you want to perform installation debugging or disaster recovery, specify an SSH key that your | One or more keys. For example: |
5.5.5.1.4. Additional Azure configuration parameters
Additional Azure configuration parameters are described in the following table:
| Parameter | Description | Values |
|---|---|---|
|
| The Azure disk size for the VM. |
Integer that represents the size of the disk in GB. The default is |
|
| Defines the type of disk. |
|
|
| The Azure disk size for the VM. |
Integer that represents the size of the disk in GB. The default is |
|
| Defines the type of disk. |
|
|
| The name of the resource group that contains the DNS zone for your base domain. |
String, for example |
|
| The outbound routing strategy used to connect your cluster to the internet. If you are using user-defined routing, you must have pre-existing networking available where the outbound routing has already been configured prior to installing a cluster. The installation program is not responsible for configuring user-defined routing. |
|
|
| The name of the Azure region that hosts your cluster. |
Any valid region name, such as |
|
| List of availability zones to place machines in. For high availability, specify at least two zones. |
List of zones, for example |
|
|
The name of the resource group that contains the existing VNet that you want to deploy your cluster to. This name cannot be the same as the | String. |
|
| The name of the existing VNet that you want to deploy your cluster to. | String. |
|
| The name of the existing subnet in your VNet that you want to deploy your control plane machines to. |
Valid CIDR, for example |
|
| The name of the existing subnet in your VNet that you want to deploy your compute machines to. |
Valid CIDR, for example |
|
|
The name of the Azure cloud environment that is used to configure the Azure SDK with the appropriate Azure API endpoints. If empty, the default value |
Any valid cloud environment, such as |
You cannot customize Azure Availability Zones or Use tags to organize your Azure resources with an Azure cluster.
5.5.5.2. Sample customized install-config.yaml file for Azure
You can customize the install-config.yaml file to specify more details about your OpenShift Container Platform cluster’s platform or modify the values of the required parameters.
This sample YAML file is provided for reference only. You must obtain your install-config.yaml file by using the installation program and modify it.
apiVersion: v1
baseDomain: example.com
controlPlane:
hyperthreading: Enabled
name: master
platform:
azure:
osDisk:
diskSizeGB: 1024
diskType: Premium_LRS
type: Standard_D8s_v3
replicas: 3
compute:
- hyperthreading: Enabled
name: worker
platform:
azure:
type: Standard_D2s_v3
osDisk:
diskSizeGB: 512
diskType: Standard_LRS
zones:
- "1"
- "2"
- "3"
replicas: 5
metadata:
name: test-cluster
networking:
clusterNetwork:
- cidr: 10.128.0.0/14
hostPrefix: 23
machineNetwork:
- cidr: 10.0.0.0/16
networkType: OpenShiftSDN
serviceNetwork:
- 172.30.0.0/16
platform:
azure:
region: centralus
baseDomainResourceGroupName: resource_group
cloudName: AzurePublicCloud
pullSecret: '{"auths": ...}'
fips: false
sshKey: ssh-ed25519 AAAA... - 1 10 12 14
- Required. The installation program prompts you for this value.
- 2 6 11
- If you do not provide these parameters and values, the installation program provides the default value.
- 3 7
- The
controlPlanesection is a single mapping, but thecomputesection is a sequence of mappings. To meet the requirements of the different data structures, the first line of thecomputesection must begin with a hyphen,-, and the first line of thecontrolPlanesection must not. Only one control plane pool is used. - 4
- Whether to enable or disable simultaneous multithreading, or
hyperthreading. By default, simultaneous multithreading is enabled to increase the performance of your machines' cores. You can disable it by setting the parameter value toDisabled. If you disable simultaneous multithreading in some cluster machines, you must disable it in all cluster machines.ImportantIf you disable simultaneous multithreading, ensure that your capacity planning accounts for the dramatically decreased machine performance. Use larger virtual machine types, such as
Standard_D8s_v3, for your machines if you disable simultaneous multithreading. - 5 8
- You can specify the size of the disk to use in GB. Minimum recommendation for control plane nodes (also known as the master nodes) is 1024 GB.
- 9
- Specify a list of zones to deploy your machines to. For high availability, specify at least two zones.
- 13
- Specify the name of the resource group that contains the DNS zone for your base domain.
- 15
- Whether to enable or disable FIPS mode. By default, FIPS mode is not enabled. If FIPS mode is enabled, the Red Hat Enterprise Linux CoreOS (RHCOS) machines that OpenShift Container Platform runs on bypass the default Kubernetes cryptography suite and use the cryptography modules that are provided with RHCOS instead.Important
The use of FIPS Validated / Modules in Process cryptographic libraries is only supported on OpenShift Container Platform deployments on the
x86_64architecture. - 16
- You can optionally provide the
sshKeyvalue that you use to access the machines in your cluster.NoteFor production OpenShift Container Platform clusters on which you want to perform installation debugging or disaster recovery, specify an SSH key that your
ssh-agentprocess uses.
5.5.5.3. Configuring the cluster-wide proxy during installation
Production environments can deny direct access to the Internet and instead have an HTTP or HTTPS proxy available. You can configure a new OpenShift Container Platform cluster to use a proxy by configuring the proxy settings in the install-config.yaml file.
Prerequisites
-
You have an existing
install-config.yamlfile. You reviewed the sites that your cluster requires access to and determined whether any of them need to bypass the proxy. By default, all cluster egress traffic is proxied, including calls to hosting cloud provider APIs. You added sites to the
Proxyobject’sspec.noProxyfield to bypass the proxy if necessary.NoteThe
Proxyobjectstatus.noProxyfield is populated with the values of thenetworking.machineNetwork[].cidr,networking.clusterNetwork[].cidr, andnetworking.serviceNetwork[]fields from your installation configuration.For installations on Amazon Web Services (AWS), Google Cloud Platform (GCP), Microsoft Azure, and Red Hat OpenStack Platform (RHOSP), the
Proxyobjectstatus.noProxyfield is also populated with the instance metadata endpoint (169.254.169.254).
Procedure
Edit your
install-config.yamlfile and add the proxy settings. For example:apiVersion: v1 baseDomain: my.domain.com proxy: httpProxy: http://<username>:<pswd>@<ip>:<port>1 httpsProxy: https://<username>:<pswd>@<ip>:<port>2 noProxy: example.com3 additionalTrustBundle: |4 -----BEGIN CERTIFICATE----- <MY_TRUSTED_CA_CERT> -----END CERTIFICATE----- ...- 1
- A proxy URL to use for creating HTTP connections outside the cluster. The URL scheme must be
http. - 2
- A proxy URL to use for creating HTTPS connections outside the cluster.
- 3
- A comma-separated list of destination domain names, IP addresses, or other network CIDRs to exclude from proxying. Preface a domain with
.to match subdomains only. For example,.y.commatchesx.y.com, but noty.com. Use*to bypass the proxy for all destinations. - 4
- If provided, the installation program generates a config map that is named
user-ca-bundlein theopenshift-confignamespace to hold the additional CA certificates. If you provideadditionalTrustBundleand at least one proxy setting, theProxyobject is configured to reference theuser-ca-bundleconfig map in thetrustedCAfield. The Cluster Network Operator then creates atrusted-ca-bundleconfig map that merges the contents specified for thetrustedCAparameter with the RHCOS trust bundle. TheadditionalTrustBundlefield is required unless the proxy’s identity certificate is signed by an authority from the RHCOS trust bundle.
NoteThe installation program does not support the proxy
readinessEndpointsfield.- Save the file and reference it when installing OpenShift Container Platform.
The installation program creates a cluster-wide proxy that is named cluster that uses the proxy settings in the provided install-config.yaml file. If no proxy settings are provided, a cluster Proxy object is still created, but it will have a nil spec.
Only the Proxy object named cluster is supported, and no additional proxies can be created.
5.5.6. Network configuration phases
When specifying a cluster configuration prior to installation, there are several phases in the installation procedures when you can modify the network configuration:
- Phase 1
After entering the
openshift-install create install-configcommand. In theinstall-config.yamlfile, you can customize the following network-related fields:-
networking.networkType -
networking.clusterNetwork -
networking.serviceNetwork networking.machineNetworkFor more information on these fields, refer to "Installation configuration parameters".
NoteSet the
networking.machineNetworkto match the CIDR that the preferred NIC resides in.
-
- Phase 2
-
After entering the
openshift-install create manifestscommand. If you must specify advanced network configuration, during this phase you can define a customized Cluster Network Operator manifest with only the fields you want to modify.
You cannot override the values specified in phase 1 in the install-config.yaml file during phase 2. However, you can further customize the cluster network provider during phase 2.
5.5.7. Specifying advanced network configuration
You can use advanced configuration customization to integrate your cluster into your existing network environment by specifying additional configuration for your cluster network provider. You can specify advanced network configuration only before you install the cluster.
Modifying the OpenShift Container Platform manifest files created by the installation program is not supported. Applying a manifest file that you create, as in the following procedure, is supported.
Prerequisites
-
Create the
install-config.yamlfile and complete any modifications to it.
Procedure
Change to the directory that contains the installation program and create the manifests:
$ ./openshift-install create manifests --dir <installation_directory>where:
<installation_directory>-
Specifies the name of the directory that contains the
install-config.yamlfile for your cluster.
Create a stub manifest file for the advanced network configuration that is named
cluster-network-03-config.ymlin the<installation_directory>/manifests/directory:$ cat <<EOF > <installation_directory>/manifests/cluster-network-03-config.yml apiVersion: operator.openshift.io/v1 kind: Network metadata: name: cluster spec: EOFwhere:
<installation_directory>-
Specifies the directory name that contains the
manifests/directory for your cluster.
Open the
cluster-network-03-config.ymlfile in an editor and specify the advanced network configuration for your cluster, such as in the following examples:Specify a different VXLAN port for the OpenShift SDN network provider
apiVersion: operator.openshift.io/v1 kind: Network metadata: name: cluster spec: defaultNetwork: openshiftSDNConfig: vxlanPort: 4800Enable IPsec for the OVN-Kubernetes network provider
apiVersion: operator.openshift.io/v1 kind: Network metadata: name: cluster spec: defaultNetwork: ovnKubernetesConfig: ipsecConfig: {}-
Save the
cluster-network-03-config.ymlfile and quit the text editor. -
Optional: Back up the
manifests/cluster-network-03-config.ymlfile. The installation program deletes themanifests/directory when creating the cluster.
5.5.8. Cluster Network Operator configuration
The configuration for the cluster network is specified as part of the Cluster Network Operator (CNO) configuration and stored in a custom resource (CR) object that is named cluster. The CR specifies the fields for the Network API in the operator.openshift.io API group.
The CNO configuration inherits the following fields during cluster installation from the Network API in the Network.config.openshift.io API group and these fields cannot be changed:
clusterNetwork- IP address pools from which pod IP addresses are allocated.
serviceNetwork- IP address pool for services.
defaultNetwork.type- Cluster network provider, such as OpenShift SDN or OVN-Kubernetes.
You can specify the cluster network provider configuration for your cluster by setting the fields for the defaultNetwork object in the CNO object named cluster.
5.5.8.1. Cluster Network Operator configuration object
The fields for the Cluster Network Operator (CNO) are described in the following table:
| Field | Type | Description |
|---|---|---|
|
|
|
The name of the CNO object. This name is always |
|
|
| A list specifying the blocks of IP addresses from which pod IP addresses are allocated and the subnet prefix length assigned to each individual node in the cluster. For example:
This value is ready-only and specified in the |
|
|
| A block of IP addresses for services. The OpenShift SDN and OVN-Kubernetes Container Network Interface (CNI) network providers support only a single IP address block for the service network. For example:
This value is ready-only and specified in the |
|
|
| Configures the Container Network Interface (CNI) cluster network provider for the cluster network. |
|
|
| The fields for this object specify the kube-proxy configuration. If you are using the OVN-Kubernetes cluster network provider, the kube-proxy configuration has no effect. |
defaultNetwork object configuration
The values for the defaultNetwork object are defined in the following table:
| Field | Type | Description |
|---|---|---|
|
|
|
Either Note OpenShift Container Platform uses the OpenShift SDN Container Network Interface (CNI) cluster network provider by default. |
|
|
| This object is only valid for the OpenShift SDN cluster network provider. |
|
|
| This object is only valid for the OVN-Kubernetes cluster network provider. |
Configuration for the OpenShift SDN CNI cluster network provider
The following table describes the configuration fields for the OpenShift SDN Container Network Interface (CNI) cluster network provider.
| Field | Type | Description |
|---|---|---|
|
|
|
Configures the network isolation mode for OpenShift SDN. The default value is
The values |
|
|
| The maximum transmission unit (MTU) for the VXLAN overlay network. This is detected automatically based on the MTU of the primary network interface. You do not normally need to override the detected MTU. If the auto-detected value is not what you expected it to be, confirm that the MTU on the primary network interface on your nodes is correct. You cannot use this option to change the MTU value of the primary network interface on the nodes.
If your cluster requires different MTU values for different nodes, you must set this value to This value cannot be changed after cluster installation. |
|
|
|
The port to use for all VXLAN packets. The default value is If you are running in a virtualized environment with existing nodes that are part of another VXLAN network, then you might be required to change this. For example, when running an OpenShift SDN overlay on top of VMware NSX-T, you must select an alternate port for the VXLAN, because both SDNs use the same default VXLAN port number.
On Amazon Web Services (AWS), you can select an alternate port for the VXLAN between port |
Example OpenShift SDN configuration
defaultNetwork:
type: OpenShiftSDN
openshiftSDNConfig:
mode: NetworkPolicy
mtu: 1450
vxlanPort: 4789Configuration for the OVN-Kubernetes CNI cluster network provider
The following table describes the configuration fields for the OVN-Kubernetes CNI cluster network provider.
| Field | Type | Description |
|---|---|---|
|
|
| The maximum transmission unit (MTU) for the Geneve (Generic Network Virtualization Encapsulation) overlay network. This is detected automatically based on the MTU of the primary network interface. You do not normally need to override the detected MTU. If the auto-detected value is not what you expected it to be, confirm that the MTU on the primary network interface on your nodes is correct. You cannot use this option to change the MTU value of the primary network interface on the nodes.
If your cluster requires different MTU values for different nodes, you must set this value to This value cannot be changed after cluster installation. |
|
|
|
The port to use for all Geneve packets. The default value is |
|
|
| Specify an empty object to enable IPsec encryption. This value cannot be changed after cluster installation. |
Example OVN-Kubernetes configuration
defaultNetwork:
type: OVNKubernetes
ovnKubernetesConfig:
mtu: 1400
genevePort: 6081
ipsecConfig: {}kubeProxyConfig object configuration
The values for the kubeProxyConfig object are defined in the following table:
| Field | Type | Description |
|---|---|---|
|
|
|
The refresh period for Note
Because of performance improvements introduced in OpenShift Container Platform 4.3 and greater, adjusting the |
|
|
|
The minimum duration before refreshing |
5.5.9. Configuring hybrid networking with OVN-Kubernetes
You can configure your cluster to use hybrid networking with OVN-Kubernetes. This allows a hybrid cluster that supports different node networking configurations. For example, this is necessary to run both Linux and Windows nodes in a cluster.
You must configure hybrid networking with OVN-Kubernetes cluster provider during the installation of your cluster. You cannot switch to hybrid networking after the installation process.
In addition, the hybrid OVN-Kubernetes cluster network provider is a requirement for Windows Machine Config Operator (WMCO).
Prerequisites
-
You defined
OVNKubernetesfor thenetworking.networkTypeparameter in theinstall-config.yamlfile. See the installation documentation for configuring OpenShift Container Platform network customizations on your chosen cloud provider for more information.
Procedure
Change to the directory that contains the installation program and create the manifests:
$ ./openshift-install create manifests --dir <installation_directory>where:
<installation_directory>-
Specifies the name of the directory that contains the
install-config.yamlfile for your cluster.
Create a stub manifest file for the advanced network configuration that is named
cluster-network-03-config.ymlin the<installation_directory>/manifests/directory:$ cat <<EOF > <installation_directory>/manifests/cluster-network-03-config.yml apiVersion: operator.openshift.io/v1 kind: Network metadata: name: cluster spec: EOFwhere:
<installation_directory>-
Specifies the directory name that contains the
manifests/directory for your cluster.
Open the
cluster-network-03-config.ymlfile in an editor and configure OVN-Kubernetes with hybrid networking, such as in the following example:Specify a hybrid networking configuration
apiVersion: operator.openshift.io/v1 kind: Network metadata: name: cluster spec: defaultNetwork: ovnKubernetesConfig: hybridOverlayConfig: hybridClusterNetwork:1 - cidr: 10.132.0.0/14 hostPrefix: 23 hybridOverlayVXLANPort: 98982 - 1
- Specify the CIDR configuration used for nodes on the additional overlay network. The
hybridClusterNetworkCIDR cannot overlap with theclusterNetworkCIDR. - 2
- Specify a custom VXLAN port for the additional overlay network. This is required for running Windows nodes in a cluster installed on vSphere, and must not be configured for any other cloud provider. The custom port can be any open port excluding the default
4789port. For more information on this requirement, see the Microsoft documentation on Pod-to-pod connectivity between hosts is broken.
NoteWindows Server Long-Term Servicing Channel (LTSC): Windows Server 2019 is not supported on clusters with a custom
hybridOverlayVXLANPortvalue because this Windows server version does not support selecting a custom VXLAN port.-
Save the
cluster-network-03-config.ymlfile and quit the text editor. -
Optional: Back up the
manifests/cluster-network-03-config.ymlfile. The installation program deletes themanifests/directory when creating the cluster.
For more information on using Linux and Windows nodes in the same cluster, see Understanding Windows container workloads.
5.5.10. Deploying the cluster
You can install OpenShift Container Platform on a compatible cloud platform.
You can run the create cluster command of the installation program only once, during initial installation.
Prerequisites
- Configure an account with the cloud platform that hosts your cluster.
- Obtain the OpenShift Container Platform installation program and the pull secret for your cluster.
Procedure
Change to the directory that contains the installation program and initialize the cluster deployment:
$ ./openshift-install create cluster --dir <installation_directory> \1 --log-level=info2 NoteIf the cloud provider account that you configured on your host does not have sufficient permissions to deploy the cluster, the installation process stops, and the missing permissions are displayed.
When the cluster deployment completes, directions for accessing your cluster, including a link to its web console and credentials for the
kubeadminuser, display in your terminal.Example output
... INFO Install complete! INFO To access the cluster as the system:admin user when using 'oc', run 'export KUBECONFIG=/home/myuser/install_dir/auth/kubeconfig' INFO Access the OpenShift web-console here: https://console-openshift-console.apps.mycluster.example.com INFO Login to the console with user: "kubeadmin", and password: "4vYBz-Ee6gm-ymBZj-Wt5AL" INFO Time elapsed: 36m22sNoteThe cluster access and credential information also outputs to
<installation_directory>/.openshift_install.logwhen an installation succeeds.Important-
The Ignition config files that the installation program generates contain certificates that expire after 24 hours, which are then renewed at that time. If the cluster is shut down before renewing the certificates and the cluster is later restarted after the 24 hours have elapsed, the cluster automatically recovers the expired certificates. The exception is that you must manually approve the pending
node-bootstrappercertificate signing requests (CSRs) to recover kubelet certificates. See the documentation for Recovering from expired control plane certificates for more information. - It is recommended that you use Ignition config files within 12 hours after they are generated because the 24-hour certificate rotates from 16 to 22 hours after the cluster is installed. By using the Ignition config files within 12 hours, you can avoid installation failure if the certificate update runs during installation.
ImportantYou must not delete the installation program or the files that the installation program creates. Both are required to delete the cluster.
-
The Ignition config files that the installation program generates contain certificates that expire after 24 hours, which are then renewed at that time. If the cluster is shut down before renewing the certificates and the cluster is later restarted after the 24 hours have elapsed, the cluster automatically recovers the expired certificates. The exception is that you must manually approve the pending
5.5.11. Installing the OpenShift CLI by downloading the binary
You can install the OpenShift CLI (oc) to interact with OpenShift Container Platform from a command-line interface. You can install oc on Linux, Windows, or macOS.
If you installed an earlier version of oc, you cannot use it to complete all of the commands in OpenShift Container Platform 4.7. Download and install the new version of oc.
5.5.11.1. Installing the OpenShift CLI on Linux
You can install the OpenShift CLI (oc) binary on Linux by using the following procedure.
Procedure
- Navigate to the OpenShift Container Platform downloads page on the Red Hat Customer Portal.
- Select the appropriate version in the Version drop-down menu.
- Click Download Now next to the OpenShift v4.7 Linux Client entry and save the file.
Unpack the archive:
$ tar xvzf <file>Place the
ocbinary in a directory that is on yourPATH.To check your
PATH, execute the following command:$ echo $PATH
After you install the OpenShift CLI, it is available using the oc command:
$ oc <command>5.5.11.2. Installing the OpenShift CLI on Windows
You can install the OpenShift CLI (oc) binary on Windows by using the following procedure.
Procedure
- Navigate to the OpenShift Container Platform downloads page on the Red Hat Customer Portal.
- Select the appropriate version in the Version drop-down menu.
- Click Download Now next to the OpenShift v4.7 Windows Client entry and save the file.
- Unzip the archive with a ZIP program.
Move the
ocbinary to a directory that is on yourPATH.To check your
PATH, open the command prompt and execute the following command:C:\> path
After you install the OpenShift CLI, it is available using the oc command:
C:\> oc <command>5.5.11.3. Installing the OpenShift CLI on macOS
You can install the OpenShift CLI (oc) binary on macOS by using the following procedure.
Procedure
- Navigate to the OpenShift Container Platform downloads page on the Red Hat Customer Portal.
- Select the appropriate version in the Version drop-down menu.
- Click Download Now next to the OpenShift v4.7 MacOSX Client entry and save the file.
- Unpack and unzip the archive.
Move the
ocbinary to a directory on your PATH.To check your
PATH, open a terminal and execute the following command:$ echo $PATH
After you install the OpenShift CLI, it is available using the oc command:
$ oc <command>5.5.12. Logging in to the cluster by using the CLI
You can log in to your cluster as a default system user by exporting the cluster kubeconfig file. The kubeconfig file contains information about the cluster that is used by the CLI to connect a client to the correct cluster and API server. The file is specific to a cluster and is created during OpenShift Container Platform installation.
Prerequisites
- You deployed an OpenShift Container Platform cluster.
-
You installed the
ocCLI.
Procedure
Export the
kubeadmincredentials:$ export KUBECONFIG=<installation_directory>/auth/kubeconfig1 - 1
- For
<installation_directory>, specify the path to the directory that you stored the installation files in.
Verify you can run
occommands successfully using the exported configuration:$ oc whoamiExample output
system:admin
5.5.13. Telemetry access for OpenShift Container Platform
In OpenShift Container Platform 4.7, the Telemetry service, which runs by default to provide metrics about cluster health and the success of updates, requires internet access. If your cluster is connected to the internet, Telemetry runs automatically, and your cluster is registered to OpenShift Cluster Manager.
After you confirm that your OpenShift Cluster Manager inventory is correct, either maintained automatically by Telemetry or manually by using OpenShift Cluster Manager, use subscription watch to track your OpenShift Container Platform subscriptions at the account or multi-cluster level.
5.5.14. Next steps
- Customize your cluster.
- If necessary, you can opt out of remote health reporting.
5.6. Installing a cluster on Azure into an existing VNet
In OpenShift Container Platform version 4.7, you can install a cluster into an existing Azure Virtual Network (VNet) on Microsoft Azure. The installation program provisions the rest of the required infrastructure, which you can further customize. To customize the installation, you modify parameters in the install-config.yaml file before you install the cluster.
5.6.1. Prerequisites
- Review details about the OpenShift Container Platform installation and update processes.
- Configure an Azure account to host the cluster and determine the tested and validated region to deploy the cluster to.
- If you use a firewall, you must configure it to allow the sites that your cluster requires access to.
- If you do not allow the system to manage identity and access management (IAM), then a cluster administrator can manually create and maintain IAM credentials. Manual mode can also be used in environments where the cloud IAM APIs are not reachable.
5.6.2. About reusing a VNet for your OpenShift Container Platform cluster
In OpenShift Container Platform 4.7, you can deploy a cluster into an existing Azure Virtual Network (VNet) in Microsoft Azure. If you do, you must also use existing subnets within the VNet and routing rules.
By deploying OpenShift Container Platform into an existing Azure VNet, you might be able to avoid service limit constraints in new accounts or more easily abide by the operational constraints that your company’s guidelines set. This is a good option to use if you cannot obtain the infrastructure creation permissions that are required to create the VNet.
5.6.2.1. Requirements for using your VNet
When you deploy a cluster by using an existing VNet, you must perform additional network configuration before you install the cluster. In installer-provisioned infrastructure clusters, the installer usually creates the following components, but it does not create them when you install into an existing VNet:
- Subnets
- Route tables
- VNets
- Network Security Groups
The installation program requires that you use the cloud-provided DNS server. Using a custom DNS server is not supported and causes the installation to fail.
If you use a custom VNet, you must correctly configure it and its subnets for the installation program and the cluster to use. The installation program cannot subdivide network ranges for the cluster to use, set route tables for the subnets, or set VNet options like DHCP, so you must do so before you install the cluster.
The cluster must be able to access the resource group that contains the existing VNet and subnets. While all of the resources that the cluster creates are placed in a separate resource group that it creates, some network resources are used from a separate group. Some cluster Operators must be able to access resources in both resource groups. For example, the Machine API controller attaches NICS for the virtual machines that it creates to subnets from the networking resource group.
Your VNet must meet the following characteristics:
-
The VNet’s CIDR block must contain the
Networking.MachineCIDRrange, which is the IP address pool for cluster machines. - The VNet and its subnets must belong to the same resource group, and the subnets must be configured to use Azure-assigned DHCP IP addresses instead of static IP addresses.
You must provide two subnets within your VNet, one for the control plane machines and one for the compute machines. Because Azure distributes machines in different availability zones within the region that you specify, your cluster will have high availability by default.
To ensure that the subnets that you provide are suitable, the installation program confirms the following data:
- All the specified subnets exist.
- There are two private subnets, one for the control plane machines and one for the compute machines.
- The subnet CIDRs belong to the machine CIDR that you specified. Machines are not provisioned in availability zones that you do not provide private subnets for. If required, the installation program creates public load balancers that manage the control plane and worker nodes, and Azure allocates a public IP address to them.
If you destroy a cluster that uses an existing VNet, the VNet is not deleted.
5.6.2.1.1. Network security group requirements
The network security groups for the subnets that host the compute and control plane machines require specific access to ensure that the cluster communication is correct. You must create rules to allow access to the required cluster communication ports.
The network security group rules must be in place before you install the cluster. If you attempt to install a cluster without the required access, the installation program cannot reach the Azure APIs, and installation fails.
| Port | Description | Control plane | Compute |
|---|---|---|---|
|
| Allows HTTP traffic | x | |
|
| Allows HTTPS traffic | x | |
|
| Allows communication to the control plane machines | x | |
|
| Allows internal communication to the machine config server for provisioning machines | x |
Since cluster components do not modify the user-provided network security groups, which the Kubernetes controllers update, a pseudo-network security group is created for the Kubernetes controller to modify without impacting the rest of the environment.
5.6.2.2. Division of permissions
Starting with OpenShift Container Platform 4.3, you do not need all of the permissions that are required for an installation program-provisioned infrastructure cluster to deploy a cluster. This change mimics the division of permissions that you might have at your company: some individuals can create different resources in your clouds than others. For example, you might be able to create application-specific items, like instances, storage, and load balancers, but not networking-related components such as VNets, subnet, or ingress rules.
The Azure credentials that you use when you create your cluster do not need the networking permissions that are required to make VNets and core networking components within the VNet, such as subnets, routing tables, internet gateways, NAT, and VPN. You still need permission to make the application resources that the machines within the cluster require, such as load balancers, security groups, storage accounts, and nodes.
5.6.2.3. Isolation between clusters
Because the cluster is unable to modify network security groups in an existing subnet, there is no way to isolate clusters from each other on the VNet.
5.6.3. Internet access for OpenShift Container Platform
In OpenShift Container Platform 4.7, you require access to the Internet to install your cluster.
You must have Internet access to:
- Access OpenShift Cluster Manager to download the installation program and perform subscription management. If the cluster has internet access and you do not disable Telemetry, that service automatically entitles your cluster.
- Access Quay.io to obtain the packages that are required to install your cluster.
- Obtain the packages that are required to perform cluster updates.
If your cluster cannot have direct Internet access, you can perform a restricted network installation on some types of infrastructure that you provision. During that process, you download the content that is required and use it to populate a mirror registry with the packages that you need to install a cluster and generate the installation program. With some installation types, the environment that you install your cluster in will not require Internet access. Before you update the cluster, you update the content of the mirror registry.
5.6.4. Generating an SSH private key and adding it to the agent
If you want to perform installation debugging or disaster recovery on your cluster, you must provide an SSH key to both your ssh-agent and the installation program. You can use this key to access the bootstrap machine in a public cluster to troubleshoot installation issues.
In a production environment, you require disaster recovery and debugging.
You can use this key to SSH into the master nodes as the user core. When you deploy the cluster, the key is added to the core user’s ~/.ssh/authorized_keys list.
You must use a local key, not one that you configured with platform-specific approaches such as AWS key pairs.
Procedure
If you do not have an SSH key that is configured for password-less authentication on your computer, create one. For example, on a computer that uses a Linux operating system, run the following command:
$ ssh-keygen -t ed25519 -N '' \ -f <path>/<file_name>1 - 1
- Specify the path and file name, such as
~/.ssh/id_rsa, of the new SSH key. If you have an existing key pair, ensure your public key is in the your~/.sshdirectory.
Running this command generates an SSH key that does not require a password in the location that you specified.
NoteIf you plan to install an OpenShift Container Platform cluster that uses FIPS Validated / Modules in Process cryptographic libraries on the
x86_64architecture, do not create a key that uses theed25519algorithm. Instead, create a key that uses thersaorecdsaalgorithm.Start the
ssh-agentprocess as a background task:$ eval "$(ssh-agent -s)"Example output
Agent pid 31874NoteIf your cluster is in FIPS mode, only use FIPS-compliant algorithms to generate the SSH key. The key must be either RSA or ECDSA.
Add your SSH private key to the
ssh-agent:$ ssh-add <path>/<file_name>1 Example output
Identity added: /home/<you>/<path>/<file_name> (<computer_name>)- 1
- Specify the path and file name for your SSH private key, such as
~/.ssh/id_rsa
Next steps
- When you install OpenShift Container Platform, provide the SSH public key to the installation program.
5.6.5. Obtaining the installation program
Before you install OpenShift Container Platform, download the installation file on a local computer.
Prerequisites
- You have a computer that runs Linux or macOS, with 500 MB of local disk space
Procedure
- Access the Infrastructure Provider page on the OpenShift Cluster Manager site. If you have a Red Hat account, log in with your credentials. If you do not, create an account.
- Select your infrastructure provider.
Navigate to the page for your installation type, download the installation program for your operating system, and place the file in the directory where you will store the installation configuration files.
ImportantThe installation program creates several files on the computer that you use to install your cluster. You must keep the installation program and the files that the installation program creates after you finish installing the cluster. Both files are required to delete the cluster.
ImportantDeleting the files created by the installation program does not remove your cluster, even if the cluster failed during installation. To remove your cluster, complete the OpenShift Container Platform uninstallation procedures for your specific cloud provider.
Extract the installation program. For example, on a computer that uses a Linux operating system, run the following command:
$ tar xvf openshift-install-linux.tar.gz- Download your installation pull secret from the Red Hat OpenShift Cluster Manager. This pull secret allows you to authenticate with the services that are provided by the included authorities, including Quay.io, which serves the container images for OpenShift Container Platform components.
5.6.6. Creating the installation configuration file
You can customize the OpenShift Container Platform cluster you install on Microsoft Azure.
Prerequisites
- Obtain the OpenShift Container Platform installation program and the pull secret for your cluster.
- Obtain service principal permissions at the subscription level.
Procedure
Create the
install-config.yamlfile.Change to the directory that contains the installation program and run the following command:
$ ./openshift-install create install-config --dir <installation_directory>1 - 1
- For
<installation_directory>, specify the directory name to store the files that the installation program creates.
ImportantSpecify an empty directory. Some installation assets, like bootstrap X.509 certificates have short expiration intervals, so you must not reuse an installation directory. If you want to reuse individual files from another cluster installation, you can copy them into your directory. However, the file names for the installation assets might change between releases. Use caution when copying installation files from an earlier OpenShift Container Platform version.
At the prompts, provide the configuration details for your cloud:
Optional: Select an SSH key to use to access your cluster machines.
NoteFor production OpenShift Container Platform clusters on which you want to perform installation debugging or disaster recovery, specify an SSH key that your
ssh-agentprocess uses.- Select azure as the platform to target.
If you do not have a Microsoft Azure profile stored on your computer, specify the following Azure parameter values for your subscription and service principal:
-
azure subscription id: The subscription ID to use for the cluster. Specify the
idvalue in your account output. -
azure tenant id: The tenant ID. Specify the
tenantIdvalue in your account output. -
azure service principal client id: The value of the
appIdparameter for the service principal. -
azure service principal client secret: The value of the
passwordparameter for the service principal.
-
azure subscription id: The subscription ID to use for the cluster. Specify the
- Select the region to deploy the cluster to.
- Select the base domain to deploy the cluster to. The base domain corresponds to the Azure DNS Zone that you created for your cluster.
Enter a descriptive name for your cluster.
ImportantAll Azure resources that are available through public endpoints are subject to resource name restrictions, and you cannot create resources that use certain terms. For a list of terms that Azure restricts, see Resolve reserved resource name errors in the Azure documentation.
- Paste the pull secret from the Red Hat OpenShift Cluster Manager.
-
Modify the
install-config.yamlfile. You can find more information about the available parameters in the "Installation configuration parameters" section. Back up the
install-config.yamlfile so that you can use it to install multiple clusters.ImportantThe
install-config.yamlfile is consumed during the installation process. If you want to reuse the file, you must back it up now.
5.6.6.1. Installation configuration parameters
Before you deploy an OpenShift Container Platform cluster, you provide parameter values to describe your account on the cloud platform that hosts your cluster and optionally customize your cluster’s platform. When you create the install-config.yaml installation configuration file, you provide values for the required parameters through the command line. If you customize your cluster, you can modify the install-config.yaml file to provide more details about the platform.
After installation, you cannot modify these parameters in the install-config.yaml file.
The openshift-install command does not validate field names for parameters. If an incorrect name is specified, the related file or object is not created, and no error is reported. Ensure that the field names for any parameters that are specified are correct.
5.6.6.1.1. Required configuration parameters
Required installation configuration parameters are described in the following table:
| Parameter | Description | Values |
|---|---|---|
|
|
The API version for the | String |
|
|
The base domain of your cloud provider. The base domain is used to create routes to your OpenShift Container Platform cluster components. The full DNS name for your cluster is a combination of the |
A fully-qualified domain or subdomain name, such as |
|
|
Kubernetes resource | Object |
|
|
The name of the cluster. DNS records for the cluster are all subdomains of |
String of lowercase letters, hyphens ( |
|
|
The configuration for the specific platform upon which to perform the installation: | Object |
|
| Get a pull secret from the Red Hat OpenShift Cluster Manager to authenticate downloading container images for OpenShift Container Platform components from services such as Quay.io. |
|
5.6.6.1.2. Network configuration parameters
You can customize your installation configuration based on the requirements of your existing network infrastructure. For example, you can expand the IP address block for the cluster network or provide different IP address blocks than the defaults.
Only IPv4 addresses are supported.
| Parameter | Description | Values |
|---|---|---|
|
| The configuration for the cluster network. | Object Note
You cannot modify parameters specified by the |
|
| The cluster network provider Container Network Interface (CNI) plug-in to install. |
Either |
|
| The IP address blocks for pods.
The default value is If you specify multiple IP address blocks, the blocks must not overlap. | An array of objects. For example: |
|
|
Required if you use An IPv4 network. |
An IP address block in Classless Inter-Domain Routing (CIDR) notation. The prefix length for an IPv4 block is between |
|
|
The subnet prefix length to assign to each individual node. For example, if | A subnet prefix.
The default value is |
|
|
The IP address block for services. The default value is The OpenShift SDN and OVN-Kubernetes network providers support only a single IP address block for the service network. | An array with an IP address block in CIDR format. For example: |
|
| The IP address blocks for machines. If you specify multiple IP address blocks, the blocks must not overlap. | An array of objects. For example: |
|
|
Required if you use | An IP network block in CIDR notation.
For example, Note
Set the |
5.6.6.1.3. Optional configuration parameters
Optional installation configuration parameters are described in the following table:
| Parameter | Description | Values |
|---|---|---|
|
| A PEM-encoded X.509 certificate bundle that is added to the nodes' trusted certificate store. This trust bundle may also be used when a proxy has been configured. | String |
|
| The configuration for the machines that comprise the compute nodes. |
Array of |
|
|
Determines the instruction set architecture of the machines in the pool. Currently, heteregeneous clusters are not supported, so all pools must specify the same architecture. Valid values are | String |
|
|
Whether to enable or disable simultaneous multithreading, or Important If you disable simultaneous multithreading, ensure that your capacity planning accounts for the dramatically decreased machine performance. |
|
|
|
Required if you use |
|
|
|
Required if you use |
|
|
| The number of compute machines, which are also known as worker machines, to provision. |
A positive integer greater than or equal to |
|
| The configuration for the machines that comprise the control plane. |
Array of |
|
|
Determines the instruction set architecture of the machines in the pool. Currently, heterogeneous clusters are not supported, so all pools must specify the same architecture. Valid values are | String |
|
|
Whether to enable or disable simultaneous multithreading, or Important If you disable simultaneous multithreading, ensure that your capacity planning accounts for the dramatically decreased machine performance. |
|
|
|
Required if you use |
|
|
|
Required if you use |
|
|
| The number of control plane machines to provision. |
The only supported value is |
|
| The Cloud Credential Operator (CCO) mode. If no mode is specified, the CCO dynamically tries to determine the capabilities of the provided credentials, with a preference for mint mode on the platforms where multiple modes are supported. Note Not all CCO modes are supported for all cloud providers. For more information on CCO modes, see the Cloud Credential Operator entry in the Cluster Operators reference content. |
|
|
|
Enable or disable FIPS mode. The default is Important
The use of FIPS Validated / Modules in Process cryptographic libraries is only supported on OpenShift Container Platform deployments on the Note If you are using Azure File storage, you cannot enable FIPS mode. |
|
|
| Sources and repositories for the release-image content. |
Array of objects. Includes a |
|
|
Required if you use | String |
|
| Specify one or more repositories that may also contain the same images. | Array of strings |
|
| How to publish or expose the user-facing endpoints of your cluster, such as the Kubernetes API, OpenShift routes. |
|
|
| The SSH key or keys to authenticate access your cluster machines. Note
For production OpenShift Container Platform clusters on which you want to perform installation debugging or disaster recovery, specify an SSH key that your | One or more keys. For example: |
5.6.6.1.4. Additional Azure configuration parameters
Additional Azure configuration parameters are described in the following table:
| Parameter | Description | Values |
|---|---|---|
|
| The Azure disk size for the VM. |
Integer that represents the size of the disk in GB. The default is |
|
| Defines the type of disk. |
|
|
| The Azure disk size for the VM. |
Integer that represents the size of the disk in GB. The default is |
|
| Defines the type of disk. |
|
|
| The name of the resource group that contains the DNS zone for your base domain. |
String, for example |
|
| The outbound routing strategy used to connect your cluster to the internet. If you are using user-defined routing, you must have pre-existing networking available where the outbound routing has already been configured prior to installing a cluster. The installation program is not responsible for configuring user-defined routing. |
|
|
| The name of the Azure region that hosts your cluster. |
Any valid region name, such as |
|
| List of availability zones to place machines in. For high availability, specify at least two zones. |
List of zones, for example |
|
|
The name of the resource group that contains the existing VNet that you want to deploy your cluster to. This name cannot be the same as the | String. |
|
| The name of the existing VNet that you want to deploy your cluster to. | String. |
|
| The name of the existing subnet in your VNet that you want to deploy your control plane machines to. |
Valid CIDR, for example |
|
| The name of the existing subnet in your VNet that you want to deploy your compute machines to. |
Valid CIDR, for example |
|
|
The name of the Azure cloud environment that is used to configure the Azure SDK with the appropriate Azure API endpoints. If empty, the default value |
Any valid cloud environment, such as |
You cannot customize Azure Availability Zones or Use tags to organize your Azure resources with an Azure cluster.
5.6.6.2. Sample customized install-config.yaml file for Azure
You can customize the install-config.yaml file to specify more details about your OpenShift Container Platform cluster’s platform or modify the values of the required parameters.
This sample YAML file is provided for reference only. You must obtain your install-config.yaml file by using the installation program and modify it.
apiVersion: v1
baseDomain: example.com
controlPlane:
hyperthreading: Enabled
name: master
platform:
azure:
osDisk:
diskSizeGB: 1024
diskType: Premium_LRS
type: Standard_D8s_v3
replicas: 3
compute:
- hyperthreading: Enabled
name: worker
platform:
azure:
type: Standard_D2s_v3
osDisk:
diskSizeGB: 512
diskType: Standard_LRS
zones:
- "1"
- "2"
- "3"
replicas: 5
metadata:
name: test-cluster
networking:
clusterNetwork:
- cidr: 10.128.0.0/14
hostPrefix: 23
machineNetwork:
- cidr: 10.0.0.0/16
networkType: OpenShiftSDN
serviceNetwork:
- 172.30.0.0/16
platform:
azure:
region: centralus
baseDomainResourceGroupName: resource_group
networkResourceGroupName: vnet_resource_group
virtualNetwork: vnet
controlPlaneSubnet: control_plane_subnet
computeSubnet: compute_subnet
cloudName: AzurePublicCloud
pullSecret: '{"auths": ...}'
fips: false
sshKey: ssh-ed25519 AAAA... - 1 10 11 17
- Required. The installation program prompts you for this value.
- 2 6
- If you do not provide these parameters and values, the installation program provides the default value.
- 3 7
- The
controlPlanesection is a single mapping, but thecomputesection is a sequence of mappings. To meet the requirements of the different data structures, the first line of thecomputesection must begin with a hyphen,-, and the first line of thecontrolPlanesection must not. Only one control plane pool is used. - 4
- Whether to enable or disable simultaneous multithreading, or
hyperthreading. By default, simultaneous multithreading is enabled to increase the performance of your machines' cores. You can disable it by setting the parameter value toDisabled. If you disable simultaneous multithreading in some cluster machines, you must disable it in all cluster machines.ImportantIf you disable simultaneous multithreading, ensure that your capacity planning accounts for the dramatically decreased machine performance. Use larger virtual machine types, such as
Standard_D8s_v3, for your machines if you disable simultaneous multithreading. - 5 8
- You can specify the size of the disk to use in GB. Minimum recommendation for control plane nodes (also known as the master nodes) is 1024 GB.
- 9
- Specify a list of zones to deploy your machines to. For high availability, specify at least two zones.
- 12
- Specify the name of the resource group that contains the DNS zone for your base domain.
- 13
- If you use an existing VNet, specify the name of the resource group that contains it.
- 14
- If you use an existing VNet, specify its name.
- 15
- If you use an existing VNet, specify the name of the subnet to host the control plane machines.
- 16
- If you use an existing VNet, specify the name of the subnet to host the compute machines.
- 18
- Whether to enable or disable FIPS mode. By default, FIPS mode is not enabled. If FIPS mode is enabled, the Red Hat Enterprise Linux CoreOS (RHCOS) machines that OpenShift Container Platform runs on bypass the default Kubernetes cryptography suite and use the cryptography modules that are provided with RHCOS instead.Important
The use of FIPS Validated / Modules in Process cryptographic libraries is only supported on OpenShift Container Platform deployments on the
x86_64architecture. - 19
- You can optionally provide the
sshKeyvalue that you use to access the machines in your cluster.NoteFor production OpenShift Container Platform clusters on which you want to perform installation debugging or disaster recovery, specify an SSH key that your
ssh-agentprocess uses.
5.6.6.3. Configuring the cluster-wide proxy during installation
Production environments can deny direct access to the Internet and instead have an HTTP or HTTPS proxy available. You can configure a new OpenShift Container Platform cluster to use a proxy by configuring the proxy settings in the install-config.yaml file.
Prerequisites
-
You have an existing
install-config.yamlfile. You reviewed the sites that your cluster requires access to and determined whether any of them need to bypass the proxy. By default, all cluster egress traffic is proxied, including calls to hosting cloud provider APIs. You added sites to the
Proxyobject’sspec.noProxyfield to bypass the proxy if necessary.NoteThe
Proxyobjectstatus.noProxyfield is populated with the values of thenetworking.machineNetwork[].cidr,networking.clusterNetwork[].cidr, andnetworking.serviceNetwork[]fields from your installation configuration.For installations on Amazon Web Services (AWS), Google Cloud Platform (GCP), Microsoft Azure, and Red Hat OpenStack Platform (RHOSP), the
Proxyobjectstatus.noProxyfield is also populated with the instance metadata endpoint (169.254.169.254).
Procedure
Edit your
install-config.yamlfile and add the proxy settings. For example:apiVersion: v1 baseDomain: my.domain.com proxy: httpProxy: http://<username>:<pswd>@<ip>:<port>1 httpsProxy: https://<username>:<pswd>@<ip>:<port>2 noProxy: example.com3 additionalTrustBundle: |4 -----BEGIN CERTIFICATE----- <MY_TRUSTED_CA_CERT> -----END CERTIFICATE----- ...- 1
- A proxy URL to use for creating HTTP connections outside the cluster. The URL scheme must be
http. - 2
- A proxy URL to use for creating HTTPS connections outside the cluster.
- 3
- A comma-separated list of destination domain names, IP addresses, or other network CIDRs to exclude from proxying. Preface a domain with
.to match subdomains only. For example,.y.commatchesx.y.com, but noty.com. Use*to bypass the proxy for all destinations. - 4
- If provided, the installation program generates a config map that is named
user-ca-bundlein theopenshift-confignamespace to hold the additional CA certificates. If you provideadditionalTrustBundleand at least one proxy setting, theProxyobject is configured to reference theuser-ca-bundleconfig map in thetrustedCAfield. The Cluster Network Operator then creates atrusted-ca-bundleconfig map that merges the contents specified for thetrustedCAparameter with the RHCOS trust bundle. TheadditionalTrustBundlefield is required unless the proxy’s identity certificate is signed by an authority from the RHCOS trust bundle.
NoteThe installation program does not support the proxy
readinessEndpointsfield.- Save the file and reference it when installing OpenShift Container Platform.
The installation program creates a cluster-wide proxy that is named cluster that uses the proxy settings in the provided install-config.yaml file. If no proxy settings are provided, a cluster Proxy object is still created, but it will have a nil spec.
Only the Proxy object named cluster is supported, and no additional proxies can be created.
5.6.7. Deploying the cluster
You can install OpenShift Container Platform on a compatible cloud platform.
You can run the create cluster command of the installation program only once, during initial installation.
Prerequisites
- Configure an account with the cloud platform that hosts your cluster.
- Obtain the OpenShift Container Platform installation program and the pull secret for your cluster.
Procedure
Change to the directory that contains the installation program and initialize the cluster deployment:
$ ./openshift-install create cluster --dir <installation_directory> \1 --log-level=info2 NoteIf the cloud provider account that you configured on your host does not have sufficient permissions to deploy the cluster, the installation process stops, and the missing permissions are displayed.
When the cluster deployment completes, directions for accessing your cluster, including a link to its web console and credentials for the
kubeadminuser, display in your terminal.Example output
... INFO Install complete! INFO To access the cluster as the system:admin user when using 'oc', run 'export KUBECONFIG=/home/myuser/install_dir/auth/kubeconfig' INFO Access the OpenShift web-console here: https://console-openshift-console.apps.mycluster.example.com INFO Login to the console with user: "kubeadmin", and password: "4vYBz-Ee6gm-ymBZj-Wt5AL" INFO Time elapsed: 36m22sNoteThe cluster access and credential information also outputs to
<installation_directory>/.openshift_install.logwhen an installation succeeds.Important-
The Ignition config files that the installation program generates contain certificates that expire after 24 hours, which are then renewed at that time. If the cluster is shut down before renewing the certificates and the cluster is later restarted after the 24 hours have elapsed, the cluster automatically recovers the expired certificates. The exception is that you must manually approve the pending
node-bootstrappercertificate signing requests (CSRs) to recover kubelet certificates. See the documentation for Recovering from expired control plane certificates for more information. - It is recommended that you use Ignition config files within 12 hours after they are generated because the 24-hour certificate rotates from 16 to 22 hours after the cluster is installed. By using the Ignition config files within 12 hours, you can avoid installation failure if the certificate update runs during installation.
ImportantYou must not delete the installation program or the files that the installation program creates. Both are required to delete the cluster.
-
The Ignition config files that the installation program generates contain certificates that expire after 24 hours, which are then renewed at that time. If the cluster is shut down before renewing the certificates and the cluster is later restarted after the 24 hours have elapsed, the cluster automatically recovers the expired certificates. The exception is that you must manually approve the pending
5.6.8. Installing the OpenShift CLI by downloading the binary
You can install the OpenShift CLI (oc) to interact with OpenShift Container Platform from a command-line interface. You can install oc on Linux, Windows, or macOS.
If you installed an earlier version of oc, you cannot use it to complete all of the commands in OpenShift Container Platform 4.7. Download and install the new version of oc.
5.6.8.1. Installing the OpenShift CLI on Linux
You can install the OpenShift CLI (oc) binary on Linux by using the following procedure.
Procedure
- Navigate to the OpenShift Container Platform downloads page on the Red Hat Customer Portal.
- Select the appropriate version in the Version drop-down menu.
- Click Download Now next to the OpenShift v4.7 Linux Client entry and save the file.
Unpack the archive:
$ tar xvzf <file>Place the
ocbinary in a directory that is on yourPATH.To check your
PATH, execute the following command:$ echo $PATH
After you install the OpenShift CLI, it is available using the oc command:
$ oc <command>5.6.8.2. Installing the OpenShift CLI on Windows
You can install the OpenShift CLI (oc) binary on Windows by using the following procedure.
Procedure
- Navigate to the OpenShift Container Platform downloads page on the Red Hat Customer Portal.
- Select the appropriate version in the Version drop-down menu.
- Click Download Now next to the OpenShift v4.7 Windows Client entry and save the file.
- Unzip the archive with a ZIP program.
Move the
ocbinary to a directory that is on yourPATH.To check your
PATH, open the command prompt and execute the following command:C:\> path
After you install the OpenShift CLI, it is available using the oc command:
C:\> oc <command>5.6.8.3. Installing the OpenShift CLI on macOS
You can install the OpenShift CLI (oc) binary on macOS by using the following procedure.
Procedure
- Navigate to the OpenShift Container Platform downloads page on the Red Hat Customer Portal.
- Select the appropriate version in the Version drop-down menu.
- Click Download Now next to the OpenShift v4.7 MacOSX Client entry and save the file.
- Unpack and unzip the archive.
Move the
ocbinary to a directory on your PATH.To check your
PATH, open a terminal and execute the following command:$ echo $PATH
After you install the OpenShift CLI, it is available using the oc command:
$ oc <command>5.6.9. Logging in to the cluster by using the CLI
You can log in to your cluster as a default system user by exporting the cluster kubeconfig file. The kubeconfig file contains information about the cluster that is used by the CLI to connect a client to the correct cluster and API server. The file is specific to a cluster and is created during OpenShift Container Platform installation.
Prerequisites
- You deployed an OpenShift Container Platform cluster.
-
You installed the
ocCLI.
Procedure
Export the
kubeadmincredentials:$ export KUBECONFIG=<installation_directory>/auth/kubeconfig1 - 1
- For
<installation_directory>, specify the path to the directory that you stored the installation files in.
Verify you can run
occommands successfully using the exported configuration:$ oc whoamiExample output
system:admin
5.6.10. Telemetry access for OpenShift Container Platform
In OpenShift Container Platform 4.7, the Telemetry service, which runs by default to provide metrics about cluster health and the success of updates, requires internet access. If your cluster is connected to the internet, Telemetry runs automatically, and your cluster is registered to OpenShift Cluster Manager.
After you confirm that your OpenShift Cluster Manager inventory is correct, either maintained automatically by Telemetry or manually by using OpenShift Cluster Manager, use subscription watch to track your OpenShift Container Platform subscriptions at the account or multi-cluster level.
5.6.11. Next steps
- Customize your cluster.
- If necessary, you can opt out of remote health reporting.
5.7. Installing a private cluster on Azure
In OpenShift Container Platform version 4.7, you can install a private cluster into an existing Azure Virtual Network (VNet) on Microsoft Azure. The installation program provisions the rest of the required infrastructure, which you can further customize. To customize the installation, you modify parameters in the install-config.yaml file before you install the cluster.
5.7.1. Prerequisites
- Review details about the OpenShift Container Platform installation and update processes.
- Configure an Azure account to host the cluster and determine the tested and validated region to deploy the cluster to.
- If you use a firewall, you must configure it to allow the sites that your cluster requires access to.
- If you do not allow the system to manage identity and access management (IAM), then a cluster administrator can manually create and maintain IAM credentials. Manual mode can also be used in environments where the cloud IAM APIs are not reachable.
5.7.2. Private clusters
You can deploy a private OpenShift Container Platform cluster that does not expose external endpoints. Private clusters are accessible from only an internal network and are not visible to the Internet.
By default, OpenShift Container Platform is provisioned to use publicly-accessible DNS and endpoints. A private cluster sets the DNS, Ingress Controller, and API server to private when you deploy your cluster. This means that the cluster resources are only accessible from your internal network and are not visible to the internet.
To deploy a private cluster, you must use existing networking that meets your requirements. Your cluster resources might be shared between other clusters on the network.
Additionally, you must deploy a private cluster from a machine that has access the API services for the cloud you provision to, the hosts on the network that you provision, and to the internet to obtain installation media. You can use any machine that meets these access requirements and follows your company’s guidelines. For example, this machine can be a bastion host on your cloud network or a machine that has access to the network through a VPN.
5.7.2.1. Private clusters in Azure
To create a private cluster on Microsoft Azure, you must provide an existing private VNet and subnets to host the cluster. The installation program must also be able to resolve the DNS records that the cluster requires. The installation program configures the Ingress Operator and API server for only internal traffic.
Depending how your network connects to the private VNET, you might need to use a DNS forwarder to resolve the cluster’s private DNS records. The cluster’s machines use 168.63.129.16 internally for DNS resolution. For more information, see What is Azure Private DNS? and What is IP address 168.63.129.16? in the Azure documentation.
The cluster still requires access to Internet to access the Azure APIs.
The following items are not required or created when you install a private cluster:
-
A
BaseDomainResourceGroup, since the cluster does not create public records - Public IP addresses
- Public DNS records
Public endpoints
The cluster is configured so that the Operators do not create public records for the cluster and all cluster machines are placed in the private subnets that you specify.
5.7.2.1.1. Limitations
Private clusters on Azure are subject to only the limitations that are associated with the use of an existing VNet.
5.7.2.2. User-defined outbound routing
In OpenShift Container Platform, you can choose your own outbound routing for a cluster to connect to the Internet. This allows you to skip the creation of public IP addresses and the public load balancer.
You can configure user-defined routing by modifying parameters in the install-config.yaml file before installing your cluster. A pre-existing VNet is required to use outbound routing when installing a cluster; the installation program is not responsible for configuring this.
When configuring a cluster to use user-defined routing, the installation program does not create the following resources:
- Outbound rules for access to the Internet.
- Public IPs for the public load balancer.
- Kubernetes Service object to add the cluster machines to the public load balancer for outbound requests.
You must ensure the following items are available before setting user-defined routing:
- Egress to the Internet is possible to pull container images, unless using an internal registry mirror.
- The cluster can access Azure APIs.
- Various allowlist endpoints are configured. You can reference these endpoints in the Configuring your firewall section.
There are several pre-existing networking setups that are supported for Internet access using user-defined routing.
Private cluster with network address translation
You can use Azure VNET network address translation (NAT) to provide outbound Internet access for the subnets in your cluster. You can reference Create a NAT gateway using Azure CLI in the Azure documentation for configuration instructions.
When using a VNet setup with Azure NAT and user-defined routing configured, you can create a private cluster with no public endpoints.
Private cluster with Azure Firewall
You can use Azure Firewall to provide outbound routing for the VNet used to install the cluster. You can learn more about providing user-defined routing with Azure Firewall in the Azure documentation.
When using a VNet setup with Azure Firewall and user-defined routing configured, you can create a private cluster with no public endpoints.
Private cluster with a proxy configuration
You can use a proxy with user-defined routing to allow egress to the Internet. You must ensure that cluster Operators do not access Azure APIs using a proxy; Operators must have access to Azure APIs outside of the proxy.
When using the default route table for subnets, with 0.0.0.0/0 populated automatically by Azure, all Azure API requests are routed over Azure’s internal network even though the IP addresses are public. As long as the Network Security Group rules allow egress to Azure API endpoints, proxies with user-defined routing configured allow you to create private clusters with no public endpoints.
Private cluster with no Internet access
You can install a private network that restricts all access to the internet, except the Azure API. This is accomplished by mirroring the release image registry locally. Your cluster must have access to the following:
- An internal registry mirror that allows for pulling container images
- Access to Azure APIs
With these requirements available, you can use user-defined routing to create private clusters with no public endpoints.
5.7.3. About reusing a VNet for your OpenShift Container Platform cluster
In OpenShift Container Platform 4.7, you can deploy a cluster into an existing Azure Virtual Network (VNet) in Microsoft Azure. If you do, you must also use existing subnets within the VNet and routing rules.
By deploying OpenShift Container Platform into an existing Azure VNet, you might be able to avoid service limit constraints in new accounts or more easily abide by the operational constraints that your company’s guidelines set. This is a good option to use if you cannot obtain the infrastructure creation permissions that are required to create the VNet.
5.7.3.1. Requirements for using your VNet
When you deploy a cluster by using an existing VNet, you must perform additional network configuration before you install the cluster. In installer-provisioned infrastructure clusters, the installer usually creates the following components, but it does not create them when you install into an existing VNet:
- Subnets
- Route tables
- VNets
- Network Security Groups
The installation program requires that you use the cloud-provided DNS server. Using a custom DNS server is not supported and causes the installation to fail.
If you use a custom VNet, you must correctly configure it and its subnets for the installation program and the cluster to use. The installation program cannot subdivide network ranges for the cluster to use, set route tables for the subnets, or set VNet options like DHCP, so you must do so before you install the cluster.
The cluster must be able to access the resource group that contains the existing VNet and subnets. While all of the resources that the cluster creates are placed in a separate resource group that it creates, some network resources are used from a separate group. Some cluster Operators must be able to access resources in both resource groups. For example, the Machine API controller attaches NICS for the virtual machines that it creates to subnets from the networking resource group.
Your VNet must meet the following characteristics:
-
The VNet’s CIDR block must contain the
Networking.MachineCIDRrange, which is the IP address pool for cluster machines. - The VNet and its subnets must belong to the same resource group, and the subnets must be configured to use Azure-assigned DHCP IP addresses instead of static IP addresses.
You must provide two subnets within your VNet, one for the control plane machines and one for the compute machines. Because Azure distributes machines in different availability zones within the region that you specify, your cluster will have high availability by default.
To ensure that the subnets that you provide are suitable, the installation program confirms the following data:
- All the specified subnets exist.
- There are two private subnets, one for the control plane machines and one for the compute machines.
- The subnet CIDRs belong to the machine CIDR that you specified. Machines are not provisioned in availability zones that you do not provide private subnets for.
If you destroy a cluster that uses an existing VNet, the VNet is not deleted.
5.7.3.1.1. Network security group requirements
The network security groups for the subnets that host the compute and control plane machines require specific access to ensure that the cluster communication is correct. You must create rules to allow access to the required cluster communication ports.
The network security group rules must be in place before you install the cluster. If you attempt to install a cluster without the required access, the installation program cannot reach the Azure APIs, and installation fails.
| Port | Description | Control plane | Compute |
|---|---|---|---|
|
| Allows HTTP traffic | x | |
|
| Allows HTTPS traffic | x | |
|
| Allows communication to the control plane machines | x | |
|
| Allows internal communication to the machine config server for provisioning machines | x |
Since cluster components do not modify the user-provided network security groups, which the Kubernetes controllers update, a pseudo-network security group is created for the Kubernetes controller to modify without impacting the rest of the environment.
5.7.3.2. Division of permissions
Starting with OpenShift Container Platform 4.3, you do not need all of the permissions that are required for an installation program-provisioned infrastructure cluster to deploy a cluster. This change mimics the division of permissions that you might have at your company: some individuals can create different resources in your clouds than others. For example, you might be able to create application-specific items, like instances, storage, and load balancers, but not networking-related components such as VNets, subnet, or ingress rules.
The Azure credentials that you use when you create your cluster do not need the networking permissions that are required to make VNets and core networking components within the VNet, such as subnets, routing tables, internet gateways, NAT, and VPN. You still need permission to make the application resources that the machines within the cluster require, such as load balancers, security groups, storage accounts, and nodes.
5.7.3.3. Isolation between clusters
Because the cluster is unable to modify network security groups in an existing subnet, there is no way to isolate clusters from each other on the VNet.
5.7.4. Internet access for OpenShift Container Platform
In OpenShift Container Platform 4.7, you require access to the Internet to install your cluster.
You must have Internet access to:
- Access OpenShift Cluster Manager to download the installation program and perform subscription management. If the cluster has internet access and you do not disable Telemetry, that service automatically entitles your cluster.
- Access Quay.io to obtain the packages that are required to install your cluster.
- Obtain the packages that are required to perform cluster updates.
If your cluster cannot have direct Internet access, you can perform a restricted network installation on some types of infrastructure that you provision. During that process, you download the content that is required and use it to populate a mirror registry with the packages that you need to install a cluster and generate the installation program. With some installation types, the environment that you install your cluster in will not require Internet access. Before you update the cluster, you update the content of the mirror registry.
5.7.5. Generating an SSH private key and adding it to the agent
If you want to perform installation debugging or disaster recovery on your cluster, you must provide an SSH key to both your ssh-agent and the installation program. You can use this key to access the bootstrap machine in a public cluster to troubleshoot installation issues.
In a production environment, you require disaster recovery and debugging.
You can use this key to SSH into the master nodes as the user core. When you deploy the cluster, the key is added to the core user’s ~/.ssh/authorized_keys list.
You must use a local key, not one that you configured with platform-specific approaches such as AWS key pairs.
Procedure
If you do not have an SSH key that is configured for password-less authentication on your computer, create one. For example, on a computer that uses a Linux operating system, run the following command:
$ ssh-keygen -t ed25519 -N '' \ -f <path>/<file_name>1 - 1
- Specify the path and file name, such as
~/.ssh/id_rsa, of the new SSH key. If you have an existing key pair, ensure your public key is in the your~/.sshdirectory.
Running this command generates an SSH key that does not require a password in the location that you specified.
NoteIf you plan to install an OpenShift Container Platform cluster that uses FIPS Validated / Modules in Process cryptographic libraries on the
x86_64architecture, do not create a key that uses theed25519algorithm. Instead, create a key that uses thersaorecdsaalgorithm.Start the
ssh-agentprocess as a background task:$ eval "$(ssh-agent -s)"Example output
Agent pid 31874NoteIf your cluster is in FIPS mode, only use FIPS-compliant algorithms to generate the SSH key. The key must be either RSA or ECDSA.
Add your SSH private key to the
ssh-agent:$ ssh-add <path>/<file_name>1 Example output
Identity added: /home/<you>/<path>/<file_name> (<computer_name>)- 1
- Specify the path and file name for your SSH private key, such as
~/.ssh/id_rsa
Next steps
- When you install OpenShift Container Platform, provide the SSH public key to the installation program.
5.7.6. Obtaining the installation program
Before you install OpenShift Container Platform, download the installation file on a local computer.
Prerequisites
- You have a computer that runs Linux or macOS, with 500 MB of local disk space
Procedure
- Access the Infrastructure Provider page on the OpenShift Cluster Manager site. If you have a Red Hat account, log in with your credentials. If you do not, create an account.
- Select your infrastructure provider.
Navigate to the page for your installation type, download the installation program for your operating system, and place the file in the directory where you will store the installation configuration files.
ImportantThe installation program creates several files on the computer that you use to install your cluster. You must keep the installation program and the files that the installation program creates after you finish installing the cluster. Both files are required to delete the cluster.
ImportantDeleting the files created by the installation program does not remove your cluster, even if the cluster failed during installation. To remove your cluster, complete the OpenShift Container Platform uninstallation procedures for your specific cloud provider.
Extract the installation program. For example, on a computer that uses a Linux operating system, run the following command:
$ tar xvf openshift-install-linux.tar.gz- Download your installation pull secret from the Red Hat OpenShift Cluster Manager. This pull secret allows you to authenticate with the services that are provided by the included authorities, including Quay.io, which serves the container images for OpenShift Container Platform components.
5.7.7. Manually creating the installation configuration file
For installations of a private OpenShift Container Platform cluster that are only accessible from an internal network and are not visible to the Internet, you must manually generate your installation configuration file.
Prerequisites
- Obtain the OpenShift Container Platform installation program and the access token for your cluster.
Procedure
Create an installation directory to store your required installation assets in:
$ mkdir <installation_directory>ImportantYou must create a directory. Some installation assets, like bootstrap X.509 certificates have short expiration intervals, so you must not reuse an installation directory. If you want to reuse individual files from another cluster installation, you can copy them into your directory. However, the file names for the installation assets might change between releases. Use caution when copying installation files from an earlier OpenShift Container Platform version.
Customize the following
install-config.yamlfile template and save it in the<installation_directory>.NoteYou must name this configuration file
install-config.yaml.Back up the
install-config.yamlfile so that you can use it to install multiple clusters.ImportantThe
install-config.yamlfile is consumed during the next step of the installation process. You must back it up now.
5.7.7.1. Installation configuration parameters
Before you deploy an OpenShift Container Platform cluster, you provide parameter values to describe your account on the cloud platform that hosts your cluster and optionally customize your cluster’s platform. When you create the install-config.yaml installation configuration file, you provide values for the required parameters through the command line. If you customize your cluster, you can modify the install-config.yaml file to provide more details about the platform.
After installation, you cannot modify these parameters in the install-config.yaml file.
The openshift-install command does not validate field names for parameters. If an incorrect name is specified, the related file or object is not created, and no error is reported. Ensure that the field names for any parameters that are specified are correct.
5.7.7.1.1. Required configuration parameters
Required installation configuration parameters are described in the following table:
| Parameter | Description | Values |
|---|---|---|
|
|
The API version for the | String |
|
|
The base domain of your cloud provider. The base domain is used to create routes to your OpenShift Container Platform cluster components. The full DNS name for your cluster is a combination of the |
A fully-qualified domain or subdomain name, such as |
|
|
Kubernetes resource | Object |
|
|
The name of the cluster. DNS records for the cluster are all subdomains of |
String of lowercase letters, hyphens ( |
|
|
The configuration for the specific platform upon which to perform the installation: | Object |
|
| Get a pull secret from the Red Hat OpenShift Cluster Manager to authenticate downloading container images for OpenShift Container Platform components from services such as Quay.io. |
|
5.7.7.1.2. Network configuration parameters
You can customize your installation configuration based on the requirements of your existing network infrastructure. For example, you can expand the IP address block for the cluster network or provide different IP address blocks than the defaults.
Only IPv4 addresses are supported.
| Parameter | Description | Values |
|---|---|---|
|
| The configuration for the cluster network. | Object Note
You cannot modify parameters specified by the |
|
| The cluster network provider Container Network Interface (CNI) plug-in to install. |
Either |
|
| The IP address blocks for pods.
The default value is If you specify multiple IP address blocks, the blocks must not overlap. | An array of objects. For example: |
|
|
Required if you use An IPv4 network. |
An IP address block in Classless Inter-Domain Routing (CIDR) notation. The prefix length for an IPv4 block is between |
|
|
The subnet prefix length to assign to each individual node. For example, if | A subnet prefix.
The default value is |
|
|
The IP address block for services. The default value is The OpenShift SDN and OVN-Kubernetes network providers support only a single IP address block for the service network. | An array with an IP address block in CIDR format. For example: |
|
| The IP address blocks for machines. If you specify multiple IP address blocks, the blocks must not overlap. | An array of objects. For example: |
|
|
Required if you use | An IP network block in CIDR notation.
For example, Note
Set the |
5.7.7.1.3. Optional configuration parameters
Optional installation configuration parameters are described in the following table:
| Parameter | Description | Values |
|---|---|---|
|
| A PEM-encoded X.509 certificate bundle that is added to the nodes' trusted certificate store. This trust bundle may also be used when a proxy has been configured. | String |
|
| The configuration for the machines that comprise the compute nodes. |
Array of |
|
|
Determines the instruction set architecture of the machines in the pool. Currently, heteregeneous clusters are not supported, so all pools must specify the same architecture. Valid values are | String |
|
|
Whether to enable or disable simultaneous multithreading, or Important If you disable simultaneous multithreading, ensure that your capacity planning accounts for the dramatically decreased machine performance. |
|
|
|
Required if you use |
|
|
|
Required if you use |
|
|
| The number of compute machines, which are also known as worker machines, to provision. |
A positive integer greater than or equal to |
|
| The configuration for the machines that comprise the control plane. |
Array of |
|
|
Determines the instruction set architecture of the machines in the pool. Currently, heterogeneous clusters are not supported, so all pools must specify the same architecture. Valid values are | String |
|
|
Whether to enable or disable simultaneous multithreading, or Important If you disable simultaneous multithreading, ensure that your capacity planning accounts for the dramatically decreased machine performance. |
|
|
|
Required if you use |
|
|
|
Required if you use |
|
|
| The number of control plane machines to provision. |
The only supported value is |
|
| The Cloud Credential Operator (CCO) mode. If no mode is specified, the CCO dynamically tries to determine the capabilities of the provided credentials, with a preference for mint mode on the platforms where multiple modes are supported. Note Not all CCO modes are supported for all cloud providers. For more information on CCO modes, see the Cloud Credential Operator entry in the Cluster Operators reference content. |
|
|
|
Enable or disable FIPS mode. The default is Important
The use of FIPS Validated / Modules in Process cryptographic libraries is only supported on OpenShift Container Platform deployments on the Note If you are using Azure File storage, you cannot enable FIPS mode. |
|
|
| Sources and repositories for the release-image content. |
Array of objects. Includes a |
|
|
Required if you use | String |
|
| Specify one or more repositories that may also contain the same images. | Array of strings |
|
| How to publish or expose the user-facing endpoints of your cluster, such as the Kubernetes API, OpenShift routes. |
|
|
| The SSH key or keys to authenticate access your cluster machines. Note
For production OpenShift Container Platform clusters on which you want to perform installation debugging or disaster recovery, specify an SSH key that your | One or more keys. For example: |
5.7.7.1.4. Additional Azure configuration parameters
Additional Azure configuration parameters are described in the following table:
| Parameter | Description | Values |
|---|---|---|
|
| The Azure disk size for the VM. |
Integer that represents the size of the disk in GB. The default is |
|
| Defines the type of disk. |
|
|
| The Azure disk size for the VM. |
Integer that represents the size of the disk in GB. The default is |
|
| Defines the type of disk. |
|
|
| The name of the resource group that contains the DNS zone for your base domain. |
String, for example |
|
| The outbound routing strategy used to connect your cluster to the internet. If you are using user-defined routing, you must have pre-existing networking available where the outbound routing has already been configured prior to installing a cluster. The installation program is not responsible for configuring user-defined routing. |
|
|
| The name of the Azure region that hosts your cluster. |
Any valid region name, such as |
|
| List of availability zones to place machines in. For high availability, specify at least two zones. |
List of zones, for example |
|
|
The name of the resource group that contains the existing VNet that you want to deploy your cluster to. This name cannot be the same as the | String. |
|
| The name of the existing VNet that you want to deploy your cluster to. | String. |
|
| The name of the existing subnet in your VNet that you want to deploy your control plane machines to. |
Valid CIDR, for example |
|
| The name of the existing subnet in your VNet that you want to deploy your compute machines to. |
Valid CIDR, for example |
|
|
The name of the Azure cloud environment that is used to configure the Azure SDK with the appropriate Azure API endpoints. If empty, the default value |
Any valid cloud environment, such as |
You cannot customize Azure Availability Zones or Use tags to organize your Azure resources with an Azure cluster.
5.7.7.2. Sample customized install-config.yaml file for Azure
You can customize the install-config.yaml file to specify more details about your OpenShift Container Platform cluster’s platform or modify the values of the required parameters.
This sample YAML file is provided for reference only. You must obtain your install-config.yaml file by using the installation program and modify it.
apiVersion: v1
baseDomain: example.com
controlPlane:
hyperthreading: Enabled
name: master
platform:
azure:
osDisk:
diskSizeGB: 1024
diskType: Premium_LRS
type: Standard_D8s_v3
replicas: 3
compute:
- hyperthreading: Enabled
name: worker
platform:
azure:
type: Standard_D2s_v3
osDisk:
diskSizeGB: 512
diskType: Standard_LRS
zones:
- "1"
- "2"
- "3"
replicas: 5
metadata:
name: test-cluster
networking:
clusterNetwork:
- cidr: 10.128.0.0/14
hostPrefix: 23
machineNetwork:
- cidr: 10.0.0.0/16
networkType: OpenShiftSDN
serviceNetwork:
- 172.30.0.0/16
platform:
azure:
region: centralus
baseDomainResourceGroupName: resource_group
networkResourceGroupName: vnet_resource_group
virtualNetwork: vnet
controlPlaneSubnet: control_plane_subnet
computeSubnet: compute_subnet
outboundType: UserDefinedRouting
cloudName: AzurePublicCloud
pullSecret: '{"auths": ...}'
fips: false
sshKey: ssh-ed25519 AAAA...
publish: Internal - 1 10 11 18
- Required. The installation program prompts you for this value.
- 2 6
- If you do not provide these parameters and values, the installation program provides the default value.
- 3 7
- The
controlPlanesection is a single mapping, but thecomputesection is a sequence of mappings. To meet the requirements of the different data structures, the first line of thecomputesection must begin with a hyphen,-, and the first line of thecontrolPlanesection must not. Only one control plane pool is used. - 4
- Whether to enable or disable simultaneous multithreading, or
hyperthreading. By default, simultaneous multithreading is enabled to increase the performance of your machines' cores. You can disable it by setting the parameter value toDisabled. If you disable simultaneous multithreading in some cluster machines, you must disable it in all cluster machines.ImportantIf you disable simultaneous multithreading, ensure that your capacity planning accounts for the dramatically decreased machine performance. Use larger virtual machine types, such as
Standard_D8s_v3, for your machines if you disable simultaneous multithreading. - 5 8
- You can specify the size of the disk to use in GB. Minimum recommendation for control plane nodes (also known as the master nodes) is 1024 GB.
- 9
- Specify a list of zones to deploy your machines to. For high availability, specify at least two zones.
- 12
- Specify the name of the resource group that contains the DNS zone for your base domain.
- 13
- If you use an existing VNet, specify the name of the resource group that contains it.
- 14
- If you use an existing VNet, specify its name.
- 15
- If you use an existing VNet, specify the name of the subnet to host the control plane machines.
- 16
- If you use an existing VNet, specify the name of the subnet to host the compute machines.
- 17
- You can customize your own outbound routing. Configuring user-defined routing prevents exposing external endpoints in your cluster. User-defined routing for egress requires deploying your cluster to an existing VNet.
- 19
- Whether to enable or disable FIPS mode. By default, FIPS mode is not enabled. If FIPS mode is enabled, the Red Hat Enterprise Linux CoreOS (RHCOS) machines that OpenShift Container Platform runs on bypass the default Kubernetes cryptography suite and use the cryptography modules that are provided with RHCOS instead.Important
The use of FIPS Validated / Modules in Process cryptographic libraries is only supported on OpenShift Container Platform deployments on the
x86_64architecture. - 20
- You can optionally provide the
sshKeyvalue that you use to access the machines in your cluster.NoteFor production OpenShift Container Platform clusters on which you want to perform installation debugging or disaster recovery, specify an SSH key that your
ssh-agentprocess uses. - 21
- How to publish the user-facing endpoints of your cluster. Set
publishtoInternalto deploy a private cluster, which cannot be accessed from the Internet. The default value isExternal.
5.7.7.3. Configuring the cluster-wide proxy during installation
Production environments can deny direct access to the Internet and instead have an HTTP or HTTPS proxy available. You can configure a new OpenShift Container Platform cluster to use a proxy by configuring the proxy settings in the install-config.yaml file.
Prerequisites
-
You have an existing
install-config.yamlfile. You reviewed the sites that your cluster requires access to and determined whether any of them need to bypass the proxy. By default, all cluster egress traffic is proxied, including calls to hosting cloud provider APIs. You added sites to the
Proxyobject’sspec.noProxyfield to bypass the proxy if necessary.NoteThe
Proxyobjectstatus.noProxyfield is populated with the values of thenetworking.machineNetwork[].cidr,networking.clusterNetwork[].cidr, andnetworking.serviceNetwork[]fields from your installation configuration.For installations on Amazon Web Services (AWS), Google Cloud Platform (GCP), Microsoft Azure, and Red Hat OpenStack Platform (RHOSP), the
Proxyobjectstatus.noProxyfield is also populated with the instance metadata endpoint (169.254.169.254).
Procedure
Edit your
install-config.yamlfile and add the proxy settings. For example:apiVersion: v1 baseDomain: my.domain.com proxy: httpProxy: http://<username>:<pswd>@<ip>:<port>1 httpsProxy: https://<username>:<pswd>@<ip>:<port>2 noProxy: example.com3 additionalTrustBundle: |4 -----BEGIN CERTIFICATE----- <MY_TRUSTED_CA_CERT> -----END CERTIFICATE----- ...- 1
- A proxy URL to use for creating HTTP connections outside the cluster. The URL scheme must be
http. - 2
- A proxy URL to use for creating HTTPS connections outside the cluster.
- 3
- A comma-separated list of destination domain names, IP addresses, or other network CIDRs to exclude from proxying. Preface a domain with
.to match subdomains only. For example,.y.commatchesx.y.com, but noty.com. Use*to bypass the proxy for all destinations. - 4
- If provided, the installation program generates a config map that is named
user-ca-bundlein theopenshift-confignamespace to hold the additional CA certificates. If you provideadditionalTrustBundleand at least one proxy setting, theProxyobject is configured to reference theuser-ca-bundleconfig map in thetrustedCAfield. The Cluster Network Operator then creates atrusted-ca-bundleconfig map that merges the contents specified for thetrustedCAparameter with the RHCOS trust bundle. TheadditionalTrustBundlefield is required unless the proxy’s identity certificate is signed by an authority from the RHCOS trust bundle.
NoteThe installation program does not support the proxy
readinessEndpointsfield.- Save the file and reference it when installing OpenShift Container Platform.
The installation program creates a cluster-wide proxy that is named cluster that uses the proxy settings in the provided install-config.yaml file. If no proxy settings are provided, a cluster Proxy object is still created, but it will have a nil spec.
Only the Proxy object named cluster is supported, and no additional proxies can be created.
5.7.8. Deploying the cluster
You can install OpenShift Container Platform on a compatible cloud platform.
You can run the create cluster command of the installation program only once, during initial installation.
Prerequisites
- Configure an account with the cloud platform that hosts your cluster.
- Obtain the OpenShift Container Platform installation program and the pull secret for your cluster.
Procedure
Change to the directory that contains the installation program and initialize the cluster deployment:
$ ./openshift-install create cluster --dir <installation_directory> \1 --log-level=info2 NoteIf the cloud provider account that you configured on your host does not have sufficient permissions to deploy the cluster, the installation process stops, and the missing permissions are displayed.
When the cluster deployment completes, directions for accessing your cluster, including a link to its web console and credentials for the
kubeadminuser, display in your terminal.Example output
... INFO Install complete! INFO To access the cluster as the system:admin user when using 'oc', run 'export KUBECONFIG=/home/myuser/install_dir/auth/kubeconfig' INFO Access the OpenShift web-console here: https://console-openshift-console.apps.mycluster.example.com INFO Login to the console with user: "kubeadmin", and password: "4vYBz-Ee6gm-ymBZj-Wt5AL" INFO Time elapsed: 36m22sNoteThe cluster access and credential information also outputs to
<installation_directory>/.openshift_install.logwhen an installation succeeds.Important-
The Ignition config files that the installation program generates contain certificates that expire after 24 hours, which are then renewed at that time. If the cluster is shut down before renewing the certificates and the cluster is later restarted after the 24 hours have elapsed, the cluster automatically recovers the expired certificates. The exception is that you must manually approve the pending
node-bootstrappercertificate signing requests (CSRs) to recover kubelet certificates. See the documentation for Recovering from expired control plane certificates for more information. - It is recommended that you use Ignition config files within 12 hours after they are generated because the 24-hour certificate rotates from 16 to 22 hours after the cluster is installed. By using the Ignition config files within 12 hours, you can avoid installation failure if the certificate update runs during installation.
ImportantYou must not delete the installation program or the files that the installation program creates. Both are required to delete the cluster.
-
The Ignition config files that the installation program generates contain certificates that expire after 24 hours, which are then renewed at that time. If the cluster is shut down before renewing the certificates and the cluster is later restarted after the 24 hours have elapsed, the cluster automatically recovers the expired certificates. The exception is that you must manually approve the pending
5.7.9. Installing the OpenShift CLI by downloading the binary
You can install the OpenShift CLI (oc) to interact with OpenShift Container Platform from a command-line interface. You can install oc on Linux, Windows, or macOS.
If you installed an earlier version of oc, you cannot use it to complete all of the commands in OpenShift Container Platform 4.7. Download and install the new version of oc.
5.7.9.1. Installing the OpenShift CLI on Linux
You can install the OpenShift CLI (oc) binary on Linux by using the following procedure.
Procedure
- Navigate to the OpenShift Container Platform downloads page on the Red Hat Customer Portal.
- Select the appropriate version in the Version drop-down menu.
- Click Download Now next to the OpenShift v4.7 Linux Client entry and save the file.
Unpack the archive:
$ tar xvzf <file>Place the
ocbinary in a directory that is on yourPATH.To check your
PATH, execute the following command:$ echo $PATH
After you install the OpenShift CLI, it is available using the oc command:
$ oc <command>5.7.9.2. Installing the OpenShift CLI on Windows
You can install the OpenShift CLI (oc) binary on Windows by using the following procedure.
Procedure
- Navigate to the OpenShift Container Platform downloads page on the Red Hat Customer Portal.
- Select the appropriate version in the Version drop-down menu.
- Click Download Now next to the OpenShift v4.7 Windows Client entry and save the file.
- Unzip the archive with a ZIP program.
Move the
ocbinary to a directory that is on yourPATH.To check your
PATH, open the command prompt and execute the following command:C:\> path
After you install the OpenShift CLI, it is available using the oc command:
C:\> oc <command>5.7.9.3. Installing the OpenShift CLI on macOS
You can install the OpenShift CLI (oc) binary on macOS by using the following procedure.
Procedure
- Navigate to the OpenShift Container Platform downloads page on the Red Hat Customer Portal.
- Select the appropriate version in the Version drop-down menu.
- Click Download Now next to the OpenShift v4.7 MacOSX Client entry and save the file.
- Unpack and unzip the archive.
Move the
ocbinary to a directory on your PATH.To check your
PATH, open a terminal and execute the following command:$ echo $PATH
After you install the OpenShift CLI, it is available using the oc command:
$ oc <command>5.7.10. Logging in to the cluster by using the CLI
You can log in to your cluster as a default system user by exporting the cluster kubeconfig file. The kubeconfig file contains information about the cluster that is used by the CLI to connect a client to the correct cluster and API server. The file is specific to a cluster and is created during OpenShift Container Platform installation.
Prerequisites
- You deployed an OpenShift Container Platform cluster.
-
You installed the
ocCLI.
Procedure
Export the
kubeadmincredentials:$ export KUBECONFIG=<installation_directory>/auth/kubeconfig1 - 1
- For
<installation_directory>, specify the path to the directory that you stored the installation files in.
Verify you can run
occommands successfully using the exported configuration:$ oc whoamiExample output
system:admin
5.7.11. Telemetry access for OpenShift Container Platform
In OpenShift Container Platform 4.7, the Telemetry service, which runs by default to provide metrics about cluster health and the success of updates, requires internet access. If your cluster is connected to the internet, Telemetry runs automatically, and your cluster is registered to OpenShift Cluster Manager.
After you confirm that your OpenShift Cluster Manager inventory is correct, either maintained automatically by Telemetry or manually by using OpenShift Cluster Manager, use subscription watch to track your OpenShift Container Platform subscriptions at the account or multi-cluster level.
5.7.12. Next steps
- Customize your cluster.
- If necessary, you can opt out of remote health reporting.
5.8. Installing a cluster on Azure into a government region
In OpenShift Container Platform version 4.7, you can install a cluster on Microsoft Azure into a government region. To configure the government region, you modify parameters in the install-config.yaml file before you install the cluster.
5.8.1. Prerequisites
- Review details about the OpenShift Container Platform installation and update processes.
- Configure an Azure account to host the cluster and determine the tested and validated government region to deploy the cluster to.
- If you use a firewall, you must configure it to allow the sites that your cluster requires access to.
- If you do not allow the system to manage identity and access management (IAM), then a cluster administrator can manually create and maintain IAM credentials. Manual mode can also be used in environments where the cloud IAM APIs are not reachable.
5.8.2. Azure government regions
OpenShift Container Platform supports deploying a cluster to Microsoft Azure Government (MAG) regions. MAG is specifically designed for US government agencies at the federal, state, and local level, as well as contractors, educational institutions, and other US customers that must run sensitive workloads on Azure. MAG is composed of government-only data center regions, all granted an Impact Level 5 Provisional Authorization.
Installing to a MAG region requires manually configuring the Azure Government dedicated cloud instance and region in the install-config.yaml file. You must also update your service principal to reference the appropriate government environment.
The Azure government region cannot be selected using the guided terminal prompts from the installation program. You must define the region manually in the install-config.yaml file. Remember to also set the dedicated cloud instance, like AzureUSGovernmentCloud, based on the region specified.
5.8.3. Private clusters
You can deploy a private OpenShift Container Platform cluster that does not expose external endpoints. Private clusters are accessible from only an internal network and are not visible to the Internet.
By default, OpenShift Container Platform is provisioned to use publicly-accessible DNS and endpoints. A private cluster sets the DNS, Ingress Controller, and API server to private when you deploy your cluster. This means that the cluster resources are only accessible from your internal network and are not visible to the internet.
To deploy a private cluster, you must use existing networking that meets your requirements. Your cluster resources might be shared between other clusters on the network.
Additionally, you must deploy a private cluster from a machine that has access the API services for the cloud you provision to, the hosts on the network that you provision, and to the internet to obtain installation media. You can use any machine that meets these access requirements and follows your company’s guidelines. For example, this machine can be a bastion host on your cloud network or a machine that has access to the network through a VPN.
5.8.3.1. Private clusters in Azure
To create a private cluster on Microsoft Azure, you must provide an existing private VNet and subnets to host the cluster. The installation program must also be able to resolve the DNS records that the cluster requires. The installation program configures the Ingress Operator and API server for only internal traffic.
Depending how your network connects to the private VNET, you might need to use a DNS forwarder to resolve the cluster’s private DNS records. The cluster’s machines use 168.63.129.16 internally for DNS resolution. For more information, see What is Azure Private DNS? and What is IP address 168.63.129.16? in the Azure documentation.
The cluster still requires access to Internet to access the Azure APIs.
The following items are not required or created when you install a private cluster:
-
A
BaseDomainResourceGroup, since the cluster does not create public records - Public IP addresses
- Public DNS records
Public endpoints
The cluster is configured so that the Operators do not create public records for the cluster and all cluster machines are placed in the private subnets that you specify.
5.8.3.1.1. Limitations
Private clusters on Azure are subject to only the limitations that are associated with the use of an existing VNet.
5.8.3.2. User-defined outbound routing
In OpenShift Container Platform, you can choose your own outbound routing for a cluster to connect to the Internet. This allows you to skip the creation of public IP addresses and the public load balancer.
You can configure user-defined routing by modifying parameters in the install-config.yaml file before installing your cluster. A pre-existing VNet is required to use outbound routing when installing a cluster; the installation program is not responsible for configuring this.
When configuring a cluster to use user-defined routing, the installation program does not create the following resources:
- Outbound rules for access to the Internet.
- Public IPs for the public load balancer.
- Kubernetes Service object to add the cluster machines to the public load balancer for outbound requests.
You must ensure the following items are available before setting user-defined routing:
- Egress to the Internet is possible to pull container images, unless using an internal registry mirror.
- The cluster can access Azure APIs.
- Various allowlist endpoints are configured. You can reference these endpoints in the Configuring your firewall section.
There are several pre-existing networking setups that are supported for Internet access using user-defined routing.
Private cluster with network address translation
You can use Azure VNET network address translation (NAT) to provide outbound Internet access for the subnets in your cluster. You can reference Create a NAT gateway using Azure CLI in the Azure documentation for configuration instructions.
When using a VNet setup with Azure NAT and user-defined routing configured, you can create a private cluster with no public endpoints.
Private cluster with Azure Firewall
You can use Azure Firewall to provide outbound routing for the VNet used to install the cluster. You can learn more about providing user-defined routing with Azure Firewall in the Azure documentation.
When using a VNet setup with Azure Firewall and user-defined routing configured, you can create a private cluster with no public endpoints.
Private cluster with a proxy configuration
You can use a proxy with user-defined routing to allow egress to the Internet. You must ensure that cluster Operators do not access Azure APIs using a proxy; Operators must have access to Azure APIs outside of the proxy.
When using the default route table for subnets, with 0.0.0.0/0 populated automatically by Azure, all Azure API requests are routed over Azure’s internal network even though the IP addresses are public. As long as the Network Security Group rules allow egress to Azure API endpoints, proxies with user-defined routing configured allow you to create private clusters with no public endpoints.
Private cluster with no Internet access
You can install a private network that restricts all access to the internet, except the Azure API. This is accomplished by mirroring the release image registry locally. Your cluster must have access to the following:
- An internal registry mirror that allows for pulling container images
- Access to Azure APIs
With these requirements available, you can use user-defined routing to create private clusters with no public endpoints.
5.8.4. About reusing a VNet for your OpenShift Container Platform cluster
In OpenShift Container Platform 4.7, you can deploy a cluster into an existing Azure Virtual Network (VNet) in Microsoft Azure. If you do, you must also use existing subnets within the VNet and routing rules.
By deploying OpenShift Container Platform into an existing Azure VNet, you might be able to avoid service limit constraints in new accounts or more easily abide by the operational constraints that your company’s guidelines set. This is a good option to use if you cannot obtain the infrastructure creation permissions that are required to create the VNet.
5.8.4.1. Requirements for using your VNet
When you deploy a cluster by using an existing VNet, you must perform additional network configuration before you install the cluster. In installer-provisioned infrastructure clusters, the installer usually creates the following components, but it does not create them when you install into an existing VNet:
- Subnets
- Route tables
- VNets
- Network Security Groups
The installation program requires that you use the cloud-provided DNS server. Using a custom DNS server is not supported and causes the installation to fail.
If you use a custom VNet, you must correctly configure it and its subnets for the installation program and the cluster to use. The installation program cannot subdivide network ranges for the cluster to use, set route tables for the subnets, or set VNet options like DHCP, so you must do so before you install the cluster.
The cluster must be able to access the resource group that contains the existing VNet and subnets. While all of the resources that the cluster creates are placed in a separate resource group that it creates, some network resources are used from a separate group. Some cluster Operators must be able to access resources in both resource groups. For example, the Machine API controller attaches NICS for the virtual machines that it creates to subnets from the networking resource group.
Your VNet must meet the following characteristics:
-
The VNet’s CIDR block must contain the
Networking.MachineCIDRrange, which is the IP address pool for cluster machines. - The VNet and its subnets must belong to the same resource group, and the subnets must be configured to use Azure-assigned DHCP IP addresses instead of static IP addresses.
You must provide two subnets within your VNet, one for the control plane machines and one for the compute machines. Because Azure distributes machines in different availability zones within the region that you specify, your cluster will have high availability by default.
To ensure that the subnets that you provide are suitable, the installation program confirms the following data:
- All the specified subnets exist.
- There are two private subnets, one for the control plane machines and one for the compute machines.
- The subnet CIDRs belong to the machine CIDR that you specified. Machines are not provisioned in availability zones that you do not provide private subnets for. If required, the installation program creates public load balancers that manage the control plane and worker nodes, and Azure allocates a public IP address to them.
If you destroy a cluster that uses an existing VNet, the VNet is not deleted.
5.8.4.1.1. Network security group requirements
The network security groups for the subnets that host the compute and control plane machines require specific access to ensure that the cluster communication is correct. You must create rules to allow access to the required cluster communication ports.
The network security group rules must be in place before you install the cluster. If you attempt to install a cluster without the required access, the installation program cannot reach the Azure APIs, and installation fails.
| Port | Description | Control plane | Compute |
|---|---|---|---|
|
| Allows HTTP traffic | x | |
|
| Allows HTTPS traffic | x | |
|
| Allows communication to the control plane machines | x | |
|
| Allows internal communication to the machine config server for provisioning machines | x |
Since cluster components do not modify the user-provided network security groups, which the Kubernetes controllers update, a pseudo-network security group is created for the Kubernetes controller to modify without impacting the rest of the environment.
5.8.4.2. Division of permissions
Starting with OpenShift Container Platform 4.3, you do not need all of the permissions that are required for an installation program-provisioned infrastructure cluster to deploy a cluster. This change mimics the division of permissions that you might have at your company: some individuals can create different resources in your clouds than others. For example, you might be able to create application-specific items, like instances, storage, and load balancers, but not networking-related components such as VNets, subnet, or ingress rules.
The Azure credentials that you use when you create your cluster do not need the networking permissions that are required to make VNets and core networking components within the VNet, such as subnets, routing tables, internet gateways, NAT, and VPN. You still need permission to make the application resources that the machines within the cluster require, such as load balancers, security groups, storage accounts, and nodes.
5.8.4.3. Isolation between clusters
Because the cluster is unable to modify network security groups in an existing subnet, there is no way to isolate clusters from each other on the VNet.
5.8.5. Internet access for OpenShift Container Platform
In OpenShift Container Platform 4.7, you require access to the Internet to install your cluster.
You must have Internet access to:
- Access OpenShift Cluster Manager to download the installation program and perform subscription management. If the cluster has internet access and you do not disable Telemetry, that service automatically entitles your cluster.
- Access Quay.io to obtain the packages that are required to install your cluster.
- Obtain the packages that are required to perform cluster updates.
If your cluster cannot have direct Internet access, you can perform a restricted network installation on some types of infrastructure that you provision. During that process, you download the content that is required and use it to populate a mirror registry with the packages that you need to install a cluster and generate the installation program. With some installation types, the environment that you install your cluster in will not require Internet access. Before you update the cluster, you update the content of the mirror registry.
5.8.6. Generating an SSH private key and adding it to the agent
If you want to perform installation debugging or disaster recovery on your cluster, you must provide an SSH key to both your ssh-agent and the installation program. You can use this key to access the bootstrap machine in a public cluster to troubleshoot installation issues.
In a production environment, you require disaster recovery and debugging.
You can use this key to SSH into the master nodes as the user core. When you deploy the cluster, the key is added to the core user’s ~/.ssh/authorized_keys list.
You must use a local key, not one that you configured with platform-specific approaches such as AWS key pairs.
Procedure
If you do not have an SSH key that is configured for password-less authentication on your computer, create one. For example, on a computer that uses a Linux operating system, run the following command:
$ ssh-keygen -t ed25519 -N '' \ -f <path>/<file_name>1 - 1
- Specify the path and file name, such as
~/.ssh/id_rsa, of the new SSH key. If you have an existing key pair, ensure your public key is in the your~/.sshdirectory.
Running this command generates an SSH key that does not require a password in the location that you specified.
NoteIf you plan to install an OpenShift Container Platform cluster that uses FIPS Validated / Modules in Process cryptographic libraries on the
x86_64architecture, do not create a key that uses theed25519algorithm. Instead, create a key that uses thersaorecdsaalgorithm.Start the
ssh-agentprocess as a background task:$ eval "$(ssh-agent -s)"Example output
Agent pid 31874NoteIf your cluster is in FIPS mode, only use FIPS-compliant algorithms to generate the SSH key. The key must be either RSA or ECDSA.
Add your SSH private key to the
ssh-agent:$ ssh-add <path>/<file_name>1 Example output
Identity added: /home/<you>/<path>/<file_name> (<computer_name>)- 1
- Specify the path and file name for your SSH private key, such as
~/.ssh/id_rsa
Next steps
- When you install OpenShift Container Platform, provide the SSH public key to the installation program.
5.8.7. Obtaining the installation program
Before you install OpenShift Container Platform, download the installation file on a local computer.
Prerequisites
- You have a computer that runs Linux or macOS, with 500 MB of local disk space
Procedure
- Access the Infrastructure Provider page on the OpenShift Cluster Manager site. If you have a Red Hat account, log in with your credentials. If you do not, create an account.
- Select your infrastructure provider.
Navigate to the page for your installation type, download the installation program for your operating system, and place the file in the directory where you will store the installation configuration files.
ImportantThe installation program creates several files on the computer that you use to install your cluster. You must keep the installation program and the files that the installation program creates after you finish installing the cluster. Both files are required to delete the cluster.
ImportantDeleting the files created by the installation program does not remove your cluster, even if the cluster failed during installation. To remove your cluster, complete the OpenShift Container Platform uninstallation procedures for your specific cloud provider.
Extract the installation program. For example, on a computer that uses a Linux operating system, run the following command:
$ tar xvf openshift-install-linux.tar.gz- Download your installation pull secret from the Red Hat OpenShift Cluster Manager. This pull secret allows you to authenticate with the services that are provided by the included authorities, including Quay.io, which serves the container images for OpenShift Container Platform components.
5.8.8. Manually creating the installation configuration file
When installing OpenShift Container Platform on Microsoft Azure into a government region, you must manually generate your installation configuration file.
Prerequisites
- Obtain the OpenShift Container Platform installation program and the access token for your cluster.
Procedure
Create an installation directory to store your required installation assets in:
$ mkdir <installation_directory>ImportantYou must create a directory. Some installation assets, like bootstrap X.509 certificates have short expiration intervals, so you must not reuse an installation directory. If you want to reuse individual files from another cluster installation, you can copy them into your directory. However, the file names for the installation assets might change between releases. Use caution when copying installation files from an earlier OpenShift Container Platform version.
Customize the following
install-config.yamlfile template and save it in the<installation_directory>.NoteYou must name this configuration file
install-config.yaml.Back up the
install-config.yamlfile so that you can use it to install multiple clusters.ImportantThe
install-config.yamlfile is consumed during the next step of the installation process. You must back it up now.
5.8.8.1. Installation configuration parameters
Before you deploy an OpenShift Container Platform cluster, you provide parameter values to describe your account on the cloud platform that hosts your cluster and optionally customize your cluster’s platform. When you create the install-config.yaml installation configuration file, you provide values for the required parameters through the command line. If you customize your cluster, you can modify the install-config.yaml file to provide more details about the platform.
After installation, you cannot modify these parameters in the install-config.yaml file.
The openshift-install command does not validate field names for parameters. If an incorrect name is specified, the related file or object is not created, and no error is reported. Ensure that the field names for any parameters that are specified are correct.
5.8.8.1.1. Required configuration parameters
Required installation configuration parameters are described in the following table:
| Parameter | Description | Values |
|---|---|---|
|
|
The API version for the | String |
|
|
The base domain of your cloud provider. The base domain is used to create routes to your OpenShift Container Platform cluster components. The full DNS name for your cluster is a combination of the |
A fully-qualified domain or subdomain name, such as |
|
|
Kubernetes resource | Object |
|
|
The name of the cluster. DNS records for the cluster are all subdomains of |
String of lowercase letters, hyphens ( |
|
|
The configuration for the specific platform upon which to perform the installation: | Object |
|
| Get a pull secret from the Red Hat OpenShift Cluster Manager to authenticate downloading container images for OpenShift Container Platform components from services such as Quay.io. |
|
5.8.8.1.2. Network configuration parameters
You can customize your installation configuration based on the requirements of your existing network infrastructure. For example, you can expand the IP address block for the cluster network or provide different IP address blocks than the defaults.
Only IPv4 addresses are supported.
| Parameter | Description | Values |
|---|---|---|
|
| The configuration for the cluster network. | Object Note
You cannot modify parameters specified by the |
|
| The cluster network provider Container Network Interface (CNI) plug-in to install. |
Either |
|
| The IP address blocks for pods.
The default value is If you specify multiple IP address blocks, the blocks must not overlap. | An array of objects. For example: |
|
|
Required if you use An IPv4 network. |
An IP address block in Classless Inter-Domain Routing (CIDR) notation. The prefix length for an IPv4 block is between |
|
|
The subnet prefix length to assign to each individual node. For example, if | A subnet prefix.
The default value is |
|
|
The IP address block for services. The default value is The OpenShift SDN and OVN-Kubernetes network providers support only a single IP address block for the service network. | An array with an IP address block in CIDR format. For example: |
|
| The IP address blocks for machines. If you specify multiple IP address blocks, the blocks must not overlap. | An array of objects. For example: |
|
|
Required if you use | An IP network block in CIDR notation.
For example, Note
Set the |
5.8.8.1.3. Optional configuration parameters
Optional installation configuration parameters are described in the following table:
| Parameter | Description | Values |
|---|---|---|
|
| A PEM-encoded X.509 certificate bundle that is added to the nodes' trusted certificate store. This trust bundle may also be used when a proxy has been configured. | String |
|
| The configuration for the machines that comprise the compute nodes. |
Array of |
|
|
Determines the instruction set architecture of the machines in the pool. Currently, heteregeneous clusters are not supported, so all pools must specify the same architecture. Valid values are | String |
|
|
Whether to enable or disable simultaneous multithreading, or Important If you disable simultaneous multithreading, ensure that your capacity planning accounts for the dramatically decreased machine performance. |
|
|
|
Required if you use |
|
|
|
Required if you use |
|
|
| The number of compute machines, which are also known as worker machines, to provision. |
A positive integer greater than or equal to |
|
| The configuration for the machines that comprise the control plane. |
Array of |
|
|
Determines the instruction set architecture of the machines in the pool. Currently, heterogeneous clusters are not supported, so all pools must specify the same architecture. Valid values are | String |
|
|
Whether to enable or disable simultaneous multithreading, or Important If you disable simultaneous multithreading, ensure that your capacity planning accounts for the dramatically decreased machine performance. |
|
|
|
Required if you use |
|
|
|
Required if you use |
|
|
| The number of control plane machines to provision. |
The only supported value is |
|
| The Cloud Credential Operator (CCO) mode. If no mode is specified, the CCO dynamically tries to determine the capabilities of the provided credentials, with a preference for mint mode on the platforms where multiple modes are supported. Note Not all CCO modes are supported for all cloud providers. For more information on CCO modes, see the Cloud Credential Operator entry in the Cluster Operators reference content. |
|
|
|
Enable or disable FIPS mode. The default is Important
The use of FIPS Validated / Modules in Process cryptographic libraries is only supported on OpenShift Container Platform deployments on the Note If you are using Azure File storage, you cannot enable FIPS mode. |
|
|
| Sources and repositories for the release-image content. |
Array of objects. Includes a |
|
|
Required if you use | String |
|
| Specify one or more repositories that may also contain the same images. | Array of strings |
|
| How to publish or expose the user-facing endpoints of your cluster, such as the Kubernetes API, OpenShift routes. |
|
|
| The SSH key or keys to authenticate access your cluster machines. Note
For production OpenShift Container Platform clusters on which you want to perform installation debugging or disaster recovery, specify an SSH key that your | One or more keys. For example: |
5.8.8.1.4. Additional Azure configuration parameters
Additional Azure configuration parameters are described in the following table:
| Parameter | Description | Values |
|---|---|---|
|
| The Azure disk size for the VM. |
Integer that represents the size of the disk in GB. The default is |
|
| Defines the type of disk. |
|
|
| The Azure disk size for the VM. |
Integer that represents the size of the disk in GB. The default is |
|
| Defines the type of disk. |
|
|
| The name of the resource group that contains the DNS zone for your base domain. |
String, for example |
|
| The outbound routing strategy used to connect your cluster to the internet. If you are using user-defined routing, you must have pre-existing networking available where the outbound routing has already been configured prior to installing a cluster. The installation program is not responsible for configuring user-defined routing. |
|
|
| The name of the Azure region that hosts your cluster. |
Any valid region name, such as |
|
| List of availability zones to place machines in. For high availability, specify at least two zones. |
List of zones, for example |
|
|
The name of the resource group that contains the existing VNet that you want to deploy your cluster to. This name cannot be the same as the | String. |
|
| The name of the existing VNet that you want to deploy your cluster to. | String. |
|
| The name of the existing subnet in your VNet that you want to deploy your control plane machines to. |
Valid CIDR, for example |
|
| The name of the existing subnet in your VNet that you want to deploy your compute machines to. |
Valid CIDR, for example |
|
|
The name of the Azure cloud environment that is used to configure the Azure SDK with the appropriate Azure API endpoints. If empty, the default value |
Any valid cloud environment, such as |
You cannot customize Azure Availability Zones or Use tags to organize your Azure resources with an Azure cluster.
5.8.8.2. Sample customized install-config.yaml file for Azure
You can customize the install-config.yaml file to specify more details about your OpenShift Container Platform cluster’s platform or modify the values of the required parameters.
This sample YAML file is provided for reference only. You must obtain your install-config.yaml file by using the installation program and modify it.
apiVersion: v1
baseDomain: example.com
controlPlane:
hyperthreading: Enabled
name: master
platform:
azure:
osDisk:
diskSizeGB: 1024
diskType: Premium_LRS
type: Standard_D8s_v3
replicas: 3
compute:
- hyperthreading: Enabled
name: worker
platform:
azure:
type: Standard_D2s_v3
osDisk:
diskSizeGB: 512
diskType: Standard_LRS
zones:
- "1"
- "2"
- "3"
replicas: 5
metadata:
name: test-cluster
networking:
clusterNetwork:
- cidr: 10.128.0.0/14
hostPrefix: 23
machineNetwork:
- cidr: 10.0.0.0/16
networkType: OpenShiftSDN
serviceNetwork:
- 172.30.0.0/16
platform:
azure:
region: usgovvirginia
baseDomainResourceGroupName: resource_group
networkResourceGroupName: vnet_resource_group
virtualNetwork: vnet
controlPlaneSubnet: control_plane_subnet
computeSubnet: compute_subnet
outboundType: UserDefinedRouting
cloudName: AzureUSGovernmentCloud
pullSecret: '{"auths": ...}'
fips: false
sshKey: ssh-ed25519 AAAA...
publish: Internal - 1 10 18
- Required.
- 2 6
- If you do not provide these parameters and values, the installation program provides the default value.
- 3 7
- The
controlPlanesection is a single mapping, but thecomputesection is a sequence of mappings. To meet the requirements of the different data structures, the first line of thecomputesection must begin with a hyphen,-, and the first line of thecontrolPlanesection must not. Only one control plane pool is used. - 4
- Whether to enable or disable simultaneous multithreading, or
hyperthreading. By default, simultaneous multithreading is enabled to increase the performance of your machines' cores. You can disable it by setting the parameter value toDisabled. If you disable simultaneous multithreading in some cluster machines, you must disable it in all cluster machines.ImportantIf you disable simultaneous multithreading, ensure that your capacity planning accounts for the dramatically decreased machine performance. Use larger virtual machine types, such as
Standard_D8s_v3, for your machines if you disable simultaneous multithreading. - 5 8
- You can specify the size of the disk to use in GB. Minimum recommendation for control plane nodes (also known as the master nodes) is 1024 GB.
- 9
- Specify a list of zones to deploy your machines to. For high availability, specify at least two zones.
- 11
- Specify the name of the resource group that contains the DNS zone for your base domain.
- 12
- If you use an existing VNet, specify the name of the resource group that contains it.
- 13
- If you use an existing VNet, specify its name.
- 14
- If you use an existing VNet, specify the name of the subnet to host the control plane machines.
- 15
- If you use an existing VNet, specify the name of the subnet to host the compute machines.
- 16
- You can customize your own outbound routing. Configuring user-defined routing prevents exposing external endpoints in your cluster. User-defined routing for egress requires deploying your cluster to an existing VNet.
- 17
- Specify the name of the Azure cloud environment to deploy your cluster to. Set
AzureUSGovernmentCloudto deploy to a Microsoft Azure Government (MAG) region. The default value isAzurePublicCloud. - 19
- Whether to enable or disable FIPS mode. By default, FIPS mode is not enabled. If FIPS mode is enabled, the Red Hat Enterprise Linux CoreOS (RHCOS) machines that OpenShift Container Platform runs on bypass the default Kubernetes cryptography suite and use the cryptography modules that are provided with RHCOS instead.Important
The use of FIPS Validated / Modules in Process cryptographic libraries is only supported on OpenShift Container Platform deployments on the
x86_64architecture. - 20
- You can optionally provide the
sshKeyvalue that you use to access the machines in your cluster.NoteFor production OpenShift Container Platform clusters on which you want to perform installation debugging or disaster recovery, specify an SSH key that your
ssh-agentprocess uses. - 21
- How to publish the user-facing endpoints of your cluster. Set
publishtoInternalto deploy a private cluster, which cannot be accessed from the Internet. The default value isExternal.
5.8.8.3. Configuring the cluster-wide proxy during installation
Production environments can deny direct access to the Internet and instead have an HTTP or HTTPS proxy available. You can configure a new OpenShift Container Platform cluster to use a proxy by configuring the proxy settings in the install-config.yaml file.
Prerequisites
-
You have an existing
install-config.yamlfile. You reviewed the sites that your cluster requires access to and determined whether any of them need to bypass the proxy. By default, all cluster egress traffic is proxied, including calls to hosting cloud provider APIs. You added sites to the
Proxyobject’sspec.noProxyfield to bypass the proxy if necessary.NoteThe
Proxyobjectstatus.noProxyfield is populated with the values of thenetworking.machineNetwork[].cidr,networking.clusterNetwork[].cidr, andnetworking.serviceNetwork[]fields from your installation configuration.For installations on Amazon Web Services (AWS), Google Cloud Platform (GCP), Microsoft Azure, and Red Hat OpenStack Platform (RHOSP), the
Proxyobjectstatus.noProxyfield is also populated with the instance metadata endpoint (169.254.169.254).
Procedure
Edit your
install-config.yamlfile and add the proxy settings. For example:apiVersion: v1 baseDomain: my.domain.com proxy: httpProxy: http://<username>:<pswd>@<ip>:<port>1 httpsProxy: https://<username>:<pswd>@<ip>:<port>2 noProxy: example.com3 additionalTrustBundle: |4 -----BEGIN CERTIFICATE----- <MY_TRUSTED_CA_CERT> -----END CERTIFICATE----- ...- 1
- A proxy URL to use for creating HTTP connections outside the cluster. The URL scheme must be
http. - 2
- A proxy URL to use for creating HTTPS connections outside the cluster.
- 3
- A comma-separated list of destination domain names, IP addresses, or other network CIDRs to exclude from proxying. Preface a domain with
.to match subdomains only. For example,.y.commatchesx.y.com, but noty.com. Use*to bypass the proxy for all destinations. - 4
- If provided, the installation program generates a config map that is named
user-ca-bundlein theopenshift-confignamespace to hold the additional CA certificates. If you provideadditionalTrustBundleand at least one proxy setting, theProxyobject is configured to reference theuser-ca-bundleconfig map in thetrustedCAfield. The Cluster Network Operator then creates atrusted-ca-bundleconfig map that merges the contents specified for thetrustedCAparameter with the RHCOS trust bundle. TheadditionalTrustBundlefield is required unless the proxy’s identity certificate is signed by an authority from the RHCOS trust bundle.
NoteThe installation program does not support the proxy
readinessEndpointsfield.- Save the file and reference it when installing OpenShift Container Platform.
The installation program creates a cluster-wide proxy that is named cluster that uses the proxy settings in the provided install-config.yaml file. If no proxy settings are provided, a cluster Proxy object is still created, but it will have a nil spec.
Only the Proxy object named cluster is supported, and no additional proxies can be created.
5.8.9. Deploying the cluster
You can install OpenShift Container Platform on a compatible cloud platform.
You can run the create cluster command of the installation program only once, during initial installation.
Prerequisites
- Configure an account with the cloud platform that hosts your cluster.
- Obtain the OpenShift Container Platform installation program and the pull secret for your cluster.
Procedure
Change to the directory that contains the installation program and initialize the cluster deployment:
$ ./openshift-install create cluster --dir <installation_directory> \1 --log-level=info2 NoteIf the cloud provider account that you configured on your host does not have sufficient permissions to deploy the cluster, the installation process stops, and the missing permissions are displayed.
When the cluster deployment completes, directions for accessing your cluster, including a link to its web console and credentials for the
kubeadminuser, display in your terminal.Example output
... INFO Install complete! INFO To access the cluster as the system:admin user when using 'oc', run 'export KUBECONFIG=/home/myuser/install_dir/auth/kubeconfig' INFO Access the OpenShift web-console here: https://console-openshift-console.apps.mycluster.example.com INFO Login to the console with user: "kubeadmin", and password: "4vYBz-Ee6gm-ymBZj-Wt5AL" INFO Time elapsed: 36m22sNoteThe cluster access and credential information also outputs to
<installation_directory>/.openshift_install.logwhen an installation succeeds.Important-
The Ignition config files that the installation program generates contain certificates that expire after 24 hours, which are then renewed at that time. If the cluster is shut down before renewing the certificates and the cluster is later restarted after the 24 hours have elapsed, the cluster automatically recovers the expired certificates. The exception is that you must manually approve the pending
node-bootstrappercertificate signing requests (CSRs) to recover kubelet certificates. See the documentation for Recovering from expired control plane certificates for more information. - It is recommended that you use Ignition config files within 12 hours after they are generated because the 24-hour certificate rotates from 16 to 22 hours after the cluster is installed. By using the Ignition config files within 12 hours, you can avoid installation failure if the certificate update runs during installation.
ImportantYou must not delete the installation program or the files that the installation program creates. Both are required to delete the cluster.
-
The Ignition config files that the installation program generates contain certificates that expire after 24 hours, which are then renewed at that time. If the cluster is shut down before renewing the certificates and the cluster is later restarted after the 24 hours have elapsed, the cluster automatically recovers the expired certificates. The exception is that you must manually approve the pending
5.8.10. Installing the OpenShift CLI by downloading the binary
You can install the OpenShift CLI (oc) to interact with OpenShift Container Platform from a command-line interface. You can install oc on Linux, Windows, or macOS.
If you installed an earlier version of oc, you cannot use it to complete all of the commands in OpenShift Container Platform 4.7. Download and install the new version of oc.
5.8.10.1. Installing the OpenShift CLI on Linux
You can install the OpenShift CLI (oc) binary on Linux by using the following procedure.
Procedure
- Navigate to the OpenShift Container Platform downloads page on the Red Hat Customer Portal.
- Select the appropriate version in the Version drop-down menu.
- Click Download Now next to the OpenShift v4.7 Linux Client entry and save the file.
Unpack the archive:
$ tar xvzf <file>Place the
ocbinary in a directory that is on yourPATH.To check your
PATH, execute the following command:$ echo $PATH
After you install the OpenShift CLI, it is available using the oc command:
$ oc <command>5.8.10.2. Installing the OpenShift CLI on Windows
You can install the OpenShift CLI (oc) binary on Windows by using the following procedure.
Procedure
- Navigate to the OpenShift Container Platform downloads page on the Red Hat Customer Portal.
- Select the appropriate version in the Version drop-down menu.
- Click Download Now next to the OpenShift v4.7 Windows Client entry and save the file.
- Unzip the archive with a ZIP program.
Move the
ocbinary to a directory that is on yourPATH.To check your
PATH, open the command prompt and execute the following command:C:\> path
After you install the OpenShift CLI, it is available using the oc command:
C:\> oc <command>5.8.10.3. Installing the OpenShift CLI on macOS
You can install the OpenShift CLI (oc) binary on macOS by using the following procedure.
Procedure
- Navigate to the OpenShift Container Platform downloads page on the Red Hat Customer Portal.
- Select the appropriate version in the Version drop-down menu.
- Click Download Now next to the OpenShift v4.7 MacOSX Client entry and save the file.
- Unpack and unzip the archive.
Move the
ocbinary to a directory on your PATH.To check your
PATH, open a terminal and execute the following command:$ echo $PATH
After you install the OpenShift CLI, it is available using the oc command:
$ oc <command>5.8.11. Logging in to the cluster by using the CLI
You can log in to your cluster as a default system user by exporting the cluster kubeconfig file. The kubeconfig file contains information about the cluster that is used by the CLI to connect a client to the correct cluster and API server. The file is specific to a cluster and is created during OpenShift Container Platform installation.
Prerequisites
- You deployed an OpenShift Container Platform cluster.
-
You installed the
ocCLI.
Procedure
Export the
kubeadmincredentials:$ export KUBECONFIG=<installation_directory>/auth/kubeconfig1 - 1
- For
<installation_directory>, specify the path to the directory that you stored the installation files in.
Verify you can run
occommands successfully using the exported configuration:$ oc whoamiExample output
system:admin
5.8.12. Telemetry access for OpenShift Container Platform
In OpenShift Container Platform 4.7, the Telemetry service, which runs by default to provide metrics about cluster health and the success of updates, requires internet access. If your cluster is connected to the internet, Telemetry runs automatically, and your cluster is registered to OpenShift Cluster Manager.
After you confirm that your OpenShift Cluster Manager inventory is correct, either maintained automatically by Telemetry or manually by using OpenShift Cluster Manager, use subscription watch to track your OpenShift Container Platform subscriptions at the account or multi-cluster level.
5.8.13. Next steps
- Customize your cluster.
- If necessary, you can opt out of remote health reporting.
5.9. Installing a cluster on Azure using ARM templates
In OpenShift Container Platform version 4.7, you can install a cluster on Microsoft Azure by using infrastructure that you provide.
Several Azure Resource Manager (ARM) templates are provided to assist in completing these steps or to help model your own.
The steps for performing a user-provisioned infrastructure installation are provided as an example only. Installing a cluster with infrastructure you provide requires knowledge of the cloud provider and the installation process of OpenShift Container Platform. Several ARM templates are provided to assist in completing these steps or to help model your own. You are also free to create the required resources through other methods; the templates are just an example.
5.9.1. Prerequisites
- Review details about the OpenShift Container Platform installation and update processes.
- Configure an Azure account to host the cluster.
-
Download the Azure CLI and install it on your computer. See Install the Azure CLI in the Azure documentation. The documentation below was last tested using version
2.2.0of the Azure CLI. Azure CLI commands might perform differently based on the version you use. - If you use a firewall and plan to use telemetry, you must configure the firewall to allow the sites that your cluster requires access to.
If you do not allow the system to manage identity and access management (IAM), then a cluster administrator can manually create and maintain IAM credentials. Manual mode can also be used in environments where the cloud IAM APIs are not reachable.
NoteBe sure to also review this site list if you are configuring a proxy.
5.9.2. Internet access for OpenShift Container Platform
In OpenShift Container Platform 4.7, you require access to the Internet to install your cluster.
You must have Internet access to:
- Access OpenShift Cluster Manager to download the installation program and perform subscription management. If the cluster has internet access and you do not disable Telemetry, that service automatically entitles your cluster.
- Access Quay.io to obtain the packages that are required to install your cluster.
- Obtain the packages that are required to perform cluster updates.
If your cluster cannot have direct Internet access, you can perform a restricted network installation on some types of infrastructure that you provision. During that process, you download the content that is required and use it to populate a mirror registry with the packages that you need to install a cluster and generate the installation program. With some installation types, the environment that you install your cluster in will not require Internet access. Before you update the cluster, you update the content of the mirror registry.
5.9.3. Configuring your Azure project
Before you can install OpenShift Container Platform, you must configure an Azure project to host it.
All Azure resources that are available through public endpoints are subject to resource name restrictions, and you cannot create resources that use certain terms. For a list of terms that Azure restricts, see Resolve reserved resource name errors in the Azure documentation.
5.9.3.1. Azure account limits
The OpenShift Container Platform cluster uses a number of Microsoft Azure components, and the default Azure subscription and service limits, quotas, and constraints affect your ability to install OpenShift Container Platform clusters.
Default limits vary by offer category types, such as Free Trial and Pay-As-You-Go, and by series, such as Dv2, F, and G. For example, the default for Enterprise Agreement subscriptions is 350 cores.
Check the limits for your subscription type and if necessary, increase quota limits for your account before you install a default cluster on Azure.
The following table summarizes the Azure components whose limits can impact your ability to install and run OpenShift Container Platform clusters.
| Component | Number of components required by default | Default Azure limit | Description | ||||||
|---|---|---|---|---|---|---|---|---|---|
| vCPU | 40 | 20 per region | A default cluster requires 40 vCPUs, so you must increase the account limit. By default, each cluster creates the following instances:
Because the bootstrap machine uses To deploy more worker nodes, enable autoscaling, deploy large workloads, or use a different instance type, you must further increase the vCPU limit for your account to ensure that your cluster can deploy the machines that you require. By default, the installation program distributes control plane and compute machines across all availability zones within a region. To ensure high availability for your cluster, select a region with at least three availability zones. If your region contains fewer than three availability zones, the installation program places more than one control plane machine in the available zones. | ||||||
| OS Disk | 7 |
VM OS disk must be able to sustain a minimum throughput of 5000 IOPS / 200MBps. This throughput can be provided by having a minimum of 1 TiB Premium SSD (P30). In Azure, disk performance is directly dependent on SSD disk sizes, so to achieve the throughput supported by
Host caching must be set to | |||||||
| VNet | 1 | 1000 per region | Each default cluster requires one Virtual Network (VNet), which contains two subnets. | ||||||
| Network interfaces | 6 | 65,536 per region | Each default cluster requires six network interfaces. If you create more machines or your deployed workloads create load balancers, your cluster uses more network interfaces. | ||||||
| Network security groups | 2 | 5000 | Each default cluster Each cluster creates network security groups for each subnet in the VNet. The default cluster creates network security groups for the control plane and for the compute node subnets:
| ||||||
| Network load balancers | 3 | 1000 per region | Each cluster creates the following load balancers:
If your applications create more Kubernetes | ||||||
| Public IP addresses | 3 | Each of the two public load balancers uses a public IP address. The bootstrap machine also uses a public IP address so that you can SSH into the machine to troubleshoot issues during installation. The IP address for the bootstrap node is used only during installation. | |||||||
| Private IP addresses | 7 | The internal load balancer, each of the three control plane machines, and each of the three worker machines each use a private IP address. | |||||||
| Spot VM vCPUs (optional) | 0 If you configure spot VMs, your cluster must have two spot VM vCPUs for every compute node. | 20 per region | This is an optional component. To use spot VMs, you must increase the Azure default limit to at least twice the number of compute nodes in your cluster. Note Using spot VMs for control plane nodes is not recommended. |
5.9.3.2. Configuring a public DNS zone in Azure
To install OpenShift Container Platform, the Microsoft Azure account you use must have a dedicated public hosted DNS zone in your account. This zone must be authoritative for the domain. This service provides cluster DNS resolution and name lookup for external connections to the cluster.
Procedure
Identify your domain, or subdomain, and registrar. You can transfer an existing domain and registrar or obtain a new one through Azure or another source.
NoteFor more information about purchasing domains through Azure, see Buy a custom domain name for Azure App Service in the Azure documentation.
- If you are using an existing domain and registrar, migrate its DNS to Azure. See Migrate an active DNS name to Azure App Service in the Azure documentation.
Configure DNS for your domain. Follow the steps in the Tutorial: Host your domain in Azure DNS in the Azure documentation to create a public hosted zone for your domain or subdomain, extract the new authoritative name servers, and update the registrar records for the name servers that your domain uses.
Use an appropriate root domain, such as
openshiftcorp.com, or subdomain, such asclusters.openshiftcorp.com.- If you use a subdomain, follow your company’s procedures to add its delegation records to the parent domain.
You can view Azure’s DNS solution by visiting this example for creating DNS zones.
5.9.3.3. Increasing Azure account limits
To increase an account limit, file a support request on the Azure portal.
You can increase only one type of quota per support request.
Procedure
- From the Azure portal, click Help + support in the lower left corner.
Click New support request and then select the required values:
- From the Issue type list, select Service and subscription limits (quotas).
- From the Subscription list, select the subscription to modify.
- From the Quota type list, select the quota to increase. For example, select Compute-VM (cores-vCPUs) subscription limit increases to increase the number of vCPUs, which is required to install a cluster.
- Click Next: Solutions.
On the Problem Details page, provide the required information for your quota increase:
- Click Provide details and provide the required details in the Quota details window.
- In the SUPPORT METHOD and CONTACT INFO sections, provide the issue severity and your contact details.
- Click Next: Review + create and then click Create.
5.9.3.4. Certificate signing requests management
Because your cluster has limited access to automatic machine management when you use infrastructure that you provision, you must provide a mechanism for approving cluster certificate signing requests (CSRs) after installation. The kube-controller-manager only approves the kubelet client CSRs. The machine-approver cannot guarantee the validity of a serving certificate that is requested by using kubelet credentials because it cannot confirm that the correct machine issued the request. You must determine and implement a method of verifying the validity of the kubelet serving certificate requests and approving them.
5.9.3.5. Required Azure roles
OpenShift Container Platform needs a service principal so it can manage Microsoft Azure resources. Before you can create a service principal, your Azure account subscription must have the following roles:
-
User Access Administrator -
Owner
To set roles on the Azure portal, see the Manage access to Azure resources using RBAC and the Azure portal in the Azure documentation.
5.9.3.6. Creating a service principal
Because OpenShift Container Platform and its installation program must create Microsoft Azure resources through Azure Resource Manager, you must create a service principal to represent it.
Prerequisites
- Install or update the Azure CLI.
-
Install the
jqpackage. - Your Azure account has the required roles for the subscription that you use.
Procedure
Log in to the Azure CLI:
$ az loginLog in to Azure in the web console by using your credentials.
If your Azure account uses subscriptions, ensure that you are using the right subscription.
View the list of available accounts and record the
tenantIdvalue for the subscription you want to use for your cluster:$ az account list --refreshExample output
[ { "cloudName": "AzureCloud", "id": "9bab1460-96d5-40b3-a78e-17b15e978a80", "isDefault": true, "name": "Subscription Name", "state": "Enabled", "tenantId": "6057c7e9-b3ae-489d-a54e-de3f6bf6a8ee", "user": { "name": "you@example.com", "type": "user" } } ]View your active account details and confirm that the
tenantIdvalue matches the subscription you want to use:$ az account showExample output
{ "environmentName": "AzureCloud", "id": "9bab1460-96d5-40b3-a78e-17b15e978a80", "isDefault": true, "name": "Subscription Name", "state": "Enabled", "tenantId": "6057c7e9-b3ae-489d-a54e-de3f6bf6a8ee",1 "user": { "name": "you@example.com", "type": "user" } }- 1
- Ensure that the value of the
tenantIdparameter is the UUID of the correct subscription.
If you are not using the right subscription, change the active subscription:
$ az account set -s <id>1 - 1
- Substitute the value of the
idfor the subscription that you want to use for<id>.
If you changed the active subscription, display your account information again:
$ az account showExample output
{ "environmentName": "AzureCloud", "id": "33212d16-bdf6-45cb-b038-f6565b61edda", "isDefault": true, "name": "Subscription Name", "state": "Enabled", "tenantId": "8049c7e9-c3de-762d-a54e-dc3f6be6a7ee", "user": { "name": "you@example.com", "type": "user" } }
-
Record the values of the
tenantIdandidparameters from the previous output. You need these values during OpenShift Container Platform installation. Create the service principal for your account:
$ az ad sp create-for-rbac --role Contributor --name <service_principal>1 - 1
- Replace
<service_principal>with the name to assign to the service principal.
Example output
Changing "<service_principal>" to a valid URI of "http://<service_principal>", which is the required format used for service principal names Retrying role assignment creation: 1/36 Retrying role assignment creation: 2/36 Retrying role assignment creation: 3/36 Retrying role assignment creation: 4/36 { "appId": "8bd0d04d-0ac2-43a8-928d-705c598c6956", "displayName": "<service_principal>", "name": "http://<service_principal>", "password": "ac461d78-bf4b-4387-ad16-7e32e328aec6", "tenant": "6048c7e9-b2ad-488d-a54e-dc3f6be6a7ee" }-
Record the values of the
appIdandpasswordparameters from the previous output. You need these values during OpenShift Container Platform installation. Grant additional permissions to the service principal.
-
You must always add the
ContributorandUser Access Administratorroles to the app registration service principal so the cluster can assign credentials for its components. -
To operate the Cloud Credential Operator (CCO) in mint mode, the app registration service principal also requires the
Azure Active Directory Graph/Application.ReadWrite.OwnedByAPI permission. - To operate the CCO in passthrough mode, the app registration service principal does not require additional API permissions.
For more information about CCO modes, see "About the Cloud Credential Operator" in the "Managing cloud provider credentials" section of the Authentication and authorization guide.
To assign the
User Access Administratorrole, run the following command:$ az role assignment create --role "User Access Administrator" \ --assignee-object-id $(az ad sp list --filter "appId eq '<appId>'" \ | jq '.[0].id' -r)1 - 1
- Replace
<appId>with theappIdparameter value for your service principal.
To assign the
Azure Active Directory Graphpermission, run the following command:$ az ad app permission add --id <appId> \1 --api 00000002-0000-0000-c000-000000000000 \ --api-permissions 824c81eb-e3f8-4ee6-8f6d-de7f50d565b7=Role- 1
- Replace
<appId>with theappIdparameter value for your service principal.
Example output
Invoking "az ad app permission grant --id 46d33abc-b8a3-46d8-8c84-f0fd58177435 --api 00000002-0000-0000-c000-000000000000" is needed to make the change effectiveFor more information about the specific permissions that you grant with this command, see the GUID Table for Windows Azure Active Directory Permissions.
Approve the permissions request. If your account does not have the Azure Active Directory tenant administrator role, follow the guidelines for your organization to request that the tenant administrator approve your permissions request.
$ az ad app permission grant --id <appId> \1 --api 00000002-0000-0000-c000-000000000000- 1
- Replace
<appId>with theappIdparameter value for your service principal.
-
You must always add the
5.9.3.7. Supported Azure regions
The installation program dynamically generates the list of available Microsoft Azure regions based on your subscription.
Supported Azure public regions
-
australiacentral(Australia Central) -
australiaeast(Australia East) -
australiasoutheast(Australia South East) -
brazilsouth(Brazil South) -
canadacentral(Canada Central) -
canadaeast(Canada East) -
centralindia(Central India) -
centralus(Central US) -
eastasia(East Asia) -
eastus(East US) -
eastus2(East US 2) -
francecentral(France Central) -
germanywestcentral(Germany West Central) -
japaneast(Japan East) -
japanwest(Japan West) -
koreacentral(Korea Central) -
koreasouth(Korea South) -
northcentralus(North Central US) -
northeurope(North Europe) -
norwayeast(Norway East) -
southafricanorth(South Africa North) -
southcentralus(South Central US) -
southeastasia(Southeast Asia) -
southindia(South India) -
switzerlandnorth(Switzerland North) -
uaenorth(UAE North) -
uksouth(UK South) -
ukwest(UK West) -
westcentralus(West Central US) -
westeurope(West Europe) -
westindia(West India) -
westus(West US) -
westus2(West US 2)
Supported Azure Government regions
Support for the following Microsoft Azure Government (MAG) regions was added in OpenShift Container Platform version 4.6:
-
usgovtexas(US Gov Texas) -
usgovvirginia(US Gov Virginia)
You can reference all available MAG regions in the Azure documentation. Other provided MAG regions are expected to work with OpenShift Container Platform, but have not been tested.
5.9.4. Obtaining the installation program
Before you install OpenShift Container Platform, download the installation file on a local computer.
Prerequisites
- You have a computer that runs Linux or macOS, with 500 MB of local disk space
Procedure
- Access the Infrastructure Provider page on the OpenShift Cluster Manager site. If you have a Red Hat account, log in with your credentials. If you do not, create an account.
- Select your infrastructure provider.
Navigate to the page for your installation type, download the installation program for your operating system, and place the file in the directory where you will store the installation configuration files.
ImportantThe installation program creates several files on the computer that you use to install your cluster. You must keep the installation program and the files that the installation program creates after you finish installing the cluster. Both files are required to delete the cluster.
ImportantDeleting the files created by the installation program does not remove your cluster, even if the cluster failed during installation. To remove your cluster, complete the OpenShift Container Platform uninstallation procedures for your specific cloud provider.
Extract the installation program. For example, on a computer that uses a Linux operating system, run the following command:
$ tar xvf openshift-install-linux.tar.gz- Download your installation pull secret from the Red Hat OpenShift Cluster Manager. This pull secret allows you to authenticate with the services that are provided by the included authorities, including Quay.io, which serves the container images for OpenShift Container Platform components.
5.9.5. Generating an SSH private key and adding it to the agent
If you want to perform installation debugging or disaster recovery on your cluster, you must provide an SSH key to both your ssh-agent and the installation program. You can use this key to access the bootstrap machine in a public cluster to troubleshoot installation issues.
In a production environment, you require disaster recovery and debugging.
You can use this key to SSH into the master nodes as the user core. When you deploy the cluster, the key is added to the core user’s ~/.ssh/authorized_keys list.
You must use a local key, not one that you configured with platform-specific approaches such as AWS key pairs.
Procedure
If you do not have an SSH key that is configured for password-less authentication on your computer, create one. For example, on a computer that uses a Linux operating system, run the following command:
$ ssh-keygen -t ed25519 -N '' \ -f <path>/<file_name>1 - 1
- Specify the path and file name, such as
~/.ssh/id_rsa, of the new SSH key. If you have an existing key pair, ensure your public key is in the your~/.sshdirectory.
Running this command generates an SSH key that does not require a password in the location that you specified.
NoteIf you plan to install an OpenShift Container Platform cluster that uses FIPS Validated / Modules in Process cryptographic libraries on the
x86_64architecture, do not create a key that uses theed25519algorithm. Instead, create a key that uses thersaorecdsaalgorithm.Start the
ssh-agentprocess as a background task:$ eval "$(ssh-agent -s)"Example output
Agent pid 31874NoteIf your cluster is in FIPS mode, only use FIPS-compliant algorithms to generate the SSH key. The key must be either RSA or ECDSA.
Add your SSH private key to the
ssh-agent:$ ssh-add <path>/<file_name>1 Example output
Identity added: /home/<you>/<path>/<file_name> (<computer_name>)- 1
- Specify the path and file name for your SSH private key, such as
~/.ssh/id_rsa
Next steps
- When you install OpenShift Container Platform, provide the SSH public key to the installation program. If you install a cluster on infrastructure that you provision, you must provide this key to your cluster’s machines.
5.9.6. Creating the installation files for Azure
To install OpenShift Container Platform on Microsoft Azure using user-provisioned infrastructure, you must generate the files that the installation program needs to deploy your cluster and modify them so that the cluster creates only the machines that it will use. You generate and customize the install-config.yaml file, Kubernetes manifests, and Ignition config files. You also have the option to first set up a separate var partition during the preparation phases of installation.
5.9.6.1. Optional: Creating a separate /var partition
It is recommended that disk partitioning for OpenShift Container Platform be left to the installer. However, there are cases where you might want to create separate partitions in a part of the filesystem that you expect to grow.
OpenShift Container Platform supports the addition of a single partition to attach storage to either the /var partition or a subdirectory of /var. For example:
-
/var/lib/containers: Holds container-related content that can grow as more images and containers are added to a system. -
/var/lib/etcd: Holds data that you might want to keep separate for purposes such as performance optimization of etcd storage. -
/var: Holds data that you might want to keep separate for purposes such as auditing.
Storing the contents of a /var directory separately makes it easier to grow storage for those areas as needed and reinstall OpenShift Container Platform at a later date and keep that data intact. With this method, you will not have to pull all your containers again, nor will you have to copy massive log files when you update systems.
Because /var must be in place before a fresh installation of Red Hat Enterprise Linux CoreOS (RHCOS), the following procedure sets up the separate /var partition by creating a machine config that is inserted during the openshift-install preparation phases of an OpenShift Container Platform installation.
If you follow the steps to create a separate /var partition in this procedure, it is not necessary to create the Kubernetes manifest and Ignition config files again as described later in this section.
Procedure
Create a directory to hold the OpenShift Container Platform installation files:
$ mkdir $HOME/clusterconfigRun
openshift-installto create a set of files in themanifestandopenshiftsubdirectories. Answer the system questions as you are prompted:$ openshift-install create manifests --dir $HOME/clusterconfigExample output
? SSH Public Key ... INFO Credentials loaded from the "myprofile" profile in file "/home/myuser/.aws/credentials" INFO Consuming Install Config from target directory INFO Manifests created in: $HOME/clusterconfig/manifests and $HOME/clusterconfig/openshiftOptional: Confirm that the installation program created manifests in the
clusterconfig/openshiftdirectory:$ ls $HOME/clusterconfig/openshift/Example output
99_kubeadmin-password-secret.yaml 99_openshift-cluster-api_master-machines-0.yaml 99_openshift-cluster-api_master-machines-1.yaml 99_openshift-cluster-api_master-machines-2.yaml ...Create a
MachineConfigobject and add it to a file in theopenshiftdirectory. For example, name the file98-var-partition.yaml, change the disk device name to the name of the storage device on theworkersystems, and set the storage size as appropriate. This example places the/vardirectory on a separate partition:apiVersion: machineconfiguration.openshift.io/v1 kind: MachineConfig metadata: labels: machineconfiguration.openshift.io/role: worker name: 98-var-partition spec: config: ignition: version: 3.2.0 storage: disks: - device: /dev/<device_name>1 partitions: - label: var startMiB: <partition_start_offset>2 sizeMiB: <partition_size>3 filesystems: - device: /dev/disk/by-partlabel/var path: /var format: xfs systemd: units: - name: var.mount4 enabled: true contents: | [Unit] Before=local-fs.target [Mount] What=/dev/disk/by-partlabel/var Where=/var Options=defaults,prjquota5 [Install] WantedBy=local-fs.target- 1
- The storage device name of the disk that you want to partition.
- 2
- When adding a data partition to the boot disk, a minimum value of 25000 MiB (Mebibytes) is recommended. The root file system is automatically resized to fill all available space up to the specified offset. If no value is specified, or if the specified value is smaller than the recommended minimum, the resulting root file system will be too small, and future reinstalls of RHCOS might overwrite the beginning of the data partition.
- 3
- The size of the data partition in mebibytes.
- 4
- The name of the mount unit must match the directory specified in the
Where=directive. For example, for a filesystem mounted on/var/lib/containers, the unit must be namedvar-lib-containers.mount. - 5
- The
prjquotamount option must be enabled for filesystems used for container storage.
NoteWhen creating a separate
/varpartition, you cannot use different instance types for worker nodes, if the different instance types do not have the same device name.Run
openshift-installagain to create Ignition configs from a set of files in themanifestandopenshiftsubdirectories:$ openshift-install create ignition-configs --dir $HOME/clusterconfig $ ls $HOME/clusterconfig/ auth bootstrap.ign master.ign metadata.json worker.ign
Now you can use the Ignition config files as input to the installation procedures to install Red Hat Enterprise Linux CoreOS (RHCOS) systems.
5.9.6.2. Creating the installation configuration file
You can customize the OpenShift Container Platform cluster you install on Microsoft Azure.
Prerequisites
- Obtain the OpenShift Container Platform installation program and the pull secret for your cluster.
- Obtain service principal permissions at the subscription level.
Procedure
Create the
install-config.yamlfile.Change to the directory that contains the installation program and run the following command:
$ ./openshift-install create install-config --dir <installation_directory>1 - 1
- For
<installation_directory>, specify the directory name to store the files that the installation program creates.
ImportantSpecify an empty directory. Some installation assets, like bootstrap X.509 certificates have short expiration intervals, so you must not reuse an installation directory. If you want to reuse individual files from another cluster installation, you can copy them into your directory. However, the file names for the installation assets might change between releases. Use caution when copying installation files from an earlier OpenShift Container Platform version.
At the prompts, provide the configuration details for your cloud:
Optional: Select an SSH key to use to access your cluster machines.
NoteFor production OpenShift Container Platform clusters on which you want to perform installation debugging or disaster recovery, specify an SSH key that your
ssh-agentprocess uses.- Select azure as the platform to target.
If you do not have a Microsoft Azure profile stored on your computer, specify the following Azure parameter values for your subscription and service principal:
-
azure subscription id: The subscription ID to use for the cluster. Specify the
idvalue in your account output. -
azure tenant id: The tenant ID. Specify the
tenantIdvalue in your account output. -
azure service principal client id: The value of the
appIdparameter for the service principal. -
azure service principal client secret: The value of the
passwordparameter for the service principal.
-
azure subscription id: The subscription ID to use for the cluster. Specify the
- Select the region to deploy the cluster to.
- Select the base domain to deploy the cluster to. The base domain corresponds to the Azure DNS Zone that you created for your cluster.
Enter a descriptive name for your cluster.
ImportantAll Azure resources that are available through public endpoints are subject to resource name restrictions, and you cannot create resources that use certain terms. For a list of terms that Azure restricts, see Resolve reserved resource name errors in the Azure documentation.
- Paste the pull secret from the Red Hat OpenShift Cluster Manager.
Optional: If you do not want the cluster to provision compute machines, empty the compute pool by editing the resulting
install-config.yamlfile to setreplicasto0for thecomputepool:compute: - hyperthreading: Enabled name: worker platform: {} replicas: 01 - 1
- Set to
0.
-
Modify the
install-config.yamlfile. You can find more information about the available parameters in the "Installation configuration parameters" section. Back up the
install-config.yamlfile so that you can use it to install multiple clusters.ImportantThe
install-config.yamlfile is consumed during the installation process. If you want to reuse the file, you must back it up now.
5.9.6.3. Configuring the cluster-wide proxy during installation
Production environments can deny direct access to the Internet and instead have an HTTP or HTTPS proxy available. You can configure a new OpenShift Container Platform cluster to use a proxy by configuring the proxy settings in the install-config.yaml file.
Prerequisites
-
You have an existing
install-config.yamlfile. You reviewed the sites that your cluster requires access to and determined whether any of them need to bypass the proxy. By default, all cluster egress traffic is proxied, including calls to hosting cloud provider APIs. You added sites to the
Proxyobject’sspec.noProxyfield to bypass the proxy if necessary.NoteThe
Proxyobjectstatus.noProxyfield is populated with the values of thenetworking.machineNetwork[].cidr,networking.clusterNetwork[].cidr, andnetworking.serviceNetwork[]fields from your installation configuration.For installations on Amazon Web Services (AWS), Google Cloud Platform (GCP), Microsoft Azure, and Red Hat OpenStack Platform (RHOSP), the
Proxyobjectstatus.noProxyfield is also populated with the instance metadata endpoint (169.254.169.254).
Procedure
Edit your
install-config.yamlfile and add the proxy settings. For example:apiVersion: v1 baseDomain: my.domain.com proxy: httpProxy: http://<username>:<pswd>@<ip>:<port>1 httpsProxy: https://<username>:<pswd>@<ip>:<port>2 noProxy: example.com3 additionalTrustBundle: |4 -----BEGIN CERTIFICATE----- <MY_TRUSTED_CA_CERT> -----END CERTIFICATE----- ...- 1
- A proxy URL to use for creating HTTP connections outside the cluster. The URL scheme must be
http. - 2
- A proxy URL to use for creating HTTPS connections outside the cluster.
- 3
- A comma-separated list of destination domain names, IP addresses, or other network CIDRs to exclude from proxying. Preface a domain with
.to match subdomains only. For example,.y.commatchesx.y.com, but noty.com. Use*to bypass the proxy for all destinations. - 4
- If provided, the installation program generates a config map that is named
user-ca-bundlein theopenshift-confignamespace to hold the additional CA certificates. If you provideadditionalTrustBundleand at least one proxy setting, theProxyobject is configured to reference theuser-ca-bundleconfig map in thetrustedCAfield. The Cluster Network Operator then creates atrusted-ca-bundleconfig map that merges the contents specified for thetrustedCAparameter with the RHCOS trust bundle. TheadditionalTrustBundlefield is required unless the proxy’s identity certificate is signed by an authority from the RHCOS trust bundle.
NoteThe installation program does not support the proxy
readinessEndpointsfield.- Save the file and reference it when installing OpenShift Container Platform.
The installation program creates a cluster-wide proxy that is named cluster that uses the proxy settings in the provided install-config.yaml file. If no proxy settings are provided, a cluster Proxy object is still created, but it will have a nil spec.
Only the Proxy object named cluster is supported, and no additional proxies can be created.
5.9.6.4. Exporting common variables for ARM templates
You must export a common set of variables that are used with the provided Azure Resource Manager (ARM) templates used to assist in completing a user-provided infrastructure install on Microsoft Azure.
Specific ARM templates can also require additional exported variables, which are detailed in their related procedures.
Prerequisites
- Obtain the OpenShift Container Platform installation program and the pull secret for your cluster.
Procedure
Export common variables found in the
install-config.yamlto be used by the provided ARM templates:$ export CLUSTER_NAME=<cluster_name>1 $ export AZURE_REGION=<azure_region>2 $ export SSH_KEY=<ssh_key>3 $ export BASE_DOMAIN=<base_domain>4 $ export BASE_DOMAIN_RESOURCE_GROUP=<base_domain_resource_group>5 - 1
- The value of the
.metadata.nameattribute from theinstall-config.yamlfile. - 2
- The region to deploy the cluster into, for example
centralus. This is the value of the.platform.azure.regionattribute from theinstall-config.yamlfile. - 3
- The SSH RSA public key file as a string. You must enclose the SSH key in quotes since it contains spaces. This is the value of the
.sshKeyattribute from theinstall-config.yamlfile. - 4
- The base domain to deploy the cluster to. The base domain corresponds to the public DNS zone that you created for your cluster. This is the value of the
.baseDomainattribute from theinstall-config.yamlfile. - 5
- The resource group where the public DNS zone exists. This is the value of the
.platform.azure.baseDomainResourceGroupNameattribute from theinstall-config.yamlfile.
For example:
$ export CLUSTER_NAME=test-cluster $ export AZURE_REGION=centralus $ export SSH_KEY="ssh-rsa xxx/xxx/xxx= user@email.com" $ export BASE_DOMAIN=example.com $ export BASE_DOMAIN_RESOURCE_GROUP=ocp-clusterExport the kubeadmin credentials:
$ export KUBECONFIG=<installation_directory>/auth/kubeconfig1 - 1
- For
<installation_directory>, specify the path to the directory that you stored the installation files in.
5.9.6.5. Creating the Kubernetes manifest and Ignition config files
Because you must modify some cluster definition files and manually start the cluster machines, you must generate the Kubernetes manifest and Ignition config files that the cluster needs to make its machines.
The installation configuration file transforms into the Kubernetes manifests. The manifests wrap into the Ignition configuration files, which are later used to create the cluster.
The Ignition config files that the installation program generates contain certificates that expire after 24 hours, which are then renewed at that time. If the cluster is shut down before renewing the certificates and the cluster is later restarted after the 24 hours have elapsed, the cluster automatically recovers the expired certificates. The exception is that you must manually approve the pending node-bootstrapper certificate signing requests (CSRs) to recover kubelet certificates. See the documentation for Recovering from expired control plane certificates for more information.
Prerequisites
- You obtained the OpenShift Container Platform installation program.
-
You created the
install-config.yamlinstallation configuration file.
Procedure
Change to the directory that contains the installation program and generate the Kubernetes manifests for the cluster:
$ ./openshift-install create manifests --dir <installation_directory>1 - 1
- For
<installation_directory>, specify the installation directory that contains theinstall-config.yamlfile you created.
Remove the Kubernetes manifest files that define the control plane machines:
$ rm -f <installation_directory>/openshift/99_openshift-cluster-api_master-machines-*.yamlBy removing these files, you prevent the cluster from automatically generating control plane machines.
Remove the Kubernetes manifest files that define the worker machines:
$ rm -f <installation_directory>/openshift/99_openshift-cluster-api_worker-machineset-*.yamlBecause you create and manage the worker machines yourself, you do not need to initialize these machines.
Check that the
mastersSchedulableparameter in the<installation_directory>/manifests/cluster-scheduler-02-config.ymlKubernetes manifest file is set tofalse. This setting prevents pods from being scheduled on the control plane machines:-
Open the
<installation_directory>/manifests/cluster-scheduler-02-config.ymlfile. -
Locate the
mastersSchedulableparameter and ensure that it is set tofalse. - Save and exit the file.
-
Open the
Optional: If you do not want the Ingress Operator to create DNS records on your behalf, remove the
privateZoneandpublicZonesections from the<installation_directory>/manifests/cluster-dns-02-config.ymlDNS configuration file:apiVersion: config.openshift.io/v1 kind: DNS metadata: creationTimestamp: null name: cluster spec: baseDomain: example.openshift.com privateZone:1 id: mycluster-100419-private-zone publicZone:2 id: example.openshift.com status: {}If you do so, you must add ingress DNS records manually in a later step.
When configuring Azure on user-provisioned infrastructure, you must export some common variables defined in the manifest files to use later in the Azure Resource Manager (ARM) templates:
Export the infrastructure ID by using the following command:
$ export INFRA_ID=<infra_id>1 - 1
- The OpenShift Container Platform cluster has been assigned an identifier (
INFRA_ID) in the form of<cluster_name>-<random_string>. This will be used as the base name for most resources created using the provided ARM templates. This is the value of the.status.infrastructureNameattribute from themanifests/cluster-infrastructure-02-config.ymlfile.
Export the resource group by using the following command:
$ export RESOURCE_GROUP=<resource_group>1 - 1
- All resources created in this Azure deployment exists as part of a resource group. The resource group name is also based on the
INFRA_ID, in the form of<cluster_name>-<random_string>-rg. This is the value of the.status.platformStatus.azure.resourceGroupNameattribute from themanifests/cluster-infrastructure-02-config.ymlfile.
To create the Ignition configuration files, run the following command from the directory that contains the installation program:
$ ./openshift-install create ignition-configs --dir <installation_directory>1 - 1
- For
<installation_directory>, specify the same installation directory.
The following files are generated in the directory:
. ├── auth │ ├── kubeadmin-password │ └── kubeconfig ├── bootstrap.ign ├── master.ign ├── metadata.json └── worker.ign
5.9.7. Creating the Azure resource group and identity
You must create a Microsoft Azure resource group and an identity for that resource group. These are both used during the installation of your OpenShift Container Platform cluster on Azure.
Prerequisites
- Configure an Azure account.
- Generate the Ignition config files for your cluster.
Procedure
Create the resource group in a supported Azure region:
$ az group create --name ${RESOURCE_GROUP} --location ${AZURE_REGION}Create an Azure identity for the resource group:
$ az identity create -g ${RESOURCE_GROUP} -n ${INFRA_ID}-identityThis is used to grant the required access to Operators in your cluster. For example, this allows the Ingress Operator to create a public IP and its load balancer. You must assign the Azure identity to a role.
Grant the Contributor role to the Azure identity:
Export the following variables required by the Azure role assignment:
$ export PRINCIPAL_ID=`az identity show -g ${RESOURCE_GROUP} -n ${INFRA_ID}-identity --query principalId --out tsv`$ export RESOURCE_GROUP_ID=`az group show -g ${RESOURCE_GROUP} --query id --out tsv`Assign the Contributor role to the identity:
$ az role assignment create --assignee "${PRINCIPAL_ID}" --role 'Contributor' --scope "${RESOURCE_GROUP_ID}"
5.9.8. Uploading the RHCOS cluster image and bootstrap Ignition config file
The Azure client does not support deployments based on files existing locally; therefore, you must copy and store the RHCOS virtual hard disk (VHD) cluster image and bootstrap Ignition config file in a storage container so they are accessible during deployment.
Prerequisites
- Configure an Azure account.
- Generate the Ignition config files for your cluster.
Procedure
Create an Azure storage account to store the VHD cluster image:
$ az storage account create -g ${RESOURCE_GROUP} --location ${AZURE_REGION} --name ${CLUSTER_NAME}sa --kind Storage --sku Standard_LRSWarningThe Azure storage account name must be between 3 and 24 characters in length and use numbers and lower-case letters only. If your
CLUSTER_NAMEvariable does not follow these restrictions, you must manually define the Azure storage account name. For more information on Azure storage account name restrictions, see Resolve errors for storage account names in the Azure documentation.Export the storage account key as an environment variable:
$ export ACCOUNT_KEY=`az storage account keys list -g ${RESOURCE_GROUP} --account-name ${CLUSTER_NAME}sa --query "[0].value" -o tsv`Choose the RHCOS version to use and export the URL of its VHD to an environment variable:
$ export VHD_URL=`curl -s https://raw.githubusercontent.com/openshift/installer/release-4.7/data/data/rhcos.json | jq -r .azure.url`ImportantThe RHCOS images might not change with every release of OpenShift Container Platform. You must specify an image with the highest version that is less than or equal to the OpenShift Container Platform version that you install. Use the image version that matches your OpenShift Container Platform version if it is available.
Copy the chosen VHD to a blob:
$ az storage container create --name vhd --account-name ${CLUSTER_NAME}sa --account-key ${ACCOUNT_KEY}$ az storage blob copy start --account-name ${CLUSTER_NAME}sa --account-key ${ACCOUNT_KEY} --destination-blob "rhcos.vhd" --destination-container vhd --source-uri "${VHD_URL}"To track the progress of the VHD copy task, run this script:
status="unknown" while [ "$status" != "success" ] do status=`az storage blob show --container-name vhd --name "rhcos.vhd" --account-name ${CLUSTER_NAME}sa --account-key ${ACCOUNT_KEY} -o tsv --query properties.copy.status` echo $status doneCreate a blob storage container and upload the generated
bootstrap.ignfile:$ az storage container create --name files --account-name ${CLUSTER_NAME}sa --account-key ${ACCOUNT_KEY} --public-access blob$ az storage blob upload --account-name ${CLUSTER_NAME}sa --account-key ${ACCOUNT_KEY} -c "files" -f "<installation_directory>/bootstrap.ign" -n "bootstrap.ign"
5.9.9. Example for creating DNS zones
DNS records are required for clusters that use user-provisioned infrastructure. You should choose the DNS strategy that fits your scenario.
For this example, Azure’s DNS solution is used, so you will create a new public DNS zone for external (internet) visibility and a private DNS zone for internal cluster resolution.
The public DNS zone is not required to exist in the same resource group as the cluster deployment and might already exist in your organization for the desired base domain. If that is the case, you can skip creating the public DNS zone; be sure the installation config you generated earlier reflects that scenario.
Prerequisites
- Configure an Azure account.
- Generate the Ignition config files for your cluster.
Procedure
Create the new public DNS zone in the resource group exported in the
BASE_DOMAIN_RESOURCE_GROUPenvironment variable:$ az network dns zone create -g ${BASE_DOMAIN_RESOURCE_GROUP} -n ${CLUSTER_NAME}.${BASE_DOMAIN}You can skip this step if you are using a public DNS zone that already exists.
Create the private DNS zone in the same resource group as the rest of this deployment:
$ az network private-dns zone create -g ${RESOURCE_GROUP} -n ${CLUSTER_NAME}.${BASE_DOMAIN}
You can learn more about configuring a public DNS zone in Azure by visiting that section.
5.9.10. Creating a VNet in Azure
You must create a virtual network (VNet) in Microsoft Azure for your OpenShift Container Platform cluster to use. You can customize the VNet to meet your requirements. One way to create the VNet is to modify the provided Azure Resource Manager (ARM) template.
If you do not use the provided ARM template to create your Azure infrastructure, you must review the provided information and manually create the infrastructure. If your cluster does not initialize correctly, you might have to contact Red Hat support with your installation logs.
Prerequisites
- Configure an Azure account.
- Generate the Ignition config files for your cluster.
Procedure
-
Copy the template from the ARM template for the VNet section of this topic and save it as
01_vnet.jsonin your cluster’s installation directory. This template describes the VNet that your cluster requires. Create the deployment by using the
azCLI:$ az deployment group create -g ${RESOURCE_GROUP} \ --template-file "<installation_directory>/01_vnet.json" \ --parameters baseName="${INFRA_ID}"1 - 1
- The base name to be used in resource names; this is usually the cluster’s infrastructure ID.
Link the VNet template to the private DNS zone:
$ az network private-dns link vnet create -g ${RESOURCE_GROUP} -z ${CLUSTER_NAME}.${BASE_DOMAIN} -n ${INFRA_ID}-network-link -v "${INFRA_ID}-vnet" -e false
5.9.10.1. ARM template for the VNet
You can use the following Azure Resource Manager (ARM) template to deploy the VNet that you need for your OpenShift Container Platform cluster:
Example 5.1. 01_vnet.json ARM template
{
"$schema" : "https://schema.management.azure.com/schemas/2015-01-01/deploymentTemplate.json#",
"contentVersion" : "1.0.0.0",
"parameters" : {
"baseName" : {
"type" : "string",
"minLength" : 1,
"metadata" : {
"description" : "Base name to be used in resource names (usually the cluster's Infra ID)"
}
}
},
"variables" : {
"location" : "[resourceGroup().location]",
"virtualNetworkName" : "[concat(parameters('baseName'), '-vnet')]",
"addressPrefix" : "10.0.0.0/16",
"masterSubnetName" : "[concat(parameters('baseName'), '-master-subnet')]",
"masterSubnetPrefix" : "10.0.0.0/24",
"nodeSubnetName" : "[concat(parameters('baseName'), '-worker-subnet')]",
"nodeSubnetPrefix" : "10.0.1.0/24",
"clusterNsgName" : "[concat(parameters('baseName'), '-nsg')]"
},
"resources" : [
{
"apiVersion" : "2018-12-01",
"type" : "Microsoft.Network/virtualNetworks",
"name" : "[variables('virtualNetworkName')]",
"location" : "[variables('location')]",
"dependsOn" : [
"[concat('Microsoft.Network/networkSecurityGroups/', variables('clusterNsgName'))]"
],
"properties" : {
"addressSpace" : {
"addressPrefixes" : [
"[variables('addressPrefix')]"
]
},
"subnets" : [
{
"name" : "[variables('masterSubnetName')]",
"properties" : {
"addressPrefix" : "[variables('masterSubnetPrefix')]",
"serviceEndpoints": [],
"networkSecurityGroup" : {
"id" : "[resourceId('Microsoft.Network/networkSecurityGroups', variables('clusterNsgName'))]"
}
}
},
{
"name" : "[variables('nodeSubnetName')]",
"properties" : {
"addressPrefix" : "[variables('nodeSubnetPrefix')]",
"serviceEndpoints": [],
"networkSecurityGroup" : {
"id" : "[resourceId('Microsoft.Network/networkSecurityGroups', variables('clusterNsgName'))]"
}
}
}
]
}
},
{
"type" : "Microsoft.Network/networkSecurityGroups",
"name" : "[variables('clusterNsgName')]",
"apiVersion" : "2018-10-01",
"location" : "[variables('location')]",
"properties" : {
"securityRules" : [
{
"name" : "apiserver_in",
"properties" : {
"protocol" : "Tcp",
"sourcePortRange" : "*",
"destinationPortRange" : "6443",
"sourceAddressPrefix" : "*",
"destinationAddressPrefix" : "*",
"access" : "Allow",
"priority" : 101,
"direction" : "Inbound"
}
}
]
}
}
]
}5.9.11. Deploying the RHCOS cluster image for the Azure infrastructure
You must use a valid Red Hat Enterprise Linux CoreOS (RHCOS) image for Microsoft Azure for your OpenShift Container Platform nodes.
Prerequisites
- Configure an Azure account.
- Generate the Ignition config files for your cluster.
- Store the RHCOS virtual hard disk (VHD) cluster image in an Azure storage container.
- Store the bootstrap Ignition config file in an Azure storage container.
Procedure
-
Copy the template from the ARM template for image storage section of this topic and save it as
02_storage.jsonin your cluster’s installation directory. This template describes the image storage that your cluster requires. Export the RHCOS VHD blob URL as a variable:
$ export VHD_BLOB_URL=`az storage blob url --account-name ${CLUSTER_NAME}sa --account-key ${ACCOUNT_KEY} -c vhd -n "rhcos.vhd" -o tsv`Deploy the cluster image:
$ az deployment group create -g ${RESOURCE_GROUP} \ --template-file "<installation_directory>/02_storage.json" \ --parameters vhdBlobURL="${VHD_BLOB_URL}" \1 --parameters baseName="${INFRA_ID}"2
5.9.11.1. ARM template for image storage
You can use the following Azure Resource Manager (ARM) template to deploy the stored Red Hat Enterprise Linux CoreOS (RHCOS) image that you need for your OpenShift Container Platform cluster:
Example 5.2. 02_storage.json ARM template
{
"$schema" : "https://schema.management.azure.com/schemas/2015-01-01/deploymentTemplate.json#",
"contentVersion" : "1.0.0.0",
"parameters" : {
"baseName" : {
"type" : "string",
"minLength" : 1,
"metadata" : {
"description" : "Base name to be used in resource names (usually the cluster's Infra ID)"
}
},
"vhdBlobURL" : {
"type" : "string",
"metadata" : {
"description" : "URL pointing to the blob where the VHD to be used to create master and worker machines is located"
}
}
},
"variables" : {
"location" : "[resourceGroup().location]",
"imageName" : "[concat(parameters('baseName'), '-image')]"
},
"resources" : [
{
"apiVersion" : "2018-06-01",
"type": "Microsoft.Compute/images",
"name": "[variables('imageName')]",
"location" : "[variables('location')]",
"properties": {
"storageProfile": {
"osDisk": {
"osType": "Linux",
"osState": "Generalized",
"blobUri": "[parameters('vhdBlobURL')]",
"storageAccountType": "Standard_LRS"
}
}
}
}
]
}5.9.12. Networking requirements for user-provisioned infrastructure
All the Red Hat Enterprise Linux CoreOS (RHCOS) machines require network in initramfs during boot to fetch Ignition config from the machine config server.
During the initial boot, the machines require either a DHCP server or that static IP addresses be set on each host in the cluster to establish a network connection, which allows them to download their Ignition config files.
It is recommended to use the DHCP server to manage the machines for the cluster long-term. Ensure that the DHCP server is configured to provide persistent IP addresses and host names to the cluster machines.
The Kubernetes API server must be able to resolve the node names of the cluster machines. If the API servers and worker nodes are in different zones, you can configure a default DNS search zone to allow the API server to resolve the node names. Another supported approach is to always refer to hosts by their fully-qualified domain names in both the node objects and all DNS requests.
You must configure the network connectivity between machines to allow cluster components to communicate. Each machine must be able to resolve the host names of all other machines in the cluster.
| Protocol | Port | Description |
|---|---|---|
| ICMP | N/A | Network reachability tests |
| TCP |
| Metrics |
|
|
Host level services, including the node exporter on ports | |
|
| The default ports that Kubernetes reserves | |
|
| openshift-sdn | |
| UDP |
| VXLAN and Geneve |
|
| VXLAN and Geneve | |
|
|
Host level services, including the node exporter on ports | |
| TCP/UDP |
| Kubernetes node port |
| Protocol | Port | Description |
|---|---|---|
| TCP |
| Kubernetes API |
| Protocol | Port | Description |
|---|---|---|
| TCP |
| etcd server and peer ports |
Network topology requirements
The infrastructure that you provision for your cluster must meet the following network topology requirements.
OpenShift Container Platform requires all nodes to have internet access to pull images for platform containers and provide telemetry data to Red Hat.
Load balancers
Before you install OpenShift Container Platform, you must provision two load balancers that meet the following requirements:
API load balancer: Provides a common endpoint for users, both human and machine, to interact with and configure the platform. Configure the following conditions:
- Layer 4 load balancing only. This can be referred to as Raw TCP, SSL Passthrough, or SSL Bridge mode. If you use SSL Bridge mode, you must enable Server Name Indication (SNI) for the API routes.
- A stateless load balancing algorithm. The options vary based on the load balancer implementation.
ImportantDo not configure session persistence for an API load balancer.
Configure the following ports on both the front and back of the load balancers:
Expand Table 5.32. API load balancer Port Back-end machines (pool members) Internal External Description 6443Bootstrap and control plane. You remove the bootstrap machine from the load balancer after the bootstrap machine initializes the cluster control plane. You must configure the
/readyzendpoint for the API server health check probe.X
X
Kubernetes API server
22623Bootstrap and control plane. You remove the bootstrap machine from the load balancer after the bootstrap machine initializes the cluster control plane.
X
Machine config server
NoteThe load balancer must be configured to take a maximum of 30 seconds from the time the API server turns off the
/readyzendpoint to the removal of the API server instance from the pool. Within the time frame after/readyzreturns an error or becomes healthy, the endpoint must have been removed or added. Probing every 5 or 10 seconds, with two successful requests to become healthy and three to become unhealthy, are well-tested values.Application Ingress load balancer: Provides an Ingress point for application traffic flowing in from outside the cluster. Configure the following conditions:
- Layer 4 load balancing only. This can be referred to as Raw TCP, SSL Passthrough, or SSL Bridge mode. If you use SSL Bridge mode, you must enable Server Name Indication (SNI) for the Ingress routes.
- A connection-based or session-based persistence is recommended, based on the options available and types of applications that will be hosted on the platform.
Configure the following ports on both the front and back of the load balancers:
Expand Table 5.33. Application Ingress load balancer Port Back-end machines (pool members) Internal External Description 443The machines that run the Ingress router pods, compute, or worker, by default.
X
X
HTTPS traffic
80The machines that run the Ingress router pods, compute, or worker, by default.
X
X
HTTP traffic
If the true IP address of the client can be seen by the load balancer, enabling source IP-based session persistence can improve performance for applications that use end-to-end TLS encryption.
A working configuration for the Ingress router is required for an OpenShift Container Platform cluster. You must configure the Ingress router after the control plane initializes.
NTP configuration
OpenShift Container Platform clusters are configured to use a public Network Time Protocol (NTP) server by default. If you want to use a local enterprise NTP server, or if your cluster is being deployed in a disconnected network, you can configure the cluster to use a specific time server. For more information, see the documentation for Configuring chrony time service.
If a DHCP server provides NTP server information, the chrony time service on the Red Hat Enterprise Linux CoreOS (RHCOS) machines read the information and can sync the clock with the NTP servers.
5.9.13. Creating networking and load balancing components in Azure
You must configure networking and load balancing in Microsoft Azure for your OpenShift Container Platform cluster to use. One way to create these components is to modify the provided Azure Resource Manager (ARM) template.
If you do not use the provided ARM template to create your Azure infrastructure, you must review the provided information and manually create the infrastructure. If your cluster does not initialize correctly, you might have to contact Red Hat support with your installation logs.
Prerequisites
- Configure an Azure account.
- Generate the Ignition config files for your cluster.
- Create and configure a VNet and associated subnets in Azure.
Procedure
-
Copy the template from the ARM template for the network and load balancers section of this topic and save it as
03_infra.jsonin your cluster’s installation directory. This template describes the networking and load balancing objects that your cluster requires. Create the deployment by using the
azCLI:$ az deployment group create -g ${RESOURCE_GROUP} \ --template-file "<installation_directory>/03_infra.json" \ --parameters privateDNSZoneName="${CLUSTER_NAME}.${BASE_DOMAIN}" \1 --parameters baseName="${INFRA_ID}"2 Create an
apiDNS record in the public zone for the API public load balancer. The${BASE_DOMAIN_RESOURCE_GROUP}variable must point to the resource group where the public DNS zone exists.Export the following variable:
$ export PUBLIC_IP=`az network public-ip list -g ${RESOURCE_GROUP} --query "[?name=='${INFRA_ID}-master-pip'] | [0].ipAddress" -o tsv`Create the DNS record in a new public zone:
$ az network dns record-set a add-record -g ${BASE_DOMAIN_RESOURCE_GROUP} -z ${CLUSTER_NAME}.${BASE_DOMAIN} -n api -a ${PUBLIC_IP} --ttl 60If you are adding the cluster to an existing public zone, you can create the DNS record in it instead:
$ az network dns record-set a add-record -g ${BASE_DOMAIN_RESOURCE_GROUP} -z ${BASE_DOMAIN} -n api.${CLUSTER_NAME} -a ${PUBLIC_IP} --ttl 60
5.9.13.1. ARM template for the network and load balancers
You can use the following Azure Resource Manager (ARM) template to deploy the networking objects and load balancers that you need for your OpenShift Container Platform cluster:
Example 5.3. 03_infra.json ARM template
{
"$schema" : "https://schema.management.azure.com/schemas/2015-01-01/deploymentTemplate.json#",
"contentVersion" : "1.0.0.0",
"parameters" : {
"baseName" : {
"type" : "string",
"minLength" : 1,
"metadata" : {
"description" : "Base name to be used in resource names (usually the cluster's Infra ID)"
}
},
"privateDNSZoneName" : {
"type" : "string",
"metadata" : {
"description" : "Name of the private DNS zone"
}
}
},
"variables" : {
"location" : "[resourceGroup().location]",
"virtualNetworkName" : "[concat(parameters('baseName'), '-vnet')]",
"virtualNetworkID" : "[resourceId('Microsoft.Network/virtualNetworks', variables('virtualNetworkName'))]",
"masterSubnetName" : "[concat(parameters('baseName'), '-master-subnet')]",
"masterSubnetRef" : "[concat(variables('virtualNetworkID'), '/subnets/', variables('masterSubnetName'))]",
"masterPublicIpAddressName" : "[concat(parameters('baseName'), '-master-pip')]",
"masterPublicIpAddressID" : "[resourceId('Microsoft.Network/publicIPAddresses', variables('masterPublicIpAddressName'))]",
"masterLoadBalancerName" : "[concat(parameters('baseName'), '-public-lb')]",
"masterLoadBalancerID" : "[resourceId('Microsoft.Network/loadBalancers', variables('masterLoadBalancerName'))]",
"internalLoadBalancerName" : "[concat(parameters('baseName'), '-internal-lb')]",
"internalLoadBalancerID" : "[resourceId('Microsoft.Network/loadBalancers', variables('internalLoadBalancerName'))]",
"skuName": "Standard"
},
"resources" : [
{
"apiVersion" : "2018-12-01",
"type" : "Microsoft.Network/publicIPAddresses",
"name" : "[variables('masterPublicIpAddressName')]",
"location" : "[variables('location')]",
"sku": {
"name": "[variables('skuName')]"
},
"properties" : {
"publicIPAllocationMethod" : "Static",
"dnsSettings" : {
"domainNameLabel" : "[variables('masterPublicIpAddressName')]"
}
}
},
{
"apiVersion" : "2018-12-01",
"type" : "Microsoft.Network/loadBalancers",
"name" : "[variables('masterLoadBalancerName')]",
"location" : "[variables('location')]",
"sku": {
"name": "[variables('skuName')]"
},
"dependsOn" : [
"[concat('Microsoft.Network/publicIPAddresses/', variables('masterPublicIpAddressName'))]"
],
"properties" : {
"frontendIPConfigurations" : [
{
"name" : "public-lb-ip",
"properties" : {
"publicIPAddress" : {
"id" : "[variables('masterPublicIpAddressID')]"
}
}
}
],
"backendAddressPools" : [
{
"name" : "public-lb-backend"
}
],
"loadBalancingRules" : [
{
"name" : "api-internal",
"properties" : {
"frontendIPConfiguration" : {
"id" :"[concat(variables('masterLoadBalancerID'), '/frontendIPConfigurations/public-lb-ip')]"
},
"backendAddressPool" : {
"id" : "[concat(variables('masterLoadBalancerID'), '/backendAddressPools/public-lb-backend')]"
},
"protocol" : "Tcp",
"loadDistribution" : "Default",
"idleTimeoutInMinutes" : 30,
"frontendPort" : 6443,
"backendPort" : 6443,
"probe" : {
"id" : "[concat(variables('masterLoadBalancerID'), '/probes/api-internal-probe')]"
}
}
}
],
"probes" : [
{
"name" : "api-internal-probe",
"properties" : {
"protocol" : "Https",
"port" : 6443,
"requestPath": "/readyz",
"intervalInSeconds" : 10,
"numberOfProbes" : 3
}
}
]
}
},
{
"apiVersion" : "2018-12-01",
"type" : "Microsoft.Network/loadBalancers",
"name" : "[variables('internalLoadBalancerName')]",
"location" : "[variables('location')]",
"sku": {
"name": "[variables('skuName')]"
},
"properties" : {
"frontendIPConfigurations" : [
{
"name" : "internal-lb-ip",
"properties" : {
"privateIPAllocationMethod" : "Dynamic",
"subnet" : {
"id" : "[variables('masterSubnetRef')]"
},
"privateIPAddressVersion" : "IPv4"
}
}
],
"backendAddressPools" : [
{
"name" : "internal-lb-backend"
}
],
"loadBalancingRules" : [
{
"name" : "api-internal",
"properties" : {
"frontendIPConfiguration" : {
"id" : "[concat(variables('internalLoadBalancerID'), '/frontendIPConfigurations/internal-lb-ip')]"
},
"frontendPort" : 6443,
"backendPort" : 6443,
"enableFloatingIP" : false,
"idleTimeoutInMinutes" : 30,
"protocol" : "Tcp",
"enableTcpReset" : false,
"loadDistribution" : "Default",
"backendAddressPool" : {
"id" : "[concat(variables('internalLoadBalancerID'), '/backendAddressPools/internal-lb-backend')]"
},
"probe" : {
"id" : "[concat(variables('internalLoadBalancerID'), '/probes/api-internal-probe')]"
}
}
},
{
"name" : "sint",
"properties" : {
"frontendIPConfiguration" : {
"id" : "[concat(variables('internalLoadBalancerID'), '/frontendIPConfigurations/internal-lb-ip')]"
},
"frontendPort" : 22623,
"backendPort" : 22623,
"enableFloatingIP" : false,
"idleTimeoutInMinutes" : 30,
"protocol" : "Tcp",
"enableTcpReset" : false,
"loadDistribution" : "Default",
"backendAddressPool" : {
"id" : "[concat(variables('internalLoadBalancerID'), '/backendAddressPools/internal-lb-backend')]"
},
"probe" : {
"id" : "[concat(variables('internalLoadBalancerID'), '/probes/sint-probe')]"
}
}
}
],
"probes" : [
{
"name" : "api-internal-probe",
"properties" : {
"protocol" : "Https",
"port" : 6443,
"requestPath": "/readyz",
"intervalInSeconds" : 10,
"numberOfProbes" : 3
}
},
{
"name" : "sint-probe",
"properties" : {
"protocol" : "Https",
"port" : 22623,
"requestPath": "/healthz",
"intervalInSeconds" : 10,
"numberOfProbes" : 3
}
}
]
}
},
{
"apiVersion": "2018-09-01",
"type": "Microsoft.Network/privateDnsZones/A",
"name": "[concat(parameters('privateDNSZoneName'), '/api')]",
"location" : "[variables('location')]",
"dependsOn" : [
"[concat('Microsoft.Network/loadBalancers/', variables('internalLoadBalancerName'))]"
],
"properties": {
"ttl": 60,
"aRecords": [
{
"ipv4Address": "[reference(variables('internalLoadBalancerName')).frontendIPConfigurations[0].properties.privateIPAddress]"
}
]
}
},
{
"apiVersion": "2018-09-01",
"type": "Microsoft.Network/privateDnsZones/A",
"name": "[concat(parameters('privateDNSZoneName'), '/api-int')]",
"location" : "[variables('location')]",
"dependsOn" : [
"[concat('Microsoft.Network/loadBalancers/', variables('internalLoadBalancerName'))]"
],
"properties": {
"ttl": 60,
"aRecords": [
{
"ipv4Address": "[reference(variables('internalLoadBalancerName')).frontendIPConfigurations[0].properties.privateIPAddress]"
}
]
}
}
]
}5.9.14. Creating the bootstrap machine in Azure
You must create the bootstrap machine in Microsoft Azure to use during OpenShift Container Platform cluster initialization. One way to create this machine is to modify the provided Azure Resource Manager (ARM) template.
If you do not use the provided ARM template to create your bootstrap machine, you must review the provided information and manually create the infrastructure. If your cluster does not initialize correctly, you might have to contact Red Hat support with your installation logs.
Prerequisites
- Configure an Azure account.
- Generate the Ignition config files for your cluster.
- Create and configure a VNet and associated subnets in Azure.
- Create and configure networking and load balancers in Azure.
- Create control plane and compute roles.
Procedure
-
Copy the template from the ARM template for the bootstrap machine section of this topic and save it as
04_bootstrap.jsonin your cluster’s installation directory. This template describes the bootstrap machine that your cluster requires. Export the following variables required by the bootstrap machine deployment:
$ export BOOTSTRAP_URL=`az storage blob url --account-name ${CLUSTER_NAME}sa --account-key ${ACCOUNT_KEY} -c "files" -n "bootstrap.ign" -o tsv` $ export BOOTSTRAP_IGNITION=`jq -rcnM --arg v "3.2.0" --arg url ${BOOTSTRAP_URL} '{ignition:{version:$v,config:{replace:{source:$url}}}}' | base64 | tr -d '\n'`Create the deployment by using the
azCLI:$ az deployment group create -g ${RESOURCE_GROUP} \ --template-file "<installation_directory>/04_bootstrap.json" \ --parameters bootstrapIgnition="${BOOTSTRAP_IGNITION}" \1 --parameters sshKeyData="${SSH_KEY}" \2 --parameters baseName="${INFRA_ID}"3
5.9.14.1. ARM template for the bootstrap machine
You can use the following Azure Resource Manager (ARM) template to deploy the bootstrap machine that you need for your OpenShift Container Platform cluster:
Example 5.4. 04_bootstrap.json ARM template
{
"$schema" : "https://schema.management.azure.com/schemas/2015-01-01/deploymentTemplate.json#",
"contentVersion" : "1.0.0.0",
"parameters" : {
"baseName" : {
"type" : "string",
"minLength" : 1,
"metadata" : {
"description" : "Base name to be used in resource names (usually the cluster's Infra ID)"
}
},
"bootstrapIgnition" : {
"type" : "string",
"minLength" : 1,
"metadata" : {
"description" : "Bootstrap ignition content for the bootstrap cluster"
}
},
"sshKeyData" : {
"type" : "securestring",
"metadata" : {
"description" : "SSH RSA public key file as a string."
}
},
"bootstrapVMSize" : {
"type" : "string",
"defaultValue" : "Standard_D4s_v3",
"allowedValues" : [
"Standard_A2",
"Standard_A3",
"Standard_A4",
"Standard_A5",
"Standard_A6",
"Standard_A7",
"Standard_A8",
"Standard_A9",
"Standard_A10",
"Standard_A11",
"Standard_D2",
"Standard_D3",
"Standard_D4",
"Standard_D11",
"Standard_D12",
"Standard_D13",
"Standard_D14",
"Standard_D2_v2",
"Standard_D3_v2",
"Standard_D4_v2",
"Standard_D5_v2",
"Standard_D8_v3",
"Standard_D11_v2",
"Standard_D12_v2",
"Standard_D13_v2",
"Standard_D14_v2",
"Standard_E2_v3",
"Standard_E4_v3",
"Standard_E8_v3",
"Standard_E16_v3",
"Standard_E32_v3",
"Standard_E64_v3",
"Standard_E2s_v3",
"Standard_E4s_v3",
"Standard_E8s_v3",
"Standard_E16s_v3",
"Standard_E32s_v3",
"Standard_E64s_v3",
"Standard_G1",
"Standard_G2",
"Standard_G3",
"Standard_G4",
"Standard_G5",
"Standard_DS2",
"Standard_DS3",
"Standard_DS4",
"Standard_DS11",
"Standard_DS12",
"Standard_DS13",
"Standard_DS14",
"Standard_DS2_v2",
"Standard_DS3_v2",
"Standard_DS4_v2",
"Standard_DS5_v2",
"Standard_DS11_v2",
"Standard_DS12_v2",
"Standard_DS13_v2",
"Standard_DS14_v2",
"Standard_GS1",
"Standard_GS2",
"Standard_GS3",
"Standard_GS4",
"Standard_GS5",
"Standard_D2s_v3",
"Standard_D4s_v3",
"Standard_D8s_v3"
],
"metadata" : {
"description" : "The size of the Bootstrap Virtual Machine"
}
}
},
"variables" : {
"location" : "[resourceGroup().location]",
"virtualNetworkName" : "[concat(parameters('baseName'), '-vnet')]",
"virtualNetworkID" : "[resourceId('Microsoft.Network/virtualNetworks', variables('virtualNetworkName'))]",
"masterSubnetName" : "[concat(parameters('baseName'), '-master-subnet')]",
"masterSubnetRef" : "[concat(variables('virtualNetworkID'), '/subnets/', variables('masterSubnetName'))]",
"masterLoadBalancerName" : "[concat(parameters('baseName'), '-public-lb')]",
"internalLoadBalancerName" : "[concat(parameters('baseName'), '-internal-lb')]",
"sshKeyPath" : "/home/core/.ssh/authorized_keys",
"identityName" : "[concat(parameters('baseName'), '-identity')]",
"vmName" : "[concat(parameters('baseName'), '-bootstrap')]",
"nicName" : "[concat(variables('vmName'), '-nic')]",
"imageName" : "[concat(parameters('baseName'), '-image')]",
"clusterNsgName" : "[concat(parameters('baseName'), '-nsg')]",
"sshPublicIpAddressName" : "[concat(variables('vmName'), '-ssh-pip')]"
},
"resources" : [
{
"apiVersion" : "2018-12-01",
"type" : "Microsoft.Network/publicIPAddresses",
"name" : "[variables('sshPublicIpAddressName')]",
"location" : "[variables('location')]",
"sku": {
"name": "Standard"
},
"properties" : {
"publicIPAllocationMethod" : "Static",
"dnsSettings" : {
"domainNameLabel" : "[variables('sshPublicIpAddressName')]"
}
}
},
{
"apiVersion" : "2018-06-01",
"type" : "Microsoft.Network/networkInterfaces",
"name" : "[variables('nicName')]",
"location" : "[variables('location')]",
"dependsOn" : [
"[resourceId('Microsoft.Network/publicIPAddresses', variables('sshPublicIpAddressName'))]"
],
"properties" : {
"ipConfigurations" : [
{
"name" : "pipConfig",
"properties" : {
"privateIPAllocationMethod" : "Dynamic",
"publicIPAddress": {
"id": "[resourceId('Microsoft.Network/publicIPAddresses', variables('sshPublicIpAddressName'))]"
},
"subnet" : {
"id" : "[variables('masterSubnetRef')]"
},
"loadBalancerBackendAddressPools" : [
{
"id" : "[concat('/subscriptions/', subscription().subscriptionId, '/resourceGroups/', resourceGroup().name, '/providers/Microsoft.Network/loadBalancers/', variables('masterLoadBalancerName'), '/backendAddressPools/public-lb-backend')]"
},
{
"id" : "[concat('/subscriptions/', subscription().subscriptionId, '/resourceGroups/', resourceGroup().name, '/providers/Microsoft.Network/loadBalancers/', variables('internalLoadBalancerName'), '/backendAddressPools/internal-lb-backend')]"
}
]
}
}
]
}
},
{
"apiVersion" : "2018-06-01",
"type" : "Microsoft.Compute/virtualMachines",
"name" : "[variables('vmName')]",
"location" : "[variables('location')]",
"identity" : {
"type" : "userAssigned",
"userAssignedIdentities" : {
"[resourceID('Microsoft.ManagedIdentity/userAssignedIdentities/', variables('identityName'))]" : {}
}
},
"dependsOn" : [
"[concat('Microsoft.Network/networkInterfaces/', variables('nicName'))]"
],
"properties" : {
"hardwareProfile" : {
"vmSize" : "[parameters('bootstrapVMSize')]"
},
"osProfile" : {
"computerName" : "[variables('vmName')]",
"adminUsername" : "core",
"customData" : "[parameters('bootstrapIgnition')]",
"linuxConfiguration" : {
"disablePasswordAuthentication" : true,
"ssh" : {
"publicKeys" : [
{
"path" : "[variables('sshKeyPath')]",
"keyData" : "[parameters('sshKeyData')]"
}
]
}
}
},
"storageProfile" : {
"imageReference": {
"id": "[resourceId('Microsoft.Compute/images', variables('imageName'))]"
},
"osDisk" : {
"name": "[concat(variables('vmName'),'_OSDisk')]",
"osType" : "Linux",
"createOption" : "FromImage",
"managedDisk": {
"storageAccountType": "Premium_LRS"
},
"diskSizeGB" : 100
}
},
"networkProfile" : {
"networkInterfaces" : [
{
"id" : "[resourceId('Microsoft.Network/networkInterfaces', variables('nicName'))]"
}
]
}
}
},
{
"apiVersion" : "2018-06-01",
"type": "Microsoft.Network/networkSecurityGroups/securityRules",
"name" : "[concat(variables('clusterNsgName'), '/bootstrap_ssh_in')]",
"location" : "[variables('location')]",
"dependsOn" : [
"[resourceId('Microsoft.Compute/virtualMachines', variables('vmName'))]"
],
"properties": {
"protocol" : "Tcp",
"sourcePortRange" : "*",
"destinationPortRange" : "22",
"sourceAddressPrefix" : "*",
"destinationAddressPrefix" : "*",
"access" : "Allow",
"priority" : 100,
"direction" : "Inbound"
}
}
]
}5.9.15. Creating the control plane machines in Azure
You must create the control plane machines in Microsoft Azure for your cluster to use. One way to create these machines is to modify the provided Azure Resource Manager (ARM) template.
If you do not use the provided ARM template to create your control plane machines, you must review the provided information and manually create the infrastructure. If your cluster does not initialize correctly, you might have to contact Red Hat support with your installation logs.
Prerequisites
- Configure an Azure account.
- Generate the Ignition config files for your cluster.
- Create and configure a VNet and associated subnets in Azure.
- Create and configure networking and load balancers in Azure.
- Create control plane and compute roles.
- Create the bootstrap machine.
Procedure
-
Copy the template from the ARM template for control plane machines section of this topic and save it as
05_masters.jsonin your cluster’s installation directory. This template describes the control plane machines that your cluster requires. Export the following variable needed by the control plane machine deployment:
$ export MASTER_IGNITION=`cat <installation_directory>/master.ign | base64 | tr -d '\n'`Create the deployment by using the
azCLI:$ az deployment group create -g ${RESOURCE_GROUP} \ --template-file "<installation_directory>/05_masters.json" \ --parameters masterIgnition="${MASTER_IGNITION}" \1 --parameters sshKeyData="${SSH_KEY}" \2 --parameters privateDNSZoneName="${CLUSTER_NAME}.${BASE_DOMAIN}" \3 --parameters baseName="${INFRA_ID}"4 - 1
- The Ignition content for the control plane nodes (also known as the master nodes).
- 2
- The SSH RSA public key file as a string.
- 3
- The name of the private DNS zone to which the control plane nodes are attached.
- 4
- The base name to be used in resource names; this is usually the cluster’s infrastructure ID.
5.9.15.1. ARM template for control plane machines
You can use the following Azure Resource Manager (ARM) template to deploy the control plane machines that you need for your OpenShift Container Platform cluster:
Example 5.5. 05_masters.json ARM template
{
"$schema" : "https://schema.management.azure.com/schemas/2015-01-01/deploymentTemplate.json#",
"contentVersion" : "1.0.0.0",
"parameters" : {
"baseName" : {
"type" : "string",
"minLength" : 1,
"metadata" : {
"description" : "Base name to be used in resource names (usually the cluster's Infra ID)"
}
},
"masterIgnition" : {
"type" : "string",
"metadata" : {
"description" : "Ignition content for the master nodes"
}
},
"numberOfMasters" : {
"type" : "int",
"defaultValue" : 3,
"minValue" : 2,
"maxValue" : 30,
"metadata" : {
"description" : "Number of OpenShift masters to deploy"
}
},
"sshKeyData" : {
"type" : "securestring",
"metadata" : {
"description" : "SSH RSA public key file as a string"
}
},
"privateDNSZoneName" : {
"type" : "string",
"metadata" : {
"description" : "Name of the private DNS zone the master nodes are going to be attached to"
}
},
"masterVMSize" : {
"type" : "string",
"defaultValue" : "Standard_D8s_v3",
"allowedValues" : [
"Standard_A2",
"Standard_A3",
"Standard_A4",
"Standard_A5",
"Standard_A6",
"Standard_A7",
"Standard_A8",
"Standard_A9",
"Standard_A10",
"Standard_A11",
"Standard_D2",
"Standard_D3",
"Standard_D4",
"Standard_D11",
"Standard_D12",
"Standard_D13",
"Standard_D14",
"Standard_D2_v2",
"Standard_D3_v2",
"Standard_D4_v2",
"Standard_D5_v2",
"Standard_D8_v3",
"Standard_D11_v2",
"Standard_D12_v2",
"Standard_D13_v2",
"Standard_D14_v2",
"Standard_E2_v3",
"Standard_E4_v3",
"Standard_E8_v3",
"Standard_E16_v3",
"Standard_E32_v3",
"Standard_E64_v3",
"Standard_E2s_v3",
"Standard_E4s_v3",
"Standard_E8s_v3",
"Standard_E16s_v3",
"Standard_E32s_v3",
"Standard_E64s_v3",
"Standard_G1",
"Standard_G2",
"Standard_G3",
"Standard_G4",
"Standard_G5",
"Standard_DS2",
"Standard_DS3",
"Standard_DS4",
"Standard_DS11",
"Standard_DS12",
"Standard_DS13",
"Standard_DS14",
"Standard_DS2_v2",
"Standard_DS3_v2",
"Standard_DS4_v2",
"Standard_DS5_v2",
"Standard_DS11_v2",
"Standard_DS12_v2",
"Standard_DS13_v2",
"Standard_DS14_v2",
"Standard_GS1",
"Standard_GS2",
"Standard_GS3",
"Standard_GS4",
"Standard_GS5",
"Standard_D2s_v3",
"Standard_D4s_v3",
"Standard_D8s_v3"
],
"metadata" : {
"description" : "The size of the Master Virtual Machines"
}
},
"diskSizeGB" : {
"type" : "int",
"defaultValue" : 1024,
"metadata" : {
"description" : "Size of the Master VM OS disk, in GB"
}
}
},
"variables" : {
"location" : "[resourceGroup().location]",
"virtualNetworkName" : "[concat(parameters('baseName'), '-vnet')]",
"virtualNetworkID" : "[resourceId('Microsoft.Network/virtualNetworks', variables('virtualNetworkName'))]",
"masterSubnetName" : "[concat(parameters('baseName'), '-master-subnet')]",
"masterSubnetRef" : "[concat(variables('virtualNetworkID'), '/subnets/', variables('masterSubnetName'))]",
"masterLoadBalancerName" : "[concat(parameters('baseName'), '-public-lb')]",
"internalLoadBalancerName" : "[concat(parameters('baseName'), '-internal-lb')]",
"sshKeyPath" : "/home/core/.ssh/authorized_keys",
"identityName" : "[concat(parameters('baseName'), '-identity')]",
"imageName" : "[concat(parameters('baseName'), '-image')]",
"copy" : [
{
"name" : "vmNames",
"count" : "[parameters('numberOfMasters')]",
"input" : "[concat(parameters('baseName'), '-master-', copyIndex('vmNames'))]"
}
]
},
"resources" : [
{
"apiVersion" : "2018-06-01",
"type" : "Microsoft.Network/networkInterfaces",
"copy" : {
"name" : "nicCopy",
"count" : "[length(variables('vmNames'))]"
},
"name" : "[concat(variables('vmNames')[copyIndex()], '-nic')]",
"location" : "[variables('location')]",
"properties" : {
"ipConfigurations" : [
{
"name" : "pipConfig",
"properties" : {
"privateIPAllocationMethod" : "Dynamic",
"subnet" : {
"id" : "[variables('masterSubnetRef')]"
},
"loadBalancerBackendAddressPools" : [
{
"id" : "[concat('/subscriptions/', subscription().subscriptionId, '/resourceGroups/', resourceGroup().name, '/providers/Microsoft.Network/loadBalancers/', variables('masterLoadBalancerName'), '/backendAddressPools/public-lb-backend')]"
},
{
"id" : "[concat('/subscriptions/', subscription().subscriptionId, '/resourceGroups/', resourceGroup().name, '/providers/Microsoft.Network/loadBalancers/', variables('internalLoadBalancerName'), '/backendAddressPools/internal-lb-backend')]"
}
]
}
}
]
}
},
{
"apiVersion": "2018-09-01",
"type": "Microsoft.Network/privateDnsZones/SRV",
"name": "[concat(parameters('privateDNSZoneName'), '/_etcd-server-ssl._tcp')]",
"location" : "[variables('location')]",
"properties": {
"ttl": 60,
"copy": [{
"name": "srvRecords",
"count": "[length(variables('vmNames'))]",
"input": {
"priority": 0,
"weight" : 10,
"port" : 2380,
"target" : "[concat('etcd-', copyIndex('srvRecords'), '.', parameters('privateDNSZoneName'))]"
}
}]
}
},
{
"apiVersion": "2018-09-01",
"type": "Microsoft.Network/privateDnsZones/A",
"copy" : {
"name" : "dnsCopy",
"count" : "[length(variables('vmNames'))]"
},
"name": "[concat(parameters('privateDNSZoneName'), '/etcd-', copyIndex())]",
"location" : "[variables('location')]",
"dependsOn" : [
"[concat('Microsoft.Network/networkInterfaces/', concat(variables('vmNames')[copyIndex()], '-nic'))]"
],
"properties": {
"ttl": 60,
"aRecords": [
{
"ipv4Address": "[reference(concat(variables('vmNames')[copyIndex()], '-nic')).ipConfigurations[0].properties.privateIPAddress]"
}
]
}
},
{
"apiVersion" : "2018-06-01",
"type" : "Microsoft.Compute/virtualMachines",
"copy" : {
"name" : "vmCopy",
"count" : "[length(variables('vmNames'))]"
},
"name" : "[variables('vmNames')[copyIndex()]]",
"location" : "[variables('location')]",
"identity" : {
"type" : "userAssigned",
"userAssignedIdentities" : {
"[resourceID('Microsoft.ManagedIdentity/userAssignedIdentities/', variables('identityName'))]" : {}
}
},
"dependsOn" : [
"[concat('Microsoft.Network/networkInterfaces/', concat(variables('vmNames')[copyIndex()], '-nic'))]",
"[concat('Microsoft.Network/privateDnsZones/', parameters('privateDNSZoneName'), '/A/etcd-', copyIndex())]",
"[concat('Microsoft.Network/privateDnsZones/', parameters('privateDNSZoneName'), '/SRV/_etcd-server-ssl._tcp')]"
],
"properties" : {
"hardwareProfile" : {
"vmSize" : "[parameters('masterVMSize')]"
},
"osProfile" : {
"computerName" : "[variables('vmNames')[copyIndex()]]",
"adminUsername" : "core",
"customData" : "[parameters('masterIgnition')]",
"linuxConfiguration" : {
"disablePasswordAuthentication" : true,
"ssh" : {
"publicKeys" : [
{
"path" : "[variables('sshKeyPath')]",
"keyData" : "[parameters('sshKeyData')]"
}
]
}
}
},
"storageProfile" : {
"imageReference": {
"id": "[resourceId('Microsoft.Compute/images', variables('imageName'))]"
},
"osDisk" : {
"name": "[concat(variables('vmNames')[copyIndex()], '_OSDisk')]",
"osType" : "Linux",
"createOption" : "FromImage",
"caching": "ReadOnly",
"writeAcceleratorEnabled": false,
"managedDisk": {
"storageAccountType": "Premium_LRS"
},
"diskSizeGB" : "[parameters('diskSizeGB')]"
}
},
"networkProfile" : {
"networkInterfaces" : [
{
"id" : "[resourceId('Microsoft.Network/networkInterfaces', concat(variables('vmNames')[copyIndex()], '-nic'))]",
"properties": {
"primary": false
}
}
]
}
}
}
]
}5.9.16. Wait for bootstrap completion and remove bootstrap resources in Azure
After you create all of the required infrastructure in Microsoft Azure, wait for the bootstrap process to complete on the machines that you provisioned by using the Ignition config files that you generated with the installation program.
Prerequisites
- Configure an Azure account.
- Generate the Ignition config files for your cluster.
- Create and configure a VNet and associated subnets in Azure.
- Create and configure networking and load balancers in Azure.
- Create control plane and compute roles.
- Create the bootstrap machine.
- Create the control plane machines.
Procedure
Change to the directory that contains the installation program and run the following command:
$ ./openshift-install wait-for bootstrap-complete --dir <installation_directory> \1 --log-level info2 If the command exits without a
FATALwarning, your production control plane has initialized.Delete the bootstrap resources:
$ az network nsg rule delete -g ${RESOURCE_GROUP} --nsg-name ${INFRA_ID}-nsg --name bootstrap_ssh_in $ az vm stop -g ${RESOURCE_GROUP} --name ${INFRA_ID}-bootstrap $ az vm deallocate -g ${RESOURCE_GROUP} --name ${INFRA_ID}-bootstrap $ az vm delete -g ${RESOURCE_GROUP} --name ${INFRA_ID}-bootstrap --yes $ az disk delete -g ${RESOURCE_GROUP} --name ${INFRA_ID}-bootstrap_OSDisk --no-wait --yes $ az network nic delete -g ${RESOURCE_GROUP} --name ${INFRA_ID}-bootstrap-nic --no-wait $ az storage blob delete --account-key ${ACCOUNT_KEY} --account-name ${CLUSTER_NAME}sa --container-name files --name bootstrap.ign $ az network public-ip delete -g ${RESOURCE_GROUP} --name ${INFRA_ID}-bootstrap-ssh-pip
If you do not delete the bootstrap server, installation may not succeed due to API traffic being routed to the bootstrap server.
5.9.17. Creating additional worker machines in Azure
You can create worker machines in Microsoft Azure for your cluster to use by launching individual instances discretely or by automated processes outside the cluster, such as auto scaling groups. You can also take advantage of the built-in cluster scaling mechanisms and the machine API in OpenShift Container Platform.
In this example, you manually launch one instance by using the Azure Resource Manager (ARM) template. Additional instances can be launched by including additional resources of type 06_workers.json in the file.
If you do not use the provided ARM template to create your worker machines, you must review the provided information and manually create the infrastructure. If your cluster does not initialize correctly, you might have to contact Red Hat support with your installation logs.
Prerequisites
- Configure an Azure account.
- Generate the Ignition config files for your cluster.
- Create and configure a VNet and associated subnets in Azure.
- Create and configure networking and load balancers in Azure.
- Create control plane and compute roles.
- Create the bootstrap machine.
- Create the control plane machines.
Procedure
-
Copy the template from the ARM template for worker machines section of this topic and save it as
06_workers.jsonin your cluster’s installation directory. This template describes the worker machines that your cluster requires. Export the following variable needed by the worker machine deployment:
$ export WORKER_IGNITION=`cat <installation_directory>/worker.ign | base64 | tr -d '\n'`Create the deployment by using the
azCLI:$ az deployment group create -g ${RESOURCE_GROUP} \ --template-file "<installation_directory>/06_workers.json" \ --parameters workerIgnition="${WORKER_IGNITION}" \1 --parameters sshKeyData="${SSH_KEY}" \2 --parameters baseName="${INFRA_ID}"3
5.9.17.1. ARM template for worker machines
You can use the following Azure Resource Manager (ARM) template to deploy the worker machines that you need for your OpenShift Container Platform cluster:
Example 5.6. 06_workers.json ARM template
{
"$schema" : "https://schema.management.azure.com/schemas/2015-01-01/deploymentTemplate.json#",
"contentVersion" : "1.0.0.0",
"parameters" : {
"baseName" : {
"type" : "string",
"minLength" : 1,
"metadata" : {
"description" : "Base name to be used in resource names (usually the cluster's Infra ID)"
}
},
"workerIgnition" : {
"type" : "string",
"metadata" : {
"description" : "Ignition content for the worker nodes"
}
},
"numberOfNodes" : {
"type" : "int",
"defaultValue" : 3,
"minValue" : 2,
"maxValue" : 30,
"metadata" : {
"description" : "Number of OpenShift compute nodes to deploy"
}
},
"sshKeyData" : {
"type" : "securestring",
"metadata" : {
"description" : "SSH RSA public key file as a string"
}
},
"nodeVMSize" : {
"type" : "string",
"defaultValue" : "Standard_D4s_v3",
"allowedValues" : [
"Standard_A2",
"Standard_A3",
"Standard_A4",
"Standard_A5",
"Standard_A6",
"Standard_A7",
"Standard_A8",
"Standard_A9",
"Standard_A10",
"Standard_A11",
"Standard_D2",
"Standard_D3",
"Standard_D4",
"Standard_D11",
"Standard_D12",
"Standard_D13",
"Standard_D14",
"Standard_D2_v2",
"Standard_D3_v2",
"Standard_D4_v2",
"Standard_D5_v2",
"Standard_D8_v3",
"Standard_D11_v2",
"Standard_D12_v2",
"Standard_D13_v2",
"Standard_D14_v2",
"Standard_E2_v3",
"Standard_E4_v3",
"Standard_E8_v3",
"Standard_E16_v3",
"Standard_E32_v3",
"Standard_E64_v3",
"Standard_E2s_v3",
"Standard_E4s_v3",
"Standard_E8s_v3",
"Standard_E16s_v3",
"Standard_E32s_v3",
"Standard_E64s_v3",
"Standard_G1",
"Standard_G2",
"Standard_G3",
"Standard_G4",
"Standard_G5",
"Standard_DS2",
"Standard_DS3",
"Standard_DS4",
"Standard_DS11",
"Standard_DS12",
"Standard_DS13",
"Standard_DS14",
"Standard_DS2_v2",
"Standard_DS3_v2",
"Standard_DS4_v2",
"Standard_DS5_v2",
"Standard_DS11_v2",
"Standard_DS12_v2",
"Standard_DS13_v2",
"Standard_DS14_v2",
"Standard_GS1",
"Standard_GS2",
"Standard_GS3",
"Standard_GS4",
"Standard_GS5",
"Standard_D2s_v3",
"Standard_D4s_v3",
"Standard_D8s_v3"
],
"metadata" : {
"description" : "The size of the each Node Virtual Machine"
}
}
},
"variables" : {
"location" : "[resourceGroup().location]",
"virtualNetworkName" : "[concat(parameters('baseName'), '-vnet')]",
"virtualNetworkID" : "[resourceId('Microsoft.Network/virtualNetworks', variables('virtualNetworkName'))]",
"nodeSubnetName" : "[concat(parameters('baseName'), '-worker-subnet')]",
"nodeSubnetRef" : "[concat(variables('virtualNetworkID'), '/subnets/', variables('nodeSubnetName'))]",
"infraLoadBalancerName" : "[parameters('baseName')]",
"sshKeyPath" : "/home/capi/.ssh/authorized_keys",
"identityName" : "[concat(parameters('baseName'), '-identity')]",
"imageName" : "[concat(parameters('baseName'), '-image')]",
"copy" : [
{
"name" : "vmNames",
"count" : "[parameters('numberOfNodes')]",
"input" : "[concat(parameters('baseName'), '-worker-', variables('location'), '-', copyIndex('vmNames', 1))]"
}
]
},
"resources" : [
{
"apiVersion" : "2019-05-01",
"name" : "[concat('node', copyIndex())]",
"type" : "Microsoft.Resources/deployments",
"copy" : {
"name" : "nodeCopy",
"count" : "[length(variables('vmNames'))]"
},
"properties" : {
"mode" : "Incremental",
"template" : {
"$schema" : "http://schema.management.azure.com/schemas/2015-01-01/deploymentTemplate.json#",
"contentVersion" : "1.0.0.0",
"resources" : [
{
"apiVersion" : "2018-06-01",
"type" : "Microsoft.Network/networkInterfaces",
"name" : "[concat(variables('vmNames')[copyIndex()], '-nic')]",
"location" : "[variables('location')]",
"properties" : {
"ipConfigurations" : [
{
"name" : "pipConfig",
"properties" : {
"privateIPAllocationMethod" : "Dynamic",
"subnet" : {
"id" : "[variables('nodeSubnetRef')]"
}
}
}
]
}
},
{
"apiVersion" : "2018-06-01",
"type" : "Microsoft.Compute/virtualMachines",
"name" : "[variables('vmNames')[copyIndex()]]",
"location" : "[variables('location')]",
"tags" : {
"kubernetes.io-cluster-ffranzupi": "owned"
},
"identity" : {
"type" : "userAssigned",
"userAssignedIdentities" : {
"[resourceID('Microsoft.ManagedIdentity/userAssignedIdentities/', variables('identityName'))]" : {}
}
},
"dependsOn" : [
"[concat('Microsoft.Network/networkInterfaces/', concat(variables('vmNames')[copyIndex()], '-nic'))]"
],
"properties" : {
"hardwareProfile" : {
"vmSize" : "[parameters('nodeVMSize')]"
},
"osProfile" : {
"computerName" : "[variables('vmNames')[copyIndex()]]",
"adminUsername" : "capi",
"customData" : "[parameters('workerIgnition')]",
"linuxConfiguration" : {
"disablePasswordAuthentication" : true,
"ssh" : {
"publicKeys" : [
{
"path" : "[variables('sshKeyPath')]",
"keyData" : "[parameters('sshKeyData')]"
}
]
}
}
},
"storageProfile" : {
"imageReference": {
"id": "[resourceId('Microsoft.Compute/images', variables('imageName'))]"
},
"osDisk" : {
"name": "[concat(variables('vmNames')[copyIndex()],'_OSDisk')]",
"osType" : "Linux",
"createOption" : "FromImage",
"managedDisk": {
"storageAccountType": "Premium_LRS"
},
"diskSizeGB": 128
}
},
"networkProfile" : {
"networkInterfaces" : [
{
"id" : "[resourceId('Microsoft.Network/networkInterfaces', concat(variables('vmNames')[copyIndex()], '-nic'))]",
"properties": {
"primary": true
}
}
]
}
}
}
]
}
}
}
]
}5.9.18. Installing the OpenShift CLI by downloading the binary
You can install the OpenShift CLI (oc) to interact with OpenShift Container Platform from a command-line interface. You can install oc on Linux, Windows, or macOS.
If you installed an earlier version of oc, you cannot use it to complete all of the commands in OpenShift Container Platform 4.7. Download and install the new version of oc.
5.9.18.1. Installing the OpenShift CLI on Linux
You can install the OpenShift CLI (oc) binary on Linux by using the following procedure.
Procedure
- Navigate to the OpenShift Container Platform downloads page on the Red Hat Customer Portal.
- Select the appropriate version in the Version drop-down menu.
- Click Download Now next to the OpenShift v4.7 Linux Client entry and save the file.
Unpack the archive:
$ tar xvzf <file>Place the
ocbinary in a directory that is on yourPATH.To check your
PATH, execute the following command:$ echo $PATH
After you install the OpenShift CLI, it is available using the oc command:
$ oc <command>5.9.18.2. Installing the OpenShift CLI on Windows
You can install the OpenShift CLI (oc) binary on Windows by using the following procedure.
Procedure
- Navigate to the OpenShift Container Platform downloads page on the Red Hat Customer Portal.
- Select the appropriate version in the Version drop-down menu.
- Click Download Now next to the OpenShift v4.7 Windows Client entry and save the file.
- Unzip the archive with a ZIP program.
Move the
ocbinary to a directory that is on yourPATH.To check your
PATH, open the command prompt and execute the following command:C:\> path
After you install the OpenShift CLI, it is available using the oc command:
C:\> oc <command>5.9.18.3. Installing the OpenShift CLI on macOS
You can install the OpenShift CLI (oc) binary on macOS by using the following procedure.
Procedure
- Navigate to the OpenShift Container Platform downloads page on the Red Hat Customer Portal.
- Select the appropriate version in the Version drop-down menu.
- Click Download Now next to the OpenShift v4.7 MacOSX Client entry and save the file.
- Unpack and unzip the archive.
Move the
ocbinary to a directory on your PATH.To check your
PATH, open a terminal and execute the following command:$ echo $PATH
After you install the OpenShift CLI, it is available using the oc command:
$ oc <command>5.9.19. Logging in to the cluster by using the CLI
You can log in to your cluster as a default system user by exporting the cluster kubeconfig file. The kubeconfig file contains information about the cluster that is used by the CLI to connect a client to the correct cluster and API server. The file is specific to a cluster and is created during OpenShift Container Platform installation.
Prerequisites
- You deployed an OpenShift Container Platform cluster.
-
You installed the
ocCLI.
Procedure
Export the
kubeadmincredentials:$ export KUBECONFIG=<installation_directory>/auth/kubeconfig1 - 1
- For
<installation_directory>, specify the path to the directory that you stored the installation files in.
Verify you can run
occommands successfully using the exported configuration:$ oc whoamiExample output
system:admin
5.9.20. Approving the certificate signing requests for your machines
When you add machines to a cluster, two pending certificate signing requests (CSRs) are generated for each machine that you added. You must confirm that these CSRs are approved or, if necessary, approve them yourself. The client requests must be approved first, followed by the server requests.
Prerequisites
- You added machines to your cluster.
Procedure
Confirm that the cluster recognizes the machines:
$ oc get nodesExample output
NAME STATUS ROLES AGE VERSION master-0 Ready master 63m v1.20.0 master-1 Ready master 63m v1.20.0 master-2 Ready master 64m v1.20.0The output lists all of the machines that you created.
NoteThe preceding output might not include the compute nodes, also known as worker nodes, until some CSRs are approved.
Review the pending CSRs and ensure that you see the client requests with the
PendingorApprovedstatus for each machine that you added to the cluster:$ oc get csrExample output
NAME AGE REQUESTOR CONDITION csr-8b2br 15m system:serviceaccount:openshift-machine-config-operator:node-bootstrapper Pending csr-8vnps 15m system:serviceaccount:openshift-machine-config-operator:node-bootstrapper Pending ...In this example, two machines are joining the cluster. You might see more approved CSRs in the list.
If the CSRs were not approved, after all of the pending CSRs for the machines you added are in
Pendingstatus, approve the CSRs for your cluster machines:NoteBecause the CSRs rotate automatically, approve your CSRs within an hour of adding the machines to the cluster. If you do not approve them within an hour, the certificates will rotate, and more than two certificates will be present for each node. You must approve all of these certificates. Once the client CSR is approved, the Kubelet creates a secondary CSR for the serving certificate, which requires manual approval. Then, subsequent serving certificate renewal requests are automatically approved by the
machine-approverif the Kubelet requests a new certificate with identical parameters.NoteFor clusters running on platforms that are not machine API enabled, such as bare metal and other user-provisioned infrastructure, you must implement a method of automatically approving the kubelet serving certificate requests (CSRs). If a request is not approved, then the
oc exec,oc rsh, andoc logscommands cannot succeed, because a serving certificate is required when the API server connects to the kubelet. Any operation that contacts the Kubelet endpoint requires this certificate approval to be in place. The method must watch for new CSRs, confirm that the CSR was submitted by thenode-bootstrapperservice account in thesystem:nodeorsystem:admingroups, and confirm the identity of the node.To approve them individually, run the following command for each valid CSR:
$ oc adm certificate approve <csr_name>1 - 1
<csr_name>is the name of a CSR from the list of current CSRs.
To approve all pending CSRs, run the following command:
$ oc get csr -o go-template='{{range .items}}{{if not .status}}{{.metadata.name}}{{"\n"}}{{end}}{{end}}' | xargs --no-run-if-empty oc adm certificate approveNoteSome Operators might not become available until some CSRs are approved.
Now that your client requests are approved, you must review the server requests for each machine that you added to the cluster:
$ oc get csrExample output
NAME AGE REQUESTOR CONDITION csr-bfd72 5m26s system:node:ip-10-0-50-126.us-east-2.compute.internal Pending csr-c57lv 5m26s system:node:ip-10-0-95-157.us-east-2.compute.internal Pending ...If the remaining CSRs are not approved, and are in the
Pendingstatus, approve the CSRs for your cluster machines:To approve them individually, run the following command for each valid CSR:
$ oc adm certificate approve <csr_name>1 - 1
<csr_name>is the name of a CSR from the list of current CSRs.
To approve all pending CSRs, run the following command:
$ oc get csr -o go-template='{{range .items}}{{if not .status}}{{.metadata.name}}{{"\n"}}{{end}}{{end}}' | xargs oc adm certificate approve
After all client and server CSRs have been approved, the machines have the
Readystatus. Verify this by running the following command:$ oc get nodesExample output
NAME STATUS ROLES AGE VERSION master-0 Ready master 73m v1.20.0 master-1 Ready master 73m v1.20.0 master-2 Ready master 74m v1.20.0 worker-0 Ready worker 11m v1.20.0 worker-1 Ready worker 11m v1.20.0NoteIt can take a few minutes after approval of the server CSRs for the machines to transition to the
Readystatus.
Additional information
- For more information on CSRs, see Certificate Signing Requests.
5.9.21. Adding the Ingress DNS records
If you removed the DNS Zone configuration when creating Kubernetes manifests and generating Ignition configs, you must manually create DNS records that point at the Ingress load balancer. You can create either a wildcard *.apps.{baseDomain}. or specific records. You can use A, CNAME, and other records per your requirements.
Prerequisites
- You deployed an OpenShift Container Platform cluster on Microsoft Azure by using infrastructure that you provisioned.
-
Install the OpenShift CLI (
oc). -
Install the
jqpackage. - Install or update the Azure CLI.
Procedure
Confirm the Ingress router has created a load balancer and populated the
EXTERNAL-IPfield:$ oc -n openshift-ingress get service router-defaultExample output
NAME TYPE CLUSTER-IP EXTERNAL-IP PORT(S) AGE router-default LoadBalancer 172.30.20.10 35.130.120.110 80:32288/TCP,443:31215/TCP 20Export the Ingress router IP as a variable:
$ export PUBLIC_IP_ROUTER=`oc -n openshift-ingress get service router-default --no-headers | awk '{print $4}'`Add a
*.appsrecord to the public DNS zone.If you are adding this cluster to a new public zone, run:
$ az network dns record-set a add-record -g ${BASE_DOMAIN_RESOURCE_GROUP} -z ${CLUSTER_NAME}.${BASE_DOMAIN} -n *.apps -a ${PUBLIC_IP_ROUTER} --ttl 300If you are adding this cluster to an already existing public zone, run:
$ az network dns record-set a add-record -g ${BASE_DOMAIN_RESOURCE_GROUP} -z ${BASE_DOMAIN} -n *.apps.${CLUSTER_NAME} -a ${PUBLIC_IP_ROUTER} --ttl 300
Add a
*.appsrecord to the private DNS zone:Create a
*.appsrecord by using the following command:$ az network private-dns record-set a create -g ${RESOURCE_GROUP} -z ${CLUSTER_NAME}.${BASE_DOMAIN} -n *.apps --ttl 300Add the
*.appsrecord to the private DNS zone by using the following command:$ az network private-dns record-set a add-record -g ${RESOURCE_GROUP} -z ${CLUSTER_NAME}.${BASE_DOMAIN} -n *.apps -a ${PUBLIC_IP_ROUTER}
If you prefer to add explicit domains instead of using a wildcard, you can create entries for each of the cluster’s current routes:
$ oc get --all-namespaces -o jsonpath='{range .items[*]}{range .status.ingress[*]}{.host}{"\n"}{end}{end}' routesExample output
oauth-openshift.apps.cluster.basedomain.com
console-openshift-console.apps.cluster.basedomain.com
downloads-openshift-console.apps.cluster.basedomain.com
alertmanager-main-openshift-monitoring.apps.cluster.basedomain.com
grafana-openshift-monitoring.apps.cluster.basedomain.com
prometheus-k8s-openshift-monitoring.apps.cluster.basedomain.com5.9.22. Completing an Azure installation on user-provisioned infrastructure
After you start the OpenShift Container Platform installation on Microsoft Azure user-provisioned infrastructure, you can monitor the cluster events until the cluster is ready.
Prerequisites
- Deploy the bootstrap machine for an OpenShift Container Platform cluster on user-provisioned Azure infrastructure.
-
Install the
ocCLI and log in.
Procedure
Complete the cluster installation:
$ ./openshift-install --dir <installation_directory> wait-for install-complete1 Example output
INFO Waiting up to 30m0s for the cluster to initialize...- 1
- For
<installation_directory>, specify the path to the directory that you stored the installation files in.
Important-
The Ignition config files that the installation program generates contain certificates that expire after 24 hours, which are then renewed at that time. If the cluster is shut down before renewing the certificates and the cluster is later restarted after the 24 hours have elapsed, the cluster automatically recovers the expired certificates. The exception is that you must manually approve the pending
node-bootstrappercertificate signing requests (CSRs) to recover kubelet certificates. See the documentation for Recovering from expired control plane certificates for more information. - It is recommended that you use Ignition config files within 12 hours after they are generated because the 24-hour certificate rotates from 16 to 22 hours after the cluster is installed. By using the Ignition config files within 12 hours, you can avoid installation failure if the certificate update runs during installation.
5.9.23. Telemetry access for OpenShift Container Platform
In OpenShift Container Platform 4.7, the Telemetry service, which runs by default to provide metrics about cluster health and the success of updates, requires internet access. If your cluster is connected to the internet, Telemetry runs automatically, and your cluster is registered to OpenShift Cluster Manager.
After you confirm that your OpenShift Cluster Manager inventory is correct, either maintained automatically by Telemetry or manually by using OpenShift Cluster Manager, use subscription watch to track your OpenShift Container Platform subscriptions at the account or multi-cluster level.
5.10. Uninstalling a cluster on Azure
You can remove a cluster that you deployed to Microsoft Azure.
5.10.1. Removing a cluster that uses installer-provisioned infrastructure
You can remove a cluster that uses installer-provisioned infrastructure from your cloud.
After uninstallation, check your cloud provider for any resources not removed properly, especially with User Provisioned Infrastructure (UPI) clusters. There might be resources that the installer did not create or that the installer is unable to access.
Prerequisites
- Have a copy of the installation program that you used to deploy the cluster.
- Have the files that the installation program generated when you created your cluster.
Procedure
From the directory that contains the installation program on the computer that you used to install the cluster, run the following command:
$ ./openshift-install destroy cluster \ --dir <installation_directory> --log-level info1 2 NoteYou must specify the directory that contains the cluster definition files for your cluster. The installation program requires the
metadata.jsonfile in this directory to delete the cluster.-
Optional: Delete the
<installation_directory>directory and the OpenShift Container Platform installation program.
Chapter 6. Installing on GCP
6.1. Configuring a GCP project
Before you can install OpenShift Container Platform, you must configure a Google Cloud Platform (GCP) project to host it.
6.1.1. Creating a GCP project
To install OpenShift Container Platform, you must create a project in your Google Cloud Platform (GCP) account to host the cluster.
Procedure
Create a project to host your OpenShift Container Platform cluster. See Creating and Managing Projects in the GCP documentation.
ImportantYour GCP project must use the Premium Network Service Tier if you are using installer-provisioned infrastructure. The Standard Network Service Tier is not supported for clusters installed using the installation program. The installation program configures internal load balancing for the
api-int.<cluster_name>.<base_domain>URL; the Premium Tier is required for internal load balancing.
6.1.2. Enabling API services in GCP
Your Google Cloud Platform (GCP) project requires access to several API services to complete OpenShift Container Platform installation.
Prerequisites
- You created a project to host your cluster.
Procedure
Enable the following required API services in the project that hosts your cluster. See Enabling services in the GCP documentation.
Expand Table 6.1. Required API services API service Console service name Compute Engine API
compute.googleapis.comGoogle Cloud APIs
cloudapis.googleapis.comCloud Resource Manager API
cloudresourcemanager.googleapis.comGoogle DNS API
dns.googleapis.comIAM Service Account Credentials API
iamcredentials.googleapis.comIdentity and Access Management (IAM) API
iam.googleapis.comService Management API
servicemanagement.googleapis.comService Usage API
serviceusage.googleapis.comGoogle Cloud Storage JSON API
storage-api.googleapis.comCloud Storage
storage-component.googleapis.com
6.1.3. Configuring DNS for GCP
To install OpenShift Container Platform, the Google Cloud Platform (GCP) account you use must have a dedicated public hosted zone in the same project that you host the OpenShift Container Platform cluster. This zone must be authoritative for the domain. The DNS service provides cluster DNS resolution and name lookup for external connections to the cluster.
Procedure
Identify your domain, or subdomain, and registrar. You can transfer an existing domain and registrar or obtain a new one through GCP or another source.
NoteIf you purchase a new domain, it can take time for the relevant DNS changes to propagate. For more information about purchasing domains through Google, see Google Domains.
Create a public hosted zone for your domain or subdomain in your GCP project. See Creating public zones in the GCP documentation.
Use an appropriate root domain, such as
openshiftcorp.com, or subdomain, such asclusters.openshiftcorp.com.Extract the new authoritative name servers from the hosted zone records. See Look up your Cloud DNS name servers in the GCP documentation.
You typically have four name servers.
- Update the registrar records for the name servers that your domain uses. For example, if you registered your domain to Google Domains, see the following topic in the Google Domains Help: How to switch to custom name servers.
- If you migrated your root domain to Google Cloud DNS, migrate your DNS records. See Migrating to Cloud DNS in the GCP documentation.
- If you use a subdomain, follow your company’s procedures to add its delegation records to the parent domain. This process might include a request to your company’s IT department or the division that controls the root domain and DNS services for your company.
6.1.4. GCP account limits
The OpenShift Container Platform cluster uses a number of Google Cloud Platform (GCP) components, but the default Quotas do not affect your ability to install a default OpenShift Container Platform cluster.
A default cluster, which contains three compute and three control plane machines, uses the following resources. Note that some resources are required only during the bootstrap process and are removed after the cluster deploys.
| Service | Component | Location | Total resources required | Resources removed after bootstrap |
|---|---|---|---|---|
| Service account | IAM | Global | 5 | 0 |
| Firewall rules | Compute | Global | 11 | 1 |
| Forwarding rules | Compute | Global | 2 | 0 |
| In-use global IP addresses | Compute | Global | 4 | 1 |
| Health checks | Compute | Global | 3 | 0 |
| Images | Compute | Global | 1 | 0 |
| Networks | Compute | Global | 2 | 0 |
| Static IP addresses | Compute | Region | 4 | 1 |
| Routers | Compute | Global | 1 | 0 |
| Routes | Compute | Global | 2 | 0 |
| Subnetworks | Compute | Global | 2 | 0 |
| Target pools | Compute | Global | 3 | 0 |
| CPUs | Compute | Region | 28 | 4 |
| Persistent disk SSD (GB) | Compute | Region | 896 | 128 |
If any of the quotas are insufficient during installation, the installation program displays an error that states both which quota was exceeded and the region.
Be sure to consider your actual cluster size, planned cluster growth, and any usage from other clusters that are associated with your account. The CPU, static IP addresses, and persistent disk SSD (storage) quotas are the ones that are most likely to be insufficient.
If you plan to deploy your cluster in one of the following regions, you will exceed the maximum storage quota and are likely to exceed the CPU quota limit:
-
asia-east2 -
asia-northeast2 -
asia-south1 -
australia-southeast1 -
europe-north1 -
europe-west2 -
europe-west3 -
europe-west6 -
northamerica-northeast1 -
southamerica-east1 -
us-west2
You can increase resource quotas from the GCP console, but you might need to file a support ticket. Be sure to plan your cluster size early so that you can allow time to resolve the support ticket before you install your OpenShift Container Platform cluster.
6.1.5. Creating a service account in GCP
OpenShift Container Platform requires a Google Cloud Platform (GCP) service account that provides authentication and authorization to access data in the Google APIs. If you do not have an existing IAM service account that contains the required roles in your project, you must create one.
Prerequisites
- You created a project to host your cluster.
Procedure
- Create a service account in the project that you use to host your OpenShift Container Platform cluster. See Creating a service account in the GCP documentation.
Grant the service account the appropriate permissions. You can either grant the individual permissions that follow or assign the
Ownerrole to it. See Granting roles to a service account for specific resources.NoteWhile making the service account an owner of the project is the easiest way to gain the required permissions, it means that service account has complete control over the project. You must determine if the risk that comes from offering that power is acceptable.
Create the service account key in JSON format. See Creating service account keys in the GCP documentation.
The service account key is required to create a cluster.
6.1.5.1. Required GCP permissions
When you attach the Owner role to the service account that you create, you grant that service account all permissions, including those that are required to install OpenShift Container Platform. To deploy an OpenShift Container Platform cluster, the service account requires the following permissions. If you deploy your cluster into an existing VPC, the service account does not require certain networking permissions, which are noted in the following lists:
Required roles for the installation program
- Compute Admin
- Security Admin
- Service Account Admin
- Service Account User
- Storage Admin
Required roles for creating network resources during installation
- DNS Administrator
Optional roles
For the cluster to create new limited credentials for its Operators, add the following role:
- Service Account Key Admin
The roles are applied to the service accounts that the control plane and compute machines use:
| Account | Roles |
|---|---|
| Control Plane |
|
|
| |
|
| |
|
| |
|
| |
| Compute |
|
|
|
6.1.6. Supported GCP regions
You can deploy an OpenShift Container Platform cluster to the following Google Cloud Platform (GCP) regions:
-
asia-east1(Changhua County, Taiwan) -
asia-east2(Hong Kong) -
asia-northeast1(Tokyo, Japan) -
asia-northeast2(Osaka, Japan) -
asia-northeast3(Seoul, South Korea) -
asia-south1(Mumbai, India) -
asia-southeast1(Jurong West, Singapore) -
asia-southeast2(Jakarta, Indonesia) -
australia-southeast1(Sydney, Australia) -
europe-north1(Hamina, Finland) -
europe-west1(St. Ghislain, Belgium) -
europe-west2(London, England, UK) -
europe-west3(Frankfurt, Germany) -
europe-west4(Eemshaven, Netherlands) -
europe-west6(Zürich, Switzerland) -
northamerica-northeast1(Montréal, Québec, Canada) -
southamerica-east1(São Paulo, Brazil) -
us-central1(Council Bluffs, Iowa, USA) -
us-east1(Moncks Corner, South Carolina, USA) -
us-east4(Ashburn, Northern Virginia, USA) -
us-west1(The Dalles, Oregon, USA) -
us-west2(Los Angeles, California, USA) -
us-west3(Salt Lake City, Utah, USA) -
us-west4(Las Vegas, Nevada, USA)
6.1.7. Next steps
- Install an OpenShift Container Platform cluster on GCP. You can install a customized cluster or quickly install a cluster with default options.
6.2. Manually creating IAM for GCP
In environments where the cloud identity and access management (IAM) APIs are not reachable, or the administrator prefers not to store an administrator-level credential secret in the cluster kube-system namespace, you can put the Cloud Credential Operator (CCO) into manual mode before you install the cluster.
6.2.1. Alternatives to storing administrator-level secrets in the kube-system project
The Cloud Credential Operator (CCO) manages cloud provider credentials as Kubernetes custom resource definitions (CRDs). You can configure the CCO to suit the security requirements of your organization by setting different values for the credentialsMode parameter in the install-config.yaml file.
If you prefer not to store an administrator-level credential secret in the cluster kube-system project, you can choose one of the following options when installing OpenShift Container Platform:
Manage cloud credentials manually:
You can set the
credentialsModeparameter for the CCO toManualto manage cloud credentials manually. Using manual mode allows each cluster component to have only the permissions it requires, without storing an administrator-level credential in the cluster. You can also use this mode if your environment does not have connectivity to the cloud provider public IAM endpoint. However, you must manually reconcile permissions with new release images for every upgrade. You must also manually supply credentials for every component that requests them.Remove the administrator-level credential secret after installing OpenShift Container Platform with mint mode:
If you are using the CCO with the
credentialsModeparameter set toMint, you can remove or rotate the administrator-level credential after installing OpenShift Container Platform. Mint mode is the default configuration for the CCO. This option requires the presence of the administrator-level credential during an installation. The administrator-level credential is used during the installation to mint other credentials with some permissions granted. The original credential secret is not stored in the cluster permanently.
Prior to a non z-stream upgrade, you must reinstate the credential secret with the administrator-level credential. If the credential is not present, the upgrade might be blocked.
For a detailed description of all available CCO credential modes and their supported platforms, see About the Cloud Credential Operator.
6.2.2. Manually create IAM
The Cloud Credential Operator (CCO) can be put into manual mode prior to installation in environments where the cloud identity and access management (IAM) APIs are not reachable, or the administrator prefers not to store an administrator-level credential secret in the cluster kube-system namespace.
Procedure
Change to the directory that contains the installation program and create the
install-config.yamlfile:$ openshift-install create install-config --dir <installation_directory>where
<installation_directory>is the directory in which the installation program creates files.Edit the
install-config.yamlconfiguration file so that it contains thecredentialsModeparameter set toManual.Example
install-config.yamlconfiguration fileapiVersion: v1 baseDomain: cluster1.example.com credentialsMode: Manual1 compute: - architecture: amd64 hyperthreading: Enabled ...- 1
- This line is added to set the
credentialsModeparameter toManual.
To generate the manifests, run the following command from the directory that contains the installation program:
$ openshift-install create manifests --dir <installation_directory>From the directory that contains the installation program, obtain details of the OpenShift Container Platform release image that your
openshift-installbinary is built to use:$ openshift-install versionExample output
release image quay.io/openshift-release-dev/ocp-release:4.y.z-x86_64Locate all
CredentialsRequestobjects in this release image that target the cloud you are deploying on:$ oc adm release extract quay.io/openshift-release-dev/ocp-release:4.y.z-x86_64 --credentials-requests --cloud=gcpThis command creates a YAML file for each
CredentialsRequestobject.Sample
CredentialsRequestobjectapiVersion: cloudcredential.openshift.io/v1 kind: CredentialsRequest metadata: labels: controller-tools.k8s.io: "1.0" name: openshift-image-registry-gcs namespace: openshift-cloud-credential-operator spec: secretRef: name: installer-cloud-credentials namespace: openshift-image-registry providerSpec: apiVersion: cloudcredential.openshift.io/v1 kind: GCPProviderSpec predefinedRoles: - roles/storage.admin - roles/iam.serviceAccountUser skipServiceCheck: true-
Create YAML files for secrets in the
openshift-installmanifests directory that you generated previously. The secrets must be stored using the namespace and secret name defined in thespec.secretReffor eachCredentialsRequestobject. The format for the secret data varies for each cloud provider. From the directory that contains the installation program, proceed with your cluster creation:
$ openshift-install create cluster --dir <installation_directory>ImportantBefore upgrading a cluster that uses manually maintained credentials, you must ensure that the CCO is in an upgradeable state. For details, see the "Upgrading clusters with manually maintained credentials" section of the installation content for your cloud provider.
6.2.3. Upgrading clusters with manually maintained credentials
If credentials are added in a future release, the Cloud Credential Operator (CCO) upgradable status for a cluster with manually maintained credentials changes to false. For minor release, for example, from 4.6 to 4.7, this status prevents you from upgrading until you have addressed any updated permissions. For z-stream releases, for example, from 4.6.10 to 4.6.11, the upgrade is not blocked, but the credentials must still be updated for the new release.
Use the Administrator perspective of the web console to determine if the CCO is upgradeable.
- Navigate to Administration → Cluster Settings.
- To view the CCO status details, click cloud-credential in the Cluster Operators list.
-
If the Upgradeable status in the Conditions section is False, examine the
CredentialsRequestcustom resource for the new release and update the manually maintained credentials on your cluster to match before upgrading.
In addition to creating new credentials for the release image that you are upgrading to, you must review the required permissions for existing credentials and accommodate any new permissions requirements for existing components in the new release. The CCO cannot detect these mismatches and will not set upgradable to false in this case.
The "Manually creating IAM" section of the installation content for your cloud provider explains how to obtain and use the credentials required for your cloud.
6.2.4. Mint mode
Mint mode is the default and recommended Cloud Credential Operator (CCO) credentials mode for OpenShift Container Platform. In this mode, the CCO uses the provided administrator-level cloud credential to run the cluster. Mint mode is supported for AWS, GCP, and Azure.
In mint mode, the admin credential is stored in the kube-system namespace and then used by the CCO to process the CredentialsRequest objects in the cluster and create users for each with specific permissions.
The benefits of mint mode include:
- Each cluster component has only the permissions it requires
- Automatic, on-going reconciliation for cloud credentials, including additional credentials or permissions that might be required for upgrades
One drawback is that mint mode requires admin credential storage in a cluster kube-system secret.
6.2.5. Mint mode with removal or rotation of the administrator-level credential
Currently, this mode is only supported on AWS and GCP.
In this mode, a user installs OpenShift Container Platform with an administrator-level credential just like the normal mint mode. However, this process removes the administrator-level credential secret from the cluster post-installation.
The administrator can have the Cloud Credential Operator make its own request for a read-only credential that allows it to verify if all CredentialsRequest objects have their required permissions, thus the administrator-level credential is not required unless something needs to be changed. After the associated credential is removed, it can be deleted or deactivated on the underlying cloud, if desired.
Prior to a non z-stream upgrade, you must reinstate the credential secret with the administrator-level credential. If the credential is not present, the upgrade might be blocked.
The administrator-level credential is not stored in the cluster permanently.
Following these steps still requires the administrator-level credential in the cluster for brief periods of time. It also requires manually re-instating the secret with administrator-level credentials for each upgrade.
6.2.6. Next steps
Install an OpenShift Container Platform cluster:
- Installing a cluster quickly on GCP with default options on installer-provisioned infrastructure
- Install a cluster with cloud customizations on installer-provisioned infrastructure
- Install a cluster with network customizations on installer-provisioned infrastructure
6.3. Installing a cluster quickly on GCP
In OpenShift Container Platform version 4.7, you can install a cluster on Google Cloud Platform (GCP) that uses the default configuration options.
6.3.1. Prerequisites
- Review details about the OpenShift Container Platform installation and update processes.
- Configure a GCP account to host the cluster.
- If you use a firewall, you must configure it to allow the sites that your cluster requires access to.
- If you do not allow the system to manage identity and access management (IAM), then a cluster administrator can manually create and maintain IAM credentials. Manual mode can also be used in environments where the cloud IAM APIs are not reachable.
6.3.2. Internet access for OpenShift Container Platform
In OpenShift Container Platform 4.7, you require access to the Internet to install your cluster.
You must have Internet access to:
- Access OpenShift Cluster Manager to download the installation program and perform subscription management. If the cluster has internet access and you do not disable Telemetry, that service automatically entitles your cluster.
- Access Quay.io to obtain the packages that are required to install your cluster.
- Obtain the packages that are required to perform cluster updates.
If your cluster cannot have direct Internet access, you can perform a restricted network installation on some types of infrastructure that you provision. During that process, you download the content that is required and use it to populate a mirror registry with the packages that you need to install a cluster and generate the installation program. With some installation types, the environment that you install your cluster in will not require Internet access. Before you update the cluster, you update the content of the mirror registry.
6.3.3. Generating an SSH private key and adding it to the agent
If you want to perform installation debugging or disaster recovery on your cluster, you must provide an SSH key to both your ssh-agent and the installation program. You can use this key to access the bootstrap machine in a public cluster to troubleshoot installation issues.
In a production environment, you require disaster recovery and debugging.
You can use this key to SSH into the master nodes as the user core. When you deploy the cluster, the key is added to the core user’s ~/.ssh/authorized_keys list.
You must use a local key, not one that you configured with platform-specific approaches such as AWS key pairs.
Procedure
If you do not have an SSH key that is configured for password-less authentication on your computer, create one. For example, on a computer that uses a Linux operating system, run the following command:
$ ssh-keygen -t ed25519 -N '' \ -f <path>/<file_name>1 - 1
- Specify the path and file name, such as
~/.ssh/id_rsa, of the new SSH key. If you have an existing key pair, ensure your public key is in the your~/.sshdirectory.
Running this command generates an SSH key that does not require a password in the location that you specified.
NoteIf you plan to install an OpenShift Container Platform cluster that uses FIPS Validated / Modules in Process cryptographic libraries on the
x86_64architecture, do not create a key that uses theed25519algorithm. Instead, create a key that uses thersaorecdsaalgorithm.Start the
ssh-agentprocess as a background task:$ eval "$(ssh-agent -s)"Example output
Agent pid 31874NoteIf your cluster is in FIPS mode, only use FIPS-compliant algorithms to generate the SSH key. The key must be either RSA or ECDSA.
Add your SSH private key to the
ssh-agent:$ ssh-add <path>/<file_name>1 Example output
Identity added: /home/<you>/<path>/<file_name> (<computer_name>)- 1
- Specify the path and file name for your SSH private key, such as
~/.ssh/id_rsa
Set the
GOOGLE_APPLICATION_CREDENTIALSenvironment variable to the full path to your service account private key file.$ export GOOGLE_APPLICATION_CREDENTIALS="<your_service_account_file>"Verify that the credentials were applied.
$ gcloud auth list
Next steps
- When you install OpenShift Container Platform, provide the SSH public key to the installation program.
6.3.4. Obtaining the installation program
Before you install OpenShift Container Platform, download the installation file on a local computer.
Prerequisites
- You have a computer that runs Linux or macOS, with 500 MB of local disk space
Procedure
- Access the Infrastructure Provider page on the OpenShift Cluster Manager site. If you have a Red Hat account, log in with your credentials. If you do not, create an account.
- Select your infrastructure provider.
Navigate to the page for your installation type, download the installation program for your operating system, and place the file in the directory where you will store the installation configuration files.
ImportantThe installation program creates several files on the computer that you use to install your cluster. You must keep the installation program and the files that the installation program creates after you finish installing the cluster. Both files are required to delete the cluster.
ImportantDeleting the files created by the installation program does not remove your cluster, even if the cluster failed during installation. To remove your cluster, complete the OpenShift Container Platform uninstallation procedures for your specific cloud provider.
Extract the installation program. For example, on a computer that uses a Linux operating system, run the following command:
$ tar xvf openshift-install-linux.tar.gz- Download your installation pull secret from the Red Hat OpenShift Cluster Manager. This pull secret allows you to authenticate with the services that are provided by the included authorities, including Quay.io, which serves the container images for OpenShift Container Platform components.
6.3.5. Deploying the cluster
You can install OpenShift Container Platform on a compatible cloud platform.
You can run the create cluster command of the installation program only once, during initial installation.
Prerequisites
- Configure an account with the cloud platform that hosts your cluster.
- Obtain the OpenShift Container Platform installation program and the pull secret for your cluster.
Procedure
Remove any existing GCP credentials that do not use the service account key for the GCP account that you configured for your cluster and that are stored in the following locations:
-
The
GOOGLE_CREDENTIALS,GOOGLE_CLOUD_KEYFILE_JSON, orGCLOUD_KEYFILE_JSONenvironment variables -
The
~/.gcp/osServiceAccount.jsonfile -
The
gcloud clidefault credentials
-
The
Change to the directory that contains the installation program and initialize the cluster deployment:
$ ./openshift-install create cluster --dir <installation_directory> \1 --log-level=info2 ImportantSpecify an empty directory. Some installation assets, like bootstrap X.509 certificates have short expiration intervals, so you must not reuse an installation directory. If you want to reuse individual files from another cluster installation, you can copy them into your directory. However, the file names for the installation assets might change between releases. Use caution when copying installation files from an earlier OpenShift Container Platform version.
Provide values at the prompts:
Optional: Select an SSH key to use to access your cluster machines.
NoteFor production OpenShift Container Platform clusters on which you want to perform installation debugging or disaster recovery, specify an SSH key that your
ssh-agentprocess uses.- Select gcp as the platform to target.
- If you have not configured the service account key for your GCP account on your computer, you must obtain it from GCP and paste the contents of the file or enter the absolute path to the file.
- Select the project ID to provision the cluster in. The default value is specified by the service account that you configured.
- Select the region to deploy the cluster to.
- Select the base domain to deploy the cluster to. The base domain corresponds to the public DNS zone that you created for your cluster.
- Enter a descriptive name for your cluster. If you provide a name that is longer than 6 characters, only the first 6 characters will be used in the infrastructure ID that is generated from the cluster name.
- Paste the pull secret from the Red Hat OpenShift Cluster Manager.
NoteIf the cloud provider account that you configured on your host does not have sufficient permissions to deploy the cluster, the installation process stops, and the missing permissions are displayed.
When the cluster deployment completes, directions for accessing your cluster, including a link to its web console and credentials for the
kubeadminuser, display in your terminal.Example output
... INFO Install complete! INFO To access the cluster as the system:admin user when using 'oc', run 'export KUBECONFIG=/home/myuser/install_dir/auth/kubeconfig' INFO Access the OpenShift web-console here: https://console-openshift-console.apps.mycluster.example.com INFO Login to the console with user: "kubeadmin", and password: "4vYBz-Ee6gm-ymBZj-Wt5AL" INFO Time elapsed: 36m22sNoteThe cluster access and credential information also outputs to
<installation_directory>/.openshift_install.logwhen an installation succeeds.Important-
The Ignition config files that the installation program generates contain certificates that expire after 24 hours, which are then renewed at that time. If the cluster is shut down before renewing the certificates and the cluster is later restarted after the 24 hours have elapsed, the cluster automatically recovers the expired certificates. The exception is that you must manually approve the pending
node-bootstrappercertificate signing requests (CSRs) to recover kubelet certificates. See the documentation for Recovering from expired control plane certificates for more information. - It is recommended that you use Ignition config files within 12 hours after they are generated because the 24-hour certificate rotates from 16 to 22 hours after the cluster is installed. By using the Ignition config files within 12 hours, you can avoid installation failure if the certificate update runs during installation.
ImportantYou must not delete the installation program or the files that the installation program creates. Both are required to delete the cluster.
Optional: You can reduce the number of permissions for the service account that you used to install the cluster.
-
If you assigned the
Ownerrole to your service account, you can remove that role and replace it with theViewerrole. -
If you included the
Service Account Key Adminrole, you can remove it.
-
If you assigned the
6.3.6. Installing the OpenShift CLI by downloading the binary
You can install the OpenShift CLI (oc) to interact with OpenShift Container Platform from a command-line interface. You can install oc on Linux, Windows, or macOS.
If you installed an earlier version of oc, you cannot use it to complete all of the commands in OpenShift Container Platform 4.7. Download and install the new version of oc.
6.3.6.1. Installing the OpenShift CLI on Linux
You can install the OpenShift CLI (oc) binary on Linux by using the following procedure.
Procedure
- Navigate to the OpenShift Container Platform downloads page on the Red Hat Customer Portal.
- Select the appropriate version in the Version drop-down menu.
- Click Download Now next to the OpenShift v4.7 Linux Client entry and save the file.
Unpack the archive:
$ tar xvzf <file>Place the
ocbinary in a directory that is on yourPATH.To check your
PATH, execute the following command:$ echo $PATH
After you install the OpenShift CLI, it is available using the oc command:
$ oc <command>6.3.6.2. Installing the OpenShift CLI on Windows
You can install the OpenShift CLI (oc) binary on Windows by using the following procedure.
Procedure
- Navigate to the OpenShift Container Platform downloads page on the Red Hat Customer Portal.
- Select the appropriate version in the Version drop-down menu.
- Click Download Now next to the OpenShift v4.7 Windows Client entry and save the file.
- Unzip the archive with a ZIP program.
Move the
ocbinary to a directory that is on yourPATH.To check your
PATH, open the command prompt and execute the following command:C:\> path
After you install the OpenShift CLI, it is available using the oc command:
C:\> oc <command>6.3.6.3. Installing the OpenShift CLI on macOS
You can install the OpenShift CLI (oc) binary on macOS by using the following procedure.
Procedure
- Navigate to the OpenShift Container Platform downloads page on the Red Hat Customer Portal.
- Select the appropriate version in the Version drop-down menu.
- Click Download Now next to the OpenShift v4.7 MacOSX Client entry and save the file.
- Unpack and unzip the archive.
Move the
ocbinary to a directory on your PATH.To check your
PATH, open a terminal and execute the following command:$ echo $PATH
After you install the OpenShift CLI, it is available using the oc command:
$ oc <command>6.3.7. Logging in to the cluster by using the CLI
You can log in to your cluster as a default system user by exporting the cluster kubeconfig file. The kubeconfig file contains information about the cluster that is used by the CLI to connect a client to the correct cluster and API server. The file is specific to a cluster and is created during OpenShift Container Platform installation.
Prerequisites
- You deployed an OpenShift Container Platform cluster.
-
You installed the
ocCLI.
Procedure
Export the
kubeadmincredentials:$ export KUBECONFIG=<installation_directory>/auth/kubeconfig1 - 1
- For
<installation_directory>, specify the path to the directory that you stored the installation files in.
Verify you can run
occommands successfully using the exported configuration:$ oc whoamiExample output
system:admin
6.3.8. Telemetry access for OpenShift Container Platform
In OpenShift Container Platform 4.7, the Telemetry service, which runs by default to provide metrics about cluster health and the success of updates, requires internet access. If your cluster is connected to the internet, Telemetry runs automatically, and your cluster is registered to OpenShift Cluster Manager.
After you confirm that your OpenShift Cluster Manager inventory is correct, either maintained automatically by Telemetry or manually by using OpenShift Cluster Manager, use subscription watch to track your OpenShift Container Platform subscriptions at the account or multi-cluster level.
6.3.9. Next steps
- Customize your cluster.
- If necessary, you can opt out of remote health reporting.
6.4. Installing a cluster on GCP with customizations
In OpenShift Container Platform version 4.7, you can install a customized cluster on infrastructure that the installation program provisions on Google Cloud Platform (GCP). To customize the installation, you modify parameters in the install-config.yaml file before you install the cluster.
6.4.1. Prerequisites
- Review details about the OpenShift Container Platform installation and update processes.
- Configure a GCP account to host the cluster.
- If you use a firewall, you must configure it to allow the sites that your cluster requires access to.
- If you do not allow the system to manage identity and access management (IAM), then a cluster administrator can manually create and maintain IAM credentials. Manual mode can also be used in environments where the cloud IAM APIs are not reachable.
6.4.2. Internet access for OpenShift Container Platform
In OpenShift Container Platform 4.7, you require access to the Internet to install your cluster.
You must have Internet access to:
- Access OpenShift Cluster Manager to download the installation program and perform subscription management. If the cluster has internet access and you do not disable Telemetry, that service automatically entitles your cluster.
- Access Quay.io to obtain the packages that are required to install your cluster.
- Obtain the packages that are required to perform cluster updates.
If your cluster cannot have direct Internet access, you can perform a restricted network installation on some types of infrastructure that you provision. During that process, you download the content that is required and use it to populate a mirror registry with the packages that you need to install a cluster and generate the installation program. With some installation types, the environment that you install your cluster in will not require Internet access. Before you update the cluster, you update the content of the mirror registry.
6.4.3. Generating an SSH private key and adding it to the agent
If you want to perform installation debugging or disaster recovery on your cluster, you must provide an SSH key to both your ssh-agent and the installation program. You can use this key to access the bootstrap machine in a public cluster to troubleshoot installation issues.
In a production environment, you require disaster recovery and debugging.
You can use this key to SSH into the master nodes as the user core. When you deploy the cluster, the key is added to the core user’s ~/.ssh/authorized_keys list.
You must use a local key, not one that you configured with platform-specific approaches such as AWS key pairs.
Procedure
If you do not have an SSH key that is configured for password-less authentication on your computer, create one. For example, on a computer that uses a Linux operating system, run the following command:
$ ssh-keygen -t ed25519 -N '' \ -f <path>/<file_name>1 - 1
- Specify the path and file name, such as
~/.ssh/id_rsa, of the new SSH key. If you have an existing key pair, ensure your public key is in the your~/.sshdirectory.
Running this command generates an SSH key that does not require a password in the location that you specified.
NoteIf you plan to install an OpenShift Container Platform cluster that uses FIPS Validated / Modules in Process cryptographic libraries on the
x86_64architecture, do not create a key that uses theed25519algorithm. Instead, create a key that uses thersaorecdsaalgorithm.Start the
ssh-agentprocess as a background task:$ eval "$(ssh-agent -s)"Example output
Agent pid 31874NoteIf your cluster is in FIPS mode, only use FIPS-compliant algorithms to generate the SSH key. The key must be either RSA or ECDSA.
Add your SSH private key to the
ssh-agent:$ ssh-add <path>/<file_name>1 Example output
Identity added: /home/<you>/<path>/<file_name> (<computer_name>)- 1
- Specify the path and file name for your SSH private key, such as
~/.ssh/id_rsa
Set the
GOOGLE_APPLICATION_CREDENTIALSenvironment variable to the full path to your service account private key file.$ export GOOGLE_APPLICATION_CREDENTIALS="<your_service_account_file>"Verify that the credentials were applied.
$ gcloud auth list
Next steps
- When you install OpenShift Container Platform, provide the SSH public key to the installation program.
6.4.4. Obtaining the installation program
Before you install OpenShift Container Platform, download the installation file on a local computer.
Prerequisites
- You have a computer that runs Linux or macOS, with 500 MB of local disk space
Procedure
- Access the Infrastructure Provider page on the OpenShift Cluster Manager site. If you have a Red Hat account, log in with your credentials. If you do not, create an account.
- Select your infrastructure provider.
Navigate to the page for your installation type, download the installation program for your operating system, and place the file in the directory where you will store the installation configuration files.
ImportantThe installation program creates several files on the computer that you use to install your cluster. You must keep the installation program and the files that the installation program creates after you finish installing the cluster. Both files are required to delete the cluster.
ImportantDeleting the files created by the installation program does not remove your cluster, even if the cluster failed during installation. To remove your cluster, complete the OpenShift Container Platform uninstallation procedures for your specific cloud provider.
Extract the installation program. For example, on a computer that uses a Linux operating system, run the following command:
$ tar xvf openshift-install-linux.tar.gz- Download your installation pull secret from the Red Hat OpenShift Cluster Manager. This pull secret allows you to authenticate with the services that are provided by the included authorities, including Quay.io, which serves the container images for OpenShift Container Platform components.
6.4.5. Creating the installation configuration file
You can customize the OpenShift Container Platform cluster you install on Google Cloud Platform (GCP).
Prerequisites
- Obtain the OpenShift Container Platform installation program and the pull secret for your cluster.
- Obtain service principal permissions at the subscription level.
Procedure
Create the
install-config.yamlfile.Change to the directory that contains the installation program and run the following command:
$ ./openshift-install create install-config --dir <installation_directory>1 - 1
- For
<installation_directory>, specify the directory name to store the files that the installation program creates.
ImportantSpecify an empty directory. Some installation assets, like bootstrap X.509 certificates have short expiration intervals, so you must not reuse an installation directory. If you want to reuse individual files from another cluster installation, you can copy them into your directory. However, the file names for the installation assets might change between releases. Use caution when copying installation files from an earlier OpenShift Container Platform version.
At the prompts, provide the configuration details for your cloud:
Optional: Select an SSH key to use to access your cluster machines.
NoteFor production OpenShift Container Platform clusters on which you want to perform installation debugging or disaster recovery, specify an SSH key that your
ssh-agentprocess uses.- Select gcp as the platform to target.
- If you have not configured the service account key for your GCP account on your computer, you must obtain it from GCP and paste the contents of the file or enter the absolute path to the file.
- Select the project ID to provision the cluster in. The default value is specified by the service account that you configured.
- Select the region to deploy the cluster to.
- Select the base domain to deploy the cluster to. The base domain corresponds to the public DNS zone that you created for your cluster.
- Enter a descriptive name for your cluster.
- Paste the pull secret from the Red Hat OpenShift Cluster Manager.
-
Modify the
install-config.yamlfile. You can find more information about the available parameters in the "Installation configuration parameters" section. Back up the
install-config.yamlfile so that you can use it to install multiple clusters.ImportantThe
install-config.yamlfile is consumed during the installation process. If you want to reuse the file, you must back it up now.
6.4.5.1. Installation configuration parameters
Before you deploy an OpenShift Container Platform cluster, you provide parameter values to describe your account on the cloud platform that hosts your cluster and optionally customize your cluster’s platform. When you create the install-config.yaml installation configuration file, you provide values for the required parameters through the command line. If you customize your cluster, you can modify the install-config.yaml file to provide more details about the platform.
After installation, you cannot modify these parameters in the install-config.yaml file.
The openshift-install command does not validate field names for parameters. If an incorrect name is specified, the related file or object is not created, and no error is reported. Ensure that the field names for any parameters that are specified are correct.
6.4.5.1.1. Required configuration parameters
Required installation configuration parameters are described in the following table:
| Parameter | Description | Values |
|---|---|---|
|
|
The API version for the | String |
|
|
The base domain of your cloud provider. The base domain is used to create routes to your OpenShift Container Platform cluster components. The full DNS name for your cluster is a combination of the |
A fully-qualified domain or subdomain name, such as |
|
|
Kubernetes resource | Object |
|
|
The name of the cluster. DNS records for the cluster are all subdomains of |
String of lowercase letters, hyphens ( |
|
|
The configuration for the specific platform upon which to perform the installation: | Object |
|
| Get a pull secret from the Red Hat OpenShift Cluster Manager to authenticate downloading container images for OpenShift Container Platform components from services such as Quay.io. |
|
6.4.5.1.2. Network configuration parameters
You can customize your installation configuration based on the requirements of your existing network infrastructure. For example, you can expand the IP address block for the cluster network or provide different IP address blocks than the defaults.
Only IPv4 addresses are supported.
| Parameter | Description | Values |
|---|---|---|
|
| The configuration for the cluster network. | Object Note
You cannot modify parameters specified by the |
|
| The cluster network provider Container Network Interface (CNI) plug-in to install. |
Either |
|
| The IP address blocks for pods.
The default value is If you specify multiple IP address blocks, the blocks must not overlap. | An array of objects. For example: |
|
|
Required if you use An IPv4 network. |
An IP address block in Classless Inter-Domain Routing (CIDR) notation. The prefix length for an IPv4 block is between |
|
|
The subnet prefix length to assign to each individual node. For example, if | A subnet prefix.
The default value is |
|
|
The IP address block for services. The default value is The OpenShift SDN and OVN-Kubernetes network providers support only a single IP address block for the service network. | An array with an IP address block in CIDR format. For example: |
|
| The IP address blocks for machines. If you specify multiple IP address blocks, the blocks must not overlap. | An array of objects. For example: |
|
|
Required if you use | An IP network block in CIDR notation.
For example, Note
Set the |
6.4.5.1.3. Optional configuration parameters
Optional installation configuration parameters are described in the following table:
| Parameter | Description | Values |
|---|---|---|
|
| A PEM-encoded X.509 certificate bundle that is added to the nodes' trusted certificate store. This trust bundle may also be used when a proxy has been configured. | String |
|
| The configuration for the machines that comprise the compute nodes. |
Array of |
|
|
Determines the instruction set architecture of the machines in the pool. Currently, heteregeneous clusters are not supported, so all pools must specify the same architecture. Valid values are | String |
|
|
Whether to enable or disable simultaneous multithreading, or Important If you disable simultaneous multithreading, ensure that your capacity planning accounts for the dramatically decreased machine performance. |
|
|
|
Required if you use |
|
|
|
Required if you use |
|
|
| The number of compute machines, which are also known as worker machines, to provision. |
A positive integer greater than or equal to |
|
| The configuration for the machines that comprise the control plane. |
Array of |
|
|
Determines the instruction set architecture of the machines in the pool. Currently, heterogeneous clusters are not supported, so all pools must specify the same architecture. Valid values are | String |
|
|
Whether to enable or disable simultaneous multithreading, or Important If you disable simultaneous multithreading, ensure that your capacity planning accounts for the dramatically decreased machine performance. |
|
|
|
Required if you use |
|
|
|
Required if you use |
|
|
| The number of control plane machines to provision. |
The only supported value is |
|
| The Cloud Credential Operator (CCO) mode. If no mode is specified, the CCO dynamically tries to determine the capabilities of the provided credentials, with a preference for mint mode on the platforms where multiple modes are supported. Note Not all CCO modes are supported for all cloud providers. For more information on CCO modes, see the Cloud Credential Operator entry in the Cluster Operators reference content. |
|
|
|
Enable or disable FIPS mode. The default is Important
The use of FIPS Validated / Modules in Process cryptographic libraries is only supported on OpenShift Container Platform deployments on the Note If you are using Azure File storage, you cannot enable FIPS mode. |
|
|
| Sources and repositories for the release-image content. |
Array of objects. Includes a |
|
|
Required if you use | String |
|
| Specify one or more repositories that may also contain the same images. | Array of strings |
|
| How to publish or expose the user-facing endpoints of your cluster, such as the Kubernetes API, OpenShift routes. |
|
|
| The SSH key or keys to authenticate access your cluster machines. Note
For production OpenShift Container Platform clusters on which you want to perform installation debugging or disaster recovery, specify an SSH key that your | One or more keys. For example: |
6.4.5.1.4. Additional Google Cloud Platform (GCP) configuration parameters
Additional GCP configuration parameters are described in the following table:
| Parameter | Description | Values |
|---|---|---|
|
| The name of the existing VPC that you want to deploy your cluster to. | String. |
|
| The name of the GCP region that hosts your cluster. |
Any valid region name, such as |
|
| The GCP machine type. | The GCP machine type. |
|
| The availability zones where the installation program creates machines for the specified MachinePool. |
A list of valid GCP availability zones, such as |
|
| The name of the existing subnet in your VPC that you want to deploy your control plane machines to. | The subnet name. |
|
| The name of the existing subnet in your VPC that you want to deploy your compute machines to. | The subnet name. |
|
| A list of license URLs that must be applied to the compute images. Important
The | Any license available with the license API, such as the license to enable nested virtualization. You cannot use this parameter with a mechanism that generates pre-built images. Using a license URL forces the installer to copy the source image before use. |
|
| The size of the disk in gigabytes (GB). | Any size between 16 GB and 65536 GB. |
|
| The type of disk. |
Either the default |
|
| The name of the customer managed encryption key to be used for control plane machine disk encryption. | The encryption key name. |
|
| For control plane machines, the name of the KMS key ring to which the KMS key belongs. | The KMS key ring name. |
|
| For control plane machines, the GCP location in which the key ring exists. For more information on KMS locations, see Google’s documentation on Cloud KMS locations. | The GCP location for the key ring. |
|
| For control plane machines, the ID of the project in which the KMS key ring exists. This value defaults to the VM project ID if not set. | The GCP project ID. |
|
| The name of the customer managed encryption key to be used for compute machine disk encryption. | The encryption key name. |
|
| For compute machines, the name of the KMS key ring to which the KMS key belongs. | The KMS key ring name. |
|
| For compute machines, the GCP location in which the key ring exists. For more information on KMS locations, see Google’s documentation on Cloud KMS locations. | The GCP location for the key ring. |
|
| For compute machines, the ID of the project in which the KMS key ring exists. This value defaults to the VM project ID if not set. | The GCP project ID. |
6.4.5.2. Sample customized install-config.yaml file for GCP
You can customize the install-config.yaml file to specify more details about your OpenShift Container Platform cluster’s platform or modify the values of the required parameters.
This sample YAML file is provided for reference only. You must obtain your install-config.yaml file by using the installation program and modify it.
apiVersion: v1
baseDomain: example.com
controlPlane:
hyperthreading: Enabled
name: master
platform:
gcp:
type: n2-standard-4
zones:
- us-central1-a
- us-central1-c
osDisk:
diskType: pd-ssd
diskSizeGB: 1024
encryptionKey:
kmsKey:
name: worker-key
keyRing: test-machine-keys
location: global
projectID: project-id
replicas: 3
compute:
- hyperthreading: Enabled
name: worker
platform:
gcp:
type: n2-standard-4
zones:
- us-central1-a
- us-central1-c
osDisk:
diskType: pd-standard
diskSizeGB: 128
encryptionKey:
kmsKey:
name: worker-key
keyRing: test-machine-keys
location: global
projectID: project-id
replicas: 3
metadata:
name: test-cluster
networking:
clusterNetwork:
- cidr: 10.128.0.0/14
hostPrefix: 23
machineNetwork:
- cidr: 10.0.0.0/16
networkType: OpenShiftSDN
serviceNetwork:
- 172.30.0.0/16
platform:
gcp:
projectID: openshift-production
region: us-central1
pullSecret: '{"auths": ...}'
fips: false
sshKey: ssh-ed25519 AAAA... - 1 10 11 12 13
- Required. The installation program prompts you for this value.
- 2 6
- If you do not provide these parameters and values, the installation program provides the default value.
- 3 7
- The
controlPlanesection is a single mapping, but thecomputesection is a sequence of mappings. To meet the requirements of the different data structures, the first line of thecomputesection must begin with a hyphen,-, and the first line of thecontrolPlanesection must not. Only one control plane pool is used. - 4 8
- Whether to enable or disable simultaneous multithreading, or
hyperthreading. By default, simultaneous multithreading is enabled to increase the performance of your machines' cores. You can disable it by setting the parameter value toDisabled. If you disable simultaneous multithreading in some cluster machines, you must disable it in all cluster machines.ImportantIf you disable simultaneous multithreading, ensure that your capacity planning accounts for the dramatically decreased machine performance. Use larger machine types, such as
n1-standard-8, for your machines if you disable simultaneous multithreading. - 5 9
- Optional: The custom encryption key section to encrypt both virtual machines and persistent volumes. Your default compute service account must have the permissions granted to use your KMS key and have the correct IAM role assigned. The default service account name follows the
service-<project_number>@compute-system.iam.gserviceaccount.compattern. For more information on granting the correct permissions for your service account, see "Machine management" → "Creating machine sets" → "Creating a machine set on GCP". - 14
- Whether to enable or disable FIPS mode. By default, FIPS mode is not enabled. If FIPS mode is enabled, the Red Hat Enterprise Linux CoreOS (RHCOS) machines that OpenShift Container Platform runs on bypass the default Kubernetes cryptography suite and use the cryptography modules that are provided with RHCOS instead.Important
The use of FIPS Validated / Modules in Process cryptographic libraries is only supported on OpenShift Container Platform deployments on the
x86_64architecture. - 15
- You can optionally provide the
sshKeyvalue that you use to access the machines in your cluster.NoteFor production OpenShift Container Platform clusters on which you want to perform installation debugging or disaster recovery, specify an SSH key that your
ssh-agentprocess uses.
6.4.7. Deploying the cluster
You can install OpenShift Container Platform on a compatible cloud platform.
You can run the create cluster command of the installation program only once, during initial installation.
Prerequisites
- Configure an account with the cloud platform that hosts your cluster.
- Obtain the OpenShift Container Platform installation program and the pull secret for your cluster.
Procedure
Remove any existing GCP credentials that do not use the service account key for the GCP account that you configured for your cluster and that are stored in the following locations:
-
The
GOOGLE_CREDENTIALS,GOOGLE_CLOUD_KEYFILE_JSON, orGCLOUD_KEYFILE_JSONenvironment variables -
The
~/.gcp/osServiceAccount.jsonfile -
The
gcloud clidefault credentials
-
The
Change to the directory that contains the installation program and initialize the cluster deployment:
$ ./openshift-install create cluster --dir <installation_directory> \1 --log-level=info2 NoteIf the cloud provider account that you configured on your host does not have sufficient permissions to deploy the cluster, the installation process stops, and the missing permissions are displayed.
When the cluster deployment completes, directions for accessing your cluster, including a link to its web console and credentials for the
kubeadminuser, display in your terminal.Example output
... INFO Install complete! INFO To access the cluster as the system:admin user when using 'oc', run 'export KUBECONFIG=/home/myuser/install_dir/auth/kubeconfig' INFO Access the OpenShift web-console here: https://console-openshift-console.apps.mycluster.example.com INFO Login to the console with user: "kubeadmin", and password: "4vYBz-Ee6gm-ymBZj-Wt5AL" INFO Time elapsed: 36m22sNoteThe cluster access and credential information also outputs to
<installation_directory>/.openshift_install.logwhen an installation succeeds.Important-
The Ignition config files that the installation program generates contain certificates that expire after 24 hours, which are then renewed at that time. If the cluster is shut down before renewing the certificates and the cluster is later restarted after the 24 hours have elapsed, the cluster automatically recovers the expired certificates. The exception is that you must manually approve the pending
node-bootstrappercertificate signing requests (CSRs) to recover kubelet certificates. See the documentation for Recovering from expired control plane certificates for more information. - It is recommended that you use Ignition config files within 12 hours after they are generated because the 24-hour certificate rotates from 16 to 22 hours after the cluster is installed. By using the Ignition config files within 12 hours, you can avoid installation failure if the certificate update runs during installation.
ImportantYou must not delete the installation program or the files that the installation program creates. Both are required to delete the cluster.
-
The Ignition config files that the installation program generates contain certificates that expire after 24 hours, which are then renewed at that time. If the cluster is shut down before renewing the certificates and the cluster is later restarted after the 24 hours have elapsed, the cluster automatically recovers the expired certificates. The exception is that you must manually approve the pending
Optional: You can reduce the number of permissions for the service account that you used to install the cluster.
-
If you assigned the
Ownerrole to your service account, you can remove that role and replace it with theViewerrole. -
If you included the
Service Account Key Adminrole, you can remove it.
-
If you assigned the
6.4.8. Installing the OpenShift CLI by downloading the binary
You can install the OpenShift CLI (oc) to interact with OpenShift Container Platform from a command-line interface. You can install oc on Linux, Windows, or macOS.
If you installed an earlier version of oc, you cannot use it to complete all of the commands in OpenShift Container Platform 4.7. Download and install the new version of oc.
6.4.8.1. Installing the OpenShift CLI on Linux
You can install the OpenShift CLI (oc) binary on Linux by using the following procedure.
Procedure
- Navigate to the OpenShift Container Platform downloads page on the Red Hat Customer Portal.
- Select the appropriate version in the Version drop-down menu.
- Click Download Now next to the OpenShift v4.7 Linux Client entry and save the file.
Unpack the archive:
$ tar xvzf <file>Place the
ocbinary in a directory that is on yourPATH.To check your
PATH, execute the following command:$ echo $PATH
After you install the OpenShift CLI, it is available using the oc command:
$ oc <command>6.4.8.2. Installing the OpenShift CLI on Windows
You can install the OpenShift CLI (oc) binary on Windows by using the following procedure.
Procedure
- Navigate to the OpenShift Container Platform downloads page on the Red Hat Customer Portal.
- Select the appropriate version in the Version drop-down menu.
- Click Download Now next to the OpenShift v4.7 Windows Client entry and save the file.
- Unzip the archive with a ZIP program.
Move the
ocbinary to a directory that is on yourPATH.To check your
PATH, open the command prompt and execute the following command:C:\> path
After you install the OpenShift CLI, it is available using the oc command:
C:\> oc <command>6.4.8.3. Installing the OpenShift CLI on macOS
You can install the OpenShift CLI (oc) binary on macOS by using the following procedure.
Procedure
- Navigate to the OpenShift Container Platform downloads page on the Red Hat Customer Portal.
- Select the appropriate version in the Version drop-down menu.
- Click Download Now next to the OpenShift v4.7 MacOSX Client entry and save the file.
- Unpack and unzip the archive.
Move the
ocbinary to a directory on your PATH.To check your
PATH, open a terminal and execute the following command:$ echo $PATH
After you install the OpenShift CLI, it is available using the oc command:
$ oc <command>6.4.9. Logging in to the cluster by using the CLI
You can log in to your cluster as a default system user by exporting the cluster kubeconfig file. The kubeconfig file contains information about the cluster that is used by the CLI to connect a client to the correct cluster and API server. The file is specific to a cluster and is created during OpenShift Container Platform installation.
Prerequisites
- You deployed an OpenShift Container Platform cluster.
-
You installed the
ocCLI.
Procedure
Export the
kubeadmincredentials:$ export KUBECONFIG=<installation_directory>/auth/kubeconfig1 - 1
- For
<installation_directory>, specify the path to the directory that you stored the installation files in.
Verify you can run
occommands successfully using the exported configuration:$ oc whoamiExample output
system:admin
6.4.10. Telemetry access for OpenShift Container Platform
In OpenShift Container Platform 4.7, the Telemetry service, which runs by default to provide metrics about cluster health and the success of updates, requires internet access. If your cluster is connected to the internet, Telemetry runs automatically, and your cluster is registered to OpenShift Cluster Manager.
After you confirm that your OpenShift Cluster Manager inventory is correct, either maintained automatically by Telemetry or manually by using OpenShift Cluster Manager, use subscription watch to track your OpenShift Container Platform subscriptions at the account or multi-cluster level.
6.4.11. Next steps
- Customize your cluster.
- If necessary, you can opt out of remote health reporting.
6.5. Installing a cluster on GCP with network customizations
In OpenShift Container Platform version 4.7, you can install a cluster with a customized network configuration on infrastructure that the installation program provisions on Google Cloud Platform (GCP). By customizing your network configuration, your cluster can coexist with existing IP address allocations in your environment and integrate with existing MTU and VXLAN configurations. To customize the installation, you modify parameters in the install-config.yaml file before you install the cluster.
You must set most of the network configuration parameters during installation, and you can modify only kubeProxy configuration parameters in a running cluster.
6.5.1. Prerequisites
- Review details about the OpenShift Container Platform installation and update processes.
- Configure a GCP account to host the cluster.
- If you use a firewall, you must configure it to allow the sites that your cluster requires access to.
- If you do not allow the system to manage identity and access management (IAM), then a cluster administrator can manually create and maintain IAM credentials. Manual mode can also be used in environments where the cloud IAM APIs are not reachable.
6.5.2. Internet access for OpenShift Container Platform
In OpenShift Container Platform 4.7, you require access to the Internet to install your cluster.
You must have Internet access to:
- Access OpenShift Cluster Manager to download the installation program and perform subscription management. If the cluster has internet access and you do not disable Telemetry, that service automatically entitles your cluster.
- Access Quay.io to obtain the packages that are required to install your cluster.
- Obtain the packages that are required to perform cluster updates.
If your cluster cannot have direct Internet access, you can perform a restricted network installation on some types of infrastructure that you provision. During that process, you download the content that is required and use it to populate a mirror registry with the packages that you need to install a cluster and generate the installation program. With some installation types, the environment that you install your cluster in will not require Internet access. Before you update the cluster, you update the content of the mirror registry.
6.5.3. Generating an SSH private key and adding it to the agent
If you want to perform installation debugging or disaster recovery on your cluster, you must provide an SSH key to both your ssh-agent and the installation program. You can use this key to access the bootstrap machine in a public cluster to troubleshoot installation issues.
In a production environment, you require disaster recovery and debugging.
You can use this key to SSH into the master nodes as the user core. When you deploy the cluster, the key is added to the core user’s ~/.ssh/authorized_keys list.
You must use a local key, not one that you configured with platform-specific approaches such as AWS key pairs.
Procedure
If you do not have an SSH key that is configured for password-less authentication on your computer, create one. For example, on a computer that uses a Linux operating system, run the following command:
$ ssh-keygen -t ed25519 -N '' \ -f <path>/<file_name>1 - 1
- Specify the path and file name, such as
~/.ssh/id_rsa, of the new SSH key. If you have an existing key pair, ensure your public key is in the your~/.sshdirectory.
Running this command generates an SSH key that does not require a password in the location that you specified.
NoteIf you plan to install an OpenShift Container Platform cluster that uses FIPS Validated / Modules in Process cryptographic libraries on the
x86_64architecture, do not create a key that uses theed25519algorithm. Instead, create a key that uses thersaorecdsaalgorithm.Start the
ssh-agentprocess as a background task:$ eval "$(ssh-agent -s)"Example output
Agent pid 31874NoteIf your cluster is in FIPS mode, only use FIPS-compliant algorithms to generate the SSH key. The key must be either RSA or ECDSA.
Add your SSH private key to the
ssh-agent:$ ssh-add <path>/<file_name>1 Example output
Identity added: /home/<you>/<path>/<file_name> (<computer_name>)- 1
- Specify the path and file name for your SSH private key, such as
~/.ssh/id_rsa
Set the
GOOGLE_APPLICATION_CREDENTIALSenvironment variable to the full path to your service account private key file.$ export GOOGLE_APPLICATION_CREDENTIALS="<your_service_account_file>"Verify that the credentials were applied.
$ gcloud auth list
Next steps
- When you install OpenShift Container Platform, provide the SSH public key to the installation program.
6.5.4. Obtaining the installation program
Before you install OpenShift Container Platform, download the installation file on a local computer.
Prerequisites
- You have a computer that runs Linux or macOS, with 500 MB of local disk space
Procedure
- Access the Infrastructure Provider page on the OpenShift Cluster Manager site. If you have a Red Hat account, log in with your credentials. If you do not, create an account.
- Select your infrastructure provider.
Navigate to the page for your installation type, download the installation program for your operating system, and place the file in the directory where you will store the installation configuration files.
ImportantThe installation program creates several files on the computer that you use to install your cluster. You must keep the installation program and the files that the installation program creates after you finish installing the cluster. Both files are required to delete the cluster.
ImportantDeleting the files created by the installation program does not remove your cluster, even if the cluster failed during installation. To remove your cluster, complete the OpenShift Container Platform uninstallation procedures for your specific cloud provider.
Extract the installation program. For example, on a computer that uses a Linux operating system, run the following command:
$ tar xvf openshift-install-linux.tar.gz- Download your installation pull secret from the Red Hat OpenShift Cluster Manager. This pull secret allows you to authenticate with the services that are provided by the included authorities, including Quay.io, which serves the container images for OpenShift Container Platform components.
6.5.5. Creating the installation configuration file
You can customize the OpenShift Container Platform cluster you install on Google Cloud Platform (GCP).
Prerequisites
- Obtain the OpenShift Container Platform installation program and the pull secret for your cluster.
- Obtain service principal permissions at the subscription level.
Procedure
Create the
install-config.yamlfile.Change to the directory that contains the installation program and run the following command:
$ ./openshift-install create install-config --dir <installation_directory>1 - 1
- For
<installation_directory>, specify the directory name to store the files that the installation program creates.
ImportantSpecify an empty directory. Some installation assets, like bootstrap X.509 certificates have short expiration intervals, so you must not reuse an installation directory. If you want to reuse individual files from another cluster installation, you can copy them into your directory. However, the file names for the installation assets might change between releases. Use caution when copying installation files from an earlier OpenShift Container Platform version.
At the prompts, provide the configuration details for your cloud:
Optional: Select an SSH key to use to access your cluster machines.
NoteFor production OpenShift Container Platform clusters on which you want to perform installation debugging or disaster recovery, specify an SSH key that your
ssh-agentprocess uses.- Select gcp as the platform to target.
- If you have not configured the service account key for your GCP account on your computer, you must obtain it from GCP and paste the contents of the file or enter the absolute path to the file.
- Select the project ID to provision the cluster in. The default value is specified by the service account that you configured.
- Select the region to deploy the cluster to.
- Select the base domain to deploy the cluster to. The base domain corresponds to the public DNS zone that you created for your cluster.
- Enter a descriptive name for your cluster.
- Paste the pull secret from the Red Hat OpenShift Cluster Manager.
-
Modify the
install-config.yamlfile. You can find more information about the available parameters in the "Installation configuration parameters" section. Back up the
install-config.yamlfile so that you can use it to install multiple clusters.ImportantThe
install-config.yamlfile is consumed during the installation process. If you want to reuse the file, you must back it up now.
6.5.5.1. Installation configuration parameters
Before you deploy an OpenShift Container Platform cluster, you provide parameter values to describe your account on the cloud platform that hosts your cluster and optionally customize your cluster’s platform. When you create the install-config.yaml installation configuration file, you provide values for the required parameters through the command line. If you customize your cluster, you can modify the install-config.yaml file to provide more details about the platform.
After installation, you cannot modify these parameters in the install-config.yaml file.
The openshift-install command does not validate field names for parameters. If an incorrect name is specified, the related file or object is not created, and no error is reported. Ensure that the field names for any parameters that are specified are correct.
6.5.5.1.1. Required configuration parameters
Required installation configuration parameters are described in the following table:
| Parameter | Description | Values |
|---|---|---|
|
|
The API version for the | String |
|
|
The base domain of your cloud provider. The base domain is used to create routes to your OpenShift Container Platform cluster components. The full DNS name for your cluster is a combination of the |
A fully-qualified domain or subdomain name, such as |
|
|
Kubernetes resource | Object |
|
|
The name of the cluster. DNS records for the cluster are all subdomains of |
String of lowercase letters, hyphens ( |
|
|
The configuration for the specific platform upon which to perform the installation: | Object |
|
| Get a pull secret from the Red Hat OpenShift Cluster Manager to authenticate downloading container images for OpenShift Container Platform components from services such as Quay.io. |
|
6.5.5.1.2. Network configuration parameters
You can customize your installation configuration based on the requirements of your existing network infrastructure. For example, you can expand the IP address block for the cluster network or provide different IP address blocks than the defaults.
Only IPv4 addresses are supported.
| Parameter | Description | Values |
|---|---|---|
|
| The configuration for the cluster network. | Object Note
You cannot modify parameters specified by the |
|
| The cluster network provider Container Network Interface (CNI) plug-in to install. |
Either |
|
| The IP address blocks for pods.
The default value is If you specify multiple IP address blocks, the blocks must not overlap. | An array of objects. For example: |
|
|
Required if you use An IPv4 network. |
An IP address block in Classless Inter-Domain Routing (CIDR) notation. The prefix length for an IPv4 block is between |
|
|
The subnet prefix length to assign to each individual node. For example, if | A subnet prefix.
The default value is |
|
|
The IP address block for services. The default value is The OpenShift SDN and OVN-Kubernetes network providers support only a single IP address block for the service network. | An array with an IP address block in CIDR format. For example: |
|
| The IP address blocks for machines. If you specify multiple IP address blocks, the blocks must not overlap. | An array of objects. For example: |
|
|
Required if you use | An IP network block in CIDR notation.
For example, Note
Set the |
6.5.5.1.3. Optional configuration parameters
Optional installation configuration parameters are described in the following table:
| Parameter | Description | Values |
|---|---|---|
|
| A PEM-encoded X.509 certificate bundle that is added to the nodes' trusted certificate store. This trust bundle may also be used when a proxy has been configured. | String |
|
| The configuration for the machines that comprise the compute nodes. |
Array of |
|
|
Determines the instruction set architecture of the machines in the pool. Currently, heteregeneous clusters are not supported, so all pools must specify the same architecture. Valid values are | String |
|
|
Whether to enable or disable simultaneous multithreading, or Important If you disable simultaneous multithreading, ensure that your capacity planning accounts for the dramatically decreased machine performance. |
|
|
|
Required if you use |
|
|
|
Required if you use |
|
|
| The number of compute machines, which are also known as worker machines, to provision. |
A positive integer greater than or equal to |
|
| The configuration for the machines that comprise the control plane. |
Array of |
|
|
Determines the instruction set architecture of the machines in the pool. Currently, heterogeneous clusters are not supported, so all pools must specify the same architecture. Valid values are | String |
|
|
Whether to enable or disable simultaneous multithreading, or Important If you disable simultaneous multithreading, ensure that your capacity planning accounts for the dramatically decreased machine performance. |
|
|
|
Required if you use |
|
|
|
Required if you use |
|
|
| The number of control plane machines to provision. |
The only supported value is |
|
| The Cloud Credential Operator (CCO) mode. If no mode is specified, the CCO dynamically tries to determine the capabilities of the provided credentials, with a preference for mint mode on the platforms where multiple modes are supported. Note Not all CCO modes are supported for all cloud providers. For more information on CCO modes, see the Cloud Credential Operator entry in the Cluster Operators reference content. |
|
|
|
Enable or disable FIPS mode. The default is Important
The use of FIPS Validated / Modules in Process cryptographic libraries is only supported on OpenShift Container Platform deployments on the Note If you are using Azure File storage, you cannot enable FIPS mode. |
|
|
| Sources and repositories for the release-image content. |
Array of objects. Includes a |
|
|
Required if you use | String |
|
| Specify one or more repositories that may also contain the same images. | Array of strings |
|
| How to publish or expose the user-facing endpoints of your cluster, such as the Kubernetes API, OpenShift routes. |
|
|
| The SSH key or keys to authenticate access your cluster machines. Note
For production OpenShift Container Platform clusters on which you want to perform installation debugging or disaster recovery, specify an SSH key that your | One or more keys. For example: |
6.5.5.1.4. Additional Google Cloud Platform (GCP) configuration parameters
Additional GCP configuration parameters are described in the following table:
| Parameter | Description | Values |
|---|---|---|
|
| The name of the existing VPC that you want to deploy your cluster to. | String. |
|
| The name of the GCP region that hosts your cluster. |
Any valid region name, such as |
|
| The GCP machine type. | The GCP machine type. |
|
| The availability zones where the installation program creates machines for the specified MachinePool. |
A list of valid GCP availability zones, such as |
|
| The name of the existing subnet in your VPC that you want to deploy your control plane machines to. | The subnet name. |
|
| The name of the existing subnet in your VPC that you want to deploy your compute machines to. | The subnet name. |
|
| A list of license URLs that must be applied to the compute images. Important
The | Any license available with the license API, such as the license to enable nested virtualization. You cannot use this parameter with a mechanism that generates pre-built images. Using a license URL forces the installer to copy the source image before use. |
|
| The size of the disk in gigabytes (GB). | Any size between 16 GB and 65536 GB. |
|
| The type of disk. |
Either the default |
|
| The name of the customer managed encryption key to be used for control plane machine disk encryption. | The encryption key name. |
|
| For control plane machines, the name of the KMS key ring to which the KMS key belongs. | The KMS key ring name. |
|
| For control plane machines, the GCP location in which the key ring exists. For more information on KMS locations, see Google’s documentation on Cloud KMS locations. | The GCP location for the key ring. |
|
| For control plane machines, the ID of the project in which the KMS key ring exists. This value defaults to the VM project ID if not set. | The GCP project ID. |
|
| The name of the customer managed encryption key to be used for compute machine disk encryption. | The encryption key name. |
|
| For compute machines, the name of the KMS key ring to which the KMS key belongs. | The KMS key ring name. |
|
| For compute machines, the GCP location in which the key ring exists. For more information on KMS locations, see Google’s documentation on Cloud KMS locations. | The GCP location for the key ring. |
|
| For compute machines, the ID of the project in which the KMS key ring exists. This value defaults to the VM project ID if not set. | The GCP project ID. |
6.5.5.2. Sample customized install-config.yaml file for GCP
You can customize the install-config.yaml file to specify more details about your OpenShift Container Platform cluster’s platform or modify the values of the required parameters.
This sample YAML file is provided for reference only. You must obtain your install-config.yaml file by using the installation program and modify it.
apiVersion: v1
baseDomain: example.com
controlPlane:
hyperthreading: Enabled
name: master
platform:
gcp:
type: n2-standard-4
zones:
- us-central1-a
- us-central1-c
osDisk:
diskType: pd-ssd
diskSizeGB: 1024
encryptionKey:
kmsKey:
name: worker-key
keyRing: test-machine-keys
location: global
projectID: project-id
replicas: 3
compute:
- hyperthreading: Enabled
name: worker
platform:
gcp:
type: n2-standard-4
zones:
- us-central1-a
- us-central1-c
osDisk:
diskType: pd-standard
diskSizeGB: 128
encryptionKey:
kmsKey:
name: worker-key
keyRing: test-machine-keys
location: global
projectID: project-id
replicas: 3
metadata:
name: test-cluster
networking:
clusterNetwork:
- cidr: 10.128.0.0/14
hostPrefix: 23
machineNetwork:
- cidr: 10.0.0.0/16
networkType: OpenShiftSDN
serviceNetwork:
- 172.30.0.0/16
platform:
gcp:
projectID: openshift-production
region: us-central1
pullSecret: '{"auths": ...}'
fips: false
sshKey: ssh-ed25519 AAAA... - 1 10 12 13 14
- Required. The installation program prompts you for this value.
- 2 6 11
- If you do not provide these parameters and values, the installation program provides the default value.
- 3 7
- The
controlPlanesection is a single mapping, but thecomputesection is a sequence of mappings. To meet the requirements of the different data structures, the first line of thecomputesection must begin with a hyphen,-, and the first line of thecontrolPlanesection must not. Only one control plane pool is used. - 4 8
- Whether to enable or disable simultaneous multithreading, or
hyperthreading. By default, simultaneous multithreading is enabled to increase the performance of your machines' cores. You can disable it by setting the parameter value toDisabled. If you disable simultaneous multithreading in some cluster machines, you must disable it in all cluster machines.ImportantIf you disable simultaneous multithreading, ensure that your capacity planning accounts for the dramatically decreased machine performance. Use larger machine types, such as
n1-standard-8, for your machines if you disable simultaneous multithreading. - 5 9
- Optional: The custom encryption key section to encrypt both virtual machines and persistent volumes. Your default compute service account must have the permissions granted to use your KMS key and have the correct IAM role assigned. The default service account name follows the
service-<project_number>@compute-system.iam.gserviceaccount.compattern. For more information on granting the correct permissions for your service account, see "Machine management" → "Creating machine sets" → "Creating a machine set on GCP". - 15
- Whether to enable or disable FIPS mode. By default, FIPS mode is not enabled. If FIPS mode is enabled, the Red Hat Enterprise Linux CoreOS (RHCOS) machines that OpenShift Container Platform runs on bypass the default Kubernetes cryptography suite and use the cryptography modules that are provided with RHCOS instead.Important
The use of FIPS Validated / Modules in Process cryptographic libraries is only supported on OpenShift Container Platform deployments on the
x86_64architecture. - 16
- You can optionally provide the
sshKeyvalue that you use to access the machines in your cluster.NoteFor production OpenShift Container Platform clusters on which you want to perform installation debugging or disaster recovery, specify an SSH key that your
ssh-agentprocess uses.
6.5.7. Network configuration phases
When specifying a cluster configuration prior to installation, there are several phases in the installation procedures when you can modify the network configuration:
- Phase 1
After entering the
openshift-install create install-configcommand. In theinstall-config.yamlfile, you can customize the following network-related fields:-
networking.networkType -
networking.clusterNetwork -
networking.serviceNetwork networking.machineNetworkFor more information on these fields, refer to "Installation configuration parameters".
NoteSet the
networking.machineNetworkto match the CIDR that the preferred NIC resides in.
-
- Phase 2
-
After entering the
openshift-install create manifestscommand. If you must specify advanced network configuration, during this phase you can define a customized Cluster Network Operator manifest with only the fields you want to modify.
You cannot override the values specified in phase 1 in the install-config.yaml file during phase 2. However, you can further customize the cluster network provider during phase 2.
6.5.8. Specifying advanced network configuration
You can use advanced configuration customization to integrate your cluster into your existing network environment by specifying additional configuration for your cluster network provider. You can specify advanced network configuration only before you install the cluster.
Modifying the OpenShift Container Platform manifest files created by the installation program is not supported. Applying a manifest file that you create, as in the following procedure, is supported.
Prerequisites
-
Create the
install-config.yamlfile and complete any modifications to it.
Procedure
Change to the directory that contains the installation program and create the manifests:
$ ./openshift-install create manifests --dir <installation_directory>where:
<installation_directory>-
Specifies the name of the directory that contains the
install-config.yamlfile for your cluster.
Create a stub manifest file for the advanced network configuration that is named
cluster-network-03-config.ymlin the<installation_directory>/manifests/directory:$ cat <<EOF > <installation_directory>/manifests/cluster-network-03-config.yml apiVersion: operator.openshift.io/v1 kind: Network metadata: name: cluster spec: EOFwhere:
<installation_directory>-
Specifies the directory name that contains the
manifests/directory for your cluster.
Open the
cluster-network-03-config.ymlfile in an editor and specify the advanced network configuration for your cluster, such as in the following examples:Specify a different VXLAN port for the OpenShift SDN network provider
apiVersion: operator.openshift.io/v1 kind: Network metadata: name: cluster spec: defaultNetwork: openshiftSDNConfig: vxlanPort: 4800Enable IPsec for the OVN-Kubernetes network provider
apiVersion: operator.openshift.io/v1 kind: Network metadata: name: cluster spec: defaultNetwork: ovnKubernetesConfig: ipsecConfig: {}-
Save the
cluster-network-03-config.ymlfile and quit the text editor. -
Optional: Back up the
manifests/cluster-network-03-config.ymlfile. The installation program deletes themanifests/directory when creating the cluster.
6.5.9. Cluster Network Operator configuration
The configuration for the cluster network is specified as part of the Cluster Network Operator (CNO) configuration and stored in a custom resource (CR) object that is named cluster. The CR specifies the fields for the Network API in the operator.openshift.io API group.
The CNO configuration inherits the following fields during cluster installation from the Network API in the Network.config.openshift.io API group and these fields cannot be changed:
clusterNetwork- IP address pools from which pod IP addresses are allocated.
serviceNetwork- IP address pool for services.
defaultNetwork.type- Cluster network provider, such as OpenShift SDN or OVN-Kubernetes.
You can specify the cluster network provider configuration for your cluster by setting the fields for the defaultNetwork object in the CNO object named cluster.
6.5.9.1. Cluster Network Operator configuration object
The fields for the Cluster Network Operator (CNO) are described in the following table:
| Field | Type | Description |
|---|---|---|
|
|
|
The name of the CNO object. This name is always |
|
|
| A list specifying the blocks of IP addresses from which pod IP addresses are allocated and the subnet prefix length assigned to each individual node in the cluster. For example:
This value is ready-only and specified in the |
|
|
| A block of IP addresses for services. The OpenShift SDN and OVN-Kubernetes Container Network Interface (CNI) network providers support only a single IP address block for the service network. For example:
This value is ready-only and specified in the |
|
|
| Configures the Container Network Interface (CNI) cluster network provider for the cluster network. |
|
|
| The fields for this object specify the kube-proxy configuration. If you are using the OVN-Kubernetes cluster network provider, the kube-proxy configuration has no effect. |
defaultNetwork object configuration
The values for the defaultNetwork object are defined in the following table:
| Field | Type | Description |
|---|---|---|
|
|
|
Either Note OpenShift Container Platform uses the OpenShift SDN Container Network Interface (CNI) cluster network provider by default. |
|
|
| This object is only valid for the OpenShift SDN cluster network provider. |
|
|
| This object is only valid for the OVN-Kubernetes cluster network provider. |
Configuration for the OpenShift SDN CNI cluster network provider
The following table describes the configuration fields for the OpenShift SDN Container Network Interface (CNI) cluster network provider.
| Field | Type | Description |
|---|---|---|
|
|
|
Configures the network isolation mode for OpenShift SDN. The default value is
The values |
|
|
| The maximum transmission unit (MTU) for the VXLAN overlay network. This is detected automatically based on the MTU of the primary network interface. You do not normally need to override the detected MTU. If the auto-detected value is not what you expected it to be, confirm that the MTU on the primary network interface on your nodes is correct. You cannot use this option to change the MTU value of the primary network interface on the nodes.
If your cluster requires different MTU values for different nodes, you must set this value to This value cannot be changed after cluster installation. |
|
|
|
The port to use for all VXLAN packets. The default value is If you are running in a virtualized environment with existing nodes that are part of another VXLAN network, then you might be required to change this. For example, when running an OpenShift SDN overlay on top of VMware NSX-T, you must select an alternate port for the VXLAN, because both SDNs use the same default VXLAN port number.
On Amazon Web Services (AWS), you can select an alternate port for the VXLAN between port |
Example OpenShift SDN configuration
defaultNetwork:
type: OpenShiftSDN
openshiftSDNConfig:
mode: NetworkPolicy
mtu: 1450
vxlanPort: 4789Configuration for the OVN-Kubernetes CNI cluster network provider
The following table describes the configuration fields for the OVN-Kubernetes CNI cluster network provider.
| Field | Type | Description |
|---|---|---|
|
|
| The maximum transmission unit (MTU) for the Geneve (Generic Network Virtualization Encapsulation) overlay network. This is detected automatically based on the MTU of the primary network interface. You do not normally need to override the detected MTU. If the auto-detected value is not what you expected it to be, confirm that the MTU on the primary network interface on your nodes is correct. You cannot use this option to change the MTU value of the primary network interface on the nodes.
If your cluster requires different MTU values for different nodes, you must set this value to This value cannot be changed after cluster installation. |
|
|
|
The port to use for all Geneve packets. The default value is |
|
|
| Specify an empty object to enable IPsec encryption. This value cannot be changed after cluster installation. |
Example OVN-Kubernetes configuration
defaultNetwork:
type: OVNKubernetes
ovnKubernetesConfig:
mtu: 1400
genevePort: 6081
ipsecConfig: {}kubeProxyConfig object configuration
The values for the kubeProxyConfig object are defined in the following table:
| Field | Type | Description |
|---|---|---|
|
|
|
The refresh period for Note
Because of performance improvements introduced in OpenShift Container Platform 4.3 and greater, adjusting the |
|
|
|
The minimum duration before refreshing |
6.5.10. Deploying the cluster
You can install OpenShift Container Platform on a compatible cloud platform.
You can run the create cluster command of the installation program only once, during initial installation.
Prerequisites
- Configure an account with the cloud platform that hosts your cluster.
- Obtain the OpenShift Container Platform installation program and the pull secret for your cluster.
Procedure
Change to the directory that contains the installation program and initialize the cluster deployment:
$ ./openshift-install create cluster --dir <installation_directory> \1 --log-level=info2 NoteIf the cloud provider account that you configured on your host does not have sufficient permissions to deploy the cluster, the installation process stops, and the missing permissions are displayed.
When the cluster deployment completes, directions for accessing your cluster, including a link to its web console and credentials for the
kubeadminuser, display in your terminal.Example output
... INFO Install complete! INFO To access the cluster as the system:admin user when using 'oc', run 'export KUBECONFIG=/home/myuser/install_dir/auth/kubeconfig' INFO Access the OpenShift web-console here: https://console-openshift-console.apps.mycluster.example.com INFO Login to the console with user: "kubeadmin", and password: "4vYBz-Ee6gm-ymBZj-Wt5AL" INFO Time elapsed: 36m22sNoteThe cluster access and credential information also outputs to
<installation_directory>/.openshift_install.logwhen an installation succeeds.Important-
The Ignition config files that the installation program generates contain certificates that expire after 24 hours, which are then renewed at that time. If the cluster is shut down before renewing the certificates and the cluster is later restarted after the 24 hours have elapsed, the cluster automatically recovers the expired certificates. The exception is that you must manually approve the pending
node-bootstrappercertificate signing requests (CSRs) to recover kubelet certificates. See the documentation for Recovering from expired control plane certificates for more information. - It is recommended that you use Ignition config files within 12 hours after they are generated because the 24-hour certificate rotates from 16 to 22 hours after the cluster is installed. By using the Ignition config files within 12 hours, you can avoid installation failure if the certificate update runs during installation.
ImportantYou must not delete the installation program or the files that the installation program creates. Both are required to delete the cluster.
-
The Ignition config files that the installation program generates contain certificates that expire after 24 hours, which are then renewed at that time. If the cluster is shut down before renewing the certificates and the cluster is later restarted after the 24 hours have elapsed, the cluster automatically recovers the expired certificates. The exception is that you must manually approve the pending
6.5.11. Installing the OpenShift CLI by downloading the binary
You can install the OpenShift CLI (oc) to interact with OpenShift Container Platform from a command-line interface. You can install oc on Linux, Windows, or macOS.
If you installed an earlier version of oc, you cannot use it to complete all of the commands in OpenShift Container Platform 4.7. Download and install the new version of oc.
6.5.11.1. Installing the OpenShift CLI on Linux
You can install the OpenShift CLI (oc) binary on Linux by using the following procedure.
Procedure
- Navigate to the OpenShift Container Platform downloads page on the Red Hat Customer Portal.
- Select the appropriate version in the Version drop-down menu.
- Click Download Now next to the OpenShift v4.7 Linux Client entry and save the file.
Unpack the archive:
$ tar xvzf <file>Place the
ocbinary in a directory that is on yourPATH.To check your
PATH, execute the following command:$ echo $PATH
After you install the OpenShift CLI, it is available using the oc command:
$ oc <command>6.5.11.2. Installing the OpenShift CLI on Windows
You can install the OpenShift CLI (oc) binary on Windows by using the following procedure.
Procedure
- Navigate to the OpenShift Container Platform downloads page on the Red Hat Customer Portal.
- Select the appropriate version in the Version drop-down menu.
- Click Download Now next to the OpenShift v4.7 Windows Client entry and save the file.
- Unzip the archive with a ZIP program.
Move the
ocbinary to a directory that is on yourPATH.To check your
PATH, open the command prompt and execute the following command:C:\> path
After you install the OpenShift CLI, it is available using the oc command:
C:\> oc <command>6.5.11.3. Installing the OpenShift CLI on macOS
You can install the OpenShift CLI (oc) binary on macOS by using the following procedure.
Procedure
- Navigate to the OpenShift Container Platform downloads page on the Red Hat Customer Portal.
- Select the appropriate version in the Version drop-down menu.
- Click Download Now next to the OpenShift v4.7 MacOSX Client entry and save the file.
- Unpack and unzip the archive.
Move the
ocbinary to a directory on your PATH.To check your
PATH, open a terminal and execute the following command:$ echo $PATH
After you install the OpenShift CLI, it is available using the oc command:
$ oc <command>6.5.12. Logging in to the cluster by using the CLI
You can log in to your cluster as a default system user by exporting the cluster kubeconfig file. The kubeconfig file contains information about the cluster that is used by the CLI to connect a client to the correct cluster and API server. The file is specific to a cluster and is created during OpenShift Container Platform installation.
Prerequisites
- You deployed an OpenShift Container Platform cluster.
-
You installed the
ocCLI.
Procedure
Export the
kubeadmincredentials:$ export KUBECONFIG=<installation_directory>/auth/kubeconfig1 - 1
- For
<installation_directory>, specify the path to the directory that you stored the installation files in.
Verify you can run
occommands successfully using the exported configuration:$ oc whoamiExample output
system:admin
6.5.13. Telemetry access for OpenShift Container Platform
In OpenShift Container Platform 4.7, the Telemetry service, which runs by default to provide metrics about cluster health and the success of updates, requires internet access. If your cluster is connected to the internet, Telemetry runs automatically, and your cluster is registered to OpenShift Cluster Manager.
After you confirm that your OpenShift Cluster Manager inventory is correct, either maintained automatically by Telemetry or manually by using OpenShift Cluster Manager, use subscription watch to track your OpenShift Container Platform subscriptions at the account or multi-cluster level.
6.5.14. Next steps
- Customize your cluster.
- If necessary, you can opt out of remote health reporting.
6.6. Installing a cluster on GCP in a restricted network
In OpenShift Container Platform 4.7, you can install a cluster on Google Cloud Platform (GCP) in a restricted network by creating an internal mirror of the installation release content on an existing Google Virtual Private Cloud (VPC).
You can install an OpenShift Container Platform cluster by using mirrored installation release content, but your cluster will require internet access to use the GCP APIs.
6.6.1. Prerequisites
You mirrored the images for a disconnected installation to your registry and obtained the
imageContentSourcesdata for your version of OpenShift Container Platform.ImportantBecause the installation media is on the mirror host, you can use that computer to complete all installation steps.
You have an existing VPC in GCP. While installing a cluster in a restricted network that uses installer-provisioned infrastructure, you cannot use the installer-provisioned VPC. You must use a user-provisioned VPC that satisfies one of the following requirements:
- Contains the mirror registry
- Has firewall rules or a peering connection to access the mirror registry hosted elsewhere
- You reviewed details about the OpenShift Container Platform installation and update processes.
-
If you use a firewall, you must configure it to allow the sites that your cluster requires access to. While you might need to grant access to more sites, you must grant access to
*.googleapis.comandaccounts.google.com. - If you do not allow the system to manage identity and access management (IAM), then a cluster administrator can manually create and maintain IAM credentials. Manual mode can also be used in environments where the cloud IAM APIs are not reachable.
6.6.2. About installations in restricted networks
In OpenShift Container Platform 4.7, you can perform an installation that does not require an active connection to the Internet to obtain software components. Restricted network installations can be completed using installer-provisioned infrastructure or user-provisioned infrastructure, depending on the cloud platform to which you are installing the cluster.
If you choose to perform a restricted network installation on a cloud platform, you still require access to its cloud APIs. Some cloud functions, like Amazon Web Service’s Route 53 DNS and IAM services, require internet access. Depending on your network, you might require less Internet access for an installation on bare metal hardware or on VMware vSphere.
To complete a restricted network installation, you must create a registry that mirrors the contents of the OpenShift Container Platform registry and contains the installation media. You can create this registry on a mirror host, which can access both the Internet and your closed network, or by using other methods that meet your restrictions.
6.6.2.1. Additional limits
Clusters in restricted networks have the following additional limitations and restrictions:
-
The
ClusterVersionstatus includes anUnable to retrieve available updateserror. - By default, you cannot use the contents of the Developer Catalog because you cannot access the required image stream tags.
6.6.3. Internet access for OpenShift Container Platform
In OpenShift Container Platform 4.7, you require access to the Internet to obtain the images that are necessary to install your cluster.
You must have Internet access to:
- Access OpenShift Cluster Manager to download the installation program and perform subscription management. If the cluster has internet access and you do not disable Telemetry, that service automatically entitles your cluster.
- Access Quay.io to obtain the packages that are required to install your cluster.
- Obtain the packages that are required to perform cluster updates.
If your cluster cannot have direct Internet access, you can perform a restricted network installation on some types of infrastructure that you provision. During that process, you download the content that is required and use it to populate a mirror registry with the packages that you need to install a cluster and generate the installation program. With some installation types, the environment that you install your cluster in will not require Internet access. Before you update the cluster, you update the content of the mirror registry.
6.6.4. Generating an SSH private key and adding it to the agent
If you want to perform installation debugging or disaster recovery on your cluster, you must provide an SSH key to both your ssh-agent and the installation program. You can use this key to access the bootstrap machine in a public cluster to troubleshoot installation issues.
In a production environment, you require disaster recovery and debugging.
You can use this key to SSH into the master nodes as the user core. When you deploy the cluster, the key is added to the core user’s ~/.ssh/authorized_keys list.
You must use a local key, not one that you configured with platform-specific approaches such as AWS key pairs.
Procedure
If you do not have an SSH key that is configured for password-less authentication on your computer, create one. For example, on a computer that uses a Linux operating system, run the following command:
$ ssh-keygen -t ed25519 -N '' \ -f <path>/<file_name>1 - 1
- Specify the path and file name, such as
~/.ssh/id_rsa, of the new SSH key. If you have an existing key pair, ensure your public key is in the your~/.sshdirectory.
Running this command generates an SSH key that does not require a password in the location that you specified.
NoteIf you plan to install an OpenShift Container Platform cluster that uses FIPS Validated / Modules in Process cryptographic libraries on the
x86_64architecture, do not create a key that uses theed25519algorithm. Instead, create a key that uses thersaorecdsaalgorithm.Start the
ssh-agentprocess as a background task:$ eval "$(ssh-agent -s)"Example output
Agent pid 31874NoteIf your cluster is in FIPS mode, only use FIPS-compliant algorithms to generate the SSH key. The key must be either RSA or ECDSA.
Add your SSH private key to the
ssh-agent:$ ssh-add <path>/<file_name>1 Example output
Identity added: /home/<you>/<path>/<file_name> (<computer_name>)- 1
- Specify the path and file name for your SSH private key, such as
~/.ssh/id_rsa
Set the
GOOGLE_APPLICATION_CREDENTIALSenvironment variable to the full path to your service account private key file.$ export GOOGLE_APPLICATION_CREDENTIALS="<your_service_account_file>"Verify that the credentials were applied.
$ gcloud auth list
Next steps
- When you install OpenShift Container Platform, provide the SSH public key to the installation program.
6.6.5. Creating the installation configuration file
You can customize the OpenShift Container Platform cluster you install on Google Cloud Platform (GCP).
Prerequisites
- Obtain the OpenShift Container Platform installation program and the pull secret for your cluster. For a restricted network installation, these files are on your mirror host.
-
Have the
imageContentSourcesvalues that were generated during mirror registry creation. - Obtain the contents of the certificate for your mirror registry.
- Obtain service principal permissions at the subscription level.
Procedure
Create the
install-config.yamlfile.Change to the directory that contains the installation program and run the following command:
$ ./openshift-install create install-config --dir <installation_directory>1 - 1
- For
<installation_directory>, specify the directory name to store the files that the installation program creates.
ImportantSpecify an empty directory. Some installation assets, like bootstrap X.509 certificates have short expiration intervals, so you must not reuse an installation directory. If you want to reuse individual files from another cluster installation, you can copy them into your directory. However, the file names for the installation assets might change between releases. Use caution when copying installation files from an earlier OpenShift Container Platform version.
At the prompts, provide the configuration details for your cloud:
Optional: Select an SSH key to use to access your cluster machines.
NoteFor production OpenShift Container Platform clusters on which you want to perform installation debugging or disaster recovery, specify an SSH key that your
ssh-agentprocess uses.- Select gcp as the platform to target.
- If you have not configured the service account key for your GCP account on your computer, you must obtain it from GCP and paste the contents of the file or enter the absolute path to the file.
- Select the project ID to provision the cluster in. The default value is specified by the service account that you configured.
- Select the region to deploy the cluster to.
- Select the base domain to deploy the cluster to. The base domain corresponds to the public DNS zone that you created for your cluster.
- Enter a descriptive name for your cluster.
- Paste the pull secret from the Red Hat OpenShift Cluster Manager.
Edit the
install-config.yamlfile to provide the additional information that is required for an installation in a restricted network.Update the
pullSecretvalue to contain the authentication information for your registry:pullSecret: '{"auths":{"<mirror_host_name>:5000": {"auth": "<credentials>","email": "you@example.com"}}}'For
<mirror_host_name>, specify the registry domain name that you specified in the certificate for your mirror registry, and for<credentials>, specify the base64-encoded user name and password for your mirror registry.Add the
additionalTrustBundleparameter and value.additionalTrustBundle: | -----BEGIN CERTIFICATE----- ZZZZZZZZZZZZZZZZZZZZZZZZZZZZZZZZZZZZZZZZZZZZZZZZZZZZZZZZZZZZZZZZ -----END CERTIFICATE-----The value must be the contents of the certificate file that you used for your mirror registry, which can be an existing, trusted certificate authority or the self-signed certificate that you generated for the mirror registry.
Define the network and subnets for the VPC to install the cluster in under the parent
platform.gcpfield:network: <existing_vpc> controlPlaneSubnet: <control_plane_subnet> computeSubnet: <compute_subnet>For
platform.gcp.network, specify the name for the existing Google VPC. Forplatform.gcp.controlPlaneSubnetandplatform.gcp.computeSubnet, specify the existing subnets to deploy the control plane machines and compute machines, respectively.Add the image content resources, which look like this excerpt:
imageContentSources: - mirrors: - <mirror_host_name>:5000/<repo_name>/release source: quay.example.com/openshift-release-dev/ocp-release - mirrors: - <mirror_host_name>:5000/<repo_name>/release source: registry.example.com/ocp/releaseTo complete these values, use the
imageContentSourcesthat you recorded during mirror registry creation.
-
Make any other modifications to the
install-config.yamlfile that you require. You can find more information about the available parameters in the Installation configuration parameters section. Back up the
install-config.yamlfile so that you can use it to install multiple clusters.ImportantThe
install-config.yamlfile is consumed during the installation process. If you want to reuse the file, you must back it up now.
6.6.5.1. Installation configuration parameters
Before you deploy an OpenShift Container Platform cluster, you provide parameter values to describe your account on the cloud platform that hosts your cluster and optionally customize your cluster’s platform. When you create the install-config.yaml installation configuration file, you provide values for the required parameters through the command line. If you customize your cluster, you can modify the install-config.yaml file to provide more details about the platform.
After installation, you cannot modify these parameters in the install-config.yaml file.
The openshift-install command does not validate field names for parameters. If an incorrect name is specified, the related file or object is not created, and no error is reported. Ensure that the field names for any parameters that are specified are correct.
6.6.5.1.1. Required configuration parameters
Required installation configuration parameters are described in the following table:
| Parameter | Description | Values |
|---|---|---|
|
|
The API version for the | String |
|
|
The base domain of your cloud provider. The base domain is used to create routes to your OpenShift Container Platform cluster components. The full DNS name for your cluster is a combination of the |
A fully-qualified domain or subdomain name, such as |
|
|
Kubernetes resource | Object |
|
|
The name of the cluster. DNS records for the cluster are all subdomains of |
String of lowercase letters, hyphens ( |
|
|
The configuration for the specific platform upon which to perform the installation: | Object |
|
| Get a pull secret from the Red Hat OpenShift Cluster Manager to authenticate downloading container images for OpenShift Container Platform components from services such as Quay.io. |
|
6.6.5.1.2. Network configuration parameters
You can customize your installation configuration based on the requirements of your existing network infrastructure. For example, you can expand the IP address block for the cluster network or provide different IP address blocks than the defaults.
Only IPv4 addresses are supported.
| Parameter | Description | Values |
|---|---|---|
|
| The configuration for the cluster network. | Object Note
You cannot modify parameters specified by the |
|
| The cluster network provider Container Network Interface (CNI) plug-in to install. |
Either |
|
| The IP address blocks for pods.
The default value is If you specify multiple IP address blocks, the blocks must not overlap. | An array of objects. For example: |
|
|
Required if you use An IPv4 network. |
An IP address block in Classless Inter-Domain Routing (CIDR) notation. The prefix length for an IPv4 block is between |
|
|
The subnet prefix length to assign to each individual node. For example, if | A subnet prefix.
The default value is |
|
|
The IP address block for services. The default value is The OpenShift SDN and OVN-Kubernetes network providers support only a single IP address block for the service network. | An array with an IP address block in CIDR format. For example: |
|
| The IP address blocks for machines. If you specify multiple IP address blocks, the blocks must not overlap. | An array of objects. For example: |
|
|
Required if you use | An IP network block in CIDR notation.
For example, Note
Set the |
6.6.5.1.3. Optional configuration parameters
Optional installation configuration parameters are described in the following table:
| Parameter | Description | Values |
|---|---|---|
|
| A PEM-encoded X.509 certificate bundle that is added to the nodes' trusted certificate store. This trust bundle may also be used when a proxy has been configured. | String |
|
| The configuration for the machines that comprise the compute nodes. |
Array of |
|
|
Determines the instruction set architecture of the machines in the pool. Currently, heteregeneous clusters are not supported, so all pools must specify the same architecture. Valid values are | String |
|
|
Whether to enable or disable simultaneous multithreading, or Important If you disable simultaneous multithreading, ensure that your capacity planning accounts for the dramatically decreased machine performance. |
|
|
|
Required if you use |
|
|
|
Required if you use |
|
|
| The number of compute machines, which are also known as worker machines, to provision. |
A positive integer greater than or equal to |
|
| The configuration for the machines that comprise the control plane. |
Array of |
|
|
Determines the instruction set architecture of the machines in the pool. Currently, heterogeneous clusters are not supported, so all pools must specify the same architecture. Valid values are | String |
|
|
Whether to enable or disable simultaneous multithreading, or Important If you disable simultaneous multithreading, ensure that your capacity planning accounts for the dramatically decreased machine performance. |
|
|
|
Required if you use |
|
|
|
Required if you use |
|
|
| The number of control plane machines to provision. |
The only supported value is |
|
| The Cloud Credential Operator (CCO) mode. If no mode is specified, the CCO dynamically tries to determine the capabilities of the provided credentials, with a preference for mint mode on the platforms where multiple modes are supported. Note Not all CCO modes are supported for all cloud providers. For more information on CCO modes, see the Cloud Credential Operator entry in the Cluster Operators reference content. |
|
|
|
Enable or disable FIPS mode. The default is Important
The use of FIPS Validated / Modules in Process cryptographic libraries is only supported on OpenShift Container Platform deployments on the Note If you are using Azure File storage, you cannot enable FIPS mode. |
|
|
| Sources and repositories for the release-image content. |
Array of objects. Includes a |
|
|
Required if you use | String |
|
| Specify one or more repositories that may also contain the same images. | Array of strings |
|
| How to publish or expose the user-facing endpoints of your cluster, such as the Kubernetes API, OpenShift routes. |
|
|
| The SSH key or keys to authenticate access your cluster machines. Note
For production OpenShift Container Platform clusters on which you want to perform installation debugging or disaster recovery, specify an SSH key that your | One or more keys. For example: |
6.6.5.1.4. Additional Google Cloud Platform (GCP) configuration parameters
Additional GCP configuration parameters are described in the following table:
| Parameter | Description | Values |
|---|---|---|
|
| The name of the existing VPC that you want to deploy your cluster to. | String. |
|
| The name of the GCP region that hosts your cluster. |
Any valid region name, such as |
|
| The GCP machine type. | The GCP machine type. |
|
| The availability zones where the installation program creates machines for the specified MachinePool. |
A list of valid GCP availability zones, such as |
|
| The name of the existing subnet in your VPC that you want to deploy your control plane machines to. | The subnet name. |
|
| The name of the existing subnet in your VPC that you want to deploy your compute machines to. | The subnet name. |
|
| A list of license URLs that must be applied to the compute images. Important
The | Any license available with the license API, such as the license to enable nested virtualization. You cannot use this parameter with a mechanism that generates pre-built images. Using a license URL forces the installer to copy the source image before use. |
|
| The size of the disk in gigabytes (GB). | Any size between 16 GB and 65536 GB. |
|
| The type of disk. |
Either the default |
|
| The name of the customer managed encryption key to be used for control plane machine disk encryption. | The encryption key name. |
|
| For control plane machines, the name of the KMS key ring to which the KMS key belongs. | The KMS key ring name. |
|
| For control plane machines, the GCP location in which the key ring exists. For more information on KMS locations, see Google’s documentation on Cloud KMS locations. | The GCP location for the key ring. |
|
| For control plane machines, the ID of the project in which the KMS key ring exists. This value defaults to the VM project ID if not set. | The GCP project ID. |
|
| The name of the customer managed encryption key to be used for compute machine disk encryption. | The encryption key name. |
|
| For compute machines, the name of the KMS key ring to which the KMS key belongs. | The KMS key ring name. |
|
| For compute machines, the GCP location in which the key ring exists. For more information on KMS locations, see Google’s documentation on Cloud KMS locations. | The GCP location for the key ring. |
|
| For compute machines, the ID of the project in which the KMS key ring exists. This value defaults to the VM project ID if not set. | The GCP project ID. |
6.6.5.2. Sample customized install-config.yaml file for GCP
You can customize the install-config.yaml file to specify more details about your OpenShift Container Platform cluster’s platform or modify the values of the required parameters.
This sample YAML file is provided for reference only. You must obtain your install-config.yaml file by using the installation program and modify it.
apiVersion: v1
baseDomain: example.com
controlPlane:
hyperthreading: Enabled
name: master
platform:
gcp:
type: n2-standard-4
zones:
- us-central1-a
- us-central1-c
osDisk:
diskType: pd-ssd
diskSizeGB: 1024
encryptionKey:
kmsKey:
name: worker-key
keyRing: test-machine-keys
location: global
projectID: project-id
replicas: 3
compute:
- hyperthreading: Enabled
name: worker
platform:
gcp:
type: n2-standard-4
zones:
- us-central1-a
- us-central1-c
osDisk:
diskType: pd-standard
diskSizeGB: 128
encryptionKey:
kmsKey:
name: worker-key
keyRing: test-machine-keys
location: global
projectID: project-id
replicas: 3
metadata:
name: test-cluster
networking:
clusterNetwork:
- cidr: 10.128.0.0/14
hostPrefix: 23
machineNetwork:
- cidr: 10.0.0.0/16
networkType: OpenShiftSDN
serviceNetwork:
- 172.30.0.0/16
platform:
gcp:
projectID: openshift-production
region: us-central1
network: existing_vpc
controlPlaneSubnet: control_plane_subnet
computeSubnet: compute_subnet
pullSecret: '{"auths":{"<local_registry>": {"auth": "<credentials>","email": "you@example.com"}}}'
fips: false
sshKey: ssh-ed25519 AAAA...
additionalTrustBundle: |
-----BEGIN CERTIFICATE-----
<MY_TRUSTED_CA_CERT>
-----END CERTIFICATE-----
imageContentSources:
- mirrors:
- <local_registry>/<local_repository_name>/release
source: quay.io/openshift-release-dev/ocp-release
- mirrors:
- <local_registry>/<local_repository_name>/release
source: quay.io/openshift-release-dev/ocp-v4.0-art-dev- 1 10 11 12
- Required. The installation program prompts you for this value.
- 2 6
- If you do not provide these parameters and values, the installation program provides the default value.
- 3 7
- The
controlPlanesection is a single mapping, but thecomputesection is a sequence of mappings. To meet the requirements of the different data structures, the first line of thecomputesection must begin with a hyphen,-, and the first line of thecontrolPlanesection must not. Only one control plane pool is used. - 4 8
- Whether to enable or disable simultaneous multithreading, or
hyperthreading. By default, simultaneous multithreading is enabled to increase the performance of your machines' cores. You can disable it by setting the parameter value toDisabled. If you disable simultaneous multithreading in some cluster machines, you must disable it in all cluster machines.ImportantIf you disable simultaneous multithreading, ensure that your capacity planning accounts for the dramatically decreased machine performance. Use larger machine types, such as
n1-standard-8, for your machines if you disable simultaneous multithreading. - 5 9
- Optional: The custom encryption key section to encrypt both virtual machines and persistent volumes. Your default compute service account must have the permissions granted to use your KMS key and have the correct IAM role assigned. The default service account name follows the
service-<project_number>@compute-system.iam.gserviceaccount.compattern. For more information on granting the correct permissions for your service account, see "Machine management" → "Creating machine sets" → "Creating a machine set on GCP". - 13
- Specify the name of an existing VPC.
- 14
- Specify the name of the existing subnet to deploy the control plane machines to. The subnet must belong to the VPC that you specified.
- 15
- Specify the name of the existing subnet to deploy the compute machines to. The subnet must belong to the VPC that you specified.
- 16
- For
<local_registry>, specify the registry domain name, and optionally the port, that your mirror registry uses to serve content. For example,registry.example.comorregistry.example.com:5000. For<credentials>, specify the base64-encoded user name and password for your mirror registry. - 17
- Whether to enable or disable FIPS mode. By default, FIPS mode is not enabled. If FIPS mode is enabled, the Red Hat Enterprise Linux CoreOS (RHCOS) machines that OpenShift Container Platform runs on bypass the default Kubernetes cryptography suite and use the cryptography modules that are provided with RHCOS instead.Important
The use of FIPS Validated / Modules in Process cryptographic libraries is only supported on OpenShift Container Platform deployments on the
x86_64architecture. - 18
- You can optionally provide the
sshKeyvalue that you use to access the machines in your cluster.NoteFor production OpenShift Container Platform clusters on which you want to perform installation debugging or disaster recovery, specify an SSH key that your
ssh-agentprocess uses. - 19
- Provide the contents of the certificate file that you used for your mirror registry.
- 20
- Provide the
imageContentSourcessection from the output of the command to mirror the repository.
6.6.5.3. Configuring the cluster-wide proxy during installation
Production environments can deny direct access to the Internet and instead have an HTTP or HTTPS proxy available. You can configure a new OpenShift Container Platform cluster to use a proxy by configuring the proxy settings in the install-config.yaml file.
Prerequisites
-
You have an existing
install-config.yamlfile. You reviewed the sites that your cluster requires access to and determined whether any of them need to bypass the proxy. By default, all cluster egress traffic is proxied, including calls to hosting cloud provider APIs. You added sites to the
Proxyobject’sspec.noProxyfield to bypass the proxy if necessary.NoteThe
Proxyobjectstatus.noProxyfield is populated with the values of thenetworking.machineNetwork[].cidr,networking.clusterNetwork[].cidr, andnetworking.serviceNetwork[]fields from your installation configuration.For installations on Amazon Web Services (AWS), Google Cloud Platform (GCP), Microsoft Azure, and Red Hat OpenStack Platform (RHOSP), the
Proxyobjectstatus.noProxyfield is also populated with the instance metadata endpoint (169.254.169.254).
Procedure
Edit your
install-config.yamlfile and add the proxy settings. For example:apiVersion: v1 baseDomain: my.domain.com proxy: httpProxy: http://<username>:<pswd>@<ip>:<port>1 httpsProxy: https://<username>:<pswd>@<ip>:<port>2 noProxy: example.com3 additionalTrustBundle: |4 -----BEGIN CERTIFICATE----- <MY_TRUSTED_CA_CERT> -----END CERTIFICATE----- ...- 1
- A proxy URL to use for creating HTTP connections outside the cluster. The URL scheme must be
http. - 2
- A proxy URL to use for creating HTTPS connections outside the cluster.
- 3
- A comma-separated list of destination domain names, IP addresses, or other network CIDRs to exclude from proxying. Preface a domain with
.to match subdomains only. For example,.y.commatchesx.y.com, but noty.com. Use*to bypass the proxy for all destinations. - 4
- If provided, the installation program generates a config map that is named
user-ca-bundlein theopenshift-confignamespace to hold the additional CA certificates. If you provideadditionalTrustBundleand at least one proxy setting, theProxyobject is configured to reference theuser-ca-bundleconfig map in thetrustedCAfield. The Cluster Network Operator then creates atrusted-ca-bundleconfig map that merges the contents specified for thetrustedCAparameter with the RHCOS trust bundle. TheadditionalTrustBundlefield is required unless the proxy’s identity certificate is signed by an authority from the RHCOS trust bundle.
NoteThe installation program does not support the proxy
readinessEndpointsfield.- Save the file and reference it when installing OpenShift Container Platform.
The installation program creates a cluster-wide proxy that is named cluster that uses the proxy settings in the provided install-config.yaml file. If no proxy settings are provided, a cluster Proxy object is still created, but it will have a nil spec.
Only the Proxy object named cluster is supported, and no additional proxies can be created.
6.6.6. Deploying the cluster
You can install OpenShift Container Platform on a compatible cloud platform.
You can run the create cluster command of the installation program only once, during initial installation.
Prerequisites
- Configure an account with the cloud platform that hosts your cluster.
- Obtain the OpenShift Container Platform installation program and the pull secret for your cluster.
Procedure
Remove any existing GCP credentials that do not use the service account key for the GCP account that you configured for your cluster and that are stored in the following locations:
-
The
GOOGLE_CREDENTIALS,GOOGLE_CLOUD_KEYFILE_JSON, orGCLOUD_KEYFILE_JSONenvironment variables -
The
~/.gcp/osServiceAccount.jsonfile -
The
gcloud clidefault credentials
-
The
Change to the directory that contains the installation program and initialize the cluster deployment:
$ ./openshift-install create cluster --dir <installation_directory> \1 --log-level=info2 NoteIf the cloud provider account that you configured on your host does not have sufficient permissions to deploy the cluster, the installation process stops, and the missing permissions are displayed.
When the cluster deployment completes, directions for accessing your cluster, including a link to its web console and credentials for the
kubeadminuser, display in your terminal.Example output
... INFO Install complete! INFO To access the cluster as the system:admin user when using 'oc', run 'export KUBECONFIG=/home/myuser/install_dir/auth/kubeconfig' INFO Access the OpenShift web-console here: https://console-openshift-console.apps.mycluster.example.com INFO Login to the console with user: "kubeadmin", and password: "4vYBz-Ee6gm-ymBZj-Wt5AL" INFO Time elapsed: 36m22sNoteThe cluster access and credential information also outputs to
<installation_directory>/.openshift_install.logwhen an installation succeeds.Important-
The Ignition config files that the installation program generates contain certificates that expire after 24 hours, which are then renewed at that time. If the cluster is shut down before renewing the certificates and the cluster is later restarted after the 24 hours have elapsed, the cluster automatically recovers the expired certificates. The exception is that you must manually approve the pending
node-bootstrappercertificate signing requests (CSRs) to recover kubelet certificates. See the documentation for Recovering from expired control plane certificates for more information. - It is recommended that you use Ignition config files within 12 hours after they are generated because the 24-hour certificate rotates from 16 to 22 hours after the cluster is installed. By using the Ignition config files within 12 hours, you can avoid installation failure if the certificate update runs during installation.
ImportantYou must not delete the installation program or the files that the installation program creates. Both are required to delete the cluster.
-
The Ignition config files that the installation program generates contain certificates that expire after 24 hours, which are then renewed at that time. If the cluster is shut down before renewing the certificates and the cluster is later restarted after the 24 hours have elapsed, the cluster automatically recovers the expired certificates. The exception is that you must manually approve the pending
Optional: You can reduce the number of permissions for the service account that you used to install the cluster.
-
If you assigned the
Ownerrole to your service account, you can remove that role and replace it with theViewerrole. -
If you included the
Service Account Key Adminrole, you can remove it.
-
If you assigned the
6.6.7. Installing the OpenShift CLI by downloading the binary
You can install the OpenShift CLI (oc) to interact with OpenShift Container Platform from a command-line interface. You can install oc on Linux, Windows, or macOS.
If you installed an earlier version of oc, you cannot use it to complete all of the commands in OpenShift Container Platform 4.7. Download and install the new version of oc.
6.6.7.1. Installing the OpenShift CLI on Linux
You can install the OpenShift CLI (oc) binary on Linux by using the following procedure.
Procedure
- Navigate to the OpenShift Container Platform downloads page on the Red Hat Customer Portal.
- Select the appropriate version in the Version drop-down menu.
- Click Download Now next to the OpenShift v4.7 Linux Client entry and save the file.
Unpack the archive:
$ tar xvzf <file>Place the
ocbinary in a directory that is on yourPATH.To check your
PATH, execute the following command:$ echo $PATH
After you install the OpenShift CLI, it is available using the oc command:
$ oc <command>6.6.7.2. Installing the OpenShift CLI on Windows
You can install the OpenShift CLI (oc) binary on Windows by using the following procedure.
Procedure
- Navigate to the OpenShift Container Platform downloads page on the Red Hat Customer Portal.
- Select the appropriate version in the Version drop-down menu.
- Click Download Now next to the OpenShift v4.7 Windows Client entry and save the file.
- Unzip the archive with a ZIP program.
Move the
ocbinary to a directory that is on yourPATH.To check your
PATH, open the command prompt and execute the following command:C:\> path
After you install the OpenShift CLI, it is available using the oc command:
C:\> oc <command>6.6.7.3. Installing the OpenShift CLI on macOS
You can install the OpenShift CLI (oc) binary on macOS by using the following procedure.
Procedure
- Navigate to the OpenShift Container Platform downloads page on the Red Hat Customer Portal.
- Select the appropriate version in the Version drop-down menu.
- Click Download Now next to the OpenShift v4.7 MacOSX Client entry and save the file.
- Unpack and unzip the archive.
Move the
ocbinary to a directory on your PATH.To check your
PATH, open a terminal and execute the following command:$ echo $PATH
After you install the OpenShift CLI, it is available using the oc command:
$ oc <command>6.6.8. Logging in to the cluster by using the CLI
You can log in to your cluster as a default system user by exporting the cluster kubeconfig file. The kubeconfig file contains information about the cluster that is used by the CLI to connect a client to the correct cluster and API server. The file is specific to a cluster and is created during OpenShift Container Platform installation.
Prerequisites
- You deployed an OpenShift Container Platform cluster.
-
You installed the
ocCLI.
Procedure
Export the
kubeadmincredentials:$ export KUBECONFIG=<installation_directory>/auth/kubeconfig1 - 1
- For
<installation_directory>, specify the path to the directory that you stored the installation files in.
Verify you can run
occommands successfully using the exported configuration:$ oc whoamiExample output
system:admin
6.6.9. Disabling the default OperatorHub sources
Operator catalogs that source content provided by Red Hat and community projects are configured for OperatorHub by default during an OpenShift Container Platform installation. In a restricted network environment, you must disable the default catalogs as a cluster administrator.
Procedure
Disable the sources for the default catalogs by adding
disableAllDefaultSources: trueto theOperatorHubobject:$ oc patch OperatorHub cluster --type json \ -p '[{"op": "add", "path": "/spec/disableAllDefaultSources", "value": true}]'
Alternatively, you can use the web console to manage catalog sources. From the Administration → Cluster Settings → Global Configuration → OperatorHub page, click the Sources tab, where you can create, delete, disable, and enable individual sources.
6.6.10. Telemetry access for OpenShift Container Platform
In OpenShift Container Platform 4.7, the Telemetry service, which runs by default to provide metrics about cluster health and the success of updates, requires internet access. If your cluster is connected to the internet, Telemetry runs automatically, and your cluster is registered to OpenShift Cluster Manager.
After you confirm that your OpenShift Cluster Manager inventory is correct, either maintained automatically by Telemetry or manually by using OpenShift Cluster Manager, use subscription watch to track your OpenShift Container Platform subscriptions at the account or multi-cluster level.
6.6.11. Next steps
- Validate an installation.
- Customize your cluster.
-
Configure image streams for the Cluster Samples Operator and the
must-gathertool. - Learn how to use Operator Lifecycle Manager (OLM) on restricted networks.
- If the mirror registry that you used to install your cluster has a trusted CA, add it to the cluster by configuring additional trust stores.
- If necessary, you can opt out of remote health reporting.
6.7. Installing a cluster on GCP into an existing VPC
In OpenShift Container Platform version 4.7, you can install a cluster into an existing Virtual Private Cloud (VPC) on Google Cloud Platform (GCP). The installation program provisions the rest of the required infrastructure, which you can further customize. To customize the installation, you modify parameters in the install-config.yaml file before you install the cluster.
6.7.1. Prerequisites
- Review details about the OpenShift Container Platform installation and update processes.
- Configure a GCP account to host the cluster.
- If you use a firewall, you must configure it to allow the sites that your cluster requires access to.
- If you do not allow the system to manage identity and access management (IAM), then a cluster administrator can manually create and maintain IAM credentials. Manual mode can also be used in environments where the cloud IAM APIs are not reachable.
6.7.2. About using a custom VPC
In OpenShift Container Platform 4.7, you can deploy a cluster into existing subnets in an existing Virtual Private Cloud (VPC) in Google Cloud Platform (GCP). By deploying OpenShift Container Platform into an existing GCP VPC, you might be able to avoid limit constraints in new accounts or more easily abide by the operational constraints that your company’s guidelines set. If you cannot obtain the infrastructure creation permissions that are required to create the VPC yourself, use this installation option. You must configure networking for the subnets.
6.7.2.1. Requirements for using your VPC
The union of the VPC CIDR block and the machine network CIDR must be non-empty. The subnets must be within the machine network.
The installation program does not create the following components:
- NAT gateways
- Subnets
- Route tables
- VPC network
The installation program requires that you use the cloud-provided DNS server. Using a custom DNS server is not supported and causes the installation to fail.
6.7.2.2. VPC validation
To ensure that the subnets that you provide are suitable, the installation program confirms the following data:
- All the subnets that you specify exist.
- You provide one subnet for control-plane machines and one subnet for compute machines.
- The subnet’s CIDRs belong to the machine CIDR that you specified.
6.7.2.3. Division of permissions
Some individuals can create different resource in your clouds than others. For example, you might be able to create application-specific items, like instances, buckets, and load balancers, but not networking-related components such as VPCs, subnets, or ingress rules.
6.7.2.4. Isolation between clusters
If you deploy OpenShift Container Platform to an existing network, the isolation of cluster services is reduced in the following ways:
- You can install multiple OpenShift Container Platform clusters in the same VPC.
- ICMP ingress is allowed to the entire network.
- TCP 22 ingress (SSH) is allowed to the entire network.
- Control plane TCP 6443 ingress (Kubernetes API) is allowed to the entire network.
- Control plane TCP 22623 ingress (MCS) is allowed to the entire network.
6.7.3. Internet access for OpenShift Container Platform
In OpenShift Container Platform 4.7, you require access to the Internet to install your cluster.
You must have Internet access to:
- Access OpenShift Cluster Manager to download the installation program and perform subscription management. If the cluster has internet access and you do not disable Telemetry, that service automatically entitles your cluster.
- Access Quay.io to obtain the packages that are required to install your cluster.
- Obtain the packages that are required to perform cluster updates.
If your cluster cannot have direct Internet access, you can perform a restricted network installation on some types of infrastructure that you provision. During that process, you download the content that is required and use it to populate a mirror registry with the packages that you need to install a cluster and generate the installation program. With some installation types, the environment that you install your cluster in will not require Internet access. Before you update the cluster, you update the content of the mirror registry.
6.7.4. Generating an SSH private key and adding it to the agent
If you want to perform installation debugging or disaster recovery on your cluster, you must provide an SSH key to both your ssh-agent and the installation program. You can use this key to access the bootstrap machine in a public cluster to troubleshoot installation issues.
In a production environment, you require disaster recovery and debugging.
You can use this key to SSH into the master nodes as the user core. When you deploy the cluster, the key is added to the core user’s ~/.ssh/authorized_keys list.
You must use a local key, not one that you configured with platform-specific approaches such as AWS key pairs.
Procedure
If you do not have an SSH key that is configured for password-less authentication on your computer, create one. For example, on a computer that uses a Linux operating system, run the following command:
$ ssh-keygen -t ed25519 -N '' \ -f <path>/<file_name>1 - 1
- Specify the path and file name, such as
~/.ssh/id_rsa, of the new SSH key. If you have an existing key pair, ensure your public key is in the your~/.sshdirectory.
Running this command generates an SSH key that does not require a password in the location that you specified.
NoteIf you plan to install an OpenShift Container Platform cluster that uses FIPS Validated / Modules in Process cryptographic libraries on the
x86_64architecture, do not create a key that uses theed25519algorithm. Instead, create a key that uses thersaorecdsaalgorithm.Start the
ssh-agentprocess as a background task:$ eval "$(ssh-agent -s)"Example output
Agent pid 31874NoteIf your cluster is in FIPS mode, only use FIPS-compliant algorithms to generate the SSH key. The key must be either RSA or ECDSA.
Add your SSH private key to the
ssh-agent:$ ssh-add <path>/<file_name>1 Example output
Identity added: /home/<you>/<path>/<file_name> (<computer_name>)- 1
- Specify the path and file name for your SSH private key, such as
~/.ssh/id_rsa
Set the
GOOGLE_APPLICATION_CREDENTIALSenvironment variable to the full path to your service account private key file.$ export GOOGLE_APPLICATION_CREDENTIALS="<your_service_account_file>"Verify that the credentials were applied.
$ gcloud auth list
Next steps
- When you install OpenShift Container Platform, provide the SSH public key to the installation program.
6.7.5. Obtaining the installation program
Before you install OpenShift Container Platform, download the installation file on a local computer.
Prerequisites
- You have a computer that runs Linux or macOS, with 500 MB of local disk space
Procedure
- Access the Infrastructure Provider page on the OpenShift Cluster Manager site. If you have a Red Hat account, log in with your credentials. If you do not, create an account.
- Select your infrastructure provider.
Navigate to the page for your installation type, download the installation program for your operating system, and place the file in the directory where you will store the installation configuration files.
ImportantThe installation program creates several files on the computer that you use to install your cluster. You must keep the installation program and the files that the installation program creates after you finish installing the cluster. Both files are required to delete the cluster.
ImportantDeleting the files created by the installation program does not remove your cluster, even if the cluster failed during installation. To remove your cluster, complete the OpenShift Container Platform uninstallation procedures for your specific cloud provider.
Extract the installation program. For example, on a computer that uses a Linux operating system, run the following command:
$ tar xvf openshift-install-linux.tar.gz- Download your installation pull secret from the Red Hat OpenShift Cluster Manager. This pull secret allows you to authenticate with the services that are provided by the included authorities, including Quay.io, which serves the container images for OpenShift Container Platform components.
6.7.6. Creating the installation configuration file
You can customize the OpenShift Container Platform cluster you install on Google Cloud Platform (GCP).
Prerequisites
- Obtain the OpenShift Container Platform installation program and the pull secret for your cluster.
- Obtain service principal permissions at the subscription level.
Procedure
Create the
install-config.yamlfile.Change to the directory that contains the installation program and run the following command:
$ ./openshift-install create install-config --dir <installation_directory>1 - 1
- For
<installation_directory>, specify the directory name to store the files that the installation program creates.
ImportantSpecify an empty directory. Some installation assets, like bootstrap X.509 certificates have short expiration intervals, so you must not reuse an installation directory. If you want to reuse individual files from another cluster installation, you can copy them into your directory. However, the file names for the installation assets might change between releases. Use caution when copying installation files from an earlier OpenShift Container Platform version.
At the prompts, provide the configuration details for your cloud:
Optional: Select an SSH key to use to access your cluster machines.
NoteFor production OpenShift Container Platform clusters on which you want to perform installation debugging or disaster recovery, specify an SSH key that your
ssh-agentprocess uses.- Select gcp as the platform to target.
- If you have not configured the service account key for your GCP account on your computer, you must obtain it from GCP and paste the contents of the file or enter the absolute path to the file.
- Select the project ID to provision the cluster in. The default value is specified by the service account that you configured.
- Select the region to deploy the cluster to.
- Select the base domain to deploy the cluster to. The base domain corresponds to the public DNS zone that you created for your cluster.
- Enter a descriptive name for your cluster.
- Paste the pull secret from the Red Hat OpenShift Cluster Manager.
-
Modify the
install-config.yamlfile. You can find more information about the available parameters in the "Installation configuration parameters" section. Back up the
install-config.yamlfile so that you can use it to install multiple clusters.ImportantThe
install-config.yamlfile is consumed during the installation process. If you want to reuse the file, you must back it up now.
6.7.6.1. Installation configuration parameters
Before you deploy an OpenShift Container Platform cluster, you provide parameter values to describe your account on the cloud platform that hosts your cluster and optionally customize your cluster’s platform. When you create the install-config.yaml installation configuration file, you provide values for the required parameters through the command line. If you customize your cluster, you can modify the install-config.yaml file to provide more details about the platform.
After installation, you cannot modify these parameters in the install-config.yaml file.
The openshift-install command does not validate field names for parameters. If an incorrect name is specified, the related file or object is not created, and no error is reported. Ensure that the field names for any parameters that are specified are correct.
6.7.6.1.1. Required configuration parameters
Required installation configuration parameters are described in the following table:
| Parameter | Description | Values |
|---|---|---|
|
|
The API version for the | String |
|
|
The base domain of your cloud provider. The base domain is used to create routes to your OpenShift Container Platform cluster components. The full DNS name for your cluster is a combination of the |
A fully-qualified domain or subdomain name, such as |
|
|
Kubernetes resource | Object |
|
|
The name of the cluster. DNS records for the cluster are all subdomains of |
String of lowercase letters, hyphens ( |
|
|
The configuration for the specific platform upon which to perform the installation: | Object |
|
| Get a pull secret from the Red Hat OpenShift Cluster Manager to authenticate downloading container images for OpenShift Container Platform components from services such as Quay.io. |
|
6.7.6.1.2. Network configuration parameters
You can customize your installation configuration based on the requirements of your existing network infrastructure. For example, you can expand the IP address block for the cluster network or provide different IP address blocks than the defaults.
Only IPv4 addresses are supported.
| Parameter | Description | Values |
|---|---|---|
|
| The configuration for the cluster network. | Object Note
You cannot modify parameters specified by the |
|
| The cluster network provider Container Network Interface (CNI) plug-in to install. |
Either |
|
| The IP address blocks for pods.
The default value is If you specify multiple IP address blocks, the blocks must not overlap. | An array of objects. For example: |
|
|
Required if you use An IPv4 network. |
An IP address block in Classless Inter-Domain Routing (CIDR) notation. The prefix length for an IPv4 block is between |
|
|
The subnet prefix length to assign to each individual node. For example, if | A subnet prefix.
The default value is |
|
|
The IP address block for services. The default value is The OpenShift SDN and OVN-Kubernetes network providers support only a single IP address block for the service network. | An array with an IP address block in CIDR format. For example: |
|
| The IP address blocks for machines. If you specify multiple IP address blocks, the blocks must not overlap. | An array of objects. For example: |
|
|
Required if you use | An IP network block in CIDR notation.
For example, Note
Set the |
6.7.6.1.3. Optional configuration parameters
Optional installation configuration parameters are described in the following table:
| Parameter | Description | Values |
|---|---|---|
|
| A PEM-encoded X.509 certificate bundle that is added to the nodes' trusted certificate store. This trust bundle may also be used when a proxy has been configured. | String |
|
| The configuration for the machines that comprise the compute nodes. |
Array of |
|
|
Determines the instruction set architecture of the machines in the pool. Currently, heteregeneous clusters are not supported, so all pools must specify the same architecture. Valid values are | String |
|
|
Whether to enable or disable simultaneous multithreading, or Important If you disable simultaneous multithreading, ensure that your capacity planning accounts for the dramatically decreased machine performance. |
|
|
|
Required if you use |
|
|
|
Required if you use |
|
|
| The number of compute machines, which are also known as worker machines, to provision. |
A positive integer greater than or equal to |
|
| The configuration for the machines that comprise the control plane. |
Array of |
|
|
Determines the instruction set architecture of the machines in the pool. Currently, heterogeneous clusters are not supported, so all pools must specify the same architecture. Valid values are | String |
|
|
Whether to enable or disable simultaneous multithreading, or Important If you disable simultaneous multithreading, ensure that your capacity planning accounts for the dramatically decreased machine performance. |
|
|
|
Required if you use |
|
|
|
Required if you use |
|
|
| The number of control plane machines to provision. |
The only supported value is |
|
| The Cloud Credential Operator (CCO) mode. If no mode is specified, the CCO dynamically tries to determine the capabilities of the provided credentials, with a preference for mint mode on the platforms where multiple modes are supported. Note Not all CCO modes are supported for all cloud providers. For more information on CCO modes, see the Cloud Credential Operator entry in the Cluster Operators reference content. |
|
|
|
Enable or disable FIPS mode. The default is Important
The use of FIPS Validated / Modules in Process cryptographic libraries is only supported on OpenShift Container Platform deployments on the Note If you are using Azure File storage, you cannot enable FIPS mode. |
|
|
| Sources and repositories for the release-image content. |
Array of objects. Includes a |
|
|
Required if you use | String |
|
| Specify one or more repositories that may also contain the same images. | Array of strings |
|
| How to publish or expose the user-facing endpoints of your cluster, such as the Kubernetes API, OpenShift routes. |
|
|
| The SSH key or keys to authenticate access your cluster machines. Note
For production OpenShift Container Platform clusters on which you want to perform installation debugging or disaster recovery, specify an SSH key that your | One or more keys. For example: |
6.7.6.1.4. Additional Google Cloud Platform (GCP) configuration parameters
Additional GCP configuration parameters are described in the following table:
| Parameter | Description | Values |
|---|---|---|
|
| The name of the existing VPC that you want to deploy your cluster to. | String. |
|
| The name of the GCP region that hosts your cluster. |
Any valid region name, such as |
|
| The GCP machine type. | The GCP machine type. |
|
| The availability zones where the installation program creates machines for the specified MachinePool. |
A list of valid GCP availability zones, such as |
|
| The name of the existing subnet in your VPC that you want to deploy your control plane machines to. | The subnet name. |
|
| The name of the existing subnet in your VPC that you want to deploy your compute machines to. | The subnet name. |
|
| A list of license URLs that must be applied to the compute images. Important
The | Any license available with the license API, such as the license to enable nested virtualization. You cannot use this parameter with a mechanism that generates pre-built images. Using a license URL forces the installer to copy the source image before use. |
|
| The size of the disk in gigabytes (GB). | Any size between 16 GB and 65536 GB. |
|
| The type of disk. |
Either the default |
|
| The name of the customer managed encryption key to be used for control plane machine disk encryption. | The encryption key name. |
|
| For control plane machines, the name of the KMS key ring to which the KMS key belongs. | The KMS key ring name. |
|
| For control plane machines, the GCP location in which the key ring exists. For more information on KMS locations, see Google’s documentation on Cloud KMS locations. | The GCP location for the key ring. |
|
| For control plane machines, the ID of the project in which the KMS key ring exists. This value defaults to the VM project ID if not set. | The GCP project ID. |
|
| The name of the customer managed encryption key to be used for compute machine disk encryption. | The encryption key name. |
|
| For compute machines, the name of the KMS key ring to which the KMS key belongs. | The KMS key ring name. |
|
| For compute machines, the GCP location in which the key ring exists. For more information on KMS locations, see Google’s documentation on Cloud KMS locations. | The GCP location for the key ring. |
|
| For compute machines, the ID of the project in which the KMS key ring exists. This value defaults to the VM project ID if not set. | The GCP project ID. |
6.7.6.2. Sample customized install-config.yaml file for GCP
You can customize the install-config.yaml file to specify more details about your OpenShift Container Platform cluster’s platform or modify the values of the required parameters.
This sample YAML file is provided for reference only. You must obtain your install-config.yaml file by using the installation program and modify it.
apiVersion: v1
baseDomain: example.com
controlPlane:
hyperthreading: Enabled
name: master
platform:
gcp:
type: n2-standard-4
zones:
- us-central1-a
- us-central1-c
osDisk:
diskType: pd-ssd
diskSizeGB: 1024
encryptionKey:
kmsKey:
name: worker-key
keyRing: test-machine-keys
location: global
projectID: project-id
replicas: 3
compute:
- hyperthreading: Enabled
name: worker
platform:
gcp:
type: n2-standard-4
zones:
- us-central1-a
- us-central1-c
osDisk:
diskType: pd-standard
diskSizeGB: 128
encryptionKey:
kmsKey:
name: worker-key
keyRing: test-machine-keys
location: global
projectID: project-id
replicas: 3
metadata:
name: test-cluster
networking:
clusterNetwork:
- cidr: 10.128.0.0/14
hostPrefix: 23
machineNetwork:
- cidr: 10.0.0.0/16
networkType: OpenShiftSDN
serviceNetwork:
- 172.30.0.0/16
platform:
gcp:
projectID: openshift-production
region: us-central1
network: existing_vpc
controlPlaneSubnet: control_plane_subnet
computeSubnet: compute_subnet
pullSecret: '{"auths": ...}'
fips: false
sshKey: ssh-ed25519 AAAA... - 1 10 11 12 16
- Required. The installation program prompts you for this value.
- 2 6
- If you do not provide these parameters and values, the installation program provides the default value.
- 3 7
- The
controlPlanesection is a single mapping, but thecomputesection is a sequence of mappings. To meet the requirements of the different data structures, the first line of thecomputesection must begin with a hyphen,-, and the first line of thecontrolPlanesection must not. Only one control plane pool is used. - 4 8
- Whether to enable or disable simultaneous multithreading, or
hyperthreading. By default, simultaneous multithreading is enabled to increase the performance of your machines' cores. You can disable it by setting the parameter value toDisabled. If you disable simultaneous multithreading in some cluster machines, you must disable it in all cluster machines.ImportantIf you disable simultaneous multithreading, ensure that your capacity planning accounts for the dramatically decreased machine performance. Use larger machine types, such as
n1-standard-8, for your machines if you disable simultaneous multithreading. - 5 9
- Optional: The custom encryption key section to encrypt both virtual machines and persistent volumes. Your default compute service account must have the permissions granted to use your KMS key and have the correct IAM role assigned. The default service account name follows the
service-<project_number>@compute-system.iam.gserviceaccount.compattern. For more information on granting the correct permissions for your service account, see "Machine management" → "Creating machine sets" → "Creating a machine set on GCP". - 13
- Specify the name of an existing VPC.
- 14
- Specify the name of the existing subnet to deploy the control plane machines to. The subnet must belong to the VPC that you specified.
- 15
- Specify the name of the existing subnet to deploy the compute machines to. The subnet must belong to the VPC that you specified.
- 17
- Whether to enable or disable FIPS mode. By default, FIPS mode is not enabled. If FIPS mode is enabled, the Red Hat Enterprise Linux CoreOS (RHCOS) machines that OpenShift Container Platform runs on bypass the default Kubernetes cryptography suite and use the cryptography modules that are provided with RHCOS instead.Important
The use of FIPS Validated / Modules in Process cryptographic libraries is only supported on OpenShift Container Platform deployments on the
x86_64architecture. - 18
- You can optionally provide the
sshKeyvalue that you use to access the machines in your cluster.NoteFor production OpenShift Container Platform clusters on which you want to perform installation debugging or disaster recovery, specify an SSH key that your
ssh-agentprocess uses.
6.7.8. Deploying the cluster
You can install OpenShift Container Platform on a compatible cloud platform.
You can run the create cluster command of the installation program only once, during initial installation.
Prerequisites
- Configure an account with the cloud platform that hosts your cluster.
- Obtain the OpenShift Container Platform installation program and the pull secret for your cluster.
Procedure
Remove any existing GCP credentials that do not use the service account key for the GCP account that you configured for your cluster and that are stored in the following locations:
-
The
GOOGLE_CREDENTIALS,GOOGLE_CLOUD_KEYFILE_JSON, orGCLOUD_KEYFILE_JSONenvironment variables -
The
~/.gcp/osServiceAccount.jsonfile -
The
gcloud clidefault credentials
-
The
Change to the directory that contains the installation program and initialize the cluster deployment:
$ ./openshift-install create cluster --dir <installation_directory> \1 --log-level=info2 NoteIf the cloud provider account that you configured on your host does not have sufficient permissions to deploy the cluster, the installation process stops, and the missing permissions are displayed.
When the cluster deployment completes, directions for accessing your cluster, including a link to its web console and credentials for the
kubeadminuser, display in your terminal.Example output
... INFO Install complete! INFO To access the cluster as the system:admin user when using 'oc', run 'export KUBECONFIG=/home/myuser/install_dir/auth/kubeconfig' INFO Access the OpenShift web-console here: https://console-openshift-console.apps.mycluster.example.com INFO Login to the console with user: "kubeadmin", and password: "4vYBz-Ee6gm-ymBZj-Wt5AL" INFO Time elapsed: 36m22sNoteThe cluster access and credential information also outputs to
<installation_directory>/.openshift_install.logwhen an installation succeeds.Important-
The Ignition config files that the installation program generates contain certificates that expire after 24 hours, which are then renewed at that time. If the cluster is shut down before renewing the certificates and the cluster is later restarted after the 24 hours have elapsed, the cluster automatically recovers the expired certificates. The exception is that you must manually approve the pending
node-bootstrappercertificate signing requests (CSRs) to recover kubelet certificates. See the documentation for Recovering from expired control plane certificates for more information. - It is recommended that you use Ignition config files within 12 hours after they are generated because the 24-hour certificate rotates from 16 to 22 hours after the cluster is installed. By using the Ignition config files within 12 hours, you can avoid installation failure if the certificate update runs during installation.
ImportantYou must not delete the installation program or the files that the installation program creates. Both are required to delete the cluster.
-
The Ignition config files that the installation program generates contain certificates that expire after 24 hours, which are then renewed at that time. If the cluster is shut down before renewing the certificates and the cluster is later restarted after the 24 hours have elapsed, the cluster automatically recovers the expired certificates. The exception is that you must manually approve the pending
Optional: You can reduce the number of permissions for the service account that you used to install the cluster.
-
If you assigned the
Ownerrole to your service account, you can remove that role and replace it with theViewerrole. -
If you included the
Service Account Key Adminrole, you can remove it.
-
If you assigned the
6.7.9. Installing the OpenShift CLI by downloading the binary
You can install the OpenShift CLI (oc) to interact with OpenShift Container Platform from a command-line interface. You can install oc on Linux, Windows, or macOS.
If you installed an earlier version of oc, you cannot use it to complete all of the commands in OpenShift Container Platform 4.7. Download and install the new version of oc.
6.7.9.1. Installing the OpenShift CLI on Linux
You can install the OpenShift CLI (oc) binary on Linux by using the following procedure.
Procedure
- Navigate to the OpenShift Container Platform downloads page on the Red Hat Customer Portal.
- Select the appropriate version in the Version drop-down menu.
- Click Download Now next to the OpenShift v4.7 Linux Client entry and save the file.
Unpack the archive:
$ tar xvzf <file>Place the
ocbinary in a directory that is on yourPATH.To check your
PATH, execute the following command:$ echo $PATH
After you install the OpenShift CLI, it is available using the oc command:
$ oc <command>6.7.9.2. Installing the OpenShift CLI on Windows
You can install the OpenShift CLI (oc) binary on Windows by using the following procedure.
Procedure
- Navigate to the OpenShift Container Platform downloads page on the Red Hat Customer Portal.
- Select the appropriate version in the Version drop-down menu.
- Click Download Now next to the OpenShift v4.7 Windows Client entry and save the file.
- Unzip the archive with a ZIP program.
Move the
ocbinary to a directory that is on yourPATH.To check your
PATH, open the command prompt and execute the following command:C:\> path
After you install the OpenShift CLI, it is available using the oc command:
C:\> oc <command>6.7.9.3. Installing the OpenShift CLI on macOS
You can install the OpenShift CLI (oc) binary on macOS by using the following procedure.
Procedure
- Navigate to the OpenShift Container Platform downloads page on the Red Hat Customer Portal.
- Select the appropriate version in the Version drop-down menu.
- Click Download Now next to the OpenShift v4.7 MacOSX Client entry and save the file.
- Unpack and unzip the archive.
Move the
ocbinary to a directory on your PATH.To check your
PATH, open a terminal and execute the following command:$ echo $PATH
After you install the OpenShift CLI, it is available using the oc command:
$ oc <command>6.7.10. Logging in to the cluster by using the CLI
You can log in to your cluster as a default system user by exporting the cluster kubeconfig file. The kubeconfig file contains information about the cluster that is used by the CLI to connect a client to the correct cluster and API server. The file is specific to a cluster and is created during OpenShift Container Platform installation.
Prerequisites
- You deployed an OpenShift Container Platform cluster.
-
You installed the
ocCLI.
Procedure
Export the
kubeadmincredentials:$ export KUBECONFIG=<installation_directory>/auth/kubeconfig1 - 1
- For
<installation_directory>, specify the path to the directory that you stored the installation files in.
Verify you can run
occommands successfully using the exported configuration:$ oc whoamiExample output
system:admin
6.7.11. Telemetry access for OpenShift Container Platform
In OpenShift Container Platform 4.7, the Telemetry service, which runs by default to provide metrics about cluster health and the success of updates, requires internet access. If your cluster is connected to the internet, Telemetry runs automatically, and your cluster is registered to OpenShift Cluster Manager.
After you confirm that your OpenShift Cluster Manager inventory is correct, either maintained automatically by Telemetry or manually by using OpenShift Cluster Manager, use subscription watch to track your OpenShift Container Platform subscriptions at the account or multi-cluster level.
6.7.12. Next steps
- Customize your cluster.
- If necessary, you can opt out of remote health reporting.
6.8. Installing a private cluster on GCP
In OpenShift Container Platform version 4.7, you can install a private cluster into an existing VPC on Google Cloud Platform (GCP). The installation program provisions the rest of the required infrastructure, which you can further customize. To customize the installation, you modify parameters in the install-config.yaml file before you install the cluster.
6.8.1. Prerequisites
- Review details about the OpenShift Container Platform installation and update processes.
- Configure a GCP account to host the cluster.
- If you use a firewall, you must configure it to allow the sites that your cluster requires access to.
- If you do not allow the system to manage identity and access management (IAM), then a cluster administrator can manually create and maintain IAM credentials. Manual mode can also be used in environments where the cloud IAM APIs are not reachable.
6.8.2. Private clusters
You can deploy a private OpenShift Container Platform cluster that does not expose external endpoints. Private clusters are accessible from only an internal network and are not visible to the Internet.
By default, OpenShift Container Platform is provisioned to use publicly-accessible DNS and endpoints. A private cluster sets the DNS, Ingress Controller, and API server to private when you deploy your cluster. This means that the cluster resources are only accessible from your internal network and are not visible to the internet.
To deploy a private cluster, you must use existing networking that meets your requirements. Your cluster resources might be shared between other clusters on the network.
Additionally, you must deploy a private cluster from a machine that has access the API services for the cloud you provision to, the hosts on the network that you provision, and to the internet to obtain installation media. You can use any machine that meets these access requirements and follows your company’s guidelines. For example, this machine can be a bastion host on your cloud network or a machine that has access to the network through a VPN.
6.8.2.1. Private clusters in GCP
To create a private cluster on Google Cloud Platform (GCP), you must provide an existing private VPC and subnets to host the cluster. The installation program must also be able to resolve the DNS records that the cluster requires. The installation program configures the Ingress Operator and API server for only internal traffic.
The cluster still requires access to Internet to access the GCP APIs.
The following items are not required or created when you install a private cluster:
- Public subnets
- Public network load balancers, which support public ingress
-
A public DNS zone that matches the
baseDomainfor the cluster
The installation program does use the baseDomain that you specify to create a private DNS zone and the required records for the cluster. The cluster is configured so that the Operators do not create public records for the cluster and all cluster machines are placed in the private subnets that you specify.
Because it is not possible to limit access to external load balancers based on source tags, the private cluster uses only internal load balancers to allow access to internal instances.
The internal load balancer relies on instance groups rather than the target pools that the network load balancers use. The installation program creates instance groups for each zone, even if there is no instance in that group.
- The cluster IP address is internal only.
- One forwarding rule manages both the Kubernetes API and machine config server ports.
- The backend service is comprised of each zone’s instance group and, while it exists, the bootstrap instance group.
- The firewall uses a single rule that is based on only internal source ranges.
6.8.2.1.1. Limitations
No health check for the Machine config server, /healthz, runs because of a difference in load balancer functionality. Two internal load balancers cannot share a single IP address, but two network load balancers can share a single external IP address. Instead, the health of an instance is determined entirely by the /readyz check on port 6443.
6.8.3. About using a custom VPC
In OpenShift Container Platform 4.7, you can deploy a cluster into an existing VPC in Google Cloud Platform (GCP). If you do, you must also use existing subnets within the VPC and routing rules.
By deploying OpenShift Container Platform into an existing GCP VPC, you might be able to avoid limit constraints in new accounts or more easily abide by the operational constraints that your company’s guidelines set. This is a good option to use if you cannot obtain the infrastructure creation permissions that are required to create the VPC yourself.
6.8.3.1. Requirements for using your VPC
The installation program will no longer create the following components:
- VPC
- Subnets
- Cloud router
- Cloud NAT
- NAT IP addresses
If you use a custom VPC, you must correctly configure it and its subnets for the installation program and the cluster to use. The installation program cannot subdivide network ranges for the cluster to use, set route tables for the subnets, or set VPC options like DHCP, so you must do so before you install the cluster.
Your VPC and subnets must meet the following characteristics:
- The VPC must be in the same GCP project that you deploy the OpenShift Container Platform cluster to.
- To allow access to the Internet from the control plane and compute machines, you must configure cloud NAT on the subnets to allow egress to it. These machines do not have a public address. Even if you do not require access to the Internet, you must allow egress to the VPC network to obtain the installation program and images. Because multiple cloud NATs cannot be configured on the shared subnets, the installation program cannot configure it.
To ensure that the subnets that you provide are suitable, the installation program confirms the following data:
- All the subnets that you specify exist and belong to the VPC that you specified.
- The subnet CIDRs belong to the machine CIDR.
- You must provide a subnet to deploy the cluster control plane and compute machines to. You can use the same subnet for both machine types.
If you destroy a cluster that uses an existing VPC, the VPC is not deleted.
6.8.3.2. Division of permissions
Starting with OpenShift Container Platform 4.3, you do not need all of the permissions that are required for an installation program-provisioned infrastructure cluster to deploy a cluster. This change mimics the division of permissions that you might have at your company: some individuals can create different resources in your clouds than others. For example, you might be able to create application-specific items, like instances, buckets, and load balancers, but not networking-related components such as VPCs, subnets, or Ingress rules.
The GCP credentials that you use when you create your cluster do not need the networking permissions that are required to make VPCs and core networking components within the VPC, such as subnets, routing tables, internet gateways, NAT, and VPN. You still need permission to make the application resources that the machines within the cluster require, such as load balancers, security groups, storage, and nodes.
6.8.3.3. Isolation between clusters
If you deploy OpenShift Container Platform to an existing network, the isolation of cluster services is preserved by firewall rules that reference the machines in your cluster by the cluster’s infrastructure ID. Only traffic within the cluster is allowed.
If you deploy multiple clusters to the same VPC, the following components might share access between clusters:
- The API, which is globally available with an external publishing strategy or available throughout the network in an internal publishing strategy
- Debugging tools, such as ports on VM instances that are open to the machine CIDR for SSH and ICMP access
6.8.4. Internet access for OpenShift Container Platform
In OpenShift Container Platform 4.7, you require access to the Internet to install your cluster.
You must have Internet access to:
- Access OpenShift Cluster Manager to download the installation program and perform subscription management. If the cluster has internet access and you do not disable Telemetry, that service automatically entitles your cluster.
- Access Quay.io to obtain the packages that are required to install your cluster.
- Obtain the packages that are required to perform cluster updates.
If your cluster cannot have direct Internet access, you can perform a restricted network installation on some types of infrastructure that you provision. During that process, you download the content that is required and use it to populate a mirror registry with the packages that you need to install a cluster and generate the installation program. With some installation types, the environment that you install your cluster in will not require Internet access. Before you update the cluster, you update the content of the mirror registry.
6.8.5. Generating an SSH private key and adding it to the agent
If you want to perform installation debugging or disaster recovery on your cluster, you must provide an SSH key to both your ssh-agent and the installation program. You can use this key to access the bootstrap machine in a public cluster to troubleshoot installation issues.
In a production environment, you require disaster recovery and debugging.
You can use this key to SSH into the master nodes as the user core. When you deploy the cluster, the key is added to the core user’s ~/.ssh/authorized_keys list.
You must use a local key, not one that you configured with platform-specific approaches such as AWS key pairs.
Procedure
If you do not have an SSH key that is configured for password-less authentication on your computer, create one. For example, on a computer that uses a Linux operating system, run the following command:
$ ssh-keygen -t ed25519 -N '' \ -f <path>/<file_name>1 - 1
- Specify the path and file name, such as
~/.ssh/id_rsa, of the new SSH key. If you have an existing key pair, ensure your public key is in the your~/.sshdirectory.
Running this command generates an SSH key that does not require a password in the location that you specified.
NoteIf you plan to install an OpenShift Container Platform cluster that uses FIPS Validated / Modules in Process cryptographic libraries on the
x86_64architecture, do not create a key that uses theed25519algorithm. Instead, create a key that uses thersaorecdsaalgorithm.Start the
ssh-agentprocess as a background task:$ eval "$(ssh-agent -s)"Example output
Agent pid 31874NoteIf your cluster is in FIPS mode, only use FIPS-compliant algorithms to generate the SSH key. The key must be either RSA or ECDSA.
Add your SSH private key to the
ssh-agent:$ ssh-add <path>/<file_name>1 Example output
Identity added: /home/<you>/<path>/<file_name> (<computer_name>)- 1
- Specify the path and file name for your SSH private key, such as
~/.ssh/id_rsa
Set the
GOOGLE_APPLICATION_CREDENTIALSenvironment variable to the full path to your service account private key file.$ export GOOGLE_APPLICATION_CREDENTIALS="<your_service_account_file>"Verify that the credentials were applied.
$ gcloud auth list
Next steps
- When you install OpenShift Container Platform, provide the SSH public key to the installation program.
6.8.6. Obtaining the installation program
Before you install OpenShift Container Platform, download the installation file on a local computer.
Prerequisites
- You have a computer that runs Linux or macOS, with 500 MB of local disk space
Procedure
- Access the Infrastructure Provider page on the OpenShift Cluster Manager site. If you have a Red Hat account, log in with your credentials. If you do not, create an account.
- Select your infrastructure provider.
Navigate to the page for your installation type, download the installation program for your operating system, and place the file in the directory where you will store the installation configuration files.
ImportantThe installation program creates several files on the computer that you use to install your cluster. You must keep the installation program and the files that the installation program creates after you finish installing the cluster. Both files are required to delete the cluster.
ImportantDeleting the files created by the installation program does not remove your cluster, even if the cluster failed during installation. To remove your cluster, complete the OpenShift Container Platform uninstallation procedures for your specific cloud provider.
Extract the installation program. For example, on a computer that uses a Linux operating system, run the following command:
$ tar xvf openshift-install-linux.tar.gz- Download your installation pull secret from the Red Hat OpenShift Cluster Manager. This pull secret allows you to authenticate with the services that are provided by the included authorities, including Quay.io, which serves the container images for OpenShift Container Platform components.
6.8.7. Manually creating the installation configuration file
For installations of a private OpenShift Container Platform cluster that are only accessible from an internal network and are not visible to the Internet, you must manually generate your installation configuration file.
Prerequisites
- Obtain the OpenShift Container Platform installation program and the access token for your cluster.
Procedure
Create an installation directory to store your required installation assets in:
$ mkdir <installation_directory>ImportantYou must create a directory. Some installation assets, like bootstrap X.509 certificates have short expiration intervals, so you must not reuse an installation directory. If you want to reuse individual files from another cluster installation, you can copy them into your directory. However, the file names for the installation assets might change between releases. Use caution when copying installation files from an earlier OpenShift Container Platform version.
Customize the following
install-config.yamlfile template and save it in the<installation_directory>.NoteYou must name this configuration file
install-config.yaml.Back up the
install-config.yamlfile so that you can use it to install multiple clusters.ImportantThe
install-config.yamlfile is consumed during the next step of the installation process. You must back it up now.
6.8.7.1. Installation configuration parameters
Before you deploy an OpenShift Container Platform cluster, you provide parameter values to describe your account on the cloud platform that hosts your cluster and optionally customize your cluster’s platform. When you create the install-config.yaml installation configuration file, you provide values for the required parameters through the command line. If you customize your cluster, you can modify the install-config.yaml file to provide more details about the platform.
After installation, you cannot modify these parameters in the install-config.yaml file.
The openshift-install command does not validate field names for parameters. If an incorrect name is specified, the related file or object is not created, and no error is reported. Ensure that the field names for any parameters that are specified are correct.
6.8.7.1.1. Required configuration parameters
Required installation configuration parameters are described in the following table:
| Parameter | Description | Values |
|---|---|---|
|
|
The API version for the | String |
|
|
The base domain of your cloud provider. The base domain is used to create routes to your OpenShift Container Platform cluster components. The full DNS name for your cluster is a combination of the |
A fully-qualified domain or subdomain name, such as |
|
|
Kubernetes resource | Object |
|
|
The name of the cluster. DNS records for the cluster are all subdomains of |
String of lowercase letters, hyphens ( |
|
|
The configuration for the specific platform upon which to perform the installation: | Object |
|
| Get a pull secret from the Red Hat OpenShift Cluster Manager to authenticate downloading container images for OpenShift Container Platform components from services such as Quay.io. |
|
6.8.7.1.2. Network configuration parameters
You can customize your installation configuration based on the requirements of your existing network infrastructure. For example, you can expand the IP address block for the cluster network or provide different IP address blocks than the defaults.
Only IPv4 addresses are supported.
| Parameter | Description | Values |
|---|---|---|
|
| The configuration for the cluster network. | Object Note
You cannot modify parameters specified by the |
|
| The cluster network provider Container Network Interface (CNI) plug-in to install. |
Either |
|
| The IP address blocks for pods.
The default value is If you specify multiple IP address blocks, the blocks must not overlap. | An array of objects. For example: |
|
|
Required if you use An IPv4 network. |
An IP address block in Classless Inter-Domain Routing (CIDR) notation. The prefix length for an IPv4 block is between |
|
|
The subnet prefix length to assign to each individual node. For example, if | A subnet prefix.
The default value is |
|
|
The IP address block for services. The default value is The OpenShift SDN and OVN-Kubernetes network providers support only a single IP address block for the service network. | An array with an IP address block in CIDR format. For example: |
|
| The IP address blocks for machines. If you specify multiple IP address blocks, the blocks must not overlap. | An array of objects. For example: |
|
|
Required if you use | An IP network block in CIDR notation.
For example, Note
Set the |
6.8.7.1.3. Optional configuration parameters
Optional installation configuration parameters are described in the following table:
| Parameter | Description | Values |
|---|---|---|
|
| A PEM-encoded X.509 certificate bundle that is added to the nodes' trusted certificate store. This trust bundle may also be used when a proxy has been configured. | String |
|
| The configuration for the machines that comprise the compute nodes. |
Array of |
|
|
Determines the instruction set architecture of the machines in the pool. Currently, heteregeneous clusters are not supported, so all pools must specify the same architecture. Valid values are | String |
|
|
Whether to enable or disable simultaneous multithreading, or Important If you disable simultaneous multithreading, ensure that your capacity planning accounts for the dramatically decreased machine performance. |
|
|
|
Required if you use |
|
|
|
Required if you use |
|
|
| The number of compute machines, which are also known as worker machines, to provision. |
A positive integer greater than or equal to |
|
| The configuration for the machines that comprise the control plane. |
Array of |
|
|
Determines the instruction set architecture of the machines in the pool. Currently, heterogeneous clusters are not supported, so all pools must specify the same architecture. Valid values are | String |
|
|
Whether to enable or disable simultaneous multithreading, or Important If you disable simultaneous multithreading, ensure that your capacity planning accounts for the dramatically decreased machine performance. |
|
|
|
Required if you use |
|
|
|
Required if you use |
|
|
| The number of control plane machines to provision. |
The only supported value is |
|
| The Cloud Credential Operator (CCO) mode. If no mode is specified, the CCO dynamically tries to determine the capabilities of the provided credentials, with a preference for mint mode on the platforms where multiple modes are supported. Note Not all CCO modes are supported for all cloud providers. For more information on CCO modes, see the Cloud Credential Operator entry in the Cluster Operators reference content. |
|
|
|
Enable or disable FIPS mode. The default is Important
The use of FIPS Validated / Modules in Process cryptographic libraries is only supported on OpenShift Container Platform deployments on the Note If you are using Azure File storage, you cannot enable FIPS mode. |
|
|
| Sources and repositories for the release-image content. |
Array of objects. Includes a |
|
|
Required if you use | String |
|
| Specify one or more repositories that may also contain the same images. | Array of strings |
|
| How to publish or expose the user-facing endpoints of your cluster, such as the Kubernetes API, OpenShift routes. |
|
|
| The SSH key or keys to authenticate access your cluster machines. Note
For production OpenShift Container Platform clusters on which you want to perform installation debugging or disaster recovery, specify an SSH key that your | One or more keys. For example: |
6.8.7.1.4. Additional Google Cloud Platform (GCP) configuration parameters
Additional GCP configuration parameters are described in the following table:
| Parameter | Description | Values |
|---|---|---|
|
| The name of the existing VPC that you want to deploy your cluster to. | String. |
|
| The name of the GCP region that hosts your cluster. |
Any valid region name, such as |
|
| The GCP machine type. | The GCP machine type. |
|
| The availability zones where the installation program creates machines for the specified MachinePool. |
A list of valid GCP availability zones, such as |
|
| The name of the existing subnet in your VPC that you want to deploy your control plane machines to. | The subnet name. |
|
| The name of the existing subnet in your VPC that you want to deploy your compute machines to. | The subnet name. |
|
| A list of license URLs that must be applied to the compute images. Important
The | Any license available with the license API, such as the license to enable nested virtualization. You cannot use this parameter with a mechanism that generates pre-built images. Using a license URL forces the installer to copy the source image before use. |
|
| The size of the disk in gigabytes (GB). | Any size between 16 GB and 65536 GB. |
|
| The type of disk. |
Either the default |
|
| The name of the customer managed encryption key to be used for control plane machine disk encryption. | The encryption key name. |
|
| For control plane machines, the name of the KMS key ring to which the KMS key belongs. | The KMS key ring name. |
|
| For control plane machines, the GCP location in which the key ring exists. For more information on KMS locations, see Google’s documentation on Cloud KMS locations. | The GCP location for the key ring. |
|
| For control plane machines, the ID of the project in which the KMS key ring exists. This value defaults to the VM project ID if not set. | The GCP project ID. |
|
| The name of the customer managed encryption key to be used for compute machine disk encryption. | The encryption key name. |
|
| For compute machines, the name of the KMS key ring to which the KMS key belongs. | The KMS key ring name. |
|
| For compute machines, the GCP location in which the key ring exists. For more information on KMS locations, see Google’s documentation on Cloud KMS locations. | The GCP location for the key ring. |
|
| For compute machines, the ID of the project in which the KMS key ring exists. This value defaults to the VM project ID if not set. | The GCP project ID. |
6.8.7.2. Sample customized install-config.yaml file for GCP
You can customize the install-config.yaml file to specify more details about your OpenShift Container Platform cluster’s platform or modify the values of the required parameters.
This sample YAML file is provided for reference only. You must obtain your install-config.yaml file by using the installation program and modify it.
apiVersion: v1
baseDomain: example.com
controlPlane:
hyperthreading: Enabled
name: master
platform:
gcp:
type: n2-standard-4
zones:
- us-central1-a
- us-central1-c
osDisk:
diskType: pd-ssd
diskSizeGB: 1024
encryptionKey:
kmsKey:
name: worker-key
keyRing: test-machine-keys
location: global
projectID: project-id
replicas: 3
compute:
- hyperthreading: Enabled
name: worker
platform:
gcp:
type: n2-standard-4
zones:
- us-central1-a
- us-central1-c
osDisk:
diskType: pd-standard
diskSizeGB: 128
encryptionKey:
kmsKey:
name: worker-key
keyRing: test-machine-keys
location: global
projectID: project-id
replicas: 3
metadata:
name: test-cluster
networking:
clusterNetwork:
- cidr: 10.128.0.0/14
hostPrefix: 23
machineNetwork:
- cidr: 10.0.0.0/16
networkType: OpenShiftSDN
serviceNetwork:
- 172.30.0.0/16
platform:
gcp:
projectID: openshift-production
region: us-central1
network: existing_vpc
controlPlaneSubnet: control_plane_subnet
computeSubnet: compute_subnet
pullSecret: '{"auths": ...}'
fips: false
sshKey: ssh-ed25519 AAAA...
publish: Internal - 1 10 11 12 16
- Required. The installation program prompts you for this value.
- 2 6
- If you do not provide these parameters and values, the installation program provides the default value.
- 3 7
- The
controlPlanesection is a single mapping, but thecomputesection is a sequence of mappings. To meet the requirements of the different data structures, the first line of thecomputesection must begin with a hyphen,-, and the first line of thecontrolPlanesection must not. Only one control plane pool is used. - 4 8
- Whether to enable or disable simultaneous multithreading, or
hyperthreading. By default, simultaneous multithreading is enabled to increase the performance of your machines' cores. You can disable it by setting the parameter value toDisabled. If you disable simultaneous multithreading in some cluster machines, you must disable it in all cluster machines.ImportantIf you disable simultaneous multithreading, ensure that your capacity planning accounts for the dramatically decreased machine performance. Use larger machine types, such as
n1-standard-8, for your machines if you disable simultaneous multithreading. - 5 9
- Optional: The custom encryption key section to encrypt both virtual machines and persistent volumes. Your default compute service account must have the permissions granted to use your KMS key and have the correct IAM role assigned. The default service account name follows the
service-<project_number>@compute-system.iam.gserviceaccount.compattern. For more information on granting the correct permissions for your service account, see "Machine management" → "Creating machine sets" → "Creating a machine set on GCP". - 13
- Specify the name of an existing VPC.
- 14
- Specify the name of the existing subnet to deploy the control plane machines to. The subnet must belong to the VPC that you specified.
- 15
- Specify the name of the existing subnet to deploy the compute machines to. The subnet must belong to the VPC that you specified.
- 17
- Whether to enable or disable FIPS mode. By default, FIPS mode is not enabled. If FIPS mode is enabled, the Red Hat Enterprise Linux CoreOS (RHCOS) machines that OpenShift Container Platform runs on bypass the default Kubernetes cryptography suite and use the cryptography modules that are provided with RHCOS instead.Important
The use of FIPS Validated / Modules in Process cryptographic libraries is only supported on OpenShift Container Platform deployments on the
x86_64architecture. - 18
- You can optionally provide the
sshKeyvalue that you use to access the machines in your cluster.NoteFor production OpenShift Container Platform clusters on which you want to perform installation debugging or disaster recovery, specify an SSH key that your
ssh-agentprocess uses. - 19
- How to publish the user-facing endpoints of your cluster. Set
publishtoInternalto deploy a private cluster, which cannot be accessed from the Internet. The default value isExternal.
6.8.9. Deploying the cluster
You can install OpenShift Container Platform on a compatible cloud platform.
You can run the create cluster command of the installation program only once, during initial installation.
Prerequisites
- Configure an account with the cloud platform that hosts your cluster.
- Obtain the OpenShift Container Platform installation program and the pull secret for your cluster.
Procedure
Change to the directory that contains the installation program and initialize the cluster deployment:
$ ./openshift-install create cluster --dir <installation_directory> \1 --log-level=info2 NoteIf the cloud provider account that you configured on your host does not have sufficient permissions to deploy the cluster, the installation process stops, and the missing permissions are displayed.
When the cluster deployment completes, directions for accessing your cluster, including a link to its web console and credentials for the
kubeadminuser, display in your terminal.Example output
... INFO Install complete! INFO To access the cluster as the system:admin user when using 'oc', run 'export KUBECONFIG=/home/myuser/install_dir/auth/kubeconfig' INFO Access the OpenShift web-console here: https://console-openshift-console.apps.mycluster.example.com INFO Login to the console with user: "kubeadmin", and password: "4vYBz-Ee6gm-ymBZj-Wt5AL" INFO Time elapsed: 36m22sNoteThe cluster access and credential information also outputs to
<installation_directory>/.openshift_install.logwhen an installation succeeds.Important-
The Ignition config files that the installation program generates contain certificates that expire after 24 hours, which are then renewed at that time. If the cluster is shut down before renewing the certificates and the cluster is later restarted after the 24 hours have elapsed, the cluster automatically recovers the expired certificates. The exception is that you must manually approve the pending
node-bootstrappercertificate signing requests (CSRs) to recover kubelet certificates. See the documentation for Recovering from expired control plane certificates for more information. - It is recommended that you use Ignition config files within 12 hours after they are generated because the 24-hour certificate rotates from 16 to 22 hours after the cluster is installed. By using the Ignition config files within 12 hours, you can avoid installation failure if the certificate update runs during installation.
ImportantYou must not delete the installation program or the files that the installation program creates. Both are required to delete the cluster.
-
The Ignition config files that the installation program generates contain certificates that expire after 24 hours, which are then renewed at that time. If the cluster is shut down before renewing the certificates and the cluster is later restarted after the 24 hours have elapsed, the cluster automatically recovers the expired certificates. The exception is that you must manually approve the pending
6.8.10. Installing the OpenShift CLI by downloading the binary
You can install the OpenShift CLI (oc) to interact with OpenShift Container Platform from a command-line interface. You can install oc on Linux, Windows, or macOS.
If you installed an earlier version of oc, you cannot use it to complete all of the commands in OpenShift Container Platform 4.7. Download and install the new version of oc.
6.8.10.1. Installing the OpenShift CLI on Linux
You can install the OpenShift CLI (oc) binary on Linux by using the following procedure.
Procedure
- Navigate to the OpenShift Container Platform downloads page on the Red Hat Customer Portal.
- Select the appropriate version in the Version drop-down menu.
- Click Download Now next to the OpenShift v4.7 Linux Client entry and save the file.
Unpack the archive:
$ tar xvzf <file>Place the
ocbinary in a directory that is on yourPATH.To check your
PATH, execute the following command:$ echo $PATH
After you install the OpenShift CLI, it is available using the oc command:
$ oc <command>6.8.10.2. Installing the OpenShift CLI on Windows
You can install the OpenShift CLI (oc) binary on Windows by using the following procedure.
Procedure
- Navigate to the OpenShift Container Platform downloads page on the Red Hat Customer Portal.
- Select the appropriate version in the Version drop-down menu.
- Click Download Now next to the OpenShift v4.7 Windows Client entry and save the file.
- Unzip the archive with a ZIP program.
Move the
ocbinary to a directory that is on yourPATH.To check your
PATH, open the command prompt and execute the following command:C:\> path
After you install the OpenShift CLI, it is available using the oc command:
C:\> oc <command>6.8.10.3. Installing the OpenShift CLI on macOS
You can install the OpenShift CLI (oc) binary on macOS by using the following procedure.
Procedure
- Navigate to the OpenShift Container Platform downloads page on the Red Hat Customer Portal.
- Select the appropriate version in the Version drop-down menu.
- Click Download Now next to the OpenShift v4.7 MacOSX Client entry and save the file.
- Unpack and unzip the archive.
Move the
ocbinary to a directory on your PATH.To check your
PATH, open a terminal and execute the following command:$ echo $PATH
After you install the OpenShift CLI, it is available using the oc command:
$ oc <command>6.8.11. Logging in to the cluster by using the CLI
You can log in to your cluster as a default system user by exporting the cluster kubeconfig file. The kubeconfig file contains information about the cluster that is used by the CLI to connect a client to the correct cluster and API server. The file is specific to a cluster and is created during OpenShift Container Platform installation.
Prerequisites
- You deployed an OpenShift Container Platform cluster.
-
You installed the
ocCLI.
Procedure
Export the
kubeadmincredentials:$ export KUBECONFIG=<installation_directory>/auth/kubeconfig1 - 1
- For
<installation_directory>, specify the path to the directory that you stored the installation files in.
Verify you can run
occommands successfully using the exported configuration:$ oc whoamiExample output
system:admin
6.8.12. Telemetry access for OpenShift Container Platform
In OpenShift Container Platform 4.7, the Telemetry service, which runs by default to provide metrics about cluster health and the success of updates, requires internet access. If your cluster is connected to the internet, Telemetry runs automatically, and your cluster is registered to OpenShift Cluster Manager.
After you confirm that your OpenShift Cluster Manager inventory is correct, either maintained automatically by Telemetry or manually by using OpenShift Cluster Manager, use subscription watch to track your OpenShift Container Platform subscriptions at the account or multi-cluster level.
6.8.13. Next steps
- Customize your cluster.
- If necessary, you can opt out of remote health reporting.
6.9. Installing a cluster on user-provisioned infrastructure in GCP by using Deployment Manager templates
In OpenShift Container Platform version 4.7, you can install a cluster on Google Cloud Platform (GCP) that uses infrastructure that you provide.
The steps for performing a user-provided infrastructure install are outlined here. Several Deployment Manager templates are provided to assist in completing these steps or to help model your own. You are also free to create the required resources through other methods.
The steps for performing a user-provisioned infrastructure installation are provided as an example only. Installing a cluster with infrastructure you provide requires knowledge of the cloud provider and the installation process of OpenShift Container Platform. Several Deployment Manager templates are provided to assist in completing these steps or to help model your own. You are also free to create the required resources through other methods; the templates are just an example.
6.9.1. Prerequisites
- Review details about the OpenShift Container Platform installation and update processes.
- If you use a firewall and plan to use telemetry, you must configure the firewall to allow the sites that your cluster requires access to.
If you do not allow the system to manage identity and access management (IAM), then a cluster administrator can manually create and maintain IAM credentials. Manual mode can also be used in environments where the cloud IAM APIs are not reachable.
NoteBe sure to also review this site list if you are configuring a proxy.
6.9.2. Certificate signing requests management
Because your cluster has limited access to automatic machine management when you use infrastructure that you provision, you must provide a mechanism for approving cluster certificate signing requests (CSRs) after installation. The kube-controller-manager only approves the kubelet client CSRs. The machine-approver cannot guarantee the validity of a serving certificate that is requested by using kubelet credentials because it cannot confirm that the correct machine issued the request. You must determine and implement a method of verifying the validity of the kubelet serving certificate requests and approving them.
6.9.3. Internet access for OpenShift Container Platform
In OpenShift Container Platform 4.7, you require access to the Internet to install your cluster.
You must have Internet access to:
- Access OpenShift Cluster Manager to download the installation program and perform subscription management. If the cluster has internet access and you do not disable Telemetry, that service automatically entitles your cluster.
- Access Quay.io to obtain the packages that are required to install your cluster.
- Obtain the packages that are required to perform cluster updates.
If your cluster cannot have direct Internet access, you can perform a restricted network installation on some types of infrastructure that you provision. During that process, you download the content that is required and use it to populate a mirror registry with the packages that you need to install a cluster and generate the installation program. With some installation types, the environment that you install your cluster in will not require Internet access. Before you update the cluster, you update the content of the mirror registry.
6.9.4. Configuring your GCP project
Before you can install OpenShift Container Platform, you must configure a Google Cloud Platform (GCP) project to host it.
6.9.4.1. Creating a GCP project
To install OpenShift Container Platform, you must create a project in your Google Cloud Platform (GCP) account to host the cluster.
Procedure
Create a project to host your OpenShift Container Platform cluster. See Creating and Managing Projects in the GCP documentation.
ImportantYour GCP project must use the Premium Network Service Tier if you are using installer-provisioned infrastructure. The Standard Network Service Tier is not supported for clusters installed using the installation program. The installation program configures internal load balancing for the
api-int.<cluster_name>.<base_domain>URL; the Premium Tier is required for internal load balancing.
6.9.4.2. Enabling API services in GCP
Your Google Cloud Platform (GCP) project requires access to several API services to complete OpenShift Container Platform installation.
Prerequisites
- You created a project to host your cluster.
Procedure
Enable the following required API services in the project that hosts your cluster. See Enabling services in the GCP documentation.
Expand Table 6.29. Required API services API service Console service name Cloud Deployment Manager V2 API
deploymentmanager.googleapis.comCompute Engine API
compute.googleapis.comGoogle Cloud APIs
cloudapis.googleapis.comCloud Resource Manager API
cloudresourcemanager.googleapis.comGoogle DNS API
dns.googleapis.comIAM Service Account Credentials API
iamcredentials.googleapis.comIdentity and Access Management (IAM) API
iam.googleapis.comService Management API
servicemanagement.googleapis.comService Usage API
serviceusage.googleapis.comGoogle Cloud Storage JSON API
storage-api.googleapis.comCloud Storage
storage-component.googleapis.com
6.9.4.3. Configuring DNS for GCP
To install OpenShift Container Platform, the Google Cloud Platform (GCP) account you use must have a dedicated public hosted zone in the same project that you host the OpenShift Container Platform cluster. This zone must be authoritative for the domain. The DNS service provides cluster DNS resolution and name lookup for external connections to the cluster.
Procedure
Identify your domain, or subdomain, and registrar. You can transfer an existing domain and registrar or obtain a new one through GCP or another source.
NoteIf you purchase a new domain, it can take time for the relevant DNS changes to propagate. For more information about purchasing domains through Google, see Google Domains.
Create a public hosted zone for your domain or subdomain in your GCP project. See Creating public zones in the GCP documentation.
Use an appropriate root domain, such as
openshiftcorp.com, or subdomain, such asclusters.openshiftcorp.com.Extract the new authoritative name servers from the hosted zone records. See Look up your Cloud DNS name servers in the GCP documentation.
You typically have four name servers.
- Update the registrar records for the name servers that your domain uses. For example, if you registered your domain to Google Domains, see the following topic in the Google Domains Help: How to switch to custom name servers.
- If you migrated your root domain to Google Cloud DNS, migrate your DNS records. See Migrating to Cloud DNS in the GCP documentation.
- If you use a subdomain, follow your company’s procedures to add its delegation records to the parent domain. This process might include a request to your company’s IT department or the division that controls the root domain and DNS services for your company.
6.9.4.4. GCP account limits
The OpenShift Container Platform cluster uses a number of Google Cloud Platform (GCP) components, but the default Quotas do not affect your ability to install a default OpenShift Container Platform cluster.
A default cluster, which contains three compute and three control plane machines, uses the following resources. Note that some resources are required only during the bootstrap process and are removed after the cluster deploys.
| Service | Component | Location | Total resources required | Resources removed after bootstrap |
|---|---|---|---|---|
| Service account | IAM | Global | 5 | 0 |
| Firewall rules | Networking | Global | 11 | 1 |
| Forwarding rules | Compute | Global | 2 | 0 |
| Health checks | Compute | Global | 2 | 0 |
| Images | Compute | Global | 1 | 0 |
| Networks | Networking | Global | 1 | 0 |
| Routers | Networking | Global | 1 | 0 |
| Routes | Networking | Global | 2 | 0 |
| Subnetworks | Compute | Global | 2 | 0 |
| Target pools | Networking | Global | 2 | 0 |
If any of the quotas are insufficient during installation, the installation program displays an error that states both which quota was exceeded and the region.
Be sure to consider your actual cluster size, planned cluster growth, and any usage from other clusters that are associated with your account. The CPU, static IP addresses, and persistent disk SSD (storage) quotas are the ones that are most likely to be insufficient.
If you plan to deploy your cluster in one of the following regions, you will exceed the maximum storage quota and are likely to exceed the CPU quota limit:
-
asia-east2 -
asia-northeast2 -
asia-south1 -
australia-southeast1 -
europe-north1 -
europe-west2 -
europe-west3 -
europe-west6 -
northamerica-northeast1 -
southamerica-east1 -
us-west2
You can increase resource quotas from the GCP console, but you might need to file a support ticket. Be sure to plan your cluster size early so that you can allow time to resolve the support ticket before you install your OpenShift Container Platform cluster.
6.9.4.5. Creating a service account in GCP
OpenShift Container Platform requires a Google Cloud Platform (GCP) service account that provides authentication and authorization to access data in the Google APIs. If you do not have an existing IAM service account that contains the required roles in your project, you must create one.
Prerequisites
- You created a project to host your cluster.
Procedure
- Create a service account in the project that you use to host your OpenShift Container Platform cluster. See Creating a service account in the GCP documentation.
Grant the service account the appropriate permissions. You can either grant the individual permissions that follow or assign the
Ownerrole to it. See Granting roles to a service account for specific resources.NoteWhile making the service account an owner of the project is the easiest way to gain the required permissions, it means that service account has complete control over the project. You must determine if the risk that comes from offering that power is acceptable.
Create the service account key in JSON format. See Creating service account keys in the GCP documentation.
The service account key is required to create a cluster.
6.9.4.5.1. Required GCP permissions
When you attach the Owner role to the service account that you create, you grant that service account all permissions, including those that are required to install OpenShift Container Platform. To deploy an OpenShift Container Platform cluster, the service account requires the following permissions. If you deploy your cluster into an existing VPC, the service account does not require certain networking permissions, which are noted in the following lists:
Required roles for the installation program
- Compute Admin
- Security Admin
- Service Account Admin
- Service Account User
- Storage Admin
Required roles for creating network resources during installation
- DNS Administrator
Required roles for user-provisioned GCP infrastructure
- Deployment Manager Editor
- Service Account Key Admin
Optional roles
For the cluster to create new limited credentials for its Operators, add the following role:
- Service Account Key Admin
The roles are applied to the service accounts that the control plane and compute machines use:
| Account | Roles |
|---|---|
| Control Plane |
|
|
| |
|
| |
|
| |
|
| |
| Compute |
|
|
|
6.9.4.6. Supported GCP regions
You can deploy an OpenShift Container Platform cluster to the following Google Cloud Platform (GCP) regions:
-
asia-east1(Changhua County, Taiwan) -
asia-east2(Hong Kong) -
asia-northeast1(Tokyo, Japan) -
asia-northeast2(Osaka, Japan) -
asia-northeast3(Seoul, South Korea) -
asia-south1(Mumbai, India) -
asia-southeast1(Jurong West, Singapore) -
asia-southeast2(Jakarta, Indonesia) -
australia-southeast1(Sydney, Australia) -
europe-north1(Hamina, Finland) -
europe-west1(St. Ghislain, Belgium) -
europe-west2(London, England, UK) -
europe-west3(Frankfurt, Germany) -
europe-west4(Eemshaven, Netherlands) -
europe-west6(Zürich, Switzerland) -
northamerica-northeast1(Montréal, Québec, Canada) -
southamerica-east1(São Paulo, Brazil) -
us-central1(Council Bluffs, Iowa, USA) -
us-east1(Moncks Corner, South Carolina, USA) -
us-east4(Ashburn, Northern Virginia, USA) -
us-west1(The Dalles, Oregon, USA) -
us-west2(Los Angeles, California, USA) -
us-west3(Salt Lake City, Utah, USA) -
us-west4(Las Vegas, Nevada, USA)
6.9.4.7. Installing and configuring CLI tools for GCP
To install OpenShift Container Platform on Google Cloud Platform (GCP) using user-provisioned infrastructure, you must install and configure the CLI tools for GCP.
Prerequisites
- You created a project to host your cluster.
- You created a service account and granted it the required permissions.
Procedure
Install the following binaries in
$PATH:-
gcloud -
gsutil
See Install the latest Cloud SDK version in the GCP documentation.
-
Authenticate using the
gcloudtool with your configured service account.See Authorizing with a service account in the GCP documentation.
6.9.5. Creating the installation files for GCP
To install OpenShift Container Platform on Google Cloud Platform (GCP) using user-provisioned infrastructure, you must generate the files that the installation program needs to deploy your cluster and modify them so that the cluster creates only the machines that it will use. You generate and customize the install-config.yaml file, Kubernetes manifests, and Ignition config files. You also have the option to first set up a separate var partition during the preparation phases of installation.
6.9.5.1. Optional: Creating a separate /var partition
It is recommended that disk partitioning for OpenShift Container Platform be left to the installer. However, there are cases where you might want to create separate partitions in a part of the filesystem that you expect to grow.
OpenShift Container Platform supports the addition of a single partition to attach storage to either the /var partition or a subdirectory of /var. For example:
-
/var/lib/containers: Holds container-related content that can grow as more images and containers are added to a system. -
/var/lib/etcd: Holds data that you might want to keep separate for purposes such as performance optimization of etcd storage. -
/var: Holds data that you might want to keep separate for purposes such as auditing.
Storing the contents of a /var directory separately makes it easier to grow storage for those areas as needed and reinstall OpenShift Container Platform at a later date and keep that data intact. With this method, you will not have to pull all your containers again, nor will you have to copy massive log files when you update systems.
Because /var must be in place before a fresh installation of Red Hat Enterprise Linux CoreOS (RHCOS), the following procedure sets up the separate /var partition by creating a machine config that is inserted during the openshift-install preparation phases of an OpenShift Container Platform installation.
If you follow the steps to create a separate /var partition in this procedure, it is not necessary to create the Kubernetes manifest and Ignition config files again as described later in this section.
Procedure
Create a directory to hold the OpenShift Container Platform installation files:
$ mkdir $HOME/clusterconfigRun
openshift-installto create a set of files in themanifestandopenshiftsubdirectories. Answer the system questions as you are prompted:$ openshift-install create manifests --dir $HOME/clusterconfigExample output
? SSH Public Key ... INFO Credentials loaded from the "myprofile" profile in file "/home/myuser/.aws/credentials" INFO Consuming Install Config from target directory INFO Manifests created in: $HOME/clusterconfig/manifests and $HOME/clusterconfig/openshiftOptional: Confirm that the installation program created manifests in the
clusterconfig/openshiftdirectory:$ ls $HOME/clusterconfig/openshift/Example output
99_kubeadmin-password-secret.yaml 99_openshift-cluster-api_master-machines-0.yaml 99_openshift-cluster-api_master-machines-1.yaml 99_openshift-cluster-api_master-machines-2.yaml ...Create a
MachineConfigobject and add it to a file in theopenshiftdirectory. For example, name the file98-var-partition.yaml, change the disk device name to the name of the storage device on theworkersystems, and set the storage size as appropriate. This example places the/vardirectory on a separate partition:apiVersion: machineconfiguration.openshift.io/v1 kind: MachineConfig metadata: labels: machineconfiguration.openshift.io/role: worker name: 98-var-partition spec: config: ignition: version: 3.2.0 storage: disks: - device: /dev/<device_name>1 partitions: - label: var startMiB: <partition_start_offset>2 sizeMiB: <partition_size>3 filesystems: - device: /dev/disk/by-partlabel/var path: /var format: xfs systemd: units: - name: var.mount4 enabled: true contents: | [Unit] Before=local-fs.target [Mount] What=/dev/disk/by-partlabel/var Where=/var Options=defaults,prjquota5 [Install] WantedBy=local-fs.target- 1
- The storage device name of the disk that you want to partition.
- 2
- When adding a data partition to the boot disk, a minimum value of 25000 MiB (Mebibytes) is recommended. The root file system is automatically resized to fill all available space up to the specified offset. If no value is specified, or if the specified value is smaller than the recommended minimum, the resulting root file system will be too small, and future reinstalls of RHCOS might overwrite the beginning of the data partition.
- 3
- The size of the data partition in mebibytes.
- 4
- The name of the mount unit must match the directory specified in the
Where=directive. For example, for a filesystem mounted on/var/lib/containers, the unit must be namedvar-lib-containers.mount. - 5
- The
prjquotamount option must be enabled for filesystems used for container storage.
NoteWhen creating a separate
/varpartition, you cannot use different instance types for worker nodes, if the different instance types do not have the same device name.Run
openshift-installagain to create Ignition configs from a set of files in themanifestandopenshiftsubdirectories:$ openshift-install create ignition-configs --dir $HOME/clusterconfig $ ls $HOME/clusterconfig/ auth bootstrap.ign master.ign metadata.json worker.ign
Now you can use the Ignition config files as input to the installation procedures to install Red Hat Enterprise Linux CoreOS (RHCOS) systems.
6.9.5.2. Creating the installation configuration file
You can customize the OpenShift Container Platform cluster you install on Google Cloud Platform (GCP).
Prerequisites
- Obtain the OpenShift Container Platform installation program and the pull secret for your cluster.
- Obtain service principal permissions at the subscription level.
Procedure
Create the
install-config.yamlfile.Change to the directory that contains the installation program and run the following command:
$ ./openshift-install create install-config --dir <installation_directory>1 - 1
- For
<installation_directory>, specify the directory name to store the files that the installation program creates.
ImportantSpecify an empty directory. Some installation assets, like bootstrap X.509 certificates have short expiration intervals, so you must not reuse an installation directory. If you want to reuse individual files from another cluster installation, you can copy them into your directory. However, the file names for the installation assets might change between releases. Use caution when copying installation files from an earlier OpenShift Container Platform version.
At the prompts, provide the configuration details for your cloud:
Optional: Select an SSH key to use to access your cluster machines.
NoteFor production OpenShift Container Platform clusters on which you want to perform installation debugging or disaster recovery, specify an SSH key that your
ssh-agentprocess uses.- Select gcp as the platform to target.
- If you have not configured the service account key for your GCP account on your computer, you must obtain it from GCP and paste the contents of the file or enter the absolute path to the file.
- Select the project ID to provision the cluster in. The default value is specified by the service account that you configured.
- Select the region to deploy the cluster to.
- Select the base domain to deploy the cluster to. The base domain corresponds to the public DNS zone that you created for your cluster.
- Enter a descriptive name for your cluster.
- Paste the pull secret from the Red Hat OpenShift Cluster Manager.
Optional: If you do not want the cluster to provision compute machines, empty the compute pool by editing the resulting
install-config.yamlfile to setreplicasto0for thecomputepool:compute: - hyperthreading: Enabled name: worker platform: {} replicas: 01 - 1
- Set to
0.
-
Modify the
install-config.yamlfile. You can find more information about the available parameters in the "Installation configuration parameters" section. Back up the
install-config.yamlfile so that you can use it to install multiple clusters.ImportantThe
install-config.yamlfile is consumed during the installation process. If you want to reuse the file, you must back it up now.
6.9.5.3. Configuring the cluster-wide proxy during installation
Production environments can deny direct access to the Internet and instead have an HTTP or HTTPS proxy available. You can configure a new OpenShift Container Platform cluster to use a proxy by configuring the proxy settings in the install-config.yaml file.
Prerequisites
-
You have an existing
install-config.yamlfile. You reviewed the sites that your cluster requires access to and determined whether any of them need to bypass the proxy. By default, all cluster egress traffic is proxied, including calls to hosting cloud provider APIs. You added sites to the
Proxyobject’sspec.noProxyfield to bypass the proxy if necessary.NoteThe
Proxyobjectstatus.noProxyfield is populated with the values of thenetworking.machineNetwork[].cidr,networking.clusterNetwork[].cidr, andnetworking.serviceNetwork[]fields from your installation configuration.For installations on Amazon Web Services (AWS), Google Cloud Platform (GCP), Microsoft Azure, and Red Hat OpenStack Platform (RHOSP), the
Proxyobjectstatus.noProxyfield is also populated with the instance metadata endpoint (169.254.169.254).
Procedure
Edit your
install-config.yamlfile and add the proxy settings. For example:apiVersion: v1 baseDomain: my.domain.com proxy: httpProxy: http://<username>:<pswd>@<ip>:<port>1 httpsProxy: https://<username>:<pswd>@<ip>:<port>2 noProxy: example.com3 additionalTrustBundle: |4 -----BEGIN CERTIFICATE----- <MY_TRUSTED_CA_CERT> -----END CERTIFICATE----- ...- 1
- A proxy URL to use for creating HTTP connections outside the cluster. The URL scheme must be
http. - 2
- A proxy URL to use for creating HTTPS connections outside the cluster.
- 3
- A comma-separated list of destination domain names, IP addresses, or other network CIDRs to exclude from proxying. Preface a domain with
.to match subdomains only. For example,.y.commatchesx.y.com, but noty.com. Use*to bypass the proxy for all destinations. - 4
- If provided, the installation program generates a config map that is named
user-ca-bundlein theopenshift-confignamespace to hold the additional CA certificates. If you provideadditionalTrustBundleand at least one proxy setting, theProxyobject is configured to reference theuser-ca-bundleconfig map in thetrustedCAfield. The Cluster Network Operator then creates atrusted-ca-bundleconfig map that merges the contents specified for thetrustedCAparameter with the RHCOS trust bundle. TheadditionalTrustBundlefield is required unless the proxy’s identity certificate is signed by an authority from the RHCOS trust bundle.
NoteThe installation program does not support the proxy
readinessEndpointsfield.- Save the file and reference it when installing OpenShift Container Platform.
The installation program creates a cluster-wide proxy that is named cluster that uses the proxy settings in the provided install-config.yaml file. If no proxy settings are provided, a cluster Proxy object is still created, but it will have a nil spec.
Only the Proxy object named cluster is supported, and no additional proxies can be created.
6.9.5.4. Creating the Kubernetes manifest and Ignition config files
Because you must modify some cluster definition files and manually start the cluster machines, you must generate the Kubernetes manifest and Ignition config files that the cluster needs to make its machines.
The installation configuration file transforms into the Kubernetes manifests. The manifests wrap into the Ignition configuration files, which are later used to create the cluster.
The Ignition config files that the installation program generates contain certificates that expire after 24 hours, which are then renewed at that time. If the cluster is shut down before renewing the certificates and the cluster is later restarted after the 24 hours have elapsed, the cluster automatically recovers the expired certificates. The exception is that you must manually approve the pending node-bootstrapper certificate signing requests (CSRs) to recover kubelet certificates. See the documentation for Recovering from expired control plane certificates for more information.
Prerequisites
- You obtained the OpenShift Container Platform installation program.
-
You created the
install-config.yamlinstallation configuration file.
Procedure
Change to the directory that contains the installation program and generate the Kubernetes manifests for the cluster:
$ ./openshift-install create manifests --dir <installation_directory>1 - 1
- For
<installation_directory>, specify the installation directory that contains theinstall-config.yamlfile you created.
Remove the Kubernetes manifest files that define the control plane machines:
$ rm -f <installation_directory>/openshift/99_openshift-cluster-api_master-machines-*.yamlBy removing these files, you prevent the cluster from automatically generating control plane machines.
Optional: If you do not want the cluster to provision compute machines, remove the Kubernetes manifest files that define the worker machines:
$ rm -f <installation_directory>/openshift/99_openshift-cluster-api_worker-machineset-*.yamlBecause you create and manage the worker machines yourself, you do not need to initialize these machines.
Check that the
mastersSchedulableparameter in the<installation_directory>/manifests/cluster-scheduler-02-config.ymlKubernetes manifest file is set tofalse. This setting prevents pods from being scheduled on the control plane machines:-
Open the
<installation_directory>/manifests/cluster-scheduler-02-config.ymlfile. -
Locate the
mastersSchedulableparameter and ensure that it is set tofalse. - Save and exit the file.
-
Open the
Optional: If you do not want the Ingress Operator to create DNS records on your behalf, remove the
privateZoneandpublicZonesections from the<installation_directory>/manifests/cluster-dns-02-config.ymlDNS configuration file:apiVersion: config.openshift.io/v1 kind: DNS metadata: creationTimestamp: null name: cluster spec: baseDomain: example.openshift.com privateZone:1 id: mycluster-100419-private-zone publicZone:2 id: example.openshift.com status: {}If you do so, you must add ingress DNS records manually in a later step.
To create the Ignition configuration files, run the following command from the directory that contains the installation program:
$ ./openshift-install create ignition-configs --dir <installation_directory>1 - 1
- For
<installation_directory>, specify the same installation directory.
The following files are generated in the directory:
. ├── auth │ ├── kubeadmin-password │ └── kubeconfig ├── bootstrap.ign ├── master.ign ├── metadata.json └── worker.ign
6.9.6. Exporting common variables
6.9.6.1. Extracting the infrastructure name
The Ignition config files contain a unique cluster identifier that you can use to uniquely identify your cluster in Google Cloud Platform (GCP). The infrastructure name is also used to locate the appropriate GCP resources during an OpenShift Container Platform installation. The provided Deployment Manager templates contain references to this infrastructure name, so you must extract it.
Prerequisites
- You obtained the OpenShift Container Platform installation program and the pull secret for your cluster.
- You generated the Ignition config files for your cluster.
-
You installed the
jqpackage.
Procedure
To extract and view the infrastructure name from the Ignition config file metadata, run the following command:
$ jq -r .infraID <installation_directory>/metadata.json1 - 1
- For
<installation_directory>, specify the path to the directory that you stored the installation files in.
Example output
openshift-vw9j61 - 1
- The output of this command is your cluster name and a random string.
6.9.6.2. Exporting common variables for Deployment Manager templates
You must export a common set of variables that are used with the provided Deployment Manager templates used to assist in completing a user-provided infrastructure install on Google Cloud Platform (GCP).
Specific Deployment Manager templates can also require additional exported variables, which are detailed in their related procedures.
Prerequisites
- Obtain the OpenShift Container Platform installation program and the pull secret for your cluster.
- Generate the Ignition config files for your cluster.
-
Install the
jqpackage.
Procedure
Export the following common variables to be used by the provided Deployment Manager templates:
$ export BASE_DOMAIN='<base_domain>' $ export BASE_DOMAIN_ZONE_NAME='<base_domain_zone_name>' $ export NETWORK_CIDR='10.0.0.0/16' $ export MASTER_SUBNET_CIDR='10.0.0.0/19' $ export WORKER_SUBNET_CIDR='10.0.32.0/19' $ export KUBECONFIG=<installation_directory>/auth/kubeconfig1 $ export CLUSTER_NAME=`jq -r .clusterName <installation_directory>/metadata.json` $ export INFRA_ID=`jq -r .infraID <installation_directory>/metadata.json` $ export PROJECT_NAME=`jq -r .gcp.projectID <installation_directory>/metadata.json` $ export REGION=`jq -r .gcp.region <installation_directory>/metadata.json`- 1
- For
<installation_directory>, specify the path to the directory that you stored the installation files in.
6.9.7. Creating a VPC in GCP
You must create a VPC in Google Cloud Platform (GCP) for your OpenShift Container Platform cluster to use. You can customize the VPC to meet your requirements. One way to create the VPC is to modify the provided Deployment Manager template.
If you do not use the provided Deployment Manager template to create your GCP infrastructure, you must review the provided information and manually create the infrastructure. If your cluster does not initialize correctly, you might have to contact Red Hat support with your installation logs.
Prerequisites
- Configure a GCP account.
- Generate the Ignition config files for your cluster.
Procedure
-
Copy the template from the Deployment Manager template for the VPC section of this topic and save it as
01_vpc.pyon your computer. This template describes the VPC that your cluster requires. Create a
01_vpc.yamlresource definition file:$ cat <<EOF >01_vpc.yaml imports: - path: 01_vpc.py resources: - name: cluster-vpc type: 01_vpc.py properties: infra_id: '${INFRA_ID}'1 region: '${REGION}'2 master_subnet_cidr: '${MASTER_SUBNET_CIDR}'3 worker_subnet_cidr: '${WORKER_SUBNET_CIDR}'4 EOF- 1
infra_idis theINFRA_IDinfrastructure name from the extraction step.- 2
regionis the region to deploy the cluster into, for exampleus-central1.- 3
master_subnet_cidris the CIDR for the master subnet, for example10.0.0.0/19.- 4
worker_subnet_cidris the CIDR for the worker subnet, for example10.0.32.0/19.
Create the deployment by using the
gcloudCLI:$ gcloud deployment-manager deployments create ${INFRA_ID}-vpc --config 01_vpc.yaml
6.9.7.1. Deployment Manager template for the VPC
You can use the following Deployment Manager template to deploy the VPC that you need for your OpenShift Container Platform cluster:
Example 6.1. 01_vpc.py Deployment Manager template
def GenerateConfig(context):
resources = [{
'name': context.properties['infra_id'] + '-network',
'type': 'compute.v1.network',
'properties': {
'region': context.properties['region'],
'autoCreateSubnetworks': False
}
}, {
'name': context.properties['infra_id'] + '-master-subnet',
'type': 'compute.v1.subnetwork',
'properties': {
'region': context.properties['region'],
'network': '$(ref.' + context.properties['infra_id'] + '-network.selfLink)',
'ipCidrRange': context.properties['master_subnet_cidr']
}
}, {
'name': context.properties['infra_id'] + '-worker-subnet',
'type': 'compute.v1.subnetwork',
'properties': {
'region': context.properties['region'],
'network': '$(ref.' + context.properties['infra_id'] + '-network.selfLink)',
'ipCidrRange': context.properties['worker_subnet_cidr']
}
}, {
'name': context.properties['infra_id'] + '-router',
'type': 'compute.v1.router',
'properties': {
'region': context.properties['region'],
'network': '$(ref.' + context.properties['infra_id'] + '-network.selfLink)',
'nats': [{
'name': context.properties['infra_id'] + '-nat-master',
'natIpAllocateOption': 'AUTO_ONLY',
'minPortsPerVm': 7168,
'sourceSubnetworkIpRangesToNat': 'LIST_OF_SUBNETWORKS',
'subnetworks': [{
'name': '$(ref.' + context.properties['infra_id'] + '-master-subnet.selfLink)',
'sourceIpRangesToNat': ['ALL_IP_RANGES']
}]
}, {
'name': context.properties['infra_id'] + '-nat-worker',
'natIpAllocateOption': 'AUTO_ONLY',
'minPortsPerVm': 512,
'sourceSubnetworkIpRangesToNat': 'LIST_OF_SUBNETWORKS',
'subnetworks': [{
'name': '$(ref.' + context.properties['infra_id'] + '-worker-subnet.selfLink)',
'sourceIpRangesToNat': ['ALL_IP_RANGES']
}]
}]
}
}]
return {'resources': resources}6.9.8. Networking requirements for user-provisioned infrastructure
All the Red Hat Enterprise Linux CoreOS (RHCOS) machines require network in initramfs during boot to fetch Ignition config from the machine config server.
During the initial boot, the machines require either a DHCP server or that static IP addresses be set on each host in the cluster to establish a network connection, which allows them to download their Ignition config files.
It is recommended to use the DHCP server to manage the machines for the cluster long-term. Ensure that the DHCP server is configured to provide persistent IP addresses and host names to the cluster machines.
The Kubernetes API server must be able to resolve the node names of the cluster machines. If the API servers and worker nodes are in different zones, you can configure a default DNS search zone to allow the API server to resolve the node names. Another supported approach is to always refer to hosts by their fully-qualified domain names in both the node objects and all DNS requests.
You must configure the network connectivity between machines to allow cluster components to communicate. Each machine must be able to resolve the host names of all other machines in the cluster.
| Protocol | Port | Description |
|---|---|---|
| ICMP | N/A | Network reachability tests |
| TCP |
| Metrics |
|
|
Host level services, including the node exporter on ports | |
|
| The default ports that Kubernetes reserves | |
|
| openshift-sdn | |
| UDP |
| VXLAN and Geneve |
|
| VXLAN and Geneve | |
|
|
Host level services, including the node exporter on ports | |
| TCP/UDP |
| Kubernetes node port |
| Protocol | Port | Description |
|---|---|---|
| TCP |
| Kubernetes API |
| Protocol | Port | Description |
|---|---|---|
| TCP |
| etcd server and peer ports |
Network topology requirements
The infrastructure that you provision for your cluster must meet the following network topology requirements.
OpenShift Container Platform requires all nodes to have internet access to pull images for platform containers and provide telemetry data to Red Hat.
Load balancers
Before you install OpenShift Container Platform, you must provision two load balancers that meet the following requirements:
API load balancer: Provides a common endpoint for users, both human and machine, to interact with and configure the platform. Configure the following conditions:
- Layer 4 load balancing only. This can be referred to as Raw TCP, SSL Passthrough, or SSL Bridge mode. If you use SSL Bridge mode, you must enable Server Name Indication (SNI) for the API routes.
- A stateless load balancing algorithm. The options vary based on the load balancer implementation.
ImportantDo not configure session persistence for an API load balancer.
Configure the following ports on both the front and back of the load balancers:
Expand Table 6.35. API load balancer Port Back-end machines (pool members) Internal External Description 6443Bootstrap and control plane. You remove the bootstrap machine from the load balancer after the bootstrap machine initializes the cluster control plane. You must configure the
/readyzendpoint for the API server health check probe.X
X
Kubernetes API server
22623Bootstrap and control plane. You remove the bootstrap machine from the load balancer after the bootstrap machine initializes the cluster control plane.
X
Machine config server
NoteThe load balancer must be configured to take a maximum of 30 seconds from the time the API server turns off the
/readyzendpoint to the removal of the API server instance from the pool. Within the time frame after/readyzreturns an error or becomes healthy, the endpoint must have been removed or added. Probing every 5 or 10 seconds, with two successful requests to become healthy and three to become unhealthy, are well-tested values.Application Ingress load balancer: Provides an Ingress point for application traffic flowing in from outside the cluster. Configure the following conditions:
- Layer 4 load balancing only. This can be referred to as Raw TCP, SSL Passthrough, or SSL Bridge mode. If you use SSL Bridge mode, you must enable Server Name Indication (SNI) for the Ingress routes.
- A connection-based or session-based persistence is recommended, based on the options available and types of applications that will be hosted on the platform.
Configure the following ports on both the front and back of the load balancers:
Expand Table 6.36. Application Ingress load balancer Port Back-end machines (pool members) Internal External Description 443The machines that run the Ingress router pods, compute, or worker, by default.
X
X
HTTPS traffic
80The machines that run the Ingress router pods, compute, or worker, by default.
X
X
HTTP traffic
If the true IP address of the client can be seen by the load balancer, enabling source IP-based session persistence can improve performance for applications that use end-to-end TLS encryption.
A working configuration for the Ingress router is required for an OpenShift Container Platform cluster. You must configure the Ingress router after the control plane initializes.
NTP configuration
OpenShift Container Platform clusters are configured to use a public Network Time Protocol (NTP) server by default. If you want to use a local enterprise NTP server, or if your cluster is being deployed in a disconnected network, you can configure the cluster to use a specific time server. For more information, see the documentation for Configuring chrony time service.
If a DHCP server provides NTP server information, the chrony time service on the Red Hat Enterprise Linux CoreOS (RHCOS) machines read the information and can sync the clock with the NTP servers.
6.9.9. Creating load balancers in GCP
You must configure load balancers in Google Cloud Platform (GCP) for your OpenShift Container Platform cluster to use. One way to create these components is to modify the provided Deployment Manager template.
If you do not use the provided Deployment Manager template to create your GCP infrastructure, you must review the provided information and manually create the infrastructure. If your cluster does not initialize correctly, you might have to contact Red Hat support with your installation logs.
Prerequisites
- Configure a GCP account.
- Generate the Ignition config files for your cluster.
- Create and configure a VPC and associated subnets in GCP.
Procedure
-
Copy the template from the Deployment Manager template for the internal load balancer section of this topic and save it as
02_lb_int.pyon your computer. This template describes the internal load balancing objects that your cluster requires. -
For an external cluster, also copy the template from the Deployment Manager template for the external load balancer section of this topic and save it as
02_lb_ext.pyon your computer. This template describes the external load balancing objects that your cluster requires. Export the variables that the deployment template uses:
Export the cluster network location:
$ export CLUSTER_NETWORK=(`gcloud compute networks describe ${INFRA_ID}-network --format json | jq -r .selfLink`)Export the control plane subnet location:
$ export CONTROL_SUBNET=(`gcloud compute networks subnets describe ${INFRA_ID}-master-subnet --region=${REGION} --format json | jq -r .selfLink`)Export the three zones that the cluster uses:
$ export ZONE_0=(`gcloud compute regions describe ${REGION} --format=json | jq -r .zones[0] | cut -d "/" -f9`)$ export ZONE_1=(`gcloud compute regions describe ${REGION} --format=json | jq -r .zones[1] | cut -d "/" -f9`)$ export ZONE_2=(`gcloud compute regions describe ${REGION} --format=json | jq -r .zones[2] | cut -d "/" -f9`)
Create a
02_infra.yamlresource definition file:$ cat <<EOF >02_infra.yaml imports: - path: 02_lb_ext.py - path: 02_lb_int.py1 resources: - name: cluster-lb-ext2 type: 02_lb_ext.py properties: infra_id: '${INFRA_ID}'3 region: '${REGION}'4 - name: cluster-lb-int type: 02_lb_int.py properties: cluster_network: '${CLUSTER_NETWORK}' control_subnet: '${CONTROL_SUBNET}'5 infra_id: '${INFRA_ID}' region: '${REGION}' zones:6 - '${ZONE_0}' - '${ZONE_1}' - '${ZONE_2}' EOF- 1 2
- Required only when deploying an external cluster.
- 3
infra_idis theINFRA_IDinfrastructure name from the extraction step.- 4
regionis the region to deploy the cluster into, for exampleus-central1.- 5
control_subnetis the URI to the control subnet.- 6
zonesare the zones to deploy the control plane instances into, likeus-east1-b,us-east1-c, andus-east1-d.
Create the deployment by using the
gcloudCLI:$ gcloud deployment-manager deployments create ${INFRA_ID}-infra --config 02_infra.yamlExport the cluster IP address:
$ export CLUSTER_IP=(`gcloud compute addresses describe ${INFRA_ID}-cluster-ip --region=${REGION} --format json | jq -r .address`)For an external cluster, also export the cluster public IP address:
$ export CLUSTER_PUBLIC_IP=(`gcloud compute addresses describe ${INFRA_ID}-cluster-public-ip --region=${REGION} --format json | jq -r .address`)
6.9.9.1. Deployment Manager template for the external load balancer
You can use the following Deployment Manager template to deploy the external load balancer that you need for your OpenShift Container Platform cluster:
Example 6.2. 02_lb_ext.py Deployment Manager template
def GenerateConfig(context):
resources = [{
'name': context.properties['infra_id'] + '-cluster-public-ip',
'type': 'compute.v1.address',
'properties': {
'region': context.properties['region']
}
}, {
# Refer to docs/dev/kube-apiserver-health-check.md on how to correctly setup health check probe for kube-apiserver
'name': context.properties['infra_id'] + '-api-http-health-check',
'type': 'compute.v1.httpHealthCheck',
'properties': {
'port': 6080,
'requestPath': '/readyz'
}
}, {
'name': context.properties['infra_id'] + '-api-target-pool',
'type': 'compute.v1.targetPool',
'properties': {
'region': context.properties['region'],
'healthChecks': ['$(ref.' + context.properties['infra_id'] + '-api-http-health-check.selfLink)'],
'instances': []
}
}, {
'name': context.properties['infra_id'] + '-api-forwarding-rule',
'type': 'compute.v1.forwardingRule',
'properties': {
'region': context.properties['region'],
'IPAddress': '$(ref.' + context.properties['infra_id'] + '-cluster-public-ip.selfLink)',
'target': '$(ref.' + context.properties['infra_id'] + '-api-target-pool.selfLink)',
'portRange': '6443'
}
}]
return {'resources': resources}6.9.9.2. Deployment Manager template for the internal load balancer
You can use the following Deployment Manager template to deploy the internal load balancer that you need for your OpenShift Container Platform cluster:
Example 6.3. 02_lb_int.py Deployment Manager template
def GenerateConfig(context):
backends = []
for zone in context.properties['zones']:
backends.append({
'group': '$(ref.' + context.properties['infra_id'] + '-master-' + zone + '-instance-group' + '.selfLink)'
})
resources = [{
'name': context.properties['infra_id'] + '-cluster-ip',
'type': 'compute.v1.address',
'properties': {
'addressType': 'INTERNAL',
'region': context.properties['region'],
'subnetwork': context.properties['control_subnet']
}
}, {
# Refer to docs/dev/kube-apiserver-health-check.md on how to correctly setup health check probe for kube-apiserver
'name': context.properties['infra_id'] + '-api-internal-health-check',
'type': 'compute.v1.healthCheck',
'properties': {
'httpsHealthCheck': {
'port': 6443,
'requestPath': '/readyz'
},
'type': "HTTPS"
}
}, {
'name': context.properties['infra_id'] + '-api-internal-backend-service',
'type': 'compute.v1.regionBackendService',
'properties': {
'backends': backends,
'healthChecks': ['$(ref.' + context.properties['infra_id'] + '-api-internal-health-check.selfLink)'],
'loadBalancingScheme': 'INTERNAL',
'region': context.properties['region'],
'protocol': 'TCP',
'timeoutSec': 120
}
}, {
'name': context.properties['infra_id'] + '-api-internal-forwarding-rule',
'type': 'compute.v1.forwardingRule',
'properties': {
'backendService': '$(ref.' + context.properties['infra_id'] + '-api-internal-backend-service.selfLink)',
'IPAddress': '$(ref.' + context.properties['infra_id'] + '-cluster-ip.selfLink)',
'loadBalancingScheme': 'INTERNAL',
'ports': ['6443','22623'],
'region': context.properties['region'],
'subnetwork': context.properties['control_subnet']
}
}]
for zone in context.properties['zones']:
resources.append({
'name': context.properties['infra_id'] + '-master-' + zone + '-instance-group',
'type': 'compute.v1.instanceGroup',
'properties': {
'namedPorts': [
{
'name': 'ignition',
'port': 22623
}, {
'name': 'https',
'port': 6443
}
],
'network': context.properties['cluster_network'],
'zone': zone
}
})
return {'resources': resources}
You will need this template in addition to the 02_lb_ext.py template when you create an external cluster.
6.9.10. Creating a private DNS zone in GCP
You must configure a private DNS zone in Google Cloud Platform (GCP) for your OpenShift Container Platform cluster to use. One way to create this component is to modify the provided Deployment Manager template.
If you do not use the provided Deployment Manager template to create your GCP infrastructure, you must review the provided information and manually create the infrastructure. If your cluster does not initialize correctly, you might have to contact Red Hat support with your installation logs.
Prerequisites
- Configure a GCP account.
- Generate the Ignition config files for your cluster.
- Create and configure a VPC and associated subnets in GCP.
Procedure
-
Copy the template from the Deployment Manager template for the private DNS section of this topic and save it as
02_dns.pyon your computer. This template describes the private DNS objects that your cluster requires. Create a
02_dns.yamlresource definition file:$ cat <<EOF >02_dns.yaml imports: - path: 02_dns.py resources: - name: cluster-dns type: 02_dns.py properties: infra_id: '${INFRA_ID}'1 cluster_domain: '${CLUSTER_NAME}.${BASE_DOMAIN}'2 cluster_network: '${CLUSTER_NETWORK}'3 EOFCreate the deployment by using the
gcloudCLI:$ gcloud deployment-manager deployments create ${INFRA_ID}-dns --config 02_dns.yamlThe templates do not create DNS entries due to limitations of Deployment Manager, so you must create them manually:
Add the internal DNS entries:
$ if [ -f transaction.yaml ]; then rm transaction.yaml; fi $ gcloud dns record-sets transaction start --zone ${INFRA_ID}-private-zone $ gcloud dns record-sets transaction add ${CLUSTER_IP} --name api.${CLUSTER_NAME}.${BASE_DOMAIN}. --ttl 60 --type A --zone ${INFRA_ID}-private-zone $ gcloud dns record-sets transaction add ${CLUSTER_IP} --name api-int.${CLUSTER_NAME}.${BASE_DOMAIN}. --ttl 60 --type A --zone ${INFRA_ID}-private-zone $ gcloud dns record-sets transaction execute --zone ${INFRA_ID}-private-zoneFor an external cluster, also add the external DNS entries:
$ if [ -f transaction.yaml ]; then rm transaction.yaml; fi $ gcloud dns record-sets transaction start --zone ${BASE_DOMAIN_ZONE_NAME} $ gcloud dns record-sets transaction add ${CLUSTER_PUBLIC_IP} --name api.${CLUSTER_NAME}.${BASE_DOMAIN}. --ttl 60 --type A --zone ${BASE_DOMAIN_ZONE_NAME} $ gcloud dns record-sets transaction execute --zone ${BASE_DOMAIN_ZONE_NAME}
6.9.10.1. Deployment Manager template for the private DNS
You can use the following Deployment Manager template to deploy the private DNS that you need for your OpenShift Container Platform cluster:
Example 6.4. 02_dns.py Deployment Manager template
def GenerateConfig(context):
resources = [{
'name': context.properties['infra_id'] + '-private-zone',
'type': 'dns.v1.managedZone',
'properties': {
'description': '',
'dnsName': context.properties['cluster_domain'] + '.',
'visibility': 'private',
'privateVisibilityConfig': {
'networks': [{
'networkUrl': context.properties['cluster_network']
}]
}
}
}]
return {'resources': resources}6.9.11. Creating firewall rules in GCP
You must create firewall rules in Google Cloud Platform (GCP) for your OpenShift Container Platform cluster to use. One way to create these components is to modify the provided Deployment Manager template.
If you do not use the provided Deployment Manager template to create your GCP infrastructure, you must review the provided information and manually create the infrastructure. If your cluster does not initialize correctly, you might have to contact Red Hat support with your installation logs.
Prerequisites
- Configure a GCP account.
- Generate the Ignition config files for your cluster.
- Create and configure a VPC and associated subnets in GCP.
Procedure
-
Copy the template from the Deployment Manager template for firewall rules section of this topic and save it as
03_firewall.pyon your computer. This template describes the security groups that your cluster requires. Create a
03_firewall.yamlresource definition file:$ cat <<EOF >03_firewall.yaml imports: - path: 03_firewall.py resources: - name: cluster-firewall type: 03_firewall.py properties: allowed_external_cidr: '0.0.0.0/0'1 infra_id: '${INFRA_ID}'2 cluster_network: '${CLUSTER_NETWORK}'3 network_cidr: '${NETWORK_CIDR}'4 EOF- 1
allowed_external_cidris the CIDR range that can access the cluster API and SSH to the bootstrap host. For an internal cluster, set this value to${NETWORK_CIDR}.- 2
infra_idis theINFRA_IDinfrastructure name from the extraction step.- 3
cluster_networkis theselfLinkURL to the cluster network.- 4
network_cidris the CIDR of the VPC network, for example10.0.0.0/16.
Create the deployment by using the
gcloudCLI:$ gcloud deployment-manager deployments create ${INFRA_ID}-firewall --config 03_firewall.yaml
6.9.11.1. Deployment Manager template for firewall rules
You can use the following Deployment Manager template to deploy the firewall rues that you need for your OpenShift Container Platform cluster:
Example 6.5. 03_firewall.py Deployment Manager template
def GenerateConfig(context):
resources = [{
'name': context.properties['infra_id'] + '-bootstrap-in-ssh',
'type': 'compute.v1.firewall',
'properties': {
'network': context.properties['cluster_network'],
'allowed': [{
'IPProtocol': 'tcp',
'ports': ['22']
}],
'sourceRanges': [context.properties['allowed_external_cidr']],
'targetTags': [context.properties['infra_id'] + '-bootstrap']
}
}, {
'name': context.properties['infra_id'] + '-api',
'type': 'compute.v1.firewall',
'properties': {
'network': context.properties['cluster_network'],
'allowed': [{
'IPProtocol': 'tcp',
'ports': ['6443']
}],
'sourceRanges': [context.properties['allowed_external_cidr']],
'targetTags': [context.properties['infra_id'] + '-master']
}
}, {
'name': context.properties['infra_id'] + '-health-checks',
'type': 'compute.v1.firewall',
'properties': {
'network': context.properties['cluster_network'],
'allowed': [{
'IPProtocol': 'tcp',
'ports': ['6080', '6443', '22624']
}],
'sourceRanges': ['35.191.0.0/16', '130.211.0.0/22', '209.85.152.0/22', '209.85.204.0/22'],
'targetTags': [context.properties['infra_id'] + '-master']
}
}, {
'name': context.properties['infra_id'] + '-etcd',
'type': 'compute.v1.firewall',
'properties': {
'network': context.properties['cluster_network'],
'allowed': [{
'IPProtocol': 'tcp',
'ports': ['2379-2380']
}],
'sourceTags': [context.properties['infra_id'] + '-master'],
'targetTags': [context.properties['infra_id'] + '-master']
}
}, {
'name': context.properties['infra_id'] + '-control-plane',
'type': 'compute.v1.firewall',
'properties': {
'network': context.properties['cluster_network'],
'allowed': [{
'IPProtocol': 'tcp',
'ports': ['10257']
},{
'IPProtocol': 'tcp',
'ports': ['10259']
},{
'IPProtocol': 'tcp',
'ports': ['22623']
}],
'sourceTags': [
context.properties['infra_id'] + '-master',
context.properties['infra_id'] + '-worker'
],
'targetTags': [context.properties['infra_id'] + '-master']
}
}, {
'name': context.properties['infra_id'] + '-internal-network',
'type': 'compute.v1.firewall',
'properties': {
'network': context.properties['cluster_network'],
'allowed': [{
'IPProtocol': 'icmp'
},{
'IPProtocol': 'tcp',
'ports': ['22']
}],
'sourceRanges': [context.properties['network_cidr']],
'targetTags': [
context.properties['infra_id'] + '-master',
context.properties['infra_id'] + '-worker'
]
}
}, {
'name': context.properties['infra_id'] + '-internal-cluster',
'type': 'compute.v1.firewall',
'properties': {
'network': context.properties['cluster_network'],
'allowed': [{
'IPProtocol': 'udp',
'ports': ['4789', '6081']
},{
'IPProtocol': 'udp',
'ports': ['500', '4500']
},{
'IPProtocol': 'esp',
},{
'IPProtocol': 'tcp',
'ports': ['9000-9999']
},{
'IPProtocol': 'udp',
'ports': ['9000-9999']
},{
'IPProtocol': 'tcp',
'ports': ['10250']
},{
'IPProtocol': 'tcp',
'ports': ['30000-32767']
},{
'IPProtocol': 'udp',
'ports': ['30000-32767']
}],
'sourceTags': [
context.properties['infra_id'] + '-master',
context.properties['infra_id'] + '-worker'
],
'targetTags': [
context.properties['infra_id'] + '-master',
context.properties['infra_id'] + '-worker'
]
}
}]
return {'resources': resources}6.9.13. Creating the RHCOS cluster image for the GCP infrastructure
You must use a valid Red Hat Enterprise Linux CoreOS (RHCOS) image for Google Cloud Platform (GCP) for your OpenShift Container Platform nodes.
Procedure
Obtain the RHCOS image from the RHCOS image mirror page.
ImportantThe RHCOS images might not change with every release of OpenShift Container Platform. You must download an image with the highest version that is less than or equal to the OpenShift Container Platform version that you install. Use the image version that matches your OpenShift Container Platform version if it is available.
The file name contains the OpenShift Container Platform version number in the format
rhcos-<version>-<arch>-gcp.<arch>.tar.gz.Create the Google storage bucket:
$ gsutil mb gs://<bucket_name>Upload the RHCOS image to the Google storage bucket:
$ gsutil cp <downloaded_image_file_path>/rhcos-<version>-x86_64-gcp.x86_64.tar.gz gs://<bucket_name>Export the uploaded RHCOS image location as a variable:
$ export IMAGE_SOURCE="gs://<bucket_name>/rhcos-<version>-x86_64-gcp.x86_64.tar.gz"Create the cluster image:
$ gcloud compute images create "${INFRA_ID}-rhcos-image" \ --source-uri="${IMAGE_SOURCE}"
6.9.14. Creating the bootstrap machine in GCP
You must create the bootstrap machine in Google Cloud Platform (GCP) to use during OpenShift Container Platform cluster initialization. One way to create this machine is to modify the provided Deployment Manager template.
If you do not use the provided Deployment Manager template to create your bootstrap machine, you must review the provided information and manually create the infrastructure. If your cluster does not initialize correctly, you might have to contact Red Hat support with your installation logs.
Prerequisites
- Configure a GCP account.
- Generate the Ignition config files for your cluster.
- Create and configure a VPC and associated subnets in GCP.
- Create and configure networking and load balancers in GCP.
- Create control plane and compute roles.
- Ensure pyOpenSSL is installed.
Procedure
-
Copy the template from the Deployment Manager template for the bootstrap machine section of this topic and save it as
04_bootstrap.pyon your computer. This template describes the bootstrap machine that your cluster requires. Export the location of the Red Hat Enterprise Linux CoreOS (RHCOS) image that the installation program requires:
$ export CLUSTER_IMAGE=(`gcloud compute images describe ${INFRA_ID}-rhcos-image --format json | jq -r .selfLink`)Create a bucket and upload the
bootstrap.ignfile:$ gsutil mb gs://${INFRA_ID}-bootstrap-ignition $ gsutil cp <installation_directory>/bootstrap.ign gs://${INFRA_ID}-bootstrap-ignition/Create a signed URL for the bootstrap instance to use to access the Ignition config. Export the URL from the output as a variable:
$ export BOOTSTRAP_IGN=`gsutil signurl -d 1h service-account-key.json gs://${INFRA_ID}-bootstrap-ignition/bootstrap.ign | grep "^gs:" | awk '{print $5}'`Create a
04_bootstrap.yamlresource definition file:$ cat <<EOF >04_bootstrap.yaml imports: - path: 04_bootstrap.py resources: - name: cluster-bootstrap type: 04_bootstrap.py properties: infra_id: '${INFRA_ID}'1 region: '${REGION}'2 zone: '${ZONE_0}'3 cluster_network: '${CLUSTER_NETWORK}'4 control_subnet: '${CONTROL_SUBNET}'5 image: '${CLUSTER_IMAGE}'6 machine_type: 'n1-standard-4'7 root_volume_size: '128'8 bootstrap_ign: '${BOOTSTRAP_IGN}'9 EOF- 1
infra_idis theINFRA_IDinfrastructure name from the extraction step.- 2
regionis the region to deploy the cluster into, for exampleus-central1.- 3
zoneis the zone to deploy the bootstrap instance into, for exampleus-central1-b.- 4
cluster_networkis theselfLinkURL to the cluster network.- 5
control_subnetis theselfLinkURL to the control subnet.- 6
imageis theselfLinkURL to the RHCOS image.- 7
machine_typeis the machine type of the instance, for examplen1-standard-4.- 8
root_volume_sizeis the boot disk size for the bootstrap machine.- 9
bootstrap_ignis the URL output when creating a signed URL.
Create the deployment by using the
gcloudCLI:$ gcloud deployment-manager deployments create ${INFRA_ID}-bootstrap --config 04_bootstrap.yamlThe templates do not manage load balancer membership due to limitations of Deployment Manager, so you must add the bootstrap machine manually.
Add the bootstrap instance to the internal load balancer instance group:
$ gcloud compute instance-groups unmanaged add-instances \ ${INFRA_ID}-bootstrap-instance-group --zone=${ZONE_0} --instances=${INFRA_ID}-bootstrapAdd the bootstrap instance group to the internal load balancer backend service:
$ gcloud compute backend-services add-backend \ ${INFRA_ID}-api-internal-backend-service --region=${REGION} --instance-group=${INFRA_ID}-bootstrap-instance-group --instance-group-zone=${ZONE_0}
6.9.14.1. Deployment Manager template for the bootstrap machine
You can use the following Deployment Manager template to deploy the bootstrap machine that you need for your OpenShift Container Platform cluster:
Example 6.7. 04_bootstrap.py Deployment Manager template
def GenerateConfig(context):
resources = [{
'name': context.properties['infra_id'] + '-bootstrap-public-ip',
'type': 'compute.v1.address',
'properties': {
'region': context.properties['region']
}
}, {
'name': context.properties['infra_id'] + '-bootstrap',
'type': 'compute.v1.instance',
'properties': {
'disks': [{
'autoDelete': True,
'boot': True,
'initializeParams': {
'diskSizeGb': context.properties['root_volume_size'],
'sourceImage': context.properties['image']
}
}],
'machineType': 'zones/' + context.properties['zone'] + '/machineTypes/' + context.properties['machine_type'],
'metadata': {
'items': [{
'key': 'user-data',
'value': '{"ignition":{"config":{"replace":{"source":"' + context.properties['bootstrap_ign'] + '"}},"version":"3.1.0"}}',
}]
},
'networkInterfaces': [{
'subnetwork': context.properties['control_subnet'],
'accessConfigs': [{
'natIP': '$(ref.' + context.properties['infra_id'] + '-bootstrap-public-ip.address)'
}]
}],
'tags': {
'items': [
context.properties['infra_id'] + '-master',
context.properties['infra_id'] + '-bootstrap'
]
},
'zone': context.properties['zone']
}
}, {
'name': context.properties['infra_id'] + '-bootstrap-instance-group',
'type': 'compute.v1.instanceGroup',
'properties': {
'namedPorts': [
{
'name': 'ignition',
'port': 22623
}, {
'name': 'https',
'port': 6443
}
],
'network': context.properties['cluster_network'],
'zone': context.properties['zone']
}
}]
return {'resources': resources}6.9.15. Creating the control plane machines in GCP
You must create the control plane machines in Google Cloud Platform (GCP) for your cluster to use. One way to create these machines is to modify the provided Deployment Manager template.
If you do not use the provided Deployment Manager template to create your control plane machines, you must review the provided information and manually create the infrastructure. If your cluster does not initialize correctly, you might have to contact Red Hat support with your installation logs.
Prerequisites
- Configure a GCP account.
- Generate the Ignition config files for your cluster.
- Create and configure a VPC and associated subnets in GCP.
- Create and configure networking and load balancers in GCP.
- Create control plane and compute roles.
- Create the bootstrap machine.
Procedure
-
Copy the template from the Deployment Manager template for control plane machines section of this topic and save it as
05_control_plane.pyon your computer. This template describes the control plane machines that your cluster requires. Export the following variable required by the resource definition:
$ export MASTER_IGNITION=`cat <installation_directory>/master.ign`Create a
05_control_plane.yamlresource definition file:$ cat <<EOF >05_control_plane.yaml imports: - path: 05_control_plane.py resources: - name: cluster-control-plane type: 05_control_plane.py properties: infra_id: '${INFRA_ID}'1 zones:2 - '${ZONE_0}' - '${ZONE_1}' - '${ZONE_2}' control_subnet: '${CONTROL_SUBNET}'3 image: '${CLUSTER_IMAGE}'4 machine_type: 'n1-standard-4'5 root_volume_size: '128' service_account_email: '${MASTER_SERVICE_ACCOUNT}'6 ignition: '${MASTER_IGNITION}'7 EOF- 1
infra_idis theINFRA_IDinfrastructure name from the extraction step.- 2
zonesare the zones to deploy the control plane instances into, for exampleus-central1-a,us-central1-b, andus-central1-c.- 3
control_subnetis theselfLinkURL to the control subnet.- 4
imageis theselfLinkURL to the RHCOS image.- 5
machine_typeis the machine type of the instance, for examplen1-standard-4.- 6
service_account_emailis the email address for the master service account that you created.- 7
ignitionis the contents of themaster.ignfile.
Create the deployment by using the
gcloudCLI:$ gcloud deployment-manager deployments create ${INFRA_ID}-control-plane --config 05_control_plane.yamlThe templates do not manage load balancer membership due to limitations of Deployment Manager, so you must add the control plane machines manually.
Run the following commands to add the control plane machines to the appropriate instance groups:
$ gcloud compute instance-groups unmanaged add-instances ${INFRA_ID}-master-${ZONE_0}-instance-group --zone=${ZONE_0} --instances=${INFRA_ID}-master-0 $ gcloud compute instance-groups unmanaged add-instances ${INFRA_ID}-master-${ZONE_1}-instance-group --zone=${ZONE_1} --instances=${INFRA_ID}-master-1 $ gcloud compute instance-groups unmanaged add-instances ${INFRA_ID}-master-${ZONE_2}-instance-group --zone=${ZONE_2} --instances=${INFRA_ID}-master-2For an external cluster, you must also run the following commands to add the control plane machines to the target pools:
$ gcloud compute target-pools add-instances ${INFRA_ID}-api-target-pool --instances-zone="${ZONE_0}" --instances=${INFRA_ID}-master-0 $ gcloud compute target-pools add-instances ${INFRA_ID}-api-target-pool --instances-zone="${ZONE_1}" --instances=${INFRA_ID}-master-1 $ gcloud compute target-pools add-instances ${INFRA_ID}-api-target-pool --instances-zone="${ZONE_2}" --instances=${INFRA_ID}-master-2
6.9.15.1. Deployment Manager template for control plane machines
You can use the following Deployment Manager template to deploy the control plane machines that you need for your OpenShift Container Platform cluster:
Example 6.8. 05_control_plane.py Deployment Manager template
def GenerateConfig(context):
resources = [{
'name': context.properties['infra_id'] + '-master-0',
'type': 'compute.v1.instance',
'properties': {
'disks': [{
'autoDelete': True,
'boot': True,
'initializeParams': {
'diskSizeGb': context.properties['root_volume_size'],
'diskType': 'zones/' + context.properties['zones'][0] + '/diskTypes/pd-ssd',
'sourceImage': context.properties['image']
}
}],
'machineType': 'zones/' + context.properties['zones'][0] + '/machineTypes/' + context.properties['machine_type'],
'metadata': {
'items': [{
'key': 'user-data',
'value': context.properties['ignition']
}]
},
'networkInterfaces': [{
'subnetwork': context.properties['control_subnet']
}],
'serviceAccounts': [{
'email': context.properties['service_account_email'],
'scopes': ['https://www.googleapis.com/auth/cloud-platform']
}],
'tags': {
'items': [
context.properties['infra_id'] + '-master',
]
},
'zone': context.properties['zones'][0]
}
}, {
'name': context.properties['infra_id'] + '-master-1',
'type': 'compute.v1.instance',
'properties': {
'disks': [{
'autoDelete': True,
'boot': True,
'initializeParams': {
'diskSizeGb': context.properties['root_volume_size'],
'diskType': 'zones/' + context.properties['zones'][1] + '/diskTypes/pd-ssd',
'sourceImage': context.properties['image']
}
}],
'machineType': 'zones/' + context.properties['zones'][1] + '/machineTypes/' + context.properties['machine_type'],
'metadata': {
'items': [{
'key': 'user-data',
'value': context.properties['ignition']
}]
},
'networkInterfaces': [{
'subnetwork': context.properties['control_subnet']
}],
'serviceAccounts': [{
'email': context.properties['service_account_email'],
'scopes': ['https://www.googleapis.com/auth/cloud-platform']
}],
'tags': {
'items': [
context.properties['infra_id'] + '-master',
]
},
'zone': context.properties['zones'][1]
}
}, {
'name': context.properties['infra_id'] + '-master-2',
'type': 'compute.v1.instance',
'properties': {
'disks': [{
'autoDelete': True,
'boot': True,
'initializeParams': {
'diskSizeGb': context.properties['root_volume_size'],
'diskType': 'zones/' + context.properties['zones'][2] + '/diskTypes/pd-ssd',
'sourceImage': context.properties['image']
}
}],
'machineType': 'zones/' + context.properties['zones'][2] + '/machineTypes/' + context.properties['machine_type'],
'metadata': {
'items': [{
'key': 'user-data',
'value': context.properties['ignition']
}]
},
'networkInterfaces': [{
'subnetwork': context.properties['control_subnet']
}],
'serviceAccounts': [{
'email': context.properties['service_account_email'],
'scopes': ['https://www.googleapis.com/auth/cloud-platform']
}],
'tags': {
'items': [
context.properties['infra_id'] + '-master',
]
},
'zone': context.properties['zones'][2]
}
}]
return {'resources': resources}6.9.16. Wait for bootstrap completion and remove bootstrap resources in GCP
After you create all of the required infrastructure in Google Cloud Platform (GCP), wait for the bootstrap process to complete on the machines that you provisioned by using the Ignition config files that you generated with the installation program.
Prerequisites
- Configure a GCP account.
- Generate the Ignition config files for your cluster.
- Create and configure a VPC and associated subnets in GCP.
- Create and configure networking and load balancers in GCP.
- Create control plane and compute roles.
- Create the bootstrap machine.
- Create the control plane machines.
Procedure
Change to the directory that contains the installation program and run the following command:
$ ./openshift-install wait-for bootstrap-complete --dir <installation_directory> \1 --log-level info2 If the command exits without a
FATALwarning, your production control plane has initialized.Delete the bootstrap resources:
$ gcloud compute backend-services remove-backend ${INFRA_ID}-api-internal-backend-service --region=${REGION} --instance-group=${INFRA_ID}-bootstrap-instance-group --instance-group-zone=${ZONE_0} $ gsutil rm gs://${INFRA_ID}-bootstrap-ignition/bootstrap.ign $ gsutil rb gs://${INFRA_ID}-bootstrap-ignition $ gcloud deployment-manager deployments delete ${INFRA_ID}-bootstrap
6.9.17. Creating additional worker machines in GCP
You can create worker machines in Google Cloud Platform (GCP) for your cluster to use by launching individual instances discretely or by automated processes outside the cluster, such as auto scaling groups. You can also take advantage of the built-in cluster scaling mechanisms and the machine API in OpenShift Container Platform.
In this example, you manually launch one instance by using the Deployment Manager template. Additional instances can be launched by including additional resources of type 06_worker.py in the file.
If you do not use the provided Deployment Manager template to create your worker machines, you must review the provided information and manually create the infrastructure. If your cluster does not initialize correctly, you might have to contact Red Hat support with your installation logs.
Prerequisites
- Configure a GCP account.
- Generate the Ignition config files for your cluster.
- Create and configure a VPC and associated subnets in GCP.
- Create and configure networking and load balancers in GCP.
- Create control plane and compute roles.
- Create the bootstrap machine.
- Create the control plane machines.
Procedure
-
Copy the template from the Deployment Manager template for worker machines section of this topic and save it as
06_worker.pyon your computer. This template describes the worker machines that your cluster requires. Export the variables that the resource definition uses.
Export the subnet that hosts the compute machines:
$ export COMPUTE_SUBNET=(`gcloud compute networks subnets describe ${INFRA_ID}-worker-subnet --region=${REGION} --format json | jq -r .selfLink`)Export the email address for your service account:
$ export WORKER_SERVICE_ACCOUNT=(`gcloud iam service-accounts list --filter "email~^${INFRA_ID}-w@${PROJECT_NAME}." --format json | jq -r '.[0].email'`)Export the location of the compute machine Ignition config file:
$ export WORKER_IGNITION=`cat <installation_directory>/worker.ign`
Create a
06_worker.yamlresource definition file:$ cat <<EOF >06_worker.yaml imports: - path: 06_worker.py resources: - name: 'worker-0'1 type: 06_worker.py properties: infra_id: '${INFRA_ID}'2 zone: '${ZONE_0}'3 compute_subnet: '${COMPUTE_SUBNET}'4 image: '${CLUSTER_IMAGE}'5 machine_type: 'n1-standard-4'6 root_volume_size: '128' service_account_email: '${WORKER_SERVICE_ACCOUNT}'7 ignition: '${WORKER_IGNITION}'8 - name: 'worker-1' type: 06_worker.py properties: infra_id: '${INFRA_ID}'9 zone: '${ZONE_1}'10 compute_subnet: '${COMPUTE_SUBNET}'11 image: '${CLUSTER_IMAGE}'12 machine_type: 'n1-standard-4'13 root_volume_size: '128' service_account_email: '${WORKER_SERVICE_ACCOUNT}'14 ignition: '${WORKER_IGNITION}'15 EOF- 1
nameis the name of the worker machine, for exampleworker-0.- 2 9
infra_idis theINFRA_IDinfrastructure name from the extraction step.- 3 10
zoneis the zone to deploy the worker machine into, for exampleus-central1-a.- 4 11
compute_subnetis theselfLinkURL to the compute subnet.- 5 12
imageis theselfLinkURL to the RHCOS image.- 6 13
machine_typeis the machine type of the instance, for examplen1-standard-4.- 7 14
service_account_emailis the email address for the worker service account that you created.- 8 15
ignitionis the contents of theworker.ignfile.
-
Optional: If you want to launch additional instances, include additional resources of type
06_worker.pyin your06_worker.yamlresource definition file. Create the deployment by using the
gcloudCLI:$ gcloud deployment-manager deployments create ${INFRA_ID}-worker --config 06_worker.yaml
6.9.17.1. Deployment Manager template for worker machines
You can use the following Deployment Manager template to deploy the worker machines that you need for your OpenShift Container Platform cluster:
Example 6.9. 06_worker.py Deployment Manager template
def GenerateConfig(context):
resources = [{
'name': context.properties['infra_id'] + '-' + context.env['name'],
'type': 'compute.v1.instance',
'properties': {
'disks': [{
'autoDelete': True,
'boot': True,
'initializeParams': {
'diskSizeGb': context.properties['root_volume_size'],
'sourceImage': context.properties['image']
}
}],
'machineType': 'zones/' + context.properties['zone'] + '/machineTypes/' + context.properties['machine_type'],
'metadata': {
'items': [{
'key': 'user-data',
'value': context.properties['ignition']
}]
},
'networkInterfaces': [{
'subnetwork': context.properties['compute_subnet']
}],
'serviceAccounts': [{
'email': context.properties['service_account_email'],
'scopes': ['https://www.googleapis.com/auth/cloud-platform']
}],
'tags': {
'items': [
context.properties['infra_id'] + '-worker',
]
},
'zone': context.properties['zone']
}
}]
return {'resources': resources}6.9.18. Installing the OpenShift CLI by downloading the binary
You can install the OpenShift CLI (oc) to interact with OpenShift Container Platform from a command-line interface. You can install oc on Linux, Windows, or macOS.
If you installed an earlier version of oc, you cannot use it to complete all of the commands in OpenShift Container Platform 4.7. Download and install the new version of oc.
6.9.18.1. Installing the OpenShift CLI on Linux
You can install the OpenShift CLI (oc) binary on Linux by using the following procedure.
Procedure
- Navigate to the OpenShift Container Platform downloads page on the Red Hat Customer Portal.
- Select the appropriate version in the Version drop-down menu.
- Click Download Now next to the OpenShift v4.7 Linux Client entry and save the file.
Unpack the archive:
$ tar xvzf <file>Place the
ocbinary in a directory that is on yourPATH.To check your
PATH, execute the following command:$ echo $PATH
After you install the OpenShift CLI, it is available using the oc command:
$ oc <command>6.9.18.2. Installing the OpenShift CLI on Windows
You can install the OpenShift CLI (oc) binary on Windows by using the following procedure.
Procedure
- Navigate to the OpenShift Container Platform downloads page on the Red Hat Customer Portal.
- Select the appropriate version in the Version drop-down menu.
- Click Download Now next to the OpenShift v4.7 Windows Client entry and save the file.
- Unzip the archive with a ZIP program.
Move the
ocbinary to a directory that is on yourPATH.To check your
PATH, open the command prompt and execute the following command:C:\> path
After you install the OpenShift CLI, it is available using the oc command:
C:\> oc <command>6.9.18.3. Installing the OpenShift CLI on macOS
You can install the OpenShift CLI (oc) binary on macOS by using the following procedure.
Procedure
- Navigate to the OpenShift Container Platform downloads page on the Red Hat Customer Portal.
- Select the appropriate version in the Version drop-down menu.
- Click Download Now next to the OpenShift v4.7 MacOSX Client entry and save the file.
- Unpack and unzip the archive.
Move the
ocbinary to a directory on your PATH.To check your
PATH, open a terminal and execute the following command:$ echo $PATH
After you install the OpenShift CLI, it is available using the oc command:
$ oc <command>6.9.19. Logging in to the cluster by using the CLI
You can log in to your cluster as a default system user by exporting the cluster kubeconfig file. The kubeconfig file contains information about the cluster that is used by the CLI to connect a client to the correct cluster and API server. The file is specific to a cluster and is created during OpenShift Container Platform installation.
Prerequisites
- You deployed an OpenShift Container Platform cluster.
-
You installed the
ocCLI.
Procedure
Export the
kubeadmincredentials:$ export KUBECONFIG=<installation_directory>/auth/kubeconfig1 - 1
- For
<installation_directory>, specify the path to the directory that you stored the installation files in.
Verify you can run
occommands successfully using the exported configuration:$ oc whoamiExample output
system:admin
6.9.20. Approving the certificate signing requests for your machines
When you add machines to a cluster, two pending certificate signing requests (CSRs) are generated for each machine that you added. You must confirm that these CSRs are approved or, if necessary, approve them yourself. The client requests must be approved first, followed by the server requests.
Prerequisites
- You added machines to your cluster.
Procedure
Confirm that the cluster recognizes the machines:
$ oc get nodesExample output
NAME STATUS ROLES AGE VERSION master-0 Ready master 63m v1.20.0 master-1 Ready master 63m v1.20.0 master-2 Ready master 64m v1.20.0The output lists all of the machines that you created.
NoteThe preceding output might not include the compute nodes, also known as worker nodes, until some CSRs are approved.
Review the pending CSRs and ensure that you see the client requests with the
PendingorApprovedstatus for each machine that you added to the cluster:$ oc get csrExample output
NAME AGE REQUESTOR CONDITION csr-8b2br 15m system:serviceaccount:openshift-machine-config-operator:node-bootstrapper Pending csr-8vnps 15m system:serviceaccount:openshift-machine-config-operator:node-bootstrapper Pending ...In this example, two machines are joining the cluster. You might see more approved CSRs in the list.
If the CSRs were not approved, after all of the pending CSRs for the machines you added are in
Pendingstatus, approve the CSRs for your cluster machines:NoteBecause the CSRs rotate automatically, approve your CSRs within an hour of adding the machines to the cluster. If you do not approve them within an hour, the certificates will rotate, and more than two certificates will be present for each node. You must approve all of these certificates. Once the client CSR is approved, the Kubelet creates a secondary CSR for the serving certificate, which requires manual approval. Then, subsequent serving certificate renewal requests are automatically approved by the
machine-approverif the Kubelet requests a new certificate with identical parameters.NoteFor clusters running on platforms that are not machine API enabled, such as bare metal and other user-provisioned infrastructure, you must implement a method of automatically approving the kubelet serving certificate requests (CSRs). If a request is not approved, then the
oc exec,oc rsh, andoc logscommands cannot succeed, because a serving certificate is required when the API server connects to the kubelet. Any operation that contacts the Kubelet endpoint requires this certificate approval to be in place. The method must watch for new CSRs, confirm that the CSR was submitted by thenode-bootstrapperservice account in thesystem:nodeorsystem:admingroups, and confirm the identity of the node.To approve them individually, run the following command for each valid CSR:
$ oc adm certificate approve <csr_name>1 - 1
<csr_name>is the name of a CSR from the list of current CSRs.
To approve all pending CSRs, run the following command:
$ oc get csr -o go-template='{{range .items}}{{if not .status}}{{.metadata.name}}{{"\n"}}{{end}}{{end}}' | xargs --no-run-if-empty oc adm certificate approveNoteSome Operators might not become available until some CSRs are approved.
Now that your client requests are approved, you must review the server requests for each machine that you added to the cluster:
$ oc get csrExample output
NAME AGE REQUESTOR CONDITION csr-bfd72 5m26s system:node:ip-10-0-50-126.us-east-2.compute.internal Pending csr-c57lv 5m26s system:node:ip-10-0-95-157.us-east-2.compute.internal Pending ...If the remaining CSRs are not approved, and are in the
Pendingstatus, approve the CSRs for your cluster machines:To approve them individually, run the following command for each valid CSR:
$ oc adm certificate approve <csr_name>1 - 1
<csr_name>is the name of a CSR from the list of current CSRs.
To approve all pending CSRs, run the following command:
$ oc get csr -o go-template='{{range .items}}{{if not .status}}{{.metadata.name}}{{"\n"}}{{end}}{{end}}' | xargs oc adm certificate approve
After all client and server CSRs have been approved, the machines have the
Readystatus. Verify this by running the following command:$ oc get nodesExample output
NAME STATUS ROLES AGE VERSION master-0 Ready master 73m v1.20.0 master-1 Ready master 73m v1.20.0 master-2 Ready master 74m v1.20.0 worker-0 Ready worker 11m v1.20.0 worker-1 Ready worker 11m v1.20.0NoteIt can take a few minutes after approval of the server CSRs for the machines to transition to the
Readystatus.
Additional information
- For more information on CSRs, see Certificate Signing Requests.
6.9.21. Optional: Adding the ingress DNS records
If you removed the DNS zone configuration when creating Kubernetes manifests and generating Ignition configs, you must manually create DNS records that point at the ingress load balancer. You can create either a wildcard *.apps.{baseDomain}. or specific records. You can use A, CNAME, and other records per your requirements.
Prerequisites
- Configure a GCP account.
- Remove the DNS Zone configuration when creating Kubernetes manifests and generating Ignition configs.
- Create and configure a VPC and associated subnets in GCP.
- Create and configure networking and load balancers in GCP.
- Create control plane and compute roles.
- Create the bootstrap machine.
- Create the control plane machines.
- Create the worker machines.
Procedure
Wait for the Ingress router to create a load balancer and populate the
EXTERNAL-IPfield:$ oc -n openshift-ingress get service router-defaultExample output
NAME TYPE CLUSTER-IP EXTERNAL-IP PORT(S) AGE router-default LoadBalancer 172.30.18.154 35.233.157.184 80:32288/TCP,443:31215/TCP 98Add the A record to your zones:
To use A records:
Export the variable for the router IP address:
$ export ROUTER_IP=`oc -n openshift-ingress get service router-default --no-headers | awk '{print $4}'`Add the A record to the private zones:
$ if [ -f transaction.yaml ]; then rm transaction.yaml; fi $ gcloud dns record-sets transaction start --zone ${INFRA_ID}-private-zone $ gcloud dns record-sets transaction add ${ROUTER_IP} --name \*.apps.${CLUSTER_NAME}.${BASE_DOMAIN}. --ttl 300 --type A --zone ${INFRA_ID}-private-zone $ gcloud dns record-sets transaction execute --zone ${INFRA_ID}-private-zoneFor an external cluster, also add the A record to the public zones:
$ if [ -f transaction.yaml ]; then rm transaction.yaml; fi $ gcloud dns record-sets transaction start --zone ${BASE_DOMAIN_ZONE_NAME} $ gcloud dns record-sets transaction add ${ROUTER_IP} --name \*.apps.${CLUSTER_NAME}.${BASE_DOMAIN}. --ttl 300 --type A --zone ${BASE_DOMAIN_ZONE_NAME} $ gcloud dns record-sets transaction execute --zone ${BASE_DOMAIN_ZONE_NAME}
To add explicit domains instead of using a wildcard, create entries for each of the cluster’s current routes:
$ oc get --all-namespaces -o jsonpath='{range .items[*]}{range .status.ingress[*]}{.host}{"\n"}{end}{end}' routesExample output
oauth-openshift.apps.your.cluster.domain.example.com console-openshift-console.apps.your.cluster.domain.example.com downloads-openshift-console.apps.your.cluster.domain.example.com alertmanager-main-openshift-monitoring.apps.your.cluster.domain.example.com grafana-openshift-monitoring.apps.your.cluster.domain.example.com prometheus-k8s-openshift-monitoring.apps.your.cluster.domain.example.com
6.9.22. Completing a GCP installation on user-provisioned infrastructure
After you start the OpenShift Container Platform installation on Google Cloud Platform (GCP) user-provisioned infrastructure, you can monitor the cluster events until the cluster is ready.
Prerequisites
- Deploy the bootstrap machine for an OpenShift Container Platform cluster on user-provisioned GCP infrastructure.
-
Install the
ocCLI and log in.
Procedure
Complete the cluster installation:
$ ./openshift-install --dir <installation_directory> wait-for install-complete1 Example output
INFO Waiting up to 30m0s for the cluster to initialize...- 1
- For
<installation_directory>, specify the path to the directory that you stored the installation files in.
Important-
The Ignition config files that the installation program generates contain certificates that expire after 24 hours, which are then renewed at that time. If the cluster is shut down before renewing the certificates and the cluster is later restarted after the 24 hours have elapsed, the cluster automatically recovers the expired certificates. The exception is that you must manually approve the pending
node-bootstrappercertificate signing requests (CSRs) to recover kubelet certificates. See the documentation for Recovering from expired control plane certificates for more information. - It is recommended that you use Ignition config files within 12 hours after they are generated because the 24-hour certificate rotates from 16 to 22 hours after the cluster is installed. By using the Ignition config files within 12 hours, you can avoid installation failure if the certificate update runs during installation.
Observe the running state of your cluster.
Run the following command to view the current cluster version and status:
$ oc get clusterversionExample output
NAME VERSION AVAILABLE PROGRESSING SINCE STATUS version False True 24m Working towards 4.5.4: 99% completeRun the following command to view the Operators managed on the control plane by the Cluster Version Operator (CVO):
$ oc get clusteroperatorsExample output
NAME VERSION AVAILABLE PROGRESSING DEGRADED SINCE authentication 4.5.4 True False False 7m56s cloud-credential 4.5.4 True False False 31m cluster-autoscaler 4.5.4 True False False 16m console 4.5.4 True False False 10m csi-snapshot-controller 4.5.4 True False False 16m dns 4.5.4 True False False 22m etcd 4.5.4 False False False 25s image-registry 4.5.4 True False False 16m ingress 4.5.4 True False False 16m insights 4.5.4 True False False 17m kube-apiserver 4.5.4 True False False 19m kube-controller-manager 4.5.4 True False False 20m kube-scheduler 4.5.4 True False False 20m kube-storage-version-migrator 4.5.4 True False False 16m machine-api 4.5.4 True False False 22m machine-config 4.5.4 True False False 22m marketplace 4.5.4 True False False 16m monitoring 4.5.4 True False False 10m network 4.5.4 True False False 23m node-tuning 4.5.4 True False False 23m openshift-apiserver 4.5.4 True False False 17m openshift-controller-manager 4.5.4 True False False 15m openshift-samples 4.5.4 True False False 16m operator-lifecycle-manager 4.5.4 True False False 22m operator-lifecycle-manager-catalog 4.5.4 True False False 22m operator-lifecycle-manager-packageserver 4.5.4 True False False 18m service-ca 4.5.4 True False False 23m service-catalog-apiserver 4.5.4 True False False 23m service-catalog-controller-manager 4.5.4 True False False 23m storage 4.5.4 True False False 17mRun the following command to view your cluster pods:
$ oc get pods --all-namespacesExample output
NAMESPACE NAME READY STATUS RESTARTS AGE kube-system etcd-member-ip-10-0-3-111.us-east-2.compute.internal 1/1 Running 0 35m kube-system etcd-member-ip-10-0-3-239.us-east-2.compute.internal 1/1 Running 0 37m kube-system etcd-member-ip-10-0-3-24.us-east-2.compute.internal 1/1 Running 0 35m openshift-apiserver-operator openshift-apiserver-operator-6d6674f4f4-h7t2t 1/1 Running 1 37m openshift-apiserver apiserver-fm48r 1/1 Running 0 30m openshift-apiserver apiserver-fxkvv 1/1 Running 0 29m openshift-apiserver apiserver-q85nm 1/1 Running 0 29m ... openshift-service-ca-operator openshift-service-ca-operator-66ff6dc6cd-9r257 1/1 Running 0 37m openshift-service-ca apiservice-cabundle-injector-695b6bcbc-cl5hm 1/1 Running 0 35m openshift-service-ca configmap-cabundle-injector-8498544d7-25qn6 1/1 Running 0 35m openshift-service-ca service-serving-cert-signer-6445fc9c6-wqdqn 1/1 Running 0 35m openshift-service-catalog-apiserver-operator openshift-service-catalog-apiserver-operator-549f44668b-b5q2w 1/1 Running 0 32m openshift-service-catalog-controller-manager-operator openshift-service-catalog-controller-manager-operator-b78cr2lnm 1/1 Running 0 31m
When the current cluster version is
AVAILABLE, the installation is complete.
6.9.23. Telemetry access for OpenShift Container Platform
In OpenShift Container Platform 4.7, the Telemetry service, which runs by default to provide metrics about cluster health and the success of updates, requires internet access. If your cluster is connected to the internet, Telemetry runs automatically, and your cluster is registered to OpenShift Cluster Manager.
After you confirm that your OpenShift Cluster Manager inventory is correct, either maintained automatically by Telemetry or manually by using OpenShift Cluster Manager, use subscription watch to track your OpenShift Container Platform subscriptions at the account or multi-cluster level.
6.9.24. Next steps
- Customize your cluster.
- If necessary, you can opt out of remote health reporting.
6.10. Installing a cluster into a shared VPC on GCP using Deployment Manager templates
In OpenShift Container Platform version 4.7, you can install a cluster into a shared Virtual Private Cloud (VPC) on Google Cloud Platform (GCP) that uses infrastructure that you provide. In this context, a cluster installed into a shared VPC is a cluster that is configured to use a VPC from a project different from where the cluster is being deployed.
A shared VPC enables an organization to connect resources from multiple projects to a common VPC network. You can communicate within the organization securely and efficiently by using internal IPs from that network. For more information about shared VPC, see Shared VPC overview in the GCP documentation.
The steps for performing a user-provided infrastructure installation into a shared VPC are outlined here. Several Deployment Manager templates are provided to assist in completing these steps or to help model your own. You are also free to create the required resources through other methods.
The steps for performing a user-provisioned infrastructure installation are provided as an example only. Installing a cluster with infrastructure you provide requires knowledge of the cloud provider and the installation process of OpenShift Container Platform. Several Deployment Manager templates are provided to assist in completing these steps or to help model your own. You are also free to create the required resources through other methods; the templates are just an example.
6.10.1. Prerequisites
- Review details about the OpenShift Container Platform installation and update processes.
- If you use a firewall and plan to use telemetry, you must configure the firewall to allow the sites that your cluster requires access to.
If you do not allow the system to manage identity and access management (IAM), then a cluster administrator can manually create and maintain IAM credentials. Manual mode can also be used in environments where the cloud IAM APIs are not reachable.
NoteBe sure to also review this site list if you are configuring a proxy.
6.10.2. Certificate signing requests management
Because your cluster has limited access to automatic machine management when you use infrastructure that you provision, you must provide a mechanism for approving cluster certificate signing requests (CSRs) after installation. The kube-controller-manager only approves the kubelet client CSRs. The machine-approver cannot guarantee the validity of a serving certificate that is requested by using kubelet credentials because it cannot confirm that the correct machine issued the request. You must determine and implement a method of verifying the validity of the kubelet serving certificate requests and approving them.
6.10.3. Internet access for OpenShift Container Platform
In OpenShift Container Platform 4.7, you require access to the Internet to install your cluster.
You must have Internet access to:
- Access OpenShift Cluster Manager to download the installation program and perform subscription management. If the cluster has internet access and you do not disable Telemetry, that service automatically entitles your cluster.
- Access Quay.io to obtain the packages that are required to install your cluster.
- Obtain the packages that are required to perform cluster updates.
If your cluster cannot have direct Internet access, you can perform a restricted network installation on some types of infrastructure that you provision. During that process, you download the content that is required and use it to populate a mirror registry with the packages that you need to install a cluster and generate the installation program. With some installation types, the environment that you install your cluster in will not require Internet access. Before you update the cluster, you update the content of the mirror registry.
6.10.4. Configuring the GCP project that hosts your cluster
Before you can install OpenShift Container Platform, you must configure a Google Cloud Platform (GCP) project to host it.
6.10.4.1. Creating a GCP project
To install OpenShift Container Platform, you must create a project in your Google Cloud Platform (GCP) account to host the cluster.
Procedure
Create a project to host your OpenShift Container Platform cluster. See Creating and Managing Projects in the GCP documentation.
ImportantYour GCP project must use the Premium Network Service Tier if you are using installer-provisioned infrastructure. The Standard Network Service Tier is not supported for clusters installed using the installation program. The installation program configures internal load balancing for the
api-int.<cluster_name>.<base_domain>URL; the Premium Tier is required for internal load balancing.
6.10.4.2. Enabling API services in GCP
Your Google Cloud Platform (GCP) project requires access to several API services to complete OpenShift Container Platform installation.
Prerequisites
- You created a project to host your cluster.
Procedure
Enable the following required API services in the project that hosts your cluster. See Enabling services in the GCP documentation.
Expand Table 6.37. Required API services API service Console service name Cloud Deployment Manager V2 API
deploymentmanager.googleapis.comCompute Engine API
compute.googleapis.comGoogle Cloud APIs
cloudapis.googleapis.comCloud Resource Manager API
cloudresourcemanager.googleapis.comGoogle DNS API
dns.googleapis.comIAM Service Account Credentials API
iamcredentials.googleapis.comIdentity and Access Management (IAM) API
iam.googleapis.comService Management API
servicemanagement.googleapis.comService Usage API
serviceusage.googleapis.comGoogle Cloud Storage JSON API
storage-api.googleapis.comCloud Storage
storage-component.googleapis.com
6.10.4.3. GCP account limits
The OpenShift Container Platform cluster uses a number of Google Cloud Platform (GCP) components, but the default Quotas do not affect your ability to install a default OpenShift Container Platform cluster.
A default cluster, which contains three compute and three control plane machines, uses the following resources. Note that some resources are required only during the bootstrap process and are removed after the cluster deploys.
| Service | Component | Location | Total resources required | Resources removed after bootstrap |
|---|---|---|---|---|
| Service account | IAM | Global | 5 | 0 |
| Firewall rules | Networking | Global | 11 | 1 |
| Forwarding rules | Compute | Global | 2 | 0 |
| Health checks | Compute | Global | 2 | 0 |
| Images | Compute | Global | 1 | 0 |
| Networks | Networking | Global | 1 | 0 |
| Routers | Networking | Global | 1 | 0 |
| Routes | Networking | Global | 2 | 0 |
| Subnetworks | Compute | Global | 2 | 0 |
| Target pools | Networking | Global | 2 | 0 |
If any of the quotas are insufficient during installation, the installation program displays an error that states both which quota was exceeded and the region.
Be sure to consider your actual cluster size, planned cluster growth, and any usage from other clusters that are associated with your account. The CPU, static IP addresses, and persistent disk SSD (storage) quotas are the ones that are most likely to be insufficient.
If you plan to deploy your cluster in one of the following regions, you will exceed the maximum storage quota and are likely to exceed the CPU quota limit:
-
asia-east2 -
asia-northeast2 -
asia-south1 -
australia-southeast1 -
europe-north1 -
europe-west2 -
europe-west3 -
europe-west6 -
northamerica-northeast1 -
southamerica-east1 -
us-west2
You can increase resource quotas from the GCP console, but you might need to file a support ticket. Be sure to plan your cluster size early so that you can allow time to resolve the support ticket before you install your OpenShift Container Platform cluster.
6.10.4.4. Creating a service account in GCP
OpenShift Container Platform requires a Google Cloud Platform (GCP) service account that provides authentication and authorization to access data in the Google APIs. If you do not have an existing IAM service account that contains the required roles in your project, you must create one.
Prerequisites
- You created a project to host your cluster.
Procedure
- Create a service account in the project that you use to host your OpenShift Container Platform cluster. See Creating a service account in the GCP documentation.
Grant the service account the appropriate permissions. You can either grant the individual permissions that follow or assign the
Ownerrole to it. See Granting roles to a service account for specific resources.NoteWhile making the service account an owner of the project is the easiest way to gain the required permissions, it means that service account has complete control over the project. You must determine if the risk that comes from offering that power is acceptable.
Create the service account key in JSON format. See Creating service account keys in the GCP documentation.
The service account key is required to create a cluster.
6.10.4.4.1. Required GCP permissions
When you attach the Owner role to the service account that you create, you grant that service account all permissions, including those that are required to install OpenShift Container Platform. To deploy an OpenShift Container Platform cluster, the service account requires the following permissions. If you deploy your cluster into an existing VPC, the service account does not require certain networking permissions, which are noted in the following lists:
Required roles for the installation program
- Compute Admin
- Security Admin
- Service Account Admin
- Service Account User
- Storage Admin
Required roles for creating network resources during installation
- DNS Administrator
Required roles for user-provisioned GCP infrastructure
- Deployment Manager Editor
- Service Account Key Admin
Optional roles
For the cluster to create new limited credentials for its Operators, add the following role:
- Service Account Key Admin
The roles are applied to the service accounts that the control plane and compute machines use:
| Account | Roles |
|---|---|
| Control Plane |
|
|
| |
|
| |
|
| |
|
| |
| Compute |
|
|
|
6.10.4.5. Supported GCP regions
You can deploy an OpenShift Container Platform cluster to the following Google Cloud Platform (GCP) regions:
-
asia-east1(Changhua County, Taiwan) -
asia-east2(Hong Kong) -
asia-northeast1(Tokyo, Japan) -
asia-northeast2(Osaka, Japan) -
asia-northeast3(Seoul, South Korea) -
asia-south1(Mumbai, India) -
asia-southeast1(Jurong West, Singapore) -
asia-southeast2(Jakarta, Indonesia) -
australia-southeast1(Sydney, Australia) -
europe-north1(Hamina, Finland) -
europe-west1(St. Ghislain, Belgium) -
europe-west2(London, England, UK) -
europe-west3(Frankfurt, Germany) -
europe-west4(Eemshaven, Netherlands) -
europe-west6(Zürich, Switzerland) -
northamerica-northeast1(Montréal, Québec, Canada) -
southamerica-east1(São Paulo, Brazil) -
us-central1(Council Bluffs, Iowa, USA) -
us-east1(Moncks Corner, South Carolina, USA) -
us-east4(Ashburn, Northern Virginia, USA) -
us-west1(The Dalles, Oregon, USA) -
us-west2(Los Angeles, California, USA) -
us-west3(Salt Lake City, Utah, USA) -
us-west4(Las Vegas, Nevada, USA)
6.10.4.6. Installing and configuring CLI tools for GCP
To install OpenShift Container Platform on Google Cloud Platform (GCP) using user-provisioned infrastructure, you must install and configure the CLI tools for GCP.
Prerequisites
- You created a project to host your cluster.
- You created a service account and granted it the required permissions.
Procedure
Install the following binaries in
$PATH:-
gcloud -
gsutil
See Install the latest Cloud SDK version in the GCP documentation.
-
Authenticate using the
gcloudtool with your configured service account.See Authorizing with a service account in the GCP documentation.
6.10.5. Configuring the GCP project that hosts your shared VPC network
If you use a shared Virtual Private Cloud (VPC) to host your OpenShift Container Platform cluster in Google Cloud Platform (GCP), you must configure the project that hosts it.
If you already have a project that hosts the shared VPC network, review this section to ensure that the project meets all of the requirements to install an OpenShift Container Platform cluster.
Procedure
- Create a project to host the shared VPC for your OpenShift Container Platform cluster. See Creating and Managing Projects in the GCP documentation.
- Create a service account in the project that hosts your shared VPC. See Creating a service account in the GCP documentation.
Grant the service account the appropriate permissions. You can either grant the individual permissions that follow or assign the
Ownerrole to it. See Granting roles to a service account for specific resources.NoteWhile making the service account an owner of the project is the easiest way to gain the required permissions, it means that service account has complete control over the project. You must determine if the risk that comes from offering that power is acceptable.
The service account for the project that hosts the shared VPC network requires the following roles:
- Compute Network User
- Compute Security Admin
- Deployment Manager Editor
- DNS Administrator
- Security Admin
- Network Management Admin
6.10.5.1. Configuring DNS for GCP
To install OpenShift Container Platform, the Google Cloud Platform (GCP) account you use must have a dedicated public hosted zone in the project that hosts the shared VPC that you install the cluster into. This zone must be authoritative for the domain. The DNS service provides cluster DNS resolution and name lookup for external connections to the cluster.
Procedure
Identify your domain, or subdomain, and registrar. You can transfer an existing domain and registrar or obtain a new one through GCP or another source.
NoteIf you purchase a new domain, it can take time for the relevant DNS changes to propagate. For more information about purchasing domains through Google, see Google Domains.
Create a public hosted zone for your domain or subdomain in your GCP project. See Creating public zones in the GCP documentation.
Use an appropriate root domain, such as
openshiftcorp.com, or subdomain, such asclusters.openshiftcorp.com.Extract the new authoritative name servers from the hosted zone records. See Look up your Cloud DNS name servers in the GCP documentation.
You typically have four name servers.
- Update the registrar records for the name servers that your domain uses. For example, if you registered your domain to Google Domains, see the following topic in the Google Domains Help: How to switch to custom name servers.
- If you migrated your root domain to Google Cloud DNS, migrate your DNS records. See Migrating to Cloud DNS in the GCP documentation.
- If you use a subdomain, follow your company’s procedures to add its delegation records to the parent domain. This process might include a request to your company’s IT department or the division that controls the root domain and DNS services for your company.
6.10.5.2. Creating a VPC in GCP
You must create a VPC in Google Cloud Platform (GCP) for your OpenShift Container Platform cluster to use. You can customize the VPC to meet your requirements. One way to create the VPC is to modify the provided Deployment Manager template.
If you do not use the provided Deployment Manager template to create your GCP infrastructure, you must review the provided information and manually create the infrastructure. If your cluster does not initialize correctly, you might have to contact Red Hat support with your installation logs.
Prerequisites
- Configure a GCP account.
Procedure
-
Copy the template from the Deployment Manager template for the VPC section of this topic and save it as
01_vpc.pyon your computer. This template describes the VPC that your cluster requires. Export the following variables required by the resource definition:
Export the control plane CIDR:
$ export MASTER_SUBNET_CIDR='10.0.0.0/19'Export the compute CIDR:
$ export WORKER_SUBNET_CIDR='10.0.32.0/19'Export the region to deploy the VPC network and cluster to:
$ export REGION='<region>'
Export the variable for the ID of the project that hosts the shared VPC:
$ export HOST_PROJECT=<host_project>Export the variable for the email of the service account that belongs to host project:
$ export HOST_PROJECT_ACCOUNT=<host_service_account_email>Create a
01_vpc.yamlresource definition file:$ cat <<EOF >01_vpc.yaml imports: - path: 01_vpc.py resources: - name: cluster-vpc type: 01_vpc.py properties: infra_id: '<prefix>'1 region: '${REGION}'2 master_subnet_cidr: '${MASTER_SUBNET_CIDR}'3 worker_subnet_cidr: '${WORKER_SUBNET_CIDR}'4 EOFCreate the deployment by using the
gcloudCLI:$ gcloud deployment-manager deployments create <vpc_deployment_name> --config 01_vpc.yaml --project ${HOST_PROJECT} --account ${HOST_PROJECT_ACCOUNT}1 - 1
- For
<vpc_deployment_name>, specify the name of the VPC to deploy.
Export the VPC variable that other components require:
Export the name of the host project network:
$ export HOST_PROJECT_NETWORK=<vpc_network>Export the name of the host project control plane subnet:
$ export HOST_PROJECT_CONTROL_SUBNET=<control_plane_subnet>Export the name of the host project compute subnet:
$ export HOST_PROJECT_COMPUTE_SUBNET=<compute_subnet>
- Set up the shared VPC. See Setting up Shared VPC in the GCP documentation.
6.10.5.2.1. Deployment Manager template for the VPC
You can use the following Deployment Manager template to deploy the VPC that you need for your OpenShift Container Platform cluster:
Example 6.10. 01_vpc.py Deployment Manager template
def GenerateConfig(context):
resources = [{
'name': context.properties['infra_id'] + '-network',
'type': 'compute.v1.network',
'properties': {
'region': context.properties['region'],
'autoCreateSubnetworks': False
}
}, {
'name': context.properties['infra_id'] + '-master-subnet',
'type': 'compute.v1.subnetwork',
'properties': {
'region': context.properties['region'],
'network': '$(ref.' + context.properties['infra_id'] + '-network.selfLink)',
'ipCidrRange': context.properties['master_subnet_cidr']
}
}, {
'name': context.properties['infra_id'] + '-worker-subnet',
'type': 'compute.v1.subnetwork',
'properties': {
'region': context.properties['region'],
'network': '$(ref.' + context.properties['infra_id'] + '-network.selfLink)',
'ipCidrRange': context.properties['worker_subnet_cidr']
}
}, {
'name': context.properties['infra_id'] + '-router',
'type': 'compute.v1.router',
'properties': {
'region': context.properties['region'],
'network': '$(ref.' + context.properties['infra_id'] + '-network.selfLink)',
'nats': [{
'name': context.properties['infra_id'] + '-nat-master',
'natIpAllocateOption': 'AUTO_ONLY',
'minPortsPerVm': 7168,
'sourceSubnetworkIpRangesToNat': 'LIST_OF_SUBNETWORKS',
'subnetworks': [{
'name': '$(ref.' + context.properties['infra_id'] + '-master-subnet.selfLink)',
'sourceIpRangesToNat': ['ALL_IP_RANGES']
}]
}, {
'name': context.properties['infra_id'] + '-nat-worker',
'natIpAllocateOption': 'AUTO_ONLY',
'minPortsPerVm': 512,
'sourceSubnetworkIpRangesToNat': 'LIST_OF_SUBNETWORKS',
'subnetworks': [{
'name': '$(ref.' + context.properties['infra_id'] + '-worker-subnet.selfLink)',
'sourceIpRangesToNat': ['ALL_IP_RANGES']
}]
}]
}
}]
return {'resources': resources}6.10.6. Creating the installation files for GCP
To install OpenShift Container Platform on Google Cloud Platform (GCP) using user-provisioned infrastructure, you must generate the files that the installation program needs to deploy your cluster and modify them so that the cluster creates only the machines that it will use. You generate and customize the install-config.yaml file, Kubernetes manifests, and Ignition config files. You also have the option to first set up a separate var partition during the preparation phases of installation.
6.10.6.1. Manually creating the installation configuration file
For installations of OpenShift Container Platform that use user-provisioned infrastructure, you manually generate your installation configuration file.
Prerequisites
- Obtain the OpenShift Container Platform installation program and the access token for your cluster.
Procedure
Create an installation directory to store your required installation assets in:
$ mkdir <installation_directory>ImportantYou must create a directory. Some installation assets, like bootstrap X.509 certificates have short expiration intervals, so you must not reuse an installation directory. If you want to reuse individual files from another cluster installation, you can copy them into your directory. However, the file names for the installation assets might change between releases. Use caution when copying installation files from an earlier OpenShift Container Platform version.
Customize the following
install-config.yamlfile template and save it in the<installation_directory>.NoteYou must name this configuration file
install-config.yaml.Back up the
install-config.yamlfile so that you can use it to install multiple clusters.ImportantThe
install-config.yamlfile is consumed during the next step of the installation process. You must back it up now.
6.10.6.3. Configuring the cluster-wide proxy during installation
Production environments can deny direct access to the Internet and instead have an HTTP or HTTPS proxy available. You can configure a new OpenShift Container Platform cluster to use a proxy by configuring the proxy settings in the install-config.yaml file.
Prerequisites
-
You have an existing
install-config.yamlfile. You reviewed the sites that your cluster requires access to and determined whether any of them need to bypass the proxy. By default, all cluster egress traffic is proxied, including calls to hosting cloud provider APIs. You added sites to the
Proxyobject’sspec.noProxyfield to bypass the proxy if necessary.NoteThe
Proxyobjectstatus.noProxyfield is populated with the values of thenetworking.machineNetwork[].cidr,networking.clusterNetwork[].cidr, andnetworking.serviceNetwork[]fields from your installation configuration.For installations on Amazon Web Services (AWS), Google Cloud Platform (GCP), Microsoft Azure, and Red Hat OpenStack Platform (RHOSP), the
Proxyobjectstatus.noProxyfield is also populated with the instance metadata endpoint (169.254.169.254).
Procedure
Edit your
install-config.yamlfile and add the proxy settings. For example:apiVersion: v1 baseDomain: my.domain.com proxy: httpProxy: http://<username>:<pswd>@<ip>:<port>1 httpsProxy: https://<username>:<pswd>@<ip>:<port>2 noProxy: example.com3 additionalTrustBundle: |4 -----BEGIN CERTIFICATE----- <MY_TRUSTED_CA_CERT> -----END CERTIFICATE----- ...- 1
- A proxy URL to use for creating HTTP connections outside the cluster. The URL scheme must be
http. - 2
- A proxy URL to use for creating HTTPS connections outside the cluster.
- 3
- A comma-separated list of destination domain names, IP addresses, or other network CIDRs to exclude from proxying. Preface a domain with
.to match subdomains only. For example,.y.commatchesx.y.com, but noty.com. Use*to bypass the proxy for all destinations. - 4
- If provided, the installation program generates a config map that is named
user-ca-bundlein theopenshift-confignamespace to hold the additional CA certificates. If you provideadditionalTrustBundleand at least one proxy setting, theProxyobject is configured to reference theuser-ca-bundleconfig map in thetrustedCAfield. The Cluster Network Operator then creates atrusted-ca-bundleconfig map that merges the contents specified for thetrustedCAparameter with the RHCOS trust bundle. TheadditionalTrustBundlefield is required unless the proxy’s identity certificate is signed by an authority from the RHCOS trust bundle.
NoteThe installation program does not support the proxy
readinessEndpointsfield.- Save the file and reference it when installing OpenShift Container Platform.
The installation program creates a cluster-wide proxy that is named cluster that uses the proxy settings in the provided install-config.yaml file. If no proxy settings are provided, a cluster Proxy object is still created, but it will have a nil spec.
Only the Proxy object named cluster is supported, and no additional proxies can be created.
6.10.6.4. Creating the Kubernetes manifest and Ignition config files
Because you must modify some cluster definition files and manually start the cluster machines, you must generate the Kubernetes manifest and Ignition config files that the cluster needs to make its machines.
The installation configuration file transforms into the Kubernetes manifests. The manifests wrap into the Ignition configuration files, which are later used to create the cluster.
The Ignition config files that the installation program generates contain certificates that expire after 24 hours, which are then renewed at that time. If the cluster is shut down before renewing the certificates and the cluster is later restarted after the 24 hours have elapsed, the cluster automatically recovers the expired certificates. The exception is that you must manually approve the pending node-bootstrapper certificate signing requests (CSRs) to recover kubelet certificates. See the documentation for Recovering from expired control plane certificates for more information.
Prerequisites
- You obtained the OpenShift Container Platform installation program.
-
You created the
install-config.yamlinstallation configuration file.
Procedure
Change to the directory that contains the installation program and generate the Kubernetes manifests for the cluster:
$ ./openshift-install create manifests --dir <installation_directory>1 - 1
- For
<installation_directory>, specify the installation directory that contains theinstall-config.yamlfile you created.
Remove the Kubernetes manifest files that define the control plane machines:
$ rm -f <installation_directory>/openshift/99_openshift-cluster-api_master-machines-*.yamlBy removing these files, you prevent the cluster from automatically generating control plane machines.
Remove the Kubernetes manifest files that define the worker machines:
$ rm -f <installation_directory>/openshift/99_openshift-cluster-api_worker-machineset-*.yamlBecause you create and manage the worker machines yourself, you do not need to initialize these machines.
Check that the
mastersSchedulableparameter in the<installation_directory>/manifests/cluster-scheduler-02-config.ymlKubernetes manifest file is set tofalse. This setting prevents pods from being scheduled on the control plane machines:-
Open the
<installation_directory>/manifests/cluster-scheduler-02-config.ymlfile. -
Locate the
mastersSchedulableparameter and ensure that it is set tofalse. - Save and exit the file.
-
Open the
Remove the
privateZonesections from the<installation_directory>/manifests/cluster-dns-02-config.ymlDNS configuration file:apiVersion: config.openshift.io/v1 kind: DNS metadata: creationTimestamp: null name: cluster spec: baseDomain: example.openshift.com privateZone:1 id: mycluster-100419-private-zone status: {}- 1
- Remove this section completely.
Configure the cloud provider for your VPC.
-
Open the
<installation_directory>/manifests/cloud-provider-config.yamlfile. -
Add the
network-project-idparameter and set its value to the ID of project that hosts the shared VPC network. -
Add the
network-nameparameter and set its value to the name of the shared VPC network that hosts the OpenShift Container Platform cluster. -
Replace the value of the
subnetwork-nameparameter with the value of the shared VPC subnet that hosts your compute machines.
The contents of the
<installation_directory>/manifests/cloud-provider-config.yamlresemble the following example:config: |+ [global] project-id = example-project regional = true multizone = true node-tags = opensh-ptzzx-master node-tags = opensh-ptzzx-worker node-instance-prefix = opensh-ptzzx external-instance-groups-prefix = opensh-ptzzx network-project-id = example-shared-vpc network-name = example-network subnetwork-name = example-worker-subnet-
Open the
If you deploy a cluster that is not on a private network, open the
<installation_directory>/manifests/cluster-ingress-default-ingresscontroller.yamlfile and replace the value of thescopeparameter withExternal. The contents of the file resemble the following example:apiVersion: operator.openshift.io/v1 kind: IngressController metadata: creationTimestamp: null name: default namespace: openshift-ingress-operator spec: endpointPublishingStrategy: loadBalancer: scope: External type: LoadBalancerService status: availableReplicas: 0 domain: '' selector: ''To create the Ignition configuration files, run the following command from the directory that contains the installation program:
$ ./openshift-install create ignition-configs --dir <installation_directory>1 - 1
- For
<installation_directory>, specify the same installation directory.
The following files are generated in the directory:
. ├── auth │ ├── kubeadmin-password │ └── kubeconfig ├── bootstrap.ign ├── master.ign ├── metadata.json └── worker.ign
6.10.7. Exporting common variables
6.10.7.1. Extracting the infrastructure name
The Ignition config files contain a unique cluster identifier that you can use to uniquely identify your cluster in Google Cloud Platform (GCP). The infrastructure name is also used to locate the appropriate GCP resources during an OpenShift Container Platform installation. The provided Deployment Manager templates contain references to this infrastructure name, so you must extract it.
Prerequisites
- You obtained the OpenShift Container Platform installation program and the pull secret for your cluster.
- You generated the Ignition config files for your cluster.
-
You installed the
jqpackage.
Procedure
To extract and view the infrastructure name from the Ignition config file metadata, run the following command:
$ jq -r .infraID <installation_directory>/metadata.json1 - 1
- For
<installation_directory>, specify the path to the directory that you stored the installation files in.
Example output
openshift-vw9j61 - 1
- The output of this command is your cluster name and a random string.
6.10.7.2. Exporting common variables for Deployment Manager templates
You must export a common set of variables that are used with the provided Deployment Manager templates used to assist in completing a user-provided infrastructure install on Google Cloud Platform (GCP).
Specific Deployment Manager templates can also require additional exported variables, which are detailed in their related procedures.
Prerequisites
- Obtain the OpenShift Container Platform installation program and the pull secret for your cluster.
- Generate the Ignition config files for your cluster.
-
Install the
jqpackage.
Procedure
- Export the following common variables to be used by the provided Deployment Manager templates:
$ export BASE_DOMAIN='<base_domain>'
$ export BASE_DOMAIN_ZONE_NAME='<base_domain_zone_name>'
$ export NETWORK_CIDR='10.0.0.0/16'
$ export KUBECONFIG=<installation_directory>/auth/kubeconfig
$ export CLUSTER_NAME=`jq -r .clusterName <installation_directory>/metadata.json`
$ export INFRA_ID=`jq -r .infraID <installation_directory>/metadata.json`
$ export PROJECT_NAME=`jq -r .gcp.projectID <installation_directory>/metadata.json`6.10.8. Networking requirements for user-provisioned infrastructure
All the Red Hat Enterprise Linux CoreOS (RHCOS) machines require network in initramfs during boot to fetch Ignition config from the machine config server.
During the initial boot, the machines require either a DHCP server or that static IP addresses be set on each host in the cluster to establish a network connection, which allows them to download their Ignition config files.
It is recommended to use the DHCP server to manage the machines for the cluster long-term. Ensure that the DHCP server is configured to provide persistent IP addresses and host names to the cluster machines.
The Kubernetes API server must be able to resolve the node names of the cluster machines. If the API servers and worker nodes are in different zones, you can configure a default DNS search zone to allow the API server to resolve the node names. Another supported approach is to always refer to hosts by their fully-qualified domain names in both the node objects and all DNS requests.
You must configure the network connectivity between machines to allow cluster components to communicate. Each machine must be able to resolve the host names of all other machines in the cluster.
| Protocol | Port | Description |
|---|---|---|
| ICMP | N/A | Network reachability tests |
| TCP |
| Metrics |
|
|
Host level services, including the node exporter on ports | |
|
| The default ports that Kubernetes reserves | |
|
| openshift-sdn | |
| UDP |
| VXLAN and Geneve |
|
| VXLAN and Geneve | |
|
|
Host level services, including the node exporter on ports | |
| TCP/UDP |
| Kubernetes node port |
| Protocol | Port | Description |
|---|---|---|
| TCP |
| Kubernetes API |
| Protocol | Port | Description |
|---|---|---|
| TCP |
| etcd server and peer ports |
Network topology requirements
The infrastructure that you provision for your cluster must meet the following network topology requirements.
OpenShift Container Platform requires all nodes to have internet access to pull images for platform containers and provide telemetry data to Red Hat.
Load balancers
Before you install OpenShift Container Platform, you must provision two load balancers that meet the following requirements:
API load balancer: Provides a common endpoint for users, both human and machine, to interact with and configure the platform. Configure the following conditions:
- Layer 4 load balancing only. This can be referred to as Raw TCP, SSL Passthrough, or SSL Bridge mode. If you use SSL Bridge mode, you must enable Server Name Indication (SNI) for the API routes.
- A stateless load balancing algorithm. The options vary based on the load balancer implementation.
ImportantDo not configure session persistence for an API load balancer.
Configure the following ports on both the front and back of the load balancers:
Expand Table 6.43. API load balancer Port Back-end machines (pool members) Internal External Description 6443Bootstrap and control plane. You remove the bootstrap machine from the load balancer after the bootstrap machine initializes the cluster control plane. You must configure the
/readyzendpoint for the API server health check probe.X
X
Kubernetes API server
22623Bootstrap and control plane. You remove the bootstrap machine from the load balancer after the bootstrap machine initializes the cluster control plane.
X
Machine config server
NoteThe load balancer must be configured to take a maximum of 30 seconds from the time the API server turns off the
/readyzendpoint to the removal of the API server instance from the pool. Within the time frame after/readyzreturns an error or becomes healthy, the endpoint must have been removed or added. Probing every 5 or 10 seconds, with two successful requests to become healthy and three to become unhealthy, are well-tested values.Application Ingress load balancer: Provides an Ingress point for application traffic flowing in from outside the cluster. Configure the following conditions:
- Layer 4 load balancing only. This can be referred to as Raw TCP, SSL Passthrough, or SSL Bridge mode. If you use SSL Bridge mode, you must enable Server Name Indication (SNI) for the Ingress routes.
- A connection-based or session-based persistence is recommended, based on the options available and types of applications that will be hosted on the platform.
Configure the following ports on both the front and back of the load balancers:
Expand Table 6.44. Application Ingress load balancer Port Back-end machines (pool members) Internal External Description 443The machines that run the Ingress router pods, compute, or worker, by default.
X
X
HTTPS traffic
80The machines that run the Ingress router pods, compute, or worker, by default.
X
X
HTTP traffic
If the true IP address of the client can be seen by the load balancer, enabling source IP-based session persistence can improve performance for applications that use end-to-end TLS encryption.
A working configuration for the Ingress router is required for an OpenShift Container Platform cluster. You must configure the Ingress router after the control plane initializes.
NTP configuration
OpenShift Container Platform clusters are configured to use a public Network Time Protocol (NTP) server by default. If you want to use a local enterprise NTP server, or if your cluster is being deployed in a disconnected network, you can configure the cluster to use a specific time server. For more information, see the documentation for Configuring chrony time service.
If a DHCP server provides NTP server information, the chrony time service on the Red Hat Enterprise Linux CoreOS (RHCOS) machines read the information and can sync the clock with the NTP servers.
6.10.9. Creating load balancers in GCP
You must configure load balancers in Google Cloud Platform (GCP) for your OpenShift Container Platform cluster to use. One way to create these components is to modify the provided Deployment Manager template.
If you do not use the provided Deployment Manager template to create your GCP infrastructure, you must review the provided information and manually create the infrastructure. If your cluster does not initialize correctly, you might have to contact Red Hat support with your installation logs.
Prerequisites
- Configure a GCP account.
- Generate the Ignition config files for your cluster.
- Create and configure a VPC and associated subnets in GCP.
Procedure
-
Copy the template from the Deployment Manager template for the internal load balancer section of this topic and save it as
02_lb_int.pyon your computer. This template describes the internal load balancing objects that your cluster requires. -
For an external cluster, also copy the template from the Deployment Manager template for the external load balancer section of this topic and save it as
02_lb_ext.pyon your computer. This template describes the external load balancing objects that your cluster requires. Export the variables that the deployment template uses:
Export the cluster network location:
$ export CLUSTER_NETWORK=(`gcloud compute networks describe ${HOST_PROJECT_NETWORK} --project ${HOST_PROJECT} --account ${HOST_PROJECT_ACCOUNT} --format json | jq -r .selfLink`)Export the control plane subnet location:
$ export CONTROL_SUBNET=(`gcloud compute networks subnets describe ${HOST_PROJECT_CONTROL_SUBNET} --region=${REGION} --project ${HOST_PROJECT} --account ${HOST_PROJECT_ACCOUNT} --format json | jq -r .selfLink`)Export the three zones that the cluster uses:
$ export ZONE_0=(`gcloud compute regions describe ${REGION} --format=json | jq -r .zones[0] | cut -d "/" -f9`)$ export ZONE_1=(`gcloud compute regions describe ${REGION} --format=json | jq -r .zones[1] | cut -d "/" -f9`)$ export ZONE_2=(`gcloud compute regions describe ${REGION} --format=json | jq -r .zones[2] | cut -d "/" -f9`)
Create a
02_infra.yamlresource definition file:$ cat <<EOF >02_infra.yaml imports: - path: 02_lb_ext.py - path: 02_lb_int.py1 resources: - name: cluster-lb-ext2 type: 02_lb_ext.py properties: infra_id: '${INFRA_ID}'3 region: '${REGION}'4 - name: cluster-lb-int type: 02_lb_int.py properties: cluster_network: '${CLUSTER_NETWORK}' control_subnet: '${CONTROL_SUBNET}'5 infra_id: '${INFRA_ID}' region: '${REGION}' zones:6 - '${ZONE_0}' - '${ZONE_1}' - '${ZONE_2}' EOF- 1 2
- Required only when deploying an external cluster.
- 3
infra_idis theINFRA_IDinfrastructure name from the extraction step.- 4
regionis the region to deploy the cluster into, for exampleus-central1.- 5
control_subnetis the URI to the control subnet.- 6
zonesare the zones to deploy the control plane instances into, likeus-east1-b,us-east1-c, andus-east1-d.
Create the deployment by using the
gcloudCLI:$ gcloud deployment-manager deployments create ${INFRA_ID}-infra --config 02_infra.yamlExport the cluster IP address:
$ export CLUSTER_IP=(`gcloud compute addresses describe ${INFRA_ID}-cluster-ip --region=${REGION} --format json | jq -r .address`)For an external cluster, also export the cluster public IP address:
$ export CLUSTER_PUBLIC_IP=(`gcloud compute addresses describe ${INFRA_ID}-cluster-public-ip --region=${REGION} --format json | jq -r .address`)
6.10.9.1. Deployment Manager template for the external load balancer
You can use the following Deployment Manager template to deploy the external load balancer that you need for your OpenShift Container Platform cluster:
Example 6.11. 02_lb_ext.py Deployment Manager template
def GenerateConfig(context):
resources = [{
'name': context.properties['infra_id'] + '-cluster-public-ip',
'type': 'compute.v1.address',
'properties': {
'region': context.properties['region']
}
}, {
# Refer to docs/dev/kube-apiserver-health-check.md on how to correctly setup health check probe for kube-apiserver
'name': context.properties['infra_id'] + '-api-http-health-check',
'type': 'compute.v1.httpHealthCheck',
'properties': {
'port': 6080,
'requestPath': '/readyz'
}
}, {
'name': context.properties['infra_id'] + '-api-target-pool',
'type': 'compute.v1.targetPool',
'properties': {
'region': context.properties['region'],
'healthChecks': ['$(ref.' + context.properties['infra_id'] + '-api-http-health-check.selfLink)'],
'instances': []
}
}, {
'name': context.properties['infra_id'] + '-api-forwarding-rule',
'type': 'compute.v1.forwardingRule',
'properties': {
'region': context.properties['region'],
'IPAddress': '$(ref.' + context.properties['infra_id'] + '-cluster-public-ip.selfLink)',
'target': '$(ref.' + context.properties['infra_id'] + '-api-target-pool.selfLink)',
'portRange': '6443'
}
}]
return {'resources': resources}6.10.9.2. Deployment Manager template for the internal load balancer
You can use the following Deployment Manager template to deploy the internal load balancer that you need for your OpenShift Container Platform cluster:
Example 6.12. 02_lb_int.py Deployment Manager template
def GenerateConfig(context):
backends = []
for zone in context.properties['zones']:
backends.append({
'group': '$(ref.' + context.properties['infra_id'] + '-master-' + zone + '-instance-group' + '.selfLink)'
})
resources = [{
'name': context.properties['infra_id'] + '-cluster-ip',
'type': 'compute.v1.address',
'properties': {
'addressType': 'INTERNAL',
'region': context.properties['region'],
'subnetwork': context.properties['control_subnet']
}
}, {
# Refer to docs/dev/kube-apiserver-health-check.md on how to correctly setup health check probe for kube-apiserver
'name': context.properties['infra_id'] + '-api-internal-health-check',
'type': 'compute.v1.healthCheck',
'properties': {
'httpsHealthCheck': {
'port': 6443,
'requestPath': '/readyz'
},
'type': "HTTPS"
}
}, {
'name': context.properties['infra_id'] + '-api-internal-backend-service',
'type': 'compute.v1.regionBackendService',
'properties': {
'backends': backends,
'healthChecks': ['$(ref.' + context.properties['infra_id'] + '-api-internal-health-check.selfLink)'],
'loadBalancingScheme': 'INTERNAL',
'region': context.properties['region'],
'protocol': 'TCP',
'timeoutSec': 120
}
}, {
'name': context.properties['infra_id'] + '-api-internal-forwarding-rule',
'type': 'compute.v1.forwardingRule',
'properties': {
'backendService': '$(ref.' + context.properties['infra_id'] + '-api-internal-backend-service.selfLink)',
'IPAddress': '$(ref.' + context.properties['infra_id'] + '-cluster-ip.selfLink)',
'loadBalancingScheme': 'INTERNAL',
'ports': ['6443','22623'],
'region': context.properties['region'],
'subnetwork': context.properties['control_subnet']
}
}]
for zone in context.properties['zones']:
resources.append({
'name': context.properties['infra_id'] + '-master-' + zone + '-instance-group',
'type': 'compute.v1.instanceGroup',
'properties': {
'namedPorts': [
{
'name': 'ignition',
'port': 22623
}, {
'name': 'https',
'port': 6443
}
],
'network': context.properties['cluster_network'],
'zone': zone
}
})
return {'resources': resources}
You will need this template in addition to the 02_lb_ext.py template when you create an external cluster.
6.10.10. Creating a private DNS zone in GCP
You must configure a private DNS zone in Google Cloud Platform (GCP) for your OpenShift Container Platform cluster to use. One way to create this component is to modify the provided Deployment Manager template.
If you do not use the provided Deployment Manager template to create your GCP infrastructure, you must review the provided information and manually create the infrastructure. If your cluster does not initialize correctly, you might have to contact Red Hat support with your installation logs.
Prerequisites
- Configure a GCP account.
- Generate the Ignition config files for your cluster.
- Create and configure a VPC and associated subnets in GCP.
Procedure
-
Copy the template from the Deployment Manager template for the private DNS section of this topic and save it as
02_dns.pyon your computer. This template describes the private DNS objects that your cluster requires. Create a
02_dns.yamlresource definition file:$ cat <<EOF >02_dns.yaml imports: - path: 02_dns.py resources: - name: cluster-dns type: 02_dns.py properties: infra_id: '${INFRA_ID}'1 cluster_domain: '${CLUSTER_NAME}.${BASE_DOMAIN}'2 cluster_network: '${CLUSTER_NETWORK}'3 EOFCreate the deployment by using the
gcloudCLI:$ gcloud deployment-manager deployments create ${INFRA_ID}-dns --config 02_dns.yaml --project ${HOST_PROJECT} --account ${HOST_PROJECT_ACCOUNT}The templates do not create DNS entries due to limitations of Deployment Manager, so you must create them manually:
Add the internal DNS entries:
$ if [ -f transaction.yaml ]; then rm transaction.yaml; fi $ gcloud dns record-sets transaction start --zone ${INFRA_ID}-private-zone --project ${HOST_PROJECT} --account ${HOST_PROJECT_ACCOUNT} $ gcloud dns record-sets transaction add ${CLUSTER_IP} --name api.${CLUSTER_NAME}.${BASE_DOMAIN}. --ttl 60 --type A --zone ${INFRA_ID}-private-zone --project ${HOST_PROJECT} --account ${HOST_PROJECT_ACCOUNT} $ gcloud dns record-sets transaction add ${CLUSTER_IP} --name api-int.${CLUSTER_NAME}.${BASE_DOMAIN}. --ttl 60 --type A --zone ${INFRA_ID}-private-zone --project ${HOST_PROJECT} --account ${HOST_PROJECT_ACCOUNT} $ gcloud dns record-sets transaction execute --zone ${INFRA_ID}-private-zone --project ${HOST_PROJECT} --account ${HOST_PROJECT_ACCOUNT}For an external cluster, also add the external DNS entries:
$ if [ -f transaction.yaml ]; then rm transaction.yaml; fi $ gcloud --account=${HOST_PROJECT_ACCOUNT} --project=${HOST_PROJECT} dns record-sets transaction start --zone ${BASE_DOMAIN_ZONE_NAME} $ gcloud --account=${HOST_PROJECT_ACCOUNT} --project=${HOST_PROJECT} dns record-sets transaction add ${CLUSTER_PUBLIC_IP} --name api.${CLUSTER_NAME}.${BASE_DOMAIN}. --ttl 60 --type A --zone ${BASE_DOMAIN_ZONE_NAME} $ gcloud --account=${HOST_PROJECT_ACCOUNT} --project=${HOST_PROJECT} dns record-sets transaction execute --zone ${BASE_DOMAIN_ZONE_NAME}
6.10.10.1. Deployment Manager template for the private DNS
You can use the following Deployment Manager template to deploy the private DNS that you need for your OpenShift Container Platform cluster:
Example 6.13. 02_dns.py Deployment Manager template
def GenerateConfig(context):
resources = [{
'name': context.properties['infra_id'] + '-private-zone',
'type': 'dns.v1.managedZone',
'properties': {
'description': '',
'dnsName': context.properties['cluster_domain'] + '.',
'visibility': 'private',
'privateVisibilityConfig': {
'networks': [{
'networkUrl': context.properties['cluster_network']
}]
}
}
}]
return {'resources': resources}6.10.11. Creating firewall rules in GCP
You must create firewall rules in Google Cloud Platform (GCP) for your OpenShift Container Platform cluster to use. One way to create these components is to modify the provided Deployment Manager template.
If you do not use the provided Deployment Manager template to create your GCP infrastructure, you must review the provided information and manually create the infrastructure. If your cluster does not initialize correctly, you might have to contact Red Hat support with your installation logs.
Prerequisites
- Configure a GCP account.
- Generate the Ignition config files for your cluster.
- Create and configure a VPC and associated subnets in GCP.
Procedure
-
Copy the template from the Deployment Manager template for firewall rules section of this topic and save it as
03_firewall.pyon your computer. This template describes the security groups that your cluster requires. Create a
03_firewall.yamlresource definition file:$ cat <<EOF >03_firewall.yaml imports: - path: 03_firewall.py resources: - name: cluster-firewall type: 03_firewall.py properties: allowed_external_cidr: '0.0.0.0/0'1 infra_id: '${INFRA_ID}'2 cluster_network: '${CLUSTER_NETWORK}'3 network_cidr: '${NETWORK_CIDR}'4 EOF- 1
allowed_external_cidris the CIDR range that can access the cluster API and SSH to the bootstrap host. For an internal cluster, set this value to${NETWORK_CIDR}.- 2
infra_idis theINFRA_IDinfrastructure name from the extraction step.- 3
cluster_networkis theselfLinkURL to the cluster network.- 4
network_cidris the CIDR of the VPC network, for example10.0.0.0/16.
Create the deployment by using the
gcloudCLI:$ gcloud deployment-manager deployments create ${INFRA_ID}-firewall --config 03_firewall.yaml --project ${HOST_PROJECT} --account ${HOST_PROJECT_ACCOUNT}
6.10.11.1. Deployment Manager template for firewall rules
You can use the following Deployment Manager template to deploy the firewall rues that you need for your OpenShift Container Platform cluster:
Example 6.14. 03_firewall.py Deployment Manager template
def GenerateConfig(context):
resources = [{
'name': context.properties['infra_id'] + '-bootstrap-in-ssh',
'type': 'compute.v1.firewall',
'properties': {
'network': context.properties['cluster_network'],
'allowed': [{
'IPProtocol': 'tcp',
'ports': ['22']
}],
'sourceRanges': [context.properties['allowed_external_cidr']],
'targetTags': [context.properties['infra_id'] + '-bootstrap']
}
}, {
'name': context.properties['infra_id'] + '-api',
'type': 'compute.v1.firewall',
'properties': {
'network': context.properties['cluster_network'],
'allowed': [{
'IPProtocol': 'tcp',
'ports': ['6443']
}],
'sourceRanges': [context.properties['allowed_external_cidr']],
'targetTags': [context.properties['infra_id'] + '-master']
}
}, {
'name': context.properties['infra_id'] + '-health-checks',
'type': 'compute.v1.firewall',
'properties': {
'network': context.properties['cluster_network'],
'allowed': [{
'IPProtocol': 'tcp',
'ports': ['6080', '6443', '22624']
}],
'sourceRanges': ['35.191.0.0/16', '130.211.0.0/22', '209.85.152.0/22', '209.85.204.0/22'],
'targetTags': [context.properties['infra_id'] + '-master']
}
}, {
'name': context.properties['infra_id'] + '-etcd',
'type': 'compute.v1.firewall',
'properties': {
'network': context.properties['cluster_network'],
'allowed': [{
'IPProtocol': 'tcp',
'ports': ['2379-2380']
}],
'sourceTags': [context.properties['infra_id'] + '-master'],
'targetTags': [context.properties['infra_id'] + '-master']
}
}, {
'name': context.properties['infra_id'] + '-control-plane',
'type': 'compute.v1.firewall',
'properties': {
'network': context.properties['cluster_network'],
'allowed': [{
'IPProtocol': 'tcp',
'ports': ['10257']
},{
'IPProtocol': 'tcp',
'ports': ['10259']
},{
'IPProtocol': 'tcp',
'ports': ['22623']
}],
'sourceTags': [
context.properties['infra_id'] + '-master',
context.properties['infra_id'] + '-worker'
],
'targetTags': [context.properties['infra_id'] + '-master']
}
}, {
'name': context.properties['infra_id'] + '-internal-network',
'type': 'compute.v1.firewall',
'properties': {
'network': context.properties['cluster_network'],
'allowed': [{
'IPProtocol': 'icmp'
},{
'IPProtocol': 'tcp',
'ports': ['22']
}],
'sourceRanges': [context.properties['network_cidr']],
'targetTags': [
context.properties['infra_id'] + '-master',
context.properties['infra_id'] + '-worker'
]
}
}, {
'name': context.properties['infra_id'] + '-internal-cluster',
'type': 'compute.v1.firewall',
'properties': {
'network': context.properties['cluster_network'],
'allowed': [{
'IPProtocol': 'udp',
'ports': ['4789', '6081']
},{
'IPProtocol': 'udp',
'ports': ['500', '4500']
},{
'IPProtocol': 'esp',
},{
'IPProtocol': 'tcp',
'ports': ['9000-9999']
},{
'IPProtocol': 'udp',
'ports': ['9000-9999']
},{
'IPProtocol': 'tcp',
'ports': ['10250']
},{
'IPProtocol': 'tcp',
'ports': ['30000-32767']
},{
'IPProtocol': 'udp',
'ports': ['30000-32767']
}],
'sourceTags': [
context.properties['infra_id'] + '-master',
context.properties['infra_id'] + '-worker'
],
'targetTags': [
context.properties['infra_id'] + '-master',
context.properties['infra_id'] + '-worker'
]
}
}]
return {'resources': resources}6.10.13. Creating the RHCOS cluster image for the GCP infrastructure
You must use a valid Red Hat Enterprise Linux CoreOS (RHCOS) image for Google Cloud Platform (GCP) for your OpenShift Container Platform nodes.
Procedure
Obtain the RHCOS image from the RHCOS image mirror page.
ImportantThe RHCOS images might not change with every release of OpenShift Container Platform. You must download an image with the highest version that is less than or equal to the OpenShift Container Platform version that you install. Use the image version that matches your OpenShift Container Platform version if it is available.
The file name contains the OpenShift Container Platform version number in the format
rhcos-<version>-<arch>-gcp.<arch>.tar.gz.Create the Google storage bucket:
$ gsutil mb gs://<bucket_name>Upload the RHCOS image to the Google storage bucket:
$ gsutil cp <downloaded_image_file_path>/rhcos-<version>-x86_64-gcp.x86_64.tar.gz gs://<bucket_name>Export the uploaded RHCOS image location as a variable:
$ export IMAGE_SOURCE="gs://<bucket_name>/rhcos-<version>-x86_64-gcp.x86_64.tar.gz"Create the cluster image:
$ gcloud compute images create "${INFRA_ID}-rhcos-image" \ --source-uri="${IMAGE_SOURCE}"
6.10.14. Creating the bootstrap machine in GCP
You must create the bootstrap machine in Google Cloud Platform (GCP) to use during OpenShift Container Platform cluster initialization. One way to create this machine is to modify the provided Deployment Manager template.
If you do not use the provided Deployment Manager template to create your bootstrap machine, you must review the provided information and manually create the infrastructure. If your cluster does not initialize correctly, you might have to contact Red Hat support with your installation logs.
Prerequisites
- Configure a GCP account.
- Generate the Ignition config files for your cluster.
- Create and configure a VPC and associated subnets in GCP.
- Create and configure networking and load balancers in GCP.
- Create control plane and compute roles.
- Ensure pyOpenSSL is installed.
Procedure
-
Copy the template from the Deployment Manager template for the bootstrap machine section of this topic and save it as
04_bootstrap.pyon your computer. This template describes the bootstrap machine that your cluster requires. Export the location of the Red Hat Enterprise Linux CoreOS (RHCOS) image that the installation program requires:
$ export CLUSTER_IMAGE=(`gcloud compute images describe ${INFRA_ID}-rhcos-image --format json | jq -r .selfLink`)Create a bucket and upload the
bootstrap.ignfile:$ gsutil mb gs://${INFRA_ID}-bootstrap-ignition $ gsutil cp <installation_directory>/bootstrap.ign gs://${INFRA_ID}-bootstrap-ignition/Create a signed URL for the bootstrap instance to use to access the Ignition config. Export the URL from the output as a variable:
$ export BOOTSTRAP_IGN=`gsutil signurl -d 1h service-account-key.json gs://${INFRA_ID}-bootstrap-ignition/bootstrap.ign | grep "^gs:" | awk '{print $5}'`Create a
04_bootstrap.yamlresource definition file:$ cat <<EOF >04_bootstrap.yaml imports: - path: 04_bootstrap.py resources: - name: cluster-bootstrap type: 04_bootstrap.py properties: infra_id: '${INFRA_ID}'1 region: '${REGION}'2 zone: '${ZONE_0}'3 cluster_network: '${CLUSTER_NETWORK}'4 control_subnet: '${CONTROL_SUBNET}'5 image: '${CLUSTER_IMAGE}'6 machine_type: 'n1-standard-4'7 root_volume_size: '128'8 bootstrap_ign: '${BOOTSTRAP_IGN}'9 EOF- 1
infra_idis theINFRA_IDinfrastructure name from the extraction step.- 2
regionis the region to deploy the cluster into, for exampleus-central1.- 3
zoneis the zone to deploy the bootstrap instance into, for exampleus-central1-b.- 4
cluster_networkis theselfLinkURL to the cluster network.- 5
control_subnetis theselfLinkURL to the control subnet.- 6
imageis theselfLinkURL to the RHCOS image.- 7
machine_typeis the machine type of the instance, for examplen1-standard-4.- 8
root_volume_sizeis the boot disk size for the bootstrap machine.- 9
bootstrap_ignis the URL output when creating a signed URL.
Create the deployment by using the
gcloudCLI:$ gcloud deployment-manager deployments create ${INFRA_ID}-bootstrap --config 04_bootstrap.yamlAdd the bootstrap instance to the internal load balancer instance group:
$ gcloud compute instance-groups unmanaged add-instances ${INFRA_ID}-bootstrap-instance-group --zone=${ZONE_0} --instances=${INFRA_ID}-bootstrapAdd the bootstrap instance group to the internal load balancer backend service:
$ gcloud compute backend-services add-backend ${INFRA_ID}-api-internal-backend-service --region=${REGION} --instance-group=${INFRA_ID}-bootstrap-instance-group --instance-group-zone=${ZONE_0}
6.10.14.1. Deployment Manager template for the bootstrap machine
You can use the following Deployment Manager template to deploy the bootstrap machine that you need for your OpenShift Container Platform cluster:
Example 6.16. 04_bootstrap.py Deployment Manager template
def GenerateConfig(context):
resources = [{
'name': context.properties['infra_id'] + '-bootstrap-public-ip',
'type': 'compute.v1.address',
'properties': {
'region': context.properties['region']
}
}, {
'name': context.properties['infra_id'] + '-bootstrap',
'type': 'compute.v1.instance',
'properties': {
'disks': [{
'autoDelete': True,
'boot': True,
'initializeParams': {
'diskSizeGb': context.properties['root_volume_size'],
'sourceImage': context.properties['image']
}
}],
'machineType': 'zones/' + context.properties['zone'] + '/machineTypes/' + context.properties['machine_type'],
'metadata': {
'items': [{
'key': 'user-data',
'value': '{"ignition":{"config":{"replace":{"source":"' + context.properties['bootstrap_ign'] + '"}},"version":"3.1.0"}}',
}]
},
'networkInterfaces': [{
'subnetwork': context.properties['control_subnet'],
'accessConfigs': [{
'natIP': '$(ref.' + context.properties['infra_id'] + '-bootstrap-public-ip.address)'
}]
}],
'tags': {
'items': [
context.properties['infra_id'] + '-master',
context.properties['infra_id'] + '-bootstrap'
]
},
'zone': context.properties['zone']
}
}, {
'name': context.properties['infra_id'] + '-bootstrap-instance-group',
'type': 'compute.v1.instanceGroup',
'properties': {
'namedPorts': [
{
'name': 'ignition',
'port': 22623
}, {
'name': 'https',
'port': 6443
}
],
'network': context.properties['cluster_network'],
'zone': context.properties['zone']
}
}]
return {'resources': resources}6.10.15. Creating the control plane machines in GCP
You must create the control plane machines in Google Cloud Platform (GCP) for your cluster to use. One way to create these machines is to modify the provided Deployment Manager template.
If you do not use the provided Deployment Manager template to create your control plane machines, you must review the provided information and manually create the infrastructure. If your cluster does not initialize correctly, you might have to contact Red Hat support with your installation logs.
Prerequisites
- Configure a GCP account.
- Generate the Ignition config files for your cluster.
- Create and configure a VPC and associated subnets in GCP.
- Create and configure networking and load balancers in GCP.
- Create control plane and compute roles.
- Create the bootstrap machine.
Procedure
-
Copy the template from the Deployment Manager template for control plane machines section of this topic and save it as
05_control_plane.pyon your computer. This template describes the control plane machines that your cluster requires. Export the following variable required by the resource definition:
$ export MASTER_IGNITION=`cat <installation_directory>/master.ign`Create a
05_control_plane.yamlresource definition file:$ cat <<EOF >05_control_plane.yaml imports: - path: 05_control_plane.py resources: - name: cluster-control-plane type: 05_control_plane.py properties: infra_id: '${INFRA_ID}'1 zones:2 - '${ZONE_0}' - '${ZONE_1}' - '${ZONE_2}' control_subnet: '${CONTROL_SUBNET}'3 image: '${CLUSTER_IMAGE}'4 machine_type: 'n1-standard-4'5 root_volume_size: '128' service_account_email: '${MASTER_SERVICE_ACCOUNT}'6 ignition: '${MASTER_IGNITION}'7 EOF- 1
infra_idis theINFRA_IDinfrastructure name from the extraction step.- 2
zonesare the zones to deploy the control plane instances into, for exampleus-central1-a,us-central1-b, andus-central1-c.- 3
control_subnetis theselfLinkURL to the control subnet.- 4
imageis theselfLinkURL to the RHCOS image.- 5
machine_typeis the machine type of the instance, for examplen1-standard-4.- 6
service_account_emailis the email address for the master service account that you created.- 7
ignitionis the contents of themaster.ignfile.
Create the deployment by using the
gcloudCLI:$ gcloud deployment-manager deployments create ${INFRA_ID}-control-plane --config 05_control_plane.yamlThe templates do not manage load balancer membership due to limitations of Deployment Manager, so you must add the control plane machines manually.
Run the following commands to add the control plane machines to the appropriate instance groups:
$ gcloud compute instance-groups unmanaged add-instances ${INFRA_ID}-master-${ZONE_0}-instance-group --zone=${ZONE_0} --instances=${INFRA_ID}-master-0 $ gcloud compute instance-groups unmanaged add-instances ${INFRA_ID}-master-${ZONE_1}-instance-group --zone=${ZONE_1} --instances=${INFRA_ID}-master-1 $ gcloud compute instance-groups unmanaged add-instances ${INFRA_ID}-master-${ZONE_2}-instance-group --zone=${ZONE_2} --instances=${INFRA_ID}-master-2For an external cluster, you must also run the following commands to add the control plane machines to the target pools:
$ gcloud compute target-pools add-instances ${INFRA_ID}-api-target-pool --instances-zone="${ZONE_0}" --instances=${INFRA_ID}-master-0 $ gcloud compute target-pools add-instances ${INFRA_ID}-api-target-pool --instances-zone="${ZONE_1}" --instances=${INFRA_ID}-master-1 $ gcloud compute target-pools add-instances ${INFRA_ID}-api-target-pool --instances-zone="${ZONE_2}" --instances=${INFRA_ID}-master-2
6.10.15.1. Deployment Manager template for control plane machines
You can use the following Deployment Manager template to deploy the control plane machines that you need for your OpenShift Container Platform cluster:
Example 6.17. 05_control_plane.py Deployment Manager template
def GenerateConfig(context):
resources = [{
'name': context.properties['infra_id'] + '-master-0',
'type': 'compute.v1.instance',
'properties': {
'disks': [{
'autoDelete': True,
'boot': True,
'initializeParams': {
'diskSizeGb': context.properties['root_volume_size'],
'diskType': 'zones/' + context.properties['zones'][0] + '/diskTypes/pd-ssd',
'sourceImage': context.properties['image']
}
}],
'machineType': 'zones/' + context.properties['zones'][0] + '/machineTypes/' + context.properties['machine_type'],
'metadata': {
'items': [{
'key': 'user-data',
'value': context.properties['ignition']
}]
},
'networkInterfaces': [{
'subnetwork': context.properties['control_subnet']
}],
'serviceAccounts': [{
'email': context.properties['service_account_email'],
'scopes': ['https://www.googleapis.com/auth/cloud-platform']
}],
'tags': {
'items': [
context.properties['infra_id'] + '-master',
]
},
'zone': context.properties['zones'][0]
}
}, {
'name': context.properties['infra_id'] + '-master-1',
'type': 'compute.v1.instance',
'properties': {
'disks': [{
'autoDelete': True,
'boot': True,
'initializeParams': {
'diskSizeGb': context.properties['root_volume_size'],
'diskType': 'zones/' + context.properties['zones'][1] + '/diskTypes/pd-ssd',
'sourceImage': context.properties['image']
}
}],
'machineType': 'zones/' + context.properties['zones'][1] + '/machineTypes/' + context.properties['machine_type'],
'metadata': {
'items': [{
'key': 'user-data',
'value': context.properties['ignition']
}]
},
'networkInterfaces': [{
'subnetwork': context.properties['control_subnet']
}],
'serviceAccounts': [{
'email': context.properties['service_account_email'],
'scopes': ['https://www.googleapis.com/auth/cloud-platform']
}],
'tags': {
'items': [
context.properties['infra_id'] + '-master',
]
},
'zone': context.properties['zones'][1]
}
}, {
'name': context.properties['infra_id'] + '-master-2',
'type': 'compute.v1.instance',
'properties': {
'disks': [{
'autoDelete': True,
'boot': True,
'initializeParams': {
'diskSizeGb': context.properties['root_volume_size'],
'diskType': 'zones/' + context.properties['zones'][2] + '/diskTypes/pd-ssd',
'sourceImage': context.properties['image']
}
}],
'machineType': 'zones/' + context.properties['zones'][2] + '/machineTypes/' + context.properties['machine_type'],
'metadata': {
'items': [{
'key': 'user-data',
'value': context.properties['ignition']
}]
},
'networkInterfaces': [{
'subnetwork': context.properties['control_subnet']
}],
'serviceAccounts': [{
'email': context.properties['service_account_email'],
'scopes': ['https://www.googleapis.com/auth/cloud-platform']
}],
'tags': {
'items': [
context.properties['infra_id'] + '-master',
]
},
'zone': context.properties['zones'][2]
}
}]
return {'resources': resources}6.10.16. Wait for bootstrap completion and remove bootstrap resources in GCP
After you create all of the required infrastructure in Google Cloud Platform (GCP), wait for the bootstrap process to complete on the machines that you provisioned by using the Ignition config files that you generated with the installation program.
Prerequisites
- Configure a GCP account.
- Generate the Ignition config files for your cluster.
- Create and configure a VPC and associated subnets in GCP.
- Create and configure networking and load balancers in GCP.
- Create control plane and compute roles.
- Create the bootstrap machine.
- Create the control plane machines.
Procedure
Change to the directory that contains the installation program and run the following command:
$ ./openshift-install wait-for bootstrap-complete --dir <installation_directory> \1 --log-level info2 If the command exits without a
FATALwarning, your production control plane has initialized.Delete the bootstrap resources:
$ gcloud compute backend-services remove-backend ${INFRA_ID}-api-internal-backend-service --region=${REGION} --instance-group=${INFRA_ID}-bootstrap-instance-group --instance-group-zone=${ZONE_0} $ gsutil rm gs://${INFRA_ID}-bootstrap-ignition/bootstrap.ign $ gsutil rb gs://${INFRA_ID}-bootstrap-ignition $ gcloud deployment-manager deployments delete ${INFRA_ID}-bootstrap
6.10.17. Creating additional worker machines in GCP
You can create worker machines in Google Cloud Platform (GCP) for your cluster to use by launching individual instances discretely or by automated processes outside the cluster, such as auto scaling groups. You can also take advantage of the built-in cluster scaling mechanisms and the machine API in OpenShift Container Platform.
In this example, you manually launch one instance by using the Deployment Manager template. Additional instances can be launched by including additional resources of type 06_worker.py in the file.
If you do not use the provided Deployment Manager template to create your worker machines, you must review the provided information and manually create the infrastructure. If your cluster does not initialize correctly, you might have to contact Red Hat support with your installation logs.
Prerequisites
- Configure a GCP account.
- Generate the Ignition config files for your cluster.
- Create and configure a VPC and associated subnets in GCP.
- Create and configure networking and load balancers in GCP.
- Create control plane and compute roles.
- Create the bootstrap machine.
- Create the control plane machines.
Procedure
-
Copy the template from the Deployment Manager template for worker machines section of this topic and save it as
06_worker.pyon your computer. This template describes the worker machines that your cluster requires. Export the variables that the resource definition uses.
Export the subnet that hosts the compute machines:
$ export COMPUTE_SUBNET=(`gcloud compute networks subnets describe ${HOST_PROJECT_COMPUTE_SUBNET} --region=${REGION} --project ${HOST_PROJECT} --account ${HOST_PROJECT_ACCOUNT} --format json | jq -r .selfLink`)Export the email address for your service account:
$ export WORKER_SERVICE_ACCOUNT=(`gcloud iam service-accounts list --filter "email~^${INFRA_ID}-w@${PROJECT_NAME}." --format json | jq -r '.[0].email'`)Export the location of the compute machine Ignition config file:
$ export WORKER_IGNITION=`cat <installation_directory>/worker.ign`
Create a
06_worker.yamlresource definition file:$ cat <<EOF >06_worker.yaml imports: - path: 06_worker.py resources: - name: 'worker-0'1 type: 06_worker.py properties: infra_id: '${INFRA_ID}'2 zone: '${ZONE_0}'3 compute_subnet: '${COMPUTE_SUBNET}'4 image: '${CLUSTER_IMAGE}'5 machine_type: 'n1-standard-4'6 root_volume_size: '128' service_account_email: '${WORKER_SERVICE_ACCOUNT}'7 ignition: '${WORKER_IGNITION}'8 - name: 'worker-1' type: 06_worker.py properties: infra_id: '${INFRA_ID}'9 zone: '${ZONE_1}'10 compute_subnet: '${COMPUTE_SUBNET}'11 image: '${CLUSTER_IMAGE}'12 machine_type: 'n1-standard-4'13 root_volume_size: '128' service_account_email: '${WORKER_SERVICE_ACCOUNT}'14 ignition: '${WORKER_IGNITION}'15 EOF- 1
nameis the name of the worker machine, for exampleworker-0.- 2 9
infra_idis theINFRA_IDinfrastructure name from the extraction step.- 3 10
zoneis the zone to deploy the worker machine into, for exampleus-central1-a.- 4 11
compute_subnetis theselfLinkURL to the compute subnet.- 5 12
imageis theselfLinkURL to the RHCOS image.- 6 13
machine_typeis the machine type of the instance, for examplen1-standard-4.- 7 14
service_account_emailis the email address for the worker service account that you created.- 8 15
ignitionis the contents of theworker.ignfile.
-
Optional: If you want to launch additional instances, include additional resources of type
06_worker.pyin your06_worker.yamlresource definition file. Create the deployment by using the
gcloudCLI:$ gcloud deployment-manager deployments create ${INFRA_ID}-worker --config 06_worker.yaml
6.10.17.1. Deployment Manager template for worker machines
You can use the following Deployment Manager template to deploy the worker machines that you need for your OpenShift Container Platform cluster:
Example 6.18. 06_worker.py Deployment Manager template
def GenerateConfig(context):
resources = [{
'name': context.properties['infra_id'] + '-' + context.env['name'],
'type': 'compute.v1.instance',
'properties': {
'disks': [{
'autoDelete': True,
'boot': True,
'initializeParams': {
'diskSizeGb': context.properties['root_volume_size'],
'sourceImage': context.properties['image']
}
}],
'machineType': 'zones/' + context.properties['zone'] + '/machineTypes/' + context.properties['machine_type'],
'metadata': {
'items': [{
'key': 'user-data',
'value': context.properties['ignition']
}]
},
'networkInterfaces': [{
'subnetwork': context.properties['compute_subnet']
}],
'serviceAccounts': [{
'email': context.properties['service_account_email'],
'scopes': ['https://www.googleapis.com/auth/cloud-platform']
}],
'tags': {
'items': [
context.properties['infra_id'] + '-worker',
]
},
'zone': context.properties['zone']
}
}]
return {'resources': resources}6.10.18. Installing the OpenShift CLI by downloading the binary
You can install the OpenShift CLI (oc) to interact with OpenShift Container Platform from a command-line interface. You can install oc on Linux, Windows, or macOS.
If you installed an earlier version of oc, you cannot use it to complete all of the commands in OpenShift Container Platform 4.7. Download and install the new version of oc.
6.10.18.1. Installing the OpenShift CLI on Linux
You can install the OpenShift CLI (oc) binary on Linux by using the following procedure.
Procedure
- Navigate to the OpenShift Container Platform downloads page on the Red Hat Customer Portal.
- Select the appropriate version in the Version drop-down menu.
- Click Download Now next to the OpenShift v4.7 Linux Client entry and save the file.
Unpack the archive:
$ tar xvzf <file>Place the
ocbinary in a directory that is on yourPATH.To check your
PATH, execute the following command:$ echo $PATH
After you install the OpenShift CLI, it is available using the oc command:
$ oc <command>6.10.18.2. Installing the OpenShift CLI on Windows
You can install the OpenShift CLI (oc) binary on Windows by using the following procedure.
Procedure
- Navigate to the OpenShift Container Platform downloads page on the Red Hat Customer Portal.
- Select the appropriate version in the Version drop-down menu.
- Click Download Now next to the OpenShift v4.7 Windows Client entry and save the file.
- Unzip the archive with a ZIP program.
Move the
ocbinary to a directory that is on yourPATH.To check your
PATH, open the command prompt and execute the following command:C:\> path
After you install the OpenShift CLI, it is available using the oc command:
C:\> oc <command>6.10.18.3. Installing the OpenShift CLI on macOS
You can install the OpenShift CLI (oc) binary on macOS by using the following procedure.
Procedure
- Navigate to the OpenShift Container Platform downloads page on the Red Hat Customer Portal.
- Select the appropriate version in the Version drop-down menu.
- Click Download Now next to the OpenShift v4.7 MacOSX Client entry and save the file.
- Unpack and unzip the archive.
Move the
ocbinary to a directory on your PATH.To check your
PATH, open a terminal and execute the following command:$ echo $PATH
After you install the OpenShift CLI, it is available using the oc command:
$ oc <command>6.10.19. Logging in to the cluster by using the CLI
You can log in to your cluster as a default system user by exporting the cluster kubeconfig file. The kubeconfig file contains information about the cluster that is used by the CLI to connect a client to the correct cluster and API server. The file is specific to a cluster and is created during OpenShift Container Platform installation.
Prerequisites
- You deployed an OpenShift Container Platform cluster.
-
You installed the
ocCLI.
Procedure
Export the
kubeadmincredentials:$ export KUBECONFIG=<installation_directory>/auth/kubeconfig1 - 1
- For
<installation_directory>, specify the path to the directory that you stored the installation files in.
Verify you can run
occommands successfully using the exported configuration:$ oc whoamiExample output
system:admin
6.10.20. Approving the certificate signing requests for your machines
When you add machines to a cluster, two pending certificate signing requests (CSRs) are generated for each machine that you added. You must confirm that these CSRs are approved or, if necessary, approve them yourself. The client requests must be approved first, followed by the server requests.
Prerequisites
- You added machines to your cluster.
Procedure
Confirm that the cluster recognizes the machines:
$ oc get nodesExample output
NAME STATUS ROLES AGE VERSION master-0 Ready master 63m v1.20.0 master-1 Ready master 63m v1.20.0 master-2 Ready master 64m v1.20.0The output lists all of the machines that you created.
NoteThe preceding output might not include the compute nodes, also known as worker nodes, until some CSRs are approved.
Review the pending CSRs and ensure that you see the client requests with the
PendingorApprovedstatus for each machine that you added to the cluster:$ oc get csrExample output
NAME AGE REQUESTOR CONDITION csr-8b2br 15m system:serviceaccount:openshift-machine-config-operator:node-bootstrapper Pending csr-8vnps 15m system:serviceaccount:openshift-machine-config-operator:node-bootstrapper Pending ...In this example, two machines are joining the cluster. You might see more approved CSRs in the list.
If the CSRs were not approved, after all of the pending CSRs for the machines you added are in
Pendingstatus, approve the CSRs for your cluster machines:NoteBecause the CSRs rotate automatically, approve your CSRs within an hour of adding the machines to the cluster. If you do not approve them within an hour, the certificates will rotate, and more than two certificates will be present for each node. You must approve all of these certificates. Once the client CSR is approved, the Kubelet creates a secondary CSR for the serving certificate, which requires manual approval. Then, subsequent serving certificate renewal requests are automatically approved by the
machine-approverif the Kubelet requests a new certificate with identical parameters.NoteFor clusters running on platforms that are not machine API enabled, such as bare metal and other user-provisioned infrastructure, you must implement a method of automatically approving the kubelet serving certificate requests (CSRs). If a request is not approved, then the
oc exec,oc rsh, andoc logscommands cannot succeed, because a serving certificate is required when the API server connects to the kubelet. Any operation that contacts the Kubelet endpoint requires this certificate approval to be in place. The method must watch for new CSRs, confirm that the CSR was submitted by thenode-bootstrapperservice account in thesystem:nodeorsystem:admingroups, and confirm the identity of the node.To approve them individually, run the following command for each valid CSR:
$ oc adm certificate approve <csr_name>1 - 1
<csr_name>is the name of a CSR from the list of current CSRs.
To approve all pending CSRs, run the following command:
$ oc get csr -o go-template='{{range .items}}{{if not .status}}{{.metadata.name}}{{"\n"}}{{end}}{{end}}' | xargs --no-run-if-empty oc adm certificate approveNoteSome Operators might not become available until some CSRs are approved.
Now that your client requests are approved, you must review the server requests for each machine that you added to the cluster:
$ oc get csrExample output
NAME AGE REQUESTOR CONDITION csr-bfd72 5m26s system:node:ip-10-0-50-126.us-east-2.compute.internal Pending csr-c57lv 5m26s system:node:ip-10-0-95-157.us-east-2.compute.internal Pending ...If the remaining CSRs are not approved, and are in the
Pendingstatus, approve the CSRs for your cluster machines:To approve them individually, run the following command for each valid CSR:
$ oc adm certificate approve <csr_name>1 - 1
<csr_name>is the name of a CSR from the list of current CSRs.
To approve all pending CSRs, run the following command:
$ oc get csr -o go-template='{{range .items}}{{if not .status}}{{.metadata.name}}{{"\n"}}{{end}}{{end}}' | xargs oc adm certificate approve
After all client and server CSRs have been approved, the machines have the
Readystatus. Verify this by running the following command:$ oc get nodesExample output
NAME STATUS ROLES AGE VERSION master-0 Ready master 73m v1.20.0 master-1 Ready master 73m v1.20.0 master-2 Ready master 74m v1.20.0 worker-0 Ready worker 11m v1.20.0 worker-1 Ready worker 11m v1.20.0NoteIt can take a few minutes after approval of the server CSRs for the machines to transition to the
Readystatus.
Additional information
- For more information on CSRs, see Certificate Signing Requests.
6.10.21. Adding the ingress DNS records
DNS zone configuration is removed when creating Kubernetes manifests and generating Ignition configs. You must manually create DNS records that point at the ingress load balancer. You can create either a wildcard *.apps.{baseDomain}. or specific records. You can use A, CNAME, and other records per your requirements.
Prerequisites
- Configure a GCP account.
- Remove the DNS Zone configuration when creating Kubernetes manifests and generating Ignition configs.
- Create and configure a VPC and associated subnets in GCP.
- Create and configure networking and load balancers in GCP.
- Create control plane and compute roles.
- Create the bootstrap machine.
- Create the control plane machines.
- Create the worker machines.
Procedure
Wait for the Ingress router to create a load balancer and populate the
EXTERNAL-IPfield:$ oc -n openshift-ingress get service router-defaultExample output
NAME TYPE CLUSTER-IP EXTERNAL-IP PORT(S) AGE router-default LoadBalancer 172.30.18.154 35.233.157.184 80:32288/TCP,443:31215/TCP 98Add the A record to your zones:
To use A records:
Export the variable for the router IP address:
$ export ROUTER_IP=`oc -n openshift-ingress get service router-default --no-headers | awk '{print $4}'`Add the A record to the private zones:
$ if [ -f transaction.yaml ]; then rm transaction.yaml; fi $ gcloud dns record-sets transaction start --zone ${INFRA_ID}-private-zone --project ${HOST_PROJECT} --account ${HOST_PROJECT_ACCOUNT} $ gcloud dns record-sets transaction add ${ROUTER_IP} --name \*.apps.${CLUSTER_NAME}.${BASE_DOMAIN}. --ttl 300 --type A --zone ${INFRA_ID}-private-zone --project ${HOST_PROJECT} --account ${HOST_PROJECT_ACCOUNT} $ gcloud dns record-sets transaction execute --zone ${INFRA_ID}-private-zone --project ${HOST_PROJECT} --account ${HOST_PROJECT_ACCOUNT}For an external cluster, also add the A record to the public zones:
$ if [ -f transaction.yaml ]; then rm transaction.yaml; fi $ gcloud dns record-sets transaction start --zone ${BASE_DOMAIN_ZONE_NAME} --project ${HOST_PROJECT} --account ${HOST_PROJECT_ACCOUNT} $ gcloud dns record-sets transaction add ${ROUTER_IP} --name \*.apps.${CLUSTER_NAME}.${BASE_DOMAIN}. --ttl 300 --type A --zone ${BASE_DOMAIN_ZONE_NAME} --project ${HOST_PROJECT} --account ${HOST_PROJECT_ACCOUNT} $ gcloud dns record-sets transaction execute --zone ${BASE_DOMAIN_ZONE_NAME} --project ${HOST_PROJECT} --account ${HOST_PROJECT_ACCOUNT}
To add explicit domains instead of using a wildcard, create entries for each of the cluster’s current routes:
$ oc get --all-namespaces -o jsonpath='{range .items[*]}{range .status.ingress[*]}{.host}{"\n"}{end}{end}' routesExample output
oauth-openshift.apps.your.cluster.domain.example.com console-openshift-console.apps.your.cluster.domain.example.com downloads-openshift-console.apps.your.cluster.domain.example.com alertmanager-main-openshift-monitoring.apps.your.cluster.domain.example.com grafana-openshift-monitoring.apps.your.cluster.domain.example.com prometheus-k8s-openshift-monitoring.apps.your.cluster.domain.example.com
6.10.22. Adding ingress firewall rules
The cluster requires several firewall rules. If you do not use a shared VPC, these rules are created by the ingress controller via the GCP cloud provider. When you use a shared VPC, you can either create cluster-wide firewall rules for all services now or create each rule based on events, when the cluster requests access. By creating each rule when the cluster requests access, you know exactly which firewall rules are required. By creating cluster-wide firewall rules, you can apply the same rule set across multiple clusters.
If you choose to create each rule based on events, you must create firewall rules after you provision the cluster and during the life of the cluster when the console notifies you that rules are missing. Events that are similar to the following event are displayed, and you must add the firewall rules that are required:
$ oc get events -n openshift-ingress --field-selector="reason=LoadBalancerManualChange"Example output
Firewall change required by security admin: `gcloud compute firewall-rules create k8s-fw-a26e631036a3f46cba28f8df67266d55 --network example-network --description "{\"kubernetes.io/service-name\":\"openshift-ingress/router-default\", \"kubernetes.io/service-ip\":\"35.237.236.234\"}\" --allow tcp:443,tcp:80 --source-ranges 0.0.0.0/0 --target-tags exampl-fqzq7-master,exampl-fqzq7-worker --project example-project`If you encounter issues when creating these rule-based events, you can configure the cluster-wide firewall rules while your cluster is running.
6.10.23. Completing a GCP installation on user-provisioned infrastructure
After you start the OpenShift Container Platform installation on Google Cloud Platform (GCP) user-provisioned infrastructure, you can monitor the cluster events until the cluster is ready.
Prerequisites
- Deploy the bootstrap machine for an OpenShift Container Platform cluster on user-provisioned GCP infrastructure.
-
Install the
ocCLI and log in.
Procedure
Complete the cluster installation:
$ ./openshift-install --dir <installation_directory> wait-for install-complete1 Example output
INFO Waiting up to 30m0s for the cluster to initialize...- 1
- For
<installation_directory>, specify the path to the directory that you stored the installation files in.
Important-
The Ignition config files that the installation program generates contain certificates that expire after 24 hours, which are then renewed at that time. If the cluster is shut down before renewing the certificates and the cluster is later restarted after the 24 hours have elapsed, the cluster automatically recovers the expired certificates. The exception is that you must manually approve the pending
node-bootstrappercertificate signing requests (CSRs) to recover kubelet certificates. See the documentation for Recovering from expired control plane certificates for more information. - It is recommended that you use Ignition config files within 12 hours after they are generated because the 24-hour certificate rotates from 16 to 22 hours after the cluster is installed. By using the Ignition config files within 12 hours, you can avoid installation failure if the certificate update runs during installation.
Observe the running state of your cluster.
Run the following command to view the current cluster version and status:
$ oc get clusterversionExample output
NAME VERSION AVAILABLE PROGRESSING SINCE STATUS version False True 24m Working towards 4.5.4: 99% completeRun the following command to view the Operators managed on the control plane by the Cluster Version Operator (CVO):
$ oc get clusteroperatorsExample output
NAME VERSION AVAILABLE PROGRESSING DEGRADED SINCE authentication 4.5.4 True False False 7m56s cloud-credential 4.5.4 True False False 31m cluster-autoscaler 4.5.4 True False False 16m console 4.5.4 True False False 10m csi-snapshot-controller 4.5.4 True False False 16m dns 4.5.4 True False False 22m etcd 4.5.4 False False False 25s image-registry 4.5.4 True False False 16m ingress 4.5.4 True False False 16m insights 4.5.4 True False False 17m kube-apiserver 4.5.4 True False False 19m kube-controller-manager 4.5.4 True False False 20m kube-scheduler 4.5.4 True False False 20m kube-storage-version-migrator 4.5.4 True False False 16m machine-api 4.5.4 True False False 22m machine-config 4.5.4 True False False 22m marketplace 4.5.4 True False False 16m monitoring 4.5.4 True False False 10m network 4.5.4 True False False 23m node-tuning 4.5.4 True False False 23m openshift-apiserver 4.5.4 True False False 17m openshift-controller-manager 4.5.4 True False False 15m openshift-samples 4.5.4 True False False 16m operator-lifecycle-manager 4.5.4 True False False 22m operator-lifecycle-manager-catalog 4.5.4 True False False 22m operator-lifecycle-manager-packageserver 4.5.4 True False False 18m service-ca 4.5.4 True False False 23m service-catalog-apiserver 4.5.4 True False False 23m service-catalog-controller-manager 4.5.4 True False False 23m storage 4.5.4 True False False 17mRun the following command to view your cluster pods:
$ oc get pods --all-namespacesExample output
NAMESPACE NAME READY STATUS RESTARTS AGE kube-system etcd-member-ip-10-0-3-111.us-east-2.compute.internal 1/1 Running 0 35m kube-system etcd-member-ip-10-0-3-239.us-east-2.compute.internal 1/1 Running 0 37m kube-system etcd-member-ip-10-0-3-24.us-east-2.compute.internal 1/1 Running 0 35m openshift-apiserver-operator openshift-apiserver-operator-6d6674f4f4-h7t2t 1/1 Running 1 37m openshift-apiserver apiserver-fm48r 1/1 Running 0 30m openshift-apiserver apiserver-fxkvv 1/1 Running 0 29m openshift-apiserver apiserver-q85nm 1/1 Running 0 29m ... openshift-service-ca-operator openshift-service-ca-operator-66ff6dc6cd-9r257 1/1 Running 0 37m openshift-service-ca apiservice-cabundle-injector-695b6bcbc-cl5hm 1/1 Running 0 35m openshift-service-ca configmap-cabundle-injector-8498544d7-25qn6 1/1 Running 0 35m openshift-service-ca service-serving-cert-signer-6445fc9c6-wqdqn 1/1 Running 0 35m openshift-service-catalog-apiserver-operator openshift-service-catalog-apiserver-operator-549f44668b-b5q2w 1/1 Running 0 32m openshift-service-catalog-controller-manager-operator openshift-service-catalog-controller-manager-operator-b78cr2lnm 1/1 Running 0 31m
When the current cluster version is
AVAILABLE, the installation is complete.
6.10.24. Telemetry access for OpenShift Container Platform
In OpenShift Container Platform 4.7, the Telemetry service, which runs by default to provide metrics about cluster health and the success of updates, requires internet access. If your cluster is connected to the internet, Telemetry runs automatically, and your cluster is registered to OpenShift Cluster Manager.
After you confirm that your OpenShift Cluster Manager inventory is correct, either maintained automatically by Telemetry or manually by using OpenShift Cluster Manager, use subscription watch to track your OpenShift Container Platform subscriptions at the account or multi-cluster level.
6.10.25. Next steps
- Customize your cluster.
- If necessary, you can opt out of remote health reporting.
6.11. Installing a cluster on GCP in a restricted network with user-provisioned infrastructure
In OpenShift Container Platform version 4.7, you can install a cluster on Google Cloud Platform (GCP) that uses infrastructure that you provide and an internal mirror of the installation release content.
While you can install an OpenShift Container Platform cluster by using mirrored installation release content, your cluster still requires internet access to use the GCP APIs.
The steps for performing a user-provided infrastructure install are outlined here. Several Deployment Manager templates are provided to assist in completing these steps or to help model your own. You are also free to create the required resources through other methods.
The steps for performing a user-provisioned infrastructure installation are provided as an example only. Installing a cluster with infrastructure you provide requires knowledge of the cloud provider and the installation process of OpenShift Container Platform. Several Deployment Manager templates are provided to assist in completing these steps or to help model your own. You are also free to create the required resources through other methods; the templates are just an example.
6.11.1. Prerequisites
Create a registry on your mirror host and obtain the
imageContentSourcesdata for your version of OpenShift Container Platform.ImportantBecause the installation media is on the mirror host, you can use that computer to complete all installation steps.
- Review details about the OpenShift Container Platform installation and update processes.
-
If you use a firewall, you must configure it to allow the sites that your cluster requires access to. While you might need to grant access to more sites, you must grant access to
*.googleapis.comandaccounts.google.com. - If you do not allow the system to manage identity and access management (IAM), then a cluster administrator can manually create and maintain IAM credentials. Manual mode can also be used in environments where the cloud IAM APIs are not reachable.
6.11.2. About installations in restricted networks
In OpenShift Container Platform 4.7, you can perform an installation that does not require an active connection to the Internet to obtain software components. Restricted network installations can be completed using installer-provisioned infrastructure or user-provisioned infrastructure, depending on the cloud platform to which you are installing the cluster.
If you choose to perform a restricted network installation on a cloud platform, you still require access to its cloud APIs. Some cloud functions, like Amazon Web Service’s Route 53 DNS and IAM services, require internet access. Depending on your network, you might require less Internet access for an installation on bare metal hardware or on VMware vSphere.
To complete a restricted network installation, you must create a registry that mirrors the contents of the OpenShift Container Platform registry and contains the installation media. You can create this registry on a mirror host, which can access both the Internet and your closed network, or by using other methods that meet your restrictions.
Because of the complexity of the configuration for user-provisioned installations, consider completing a standard user-provisioned infrastructure installation before you attempt a restricted network installation using user-provisioned infrastructure. Completing this test installation might make it easier to isolate and troubleshoot any issues that might arise during your installation in a restricted network.
6.11.2.1. Additional limits
Clusters in restricted networks have the following additional limitations and restrictions:
-
The
ClusterVersionstatus includes anUnable to retrieve available updateserror. - By default, you cannot use the contents of the Developer Catalog because you cannot access the required image stream tags.
6.11.3. Internet access for OpenShift Container Platform
In OpenShift Container Platform 4.7, you require access to the Internet to obtain the images that are necessary to install your cluster.
You must have Internet access to:
- Access OpenShift Cluster Manager to download the installation program and perform subscription management. If the cluster has internet access and you do not disable Telemetry, that service automatically entitles your cluster.
- Access Quay.io to obtain the packages that are required to install your cluster.
- Obtain the packages that are required to perform cluster updates.
If your cluster cannot have direct Internet access, you can perform a restricted network installation on some types of infrastructure that you provision. During that process, you download the content that is required and use it to populate a mirror registry with the packages that you need to install a cluster and generate the installation program. With some installation types, the environment that you install your cluster in will not require Internet access. Before you update the cluster, you update the content of the mirror registry.
6.11.4. Configuring your GCP project
Before you can install OpenShift Container Platform, you must configure a Google Cloud Platform (GCP) project to host it.
6.11.4.1. Creating a GCP project
To install OpenShift Container Platform, you must create a project in your Google Cloud Platform (GCP) account to host the cluster.
Procedure
Create a project to host your OpenShift Container Platform cluster. See Creating and Managing Projects in the GCP documentation.
ImportantYour GCP project must use the Premium Network Service Tier if you are using installer-provisioned infrastructure. The Standard Network Service Tier is not supported for clusters installed using the installation program. The installation program configures internal load balancing for the
api-int.<cluster_name>.<base_domain>URL; the Premium Tier is required for internal load balancing.
6.11.4.2. Enabling API services in GCP
Your Google Cloud Platform (GCP) project requires access to several API services to complete OpenShift Container Platform installation.
Prerequisites
- You created a project to host your cluster.
Procedure
Enable the following required API services in the project that hosts your cluster. See Enabling services in the GCP documentation.
Expand Table 6.45. Required API services API service Console service name Compute Engine API
compute.googleapis.comGoogle Cloud APIs
cloudapis.googleapis.comCloud Resource Manager API
cloudresourcemanager.googleapis.comGoogle DNS API
dns.googleapis.comIAM Service Account Credentials API
iamcredentials.googleapis.comIdentity and Access Management (IAM) API
iam.googleapis.comService Management API
servicemanagement.googleapis.comService Usage API
serviceusage.googleapis.comGoogle Cloud Storage JSON API
storage-api.googleapis.comCloud Storage
storage-component.googleapis.com
6.11.4.3. Configuring DNS for GCP
To install OpenShift Container Platform, the Google Cloud Platform (GCP) account you use must have a dedicated public hosted zone in the same project that you host the OpenShift Container Platform cluster. This zone must be authoritative for the domain. The DNS service provides cluster DNS resolution and name lookup for external connections to the cluster.
Procedure
Identify your domain, or subdomain, and registrar. You can transfer an existing domain and registrar or obtain a new one through GCP or another source.
NoteIf you purchase a new domain, it can take time for the relevant DNS changes to propagate. For more information about purchasing domains through Google, see Google Domains.
Create a public hosted zone for your domain or subdomain in your GCP project. See Creating public zones in the GCP documentation.
Use an appropriate root domain, such as
openshiftcorp.com, or subdomain, such asclusters.openshiftcorp.com.Extract the new authoritative name servers from the hosted zone records. See Look up your Cloud DNS name servers in the GCP documentation.
You typically have four name servers.
- Update the registrar records for the name servers that your domain uses. For example, if you registered your domain to Google Domains, see the following topic in the Google Domains Help: How to switch to custom name servers.
- If you migrated your root domain to Google Cloud DNS, migrate your DNS records. See Migrating to Cloud DNS in the GCP documentation.
- If you use a subdomain, follow your company’s procedures to add its delegation records to the parent domain. This process might include a request to your company’s IT department or the division that controls the root domain and DNS services for your company.
6.11.4.4. GCP account limits
The OpenShift Container Platform cluster uses a number of Google Cloud Platform (GCP) components, but the default Quotas do not affect your ability to install a default OpenShift Container Platform cluster.
A default cluster, which contains three compute and three control plane machines, uses the following resources. Note that some resources are required only during the bootstrap process and are removed after the cluster deploys.
| Service | Component | Location | Total resources required | Resources removed after bootstrap |
|---|---|---|---|---|
| Service account | IAM | Global | 5 | 0 |
| Firewall rules | Networking | Global | 11 | 1 |
| Forwarding rules | Compute | Global | 2 | 0 |
| Health checks | Compute | Global | 2 | 0 |
| Images | Compute | Global | 1 | 0 |
| Networks | Networking | Global | 1 | 0 |
| Routers | Networking | Global | 1 | 0 |
| Routes | Networking | Global | 2 | 0 |
| Subnetworks | Compute | Global | 2 | 0 |
| Target pools | Networking | Global | 2 | 0 |
If any of the quotas are insufficient during installation, the installation program displays an error that states both which quota was exceeded and the region.
Be sure to consider your actual cluster size, planned cluster growth, and any usage from other clusters that are associated with your account. The CPU, static IP addresses, and persistent disk SSD (storage) quotas are the ones that are most likely to be insufficient.
If you plan to deploy your cluster in one of the following regions, you will exceed the maximum storage quota and are likely to exceed the CPU quota limit:
-
asia-east2 -
asia-northeast2 -
asia-south1 -
australia-southeast1 -
europe-north1 -
europe-west2 -
europe-west3 -
europe-west6 -
northamerica-northeast1 -
southamerica-east1 -
us-west2
You can increase resource quotas from the GCP console, but you might need to file a support ticket. Be sure to plan your cluster size early so that you can allow time to resolve the support ticket before you install your OpenShift Container Platform cluster.
6.11.4.5. Creating a service account in GCP
OpenShift Container Platform requires a Google Cloud Platform (GCP) service account that provides authentication and authorization to access data in the Google APIs. If you do not have an existing IAM service account that contains the required roles in your project, you must create one.
Prerequisites
- You created a project to host your cluster.
Procedure
- Create a service account in the project that you use to host your OpenShift Container Platform cluster. See Creating a service account in the GCP documentation.
Grant the service account the appropriate permissions. You can either grant the individual permissions that follow or assign the
Ownerrole to it. See Granting roles to a service account for specific resources.NoteWhile making the service account an owner of the project is the easiest way to gain the required permissions, it means that service account has complete control over the project. You must determine if the risk that comes from offering that power is acceptable.
Create the service account key in JSON format. See Creating service account keys in the GCP documentation.
The service account key is required to create a cluster.
6.11.4.5.1. Required GCP permissions
When you attach the Owner role to the service account that you create, you grant that service account all permissions, including those that are required to install OpenShift Container Platform. To deploy an OpenShift Container Platform cluster, the service account requires the following permissions. If you deploy your cluster into an existing VPC, the service account does not require certain networking permissions, which are noted in the following lists:
Required roles for the installation program
- Compute Admin
- Security Admin
- Service Account Admin
- Service Account User
- Storage Admin
Required roles for creating network resources during installation
- DNS Administrator
Required roles for user-provisioned GCP infrastructure
- Deployment Manager Editor
- Service Account Key Admin
Optional roles
For the cluster to create new limited credentials for its Operators, add the following role:
- Service Account Key Admin
The roles are applied to the service accounts that the control plane and compute machines use:
| Account | Roles |
|---|---|
| Control Plane |
|
|
| |
|
| |
|
| |
|
| |
| Compute |
|
|
|
6.11.4.6. Supported GCP regions
You can deploy an OpenShift Container Platform cluster to the following Google Cloud Platform (GCP) regions:
-
asia-east1(Changhua County, Taiwan) -
asia-east2(Hong Kong) -
asia-northeast1(Tokyo, Japan) -
asia-northeast2(Osaka, Japan) -
asia-northeast3(Seoul, South Korea) -
asia-south1(Mumbai, India) -
asia-southeast1(Jurong West, Singapore) -
asia-southeast2(Jakarta, Indonesia) -
australia-southeast1(Sydney, Australia) -
europe-north1(Hamina, Finland) -
europe-west1(St. Ghislain, Belgium) -
europe-west2(London, England, UK) -
europe-west3(Frankfurt, Germany) -
europe-west4(Eemshaven, Netherlands) -
europe-west6(Zürich, Switzerland) -
northamerica-northeast1(Montréal, Québec, Canada) -
southamerica-east1(São Paulo, Brazil) -
us-central1(Council Bluffs, Iowa, USA) -
us-east1(Moncks Corner, South Carolina, USA) -
us-east4(Ashburn, Northern Virginia, USA) -
us-west1(The Dalles, Oregon, USA) -
us-west2(Los Angeles, California, USA) -
us-west3(Salt Lake City, Utah, USA) -
us-west4(Las Vegas, Nevada, USA)
6.11.4.7. Installing and configuring CLI tools for GCP
To install OpenShift Container Platform on Google Cloud Platform (GCP) using user-provisioned infrastructure, you must install and configure the CLI tools for GCP.
Prerequisites
- You created a project to host your cluster.
- You created a service account and granted it the required permissions.
Procedure
Install the following binaries in
$PATH:-
gcloud -
gsutil
See Install the latest Cloud SDK version in the GCP documentation.
-
Authenticate using the
gcloudtool with your configured service account.See Authorizing with a service account in the GCP documentation.
6.11.5. Creating the installation files for GCP
To install OpenShift Container Platform on Google Cloud Platform (GCP) using user-provisioned infrastructure, you must generate the files that the installation program needs to deploy your cluster and modify them so that the cluster creates only the machines that it will use. You generate and customize the install-config.yaml file, Kubernetes manifests, and Ignition config files. You also have the option to first set up a separate var partition during the preparation phases of installation.
6.11.5.1. Optional: Creating a separate /var partition
It is recommended that disk partitioning for OpenShift Container Platform be left to the installer. However, there are cases where you might want to create separate partitions in a part of the filesystem that you expect to grow.
OpenShift Container Platform supports the addition of a single partition to attach storage to either the /var partition or a subdirectory of /var. For example:
-
/var/lib/containers: Holds container-related content that can grow as more images and containers are added to a system. -
/var/lib/etcd: Holds data that you might want to keep separate for purposes such as performance optimization of etcd storage. -
/var: Holds data that you might want to keep separate for purposes such as auditing.
Storing the contents of a /var directory separately makes it easier to grow storage for those areas as needed and reinstall OpenShift Container Platform at a later date and keep that data intact. With this method, you will not have to pull all your containers again, nor will you have to copy massive log files when you update systems.
Because /var must be in place before a fresh installation of Red Hat Enterprise Linux CoreOS (RHCOS), the following procedure sets up the separate /var partition by creating a machine config that is inserted during the openshift-install preparation phases of an OpenShift Container Platform installation.
If you follow the steps to create a separate /var partition in this procedure, it is not necessary to create the Kubernetes manifest and Ignition config files again as described later in this section.
Procedure
Create a directory to hold the OpenShift Container Platform installation files:
$ mkdir $HOME/clusterconfigRun
openshift-installto create a set of files in themanifestandopenshiftsubdirectories. Answer the system questions as you are prompted:$ openshift-install create manifests --dir $HOME/clusterconfigExample output
? SSH Public Key ... INFO Credentials loaded from the "myprofile" profile in file "/home/myuser/.aws/credentials" INFO Consuming Install Config from target directory INFO Manifests created in: $HOME/clusterconfig/manifests and $HOME/clusterconfig/openshiftOptional: Confirm that the installation program created manifests in the
clusterconfig/openshiftdirectory:$ ls $HOME/clusterconfig/openshift/Example output
99_kubeadmin-password-secret.yaml 99_openshift-cluster-api_master-machines-0.yaml 99_openshift-cluster-api_master-machines-1.yaml 99_openshift-cluster-api_master-machines-2.yaml ...Create a
MachineConfigobject and add it to a file in theopenshiftdirectory. For example, name the file98-var-partition.yaml, change the disk device name to the name of the storage device on theworkersystems, and set the storage size as appropriate. This example places the/vardirectory on a separate partition:apiVersion: machineconfiguration.openshift.io/v1 kind: MachineConfig metadata: labels: machineconfiguration.openshift.io/role: worker name: 98-var-partition spec: config: ignition: version: 3.2.0 storage: disks: - device: /dev/<device_name>1 partitions: - label: var startMiB: <partition_start_offset>2 sizeMiB: <partition_size>3 filesystems: - device: /dev/disk/by-partlabel/var path: /var format: xfs systemd: units: - name: var.mount4 enabled: true contents: | [Unit] Before=local-fs.target [Mount] What=/dev/disk/by-partlabel/var Where=/var Options=defaults,prjquota5 [Install] WantedBy=local-fs.target- 1
- The storage device name of the disk that you want to partition.
- 2
- When adding a data partition to the boot disk, a minimum value of 25000 MiB (Mebibytes) is recommended. The root file system is automatically resized to fill all available space up to the specified offset. If no value is specified, or if the specified value is smaller than the recommended minimum, the resulting root file system will be too small, and future reinstalls of RHCOS might overwrite the beginning of the data partition.
- 3
- The size of the data partition in mebibytes.
- 4
- The name of the mount unit must match the directory specified in the
Where=directive. For example, for a filesystem mounted on/var/lib/containers, the unit must be namedvar-lib-containers.mount. - 5
- The
prjquotamount option must be enabled for filesystems used for container storage.
NoteWhen creating a separate
/varpartition, you cannot use different instance types for worker nodes, if the different instance types do not have the same device name.Run
openshift-installagain to create Ignition configs from a set of files in themanifestandopenshiftsubdirectories:$ openshift-install create ignition-configs --dir $HOME/clusterconfig $ ls $HOME/clusterconfig/ auth bootstrap.ign master.ign metadata.json worker.ign
Now you can use the Ignition config files as input to the installation procedures to install Red Hat Enterprise Linux CoreOS (RHCOS) systems.
6.11.5.2. Creating the installation configuration file
You can customize the OpenShift Container Platform cluster you install on Google Cloud Platform (GCP).
Prerequisites
- Obtain the OpenShift Container Platform installation program and the pull secret for your cluster. For a restricted network installation, these files are on your mirror host.
-
Have the
imageContentSourcesvalues that were generated during mirror registry creation. - Obtain the contents of the certificate for your mirror registry.
- Obtain service principal permissions at the subscription level.
Procedure
Create the
install-config.yamlfile.Change to the directory that contains the installation program and run the following command:
$ ./openshift-install create install-config --dir <installation_directory>1 - 1
- For
<installation_directory>, specify the directory name to store the files that the installation program creates.
ImportantSpecify an empty directory. Some installation assets, like bootstrap X.509 certificates have short expiration intervals, so you must not reuse an installation directory. If you want to reuse individual files from another cluster installation, you can copy them into your directory. However, the file names for the installation assets might change between releases. Use caution when copying installation files from an earlier OpenShift Container Platform version.
At the prompts, provide the configuration details for your cloud:
Optional: Select an SSH key to use to access your cluster machines.
NoteFor production OpenShift Container Platform clusters on which you want to perform installation debugging or disaster recovery, specify an SSH key that your
ssh-agentprocess uses.- Select gcp as the platform to target.
- If you have not configured the service account key for your GCP account on your computer, you must obtain it from GCP and paste the contents of the file or enter the absolute path to the file.
- Select the project ID to provision the cluster in. The default value is specified by the service account that you configured.
- Select the region to deploy the cluster to.
- Select the base domain to deploy the cluster to. The base domain corresponds to the public DNS zone that you created for your cluster.
- Enter a descriptive name for your cluster.
- Paste the pull secret from the Red Hat OpenShift Cluster Manager.
Edit the
install-config.yamlfile to provide the additional information that is required for an installation in a restricted network.Update the
pullSecretvalue to contain the authentication information for your registry:pullSecret: '{"auths":{"<mirror_host_name>:5000": {"auth": "<credentials>","email": "you@example.com"}}}'For
<mirror_host_name>, specify the registry domain name that you specified in the certificate for your mirror registry, and for<credentials>, specify the base64-encoded user name and password for your mirror registry.Add the
additionalTrustBundleparameter and value.additionalTrustBundle: | -----BEGIN CERTIFICATE----- ZZZZZZZZZZZZZZZZZZZZZZZZZZZZZZZZZZZZZZZZZZZZZZZZZZZZZZZZZZZZZZZZ -----END CERTIFICATE-----The value must be the contents of the certificate file that you used for your mirror registry, which can be an existing, trusted certificate authority or the self-signed certificate that you generated for the mirror registry.
Define the network and subnets for the VPC to install the cluster in under the parent
platform.gcpfield:network: <existing_vpc> controlPlaneSubnet: <control_plane_subnet> computeSubnet: <compute_subnet>For
platform.gcp.network, specify the name for the existing Google VPC. Forplatform.gcp.controlPlaneSubnetandplatform.gcp.computeSubnet, specify the existing subnets to deploy the control plane machines and compute machines, respectively.Add the image content resources, which look like this excerpt:
imageContentSources: - mirrors: - <mirror_host_name>:5000/<repo_name>/release source: quay.example.com/openshift-release-dev/ocp-release - mirrors: - <mirror_host_name>:5000/<repo_name>/release source: registry.example.com/ocp/releaseTo complete these values, use the
imageContentSourcesthat you recorded during mirror registry creation.
-
Make any other modifications to the
install-config.yamlfile that you require. You can find more information about the available parameters in the Installation configuration parameters section. Back up the
install-config.yamlfile so that you can use it to install multiple clusters.ImportantThe
install-config.yamlfile is consumed during the installation process. If you want to reuse the file, you must back it up now.
6.11.5.3. Configuring the cluster-wide proxy during installation
Production environments can deny direct access to the Internet and instead have an HTTP or HTTPS proxy available. You can configure a new OpenShift Container Platform cluster to use a proxy by configuring the proxy settings in the install-config.yaml file.
Prerequisites
-
You have an existing
install-config.yamlfile. You reviewed the sites that your cluster requires access to and determined whether any of them need to bypass the proxy. By default, all cluster egress traffic is proxied, including calls to hosting cloud provider APIs. You added sites to the
Proxyobject’sspec.noProxyfield to bypass the proxy if necessary.NoteThe
Proxyobjectstatus.noProxyfield is populated with the values of thenetworking.machineNetwork[].cidr,networking.clusterNetwork[].cidr, andnetworking.serviceNetwork[]fields from your installation configuration.For installations on Amazon Web Services (AWS), Google Cloud Platform (GCP), Microsoft Azure, and Red Hat OpenStack Platform (RHOSP), the
Proxyobjectstatus.noProxyfield is also populated with the instance metadata endpoint (169.254.169.254).
Procedure
Edit your
install-config.yamlfile and add the proxy settings. For example:apiVersion: v1 baseDomain: my.domain.com proxy: httpProxy: http://<username>:<pswd>@<ip>:<port>1 httpsProxy: https://<username>:<pswd>@<ip>:<port>2 noProxy: example.com3 additionalTrustBundle: |4 -----BEGIN CERTIFICATE----- <MY_TRUSTED_CA_CERT> -----END CERTIFICATE----- ...- 1
- A proxy URL to use for creating HTTP connections outside the cluster. The URL scheme must be
http. - 2
- A proxy URL to use for creating HTTPS connections outside the cluster.
- 3
- A comma-separated list of destination domain names, IP addresses, or other network CIDRs to exclude from proxying. Preface a domain with
.to match subdomains only. For example,.y.commatchesx.y.com, but noty.com. Use*to bypass the proxy for all destinations. - 4
- If provided, the installation program generates a config map that is named
user-ca-bundlein theopenshift-confignamespace to hold the additional CA certificates. If you provideadditionalTrustBundleand at least one proxy setting, theProxyobject is configured to reference theuser-ca-bundleconfig map in thetrustedCAfield. The Cluster Network Operator then creates atrusted-ca-bundleconfig map that merges the contents specified for thetrustedCAparameter with the RHCOS trust bundle. TheadditionalTrustBundlefield is required unless the proxy’s identity certificate is signed by an authority from the RHCOS trust bundle.
NoteThe installation program does not support the proxy
readinessEndpointsfield.- Save the file and reference it when installing OpenShift Container Platform.
The installation program creates a cluster-wide proxy that is named cluster that uses the proxy settings in the provided install-config.yaml file. If no proxy settings are provided, a cluster Proxy object is still created, but it will have a nil spec.
Only the Proxy object named cluster is supported, and no additional proxies can be created.
6.11.5.4. Creating the Kubernetes manifest and Ignition config files
Because you must modify some cluster definition files and manually start the cluster machines, you must generate the Kubernetes manifest and Ignition config files that the cluster needs to make its machines.
The installation configuration file transforms into the Kubernetes manifests. The manifests wrap into the Ignition configuration files, which are later used to create the cluster.
The Ignition config files that the installation program generates contain certificates that expire after 24 hours, which are then renewed at that time. If the cluster is shut down before renewing the certificates and the cluster is later restarted after the 24 hours have elapsed, the cluster automatically recovers the expired certificates. The exception is that you must manually approve the pending node-bootstrapper certificate signing requests (CSRs) to recover kubelet certificates. See the documentation for Recovering from expired control plane certificates for more information.
Prerequisites
- You obtained the OpenShift Container Platform installation program. For a restricted network installation, these files are on your mirror host.
-
You created the
install-config.yamlinstallation configuration file.
Procedure
Change to the directory that contains the installation program and generate the Kubernetes manifests for the cluster:
$ ./openshift-install create manifests --dir <installation_directory>1 - 1
- For
<installation_directory>, specify the installation directory that contains theinstall-config.yamlfile you created.
Remove the Kubernetes manifest files that define the control plane machines:
$ rm -f <installation_directory>/openshift/99_openshift-cluster-api_master-machines-*.yamlBy removing these files, you prevent the cluster from automatically generating control plane machines.
Optional: If you do not want the cluster to provision compute machines, remove the Kubernetes manifest files that define the worker machines:
$ rm -f <installation_directory>/openshift/99_openshift-cluster-api_worker-machineset-*.yamlBecause you create and manage the worker machines yourself, you do not need to initialize these machines.
Check that the
mastersSchedulableparameter in the<installation_directory>/manifests/cluster-scheduler-02-config.ymlKubernetes manifest file is set tofalse. This setting prevents pods from being scheduled on the control plane machines:-
Open the
<installation_directory>/manifests/cluster-scheduler-02-config.ymlfile. -
Locate the
mastersSchedulableparameter and ensure that it is set tofalse. - Save and exit the file.
-
Open the
Optional: If you do not want the Ingress Operator to create DNS records on your behalf, remove the
privateZoneandpublicZonesections from the<installation_directory>/manifests/cluster-dns-02-config.ymlDNS configuration file:apiVersion: config.openshift.io/v1 kind: DNS metadata: creationTimestamp: null name: cluster spec: baseDomain: example.openshift.com privateZone:1 id: mycluster-100419-private-zone publicZone:2 id: example.openshift.com status: {}If you do so, you must add ingress DNS records manually in a later step.
To create the Ignition configuration files, run the following command from the directory that contains the installation program:
$ ./openshift-install create ignition-configs --dir <installation_directory>1 - 1
- For
<installation_directory>, specify the same installation directory.
The following files are generated in the directory:
. ├── auth │ ├── kubeadmin-password │ └── kubeconfig ├── bootstrap.ign ├── master.ign ├── metadata.json └── worker.ign
6.11.6. Exporting common variables
6.11.6.1. Extracting the infrastructure name
The Ignition config files contain a unique cluster identifier that you can use to uniquely identify your cluster in Google Cloud Platform (GCP). The infrastructure name is also used to locate the appropriate GCP resources during an OpenShift Container Platform installation. The provided Deployment Manager templates contain references to this infrastructure name, so you must extract it.
Prerequisites
- You obtained the OpenShift Container Platform installation program and the pull secret for your cluster.
- You generated the Ignition config files for your cluster.
-
You installed the
jqpackage.
Procedure
To extract and view the infrastructure name from the Ignition config file metadata, run the following command:
$ jq -r .infraID <installation_directory>/metadata.json1 - 1
- For
<installation_directory>, specify the path to the directory that you stored the installation files in.
Example output
openshift-vw9j61 - 1
- The output of this command is your cluster name and a random string.
6.11.6.2. Exporting common variables for Deployment Manager templates
You must export a common set of variables that are used with the provided Deployment Manager templates used to assist in completing a user-provided infrastructure install on Google Cloud Platform (GCP).
Specific Deployment Manager templates can also require additional exported variables, which are detailed in their related procedures.
Prerequisites
- Obtain the OpenShift Container Platform installation program and the pull secret for your cluster.
- Generate the Ignition config files for your cluster.
-
Install the
jqpackage.
Procedure
Export the following common variables to be used by the provided Deployment Manager templates:
$ export BASE_DOMAIN='<base_domain>' $ export BASE_DOMAIN_ZONE_NAME='<base_domain_zone_name>' $ export NETWORK_CIDR='10.0.0.0/16' $ export MASTER_SUBNET_CIDR='10.0.0.0/19' $ export WORKER_SUBNET_CIDR='10.0.32.0/19' $ export KUBECONFIG=<installation_directory>/auth/kubeconfig1 $ export CLUSTER_NAME=`jq -r .clusterName <installation_directory>/metadata.json` $ export INFRA_ID=`jq -r .infraID <installation_directory>/metadata.json` $ export PROJECT_NAME=`jq -r .gcp.projectID <installation_directory>/metadata.json` $ export REGION=`jq -r .gcp.region <installation_directory>/metadata.json`- 1
- For
<installation_directory>, specify the path to the directory that you stored the installation files in.
6.11.7. Creating a VPC in GCP
You must create a VPC in Google Cloud Platform (GCP) for your OpenShift Container Platform cluster to use. You can customize the VPC to meet your requirements. One way to create the VPC is to modify the provided Deployment Manager template.
If you do not use the provided Deployment Manager template to create your GCP infrastructure, you must review the provided information and manually create the infrastructure. If your cluster does not initialize correctly, you might have to contact Red Hat support with your installation logs.
Prerequisites
- Configure a GCP account.
- Generate the Ignition config files for your cluster.
Procedure
-
Copy the template from the Deployment Manager template for the VPC section of this topic and save it as
01_vpc.pyon your computer. This template describes the VPC that your cluster requires. Create a
01_vpc.yamlresource definition file:$ cat <<EOF >01_vpc.yaml imports: - path: 01_vpc.py resources: - name: cluster-vpc type: 01_vpc.py properties: infra_id: '${INFRA_ID}'1 region: '${REGION}'2 master_subnet_cidr: '${MASTER_SUBNET_CIDR}'3 worker_subnet_cidr: '${WORKER_SUBNET_CIDR}'4 EOF- 1
infra_idis theINFRA_IDinfrastructure name from the extraction step.- 2
regionis the region to deploy the cluster into, for exampleus-central1.- 3
master_subnet_cidris the CIDR for the master subnet, for example10.0.0.0/19.- 4
worker_subnet_cidris the CIDR for the worker subnet, for example10.0.32.0/19.
Create the deployment by using the
gcloudCLI:$ gcloud deployment-manager deployments create ${INFRA_ID}-vpc --config 01_vpc.yaml
6.11.7.1. Deployment Manager template for the VPC
You can use the following Deployment Manager template to deploy the VPC that you need for your OpenShift Container Platform cluster:
Example 6.19. 01_vpc.py Deployment Manager template
def GenerateConfig(context):
resources = [{
'name': context.properties['infra_id'] + '-network',
'type': 'compute.v1.network',
'properties': {
'region': context.properties['region'],
'autoCreateSubnetworks': False
}
}, {
'name': context.properties['infra_id'] + '-master-subnet',
'type': 'compute.v1.subnetwork',
'properties': {
'region': context.properties['region'],
'network': '$(ref.' + context.properties['infra_id'] + '-network.selfLink)',
'ipCidrRange': context.properties['master_subnet_cidr']
}
}, {
'name': context.properties['infra_id'] + '-worker-subnet',
'type': 'compute.v1.subnetwork',
'properties': {
'region': context.properties['region'],
'network': '$(ref.' + context.properties['infra_id'] + '-network.selfLink)',
'ipCidrRange': context.properties['worker_subnet_cidr']
}
}, {
'name': context.properties['infra_id'] + '-router',
'type': 'compute.v1.router',
'properties': {
'region': context.properties['region'],
'network': '$(ref.' + context.properties['infra_id'] + '-network.selfLink)',
'nats': [{
'name': context.properties['infra_id'] + '-nat-master',
'natIpAllocateOption': 'AUTO_ONLY',
'minPortsPerVm': 7168,
'sourceSubnetworkIpRangesToNat': 'LIST_OF_SUBNETWORKS',
'subnetworks': [{
'name': '$(ref.' + context.properties['infra_id'] + '-master-subnet.selfLink)',
'sourceIpRangesToNat': ['ALL_IP_RANGES']
}]
}, {
'name': context.properties['infra_id'] + '-nat-worker',
'natIpAllocateOption': 'AUTO_ONLY',
'minPortsPerVm': 512,
'sourceSubnetworkIpRangesToNat': 'LIST_OF_SUBNETWORKS',
'subnetworks': [{
'name': '$(ref.' + context.properties['infra_id'] + '-worker-subnet.selfLink)',
'sourceIpRangesToNat': ['ALL_IP_RANGES']
}]
}]
}
}]
return {'resources': resources}6.11.8. Networking requirements for user-provisioned infrastructure
All the Red Hat Enterprise Linux CoreOS (RHCOS) machines require network in initramfs during boot to fetch Ignition config from the machine config server.
During the initial boot, the machines require either a DHCP server or that static IP addresses be set on each host in the cluster to establish a network connection, which allows them to download their Ignition config files.
It is recommended to use the DHCP server to manage the machines for the cluster long-term. Ensure that the DHCP server is configured to provide persistent IP addresses and host names to the cluster machines.
The Kubernetes API server must be able to resolve the node names of the cluster machines. If the API servers and worker nodes are in different zones, you can configure a default DNS search zone to allow the API server to resolve the node names. Another supported approach is to always refer to hosts by their fully-qualified domain names in both the node objects and all DNS requests.
You must configure the network connectivity between machines to allow cluster components to communicate. Each machine must be able to resolve the host names of all other machines in the cluster.
| Protocol | Port | Description |
|---|---|---|
| ICMP | N/A | Network reachability tests |
| TCP |
| Metrics |
|
|
Host level services, including the node exporter on ports | |
|
| The default ports that Kubernetes reserves | |
|
| openshift-sdn | |
| UDP |
| VXLAN and Geneve |
|
| VXLAN and Geneve | |
|
|
Host level services, including the node exporter on ports | |
| TCP/UDP |
| Kubernetes node port |
| Protocol | Port | Description |
|---|---|---|
| TCP |
| Kubernetes API |
| Protocol | Port | Description |
|---|---|---|
| TCP |
| etcd server and peer ports |
Network topology requirements
The infrastructure that you provision for your cluster must meet the following network topology requirements.
OpenShift Container Platform requires all nodes to have internet access to pull images for platform containers and provide telemetry data to Red Hat.
Load balancers
Before you install OpenShift Container Platform, you must provision two load balancers that meet the following requirements:
API load balancer: Provides a common endpoint for users, both human and machine, to interact with and configure the platform. Configure the following conditions:
- Layer 4 load balancing only. This can be referred to as Raw TCP, SSL Passthrough, or SSL Bridge mode. If you use SSL Bridge mode, you must enable Server Name Indication (SNI) for the API routes.
- A stateless load balancing algorithm. The options vary based on the load balancer implementation.
ImportantDo not configure session persistence for an API load balancer.
Configure the following ports on both the front and back of the load balancers:
Expand Table 6.51. API load balancer Port Back-end machines (pool members) Internal External Description 6443Bootstrap and control plane. You remove the bootstrap machine from the load balancer after the bootstrap machine initializes the cluster control plane. You must configure the
/readyzendpoint for the API server health check probe.X
X
Kubernetes API server
22623Bootstrap and control plane. You remove the bootstrap machine from the load balancer after the bootstrap machine initializes the cluster control plane.
X
Machine config server
NoteThe load balancer must be configured to take a maximum of 30 seconds from the time the API server turns off the
/readyzendpoint to the removal of the API server instance from the pool. Within the time frame after/readyzreturns an error or becomes healthy, the endpoint must have been removed or added. Probing every 5 or 10 seconds, with two successful requests to become healthy and three to become unhealthy, are well-tested values.Application Ingress load balancer: Provides an Ingress point for application traffic flowing in from outside the cluster. Configure the following conditions:
- Layer 4 load balancing only. This can be referred to as Raw TCP, SSL Passthrough, or SSL Bridge mode. If you use SSL Bridge mode, you must enable Server Name Indication (SNI) for the Ingress routes.
- A connection-based or session-based persistence is recommended, based on the options available and types of applications that will be hosted on the platform.
Configure the following ports on both the front and back of the load balancers:
Expand Table 6.52. Application Ingress load balancer Port Back-end machines (pool members) Internal External Description 443The machines that run the Ingress router pods, compute, or worker, by default.
X
X
HTTPS traffic
80The machines that run the Ingress router pods, compute, or worker, by default.
X
X
HTTP traffic
If the true IP address of the client can be seen by the load balancer, enabling source IP-based session persistence can improve performance for applications that use end-to-end TLS encryption.
A working configuration for the Ingress router is required for an OpenShift Container Platform cluster. You must configure the Ingress router after the control plane initializes.
NTP configuration
OpenShift Container Platform clusters are configured to use a public Network Time Protocol (NTP) server by default. If you want to use a local enterprise NTP server, or if your cluster is being deployed in a disconnected network, you can configure the cluster to use a specific time server. For more information, see the documentation for Configuring chrony time service.
If a DHCP server provides NTP server information, the chrony time service on the Red Hat Enterprise Linux CoreOS (RHCOS) machines read the information and can sync the clock with the NTP servers.
6.11.9. Creating load balancers in GCP
You must configure load balancers in Google Cloud Platform (GCP) for your OpenShift Container Platform cluster to use. One way to create these components is to modify the provided Deployment Manager template.
If you do not use the provided Deployment Manager template to create your GCP infrastructure, you must review the provided information and manually create the infrastructure. If your cluster does not initialize correctly, you might have to contact Red Hat support with your installation logs.
Prerequisites
- Configure a GCP account.
- Generate the Ignition config files for your cluster.
- Create and configure a VPC and associated subnets in GCP.
Procedure
-
Copy the template from the Deployment Manager template for the internal load balancer section of this topic and save it as
02_lb_int.pyon your computer. This template describes the internal load balancing objects that your cluster requires. -
For an external cluster, also copy the template from the Deployment Manager template for the external load balancer section of this topic and save it as
02_lb_ext.pyon your computer. This template describes the external load balancing objects that your cluster requires. Export the variables that the deployment template uses:
Export the cluster network location:
$ export CLUSTER_NETWORK=(`gcloud compute networks describe ${INFRA_ID}-network --format json | jq -r .selfLink`)Export the control plane subnet location:
$ export CONTROL_SUBNET=(`gcloud compute networks subnets describe ${INFRA_ID}-master-subnet --region=${REGION} --format json | jq -r .selfLink`)Export the three zones that the cluster uses:
$ export ZONE_0=(`gcloud compute regions describe ${REGION} --format=json | jq -r .zones[0] | cut -d "/" -f9`)$ export ZONE_1=(`gcloud compute regions describe ${REGION} --format=json | jq -r .zones[1] | cut -d "/" -f9`)$ export ZONE_2=(`gcloud compute regions describe ${REGION} --format=json | jq -r .zones[2] | cut -d "/" -f9`)
Create a
02_infra.yamlresource definition file:$ cat <<EOF >02_infra.yaml imports: - path: 02_lb_ext.py - path: 02_lb_int.py1 resources: - name: cluster-lb-ext2 type: 02_lb_ext.py properties: infra_id: '${INFRA_ID}'3 region: '${REGION}'4 - name: cluster-lb-int type: 02_lb_int.py properties: cluster_network: '${CLUSTER_NETWORK}' control_subnet: '${CONTROL_SUBNET}'5 infra_id: '${INFRA_ID}' region: '${REGION}' zones:6 - '${ZONE_0}' - '${ZONE_1}' - '${ZONE_2}' EOF- 1 2
- Required only when deploying an external cluster.
- 3
infra_idis theINFRA_IDinfrastructure name from the extraction step.- 4
regionis the region to deploy the cluster into, for exampleus-central1.- 5
control_subnetis the URI to the control subnet.- 6
zonesare the zones to deploy the control plane instances into, likeus-east1-b,us-east1-c, andus-east1-d.
Create the deployment by using the
gcloudCLI:$ gcloud deployment-manager deployments create ${INFRA_ID}-infra --config 02_infra.yamlExport the cluster IP address:
$ export CLUSTER_IP=(`gcloud compute addresses describe ${INFRA_ID}-cluster-ip --region=${REGION} --format json | jq -r .address`)For an external cluster, also export the cluster public IP address:
$ export CLUSTER_PUBLIC_IP=(`gcloud compute addresses describe ${INFRA_ID}-cluster-public-ip --region=${REGION} --format json | jq -r .address`)
6.11.9.1. Deployment Manager template for the external load balancer
You can use the following Deployment Manager template to deploy the external load balancer that you need for your OpenShift Container Platform cluster:
Example 6.20. 02_lb_ext.py Deployment Manager template
def GenerateConfig(context):
resources = [{
'name': context.properties['infra_id'] + '-cluster-public-ip',
'type': 'compute.v1.address',
'properties': {
'region': context.properties['region']
}
}, {
# Refer to docs/dev/kube-apiserver-health-check.md on how to correctly setup health check probe for kube-apiserver
'name': context.properties['infra_id'] + '-api-http-health-check',
'type': 'compute.v1.httpHealthCheck',
'properties': {
'port': 6080,
'requestPath': '/readyz'
}
}, {
'name': context.properties['infra_id'] + '-api-target-pool',
'type': 'compute.v1.targetPool',
'properties': {
'region': context.properties['region'],
'healthChecks': ['$(ref.' + context.properties['infra_id'] + '-api-http-health-check.selfLink)'],
'instances': []
}
}, {
'name': context.properties['infra_id'] + '-api-forwarding-rule',
'type': 'compute.v1.forwardingRule',
'properties': {
'region': context.properties['region'],
'IPAddress': '$(ref.' + context.properties['infra_id'] + '-cluster-public-ip.selfLink)',
'target': '$(ref.' + context.properties['infra_id'] + '-api-target-pool.selfLink)',
'portRange': '6443'
}
}]
return {'resources': resources}6.11.9.2. Deployment Manager template for the internal load balancer
You can use the following Deployment Manager template to deploy the internal load balancer that you need for your OpenShift Container Platform cluster:
Example 6.21. 02_lb_int.py Deployment Manager template
def GenerateConfig(context):
backends = []
for zone in context.properties['zones']:
backends.append({
'group': '$(ref.' + context.properties['infra_id'] + '-master-' + zone + '-instance-group' + '.selfLink)'
})
resources = [{
'name': context.properties['infra_id'] + '-cluster-ip',
'type': 'compute.v1.address',
'properties': {
'addressType': 'INTERNAL',
'region': context.properties['region'],
'subnetwork': context.properties['control_subnet']
}
}, {
# Refer to docs/dev/kube-apiserver-health-check.md on how to correctly setup health check probe for kube-apiserver
'name': context.properties['infra_id'] + '-api-internal-health-check',
'type': 'compute.v1.healthCheck',
'properties': {
'httpsHealthCheck': {
'port': 6443,
'requestPath': '/readyz'
},
'type': "HTTPS"
}
}, {
'name': context.properties['infra_id'] + '-api-internal-backend-service',
'type': 'compute.v1.regionBackendService',
'properties': {
'backends': backends,
'healthChecks': ['$(ref.' + context.properties['infra_id'] + '-api-internal-health-check.selfLink)'],
'loadBalancingScheme': 'INTERNAL',
'region': context.properties['region'],
'protocol': 'TCP',
'timeoutSec': 120
}
}, {
'name': context.properties['infra_id'] + '-api-internal-forwarding-rule',
'type': 'compute.v1.forwardingRule',
'properties': {
'backendService': '$(ref.' + context.properties['infra_id'] + '-api-internal-backend-service.selfLink)',
'IPAddress': '$(ref.' + context.properties['infra_id'] + '-cluster-ip.selfLink)',
'loadBalancingScheme': 'INTERNAL',
'ports': ['6443','22623'],
'region': context.properties['region'],
'subnetwork': context.properties['control_subnet']
}
}]
for zone in context.properties['zones']:
resources.append({
'name': context.properties['infra_id'] + '-master-' + zone + '-instance-group',
'type': 'compute.v1.instanceGroup',
'properties': {
'namedPorts': [
{
'name': 'ignition',
'port': 22623
}, {
'name': 'https',
'port': 6443
}
],
'network': context.properties['cluster_network'],
'zone': zone
}
})
return {'resources': resources}
You will need this template in addition to the 02_lb_ext.py template when you create an external cluster.
6.11.10. Creating a private DNS zone in GCP
You must configure a private DNS zone in Google Cloud Platform (GCP) for your OpenShift Container Platform cluster to use. One way to create this component is to modify the provided Deployment Manager template.
If you do not use the provided Deployment Manager template to create your GCP infrastructure, you must review the provided information and manually create the infrastructure. If your cluster does not initialize correctly, you might have to contact Red Hat support with your installation logs.
Prerequisites
- Configure a GCP account.
- Generate the Ignition config files for your cluster.
- Create and configure a VPC and associated subnets in GCP.
Procedure
-
Copy the template from the Deployment Manager template for the private DNS section of this topic and save it as
02_dns.pyon your computer. This template describes the private DNS objects that your cluster requires. Create a
02_dns.yamlresource definition file:$ cat <<EOF >02_dns.yaml imports: - path: 02_dns.py resources: - name: cluster-dns type: 02_dns.py properties: infra_id: '${INFRA_ID}'1 cluster_domain: '${CLUSTER_NAME}.${BASE_DOMAIN}'2 cluster_network: '${CLUSTER_NETWORK}'3 EOFCreate the deployment by using the
gcloudCLI:$ gcloud deployment-manager deployments create ${INFRA_ID}-dns --config 02_dns.yamlThe templates do not create DNS entries due to limitations of Deployment Manager, so you must create them manually:
Add the internal DNS entries:
$ if [ -f transaction.yaml ]; then rm transaction.yaml; fi $ gcloud dns record-sets transaction start --zone ${INFRA_ID}-private-zone $ gcloud dns record-sets transaction add ${CLUSTER_IP} --name api.${CLUSTER_NAME}.${BASE_DOMAIN}. --ttl 60 --type A --zone ${INFRA_ID}-private-zone $ gcloud dns record-sets transaction add ${CLUSTER_IP} --name api-int.${CLUSTER_NAME}.${BASE_DOMAIN}. --ttl 60 --type A --zone ${INFRA_ID}-private-zone $ gcloud dns record-sets transaction execute --zone ${INFRA_ID}-private-zoneFor an external cluster, also add the external DNS entries:
$ if [ -f transaction.yaml ]; then rm transaction.yaml; fi $ gcloud dns record-sets transaction start --zone ${BASE_DOMAIN_ZONE_NAME} $ gcloud dns record-sets transaction add ${CLUSTER_PUBLIC_IP} --name api.${CLUSTER_NAME}.${BASE_DOMAIN}. --ttl 60 --type A --zone ${BASE_DOMAIN_ZONE_NAME} $ gcloud dns record-sets transaction execute --zone ${BASE_DOMAIN_ZONE_NAME}
6.11.10.1. Deployment Manager template for the private DNS
You can use the following Deployment Manager template to deploy the private DNS that you need for your OpenShift Container Platform cluster:
Example 6.22. 02_dns.py Deployment Manager template
def GenerateConfig(context):
resources = [{
'name': context.properties['infra_id'] + '-private-zone',
'type': 'dns.v1.managedZone',
'properties': {
'description': '',
'dnsName': context.properties['cluster_domain'] + '.',
'visibility': 'private',
'privateVisibilityConfig': {
'networks': [{
'networkUrl': context.properties['cluster_network']
}]
}
}
}]
return {'resources': resources}6.11.11. Creating firewall rules in GCP
You must create firewall rules in Google Cloud Platform (GCP) for your OpenShift Container Platform cluster to use. One way to create these components is to modify the provided Deployment Manager template.
If you do not use the provided Deployment Manager template to create your GCP infrastructure, you must review the provided information and manually create the infrastructure. If your cluster does not initialize correctly, you might have to contact Red Hat support with your installation logs.
Prerequisites
- Configure a GCP account.
- Generate the Ignition config files for your cluster.
- Create and configure a VPC and associated subnets in GCP.
Procedure
-
Copy the template from the Deployment Manager template for firewall rules section of this topic and save it as
03_firewall.pyon your computer. This template describes the security groups that your cluster requires. Create a
03_firewall.yamlresource definition file:$ cat <<EOF >03_firewall.yaml imports: - path: 03_firewall.py resources: - name: cluster-firewall type: 03_firewall.py properties: allowed_external_cidr: '0.0.0.0/0'1 infra_id: '${INFRA_ID}'2 cluster_network: '${CLUSTER_NETWORK}'3 network_cidr: '${NETWORK_CIDR}'4 EOF- 1
allowed_external_cidris the CIDR range that can access the cluster API and SSH to the bootstrap host. For an internal cluster, set this value to${NETWORK_CIDR}.- 2
infra_idis theINFRA_IDinfrastructure name from the extraction step.- 3
cluster_networkis theselfLinkURL to the cluster network.- 4
network_cidris the CIDR of the VPC network, for example10.0.0.0/16.
Create the deployment by using the
gcloudCLI:$ gcloud deployment-manager deployments create ${INFRA_ID}-firewall --config 03_firewall.yaml
6.11.11.1. Deployment Manager template for firewall rules
You can use the following Deployment Manager template to deploy the firewall rues that you need for your OpenShift Container Platform cluster:
Example 6.23. 03_firewall.py Deployment Manager template
def GenerateConfig(context):
resources = [{
'name': context.properties['infra_id'] + '-bootstrap-in-ssh',
'type': 'compute.v1.firewall',
'properties': {
'network': context.properties['cluster_network'],
'allowed': [{
'IPProtocol': 'tcp',
'ports': ['22']
}],
'sourceRanges': [context.properties['allowed_external_cidr']],
'targetTags': [context.properties['infra_id'] + '-bootstrap']
}
}, {
'name': context.properties['infra_id'] + '-api',
'type': 'compute.v1.firewall',
'properties': {
'network': context.properties['cluster_network'],
'allowed': [{
'IPProtocol': 'tcp',
'ports': ['6443']
}],
'sourceRanges': [context.properties['allowed_external_cidr']],
'targetTags': [context.properties['infra_id'] + '-master']
}
}, {
'name': context.properties['infra_id'] + '-health-checks',
'type': 'compute.v1.firewall',
'properties': {
'network': context.properties['cluster_network'],
'allowed': [{
'IPProtocol': 'tcp',
'ports': ['6080', '6443', '22624']
}],
'sourceRanges': ['35.191.0.0/16', '130.211.0.0/22', '209.85.152.0/22', '209.85.204.0/22'],
'targetTags': [context.properties['infra_id'] + '-master']
}
}, {
'name': context.properties['infra_id'] + '-etcd',
'type': 'compute.v1.firewall',
'properties': {
'network': context.properties['cluster_network'],
'allowed': [{
'IPProtocol': 'tcp',
'ports': ['2379-2380']
}],
'sourceTags': [context.properties['infra_id'] + '-master'],
'targetTags': [context.properties['infra_id'] + '-master']
}
}, {
'name': context.properties['infra_id'] + '-control-plane',
'type': 'compute.v1.firewall',
'properties': {
'network': context.properties['cluster_network'],
'allowed': [{
'IPProtocol': 'tcp',
'ports': ['10257']
},{
'IPProtocol': 'tcp',
'ports': ['10259']
},{
'IPProtocol': 'tcp',
'ports': ['22623']
}],
'sourceTags': [
context.properties['infra_id'] + '-master',
context.properties['infra_id'] + '-worker'
],
'targetTags': [context.properties['infra_id'] + '-master']
}
}, {
'name': context.properties['infra_id'] + '-internal-network',
'type': 'compute.v1.firewall',
'properties': {
'network': context.properties['cluster_network'],
'allowed': [{
'IPProtocol': 'icmp'
},{
'IPProtocol': 'tcp',
'ports': ['22']
}],
'sourceRanges': [context.properties['network_cidr']],
'targetTags': [
context.properties['infra_id'] + '-master',
context.properties['infra_id'] + '-worker'
]
}
}, {
'name': context.properties['infra_id'] + '-internal-cluster',
'type': 'compute.v1.firewall',
'properties': {
'network': context.properties['cluster_network'],
'allowed': [{
'IPProtocol': 'udp',
'ports': ['4789', '6081']
},{
'IPProtocol': 'udp',
'ports': ['500', '4500']
},{
'IPProtocol': 'esp',
},{
'IPProtocol': 'tcp',
'ports': ['9000-9999']
},{
'IPProtocol': 'udp',
'ports': ['9000-9999']
},{
'IPProtocol': 'tcp',
'ports': ['10250']
},{
'IPProtocol': 'tcp',
'ports': ['30000-32767']
},{
'IPProtocol': 'udp',
'ports': ['30000-32767']
}],
'sourceTags': [
context.properties['infra_id'] + '-master',
context.properties['infra_id'] + '-worker'
],
'targetTags': [
context.properties['infra_id'] + '-master',
context.properties['infra_id'] + '-worker'
]
}
}]
return {'resources': resources}6.11.13. Creating the RHCOS cluster image for the GCP infrastructure
You must use a valid Red Hat Enterprise Linux CoreOS (RHCOS) image for Google Cloud Platform (GCP) for your OpenShift Container Platform nodes.
Procedure
Obtain the RHCOS image from the RHCOS image mirror page.
ImportantThe RHCOS images might not change with every release of OpenShift Container Platform. You must download an image with the highest version that is less than or equal to the OpenShift Container Platform version that you install. Use the image version that matches your OpenShift Container Platform version if it is available.
The file name contains the OpenShift Container Platform version number in the format
rhcos-<version>-<arch>-gcp.<arch>.tar.gz.Create the Google storage bucket:
$ gsutil mb gs://<bucket_name>Upload the RHCOS image to the Google storage bucket:
$ gsutil cp <downloaded_image_file_path>/rhcos-<version>-x86_64-gcp.x86_64.tar.gz gs://<bucket_name>Export the uploaded RHCOS image location as a variable:
$ export IMAGE_SOURCE="gs://<bucket_name>/rhcos-<version>-x86_64-gcp.x86_64.tar.gz"Create the cluster image:
$ gcloud compute images create "${INFRA_ID}-rhcos-image" \ --source-uri="${IMAGE_SOURCE}"
6.11.14. Creating the bootstrap machine in GCP
You must create the bootstrap machine in Google Cloud Platform (GCP) to use during OpenShift Container Platform cluster initialization. One way to create this machine is to modify the provided Deployment Manager template.
If you do not use the provided Deployment Manager template to create your bootstrap machine, you must review the provided information and manually create the infrastructure. If your cluster does not initialize correctly, you might have to contact Red Hat support with your installation logs.
Prerequisites
- Configure a GCP account.
- Generate the Ignition config files for your cluster.
- Create and configure a VPC and associated subnets in GCP.
- Create and configure networking and load balancers in GCP.
- Create control plane and compute roles.
- Ensure pyOpenSSL is installed.
Procedure
-
Copy the template from the Deployment Manager template for the bootstrap machine section of this topic and save it as
04_bootstrap.pyon your computer. This template describes the bootstrap machine that your cluster requires. Export the location of the Red Hat Enterprise Linux CoreOS (RHCOS) image that the installation program requires:
$ export CLUSTER_IMAGE=(`gcloud compute images describe ${INFRA_ID}-rhcos-image --format json | jq -r .selfLink`)Create a bucket and upload the
bootstrap.ignfile:$ gsutil mb gs://${INFRA_ID}-bootstrap-ignition $ gsutil cp <installation_directory>/bootstrap.ign gs://${INFRA_ID}-bootstrap-ignition/Create a signed URL for the bootstrap instance to use to access the Ignition config. Export the URL from the output as a variable:
$ export BOOTSTRAP_IGN=`gsutil signurl -d 1h service-account-key.json gs://${INFRA_ID}-bootstrap-ignition/bootstrap.ign | grep "^gs:" | awk '{print $5}'`Create a
04_bootstrap.yamlresource definition file:$ cat <<EOF >04_bootstrap.yaml imports: - path: 04_bootstrap.py resources: - name: cluster-bootstrap type: 04_bootstrap.py properties: infra_id: '${INFRA_ID}'1 region: '${REGION}'2 zone: '${ZONE_0}'3 cluster_network: '${CLUSTER_NETWORK}'4 control_subnet: '${CONTROL_SUBNET}'5 image: '${CLUSTER_IMAGE}'6 machine_type: 'n1-standard-4'7 root_volume_size: '128'8 bootstrap_ign: '${BOOTSTRAP_IGN}'9 EOF- 1
infra_idis theINFRA_IDinfrastructure name from the extraction step.- 2
regionis the region to deploy the cluster into, for exampleus-central1.- 3
zoneis the zone to deploy the bootstrap instance into, for exampleus-central1-b.- 4
cluster_networkis theselfLinkURL to the cluster network.- 5
control_subnetis theselfLinkURL to the control subnet.- 6
imageis theselfLinkURL to the RHCOS image.- 7
machine_typeis the machine type of the instance, for examplen1-standard-4.- 8
root_volume_sizeis the boot disk size for the bootstrap machine.- 9
bootstrap_ignis the URL output when creating a signed URL.
Create the deployment by using the
gcloudCLI:$ gcloud deployment-manager deployments create ${INFRA_ID}-bootstrap --config 04_bootstrap.yamlThe templates do not manage load balancer membership due to limitations of Deployment Manager, so you must add the bootstrap machine manually.
Add the bootstrap instance to the internal load balancer instance group:
$ gcloud compute instance-groups unmanaged add-instances \ ${INFRA_ID}-bootstrap-instance-group --zone=${ZONE_0} --instances=${INFRA_ID}-bootstrapAdd the bootstrap instance group to the internal load balancer backend service:
$ gcloud compute backend-services add-backend \ ${INFRA_ID}-api-internal-backend-service --region=${REGION} --instance-group=${INFRA_ID}-bootstrap-instance-group --instance-group-zone=${ZONE_0}
6.11.14.1. Deployment Manager template for the bootstrap machine
You can use the following Deployment Manager template to deploy the bootstrap machine that you need for your OpenShift Container Platform cluster:
Example 6.25. 04_bootstrap.py Deployment Manager template
def GenerateConfig(context):
resources = [{
'name': context.properties['infra_id'] + '-bootstrap-public-ip',
'type': 'compute.v1.address',
'properties': {
'region': context.properties['region']
}
}, {
'name': context.properties['infra_id'] + '-bootstrap',
'type': 'compute.v1.instance',
'properties': {
'disks': [{
'autoDelete': True,
'boot': True,
'initializeParams': {
'diskSizeGb': context.properties['root_volume_size'],
'sourceImage': context.properties['image']
}
}],
'machineType': 'zones/' + context.properties['zone'] + '/machineTypes/' + context.properties['machine_type'],
'metadata': {
'items': [{
'key': 'user-data',
'value': '{"ignition":{"config":{"replace":{"source":"' + context.properties['bootstrap_ign'] + '"}},"version":"3.1.0"}}',
}]
},
'networkInterfaces': [{
'subnetwork': context.properties['control_subnet'],
'accessConfigs': [{
'natIP': '$(ref.' + context.properties['infra_id'] + '-bootstrap-public-ip.address)'
}]
}],
'tags': {
'items': [
context.properties['infra_id'] + '-master',
context.properties['infra_id'] + '-bootstrap'
]
},
'zone': context.properties['zone']
}
}, {
'name': context.properties['infra_id'] + '-bootstrap-instance-group',
'type': 'compute.v1.instanceGroup',
'properties': {
'namedPorts': [
{
'name': 'ignition',
'port': 22623
}, {
'name': 'https',
'port': 6443
}
],
'network': context.properties['cluster_network'],
'zone': context.properties['zone']
}
}]
return {'resources': resources}6.11.15. Creating the control plane machines in GCP
You must create the control plane machines in Google Cloud Platform (GCP) for your cluster to use. One way to create these machines is to modify the provided Deployment Manager template.
If you do not use the provided Deployment Manager template to create your control plane machines, you must review the provided information and manually create the infrastructure. If your cluster does not initialize correctly, you might have to contact Red Hat support with your installation logs.
Prerequisites
- Configure a GCP account.
- Generate the Ignition config files for your cluster.
- Create and configure a VPC and associated subnets in GCP.
- Create and configure networking and load balancers in GCP.
- Create control plane and compute roles.
- Create the bootstrap machine.
Procedure
-
Copy the template from the Deployment Manager template for control plane machines section of this topic and save it as
05_control_plane.pyon your computer. This template describes the control plane machines that your cluster requires. Export the following variable required by the resource definition:
$ export MASTER_IGNITION=`cat <installation_directory>/master.ign`Create a
05_control_plane.yamlresource definition file:$ cat <<EOF >05_control_plane.yaml imports: - path: 05_control_plane.py resources: - name: cluster-control-plane type: 05_control_plane.py properties: infra_id: '${INFRA_ID}'1 zones:2 - '${ZONE_0}' - '${ZONE_1}' - '${ZONE_2}' control_subnet: '${CONTROL_SUBNET}'3 image: '${CLUSTER_IMAGE}'4 machine_type: 'n1-standard-4'5 root_volume_size: '128' service_account_email: '${MASTER_SERVICE_ACCOUNT}'6 ignition: '${MASTER_IGNITION}'7 EOF- 1
infra_idis theINFRA_IDinfrastructure name from the extraction step.- 2
zonesare the zones to deploy the control plane instances into, for exampleus-central1-a,us-central1-b, andus-central1-c.- 3
control_subnetis theselfLinkURL to the control subnet.- 4
imageis theselfLinkURL to the RHCOS image.- 5
machine_typeis the machine type of the instance, for examplen1-standard-4.- 6
service_account_emailis the email address for the master service account that you created.- 7
ignitionis the contents of themaster.ignfile.
Create the deployment by using the
gcloudCLI:$ gcloud deployment-manager deployments create ${INFRA_ID}-control-plane --config 05_control_plane.yamlThe templates do not manage load balancer membership due to limitations of Deployment Manager, so you must add the control plane machines manually.
Run the following commands to add the control plane machines to the appropriate instance groups:
$ gcloud compute instance-groups unmanaged add-instances ${INFRA_ID}-master-${ZONE_0}-instance-group --zone=${ZONE_0} --instances=${INFRA_ID}-master-0 $ gcloud compute instance-groups unmanaged add-instances ${INFRA_ID}-master-${ZONE_1}-instance-group --zone=${ZONE_1} --instances=${INFRA_ID}-master-1 $ gcloud compute instance-groups unmanaged add-instances ${INFRA_ID}-master-${ZONE_2}-instance-group --zone=${ZONE_2} --instances=${INFRA_ID}-master-2For an external cluster, you must also run the following commands to add the control plane machines to the target pools:
$ gcloud compute target-pools add-instances ${INFRA_ID}-api-target-pool --instances-zone="${ZONE_0}" --instances=${INFRA_ID}-master-0 $ gcloud compute target-pools add-instances ${INFRA_ID}-api-target-pool --instances-zone="${ZONE_1}" --instances=${INFRA_ID}-master-1 $ gcloud compute target-pools add-instances ${INFRA_ID}-api-target-pool --instances-zone="${ZONE_2}" --instances=${INFRA_ID}-master-2
6.11.15.1. Deployment Manager template for control plane machines
You can use the following Deployment Manager template to deploy the control plane machines that you need for your OpenShift Container Platform cluster:
Example 6.26. 05_control_plane.py Deployment Manager template
def GenerateConfig(context):
resources = [{
'name': context.properties['infra_id'] + '-master-0',
'type': 'compute.v1.instance',
'properties': {
'disks': [{
'autoDelete': True,
'boot': True,
'initializeParams': {
'diskSizeGb': context.properties['root_volume_size'],
'diskType': 'zones/' + context.properties['zones'][0] + '/diskTypes/pd-ssd',
'sourceImage': context.properties['image']
}
}],
'machineType': 'zones/' + context.properties['zones'][0] + '/machineTypes/' + context.properties['machine_type'],
'metadata': {
'items': [{
'key': 'user-data',
'value': context.properties['ignition']
}]
},
'networkInterfaces': [{
'subnetwork': context.properties['control_subnet']
}],
'serviceAccounts': [{
'email': context.properties['service_account_email'],
'scopes': ['https://www.googleapis.com/auth/cloud-platform']
}],
'tags': {
'items': [
context.properties['infra_id'] + '-master',
]
},
'zone': context.properties['zones'][0]
}
}, {
'name': context.properties['infra_id'] + '-master-1',
'type': 'compute.v1.instance',
'properties': {
'disks': [{
'autoDelete': True,
'boot': True,
'initializeParams': {
'diskSizeGb': context.properties['root_volume_size'],
'diskType': 'zones/' + context.properties['zones'][1] + '/diskTypes/pd-ssd',
'sourceImage': context.properties['image']
}
}],
'machineType': 'zones/' + context.properties['zones'][1] + '/machineTypes/' + context.properties['machine_type'],
'metadata': {
'items': [{
'key': 'user-data',
'value': context.properties['ignition']
}]
},
'networkInterfaces': [{
'subnetwork': context.properties['control_subnet']
}],
'serviceAccounts': [{
'email': context.properties['service_account_email'],
'scopes': ['https://www.googleapis.com/auth/cloud-platform']
}],
'tags': {
'items': [
context.properties['infra_id'] + '-master',
]
},
'zone': context.properties['zones'][1]
}
}, {
'name': context.properties['infra_id'] + '-master-2',
'type': 'compute.v1.instance',
'properties': {
'disks': [{
'autoDelete': True,
'boot': True,
'initializeParams': {
'diskSizeGb': context.properties['root_volume_size'],
'diskType': 'zones/' + context.properties['zones'][2] + '/diskTypes/pd-ssd',
'sourceImage': context.properties['image']
}
}],
'machineType': 'zones/' + context.properties['zones'][2] + '/machineTypes/' + context.properties['machine_type'],
'metadata': {
'items': [{
'key': 'user-data',
'value': context.properties['ignition']
}]
},
'networkInterfaces': [{
'subnetwork': context.properties['control_subnet']
}],
'serviceAccounts': [{
'email': context.properties['service_account_email'],
'scopes': ['https://www.googleapis.com/auth/cloud-platform']
}],
'tags': {
'items': [
context.properties['infra_id'] + '-master',
]
},
'zone': context.properties['zones'][2]
}
}]
return {'resources': resources}6.11.16. Wait for bootstrap completion and remove bootstrap resources in GCP
After you create all of the required infrastructure in Google Cloud Platform (GCP), wait for the bootstrap process to complete on the machines that you provisioned by using the Ignition config files that you generated with the installation program.
Prerequisites
- Configure a GCP account.
- Generate the Ignition config files for your cluster.
- Create and configure a VPC and associated subnets in GCP.
- Create and configure networking and load balancers in GCP.
- Create control plane and compute roles.
- Create the bootstrap machine.
- Create the control plane machines.
Procedure
Change to the directory that contains the installation program and run the following command:
$ ./openshift-install wait-for bootstrap-complete --dir <installation_directory> \1 --log-level info2 If the command exits without a
FATALwarning, your production control plane has initialized.Delete the bootstrap resources:
$ gcloud compute backend-services remove-backend ${INFRA_ID}-api-internal-backend-service --region=${REGION} --instance-group=${INFRA_ID}-bootstrap-instance-group --instance-group-zone=${ZONE_0} $ gsutil rm gs://${INFRA_ID}-bootstrap-ignition/bootstrap.ign $ gsutil rb gs://${INFRA_ID}-bootstrap-ignition $ gcloud deployment-manager deployments delete ${INFRA_ID}-bootstrap
6.11.17. Creating additional worker machines in GCP
You can create worker machines in Google Cloud Platform (GCP) for your cluster to use by launching individual instances discretely or by automated processes outside the cluster, such as auto scaling groups. You can also take advantage of the built-in cluster scaling mechanisms and the machine API in OpenShift Container Platform.
In this example, you manually launch one instance by using the Deployment Manager template. Additional instances can be launched by including additional resources of type 06_worker.py in the file.
If you do not use the provided Deployment Manager template to create your worker machines, you must review the provided information and manually create the infrastructure. If your cluster does not initialize correctly, you might have to contact Red Hat support with your installation logs.
Prerequisites
- Configure a GCP account.
- Generate the Ignition config files for your cluster.
- Create and configure a VPC and associated subnets in GCP.
- Create and configure networking and load balancers in GCP.
- Create control plane and compute roles.
- Create the bootstrap machine.
- Create the control plane machines.
Procedure
-
Copy the template from the Deployment Manager template for worker machines section of this topic and save it as
06_worker.pyon your computer. This template describes the worker machines that your cluster requires. Export the variables that the resource definition uses.
Export the subnet that hosts the compute machines:
$ export COMPUTE_SUBNET=(`gcloud compute networks subnets describe ${INFRA_ID}-worker-subnet --region=${REGION} --format json | jq -r .selfLink`)Export the email address for your service account:
$ export WORKER_SERVICE_ACCOUNT=(`gcloud iam service-accounts list --filter "email~^${INFRA_ID}-w@${PROJECT_NAME}." --format json | jq -r '.[0].email'`)Export the location of the compute machine Ignition config file:
$ export WORKER_IGNITION=`cat <installation_directory>/worker.ign`
Create a
06_worker.yamlresource definition file:$ cat <<EOF >06_worker.yaml imports: - path: 06_worker.py resources: - name: 'worker-0'1 type: 06_worker.py properties: infra_id: '${INFRA_ID}'2 zone: '${ZONE_0}'3 compute_subnet: '${COMPUTE_SUBNET}'4 image: '${CLUSTER_IMAGE}'5 machine_type: 'n1-standard-4'6 root_volume_size: '128' service_account_email: '${WORKER_SERVICE_ACCOUNT}'7 ignition: '${WORKER_IGNITION}'8 - name: 'worker-1' type: 06_worker.py properties: infra_id: '${INFRA_ID}'9 zone: '${ZONE_1}'10 compute_subnet: '${COMPUTE_SUBNET}'11 image: '${CLUSTER_IMAGE}'12 machine_type: 'n1-standard-4'13 root_volume_size: '128' service_account_email: '${WORKER_SERVICE_ACCOUNT}'14 ignition: '${WORKER_IGNITION}'15 EOF- 1
nameis the name of the worker machine, for exampleworker-0.- 2 9
infra_idis theINFRA_IDinfrastructure name from the extraction step.- 3 10
zoneis the zone to deploy the worker machine into, for exampleus-central1-a.- 4 11
compute_subnetis theselfLinkURL to the compute subnet.- 5 12
imageis theselfLinkURL to the RHCOS image.- 6 13
machine_typeis the machine type of the instance, for examplen1-standard-4.- 7 14
service_account_emailis the email address for the worker service account that you created.- 8 15
ignitionis the contents of theworker.ignfile.
-
Optional: If you want to launch additional instances, include additional resources of type
06_worker.pyin your06_worker.yamlresource definition file. Create the deployment by using the
gcloudCLI:$ gcloud deployment-manager deployments create ${INFRA_ID}-worker --config 06_worker.yaml
6.11.17.1. Deployment Manager template for worker machines
You can use the following Deployment Manager template to deploy the worker machines that you need for your OpenShift Container Platform cluster:
Example 6.27. 06_worker.py Deployment Manager template
def GenerateConfig(context):
resources = [{
'name': context.properties['infra_id'] + '-' + context.env['name'],
'type': 'compute.v1.instance',
'properties': {
'disks': [{
'autoDelete': True,
'boot': True,
'initializeParams': {
'diskSizeGb': context.properties['root_volume_size'],
'sourceImage': context.properties['image']
}
}],
'machineType': 'zones/' + context.properties['zone'] + '/machineTypes/' + context.properties['machine_type'],
'metadata': {
'items': [{
'key': 'user-data',
'value': context.properties['ignition']
}]
},
'networkInterfaces': [{
'subnetwork': context.properties['compute_subnet']
}],
'serviceAccounts': [{
'email': context.properties['service_account_email'],
'scopes': ['https://www.googleapis.com/auth/cloud-platform']
}],
'tags': {
'items': [
context.properties['infra_id'] + '-worker',
]
},
'zone': context.properties['zone']
}
}]
return {'resources': resources}6.11.18. Logging in to the cluster by using the CLI
You can log in to your cluster as a default system user by exporting the cluster kubeconfig file. The kubeconfig file contains information about the cluster that is used by the CLI to connect a client to the correct cluster and API server. The file is specific to a cluster and is created during OpenShift Container Platform installation.
Prerequisites
- You deployed an OpenShift Container Platform cluster.
-
You installed the
ocCLI.
Procedure
Export the
kubeadmincredentials:$ export KUBECONFIG=<installation_directory>/auth/kubeconfig1 - 1
- For
<installation_directory>, specify the path to the directory that you stored the installation files in.
Verify you can run
occommands successfully using the exported configuration:$ oc whoamiExample output
system:admin
6.11.19. Disabling the default OperatorHub sources
Operator catalogs that source content provided by Red Hat and community projects are configured for OperatorHub by default during an OpenShift Container Platform installation. In a restricted network environment, you must disable the default catalogs as a cluster administrator.
Procedure
Disable the sources for the default catalogs by adding
disableAllDefaultSources: trueto theOperatorHubobject:$ oc patch OperatorHub cluster --type json \ -p '[{"op": "add", "path": "/spec/disableAllDefaultSources", "value": true}]'
Alternatively, you can use the web console to manage catalog sources. From the Administration → Cluster Settings → Global Configuration → OperatorHub page, click the Sources tab, where you can create, delete, disable, and enable individual sources.
6.11.20. Approving the certificate signing requests for your machines
When you add machines to a cluster, two pending certificate signing requests (CSRs) are generated for each machine that you added. You must confirm that these CSRs are approved or, if necessary, approve them yourself. The client requests must be approved first, followed by the server requests.
Prerequisites
- You added machines to your cluster.
Procedure
Confirm that the cluster recognizes the machines:
$ oc get nodesExample output
NAME STATUS ROLES AGE VERSION master-0 Ready master 63m v1.20.0 master-1 Ready master 63m v1.20.0 master-2 Ready master 64m v1.20.0The output lists all of the machines that you created.
NoteThe preceding output might not include the compute nodes, also known as worker nodes, until some CSRs are approved.
Review the pending CSRs and ensure that you see the client requests with the
PendingorApprovedstatus for each machine that you added to the cluster:$ oc get csrExample output
NAME AGE REQUESTOR CONDITION csr-8b2br 15m system:serviceaccount:openshift-machine-config-operator:node-bootstrapper Pending csr-8vnps 15m system:serviceaccount:openshift-machine-config-operator:node-bootstrapper Pending ...In this example, two machines are joining the cluster. You might see more approved CSRs in the list.
If the CSRs were not approved, after all of the pending CSRs for the machines you added are in
Pendingstatus, approve the CSRs for your cluster machines:NoteBecause the CSRs rotate automatically, approve your CSRs within an hour of adding the machines to the cluster. If you do not approve them within an hour, the certificates will rotate, and more than two certificates will be present for each node. You must approve all of these certificates. Once the client CSR is approved, the Kubelet creates a secondary CSR for the serving certificate, which requires manual approval. Then, subsequent serving certificate renewal requests are automatically approved by the
machine-approverif the Kubelet requests a new certificate with identical parameters.NoteFor clusters running on platforms that are not machine API enabled, such as bare metal and other user-provisioned infrastructure, you must implement a method of automatically approving the kubelet serving certificate requests (CSRs). If a request is not approved, then the
oc exec,oc rsh, andoc logscommands cannot succeed, because a serving certificate is required when the API server connects to the kubelet. Any operation that contacts the Kubelet endpoint requires this certificate approval to be in place. The method must watch for new CSRs, confirm that the CSR was submitted by thenode-bootstrapperservice account in thesystem:nodeorsystem:admingroups, and confirm the identity of the node.To approve them individually, run the following command for each valid CSR:
$ oc adm certificate approve <csr_name>1 - 1
<csr_name>is the name of a CSR from the list of current CSRs.
To approve all pending CSRs, run the following command:
$ oc get csr -o go-template='{{range .items}}{{if not .status}}{{.metadata.name}}{{"\n"}}{{end}}{{end}}' | xargs --no-run-if-empty oc adm certificate approveNoteSome Operators might not become available until some CSRs are approved.
Now that your client requests are approved, you must review the server requests for each machine that you added to the cluster:
$ oc get csrExample output
NAME AGE REQUESTOR CONDITION csr-bfd72 5m26s system:node:ip-10-0-50-126.us-east-2.compute.internal Pending csr-c57lv 5m26s system:node:ip-10-0-95-157.us-east-2.compute.internal Pending ...If the remaining CSRs are not approved, and are in the
Pendingstatus, approve the CSRs for your cluster machines:To approve them individually, run the following command for each valid CSR:
$ oc adm certificate approve <csr_name>1 - 1
<csr_name>is the name of a CSR from the list of current CSRs.
To approve all pending CSRs, run the following command:
$ oc get csr -o go-template='{{range .items}}{{if not .status}}{{.metadata.name}}{{"\n"}}{{end}}{{end}}' | xargs oc adm certificate approve
After all client and server CSRs have been approved, the machines have the
Readystatus. Verify this by running the following command:$ oc get nodesExample output
NAME STATUS ROLES AGE VERSION master-0 Ready master 73m v1.20.0 master-1 Ready master 73m v1.20.0 master-2 Ready master 74m v1.20.0 worker-0 Ready worker 11m v1.20.0 worker-1 Ready worker 11m v1.20.0NoteIt can take a few minutes after approval of the server CSRs for the machines to transition to the
Readystatus.
Additional information
- For more information on CSRs, see Certificate Signing Requests.
6.11.21. Optional: Adding the ingress DNS records
If you removed the DNS zone configuration when creating Kubernetes manifests and generating Ignition configs, you must manually create DNS records that point at the ingress load balancer. You can create either a wildcard *.apps.{baseDomain}. or specific records. You can use A, CNAME, and other records per your requirements.
Prerequisites
- Configure a GCP account.
- Remove the DNS Zone configuration when creating Kubernetes manifests and generating Ignition configs.
- Create and configure a VPC and associated subnets in GCP.
- Create and configure networking and load balancers in GCP.
- Create control plane and compute roles.
- Create the bootstrap machine.
- Create the control plane machines.
- Create the worker machines.
Procedure
Wait for the Ingress router to create a load balancer and populate the
EXTERNAL-IPfield:$ oc -n openshift-ingress get service router-defaultExample output
NAME TYPE CLUSTER-IP EXTERNAL-IP PORT(S) AGE router-default LoadBalancer 172.30.18.154 35.233.157.184 80:32288/TCP,443:31215/TCP 98Add the A record to your zones:
To use A records:
Export the variable for the router IP address:
$ export ROUTER_IP=`oc -n openshift-ingress get service router-default --no-headers | awk '{print $4}'`Add the A record to the private zones:
$ if [ -f transaction.yaml ]; then rm transaction.yaml; fi $ gcloud dns record-sets transaction start --zone ${INFRA_ID}-private-zone $ gcloud dns record-sets transaction add ${ROUTER_IP} --name \*.apps.${CLUSTER_NAME}.${BASE_DOMAIN}. --ttl 300 --type A --zone ${INFRA_ID}-private-zone $ gcloud dns record-sets transaction execute --zone ${INFRA_ID}-private-zoneFor an external cluster, also add the A record to the public zones:
$ if [ -f transaction.yaml ]; then rm transaction.yaml; fi $ gcloud dns record-sets transaction start --zone ${BASE_DOMAIN_ZONE_NAME} $ gcloud dns record-sets transaction add ${ROUTER_IP} --name \*.apps.${CLUSTER_NAME}.${BASE_DOMAIN}. --ttl 300 --type A --zone ${BASE_DOMAIN_ZONE_NAME} $ gcloud dns record-sets transaction execute --zone ${BASE_DOMAIN_ZONE_NAME}
To add explicit domains instead of using a wildcard, create entries for each of the cluster’s current routes:
$ oc get --all-namespaces -o jsonpath='{range .items[*]}{range .status.ingress[*]}{.host}{"\n"}{end}{end}' routesExample output
oauth-openshift.apps.your.cluster.domain.example.com console-openshift-console.apps.your.cluster.domain.example.com downloads-openshift-console.apps.your.cluster.domain.example.com alertmanager-main-openshift-monitoring.apps.your.cluster.domain.example.com grafana-openshift-monitoring.apps.your.cluster.domain.example.com prometheus-k8s-openshift-monitoring.apps.your.cluster.domain.example.com
6.11.22. Completing a GCP installation on user-provisioned infrastructure
After you start the OpenShift Container Platform installation on Google Cloud Platform (GCP) user-provisioned infrastructure, you can monitor the cluster events until the cluster is ready.
Prerequisites
- Deploy the bootstrap machine for an OpenShift Container Platform cluster on user-provisioned GCP infrastructure.
-
Install the
ocCLI and log in.
Procedure
Complete the cluster installation:
$ ./openshift-install --dir <installation_directory> wait-for install-complete1 Example output
INFO Waiting up to 30m0s for the cluster to initialize...- 1
- For
<installation_directory>, specify the path to the directory that you stored the installation files in.
Important-
The Ignition config files that the installation program generates contain certificates that expire after 24 hours, which are then renewed at that time. If the cluster is shut down before renewing the certificates and the cluster is later restarted after the 24 hours have elapsed, the cluster automatically recovers the expired certificates. The exception is that you must manually approve the pending
node-bootstrappercertificate signing requests (CSRs) to recover kubelet certificates. See the documentation for Recovering from expired control plane certificates for more information. - It is recommended that you use Ignition config files within 12 hours after they are generated because the 24-hour certificate rotates from 16 to 22 hours after the cluster is installed. By using the Ignition config files within 12 hours, you can avoid installation failure if the certificate update runs during installation.
Observe the running state of your cluster.
Run the following command to view the current cluster version and status:
$ oc get clusterversionExample output
NAME VERSION AVAILABLE PROGRESSING SINCE STATUS version False True 24m Working towards 4.5.4: 99% completeRun the following command to view the Operators managed on the control plane by the Cluster Version Operator (CVO):
$ oc get clusteroperatorsExample output
NAME VERSION AVAILABLE PROGRESSING DEGRADED SINCE authentication 4.5.4 True False False 7m56s cloud-credential 4.5.4 True False False 31m cluster-autoscaler 4.5.4 True False False 16m console 4.5.4 True False False 10m csi-snapshot-controller 4.5.4 True False False 16m dns 4.5.4 True False False 22m etcd 4.5.4 False False False 25s image-registry 4.5.4 True False False 16m ingress 4.5.4 True False False 16m insights 4.5.4 True False False 17m kube-apiserver 4.5.4 True False False 19m kube-controller-manager 4.5.4 True False False 20m kube-scheduler 4.5.4 True False False 20m kube-storage-version-migrator 4.5.4 True False False 16m machine-api 4.5.4 True False False 22m machine-config 4.5.4 True False False 22m marketplace 4.5.4 True False False 16m monitoring 4.5.4 True False False 10m network 4.5.4 True False False 23m node-tuning 4.5.4 True False False 23m openshift-apiserver 4.5.4 True False False 17m openshift-controller-manager 4.5.4 True False False 15m openshift-samples 4.5.4 True False False 16m operator-lifecycle-manager 4.5.4 True False False 22m operator-lifecycle-manager-catalog 4.5.4 True False False 22m operator-lifecycle-manager-packageserver 4.5.4 True False False 18m service-ca 4.5.4 True False False 23m service-catalog-apiserver 4.5.4 True False False 23m service-catalog-controller-manager 4.5.4 True False False 23m storage 4.5.4 True False False 17mRun the following command to view your cluster pods:
$ oc get pods --all-namespacesExample output
NAMESPACE NAME READY STATUS RESTARTS AGE kube-system etcd-member-ip-10-0-3-111.us-east-2.compute.internal 1/1 Running 0 35m kube-system etcd-member-ip-10-0-3-239.us-east-2.compute.internal 1/1 Running 0 37m kube-system etcd-member-ip-10-0-3-24.us-east-2.compute.internal 1/1 Running 0 35m openshift-apiserver-operator openshift-apiserver-operator-6d6674f4f4-h7t2t 1/1 Running 1 37m openshift-apiserver apiserver-fm48r 1/1 Running 0 30m openshift-apiserver apiserver-fxkvv 1/1 Running 0 29m openshift-apiserver apiserver-q85nm 1/1 Running 0 29m ... openshift-service-ca-operator openshift-service-ca-operator-66ff6dc6cd-9r257 1/1 Running 0 37m openshift-service-ca apiservice-cabundle-injector-695b6bcbc-cl5hm 1/1 Running 0 35m openshift-service-ca configmap-cabundle-injector-8498544d7-25qn6 1/1 Running 0 35m openshift-service-ca service-serving-cert-signer-6445fc9c6-wqdqn 1/1 Running 0 35m openshift-service-catalog-apiserver-operator openshift-service-catalog-apiserver-operator-549f44668b-b5q2w 1/1 Running 0 32m openshift-service-catalog-controller-manager-operator openshift-service-catalog-controller-manager-operator-b78cr2lnm 1/1 Running 0 31m
When the current cluster version is
AVAILABLE, the installation is complete.
6.11.23. Telemetry access for OpenShift Container Platform
In OpenShift Container Platform 4.7, the Telemetry service, which runs by default to provide metrics about cluster health and the success of updates, requires internet access. If your cluster is connected to the internet, Telemetry runs automatically, and your cluster is registered to OpenShift Cluster Manager.
After you confirm that your OpenShift Cluster Manager inventory is correct, either maintained automatically by Telemetry or manually by using OpenShift Cluster Manager, use subscription watch to track your OpenShift Container Platform subscriptions at the account or multi-cluster level.
6.11.24. Next steps
- Customize your cluster.
-
Configure image streams for the Cluster Samples Operator and the
must-gathertool. - Learn how to use Operator Lifecycle Manager (OLM) on restricted networks.
- If the mirror registry that you used to install your cluster has a trusted CA, add it to the cluster by configuring additional trust stores.
- If necessary, you can opt out of remote health reporting.
6.12. Uninstalling a cluster on GCP
You can remove a cluster that you deployed to Google Cloud Platform (GCP).
6.12.1. Removing a cluster that uses installer-provisioned infrastructure
You can remove a cluster that uses installer-provisioned infrastructure from your cloud.
After uninstallation, check your cloud provider for any resources not removed properly, especially with User Provisioned Infrastructure (UPI) clusters. There might be resources that the installer did not create or that the installer is unable to access. For example, some Google Cloud resources require IAM permissions in shared VPC host projects, or there might be unused health checks that must be deleted.
Prerequisites
- Have a copy of the installation program that you used to deploy the cluster.
- Have the files that the installation program generated when you created your cluster.
Procedure
From the directory that contains the installation program on the computer that you used to install the cluster, run the following command:
$ ./openshift-install destroy cluster \ --dir <installation_directory> --log-level info1 2 NoteYou must specify the directory that contains the cluster definition files for your cluster. The installation program requires the
metadata.jsonfile in this directory to delete the cluster.-
Optional: Delete the
<installation_directory>directory and the OpenShift Container Platform installation program.
Chapter 7. Installing on bare metal
7.1. Installing a cluster on bare metal
In OpenShift Container Platform version 4.7, you can install a cluster on bare metal infrastructure that you provision.
While you might be able to follow this procedure to deploy a cluster on virtualized or cloud environments, you must be aware of additional considerations for non-bare metal platforms. Review the information in the guidelines for deploying OpenShift Container Platform on non-tested platforms before you attempt to install an OpenShift Container Platform cluster in such an environment.
7.1.1. Prerequisites
- Review details about the OpenShift Container Platform installation and update processes.
If you use a firewall, you must configure it to allow the sites that your cluster requires access to.
NoteBe sure to also review this site list if you are configuring a proxy.
7.1.2. Internet access for OpenShift Container Platform
In OpenShift Container Platform 4.7, you require access to the Internet to install your cluster.
You must have Internet access to:
- Access OpenShift Cluster Manager to download the installation program and perform subscription management. If the cluster has internet access and you do not disable Telemetry, that service automatically entitles your cluster.
- Access Quay.io to obtain the packages that are required to install your cluster.
- Obtain the packages that are required to perform cluster updates.
If your cluster cannot have direct Internet access, you can perform a restricted network installation on some types of infrastructure that you provision. During that process, you download the content that is required and use it to populate a mirror registry with the packages that you need to install a cluster and generate the installation program. With some installation types, the environment that you install your cluster in will not require Internet access. Before you update the cluster, you update the content of the mirror registry.
7.1.3. Machine requirements for a cluster with user-provisioned infrastructure
For a cluster that contains user-provisioned infrastructure, you must deploy all of the required machines.
7.1.3.1. Required machines
The smallest OpenShift Container Platform clusters require the following hosts:
- One temporary bootstrap machine
- Three control plane, or master, machines
- At least two compute machines, which are also known as worker machines. If you are running a three-node cluster, running zero compute machines is supported. Running one compute machine is not supported.
The cluster requires the bootstrap machine to deploy the OpenShift Container Platform cluster on the three control plane machines. You can remove the bootstrap machine after you install the cluster.
To maintain high availability of your cluster, use separate physical hosts for these cluster machines.
The bootstrap and control plane machines must use Red Hat Enterprise Linux CoreOS (RHCOS) as the operating system. However, the compute machines can choose between Red Hat Enterprise Linux CoreOS (RHCOS) or Red Hat Enterprise Linux (RHEL) 7.9.
Note that RHCOS is based on Red Hat Enterprise Linux (RHEL) 8 and inherits all of its hardware certifications and requirements. See Red Hat Enterprise Linux technology capabilities and limits.
7.1.3.2. Network connectivity requirements
All the Red Hat Enterprise Linux CoreOS (RHCOS) machines require network in initramfs during boot to fetch Ignition config files from the Machine Config Server. During the initial boot, the machines require either a DHCP server or that static IP addresses be set in order to establish a network connection to download their Ignition config files. Additionally, each OpenShift Container Platform node in the cluster must have access to a Network Time Protocol (NTP) server. If a DHCP server provides NTP servers information, the chrony time service on the Red Hat Enterprise Linux CoreOS (RHCOS) machines read the information and can sync the clock with the NTP servers.
7.1.3.3. Minimum resource requirements
Each cluster machine must meet the following minimum requirements:
| Machine | Operating System | CPU [1] | RAM | Storage | IOPS [2] |
|---|---|---|---|---|---|
| Bootstrap | RHCOS | 4 | 16 GB | 100 GB | 300 |
| Control plane | RHCOS | 4 | 16 GB | 100 GB | 300 |
| Compute | RHCOS or RHEL 7.9 | 2 | 8 GB | 100 GB | 300 |
- One CPU is equivalent to one physical core when simultaneous multithreading (SMT), or hyperthreading, is not enabled. When enabled, use the following formula to calculate the corresponding ratio: (threads per core × cores) × sockets = CPUs.
- OpenShift Container Platform and Kubernetes are sensitive to disk performance, and faster storage is recommended, particularly for etcd on the control plane nodes which require a 10 ms p99 fsync duration. Note that on many cloud platforms, storage size and IOPS scale together, so you might need to over-allocate storage volume to obtain sufficient performance.
7.1.3.4. Certificate signing requests management
Because your cluster has limited access to automatic machine management when you use infrastructure that you provision, you must provide a mechanism for approving cluster certificate signing requests (CSRs) after installation. The kube-controller-manager only approves the kubelet client CSRs. The machine-approver cannot guarantee the validity of a serving certificate that is requested by using kubelet credentials because it cannot confirm that the correct machine issued the request. You must determine and implement a method of verifying the validity of the kubelet serving certificate requests and approving them.
7.1.4. Creating the user-provisioned infrastructure
Before you deploy an OpenShift Container Platform cluster that uses user-provisioned infrastructure, you must create the underlying infrastructure.
Prerequisites
- Review the OpenShift Container Platform 4.x Tested Integrations page before you create the supporting infrastructure for your cluster.
Procedure
- Configure DHCP or set static IP addresses on each node.
- Provision the required load balancers.
- Configure the ports for your machines.
- Configure DNS.
- Ensure network connectivity.
7.1.4.1. Networking requirements for user-provisioned infrastructure
All the Red Hat Enterprise Linux CoreOS (RHCOS) machines require network in initramfs during boot to fetch Ignition config from the machine config server.
During the initial boot, the machines require either a DHCP server or that static IP addresses be set on each host in the cluster to establish a network connection, which allows them to download their Ignition config files.
It is recommended to use the DHCP server to manage the machines for the cluster long-term. Ensure that the DHCP server is configured to provide persistent IP addresses and host names to the cluster machines.
The Kubernetes API server must be able to resolve the node names of the cluster machines. If the API servers and worker nodes are in different zones, you can configure a default DNS search zone to allow the API server to resolve the node names. Another supported approach is to always refer to hosts by their fully-qualified domain names in both the node objects and all DNS requests.
You must configure the network connectivity between machines to allow cluster components to communicate. Each machine must be able to resolve the host names of all other machines in the cluster.
| Protocol | Port | Description |
|---|---|---|
| ICMP | N/A | Network reachability tests |
| TCP |
| Metrics |
|
|
Host level services, including the node exporter on ports | |
|
| The default ports that Kubernetes reserves | |
|
| openshift-sdn | |
| UDP |
| VXLAN and Geneve |
|
| VXLAN and Geneve | |
|
|
Host level services, including the node exporter on ports | |
| TCP/UDP |
| Kubernetes node port |
| Protocol | Port | Description |
|---|---|---|
| TCP |
| Kubernetes API |
| Protocol | Port | Description |
|---|---|---|
| TCP |
| etcd server and peer ports |
Network topology requirements
The infrastructure that you provision for your cluster must meet the following network topology requirements.
OpenShift Container Platform requires all nodes to have internet access to pull images for platform containers and provide telemetry data to Red Hat.
Load balancers
Before you install OpenShift Container Platform, you must provision two load balancers that meet the following requirements:
API load balancer: Provides a common endpoint for users, both human and machine, to interact with and configure the platform. Configure the following conditions:
- Layer 4 load balancing only. This can be referred to as Raw TCP, SSL Passthrough, or SSL Bridge mode. If you use SSL Bridge mode, you must enable Server Name Indication (SNI) for the API routes.
- A stateless load balancing algorithm. The options vary based on the load balancer implementation.
ImportantDo not configure session persistence for an API load balancer.
Configure the following ports on both the front and back of the load balancers:
Expand Table 7.5. API load balancer Port Back-end machines (pool members) Internal External Description 6443Bootstrap and control plane. You remove the bootstrap machine from the load balancer after the bootstrap machine initializes the cluster control plane. You must configure the
/readyzendpoint for the API server health check probe.X
X
Kubernetes API server
22623Bootstrap and control plane. You remove the bootstrap machine from the load balancer after the bootstrap machine initializes the cluster control plane.
X
Machine config server
NoteThe load balancer must be configured to take a maximum of 30 seconds from the time the API server turns off the
/readyzendpoint to the removal of the API server instance from the pool. Within the time frame after/readyzreturns an error or becomes healthy, the endpoint must have been removed or added. Probing every 5 or 10 seconds, with two successful requests to become healthy and three to become unhealthy, are well-tested values.Application Ingress load balancer: Provides an Ingress point for application traffic flowing in from outside the cluster. Configure the following conditions:
- Layer 4 load balancing only. This can be referred to as Raw TCP, SSL Passthrough, or SSL Bridge mode. If you use SSL Bridge mode, you must enable Server Name Indication (SNI) for the Ingress routes.
- A connection-based or session-based persistence is recommended, based on the options available and types of applications that will be hosted on the platform.
Configure the following ports on both the front and back of the load balancers:
Expand Table 7.6. Application Ingress load balancer Port Back-end machines (pool members) Internal External Description 443The machines that run the Ingress router pods, compute, or worker, by default.
X
X
HTTPS traffic
80The machines that run the Ingress router pods, compute, or worker, by default.
X
X
HTTP traffic
If the true IP address of the client can be seen by the load balancer, enabling source IP-based session persistence can improve performance for applications that use end-to-end TLS encryption.
A working configuration for the Ingress router is required for an OpenShift Container Platform cluster. You must configure the Ingress router after the control plane initializes.
NTP configuration
OpenShift Container Platform clusters are configured to use a public Network Time Protocol (NTP) server by default. If you want to use a local enterprise NTP server, or if your cluster is being deployed in a disconnected network, you can configure the cluster to use a specific time server. For more information, see the documentation for Configuring chrony time service.
If a DHCP server provides NTP server information, the chrony time service on the Red Hat Enterprise Linux CoreOS (RHCOS) machines read the information and can sync the clock with the NTP servers.
7.1.4.2. User-provisioned DNS requirements
DNS is used for name resolution and reverse name resolution. DNS A/AAAA or CNAME records are used for name resolution and PTR records are used for reverse name resolution. The reverse records are important because Red Hat Enterprise Linux CoreOS (RHCOS) uses the reverse records to set the host name for all the nodes. Additionally, the reverse records are used to generate the certificate signing requests (CSR) that OpenShift Container Platform needs to operate.
The following DNS records are required for an OpenShift Container Platform cluster that uses user-provisioned infrastructure. In each record, <cluster_name> is the cluster name and <base_domain> is the cluster base domain that you specify in the install-config.yaml file. A complete DNS record takes the form: <component>.<cluster_name>.<base_domain>..
| Component | Record | Description |
|---|---|---|
| Kubernetes API |
| Add a DNS A/AAAA or CNAME record, and a DNS PTR record, to identify the load balancer for the control plane machines. These records must be resolvable by both clients external to the cluster and from all the nodes within the cluster. |
|
| Add a DNS A/AAAA or CNAME record, and a DNS PTR record, to identify the load balancer for the control plane machines. These records must be resolvable from all the nodes within the cluster. Important The API server must be able to resolve the worker nodes by the host names that are recorded in Kubernetes. If the API server cannot resolve the node names, then proxied API calls can fail, and you cannot retrieve logs from pods. | |
| Routes |
| Add a wildcard DNS A/AAAA or CNAME record that refers to the load balancer that targets the machines that run the Ingress router pods, which are the worker nodes by default. These records must be resolvable by both clients external to the cluster and from all the nodes within the cluster. |
| Bootstrap |
| Add a DNS A/AAAA or CNAME record, and a DNS PTR record, to identify the bootstrap machine. These records must be resolvable by the nodes within the cluster. |
| Master hosts |
| DNS A/AAAA or CNAME records and DNS PTR records to identify each machine for the control plane nodes (also known as the master nodes). These records must be resolvable by the nodes within the cluster. |
| Worker hosts |
| Add DNS A/AAAA or CNAME records and DNS PTR records to identify each machine for the worker nodes. These records must be resolvable by the nodes within the cluster. |
You can use the nslookup <hostname> command to verify name resolution. You can use the dig -x <ip_address> command to verify reverse name resolution for the PTR records.
The following example of a BIND zone file shows sample A records for name resolution. The purpose of the example is to show the records that are needed. The example is not meant to provide advice for choosing one name resolution service over another.
Example 7.1. Sample DNS zone database
$TTL 1W
@ IN SOA ns1.example.com. root (
2019070700 ; serial
3H ; refresh (3 hours)
30M ; retry (30 minutes)
2W ; expiry (2 weeks)
1W ) ; minimum (1 week)
IN NS ns1.example.com.
IN MX 10 smtp.example.com.
;
;
ns1 IN A 192.168.1.5
smtp IN A 192.168.1.5
;
helper IN A 192.168.1.5
helper.ocp4 IN A 192.168.1.5
;
; The api identifies the IP of your load balancer.
api.ocp4 IN A 192.168.1.5
api-int.ocp4 IN A 192.168.1.5
;
; The wildcard also identifies the load balancer.
*.apps.ocp4 IN A 192.168.1.5
;
; Create an entry for the bootstrap host.
bootstrap.ocp4 IN A 192.168.1.96
;
; Create entries for the master hosts.
master0.ocp4 IN A 192.168.1.97
master1.ocp4 IN A 192.168.1.98
master2.ocp4 IN A 192.168.1.99
;
; Create entries for the worker hosts.
worker0.ocp4 IN A 192.168.1.11
worker1.ocp4 IN A 192.168.1.7
;
;EOFThe following example BIND zone file shows sample PTR records for reverse name resolution.
Example 7.2. Sample DNS zone database for reverse records
$TTL 1W
@ IN SOA ns1.example.com. root (
2019070700 ; serial
3H ; refresh (3 hours)
30M ; retry (30 minutes)
2W ; expiry (2 weeks)
1W ) ; minimum (1 week)
IN NS ns1.example.com.
;
; The syntax is "last octet" and the host must have an FQDN
; with a trailing dot.
97 IN PTR master0.ocp4.example.com.
98 IN PTR master1.ocp4.example.com.
99 IN PTR master2.ocp4.example.com.
;
96 IN PTR bootstrap.ocp4.example.com.
;
5 IN PTR api.ocp4.example.com.
5 IN PTR api-int.ocp4.example.com.
;
11 IN PTR worker0.ocp4.example.com.
7 IN PTR worker1.ocp4.example.com.
;
;EOFFor clusters using installer-provisioned infrastructure, only the DNS records must be added.
7.1.5. Generating an SSH private key and adding it to the agent
If you want to perform installation debugging or disaster recovery on your cluster, you must provide an SSH key to both your ssh-agent and the installation program. You can use this key to access the bootstrap machine in a public cluster to troubleshoot installation issues.
In a production environment, you require disaster recovery and debugging.
You can use this key to SSH into the master nodes as the user core. When you deploy the cluster, the key is added to the core user’s ~/.ssh/authorized_keys list.
You must use a local key, not one that you configured with platform-specific approaches such as AWS key pairs.
Procedure
If you do not have an SSH key that is configured for password-less authentication on your computer, create one. For example, on a computer that uses a Linux operating system, run the following command:
$ ssh-keygen -t ed25519 -N '' \ -f <path>/<file_name>1 - 1
- Specify the path and file name, such as
~/.ssh/id_rsa, of the new SSH key. If you have an existing key pair, ensure your public key is in the your~/.sshdirectory.
Running this command generates an SSH key that does not require a password in the location that you specified.
NoteIf you plan to install an OpenShift Container Platform cluster that uses FIPS Validated / Modules in Process cryptographic libraries on the
x86_64architecture, do not create a key that uses theed25519algorithm. Instead, create a key that uses thersaorecdsaalgorithm.Start the
ssh-agentprocess as a background task:$ eval "$(ssh-agent -s)"Example output
Agent pid 31874NoteIf your cluster is in FIPS mode, only use FIPS-compliant algorithms to generate the SSH key. The key must be either RSA or ECDSA.
Add your SSH private key to the
ssh-agent:$ ssh-add <path>/<file_name>1 Example output
Identity added: /home/<you>/<path>/<file_name> (<computer_name>)- 1
- Specify the path and file name for your SSH private key, such as
~/.ssh/id_rsa
Next steps
- When you install OpenShift Container Platform, provide the SSH public key to the installation program. If you install a cluster on infrastructure that you provision, you must provide this key to your cluster’s machines.
7.1.6. Obtaining the installation program
Before you install OpenShift Container Platform, download the installation file on a local computer.
Prerequisites
- You have a computer that runs Linux or macOS, with 500 MB of local disk space
Procedure
- Access the Infrastructure Provider page on the OpenShift Cluster Manager site. If you have a Red Hat account, log in with your credentials. If you do not, create an account.
- Select your infrastructure provider.
Navigate to the page for your installation type, download the installation program for your operating system, and place the file in the directory where you will store the installation configuration files.
ImportantThe installation program creates several files on the computer that you use to install your cluster. You must keep the installation program and the files that the installation program creates after you finish installing the cluster. Both files are required to delete the cluster.
ImportantDeleting the files created by the installation program does not remove your cluster, even if the cluster failed during installation. To remove your cluster, complete the OpenShift Container Platform uninstallation procedures for your specific cloud provider.
Extract the installation program. For example, on a computer that uses a Linux operating system, run the following command:
$ tar xvf openshift-install-linux.tar.gz- Download your installation pull secret from the Red Hat OpenShift Cluster Manager. This pull secret allows you to authenticate with the services that are provided by the included authorities, including Quay.io, which serves the container images for OpenShift Container Platform components.
7.1.7. Installing the OpenShift CLI by downloading the binary
You can install the OpenShift CLI (oc) to interact with OpenShift Container Platform from a command-line interface. You can install oc on Linux, Windows, or macOS.
If you installed an earlier version of oc, you cannot use it to complete all of the commands in OpenShift Container Platform 4.7. Download and install the new version of oc.
7.1.7.1. Installing the OpenShift CLI on Linux
You can install the OpenShift CLI (oc) binary on Linux by using the following procedure.
Procedure
- Navigate to the OpenShift Container Platform downloads page on the Red Hat Customer Portal.
- Select the appropriate version in the Version drop-down menu.
- Click Download Now next to the OpenShift v4.7 Linux Client entry and save the file.
Unpack the archive:
$ tar xvzf <file>Place the
ocbinary in a directory that is on yourPATH.To check your
PATH, execute the following command:$ echo $PATH
After you install the OpenShift CLI, it is available using the oc command:
$ oc <command>7.1.7.2. Installing the OpenShift CLI on Windows
You can install the OpenShift CLI (oc) binary on Windows by using the following procedure.
Procedure
- Navigate to the OpenShift Container Platform downloads page on the Red Hat Customer Portal.
- Select the appropriate version in the Version drop-down menu.
- Click Download Now next to the OpenShift v4.7 Windows Client entry and save the file.
- Unzip the archive with a ZIP program.
Move the
ocbinary to a directory that is on yourPATH.To check your
PATH, open the command prompt and execute the following command:C:\> path
After you install the OpenShift CLI, it is available using the oc command:
C:\> oc <command>7.1.7.3. Installing the OpenShift CLI on macOS
You can install the OpenShift CLI (oc) binary on macOS by using the following procedure.
Procedure
- Navigate to the OpenShift Container Platform downloads page on the Red Hat Customer Portal.
- Select the appropriate version in the Version drop-down menu.
- Click Download Now next to the OpenShift v4.7 MacOSX Client entry and save the file.
- Unpack and unzip the archive.
Move the
ocbinary to a directory on your PATH.To check your
PATH, open a terminal and execute the following command:$ echo $PATH
After you install the OpenShift CLI, it is available using the oc command:
$ oc <command>7.1.8. Manually creating the installation configuration file
For installations of OpenShift Container Platform that use user-provisioned infrastructure, you manually generate your installation configuration file.
Prerequisites
- Obtain the OpenShift Container Platform installation program and the access token for your cluster.
Procedure
Create an installation directory to store your required installation assets in:
$ mkdir <installation_directory>ImportantYou must create a directory. Some installation assets, like bootstrap X.509 certificates have short expiration intervals, so you must not reuse an installation directory. If you want to reuse individual files from another cluster installation, you can copy them into your directory. However, the file names for the installation assets might change between releases. Use caution when copying installation files from an earlier OpenShift Container Platform version.
Customize the following
install-config.yamlfile template and save it in the<installation_directory>.NoteYou must name this configuration file
install-config.yaml.Back up the
install-config.yamlfile so that you can use it to install multiple clusters.ImportantThe
install-config.yamlfile is consumed during the next step of the installation process. You must back it up now.
7.1.8.1. Installation configuration parameters
Before you deploy an OpenShift Container Platform cluster, you provide parameter values to describe your account on the cloud platform that hosts your cluster and optionally customize your cluster’s platform. When you create the install-config.yaml installation configuration file, you provide values for the required parameters through the command line. If you customize your cluster, you can modify the install-config.yaml file to provide more details about the platform.
After installation, you cannot modify these parameters in the install-config.yaml file.
The openshift-install command does not validate field names for parameters. If an incorrect name is specified, the related file or object is not created, and no error is reported. Ensure that the field names for any parameters that are specified are correct.
7.1.8.1.1. Required configuration parameters
Required installation configuration parameters are described in the following table:
| Parameter | Description | Values |
|---|---|---|
|
|
The API version for the | String |
|
|
The base domain of your cloud provider. The base domain is used to create routes to your OpenShift Container Platform cluster components. The full DNS name for your cluster is a combination of the |
A fully-qualified domain or subdomain name, such as |
|
|
Kubernetes resource | Object |
|
|
The name of the cluster. DNS records for the cluster are all subdomains of |
String of lowercase letters, hyphens ( |
|
|
The configuration for the specific platform upon which to perform the installation: | Object |
|
| Get a pull secret from the Red Hat OpenShift Cluster Manager to authenticate downloading container images for OpenShift Container Platform components from services such as Quay.io. |
|
7.1.8.1.2. Network configuration parameters
You can customize your installation configuration based on the requirements of your existing network infrastructure. For example, you can expand the IP address block for the cluster network or provide different IP address blocks than the defaults.
Only IPv4 addresses are supported.
| Parameter | Description | Values |
|---|---|---|
|
| The configuration for the cluster network. | Object Note
You cannot modify parameters specified by the |
|
| The cluster network provider Container Network Interface (CNI) plug-in to install. |
Either |
|
| The IP address blocks for pods.
The default value is If you specify multiple IP address blocks, the blocks must not overlap. | An array of objects. For example: |
|
|
Required if you use An IPv4 network. |
An IP address block in Classless Inter-Domain Routing (CIDR) notation. The prefix length for an IPv4 block is between |
|
|
The subnet prefix length to assign to each individual node. For example, if | A subnet prefix.
The default value is |
|
|
The IP address block for services. The default value is The OpenShift SDN and OVN-Kubernetes network providers support only a single IP address block for the service network. | An array with an IP address block in CIDR format. For example: |
|
| The IP address blocks for machines. If you specify multiple IP address blocks, the blocks must not overlap. | An array of objects. For example: |
|
|
Required if you use | An IP network block in CIDR notation.
For example, Note
Set the |
7.1.8.1.3. Optional configuration parameters
Optional installation configuration parameters are described in the following table:
| Parameter | Description | Values |
|---|---|---|
|
| A PEM-encoded X.509 certificate bundle that is added to the nodes' trusted certificate store. This trust bundle may also be used when a proxy has been configured. | String |
|
| The configuration for the machines that comprise the compute nodes. |
Array of |
|
|
Determines the instruction set architecture of the machines in the pool. Currently, heteregeneous clusters are not supported, so all pools must specify the same architecture. Valid values are | String |
|
|
Whether to enable or disable simultaneous multithreading, or Important If you disable simultaneous multithreading, ensure that your capacity planning accounts for the dramatically decreased machine performance. |
|
|
|
Required if you use |
|
|
|
Required if you use |
|
|
| The number of compute machines, which are also known as worker machines, to provision. |
A positive integer greater than or equal to |
|
| The configuration for the machines that comprise the control plane. |
Array of |
|
|
Determines the instruction set architecture of the machines in the pool. Currently, heterogeneous clusters are not supported, so all pools must specify the same architecture. Valid values are | String |
|
|
Whether to enable or disable simultaneous multithreading, or Important If you disable simultaneous multithreading, ensure that your capacity planning accounts for the dramatically decreased machine performance. |
|
|
|
Required if you use |
|
|
|
Required if you use |
|
|
| The number of control plane machines to provision. |
The only supported value is |
|
| The Cloud Credential Operator (CCO) mode. If no mode is specified, the CCO dynamically tries to determine the capabilities of the provided credentials, with a preference for mint mode on the platforms where multiple modes are supported. Note Not all CCO modes are supported for all cloud providers. For more information on CCO modes, see the Cloud Credential Operator entry in the Cluster Operators reference content. |
|
|
|
Enable or disable FIPS mode. The default is Important
The use of FIPS Validated / Modules in Process cryptographic libraries is only supported on OpenShift Container Platform deployments on the Note If you are using Azure File storage, you cannot enable FIPS mode. |
|
|
| Sources and repositories for the release-image content. |
Array of objects. Includes a |
|
|
Required if you use | String |
|
| Specify one or more repositories that may also contain the same images. | Array of strings |
|
| How to publish or expose the user-facing endpoints of your cluster, such as the Kubernetes API, OpenShift routes. |
Setting this field to Important
If the value of the field is set to |
|
| The SSH key or keys to authenticate access your cluster machines. Note
For production OpenShift Container Platform clusters on which you want to perform installation debugging or disaster recovery, specify an SSH key that your | One or more keys. For example: |
7.1.8.2. Sample install-config.yaml file for bare metal
You can customize the install-config.yaml file to specify more details about your OpenShift Container Platform cluster’s platform or modify the values of the required parameters.
apiVersion: v1
baseDomain: example.com
compute:
- hyperthreading: Enabled
name: worker
replicas: 0
controlPlane:
hyperthreading: Enabled
name: master
replicas: 3
metadata:
name: test
networking:
clusterNetwork:
- cidr: 10.128.0.0/14
hostPrefix: 23
networkType: OpenShiftSDN
serviceNetwork:
- 172.30.0.0/16
platform:
none: {}
fips: false
pullSecret: '{"auths": ...}'
sshKey: 'ssh-ed25519 AAAA...' - 1
- The base domain of the cluster. All DNS records must be sub-domains of this base and include the cluster name.
- 2 5
- The
controlPlanesection is a single mapping, but thecomputesection is a sequence of mappings. To meet the requirements of the different data structures, the first line of thecomputesection must begin with a hyphen,-, and the first line of thecontrolPlanesection must not. Only one control plane pool is used. - 3 6
- Whether to enable or disable simultaneous multithreading (SMT), or
hyperthreading. By default, SMT is enabled to increase the performance of your machines' cores. You can disable it by setting the parameter value toDisabled. If you disable SMT, you must disable it in all cluster machines; this includes both control plane and compute machines.NoteSimultaneous multithreading (SMT) is enabled by default. If SMT is not enabled in your BIOS settings, the
hyperthreadingparameter has no effect.ImportantIf you disable
hyperthreading, whether in the BIOS or in theinstall-config.yaml, ensure that your capacity planning accounts for the dramatically decreased machine performance. - 4
- You must set the value of the
replicasparameter to0. This parameter controls the number of workers that the cluster creates and manages for you, which are functions that the cluster does not perform when you use user-provisioned infrastructure. You must manually deploy worker machines for the cluster to use before you finish installing OpenShift Container Platform. - 7
- The number of control plane machines that you add to the cluster. Because the cluster uses these values as the number of etcd endpoints in the cluster, the value must match the number of control plane machines that you deploy.
- 8
- The cluster name that you specified in your DNS records.
- 9
- A block of IP addresses from which pod IP addresses are allocated. This block must not overlap with existing physical networks. These IP addresses are used for the pod network. If you need to access the pods from an external network, you must configure load balancers and routers to manage the traffic.Note
Class E CIDR range is reserved for a future use. To use the Class E CIDR range, you must ensure your networking environment accepts the IP addresses within the Class E CIDR range.
- 10
- The subnet prefix length to assign to each individual node. For example, if
hostPrefixis set to23, then each node is assigned a/23subnet out of the givencidr, which allows for 510 (2^(32 - 23) - 2) pod IPs addresses. If you are required to provide access to nodes from an external network, configure load balancers and routers to manage the traffic. - 11
- The IP address pool to use for service IP addresses. You can enter only one IP address pool. This block must not overlap with existing physical networks. If you need to access the services from an external network, configure load balancers and routers to manage the traffic.
- 12
- You must set the platform to
none. You cannot provide additional platform configuration variables for your platform.WarningRed Hat Virtualization does not currently support installation with user-provisioned infrastructure on the oVirt platform. Therefore, you must set the platform to
none, allowing OpenShift Container Platform to identify each node as a bare-metal node and the cluster as a bare-metal cluster. This is the same as installing a cluster on any platform, and has the following limitations:- There will be no cluster provider so you must manually add each machine and there will be no node scaling capabilities.
- The oVirt CSI driver will not be installed and there will be no CSI capabilities.
- 13
- Whether to enable or disable FIPS mode. By default, FIPS mode is not enabled. If FIPS mode is enabled, the Red Hat Enterprise Linux CoreOS (RHCOS) machines that OpenShift Container Platform runs on bypass the default Kubernetes cryptography suite and use the cryptography modules that are provided with RHCOS instead.Important
The use of FIPS Validated / Modules in Process cryptographic libraries is only supported on OpenShift Container Platform deployments on the
x86_64architecture. - 14
- The pull secret from the Red Hat OpenShift Cluster Manager. This pull secret allows you to authenticate with the services that are provided by the included authorities, including Quay.io, which serves the container images for OpenShift Container Platform components.
- 15
- The public portion of the default SSH key for the
coreuser in Red Hat Enterprise Linux CoreOS (RHCOS).NoteFor production OpenShift Container Platform clusters on which you want to perform installation debugging or disaster recovery, specify an SSH key that your
ssh-agentprocess uses.
7.1.8.3. Configuring the cluster-wide proxy during installation
Production environments can deny direct access to the Internet and instead have an HTTP or HTTPS proxy available. You can configure a new OpenShift Container Platform cluster to use a proxy by configuring the proxy settings in the install-config.yaml file.
For bare metal installations, if you do not assign node IP addresses from the range that is specified in the networking.machineNetwork[].cidr field in the install-config.yaml file, you must include them in the proxy.noProxy field.
Prerequisites
-
You have an existing
install-config.yamlfile. You reviewed the sites that your cluster requires access to and determined whether any of them need to bypass the proxy. By default, all cluster egress traffic is proxied, including calls to hosting cloud provider APIs. You added sites to the
Proxyobject’sspec.noProxyfield to bypass the proxy if necessary.NoteThe
Proxyobjectstatus.noProxyfield is populated with the values of thenetworking.machineNetwork[].cidr,networking.clusterNetwork[].cidr, andnetworking.serviceNetwork[]fields from your installation configuration.For installations on Amazon Web Services (AWS), Google Cloud Platform (GCP), Microsoft Azure, and Red Hat OpenStack Platform (RHOSP), the
Proxyobjectstatus.noProxyfield is also populated with the instance metadata endpoint (169.254.169.254).
Procedure
Edit your
install-config.yamlfile and add the proxy settings. For example:apiVersion: v1 baseDomain: my.domain.com proxy: httpProxy: http://<username>:<pswd>@<ip>:<port>1 httpsProxy: https://<username>:<pswd>@<ip>:<port>2 noProxy: example.com3 additionalTrustBundle: |4 -----BEGIN CERTIFICATE----- <MY_TRUSTED_CA_CERT> -----END CERTIFICATE----- ...- 1
- A proxy URL to use for creating HTTP connections outside the cluster. The URL scheme must be
http. - 2
- A proxy URL to use for creating HTTPS connections outside the cluster.
- 3
- A comma-separated list of destination domain names, IP addresses, or other network CIDRs to exclude from proxying. Preface a domain with
.to match subdomains only. For example,.y.commatchesx.y.com, but noty.com. Use*to bypass the proxy for all destinations. - 4
- If provided, the installation program generates a config map that is named
user-ca-bundlein theopenshift-confignamespace to hold the additional CA certificates. If you provideadditionalTrustBundleand at least one proxy setting, theProxyobject is configured to reference theuser-ca-bundleconfig map in thetrustedCAfield. The Cluster Network Operator then creates atrusted-ca-bundleconfig map that merges the contents specified for thetrustedCAparameter with the RHCOS trust bundle. TheadditionalTrustBundlefield is required unless the proxy’s identity certificate is signed by an authority from the RHCOS trust bundle.
NoteThe installation program does not support the proxy
readinessEndpointsfield.- Save the file and reference it when installing OpenShift Container Platform.
The installation program creates a cluster-wide proxy that is named cluster that uses the proxy settings in the provided install-config.yaml file. If no proxy settings are provided, a cluster Proxy object is still created, but it will have a nil spec.
Only the Proxy object named cluster is supported, and no additional proxies can be created.
7.1.9. Configuring a three-node cluster
You can optionally install and run three-node clusters in OpenShift Container Platform with no workers. This provides smaller, more resource efficient clusters for cluster administrators and developers to use for development, production, and testing.
Procedure
Edit the
install-config.yamlfile to set the number of compute replicas, which are also known as worker replicas, to0, as shown in the followingcomputestanza:compute: - name: worker platform: {} replicas: 0
7.1.10. Creating the Kubernetes manifest and Ignition config files
Because you must modify some cluster definition files and manually start the cluster machines, you must generate the Kubernetes manifest and Ignition config files that the cluster needs to make its machines.
The installation configuration file transforms into the Kubernetes manifests. The manifests wrap into the Ignition configuration files, which are later used to create the cluster.
The Ignition config files that the installation program generates contain certificates that expire after 24 hours, which are then renewed at that time. If the cluster is shut down before renewing the certificates and the cluster is later restarted after the 24 hours have elapsed, the cluster automatically recovers the expired certificates. The exception is that you must manually approve the pending node-bootstrapper certificate signing requests (CSRs) to recover kubelet certificates. See the documentation for Recovering from expired control plane certificates for more information.
Prerequisites
- You obtained the OpenShift Container Platform installation program.
-
You created the
install-config.yamlinstallation configuration file.
Procedure
Change to the directory that contains the installation program and generate the Kubernetes manifests for the cluster:
$ ./openshift-install create manifests --dir <installation_directory>1 - 1
- For
<installation_directory>, specify the installation directory that contains theinstall-config.yamlfile you created.
WarningIf you are installing a three-node cluster, skip the following step to allow the control plane nodes to be schedulable.
ImportantWhen you configure control plane nodes from the default unschedulable to schedulable, additional subscriptions are required. This is because control plane nodes then become worker nodes.
Check that the
mastersSchedulableparameter in the<installation_directory>/manifests/cluster-scheduler-02-config.ymlKubernetes manifest file is set tofalse. This setting prevents pods from being scheduled on the control plane machines:-
Open the
<installation_directory>/manifests/cluster-scheduler-02-config.ymlfile. -
Locate the
mastersSchedulableparameter and ensure that it is set tofalse. - Save and exit the file.
-
Open the
To create the Ignition configuration files, run the following command from the directory that contains the installation program:
$ ./openshift-install create ignition-configs --dir <installation_directory>1 - 1
- For
<installation_directory>, specify the same installation directory.
The following files are generated in the directory:
. ├── auth │ ├── kubeadmin-password │ └── kubeconfig ├── bootstrap.ign ├── master.ign ├── metadata.json └── worker.ign
7.1.11. Installing RHCOS and starting the OpenShift Container Platform bootstrap process
To install OpenShift Container Platform on bare metal infrastructure that you provision, you must install Red Hat Enterprise Linux CoreOS (RHCOS) on the machines. When you install RHCOS, you must provide the Ignition config file that was generated by the OpenShift Container Platform installation program for the type of machine you are installing. If you have configured suitable networking, DNS, and load balancing infrastructure, the OpenShift Container Platform bootstrap process begins automatically after the RHCOS machines have rebooted.
To install RHCOS on the machines, follow either the steps to use an ISO image or network PXE booting.
The compute node deployment steps included in this installation document are RHCOS-specific. If you choose instead to deploy RHEL-based compute nodes, you take responsibility for all operating system life cycle management and maintenance, including performing system updates, applying patches, and completing all other required tasks. Use of RHEL 7 compute machines is deprecated and planned for removal in a future release of OpenShift Container Platform 4.
You can configure RHCOS during ISO and PXE installations by using the following methods:
-
Kernel arguments: You can use kernel arguments to provide installation-specific information. For example, you can specify the locations of the RHCOS installation files that you uploaded to your HTTP server and the location of the Ignition config file for the type of node you are installing. For a PXE installation, you can use the
APPENDparameter to pass the arguments to the kernel of the live installer. For an ISO installation, you can interrupt the live installation boot process to add the kernel arguments. In both installation cases, you can use specialcoreos.inst.*arguments to direct the live installer, as well as standard installation boot arguments for turning standard kernel services on or off. -
Ignition configs: OpenShift Container Platform Ignition config files (
*.ign) are specific to the type of node you are installing. You pass the location of a bootstrap, control plane, or compute node Ignition config file during the RHCOS installation so that it takes effect on first boot. In special cases, you can create a separate, limited Ignition config to pass to the live system. That Ignition config could do a certain set of tasks, such as reporting success to a provisioning system after completing installation. This special Ignition config is consumed by thecoreos-installerto be applied on first boot of the installed system. Do not provide the standard control plane and compute node Ignition configs to the live ISO directly. -
coreos-installer: You can boot the live ISO installer to a shell prompt, which allows you to prepare the permanent system in a variety of ways before first boot. In particular, you can run thecoreos-installercommand to identify various artifacts to include, work with disk partitions, and set up networking. In some cases, you can configure features on the live system and copy them to the installed system.
Whether to use an ISO or PXE install depends on your situation. A PXE install requires an available DHCP service and more preparation, but can make the installation process more automated. An ISO install is a more manual process and can be inconvenient if you are setting up more than a few machines.
As of OpenShift Container Platform 4.6, the RHCOS ISO and other installation artifacts provide support for installation on disks with 4K sectors.
7.1.11.1. Creating Red Hat Enterprise Linux CoreOS (RHCOS) machines using an ISO image
Before you install a cluster on infrastructure that you provision, you must create RHCOS machines for it to use. You can use an ISO image to create the machines.
Prerequisites
- Obtain the Ignition config files for your cluster.
- Have access to an HTTP server that can be accessed from your computer, and from the machines that you create.
Procedure
Upload the control plane, compute, and bootstrap Ignition config files that the installation program created to your HTTP server. Note the URLs of these files.
ImportantIf you plan to add more compute machines to your cluster after you finish installation, do not delete these files.
Obtain the RHCOS images that are required for your preferred method of installing operating system instances from the RHCOS image mirror page.
ImportantThe RHCOS images might not change with every release of OpenShift Container Platform. You must download images with the highest version that is less than or equal to the OpenShift Container Platform version that you install. Use the image versions that match your OpenShift Container Platform version if they are available. Use only ISO images for this procedure. RHCOS qcow2 images are not supported for this installation type.
ISO file names resemble the following example:
rhcos-<version>-live.<architecture>.isoUse the ISO to start the RHCOS installation. Use one of the following installation options:
- Burn the ISO image to a disk and boot it directly.
- Use ISO redirection via a LOM interface.
-
Boot the ISO image. You can interrupt the installation boot process to add kernel arguments. However, for this ISO procedure you should use the
coreos-installercommand instead of adding kernel arguments. If you run the live installer without options or interruption, the installer boots up to a shell prompt on the live system, ready for you to install RHCOS to disk. -
Review the Advanced RHCOS installation reference section for different ways of configuring features, such as networking and disk partitions, before running the
coreos-installer. Run the
coreos-installercommand. At a minimum, you must identify the Ignition config file location for your node type, and the location of the disk you are installing to. Here is an example:$ sudo coreos-installer install \ --ignition-url=https://host/worker.ign /dev/sda- After RHCOS installs, the system reboots. During the system reboot, it applies the Ignition config file that you specified.
Continue to create the other machines for your cluster.
ImportantYou must create the bootstrap and control plane machines at this time. If the control plane machines are not made schedulable, which is the default, also create at least two compute machines before you install the cluster.
7.1.11.2. Creating Red Hat Enterprise Linux CoreOS (RHCOS) machines by PXE or iPXE booting
Before you install a cluster that uses manually-provisioned RHCOS nodes, such as bare metal, you must create RHCOS machines for it to use. You can use PXE or iPXE booting to create the machines.
Prerequisites
- Obtain the Ignition config files for your cluster.
- Configure suitable PXE or iPXE infrastructure.
- Have access to an HTTP server that you can access from your computer.
Procedure
Upload the master, worker, and bootstrap Ignition config files that the installation program created to your HTTP server. Note the URLs of these files.
ImportantYou can add or change configuration settings in your Ignition configs before saving them to your HTTP server. If you plan to add more compute machines to your cluster after you finish installation, do not delete these files.
Obtain the RHCOS
kernel,initramfsandrootfsfiles from the RHCOS image mirror page.ImportantThe RHCOS artifacts might not change with every release of OpenShift Container Platform. You must download artifacts with the highest version that is less than or equal to the OpenShift Container Platform version that you install. Only use the appropriate
kernel,initramfs, androotfsartifacts described below for this procedure. RHCOS qcow2 images are not supported for this installation type.The file names contain the OpenShift Container Platform version number. They resemble the following examples:
-
kernel:rhcos-<version>-live-kernel-<architecture> -
initramfs:rhcos-<version>-live-initramfs.<architecture>.img -
rootfs:rhcos-<version>-live-rootfs.<architecture>.img
-
Upload the additional files that are required for your booting method:
-
For traditional PXE, upload the
kernelandinitramfsfiles to your TFTP server and therootfsfile to your HTTP server. For iPXE, upload the
kernel,initramfs, androotfsfiles to your HTTP server.ImportantIf you plan to add more compute machines to your cluster after you finish installation, do not delete these files.
-
For traditional PXE, upload the
- Configure the network boot infrastructure so that the machines boot from their local disks after RHCOS is installed on them.
Configure PXE or iPXE installation for the RHCOS images.
Modify one of the following example menu entries for your environment and verify that the image and Ignition files are properly accessible:
For PXE:
DEFAULT pxeboot TIMEOUT 20 PROMPT 0 LABEL pxeboot KERNEL http://<HTTP_server>/rhcos-<version>-live-kernel-<architecture>1 APPEND initrd=http://<HTTP_server>/rhcos-<version>-live-initramfs.<architecture>.img coreos.live.rootfs_url=http://<HTTP_server>/rhcos-<version>-live-rootfs.<architecture>.img coreos.inst.install_dev=/dev/sda coreos.inst.ignition_url=http://<HTTP_server>/bootstrap.ign2 3 - 1
- Specify the location of the live
kernelfile that you uploaded to your HTTP server. The URL must be HTTP, TFTP, or FTP; HTTPS and NFS are not supported. - 2
- If you use multiple NICs, specify a single interface in the
ipoption. For example, to use DHCP on a NIC that is namedeno1, setip=eno1:dhcp. - 3
- Specify locations of the RHCOS files that you uploaded to your HTTP server. The
initrdparameter value is the location of theinitramfsfile, thecoreos.live.rootfs_urlparameter value is the location of therootfsfile, and thecoreos.inst.ignition_urlparameter value is the location of the bootstrap Ignition config file. You can also add more kernel arguments to theAPPENDline to configure networking or other boot options.
NoteThis configuration does not enable serial console access on machines with a graphical console. To configure a different console, add one or more
console=arguments to theAPPENDline. For example, addconsole=tty0 console=ttyS0to set the first PC serial port as the primary console and the graphical console as a secondary console. For more information, see How does one set up a serial terminal and/or console in Red Hat Enterprise Linux?.For iPXE:
kernel http://<HTTP_server>/rhcos-<version>-live-kernel-<architecture> initrd=main coreos.live.rootfs_url=http://<HTTP_server>/rhcos-<version>-live-rootfs.<architecture>.img coreos.inst.install_dev=/dev/sda coreos.inst.ignition_url=http://<HTTP_server>/bootstrap.ign1 2 initrd --name main http://<HTTP_server>/rhcos-<version>-live-initramfs.<architecture>.img3 boot- 1
- Specify locations of the RHCOS files that you uploaded to your HTTP server. The
kernelparameter value is the location of thekernelfile, theinitrd=mainargument is needed for booting on UEFI systems, thecoreos.live.rootfs_urlparameter value is the location of therootfsfile, and thecoreos.inst.ignition_urlparameter value is the location of the bootstrap Ignition config file. - 2
- If you use multiple NICs, specify a single interface in the
ipoption. For example, to use DHCP on a NIC that is namedeno1, setip=eno1:dhcp. - 3
- Specify the location of the
initramfsfile that you uploaded to your HTTP server.
NoteThis configuration does not enable serial console access on machines with a graphical console. To configure a different console, add one or more
console=arguments to thekernelline. For example, addconsole=tty0 console=ttyS0to set the first PC serial port as the primary console and the graphical console as a secondary console. For more information, see How does one set up a serial terminal and/or console in Red Hat Enterprise Linux?.
If you use PXE UEFI, perform the following actions:
Provide the
shimx64.efiandgrubx64.efiEFI binaries and thegrub.cfgfile that are required for booting the system.Extract the necessary EFI binaries by mounting the RHCOS ISO to your host and then mounting the
images/efiboot.imgfile to your host:$ mkdir -p /mnt/iso$ mkdir -p /mnt/efiboot$ mount -o loop rhcos-installer.x86_64.iso /mnt/iso$ mount -o loop,ro /mnt/iso/images/efiboot.img /mnt/efibootFrom the
efiboot.imgmount point, copy theEFI/redhat/shimx64.efiandEFI/redhat/grubx64.efifiles to your TFTP server:$ cp /mnt/efiboot/EFI/redhat/shimx64.efi .$ cp /mnt/efiboot/EFI/redhat/grubx64.efi .$ umount /mnt/efiboot$ umount /mnt/iso-
Copy the
EFI/redhat/grub.cfgfile that is included in the RHCOS ISO to your TFTP server.
Edit the
grub.cfgfile to include arguments similar to the following:menuentry 'Install Red Hat Enterprise Linux CoreOS' --class fedora --class gnu-linux --class gnu --class os { linuxefi rhcos-<version>-live-kernel-<architecture> coreos.inst.install_dev=/dev/sda coreos.live.rootfs_url=http://<HTTP_server>/rhcos-<version>-live-rootfs.<architecture>.img coreos.inst.ignition_url=http://<HTTP_server>/bootstrap.ign initrdefi rhcos-<version>-live-initramfs.<architecture>.img }where:
rhcos-<version>-live-kernel-<architecture>-
Specifies the
kernelfile that you uploaded to your TFTP server. http://<HTTP_server>/rhcos-<version>-live-rootfs.<architecture>.img- Specifies the location of the live rootfs image that you uploaded to your HTTP server.
http://<HTTP_server>/bootstrap.ign- Specifies the location of the bootstrap Ignition config file that you uploaded to your HTTP server.
rhcos-<version>-live-initramfs.<architecture>.img-
Specifies the location of the
initramfsfile that you uploaded to your TFTP server.
NoteFor more information on how to configure a PXE server for UEFI boot, see the Red Hat Knowledgebase article: How to configure/setup a PXE server for UEFI boot for Red Hat Enterprise Linux?.
Continue to create the machines for your cluster.
ImportantYou must create the bootstrap and control plane machines at this time. If the control plane machines are not made schedulable, which is the default, also create at least two compute machines before you install the cluster.
7.1.11.3. Advanced Red Hat Enterprise Linux CoreOS (RHCOS) installation configuration
A key benefit for manually provisioning the Red Hat Enterprise Linux CoreOS (RHCOS) nodes for OpenShift Container Platform is to be able to do configuration that is not available through default OpenShift Container Platform installation methods. This section describes some of the configurations that you can do using techniques that include:
- Passing kernel arguments to the live installer
-
Running
coreos-installermanually from the live system - Embedding Ignition configs in an ISO
The advanced configuration topics for manual Red Hat Enterprise Linux CoreOS (RHCOS) installations detailed in this section relate to disk partitioning, networking, and using Ignition configs in different ways.
7.1.11.3.1. Using advanced networking options for PXE and ISO installations
Networking for OpenShift Container Platform nodes uses DHCP by default to gather all necessary configuration settings. To set up static IP addresses or configure special settings, such as bonding, you can do one of the following:
- Pass special kernel parameters when you boot the live installer.
- Use a machine config to copy networking files to the installed system.
- Configure networking from a live installer shell prompt, then copy those settings to the installed system so that they take effect when the installed system first boots.
To configure a PXE or iPXE installation, use one of the following options:
- See the "Advanced RHCOS installation reference" tables.
- Use a machine config to copy networking files to the installed system.
To configure an ISO installation, use the following procedure.
Procedure
- Boot the ISO installer.
-
From the live system shell prompt, configure networking for the live system using available RHEL tools, such as
nmcliornmtui. Run the
coreos-installercommand to install the system, adding the--copy-networkoption to copy networking configuration. For example:$ coreos-installer install --copy-network \ --ignition-url=http://host/worker.ign /dev/sdaImportantThe
--copy-networkoption only copies networking configuration found under/etc/NetworkManager/system-connections. In particular, it does not copy the system hostname.- Reboot into the installed system.
7.1.11.3.2. Disk partitioning
The disk partitions are created on OpenShift Container Platform cluster nodes during the Red Hat Enterprise Linux CoreOS (RHCOS) installation. Each RHCOS node of a particular architecture uses the same partition layout, unless the default partitioning configuration is overridden. During the RHCOS installation, the size of the root file system is increased to use the remaining available space on the target device.
However, there are two cases where you might want to intervene to override the default partitioning when installing an OpenShift Container Platform node:
Create separate partitions: For greenfield installations on an empty disk, you might want to add separate storage to a partition. This is officially supported for making
/varor a subdirectory of/var, such as/var/lib/etcd, a separate partition, but not both.ImportantKubernetes supports only two filesystem partitions. If you add more than one partition to the original configuration, Kubernetes cannot monitor all of them.
-
Retain existing partitions: For a brownfield installation where you are reinstalling OpenShift Container Platform on an existing node and want to retain data partitions installed from your previous operating system, there are both boot arguments and options to
coreos-installerthat allow you to retain existing data partitions.
7.1.11.3.2.1. Creating a separate /var partition
In general, disk partitioning for OpenShift Container Platform should be left to the installer. However, there are cases where you might want to create separate partitions in a part of the filesystem that you expect to grow.
OpenShift Container Platform supports the addition of a single partition to attach storage to either the /var partition or a subdirectory of /var. For example:
-
/var/lib/containers: Holds container-related content that can grow as more images and containers are added to a system. -
/var/lib/etcd: Holds data that you might want to keep separate for purposes such as performance optimization of etcd storage. -
/var: Holds data that you might want to keep separate for purposes such as auditing.
Storing the contents of a /var directory separately makes it easier to grow storage for those areas as needed and reinstall OpenShift Container Platform at a later date and keep that data intact. With this method, you will not have to pull all your containers again, nor will you have to copy massive log files when you update systems.
Because /var must be in place before a fresh installation of Red Hat Enterprise Linux CoreOS (RHCOS), the following procedure sets up the separate /var partition by creating a machine config that is inserted during the openshift-install preparation phases of an OpenShift Container Platform installation.
Procedure
Create a directory to hold the OpenShift Container Platform installation files:
$ mkdir $HOME/clusterconfigRun
openshift-installto create a set of files in themanifestandopenshiftsubdirectories. Answer the system questions as you are prompted:$ openshift-install create manifests --dir $HOME/clusterconfig ? SSH Public Key ... $ ls $HOME/clusterconfig/openshift/ 99_kubeadmin-password-secret.yaml 99_openshift-cluster-api_master-machines-0.yaml 99_openshift-cluster-api_master-machines-1.yaml 99_openshift-cluster-api_master-machines-2.yaml ...Create a
MachineConfigobject and add it to a file in theopenshiftdirectory. For example, name the file98-var-partition.yaml, change the disk device name to the name of the storage device on theworkersystems, and set the storage size as appropriate. This example places the/vardirectory on a separate partition:apiVersion: machineconfiguration.openshift.io/v1 kind: MachineConfig metadata: labels: machineconfiguration.openshift.io/role: worker name: 98-var-partition spec: config: ignition: version: 3.2.0 storage: disks: - device: /dev/<device_name>1 partitions: - label: var startMiB: <partition_start_offset>2 sizeMiB: <partition_size>3 filesystems: - device: /dev/disk/by-partlabel/var path: /var format: xfs systemd: units: - name: var.mount4 enabled: true contents: | [Unit] Before=local-fs.target [Mount] What=/dev/disk/by-partlabel/var Where=/var Options=defaults,prjquota5 [Install] WantedBy=local-fs.target- 1
- The storage device name of the disk that you want to partition.
- 2
- When adding a data partition to the boot disk, a minimum value of 25000 mebibytes is recommended. The root file system is automatically resized to fill all available space up to the specified offset. If no value is specified, or if the specified value is smaller than the recommended minimum, the resulting root file system will be too small, and future reinstalls of RHCOS might overwrite the beginning of the data partition.
- 3
- The size of the data partition in mebibytes.
- 4
- The name of the mount unit must match the directory specified in the
Where=directive. For example, for a filesystem mounted on/var/lib/containers, the unit must be namedvar-lib-containers.mount. - 5
- The
prjquotamount option must be enabled for filesystems used for container storage.
NoteWhen creating a separate
/varpartition, you cannot use different instance types for worker nodes, if the different instance types do not have the same device name.Run
openshift-installagain to create Ignition configs from a set of files in themanifestandopenshiftsubdirectories:$ openshift-install create ignition-configs --dir $HOME/clusterconfig $ ls $HOME/clusterconfig/ auth bootstrap.ign master.ign metadata.json worker.ign
Now you can use the Ignition config files as input to the ISO or PXE manual installation procedures to install Red Hat Enterprise Linux CoreOS (RHCOS) systems.
7.1.11.3.2.2. Retaining existing partitions
For an ISO installation, you can add options to the coreos-installer command line that causes the installer to maintain one or more existing partitions. For a PXE installation, you can APPEND coreos.inst.* options to preserve partitions.
Saved partitions might be partitions from an existing OpenShift Container Platform system that has data partitions that you want to keep. Here are a few tips:
- If you save existing partitions, and those partitions do not leave enough space for RHCOS, installation will fail without damaging the saved partitions.
- Identify the disk partitions you want to keep either by partition label or by number.
For an ISO installation
This example preserves any partition in which the partition label begins with data (data*):
# coreos-installer install --ignition-url http://10.0.2.2:8080/user.ign \
--save-partlabel 'data*' /dev/sda
The following example illustrates running the coreos-installer in a way that preserves the sixth (6) partition on the disk:
# coreos-installer install --ignition-url http://10.0.2.2:8080/user.ign \
--save-partindex 6 /dev/sdaThis example preserves partitions 5 and higher:
# coreos-installer install --ignition-url http://10.0.2.2:8080/user.ign
--save-partindex 5- /dev/sda
In the previous examples where partition saving is used, coreos-installer recreates the partition immediately.
For a PXE installation
This APPEND option preserves any partition in which the partition label begins with 'data' ('data*'):
coreos.inst.save_partlabel=data*
This APPEND option preserves partitions 5 and higher:
coreos.inst.save_partindex=5-
This APPEND option preserves partition 6:
coreos.inst.save_partindex=67.1.11.3.3. Identifying Ignition configs
When doing an RHCOS manual installation, there are two types of Ignition configs that you can provide, with different reasons for providing each one:
Permanent install Ignition config: Every manual RHCOS installation needs to pass one of the Ignition config files generated by
openshift-installer, such asbootstrap.ign,master.ignandworker.ign, to carry out the installation.ImportantIt is not recommended to modify these files.
For PXE installations, you pass the Ignition configs on the
APPENDline using thecoreos.inst.ignition_url=option. For ISO installations, after the ISO boots to the shell prompt, you identify the Ignition config on thecoreos-installercommand line with the--ignition-url=option. In both cases, only HTTP and HTTPS protocols are supported.Live install Ignition config: This type must be created manually and should be avoided if possible, as it is not supported by Red Hat. With this method, the Ignition config passes to the live install medium, runs immediately upon booting, and performs setup tasks before and/or after the RHCOS system installs to disk. This method should only be used for performing tasks that must be performed once and not applied again later, such as with advanced partitioning that cannot be done using a machine config.
For PXE or ISO boots, you can create the Ignition config and
APPENDtheignition.config.url=option to identify the location of the Ignition config. You also need to appendignition.firstboot ignition.platform.id=metalor theignition.config.urloption will be ignored.
7.1.11.3.3.1. Embedding an Ignition config in the RHCOS ISO
You can embed a live install Ignition config directly in an RHCOS ISO image. When the ISO image is booted, the embedded config will be applied automatically.
Procedure
-
Download the
coreos-installerbinary from the following image mirror page: https://mirror.openshift.com/pub/openshift-v4/clients/coreos-installer/latest/. Retrieve the RHCOS ISO image and the Ignition config file, and copy them into an accessible directory, such as
/mnt:# cp rhcos-<version>-live.x86_64.iso bootstrap.ign /mnt/ # chmod 644 /mnt/rhcos-<version>-live.x86_64.isoRun the following command to embed the Ignition config into the ISO:
# ./coreos-installer iso ignition embed -i /mnt/bootstrap.ign \ /mnt/rhcos-<version>-live.x86_64.isoYou can now use that ISO to install RHCOS using the specified live install Ignition config.
ImportantUsing
coreos-installer iso ignition embedto embed a file generated byopenshift-installer, such asbootstrap.ign,master.ignandworker.ign, is unsupported and not recommended.To show the contents of the embedded Ignition config and direct it into a file, run:
# ./coreos-installer iso ignition show /mnt/rhcos-<version>-live.x86_64.iso > mybootstrap.ign# diff -s bootstrap.ign mybootstrap.ignExample output
Files bootstrap.ign and mybootstrap.ign are identicalTo remove the Ignition config and return the ISO to its pristine state so you can reuse it, run:
# ./coreos-installer iso ignition remove /mnt/rhcos-<version>-live.x86_64.isoYou can now embed another Ignition config into the ISO or use the ISO in its pristine state.
7.1.11.3.4. Advanced RHCOS installation reference
This section illustrates the networking configuration and other advanced options that allow you to modify the Red Hat Enterprise Linux CoreOS (RHCOS) manual installation process. The following tables describe the kernel arguments and command-line options you can use with the RHCOS live installer and the coreos-installer command.
Routing and bonding options at RHCOS boot prompt
If you install RHCOS from an ISO image, you can add kernel arguments manually when you boot that image to configure the node’s networking. If no networking arguments are used, the installation defaults to using DHCP.
When adding networking arguments, you must also add the rd.neednet=1 kernel argument.
The following table describes how to use ip=, nameserver=, and bond= kernel arguments for live ISO installs.
Ordering is important when adding kernel arguments: ip=, nameserver=, and then bond=.
Routing and bonding options for ISO
The following table provides examples for configuring networking of your Red Hat Enterprise Linux CoreOS (RHCOS) nodes. These are networking options that are passed to the dracut tool during system boot. For more information about the networking options supported by dracut, see the dracut.cmdline manual page.
| Description | Examples |
|---|---|
|
To configure an IP address, either use DHCP (
|
|
|
Specify multiple network interfaces by specifying multiple |
|
|
Optional: You can configure routes to additional networks by setting an If the additional network gateway is different from the primary network gateway, the default gateway must be the primary network gateway. | To configure the default gateway: To configure the route for the additional network: |
| Disable DHCP on a single interface, such as when there are two or more network interfaces and only one interface is being used. |
|
| You can combine DHCP and static IP configurations on systems with multiple network interfaces. |
|
|
Optional: You can configure VLANs on individual interfaces by using the | To configure a VLAN on a network interface and use a static IP address: To configure a VLAN on a network interface and to use DHCP: |
|
You can provide multiple DNS servers by adding a |
|
|
Optional: Bonding multiple network interfaces to a single interface is supported using the
|
To configure the bonded interface to use DHCP, set the bond’s IP address to To configure the bonded interface to use a static IP address, enter the specific IP address you want and related information. For example: |
|
Optional: You can configure VLANs on bonded interfaces by using the | To configure the bonded interface with a VLAN and to use DHCP: To configure the bonded interface with a VLAN and to use a static IP address: |
|
Optional: Network teaming can be used as an alternative to bonding by using the
Note Teaming is planned to be deprecated when RHCOS switches to an upcoming version of RHEL. For more information, see this Red Hat Knowledgebase Article. | To configure a network team: |
coreos.inst boot options for ISO or PXE install
While you can pass most standard installation boot arguments to the live installer, there are several arguments that are specific to the RHCOS live installer.
- For ISO, these options can be added by interrupting the RHCOS installer.
-
For PXE or iPXE, these options must be added to the
APPENDline before starting the PXE kernel. You cannot interrupt a live PXE install.
The following table shows the RHCOS live installer boot options for ISO and PXE installs.
| Argument | Description |
|---|---|
|
|
Required. The block device on the system to install to. It is recommended to use the full path, such as |
|
| Optional: The URL of the Ignition config to embed into the installed system. If no URL is specified, no Ignition config is embedded. |
|
| Optional: Comma-separated labels of partitions to preserve during the install. Glob-style wildcards are permitted. The specified partitions do not need to exist. |
|
|
Optional: Comma-separated indexes of partitions to preserve during the install. Ranges |
|
|
Optional: Permits the OS image that is specified by |
|
| Optional: Download and install the specified RHCOS image.
|
|
| Optional: The system will not reboot after installing. Once the install finishes, you will receive a prompt that allows you to inspect what is happening during installation. This argument should not be used in production environments and is intended for debugging purposes only. |
|
|
Optional: The Ignition platform ID of the platform the RHCOS image is being installed on. Default is |
|
|
Optional: The URL of the Ignition config for the live boot. For example, this can be used to customize how |
coreos-installer options for ISO install
You can also install RHCOS by invoking the coreos-installer command directly from the command line. The kernel arguments in the previous table provide a shortcut for automatically invoking coreos-installer at boot time, but you can pass similar arguments directly to coreos-installer when running it from a shell prompt.
The following table shows the options and subcommands you can pass to the coreos-installer command from a shell prompt during a live install.
| Command-line options | |
| Option | Description |
|
| Specify the image URL manually. |
|
| Specify a local image file manually. |
|
| Embed an Ignition config from a file. |
|
| Embed an Ignition config from a URL. |
|
|
Digest |
|
| Override the Ignition platform ID. |
|
| Append the default kernel argument. |
|
| Delete the default kernel argument. |
|
| Copy the network configuration from the install environment. Important
The |
|
|
For use with |
|
| Save partitions with this label glob. |
|
| Save partitions with this number or range. |
|
| Force offline installation. |
|
| Skip signature verification. |
|
| Allow Ignition URL without HTTPS or hash. |
|
|
Target CPU architecture. Default is |
|
| Do not clear partition table on error. |
|
| Print help information. |
| Command-line argument | |
| Argument | Description |
|
| The destination device. |
| coreos-installer embedded Ignition commands | |
| Command | Description |
|
| Embed an Ignition config in an ISO image. |
|
| Show the embedded Ignition config from an ISO image. |
|
| Remove the embedded Ignition config from an ISO image. |
| coreos-installer ISO Ignition options | |
| Option | Description |
|
| Overwrite an existing Ignition config. |
|
|
The Ignition config to be used. Default is |
|
| Write the ISO to a new output file. |
|
| Print help information. |
| coreos-installer PXE Ignition commands | |
| Command | Description |
| Note that not all of these options are accepted by all subcommands. | |
|
| Wrap an Ignition config in an image. |
|
| Show the wrapped Ignition config in an image. |
|
|
Show the wrapped Ignition config in an |
| coreos-installer PXE Ignition options | |
| Option | Description |
|
|
The Ignition config to be used. Default is |
|
| Write the ISO to a new output file. |
|
| Print help information. |
7.1.11.4. Updating the bootloader using bootupd
To update the bootloader by using bootupd, you must either install bootupd on RHCOS machines manually or provide a machine config with the enabled systemd unit. Unlike grubby or other bootloader tools, bootupd does not manage kernel space configuration such as passing kernel arguments.
After you have installed bootupd, you can manage it remotely from the OpenShift Container Platform cluster.
It is recommended that you use bootupd only on bare metal or virtualized hypervisor installations, such as for protection against the BootHole vulnerability.
Manual install method
You can manually install bootupd by using the bootctl command-line tool.
Inspect the system status:
# bootupctl statusExample output
Component EFI Installed: grub2-efi-x64-1:2.04-31.fc33.x86_64,shim-x64-15-8.x86_64 Update: At latest version
RHCOS images created without
bootupdinstalled on them require an explicit adoption phase.If the system status is
Adoptable, perform the adoption:# bootupctl adopt-and-updateExample output
Updated: grub2-efi-x64-1:2.04-31.fc33.x86_64,shim-x64-15-8.x86_64If an update is available, apply the update so that the changes take effect on the next reboot:
# bootupctl updateExample output
Updated: grub2-efi-x64-1:2.04-31.fc33.x86_64,shim-x64-15-8.x86_64
Machine config method
Another way to enable bootupd is by providing a machine config.
Provide a machine config file with the enabled
systemdunit, as shown in the following example:Example output
variant: rhcos version: 1.1.0 systemd: units: - name: custom-bootupd-auto.service enabled: true contents: | [Unit] Description=Bootupd automatic update [Service] ExecStart=/usr/bin/bootupctl update RemainAfterExit=yes [Install] WantedBy=multi-user.target
7.1.12. Creating the cluster
To create the OpenShift Container Platform cluster, you wait for the bootstrap process to complete on the machines that you provisioned by using the Ignition config files that you generated with the installation program.
Prerequisites
- Create the required infrastructure for the cluster.
- You obtained the installation program and generated the Ignition config files for your cluster.
- You used the Ignition config files to create RHCOS machines for your cluster.
- Your machines have direct Internet access or have an HTTP or HTTPS proxy available.
Procedure
Monitor the bootstrap process:
$ ./openshift-install --dir <installation_directory> wait-for bootstrap-complete \1 --log-level=info2 Example output
INFO Waiting up to 30m0s for the Kubernetes API at https://api.test.example.com:6443... INFO API v1.20.0 up INFO Waiting up to 30m0s for bootstrapping to complete... INFO It is now safe to remove the bootstrap resourcesThe command succeeds when the Kubernetes API server signals that it has been bootstrapped on the control plane machines.
After bootstrap process is complete, remove the bootstrap machine from the load balancer.
ImportantYou must remove the bootstrap machine from the load balancer at this point. You can also remove or reformat the machine itself.
7.1.13. Logging in to the cluster by using the CLI
You can log in to your cluster as a default system user by exporting the cluster kubeconfig file. The kubeconfig file contains information about the cluster that is used by the CLI to connect a client to the correct cluster and API server. The file is specific to a cluster and is created during OpenShift Container Platform installation.
Prerequisites
- You deployed an OpenShift Container Platform cluster.
-
You installed the
ocCLI.
Procedure
Export the
kubeadmincredentials:$ export KUBECONFIG=<installation_directory>/auth/kubeconfig1 - 1
- For
<installation_directory>, specify the path to the directory that you stored the installation files in.
Verify you can run
occommands successfully using the exported configuration:$ oc whoamiExample output
system:admin
7.1.14. Approving the certificate signing requests for your machines
When you add machines to a cluster, two pending certificate signing requests (CSRs) are generated for each machine that you added. You must confirm that these CSRs are approved or, if necessary, approve them yourself. The client requests must be approved first, followed by the server requests.
Prerequisites
- You added machines to your cluster.
Procedure
Confirm that the cluster recognizes the machines:
$ oc get nodesExample output
NAME STATUS ROLES AGE VERSION master-0 Ready master 63m v1.20.0 master-1 Ready master 63m v1.20.0 master-2 Ready master 64m v1.20.0The output lists all of the machines that you created.
NoteThe preceding output might not include the compute nodes, also known as worker nodes, until some CSRs are approved.
Review the pending CSRs and ensure that you see the client requests with the
PendingorApprovedstatus for each machine that you added to the cluster:$ oc get csrExample output
NAME AGE REQUESTOR CONDITION csr-8b2br 15m system:serviceaccount:openshift-machine-config-operator:node-bootstrapper Pending csr-8vnps 15m system:serviceaccount:openshift-machine-config-operator:node-bootstrapper Pending ...In this example, two machines are joining the cluster. You might see more approved CSRs in the list.
If the CSRs were not approved, after all of the pending CSRs for the machines you added are in
Pendingstatus, approve the CSRs for your cluster machines:NoteBecause the CSRs rotate automatically, approve your CSRs within an hour of adding the machines to the cluster. If you do not approve them within an hour, the certificates will rotate, and more than two certificates will be present for each node. You must approve all of these certificates. Once the client CSR is approved, the Kubelet creates a secondary CSR for the serving certificate, which requires manual approval. Then, subsequent serving certificate renewal requests are automatically approved by the
machine-approverif the Kubelet requests a new certificate with identical parameters.NoteFor clusters running on platforms that are not machine API enabled, such as bare metal and other user-provisioned infrastructure, you must implement a method of automatically approving the kubelet serving certificate requests (CSRs). If a request is not approved, then the
oc exec,oc rsh, andoc logscommands cannot succeed, because a serving certificate is required when the API server connects to the kubelet. Any operation that contacts the Kubelet endpoint requires this certificate approval to be in place. The method must watch for new CSRs, confirm that the CSR was submitted by thenode-bootstrapperservice account in thesystem:nodeorsystem:admingroups, and confirm the identity of the node.To approve them individually, run the following command for each valid CSR:
$ oc adm certificate approve <csr_name>1 - 1
<csr_name>is the name of a CSR from the list of current CSRs.
To approve all pending CSRs, run the following command:
$ oc get csr -o go-template='{{range .items}}{{if not .status}}{{.metadata.name}}{{"\n"}}{{end}}{{end}}' | xargs --no-run-if-empty oc adm certificate approveNoteSome Operators might not become available until some CSRs are approved.
Now that your client requests are approved, you must review the server requests for each machine that you added to the cluster:
$ oc get csrExample output
NAME AGE REQUESTOR CONDITION csr-bfd72 5m26s system:node:ip-10-0-50-126.us-east-2.compute.internal Pending csr-c57lv 5m26s system:node:ip-10-0-95-157.us-east-2.compute.internal Pending ...If the remaining CSRs are not approved, and are in the
Pendingstatus, approve the CSRs for your cluster machines:To approve them individually, run the following command for each valid CSR:
$ oc adm certificate approve <csr_name>1 - 1
<csr_name>is the name of a CSR from the list of current CSRs.
To approve all pending CSRs, run the following command:
$ oc get csr -o go-template='{{range .items}}{{if not .status}}{{.metadata.name}}{{"\n"}}{{end}}{{end}}' | xargs oc adm certificate approve
After all client and server CSRs have been approved, the machines have the
Readystatus. Verify this by running the following command:$ oc get nodesExample output
NAME STATUS ROLES AGE VERSION master-0 Ready master 73m v1.20.0 master-1 Ready master 73m v1.20.0 master-2 Ready master 74m v1.20.0 worker-0 Ready worker 11m v1.20.0 worker-1 Ready worker 11m v1.20.0NoteIt can take a few minutes after approval of the server CSRs for the machines to transition to the
Readystatus.
Additional information
- For more information on CSRs, see Certificate Signing Requests.
7.1.15. Initial Operator configuration
After the control plane initializes, you must immediately configure some Operators so that they all become available.
Prerequisites
- Your control plane has initialized.
Procedure
Watch the cluster components come online:
$ watch -n5 oc get clusteroperatorsExample output
NAME VERSION AVAILABLE PROGRESSING DEGRADED SINCE authentication 4.7.0 True False False 3h56m baremetal 4.7.0 True False False 29h cloud-credential 4.7.0 True False False 29h cluster-autoscaler 4.7.0 True False False 29h config-operator 4.7.0 True False False 6h39m console 4.7.0 True False False 3h59m csi-snapshot-controller 4.7.0 True False False 4h12m dns 4.7.0 True False False 4h15m etcd 4.7.0 True False False 29h image-registry 4.7.0 True False False 3h59m ingress 4.7.0 True False False 4h30m insights 4.7.0 True False False 29h kube-apiserver 4.7.0 True False False 29h kube-controller-manager 4.7.0 True False False 29h kube-scheduler 4.7.0 True False False 29h kube-storage-version-migrator 4.7.0 True False False 4h2m machine-api 4.7.0 True False False 29h machine-approver 4.7.0 True False False 6h34m machine-config 4.7.0 True False False 3h56m marketplace 4.7.0 True False False 4h2m monitoring 4.7.0 True False False 6h31m network 4.7.0 True False False 29h node-tuning 4.7.0 True False False 4h30m openshift-apiserver 4.7.0 True False False 3h56m openshift-controller-manager 4.7.0 True False False 4h36m openshift-samples 4.7.0 True False False 4h30m operator-lifecycle-manager 4.7.0 True False False 29h operator-lifecycle-manager-catalog 4.7.0 True False False 29h operator-lifecycle-manager-packageserver 4.7.0 True False False 3h59m service-ca 4.7.0 True False False 29h storage 4.7.0 True False False 4h30m- Configure the Operators that are not available.
7.1.15.1. Image registry removed during installation
On platforms that do not provide shareable object storage, the OpenShift Image Registry Operator bootstraps itself as Removed. This allows openshift-installer to complete installations on these platform types.
After installation, you must edit the Image Registry Operator configuration to switch the managementState from Removed to Managed.
The Prometheus console provides an ImageRegistryRemoved alert, for example:
"Image Registry has been removed. ImageStreamTags, BuildConfigs and DeploymentConfigs which reference ImageStreamTags may not work as expected. Please configure storage and update the config to Managed state by editing configs.imageregistry.operator.openshift.io."
7.1.15.2. Image registry storage configuration
The Image Registry Operator is not initially available for platforms that do not provide default storage. After installation, you must configure your registry to use storage so that the Registry Operator is made available.
Instructions are shown for configuring a persistent volume, which is required for production clusters. Where applicable, instructions are shown for configuring an empty directory as the storage location, which is available for only non-production clusters.
Additional instructions are provided for allowing the image registry to use block storage types by using the Recreate rollout strategy during upgrades.
7.1.15.2.1. Configuring registry storage for bare metal and other manual installations
As a cluster administrator, following installation you must configure your registry to use storage.
Prerequisites
- Cluster administrator permissions.
- A cluster that uses manually-provisioned Red Hat Enterprise Linux CoreOS (RHCOS) nodes, such as bare metal.
Persistent storage provisioned for your cluster, such as Red Hat OpenShift Container Storage.
ImportantOpenShift Container Platform supports
ReadWriteOnceaccess for image registry storage when you have only one replica. To deploy an image registry that supports high availability with two or more replicas,ReadWriteManyaccess is required.- Must have 100Gi capacity.
Procedure
To configure your registry to use storage, change the
spec.storage.pvcin theconfigs.imageregistry/clusterresource.NoteWhen using shared storage, review your security settings to prevent outside access.
Verify that you do not have a registry pod:
$ oc get pod -n openshift-image-registry -l docker-registry=defaultExample output
No resourses found in openshift-image-registry namespaceNoteIf you do have a registry pod in your output, you do not need to continue with this procedure.
Check the registry configuration:
$ oc edit configs.imageregistry.operator.openshift.ioExample output
storage: pvc: claim:Leave the
claimfield blank to allow the automatic creation of animage-registry-storagePVC.Check the
clusteroperatorstatus:$ oc get clusteroperator image-registryExample output
NAME VERSION AVAILABLE PROGRESSING DEGRADED SINCE MESSAGE image-registry 4.7 True False False 6h50mEnsure that your registry is set to managed to enable building and pushing of images.
Run:
$ oc edit configs.imageregistry/clusterThen, change the line
managementState: Removedto
managementState: Managed
7.1.15.2.2. Configuring storage for the image registry in non-production clusters
You must configure storage for the Image Registry Operator. For non-production clusters, you can set the image registry to an empty directory. If you do so, all images are lost if you restart the registry.
Procedure
To set the image registry storage to an empty directory:
$ oc patch configs.imageregistry.operator.openshift.io cluster --type merge --patch '{"spec":{"storage":{"emptyDir":{}}}}'WarningConfigure this option for only non-production clusters.
If you run this command before the Image Registry Operator initializes its components, the
oc patchcommand fails with the following error:Error from server (NotFound): configs.imageregistry.operator.openshift.io "cluster" not foundWait a few minutes and run the command again.
7.1.15.2.3. Configuring block registry storage
To allow the image registry to use block storage types during upgrades as a cluster administrator, you can use the Recreate rollout strategy.
Block storage volumes are supported but not recommended for use with the image registry on production clusters. An installation where the registry is configured on block storage is not highly available because the registry cannot have more than one replica.
Procedure
To set the image registry storage as a block storage type, patch the registry so that it uses the
Recreaterollout strategy and runs with only one (1) replica:$ oc patch config.imageregistry.operator.openshift.io/cluster --type=merge -p '{"spec":{"rolloutStrategy":"Recreate","replicas":1}}'- Provision the PV for the block storage device, and create a PVC for that volume. The requested block volume uses the ReadWriteOnce (RWO) access mode.
- Edit the registry configuration so that it references the correct PVC.
7.1.16. Completing installation on user-provisioned infrastructure
After you complete the Operator configuration, you can finish installing the cluster on infrastructure that you provide.
Prerequisites
- Your control plane has initialized.
- You have completed the initial Operator configuration.
Procedure
Confirm that all the cluster components are online with the following command:
$ watch -n5 oc get clusteroperatorsExample output
NAME VERSION AVAILABLE PROGRESSING DEGRADED SINCE authentication 4.7.0 True False False 3h56m baremetal 4.7.0 True False False 29h cloud-credential 4.7.0 True False False 29h cluster-autoscaler 4.7.0 True False False 29h config-operator 4.7.0 True False False 6h39m console 4.7.0 True False False 3h59m csi-snapshot-controller 4.7.0 True False False 4h12m dns 4.7.0 True False False 4h15m etcd 4.7.0 True False False 29h image-registry 4.7.0 True False False 3h59m ingress 4.7.0 True False False 4h30m insights 4.7.0 True False False 29h kube-apiserver 4.7.0 True False False 29h kube-controller-manager 4.7.0 True False False 29h kube-scheduler 4.7.0 True False False 29h kube-storage-version-migrator 4.7.0 True False False 4h2m machine-api 4.7.0 True False False 29h machine-approver 4.7.0 True False False 6h34m machine-config 4.7.0 True False False 3h56m marketplace 4.7.0 True False False 4h2m monitoring 4.7.0 True False False 6h31m network 4.7.0 True False False 29h node-tuning 4.7.0 True False False 4h30m openshift-apiserver 4.7.0 True False False 3h56m openshift-controller-manager 4.7.0 True False False 4h36m openshift-samples 4.7.0 True False False 4h30m operator-lifecycle-manager 4.7.0 True False False 29h operator-lifecycle-manager-catalog 4.7.0 True False False 29h operator-lifecycle-manager-packageserver 4.7.0 True False False 3h59m service-ca 4.7.0 True False False 29h storage 4.7.0 True False False 4h30mAlternatively, the following command notifies you when all of the clusters are available. It also retrieves and displays credentials:
$ ./openshift-install --dir <installation_directory> wait-for install-complete1 - 1
- For
<installation_directory>, specify the path to the directory that you stored the installation files in.
Example output
INFO Waiting up to 30m0s for the cluster to initialize...The command succeeds when the Cluster Version Operator finishes deploying the OpenShift Container Platform cluster from Kubernetes API server.
Important-
The Ignition config files that the installation program generates contain certificates that expire after 24 hours, which are then renewed at that time. If the cluster is shut down before renewing the certificates and the cluster is later restarted after the 24 hours have elapsed, the cluster automatically recovers the expired certificates. The exception is that you must manually approve the pending
node-bootstrappercertificate signing requests (CSRs) to recover kubelet certificates. See the documentation for Recovering from expired control plane certificates for more information. - It is recommended that you use Ignition config files within 12 hours after they are generated because the 24-hour certificate rotates from 16 to 22 hours after the cluster is installed. By using the Ignition config files within 12 hours, you can avoid installation failure if the certificate update runs during installation.
Confirm that the Kubernetes API server is communicating with the pods.
To view a list of all pods, use the following command:
$ oc get pods --all-namespacesExample output
NAMESPACE NAME READY STATUS RESTARTS AGE openshift-apiserver-operator openshift-apiserver-operator-85cb746d55-zqhs8 1/1 Running 1 9m openshift-apiserver apiserver-67b9g 1/1 Running 0 3m openshift-apiserver apiserver-ljcmx 1/1 Running 0 1m openshift-apiserver apiserver-z25h4 1/1 Running 0 2m openshift-authentication-operator authentication-operator-69d5d8bf84-vh2n8 1/1 Running 0 5m ...View the logs for a pod that is listed in the output of the previous command by using the following command:
$ oc logs <pod_name> -n <namespace>1 - 1
- Specify the pod name and namespace, as shown in the output of the previous command.
If the pod logs display, the Kubernetes API server can communicate with the cluster machines.
For an installation with Fibre Channel Protocol (FCP), additional steps are required to enable multipathing. Do not enable multipathing during installation.
See "Enabling multipathing with kernel arguments on RHCOS" in the Post-installation configuration documentation for more information.
7.1.17. Telemetry access for OpenShift Container Platform
In OpenShift Container Platform 4.7, the Telemetry service, which runs by default to provide metrics about cluster health and the success of updates, requires internet access. If your cluster is connected to the internet, Telemetry runs automatically, and your cluster is registered to OpenShift Cluster Manager.
After you confirm that your OpenShift Cluster Manager inventory is correct, either maintained automatically by Telemetry or manually by using OpenShift Cluster Manager, use subscription watch to track your OpenShift Container Platform subscriptions at the account or multi-cluster level.
7.1.18. Next steps
- Customize your cluster.
- If necessary, you can opt out of remote health reporting.
- Set up your registry and configure registry storage.
7.2. Installing a cluster on bare metal with network customizations
In OpenShift Container Platform version 4.7, you can install a cluster on bare metal infrastructure that you provision with customized network configuration options. By customizing your network configuration, your cluster can coexist with existing IP address allocations in your environment and integrate with existing MTU and VXLAN configurations.
You must set most of the network configuration parameters during installation, and you can modify only kubeProxy configuration parameters in a running cluster.
7.2.1. Prerequisites
- Review details about the OpenShift Container Platform installation and update processes.
- If you use a firewall, you must configure it to access Red Hat Insights.
7.2.2. Internet access for OpenShift Container Platform
In OpenShift Container Platform 4.7, you require access to the Internet to install your cluster.
You must have Internet access to:
- Access OpenShift Cluster Manager to download the installation program and perform subscription management. If the cluster has internet access and you do not disable Telemetry, that service automatically entitles your cluster.
- Access Quay.io to obtain the packages that are required to install your cluster.
- Obtain the packages that are required to perform cluster updates.
If your cluster cannot have direct Internet access, you can perform a restricted network installation on some types of infrastructure that you provision. During that process, you download the content that is required and use it to populate a mirror registry with the packages that you need to install a cluster and generate the installation program. With some installation types, the environment that you install your cluster in will not require Internet access. Before you update the cluster, you update the content of the mirror registry.
7.2.3. Machine requirements for a cluster with user-provisioned infrastructure
For a cluster that contains user-provisioned infrastructure, you must deploy all of the required machines.
7.2.3.1. Required machines
The smallest OpenShift Container Platform clusters require the following hosts:
- One temporary bootstrap machine
- Three control plane, or master, machines
- At least two compute machines, which are also known as worker machines. If you are running a three-node cluster, running zero compute machines is supported. Running one compute machine is not supported.
The cluster requires the bootstrap machine to deploy the OpenShift Container Platform cluster on the three control plane machines. You can remove the bootstrap machine after you install the cluster.
To maintain high availability of your cluster, use separate physical hosts for these cluster machines.
The bootstrap and control plane machines must use Red Hat Enterprise Linux CoreOS (RHCOS) as the operating system. However, the compute machines can choose between Red Hat Enterprise Linux CoreOS (RHCOS) or Red Hat Enterprise Linux (RHEL) 7.9.
Note that RHCOS is based on Red Hat Enterprise Linux (RHEL) 8 and inherits all of its hardware certifications and requirements. See Red Hat Enterprise Linux technology capabilities and limits.
7.2.3.2. Network connectivity requirements
All the Red Hat Enterprise Linux CoreOS (RHCOS) machines require network in initramfs during boot to fetch Ignition config files from the Machine Config Server. During the initial boot, the machines require either a DHCP server or that static IP addresses be set in order to establish a network connection to download their Ignition config files. Additionally, each OpenShift Container Platform node in the cluster must have access to a Network Time Protocol (NTP) server. If a DHCP server provides NTP servers information, the chrony time service on the Red Hat Enterprise Linux CoreOS (RHCOS) machines read the information and can sync the clock with the NTP servers.
7.2.3.3. Minimum resource requirements
Each cluster machine must meet the following minimum requirements:
| Machine | Operating System | CPU [1] | RAM | Storage | IOPS [2] |
|---|---|---|---|---|---|
| Bootstrap | RHCOS | 4 | 16 GB | 100 GB | 300 |
| Control plane | RHCOS | 4 | 16 GB | 100 GB | 300 |
| Compute | RHCOS or RHEL 7.9 | 2 | 8 GB | 100 GB | 300 |
- One CPU is equivalent to one physical core when simultaneous multithreading (SMT), or hyperthreading, is not enabled. When enabled, use the following formula to calculate the corresponding ratio: (threads per core × cores) × sockets = CPUs.
- OpenShift Container Platform and Kubernetes are sensitive to disk performance, and faster storage is recommended, particularly for etcd on the control plane nodes which require a 10 ms p99 fsync duration. Note that on many cloud platforms, storage size and IOPS scale together, so you might need to over-allocate storage volume to obtain sufficient performance.
7.2.3.4. Certificate signing requests management
Because your cluster has limited access to automatic machine management when you use infrastructure that you provision, you must provide a mechanism for approving cluster certificate signing requests (CSRs) after installation. The kube-controller-manager only approves the kubelet client CSRs. The machine-approver cannot guarantee the validity of a serving certificate that is requested by using kubelet credentials because it cannot confirm that the correct machine issued the request. You must determine and implement a method of verifying the validity of the kubelet serving certificate requests and approving them.
7.2.4. Creating the user-provisioned infrastructure
Before you deploy an OpenShift Container Platform cluster that uses user-provisioned infrastructure, you must create the underlying infrastructure.
Prerequisites
- Review the OpenShift Container Platform 4.x Tested Integrations page before you create the supporting infrastructure for your cluster.
Procedure
- Configure DHCP or set static IP addresses on each node.
- Provision the required load balancers.
- Configure the ports for your machines.
- Configure DNS.
- Ensure network connectivity.
7.2.4.1. Networking requirements for user-provisioned infrastructure
All the Red Hat Enterprise Linux CoreOS (RHCOS) machines require network in initramfs during boot to fetch Ignition config from the machine config server.
During the initial boot, the machines require either a DHCP server or that static IP addresses be set on each host in the cluster to establish a network connection, which allows them to download their Ignition config files.
It is recommended to use the DHCP server to manage the machines for the cluster long-term. Ensure that the DHCP server is configured to provide persistent IP addresses and host names to the cluster machines.
The Kubernetes API server must be able to resolve the node names of the cluster machines. If the API servers and worker nodes are in different zones, you can configure a default DNS search zone to allow the API server to resolve the node names. Another supported approach is to always refer to hosts by their fully-qualified domain names in both the node objects and all DNS requests.
You must configure the network connectivity between machines to allow cluster components to communicate. Each machine must be able to resolve the host names of all other machines in the cluster.
| Protocol | Port | Description |
|---|---|---|
| ICMP | N/A | Network reachability tests |
| TCP |
| Metrics |
|
|
Host level services, including the node exporter on ports | |
|
| The default ports that Kubernetes reserves | |
|
| openshift-sdn | |
| UDP |
| VXLAN and Geneve |
|
| VXLAN and Geneve | |
|
|
Host level services, including the node exporter on ports | |
| TCP/UDP |
| Kubernetes node port |
| Protocol | Port | Description |
|---|---|---|
| TCP |
| Kubernetes API |
| Protocol | Port | Description |
|---|---|---|
| TCP |
| etcd server and peer ports |
Network topology requirements
The infrastructure that you provision for your cluster must meet the following network topology requirements.
OpenShift Container Platform requires all nodes to have internet access to pull images for platform containers and provide telemetry data to Red Hat.
Load balancers
Before you install OpenShift Container Platform, you must provision two load balancers that meet the following requirements:
API load balancer: Provides a common endpoint for users, both human and machine, to interact with and configure the platform. Configure the following conditions:
- Layer 4 load balancing only. This can be referred to as Raw TCP, SSL Passthrough, or SSL Bridge mode. If you use SSL Bridge mode, you must enable Server Name Indication (SNI) for the API routes.
- A stateless load balancing algorithm. The options vary based on the load balancer implementation.
ImportantDo not configure session persistence for an API load balancer.
Configure the following ports on both the front and back of the load balancers:
Expand Table 7.17. API load balancer Port Back-end machines (pool members) Internal External Description 6443Bootstrap and control plane. You remove the bootstrap machine from the load balancer after the bootstrap machine initializes the cluster control plane. You must configure the
/readyzendpoint for the API server health check probe.X
X
Kubernetes API server
22623Bootstrap and control plane. You remove the bootstrap machine from the load balancer after the bootstrap machine initializes the cluster control plane.
X
Machine config server
NoteThe load balancer must be configured to take a maximum of 30 seconds from the time the API server turns off the
/readyzendpoint to the removal of the API server instance from the pool. Within the time frame after/readyzreturns an error or becomes healthy, the endpoint must have been removed or added. Probing every 5 or 10 seconds, with two successful requests to become healthy and three to become unhealthy, are well-tested values.Application Ingress load balancer: Provides an Ingress point for application traffic flowing in from outside the cluster. Configure the following conditions:
- Layer 4 load balancing only. This can be referred to as Raw TCP, SSL Passthrough, or SSL Bridge mode. If you use SSL Bridge mode, you must enable Server Name Indication (SNI) for the Ingress routes.
- A connection-based or session-based persistence is recommended, based on the options available and types of applications that will be hosted on the platform.
Configure the following ports on both the front and back of the load balancers:
Expand Table 7.18. Application Ingress load balancer Port Back-end machines (pool members) Internal External Description 443The machines that run the Ingress router pods, compute, or worker, by default.
X
X
HTTPS traffic
80The machines that run the Ingress router pods, compute, or worker, by default.
X
X
HTTP traffic
If the true IP address of the client can be seen by the load balancer, enabling source IP-based session persistence can improve performance for applications that use end-to-end TLS encryption.
A working configuration for the Ingress router is required for an OpenShift Container Platform cluster. You must configure the Ingress router after the control plane initializes.
NTP configuration
OpenShift Container Platform clusters are configured to use a public Network Time Protocol (NTP) server by default. If you want to use a local enterprise NTP server, or if your cluster is being deployed in a disconnected network, you can configure the cluster to use a specific time server. For more information, see the documentation for Configuring chrony time service.
If a DHCP server provides NTP server information, the chrony time service on the Red Hat Enterprise Linux CoreOS (RHCOS) machines read the information and can sync the clock with the NTP servers.
7.2.4.2. User-provisioned DNS requirements
DNS is used for name resolution and reverse name resolution. DNS A/AAAA or CNAME records are used for name resolution and PTR records are used for reverse name resolution. The reverse records are important because Red Hat Enterprise Linux CoreOS (RHCOS) uses the reverse records to set the host name for all the nodes. Additionally, the reverse records are used to generate the certificate signing requests (CSR) that OpenShift Container Platform needs to operate.
The following DNS records are required for an OpenShift Container Platform cluster that uses user-provisioned infrastructure. In each record, <cluster_name> is the cluster name and <base_domain> is the cluster base domain that you specify in the install-config.yaml file. A complete DNS record takes the form: <component>.<cluster_name>.<base_domain>..
| Component | Record | Description |
|---|---|---|
| Kubernetes API |
| Add a DNS A/AAAA or CNAME record, and a DNS PTR record, to identify the load balancer for the control plane machines. These records must be resolvable by both clients external to the cluster and from all the nodes within the cluster. |
|
| Add a DNS A/AAAA or CNAME record, and a DNS PTR record, to identify the load balancer for the control plane machines. These records must be resolvable from all the nodes within the cluster. Important The API server must be able to resolve the worker nodes by the host names that are recorded in Kubernetes. If the API server cannot resolve the node names, then proxied API calls can fail, and you cannot retrieve logs from pods. | |
| Routes |
| Add a wildcard DNS A/AAAA or CNAME record that refers to the load balancer that targets the machines that run the Ingress router pods, which are the worker nodes by default. These records must be resolvable by both clients external to the cluster and from all the nodes within the cluster. |
| Bootstrap |
| Add a DNS A/AAAA or CNAME record, and a DNS PTR record, to identify the bootstrap machine. These records must be resolvable by the nodes within the cluster. |
| Master hosts |
| DNS A/AAAA or CNAME records and DNS PTR records to identify each machine for the control plane nodes (also known as the master nodes). These records must be resolvable by the nodes within the cluster. |
| Worker hosts |
| Add DNS A/AAAA or CNAME records and DNS PTR records to identify each machine for the worker nodes. These records must be resolvable by the nodes within the cluster. |
You can use the nslookup <hostname> command to verify name resolution. You can use the dig -x <ip_address> command to verify reverse name resolution for the PTR records.
The following example of a BIND zone file shows sample A records for name resolution. The purpose of the example is to show the records that are needed. The example is not meant to provide advice for choosing one name resolution service over another.
Example 7.3. Sample DNS zone database
$TTL 1W
@ IN SOA ns1.example.com. root (
2019070700 ; serial
3H ; refresh (3 hours)
30M ; retry (30 minutes)
2W ; expiry (2 weeks)
1W ) ; minimum (1 week)
IN NS ns1.example.com.
IN MX 10 smtp.example.com.
;
;
ns1 IN A 192.168.1.5
smtp IN A 192.168.1.5
;
helper IN A 192.168.1.5
helper.ocp4 IN A 192.168.1.5
;
; The api identifies the IP of your load balancer.
api.ocp4 IN A 192.168.1.5
api-int.ocp4 IN A 192.168.1.5
;
; The wildcard also identifies the load balancer.
*.apps.ocp4 IN A 192.168.1.5
;
; Create an entry for the bootstrap host.
bootstrap.ocp4 IN A 192.168.1.96
;
; Create entries for the master hosts.
master0.ocp4 IN A 192.168.1.97
master1.ocp4 IN A 192.168.1.98
master2.ocp4 IN A 192.168.1.99
;
; Create entries for the worker hosts.
worker0.ocp4 IN A 192.168.1.11
worker1.ocp4 IN A 192.168.1.7
;
;EOFThe following example BIND zone file shows sample PTR records for reverse name resolution.
Example 7.4. Sample DNS zone database for reverse records
$TTL 1W
@ IN SOA ns1.example.com. root (
2019070700 ; serial
3H ; refresh (3 hours)
30M ; retry (30 minutes)
2W ; expiry (2 weeks)
1W ) ; minimum (1 week)
IN NS ns1.example.com.
;
; The syntax is "last octet" and the host must have an FQDN
; with a trailing dot.
97 IN PTR master0.ocp4.example.com.
98 IN PTR master1.ocp4.example.com.
99 IN PTR master2.ocp4.example.com.
;
96 IN PTR bootstrap.ocp4.example.com.
;
5 IN PTR api.ocp4.example.com.
5 IN PTR api-int.ocp4.example.com.
;
11 IN PTR worker0.ocp4.example.com.
7 IN PTR worker1.ocp4.example.com.
;
;EOFFor clusters using installer-provisioned infrastructure, only the DNS records must be added.
7.2.5. Generating an SSH private key and adding it to the agent
If you want to perform installation debugging or disaster recovery on your cluster, you must provide an SSH key to both your ssh-agent and the installation program. You can use this key to access the bootstrap machine in a public cluster to troubleshoot installation issues.
In a production environment, you require disaster recovery and debugging.
You can use this key to SSH into the master nodes as the user core. When you deploy the cluster, the key is added to the core user’s ~/.ssh/authorized_keys list.
You must use a local key, not one that you configured with platform-specific approaches such as AWS key pairs.
Procedure
If you do not have an SSH key that is configured for password-less authentication on your computer, create one. For example, on a computer that uses a Linux operating system, run the following command:
$ ssh-keygen -t ed25519 -N '' \ -f <path>/<file_name>1 - 1
- Specify the path and file name, such as
~/.ssh/id_rsa, of the new SSH key. If you have an existing key pair, ensure your public key is in the your~/.sshdirectory.
Running this command generates an SSH key that does not require a password in the location that you specified.
NoteIf you plan to install an OpenShift Container Platform cluster that uses FIPS Validated / Modules in Process cryptographic libraries on the
x86_64architecture, do not create a key that uses theed25519algorithm. Instead, create a key that uses thersaorecdsaalgorithm.Start the
ssh-agentprocess as a background task:$ eval "$(ssh-agent -s)"Example output
Agent pid 31874NoteIf your cluster is in FIPS mode, only use FIPS-compliant algorithms to generate the SSH key. The key must be either RSA or ECDSA.
Add your SSH private key to the
ssh-agent:$ ssh-add <path>/<file_name>1 Example output
Identity added: /home/<you>/<path>/<file_name> (<computer_name>)- 1
- Specify the path and file name for your SSH private key, such as
~/.ssh/id_rsa
Next steps
- When you install OpenShift Container Platform, provide the SSH public key to the installation program.
7.2.6. Obtaining the installation program
Before you install OpenShift Container Platform, download the installation file on a local computer.
Prerequisites
- You have a computer that runs Linux or macOS, with 500 MB of local disk space
Procedure
- Access the Infrastructure Provider page on the OpenShift Cluster Manager site. If you have a Red Hat account, log in with your credentials. If you do not, create an account.
- Select your infrastructure provider.
Navigate to the page for your installation type, download the installation program for your operating system, and place the file in the directory where you will store the installation configuration files.
ImportantThe installation program creates several files on the computer that you use to install your cluster. You must keep the installation program and the files that the installation program creates after you finish installing the cluster. Both files are required to delete the cluster.
ImportantDeleting the files created by the installation program does not remove your cluster, even if the cluster failed during installation. To remove your cluster, complete the OpenShift Container Platform uninstallation procedures for your specific cloud provider.
Extract the installation program. For example, on a computer that uses a Linux operating system, run the following command:
$ tar xvf openshift-install-linux.tar.gz- Download your installation pull secret from the Red Hat OpenShift Cluster Manager. This pull secret allows you to authenticate with the services that are provided by the included authorities, including Quay.io, which serves the container images for OpenShift Container Platform components.
7.2.7. Installing the OpenShift CLI by downloading the binary
You can install the OpenShift CLI (oc) to interact with OpenShift Container Platform from a command-line interface. You can install oc on Linux, Windows, or macOS.
If you installed an earlier version of oc, you cannot use it to complete all of the commands in OpenShift Container Platform 4.7. Download and install the new version of oc.
7.2.7.1. Installing the OpenShift CLI on Linux
You can install the OpenShift CLI (oc) binary on Linux by using the following procedure.
Procedure
- Navigate to the OpenShift Container Platform downloads page on the Red Hat Customer Portal.
- Select the appropriate version in the Version drop-down menu.
- Click Download Now next to the OpenShift v4.7 Linux Client entry and save the file.
Unpack the archive:
$ tar xvzf <file>Place the
ocbinary in a directory that is on yourPATH.To check your
PATH, execute the following command:$ echo $PATH
After you install the OpenShift CLI, it is available using the oc command:
$ oc <command>7.2.7.2. Installing the OpenShift CLI on Windows
You can install the OpenShift CLI (oc) binary on Windows by using the following procedure.
Procedure
- Navigate to the OpenShift Container Platform downloads page on the Red Hat Customer Portal.
- Select the appropriate version in the Version drop-down menu.
- Click Download Now next to the OpenShift v4.7 Windows Client entry and save the file.
- Unzip the archive with a ZIP program.
Move the
ocbinary to a directory that is on yourPATH.To check your
PATH, open the command prompt and execute the following command:C:\> path
After you install the OpenShift CLI, it is available using the oc command:
C:\> oc <command>7.2.7.3. Installing the OpenShift CLI on macOS
You can install the OpenShift CLI (oc) binary on macOS by using the following procedure.
Procedure
- Navigate to the OpenShift Container Platform downloads page on the Red Hat Customer Portal.
- Select the appropriate version in the Version drop-down menu.
- Click Download Now next to the OpenShift v4.7 MacOSX Client entry and save the file.
- Unpack and unzip the archive.
Move the
ocbinary to a directory on your PATH.To check your
PATH, open a terminal and execute the following command:$ echo $PATH
After you install the OpenShift CLI, it is available using the oc command:
$ oc <command>7.2.8. Manually creating the installation configuration file
For installations of OpenShift Container Platform that use user-provisioned infrastructure, you manually generate your installation configuration file.
Prerequisites
- Obtain the OpenShift Container Platform installation program and the access token for your cluster.
Procedure
Create an installation directory to store your required installation assets in:
$ mkdir <installation_directory>ImportantYou must create a directory. Some installation assets, like bootstrap X.509 certificates have short expiration intervals, so you must not reuse an installation directory. If you want to reuse individual files from another cluster installation, you can copy them into your directory. However, the file names for the installation assets might change between releases. Use caution when copying installation files from an earlier OpenShift Container Platform version.
Customize the following
install-config.yamlfile template and save it in the<installation_directory>.NoteYou must name this configuration file
install-config.yaml.Back up the
install-config.yamlfile so that you can use it to install multiple clusters.ImportantThe
install-config.yamlfile is consumed during the next step of the installation process. You must back it up now.
7.2.8.1. Installation configuration parameters
Before you deploy an OpenShift Container Platform cluster, you provide parameter values to describe your account on the cloud platform that hosts your cluster and optionally customize your cluster’s platform. When you create the install-config.yaml installation configuration file, you provide values for the required parameters through the command line. If you customize your cluster, you can modify the install-config.yaml file to provide more details about the platform.
After installation, you cannot modify these parameters in the install-config.yaml file.
The openshift-install command does not validate field names for parameters. If an incorrect name is specified, the related file or object is not created, and no error is reported. Ensure that the field names for any parameters that are specified are correct.
7.2.8.1.1. Required configuration parameters
Required installation configuration parameters are described in the following table:
| Parameter | Description | Values |
|---|---|---|
|
|
The API version for the | String |
|
|
The base domain of your cloud provider. The base domain is used to create routes to your OpenShift Container Platform cluster components. The full DNS name for your cluster is a combination of the |
A fully-qualified domain or subdomain name, such as |
|
|
Kubernetes resource | Object |
|
|
The name of the cluster. DNS records for the cluster are all subdomains of |
String of lowercase letters, hyphens ( |
|
|
The configuration for the specific platform upon which to perform the installation: | Object |
|
| Get a pull secret from the Red Hat OpenShift Cluster Manager to authenticate downloading container images for OpenShift Container Platform components from services such as Quay.io. |
|
7.2.8.1.2. Network configuration parameters
You can customize your installation configuration based on the requirements of your existing network infrastructure. For example, you can expand the IP address block for the cluster network or provide different IP address blocks than the defaults.
Only IPv4 addresses are supported.
| Parameter | Description | Values |
|---|---|---|
|
| The configuration for the cluster network. | Object Note
You cannot modify parameters specified by the |
|
| The cluster network provider Container Network Interface (CNI) plug-in to install. |
Either |
|
| The IP address blocks for pods.
The default value is If you specify multiple IP address blocks, the blocks must not overlap. | An array of objects. For example: |
|
|
Required if you use An IPv4 network. |
An IP address block in Classless Inter-Domain Routing (CIDR) notation. The prefix length for an IPv4 block is between |
|
|
The subnet prefix length to assign to each individual node. For example, if | A subnet prefix.
The default value is |
|
|
The IP address block for services. The default value is The OpenShift SDN and OVN-Kubernetes network providers support only a single IP address block for the service network. | An array with an IP address block in CIDR format. For example: |
|
| The IP address blocks for machines. If you specify multiple IP address blocks, the blocks must not overlap. | An array of objects. For example: |
|
|
Required if you use | An IP network block in CIDR notation.
For example, Note
Set the |
7.2.8.1.3. Optional configuration parameters
Optional installation configuration parameters are described in the following table:
| Parameter | Description | Values |
|---|---|---|
|
| A PEM-encoded X.509 certificate bundle that is added to the nodes' trusted certificate store. This trust bundle may also be used when a proxy has been configured. | String |
|
| The configuration for the machines that comprise the compute nodes. |
Array of |
|
|
Determines the instruction set architecture of the machines in the pool. Currently, heteregeneous clusters are not supported, so all pools must specify the same architecture. Valid values are | String |
|
|
Whether to enable or disable simultaneous multithreading, or Important If you disable simultaneous multithreading, ensure that your capacity planning accounts for the dramatically decreased machine performance. |
|
|
|
Required if you use |
|
|
|
Required if you use |
|
|
| The number of compute machines, which are also known as worker machines, to provision. |
A positive integer greater than or equal to |
|
| The configuration for the machines that comprise the control plane. |
Array of |
|
|
Determines the instruction set architecture of the machines in the pool. Currently, heterogeneous clusters are not supported, so all pools must specify the same architecture. Valid values are | String |
|
|
Whether to enable or disable simultaneous multithreading, or Important If you disable simultaneous multithreading, ensure that your capacity planning accounts for the dramatically decreased machine performance. |
|
|
|
Required if you use |
|
|
|
Required if you use |
|
|
| The number of control plane machines to provision. |
The only supported value is |
|
| The Cloud Credential Operator (CCO) mode. If no mode is specified, the CCO dynamically tries to determine the capabilities of the provided credentials, with a preference for mint mode on the platforms where multiple modes are supported. Note Not all CCO modes are supported for all cloud providers. For more information on CCO modes, see the Cloud Credential Operator entry in the Cluster Operators reference content. |
|
|
|
Enable or disable FIPS mode. The default is Important
The use of FIPS Validated / Modules in Process cryptographic libraries is only supported on OpenShift Container Platform deployments on the Note If you are using Azure File storage, you cannot enable FIPS mode. |
|
|
| Sources and repositories for the release-image content. |
Array of objects. Includes a |
|
|
Required if you use | String |
|
| Specify one or more repositories that may also contain the same images. | Array of strings |
|
| How to publish or expose the user-facing endpoints of your cluster, such as the Kubernetes API, OpenShift routes. |
Setting this field to Important
If the value of the field is set to |
|
| The SSH key or keys to authenticate access your cluster machines. Note
For production OpenShift Container Platform clusters on which you want to perform installation debugging or disaster recovery, specify an SSH key that your | One or more keys. For example: |
7.2.8.2. Sample install-config.yaml file for bare metal
You can customize the install-config.yaml file to specify more details about your OpenShift Container Platform cluster’s platform or modify the values of the required parameters.
apiVersion: v1
baseDomain: example.com
compute:
- hyperthreading: Enabled
name: worker
replicas: 0
controlPlane:
hyperthreading: Enabled
name: master
replicas: 3
metadata:
name: test
networking:
clusterNetwork:
- cidr: 10.128.0.0/14
hostPrefix: 23
networkType: OpenShiftSDN
serviceNetwork:
- 172.30.0.0/16
platform:
none: {}
fips: false
pullSecret: '{"auths": ...}'
sshKey: 'ssh-ed25519 AAAA...' - 1
- The base domain of the cluster. All DNS records must be sub-domains of this base and include the cluster name.
- 2 5
- The
controlPlanesection is a single mapping, but thecomputesection is a sequence of mappings. To meet the requirements of the different data structures, the first line of thecomputesection must begin with a hyphen,-, and the first line of thecontrolPlanesection must not. Only one control plane pool is used. - 3 6
- Whether to enable or disable simultaneous multithreading (SMT), or
hyperthreading. By default, SMT is enabled to increase the performance of your machines' cores. You can disable it by setting the parameter value toDisabled. If you disable SMT, you must disable it in all cluster machines; this includes both control plane and compute machines.NoteSimultaneous multithreading (SMT) is enabled by default. If SMT is not enabled in your BIOS settings, the
hyperthreadingparameter has no effect.ImportantIf you disable
hyperthreading, whether in the BIOS or in theinstall-config.yaml, ensure that your capacity planning accounts for the dramatically decreased machine performance. - 4
- You must set the value of the
replicasparameter to0. This parameter controls the number of workers that the cluster creates and manages for you, which are functions that the cluster does not perform when you use user-provisioned infrastructure. You must manually deploy worker machines for the cluster to use before you finish installing OpenShift Container Platform. - 7
- The number of control plane machines that you add to the cluster. Because the cluster uses these values as the number of etcd endpoints in the cluster, the value must match the number of control plane machines that you deploy.
- 8
- The cluster name that you specified in your DNS records.
- 9
- A block of IP addresses from which pod IP addresses are allocated. This block must not overlap with existing physical networks. These IP addresses are used for the pod network. If you need to access the pods from an external network, you must configure load balancers and routers to manage the traffic.Note
Class E CIDR range is reserved for a future use. To use the Class E CIDR range, you must ensure your networking environment accepts the IP addresses within the Class E CIDR range.
- 10
- The subnet prefix length to assign to each individual node. For example, if
hostPrefixis set to23, then each node is assigned a/23subnet out of the givencidr, which allows for 510 (2^(32 - 23) - 2) pod IPs addresses. If you are required to provide access to nodes from an external network, configure load balancers and routers to manage the traffic. - 11
- The IP address pool to use for service IP addresses. You can enter only one IP address pool. This block must not overlap with existing physical networks. If you need to access the services from an external network, configure load balancers and routers to manage the traffic.
- 12
- You must set the platform to
none. You cannot provide additional platform configuration variables for your platform.WarningRed Hat Virtualization does not currently support installation with user-provisioned infrastructure on the oVirt platform. Therefore, you must set the platform to
none, allowing OpenShift Container Platform to identify each node as a bare-metal node and the cluster as a bare-metal cluster. This is the same as installing a cluster on any platform, and has the following limitations:- There will be no cluster provider so you must manually add each machine and there will be no node scaling capabilities.
- The oVirt CSI driver will not be installed and there will be no CSI capabilities.
- 13
- Whether to enable or disable FIPS mode. By default, FIPS mode is not enabled. If FIPS mode is enabled, the Red Hat Enterprise Linux CoreOS (RHCOS) machines that OpenShift Container Platform runs on bypass the default Kubernetes cryptography suite and use the cryptography modules that are provided with RHCOS instead.Important
The use of FIPS Validated / Modules in Process cryptographic libraries is only supported on OpenShift Container Platform deployments on the
x86_64architecture. - 14
- The pull secret from the Red Hat OpenShift Cluster Manager. This pull secret allows you to authenticate with the services that are provided by the included authorities, including Quay.io, which serves the container images for OpenShift Container Platform components.
- 15
- The public portion of the default SSH key for the
coreuser in Red Hat Enterprise Linux CoreOS (RHCOS).NoteFor production OpenShift Container Platform clusters on which you want to perform installation debugging or disaster recovery, specify an SSH key that your
ssh-agentprocess uses.
7.2.9. Network configuration phases
When specifying a cluster configuration prior to installation, there are several phases in the installation procedures when you can modify the network configuration:
- Phase 1
After entering the
openshift-install create install-configcommand. In theinstall-config.yamlfile, you can customize the following network-related fields:-
networking.networkType -
networking.clusterNetwork -
networking.serviceNetwork networking.machineNetworkFor more information on these fields, refer to "Installation configuration parameters".
NoteSet the
networking.machineNetworkto match the CIDR that the preferred NIC resides in.
-
- Phase 2
-
After entering the
openshift-install create manifestscommand. If you must specify advanced network configuration, during this phase you can define a customized Cluster Network Operator manifest with only the fields you want to modify.
You cannot override the values specified in phase 1 in the install-config.yaml file during phase 2. However, you can further customize the cluster network provider during phase 2.
7.2.10. Specifying advanced network configuration
You can use advanced configuration customization to integrate your cluster into your existing network environment by specifying additional configuration for your cluster network provider. You can specify advanced network configuration only before you install the cluster.
Modifying the OpenShift Container Platform manifest files created by the installation program is not supported. Applying a manifest file that you create, as in the following procedure, is supported.
Prerequisites
-
Create the
install-config.yamlfile and complete any modifications to it. - Create the Ignition config files for your cluster.
Procedure
Change to the directory that contains the installation program and create the manifests:
$ ./openshift-install create manifests --dir <installation_directory>where:
<installation_directory>-
Specifies the name of the directory that contains the
install-config.yamlfile for your cluster.
Create a stub manifest file for the advanced network configuration that is named
cluster-network-03-config.ymlin the<installation_directory>/manifests/directory:$ cat <<EOF > <installation_directory>/manifests/cluster-network-03-config.yml apiVersion: operator.openshift.io/v1 kind: Network metadata: name: cluster spec: EOFwhere:
<installation_directory>-
Specifies the directory name that contains the
manifests/directory for your cluster.
Open the
cluster-network-03-config.ymlfile in an editor and specify the advanced network configuration for your cluster, such as in the following examples:Specify a different VXLAN port for the OpenShift SDN network provider
apiVersion: operator.openshift.io/v1 kind: Network metadata: name: cluster spec: defaultNetwork: openshiftSDNConfig: vxlanPort: 4800Enable IPsec for the OVN-Kubernetes network provider
apiVersion: operator.openshift.io/v1 kind: Network metadata: name: cluster spec: defaultNetwork: ovnKubernetesConfig: ipsecConfig: {}-
Save the
cluster-network-03-config.ymlfile and quit the text editor. -
Optional: Back up the
manifests/cluster-network-03-config.ymlfile. The installation program deletes themanifests/directory when creating the cluster.
7.2.11. Cluster Network Operator configuration
The configuration for the cluster network is specified as part of the Cluster Network Operator (CNO) configuration and stored in a custom resource (CR) object that is named cluster. The CR specifies the fields for the Network API in the operator.openshift.io API group.
The CNO configuration inherits the following fields during cluster installation from the Network API in the Network.config.openshift.io API group and these fields cannot be changed:
clusterNetwork- IP address pools from which pod IP addresses are allocated.
serviceNetwork- IP address pool for services.
defaultNetwork.type- Cluster network provider, such as OpenShift SDN or OVN-Kubernetes.
You can specify the cluster network provider configuration for your cluster by setting the fields for the defaultNetwork object in the CNO object named cluster.
7.2.11.1. Cluster Network Operator configuration object
The fields for the Cluster Network Operator (CNO) are described in the following table:
| Field | Type | Description |
|---|---|---|
|
|
|
The name of the CNO object. This name is always |
|
|
| A list specifying the blocks of IP addresses from which pod IP addresses are allocated and the subnet prefix length assigned to each individual node in the cluster. For example:
This value is ready-only and specified in the |
|
|
| A block of IP addresses for services. The OpenShift SDN and OVN-Kubernetes Container Network Interface (CNI) network providers support only a single IP address block for the service network. For example:
This value is ready-only and specified in the |
|
|
| Configures the Container Network Interface (CNI) cluster network provider for the cluster network. |
|
|
| The fields for this object specify the kube-proxy configuration. If you are using the OVN-Kubernetes cluster network provider, the kube-proxy configuration has no effect. |
defaultNetwork object configuration
The values for the defaultNetwork object are defined in the following table:
| Field | Type | Description |
|---|---|---|
|
|
|
Either Note OpenShift Container Platform uses the OpenShift SDN Container Network Interface (CNI) cluster network provider by default. |
|
|
| This object is only valid for the OpenShift SDN cluster network provider. |
|
|
| This object is only valid for the OVN-Kubernetes cluster network provider. |
Configuration for the OpenShift SDN CNI cluster network provider
The following table describes the configuration fields for the OpenShift SDN Container Network Interface (CNI) cluster network provider.
| Field | Type | Description |
|---|---|---|
|
|
|
Configures the network isolation mode for OpenShift SDN. The default value is
The values |
|
|
| The maximum transmission unit (MTU) for the VXLAN overlay network. This is detected automatically based on the MTU of the primary network interface. You do not normally need to override the detected MTU. If the auto-detected value is not what you expected it to be, confirm that the MTU on the primary network interface on your nodes is correct. You cannot use this option to change the MTU value of the primary network interface on the nodes.
If your cluster requires different MTU values for different nodes, you must set this value to This value cannot be changed after cluster installation. |
|
|
|
The port to use for all VXLAN packets. The default value is If you are running in a virtualized environment with existing nodes that are part of another VXLAN network, then you might be required to change this. For example, when running an OpenShift SDN overlay on top of VMware NSX-T, you must select an alternate port for the VXLAN, because both SDNs use the same default VXLAN port number.
On Amazon Web Services (AWS), you can select an alternate port for the VXLAN between port |
Example OpenShift SDN configuration
defaultNetwork:
type: OpenShiftSDN
openshiftSDNConfig:
mode: NetworkPolicy
mtu: 1450
vxlanPort: 4789Configuration for the OVN-Kubernetes CNI cluster network provider
The following table describes the configuration fields for the OVN-Kubernetes CNI cluster network provider.
| Field | Type | Description |
|---|---|---|
|
|
| The maximum transmission unit (MTU) for the Geneve (Generic Network Virtualization Encapsulation) overlay network. This is detected automatically based on the MTU of the primary network interface. You do not normally need to override the detected MTU. If the auto-detected value is not what you expected it to be, confirm that the MTU on the primary network interface on your nodes is correct. You cannot use this option to change the MTU value of the primary network interface on the nodes.
If your cluster requires different MTU values for different nodes, you must set this value to This value cannot be changed after cluster installation. |
|
|
|
The port to use for all Geneve packets. The default value is |
|
|
| Specify an empty object to enable IPsec encryption. This value cannot be changed after cluster installation. |
Example OVN-Kubernetes configuration
defaultNetwork:
type: OVNKubernetes
ovnKubernetesConfig:
mtu: 1400
genevePort: 6081
ipsecConfig: {}kubeProxyConfig object configuration
The values for the kubeProxyConfig object are defined in the following table:
| Field | Type | Description |
|---|---|---|
|
|
|
The refresh period for Note
Because of performance improvements introduced in OpenShift Container Platform 4.3 and greater, adjusting the |
|
|
|
The minimum duration before refreshing |
7.2.12. Creating the Ignition config files
Because you must manually start the cluster machines, you must generate the Ignition config files that the cluster needs to make its machines.
-
The Ignition config files that the installation program generates contain certificates that expire after 24 hours, which are then renewed at that time. If the cluster is shut down before renewing the certificates and the cluster is later restarted after the 24 hours have elapsed, the cluster automatically recovers the expired certificates. The exception is that you must manually approve the pending
node-bootstrappercertificate signing requests (CSRs) to recover kubelet certificates. See the documentation for Recovering from expired control plane certificates for more information. - It is recommended that you use Ignition config files within 12 hours after they are generated because the 24-hour certificate rotates from 16 to 22 hours after the cluster is installed. By using the Ignition config files within 12 hours, you can avoid installation failure if the certificate update runs during installation.
Prerequisites
- Obtain the OpenShift Container Platform installation program and the pull secret for your cluster.
Procedure
Obtain the Ignition config files:
$ ./openshift-install create ignition-configs --dir <installation_directory>1 - 1
- For
<installation_directory>, specify the directory name to store the files that the installation program creates.
ImportantIf you created an
install-config.yamlfile, specify the directory that contains it. Otherwise, specify an empty directory. Some installation assets, like bootstrap X.509 certificates have short expiration intervals, so you must not reuse an installation directory. If you want to reuse individual files from another cluster installation, you can copy them into your directory. However, the file names for the installation assets might change between releases. Use caution when copying installation files from an earlier OpenShift Container Platform version.The following files are generated in the directory:
. ├── auth │ ├── kubeadmin-password │ └── kubeconfig ├── bootstrap.ign ├── master.ign ├── metadata.json └── worker.ign
7.2.13. Installing RHCOS and starting the OpenShift Container Platform bootstrap process
To install OpenShift Container Platform on bare metal infrastructure that you provision, you must install Red Hat Enterprise Linux CoreOS (RHCOS) on the machines. When you install RHCOS, you must provide the Ignition config file that was generated by the OpenShift Container Platform installation program for the type of machine you are installing. If you have configured suitable networking, DNS, and load balancing infrastructure, the OpenShift Container Platform bootstrap process begins automatically after the RHCOS machines have rebooted.
To install RHCOS on the machines, follow either the steps to use an ISO image or network PXE booting.
The compute node deployment steps included in this installation document are RHCOS-specific. If you choose instead to deploy RHEL-based compute nodes, you take responsibility for all operating system life cycle management and maintenance, including performing system updates, applying patches, and completing all other required tasks. Use of RHEL 7 compute machines is deprecated and planned for removal in a future release of OpenShift Container Platform 4.
You can configure RHCOS during ISO and PXE installations by using the following methods:
-
Kernel arguments: You can use kernel arguments to provide installation-specific information. For example, you can specify the locations of the RHCOS installation files that you uploaded to your HTTP server and the location of the Ignition config file for the type of node you are installing. For a PXE installation, you can use the
APPENDparameter to pass the arguments to the kernel of the live installer. For an ISO installation, you can interrupt the live installation boot process to add the kernel arguments. In both installation cases, you can use specialcoreos.inst.*arguments to direct the live installer, as well as standard installation boot arguments for turning standard kernel services on or off. -
Ignition configs: OpenShift Container Platform Ignition config files (
*.ign) are specific to the type of node you are installing. You pass the location of a bootstrap, control plane, or compute node Ignition config file during the RHCOS installation so that it takes effect on first boot. In special cases, you can create a separate, limited Ignition config to pass to the live system. That Ignition config could do a certain set of tasks, such as reporting success to a provisioning system after completing installation. This special Ignition config is consumed by thecoreos-installerto be applied on first boot of the installed system. Do not provide the standard control plane and compute node Ignition configs to the live ISO directly. -
coreos-installer: You can boot the live ISO installer to a shell prompt, which allows you to prepare the permanent system in a variety of ways before first boot. In particular, you can run thecoreos-installercommand to identify various artifacts to include, work with disk partitions, and set up networking. In some cases, you can configure features on the live system and copy them to the installed system.
Whether to use an ISO or PXE install depends on your situation. A PXE install requires an available DHCP service and more preparation, but can make the installation process more automated. An ISO install is a more manual process and can be inconvenient if you are setting up more than a few machines.
As of OpenShift Container Platform 4.6, the RHCOS ISO and other installation artifacts provide support for installation on disks with 4K sectors.
7.2.13.1. Creating Red Hat Enterprise Linux CoreOS (RHCOS) machines using an ISO image
Before you install a cluster on infrastructure that you provision, you must create RHCOS machines for it to use. You can use an ISO image to create the machines.
Prerequisites
- Obtain the Ignition config files for your cluster.
- Have access to an HTTP server that can be accessed from your computer, and from the machines that you create.
Procedure
Upload the control plane, compute, and bootstrap Ignition config files that the installation program created to your HTTP server. Note the URLs of these files.
ImportantIf you plan to add more compute machines to your cluster after you finish installation, do not delete these files.
Obtain the RHCOS images that are required for your preferred method of installing operating system instances from the RHCOS image mirror page.
ImportantThe RHCOS images might not change with every release of OpenShift Container Platform. You must download images with the highest version that is less than or equal to the OpenShift Container Platform version that you install. Use the image versions that match your OpenShift Container Platform version if they are available. Use only ISO images for this procedure. RHCOS qcow2 images are not supported for this installation type.
ISO file names resemble the following example:
rhcos-<version>-live.<architecture>.isoUse the ISO to start the RHCOS installation. Use one of the following installation options:
- Burn the ISO image to a disk and boot it directly.
- Use ISO redirection via a LOM interface.
-
Boot the ISO image. You can interrupt the installation boot process to add kernel arguments. However, for this ISO procedure you should use the
coreos-installercommand instead of adding kernel arguments. If you run the live installer without options or interruption, the installer boots up to a shell prompt on the live system, ready for you to install RHCOS to disk. -
Review the Advanced RHCOS installation reference section for different ways of configuring features, such as networking and disk partitions, before running the
coreos-installer. Run the
coreos-installercommand. At a minimum, you must identify the Ignition config file location for your node type, and the location of the disk you are installing to. Here is an example:$ sudo coreos-installer install \ --ignition-url=https://host/worker.ign /dev/sda- After RHCOS installs, the system reboots. During the system reboot, it applies the Ignition config file that you specified.
Continue to create the other machines for your cluster.
ImportantYou must create the bootstrap and control plane machines at this time. If the control plane machines are not made schedulable, which is the default, also create at least two compute machines before you install the cluster.
7.2.13.2. Creating Red Hat Enterprise Linux CoreOS (RHCOS) machines by PXE or iPXE booting
Before you install a cluster that uses manually-provisioned RHCOS nodes, such as bare metal, you must create RHCOS machines for it to use. You can use PXE or iPXE booting to create the machines.
Prerequisites
- Obtain the Ignition config files for your cluster.
- Configure suitable PXE or iPXE infrastructure.
- Have access to an HTTP server that you can access from your computer.
Procedure
Upload the master, worker, and bootstrap Ignition config files that the installation program created to your HTTP server. Note the URLs of these files.
ImportantYou can add or change configuration settings in your Ignition configs before saving them to your HTTP server. If you plan to add more compute machines to your cluster after you finish installation, do not delete these files.
Obtain the RHCOS
kernel,initramfsandrootfsfiles from the RHCOS image mirror page.ImportantThe RHCOS artifacts might not change with every release of OpenShift Container Platform. You must download artifacts with the highest version that is less than or equal to the OpenShift Container Platform version that you install. Only use the appropriate
kernel,initramfs, androotfsartifacts described below for this procedure. RHCOS qcow2 images are not supported for this installation type.The file names contain the OpenShift Container Platform version number. They resemble the following examples:
-
kernel:rhcos-<version>-live-kernel-<architecture> -
initramfs:rhcos-<version>-live-initramfs.<architecture>.img -
rootfs:rhcos-<version>-live-rootfs.<architecture>.img
-
Upload the additional files that are required for your booting method:
-
For traditional PXE, upload the
kernelandinitramfsfiles to your TFTP server and therootfsfile to your HTTP server. For iPXE, upload the
kernel,initramfs, androotfsfiles to your HTTP server.ImportantIf you plan to add more compute machines to your cluster after you finish installation, do not delete these files.
-
For traditional PXE, upload the
- Configure the network boot infrastructure so that the machines boot from their local disks after RHCOS is installed on them.
Configure PXE or iPXE installation for the RHCOS images.
Modify one of the following example menu entries for your environment and verify that the image and Ignition files are properly accessible:
For PXE:
DEFAULT pxeboot TIMEOUT 20 PROMPT 0 LABEL pxeboot KERNEL http://<HTTP_server>/rhcos-<version>-live-kernel-<architecture>1 APPEND initrd=http://<HTTP_server>/rhcos-<version>-live-initramfs.<architecture>.img coreos.live.rootfs_url=http://<HTTP_server>/rhcos-<version>-live-rootfs.<architecture>.img coreos.inst.install_dev=/dev/sda coreos.inst.ignition_url=http://<HTTP_server>/bootstrap.ign2 3 - 1
- Specify the location of the live
kernelfile that you uploaded to your HTTP server. The URL must be HTTP, TFTP, or FTP; HTTPS and NFS are not supported. - 2
- If you use multiple NICs, specify a single interface in the
ipoption. For example, to use DHCP on a NIC that is namedeno1, setip=eno1:dhcp. - 3
- Specify locations of the RHCOS files that you uploaded to your HTTP server. The
initrdparameter value is the location of theinitramfsfile, thecoreos.live.rootfs_urlparameter value is the location of therootfsfile, and thecoreos.inst.ignition_urlparameter value is the location of the bootstrap Ignition config file. You can also add more kernel arguments to theAPPENDline to configure networking or other boot options.
NoteThis configuration does not enable serial console access on machines with a graphical console. To configure a different console, add one or more
console=arguments to theAPPENDline. For example, addconsole=tty0 console=ttyS0to set the first PC serial port as the primary console and the graphical console as a secondary console. For more information, see How does one set up a serial terminal and/or console in Red Hat Enterprise Linux?.For iPXE:
kernel http://<HTTP_server>/rhcos-<version>-live-kernel-<architecture> initrd=main coreos.live.rootfs_url=http://<HTTP_server>/rhcos-<version>-live-rootfs.<architecture>.img coreos.inst.install_dev=/dev/sda coreos.inst.ignition_url=http://<HTTP_server>/bootstrap.ign1 2 initrd --name main http://<HTTP_server>/rhcos-<version>-live-initramfs.<architecture>.img3 boot- 1
- Specify locations of the RHCOS files that you uploaded to your HTTP server. The
kernelparameter value is the location of thekernelfile, theinitrd=mainargument is needed for booting on UEFI systems, thecoreos.live.rootfs_urlparameter value is the location of therootfsfile, and thecoreos.inst.ignition_urlparameter value is the location of the bootstrap Ignition config file. - 2
- If you use multiple NICs, specify a single interface in the
ipoption. For example, to use DHCP on a NIC that is namedeno1, setip=eno1:dhcp. - 3
- Specify the location of the
initramfsfile that you uploaded to your HTTP server.
NoteThis configuration does not enable serial console access on machines with a graphical console. To configure a different console, add one or more
console=arguments to thekernelline. For example, addconsole=tty0 console=ttyS0to set the first PC serial port as the primary console and the graphical console as a secondary console. For more information, see How does one set up a serial terminal and/or console in Red Hat Enterprise Linux?.
If you use PXE UEFI, perform the following actions:
Provide the
shimx64.efiandgrubx64.efiEFI binaries and thegrub.cfgfile that are required for booting the system.Extract the necessary EFI binaries by mounting the RHCOS ISO to your host and then mounting the
images/efiboot.imgfile to your host:$ mkdir -p /mnt/iso$ mkdir -p /mnt/efiboot$ mount -o loop rhcos-installer.x86_64.iso /mnt/iso$ mount -o loop,ro /mnt/iso/images/efiboot.img /mnt/efibootFrom the
efiboot.imgmount point, copy theEFI/redhat/shimx64.efiandEFI/redhat/grubx64.efifiles to your TFTP server:$ cp /mnt/efiboot/EFI/redhat/shimx64.efi .$ cp /mnt/efiboot/EFI/redhat/grubx64.efi .$ umount /mnt/efiboot$ umount /mnt/iso-
Copy the
EFI/redhat/grub.cfgfile that is included in the RHCOS ISO to your TFTP server.
Edit the
grub.cfgfile to include arguments similar to the following:menuentry 'Install Red Hat Enterprise Linux CoreOS' --class fedora --class gnu-linux --class gnu --class os { linuxefi rhcos-<version>-live-kernel-<architecture> coreos.inst.install_dev=/dev/sda coreos.live.rootfs_url=http://<HTTP_server>/rhcos-<version>-live-rootfs.<architecture>.img coreos.inst.ignition_url=http://<HTTP_server>/bootstrap.ign initrdefi rhcos-<version>-live-initramfs.<architecture>.img }where:
rhcos-<version>-live-kernel-<architecture>-
Specifies the
kernelfile that you uploaded to your TFTP server. http://<HTTP_server>/rhcos-<version>-live-rootfs.<architecture>.img- Specifies the location of the live rootfs image that you uploaded to your HTTP server.
http://<HTTP_server>/bootstrap.ign- Specifies the location of the bootstrap Ignition config file that you uploaded to your HTTP server.
rhcos-<version>-live-initramfs.<architecture>.img-
Specifies the location of the
initramfsfile that you uploaded to your TFTP server.
NoteFor more information on how to configure a PXE server for UEFI boot, see the Red Hat Knowledgebase article: How to configure/setup a PXE server for UEFI boot for Red Hat Enterprise Linux?.
Continue to create the machines for your cluster.
ImportantYou must create the bootstrap and control plane machines at this time. If the control plane machines are not made schedulable, which is the default, also create at least two compute machines before you install the cluster.
7.2.13.3. Advanced Red Hat Enterprise Linux CoreOS (RHCOS) installation configuration
A key benefit for manually provisioning the Red Hat Enterprise Linux CoreOS (RHCOS) nodes for OpenShift Container Platform is to be able to do configuration that is not available through default OpenShift Container Platform installation methods. This section describes some of the configurations that you can do using techniques that include:
- Passing kernel arguments to the live installer
-
Running
coreos-installermanually from the live system - Embedding Ignition configs in an ISO
The advanced configuration topics for manual Red Hat Enterprise Linux CoreOS (RHCOS) installations detailed in this section relate to disk partitioning, networking, and using Ignition configs in different ways.
7.2.13.3.1. Using advanced networking options for PXE and ISO installations
Networking for OpenShift Container Platform nodes uses DHCP by default to gather all necessary configuration settings. To set up static IP addresses or configure special settings, such as bonding, you can do one of the following:
- Pass special kernel parameters when you boot the live installer.
- Use a machine config to copy networking files to the installed system.
- Configure networking from a live installer shell prompt, then copy those settings to the installed system so that they take effect when the installed system first boots.
To configure a PXE or iPXE installation, use one of the following options:
- See the "Advanced RHCOS installation reference" tables.
- Use a machine config to copy networking files to the installed system.
To configure an ISO installation, use the following procedure.
Procedure
- Boot the ISO installer.
-
From the live system shell prompt, configure networking for the live system using available RHEL tools, such as
nmcliornmtui. Run the
coreos-installercommand to install the system, adding the--copy-networkoption to copy networking configuration. For example:$ coreos-installer install --copy-network \ --ignition-url=http://host/worker.ign /dev/sdaImportantThe
--copy-networkoption only copies networking configuration found under/etc/NetworkManager/system-connections. In particular, it does not copy the system hostname.- Reboot into the installed system.
7.2.13.3.2. Disk partitioning
The disk partitions are created on OpenShift Container Platform cluster nodes during the Red Hat Enterprise Linux CoreOS (RHCOS) installation. Each RHCOS node of a particular architecture uses the same partition layout, unless the default partitioning configuration is overridden. During the RHCOS installation, the size of the root file system is increased to use the remaining available space on the target device.
However, there are two cases where you might want to intervene to override the default partitioning when installing an OpenShift Container Platform node:
Create separate partitions: For greenfield installations on an empty disk, you might want to add separate storage to a partition. This is officially supported for making
/varor a subdirectory of/var, such as/var/lib/etcd, a separate partition, but not both.ImportantKubernetes supports only two filesystem partitions. If you add more than one partition to the original configuration, Kubernetes cannot monitor all of them.
-
Retain existing partitions: For a brownfield installation where you are reinstalling OpenShift Container Platform on an existing node and want to retain data partitions installed from your previous operating system, there are both boot arguments and options to
coreos-installerthat allow you to retain existing data partitions.
7.2.13.3.2.1. Creating a separate /var partition
In general, disk partitioning for OpenShift Container Platform should be left to the installer. However, there are cases where you might want to create separate partitions in a part of the filesystem that you expect to grow.
OpenShift Container Platform supports the addition of a single partition to attach storage to either the /var partition or a subdirectory of /var. For example:
-
/var/lib/containers: Holds container-related content that can grow as more images and containers are added to a system. -
/var/lib/etcd: Holds data that you might want to keep separate for purposes such as performance optimization of etcd storage. -
/var: Holds data that you might want to keep separate for purposes such as auditing.
Storing the contents of a /var directory separately makes it easier to grow storage for those areas as needed and reinstall OpenShift Container Platform at a later date and keep that data intact. With this method, you will not have to pull all your containers again, nor will you have to copy massive log files when you update systems.
Because /var must be in place before a fresh installation of Red Hat Enterprise Linux CoreOS (RHCOS), the following procedure sets up the separate /var partition by creating a machine config that is inserted during the openshift-install preparation phases of an OpenShift Container Platform installation.
Procedure
Create a directory to hold the OpenShift Container Platform installation files:
$ mkdir $HOME/clusterconfigRun
openshift-installto create a set of files in themanifestandopenshiftsubdirectories. Answer the system questions as you are prompted:$ openshift-install create manifests --dir $HOME/clusterconfig ? SSH Public Key ... $ ls $HOME/clusterconfig/openshift/ 99_kubeadmin-password-secret.yaml 99_openshift-cluster-api_master-machines-0.yaml 99_openshift-cluster-api_master-machines-1.yaml 99_openshift-cluster-api_master-machines-2.yaml ...Create a
MachineConfigobject and add it to a file in theopenshiftdirectory. For example, name the file98-var-partition.yaml, change the disk device name to the name of the storage device on theworkersystems, and set the storage size as appropriate. This example places the/vardirectory on a separate partition:apiVersion: machineconfiguration.openshift.io/v1 kind: MachineConfig metadata: labels: machineconfiguration.openshift.io/role: worker name: 98-var-partition spec: config: ignition: version: 3.2.0 storage: disks: - device: /dev/<device_name>1 partitions: - label: var startMiB: <partition_start_offset>2 sizeMiB: <partition_size>3 filesystems: - device: /dev/disk/by-partlabel/var path: /var format: xfs systemd: units: - name: var.mount4 enabled: true contents: | [Unit] Before=local-fs.target [Mount] What=/dev/disk/by-partlabel/var Where=/var Options=defaults,prjquota5 [Install] WantedBy=local-fs.target- 1
- The storage device name of the disk that you want to partition.
- 2
- When adding a data partition to the boot disk, a minimum value of 25000 mebibytes is recommended. The root file system is automatically resized to fill all available space up to the specified offset. If no value is specified, or if the specified value is smaller than the recommended minimum, the resulting root file system will be too small, and future reinstalls of RHCOS might overwrite the beginning of the data partition.
- 3
- The size of the data partition in mebibytes.
- 4
- The name of the mount unit must match the directory specified in the
Where=directive. For example, for a filesystem mounted on/var/lib/containers, the unit must be namedvar-lib-containers.mount. - 5
- The
prjquotamount option must be enabled for filesystems used for container storage.
NoteWhen creating a separate
/varpartition, you cannot use different instance types for worker nodes, if the different instance types do not have the same device name.Run
openshift-installagain to create Ignition configs from a set of files in themanifestandopenshiftsubdirectories:$ openshift-install create ignition-configs --dir $HOME/clusterconfig $ ls $HOME/clusterconfig/ auth bootstrap.ign master.ign metadata.json worker.ign
Now you can use the Ignition config files as input to the ISO or PXE manual installation procedures to install Red Hat Enterprise Linux CoreOS (RHCOS) systems.
7.2.13.3.2.2. Retaining existing partitions
For an ISO installation, you can add options to the coreos-installer command line that causes the installer to maintain one or more existing partitions. For a PXE installation, you can APPEND coreos.inst.* options to preserve partitions.
Saved partitions might be partitions from an existing OpenShift Container Platform system that has data partitions that you want to keep. Here are a few tips:
- If you save existing partitions, and those partitions do not leave enough space for RHCOS, installation will fail without damaging the saved partitions.
- Identify the disk partitions you want to keep either by partition label or by number.
For an ISO installation
This example preserves any partition in which the partition label begins with data (data*):
# coreos-installer install --ignition-url http://10.0.2.2:8080/user.ign \
--save-partlabel 'data*' /dev/sda
The following example illustrates running the coreos-installer in a way that preserves the sixth (6) partition on the disk:
# coreos-installer install --ignition-url http://10.0.2.2:8080/user.ign \
--save-partindex 6 /dev/sdaThis example preserves partitions 5 and higher:
# coreos-installer install --ignition-url http://10.0.2.2:8080/user.ign
--save-partindex 5- /dev/sda
In the previous examples where partition saving is used, coreos-installer recreates the partition immediately.
For a PXE installation
This APPEND option preserves any partition in which the partition label begins with 'data' ('data*'):
coreos.inst.save_partlabel=data*
This APPEND option preserves partitions 5 and higher:
coreos.inst.save_partindex=5-
This APPEND option preserves partition 6:
coreos.inst.save_partindex=67.2.13.3.3. Identifying Ignition configs
When doing an RHCOS manual installation, there are two types of Ignition configs that you can provide, with different reasons for providing each one:
Permanent install Ignition config: Every manual RHCOS installation needs to pass one of the Ignition config files generated by
openshift-installer, such asbootstrap.ign,master.ignandworker.ign, to carry out the installation.ImportantIt is not recommended to modify these files.
For PXE installations, you pass the Ignition configs on the
APPENDline using thecoreos.inst.ignition_url=option. For ISO installations, after the ISO boots to the shell prompt, you identify the Ignition config on thecoreos-installercommand line with the--ignition-url=option. In both cases, only HTTP and HTTPS protocols are supported.Live install Ignition config: This type must be created manually and should be avoided if possible, as it is not supported by Red Hat. With this method, the Ignition config passes to the live install medium, runs immediately upon booting, and performs setup tasks before and/or after the RHCOS system installs to disk. This method should only be used for performing tasks that must be performed once and not applied again later, such as with advanced partitioning that cannot be done using a machine config.
For PXE or ISO boots, you can create the Ignition config and
APPENDtheignition.config.url=option to identify the location of the Ignition config. You also need to appendignition.firstboot ignition.platform.id=metalor theignition.config.urloption will be ignored.
7.2.13.3.3.1. Embedding an Ignition config in the RHCOS ISO
You can embed a live install Ignition config directly in an RHCOS ISO image. When the ISO image is booted, the embedded config will be applied automatically.
Procedure
-
Download the
coreos-installerbinary from the following image mirror page: https://mirror.openshift.com/pub/openshift-v4/clients/coreos-installer/latest/. Retrieve the RHCOS ISO image and the Ignition config file, and copy them into an accessible directory, such as
/mnt:# cp rhcos-<version>-live.x86_64.iso bootstrap.ign /mnt/ # chmod 644 /mnt/rhcos-<version>-live.x86_64.isoRun the following command to embed the Ignition config into the ISO:
# ./coreos-installer iso ignition embed -i /mnt/bootstrap.ign \ /mnt/rhcos-<version>-live.x86_64.isoYou can now use that ISO to install RHCOS using the specified live install Ignition config.
ImportantUsing
coreos-installer iso ignition embedto embed a file generated byopenshift-installer, such asbootstrap.ign,master.ignandworker.ign, is unsupported and not recommended.To show the contents of the embedded Ignition config and direct it into a file, run:
# ./coreos-installer iso ignition show /mnt/rhcos-<version>-live.x86_64.iso > mybootstrap.ign# diff -s bootstrap.ign mybootstrap.ignExample output
Files bootstrap.ign and mybootstrap.ign are identicalTo remove the Ignition config and return the ISO to its pristine state so you can reuse it, run:
# ./coreos-installer iso ignition remove /mnt/rhcos-<version>-live.x86_64.isoYou can now embed another Ignition config into the ISO or use the ISO in its pristine state.
7.2.13.3.4. Advanced RHCOS installation reference
This section illustrates the networking configuration and other advanced options that allow you to modify the Red Hat Enterprise Linux CoreOS (RHCOS) manual installation process. The following tables describe the kernel arguments and command-line options you can use with the RHCOS live installer and the coreos-installer command.
Routing and bonding options at RHCOS boot prompt
If you install RHCOS from an ISO image, you can add kernel arguments manually when you boot that image to configure the node’s networking. If no networking arguments are used, the installation defaults to using DHCP.
When adding networking arguments, you must also add the rd.neednet=1 kernel argument.
The following table describes how to use ip=, nameserver=, and bond= kernel arguments for live ISO installs.
Ordering is important when adding kernel arguments: ip=, nameserver=, and then bond=.
Routing and bonding options for ISO
The following table provides examples for configuring networking of your Red Hat Enterprise Linux CoreOS (RHCOS) nodes. These are networking options that are passed to the dracut tool during system boot. For more information about the networking options supported by dracut, see the dracut.cmdline manual page.
| Description | Examples |
|---|---|
|
To configure an IP address, either use DHCP (
|
|
|
Specify multiple network interfaces by specifying multiple |
|
|
Optional: You can configure routes to additional networks by setting an If the additional network gateway is different from the primary network gateway, the default gateway must be the primary network gateway. | To configure the default gateway: To configure the route for the additional network: |
| Disable DHCP on a single interface, such as when there are two or more network interfaces and only one interface is being used. |
|
| You can combine DHCP and static IP configurations on systems with multiple network interfaces. |
|
|
Optional: You can configure VLANs on individual interfaces by using the | To configure a VLAN on a network interface and use a static IP address: To configure a VLAN on a network interface and to use DHCP: |
|
You can provide multiple DNS servers by adding a |
|
|
Optional: Bonding multiple network interfaces to a single interface is supported using the
|
To configure the bonded interface to use DHCP, set the bond’s IP address to To configure the bonded interface to use a static IP address, enter the specific IP address you want and related information. For example: |
|
Optional: You can configure VLANs on bonded interfaces by using the | To configure the bonded interface with a VLAN and to use DHCP: To configure the bonded interface with a VLAN and to use a static IP address: |
|
Optional: Network teaming can be used as an alternative to bonding by using the
Note Teaming is planned to be deprecated when RHCOS switches to an upcoming version of RHEL. For more information, see this Red Hat Knowledgebase Article. | To configure a network team: |
coreos.inst boot options for ISO or PXE install
While you can pass most standard installation boot arguments to the live installer, there are several arguments that are specific to the RHCOS live installer.
- For ISO, these options can be added by interrupting the RHCOS installer.
-
For PXE or iPXE, these options must be added to the
APPENDline before starting the PXE kernel. You cannot interrupt a live PXE install.
The following table shows the RHCOS live installer boot options for ISO and PXE installs.
| Argument | Description |
|---|---|
|
|
Required. The block device on the system to install to. It is recommended to use the full path, such as |
|
| Optional: The URL of the Ignition config to embed into the installed system. If no URL is specified, no Ignition config is embedded. |
|
| Optional: Comma-separated labels of partitions to preserve during the install. Glob-style wildcards are permitted. The specified partitions do not need to exist. |
|
|
Optional: Comma-separated indexes of partitions to preserve during the install. Ranges |
|
|
Optional: Permits the OS image that is specified by |
|
| Optional: Download and install the specified RHCOS image.
|
|
| Optional: The system will not reboot after installing. Once the install finishes, you will receive a prompt that allows you to inspect what is happening during installation. This argument should not be used in production environments and is intended for debugging purposes only. |
|
|
Optional: The Ignition platform ID of the platform the RHCOS image is being installed on. Default is |
|
|
Optional: The URL of the Ignition config for the live boot. For example, this can be used to customize how |
coreos-installer options for ISO install
You can also install RHCOS by invoking the coreos-installer command directly from the command line. The kernel arguments in the previous table provide a shortcut for automatically invoking coreos-installer at boot time, but you can pass similar arguments directly to coreos-installer when running it from a shell prompt.
The following table shows the options and subcommands you can pass to the coreos-installer command from a shell prompt during a live install.
| Command-line options | |
| Option | Description |
|
| Specify the image URL manually. |
|
| Specify a local image file manually. |
|
| Embed an Ignition config from a file. |
|
| Embed an Ignition config from a URL. |
|
|
Digest |
|
| Override the Ignition platform ID. |
|
| Append the default kernel argument. |
|
| Delete the default kernel argument. |
|
| Copy the network configuration from the install environment. Important
The |
|
|
For use with |
|
| Save partitions with this label glob. |
|
| Save partitions with this number or range. |
|
| Force offline installation. |
|
| Skip signature verification. |
|
| Allow Ignition URL without HTTPS or hash. |
|
|
Target CPU architecture. Default is |
|
| Do not clear partition table on error. |
|
| Print help information. |
| Command-line argument | |
| Argument | Description |
|
| The destination device. |
| coreos-installer embedded Ignition commands | |
| Command | Description |
|
| Embed an Ignition config in an ISO image. |
|
| Show the embedded Ignition config from an ISO image. |
|
| Remove the embedded Ignition config from an ISO image. |
| coreos-installer ISO Ignition options | |
| Option | Description |
|
| Overwrite an existing Ignition config. |
|
|
The Ignition config to be used. Default is |
|
| Write the ISO to a new output file. |
|
| Print help information. |
| coreos-installer PXE Ignition commands | |
| Command | Description |
| Note that not all of these options are accepted by all subcommands. | |
|
| Wrap an Ignition config in an image. |
|
| Show the wrapped Ignition config in an image. |
|
|
Show the wrapped Ignition config in an |
| coreos-installer PXE Ignition options | |
| Option | Description |
|
|
The Ignition config to be used. Default is |
|
| Write the ISO to a new output file. |
|
| Print help information. |
7.2.13.4. Updating the bootloader using bootupd
To update the bootloader by using bootupd, you must either install bootupd on RHCOS machines manually or provide a machine config with the enabled systemd unit. Unlike grubby or other bootloader tools, bootupd does not manage kernel space configuration such as passing kernel arguments.
After you have installed bootupd, you can manage it remotely from the OpenShift Container Platform cluster.
It is recommended that you use bootupd only on bare metal or virtualized hypervisor installations, such as for protection against the BootHole vulnerability.
Manual install method
You can manually install bootupd by using the bootctl command-line tool.
Inspect the system status:
# bootupctl statusExample output
Component EFI Installed: grub2-efi-x64-1:2.04-31.fc33.x86_64,shim-x64-15-8.x86_64 Update: At latest version
RHCOS images created without
bootupdinstalled on them require an explicit adoption phase.If the system status is
Adoptable, perform the adoption:# bootupctl adopt-and-updateExample output
Updated: grub2-efi-x64-1:2.04-31.fc33.x86_64,shim-x64-15-8.x86_64If an update is available, apply the update so that the changes take effect on the next reboot:
# bootupctl updateExample output
Updated: grub2-efi-x64-1:2.04-31.fc33.x86_64,shim-x64-15-8.x86_64
Machine config method
Another way to enable bootupd is by providing a machine config.
Provide a machine config file with the enabled
systemdunit, as shown in the following example:Example output
variant: rhcos version: 1.1.0 systemd: units: - name: custom-bootupd-auto.service enabled: true contents: | [Unit] Description=Bootupd automatic update [Service] ExecStart=/usr/bin/bootupctl update RemainAfterExit=yes [Install] WantedBy=multi-user.target
7.2.14. Creating the cluster
To create the OpenShift Container Platform cluster, you wait for the bootstrap process to complete on the machines that you provisioned by using the Ignition config files that you generated with the installation program.
Prerequisites
- Create the required infrastructure for the cluster.
- You obtained the installation program and generated the Ignition config files for your cluster.
- You used the Ignition config files to create RHCOS machines for your cluster.
- Your machines have direct Internet access or have an HTTP or HTTPS proxy available.
Procedure
Monitor the bootstrap process:
$ ./openshift-install --dir <installation_directory> wait-for bootstrap-complete \1 --log-level=info2 Example output
INFO Waiting up to 30m0s for the Kubernetes API at https://api.test.example.com:6443... INFO API v1.20.0 up INFO Waiting up to 30m0s for bootstrapping to complete... INFO It is now safe to remove the bootstrap resourcesThe command succeeds when the Kubernetes API server signals that it has been bootstrapped on the control plane machines.
After bootstrap process is complete, remove the bootstrap machine from the load balancer.
ImportantYou must remove the bootstrap machine from the load balancer at this point. You can also remove or reformat the machine itself.
7.2.15. Logging in to the cluster by using the CLI
You can log in to your cluster as a default system user by exporting the cluster kubeconfig file. The kubeconfig file contains information about the cluster that is used by the CLI to connect a client to the correct cluster and API server. The file is specific to a cluster and is created during OpenShift Container Platform installation.
Prerequisites
- You deployed an OpenShift Container Platform cluster.
-
You installed the
ocCLI.
Procedure
Export the
kubeadmincredentials:$ export KUBECONFIG=<installation_directory>/auth/kubeconfig1 - 1
- For
<installation_directory>, specify the path to the directory that you stored the installation files in.
Verify you can run
occommands successfully using the exported configuration:$ oc whoamiExample output
system:admin
7.2.16. Approving the certificate signing requests for your machines
When you add machines to a cluster, two pending certificate signing requests (CSRs) are generated for each machine that you added. You must confirm that these CSRs are approved or, if necessary, approve them yourself. The client requests must be approved first, followed by the server requests.
Prerequisites
- You added machines to your cluster.
Procedure
Confirm that the cluster recognizes the machines:
$ oc get nodesExample output
NAME STATUS ROLES AGE VERSION master-0 Ready master 63m v1.20.0 master-1 Ready master 63m v1.20.0 master-2 Ready master 64m v1.20.0The output lists all of the machines that you created.
NoteThe preceding output might not include the compute nodes, also known as worker nodes, until some CSRs are approved.
Review the pending CSRs and ensure that you see the client requests with the
PendingorApprovedstatus for each machine that you added to the cluster:$ oc get csrExample output
NAME AGE REQUESTOR CONDITION csr-8b2br 15m system:serviceaccount:openshift-machine-config-operator:node-bootstrapper Pending csr-8vnps 15m system:serviceaccount:openshift-machine-config-operator:node-bootstrapper Pending ...In this example, two machines are joining the cluster. You might see more approved CSRs in the list.
If the CSRs were not approved, after all of the pending CSRs for the machines you added are in
Pendingstatus, approve the CSRs for your cluster machines:NoteBecause the CSRs rotate automatically, approve your CSRs within an hour of adding the machines to the cluster. If you do not approve them within an hour, the certificates will rotate, and more than two certificates will be present for each node. You must approve all of these certificates. Once the client CSR is approved, the Kubelet creates a secondary CSR for the serving certificate, which requires manual approval. Then, subsequent serving certificate renewal requests are automatically approved by the
machine-approverif the Kubelet requests a new certificate with identical parameters.NoteFor clusters running on platforms that are not machine API enabled, such as bare metal and other user-provisioned infrastructure, you must implement a method of automatically approving the kubelet serving certificate requests (CSRs). If a request is not approved, then the
oc exec,oc rsh, andoc logscommands cannot succeed, because a serving certificate is required when the API server connects to the kubelet. Any operation that contacts the Kubelet endpoint requires this certificate approval to be in place. The method must watch for new CSRs, confirm that the CSR was submitted by thenode-bootstrapperservice account in thesystem:nodeorsystem:admingroups, and confirm the identity of the node.To approve them individually, run the following command for each valid CSR:
$ oc adm certificate approve <csr_name>1 - 1
<csr_name>is the name of a CSR from the list of current CSRs.
To approve all pending CSRs, run the following command:
$ oc get csr -o go-template='{{range .items}}{{if not .status}}{{.metadata.name}}{{"\n"}}{{end}}{{end}}' | xargs --no-run-if-empty oc adm certificate approveNoteSome Operators might not become available until some CSRs are approved.
Now that your client requests are approved, you must review the server requests for each machine that you added to the cluster:
$ oc get csrExample output
NAME AGE REQUESTOR CONDITION csr-bfd72 5m26s system:node:ip-10-0-50-126.us-east-2.compute.internal Pending csr-c57lv 5m26s system:node:ip-10-0-95-157.us-east-2.compute.internal Pending ...If the remaining CSRs are not approved, and are in the
Pendingstatus, approve the CSRs for your cluster machines:To approve them individually, run the following command for each valid CSR:
$ oc adm certificate approve <csr_name>1 - 1
<csr_name>is the name of a CSR from the list of current CSRs.
To approve all pending CSRs, run the following command:
$ oc get csr -o go-template='{{range .items}}{{if not .status}}{{.metadata.name}}{{"\n"}}{{end}}{{end}}' | xargs oc adm certificate approve
After all client and server CSRs have been approved, the machines have the
Readystatus. Verify this by running the following command:$ oc get nodesExample output
NAME STATUS ROLES AGE VERSION master-0 Ready master 73m v1.20.0 master-1 Ready master 73m v1.20.0 master-2 Ready master 74m v1.20.0 worker-0 Ready worker 11m v1.20.0 worker-1 Ready worker 11m v1.20.0NoteIt can take a few minutes after approval of the server CSRs for the machines to transition to the
Readystatus.
Additional information
- For more information on CSRs, see Certificate Signing Requests.
7.2.17. Initial Operator configuration
After the control plane initializes, you must immediately configure some Operators so that they all become available.
Prerequisites
- Your control plane has initialized.
Procedure
Watch the cluster components come online:
$ watch -n5 oc get clusteroperatorsExample output
NAME VERSION AVAILABLE PROGRESSING DEGRADED SINCE authentication 4.7.0 True False False 3h56m baremetal 4.7.0 True False False 29h cloud-credential 4.7.0 True False False 29h cluster-autoscaler 4.7.0 True False False 29h config-operator 4.7.0 True False False 6h39m console 4.7.0 True False False 3h59m csi-snapshot-controller 4.7.0 True False False 4h12m dns 4.7.0 True False False 4h15m etcd 4.7.0 True False False 29h image-registry 4.7.0 True False False 3h59m ingress 4.7.0 True False False 4h30m insights 4.7.0 True False False 29h kube-apiserver 4.7.0 True False False 29h kube-controller-manager 4.7.0 True False False 29h kube-scheduler 4.7.0 True False False 29h kube-storage-version-migrator 4.7.0 True False False 4h2m machine-api 4.7.0 True False False 29h machine-approver 4.7.0 True False False 6h34m machine-config 4.7.0 True False False 3h56m marketplace 4.7.0 True False False 4h2m monitoring 4.7.0 True False False 6h31m network 4.7.0 True False False 29h node-tuning 4.7.0 True False False 4h30m openshift-apiserver 4.7.0 True False False 3h56m openshift-controller-manager 4.7.0 True False False 4h36m openshift-samples 4.7.0 True False False 4h30m operator-lifecycle-manager 4.7.0 True False False 29h operator-lifecycle-manager-catalog 4.7.0 True False False 29h operator-lifecycle-manager-packageserver 4.7.0 True False False 3h59m service-ca 4.7.0 True False False 29h storage 4.7.0 True False False 4h30m- Configure the Operators that are not available.
7.2.17.1. Image registry removed during installation
On platforms that do not provide shareable object storage, the OpenShift Image Registry Operator bootstraps itself as Removed. This allows openshift-installer to complete installations on these platform types.
After installation, you must edit the Image Registry Operator configuration to switch the managementState from Removed to Managed.
The Prometheus console provides an ImageRegistryRemoved alert, for example:
"Image Registry has been removed. ImageStreamTags, BuildConfigs and DeploymentConfigs which reference ImageStreamTags may not work as expected. Please configure storage and update the config to Managed state by editing configs.imageregistry.operator.openshift.io."
7.2.17.2. Image registry storage configuration
The Image Registry Operator is not initially available for platforms that do not provide default storage. After installation, you must configure your registry to use storage so that the Registry Operator is made available.
Instructions are shown for configuring a persistent volume, which is required for production clusters. Where applicable, instructions are shown for configuring an empty directory as the storage location, which is available for only non-production clusters.
Additional instructions are provided for allowing the image registry to use block storage types by using the Recreate rollout strategy during upgrades.
7.2.17.3. Configuring block registry storage
To allow the image registry to use block storage types during upgrades as a cluster administrator, you can use the Recreate rollout strategy.
Block storage volumes are supported but not recommended for use with the image registry on production clusters. An installation where the registry is configured on block storage is not highly available because the registry cannot have more than one replica.
Procedure
To set the image registry storage as a block storage type, patch the registry so that it uses the
Recreaterollout strategy and runs with only one (1) replica:$ oc patch config.imageregistry.operator.openshift.io/cluster --type=merge -p '{"spec":{"rolloutStrategy":"Recreate","replicas":1}}'- Provision the PV for the block storage device, and create a PVC for that volume. The requested block volume uses the ReadWriteOnce (RWO) access mode.
- Edit the registry configuration so that it references the correct PVC.
7.2.18. Completing installation on user-provisioned infrastructure
After you complete the Operator configuration, you can finish installing the cluster on infrastructure that you provide.
Prerequisites
- Your control plane has initialized.
- You have completed the initial Operator configuration.
Procedure
Confirm that all the cluster components are online with the following command:
$ watch -n5 oc get clusteroperatorsExample output
NAME VERSION AVAILABLE PROGRESSING DEGRADED SINCE authentication 4.7.0 True False False 3h56m baremetal 4.7.0 True False False 29h cloud-credential 4.7.0 True False False 29h cluster-autoscaler 4.7.0 True False False 29h config-operator 4.7.0 True False False 6h39m console 4.7.0 True False False 3h59m csi-snapshot-controller 4.7.0 True False False 4h12m dns 4.7.0 True False False 4h15m etcd 4.7.0 True False False 29h image-registry 4.7.0 True False False 3h59m ingress 4.7.0 True False False 4h30m insights 4.7.0 True False False 29h kube-apiserver 4.7.0 True False False 29h kube-controller-manager 4.7.0 True False False 29h kube-scheduler 4.7.0 True False False 29h kube-storage-version-migrator 4.7.0 True False False 4h2m machine-api 4.7.0 True False False 29h machine-approver 4.7.0 True False False 6h34m machine-config 4.7.0 True False False 3h56m marketplace 4.7.0 True False False 4h2m monitoring 4.7.0 True False False 6h31m network 4.7.0 True False False 29h node-tuning 4.7.0 True False False 4h30m openshift-apiserver 4.7.0 True False False 3h56m openshift-controller-manager 4.7.0 True False False 4h36m openshift-samples 4.7.0 True False False 4h30m operator-lifecycle-manager 4.7.0 True False False 29h operator-lifecycle-manager-catalog 4.7.0 True False False 29h operator-lifecycle-manager-packageserver 4.7.0 True False False 3h59m service-ca 4.7.0 True False False 29h storage 4.7.0 True False False 4h30mAlternatively, the following command notifies you when all of the clusters are available. It also retrieves and displays credentials:
$ ./openshift-install --dir <installation_directory> wait-for install-complete1 - 1
- For
<installation_directory>, specify the path to the directory that you stored the installation files in.
Example output
INFO Waiting up to 30m0s for the cluster to initialize...The command succeeds when the Cluster Version Operator finishes deploying the OpenShift Container Platform cluster from Kubernetes API server.
Important-
The Ignition config files that the installation program generates contain certificates that expire after 24 hours, which are then renewed at that time. If the cluster is shut down before renewing the certificates and the cluster is later restarted after the 24 hours have elapsed, the cluster automatically recovers the expired certificates. The exception is that you must manually approve the pending
node-bootstrappercertificate signing requests (CSRs) to recover kubelet certificates. See the documentation for Recovering from expired control plane certificates for more information. - It is recommended that you use Ignition config files within 12 hours after they are generated because the 24-hour certificate rotates from 16 to 22 hours after the cluster is installed. By using the Ignition config files within 12 hours, you can avoid installation failure if the certificate update runs during installation.
Confirm that the Kubernetes API server is communicating with the pods.
To view a list of all pods, use the following command:
$ oc get pods --all-namespacesExample output
NAMESPACE NAME READY STATUS RESTARTS AGE openshift-apiserver-operator openshift-apiserver-operator-85cb746d55-zqhs8 1/1 Running 1 9m openshift-apiserver apiserver-67b9g 1/1 Running 0 3m openshift-apiserver apiserver-ljcmx 1/1 Running 0 1m openshift-apiserver apiserver-z25h4 1/1 Running 0 2m openshift-authentication-operator authentication-operator-69d5d8bf84-vh2n8 1/1 Running 0 5m ...View the logs for a pod that is listed in the output of the previous command by using the following command:
$ oc logs <pod_name> -n <namespace>1 - 1
- Specify the pod name and namespace, as shown in the output of the previous command.
If the pod logs display, the Kubernetes API server can communicate with the cluster machines.
For an installation with Fibre Channel Protocol (FCP), additional steps are required to enable multipathing. Do not enable multipathing during installation.
See "Enabling multipathing with kernel arguments on RHCOS" in the Post-installation configuration documentation for more information.
7.2.19. Telemetry access for OpenShift Container Platform
In OpenShift Container Platform 4.7, the Telemetry service, which runs by default to provide metrics about cluster health and the success of updates, requires internet access. If your cluster is connected to the internet, Telemetry runs automatically, and your cluster is registered to OpenShift Cluster Manager.
After you confirm that your OpenShift Cluster Manager inventory is correct, either maintained automatically by Telemetry or manually by using OpenShift Cluster Manager, use subscription watch to track your OpenShift Container Platform subscriptions at the account or multi-cluster level.
7.2.20. Next steps
- Customize your cluster.
- If necessary, you can opt out of remote health reporting.
- Set up your registry and configure registry storage.
7.3. Installing a cluster on bare metal in a restricted network
In OpenShift Container Platform version 4.7, you can install a cluster on bare metal infrastructure that you provision in a restricted network.
While you might be able to follow this procedure to deploy a cluster on virtualized or cloud environments, you must be aware of additional considerations for non-bare metal platforms. Review the information in the guidelines for deploying OpenShift Container Platform on non-tested platforms before you attempt to install an OpenShift Container Platform cluster in such an environment.
7.3.1. Prerequisites
Create a registry on your mirror host and obtain the
imageContentSourcesdata for your version of OpenShift Container Platform.ImportantBecause the installation media is on the mirror host, you can use that computer to complete all installation steps.
- Provision persistent storage for your cluster. To deploy a private image registry, your storage must provide ReadWriteMany access modes.
- Review details about the OpenShift Container Platform installation and update processes.
If you use a firewall and plan to use telemetry, you must configure the firewall to allow the sites that your cluster requires access to.
NoteBe sure to also review this site list if you are configuring a proxy.
7.3.2. About installations in restricted networks
In OpenShift Container Platform 4.7, you can perform an installation that does not require an active connection to the Internet to obtain software components. Restricted network installations can be completed using installer-provisioned infrastructure or user-provisioned infrastructure, depending on the cloud platform to which you are installing the cluster.
If you choose to perform a restricted network installation on a cloud platform, you still require access to its cloud APIs. Some cloud functions, like Amazon Web Service’s Route 53 DNS and IAM services, require internet access. Depending on your network, you might require less Internet access for an installation on bare metal hardware or on VMware vSphere.
To complete a restricted network installation, you must create a registry that mirrors the contents of the OpenShift Container Platform registry and contains the installation media. You can create this registry on a mirror host, which can access both the Internet and your closed network, or by using other methods that meet your restrictions.
Because of the complexity of the configuration for user-provisioned installations, consider completing a standard user-provisioned infrastructure installation before you attempt a restricted network installation using user-provisioned infrastructure. Completing this test installation might make it easier to isolate and troubleshoot any issues that might arise during your installation in a restricted network.
7.3.2.1. Additional limits
Clusters in restricted networks have the following additional limitations and restrictions:
-
The
ClusterVersionstatus includes anUnable to retrieve available updateserror. - By default, you cannot use the contents of the Developer Catalog because you cannot access the required image stream tags.
7.3.3. Internet access for OpenShift Container Platform
In OpenShift Container Platform 4.7, you require access to the Internet to obtain the images that are necessary to install your cluster.
You must have Internet access to:
- Access OpenShift Cluster Manager to download the installation program and perform subscription management. If the cluster has internet access and you do not disable Telemetry, that service automatically entitles your cluster.
- Access Quay.io to obtain the packages that are required to install your cluster.
- Obtain the packages that are required to perform cluster updates.
If your cluster cannot have direct Internet access, you can perform a restricted network installation on some types of infrastructure that you provision. During that process, you download the content that is required and use it to populate a mirror registry with the packages that you need to install a cluster and generate the installation program. With some installation types, the environment that you install your cluster in will not require Internet access. Before you update the cluster, you update the content of the mirror registry.
7.3.4. Machine requirements for a cluster with user-provisioned infrastructure
For a cluster that contains user-provisioned infrastructure, you must deploy all of the required machines.
7.3.4.1. Required machines
The smallest OpenShift Container Platform clusters require the following hosts:
- One temporary bootstrap machine
- Three control plane, or master, machines
- At least two compute machines, which are also known as worker machines. If you are running a three-node cluster, running zero compute machines is supported. Running one compute machine is not supported.
The cluster requires the bootstrap machine to deploy the OpenShift Container Platform cluster on the three control plane machines. You can remove the bootstrap machine after you install the cluster.
To maintain high availability of your cluster, use separate physical hosts for these cluster machines.
The bootstrap and control plane machines must use Red Hat Enterprise Linux CoreOS (RHCOS) as the operating system. However, the compute machines can choose between Red Hat Enterprise Linux CoreOS (RHCOS) or Red Hat Enterprise Linux (RHEL) 7.9.
Note that RHCOS is based on Red Hat Enterprise Linux (RHEL) 8 and inherits all of its hardware certifications and requirements. See Red Hat Enterprise Linux technology capabilities and limits.
7.3.4.2. Network connectivity requirements
All the Red Hat Enterprise Linux CoreOS (RHCOS) machines require network in initramfs during boot to fetch Ignition config files from the Machine Config Server. During the initial boot, the machines require either a DHCP server or that static IP addresses be set in order to establish a network connection to download their Ignition config files. Additionally, each OpenShift Container Platform node in the cluster must have access to a Network Time Protocol (NTP) server. If a DHCP server provides NTP servers information, the chrony time service on the Red Hat Enterprise Linux CoreOS (RHCOS) machines read the information and can sync the clock with the NTP servers.
7.3.4.3. Minimum resource requirements
Each cluster machine must meet the following minimum requirements:
| Machine | Operating System | CPU [1] | RAM | Storage | IOPS [2] |
|---|---|---|---|---|---|
| Bootstrap | RHCOS | 4 | 16 GB | 100 GB | 300 |
| Control plane | RHCOS | 4 | 16 GB | 100 GB | 300 |
| Compute | RHCOS or RHEL 7.9 | 2 | 8 GB | 100 GB | 300 |
- One CPU is equivalent to one physical core when simultaneous multithreading (SMT), or hyperthreading, is not enabled. When enabled, use the following formula to calculate the corresponding ratio: (threads per core × cores) × sockets = CPUs.
- OpenShift Container Platform and Kubernetes are sensitive to disk performance, and faster storage is recommended, particularly for etcd on the control plane nodes which require a 10 ms p99 fsync duration. Note that on many cloud platforms, storage size and IOPS scale together, so you might need to over-allocate storage volume to obtain sufficient performance.
7.3.4.4. Certificate signing requests management
Because your cluster has limited access to automatic machine management when you use infrastructure that you provision, you must provide a mechanism for approving cluster certificate signing requests (CSRs) after installation. The kube-controller-manager only approves the kubelet client CSRs. The machine-approver cannot guarantee the validity of a serving certificate that is requested by using kubelet credentials because it cannot confirm that the correct machine issued the request. You must determine and implement a method of verifying the validity of the kubelet serving certificate requests and approving them.
7.3.5. Creating the user-provisioned infrastructure
Before you deploy an OpenShift Container Platform cluster that uses user-provisioned infrastructure, you must create the underlying infrastructure.
Prerequisites
- Review the OpenShift Container Platform 4.x Tested Integrations page before you create the supporting infrastructure for your cluster.
Procedure
- Configure DHCP or set static IP addresses on each node.
- Provision the required load balancers.
- Configure the ports for your machines.
- Configure DNS.
- Ensure network connectivity.
7.3.5.1. Networking requirements for user-provisioned infrastructure
All the Red Hat Enterprise Linux CoreOS (RHCOS) machines require network in initramfs during boot to fetch Ignition config from the machine config server.
During the initial boot, the machines require either a DHCP server or that static IP addresses be set on each host in the cluster to establish a network connection, which allows them to download their Ignition config files.
It is recommended to use the DHCP server to manage the machines for the cluster long-term. Ensure that the DHCP server is configured to provide persistent IP addresses and host names to the cluster machines.
The Kubernetes API server must be able to resolve the node names of the cluster machines. If the API servers and worker nodes are in different zones, you can configure a default DNS search zone to allow the API server to resolve the node names. Another supported approach is to always refer to hosts by their fully-qualified domain names in both the node objects and all DNS requests.
You must configure the network connectivity between machines to allow cluster components to communicate. Each machine must be able to resolve the host names of all other machines in the cluster.
| Protocol | Port | Description |
|---|---|---|
| ICMP | N/A | Network reachability tests |
| TCP |
| Metrics |
|
|
Host level services, including the node exporter on ports | |
|
| The default ports that Kubernetes reserves | |
|
| openshift-sdn | |
| UDP |
| VXLAN and Geneve |
|
| VXLAN and Geneve | |
|
|
Host level services, including the node exporter on ports | |
| TCP/UDP |
| Kubernetes node port |
| Protocol | Port | Description |
|---|---|---|
| TCP |
| Kubernetes API |
| Protocol | Port | Description |
|---|---|---|
| TCP |
| etcd server and peer ports |
Network topology requirements
The infrastructure that you provision for your cluster must meet the following network topology requirements.
Load balancers
Before you install OpenShift Container Platform, you must provision two load balancers that meet the following requirements:
API load balancer: Provides a common endpoint for users, both human and machine, to interact with and configure the platform. Configure the following conditions:
- Layer 4 load balancing only. This can be referred to as Raw TCP, SSL Passthrough, or SSL Bridge mode. If you use SSL Bridge mode, you must enable Server Name Indication (SNI) for the API routes.
- A stateless load balancing algorithm. The options vary based on the load balancer implementation.
ImportantDo not configure session persistence for an API load balancer.
Configure the following ports on both the front and back of the load balancers:
Expand Table 7.34. API load balancer Port Back-end machines (pool members) Internal External Description 6443Bootstrap and control plane. You remove the bootstrap machine from the load balancer after the bootstrap machine initializes the cluster control plane. You must configure the
/readyzendpoint for the API server health check probe.X
X
Kubernetes API server
22623Bootstrap and control plane. You remove the bootstrap machine from the load balancer after the bootstrap machine initializes the cluster control plane.
X
Machine config server
NoteThe load balancer must be configured to take a maximum of 30 seconds from the time the API server turns off the
/readyzendpoint to the removal of the API server instance from the pool. Within the time frame after/readyzreturns an error or becomes healthy, the endpoint must have been removed or added. Probing every 5 or 10 seconds, with two successful requests to become healthy and three to become unhealthy, are well-tested values.Application Ingress load balancer: Provides an Ingress point for application traffic flowing in from outside the cluster. Configure the following conditions:
- Layer 4 load balancing only. This can be referred to as Raw TCP, SSL Passthrough, or SSL Bridge mode. If you use SSL Bridge mode, you must enable Server Name Indication (SNI) for the Ingress routes.
- A connection-based or session-based persistence is recommended, based on the options available and types of applications that will be hosted on the platform.
Configure the following ports on both the front and back of the load balancers:
Expand Table 7.35. Application Ingress load balancer Port Back-end machines (pool members) Internal External Description 443The machines that run the Ingress router pods, compute, or worker, by default.
X
X
HTTPS traffic
80The machines that run the Ingress router pods, compute, or worker, by default.
X
X
HTTP traffic
If the true IP address of the client can be seen by the load balancer, enabling source IP-based session persistence can improve performance for applications that use end-to-end TLS encryption.
A working configuration for the Ingress router is required for an OpenShift Container Platform cluster. You must configure the Ingress router after the control plane initializes.
NTP configuration
OpenShift Container Platform clusters are configured to use a public Network Time Protocol (NTP) server by default. If you want to use a local enterprise NTP server, or if your cluster is being deployed in a disconnected network, you can configure the cluster to use a specific time server. For more information, see the documentation for Configuring chrony time service.
If a DHCP server provides NTP server information, the chrony time service on the Red Hat Enterprise Linux CoreOS (RHCOS) machines read the information and can sync the clock with the NTP servers.
7.3.5.2. User-provisioned DNS requirements
DNS is used for name resolution and reverse name resolution. DNS A/AAAA or CNAME records are used for name resolution and PTR records are used for reverse name resolution. The reverse records are important because Red Hat Enterprise Linux CoreOS (RHCOS) uses the reverse records to set the host name for all the nodes. Additionally, the reverse records are used to generate the certificate signing requests (CSR) that OpenShift Container Platform needs to operate.
The following DNS records are required for an OpenShift Container Platform cluster that uses user-provisioned infrastructure. In each record, <cluster_name> is the cluster name and <base_domain> is the cluster base domain that you specify in the install-config.yaml file. A complete DNS record takes the form: <component>.<cluster_name>.<base_domain>..
| Component | Record | Description |
|---|---|---|
| Kubernetes API |
| Add a DNS A/AAAA or CNAME record, and a DNS PTR record, to identify the load balancer for the control plane machines. These records must be resolvable by both clients external to the cluster and from all the nodes within the cluster. |
|
| Add a DNS A/AAAA or CNAME record, and a DNS PTR record, to identify the load balancer for the control plane machines. These records must be resolvable from all the nodes within the cluster. Important The API server must be able to resolve the worker nodes by the host names that are recorded in Kubernetes. If the API server cannot resolve the node names, then proxied API calls can fail, and you cannot retrieve logs from pods. | |
| Routes |
| Add a wildcard DNS A/AAAA or CNAME record that refers to the load balancer that targets the machines that run the Ingress router pods, which are the worker nodes by default. These records must be resolvable by both clients external to the cluster and from all the nodes within the cluster. |
| Bootstrap |
| Add a DNS A/AAAA or CNAME record, and a DNS PTR record, to identify the bootstrap machine. These records must be resolvable by the nodes within the cluster. |
| Master hosts |
| DNS A/AAAA or CNAME records and DNS PTR records to identify each machine for the control plane nodes (also known as the master nodes). These records must be resolvable by the nodes within the cluster. |
| Worker hosts |
| Add DNS A/AAAA or CNAME records and DNS PTR records to identify each machine for the worker nodes. These records must be resolvable by the nodes within the cluster. |
You can use the nslookup <hostname> command to verify name resolution. You can use the dig -x <ip_address> command to verify reverse name resolution for the PTR records.
The following example of a BIND zone file shows sample A records for name resolution. The purpose of the example is to show the records that are needed. The example is not meant to provide advice for choosing one name resolution service over another.
Example 7.5. Sample DNS zone database
$TTL 1W
@ IN SOA ns1.example.com. root (
2019070700 ; serial
3H ; refresh (3 hours)
30M ; retry (30 minutes)
2W ; expiry (2 weeks)
1W ) ; minimum (1 week)
IN NS ns1.example.com.
IN MX 10 smtp.example.com.
;
;
ns1 IN A 192.168.1.5
smtp IN A 192.168.1.5
;
helper IN A 192.168.1.5
helper.ocp4 IN A 192.168.1.5
;
; The api identifies the IP of your load balancer.
api.ocp4 IN A 192.168.1.5
api-int.ocp4 IN A 192.168.1.5
;
; The wildcard also identifies the load balancer.
*.apps.ocp4 IN A 192.168.1.5
;
; Create an entry for the bootstrap host.
bootstrap.ocp4 IN A 192.168.1.96
;
; Create entries for the master hosts.
master0.ocp4 IN A 192.168.1.97
master1.ocp4 IN A 192.168.1.98
master2.ocp4 IN A 192.168.1.99
;
; Create entries for the worker hosts.
worker0.ocp4 IN A 192.168.1.11
worker1.ocp4 IN A 192.168.1.7
;
;EOFThe following example BIND zone file shows sample PTR records for reverse name resolution.
Example 7.6. Sample DNS zone database for reverse records
$TTL 1W
@ IN SOA ns1.example.com. root (
2019070700 ; serial
3H ; refresh (3 hours)
30M ; retry (30 minutes)
2W ; expiry (2 weeks)
1W ) ; minimum (1 week)
IN NS ns1.example.com.
;
; The syntax is "last octet" and the host must have an FQDN
; with a trailing dot.
97 IN PTR master0.ocp4.example.com.
98 IN PTR master1.ocp4.example.com.
99 IN PTR master2.ocp4.example.com.
;
96 IN PTR bootstrap.ocp4.example.com.
;
5 IN PTR api.ocp4.example.com.
5 IN PTR api-int.ocp4.example.com.
;
11 IN PTR worker0.ocp4.example.com.
7 IN PTR worker1.ocp4.example.com.
;
;EOFFor clusters using installer-provisioned infrastructure, only the DNS records must be added.
7.3.6. Generating an SSH private key and adding it to the agent
If you want to perform installation debugging or disaster recovery on your cluster, you must provide an SSH key to both your ssh-agent and the installation program. You can use this key to access the bootstrap machine in a public cluster to troubleshoot installation issues.
In a production environment, you require disaster recovery and debugging.
You can use this key to SSH into the master nodes as the user core. When you deploy the cluster, the key is added to the core user’s ~/.ssh/authorized_keys list.
You must use a local key, not one that you configured with platform-specific approaches such as AWS key pairs.
Procedure
If you do not have an SSH key that is configured for password-less authentication on your computer, create one. For example, on a computer that uses a Linux operating system, run the following command:
$ ssh-keygen -t ed25519 -N '' \ -f <path>/<file_name>1 - 1
- Specify the path and file name, such as
~/.ssh/id_rsa, of the new SSH key. If you have an existing key pair, ensure your public key is in the your~/.sshdirectory.
Running this command generates an SSH key that does not require a password in the location that you specified.
NoteIf you plan to install an OpenShift Container Platform cluster that uses FIPS Validated / Modules in Process cryptographic libraries on the
x86_64architecture, do not create a key that uses theed25519algorithm. Instead, create a key that uses thersaorecdsaalgorithm.Start the
ssh-agentprocess as a background task:$ eval "$(ssh-agent -s)"Example output
Agent pid 31874NoteIf your cluster is in FIPS mode, only use FIPS-compliant algorithms to generate the SSH key. The key must be either RSA or ECDSA.
Add your SSH private key to the
ssh-agent:$ ssh-add <path>/<file_name>1 Example output
Identity added: /home/<you>/<path>/<file_name> (<computer_name>)- 1
- Specify the path and file name for your SSH private key, such as
~/.ssh/id_rsa
Next steps
- When you install OpenShift Container Platform, provide the SSH public key to the installation program. If you install a cluster on infrastructure that you provision, you must provide this key to your cluster’s machines.
7.3.7. Manually creating the installation configuration file
For installations of OpenShift Container Platform that use user-provisioned infrastructure, you manually generate your installation configuration file.
Prerequisites
- Obtain the OpenShift Container Platform installation program and the access token for your cluster.
-
Obtain the
imageContentSourcessection from the output of the command to mirror the repository. - Obtain the contents of the certificate for your mirror registry.
Procedure
Create an installation directory to store your required installation assets in:
$ mkdir <installation_directory>ImportantYou must create a directory. Some installation assets, like bootstrap X.509 certificates have short expiration intervals, so you must not reuse an installation directory. If you want to reuse individual files from another cluster installation, you can copy them into your directory. However, the file names for the installation assets might change between releases. Use caution when copying installation files from an earlier OpenShift Container Platform version.
Customize the following
install-config.yamlfile template and save it in the<installation_directory>.NoteYou must name this configuration file
install-config.yaml.-
Unless you use a registry that RHCOS trusts by default, such as
docker.io, you must provide the contents of the certificate for your mirror repository in theadditionalTrustBundlesection. In most cases, you must provide the certificate for your mirror. -
You must include the
imageContentSourcessection from the output of the command to mirror the repository.
-
Unless you use a registry that RHCOS trusts by default, such as
Back up the
install-config.yamlfile so that you can use it to install multiple clusters.ImportantThe
install-config.yamlfile is consumed during the next step of the installation process. You must back it up now.
7.3.7.1. Installation configuration parameters
Before you deploy an OpenShift Container Platform cluster, you provide parameter values to describe your account on the cloud platform that hosts your cluster and optionally customize your cluster’s platform. When you create the install-config.yaml installation configuration file, you provide values for the required parameters through the command line. If you customize your cluster, you can modify the install-config.yaml file to provide more details about the platform.
After installation, you cannot modify these parameters in the install-config.yaml file.
The openshift-install command does not validate field names for parameters. If an incorrect name is specified, the related file or object is not created, and no error is reported. Ensure that the field names for any parameters that are specified are correct.
7.3.7.1.1. Required configuration parameters
Required installation configuration parameters are described in the following table:
| Parameter | Description | Values |
|---|---|---|
|
|
The API version for the | String |
|
|
The base domain of your cloud provider. The base domain is used to create routes to your OpenShift Container Platform cluster components. The full DNS name for your cluster is a combination of the |
A fully-qualified domain or subdomain name, such as |
|
|
Kubernetes resource | Object |
|
|
The name of the cluster. DNS records for the cluster are all subdomains of |
String of lowercase letters, hyphens ( |
|
|
The configuration for the specific platform upon which to perform the installation: | Object |
|
| Get a pull secret from the Red Hat OpenShift Cluster Manager to authenticate downloading container images for OpenShift Container Platform components from services such as Quay.io. |
|
7.3.7.1.2. Network configuration parameters
You can customize your installation configuration based on the requirements of your existing network infrastructure. For example, you can expand the IP address block for the cluster network or provide different IP address blocks than the defaults.
Only IPv4 addresses are supported.
| Parameter | Description | Values |
|---|---|---|
|
| The configuration for the cluster network. | Object Note
You cannot modify parameters specified by the |
|
| The cluster network provider Container Network Interface (CNI) plug-in to install. |
Either |
|
| The IP address blocks for pods.
The default value is If you specify multiple IP address blocks, the blocks must not overlap. | An array of objects. For example: |
|
|
Required if you use An IPv4 network. |
An IP address block in Classless Inter-Domain Routing (CIDR) notation. The prefix length for an IPv4 block is between |
|
|
The subnet prefix length to assign to each individual node. For example, if | A subnet prefix.
The default value is |
|
|
The IP address block for services. The default value is The OpenShift SDN and OVN-Kubernetes network providers support only a single IP address block for the service network. | An array with an IP address block in CIDR format. For example: |
|
| The IP address blocks for machines. If you specify multiple IP address blocks, the blocks must not overlap. | An array of objects. For example: |
|
|
Required if you use | An IP network block in CIDR notation.
For example, Note
Set the |
7.3.7.1.3. Optional configuration parameters
Optional installation configuration parameters are described in the following table:
| Parameter | Description | Values |
|---|---|---|
|
| A PEM-encoded X.509 certificate bundle that is added to the nodes' trusted certificate store. This trust bundle may also be used when a proxy has been configured. | String |
|
| The configuration for the machines that comprise the compute nodes. |
Array of |
|
|
Determines the instruction set architecture of the machines in the pool. Currently, heteregeneous clusters are not supported, so all pools must specify the same architecture. Valid values are | String |
|
|
Whether to enable or disable simultaneous multithreading, or Important If you disable simultaneous multithreading, ensure that your capacity planning accounts for the dramatically decreased machine performance. |
|
|
|
Required if you use |
|
|
|
Required if you use |
|
|
| The number of compute machines, which are also known as worker machines, to provision. |
A positive integer greater than or equal to |
|
| The configuration for the machines that comprise the control plane. |
Array of |
|
|
Determines the instruction set architecture of the machines in the pool. Currently, heterogeneous clusters are not supported, so all pools must specify the same architecture. Valid values are | String |
|
|
Whether to enable or disable simultaneous multithreading, or Important If you disable simultaneous multithreading, ensure that your capacity planning accounts for the dramatically decreased machine performance. |
|
|
|
Required if you use |
|
|
|
Required if you use |
|
|
| The number of control plane machines to provision. |
The only supported value is |
|
| The Cloud Credential Operator (CCO) mode. If no mode is specified, the CCO dynamically tries to determine the capabilities of the provided credentials, with a preference for mint mode on the platforms where multiple modes are supported. Note Not all CCO modes are supported for all cloud providers. For more information on CCO modes, see the Cloud Credential Operator entry in the Cluster Operators reference content. |
|
|
|
Enable or disable FIPS mode. The default is Important
The use of FIPS Validated / Modules in Process cryptographic libraries is only supported on OpenShift Container Platform deployments on the Note If you are using Azure File storage, you cannot enable FIPS mode. |
|
|
| Sources and repositories for the release-image content. |
Array of objects. Includes a |
|
|
Required if you use | String |
|
| Specify one or more repositories that may also contain the same images. | Array of strings |
|
| How to publish or expose the user-facing endpoints of your cluster, such as the Kubernetes API, OpenShift routes. |
Setting this field to Important
If the value of the field is set to |
|
| The SSH key or keys to authenticate access your cluster machines. Note
For production OpenShift Container Platform clusters on which you want to perform installation debugging or disaster recovery, specify an SSH key that your | One or more keys. For example: |
7.3.7.2. Sample install-config.yaml file for bare metal
You can customize the install-config.yaml file to specify more details about your OpenShift Container Platform cluster’s platform or modify the values of the required parameters.
apiVersion: v1
baseDomain: example.com
compute:
- hyperthreading: Enabled
name: worker
replicas: 0
controlPlane:
hyperthreading: Enabled
name: master
replicas: 3
metadata:
name: test
networking:
clusterNetwork:
- cidr: 10.128.0.0/14
hostPrefix: 23
networkType: OpenShiftSDN
serviceNetwork:
- 172.30.0.0/16
platform:
none: {}
fips: false
pullSecret: '{"auths":{"<local_registry>": {"auth": "<credentials>","email": "you@example.com"}}}'
sshKey: 'ssh-ed25519 AAAA...'
additionalTrustBundle: |
-----BEGIN CERTIFICATE-----
ZZZZZZZZZZZZZZZZZZZZZZZZZZZZZZZZZZZZZZZZZZZZZZZZZZZZZZZZZZZZZZZZ
-----END CERTIFICATE-----
imageContentSources:
- mirrors:
- <local_registry>/<local_repository_name>/release
source: quay.io/openshift-release-dev/ocp-release
- mirrors:
- <local_registry>/<local_repository_name>/release
source: quay.io/openshift-release-dev/ocp-v4.0-art-dev- 1
- The base domain of the cluster. All DNS records must be sub-domains of this base and include the cluster name.
- 2 5
- The
controlPlanesection is a single mapping, but thecomputesection is a sequence of mappings. To meet the requirements of the different data structures, the first line of thecomputesection must begin with a hyphen,-, and the first line of thecontrolPlanesection must not. Only one control plane pool is used. - 3 6
- Whether to enable or disable simultaneous multithreading (SMT), or
hyperthreading. By default, SMT is enabled to increase the performance of your machines' cores. You can disable it by setting the parameter value toDisabled. If you disable SMT, you must disable it in all cluster machines; this includes both control plane and compute machines.NoteSimultaneous multithreading (SMT) is enabled by default. If SMT is not enabled in your BIOS settings, the
hyperthreadingparameter has no effect.ImportantIf you disable
hyperthreading, whether in the BIOS or in theinstall-config.yaml, ensure that your capacity planning accounts for the dramatically decreased machine performance. - 4
- You must set the value of the
replicasparameter to0. This parameter controls the number of workers that the cluster creates and manages for you, which are functions that the cluster does not perform when you use user-provisioned infrastructure. You must manually deploy worker machines for the cluster to use before you finish installing OpenShift Container Platform. - 7
- The number of control plane machines that you add to the cluster. Because the cluster uses these values as the number of etcd endpoints in the cluster, the value must match the number of control plane machines that you deploy.
- 8
- The cluster name that you specified in your DNS records.
- 9
- A block of IP addresses from which pod IP addresses are allocated. This block must not overlap with existing physical networks. These IP addresses are used for the pod network. If you need to access the pods from an external network, you must configure load balancers and routers to manage the traffic.Note
Class E CIDR range is reserved for a future use. To use the Class E CIDR range, you must ensure your networking environment accepts the IP addresses within the Class E CIDR range.
- 10
- The subnet prefix length to assign to each individual node. For example, if
hostPrefixis set to23, then each node is assigned a/23subnet out of the givencidr, which allows for 510 (2^(32 - 23) - 2) pod IPs addresses. If you are required to provide access to nodes from an external network, configure load balancers and routers to manage the traffic. - 11
- The IP address pool to use for service IP addresses. You can enter only one IP address pool. This block must not overlap with existing physical networks. If you need to access the services from an external network, configure load balancers and routers to manage the traffic.
- 12
- You must set the platform to
none. You cannot provide additional platform configuration variables for your platform.WarningRed Hat Virtualization does not currently support installation with user-provisioned infrastructure on the oVirt platform. Therefore, you must set the platform to
none, allowing OpenShift Container Platform to identify each node as a bare-metal node and the cluster as a bare-metal cluster. This is the same as installing a cluster on any platform, and has the following limitations:- There will be no cluster provider so you must manually add each machine and there will be no node scaling capabilities.
- The oVirt CSI driver will not be installed and there will be no CSI capabilities.
- 13
- Whether to enable or disable FIPS mode. By default, FIPS mode is not enabled. If FIPS mode is enabled, the Red Hat Enterprise Linux CoreOS (RHCOS) machines that OpenShift Container Platform runs on bypass the default Kubernetes cryptography suite and use the cryptography modules that are provided with RHCOS instead.Important
The use of FIPS Validated / Modules in Process cryptographic libraries is only supported on OpenShift Container Platform deployments on the
x86_64architecture. - 14
- For
<local_registry>, specify the registry domain name, and optionally the port, that your mirror registry uses to serve content. For example,registry.example.comorregistry.example.com:5000. For<credentials>, specify the base64-encoded user name and password for your mirror registry. - 15
- The public portion of the default SSH key for the
coreuser in Red Hat Enterprise Linux CoreOS (RHCOS).NoteFor production OpenShift Container Platform clusters on which you want to perform installation debugging or disaster recovery, specify an SSH key that your
ssh-agentprocess uses. - 16
- Provide the contents of the certificate file that you used for your mirror registry.
- 17
- Provide the
imageContentSourcessection from the output of the command to mirror the repository.
7.3.7.3. Configuring the cluster-wide proxy during installation
Production environments can deny direct access to the Internet and instead have an HTTP or HTTPS proxy available. You can configure a new OpenShift Container Platform cluster to use a proxy by configuring the proxy settings in the install-config.yaml file.
For bare metal installations, if you do not assign node IP addresses from the range that is specified in the networking.machineNetwork[].cidr field in the install-config.yaml file, you must include them in the proxy.noProxy field.
Prerequisites
-
You have an existing
install-config.yamlfile. You reviewed the sites that your cluster requires access to and determined whether any of them need to bypass the proxy. By default, all cluster egress traffic is proxied, including calls to hosting cloud provider APIs. You added sites to the
Proxyobject’sspec.noProxyfield to bypass the proxy if necessary.NoteThe
Proxyobjectstatus.noProxyfield is populated with the values of thenetworking.machineNetwork[].cidr,networking.clusterNetwork[].cidr, andnetworking.serviceNetwork[]fields from your installation configuration.For installations on Amazon Web Services (AWS), Google Cloud Platform (GCP), Microsoft Azure, and Red Hat OpenStack Platform (RHOSP), the
Proxyobjectstatus.noProxyfield is also populated with the instance metadata endpoint (169.254.169.254).
Procedure
Edit your
install-config.yamlfile and add the proxy settings. For example:apiVersion: v1 baseDomain: my.domain.com proxy: httpProxy: http://<username>:<pswd>@<ip>:<port>1 httpsProxy: https://<username>:<pswd>@<ip>:<port>2 noProxy: example.com3 additionalTrustBundle: |4 -----BEGIN CERTIFICATE----- <MY_TRUSTED_CA_CERT> -----END CERTIFICATE----- ...- 1
- A proxy URL to use for creating HTTP connections outside the cluster. The URL scheme must be
http. - 2
- A proxy URL to use for creating HTTPS connections outside the cluster.
- 3
- A comma-separated list of destination domain names, IP addresses, or other network CIDRs to exclude from proxying. Preface a domain with
.to match subdomains only. For example,.y.commatchesx.y.com, but noty.com. Use*to bypass the proxy for all destinations. - 4
- If provided, the installation program generates a config map that is named
user-ca-bundlein theopenshift-confignamespace to hold the additional CA certificates. If you provideadditionalTrustBundleand at least one proxy setting, theProxyobject is configured to reference theuser-ca-bundleconfig map in thetrustedCAfield. The Cluster Network Operator then creates atrusted-ca-bundleconfig map that merges the contents specified for thetrustedCAparameter with the RHCOS trust bundle. TheadditionalTrustBundlefield is required unless the proxy’s identity certificate is signed by an authority from the RHCOS trust bundle.
NoteThe installation program does not support the proxy
readinessEndpointsfield.- Save the file and reference it when installing OpenShift Container Platform.
The installation program creates a cluster-wide proxy that is named cluster that uses the proxy settings in the provided install-config.yaml file. If no proxy settings are provided, a cluster Proxy object is still created, but it will have a nil spec.
Only the Proxy object named cluster is supported, and no additional proxies can be created.
7.3.8. Configuring a three-node cluster
You can optionally install and run three-node clusters in OpenShift Container Platform with no workers. This provides smaller, more resource efficient clusters for cluster administrators and developers to use for development, production, and testing.
Procedure
Edit the
install-config.yamlfile to set the number of compute replicas, which are also known as worker replicas, to0, as shown in the followingcomputestanza:compute: - name: worker platform: {} replicas: 0
7.3.9. Creating the Kubernetes manifest and Ignition config files
Because you must modify some cluster definition files and manually start the cluster machines, you must generate the Kubernetes manifest and Ignition config files that the cluster needs to make its machines.
The installation configuration file transforms into the Kubernetes manifests. The manifests wrap into the Ignition configuration files, which are later used to create the cluster.
The Ignition config files that the installation program generates contain certificates that expire after 24 hours, which are then renewed at that time. If the cluster is shut down before renewing the certificates and the cluster is later restarted after the 24 hours have elapsed, the cluster automatically recovers the expired certificates. The exception is that you must manually approve the pending node-bootstrapper certificate signing requests (CSRs) to recover kubelet certificates. See the documentation for Recovering from expired control plane certificates for more information.
Prerequisites
- You obtained the OpenShift Container Platform installation program. For a restricted network installation, these files are on your mirror host.
-
You created the
install-config.yamlinstallation configuration file.
Procedure
Change to the directory that contains the installation program and generate the Kubernetes manifests for the cluster:
$ ./openshift-install create manifests --dir <installation_directory>1 - 1
- For
<installation_directory>, specify the installation directory that contains theinstall-config.yamlfile you created.
WarningIf you are installing a three-node cluster, skip the following step to allow the control plane nodes to be schedulable.
ImportantWhen you configure control plane nodes from the default unschedulable to schedulable, additional subscriptions are required. This is because control plane nodes then become worker nodes.
Check that the
mastersSchedulableparameter in the<installation_directory>/manifests/cluster-scheduler-02-config.ymlKubernetes manifest file is set tofalse. This setting prevents pods from being scheduled on the control plane machines:-
Open the
<installation_directory>/manifests/cluster-scheduler-02-config.ymlfile. -
Locate the
mastersSchedulableparameter and ensure that it is set tofalse. - Save and exit the file.
-
Open the
To create the Ignition configuration files, run the following command from the directory that contains the installation program:
$ ./openshift-install create ignition-configs --dir <installation_directory>1 - 1
- For
<installation_directory>, specify the same installation directory.
The following files are generated in the directory:
. ├── auth │ ├── kubeadmin-password │ └── kubeconfig ├── bootstrap.ign ├── master.ign ├── metadata.json └── worker.ign
7.3.10. Configuring chrony time service
You must set the time server and related settings used by the chrony time service (chronyd) by modifying the contents of the chrony.conf file and passing those contents to your nodes as a machine config.
Procedure
Create the contents of the
chrony.conffile and encode it as base64. For example:$ cat << EOF | base64 pool 0.rhel.pool.ntp.org iburst1 driftfile /var/lib/chrony/drift makestep 1.0 3 rtcsync logdir /var/log/chrony EOF- 1
- Specify any valid, reachable time source, such as the one provided by your DHCP server.
Example output
ICAgIHNlcnZlciBjbG9jay5yZWRoYXQuY29tIGlidXJzdAogICAgZHJpZnRmaWxlIC92YXIvbGli L2Nocm9ueS9kcmlmdAogICAgbWFrZXN0ZXAgMS4wIDMKICAgIHJ0Y3N5bmMKICAgIGxvZ2RpciAv dmFyL2xvZy9jaHJvbnkKCreate the
MachineConfigobject file, replacing the base64 string with the one you just created. This example adds the file tomasternodes. You can change it toworkeror make an additional MachineConfig for theworkerrole. Create MachineConfig files for each type of machine that your cluster uses:$ cat << EOF > ./99-masters-chrony-configuration.yaml apiVersion: machineconfiguration.openshift.io/v1 kind: MachineConfig metadata: labels: machineconfiguration.openshift.io/role: master name: 99-masters-chrony-configuration spec: config: ignition: config: {} security: tls: {} timeouts: {} version: 3.2.0 networkd: {} passwd: {} storage: files: - contents: source: data:text/plain;charset=utf-8;base64,ICAgIHNlcnZlciBjbG9jay5yZWRoYXQuY29tIGlidXJzdAogICAgZHJpZnRmaWxlIC92YXIvbGliL2Nocm9ueS9kcmlmdAogICAgbWFrZXN0ZXAgMS4wIDMKICAgIHJ0Y3N5bmMKICAgIGxvZ2RpciAvdmFyL2xvZy9jaHJvbnkK mode: 4201 overwrite: true path: /etc/chrony.conf osImageURL: "" EOF- 1
- Specify an octal value mode for the
modefield in the machine config file. After creating the file and applying the changes, themodeis converted to a decimal value. You can check the YAML file with the commandoc get mc <mc-name> -o yaml.
- Make a backup copy of the configuration files.
Apply the configurations in one of two ways:
-
If the cluster is not up yet, after you generate manifest files, add this file to the
<installation_directory>/openshiftdirectory, and then continue to create the cluster. If the cluster is already running, apply the file:
$ oc apply -f ./99-masters-chrony-configuration.yaml
-
If the cluster is not up yet, after you generate manifest files, add this file to the
7.3.11. Installing RHCOS and starting the OpenShift Container Platform bootstrap process
To install OpenShift Container Platform on bare metal infrastructure that you provision, you must install Red Hat Enterprise Linux CoreOS (RHCOS) on the machines. When you install RHCOS, you must provide the Ignition config file that was generated by the OpenShift Container Platform installation program for the type of machine you are installing. If you have configured suitable networking, DNS, and load balancing infrastructure, the OpenShift Container Platform bootstrap process begins automatically after the RHCOS machines have rebooted.
To install RHCOS on the machines, follow either the steps to use an ISO image or network PXE booting.
The compute node deployment steps included in this installation document are RHCOS-specific. If you choose instead to deploy RHEL-based compute nodes, you take responsibility for all operating system life cycle management and maintenance, including performing system updates, applying patches, and completing all other required tasks. Use of RHEL 7 compute machines is deprecated and planned for removal in a future release of OpenShift Container Platform 4.
You can configure RHCOS during ISO and PXE installations by using the following methods:
-
Kernel arguments: You can use kernel arguments to provide installation-specific information. For example, you can specify the locations of the RHCOS installation files that you uploaded to your HTTP server and the location of the Ignition config file for the type of node you are installing. For a PXE installation, you can use the
APPENDparameter to pass the arguments to the kernel of the live installer. For an ISO installation, you can interrupt the live installation boot process to add the kernel arguments. In both installation cases, you can use specialcoreos.inst.*arguments to direct the live installer, as well as standard installation boot arguments for turning standard kernel services on or off. -
Ignition configs: OpenShift Container Platform Ignition config files (
*.ign) are specific to the type of node you are installing. You pass the location of a bootstrap, control plane, or compute node Ignition config file during the RHCOS installation so that it takes effect on first boot. In special cases, you can create a separate, limited Ignition config to pass to the live system. That Ignition config could do a certain set of tasks, such as reporting success to a provisioning system after completing installation. This special Ignition config is consumed by thecoreos-installerto be applied on first boot of the installed system. Do not provide the standard control plane and compute node Ignition configs to the live ISO directly. -
coreos-installer: You can boot the live ISO installer to a shell prompt, which allows you to prepare the permanent system in a variety of ways before first boot. In particular, you can run thecoreos-installercommand to identify various artifacts to include, work with disk partitions, and set up networking. In some cases, you can configure features on the live system and copy them to the installed system.
Whether to use an ISO or PXE install depends on your situation. A PXE install requires an available DHCP service and more preparation, but can make the installation process more automated. An ISO install is a more manual process and can be inconvenient if you are setting up more than a few machines.
As of OpenShift Container Platform 4.6, the RHCOS ISO and other installation artifacts provide support for installation on disks with 4K sectors.
7.3.11.1. Creating Red Hat Enterprise Linux CoreOS (RHCOS) machines using an ISO image
Before you install a cluster on infrastructure that you provision, you must create RHCOS machines for it to use. You can use an ISO image to create the machines.
Prerequisites
- Obtain the Ignition config files for your cluster.
- Have access to an HTTP server that can be accessed from your computer, and from the machines that you create.
Procedure
Upload the control plane, compute, and bootstrap Ignition config files that the installation program created to your HTTP server. Note the URLs of these files.
ImportantIf you plan to add more compute machines to your cluster after you finish installation, do not delete these files.
Obtain the RHCOS images that are required for your preferred method of installing operating system instances from the RHCOS image mirror page.
ImportantThe RHCOS images might not change with every release of OpenShift Container Platform. You must download images with the highest version that is less than or equal to the OpenShift Container Platform version that you install. Use the image versions that match your OpenShift Container Platform version if they are available. Use only ISO images for this procedure. RHCOS qcow2 images are not supported for this installation type.
ISO file names resemble the following example:
rhcos-<version>-live.<architecture>.isoUse the ISO to start the RHCOS installation. Use one of the following installation options:
- Burn the ISO image to a disk and boot it directly.
- Use ISO redirection via a LOM interface.
-
Boot the ISO image. You can interrupt the installation boot process to add kernel arguments. However, for this ISO procedure you should use the
coreos-installercommand instead of adding kernel arguments. If you run the live installer without options or interruption, the installer boots up to a shell prompt on the live system, ready for you to install RHCOS to disk. -
Review the Advanced RHCOS installation reference section for different ways of configuring features, such as networking and disk partitions, before running the
coreos-installer. Run the
coreos-installercommand. At a minimum, you must identify the Ignition config file location for your node type, and the location of the disk you are installing to. Here is an example:$ sudo coreos-installer install \ --ignition-url=https://host/worker.ign /dev/sda- After RHCOS installs, the system reboots. During the system reboot, it applies the Ignition config file that you specified.
Continue to create the other machines for your cluster.
ImportantYou must create the bootstrap and control plane machines at this time. If the control plane machines are not made schedulable, which is the default, also create at least two compute machines before you install the cluster.
7.3.11.2. Creating Red Hat Enterprise Linux CoreOS (RHCOS) machines by PXE or iPXE booting
Before you install a cluster that uses manually-provisioned RHCOS nodes, such as bare metal, you must create RHCOS machines for it to use. You can use PXE or iPXE booting to create the machines.
Prerequisites
- Obtain the Ignition config files for your cluster.
- Configure suitable PXE or iPXE infrastructure.
- Have access to an HTTP server that you can access from your computer.
Procedure
Upload the master, worker, and bootstrap Ignition config files that the installation program created to your HTTP server. Note the URLs of these files.
ImportantYou can add or change configuration settings in your Ignition configs before saving them to your HTTP server. If you plan to add more compute machines to your cluster after you finish installation, do not delete these files.
Obtain the RHCOS
kernel,initramfsandrootfsfiles from the RHCOS image mirror page.ImportantThe RHCOS artifacts might not change with every release of OpenShift Container Platform. You must download artifacts with the highest version that is less than or equal to the OpenShift Container Platform version that you install. Only use the appropriate
kernel,initramfs, androotfsartifacts described below for this procedure. RHCOS qcow2 images are not supported for this installation type.The file names contain the OpenShift Container Platform version number. They resemble the following examples:
-
kernel:rhcos-<version>-live-kernel-<architecture> -
initramfs:rhcos-<version>-live-initramfs.<architecture>.img -
rootfs:rhcos-<version>-live-rootfs.<architecture>.img
-
Upload the additional files that are required for your booting method:
-
For traditional PXE, upload the
kernelandinitramfsfiles to your TFTP server and therootfsfile to your HTTP server. For iPXE, upload the
kernel,initramfs, androotfsfiles to your HTTP server.ImportantIf you plan to add more compute machines to your cluster after you finish installation, do not delete these files.
-
For traditional PXE, upload the
- Configure the network boot infrastructure so that the machines boot from their local disks after RHCOS is installed on them.
Configure PXE or iPXE installation for the RHCOS images.
Modify one of the following example menu entries for your environment and verify that the image and Ignition files are properly accessible:
For PXE:
DEFAULT pxeboot TIMEOUT 20 PROMPT 0 LABEL pxeboot KERNEL http://<HTTP_server>/rhcos-<version>-live-kernel-<architecture>1 APPEND initrd=http://<HTTP_server>/rhcos-<version>-live-initramfs.<architecture>.img coreos.live.rootfs_url=http://<HTTP_server>/rhcos-<version>-live-rootfs.<architecture>.img coreos.inst.install_dev=/dev/sda coreos.inst.ignition_url=http://<HTTP_server>/bootstrap.ign2 3 - 1
- Specify the location of the live
kernelfile that you uploaded to your HTTP server. The URL must be HTTP, TFTP, or FTP; HTTPS and NFS are not supported. - 2
- If you use multiple NICs, specify a single interface in the
ipoption. For example, to use DHCP on a NIC that is namedeno1, setip=eno1:dhcp. - 3
- Specify locations of the RHCOS files that you uploaded to your HTTP server. The
initrdparameter value is the location of theinitramfsfile, thecoreos.live.rootfs_urlparameter value is the location of therootfsfile, and thecoreos.inst.ignition_urlparameter value is the location of the bootstrap Ignition config file. You can also add more kernel arguments to theAPPENDline to configure networking or other boot options.
NoteThis configuration does not enable serial console access on machines with a graphical console. To configure a different console, add one or more
console=arguments to theAPPENDline. For example, addconsole=tty0 console=ttyS0to set the first PC serial port as the primary console and the graphical console as a secondary console. For more information, see How does one set up a serial terminal and/or console in Red Hat Enterprise Linux?.For iPXE:
kernel http://<HTTP_server>/rhcos-<version>-live-kernel-<architecture> initrd=main coreos.live.rootfs_url=http://<HTTP_server>/rhcos-<version>-live-rootfs.<architecture>.img coreos.inst.install_dev=/dev/sda coreos.inst.ignition_url=http://<HTTP_server>/bootstrap.ign1 2 initrd --name main http://<HTTP_server>/rhcos-<version>-live-initramfs.<architecture>.img3 boot- 1
- Specify locations of the RHCOS files that you uploaded to your HTTP server. The
kernelparameter value is the location of thekernelfile, theinitrd=mainargument is needed for booting on UEFI systems, thecoreos.live.rootfs_urlparameter value is the location of therootfsfile, and thecoreos.inst.ignition_urlparameter value is the location of the bootstrap Ignition config file. - 2
- If you use multiple NICs, specify a single interface in the
ipoption. For example, to use DHCP on a NIC that is namedeno1, setip=eno1:dhcp. - 3
- Specify the location of the
initramfsfile that you uploaded to your HTTP server.
NoteThis configuration does not enable serial console access on machines with a graphical console. To configure a different console, add one or more
console=arguments to thekernelline. For example, addconsole=tty0 console=ttyS0to set the first PC serial port as the primary console and the graphical console as a secondary console. For more information, see How does one set up a serial terminal and/or console in Red Hat Enterprise Linux?.
If you use PXE UEFI, perform the following actions:
Provide the
shimx64.efiandgrubx64.efiEFI binaries and thegrub.cfgfile that are required for booting the system.Extract the necessary EFI binaries by mounting the RHCOS ISO to your host and then mounting the
images/efiboot.imgfile to your host:$ mkdir -p /mnt/iso$ mkdir -p /mnt/efiboot$ mount -o loop rhcos-installer.x86_64.iso /mnt/iso$ mount -o loop,ro /mnt/iso/images/efiboot.img /mnt/efibootFrom the
efiboot.imgmount point, copy theEFI/redhat/shimx64.efiandEFI/redhat/grubx64.efifiles to your TFTP server:$ cp /mnt/efiboot/EFI/redhat/shimx64.efi .$ cp /mnt/efiboot/EFI/redhat/grubx64.efi .$ umount /mnt/efiboot$ umount /mnt/iso-
Copy the
EFI/redhat/grub.cfgfile that is included in the RHCOS ISO to your TFTP server.
Edit the
grub.cfgfile to include arguments similar to the following:menuentry 'Install Red Hat Enterprise Linux CoreOS' --class fedora --class gnu-linux --class gnu --class os { linuxefi rhcos-<version>-live-kernel-<architecture> coreos.inst.install_dev=/dev/sda coreos.live.rootfs_url=http://<HTTP_server>/rhcos-<version>-live-rootfs.<architecture>.img coreos.inst.ignition_url=http://<HTTP_server>/bootstrap.ign initrdefi rhcos-<version>-live-initramfs.<architecture>.img }where:
rhcos-<version>-live-kernel-<architecture>-
Specifies the
kernelfile that you uploaded to your TFTP server. http://<HTTP_server>/rhcos-<version>-live-rootfs.<architecture>.img- Specifies the location of the live rootfs image that you uploaded to your HTTP server.
http://<HTTP_server>/bootstrap.ign- Specifies the location of the bootstrap Ignition config file that you uploaded to your HTTP server.
rhcos-<version>-live-initramfs.<architecture>.img-
Specifies the location of the
initramfsfile that you uploaded to your TFTP server.
NoteFor more information on how to configure a PXE server for UEFI boot, see the Red Hat Knowledgebase article: How to configure/setup a PXE server for UEFI boot for Red Hat Enterprise Linux?.
Continue to create the machines for your cluster.
ImportantYou must create the bootstrap and control plane machines at this time. If the control plane machines are not made schedulable, which is the default, also create at least two compute machines before you install the cluster.
7.3.11.3. Advanced Red Hat Enterprise Linux CoreOS (RHCOS) installation configuration
A key benefit for manually provisioning the Red Hat Enterprise Linux CoreOS (RHCOS) nodes for OpenShift Container Platform is to be able to do configuration that is not available through default OpenShift Container Platform installation methods. This section describes some of the configurations that you can do using techniques that include:
- Passing kernel arguments to the live installer
-
Running
coreos-installermanually from the live system - Embedding Ignition configs in an ISO
The advanced configuration topics for manual Red Hat Enterprise Linux CoreOS (RHCOS) installations detailed in this section relate to disk partitioning, networking, and using Ignition configs in different ways.
7.3.11.3.1. Using advanced networking options for PXE and ISO installations
Networking for OpenShift Container Platform nodes uses DHCP by default to gather all necessary configuration settings. To set up static IP addresses or configure special settings, such as bonding, you can do one of the following:
- Pass special kernel parameters when you boot the live installer.
- Use a machine config to copy networking files to the installed system.
- Configure networking from a live installer shell prompt, then copy those settings to the installed system so that they take effect when the installed system first boots.
To configure a PXE or iPXE installation, use one of the following options:
- See the "Advanced RHCOS installation reference" tables.
- Use a machine config to copy networking files to the installed system.
To configure an ISO installation, use the following procedure.
Procedure
- Boot the ISO installer.
-
From the live system shell prompt, configure networking for the live system using available RHEL tools, such as
nmcliornmtui. Run the
coreos-installercommand to install the system, adding the--copy-networkoption to copy networking configuration. For example:$ coreos-installer install --copy-network \ --ignition-url=http://host/worker.ign /dev/sdaImportantThe
--copy-networkoption only copies networking configuration found under/etc/NetworkManager/system-connections. In particular, it does not copy the system hostname.- Reboot into the installed system.
7.3.11.3.2. Disk partitioning
The disk partitions are created on OpenShift Container Platform cluster nodes during the Red Hat Enterprise Linux CoreOS (RHCOS) installation. Each RHCOS node of a particular architecture uses the same partition layout, unless the default partitioning configuration is overridden. During the RHCOS installation, the size of the root file system is increased to use the remaining available space on the target device.
However, there are two cases where you might want to intervene to override the default partitioning when installing an OpenShift Container Platform node:
Create separate partitions: For greenfield installations on an empty disk, you might want to add separate storage to a partition. This is officially supported for making
/varor a subdirectory of/var, such as/var/lib/etcd, a separate partition, but not both.ImportantKubernetes supports only two filesystem partitions. If you add more than one partition to the original configuration, Kubernetes cannot monitor all of them.
-
Retain existing partitions: For a brownfield installation where you are reinstalling OpenShift Container Platform on an existing node and want to retain data partitions installed from your previous operating system, there are both boot arguments and options to
coreos-installerthat allow you to retain existing data partitions.
7.3.11.3.2.1. Creating a separate /var partition
In general, disk partitioning for OpenShift Container Platform should be left to the installer. However, there are cases where you might want to create separate partitions in a part of the filesystem that you expect to grow.
OpenShift Container Platform supports the addition of a single partition to attach storage to either the /var partition or a subdirectory of /var. For example:
-
/var/lib/containers: Holds container-related content that can grow as more images and containers are added to a system. -
/var/lib/etcd: Holds data that you might want to keep separate for purposes such as performance optimization of etcd storage. -
/var: Holds data that you might want to keep separate for purposes such as auditing.
Storing the contents of a /var directory separately makes it easier to grow storage for those areas as needed and reinstall OpenShift Container Platform at a later date and keep that data intact. With this method, you will not have to pull all your containers again, nor will you have to copy massive log files when you update systems.
Because /var must be in place before a fresh installation of Red Hat Enterprise Linux CoreOS (RHCOS), the following procedure sets up the separate /var partition by creating a machine config that is inserted during the openshift-install preparation phases of an OpenShift Container Platform installation.
Procedure
Create a directory to hold the OpenShift Container Platform installation files:
$ mkdir $HOME/clusterconfigRun
openshift-installto create a set of files in themanifestandopenshiftsubdirectories. Answer the system questions as you are prompted:$ openshift-install create manifests --dir $HOME/clusterconfig ? SSH Public Key ... $ ls $HOME/clusterconfig/openshift/ 99_kubeadmin-password-secret.yaml 99_openshift-cluster-api_master-machines-0.yaml 99_openshift-cluster-api_master-machines-1.yaml 99_openshift-cluster-api_master-machines-2.yaml ...Create a
MachineConfigobject and add it to a file in theopenshiftdirectory. For example, name the file98-var-partition.yaml, change the disk device name to the name of the storage device on theworkersystems, and set the storage size as appropriate. This example places the/vardirectory on a separate partition:apiVersion: machineconfiguration.openshift.io/v1 kind: MachineConfig metadata: labels: machineconfiguration.openshift.io/role: worker name: 98-var-partition spec: config: ignition: version: 3.2.0 storage: disks: - device: /dev/<device_name>1 partitions: - label: var startMiB: <partition_start_offset>2 sizeMiB: <partition_size>3 filesystems: - device: /dev/disk/by-partlabel/var path: /var format: xfs systemd: units: - name: var.mount4 enabled: true contents: | [Unit] Before=local-fs.target [Mount] What=/dev/disk/by-partlabel/var Where=/var Options=defaults,prjquota5 [Install] WantedBy=local-fs.target- 1
- The storage device name of the disk that you want to partition.
- 2
- When adding a data partition to the boot disk, a minimum value of 25000 mebibytes is recommended. The root file system is automatically resized to fill all available space up to the specified offset. If no value is specified, or if the specified value is smaller than the recommended minimum, the resulting root file system will be too small, and future reinstalls of RHCOS might overwrite the beginning of the data partition.
- 3
- The size of the data partition in mebibytes.
- 4
- The name of the mount unit must match the directory specified in the
Where=directive. For example, for a filesystem mounted on/var/lib/containers, the unit must be namedvar-lib-containers.mount. - 5
- The
prjquotamount option must be enabled for filesystems used for container storage.
NoteWhen creating a separate
/varpartition, you cannot use different instance types for worker nodes, if the different instance types do not have the same device name.Run
openshift-installagain to create Ignition configs from a set of files in themanifestandopenshiftsubdirectories:$ openshift-install create ignition-configs --dir $HOME/clusterconfig $ ls $HOME/clusterconfig/ auth bootstrap.ign master.ign metadata.json worker.ign
Now you can use the Ignition config files as input to the ISO or PXE manual installation procedures to install Red Hat Enterprise Linux CoreOS (RHCOS) systems.
7.3.11.3.2.2. Retaining existing partitions
For an ISO installation, you can add options to the coreos-installer command line that causes the installer to maintain one or more existing partitions. For a PXE installation, you can APPEND coreos.inst.* options to preserve partitions.
Saved partitions might be partitions from an existing OpenShift Container Platform system that has data partitions that you want to keep. Here are a few tips:
- If you save existing partitions, and those partitions do not leave enough space for RHCOS, installation will fail without damaging the saved partitions.
- Identify the disk partitions you want to keep either by partition label or by number.
For an ISO installation
This example preserves any partition in which the partition label begins with data (data*):
# coreos-installer install --ignition-url http://10.0.2.2:8080/user.ign \
--save-partlabel 'data*' /dev/sda
The following example illustrates running the coreos-installer in a way that preserves the sixth (6) partition on the disk:
# coreos-installer install --ignition-url http://10.0.2.2:8080/user.ign \
--save-partindex 6 /dev/sdaThis example preserves partitions 5 and higher:
# coreos-installer install --ignition-url http://10.0.2.2:8080/user.ign
--save-partindex 5- /dev/sda
In the previous examples where partition saving is used, coreos-installer recreates the partition immediately.
For a PXE installation
This APPEND option preserves any partition in which the partition label begins with 'data' ('data*'):
coreos.inst.save_partlabel=data*
This APPEND option preserves partitions 5 and higher:
coreos.inst.save_partindex=5-
This APPEND option preserves partition 6:
coreos.inst.save_partindex=67.3.11.3.3. Identifying Ignition configs
When doing an RHCOS manual installation, there are two types of Ignition configs that you can provide, with different reasons for providing each one:
Permanent install Ignition config: Every manual RHCOS installation needs to pass one of the Ignition config files generated by
openshift-installer, such asbootstrap.ign,master.ignandworker.ign, to carry out the installation.ImportantIt is not recommended to modify these files.
For PXE installations, you pass the Ignition configs on the
APPENDline using thecoreos.inst.ignition_url=option. For ISO installations, after the ISO boots to the shell prompt, you identify the Ignition config on thecoreos-installercommand line with the--ignition-url=option. In both cases, only HTTP and HTTPS protocols are supported.Live install Ignition config: This type must be created manually and should be avoided if possible, as it is not supported by Red Hat. With this method, the Ignition config passes to the live install medium, runs immediately upon booting, and performs setup tasks before and/or after the RHCOS system installs to disk. This method should only be used for performing tasks that must be performed once and not applied again later, such as with advanced partitioning that cannot be done using a machine config.
For PXE or ISO boots, you can create the Ignition config and
APPENDtheignition.config.url=option to identify the location of the Ignition config. You also need to appendignition.firstboot ignition.platform.id=metalor theignition.config.urloption will be ignored.
7.3.11.3.3.1. Embedding an Ignition config in the RHCOS ISO
You can embed a live install Ignition config directly in an RHCOS ISO image. When the ISO image is booted, the embedded config will be applied automatically.
Procedure
-
Download the
coreos-installerbinary from the following image mirror page: https://mirror.openshift.com/pub/openshift-v4/clients/coreos-installer/latest/. Retrieve the RHCOS ISO image and the Ignition config file, and copy them into an accessible directory, such as
/mnt:# cp rhcos-<version>-live.x86_64.iso bootstrap.ign /mnt/ # chmod 644 /mnt/rhcos-<version>-live.x86_64.isoRun the following command to embed the Ignition config into the ISO:
# ./coreos-installer iso ignition embed -i /mnt/bootstrap.ign \ /mnt/rhcos-<version>-live.x86_64.isoYou can now use that ISO to install RHCOS using the specified live install Ignition config.
ImportantUsing
coreos-installer iso ignition embedto embed a file generated byopenshift-installer, such asbootstrap.ign,master.ignandworker.ign, is unsupported and not recommended.To show the contents of the embedded Ignition config and direct it into a file, run:
# ./coreos-installer iso ignition show /mnt/rhcos-<version>-live.x86_64.iso > mybootstrap.ign# diff -s bootstrap.ign mybootstrap.ignExample output
Files bootstrap.ign and mybootstrap.ign are identicalTo remove the Ignition config and return the ISO to its pristine state so you can reuse it, run:
# ./coreos-installer iso ignition remove /mnt/rhcos-<version>-live.x86_64.isoYou can now embed another Ignition config into the ISO or use the ISO in its pristine state.
7.3.11.3.4. Advanced RHCOS installation reference
This section illustrates the networking configuration and other advanced options that allow you to modify the Red Hat Enterprise Linux CoreOS (RHCOS) manual installation process. The following tables describe the kernel arguments and command-line options you can use with the RHCOS live installer and the coreos-installer command.
Routing and bonding options at RHCOS boot prompt
If you install RHCOS from an ISO image, you can add kernel arguments manually when you boot that image to configure the node’s networking. If no networking arguments are used, the installation defaults to using DHCP.
When adding networking arguments, you must also add the rd.neednet=1 kernel argument.
The following table describes how to use ip=, nameserver=, and bond= kernel arguments for live ISO installs.
Ordering is important when adding kernel arguments: ip=, nameserver=, and then bond=.
Routing and bonding options for ISO
The following table provides examples for configuring networking of your Red Hat Enterprise Linux CoreOS (RHCOS) nodes. These are networking options that are passed to the dracut tool during system boot. For more information about the networking options supported by dracut, see the dracut.cmdline manual page.
| Description | Examples |
|---|---|
|
To configure an IP address, either use DHCP (
|
|
|
Specify multiple network interfaces by specifying multiple |
|
|
Optional: You can configure routes to additional networks by setting an If the additional network gateway is different from the primary network gateway, the default gateway must be the primary network gateway. | To configure the default gateway: To configure the route for the additional network: |
| Disable DHCP on a single interface, such as when there are two or more network interfaces and only one interface is being used. |
|
| You can combine DHCP and static IP configurations on systems with multiple network interfaces. |
|
|
Optional: You can configure VLANs on individual interfaces by using the | To configure a VLAN on a network interface and use a static IP address: To configure a VLAN on a network interface and to use DHCP: |
|
You can provide multiple DNS servers by adding a |
|
|
Optional: Bonding multiple network interfaces to a single interface is supported using the
|
To configure the bonded interface to use DHCP, set the bond’s IP address to To configure the bonded interface to use a static IP address, enter the specific IP address you want and related information. For example: |
|
Optional: You can configure VLANs on bonded interfaces by using the | To configure the bonded interface with a VLAN and to use DHCP: To configure the bonded interface with a VLAN and to use a static IP address: |
|
Optional: Network teaming can be used as an alternative to bonding by using the
Note Teaming is planned to be deprecated when RHCOS switches to an upcoming version of RHEL. For more information, see this Red Hat Knowledgebase Article. | To configure a network team: |
coreos.inst boot options for ISO or PXE install
While you can pass most standard installation boot arguments to the live installer, there are several arguments that are specific to the RHCOS live installer.
- For ISO, these options can be added by interrupting the RHCOS installer.
-
For PXE or iPXE, these options must be added to the
APPENDline before starting the PXE kernel. You cannot interrupt a live PXE install.
The following table shows the RHCOS live installer boot options for ISO and PXE installs.
| Argument | Description |
|---|---|
|
|
Required. The block device on the system to install to. It is recommended to use the full path, such as |
|
| Optional: The URL of the Ignition config to embed into the installed system. If no URL is specified, no Ignition config is embedded. |
|
| Optional: Comma-separated labels of partitions to preserve during the install. Glob-style wildcards are permitted. The specified partitions do not need to exist. |
|
|
Optional: Comma-separated indexes of partitions to preserve during the install. Ranges |
|
|
Optional: Permits the OS image that is specified by |
|
| Optional: Download and install the specified RHCOS image.
|
|
| Optional: The system will not reboot after installing. Once the install finishes, you will receive a prompt that allows you to inspect what is happening during installation. This argument should not be used in production environments and is intended for debugging purposes only. |
|
|
Optional: The Ignition platform ID of the platform the RHCOS image is being installed on. Default is |
|
|
Optional: The URL of the Ignition config for the live boot. For example, this can be used to customize how |
coreos-installer options for ISO install
You can also install RHCOS by invoking the coreos-installer command directly from the command line. The kernel arguments in the previous table provide a shortcut for automatically invoking coreos-installer at boot time, but you can pass similar arguments directly to coreos-installer when running it from a shell prompt.
The following table shows the options and subcommands you can pass to the coreos-installer command from a shell prompt during a live install.
| Command-line options | |
| Option | Description |
|
| Specify the image URL manually. |
|
| Specify a local image file manually. |
|
| Embed an Ignition config from a file. |
|
| Embed an Ignition config from a URL. |
|
|
Digest |
|
| Override the Ignition platform ID. |
|
| Append the default kernel argument. |
|
| Delete the default kernel argument. |
|
| Copy the network configuration from the install environment. Important
The |
|
|
For use with |
|
| Save partitions with this label glob. |
|
| Save partitions with this number or range. |
|
| Force offline installation. |
|
| Skip signature verification. |
|
| Allow Ignition URL without HTTPS or hash. |
|
|
Target CPU architecture. Default is |
|
| Do not clear partition table on error. |
|
| Print help information. |
| Command-line argument | |
| Argument | Description |
|
| The destination device. |
| coreos-installer embedded Ignition commands | |
| Command | Description |
|
| Embed an Ignition config in an ISO image. |
|
| Show the embedded Ignition config from an ISO image. |
|
| Remove the embedded Ignition config from an ISO image. |
| coreos-installer ISO Ignition options | |
| Option | Description |
|
| Overwrite an existing Ignition config. |
|
|
The Ignition config to be used. Default is |
|
| Write the ISO to a new output file. |
|
| Print help information. |
| coreos-installer PXE Ignition commands | |
| Command | Description |
| Note that not all of these options are accepted by all subcommands. | |
|
| Wrap an Ignition config in an image. |
|
| Show the wrapped Ignition config in an image. |
|
|
Show the wrapped Ignition config in an |
| coreos-installer PXE Ignition options | |
| Option | Description |
|
|
The Ignition config to be used. Default is |
|
| Write the ISO to a new output file. |
|
| Print help information. |
7.3.11.4. Updating the bootloader using bootupd
To update the bootloader by using bootupd, you must either install bootupd on RHCOS machines manually or provide a machine config with the enabled systemd unit. Unlike grubby or other bootloader tools, bootupd does not manage kernel space configuration such as passing kernel arguments.
After you have installed bootupd, you can manage it remotely from the OpenShift Container Platform cluster.
It is recommended that you use bootupd only on bare metal or virtualized hypervisor installations, such as for protection against the BootHole vulnerability.
Manual install method
You can manually install bootupd by using the bootctl command-line tool.
Inspect the system status:
# bootupctl statusExample output
Component EFI Installed: grub2-efi-x64-1:2.04-31.fc33.x86_64,shim-x64-15-8.x86_64 Update: At latest version
RHCOS images created without
bootupdinstalled on them require an explicit adoption phase.If the system status is
Adoptable, perform the adoption:# bootupctl adopt-and-updateExample output
Updated: grub2-efi-x64-1:2.04-31.fc33.x86_64,shim-x64-15-8.x86_64If an update is available, apply the update so that the changes take effect on the next reboot:
# bootupctl updateExample output
Updated: grub2-efi-x64-1:2.04-31.fc33.x86_64,shim-x64-15-8.x86_64
Machine config method
Another way to enable bootupd is by providing a machine config.
Provide a machine config file with the enabled
systemdunit, as shown in the following example:Example output
variant: rhcos version: 1.1.0 systemd: units: - name: custom-bootupd-auto.service enabled: true contents: | [Unit] Description=Bootupd automatic update [Service] ExecStart=/usr/bin/bootupctl update RemainAfterExit=yes [Install] WantedBy=multi-user.target
7.3.12. Creating the cluster
To create the OpenShift Container Platform cluster, you wait for the bootstrap process to complete on the machines that you provisioned by using the Ignition config files that you generated with the installation program.
Prerequisites
- Create the required infrastructure for the cluster.
- You obtained the installation program and generated the Ignition config files for your cluster.
- You used the Ignition config files to create RHCOS machines for your cluster.
Procedure
Monitor the bootstrap process:
$ ./openshift-install --dir <installation_directory> wait-for bootstrap-complete \1 --log-level=info2 Example output
INFO Waiting up to 30m0s for the Kubernetes API at https://api.test.example.com:6443... INFO API v1.20.0 up INFO Waiting up to 30m0s for bootstrapping to complete... INFO It is now safe to remove the bootstrap resourcesThe command succeeds when the Kubernetes API server signals that it has been bootstrapped on the control plane machines.
After bootstrap process is complete, remove the bootstrap machine from the load balancer.
ImportantYou must remove the bootstrap machine from the load balancer at this point. You can also remove or reformat the machine itself.
7.3.13. Logging in to the cluster by using the CLI
You can log in to your cluster as a default system user by exporting the cluster kubeconfig file. The kubeconfig file contains information about the cluster that is used by the CLI to connect a client to the correct cluster and API server. The file is specific to a cluster and is created during OpenShift Container Platform installation.
Prerequisites
- You deployed an OpenShift Container Platform cluster.
-
You installed the
ocCLI.
Procedure
Export the
kubeadmincredentials:$ export KUBECONFIG=<installation_directory>/auth/kubeconfig1 - 1
- For
<installation_directory>, specify the path to the directory that you stored the installation files in.
Verify you can run
occommands successfully using the exported configuration:$ oc whoamiExample output
system:admin
7.3.14. Approving the certificate signing requests for your machines
When you add machines to a cluster, two pending certificate signing requests (CSRs) are generated for each machine that you added. You must confirm that these CSRs are approved or, if necessary, approve them yourself. The client requests must be approved first, followed by the server requests.
Prerequisites
- You added machines to your cluster.
Procedure
Confirm that the cluster recognizes the machines:
$ oc get nodesExample output
NAME STATUS ROLES AGE VERSION master-0 Ready master 63m v1.20.0 master-1 Ready master 63m v1.20.0 master-2 Ready master 64m v1.20.0The output lists all of the machines that you created.
NoteThe preceding output might not include the compute nodes, also known as worker nodes, until some CSRs are approved.
Review the pending CSRs and ensure that you see the client requests with the
PendingorApprovedstatus for each machine that you added to the cluster:$ oc get csrExample output
NAME AGE REQUESTOR CONDITION csr-8b2br 15m system:serviceaccount:openshift-machine-config-operator:node-bootstrapper Pending csr-8vnps 15m system:serviceaccount:openshift-machine-config-operator:node-bootstrapper Pending ...In this example, two machines are joining the cluster. You might see more approved CSRs in the list.
If the CSRs were not approved, after all of the pending CSRs for the machines you added are in
Pendingstatus, approve the CSRs for your cluster machines:NoteBecause the CSRs rotate automatically, approve your CSRs within an hour of adding the machines to the cluster. If you do not approve them within an hour, the certificates will rotate, and more than two certificates will be present for each node. You must approve all of these certificates. Once the client CSR is approved, the Kubelet creates a secondary CSR for the serving certificate, which requires manual approval. Then, subsequent serving certificate renewal requests are automatically approved by the
machine-approverif the Kubelet requests a new certificate with identical parameters.NoteFor clusters running on platforms that are not machine API enabled, such as bare metal and other user-provisioned infrastructure, you must implement a method of automatically approving the kubelet serving certificate requests (CSRs). If a request is not approved, then the
oc exec,oc rsh, andoc logscommands cannot succeed, because a serving certificate is required when the API server connects to the kubelet. Any operation that contacts the Kubelet endpoint requires this certificate approval to be in place. The method must watch for new CSRs, confirm that the CSR was submitted by thenode-bootstrapperservice account in thesystem:nodeorsystem:admingroups, and confirm the identity of the node.To approve them individually, run the following command for each valid CSR:
$ oc adm certificate approve <csr_name>1 - 1
<csr_name>is the name of a CSR from the list of current CSRs.
To approve all pending CSRs, run the following command:
$ oc get csr -o go-template='{{range .items}}{{if not .status}}{{.metadata.name}}{{"\n"}}{{end}}{{end}}' | xargs --no-run-if-empty oc adm certificate approveNoteSome Operators might not become available until some CSRs are approved.
Now that your client requests are approved, you must review the server requests for each machine that you added to the cluster:
$ oc get csrExample output
NAME AGE REQUESTOR CONDITION csr-bfd72 5m26s system:node:ip-10-0-50-126.us-east-2.compute.internal Pending csr-c57lv 5m26s system:node:ip-10-0-95-157.us-east-2.compute.internal Pending ...If the remaining CSRs are not approved, and are in the
Pendingstatus, approve the CSRs for your cluster machines:To approve them individually, run the following command for each valid CSR:
$ oc adm certificate approve <csr_name>1 - 1
<csr_name>is the name of a CSR from the list of current CSRs.
To approve all pending CSRs, run the following command:
$ oc get csr -o go-template='{{range .items}}{{if not .status}}{{.metadata.name}}{{"\n"}}{{end}}{{end}}' | xargs oc adm certificate approve
After all client and server CSRs have been approved, the machines have the
Readystatus. Verify this by running the following command:$ oc get nodesExample output
NAME STATUS ROLES AGE VERSION master-0 Ready master 73m v1.20.0 master-1 Ready master 73m v1.20.0 master-2 Ready master 74m v1.20.0 worker-0 Ready worker 11m v1.20.0 worker-1 Ready worker 11m v1.20.0NoteIt can take a few minutes after approval of the server CSRs for the machines to transition to the
Readystatus.
Additional information
- For more information on CSRs, see Certificate Signing Requests.
7.3.15. Initial Operator configuration
After the control plane initializes, you must immediately configure some Operators so that they all become available.
Prerequisites
- Your control plane has initialized.
Procedure
Watch the cluster components come online:
$ watch -n5 oc get clusteroperatorsExample output
NAME VERSION AVAILABLE PROGRESSING DEGRADED SINCE authentication 4.7.0 True False False 3h56m baremetal 4.7.0 True False False 29h cloud-credential 4.7.0 True False False 29h cluster-autoscaler 4.7.0 True False False 29h config-operator 4.7.0 True False False 6h39m console 4.7.0 True False False 3h59m csi-snapshot-controller 4.7.0 True False False 4h12m dns 4.7.0 True False False 4h15m etcd 4.7.0 True False False 29h image-registry 4.7.0 True False False 3h59m ingress 4.7.0 True False False 4h30m insights 4.7.0 True False False 29h kube-apiserver 4.7.0 True False False 29h kube-controller-manager 4.7.0 True False False 29h kube-scheduler 4.7.0 True False False 29h kube-storage-version-migrator 4.7.0 True False False 4h2m machine-api 4.7.0 True False False 29h machine-approver 4.7.0 True False False 6h34m machine-config 4.7.0 True False False 3h56m marketplace 4.7.0 True False False 4h2m monitoring 4.7.0 True False False 6h31m network 4.7.0 True False False 29h node-tuning 4.7.0 True False False 4h30m openshift-apiserver 4.7.0 True False False 3h56m openshift-controller-manager 4.7.0 True False False 4h36m openshift-samples 4.7.0 True False False 4h30m operator-lifecycle-manager 4.7.0 True False False 29h operator-lifecycle-manager-catalog 4.7.0 True False False 29h operator-lifecycle-manager-packageserver 4.7.0 True False False 3h59m service-ca 4.7.0 True False False 29h storage 4.7.0 True False False 4h30m- Configure the Operators that are not available.
7.3.15.1. Disabling the default OperatorHub sources
Operator catalogs that source content provided by Red Hat and community projects are configured for OperatorHub by default during an OpenShift Container Platform installation. In a restricted network environment, you must disable the default catalogs as a cluster administrator.
Procedure
Disable the sources for the default catalogs by adding
disableAllDefaultSources: trueto theOperatorHubobject:$ oc patch OperatorHub cluster --type json \ -p '[{"op": "add", "path": "/spec/disableAllDefaultSources", "value": true}]'
Alternatively, you can use the web console to manage catalog sources. From the Administration → Cluster Settings → Global Configuration → OperatorHub page, click the Sources tab, where you can create, delete, disable, and enable individual sources.
7.3.15.2. Image registry storage configuration
The Image Registry Operator is not initially available for platforms that do not provide default storage. After installation, you must configure your registry to use storage so that the Registry Operator is made available.
Instructions are shown for configuring a persistent volume, which is required for production clusters. Where applicable, instructions are shown for configuring an empty directory as the storage location, which is available for only non-production clusters.
Additional instructions are provided for allowing the image registry to use block storage types by using the Recreate rollout strategy during upgrades.
7.3.15.2.1. Changing the image registry’s management state
To start the image registry, you must change the Image Registry Operator configuration’s managementState from Removed to Managed.
Procedure
Change
managementStateImage Registry Operator configuration fromRemovedtoManaged. For example:$ oc patch configs.imageregistry.operator.openshift.io cluster --type merge --patch '{"spec":{"managementState":"Managed"}}'
7.3.15.2.2. Configuring registry storage for bare metal and other manual installations
As a cluster administrator, following installation you must configure your registry to use storage.
Prerequisites
- Cluster administrator permissions.
- A cluster that uses manually-provisioned Red Hat Enterprise Linux CoreOS (RHCOS) nodes, such as bare metal.
Persistent storage provisioned for your cluster, such as Red Hat OpenShift Container Storage.
ImportantOpenShift Container Platform supports
ReadWriteOnceaccess for image registry storage when you have only one replica. To deploy an image registry that supports high availability with two or more replicas,ReadWriteManyaccess is required.- Must have 100Gi capacity.
Procedure
To configure your registry to use storage, change the
spec.storage.pvcin theconfigs.imageregistry/clusterresource.NoteWhen using shared storage, review your security settings to prevent outside access.
Verify that you do not have a registry pod:
$ oc get pod -n openshift-image-registry -l docker-registry=defaultExample output
No resourses found in openshift-image-registry namespaceNoteIf you do have a registry pod in your output, you do not need to continue with this procedure.
Check the registry configuration:
$ oc edit configs.imageregistry.operator.openshift.ioExample output
storage: pvc: claim:Leave the
claimfield blank to allow the automatic creation of animage-registry-storagePVC.Check the
clusteroperatorstatus:$ oc get clusteroperator image-registryExample output
NAME VERSION AVAILABLE PROGRESSING DEGRADED SINCE MESSAGE image-registry 4.7 True False False 6h50mEnsure that your registry is set to managed to enable building and pushing of images.
Run:
$ oc edit configs.imageregistry/clusterThen, change the line
managementState: Removedto
managementState: Managed
7.3.15.2.3. Configuring storage for the image registry in non-production clusters
You must configure storage for the Image Registry Operator. For non-production clusters, you can set the image registry to an empty directory. If you do so, all images are lost if you restart the registry.
Procedure
To set the image registry storage to an empty directory:
$ oc patch configs.imageregistry.operator.openshift.io cluster --type merge --patch '{"spec":{"storage":{"emptyDir":{}}}}'WarningConfigure this option for only non-production clusters.
If you run this command before the Image Registry Operator initializes its components, the
oc patchcommand fails with the following error:Error from server (NotFound): configs.imageregistry.operator.openshift.io "cluster" not foundWait a few minutes and run the command again.
7.3.15.2.4. Configuring block registry storage
To allow the image registry to use block storage types during upgrades as a cluster administrator, you can use the Recreate rollout strategy.
Block storage volumes are supported but not recommended for use with the image registry on production clusters. An installation where the registry is configured on block storage is not highly available because the registry cannot have more than one replica.
Procedure
To set the image registry storage as a block storage type, patch the registry so that it uses the
Recreaterollout strategy and runs with only one (1) replica:$ oc patch config.imageregistry.operator.openshift.io/cluster --type=merge -p '{"spec":{"rolloutStrategy":"Recreate","replicas":1}}'- Provision the PV for the block storage device, and create a PVC for that volume. The requested block volume uses the ReadWriteOnce (RWO) access mode.
- Edit the registry configuration so that it references the correct PVC.
7.3.16. Completing installation on user-provisioned infrastructure
After you complete the Operator configuration, you can finish installing the cluster on infrastructure that you provide.
Prerequisites
- Your control plane has initialized.
- You have completed the initial Operator configuration.
Procedure
Confirm that all the cluster components are online with the following command:
$ watch -n5 oc get clusteroperatorsExample output
NAME VERSION AVAILABLE PROGRESSING DEGRADED SINCE authentication 4.7.0 True False False 3h56m baremetal 4.7.0 True False False 29h cloud-credential 4.7.0 True False False 29h cluster-autoscaler 4.7.0 True False False 29h config-operator 4.7.0 True False False 6h39m console 4.7.0 True False False 3h59m csi-snapshot-controller 4.7.0 True False False 4h12m dns 4.7.0 True False False 4h15m etcd 4.7.0 True False False 29h image-registry 4.7.0 True False False 3h59m ingress 4.7.0 True False False 4h30m insights 4.7.0 True False False 29h kube-apiserver 4.7.0 True False False 29h kube-controller-manager 4.7.0 True False False 29h kube-scheduler 4.7.0 True False False 29h kube-storage-version-migrator 4.7.0 True False False 4h2m machine-api 4.7.0 True False False 29h machine-approver 4.7.0 True False False 6h34m machine-config 4.7.0 True False False 3h56m marketplace 4.7.0 True False False 4h2m monitoring 4.7.0 True False False 6h31m network 4.7.0 True False False 29h node-tuning 4.7.0 True False False 4h30m openshift-apiserver 4.7.0 True False False 3h56m openshift-controller-manager 4.7.0 True False False 4h36m openshift-samples 4.7.0 True False False 4h30m operator-lifecycle-manager 4.7.0 True False False 29h operator-lifecycle-manager-catalog 4.7.0 True False False 29h operator-lifecycle-manager-packageserver 4.7.0 True False False 3h59m service-ca 4.7.0 True False False 29h storage 4.7.0 True False False 4h30mAlternatively, the following command notifies you when all of the clusters are available. It also retrieves and displays credentials:
$ ./openshift-install --dir <installation_directory> wait-for install-complete1 - 1
- For
<installation_directory>, specify the path to the directory that you stored the installation files in.
Example output
INFO Waiting up to 30m0s for the cluster to initialize...The command succeeds when the Cluster Version Operator finishes deploying the OpenShift Container Platform cluster from Kubernetes API server.
Important-
The Ignition config files that the installation program generates contain certificates that expire after 24 hours, which are then renewed at that time. If the cluster is shut down before renewing the certificates and the cluster is later restarted after the 24 hours have elapsed, the cluster automatically recovers the expired certificates. The exception is that you must manually approve the pending
node-bootstrappercertificate signing requests (CSRs) to recover kubelet certificates. See the documentation for Recovering from expired control plane certificates for more information. - It is recommended that you use Ignition config files within 12 hours after they are generated because the 24-hour certificate rotates from 16 to 22 hours after the cluster is installed. By using the Ignition config files within 12 hours, you can avoid installation failure if the certificate update runs during installation.
Confirm that the Kubernetes API server is communicating with the pods.
To view a list of all pods, use the following command:
$ oc get pods --all-namespacesExample output
NAMESPACE NAME READY STATUS RESTARTS AGE openshift-apiserver-operator openshift-apiserver-operator-85cb746d55-zqhs8 1/1 Running 1 9m openshift-apiserver apiserver-67b9g 1/1 Running 0 3m openshift-apiserver apiserver-ljcmx 1/1 Running 0 1m openshift-apiserver apiserver-z25h4 1/1 Running 0 2m openshift-authentication-operator authentication-operator-69d5d8bf84-vh2n8 1/1 Running 0 5m ...View the logs for a pod that is listed in the output of the previous command by using the following command:
$ oc logs <pod_name> -n <namespace>1 - 1
- Specify the pod name and namespace, as shown in the output of the previous command.
If the pod logs display, the Kubernetes API server can communicate with the cluster machines.
For an installation with Fibre Channel Protocol (FCP), additional steps are required to enable multipathing. Do not enable multipathing during installation.
See "Enabling multipathing with kernel arguments on RHCOS" in the Post-installation configuration documentation for more information.
- Register your cluster on the Cluster registration page.
7.3.17. Telemetry access for OpenShift Container Platform
In OpenShift Container Platform 4.7, the Telemetry service, which runs by default to provide metrics about cluster health and the success of updates, requires internet access. If your cluster is connected to the internet, Telemetry runs automatically, and your cluster is registered to OpenShift Cluster Manager.
After you confirm that your OpenShift Cluster Manager inventory is correct, either maintained automatically by Telemetry or manually by using OpenShift Cluster Manager, use subscription watch to track your OpenShift Container Platform subscriptions at the account or multi-cluster level.
7.3.18. Next steps
- Customize your cluster.
-
Configure image streams for the Cluster Samples Operator and the
must-gathertool. - Learn how to use Operator Lifecycle Manager (OLM) on restricted networks.
- If the mirror registry that you used to install your cluster has a trusted CA, add it to the cluster by configuring additional trust stores.
- If necessary, you can opt out of remote health reporting.
Chapter 8. Deploying installer-provisioned clusters on bare metal
8.1. Overview
Installer-provisioned installation provides support for installing OpenShift Container Platform on bare metal nodes. This guide provides a methodology to achieving a successful installation.
During installer-provisioned installation on bare metal, the installer on the bare metal node labeled as provisioner creates a bootstrap VM. The role of the bootstrap VM is to assist in the process of deploying an OpenShift Container Platform cluster. The bootstrap VM connects to the baremetal network and to the provisioning network, if present, via the network bridges.
When the installation of OpenShift Container Platform control plane nodes is complete and fully operational, the installer destroys the bootstrap VM automatically and moves the virtual IP addresses (VIPs) to the appropriate nodes accordingly. The API VIP moves to the control plane nodes and the Ingress VIP moves to the worker nodes.
8.2. Prerequisites
Installer-provisioned installation of OpenShift Container Platform requires:
- One provisioner node with Red Hat Enterprise Linux (RHEL) 8.x installed.
- Three control plane nodes.
- Baseboard Management Controller (BMC) access to each node.
At least one network:
- One required routable network
- One optional network for provisioning nodes; and,
- One optional management network.
Before starting an installer-provisioned installation of OpenShift Container Platform, ensure the hardware environment meets the following requirements.
8.2.1. Node requirements
Installer-provisioned installation involves a number of hardware node requirements:
-
CPU architecture: All nodes must use
x86_64CPU architecture. - Similar nodes: Red Hat recommends nodes have an identical configuration per role. That is, Red Hat recommends nodes be the same brand and model with the same CPU, memory, and storage configuration.
-
Baseboard Management Controller: The
provisionernode must be able to access the baseboard management controller (BMC) of each OpenShift Container Platform cluster node. You may use IPMI, Redfish, or a proprietary protocol. -
Latest generation: Nodes must be of the most recent generation. Because the installer-provisioned installation relies on BMC protocols, the hardware must support IPMI cipher suite 17. Additionally, RHEL 8 ships with the most recent drivers for RAID controllers. Ensure that the nodes are recent enough to support RHEL 8 for the
provisionernode and RHCOS 8 for the control plane and worker nodes. - Registry node: (Optional) If setting up a disconnected mirrored registry, it is recommended the registry reside in its own node.
-
Provisioner node: Installer-provisioned installation requires one
provisionernode. - Control plane: Installer-provisioned installation requires three control plane nodes for high availability.
- Worker nodes: While not required, a typical production cluster has one or more worker nodes. Smaller clusters are more resource efficient for administrators and developers during development, production, and testing.
-
Network interfaces: Each node must have at least one network interface for the routable
baremetalnetwork. Each node must have one network interface for aprovisioningnetwork when using theprovisioningnetwork for deployment. Using theprovisioningnetwork is the default configuration. Network interface naming must be consistent across control plane nodes for the provisioning network. For example, if a control plane node uses theeth0NIC for the provisioning network, the other control plane nodes must use it as well. Unified Extensible Firmware Interface (UEFI): Installer-provisioned installation requires UEFI boot on all OpenShift Container Platform nodes when using IPv6 addressing on the
provisioningnetwork. In addition, UEFI Device PXE Settings must be set to use the IPv6 protocol on theprovisioningnetwork NIC, but omitting theprovisioningnetwork removes this requirement.ImportantWhen starting the installation from virtual media such as an ISO image, delete all old UEFI boot table entries. If the boot table includes entries that are not generic entries provided by the firmware, the installation might fail.
- Secure Boot: Many production scenarios require nodes with Secure Boot enabled to verify the node only boots with trusted software, such as UEFI firmware drivers, EFI applications, and the operating system. To deploy an OpenShift Container Platform cluster with Secure Boot, you must enable UEFI boot mode and Secure Boot on each control plane node and each worker node. Red Hat supports Secure Boot only when installer-provisioned installations use Red Fish Virtual Media. Red Hat does not support Secure Boot with self-generated keys.
8.2.2. Firmware requirements for installing with virtual media
The installer for installer-provisioned OpenShift Container Platform clusters validates the hardware and firmware compatibility with Redfish virtual media. The following table lists supported firmware for installer-provisioned OpenShift Container Platform clusters deployed with Redfish virtual media.
| Hardware | Model | Management | Firmware Versions |
|---|---|---|---|
| HP | 10th Generation | iLO5 | N/A |
| Dell | 14th Generation | iDRAC 9 | v4.20.20.20 - 04.40.00.00 |
| 13th Generation | iDRAC 8 | v2.75.75.75+ |
Refer to the hardware documentation for the nodes or contact the hardware vendor for information on updating the firmware.
For HP servers, Redfish virtual media is not supported on 9th generation systems running iLO4, because Ironic does not support iLO4 with virtual media.
For Dell servers, ensure the OpenShift Container Platform cluster nodes have AutoAttach Enabled through the iDRAC console. The menu path is: Configuration → Virtual Media → Attach Mode → AutoAttach . With iDRAC 9 firmware version 04.40.00.00, the Virtual Console plug-in defaults to eHTML5, which causes problems with the InsertVirtualMedia workflow. Set the plug-in to HTML5 to avoid this issue. The menu path is: Configuration → Virtual console → Plug-in Type → HTML5 .
The installer will not initiate installation on a node if the node firmware is below the foregoing versions when installing with virtual media.
8.2.3. Network requirements
Installer-provisioned installation of OpenShift Container Platform involves several network requirements. First, installer-provisioned installation involves an optional non-routable provisioning network for provisioning the operating system on each bare metal node. Second, installer-provisioned installation involves a routable baremetal network.
8.2.3.1. Configuring NICs
OpenShift Container Platform deploys with two networks:
-
provisioning: Theprovisioningnetwork is an optional non-routable network used for provisioning the underlying operating system on each node that is a part of the OpenShift Container Platform cluster. When deploying using theprovisioningnetwork, the first NIC on each node, such aseth0oreno1, must interface with theprovisioningnetwork. -
baremetal: Thebaremetalnetwork is a routable network. When deploying using theprovisioningnetwork, the second NIC on each node, such aseth1oreno2, must interface with thebaremetalnetwork. When deploying without aprovisioningnetwork, you can use any NIC on each node to interface with thebaremetalnetwork.
Each NIC should be on a separate VLAN corresponding to the appropriate network.
8.2.3.2. Configuring the DNS server
Clients access the OpenShift Container Platform cluster nodes over the baremetal network. A network administrator must configure a subdomain or subzone where the canonical name extension is the cluster name.
<cluster_name>.<domain-name>For example:
test-cluster.example.comOpenShift Container Platform includes functionality that uses cluster membership information to generate A/AAAA records. This resolves the node names to their IP addresses. Once the nodes are registered with the API, the cluster can disperse node information without using CoreDNS-mDNS. This eliminates the network traffic associated with multicast DNS.
8.2.3.3. Dynamic Host Configuration Protocol (DHCP) requirements
By default, installer-provisioned installation deploys ironic-dnsmasq with DHCP enabled for the provisioning network. No other DHCP servers should be running on the provisioning network when the provisioningNetwork configuration setting is set to managed, which is the default value. If you have a DHCP server running on the provisioning network, you must set the provisioningNetwork configuration setting to unmanaged in the install-config.yaml file.
Network administrators must reserve IP addresses for each node in the OpenShift Container Platform cluster for the baremetal network on an external DHCP server.
8.2.3.4. Reserving IP addresses for nodes with the DHCP server
For the baremetal network, a network administrator must reserve a number of IP addresses to ensure that they do not change after deployment, including:
Two virtual IP addresses:
- One IP address for the API endpoint.
- One IP address for the wildcard ingress endpoint.
- One IP address for the provisioner node.
- One IP address for each control plane (master) node.
- One IP address for each worker node.
Some administrators prefer to use static IP addresses so that each node’s IP address remains constant in the absence of a DHCP server. To use static IP addresses in the OpenShift Container Platform cluster, reserve the IP addresses with an infinite lease. During deployment, the installer will reconfigure the NICs from DHCP assigned addresses to static IP addresses. NICs with DHCP leases that are not infinite will remain configured to use DHCP.
Setting IP addresses with an infinite lease is incompatible with network configuration deployed by using the Machine Config Operator.
Your DHCP server must provide a DHCP expiration time of 4294967295 seconds to properly set an infinite lease as specified by rfc2131. If a lesser value is returned for the DHCP infinite lease time, the node reports an error and a permanent IP is not set for the node. In RHEL 8, dhcpd does not provide infinite leases. If you want to use the provisioner node to serve dynamic IP addresses with infinite lease times, use dnsmasq rather than dhcpd.
Do not change a worker node’s IP address manually after deployment. To change the IP address of a worker node after deployment, you must mark the worker node unschedulable, evacuate the pods, delete the node, and recreate it with the new IP address. See "Working with nodes" for additional details. To change the IP address of a control plane node after deployment, contact support.
The storage interface requires a DHCP reservation.
The following table provides an exemplary embodiment of fully qualified domain names. The API and Nameserver addresses begin with canonical name extensions. The hostnames of the control plane and worker nodes are exemplary, so you can use any host naming convention you prefer.
| Usage | Host Name | IP |
|---|---|---|
| API | api.<cluster_name>.<domain> | <ip> |
| Ingress LB (apps) | *.apps.<cluster_name>.<domain> | <ip> |
| Provisioner node | provisioner.<cluster_name>.<domain> | <ip> |
| Master-0 | openshift-master-0.<cluster_name>.<domain> | <ip> |
| Master-1 | openshift-master-1.<cluster_name>.<domain> | <ip> |
| Master-2 | openshift-master-2.<cluster_name>.<domain> | <ip> |
| Worker-0 | openshift-worker-0.<cluster_name>.<domain> | <ip> |
| Worker-1 | openshift-worker-1.<cluster_name>.<domain> | <ip> |
| Worker-n | openshift-worker-n.<cluster_name>.<domain> | <ip> |
8.2.3.5. Network Time Protocol (NTP)
Each OpenShift Container Platform node in the cluster must have access to an NTP server. OpenShift Container Platform nodes use NTP to synchronize their clocks. For example, cluster nodes use SSL certificates that require validation, which might fail if the date and time between the nodes are not in sync.
Define a consistent clock date and time format in each cluster node’s BIOS settings, or installation might fail.
You may reconfigure the control plane nodes to act as NTP servers on disconnected clusters, and reconfigure worker nodes to retrieve time from the control plane nodes.
8.2.3.6. State-driven network configuration requirements (Technology Preview)
OpenShift Container Platform supports additional post-installation state-driven network configuration on the secondary network interfaces of cluster nodes using kubernetes-nmstate. For example, system administrators might configure a secondary network interface on cluster nodes after installation for a storage network.
Configuration must occur before scheduling pods.
State-driven network configuration requires installing kubernetes-nmstate, and also requires Network Manager running on the cluster nodes. See OpenShift Virtualization > Kubernetes NMState (Tech Preview) for additional details.
8.2.3.7. Port access for the out-of-band management IP address
The out-of-band management IP address is on a separate network from the node. To ensure that the out-of-band management can communicate with the baremetal node during installation, the out-of-band management IP address address must be granted access to the TCP 6180 port.
8.2.4. Configuring nodes
Configuring nodes when using the provisioning network
Each node in the cluster requires the following configuration for proper installation.
A mismatch between nodes will cause an installation failure.
While the cluster nodes can contain more than two NICs, the installation process only focuses on the first two NICs:
| NIC | Network | VLAN |
| NIC1 |
| <provisioning-vlan> |
| NIC2 |
| <baremetal-vlan> |
NIC1 is a non-routable network (provisioning) that is only used for the installation of the OpenShift Container Platform cluster.
The Red Hat Enterprise Linux (RHEL) 8.x installation process on the provisioner node might vary. To install Red Hat Enterprise Linux (RHEL) 8.x using a local Satellite server or a PXE server, PXE-enable NIC2.
| PXE | Boot order |
|
NIC1 PXE-enabled | 1 |
|
NIC2 | 2 |
Ensure PXE is disabled on all other NICs.
Configure the control plane and worker nodes as follows:
| PXE | Boot order |
| NIC1 PXE-enabled (provisioning network) | 1 |
Configuring nodes without the provisioning network
The installation process requires one NIC:
| NIC | Network | VLAN |
| NICx |
| <baremetal-vlan> |
NICx is a routable network (baremetal) that is used for the installation of the OpenShift Container Platform cluster, and routable to the internet.
Configuring nodes for Secure Boot
Secure Boot prevents a node from booting unless it verifies the node is using only trusted software, such as UEFI firmware drivers, EFI applications and the operating system. Red Hat only supports Secure Boot when deploying with RedFish Virtual Media.
To enable Secure Boot, refer to the hardware guide for the node. To enable Secure Boot, execute the following:
- Boot the node and enter the BIOS menu.
- Set the node’s boot mode to UEFI Enabled.
Enable Secure Boot.
ImportantRed Hat does not support Secure Boot with self-generated keys.
8.2.5. Out-of-band management
Nodes will typically have an additional NIC used by the Baseboard Management Controllers (BMCs). These BMCs must be accessible from the provisioner node.
Each node must be accessible via out-of-band management. When using an out-of-band management network, the provisioner node requires access to the out-of-band management network for a successful OpenShift Container Platform 4 installation.
The out-of-band management setup is out of scope for this document. We recommend setting up a separate management network for out-of-band management. However, using the provisioning network or the baremetal network are valid options.
8.2.6. Required data for installation
Prior to the installation of the OpenShift Container Platform cluster, gather the following information from all cluster nodes:
Out-of-band management IP
Examples
- Dell (iDRAC) IP
- HP (iLO) IP
- Fujitsu (iRMC) IP
When using the provisioning network
-
NIC1 (
provisioning) MAC address -
NIC2 (
baremetal) MAC address
When omitting the provisioning network
-
NICx (
baremetal) MAC address
8.2.7. Validation checklist for nodes
When using the provisioning network
-
❏ NIC1 VLAN is configured for the
provisioningnetwork. (optional) -
❏ NIC1 is PXE-enabled on the provisioner, control plane (master), and worker nodes when using a
provisioningnetwork. (optional) -
❏ NIC2 VLAN is configured for the
baremetalnetwork. - ❏ PXE has been disabled on all other NICs.
- ❏ Control plane and worker nodes are configured.
- ❏ All nodes accessible via out-of-band management.
- ❏ A separate management network has been created. (optional)
- ❏ Required data for installation.
When omitting the provisioning network
-
❏ NICx VLAN is configured for the
baremetalnetwork. - ❏ Control plane and worker nodes are configured.
- ❏ All nodes accessible via out-of-band management.
- ❏ A separate management network has been created. (optional)
- ❏ Required data for installation.
8.3. Setting up the environment for an OpenShift installation
8.3.1. Installing RHEL on the provisioner node
With the networking configuration complete, the next step is to install RHEL 8.x on the provisioner node. The installer uses the provisioner node as the orchestrator while installing the OpenShift Container Platform cluster. For the purposes of this document, installing RHEL on the provisioner node is out of scope. However, options include but are not limited to using a RHEL Satellite server, PXE, or installation media.
8.3.2. Preparing the provisioner node for OpenShift Container Platform installation
Perform the following steps to prepare the environment.
Procedure
-
Log in to the provisioner node via
ssh. Create a non-root user (
kni) and provide that user withsudoprivileges:# useradd kni # passwd kni # echo "kni ALL=(root) NOPASSWD:ALL" | tee -a /etc/sudoers.d/kni # chmod 0440 /etc/sudoers.d/kniCreate an
sshkey for the new user:# su - kni -c "ssh-keygen -t ed25519 -f /home/kni/.ssh/id_rsa -N ''"Log in as the new user on the provisioner node:
# su - kni $Use Red Hat Subscription Manager to register the provisioner node:
$ sudo subscription-manager register --username=<user> --password=<pass> --auto-attach $ sudo subscription-manager repos --enable=rhel-8-for-x86_64-appstream-rpms --enable=rhel-8-for-x86_64-baseos-rpmsNoteFor more information about Red Hat Subscription Manager, see Using and Configuring Red Hat Subscription Manager.
Install the following packages:
$ sudo dnf install -y libvirt qemu-kvm mkisofs python3-devel jq ipmitoolModify the user to add the
libvirtgroup to the newly created user:$ sudo usermod --append --groups libvirt <user>Restart
firewalldand enable thehttpservice:$ sudo systemctl start firewalld $ sudo firewall-cmd --zone=public --add-service=http --permanent $ sudo firewall-cmd --reloadStart and enable the
libvirtdservice:$ sudo systemctl enable libvirtd --nowCreate the
defaultstorage pool and start it:$ sudo virsh pool-define-as --name default --type dir --target /var/lib/libvirt/images $ sudo virsh pool-start default $ sudo virsh pool-autostart defaultConfigure networking.
NoteYou can also configure networking from the web console.
Export the
baremetalnetwork NIC name:$ export PUB_CONN=<baremetal_nic_name>Configure the
baremetalnetwork:$ sudo nohup bash -c " nmcli con down \"$PUB_CONN\" nmcli con delete \"$PUB_CONN\" # RHEL 8.1 appends the word \"System\" in front of the connection, delete in case it exists nmcli con down \"System $PUB_CONN\" nmcli con delete \"System $PUB_CONN\" nmcli connection add ifname baremetal type bridge con-name baremetal nmcli con add type bridge-slave ifname \"$PUB_CONN\" master baremetal pkill dhclient;dhclient baremetal "If you are deploying with a
provisioningnetwork, export theprovisioningnetwork NIC name:$ export PROV_CONN=<prov_nic_name>If you are deploying with a
provisioningnetwork, configure theprovisioningnetwork:$ sudo nohup bash -c " nmcli con down \"$PROV_CONN\" nmcli con delete \"$PROV_CONN\" nmcli connection add ifname provisioning type bridge con-name provisioning nmcli con add type bridge-slave ifname \"$PROV_CONN\" master provisioning nmcli connection modify provisioning ipv6.addresses fd00:1101::1/64 ipv6.method manual nmcli con down provisioning nmcli con up provisioning "NoteThe
sshconnection might disconnect after executing these steps.The IPv6 address can be any address as long as it is not routable via the
baremetalnetwork.Ensure that UEFI is enabled and UEFI PXE settings are set to the IPv6 protocol when using IPv6 addressing.
Configure the IPv4 address on the
provisioningnetwork connection.$ nmcli connection modify provisioning ipv4.addresses 172.22.0.254/24 ipv4.method manualsshback into theprovisionernode (if required).# ssh kni@provisioner.<cluster-name>.<domain>Verify the connection bridges have been properly created.
$ sudo nmcli con showNAME UUID TYPE DEVICE baremetal 4d5133a5-8351-4bb9-bfd4-3af264801530 bridge baremetal provisioning 43942805-017f-4d7d-a2c2-7cb3324482ed bridge provisioning virbr0 d9bca40f-eee1-410b-8879-a2d4bb0465e7 bridge virbr0 bridge-slave-eno1 76a8ed50-c7e5-4999-b4f6-6d9014dd0812 ethernet eno1 bridge-slave-eno2 f31c3353-54b7-48de-893a-02d2b34c4736 ethernet eno2Create a
pull-secret.txtfile.$ vim pull-secret.txtIn a web browser, navigate to Install OpenShift on Bare Metal with installer-provisioned infrastructure, and scroll down to the Downloads section. Click Copy pull secret. Paste the contents into the
pull-secret.txtfile and save the contents in thekniuser’s home directory.
8.3.3. Retrieving the OpenShift Container Platform installer
Use the latest-4.x version of the installer to deploy the latest generally available version of OpenShift Container Platform:
$ export VERSION=latest-4.7
export RELEASE_IMAGE=$(curl -s https://mirror.openshift.com/pub/openshift-v4/clients/ocp/$VERSION/release.txt | grep 'Pull From: quay.io' | awk -F ' ' '{print $3}')8.3.4. Extracting the OpenShift Container Platform installer
After retrieving the installer, the next step is to extract it.
Procedure
Set the environment variables:
$ export cmd=openshift-baremetal-install $ export pullsecret_file=~/pull-secret.txt $ export extract_dir=$(pwd)Get the
ocbinary:$ curl -s https://mirror.openshift.com/pub/openshift-v4/clients/ocp/$VERSION/openshift-client-linux.tar.gz | tar zxvf - ocExtract the installer:
$ sudo cp oc /usr/local/bin $ oc adm release extract --registry-config "${pullsecret_file}" --command=$cmd --to "${extract_dir}" ${RELEASE_IMAGE} $ sudo cp openshift-baremetal-install /usr/local/bin
8.3.5. Creating an RHCOS images cache (optional)
To employ image caching, you must download two images: the Red Hat Enterprise Linux CoreOS (RHCOS) image used by the bootstrap VM and the RHCOS image used by the installer to provision the different nodes. Image caching is optional, but especially useful when running the installer on a network with limited bandwidth.
If you are running the installer on a network with limited bandwidth and the RHCOS images download takes more than 15 to 20 minutes, the installer will timeout. Caching images on a web server will help in such scenarios.
Use the following steps to install a container that contains the images.
Install
podman.$ sudo dnf install -y podmanOpen firewall port
8080to be used for RHCOS image caching.$ sudo firewall-cmd --add-port=8080/tcp --zone=public --permanent$ sudo firewall-cmd --reloadCreate a directory to store the
bootstraposimageandclusterosimage.$ mkdir /home/kni/rhcos_image_cacheSet the appropriate SELinux context for the newly created directory.
$ sudo semanage fcontext -a -t httpd_sys_content_t "/home/kni/rhcos_image_cache(/.*)?" $ sudo restorecon -Rv rhcos_image_cache/Get the commit ID from the installer. The ID determines which images the installer needs to download.
$ export COMMIT_ID=$(/usr/local/bin/openshift-baremetal-install version | grep '^built from commit' | awk '{print $4}')Get the URI for the RHCOS image that the installer will deploy on the nodes.
$ export RHCOS_OPENSTACK_URI=$(curl -s -S https://raw.githubusercontent.com/openshift/installer/$COMMIT_ID/data/data/rhcos.json | jq .images.openstack.path | sed 's/"//g')Get the URI for the RHCOS image that the installer will deploy on the bootstrap VM.
$ export RHCOS_QEMU_URI=$(curl -s -S https://raw.githubusercontent.com/openshift/installer/$COMMIT_ID/data/data/rhcos.json | jq .images.qemu.path | sed 's/"//g')Get the path where the images are published.
$ export RHCOS_PATH=$(curl -s -S https://raw.githubusercontent.com/openshift/installer/$COMMIT_ID/data/data/rhcos.json | jq .baseURI | sed 's/"//g')Get the SHA hash for the RHCOS image that will be deployed on the bootstrap VM.
$ export RHCOS_QEMU_SHA_UNCOMPRESSED=$(curl -s -S https://raw.githubusercontent.com/openshift/installer/$COMMIT_ID/data/data/rhcos.json | jq -r '.images.qemu["uncompressed-sha256"]')Get the SHA hash for the RHCOS image that will be deployed on the nodes.
$ export RHCOS_OPENSTACK_SHA_COMPRESSED=$(curl -s -S https://raw.githubusercontent.com/openshift/installer/$COMMIT_ID/data/data/rhcos.json | jq -r '.images.openstack.sha256')Download the images and place them in the
/home/kni/rhcos_image_cachedirectory.$ curl -L ${RHCOS_PATH}${RHCOS_QEMU_URI} -o /home/kni/rhcos_image_cache/${RHCOS_QEMU_URI} $ curl -L ${RHCOS_PATH}${RHCOS_OPENSTACK_URI} -o /home/kni/rhcos_image_cache/${RHCOS_OPENSTACK_URI}Confirm SELinux type is of
httpd_sys_content_tfor the newly created files.$ ls -Z /home/kni/rhcos_image_cacheCreate the pod.
$ podman run -d --name rhcos_image_cache \ -v /home/kni/rhcos_image_cache:/var/www/html \ -p 8080:8080/tcp \ quay.io/centos7/httpd-24-centos7:latest
8.3.6. Configuration files
8.3.6.1. Configuring the install-config.yaml file
The install-config.yaml file requires some additional details. Most of the information is teaching the installer and the resulting cluster enough about the available hardware so that it is able to fully manage it.
Configure
install-config.yaml. Change the appropriate variables to match the environment, includingpullSecretandsshKey.apiVersion: v1 baseDomain: <domain> metadata: name: <cluster-name> networking: machineCIDR: <public-cidr> networkType: OVNKubernetes compute: - name: worker replicas: 21 controlPlane: name: master replicas: 3 platform: baremetal: {} platform: baremetal: apiVIP: <api-ip> ingressVIP: <wildcard-ip> provisioningNetworkInterface: <NIC1> provisioningNetworkCIDR: <CIDR> hosts: - name: openshift-master-0 role: master bmc: address: ipmi://<out-of-band-ip>2 username: <user> password: <password> bootMACAddress: <NIC1-mac-address> hardwareProfile: default - name: <openshift-master-1> role: master bmc: address: ipmi://<out-of-band-ip>3 username: <user> password: <password> bootMACAddress: <NIC1-mac-address> hardwareProfile: default - name: <openshift-master-2> role: master bmc: address: ipmi://<out-of-band-ip>4 username: <user> password: <password> bootMACAddress: <NIC1-mac-address> hardwareProfile: default - name: <openshift-worker-0> role: worker bmc: address: ipmi://<out-of-band-ip>5 username: <user> password: <password> bootMACAddress: <NIC1-mac-address> hardwareProfile: unknown - name: <openshift-worker-1> role: worker bmc: address: ipmi://<out-of-band-ip> username: <user> password: <password> bootMACAddress: <NIC1-mac-address> hardwareProfile: unknown pullSecret: '<pull_secret>' sshKey: '<ssh_pub_key>'Create a directory to store cluster configs.
$ mkdir ~/clusterconfigs $ cp install-config.yaml ~/clusterconfigsEnsure all bare metal nodes are powered off prior to installing the OpenShift Container Platform cluster.
$ ipmitool -I lanplus -U <user> -P <password> -H <management-server-ip> power offRemove old bootstrap resources if any are left over from a previous deployment attempt.
for i in $(sudo virsh list | tail -n +3 | grep bootstrap | awk {'print $2'}); do sudo virsh destroy $i; sudo virsh undefine $i; sudo virsh vol-delete $i --pool $i; sudo virsh vol-delete $i.ign --pool $i; sudo virsh pool-destroy $i; sudo virsh pool-undefine $i; done
8.3.6.2. Setting proxy settings within the install-config.yaml file (optional)
To deploy an OpenShift Container Platform cluster using a proxy, make the following changes to the install-config.yaml file.
apiVersion: v1
baseDomain: <domain>
proxy:
httpProxy: http://USERNAME:PASSWORD@proxy.example.com:PORT
httpsProxy: https://USERNAME:PASSWORD@proxy.example.com:PORT
noProxy: <WILDCARD_OF_DOMAIN>,<PROVISIONING_NETWORK/CIDR>,<BMC_ADDRESS_RANGE/CIDR>
The following is an example of noProxy with values.
noProxy: .example.com,172.22.0.0/24,10.10.0.0/24With a proxy enabled, set the appropriate values of the proxy in the corresponding key/value pair.
Key considerations:
-
If the proxy does not have an HTTPS proxy, change the value of
httpsProxyfromhttps://tohttp://. -
If using a provisioning network, include it in the
noProxysetting, otherwise the installer will fail. -
Set all of the proxy settings as environment variables within the provisioner node. For example,
HTTP_PROXY,HTTPS_PROXY, andNO_PROXY.
When provisioning with IPv6, you cannot define a CIDR address block in the noProxy settings. You must define each address separately.
8.3.6.3. Modifying the install-config.yaml file for no provisioning network (optional)
To deploy an OpenShift Container Platform cluster without a provisioning network, make the following changes to the install-config.yaml file.
platform:
baremetal:
apiVIP: <apiVIP>
ingressVIP: <ingress/wildcard VIP>
provisioningNetwork: "Disabled"8.3.6.4. Configuring managed Secure Boot in the install-config.yaml file (optional)
You can enable managed Secure Boot when deploying an installer-provisioned cluster using Redfish BMC addressing, such as redfish, redfish-virtualmedia, or idrac-virtualmedia. To enable managed Secure Boot, add the bootMode configuration setting to each node:
Example
hosts:
- name: openshift-master-0
role: master
bmc:
address: redfish://<out_of_band_ip>
username: <user>
password: <password>
bootMACAddress: <NIC1_mac_address>
rootDeviceHints:
deviceName: "/dev/sda"
bootMode: UEFISecureBoot - 1
- Ensure the
bmc.addresssetting usesredfish,redfish-virtualmedia, oridrac-virtualmediaas the protocol. For additional information, see "BMC addressing for HPE iLO" or "BMC addressing for Dell iDRAC". - 2
- The
bootModesetting isUEFIby default. To enable managed Secure Boot, change it toUEFISecureBoot.
To ensure the nodes can support managed Secure Boot, see "Configuring nodes" in the "Prerequisites". If the nodes do not support managed Secure Boot, see "Configuring nodes for Secure Boot manually" in the "Configuring nodes" section. Configuring Secure Boot manually requires Redfish virtual media.
Red Hat does not support Secure Boot with IPMI because IPMI does not provide Secure Boot management facilities.
8.3.6.5. Additional install-config parameters
See the following tables for the required parameters, the hosts parameter, and the bmc parameter for the install-config.yaml file.
| Parameters | Default | Description |
|---|---|---|
|
|
The domain name for the cluster. For example, | |
|
|
The | |
|
|
The | |
|
The name to be given to the OpenShift Container Platform cluster. For example, | |
|
The public CIDR (Classless Inter-Domain Routing) of the external network. For example, | |
| The OpenShift Container Platform cluster requires a name be provided for worker (or compute) nodes even if there are zero nodes. | |
| Replicas sets the number of worker (or compute) nodes in the OpenShift Container Platform cluster. | |
| The OpenShift Container Platform cluster requires a name for control plane (master) nodes. | |
| Replicas sets the number of control plane (master) nodes included as part of the OpenShift Container Platform cluster. | |
|
| The default configuration used for machine pools without a platform configuration. | |
|
|
| The VIP to use for internal API communication. This setting must either be provided or pre-configured in the DNS so that the default name resolves correctly. |
|
|
|
|
|
|
| The VIP to use for ingress traffic. |
| Parameters | Default | Description |
|---|---|---|
|
|
|
Defines the IP range for nodes on the |
|
|
|
The CIDR for the network to use for provisioning. This option is required when not using the default address range on the |
|
|
The third IP address of the |
The IP address within the cluster where the provisioning services run. Defaults to the third IP address of the |
|
|
The second IP address of the |
The IP address on the bootstrap VM where the provisioning services run while the installer is deploying the control plane (master) nodes. Defaults to the second IP address of the |
|
|
|
The name of the |
|
|
|
The name of the |
|
| The default configuration used for machine pools without a platform configuration. | |
|
|
A URL to override the default operating system image for the bootstrap node. The URL must contain a SHA-256 hash of the image. For example: | |
|
|
A URL to override the default operating system for cluster nodes. The URL must include a SHA-256 hash of the image. For example, | |
|
|
Set this parameter to
Set this parameter to | |
|
| Set this parameter to the appropriate HTTP proxy used within your environment. | |
|
| Set this parameter to the appropriate HTTPS proxy used within your environment. | |
|
| Set this parameter to the appropriate list of exclusions for proxy usage within your environment. |
Hosts
The hosts parameter is a list of separate bare metal assets used to build the cluster.
| Name | Default | Description |
|
|
The name of the | |
|
|
The role of the bare metal node. Either | |
|
| Connection details for the baseboard management controller. See the BMC addressing section for additional details. | |
|
|
The MAC address of the NIC that the host uses for the Note
You must provide a valid MAC address from the host if you disabled the |
8.3.6.6. BMC addressing
Most vendors support BMC addressing with the Intelligent Platform Management Interface (IPMI). IPMI does not encrypt communications. It is suitable for use within a data center over a secured or dedicated management network. Check with your vendor to see if they support Redfish network boot. Redfish delivers simple and secure management for converged, hybrid IT and the Software Defined Data Center (SDDC). Redfish is human readable and machine capable, and leverages common Internet and web services standards to expose information directly to the modern tool chain. If your hardware does not support Redfish network boot, use IPMI.
IPMI
Hosts using IPMI use the ipmi://<out-of-band-ip>:<port> address format, which defaults to port 623 if not specified. The following example demonstrates an IPMI configuration within the install-config.yaml file.
platform:
baremetal:
hosts:
- name: openshift-master-0
role: master
bmc:
address: ipmi://<out-of-band-ip>
username: <user>
password: <password>Redfish network boot
To enable Redfish, use redfish:// or redfish+http:// to disable TLS. The installer requires both the hostname or the IP address and the path to the system ID. The following example demonstrates a Redfish configuration within the install-config.yaml file.
platform:
baremetal:
hosts:
- name: openshift-master-0
role: master
bmc:
address: redfish://<out-of-band-ip>/redfish/v1/Systems/1
username: <user>
password: <password>
While it is recommended to have a certificate of authority for the out-of-band management addresses, you must include disableCertificateVerification: True in the bmc configuration if using self-signed certificates. The following example demonstrates a Redfish configuration using the disableCertificateVerification: True configuration parameter within the install-config.yaml file.
platform:
baremetal:
hosts:
- name: openshift-master-0
role: master
bmc:
address: redfish://<out-of-band-ip>/redfish/v1/Systems/1
username: <user>
password: <password>
disableCertificateVerification: True8.3.6.7. BMC addressing for Dell
The address field for each bmc entry is a URL for connecting to the OpenShift Container Platform cluster nodes, including the type of controller in the URL scheme and its location on the network.
platform:
baremetal:
hosts:
- name: <hostname>
role: <master | worker>
bmc:
address: <address>
username: <user>
password: <password>For Dell hardware, Red Hat supports Redfish virtual media, Redfish network boot, and IPMI.
| Protocol | Address Format |
|---|---|
| Redfish virtual media |
|
| Redfish network boot |
|
| IPMI |
|
Use idrac-virtualmedia as the protocol for Redfish virtual media. redfish-virtualmedia will not work on Dell hardware. Dell’s idrac-virtualmedia uses the Redfish standard with Dell’s OEM extensions.
See the following sections for additional details.
Redfish virtual media for Dell
For Redfish virtual media on Dell servers, use idrac-virtualmedia:// in the address setting. Using redfish-virtualmedia:// will not work.
The following example demonstrates using iDRAC virtual media within the install-config.yaml file.
platform:
baremetal:
hosts:
- name: openshift-master-0
role: master
bmc:
address: idrac-virtualmedia://<out-of-band-ip>/redfish/v1/Systems/System.Embedded.1
username: <user>
password: <password>
While it is recommended to have a certificate of authority for the out-of-band management addresses, you must include disableCertificateVerification: True in the bmc configuration if using self-signed certificates. The following example demonstrates a Redfish configuration using the disableCertificateVerification: True configuration parameter within the install-config.yaml file.
platform:
baremetal:
hosts:
- name: openshift-master-0
role: master
bmc:
address: idrac-virtualmedia://<out-of-band-ip>/redfish/v1/Systems/System.Embedded.1
username: <user>
password: <password>
disableCertificateVerification: True
Currently, Redfish is only supported on Dell with iDRAC firmware versions 4.20.20.20 through 04.40.00.00 for installer-provisioned installations on bare metal deployments. There is a known issue with version 04.40.00.00. With iDRAC 9 firmware version 04.40.00.00, the Virtual Console plug-in defaults to eHTML5, which causes problems with the InsertVirtualMedia workflow. Set the plug-in to HTML5 to avoid this issue. The menu path is: Configuration → Virtual console → Plug-in Type → HTML5 .
Ensure the OpenShift Container Platform cluster nodes have AutoAttach Enabled through the iDRAC console. The menu path is: Configuration → Virtual Media → Attach Mode → AutoAttach .
Use idrac-virtualmedia:// as the protocol for Redfish virtual media. Using redfish-virtualmedia:// will not work on Dell hardware, because the idrac-virtualmedia:// protocol corresponds to the idrac hardware type and the Redfish protocol in Ironic. Dell’s idrac-virtualmedia:// protocol uses the Redfish standard with Dell’s OEM extensions. Ironic also supports the idrac type with the WSMAN protocol. Therefore, you must specify idrac-virtualmedia:// to avoid unexpected behavior when electing to use Redfish with virtual media on Dell hardware.
Redfish network boot for Dell
To enable Redfish, use redfish:// or redfish+http:// to disable transport layer security (TLS). The installer requires both the hostname or the IP address and the path to the system ID. The following example demonstrates a Redfish configuration within the install-config.yaml file.
platform:
baremetal:
hosts:
- name: openshift-master-0
role: master
bmc:
address: redfish://<out-of-band-ip>/redfish/v1/Systems/System.Embedded.1
username: <user>
password: <password>
While it is recommended to have a certificate of authority for the out-of-band management addresses, you must include disableCertificateVerification: True in the bmc configuration if using self-signed certificates. The following example demonstrates a Redfish configuration using the disableCertificateVerification: True configuration parameter within the install-config.yaml file.
platform:
baremetal:
hosts:
- name: openshift-master-0
role: master
bmc:
address: redfish://<out-of-band-ip>/redfish/v1/Systems/System.Embedded.1
username: <user>
password: <password>
disableCertificateVerification: True
Currently, Redfish is only supported on Dell with iDRAC firmware versions 4.20.20.20 through 04.40.00.00 for installer-provisioned installations on bare metal deployments. There is a known issue with version 04.40.00.00. With iDRAC 9 firmware version 04.40.00.00, the Virtual Console plug-in defaults to eHTML5, which causes problems with the InsertVirtualMedia workflow. Set the plug-in to HTML5 to avoid this issue. The menu path is: Configuration → Virtual console → Plug-in Type → HTML5 .
Ensure the OpenShift Container Platform cluster nodes have AutoAttach Enabled through the iDRAC console. The menu path is: Configuration → Virtual Media → Attach Mode → AutoAttach .
The redfish:// URL protocol corresponds to the redfish hardware type in Ironic.
8.3.6.8. BMC addressing for HPE
The address field for each bmc entry is a URL for connecting to the OpenShift Container Platform cluster nodes, including the type of controller in the URL scheme and its location on the network.
platform:
baremetal:
hosts:
- name: <hostname>
role: <master | worker>
bmc:
address: <address>
username: <user>
password: <password>For HPE hardware, Red Hat supports Redfish virtual media, Redfish network boot, and IPMI.
| Protocol | Address Format |
|---|---|
| Redfish virtual media |
|
| Redfish network boot |
|
| IPMI |
|
See the following sections for additional details.
Redfish virtual media for HPE
To enable Redfish virtual media for HPE servers, use redfish-virtualmedia:// in the address setting. The following example demonstrates using Redfish virtual media within the install-config.yaml file.
platform:
baremetal:
hosts:
- name: openshift-master-0
role: master
bmc:
address: redfish-virtualmedia://<out-of-band-ip>/redfish/v1/Systems/1
username: <user>
password: <password>
While it is recommended to have a certificate of authority for the out-of-band management addresses, you must include disableCertificateVerification: True in the bmc configuration if using self-signed certificates. The following example demonstrates a Redfish configuration using the disableCertificateVerification: True configuration parameter within the install-config.yaml file.
platform:
baremetal:
hosts:
- name: openshift-master-0
role: master
bmc:
address: redfish-virtualmedia://<out-of-band-ip>/redfish/v1/Systems/1
username: <user>
password: <password>
disableCertificateVerification: TrueRedfish virtual media is not supported on 9th generation systems running iLO4, because Ironic does not support iLO4 with virtual media.
Redfish network boot for HPE
To enable Redfish, use redfish:// or redfish+http:// to disable TLS. The installer requires both the hostname or the IP address and the path to the system ID. The following example demonstrates a Redfish configuration within the install-config.yaml file.
platform:
baremetal:
hosts:
- name: openshift-master-0
role: master
bmc:
address: redfish://<out-of-band-ip>/redfish/v1/Systems/1
username: <user>
password: <password>
While it is recommended to have a certificate of authority for the out-of-band management addresses, you must include disableCertificateVerification: True in the bmc configuration if using self-signed certificates. The following example demonstrates a Redfish configuration using the disableCertificateVerification: True configuration parameter within the install-config.yaml file.
platform:
baremetal:
hosts:
- name: openshift-master-0
role: master
bmc:
address: redfish://<out-of-band-ip>/redfish/v1/Systems/1
username: <user>
password: <password>
disableCertificateVerification: True8.3.6.9. Root device hints
The rootDeviceHints parameter enables the installer to provision the Red Hat Enterprise Linux CoreOS (RHCOS) image to a particular device. The installer examines the devices in the order it discovers them, and compares the discovered values with the hint values. The installer uses the first discovered device that matches the hint value. The configuration can combine multiple hints, but a device must match all hints for the installer to select it.
| Subfield | Description |
|---|---|
|
|
A string containing a Linux device name like |
|
|
A string containing a SCSI bus address like |
|
| A string containing a vendor-specific device identifier. The hint can be a substring of the actual value. |
|
| A string containing the name of the vendor or manufacturer of the device. The hint can be a sub-string of the actual value. |
|
| A string containing the device serial number. The hint must match the actual value exactly. |
|
| An integer representing the minimum size of the device in gigabytes. |
|
| A string containing the unique storage identifier. The hint must match the actual value exactly. |
|
| A string containing the unique storage identifier with the vendor extension appended. The hint must match the actual value exactly. |
|
| A string containing the unique vendor storage identifier. The hint must match the actual value exactly. |
|
| A boolean indicating whether the device should be a rotating disk (true) or not (false). |
Example usage
- name: master-0
role: master
bmc:
address: ipmi://10.10.0.3:6203
username: admin
password: redhat
bootMACAddress: de:ad:be:ef:00:40
rootDeviceHints:
deviceName: "/dev/sda"8.3.6.10. Creating the OpenShift Container Platform manifests
Create the OpenShift Container Platform manifests.
$ ./openshift-baremetal-install --dir ~/clusterconfigs create manifestsINFO Consuming Install Config from target directory WARNING Making control-plane schedulable by setting MastersSchedulable to true for Scheduler cluster settings WARNING Discarding the OpenShift Manifest that was provided in the target directory because its dependencies are dirty and it needs to be regenerated
8.3.7. Creating a disconnected registry (optional)
In some cases, you might want to install an OpenShift Container Platform cluster using a local copy of the installation registry. This could be for enhancing network efficiency because the cluster nodes are on a network that does not have access to the internet.
A local, or mirrored, copy of the registry requires the following:
- A certificate for the registry node. This can be a self-signed certificate.
- A web server that a container on a system will serve.
- An updated pull secret that contains the certificate and local repository information.
Creating a disconnected registry on a registry node is optional. The subsequent sections indicate that they are optional since they are steps you need to execute only when creating a disconnected registry on a registry node. You should execute all of the subsequent sub-sections labeled "(optional)" when creating a disconnected registry on a registry node.
8.3.7.1. Preparing the registry node to host the mirrored registry (optional)
Make the following changes to the registry node.
Procedure
Open the firewall port on the registry node.
$ sudo firewall-cmd --add-port=5000/tcp --zone=libvirt --permanent $ sudo firewall-cmd --add-port=5000/tcp --zone=public --permanent $ sudo firewall-cmd --reloadInstall the required packages for the registry node.
$ sudo yum -y install python3 podman httpd httpd-tools jqCreate the directory structure where the repository information will be held.
$ sudo mkdir -p /opt/registry/{auth,certs,data}
8.3.7.2. Generating the self-signed certificate (optional)
Generate a self-signed certificate for the registry node and put it in the /opt/registry/certs directory.
Procedure
Adjust the certificate information as appropriate.
$ host_fqdn=$( hostname --long ) $ cert_c="<Country Name>" # Country Name (C, 2 letter code) $ cert_s="<State>" # Certificate State (S) $ cert_l="<Locality>" # Certificate Locality (L) $ cert_o="<Organization>" # Certificate Organization (O) $ cert_ou="<Org Unit>" # Certificate Organizational Unit (OU) $ cert_cn="${host_fqdn}" # Certificate Common Name (CN) $ openssl req \ -newkey rsa:4096 \ -nodes \ -sha256 \ -keyout /opt/registry/certs/domain.key \ -x509 \ -days 365 \ -out /opt/registry/certs/domain.crt \ -addext "subjectAltName = DNS:${host_fqdn}" \ -subj "/C=${cert_c}/ST=${cert_s}/L=${cert_l}/O=${cert_o}/OU=${cert_ou}/CN=${cert_cn}"NoteWhen replacing
<Country Name>, ensure that it only contains two letters. For example,US.Update the registry node’s
ca-trustwith the new certificate.$ sudo cp /opt/registry/certs/domain.crt /etc/pki/ca-trust/source/anchors/ $ sudo update-ca-trust extract
8.3.7.3. Creating the registry podman container (optional)
The registry container uses the /opt/registry directory for certificates, authentication files, and to store its data files.
The registry container uses httpd and needs an htpasswd file for authentication.
Procedure
Create an
htpasswdfile in/opt/registry/authfor the container to use.$ htpasswd -bBc /opt/registry/auth/htpasswd <user> <passwd>Replace
<user>with the user name and<passwd>with the password.Create and start the registry container.
$ podman create \ --name ocpdiscon-registry \ -p 5000:5000 \ -e "REGISTRY_AUTH=htpasswd" \ -e "REGISTRY_AUTH_HTPASSWD_REALM=Registry" \ -e "REGISTRY_HTTP_SECRET=ALongRandomSecretForRegistry" \ -e "REGISTRY_AUTH_HTPASSWD_PATH=/auth/htpasswd" \ -e "REGISTRY_HTTP_TLS_CERTIFICATE=/certs/domain.crt" \ -e "REGISTRY_HTTP_TLS_KEY=/certs/domain.key" \ -e "REGISTRY_COMPATIBILITY_SCHEMA1_ENABLED=true" \ -v /opt/registry/data:/var/lib/registry:z \ -v /opt/registry/auth:/auth:z \ -v /opt/registry/certs:/certs:z \ docker.io/library/registry:2$ podman start ocpdiscon-registry
8.3.7.4. Copy and update the pull-secret (optional)
Copy the pull secret file from the provisioner node to the registry node and modify it to include the authentication information for the new registry node.
Procedure
Copy the
pull-secret.txtfile.$ scp kni@provisioner:/home/kni/pull-secret.txt pull-secret.txtUpdate the
host_fqdnenvironment variable with the fully qualified domain name of the registry node.$ host_fqdn=$( hostname --long )Update the
b64authenvironment variable with the base64 encoding of thehttpcredentials used to create thehtpasswdfile.$ b64auth=$( echo -n '<username>:<passwd>' | openssl base64 )Replace
<username>with the user name and<passwd>with the password.Set the
AUTHSTRINGenvironment variable to use thebase64authorization string. The$USERvariable is an environment variable containing the name of the current user.$ AUTHSTRING="{\"$host_fqdn:5000\": {\"auth\": \"$b64auth\",\"email\": \"$USER@redhat.com\"}}"Update the
pull-secret.txtfile.$ jq ".auths += $AUTHSTRING" < pull-secret.txt > pull-secret-update.txt
8.3.7.5. Mirroring the repository (optional)
Procedure
Copy the
ocbinary from the provisioner node to the registry node.$ sudo scp kni@provisioner:/usr/local/bin/oc /usr/local/binSet the required environment variables.
Set the release version:
$ VERSION=<release_version>For
<release_version>, specify the tag that corresponds to the version of OpenShift Container Platform to install, such as4.7.Set the local registry name and host port:
$ LOCAL_REG='<local_registry_host_name>:<local_registry_host_port>'For
<local_registry_host_name>, specify the registry domain name for your mirror repository, and for<local_registry_host_port>, specify the port that it serves content on.Set the local repository name:
$ LOCAL_REPO='<local_repository_name>'For
<local_repository_name>, specify the name of the repository to create in your registry, such asocp4/openshift4.
Mirror the remote install images to the local repository.
$ /usr/local/bin/oc adm release mirror \ -a pull-secret-update.txt \ --from=$UPSTREAM_REPO \ --to-release-image=$LOCAL_REG/$LOCAL_REPO:${VERSION} \ --to=$LOCAL_REG/$LOCAL_REPO
8.3.7.6. Modify the install-config.yaml file to use the disconnected registry (optional)
On the provisioner node, the install-config.yaml file should use the newly created pull-secret from the pull-secret-update.txt file. The install-config.yaml file must also contain the disconnected registry node’s certificate and registry information.
Procedure
Add the disconnected registry node’s certificate to the
install-config.yamlfile. The certificate should follow the"additionalTrustBundle: |"line and be properly indented, usually by two spaces.$ echo "additionalTrustBundle: |" >> install-config.yaml $ sed -e 's/^/ /' /opt/registry/certs/domain.crt >> install-config.yamlAdd the mirror information for the registry to the
install-config.yamlfile.$ echo "imageContentSources:" >> install-config.yaml $ echo "- mirrors:" >> install-config.yaml $ echo " - registry.example.com:5000/ocp4/openshift4" >> install-config.yaml $ echo " source: quay.io/openshift-release-dev/ocp-release" >> install-config.yaml $ echo "- mirrors:" >> install-config.yaml $ echo " - registry.example.com:5000/ocp4/openshift4" >> install-config.yaml $ echo " source: quay.io/openshift-release-dev/ocp-v4.0-art-dev" >> install-config.yamlNoteReplace
registry.example.comwith the registry’s fully qualified domain name.
8.3.8. Deploying routers on worker nodes
During installation, the installer deploys router pods on worker nodes. By default, the installer installs two router pods. If the initial cluster has only one worker node, or if a deployed cluster requires additional routers to handle external traffic loads destined for services within the OpenShift Container Platform cluster, you can create a yaml file to set an appropriate number of router replicas.
By default, the installer deploys two routers. If the cluster has at least two worker nodes, you can skip this section.
If the cluster has no worker nodes, the installer deploys the two routers on the control plane nodes by default. If the cluster has no worker nodes, you can skip this section.
Procedure
Create a
router-replicas.yamlfile.apiVersion: operator.openshift.io/v1 kind: IngressController metadata: name: default namespace: openshift-ingress-operator spec: replicas: <num-of-router-pods> endpointPublishingStrategy: type: HostNetwork nodePlacement: nodeSelector: matchLabels: node-role.kubernetes.io/worker: ""NoteReplace
<num-of-router-pods>with an appropriate value. If working with just one worker node, setreplicas:to1. If working with more than 3 worker nodes, you can increasereplicas:from the default value2as appropriate.Save and copy the
router-replicas.yamlfile to theclusterconfigs/openshiftdirectory.cp ~/router-replicas.yaml clusterconfigs/openshift/99_router-replicas.yaml
8.3.9. Validation checklist for installation
- ❏ OpenShift Container Platform installer has been retrieved.
- ❏ OpenShift Container Platform installer has been extracted.
-
❏ Required parameters for the
install-config.yamlhave been configured. -
❏ The
hostsparameter for theinstall-config.yamlhas been configured. -
❏ The
bmcparameter for theinstall-config.yamlhas been configured. -
❏ Conventions for the values configured in the
bmcaddressfield have been applied. - ❏ Created a disconnected registry (optional).
- ❏ (optional) Validate disconnected registry settings if in use.
- ❏ (optional) Deployed routers on worker nodes.
8.3.10. Deploying the cluster via the OpenShift Container Platform installer
Run the OpenShift Container Platform installer:
$ ./openshift-baremetal-install --dir ~/clusterconfigs --log-level debug create cluster8.3.11. Following the installation
During the deployment process, you can check the installation’s overall status by issuing the tail command to the .openshift_install.log log file in the install directory folder.
$ tail -f /path/to/install-dir/.openshift_install.log8.3.12. Preparing to reinstall a cluster on bare metal
Before you reinstall a cluster on bare metal, you must perform cleanup operations.
Procedure
- Remove or reformat the disks for the bootstrap, control plane (also known as master) node, and worker nodes. If you are working in a hypervisor environment, you must add any disks you removed.
Delete the artifacts that the previous installation generated:
$ cd ; /bin/rm -rf auth/ bootstrap.ign master.ign worker.ign metadata.json \ .openshift_install.log .openshift_install_state.json- Generate new manifests and Ignition config files. See “Creating the Kubernetes manifest and Ignition config files" for more information.
- Upload the new bootstrap, control plane, and compute node Ignition config files that the installation program created to your HTTP server. This will overwrite the previous Ignition files.
8.4. Expanding the cluster
After deploying an installer-provisioned OpenShift Container Platform cluster, you can use the following procedures to expand the number of worker nodes. Ensure that each prospective worker node meets the prerequisites.
Expanding the cluster using RedFish Virtual Media involves meeting minimum firmware requirements. See Firmware requirements for installing with virtual media in the Prerequisites section for additional details when expanding the cluster using RedFish Virtual Media.
8.4.1. Preparing the bare metal node
Expanding the cluster requires a DHCP server. Each node must have a DHCP reservation.
Some administrators prefer to use static IP addresses so that each node’s IP address remains constant in the absence of a DHCP server. To use static IP addresses in the OpenShift Container Platform cluster, reserve the IP addresses in the DHCP server with an infinite lease. After the installer provisions the node successfully, the dispatcher script will check the node’s network configuration. If the dispatcher script finds that the network configuration contains a DHCP infinite lease, it will recreate the connection as a static IP connection using the IP address from the DHCP infinite lease. NICs without DHCP infinite leases will remain unmodified.
Setting IP addresses with an infinite lease is incompatible with network configuration deployed by using the Machine Config Operator.
Preparing the bare metal node requires executing the following procedure from the provisioner node.
Procedure
Get the
ocbinary, if needed. It should already exist on the provisioner node.[kni@provisioner ~]$ curl -s https://mirror.openshift.com/pub/openshift-v4/clients/ocp/$VERSION/openshift-client-linux-$VERSION.tar.gz | tar zxvf - oc[kni@provisioner ~]$ sudo cp oc /usr/local/bin- Power off the bare metal node via the baseboard management controller and ensure it is off.
Retrieve the user name and password of the bare metal node’s baseboard management controller. Then, create
base64strings from the user name and password. In the following example, the user name isrootand the password iscalvin.[kni@provisioner ~]$ echo -ne "root" | base64[kni@provisioner ~]$ echo -ne "calvin" | base64Create a configuration file for the bare metal node.
[kni@provisioner ~]$ vim bmh.yaml--- apiVersion: v1 kind: Secret metadata: name: openshift-worker-<num>-bmc-secret type: Opaque data: username: <base64-of-uid> password: <base64-of-pwd> --- apiVersion: metal3.io/v1alpha1 kind: BareMetalHost metadata: name: openshift-worker-<num> spec: online: true bootMACAddress: <NIC1-mac-address> bmc: address: <protocol>://<bmc-ip> credentialsName: openshift-worker-<num>-bmc-secretReplace
<num>for the worker number of the bare metal node in the twonamefields and thecredentialsNamefield. Replace<base64-of-uid>with thebase64string of the user name. Replace<base64-of-pwd>with thebase64string of the password. Replace<NIC1-mac-address>with the MAC address of the bare metal node’s first NIC.Refer to the BMC addressing section for additional BMC configuration options. Replace
<protocol>with the BMC protocol, such as IPMI, RedFish, or others. Replace<bmc-ip>with the IP address of the bare metal node’s baseboard management controller.NoteIf the MAC address of an existing bare metal node matches the MAC address of a bare metal host that you are attempting to provision, then the Ironic installation will fail. If the host enrollment, inspection, cleaning, or other Ironic steps fail, the Bare Metal Operator retries the installation continuously. See Diagnosing a host duplicate MAC address for more information.
Create the bare metal node.
[kni@provisioner ~]$ oc -n openshift-machine-api create -f bmh.yamlsecret/openshift-worker-<num>-bmc-secret created baremetalhost.metal3.io/openshift-worker-<num> createdWhere
<num>will be the worker number.Power up and inspect the bare metal node.
[kni@provisioner ~]$ oc -n openshift-machine-api get bmh openshift-worker-<num>Where
<num>is the worker node number.NAME STATUS PROVISIONING STATUS CONSUMER BMC HARDWARE PROFILE ONLINE ERROR openshift-worker-<num> OK ready ipmi://<out-of-band-ip> unknown true
8.4.1.1. Diagnosing a duplicate MAC address when provisioning a new host in the cluster
If the MAC address of an existing bare-metal node in the cluster matches the MAC address of a bare-metal host you are attempting to add to the cluster, the Bare Metal Operator associates the host with the existing node. If the host enrollment, inspection, cleaning, or other Ironic steps fail, the Bare Metal Operator retries the installation continuously. A registration error is displayed for the failed bare-metal host.
You can diagnose a duplicate MAC address by examining the bare-metal hosts that are running in the openshift-machine-api namespace.
Prerequisites
- Install an OpenShift Container Platform cluster on bare metal.
-
Install the OpenShift Container Platform CLI
oc. -
Log in as a user with
cluster-adminprivileges.
Procedure
To determine whether a bare-metal host that fails provisioning has the same MAC address as an existing node, do the following:
Get the bare-metal hosts running in the
openshift-machine-apinamespace:$ oc get bmh -n openshift-machine-apiExample output
NAME STATUS PROVISIONING STATUS CONSUMER openshift-master-0 OK externally provisioned openshift-zpwpq-master-0 openshift-master-1 OK externally provisioned openshift-zpwpq-master-1 openshift-master-2 OK externally provisioned openshift-zpwpq-master-2 openshift-worker-0 OK provisioned openshift-zpwpq-worker-0-lv84n openshift-worker-1 OK provisioned openshift-zpwpq-worker-0-zd8lm openshift-worker-2 error registeringTo see more detailed information about the status of the failing host, run the following command replacing
<bare_metal_host_name>with the name of the host:$ oc get -n openshift-machine-api bmh <bare_metal_host_name> -o yamlExample output
... status: errorCount: 12 errorMessage: MAC address b4:96:91:1d:7c:20 conflicts with existing node openshift-worker-1 errorType: registration error ...
8.4.2. Provisioning the bare metal node
Provisioning the bare metal node requires executing the following procedure from the provisioner node.
Procedure
Ensure the
PROVISIONING STATUSisreadybefore provisioning the bare metal node.$ oc -n openshift-machine-api get bmh openshift-worker-<num>Where
<num>is the worker node number.NAME STATUS PROVISIONING STATUS CONSUMER BMC HARDWARE PROFILE ONLINE ERROR openshift-worker-<num> OK ready ipmi://<out-of-band-ip> unknown trueGet a count of the number of worker nodes.
$ oc get nodesNAME STATUS ROLES AGE VERSION provisioner.openshift.example.com Ready master 30h v1.16.2 openshift-master-1.openshift.example.com Ready master 30h v1.16.2 openshift-master-2.openshift.example.com Ready master 30h v1.16.2 openshift-master-3.openshift.example.com Ready master 30h v1.16.2 openshift-worker-0.openshift.example.com Ready master 30h v1.16.2 openshift-worker-1.openshift.example.com Ready master 30h v1.16.2Get the machine set.
$ oc get machinesets -n openshift-machine-apiNAME DESIRED CURRENT READY AVAILABLE AGE ... openshift-worker-0.example.com 1 1 1 1 55m openshift-worker-1.example.com 1 1 1 1 55mIncrease the number of worker nodes by one.
$ oc scale --replicas=<num> machineset <machineset> -n openshift-machine-apiReplace
<num>with the new number of worker nodes. Replace<machineset>with the name of the machine set from the previous step.Check the status of the bare metal node.
$ oc -n openshift-machine-api get bmh openshift-worker-<num>Where
<num>is the worker node number. The status changes fromreadytoprovisioning.NAME STATUS PROVISIONING STATUS CONSUMER BMC HARDWARE PROFILE ONLINE ERROR openshift-worker-<num> OK provisioning openshift-worker-<num>-65tjz ipmi://<out-of-band-ip> unknown trueThe
provisioningstatus remains until the OpenShift Container Platform cluster provisions the node. This can take 30 minutes or more. Once complete, the status will change toprovisioned.NAME STATUS PROVISIONING STATUS CONSUMER BMC HARDWARE PROFILE ONLINE ERROR openshift-worker-<num> OK provisioned openshift-worker-<num>-65tjz ipmi://<out-of-band-ip> unknown trueOnce provisioned, ensure the bare metal node is ready.
$ oc get nodesNAME STATUS ROLES AGE VERSION provisioner.openshift.example.com Ready master 30h v1.16.2 openshift-master-1.openshift.example.com Ready master 30h v1.16.2 openshift-master-2.openshift.example.com Ready master 30h v1.16.2 openshift-master-3.openshift.example.com Ready master 30h v1.16.2 openshift-worker-0.openshift.example.com Ready master 30h v1.16.2 openshift-worker-1.openshift.example.com Ready master 30h v1.16.2 openshift-worker-<num>.openshift.example.com Ready worker 3m27s v1.16.2You can also check the kubelet.
$ ssh openshift-worker-<num>[kni@openshift-worker-<num>]$ journalctl -fu kubelet
8.5. Troubleshooting
8.5.1. Troubleshooting the installer workflow
Prior to troubleshooting the installation environment, it is critical to understand the overall flow of the installer-provisioned installation on bare metal. The diagrams below provide a troubleshooting flow with a step-by-step breakdown for the environment.
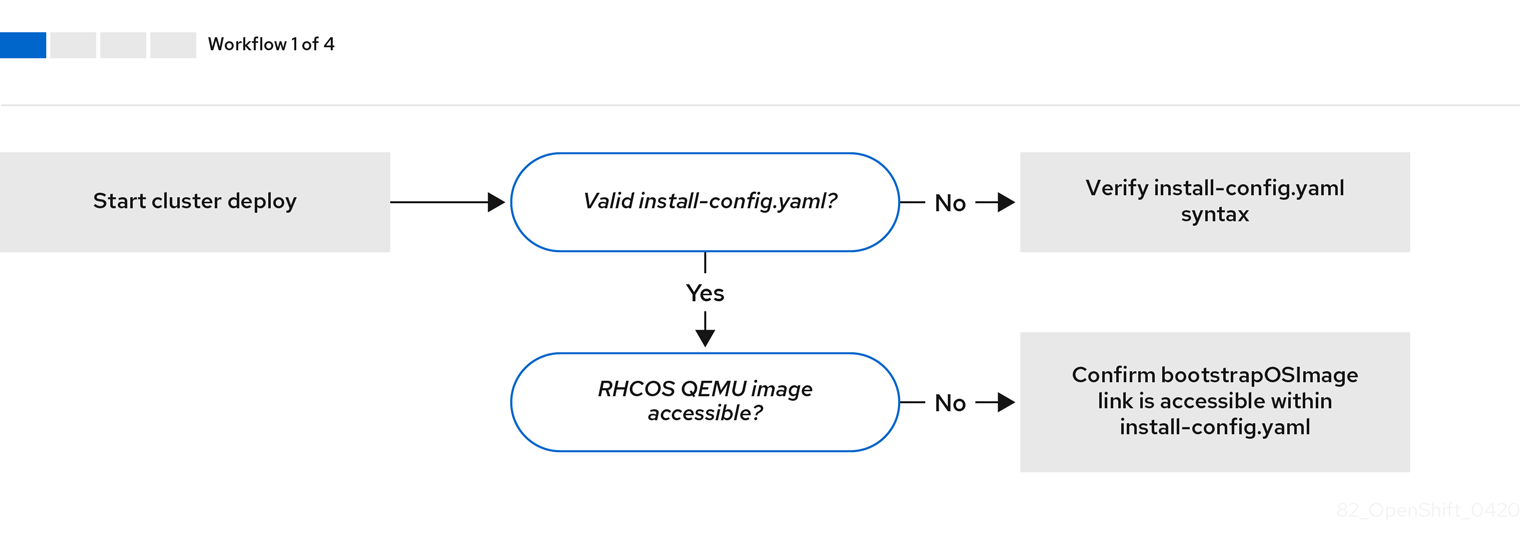
Workflow 1 of 4 illustrates a troubleshooting workflow when the install-config.yaml file has errors or the Red Hat Enterprise Linux CoreOS (RHCOS) images are inaccessible. Troubleshooting suggestions can be found at Troubleshooting install-config.yaml.
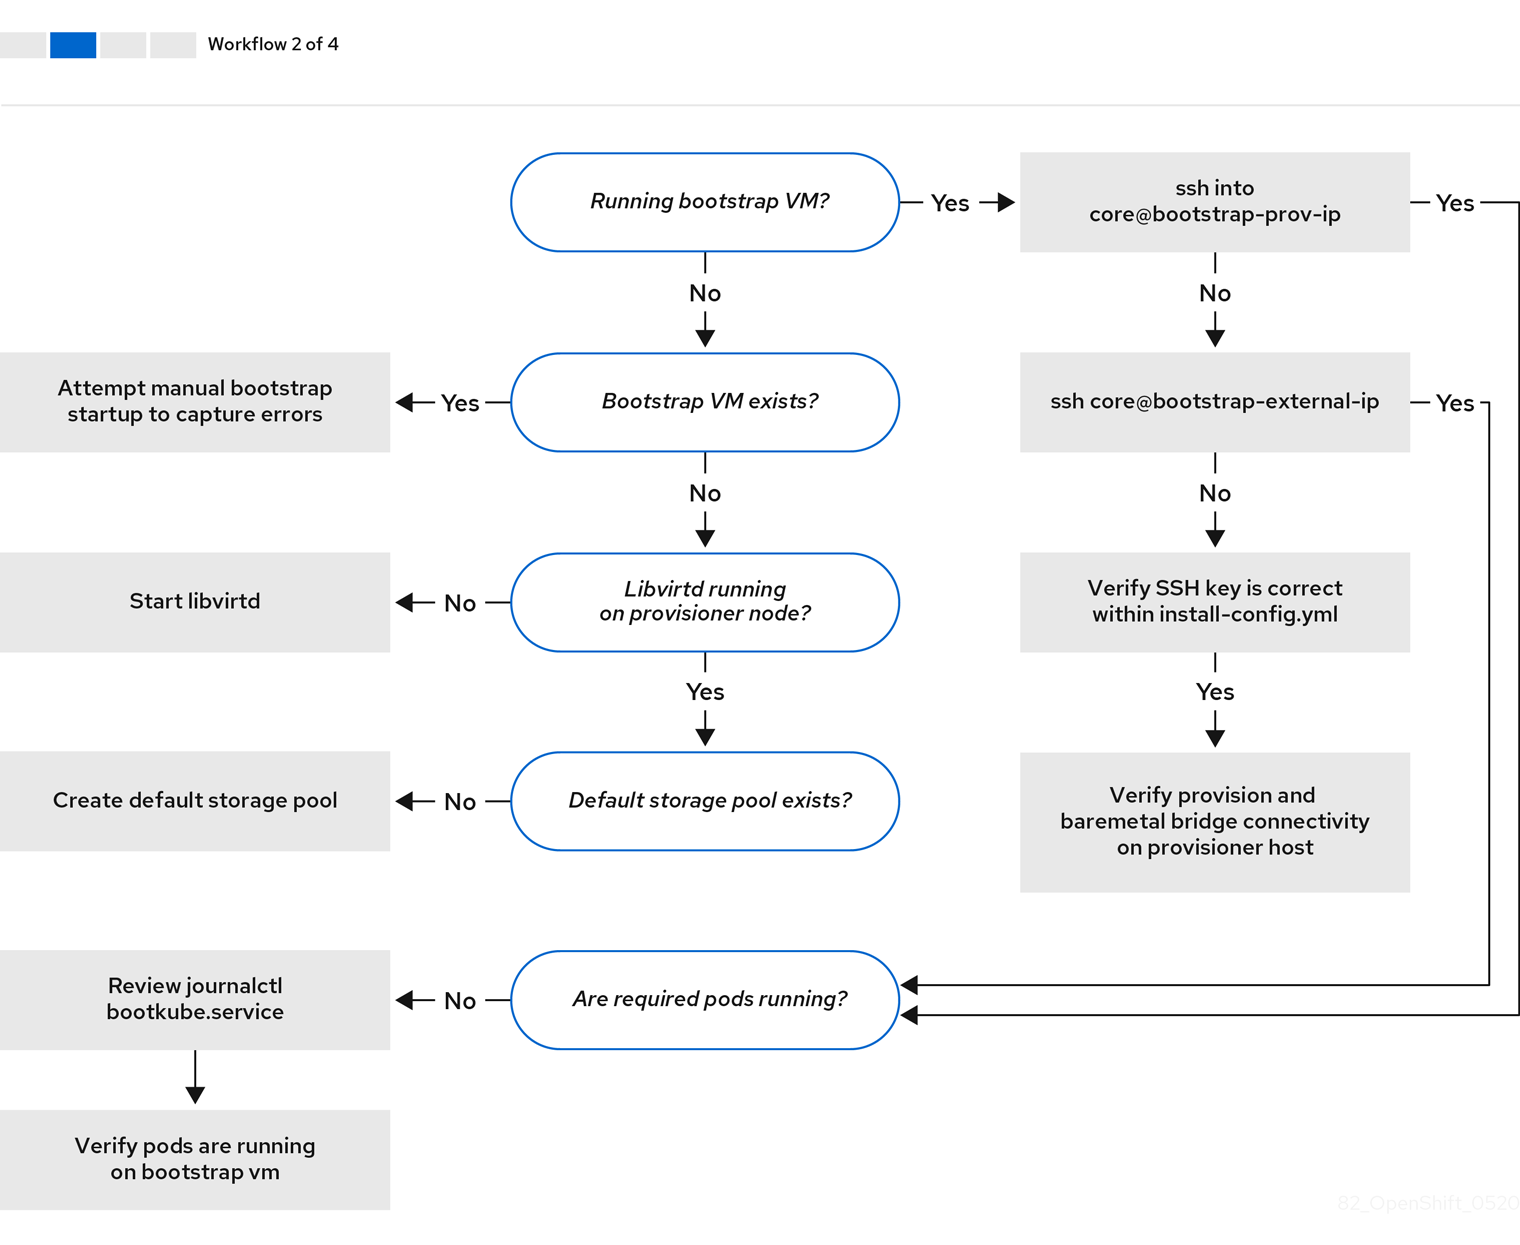
Workflow 2 of 4 illustrates a troubleshooting workflow for bootstrap VM issues, bootstrap VMs that cannot boot up the cluster nodes, and inspecting logs. When installing a OpenShift Container Platform cluster without the provisioning network, this workflow does not apply.
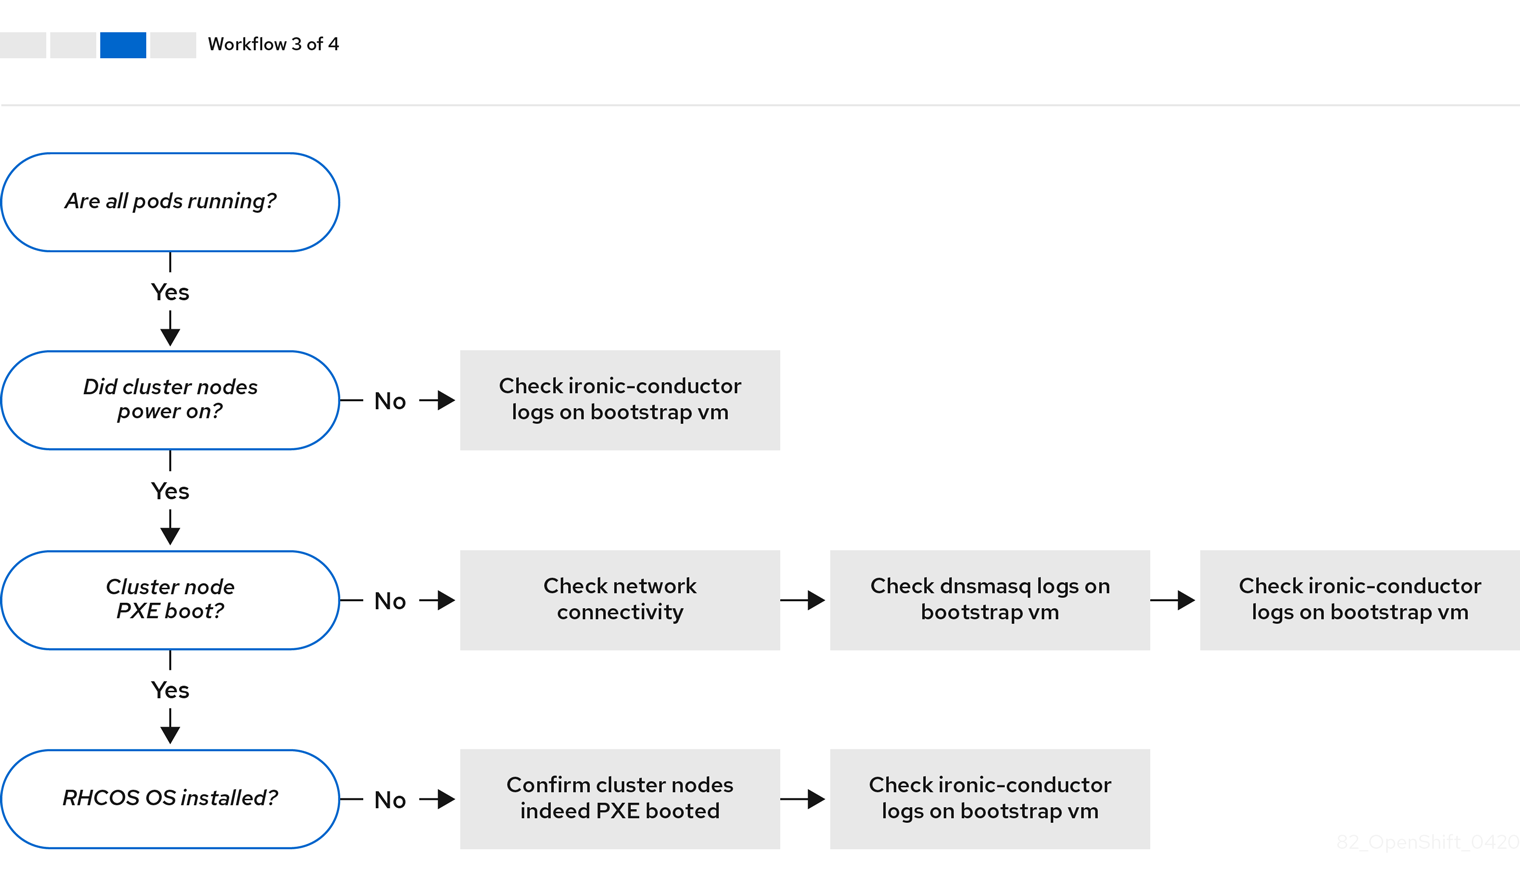
Workflow 3 of 4 illustrates a troubleshooting workflow for cluster nodes that will not PXE boot. If installing using RedFish Virtual Media, each node must meet minimum firmware requirements for the installer to deploy the node. See Firmware requirements for installing with virtual media in the Prerequisites section for additional details.
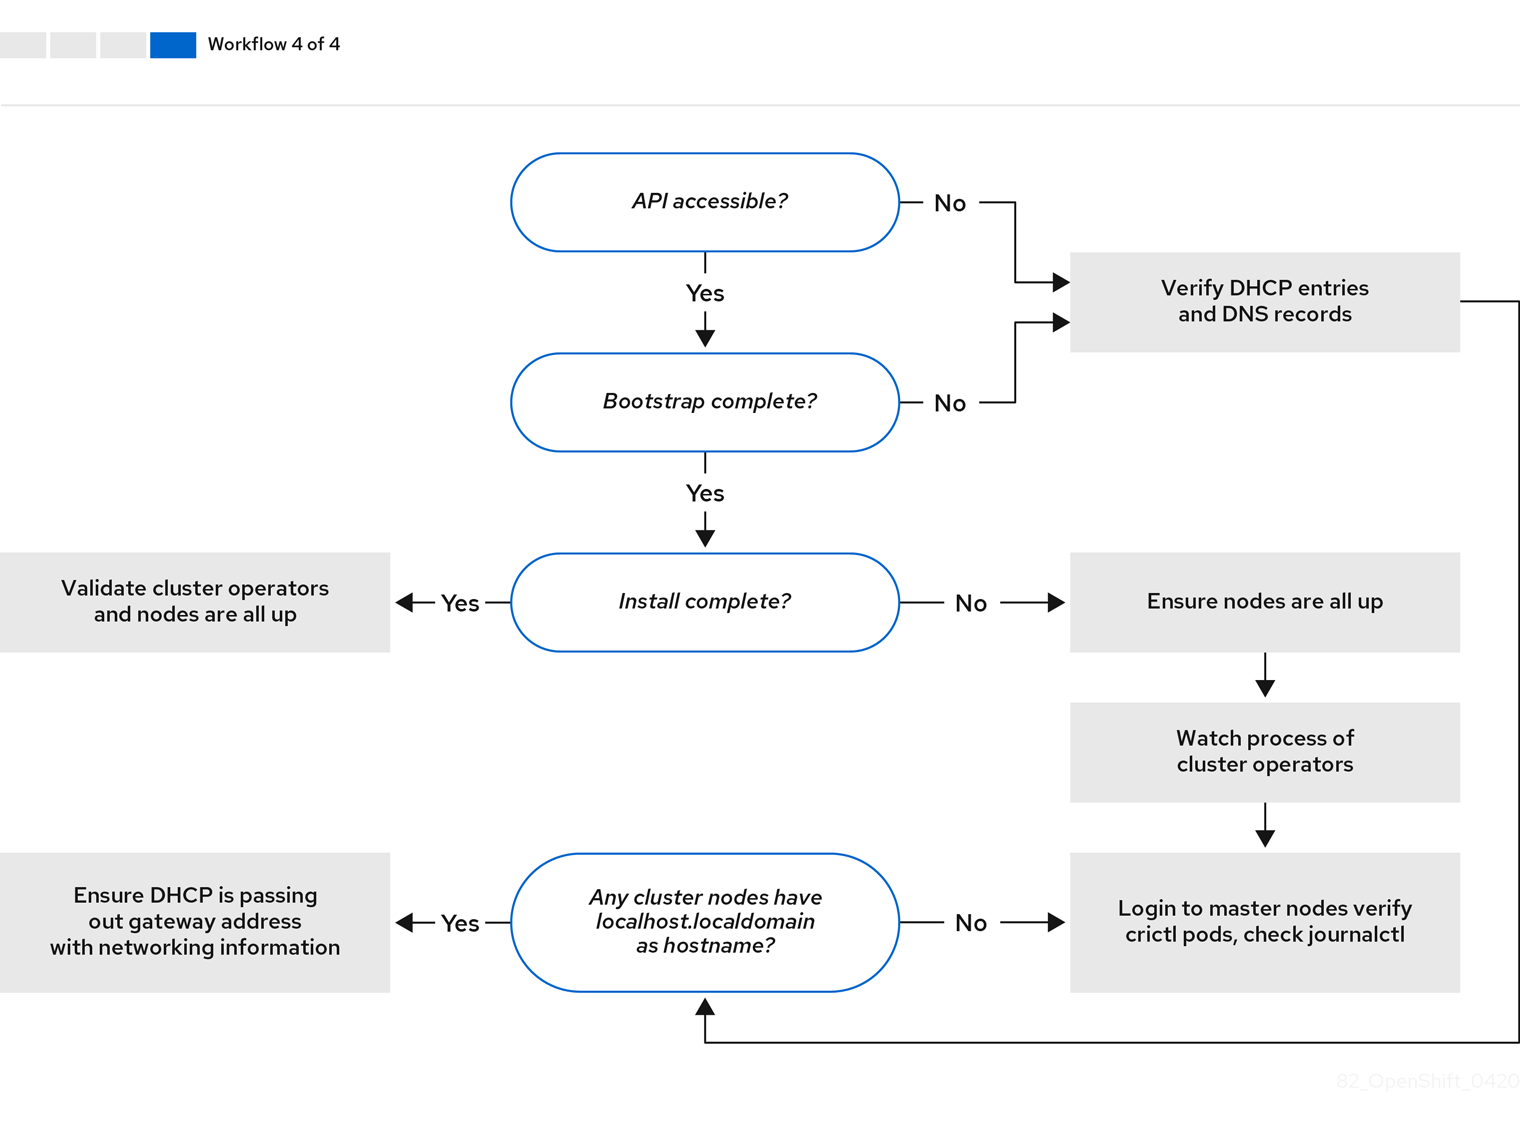
Workflow 4 of 4 illustrates a troubleshooting workflow from a non-accessible API to a validated installation.
8.5.2. Troubleshooting install-config.yaml
The install-config.yaml configuration file represents all of the nodes that are part of the OpenShift Container Platform cluster. The file contains the necessary options consisting of but not limited to apiVersion, baseDomain, imageContentSources and virtual IP addresses. If errors occur early in the deployment of the OpenShift Container Platform cluster, the errors are likely in the install-config.yaml configuration file.
Procedure
- Use the guidelines in YAML-tips.
- Verify the YAML syntax is correct using syntax-check.
Verify the Red Hat Enterprise Linux CoreOS (RHCOS) QEMU images are properly defined and accessible via the URL provided in the
install-config.yaml. For example:$ curl -s -o /dev/null -I -w "%{http_code}\n" http://webserver.example.com:8080/rhcos-44.81.202004250133-0-qemu.x86_64.qcow2.gz?sha256=7d884b46ee54fe87bbc3893bf2aa99af3b2d31f2e19ab5529c60636fbd0f1ce7If the output is
200, there is a valid response from the webserver storing the bootstrap VM image.
8.5.3. Bootstrap VM issues
The OpenShift Container Platform installer spawns a bootstrap node virtual machine, which handles provisioning the OpenShift Container Platform cluster nodes.
Procedure
About 10 to 15 minutes after triggering the installer, check to ensure the bootstrap VM is operational using the
virshcommand:$ sudo virsh listId Name State -------------------------------------------- 12 openshift-xf6fq-bootstrap runningNoteThe name of the bootstrap VM is always the cluster name followed by a random set of characters and ending in the word "bootstrap."
If the bootstrap VM is not running after 10-15 minutes, troubleshoot why it is not running. Possible issues include:
Verify
libvirtdis running on the system:$ systemctl status libvirtd● libvirtd.service - Virtualization daemon Loaded: loaded (/usr/lib/systemd/system/libvirtd.service; enabled; vendor preset: enabled) Active: active (running) since Tue 2020-03-03 21:21:07 UTC; 3 weeks 5 days ago Docs: man:libvirtd(8) https://libvirt.org Main PID: 9850 (libvirtd) Tasks: 20 (limit: 32768) Memory: 74.8M CGroup: /system.slice/libvirtd.service ├─ 9850 /usr/sbin/libvirtdIf the bootstrap VM is operational, log in to it.
Use the
virsh consolecommand to find the IP address of the bootstrap VM:$ sudo virsh console example.comConnected to domain example.com Escape character is ^] Red Hat Enterprise Linux CoreOS 43.81.202001142154.0 (Ootpa) 4.3 SSH host key: SHA256:BRWJktXZgQQRY5zjuAV0IKZ4WM7i4TiUyMVanqu9Pqg (ED25519) SSH host key: SHA256:7+iKGA7VtG5szmk2jB5gl/5EZ+SNcJ3a2g23o0lnIio (ECDSA) SSH host key: SHA256:DH5VWhvhvagOTaLsYiVNse9ca+ZSW/30OOMed8rIGOc (RSA) ens3: fd35:919d:4042:2:c7ed:9a9f:a9ec:7 ens4: 172.22.0.2 fe80::1d05:e52e:be5d:263f localhost login:ImportantWhen deploying a OpenShift Container Platform cluster without the
provisioningnetwork, you must use a public IP address and not a private IP address like172.22.0.2.Once you obtain the IP address, log in to the bootstrap VM using the
sshcommand:NoteIn the console output of the previous step, you can use the IPv6 IP address provided by
ens3or the IPv4 IP provided byens4.$ ssh core@172.22.0.2
If you are not successful logging in to the bootstrap VM, you have likely encountered one of the following scenarios:
-
You cannot reach the
172.22.0.0/24network. Verify network connectivity on the provisioner host specifically around theprovisioningnetwork bridge. This will not be the issue if you are not using theprovisioningnetwork. -
You cannot reach the bootstrap VM via the public network. When attempting to SSH via
baremetalnetwork, verify connectivity on theprovisionerhost specifically around thebaremetalnetwork bridge. -
You encountered
Permission denied (publickey,password,keyboard-interactive). When attempting to access the bootstrap VM, aPermission deniederror might occur. Verify that the SSH key for the user attempting to log into the VM is set within theinstall-config.yamlfile.
8.5.3.1. Bootstrap VM cannot boot up the cluster nodes
During the deployment, it is possible for the bootstrap VM to fail to boot the cluster nodes, which prevents the VM from provisioning the nodes with the RHCOS image. This scenario can arise due to:
-
A problem with the
install-config.yamlfile. - Issues with out-of-band network access via the baremetal network.
To verify the issue, there are three containers related to ironic:
-
ironic-api -
ironic-conductor -
ironic-inspector
Procedure
Log in to the bootstrap VM:
$ ssh core@172.22.0.2To check the container logs, execute the following:
[core@localhost ~]$ sudo podman logs -f <container-name>Replace
<container-name>with one ofironic-api,ironic-conductor, orironic-inspector. If you encounter an issue where the control plane nodes are not booting up via PXE, check theironic-conductorpod. Theironic-conductorpod contains the most detail about the attempt to boot the cluster nodes, because it attempts to log in to the node over IPMI.
Potential reason
The cluster nodes might be in the ON state when deployment started.
Solution
Power off the OpenShift Container Platform cluster nodes before you begin the installation over IPMI:
$ ipmitool -I lanplus -U root -P <password> -H <out-of-band-ip> power off8.5.3.2. Inspecting logs
When experiencing issues downloading or accessing the RHCOS images, first verify that the URL is correct in the install-config.yaml configuration file.
Example of internal webserver hosting RHCOS images
bootstrapOSImage: http://<ip:port>/rhcos-43.81.202001142154.0-qemu.x86_64.qcow2.gz?sha256=9d999f55ff1d44f7ed7c106508e5deecd04dc3c06095d34d36bf1cd127837e0c
clusterOSImage: http://<ip:port>/rhcos-43.81.202001142154.0-openstack.x86_64.qcow2.gz?sha256=a1bda656fa0892f7b936fdc6b6a6086bddaed5dafacedcd7a1e811abb78fe3b0
The ipa-downloader and coreos-downloader containers download resources from a webserver or the external quay.io registry, whichever the install-config.yaml configuration file specifies. Verify the following two containers are up and running and inspect their logs as needed:
-
ipa-downloader -
coreos-downloader
Procedure
Log in to the bootstrap VM:
$ ssh core@172.22.0.2Check the status of the
ipa-downloaderandcoreos-downloadercontainers within the bootstrap VM:[core@localhost ~]$ sudo podman logs -f ipa-downloader[core@localhost ~]$ sudo podman logs -f coreos-downloaderIf the bootstrap VM cannot access the URL to the images, use the
curlcommand to verify that the VM can access the images.To inspect the
bootkubelogs that indicate if all the containers launched during the deployment phase, execute the following:[core@localhost ~]$ journalctl -xe[core@localhost ~]$ journalctl -b -f -u bootkube.serviceVerify all the pods, including
dnsmasq,mariadb,httpd, andironic, are running:[core@localhost ~]$ sudo podman psIf there are issues with the pods, check the logs of the containers with issues. To check the log of the
ironic-api, execute the following:[core@localhost ~]$ sudo podman logs <ironic-api>
8.5.4. Cluster nodes will not PXE boot
When OpenShift Container Platform cluster nodes will not PXE boot, execute the following checks on the cluster nodes that will not PXE boot. This procedure does not apply when installing a OpenShift Container Platform cluster without the provisioning network.
Procedure
-
Check the network connectivity to the
provisioningnetwork. -
Ensure PXE is enabled on the NIC for the
provisioningnetwork and PXE is disabled for all other NICs. Verify that the
install-config.yamlconfiguration file has the proper hardware profile and boot MAC address for the NIC connected to theprovisioningnetwork. For example:control plane node settings
bootMACAddress: 24:6E:96:1B:96:90 # MAC of bootable provisioning NIC hardwareProfile: default #control plane node settingsWorker node settings
bootMACAddress: 24:6E:96:1B:96:90 # MAC of bootable provisioning NIC hardwareProfile: unknown #worker node settings
8.5.5. The API is not accessible
When the cluster is running and clients cannot access the API, domain name resolution issues might impede access to the API.
Procedure
Hostname Resolution: Check the cluster nodes to ensure they have a fully qualified domain name, and not just
localhost.localdomain. For example:$ hostnameIf a hostname is not set, set the correct hostname. For example:
$ hostnamectl set-hostname <hostname>Incorrect Name Resolution: Ensure that each node has the correct name resolution in the DNS server using
digandnslookup. For example:$ dig api.<cluster-name>.example.com; <<>> DiG 9.11.4-P2-RedHat-9.11.4-26.P2.el8 <<>> api.<cluster-name>.example.com ;; global options: +cmd ;; Got answer: ;; ->>HEADER<<- opcode: QUERY, status: NOERROR, id: 37551 ;; flags: qr aa rd ra; QUERY: 1, ANSWER: 1, AUTHORITY: 1, ADDITIONAL: 2 ;; OPT PSEUDOSECTION: ; EDNS: version: 0, flags:; udp: 4096 ; COOKIE: 866929d2f8e8563582af23f05ec44203d313e50948d43f60 (good) ;; QUESTION SECTION: ;api.<cluster-name>.example.com. IN A ;; ANSWER SECTION: api.<cluster-name>.example.com. 10800 IN A 10.19.13.86 ;; AUTHORITY SECTION: <cluster-name>.example.com. 10800 IN NS <cluster-name>.example.com. ;; ADDITIONAL SECTION: <cluster-name>.example.com. 10800 IN A 10.19.14.247 ;; Query time: 0 msec ;; SERVER: 10.19.14.247#53(10.19.14.247) ;; WHEN: Tue May 19 20:30:59 UTC 2020 ;; MSG SIZE rcvd: 140The output in the foregoing example indicates that the appropriate IP address for the
api.<cluster-name>.example.comVIP is10.19.13.86. This IP address should reside on thebaremetalnetwork.
8.5.6. Cleaning up previous installations
In the event of a previous failed deployment, remove the artifacts from the failed attempt before attempting to deploy OpenShift Container Platform again.
Procedure
Power off all bare metal nodes prior to installing the OpenShift Container Platform cluster:
$ ipmitool -I lanplus -U <user> -P <password> -H <management-server-ip> power offRemove all old bootstrap resources if any are left over from a previous deployment attempt:
for i in $(sudo virsh list | tail -n +3 | grep bootstrap | awk {'print $2'}); do sudo virsh destroy $i; sudo virsh undefine $i; sudo virsh vol-delete $i --pool $i; sudo virsh vol-delete $i.ign --pool $i; sudo virsh pool-destroy $i; sudo virsh pool-undefine $i; doneRemove the following from the
clusterconfigsdirectory to prevent Terraform from failing:$ rm -rf ~/clusterconfigs/auth ~/clusterconfigs/terraform* ~/clusterconfigs/tls ~/clusterconfigs/metadata.json
8.5.7. Issues with creating the registry
When creating a disconnected registry, you might encounter a "User Not Authorized" error when attempting to mirror the registry. This error might occur if you fail to append the new authentication to the existing pull-secret.txt file.
Procedure
Check to ensure authentication is successful:
$ /usr/local/bin/oc adm release mirror \ -a pull-secret-update.json --from=$UPSTREAM_REPO \ --to-release-image=$LOCAL_REG/$LOCAL_REPO:${VERSION} \ --to=$LOCAL_REG/$LOCAL_REPONoteExample output of the variables used to mirror the install images:
UPSTREAM_REPO=${RELEASE_IMAGE} LOCAL_REG=<registry_FQDN>:<registry_port> LOCAL_REPO='ocp4/openshift4'The values of
RELEASE_IMAGEandVERSIONwere set during the Retrieving OpenShift Installer step of the Setting up the environment for an OpenShift installation section.After mirroring the registry, confirm that you can access it in your disconnected environment:
$ curl -k -u <user>:<password> https://registry.example.com:<registry-port>/v2/_catalog {"repositories":["<Repo-Name>"]}
8.5.8. Miscellaneous issues
8.5.8.1. Addressing the runtime network not ready error
After the deployment of a cluster you might receive the following error:
`runtime network not ready: NetworkReady=false reason:NetworkPluginNotReady message:Network plugin returns error: Missing CNI default network`
The Cluster Network Operator is responsible for deploying the networking components in response to a special object created by the installer. It runs very early in the installation process, after the control plane (master) nodes have come up, but before the bootstrap control plane has been torn down. It can be indicative of more subtle installer issues, such as long delays in bringing up control plane (master) nodes or issues with apiserver communication.
Procedure
Inspect the pods in the
openshift-network-operatornamespace:$ oc get all -n openshift-network-operatorNAME READY STATUS RESTARTS AGE pod/network-operator-69dfd7b577-bg89v 0/1 ContainerCreating 0 149mOn the
provisionernode, determine that the network configuration exists:$ kubectl get network.config.openshift.io cluster -oyamlapiVersion: config.openshift.io/v1 kind: Network metadata: name: cluster spec: serviceNetwork: - 172.30.0.0/16 clusterNetwork: - cidr: 10.128.0.0/14 hostPrefix: 23 networkType: OpenShiftSDNIf it does not exist, the installer did not create it. To determine why the installer did not create it, execute the following:
$ openshift-install create manifestsCheck that the
network-operatoris running:$ kubectl -n openshift-network-operator get podsRetrieve the logs:
$ kubectl -n openshift-network-operator logs -l "name=network-operator"On high availability clusters with three or more control plane (master) nodes, the Operator will perform leader election and all other Operators will sleep. For additional details, see Troubleshooting.
8.5.8.2. Cluster nodes not getting the correct IPv6 address over DHCP
If the cluster nodes are not getting the correct IPv6 address over DHCP, check the following:
- Ensure the reserved IPv6 addresses reside outside the DHCP range.
In the IP address reservation on the DHCP server, ensure the reservation specifies the correct DHCP Unique Identifier (DUID). For example:
# This is a dnsmasq dhcp reservation, 'id:00:03:00:01' is the client id and '18:db:f2:8c:d5:9f' is the MAC Address for the NIC id:00:03:00:01:18:db:f2:8c:d5:9f,openshift-master-1,[2620:52:0:1302::6]- Ensure that route announcements are working.
- Ensure that the DHCP server is listening on the required interfaces serving the IP address ranges.
8.5.8.3. Cluster nodes not getting the correct hostname over DHCP
During IPv6 deployment, cluster nodes must get their hostname over DHCP. Sometimes the NetworkManager does not assign the hostname immediately. A control plane (master) node might report an error such as:
Failed Units: 2
NetworkManager-wait-online.service
nodeip-configuration.service
This error indicates that the cluster node likely booted without first receiving a hostname from the DHCP server, which causes kubelet to boot with a localhost.localdomain hostname. To address the error, force the node to renew the hostname.
Procedure
Retrieve the
hostname:[core@master-X ~]$ hostnameIf the hostname is
localhost, proceed with the following steps.NoteWhere
Xis the control plane node (also known as the master node) number.Force the cluster node to renew the DHCP lease:
[core@master-X ~]$ sudo nmcli con up "<bare-metal-nic>"Replace
<bare-metal-nic>with the wired connection corresponding to thebaremetalnetwork.Check
hostnameagain:[core@master-X ~]$ hostnameIf the hostname is still
localhost.localdomain, restartNetworkManager:[core@master-X ~]$ sudo systemctl restart NetworkManager-
If the hostname is still
localhost.localdomain, wait a few minutes and check again. If the hostname remainslocalhost.localdomain, repeat the previous steps. Restart the
nodeip-configurationservice:[core@master-X ~]$ sudo systemctl restart nodeip-configuration.serviceThis service will reconfigure the
kubeletservice with the correct hostname references.Reload the unit files definition since the kubelet changed in the previous step:
[core@master-X ~]$ sudo systemctl daemon-reloadRestart the
kubeletservice:[core@master-X ~]$ sudo systemctl restart kubelet.serviceEnsure
kubeletbooted with the correct hostname:[core@master-X ~]$ sudo journalctl -fu kubelet.service
If the cluster node is not getting the correct hostname over DHCP after the cluster is up and running, such as during a reboot, the cluster will have a pending csr. Do not approve a csr, or other issues might arise.
Addressing a csr
Get CSRs on the cluster:
$ oc get csrVerify if a pending
csrcontainsSubject Name: localhost.localdomain:$ oc get csr <pending_csr> -o jsonpath='{.spec.request}' | base64 --decode | openssl req -noout -textRemove any
csrthat containsSubject Name: localhost.localdomain:$ oc delete csr <wrong_csr>
8.5.8.4. Routes do not reach endpoints
During the installation process, it is possible to encounter a Virtual Router Redundancy Protocol (VRRP) conflict. This conflict might occur if a previously used OpenShift Container Platform node that was once part of a cluster deployment using a specific cluster name is still running but not part of the current OpenShift Container Platform cluster deployment using that same cluster name. For example, a cluster was deployed using the cluster name openshift, deploying three control plane (master) nodes and three worker nodes. Later, a separate install uses the same cluster name openshift, but this redeployment only installed three control plane (master) nodes, leaving the three worker nodes from a previous deployment in an ON state. This might cause a Virtual Router Identifier (VRID) conflict and a VRRP conflict.
Get the route:
$ oc get route oauth-openshiftCheck the service endpoint:
$ oc get svc oauth-openshiftNAME TYPE CLUSTER-IP EXTERNAL-IP PORT(S) AGE oauth-openshift ClusterIP 172.30.19.162 <none> 443/TCP 59mAttempt to reach the service from a control plane (master) node:
[core@master0 ~]$ curl -k https://172.30.19.162{ "kind": "Status", "apiVersion": "v1", "metadata": { }, "status": "Failure", "message": "forbidden: User \"system:anonymous\" cannot get path \"/\"", "reason": "Forbidden", "details": { }, "code": 403Identify the
authentication-operatorerrors from theprovisionernode:$ oc logs deployment/authentication-operator -n openshift-authentication-operatorEvent(v1.ObjectReference{Kind:"Deployment", Namespace:"openshift-authentication-operator", Name:"authentication-operator", UID:"225c5bd5-b368-439b-9155-5fd3c0459d98", APIVersion:"apps/v1", ResourceVersion:"", FieldPath:""}): type: 'Normal' reason: 'OperatorStatusChanged' Status for clusteroperator/authentication changed: Degraded message changed from "IngressStateEndpointsDegraded: All 2 endpoints for oauth-server are reporting"
Solution
- Ensure that the cluster name for every deployment is unique, ensuring no conflict.
- Turn off all the rogue nodes which are not part of the cluster deployment that are using the same cluster name. Otherwise, the authentication pod of the OpenShift Container Platform cluster might never start successfully.
8.5.8.5. Failed Ignition during Firstboot
During the Firstboot, the Ignition configuration may fail.
Procedure
Connect to the node where the Ignition configuration failed:
Failed Units: 1 machine-config-daemon-firstboot.serviceRestart the
machine-config-daemon-firstbootservice:[core@worker-X ~]$ sudo systemctl restart machine-config-daemon-firstboot.service
8.5.8.6. NTP out of sync
The deployment of OpenShift Container Platform clusters depends on NTP synchronized clocks among the cluster nodes. Without synchronized clocks, the deployment may fail due to clock drift if the time difference is greater than two seconds.
Procedure
Check for differences in the
AGEof the cluster nodes. For example:$ oc get nodesNAME STATUS ROLES AGE VERSION master-0.cloud.example.com Ready master 145m v1.16.2 master-1.cloud.example.com Ready master 135m v1.16.2 master-2.cloud.example.com Ready master 145m v1.16.2 worker-2.cloud.example.com Ready worker 100m v1.16.2Check for inconsistent timing delays due to clock drift. For example:
$ oc get bmh -n openshift-machine-apimaster-1 error registering master-1 ipmi://<out-of-band-ip>$ sudo timedatectlLocal time: Tue 2020-03-10 18:20:02 UTC Universal time: Tue 2020-03-10 18:20:02 UTC RTC time: Tue 2020-03-10 18:36:53 Time zone: UTC (UTC, +0000) System clock synchronized: no NTP service: active RTC in local TZ: no
Addressing clock drift in existing clusters
Create a
chrony.conffile and encode it asbase64string. For example:$ cat << EOF | base 64 server <NTP-server> iburst1 stratumweight 0 driftfile /var/lib/chrony/drift rtcsync makestep 10 3 bindcmdaddress 127.0.0.1 bindcmdaddress ::1 keyfile /etc/chrony.keys commandkey 1 generatecommandkey noclientlog logchange 0.5 logdir /var/log/chrony EOF- 1
- Replace
<NTP-server>with the IP address of the NTP server. Copy the output.
[text-in-base-64]Create a
MachineConfigobject, replacing thebase64string with the[text-in-base-64]string generated in the output of the previous step. The following example adds the file to the control plane (master) nodes. You can modify the file for worker nodes or make an additional machine config for the worker role.$ cat << EOF > ./99_masters-chrony-configuration.yaml apiVersion: machineconfiguration.openshift.io/v1 kind: MachineConfig metadata: creationTimestamp: null labels: machineconfiguration.openshift.io/role: master name: 99-master-etc-chrony-conf spec: config: ignition: config: {} security: tls: {} timeouts: {} version: 3.1.0 networkd: {} passwd: {} storage: files: - contents: source: data:text/plain;charset=utf-8;base64,[text-in-base-64]1 group: name: root mode: 420 overwrite: true path: /etc/chrony.conf user: name: root osImageURL: ""- 1
- Replace
[text-in-base-64]with the base64 string.
Make a backup copy of the configuration file. For example:
$ cp 99_masters-chrony-configuration.yaml 99_masters-chrony-configuration.yaml.backupApply the configuration file:
$ oc apply -f ./masters-chrony-configuration.yamlEnsure the
System clock synchronizedvalue is yes:$ sudo timedatectlLocal time: Tue 2020-03-10 19:10:02 UTC Universal time: Tue 2020-03-10 19:10:02 UTC RTC time: Tue 2020-03-10 19:36:53 Time zone: UTC (UTC, +0000) System clock synchronized: yes NTP service: active RTC in local TZ: noTo setup clock synchronization prior to deployment, generate the manifest files and add this file to the
openshiftdirectory. For example:$ cp chrony-masters.yaml ~/clusterconfigs/openshift/99_masters-chrony-configuration.yamlThen, continue to create the cluster.
8.5.9. Reviewing the installation
After installation, ensure the installer deployed the nodes and pods successfully.
Procedure
When the OpenShift Container Platform cluster nodes are installed appropriately, the following
Readystate is seen within theSTATUScolumn:$ oc get nodesNAME STATUS ROLES AGE VERSION master-0.example.com Ready master,worker 4h v1.16.2 master-1.example.com Ready master,worker 4h v1.16.2 master-2.example.com Ready master,worker 4h v1.16.2Confirm the installer deployed all pods successfully. The following command removes any pods that are still running or have completed as part of the output.
$ oc get pods --all-namespaces | grep -iv running | grep -iv complete
Chapter 9. Installing with z/VM on IBM Z and LinuxONE
9.1. Installing a cluster with z/VM on IBM Z and LinuxONE
In OpenShift Container Platform version 4.7, you can install a cluster on IBM Z or LinuxONE infrastructure that you provision.
While this document refers only to IBM Z, all information in it also applies to LinuxONE.
Additional considerations exist for non-bare metal platforms. Review the information in the guidelines for deploying OpenShift Container Platform on non-tested platforms before you install an OpenShift Container Platform cluster.
9.1.1. Prerequisites
- Before you begin the installation process, you must clean the installation directory. This ensures that the required installation files are created and updated during the installation process.
-
Provision persistent storage using NFS for your cluster. To deploy a private image registry, your storage must provide
ReadWriteManyaccess modes. - Review details about the OpenShift Container Platform installation and update processes.
- If you use a firewall, you must configure it to allow the sites that your cluster requires access to.
Be sure to also review this site list if you are configuring a proxy.
9.1.2. Internet access for OpenShift Container Platform
In OpenShift Container Platform 4.7, you require access to the Internet to install your cluster.
You must have Internet access to:
- Access OpenShift Cluster Manager to download the installation program and perform subscription management. If the cluster has internet access and you do not disable Telemetry, that service automatically entitles your cluster.
- Access Quay.io to obtain the packages that are required to install your cluster.
- Obtain the packages that are required to perform cluster updates.
If your cluster cannot have direct Internet access, you can perform a restricted network installation on some types of infrastructure that you provision. During that process, you download the content that is required and use it to populate a mirror registry with the packages that you need to install a cluster and generate the installation program. With some installation types, the environment that you install your cluster in will not require Internet access. Before you update the cluster, you update the content of the mirror registry.
9.1.3. Machine requirements for a cluster with user-provisioned infrastructure
For a cluster that contains user-provisioned infrastructure, you must deploy all of the required machines.
9.1.3.1. Required machines
The smallest OpenShift Container Platform clusters require the following hosts:
- One temporary bootstrap machine
- Three control plane, or master, machines
- At least two compute machines, which are also known as worker machines.
The cluster requires the bootstrap machine to deploy the OpenShift Container Platform cluster on the three control plane machines. You can remove the bootstrap machine after you install the cluster.
To improve high availability of your cluster, distribute the control plane machines over different z/VM instances on at least two physical machines.
The bootstrap and control plane machines must use Red Hat Enterprise Linux CoreOS (RHCOS) as the operating system. However, the compute machines can choose between Red Hat Enterprise Linux CoreOS (RHCOS) or Red Hat Enterprise Linux (RHEL) 7.9.
Note that RHCOS is based on Red Hat Enterprise Linux (RHEL) 8 and inherits all of its hardware certifications and requirements. See Red Hat Enterprise Linux technology capabilities and limits.
9.1.3.2. Network connectivity requirements
All the Red Hat Enterprise Linux CoreOS (RHCOS) machines require network in initramfs during boot to fetch Ignition config files from the Machine Config Server. The machines are configured with static IP addresses. No DHCP server is required. Additionally, each OpenShift Container Platform node in the cluster must have access to a Network Time Protocol (NTP) server.
9.1.3.3. IBM Z network connectivity requirements
To install on IBM Z under z/VM, you require a single z/VM virtual NIC in layer 2 mode. You also need:
- A direct-attached OSA or RoCE network adapter
- A z/VM VSwitch set up. For a preferred setup, use OSA link aggregation.
9.1.3.4. Minimum resource requirements
Each cluster machine must meet the following minimum requirements:
| Machine | Operating System | vCPU [1] | Virtual RAM | Storage | IOPS |
|---|---|---|---|---|---|
| Bootstrap | RHCOS | 4 | 16 GB | 100 GB | N/A |
| Control plane | RHCOS | 4 | 16 GB | 100 GB | N/A |
| Compute | RHCOS | 2 | 8 GB | 100 GB | N/A |
- One physical core (IFL) provides two logical cores (threads) when SMT-2 is enabled. The hypervisor can provide two or more vCPUs.
9.1.3.5. Minimum IBM Z system environment
You can install OpenShift Container Platform version 4.7 on the following IBM hardware:
- IBM z15 (all models), IBM z14 (all models), IBM z13, and IBM z13s
- LinuxONE, any version
Hardware requirements
- The equivalent of 6 IFLs, which are SMT2 enabled, for each cluster.
-
At least one network connection to both connect to the
LoadBalancerservice and to serve data for traffic outside the cluster.
You can use dedicated or shared IFLs to assign sufficient compute resources. Resource sharing is one of the key strengths of IBM Z. However, you must adjust capacity correctly on each hypervisor layer and ensure sufficient resources for every OpenShift Container Platform cluster.
Since the overall performance of the cluster can be impacted, the LPARs that are used to setup the OpenShift Container Platform clusters must provide sufficient compute capacity. In this context, LPAR weight management, entitlements, and CPU shares on the hypervisor level play an important role.
Operating system requirements
- One instance of z/VM 7.1 or later
On your z/VM instance, set up:
- 3 guest virtual machines for OpenShift Container Platform control plane machines
- 2 guest virtual machines for OpenShift Container Platform compute machines
- 1 guest virtual machine for the temporary OpenShift Container Platform bootstrap machine
IBM Z network connectivity requirements
To install on IBM Z under z/VM, you require a single z/VM virtual NIC in layer 2 mode. You also need:
- A direct-attached OSA or RoCE network adapter
- A z/VM VSwitch set up. For a preferred setup, use OSA link aggregation.
Disk storage for the z/VM guest virtual machines
- FICON attached disk storage (DASDs). These can be z/VM minidisks, fullpack minidisks, or dedicated DASDs, all of which must be formatted as CDL, which is the default. To reach the minimum required DASD size for Red Hat Enterprise Linux CoreOS (RHCOS) installations, you need extended address volumes (EAV). If available, use HyperPAV to ensure optimal performance.
- FCP attached disk storage
Storage / Main Memory
- 16 GB for OpenShift Container Platform control plane machines
- 8 GB for OpenShift Container Platform compute machines
- 16 GB for the temporary OpenShift Container Platform bootstrap machine
9.1.3.6. Preferred IBM Z system environment
Hardware requirements
- 3 LPARS that each have the equivalent of 6 IFLs, which are SMT2 enabled, for each cluster.
-
Two network connections to connect to both connect to the
LoadBalancerservice and to serve data for traffic outside the cluster. - HiperSockets, which are attached to a node either directly as a device or by bridging with one z/VM VSWITCH to be transparent to the z/VM guest. To directly connect HiperSockets to a node, you must set up a gateway to the external network via a RHEL 8 guest to bridge to the HiperSockets network.
Operating system requirements
- 2 or 3 instances of z/VM 7.1 or later for high availability
On your z/VM instances, set up:
- 3 guest virtual machines for OpenShift Container Platform control plane machines, one per z/VM instance.
- At least 6 guest virtual machines for OpenShift Container Platform compute machines, distributed across the z/VM instances.
- 1 guest virtual machine for the temporary OpenShift Container Platform bootstrap machine.
-
To ensure the availability of integral components in an overcommitted environment, increase the priority of the control plane by using the CP command
SET SHARE. Do the same for infrastructure nodes, if they exist. See SET SHARE in IBM Documentation.
IBM Z network connectivity requirements
To install on IBM Z under z/VM, you require a single z/VM virtual NIC in layer 2 mode. You also need:
- A direct-attached OSA or RoCE network adapter
- A z/VM VSwitch set up. For a preferred setup, use OSA link aggregation.
Disk storage for the z/VM guest virtual machines
- FICON attached disk storage (DASDs). These can be z/VM minidisks, fullpack minidisks, or dedicated DASDs, all of which must be formatted as CDL, which is the default. To reach the minimum required DASD size for Red Hat Enterprise Linux CoreOS (RHCOS) installations, you need extended address volumes (EAV). If available, use HyperPAV and High Performance FICON (zHPF) to ensure optimal performance.
- FCP attached disk storage
Storage / Main Memory
- 16 GB for OpenShift Container Platform control plane machines
- 8 GB for OpenShift Container Platform compute machines
- 16 GB for the temporary OpenShift Container Platform bootstrap machine
9.1.3.7. Certificate signing requests management
Because your cluster has limited access to automatic machine management when you use infrastructure that you provision, you must provide a mechanism for approving cluster certificate signing requests (CSRs) after installation. The kube-controller-manager only approves the kubelet client CSRs. The machine-approver cannot guarantee the validity of a serving certificate that is requested by using kubelet credentials because it cannot confirm that the correct machine issued the request. You must determine and implement a method of verifying the validity of the kubelet serving certificate requests and approving them.
9.1.4. Creating the user-provisioned infrastructure
Before you deploy an OpenShift Container Platform cluster that uses user-provisioned infrastructure, you must create the underlying infrastructure.
Prerequisites
- Review the OpenShift Container Platform 4.x Tested Integrations page before you create the supporting infrastructure for your cluster.
Procedure
- Set up static IP addresses.
- Set up an HTTP or HTTPS server to provide Ignition files to the cluster nodes.
- Provision the required load balancers.
- Configure the ports for your machines.
- Configure DNS.
- Ensure network connectivity.
9.1.4.1. Networking requirements for user-provisioned infrastructure
All the Red Hat Enterprise Linux CoreOS (RHCOS) machines require network in initramfs during boot to fetch Ignition config from the machine config server.
During the initial boot, the machines require an HTTP or HTTPS server to establish a network connection to download their Ignition config files.
Ensure that the machines have persistent IP addresses and host names.
The Kubernetes API server must be able to resolve the node names of the cluster machines. If the API servers and worker nodes are in different zones, you can configure a default DNS search zone to allow the API server to resolve the node names. Another supported approach is to always refer to hosts by their fully-qualified domain names in both the node objects and all DNS requests.
You must configure the network connectivity between machines to allow cluster components to communicate. Each machine must be able to resolve the host names of all other machines in the cluster.
| Protocol | Port | Description |
|---|---|---|
| ICMP | N/A | Network reachability tests |
| TCP |
| Metrics |
|
|
Host level services, including the node exporter on ports | |
|
| The default ports that Kubernetes reserves | |
|
| openshift-sdn | |
| UDP |
| VXLAN and Geneve |
|
| VXLAN and Geneve | |
|
|
Host level services, including the node exporter on ports | |
| TCP/UDP |
| Kubernetes node port |
| Protocol | Port | Description |
|---|---|---|
| TCP |
| Kubernetes API |
| Protocol | Port | Description |
|---|---|---|
| TCP |
| etcd server and peer ports |
Network topology requirements
The infrastructure that you provision for your cluster must meet the following network topology requirements.
OpenShift Container Platform requires all nodes to have internet access to pull images for platform containers and provide telemetry data to Red Hat.
Load balancers
Before you install OpenShift Container Platform, you must provision two load balancers that meet the following requirements:
API load balancer: Provides a common endpoint for users, both human and machine, to interact with and configure the platform. Configure the following conditions:
- Layer 4 load balancing only. This can be referred to as Raw TCP, SSL Passthrough, or SSL Bridge mode. If you use SSL Bridge mode, you must enable Server Name Indication (SNI) for the API routes.
- A stateless load balancing algorithm. The options vary based on the load balancer implementation.
ImportantDo not configure session persistence for an API load balancer.
Configure the following ports on both the front and back of the load balancers:
Expand Table 9.5. API load balancer Port Back-end machines (pool members) Internal External Description 6443Bootstrap and control plane. You remove the bootstrap machine from the load balancer after the bootstrap machine initializes the cluster control plane. You must configure the
/readyzendpoint for the API server health check probe.X
X
Kubernetes API server
22623Bootstrap and control plane. You remove the bootstrap machine from the load balancer after the bootstrap machine initializes the cluster control plane.
X
Machine config server
NoteThe load balancer must be configured to take a maximum of 30 seconds from the time the API server turns off the
/readyzendpoint to the removal of the API server instance from the pool. Within the time frame after/readyzreturns an error or becomes healthy, the endpoint must have been removed or added. Probing every 5 or 10 seconds, with two successful requests to become healthy and three to become unhealthy, are well-tested values.Application Ingress load balancer: Provides an Ingress point for application traffic flowing in from outside the cluster. Configure the following conditions:
- Layer 4 load balancing only. This can be referred to as Raw TCP, SSL Passthrough, or SSL Bridge mode. If you use SSL Bridge mode, you must enable Server Name Indication (SNI) for the Ingress routes.
- A connection-based or session-based persistence is recommended, based on the options available and types of applications that will be hosted on the platform.
Configure the following ports on both the front and back of the load balancers:
Expand Table 9.6. Application Ingress load balancer Port Back-end machines (pool members) Internal External Description 443The machines that run the Ingress router pods, compute, or worker, by default.
X
X
HTTPS traffic
80The machines that run the Ingress router pods, compute, or worker, by default.
X
X
HTTP traffic
If the true IP address of the client can be seen by the load balancer, enabling source IP-based session persistence can improve performance for applications that use end-to-end TLS encryption.
A working configuration for the Ingress router is required for an OpenShift Container Platform cluster. You must configure the Ingress router after the control plane initializes.
NTP configuration
OpenShift Container Platform clusters are configured to use a public Network Time Protocol (NTP) server by default. If you want to use a local enterprise NTP server, or if your cluster is being deployed in a disconnected network, you can configure the cluster to use a specific time server. For more information, see the documentation for Configuring chrony time service.
9.1.4.2. User-provisioned DNS requirements
DNS is used for name resolution and reverse name resolution. DNS A/AAAA or CNAME records are used for name resolution and PTR records are used for reverse name resolution. The reverse records are important because Red Hat Enterprise Linux CoreOS (RHCOS) uses the reverse records to set the host name for all the nodes. Additionally, the reverse records are used to generate the certificate signing requests (CSR) that OpenShift Container Platform needs to operate.
The following DNS records are required for an OpenShift Container Platform cluster that uses user-provisioned infrastructure. In each record, <cluster_name> is the cluster name and <base_domain> is the cluster base domain that you specify in the install-config.yaml file. A complete DNS record takes the form: <component>.<cluster_name>.<base_domain>..
| Component | Record | Description |
|---|---|---|
| Kubernetes API |
| Add a DNS A/AAAA or CNAME record, and a DNS PTR record, to identify the load balancer for the control plane machines. These records must be resolvable by both clients external to the cluster and from all the nodes within the cluster. |
|
| Add a DNS A/AAAA or CNAME record, and a DNS PTR record, to identify the load balancer for the control plane machines. These records must be resolvable from all the nodes within the cluster. Important The API server must be able to resolve the worker nodes by the host names that are recorded in Kubernetes. If the API server cannot resolve the node names, then proxied API calls can fail, and you cannot retrieve logs from pods. | |
| Routes |
| Add a wildcard DNS A/AAAA or CNAME record that refers to the load balancer that targets the machines that run the Ingress router pods, which are the worker nodes by default. These records must be resolvable by both clients external to the cluster and from all the nodes within the cluster. |
| Bootstrap |
| Add a DNS A/AAAA or CNAME record, and a DNS PTR record, to identify the bootstrap machine. These records must be resolvable by the nodes within the cluster. |
| Master hosts |
| DNS A/AAAA or CNAME records and DNS PTR records to identify each machine for the control plane nodes (also known as the master nodes). These records must be resolvable by the nodes within the cluster. |
| Worker hosts |
| Add DNS A/AAAA or CNAME records and DNS PTR records to identify each machine for the worker nodes. These records must be resolvable by the nodes within the cluster. |
You can use the nslookup <hostname> command to verify name resolution. You can use the dig -x <ip_address> command to verify reverse name resolution for the PTR records.
The following example of a BIND zone file shows sample A records for name resolution. The purpose of the example is to show the records that are needed. The example is not meant to provide advice for choosing one name resolution service over another.
Example 9.1. Sample DNS zone database
$TTL 1W
@ IN SOA ns1.example.com. root (
2019070700 ; serial
3H ; refresh (3 hours)
30M ; retry (30 minutes)
2W ; expiry (2 weeks)
1W ) ; minimum (1 week)
IN NS ns1.example.com.
IN MX 10 smtp.example.com.
;
;
ns1 IN A 192.168.1.5
smtp IN A 192.168.1.5
;
helper IN A 192.168.1.5
helper.ocp4 IN A 192.168.1.5
;
; The api identifies the IP of your load balancer.
api.ocp4 IN A 192.168.1.5
api-int.ocp4 IN A 192.168.1.5
;
; The wildcard also identifies the load balancer.
*.apps.ocp4 IN A 192.168.1.5
;
; Create an entry for the bootstrap host.
bootstrap.ocp4 IN A 192.168.1.96
;
; Create entries for the master hosts.
master0.ocp4 IN A 192.168.1.97
master1.ocp4 IN A 192.168.1.98
master2.ocp4 IN A 192.168.1.99
;
; Create entries for the worker hosts.
worker0.ocp4 IN A 192.168.1.11
worker1.ocp4 IN A 192.168.1.7
;
;EOFThe following example BIND zone file shows sample PTR records for reverse name resolution.
Example 9.2. Sample DNS zone database for reverse records
$TTL 1W
@ IN SOA ns1.example.com. root (
2019070700 ; serial
3H ; refresh (3 hours)
30M ; retry (30 minutes)
2W ; expiry (2 weeks)
1W ) ; minimum (1 week)
IN NS ns1.example.com.
;
; The syntax is "last octet" and the host must have an FQDN
; with a trailing dot.
97 IN PTR master0.ocp4.example.com.
98 IN PTR master1.ocp4.example.com.
99 IN PTR master2.ocp4.example.com.
;
96 IN PTR bootstrap.ocp4.example.com.
;
5 IN PTR api.ocp4.example.com.
5 IN PTR api-int.ocp4.example.com.
;
11 IN PTR worker0.ocp4.example.com.
7 IN PTR worker1.ocp4.example.com.
;
;EOF9.1.5. Generating an SSH private key and adding it to the agent
If you want to perform installation debugging or disaster recovery on your cluster, you must provide an SSH key to both your ssh-agent and the installation program. You can use this key to access the bootstrap machine in a public cluster to troubleshoot installation issues.
In a production environment, you require disaster recovery and debugging.
Do not skip this procedure in production environments where disaster recovery and debugging is required.
You can use this key to SSH into the master nodes as the user core. When you deploy the cluster, the key is added to the core user’s ~/.ssh/authorized_keys list.
Procedure
If you do not have an SSH key that is configured for password-less authentication on your computer, create one. For example, on a computer that uses a Linux operating system, run the following command:
$ ssh-keygen -t ed25519 -N '' \ -f <path>/<file_name>1 - 1
- Specify the path and file name, such as
~/.ssh/id_rsa, of the new SSH key. If you have an existing key pair, ensure your public key is in the your~/.sshdirectory.
Running this command generates an SSH key that does not require a password in the location that you specified.
NoteIf you plan to install an OpenShift Container Platform cluster that uses FIPS Validated / Modules in Process cryptographic libraries on the
x86_64architecture, do not create a key that uses theed25519algorithm. Instead, create a key that uses thersaorecdsaalgorithm.Start the
ssh-agentprocess as a background task:$ eval "$(ssh-agent -s)"Example output
Agent pid 31874NoteIf your cluster is in FIPS mode, only use FIPS-compliant algorithms to generate the SSH key. The key must be either RSA or ECDSA.
Add your SSH private key to the
ssh-agent:$ ssh-add <path>/<file_name>1 Example output
Identity added: /home/<you>/<path>/<file_name> (<computer_name>)- 1
- Specify the path and file name for your SSH private key, such as
~/.ssh/id_rsa
Next steps
- When you install OpenShift Container Platform, provide the SSH public key to the installation program.
9.1.6. Obtaining the installation program
Before you install OpenShift Container Platform, download the installation file on your provisioning machine.
Prerequisites
- You have a machine that runs Linux, for example Red Hat Enterprise Linux 8, with 500 MB of local disk space
Procedure
- Access the Infrastructure Provider page on the OpenShift Cluster Manager site. If you have a Red Hat account, log in with your credentials. If you do not, create an account.
- Select your infrastructure provider.
Navigate to the page for your installation type, download the installation program for your operating system, and place the file in the directory where you will store the installation configuration files.
ImportantThe installation program creates several files on the computer that you use to install your cluster. You must keep the installation program and the files that the installation program creates after you finish installing the cluster. Both files are required to delete the cluster.
ImportantDeleting the files created by the installation program does not remove your cluster, even if the cluster failed during installation. To remove your cluster, complete the OpenShift Container Platform uninstallation procedures for your specific cloud provider.
Extract the installation program. For example, on a computer that uses a Linux operating system, run the following command:
$ tar xvf openshift-install-linux.tar.gz- Download your installation pull secret from the Red Hat OpenShift Cluster Manager. This pull secret allows you to authenticate with the services that are provided by the included authorities, including Quay.io, which serves the container images for OpenShift Container Platform components.
9.1.7. Installing the OpenShift CLI by downloading the binary
You can install the OpenShift CLI (oc) to interact with OpenShift Container Platform from a command-line interface. You can install oc on Linux, Windows, or macOS.
If you installed an earlier version of oc, you cannot use it to complete all of the commands in OpenShift Container Platform 4.7. Download and install the new version of oc.
9.1.7.1. Installing the OpenShift CLI on Linux
You can install the OpenShift CLI (oc) binary on Linux by using the following procedure.
Procedure
- Navigate to the OpenShift Container Platform downloads page on the Red Hat Customer Portal.
- Select the appropriate version in the Version drop-down menu.
- Click Download Now next to the OpenShift v4.7 Linux Client entry and save the file.
Unpack the archive:
$ tar xvzf <file>Place the
ocbinary in a directory that is on yourPATH.To check your
PATH, execute the following command:$ echo $PATH
After you install the OpenShift CLI, it is available using the oc command:
$ oc <command>9.1.7.2. Installing the OpenShift CLI on Windows
You can install the OpenShift CLI (oc) binary on Windows by using the following procedure.
Procedure
- Navigate to the OpenShift Container Platform downloads page on the Red Hat Customer Portal.
- Select the appropriate version in the Version drop-down menu.
- Click Download Now next to the OpenShift v4.7 Windows Client entry and save the file.
- Unzip the archive with a ZIP program.
Move the
ocbinary to a directory that is on yourPATH.To check your
PATH, open the command prompt and execute the following command:C:\> path
After you install the OpenShift CLI, it is available using the oc command:
C:\> oc <command>9.1.7.3. Installing the OpenShift CLI on macOS
You can install the OpenShift CLI (oc) binary on macOS by using the following procedure.
Procedure
- Navigate to the OpenShift Container Platform downloads page on the Red Hat Customer Portal.
- Select the appropriate version in the Version drop-down menu.
- Click Download Now next to the OpenShift v4.7 MacOSX Client entry and save the file.
- Unpack and unzip the archive.
Move the
ocbinary to a directory on your PATH.To check your
PATH, open a terminal and execute the following command:$ echo $PATH
After you install the OpenShift CLI, it is available using the oc command:
$ oc <command>9.1.8. Manually creating the installation configuration file
For installations of OpenShift Container Platform that use user-provisioned infrastructure, you manually generate your installation configuration file.
Prerequisites
- Obtain the OpenShift Container Platform installation program and the access token for your cluster.
Procedure
Create an installation directory to store your required installation assets in:
$ mkdir <installation_directory>ImportantYou must create a directory. Some installation assets, like bootstrap X.509 certificates have short expiration intervals, so you must not reuse an installation directory. If you want to reuse individual files from another cluster installation, you can copy them into your directory. However, the file names for the installation assets might change between releases. Use caution when copying installation files from an earlier OpenShift Container Platform version.
Customize the following
install-config.yamlfile template and save it in the<installation_directory>.NoteYou must name this configuration file
install-config.yaml.Back up the
install-config.yamlfile so that you can use it to install multiple clusters.ImportantThe
install-config.yamlfile is consumed during the next step of the installation process. You must back it up now.
9.1.8.1. Installation configuration parameters
Before you deploy an OpenShift Container Platform cluster, you provide parameter values to describe your account on the cloud platform that hosts your cluster and optionally customize your cluster’s platform. When you create the install-config.yaml installation configuration file, you provide values for the required parameters through the command line. If you customize your cluster, you can modify the install-config.yaml file to provide more details about the platform.
After installation, you cannot modify these parameters in the install-config.yaml file.
The openshift-install command does not validate field names for parameters. If an incorrect name is specified, the related file or object is not created, and no error is reported. Ensure that the field names for any parameters that are specified are correct.
9.1.8.1.1. Required configuration parameters
Required installation configuration parameters are described in the following table:
| Parameter | Description | Values |
|---|---|---|
|
|
The API version for the | String |
|
|
The base domain of your cloud provider. The base domain is used to create routes to your OpenShift Container Platform cluster components. The full DNS name for your cluster is a combination of the |
A fully-qualified domain or subdomain name, such as |
|
|
Kubernetes resource | Object |
|
|
The name of the cluster. DNS records for the cluster are all subdomains of |
String of lowercase letters, hyphens ( |
|
|
The configuration for the specific platform upon which to perform the installation: | Object |
|
| Get a pull secret from the Red Hat OpenShift Cluster Manager to authenticate downloading container images for OpenShift Container Platform components from services such as Quay.io. |
|
9.1.8.1.2. Network configuration parameters
You can customize your installation configuration based on the requirements of your existing network infrastructure. For example, you can expand the IP address block for the cluster network or provide different IP address blocks than the defaults.
Only IPv4 addresses are supported.
| Parameter | Description | Values |
|---|---|---|
|
| The configuration for the cluster network. | Object Note
You cannot modify parameters specified by the |
|
| The cluster network provider Container Network Interface (CNI) plug-in to install. |
Either |
|
| The IP address blocks for pods.
The default value is If you specify multiple IP address blocks, the blocks must not overlap. | An array of objects. For example: |
|
|
Required if you use An IPv4 network. |
An IP address block in Classless Inter-Domain Routing (CIDR) notation. The prefix length for an IPv4 block is between |
|
|
The subnet prefix length to assign to each individual node. For example, if | A subnet prefix.
The default value is |
|
|
The IP address block for services. The default value is The OpenShift SDN and OVN-Kubernetes network providers support only a single IP address block for the service network. | An array with an IP address block in CIDR format. For example: |
|
| The IP address blocks for machines. If you specify multiple IP address blocks, the blocks must not overlap.
If you specify multiple IP kernel arguments, the | An array of objects. For example: |
|
|
Required if you use | An IP network block in CIDR notation.
For example, Note
Set the |
9.1.8.1.3. Optional configuration parameters
Optional installation configuration parameters are described in the following table:
| Parameter | Description | Values |
|---|---|---|
|
| A PEM-encoded X.509 certificate bundle that is added to the nodes' trusted certificate store. This trust bundle may also be used when a proxy has been configured. | String |
|
| The configuration for the machines that comprise the compute nodes. |
Array of |
|
|
Determines the instruction set architecture of the machines in the pool. Currently, heteregeneous clusters are not supported, so all pools must specify the same architecture. Valid values are | String |
|
|
Whether to enable or disable simultaneous multithreading, or Important If you disable simultaneous multithreading, ensure that your capacity planning accounts for the dramatically decreased machine performance. |
|
|
|
Required if you use |
|
|
|
Required if you use |
|
|
| The number of compute machines, which are also known as worker machines, to provision. |
A positive integer greater than or equal to |
|
| The configuration for the machines that comprise the control plane. |
Array of |
|
|
Determines the instruction set architecture of the machines in the pool. Currently, heterogeneous clusters are not supported, so all pools must specify the same architecture. Valid values are | String |
|
|
Whether to enable or disable simultaneous multithreading, or Important If you disable simultaneous multithreading, ensure that your capacity planning accounts for the dramatically decreased machine performance. |
|
|
|
Required if you use |
|
|
|
Required if you use |
|
|
| The number of control plane machines to provision. |
The only supported value is |
|
| The Cloud Credential Operator (CCO) mode. If no mode is specified, the CCO dynamically tries to determine the capabilities of the provided credentials, with a preference for mint mode on the platforms where multiple modes are supported. Note Not all CCO modes are supported for all cloud providers. For more information on CCO modes, see the Cloud Credential Operator entry in the Cluster Operators reference content. |
|
|
|
Enable or disable FIPS mode. The default is Important
The use of FIPS Validated / Modules in Process cryptographic libraries is only supported on OpenShift Container Platform deployments on the Note If you are using Azure File storage, you cannot enable FIPS mode. |
|
|
| Sources and repositories for the release-image content. |
Array of objects. Includes a |
|
|
Required if you use | String |
|
| Specify one or more repositories that may also contain the same images. | Array of strings |
|
| How to publish or expose the user-facing endpoints of your cluster, such as the Kubernetes API, OpenShift routes. |
Setting this field to Important
If the value of the field is set to |
|
| The SSH key or keys to authenticate access your cluster machines. Note
For production OpenShift Container Platform clusters on which you want to perform installation debugging or disaster recovery, specify an SSH key that your | One or more keys. For example: |
9.1.8.2. Sample install-config.yaml file for IBM Z
You can customize the install-config.yaml file to specify more details about your OpenShift Container Platform cluster’s platform or modify the values of the required parameters.
apiVersion: v1
baseDomain: example.com
compute:
- hyperthreading: Enabled
name: worker
replicas: 0
architecture : s390x
controlPlane:
hyperthreading: Enabled
name: master
replicas: 3
architecture : s390x
metadata:
name: test
networking:
clusterNetwork:
- cidr: 10.128.0.0/14
hostPrefix: 23
networkType: OpenShiftSDN
serviceNetwork:
- 172.30.0.0/16
platform:
none: {}
fips: false
pullSecret: '{"auths": ...}'
sshKey: 'ssh-ed25519 AAAA...' - 1
- The base domain of the cluster. All DNS records must be sub-domains of this base and include the cluster name.
- 2 5
- The
controlPlanesection is a single mapping, but thecomputesection is a sequence of mappings. To meet the requirements of the different data structures, the first line of thecomputesection must begin with a hyphen,-, and the first line of thecontrolPlanesection must not. Only one control plane pool is used. - 3 6
- Whether to enable or disable simultaneous multithreading (SMT), or
hyperthreading. By default, SMT is enabled to increase the performance of your machines' cores. You can disable it by setting the parameter value toDisabled. If you disable SMT, you must disable it in all cluster machines; this includes both control plane and compute machines.NoteSimultaneous multithreading (SMT) is enabled by default. If SMT is not enabled in your BIOS settings, the
hyperthreadingparameter has no effect.ImportantIf you disable
hyperthreading, whether in the BIOS or in theinstall-config.yaml, ensure that your capacity planning accounts for the dramatically decreased machine performance. - 4
- You must set the value of the
replicasparameter to0. This parameter controls the number of workers that the cluster creates and manages for you, which are functions that the cluster does not perform when you use user-provisioned infrastructure. You must manually deploy worker machines for the cluster to use before you finish installing OpenShift Container Platform. - 7
- The number of control plane machines that you add to the cluster. Because the cluster uses these values as the number of etcd endpoints in the cluster, the value must match the number of control plane machines that you deploy.
- 8
- The cluster name that you specified in your DNS records.
- 9
- A block of IP addresses from which pod IP addresses are allocated. This block must not overlap with existing physical networks. These IP addresses are used for the pod network. If you need to access the pods from an external network, you must configure load balancers and routers to manage the traffic.Note
Class E CIDR range is reserved for a future use. To use the Class E CIDR range, you must ensure your networking environment accepts the IP addresses within the Class E CIDR range.
- 10
- The subnet prefix length to assign to each individual node. For example, if
hostPrefixis set to23, then each node is assigned a/23subnet out of the givencidr, which allows for 510 (2^(32 - 23) - 2) pod IPs addresses. If you are required to provide access to nodes from an external network, configure load balancers and routers to manage the traffic. - 11
- The IP address pool to use for service IP addresses. You can enter only one IP address pool. This block must not overlap with existing physical networks. If you need to access the services from an external network, configure load balancers and routers to manage the traffic.
- 12
- You must set the platform to
none. You cannot provide additional platform configuration variables for IBM Z infrastructure.WarningRed Hat Virtualization does not currently support installation with user-provisioned infrastructure on the oVirt platform. Therefore, you must set the platform to
none, allowing OpenShift Container Platform to identify each node as a bare-metal node and the cluster as a bare-metal cluster. This is the same as installing a cluster on any platform, and has the following limitations:- There will be no cluster provider so you must manually add each machine and there will be no node scaling capabilities.
- The oVirt CSI driver will not be installed and there will be no CSI capabilities.
- 13
- Whether to enable or disable FIPS mode. By default, FIPS mode is not enabled. If FIPS mode is enabled, the Red Hat Enterprise Linux CoreOS (RHCOS) machines that OpenShift Container Platform runs on bypass the default Kubernetes cryptography suite and use the cryptography modules that are provided with RHCOS instead.Important
The use of FIPS Validated / Modules in Process cryptographic libraries is only supported on OpenShift Container Platform deployments on the
x86_64architecture. - 14
- The pull secret from the Red Hat OpenShift Cluster Manager. This pull secret allows you to authenticate with the services that are provided by the included authorities, including Quay.io, which serves the container images for OpenShift Container Platform components.
- 15
- The public portion of the default SSH key for the
coreuser in Red Hat Enterprise Linux CoreOS (RHCOS).NoteFor production OpenShift Container Platform clusters on which you want to perform installation debugging or disaster recovery, specify an SSH key that your
ssh-agentprocess uses.
9.1.9. Configuring the cluster-wide proxy during installation
Production environments can deny direct access to the Internet and instead have an HTTP or HTTPS proxy available. You can configure a new OpenShift Container Platform cluster to use a proxy by configuring the proxy settings in the install-config.yaml file.
Prerequisites
-
You have an existing
install-config.yamlfile. You reviewed the sites that your cluster requires access to and determined whether any of them need to bypass the proxy. By default, all cluster egress traffic is proxied, including calls to hosting cloud provider APIs. You added sites to the
Proxyobject’sspec.noProxyfield to bypass the proxy if necessary.NoteThe
Proxyobjectstatus.noProxyfield is populated with the values of thenetworking.machineNetwork[].cidr,networking.clusterNetwork[].cidr, andnetworking.serviceNetwork[]fields from your installation configuration.For installations on Amazon Web Services (AWS), Google Cloud Platform (GCP), Microsoft Azure, and Red Hat OpenStack Platform (RHOSP), the
Proxyobjectstatus.noProxyfield is also populated with the instance metadata endpoint (169.254.169.254).
Procedure
Edit your
install-config.yamlfile and add the proxy settings. For example:apiVersion: v1 baseDomain: my.domain.com proxy: httpProxy: http://<username>:<pswd>@<ip>:<port>1 httpsProxy: https://<username>:<pswd>@<ip>:<port>2 noProxy: example.com3 additionalTrustBundle: |4 -----BEGIN CERTIFICATE----- <MY_TRUSTED_CA_CERT> -----END CERTIFICATE----- ...- 1
- A proxy URL to use for creating HTTP connections outside the cluster. The URL scheme must be
http. - 2
- A proxy URL to use for creating HTTPS connections outside the cluster.
- 3
- A comma-separated list of destination domain names, IP addresses, or other network CIDRs to exclude from proxying. Preface a domain with
.to match subdomains only. For example,.y.commatchesx.y.com, but noty.com. Use*to bypass the proxy for all destinations. - 4
- If provided, the installation program generates a config map that is named
user-ca-bundlein theopenshift-confignamespace to hold the additional CA certificates. If you provideadditionalTrustBundleand at least one proxy setting, theProxyobject is configured to reference theuser-ca-bundleconfig map in thetrustedCAfield. The Cluster Network Operator then creates atrusted-ca-bundleconfig map that merges the contents specified for thetrustedCAparameter with the RHCOS trust bundle. TheadditionalTrustBundlefield is required unless the proxy’s identity certificate is signed by an authority from the RHCOS trust bundle.
NoteThe installation program does not support the proxy
readinessEndpointsfield.- Save the file and reference it when installing OpenShift Container Platform.
The installation program creates a cluster-wide proxy that is named cluster that uses the proxy settings in the provided install-config.yaml file. If no proxy settings are provided, a cluster Proxy object is still created, but it will have a nil spec.
Only the Proxy object named cluster is supported, and no additional proxies can be created.
9.1.10. Creating the Kubernetes manifest and Ignition config files
Because you must modify some cluster definition files and manually start the cluster machines, you must generate the Kubernetes manifest and Ignition config files that the cluster needs to make its machines.
The installation configuration file transforms into the Kubernetes manifests. The manifests wrap into the Ignition configuration files, which are later used to create the cluster.
The Ignition config files that the installation program generates contain certificates that expire after 24 hours, which are then renewed at that time. If the cluster is shut down before renewing the certificates and the cluster is later restarted after the 24 hours have elapsed, the cluster automatically recovers the expired certificates. The exception is that you must manually approve the pending node-bootstrapper certificate signing requests (CSRs) to recover kubelet certificates. See the documentation for Recovering from expired control plane certificates for more information.
The installation program that generates the manifest and Ignition files is architecture specific and can be obtained from the client image mirror. The Linux version of the installation program runs on s390x only. This installer program is also available as a Mac OS version.
Prerequisites
- You obtained the OpenShift Container Platform installation program.
-
You created the
install-config.yamlinstallation configuration file.
Procedure
Change to the directory that contains the installation program and generate the Kubernetes manifests for the cluster:
$ ./openshift-install create manifests --dir <installation_directory>1 - 1
- For
<installation_directory>, specify the installation directory that contains theinstall-config.yamlfile you created.
WarningIf you are installing a three-node cluster, skip the following step to allow the control plane nodes to be schedulable.
ImportantWhen you configure control plane nodes from the default unschedulable to schedulable, additional subscriptions are required. This is because control plane nodes then become worker nodes.
Check that the
mastersSchedulableparameter in the<installation_directory>/manifests/cluster-scheduler-02-config.ymlKubernetes manifest file is set tofalse. This setting prevents pods from being scheduled on the control plane machines:-
Open the
<installation_directory>/manifests/cluster-scheduler-02-config.ymlfile. -
Locate the
mastersSchedulableparameter and ensure that it is set tofalse. - Save and exit the file.
-
Open the
To create the Ignition configuration files, run the following command from the directory that contains the installation program:
$ ./openshift-install create ignition-configs --dir <installation_directory>1 - 1
- For
<installation_directory>, specify the same installation directory.
The following files are generated in the directory:
. ├── auth │ ├── kubeadmin-password │ └── kubeconfig ├── bootstrap.ign ├── master.ign ├── metadata.json └── worker.ign
9.1.11. Creating Red Hat Enterprise Linux CoreOS (RHCOS) machines
Before you install a cluster on IBM Z infrastructure that you provision, you must install RHCOS on z/VM guest virtual machines for the cluster to use. Complete the following steps to create the machines.
Prerequisites
- An HTTP or HTTPS server running on your provisioning machine that is accessible to the machines you create.
Procedure
- Log in to Linux on your provisioning machine.
Obtain the Red Hat Enterprise Linux CoreOS (RHCOS) kernel, initramfs, and rootfs files from the RHCOS image mirror.
ImportantThe RHCOS images might not change with every release of OpenShift Container Platform. You must download images with the highest version that is less than or equal to the OpenShift Container Platform version that you install. Only use the appropriate kernel, initramfs, and rootfs artifacts described in the following procedure.
The file names contain the OpenShift Container Platform version number. They resemble the following examples:
-
kernel:
rhcos-<version>-live-kernel-<architecture> -
initramfs:
rhcos-<version>-live-initramfs.<architecture>.img rootfs:
rhcos-<version>-live-rootfs.<architecture>.imgNoteThe rootfs image is the same for FCP and DASD.
-
kernel:
Create parameter files. The following parameters are specific for a particular virtual machine:
For
ip=, specify the following seven entries:- The IP address for the machine.
- An empty string.
- The gateway.
- The netmask.
-
The machine host and domain name in the form
hostname.domainname. Omit this value to let RHCOS decide. - The network interface name. Omit this value to let RHCOS decide.
-
If you use static IP addresses, specify
none.
-
For
coreos.inst.ignition_url=, specify the Ignition file for the machine role. Usebootstrap.ign,master.ign, orworker.ign. Only HTTP and HTTPS protocols are supported. -
For
coreos.live.rootfs_url=, specify the matching rootfs artifact for the kernel and initramfs you are booting. Only HTTP and HTTPS protocols are supported. For installations on DASD-type disks, complete the following tasks:
-
For
coreos.inst.install_dev=, specifydasda. -
Use
rd.dasd=to specify the DASD where RHCOS is to be installed. Leave all other parameters unchanged.
Example parameter file,
bootstrap-0.parm, for the bootstrap machine:rd.neednet=1 \ console=ttysclp0 \ coreos.inst.install_dev=dasda \ coreos.live.rootfs_url=http://cl1.provide.example.com:8080/assets/rhcos-live-rootfs.s390x.img \ coreos.inst.ignition_url=http://cl1.provide.example.com:8080/ignition/bootstrap.ign \ ip=172.18.78.2::172.18.78.1:255.255.255.0:::none nameserver=172.18.78.1 \ rd.znet=qeth,0.0.bdf0,0.0.bdf1,0.0.bdf2,layer2=1,portno=0 \ zfcp.allow_lun_scan=0 \ rd.dasd=0.0.3490Write all options in the parameter file as a single line and make sure you have no newline characters.
-
For
For installations on FCP-type disks, complete the following tasks:
-
Use
rd.zfcp=<adapter>,<wwpn>,<lun>to specify the FCP disk where RHCOS is to be installed. For multipathing repeat this step for each additional path. -
For multipathing, set the following parameter:
rd.multipath=default. -
For multipathing, set the install device as:
coreos.inst.install_dev=/dev/mapper/mpatha. For single-path installation, set the install device as:
coreos.inst.install_dev=sda.NoteIf additional LUNs are configured with NPIV, FCP requires
zfcp.allow_lun_scan=0. If you must enablezfcp.allow_lun_scan=1because you use a CSI driver, for example, you must configure your NPIV so that each node cannot access the boot partition of another node.Leave all other parameters unchanged.
ImportantAdditional post-installation steps are required to fully enable multipathing. For more information, see “Enabling multipathing with kernel arguments on RHCOS" in Post-installation machine configuration tasks.
The following is an example parameter file
worker-1.parmfor a worker node with multipathing:rd.neednet=1 \ console=ttysclp0 \ coreos.inst.install_dev=sda \ coreos.live.rootfs_url=http://cl1.provide.example.com:8080/assets/rhcos-live-rootfs.s390x.img \ coreos.inst.ignition_url=http://cl1.provide.example.com:8080/ignition/worker.ign \ ip=172.18.78.2::172.18.78.1:255.255.255.0:::none nameserver=172.18.78.1 \ rd.znet=qeth,0.0.bdf0,0.0.bdf1,0.0.bdf2,layer2=1,portno=0 \ zfcp.allow_lun_scan=0 \ rd.zfcp=0.0.1987,0x50050763070bc5e3,0x4008400B00000000 \ rd.zfcp=0.0.19C7,0x50050763070bc5e3,0x4008400B00000000 \ rd.zfcp=0.0.1987,0x50050763071bc5e3,0x4008400B00000000 \ rd.zfcp=0.0.19C7,0x50050763071bc5e3,0x4008400B00000000Write all options in the parameter file as a single line and make sure you have no newline characters.
-
Use
- Transfer the initramfs, kernel, parameter files, and RHCOS images to z/VM, for example with FTP. For details about how to transfer the files with FTP and boot from the virtual reader, see Installing under Z/VM.
Punch the files to the virtual reader of the z/VM guest virtual machine that is to become your bootstrap node.
See PUNCH in IBM Documentation.
TipYou can use the CP PUNCH command or, if you use Linux, the vmur command to transfer files between two z/VM guest virtual machines.
- Log in to CMS on the bootstrap machine.
IPL the bootstrap machine from the reader:
$ ipl cSee IPL in IBM Documentation.
- Repeat this procedure for the other machines in the cluster.
9.1.11.1. Advanced RHCOS installation reference
This section illustrates the networking configuration and other advanced options that allow you to modify the Red Hat Enterprise Linux CoreOS (RHCOS) manual installation process. The following tables describe the kernel arguments and command-line options you can use with the RHCOS live installer and the coreos-installer command.
Routing and bonding options at RHCOS boot prompt
If you install RHCOS from an ISO image, you can add kernel arguments manually when you boot that image to configure the node’s networking. If no networking arguments are used, the installation defaults to using DHCP.
When adding networking arguments, you must also add the rd.neednet=1 kernel argument.
The following table describes how to use ip=, nameserver=, and bond= kernel arguments for live ISO installs.
Ordering is important when adding kernel arguments: ip=, nameserver=, and then bond=.
Routing and bonding options for ISO
The following table provides examples for configuring networking of your Red Hat Enterprise Linux CoreOS (RHCOS) nodes. These are networking options that are passed to the dracut tool during system boot. For more information about the networking options supported by dracut, see the dracut.cmdline manual page.
| Description | Examples |
|---|---|
|
To configure an IP address, either use DHCP (
|
|
|
Specify multiple network interfaces by specifying multiple |
|
|
Optional: You can configure routes to additional networks by setting an If the additional network gateway is different from the primary network gateway, the default gateway must be the primary network gateway. | To configure the default gateway: To configure the route for the additional network: |
| Disable DHCP on a single interface, such as when there are two or more network interfaces and only one interface is being used. |
|
| You can combine DHCP and static IP configurations on systems with multiple network interfaces. |
|
|
Optional: You can configure VLANs on individual interfaces by using the | To configure a VLAN on a network interface and use a static IP address: To configure a VLAN on a network interface and to use DHCP: |
|
You can provide multiple DNS servers by adding a |
|
|
Optional: Bonding multiple network interfaces to a single interface is supported using the
|
To configure the bonded interface to use DHCP, set the bond’s IP address to To configure the bonded interface to use a static IP address, enter the specific IP address you want and related information. For example: |
|
Optional: You can configure VLANs on bonded interfaces by using the | To configure the bonded interface with a VLAN and to use DHCP: To configure the bonded interface with a VLAN and to use a static IP address: |
|
Optional: Network teaming can be used as an alternative to bonding by using the
Note Teaming is planned to be deprecated when RHCOS switches to an upcoming version of RHEL. For more information, see this Red Hat Knowledgebase Article. | To configure a network team: |
9.1.12. Creating the cluster
To create the OpenShift Container Platform cluster, you wait for the bootstrap process to complete on the machines that you provisioned by using the Ignition config files that you generated with the installation program.
Prerequisites
- Create the required infrastructure for the cluster.
- You obtained the installation program and generated the Ignition config files for your cluster.
- You used the Ignition config files to create RHCOS machines for your cluster.
- Your machines have direct Internet access or have an HTTP or HTTPS proxy available.
Procedure
Monitor the bootstrap process:
$ ./openshift-install --dir <installation_directory> wait-for bootstrap-complete \1 --log-level=info2 Example output
INFO Waiting up to 30m0s for the Kubernetes API at https://api.test.example.com:6443... INFO API v1.20.0 up INFO Waiting up to 30m0s for bootstrapping to complete... INFO It is now safe to remove the bootstrap resourcesThe command succeeds when the Kubernetes API server signals that it has been bootstrapped on the control plane machines.
After bootstrap process is complete, remove the bootstrap machine from the load balancer.
ImportantYou must remove the bootstrap machine from the load balancer at this point. You can also remove or reformat the machine itself.
9.1.13. Logging in to the cluster by using the CLI
You can log in to your cluster as a default system user by exporting the cluster kubeconfig file. The kubeconfig file contains information about the cluster that is used by the CLI to connect a client to the correct cluster and API server. The file is specific to a cluster and is created during OpenShift Container Platform installation.
Prerequisites
- You deployed an OpenShift Container Platform cluster.
-
You installed the
ocCLI.
Procedure
Export the
kubeadmincredentials:$ export KUBECONFIG=<installation_directory>/auth/kubeconfig1 - 1
- For
<installation_directory>, specify the path to the directory that you stored the installation files in.
Verify you can run
occommands successfully using the exported configuration:$ oc whoamiExample output
system:admin
9.1.14. Approving the certificate signing requests for your machines
When you add machines to a cluster, two pending certificate signing requests (CSRs) are generated for each machine that you added. You must confirm that these CSRs are approved or, if necessary, approve them yourself. The client requests must be approved first, followed by the server requests.
Prerequisites
- You added machines to your cluster.
Procedure
Confirm that the cluster recognizes the machines:
$ oc get nodesExample output
NAME STATUS ROLES AGE VERSION master-0 Ready master 63m v1.20.0 master-1 Ready master 63m v1.20.0 master-2 Ready master 64m v1.20.0The output lists all of the machines that you created.
NoteThe preceding output might not include the compute nodes, also known as worker nodes, until some CSRs are approved.
Review the pending CSRs and ensure that you see the client requests with the
PendingorApprovedstatus for each machine that you added to the cluster:$ oc get csrExample output
NAME AGE REQUESTOR CONDITION csr-mddf5 20m system:node:master-01.example.com Approved,Issued csr-z5rln 16m system:node:worker-21.example.com Approved,IssuedIf the CSRs were not approved, after all of the pending CSRs for the machines you added are in
Pendingstatus, approve the CSRs for your cluster machines:NoteBecause the CSRs rotate automatically, approve your CSRs within an hour of adding the machines to the cluster. If you do not approve them within an hour, the certificates will rotate, and more than two certificates will be present for each node. You must approve all of these certificates. Once the client CSR is approved, the Kubelet creates a secondary CSR for the serving certificate, which requires manual approval. Then, subsequent serving certificate renewal requests are automatically approved by the
machine-approverif the Kubelet requests a new certificate with identical parameters.NoteFor clusters running on platforms that are not machine API enabled, such as bare metal and other user-provisioned infrastructure, you must implement a method of automatically approving the kubelet serving certificate requests (CSRs). If a request is not approved, then the
oc exec,oc rsh, andoc logscommands cannot succeed, because a serving certificate is required when the API server connects to the kubelet. Any operation that contacts the Kubelet endpoint requires this certificate approval to be in place. The method must watch for new CSRs, confirm that the CSR was submitted by thenode-bootstrapperservice account in thesystem:nodeorsystem:admingroups, and confirm the identity of the node.To approve them individually, run the following command for each valid CSR:
$ oc adm certificate approve <csr_name>1 - 1
<csr_name>is the name of a CSR from the list of current CSRs.
To approve all pending CSRs, run the following command:
$ oc get csr -o go-template='{{range .items}}{{if not .status}}{{.metadata.name}}{{"\n"}}{{end}}{{end}}' | xargs --no-run-if-empty oc adm certificate approveNoteSome Operators might not become available until some CSRs are approved.
Now that your client requests are approved, you must review the server requests for each machine that you added to the cluster:
$ oc get csrExample output
NAME AGE REQUESTOR CONDITION csr-bfd72 5m26s system:node:ip-10-0-50-126.us-east-2.compute.internal Pending csr-c57lv 5m26s system:node:ip-10-0-95-157.us-east-2.compute.internal Pending ...If the remaining CSRs are not approved, and are in the
Pendingstatus, approve the CSRs for your cluster machines:To approve them individually, run the following command for each valid CSR:
$ oc adm certificate approve <csr_name>1 - 1
<csr_name>is the name of a CSR from the list of current CSRs.
To approve all pending CSRs, run the following command:
$ oc get csr -o go-template='{{range .items}}{{if not .status}}{{.metadata.name}}{{"\n"}}{{end}}{{end}}' | xargs oc adm certificate approve
After all client and server CSRs have been approved, the machines have the
Readystatus. Verify this by running the following command:$ oc get nodesExample output
NAME STATUS ROLES AGE VERSION master-0 Ready master 73m v1.20.0 master-1 Ready master 73m v1.20.0 master-2 Ready master 74m v1.20.0 worker-0 Ready worker 11m v1.20.0 worker-1 Ready worker 11m v1.20.0NoteIt can take a few minutes after approval of the server CSRs for the machines to transition to the
Readystatus.
Additional information
- For more information on CSRs, see Certificate Signing Requests.
9.1.15. Initial Operator configuration
After the control plane initializes, you must immediately configure some Operators so that they all become available.
Prerequisites
- Your control plane has initialized.
Procedure
Watch the cluster components come online:
$ watch -n5 oc get clusteroperatorsExample output
NAME VERSION AVAILABLE PROGRESSING DEGRADED SINCE authentication 4.7.0 True False False 3h56m baremetal 4.7.0 True False False 29h cloud-credential 4.7.0 True False False 29h cluster-autoscaler 4.7.0 True False False 29h config-operator 4.7.0 True False False 6h39m console 4.7.0 True False False 3h59m csi-snapshot-controller 4.7.0 True False False 4h12m dns 4.7.0 True False False 4h15m etcd 4.7.0 True False False 29h image-registry 4.7.0 True False False 3h59m ingress 4.7.0 True False False 4h30m insights 4.7.0 True False False 29h kube-apiserver 4.7.0 True False False 29h kube-controller-manager 4.7.0 True False False 29h kube-scheduler 4.7.0 True False False 29h kube-storage-version-migrator 4.7.0 True False False 4h2m machine-api 4.7.0 True False False 29h machine-approver 4.7.0 True False False 6h34m machine-config 4.7.0 True False False 3h56m marketplace 4.7.0 True False False 4h2m monitoring 4.7.0 True False False 6h31m network 4.7.0 True False False 29h node-tuning 4.7.0 True False False 4h30m openshift-apiserver 4.7.0 True False False 3h56m openshift-controller-manager 4.7.0 True False False 4h36m openshift-samples 4.7.0 True False False 4h30m operator-lifecycle-manager 4.7.0 True False False 29h operator-lifecycle-manager-catalog 4.7.0 True False False 29h operator-lifecycle-manager-packageserver 4.7.0 True False False 3h59m service-ca 4.7.0 True False False 29h storage 4.7.0 True False False 4h30m- Configure the Operators that are not available.
9.1.15.1. Image registry storage configuration
The Image Registry Operator is not initially available for platforms that do not provide default storage. After installation, you must configure your registry to use storage so that the Registry Operator is made available.
Instructions are shown for configuring a persistent volume, which is required for production clusters. Where applicable, instructions are shown for configuring an empty directory as the storage location, which is available for only non-production clusters.
Additional instructions are provided for allowing the image registry to use block storage types by using the Recreate rollout strategy during upgrades.
9.1.15.1.1. Configuring registry storage for IBM Z
As a cluster administrator, following installation you must configure your registry to use storage.
Prerequisites
- Cluster administrator permissions.
- A cluster on IBM Z.
Persistent storage provisioned for your cluster.
ImportantOpenShift Container Platform supports
ReadWriteOnceaccess for image registry storage when you have only one replica. To deploy an image registry that supports high availability with two or more replicas,ReadWriteManyaccess is required.- Must have 100Gi capacity.
Procedure
To configure your registry to use storage, change the
spec.storage.pvcin theconfigs.imageregistry/clusterresource.NoteWhen using shared storage, review your security settings to prevent outside access.
Verify that you do not have a registry pod:
$ oc get pod -n openshift-image-registry -l docker-registry=defaultExample output
No resourses found in openshift-image-registry namespaceNoteIf you do have a registry pod in your output, you do not need to continue with this procedure.
Check the registry configuration:
$ oc edit configs.imageregistry.operator.openshift.ioExample output
storage: pvc: claim:Leave the
claimfield blank to allow the automatic creation of animage-registry-storagePVC.Check the
clusteroperatorstatus:$ oc get clusteroperator image-registryExample output
NAME VERSION AVAILABLE PROGRESSING DEGRADED SINCE MESSAGE image-registry 4.7 True False False 6h50mEnsure that your registry is set to managed to enable building and pushing of images.
Run:
$ oc edit configs.imageregistry/clusterThen, change the line
managementState: Removedto
managementState: Managed
9.1.15.1.2. Configuring storage for the image registry in non-production clusters
You must configure storage for the Image Registry Operator. For non-production clusters, you can set the image registry to an empty directory. If you do so, all images are lost if you restart the registry.
Procedure
To set the image registry storage to an empty directory:
$ oc patch configs.imageregistry.operator.openshift.io cluster --type merge --patch '{"spec":{"storage":{"emptyDir":{}}}}'WarningConfigure this option for only non-production clusters.
If you run this command before the Image Registry Operator initializes its components, the
oc patchcommand fails with the following error:Error from server (NotFound): configs.imageregistry.operator.openshift.io "cluster" not foundWait a few minutes and run the command again.
9.1.16. Completing installation on user-provisioned infrastructure
After you complete the Operator configuration, you can finish installing the cluster on infrastructure that you provide.
Prerequisites
- Your control plane has initialized.
- You have completed the initial Operator configuration.
Procedure
Confirm that all the cluster components are online with the following command:
$ watch -n5 oc get clusteroperatorsExample output
NAME VERSION AVAILABLE PROGRESSING DEGRADED SINCE authentication 4.7.0 True False False 3h56m baremetal 4.7.0 True False False 29h cloud-credential 4.7.0 True False False 29h cluster-autoscaler 4.7.0 True False False 29h config-operator 4.7.0 True False False 6h39m console 4.7.0 True False False 3h59m csi-snapshot-controller 4.7.0 True False False 4h12m dns 4.7.0 True False False 4h15m etcd 4.7.0 True False False 29h image-registry 4.7.0 True False False 3h59m ingress 4.7.0 True False False 4h30m insights 4.7.0 True False False 29h kube-apiserver 4.7.0 True False False 29h kube-controller-manager 4.7.0 True False False 29h kube-scheduler 4.7.0 True False False 29h kube-storage-version-migrator 4.7.0 True False False 4h2m machine-api 4.7.0 True False False 29h machine-approver 4.7.0 True False False 6h34m machine-config 4.7.0 True False False 3h56m marketplace 4.7.0 True False False 4h2m monitoring 4.7.0 True False False 6h31m network 4.7.0 True False False 29h node-tuning 4.7.0 True False False 4h30m openshift-apiserver 4.7.0 True False False 3h56m openshift-controller-manager 4.7.0 True False False 4h36m openshift-samples 4.7.0 True False False 4h30m operator-lifecycle-manager 4.7.0 True False False 29h operator-lifecycle-manager-catalog 4.7.0 True False False 29h operator-lifecycle-manager-packageserver 4.7.0 True False False 3h59m service-ca 4.7.0 True False False 29h storage 4.7.0 True False False 4h30mAlternatively, the following command notifies you when all of the clusters are available. It also retrieves and displays credentials:
$ ./openshift-install --dir <installation_directory> wait-for install-complete1 - 1
- For
<installation_directory>, specify the path to the directory that you stored the installation files in.
Example output
INFO Waiting up to 30m0s for the cluster to initialize...The command succeeds when the Cluster Version Operator finishes deploying the OpenShift Container Platform cluster from Kubernetes API server.
Important-
The Ignition config files that the installation program generates contain certificates that expire after 24 hours, which are then renewed at that time. If the cluster is shut down before renewing the certificates and the cluster is later restarted after the 24 hours have elapsed, the cluster automatically recovers the expired certificates. The exception is that you must manually approve the pending
node-bootstrappercertificate signing requests (CSRs) to recover kubelet certificates. See the documentation for Recovering from expired control plane certificates for more information. - It is recommended that you use Ignition config files within 12 hours after they are generated because the 24-hour certificate rotates from 16 to 22 hours after the cluster is installed. By using the Ignition config files within 12 hours, you can avoid installation failure if the certificate update runs during installation.
Confirm that the Kubernetes API server is communicating with the pods.
To view a list of all pods, use the following command:
$ oc get pods --all-namespacesExample output
NAMESPACE NAME READY STATUS RESTARTS AGE openshift-apiserver-operator openshift-apiserver-operator-85cb746d55-zqhs8 1/1 Running 1 9m openshift-apiserver apiserver-67b9g 1/1 Running 0 3m openshift-apiserver apiserver-ljcmx 1/1 Running 0 1m openshift-apiserver apiserver-z25h4 1/1 Running 0 2m openshift-authentication-operator authentication-operator-69d5d8bf84-vh2n8 1/1 Running 0 5m ...View the logs for a pod that is listed in the output of the previous command by using the following command:
$ oc logs <pod_name> -n <namespace>1 - 1
- Specify the pod name and namespace, as shown in the output of the previous command.
If the pod logs display, the Kubernetes API server can communicate with the cluster machines.
For an installation with Fibre Channel Protocol (FCP), additional steps are required to enable multipathing. Do not enable multipathing during installation.
See "Enabling multipathing with kernel arguments on RHCOS" in the Post-installation configuration documentation for more information.
All the worker nodes are restarted. To monitor the process, enter the following command:
$ oc get nodes -wNoteIf you have additional machine types such as infrastructure nodes, repeat the process for these types.
9.1.17. Telemetry access for OpenShift Container Platform
In OpenShift Container Platform 4.7, the Telemetry service, which runs by default to provide metrics about cluster health and the success of updates, requires internet access. If your cluster is connected to the internet, Telemetry runs automatically, and your cluster is registered to OpenShift Cluster Manager.
After you confirm that your OpenShift Cluster Manager inventory is correct, either maintained automatically by Telemetry or manually by using OpenShift Cluster Manager, use subscription watch to track your OpenShift Container Platform subscriptions at the account or multi-cluster level.
9.1.18. Collecting debugging information
You can gather debugging information that might help you to troubleshoot and debug certain issues with an OpenShift Container Platform installation on IBM Z.
Prerequisites
-
The
ocCLI tool installed.
Procedure
Log in to the cluster:
$ oc login -u <username>On the node you want to gather hardware information about, start a debugging container:
$ oc debug node/<nodename>Change to the /host file system and start
toolbox:$ chroot /host $ toolboxCollect the
dbginfodata:$ dbginfo.sh-
You can then retrieve the data, for example, using
scp.
9.1.19. Next steps
- Enabling multipathing with kernel arguments on RHCOS.
- Customize your cluster.
- If necessary, you can opt out of remote health reporting.
9.2. Installing a cluster with z/VM on IBM Z and LinuxONE in a restricted network
In OpenShift Container Platform version 4.7, you can install a cluster on IBM Z and LinuxONE infrastructure that you provision in a restricted network.
While this document refers to only IBM Z, all information in it also applies to LinuxONE.
Additional considerations exist for non-bare metal platforms. Review the information in the guidelines for deploying OpenShift Container Platform on non-tested platforms before you install an OpenShift Container Platform cluster.
Prerequisites
-
Create a mirror registry for installation in a restricted network and obtain the
imageContentSourcesdata for your version of OpenShift Container Platform. Before you begin the installation process, you must move or remove any existing installation files. This ensures that the required installation files are created and updated during the installation process.
ImportantEnsure that installation steps are done from a machine with access to the installation media.
-
Provision persistent storage using NFS for your cluster. To deploy a private image registry, your storage must provide
ReadWriteManyaccess modes. - Review details about the OpenShift Container Platform installation and update processes.
If you use a firewall and plan to use telemetry, you must configure the firewall to allow the sites that your cluster requires access to.
NoteBe sure to also review this site list if you are configuring a proxy.
9.2.1. About installations in restricted networks
In OpenShift Container Platform 4.7, you can perform an installation that does not require an active connection to the Internet to obtain software components. Restricted network installations can be completed using installer-provisioned infrastructure or user-provisioned infrastructure, depending on the cloud platform to which you are installing the cluster.
If you choose to perform a restricted network installation on a cloud platform, you still require access to its cloud APIs. Some cloud functions, like Amazon Web Service’s Route 53 DNS and IAM services, require internet access. Depending on your network, you might require less Internet access for an installation on bare metal hardware or on VMware vSphere.
To complete a restricted network installation, you must create a registry that mirrors the contents of the OpenShift Container Platform registry and contains the installation media. You can create this registry on a mirror host, which can access both the Internet and your closed network, or by using other methods that meet your restrictions.
Because of the complexity of the configuration for user-provisioned installations, consider completing a standard user-provisioned infrastructure installation before you attempt a restricted network installation using user-provisioned infrastructure. Completing this test installation might make it easier to isolate and troubleshoot any issues that might arise during your installation in a restricted network.
9.2.1.1. Additional limits
Clusters in restricted networks have the following additional limitations and restrictions:
-
The
ClusterVersionstatus includes anUnable to retrieve available updateserror. - By default, you cannot use the contents of the Developer Catalog because you cannot access the required image stream tags.
9.2.2. Internet access for OpenShift Container Platform
In OpenShift Container Platform 4.7, you require access to the Internet to obtain the images that are necessary to install your cluster.
You must have Internet access to:
- Access OpenShift Cluster Manager to download the installation program and perform subscription management. If the cluster has internet access and you do not disable Telemetry, that service automatically entitles your cluster.
- Access Quay.io to obtain the packages that are required to install your cluster.
- Obtain the packages that are required to perform cluster updates.
If your cluster cannot have direct Internet access, you can perform a restricted network installation on some types of infrastructure that you provision. During that process, you download the content that is required and use it to populate a mirror registry with the packages that you need to install a cluster and generate the installation program. With some installation types, the environment that you install your cluster in will not require Internet access. Before you update the cluster, you update the content of the mirror registry.
9.2.3. Machine requirements for a cluster with user-provisioned infrastructure
For a cluster that contains user-provisioned infrastructure, you must deploy all of the required machines.
9.2.3.1. Required machines
The smallest OpenShift Container Platform clusters require the following hosts:
- One temporary bootstrap machine
- Three control plane, or master, machines
- At least two compute machines, which are also known as worker machines.
The cluster requires the bootstrap machine to deploy the OpenShift Container Platform cluster on the three control plane machines. You can remove the bootstrap machine after you install the cluster.
To improve high availability of your cluster, distribute the control plane machines over different z/VM instances on at least two physical machines.
The bootstrap and control plane machines must use Red Hat Enterprise Linux CoreOS (RHCOS) as the operating system. However, the compute machines can choose between Red Hat Enterprise Linux CoreOS (RHCOS) or Red Hat Enterprise Linux (RHEL) 7.9.
Note that RHCOS is based on Red Hat Enterprise Linux (RHEL) 8 and inherits all of its hardware certifications and requirements. See Red Hat Enterprise Linux technology capabilities and limits.
9.2.3.2. Network connectivity requirements
All the Red Hat Enterprise Linux CoreOS (RHCOS) machines require network in initramfs during boot to fetch Ignition config files from the Machine Config Server. The machines are configured with static IP addresses. No DHCP server is required. Additionally, each OpenShift Container Platform node in the cluster must have access to a Network Time Protocol (NTP) server.
9.2.3.3. IBM Z network connectivity requirements
To install on IBM Z under z/VM, you require a single z/VM virtual NIC in layer 2 mode. You also need:
- A direct-attached OSA or RoCE network adapter
- A z/VM VSwitch set up. For a preferred setup, use OSA link aggregation.
9.2.3.4. Minimum resource requirements
Each cluster machine must meet the following minimum requirements:
| Machine | Operating System | vCPU [1] | Virtual RAM | Storage | IOPS |
|---|---|---|---|---|---|
| Bootstrap | RHCOS | 4 | 16 GB | 100 GB | N/A |
| Control plane | RHCOS | 4 | 16 GB | 100 GB | N/A |
| Compute | RHCOS | 2 | 8 GB | 100 GB | N/A |
- One physical core (IFL) provides two logical cores (threads) when SMT-2 is enabled. The hypervisor can provide two or more vCPUs.
9.2.3.5. Minimum IBM Z system environment
You can install OpenShift Container Platform version 4.7 on the following IBM hardware:
- IBM z15 (all models), IBM z14 (all models), IBM z13, and IBM z13s
- LinuxONE, any version
Hardware requirements
- The equivalent of 6 IFLs, which are SMT2 enabled, for each cluster.
-
At least one network connection to both connect to the
LoadBalancerservice and to serve data for traffic outside the cluster.
You can use dedicated or shared IFLs to assign sufficient compute resources. Resource sharing is one of the key strengths of IBM Z. However, you must adjust capacity correctly on each hypervisor layer and ensure sufficient resources for every OpenShift Container Platform cluster.
Since the overall performance of the cluster can be impacted, the LPARs that are used to setup the OpenShift Container Platform clusters must provide sufficient compute capacity. In this context, LPAR weight management, entitlements, and CPU shares on the hypervisor level play an important role.
Operating system requirements
- One instance of z/VM 7.1 or later
On your z/VM instance, set up:
- 3 guest virtual machines for OpenShift Container Platform control plane machines
- 2 guest virtual machines for OpenShift Container Platform compute machines
- 1 guest virtual machine for the temporary OpenShift Container Platform bootstrap machine
IBM Z network connectivity requirements
To install on IBM Z under z/VM, you require a single z/VM virtual NIC in layer 2 mode. You also need:
- A direct-attached OSA or RoCE network adapter
- A z/VM VSwitch set up. For a preferred setup, use OSA link aggregation.
Disk storage for the z/VM guest virtual machines
- FICON attached disk storage (DASDs). These can be z/VM minidisks, fullpack minidisks, or dedicated DASDs, all of which must be formatted as CDL, which is the default. To reach the minimum required DASD size for Red Hat Enterprise Linux CoreOS (RHCOS) installations, you need extended address volumes (EAV). If available, use HyperPAV to ensure optimal performance.
- FCP attached disk storage
Storage / Main Memory
- 16 GB for OpenShift Container Platform control plane machines
- 8 GB for OpenShift Container Platform compute machines
- 16 GB for the temporary OpenShift Container Platform bootstrap machine
9.2.3.6. Preferred IBM Z system environment
Hardware requirements
- 3 LPARS that each have the equivalent of 6 IFLs, which are SMT2 enabled, for each cluster.
-
Two network connections to connect to both connect to the
LoadBalancerservice and to serve data for traffic outside the cluster. - HiperSockets, which are attached to a node either directly as a device or by bridging with one z/VM VSWITCH to be transparent to the z/VM guest. To directly connect HiperSockets to a node, you must set up a gateway to the external network via a RHEL 8 guest to bridge to the HiperSockets network.
Operating system requirements
- 2 or 3 instances of z/VM 7.1 or later for high availability
On your z/VM instances, set up:
- 3 guest virtual machines for OpenShift Container Platform control plane machines, one per z/VM instance.
- At least 6 guest virtual machines for OpenShift Container Platform compute machines, distributed across the z/VM instances.
- 1 guest virtual machine for the temporary OpenShift Container Platform bootstrap machine.
-
To ensure the availability of integral components in an overcommitted environment, increase the priority of the control plane by using the CP command
SET SHARE. Do the same for infrastructure nodes, if they exist. See SET SHARE in IBM Documentation.
IBM Z network connectivity requirements
To install on IBM Z under z/VM, you require a single z/VM virtual NIC in layer 2 mode. You also need:
- A direct-attached OSA or RoCE network adapter
- A z/VM VSwitch set up. For a preferred setup, use OSA link aggregation.
Disk storage for the z/VM guest virtual machines
- FICON attached disk storage (DASDs). These can be z/VM minidisks, fullpack minidisks, or dedicated DASDs, all of which must be formatted as CDL, which is the default. To reach the minimum required DASD size for Red Hat Enterprise Linux CoreOS (RHCOS) installations, you need extended address volumes (EAV). If available, use HyperPAV and High Performance FICON (zHPF) to ensure optimal performance.
- FCP attached disk storage
Storage / Main Memory
- 16 GB for OpenShift Container Platform control plane machines
- 8 GB for OpenShift Container Platform compute machines
- 16 GB for the temporary OpenShift Container Platform bootstrap machine
9.2.3.7. Certificate signing requests management
Because your cluster has limited access to automatic machine management when you use infrastructure that you provision, you must provide a mechanism for approving cluster certificate signing requests (CSRs) after installation. The kube-controller-manager only approves the kubelet client CSRs. The machine-approver cannot guarantee the validity of a serving certificate that is requested by using kubelet credentials because it cannot confirm that the correct machine issued the request. You must determine and implement a method of verifying the validity of the kubelet serving certificate requests and approving them.
9.2.4. Creating the user-provisioned infrastructure
Before you deploy an OpenShift Container Platform cluster that uses user-provisioned infrastructure, you must create the underlying infrastructure.
Prerequisites
- Review the OpenShift Container Platform 4.x Tested Integrations page before you create the supporting infrastructure for your cluster.
Procedure
- Configure DHCP or set static IP addresses on each node.
- Provision the required load balancers.
- Configure the ports for your machines.
- Configure DNS.
- Ensure network connectivity.
9.2.4.1. Networking requirements for user-provisioned infrastructure
All the Red Hat Enterprise Linux CoreOS (RHCOS) machines require network in initramfs during boot to fetch Ignition config from the machine config server.
During the initial boot, the machines require either a DHCP server or that static IP addresses be set on each host in the cluster to establish a network connection, which allows them to download their Ignition config files.
It is recommended to use the DHCP server to manage the machines for the cluster long-term. Ensure that the DHCP server is configured to provide persistent IP addresses and host names to the cluster machines.
The Kubernetes API server must be able to resolve the node names of the cluster machines. If the API servers and worker nodes are in different zones, you can configure a default DNS search zone to allow the API server to resolve the node names. Another supported approach is to always refer to hosts by their fully-qualified domain names in both the node objects and all DNS requests.
You must configure the network connectivity between machines to allow cluster components to communicate. Each machine must be able to resolve the host names of all other machines in the cluster.
| Protocol | Port | Description |
|---|---|---|
| ICMP | N/A | Network reachability tests |
| TCP |
| Metrics |
|
|
Host level services, including the node exporter on ports | |
|
| The default ports that Kubernetes reserves | |
|
| openshift-sdn | |
| UDP |
| VXLAN and Geneve |
|
| VXLAN and Geneve | |
|
|
Host level services, including the node exporter on ports | |
| TCP/UDP |
| Kubernetes node port |
| Protocol | Port | Description |
|---|---|---|
| TCP |
| Kubernetes API |
| Protocol | Port | Description |
|---|---|---|
| TCP |
| etcd server and peer ports |
Network topology requirements
The infrastructure that you provision for your cluster must meet the following network topology requirements.
Load balancers
Before you install OpenShift Container Platform, you must provision two load balancers that meet the following requirements:
API load balancer: Provides a common endpoint for users, both human and machine, to interact with and configure the platform. Configure the following conditions:
- Layer 4 load balancing only. This can be referred to as Raw TCP, SSL Passthrough, or SSL Bridge mode. If you use SSL Bridge mode, you must enable Server Name Indication (SNI) for the API routes.
- A stateless load balancing algorithm. The options vary based on the load balancer implementation.
ImportantDo not configure session persistence for an API load balancer.
Configure the following ports on both the front and back of the load balancers:
Expand Table 9.15. API load balancer Port Back-end machines (pool members) Internal External Description 6443Bootstrap and control plane. You remove the bootstrap machine from the load balancer after the bootstrap machine initializes the cluster control plane. You must configure the
/readyzendpoint for the API server health check probe.X
X
Kubernetes API server
22623Bootstrap and control plane. You remove the bootstrap machine from the load balancer after the bootstrap machine initializes the cluster control plane.
X
Machine config server
NoteThe load balancer must be configured to take a maximum of 30 seconds from the time the API server turns off the
/readyzendpoint to the removal of the API server instance from the pool. Within the time frame after/readyzreturns an error or becomes healthy, the endpoint must have been removed or added. Probing every 5 or 10 seconds, with two successful requests to become healthy and three to become unhealthy, are well-tested values.Application Ingress load balancer: Provides an Ingress point for application traffic flowing in from outside the cluster. Configure the following conditions:
- Layer 4 load balancing only. This can be referred to as Raw TCP, SSL Passthrough, or SSL Bridge mode. If you use SSL Bridge mode, you must enable Server Name Indication (SNI) for the Ingress routes.
- A connection-based or session-based persistence is recommended, based on the options available and types of applications that will be hosted on the platform.
Configure the following ports on both the front and back of the load balancers:
Expand Table 9.16. Application Ingress load balancer Port Back-end machines (pool members) Internal External Description 443The machines that run the Ingress router pods, compute, or worker, by default.
X
X
HTTPS traffic
80The machines that run the Ingress router pods, compute, or worker, by default.
X
X
HTTP traffic
If the true IP address of the client can be seen by the load balancer, enabling source IP-based session persistence can improve performance for applications that use end-to-end TLS encryption.
A working configuration for the Ingress router is required for an OpenShift Container Platform cluster. You must configure the Ingress router after the control plane initializes.
NTP configuration
OpenShift Container Platform clusters are configured to use a public Network Time Protocol (NTP) server by default. If you want to use a local enterprise NTP server, or if your cluster is being deployed in a disconnected network, you can configure the cluster to use a specific time server. For more information, see the documentation for Configuring chrony time service.
If a DHCP server provides NTP server information, the chrony time service on the Red Hat Enterprise Linux CoreOS (RHCOS) machines read the information and can sync the clock with the NTP servers.
9.2.4.2. User-provisioned DNS requirements
DNS is used for name resolution and reverse name resolution. DNS A/AAAA or CNAME records are used for name resolution and PTR records are used for reverse name resolution. The reverse records are important because Red Hat Enterprise Linux CoreOS (RHCOS) uses the reverse records to set the host name for all the nodes. Additionally, the reverse records are used to generate the certificate signing requests (CSR) that OpenShift Container Platform needs to operate.
The following DNS records are required for an OpenShift Container Platform cluster that uses user-provisioned infrastructure. In each record, <cluster_name> is the cluster name and <base_domain> is the cluster base domain that you specify in the install-config.yaml file. A complete DNS record takes the form: <component>.<cluster_name>.<base_domain>..
| Component | Record | Description |
|---|---|---|
| Kubernetes API |
| Add a DNS A/AAAA or CNAME record, and a DNS PTR record, to identify the load balancer for the control plane machines. These records must be resolvable by both clients external to the cluster and from all the nodes within the cluster. |
|
| Add a DNS A/AAAA or CNAME record, and a DNS PTR record, to identify the load balancer for the control plane machines. These records must be resolvable from all the nodes within the cluster. Important The API server must be able to resolve the worker nodes by the host names that are recorded in Kubernetes. If the API server cannot resolve the node names, then proxied API calls can fail, and you cannot retrieve logs from pods. | |
| Routes |
| Add a wildcard DNS A/AAAA or CNAME record that refers to the load balancer that targets the machines that run the Ingress router pods, which are the worker nodes by default. These records must be resolvable by both clients external to the cluster and from all the nodes within the cluster. |
| Bootstrap |
| Add a DNS A/AAAA or CNAME record, and a DNS PTR record, to identify the bootstrap machine. These records must be resolvable by the nodes within the cluster. |
| Master hosts |
| DNS A/AAAA or CNAME records and DNS PTR records to identify each machine for the control plane nodes (also known as the master nodes). These records must be resolvable by the nodes within the cluster. |
| Worker hosts |
| Add DNS A/AAAA or CNAME records and DNS PTR records to identify each machine for the worker nodes. These records must be resolvable by the nodes within the cluster. |
You can use the nslookup <hostname> command to verify name resolution. You can use the dig -x <ip_address> command to verify reverse name resolution for the PTR records.
The following example of a BIND zone file shows sample A records for name resolution. The purpose of the example is to show the records that are needed. The example is not meant to provide advice for choosing one name resolution service over another.
Example 9.3. Sample DNS zone database
$TTL 1W
@ IN SOA ns1.example.com. root (
2019070700 ; serial
3H ; refresh (3 hours)
30M ; retry (30 minutes)
2W ; expiry (2 weeks)
1W ) ; minimum (1 week)
IN NS ns1.example.com.
IN MX 10 smtp.example.com.
;
;
ns1 IN A 192.168.1.5
smtp IN A 192.168.1.5
;
helper IN A 192.168.1.5
helper.ocp4 IN A 192.168.1.5
;
; The api identifies the IP of your load balancer.
api.ocp4 IN A 192.168.1.5
api-int.ocp4 IN A 192.168.1.5
;
; The wildcard also identifies the load balancer.
*.apps.ocp4 IN A 192.168.1.5
;
; Create an entry for the bootstrap host.
bootstrap.ocp4 IN A 192.168.1.96
;
; Create entries for the master hosts.
master0.ocp4 IN A 192.168.1.97
master1.ocp4 IN A 192.168.1.98
master2.ocp4 IN A 192.168.1.99
;
; Create entries for the worker hosts.
worker0.ocp4 IN A 192.168.1.11
worker1.ocp4 IN A 192.168.1.7
;
;EOFThe following example BIND zone file shows sample PTR records for reverse name resolution.
Example 9.4. Sample DNS zone database for reverse records
$TTL 1W
@ IN SOA ns1.example.com. root (
2019070700 ; serial
3H ; refresh (3 hours)
30M ; retry (30 minutes)
2W ; expiry (2 weeks)
1W ) ; minimum (1 week)
IN NS ns1.example.com.
;
; The syntax is "last octet" and the host must have an FQDN
; with a trailing dot.
97 IN PTR master0.ocp4.example.com.
98 IN PTR master1.ocp4.example.com.
99 IN PTR master2.ocp4.example.com.
;
96 IN PTR bootstrap.ocp4.example.com.
;
5 IN PTR api.ocp4.example.com.
5 IN PTR api-int.ocp4.example.com.
;
11 IN PTR worker0.ocp4.example.com.
7 IN PTR worker1.ocp4.example.com.
;
;EOF9.2.5. Generating an SSH private key and adding it to the agent
If you want to perform installation debugging or disaster recovery on your cluster, you must provide an SSH key to both your ssh-agent and the installation program. You can use this key to access the bootstrap machine in a public cluster to troubleshoot installation issues.
In a production environment, you require disaster recovery and debugging.
Do not skip this procedure in production environments where disaster recovery and debugging is required.
You can use this key to SSH into the master nodes as the user core. When you deploy the cluster, the key is added to the core user’s ~/.ssh/authorized_keys list.
Procedure
If you do not have an SSH key that is configured for password-less authentication on your computer, create one. For example, on a computer that uses a Linux operating system, run the following command:
$ ssh-keygen -t ed25519 -N '' \ -f <path>/<file_name>1 - 1
- Specify the path and file name, such as
~/.ssh/id_rsa, of the new SSH key. If you have an existing key pair, ensure your public key is in the your~/.sshdirectory.
Running this command generates an SSH key that does not require a password in the location that you specified.
NoteIf you plan to install an OpenShift Container Platform cluster that uses FIPS Validated / Modules in Process cryptographic libraries on the
x86_64architecture, do not create a key that uses theed25519algorithm. Instead, create a key that uses thersaorecdsaalgorithm.Start the
ssh-agentprocess as a background task:$ eval "$(ssh-agent -s)"Example output
Agent pid 31874NoteIf your cluster is in FIPS mode, only use FIPS-compliant algorithms to generate the SSH key. The key must be either RSA or ECDSA.
Add your SSH private key to the
ssh-agent:$ ssh-add <path>/<file_name>1 Example output
Identity added: /home/<you>/<path>/<file_name> (<computer_name>)- 1
- Specify the path and file name for your SSH private key, such as
~/.ssh/id_rsa
Next steps
- When you install OpenShift Container Platform, provide the SSH public key to the installation program.
9.2.6. Manually creating the installation configuration file
For installations of OpenShift Container Platform that use user-provisioned infrastructure, you manually generate your installation configuration file.
Prerequisites
- Obtain the OpenShift Container Platform installation program and the access token for your cluster.
Procedure
Create an installation directory to store your required installation assets in:
$ mkdir <installation_directory>ImportantYou must create a directory. Some installation assets, like bootstrap X.509 certificates have short expiration intervals, so you must not reuse an installation directory. If you want to reuse individual files from another cluster installation, you can copy them into your directory. However, the file names for the installation assets might change between releases. Use caution when copying installation files from an earlier OpenShift Container Platform version.
Customize the following
install-config.yamlfile template and save it in the<installation_directory>.NoteYou must name this configuration file
install-config.yaml.Back up the
install-config.yamlfile so that you can use it to install multiple clusters.ImportantThe
install-config.yamlfile is consumed during the next step of the installation process. You must back it up now.
9.2.6.1. Installation configuration parameters
Before you deploy an OpenShift Container Platform cluster, you provide parameter values to describe your account on the cloud platform that hosts your cluster and optionally customize your cluster’s platform. When you create the install-config.yaml installation configuration file, you provide values for the required parameters through the command line. If you customize your cluster, you can modify the install-config.yaml file to provide more details about the platform.
After installation, you cannot modify these parameters in the install-config.yaml file.
The openshift-install command does not validate field names for parameters. If an incorrect name is specified, the related file or object is not created, and no error is reported. Ensure that the field names for any parameters that are specified are correct.
9.2.6.1.1. Required configuration parameters
Required installation configuration parameters are described in the following table:
| Parameter | Description | Values |
|---|---|---|
|
|
The API version for the | String |
|
|
The base domain of your cloud provider. The base domain is used to create routes to your OpenShift Container Platform cluster components. The full DNS name for your cluster is a combination of the |
A fully-qualified domain or subdomain name, such as |
|
|
Kubernetes resource | Object |
|
|
The name of the cluster. DNS records for the cluster are all subdomains of |
String of lowercase letters, hyphens ( |
|
|
The configuration for the specific platform upon which to perform the installation: | Object |
|
| Get a pull secret from the Red Hat OpenShift Cluster Manager to authenticate downloading container images for OpenShift Container Platform components from services such as Quay.io. |
|
9.2.6.1.2. Network configuration parameters
You can customize your installation configuration based on the requirements of your existing network infrastructure. For example, you can expand the IP address block for the cluster network or provide different IP address blocks than the defaults.
Only IPv4 addresses are supported.
| Parameter | Description | Values |
|---|---|---|
|
| The configuration for the cluster network. | Object Note
You cannot modify parameters specified by the |
|
| The cluster network provider Container Network Interface (CNI) plug-in to install. |
Either |
|
| The IP address blocks for pods.
The default value is If you specify multiple IP address blocks, the blocks must not overlap. | An array of objects. For example: |
|
|
Required if you use An IPv4 network. |
An IP address block in Classless Inter-Domain Routing (CIDR) notation. The prefix length for an IPv4 block is between |
|
|
The subnet prefix length to assign to each individual node. For example, if | A subnet prefix.
The default value is |
|
|
The IP address block for services. The default value is The OpenShift SDN and OVN-Kubernetes network providers support only a single IP address block for the service network. | An array with an IP address block in CIDR format. For example: |
|
| The IP address blocks for machines. If you specify multiple IP address blocks, the blocks must not overlap.
If you specify multiple IP kernel arguments, the | An array of objects. For example: |
|
|
Required if you use | An IP network block in CIDR notation.
For example, Note
Set the |
9.2.6.1.3. Optional configuration parameters
Optional installation configuration parameters are described in the following table:
| Parameter | Description | Values |
|---|---|---|
|
| A PEM-encoded X.509 certificate bundle that is added to the nodes' trusted certificate store. This trust bundle may also be used when a proxy has been configured. | String |
|
| The configuration for the machines that comprise the compute nodes. |
Array of |
|
|
Determines the instruction set architecture of the machines in the pool. Currently, heteregeneous clusters are not supported, so all pools must specify the same architecture. Valid values are | String |
|
|
Whether to enable or disable simultaneous multithreading, or Important If you disable simultaneous multithreading, ensure that your capacity planning accounts for the dramatically decreased machine performance. |
|
|
|
Required if you use |
|
|
|
Required if you use |
|
|
| The number of compute machines, which are also known as worker machines, to provision. |
A positive integer greater than or equal to |
|
| The configuration for the machines that comprise the control plane. |
Array of |
|
|
Determines the instruction set architecture of the machines in the pool. Currently, heterogeneous clusters are not supported, so all pools must specify the same architecture. Valid values are | String |
|
|
Whether to enable or disable simultaneous multithreading, or Important If you disable simultaneous multithreading, ensure that your capacity planning accounts for the dramatically decreased machine performance. |
|
|
|
Required if you use |
|
|
|
Required if you use |
|
|
| The number of control plane machines to provision. |
The only supported value is |
|
| The Cloud Credential Operator (CCO) mode. If no mode is specified, the CCO dynamically tries to determine the capabilities of the provided credentials, with a preference for mint mode on the platforms where multiple modes are supported. Note Not all CCO modes are supported for all cloud providers. For more information on CCO modes, see the Cloud Credential Operator entry in the Cluster Operators reference content. |
|
|
|
Enable or disable FIPS mode. The default is Important
The use of FIPS Validated / Modules in Process cryptographic libraries is only supported on OpenShift Container Platform deployments on the Note If you are using Azure File storage, you cannot enable FIPS mode. |
|
|
| Sources and repositories for the release-image content. |
Array of objects. Includes a |
|
|
Required if you use | String |
|
| Specify one or more repositories that may also contain the same images. | Array of strings |
|
| How to publish or expose the user-facing endpoints of your cluster, such as the Kubernetes API, OpenShift routes. |
Setting this field to Important
If the value of the field is set to |
|
| The SSH key or keys to authenticate access your cluster machines. Note
For production OpenShift Container Platform clusters on which you want to perform installation debugging or disaster recovery, specify an SSH key that your | One or more keys. For example: |
9.2.6.2. Sample install-config.yaml file for IBM Z
You can customize the install-config.yaml file to specify more details about your OpenShift Container Platform cluster’s platform or modify the values of the required parameters.
apiVersion: v1
baseDomain: example.com
compute:
- hyperthreading: Enabled
name: worker
replicas: 0
architecture : s390x
controlPlane:
hyperthreading: Enabled
name: master
replicas: 3
architecture : s390x
metadata:
name: test
networking:
clusterNetwork:
- cidr: 10.128.0.0/14
hostPrefix: 23
networkType: OpenShiftSDN
serviceNetwork:
- 172.30.0.0/16
platform:
none: {}
fips: false
pullSecret: '{"auths":{"<local_registry>": {"auth": "<credentials>","email": "you@example.com"}}}'
sshKey: 'ssh-ed25519 AAAA...'
additionalTrustBundle: |
-----BEGIN CERTIFICATE-----
ZZZZZZZZZZZZZZZZZZZZZZZZZZZZZZZZZZZZZZZZZZZZZZZZZZZZZZZZZZZZZZZZ
-----END CERTIFICATE-----
imageContentSources:
- mirrors:
- <local_repository>/ocp4/openshift4
source: quay.io/openshift-release-dev/ocp-release
- mirrors:
- <local_repository>/ocp4/openshift4
source: quay.io/openshift-release-dev/ocp-v4.0-art-dev- 1
- The base domain of the cluster. All DNS records must be sub-domains of this base and include the cluster name.
- 2 5
- The
controlPlanesection is a single mapping, but thecomputesection is a sequence of mappings. To meet the requirements of the different data structures, the first line of thecomputesection must begin with a hyphen,-, and the first line of thecontrolPlanesection must not. Only one control plane pool is used. - 3 6
- Whether to enable or disable simultaneous multithreading (SMT), or
hyperthreading. By default, SMT is enabled to increase the performance of your machines' cores. You can disable it by setting the parameter value toDisabled. If you disable SMT, you must disable it in all cluster machines; this includes both control plane and compute machines.NoteSimultaneous multithreading (SMT) is enabled by default. If SMT is not enabled in your BIOS settings, the
hyperthreadingparameter has no effect.ImportantIf you disable
hyperthreading, whether in the BIOS or in theinstall-config.yaml, ensure that your capacity planning accounts for the dramatically decreased machine performance. - 4
- You must set the value of the
replicasparameter to0. This parameter controls the number of workers that the cluster creates and manages for you, which are functions that the cluster does not perform when you use user-provisioned infrastructure. You must manually deploy worker machines for the cluster to use before you finish installing OpenShift Container Platform. - 7
- The number of control plane machines that you add to the cluster. Because the cluster uses these values as the number of etcd endpoints in the cluster, the value must match the number of control plane machines that you deploy.
- 8
- The cluster name that you specified in your DNS records.
- 9
- A block of IP addresses from which pod IP addresses are allocated. This block must not overlap with existing physical networks. These IP addresses are used for the pod network. If you need to access the pods from an external network, you must configure load balancers and routers to manage the traffic.Note
Class E CIDR range is reserved for a future use. To use the Class E CIDR range, you must ensure your networking environment accepts the IP addresses within the Class E CIDR range.
- 10
- The subnet prefix length to assign to each individual node. For example, if
hostPrefixis set to23, then each node is assigned a/23subnet out of the givencidr, which allows for 510 (2^(32 - 23) - 2) pod IPs addresses. If you are required to provide access to nodes from an external network, configure load balancers and routers to manage the traffic. - 11
- The IP address pool to use for service IP addresses. You can enter only one IP address pool. This block must not overlap with existing physical networks. If you need to access the services from an external network, configure load balancers and routers to manage the traffic.
- 12
- You must set the platform to
none. You cannot provide additional platform configuration variables for IBM Z infrastructure.WarningRed Hat Virtualization does not currently support installation with user-provisioned infrastructure on the oVirt platform. Therefore, you must set the platform to
none, allowing OpenShift Container Platform to identify each node as a bare-metal node and the cluster as a bare-metal cluster. This is the same as installing a cluster on any platform, and has the following limitations:- There will be no cluster provider so you must manually add each machine and there will be no node scaling capabilities.
- The oVirt CSI driver will not be installed and there will be no CSI capabilities.
- 13
- Whether to enable or disable FIPS mode. By default, FIPS mode is not enabled. If FIPS mode is enabled, the Red Hat Enterprise Linux CoreOS (RHCOS) machines that OpenShift Container Platform runs on bypass the default Kubernetes cryptography suite and use the cryptography modules that are provided with RHCOS instead.Important
The use of FIPS Validated / Modules in Process cryptographic libraries is only supported on OpenShift Container Platform deployments on the
x86_64architecture. - 14
- For
<local_registry>, specify the registry domain name, and optionally the port, that your mirror registry uses to serve content. For example,registry.example.comorregistry.example.com:5000. For<credentials>, specify the base64-encoded user name and password for your mirror registry. - 15
- The public portion of the default SSH key for the
coreuser in Red Hat Enterprise Linux CoreOS (RHCOS).NoteFor production OpenShift Container Platform clusters on which you want to perform installation debugging or disaster recovery, specify an SSH key that your
ssh-agentprocess uses. - 16
- Add the
additionalTrustBundleparameter and value. The value must be the contents of the certificate file that you used for your mirror registry, which can be an existing, trusted certificate authority or the self-signed certificate that you generated for the mirror registry. - 17
- Provide the
imageContentSourcessection from the output of the command to mirror the repository.
9.2.6.3. Configuring the cluster-wide proxy during installation
Production environments can deny direct access to the Internet and instead have an HTTP or HTTPS proxy available. You can configure a new OpenShift Container Platform cluster to use a proxy by configuring the proxy settings in the install-config.yaml file.
Prerequisites
-
You have an existing
install-config.yamlfile. You reviewed the sites that your cluster requires access to and determined whether any of them need to bypass the proxy. By default, all cluster egress traffic is proxied, including calls to hosting cloud provider APIs. You added sites to the
Proxyobject’sspec.noProxyfield to bypass the proxy if necessary.NoteThe
Proxyobjectstatus.noProxyfield is populated with the values of thenetworking.machineNetwork[].cidr,networking.clusterNetwork[].cidr, andnetworking.serviceNetwork[]fields from your installation configuration.For installations on Amazon Web Services (AWS), Google Cloud Platform (GCP), Microsoft Azure, and Red Hat OpenStack Platform (RHOSP), the
Proxyobjectstatus.noProxyfield is also populated with the instance metadata endpoint (169.254.169.254).
Procedure
Edit your
install-config.yamlfile and add the proxy settings. For example:apiVersion: v1 baseDomain: my.domain.com proxy: httpProxy: http://<username>:<pswd>@<ip>:<port>1 httpsProxy: https://<username>:<pswd>@<ip>:<port>2 noProxy: example.com3 additionalTrustBundle: |4 -----BEGIN CERTIFICATE----- <MY_TRUSTED_CA_CERT> -----END CERTIFICATE----- ...- 1
- A proxy URL to use for creating HTTP connections outside the cluster. The URL scheme must be
http. - 2
- A proxy URL to use for creating HTTPS connections outside the cluster.
- 3
- A comma-separated list of destination domain names, IP addresses, or other network CIDRs to exclude from proxying. Preface a domain with
.to match subdomains only. For example,.y.commatchesx.y.com, but noty.com. Use*to bypass the proxy for all destinations. - 4
- If provided, the installation program generates a config map that is named
user-ca-bundlein theopenshift-confignamespace to hold the additional CA certificates. If you provideadditionalTrustBundleand at least one proxy setting, theProxyobject is configured to reference theuser-ca-bundleconfig map in thetrustedCAfield. The Cluster Network Operator then creates atrusted-ca-bundleconfig map that merges the contents specified for thetrustedCAparameter with the RHCOS trust bundle. TheadditionalTrustBundlefield is required unless the proxy’s identity certificate is signed by an authority from the RHCOS trust bundle.
NoteThe installation program does not support the proxy
readinessEndpointsfield.- Save the file and reference it when installing OpenShift Container Platform.
The installation program creates a cluster-wide proxy that is named cluster that uses the proxy settings in the provided install-config.yaml file. If no proxy settings are provided, a cluster Proxy object is still created, but it will have a nil spec.
Only the Proxy object named cluster is supported, and no additional proxies can be created.
9.2.7. Creating the Kubernetes manifest and Ignition config files
Because you must modify some cluster definition files and manually start the cluster machines, you must generate the Kubernetes manifest and Ignition config files that the cluster needs to make its machines.
The installation configuration file transforms into the Kubernetes manifests. The manifests wrap into the Ignition configuration files, which are later used to create the cluster.
The Ignition config files that the installation program generates contain certificates that expire after 24 hours, which are then renewed at that time. If the cluster is shut down before renewing the certificates and the cluster is later restarted after the 24 hours have elapsed, the cluster automatically recovers the expired certificates. The exception is that you must manually approve the pending node-bootstrapper certificate signing requests (CSRs) to recover kubelet certificates. See the documentation for Recovering from expired control plane certificates for more information.
The installation program that generates the manifest and Ignition files is architecture specific and can be obtained from the client image mirror. The Linux version of the installation program runs on s390x only. This installer program is also available as a Mac OS version.
Prerequisites
- You obtained the OpenShift Container Platform installation program. For a restricted network installation, these files are on your mirror host.
-
You created the
install-config.yamlinstallation configuration file.
Procedure
Change to the directory that contains the installation program and generate the Kubernetes manifests for the cluster:
$ ./openshift-install create manifests --dir <installation_directory>1 - 1
- For
<installation_directory>, specify the installation directory that contains theinstall-config.yamlfile you created.
WarningIf you are installing a three-node cluster, skip the following step to allow the control plane nodes to be schedulable.
ImportantWhen you configure control plane nodes from the default unschedulable to schedulable, additional subscriptions are required. This is because control plane nodes then become worker nodes.
Check that the
mastersSchedulableparameter in the<installation_directory>/manifests/cluster-scheduler-02-config.ymlKubernetes manifest file is set tofalse. This setting prevents pods from being scheduled on the control plane machines:-
Open the
<installation_directory>/manifests/cluster-scheduler-02-config.ymlfile. -
Locate the
mastersSchedulableparameter and ensure that it is set tofalse. - Save and exit the file.
-
Open the
To create the Ignition configuration files, run the following command from the directory that contains the installation program:
$ ./openshift-install create ignition-configs --dir <installation_directory>1 - 1
- For
<installation_directory>, specify the same installation directory.
The following files are generated in the directory:
. ├── auth │ ├── kubeadmin-password │ └── kubeconfig ├── bootstrap.ign ├── master.ign ├── metadata.json └── worker.ign
9.2.8. Creating Red Hat Enterprise Linux CoreOS (RHCOS) machines
Before you install a cluster on IBM Z infrastructure that you provision, you must install RHCOS on z/VM guest virtual machines for the cluster to use. Complete the following steps to create the machines.
Prerequisites
- An HTTP or HTTPS server running on your provisioning machine that is accessible to the machines you create.
Procedure
- Log in to Linux on your provisioning machine.
Obtain the Red Hat Enterprise Linux CoreOS (RHCOS) kernel, initramfs, and rootfs files from the RHCOS image mirror.
ImportantThe RHCOS images might not change with every release of OpenShift Container Platform. You must download images with the highest version that is less than or equal to the OpenShift Container Platform version that you install. Only use the appropriate kernel, initramfs, and rootfs artifacts described in the following procedure.
The file names contain the OpenShift Container Platform version number. They resemble the following examples:
-
kernel:
rhcos-<version>-live-kernel-<architecture> -
initramfs:
rhcos-<version>-live-initramfs.<architecture>.img rootfs:
rhcos-<version>-live-rootfs.<architecture>.imgNoteThe rootfs image is the same for FCP and DASD.
-
kernel:
Create parameter files. The following parameters are specific for a particular virtual machine:
For
ip=, specify the following seven entries:- The IP address for the machine.
- An empty string.
- The gateway.
- The netmask.
-
The machine host and domain name in the form
hostname.domainname. Omit this value to let RHCOS decide. - The network interface name. Omit this value to let RHCOS decide.
-
If you use static IP addresses, specify
none.
-
For
coreos.inst.ignition_url=, specify the Ignition file for the machine role. Usebootstrap.ign,master.ign, orworker.ign. Only HTTP and HTTPS protocols are supported. -
For
coreos.live.rootfs_url=, specify the matching rootfs artifact for the kernel and initramfs you are booting. Only HTTP and HTTPS protocols are supported. For installations on DASD-type disks, complete the following tasks:
-
For
coreos.inst.install_dev=, specifydasda. -
Use
rd.dasd=to specify the DASD where RHCOS is to be installed. Leave all other parameters unchanged.
Example parameter file,
bootstrap-0.parm, for the bootstrap machine:rd.neednet=1 \ console=ttysclp0 \ coreos.inst.install_dev=dasda \ coreos.live.rootfs_url=http://cl1.provide.example.com:8080/assets/rhcos-live-rootfs.s390x.img \ coreos.inst.ignition_url=http://cl1.provide.example.com:8080/ignition/bootstrap.ign \ ip=172.18.78.2::172.18.78.1:255.255.255.0:::none nameserver=172.18.78.1 \ rd.znet=qeth,0.0.bdf0,0.0.bdf1,0.0.bdf2,layer2=1,portno=0 \ zfcp.allow_lun_scan=0 \ rd.dasd=0.0.3490Write all options in the parameter file as a single line and make sure you have no newline characters.
-
For
For installations on FCP-type disks, complete the following tasks:
-
Use
rd.zfcp=<adapter>,<wwpn>,<lun>to specify the FCP disk where RHCOS is to be installed. For multipathing repeat this step for each additional path. -
For multipathing, set the following parameter:
rd.multipath=default. -
For multipathing, set the install device as:
coreos.inst.install_dev=/dev/mapper/mpatha. For single-path installation, set the install device as:
coreos.inst.install_dev=sda.NoteIf additional LUNs are configured with NPIV, FCP requires
zfcp.allow_lun_scan=0. If you must enablezfcp.allow_lun_scan=1because you use a CSI driver, for example, you must configure your NPIV so that each node cannot access the boot partition of another node.Leave all other parameters unchanged.
ImportantAdditional post-installation steps are required to fully enable multipathing. For more information, see “Enabling multipathing with kernel arguments on RHCOS" in Post-installation machine configuration tasks.
The following is an example parameter file
worker-1.parmfor a worker node with multipathing:rd.neednet=1 \ console=ttysclp0 \ coreos.inst.install_dev=sda \ coreos.live.rootfs_url=http://cl1.provide.example.com:8080/assets/rhcos-live-rootfs.s390x.img \ coreos.inst.ignition_url=http://cl1.provide.example.com:8080/ignition/worker.ign \ ip=172.18.78.2::172.18.78.1:255.255.255.0:::none nameserver=172.18.78.1 \ rd.znet=qeth,0.0.bdf0,0.0.bdf1,0.0.bdf2,layer2=1,portno=0 \ zfcp.allow_lun_scan=0 \ rd.zfcp=0.0.1987,0x50050763070bc5e3,0x4008400B00000000 \ rd.zfcp=0.0.19C7,0x50050763070bc5e3,0x4008400B00000000 \ rd.zfcp=0.0.1987,0x50050763071bc5e3,0x4008400B00000000 \ rd.zfcp=0.0.19C7,0x50050763071bc5e3,0x4008400B00000000Write all options in the parameter file as a single line and make sure you have no newline characters.
-
Use
- Transfer the initramfs, kernel, parameter files, and RHCOS images to z/VM, for example with FTP. For details about how to transfer the files with FTP and boot from the virtual reader, see Installing under Z/VM.
Punch the files to the virtual reader of the z/VM guest virtual machine that is to become your bootstrap node.
See PUNCH in IBM Documentation.
TipYou can use the CP PUNCH command or, if you use Linux, the vmur command to transfer files between two z/VM guest virtual machines.
- Log in to CMS on the bootstrap machine.
IPL the bootstrap machine from the reader:
$ ipl cSee IPL in IBM Documentation.
- Repeat this procedure for the other machines in the cluster.
9.2.8.1. Advanced RHCOS installation reference
This section illustrates the networking configuration and other advanced options that allow you to modify the Red Hat Enterprise Linux CoreOS (RHCOS) manual installation process. The following tables describe the kernel arguments and command-line options you can use with the RHCOS live installer and the coreos-installer command.
Routing and bonding options at RHCOS boot prompt
If you install RHCOS from an ISO image, you can add kernel arguments manually when you boot that image to configure the node’s networking. If no networking arguments are used, the installation defaults to using DHCP.
When adding networking arguments, you must also add the rd.neednet=1 kernel argument.
The following table describes how to use ip=, nameserver=, and bond= kernel arguments for live ISO installs.
Ordering is important when adding kernel arguments: ip=, nameserver=, and then bond=.
Routing and bonding options for ISO
The following table provides examples for configuring networking of your Red Hat Enterprise Linux CoreOS (RHCOS) nodes. These are networking options that are passed to the dracut tool during system boot. For more information about the networking options supported by dracut, see the dracut.cmdline manual page.
| Description | Examples |
|---|---|
|
To configure an IP address, either use DHCP (
|
|
|
Specify multiple network interfaces by specifying multiple |
|
|
Optional: You can configure routes to additional networks by setting an If the additional network gateway is different from the primary network gateway, the default gateway must be the primary network gateway. | To configure the default gateway: To configure the route for the additional network: |
| Disable DHCP on a single interface, such as when there are two or more network interfaces and only one interface is being used. |
|
| You can combine DHCP and static IP configurations on systems with multiple network interfaces. |
|
|
Optional: You can configure VLANs on individual interfaces by using the | To configure a VLAN on a network interface and use a static IP address: To configure a VLAN on a network interface and to use DHCP: |
|
You can provide multiple DNS servers by adding a |
|
|
Optional: Bonding multiple network interfaces to a single interface is supported using the
|
To configure the bonded interface to use DHCP, set the bond’s IP address to To configure the bonded interface to use a static IP address, enter the specific IP address you want and related information. For example: |
|
Optional: You can configure VLANs on bonded interfaces by using the | To configure the bonded interface with a VLAN and to use DHCP: To configure the bonded interface with a VLAN and to use a static IP address: |
|
Optional: Network teaming can be used as an alternative to bonding by using the
Note Teaming is planned to be deprecated when RHCOS switches to an upcoming version of RHEL. For more information, see this Red Hat Knowledgebase Article. | To configure a network team: |
9.2.9. Creating the cluster
To create the OpenShift Container Platform cluster, you wait for the bootstrap process to complete on the machines that you provisioned by using the Ignition config files that you generated with the installation program.
Prerequisites
- Create the required infrastructure for the cluster.
- You obtained the installation program and generated the Ignition config files for your cluster.
- You used the Ignition config files to create RHCOS machines for your cluster.
Procedure
Monitor the bootstrap process:
$ ./openshift-install --dir <installation_directory> wait-for bootstrap-complete \1 --log-level=info2 Example output
INFO Waiting up to 30m0s for the Kubernetes API at https://api.test.example.com:6443... INFO API v1.20.0 up INFO Waiting up to 30m0s for bootstrapping to complete... INFO It is now safe to remove the bootstrap resourcesThe command succeeds when the Kubernetes API server signals that it has been bootstrapped on the control plane machines.
After bootstrap process is complete, remove the bootstrap machine from the load balancer.
ImportantYou must remove the bootstrap machine from the load balancer at this point. You can also remove or reformat the machine itself.
9.2.10. Logging in to the cluster by using the CLI
You can log in to your cluster as a default system user by exporting the cluster kubeconfig file. The kubeconfig file contains information about the cluster that is used by the CLI to connect a client to the correct cluster and API server. The file is specific to a cluster and is created during OpenShift Container Platform installation.
Prerequisites
- You deployed an OpenShift Container Platform cluster.
-
You installed the
ocCLI.
Procedure
Export the
kubeadmincredentials:$ export KUBECONFIG=<installation_directory>/auth/kubeconfig1 - 1
- For
<installation_directory>, specify the path to the directory that you stored the installation files in.
Verify you can run
occommands successfully using the exported configuration:$ oc whoamiExample output
system:admin
9.2.11. Approving the certificate signing requests for your machines
When you add machines to a cluster, two pending certificate signing requests (CSRs) are generated for each machine that you added. You must confirm that these CSRs are approved or, if necessary, approve them yourself. The client requests must be approved first, followed by the server requests.
Prerequisites
- You added machines to your cluster.
Procedure
Confirm that the cluster recognizes the machines:
$ oc get nodesExample output
NAME STATUS ROLES AGE VERSION master-0 Ready master 63m v1.20.0 master-1 Ready master 63m v1.20.0 master-2 Ready master 64m v1.20.0The output lists all of the machines that you created.
NoteThe preceding output might not include the compute nodes, also known as worker nodes, until some CSRs are approved.
Review the pending CSRs and ensure that you see the client requests with the
PendingorApprovedstatus for each machine that you added to the cluster:$ oc get csrExample output
NAME AGE REQUESTOR CONDITION csr-8b2br 15m system:serviceaccount:openshift-machine-config-operator:node-bootstrapper Pending csr-8vnps 15m system:serviceaccount:openshift-machine-config-operator:node-bootstrapper Pending ...In this example, two machines are joining the cluster. You might see more approved CSRs in the list.
If the CSRs were not approved, after all of the pending CSRs for the machines you added are in
Pendingstatus, approve the CSRs for your cluster machines:NoteBecause the CSRs rotate automatically, approve your CSRs within an hour of adding the machines to the cluster. If you do not approve them within an hour, the certificates will rotate, and more than two certificates will be present for each node. You must approve all of these certificates. Once the client CSR is approved, the Kubelet creates a secondary CSR for the serving certificate, which requires manual approval. Then, subsequent serving certificate renewal requests are automatically approved by the
machine-approverif the Kubelet requests a new certificate with identical parameters.NoteFor clusters running on platforms that are not machine API enabled, such as bare metal and other user-provisioned infrastructure, you must implement a method of automatically approving the kubelet serving certificate requests (CSRs). If a request is not approved, then the
oc exec,oc rsh, andoc logscommands cannot succeed, because a serving certificate is required when the API server connects to the kubelet. Any operation that contacts the Kubelet endpoint requires this certificate approval to be in place. The method must watch for new CSRs, confirm that the CSR was submitted by thenode-bootstrapperservice account in thesystem:nodeorsystem:admingroups, and confirm the identity of the node.To approve them individually, run the following command for each valid CSR:
$ oc adm certificate approve <csr_name>1 - 1
<csr_name>is the name of a CSR from the list of current CSRs.
To approve all pending CSRs, run the following command:
$ oc get csr -o go-template='{{range .items}}{{if not .status}}{{.metadata.name}}{{"\n"}}{{end}}{{end}}' | xargs --no-run-if-empty oc adm certificate approveNoteSome Operators might not become available until some CSRs are approved.
Now that your client requests are approved, you must review the server requests for each machine that you added to the cluster:
$ oc get csrExample output
NAME AGE REQUESTOR CONDITION csr-bfd72 5m26s system:node:ip-10-0-50-126.us-east-2.compute.internal Pending csr-c57lv 5m26s system:node:ip-10-0-95-157.us-east-2.compute.internal Pending ...If the remaining CSRs are not approved, and are in the
Pendingstatus, approve the CSRs for your cluster machines:To approve them individually, run the following command for each valid CSR:
$ oc adm certificate approve <csr_name>1 - 1
<csr_name>is the name of a CSR from the list of current CSRs.
To approve all pending CSRs, run the following command:
$ oc get csr -o go-template='{{range .items}}{{if not .status}}{{.metadata.name}}{{"\n"}}{{end}}{{end}}' | xargs oc adm certificate approve
After all client and server CSRs have been approved, the machines have the
Readystatus. Verify this by running the following command:$ oc get nodesExample output
NAME STATUS ROLES AGE VERSION master-0 Ready master 73m v1.20.0 master-1 Ready master 73m v1.20.0 master-2 Ready master 74m v1.20.0 worker-0 Ready worker 11m v1.20.0 worker-1 Ready worker 11m v1.20.0NoteIt can take a few minutes after approval of the server CSRs for the machines to transition to the
Readystatus.
Additional information
- For more information on CSRs, see Certificate Signing Requests.
9.2.12. Initial Operator configuration
After the control plane initializes, you must immediately configure some Operators so that they all become available.
Prerequisites
- Your control plane has initialized.
Procedure
Watch the cluster components come online:
$ watch -n5 oc get clusteroperatorsExample output
NAME VERSION AVAILABLE PROGRESSING DEGRADED SINCE authentication 4.7.0 True False False 3h56m baremetal 4.7.0 True False False 29h cloud-credential 4.7.0 True False False 29h cluster-autoscaler 4.7.0 True False False 29h config-operator 4.7.0 True False False 6h39m console 4.7.0 True False False 3h59m csi-snapshot-controller 4.7.0 True False False 4h12m dns 4.7.0 True False False 4h15m etcd 4.7.0 True False False 29h image-registry 4.7.0 True False False 3h59m ingress 4.7.0 True False False 4h30m insights 4.7.0 True False False 29h kube-apiserver 4.7.0 True False False 29h kube-controller-manager 4.7.0 True False False 29h kube-scheduler 4.7.0 True False False 29h kube-storage-version-migrator 4.7.0 True False False 4h2m machine-api 4.7.0 True False False 29h machine-approver 4.7.0 True False False 6h34m machine-config 4.7.0 True False False 3h56m marketplace 4.7.0 True False False 4h2m monitoring 4.7.0 True False False 6h31m network 4.7.0 True False False 29h node-tuning 4.7.0 True False False 4h30m openshift-apiserver 4.7.0 True False False 3h56m openshift-controller-manager 4.7.0 True False False 4h36m openshift-samples 4.7.0 True False False 4h30m operator-lifecycle-manager 4.7.0 True False False 29h operator-lifecycle-manager-catalog 4.7.0 True False False 29h operator-lifecycle-manager-packageserver 4.7.0 True False False 3h59m service-ca 4.7.0 True False False 29h storage 4.7.0 True False False 4h30m- Configure the Operators that are not available.
9.2.12.1. Disabling the default OperatorHub sources
Operator catalogs that source content provided by Red Hat and community projects are configured for OperatorHub by default during an OpenShift Container Platform installation. In a restricted network environment, you must disable the default catalogs as a cluster administrator.
Procedure
Disable the sources for the default catalogs by adding
disableAllDefaultSources: trueto theOperatorHubobject:$ oc patch OperatorHub cluster --type json \ -p '[{"op": "add", "path": "/spec/disableAllDefaultSources", "value": true}]'
Alternatively, you can use the web console to manage catalog sources. From the Administration → Cluster Settings → Global Configuration → OperatorHub page, click the Sources tab, where you can create, delete, disable, and enable individual sources.
9.2.12.2. Image registry storage configuration
The Image Registry Operator is not initially available for platforms that do not provide default storage. After installation, you must configure your registry to use storage so that the Registry Operator is made available.
Instructions are shown for configuring a persistent volume, which is required for production clusters. Where applicable, instructions are shown for configuring an empty directory as the storage location, which is available for only non-production clusters.
Additional instructions are provided for allowing the image registry to use block storage types by using the Recreate rollout strategy during upgrades.
9.2.12.2.1. Configuring registry storage for IBM Z
As a cluster administrator, following installation you must configure your registry to use storage.
Prerequisites
- Cluster administrator permissions.
- A cluster on IBM Z.
Persistent storage provisioned for your cluster.
ImportantOpenShift Container Platform supports
ReadWriteOnceaccess for image registry storage when you have only one replica. To deploy an image registry that supports high availability with two or more replicas,ReadWriteManyaccess is required.- Must have 100Gi capacity.
Procedure
To configure your registry to use storage, change the
spec.storage.pvcin theconfigs.imageregistry/clusterresource.NoteWhen using shared storage, review your security settings to prevent outside access.
Verify that you do not have a registry pod:
$ oc get pod -n openshift-image-registry -l docker-registry=defaultExample output
No resourses found in openshift-image-registry namespaceNoteIf you do have a registry pod in your output, you do not need to continue with this procedure.
Check the registry configuration:
$ oc edit configs.imageregistry.operator.openshift.ioExample output
storage: pvc: claim:Leave the
claimfield blank to allow the automatic creation of animage-registry-storagePVC.Check the
clusteroperatorstatus:$ oc get clusteroperator image-registryExample output
NAME VERSION AVAILABLE PROGRESSING DEGRADED SINCE MESSAGE image-registry 4.7 True False False 6h50mEnsure that your registry is set to managed to enable building and pushing of images.
Run:
$ oc edit configs.imageregistry/clusterThen, change the line
managementState: Removedto
managementState: Managed
9.2.12.2.2. Configuring storage for the image registry in non-production clusters
You must configure storage for the Image Registry Operator. For non-production clusters, you can set the image registry to an empty directory. If you do so, all images are lost if you restart the registry.
Procedure
To set the image registry storage to an empty directory:
$ oc patch configs.imageregistry.operator.openshift.io cluster --type merge --patch '{"spec":{"storage":{"emptyDir":{}}}}'WarningConfigure this option for only non-production clusters.
If you run this command before the Image Registry Operator initializes its components, the
oc patchcommand fails with the following error:Error from server (NotFound): configs.imageregistry.operator.openshift.io "cluster" not foundWait a few minutes and run the command again.
9.2.13. Completing installation on user-provisioned infrastructure
After you complete the Operator configuration, you can finish installing the cluster on infrastructure that you provide.
Prerequisites
- Your control plane has initialized.
- You have completed the initial Operator configuration.
Procedure
Confirm that all the cluster components are online with the following command:
$ watch -n5 oc get clusteroperatorsExample output
NAME VERSION AVAILABLE PROGRESSING DEGRADED SINCE authentication 4.7.0 True False False 3h56m baremetal 4.7.0 True False False 29h cloud-credential 4.7.0 True False False 29h cluster-autoscaler 4.7.0 True False False 29h config-operator 4.7.0 True False False 6h39m console 4.7.0 True False False 3h59m csi-snapshot-controller 4.7.0 True False False 4h12m dns 4.7.0 True False False 4h15m etcd 4.7.0 True False False 29h image-registry 4.7.0 True False False 3h59m ingress 4.7.0 True False False 4h30m insights 4.7.0 True False False 29h kube-apiserver 4.7.0 True False False 29h kube-controller-manager 4.7.0 True False False 29h kube-scheduler 4.7.0 True False False 29h kube-storage-version-migrator 4.7.0 True False False 4h2m machine-api 4.7.0 True False False 29h machine-approver 4.7.0 True False False 6h34m machine-config 4.7.0 True False False 3h56m marketplace 4.7.0 True False False 4h2m monitoring 4.7.0 True False False 6h31m network 4.7.0 True False False 29h node-tuning 4.7.0 True False False 4h30m openshift-apiserver 4.7.0 True False False 3h56m openshift-controller-manager 4.7.0 True False False 4h36m openshift-samples 4.7.0 True False False 4h30m operator-lifecycle-manager 4.7.0 True False False 29h operator-lifecycle-manager-catalog 4.7.0 True False False 29h operator-lifecycle-manager-packageserver 4.7.0 True False False 3h59m service-ca 4.7.0 True False False 29h storage 4.7.0 True False False 4h30mAlternatively, the following command notifies you when all of the clusters are available. It also retrieves and displays credentials:
$ ./openshift-install --dir <installation_directory> wait-for install-complete1 - 1
- For
<installation_directory>, specify the path to the directory that you stored the installation files in.
Example output
INFO Waiting up to 30m0s for the cluster to initialize...The command succeeds when the Cluster Version Operator finishes deploying the OpenShift Container Platform cluster from Kubernetes API server.
Important-
The Ignition config files that the installation program generates contain certificates that expire after 24 hours, which are then renewed at that time. If the cluster is shut down before renewing the certificates and the cluster is later restarted after the 24 hours have elapsed, the cluster automatically recovers the expired certificates. The exception is that you must manually approve the pending
node-bootstrappercertificate signing requests (CSRs) to recover kubelet certificates. See the documentation for Recovering from expired control plane certificates for more information. - It is recommended that you use Ignition config files within 12 hours after they are generated because the 24-hour certificate rotates from 16 to 22 hours after the cluster is installed. By using the Ignition config files within 12 hours, you can avoid installation failure if the certificate update runs during installation.
Confirm that the Kubernetes API server is communicating with the pods.
To view a list of all pods, use the following command:
$ oc get pods --all-namespacesExample output
NAMESPACE NAME READY STATUS RESTARTS AGE openshift-apiserver-operator openshift-apiserver-operator-85cb746d55-zqhs8 1/1 Running 1 9m openshift-apiserver apiserver-67b9g 1/1 Running 0 3m openshift-apiserver apiserver-ljcmx 1/1 Running 0 1m openshift-apiserver apiserver-z25h4 1/1 Running 0 2m openshift-authentication-operator authentication-operator-69d5d8bf84-vh2n8 1/1 Running 0 5m ...View the logs for a pod that is listed in the output of the previous command by using the following command:
$ oc logs <pod_name> -n <namespace>1 - 1
- Specify the pod name and namespace, as shown in the output of the previous command.
If the pod logs display, the Kubernetes API server can communicate with the cluster machines.
For an installation with Fibre Channel Protocol (FCP), additional steps are required to enable multipathing. Do not enable multipathing during installation.
See "Enabling multipathing with kernel arguments on RHCOS" in the Post-installation configuration documentation for more information.
All the worker nodes are restarted. To monitor the process, enter the following command:
$ oc get nodes -wNoteIf you have additional machine types such as infrastructure nodes, repeat the process for these types.
- Register your cluster on the Cluster registration page.
9.2.14. Telemetry access for OpenShift Container Platform
In OpenShift Container Platform 4.7, the Telemetry service, which runs by default to provide metrics about cluster health and the success of updates, requires internet access. If your cluster is connected to the internet, Telemetry runs automatically, and your cluster is registered to OpenShift Cluster Manager.
After you confirm that your OpenShift Cluster Manager inventory is correct, either maintained automatically by Telemetry or manually by using OpenShift Cluster Manager, use subscription watch to track your OpenShift Container Platform subscriptions at the account or multi-cluster level.
9.2.15. Collecting debugging information
You can gather debugging information that might help you to troubleshoot and debug certain issues with an OpenShift Container Platform installation on IBM Z.
Prerequisites
-
The
ocCLI tool installed.
Procedure
Log in to the cluster:
$ oc login -u <username>On the node you want to gather hardware information about, start a debugging container:
$ oc debug node/<nodename>Change to the /host file system and start
toolbox:$ chroot /host $ toolboxCollect the
dbginfodata:$ dbginfo.sh-
You can then retrieve the data, for example, using
scp.
9.2.16. Next steps
- Customize your cluster.
- If the mirror registry that you used to install your cluster has a trusted CA, add it to the cluster by configuring additional trust stores.
Chapter 10. Installing with RHEL KVM on IBM Z and LinuxONE
10.1. Installing a cluster with RHEL KVM on IBM Z and LinuxONE
In OpenShift Container Platform version 4.7, you can install a cluster on IBM Z or LinuxONE infrastructure that you provision.
While this document refers only to IBM Z, all information in it also applies to LinuxONE.
Additional considerations exist for non-bare metal platforms. Review the information in the guidelines for deploying OpenShift Container Platform on non-tested platforms before you install an OpenShift Container Platform cluster.
10.1.1. Prerequisites
- Before you begin the installation process, you must clean the installation directory. This ensures that the required installation files are created and updated during the installation process.
- Provision persistent storage using NFS for your cluster. To deploy a private image registry, your storage must provide ReadWriteMany access modes.
- Review details about the OpenShift Container Platform installation and update processes.
- If you use a firewall, you must configure it to allow the sites that your cluster requires access to.
RHEL Kernel Virtual Machine (KVM) system that is hosted on the logical partition (LPAR) and based on RHEL 8.4 or later
NoteBe sure to also review this site list if you are configuring a proxy.
10.1.2. Internet access for OpenShift Container Platform
In OpenShift Container Platform 4.7, you require access to the Internet to install your cluster.
You must have Internet access to:
- Access OpenShift Cluster Manager to download the installation program and perform subscription management. If the cluster has internet access and you do not disable Telemetry, that service automatically entitles your cluster.
- Access Quay.io to obtain the packages that are required to install your cluster.
- Obtain the packages that are required to perform cluster updates.
If your cluster cannot have direct Internet access, you can perform a restricted network installation on some types of infrastructure that you provision. During that process, you download the content that is required and use it to populate a mirror registry with the packages that you need to install a cluster and generate the installation program. With some installation types, the environment that you install your cluster in will not require Internet access. Before you update the cluster, you update the content of the mirror registry.
10.1.3. Machine requirements for a cluster with user-provisioned infrastructure
For a cluster that contains user-provisioned infrastructure, you must deploy all of the required machines.
One or more KVM host machines based on RHEL 8.4 or later. Each RHEL KVM host machine must have libvirt installed and running. The virtual machines are provisioned under each RHEL KVM host machine.
10.1.3.1. Required machines
The smallest OpenShift Container Platform clusters require the following nodes:
- One temporary bootstrap machine
- Three control plane, or master, machines
- At least two compute machines, which are also known as worker machines
The cluster requires the bootstrap machine to deploy the OpenShift Container Platform cluster on the three control plane machines. You can remove the bootstrap machine after you install the cluster.
To improve high availability of your cluster, distribute the control plane machines over different RHEL instances on at least two physical machines.
The bootstrap, control plane, and compute machines must use Red Hat Enterprise Linux CoreOS (RHCOS) as the operating system.
See Red Hat Enterprise Linux technology capabilities and limits.
10.1.3.2. Network connectivity requirements
The OpenShift Container Platform installer creates the Ignition files, which are necessary for all the Red Hat Enterprise Linux CoreOS (RHCOS) virtual machines. The automated installation of OpenShift Container Platform is performed by the bootstrap machine. It starts the installation of OpenShift Container Platform on each node, starts the Kubernetes cluster, and then finishes. During this bootstrap, the virtual machine must have an established network connection either through a Dynamic Host Configuration Protocol (DHCP) server or static IP address.
10.1.3.3. IBM Z network connectivity requirements
To install on IBM Z under RHEL KVM, you need:
- A RHEL KVM host configured with an OSA or RoCE network adapter.
Either a RHEL KVM host that is configured to use bridged networking in libvirt or MacVTap to connect the network to the guests.
10.1.3.4. Host machine resource requirements
The RHEL KVM host in your environment must meet the following requirements to host the virtual machines that you plan for the OpenShift Container Platform environment. See Getting started with virtualization.
You can install OpenShift Container Platform version 4.7 on the following IBM hardware:
- IBM z15 (all models), IBM z14 (all models), IBM z13, and IBM z13s
- LinuxONE, any version
10.1.3.5. Minimum IBM Z system environment
Hardware requirements
- The equivalent of six IFLs, which are SMT2 enabled, for each cluster.
-
At least one network connection to both connect to the
LoadBalancerservice and to serve data for traffic outside the cluster.
You can use dedicated or shared IFLs to assign sufficient compute resources. Resource sharing is one of the key strengths of IBM Z. However, you must adjust capacity correctly on each hypervisor layer and ensure sufficient resources for every OpenShift Container Platform cluster.
Since the overall performance of the cluster can be impacted, the LPARs that are used to setup the OpenShift Container Platform clusters must provide sufficient compute capacity. In this context, LPAR weight management, entitlements, and CPU shares on the hypervisor level play an important role.
Operating system requirements
- One LPAR running RHEL 8.4 or later with KVM, which is managed by libvirt
On your RHEL KVM host, set up:
- Three guest virtual machines for OpenShift Container Platform control plane machines
- Two guest virtual machines for OpenShift Container Platform compute machines
- One guest virtual machine for the temporary OpenShift Container Platform bootstrap machine
10.1.3.6. Minimum resource requirements
Each cluster virtual machine must meet the following minimum requirements:
| Virtual Machine | Operating System | vCPU [1] | Virtual RAM | Storage | IOPS |
|---|---|---|---|---|---|
| Bootstrap | RHCOS | 4 | 16 GB | 100 GB | N/A |
| Control plane | RHCOS | 4 | 16 GB | 100 GB | N/A |
| Compute | RHCOS | 2 | 8 GB | 100 GB | N/A |
- One physical core (IFL) provides two logical cores (threads) when SMT-2 is enabled. The hypervisor can provide two or more vCPUs.
10.1.3.7. Preferred IBM Z system environment
Hardware requirements
- Three LPARS that each have the equivalent of six IFLs, which are SMT2 enabled, for each cluster.
-
Two network connections to connect to both connect to the
LoadBalancerservice and to serve data for traffic outside the cluster.
Operating system requirements
- For high availability, two or three LPARs running RHEL 8.4 or later with KVM, which are managed by libvirt.
On your RHEL KVM host, set up:
- Three guest virtual machines for OpenShift Container Platform control plane machines, distributed across the RHEL KVM host machines.
- At least six guest virtual machines for OpenShift Container Platform compute machines, distributed across the RHEL KVM host machines.
- One guest virtual machine for the temporary OpenShift Container Platform bootstrap machine.
-
To ensure the availability of integral components in an overcommitted environment, increase the priority of the control plane by using
cpu_shares. Do the same for infrastructure nodes, if they exist. See schedinfo in IBM Documentation.
10.1.3.8. Preferred resource requirements
The preferred requirements for each cluster virtual machine are:
| Virtual Machine | Operating System | vCPU | Virtual RAM | Storage |
|---|---|---|---|---|
| Bootstrap | RHCOS | 4 | 16 GB | 120 GB |
| Control plane | RHCOS | 8 | 16 GB | 120 GB |
| Compute | RHCOS | 6 | 8 GB | 120 GB |
10.1.3.9. Certificate signing requests management
Because your cluster has limited access to automatic machine management when you use infrastructure that you provision, you must provide a mechanism for approving cluster certificate signing requests (CSRs) after installation. The kube-controller-manager only approves the kubelet client CSRs. The machine-approver cannot guarantee the validity of a serving certificate that is requested by using kubelet credentials because it cannot confirm that the correct machine issued the request. You must determine and implement a method of verifying the validity of the kubelet serving certificate requests and approving them.
10.1.4. Creating the user-provisioned infrastructure
Before you deploy an OpenShift Container Platform cluster that uses user-provisioned infrastructure, you must create the underlying infrastructure.
Prerequisites
- Review the OpenShift Container Platform 4.x Tested Integrations page before you create the supporting infrastructure for your cluster.
Procedure
- Configure DHCP or set static IP addresses on each node.
- Choose to perform either a fast track installation of Red Hat Enterprise Linux CoreOS (RHCOS) or a full installation of Red Hat Enterprise Linux CoreOS (RHCOS). For the full installation you must set up an HTTP or HTTPS server to provide Ignition files and install images to the cluster nodes. For the fast track installation an HTTP or HTTPS server is not required, however, a DHCP server is required. See sections “Fast-track installation: Creating Red Hat Enterprise Linux CoreOS (RHCOS) machines" and “Full installation: Creating Red Hat Enterprise Linux CoreOS (RHCOS) machines".
- Provision the required load balancers.
- Configure the ports for your machines.
- Configure DNS.
- Ensure network connectivity.
10.1.4.1. Networking requirements for user-provisioned infrastructure
All the Red Hat Enterprise Linux CoreOS (RHCOS) machines require network in initramfs during boot to fetch Ignition config from the machine config server.
During the initial boot, the machines require either a DHCP server or that static IP addresses be set on each host in the cluster to establish a network connection, which allows them to download their Ignition config files.
It is recommended to use the DHCP server to manage the machines for the cluster long-term. Ensure that the DHCP server is configured to provide persistent IP addresses and host names to the cluster machines.
The Kubernetes API server must be able to resolve the node names of the cluster machines. If the API servers and worker nodes are in different zones, you can configure a default DNS search zone to allow the API server to resolve the node names. Another supported approach is to always refer to hosts by their fully-qualified domain names in both the node objects and all DNS requests.
You must configure the network connectivity between machines to allow cluster components to communicate. Each machine must be able to resolve the host names of all other machines in the cluster.
The RHEL KVM host must be configured to use bridged networking in libvirt or MacVTap to connect the network to the virtual machines. The virtual machines must have access to the network, which is attached to the RHEL KVM host. Virtual Networks, for example network address translation (NAT), within KVM are not a supported configuration.
| Protocol | Port | Description |
|---|---|---|
| ICMP | N/A | Network reachability tests |
| TCP |
| Metrics |
|
|
Host level services, including the node exporter on ports | |
|
| The default ports that Kubernetes reserves | |
|
| openshift-sdn | |
| UDP |
| VXLAN and Geneve |
|
| VXLAN and Geneve | |
|
|
Host level services, including the node exporter on ports | |
| TCP/UDP |
| Kubernetes node port |
| Protocol | Port | Description |
|---|---|---|
| TCP |
| Kubernetes API |
| Protocol | Port | Description |
|---|---|---|
| TCP |
| etcd server and peer ports |
Network topology requirements
The infrastructure that you provision for your cluster must meet the following network topology requirements.
OpenShift Container Platform requires all nodes to have internet access to pull images for platform containers and provide telemetry data to Red Hat.
Load balancers
Before you install OpenShift Container Platform, you must provision two load balancers that meet the following requirements:
API load balancer: Provides a common endpoint for users, both human and machine, to interact with and configure the platform. Configure the following conditions:
- Layer 4 load balancing only. This can be referred to as Raw TCP, SSL Passthrough, or SSL Bridge mode. If you use SSL Bridge mode, you must enable Server Name Indication (SNI) for the API routes.
- A stateless load balancing algorithm. The options vary based on the load balancer implementation.
ImportantDo not configure session persistence for an API load balancer.
Configure the following ports on both the front and back of the load balancers:
Expand Table 10.4. API load balancer Port Back-end machines (pool members) Internal External Description 6443Bootstrap and control plane. You remove the bootstrap machine from the load balancer after the bootstrap machine initializes the cluster control plane. You must configure the
/readyzendpoint for the API server health check probe.X
X
Kubernetes API server
22623Bootstrap and control plane. You remove the bootstrap machine from the load balancer after the bootstrap machine initializes the cluster control plane.
X
Machine config server
NoteThe load balancer must be configured to take a maximum of 30 seconds from the time the API server turns off the
/readyzendpoint to the removal of the API server instance from the pool. Within the time frame after/readyzreturns an error or becomes healthy, the endpoint must have been removed or added. Probing every 5 or 10 seconds, with two successful requests to become healthy and three to become unhealthy, are well-tested values.Application Ingress load balancer: Provides an Ingress point for application traffic flowing in from outside the cluster. Configure the following conditions:
- Layer 4 load balancing only. This can be referred to as Raw TCP, SSL Passthrough, or SSL Bridge mode. If you use SSL Bridge mode, you must enable Server Name Indication (SNI) for the Ingress routes.
- A connection-based or session-based persistence is recommended, based on the options available and types of applications that will be hosted on the platform.
Configure the following ports on both the front and back of the load balancers:
Expand Table 10.5. Application Ingress load balancer Port Back-end machines (pool members) Internal External Description 443The machines that run the Ingress router pods, compute, or worker, by default.
X
X
HTTPS traffic
80The machines that run the Ingress router pods, compute, or worker, by default.
X
X
HTTP traffic
If the true IP address of the client can be seen by the load balancer, enabling source IP-based session persistence can improve performance for applications that use end-to-end TLS encryption.
A working configuration for the Ingress router is required for an OpenShift Container Platform cluster. You must configure the Ingress router after the control plane initializes.
NTP configuration
OpenShift Container Platform clusters are configured to use a public Network Time Protocol (NTP) server by default. If you want to use a local enterprise NTP server, or if your cluster is being deployed in a disconnected network, you can configure the cluster to use a specific time server. For more information, see the documentation for Configuring chrony time service.
If a DHCP server provides NTP server information, the chrony time service on the Red Hat Enterprise Linux CoreOS (RHCOS) machines read the information and can sync the clock with the NTP servers.
10.1.4.2. User-provisioned DNS requirements
DNS is used for name resolution and reverse name resolution. DNS A/AAAA or CNAME records are used for name resolution and PTR records are used for reverse name resolution. The reverse records are important because Red Hat Enterprise Linux CoreOS (RHCOS) uses the reverse records to set the host name for all the nodes. Additionally, the reverse records are used to generate the certificate signing requests (CSR) that OpenShift Container Platform needs to operate.
The following DNS records are required for an OpenShift Container Platform cluster that uses user-provisioned infrastructure. In each record, <cluster_name> is the cluster name and <base_domain> is the cluster base domain that you specify in the install-config.yaml file. A complete DNS record takes the form: <component>.<cluster_name>.<base_domain>..
| Component | Record | Description |
|---|---|---|
| Kubernetes API |
| Add a DNS A/AAAA or CNAME record, and a DNS PTR record, to identify the load balancer for the control plane machines. These records must be resolvable by both clients external to the cluster and from all the nodes within the cluster. |
|
| Add a DNS A/AAAA or CNAME record, and a DNS PTR record, to identify the load balancer for the control plane machines. These records must be resolvable from all the nodes within the cluster. Important The API server must be able to resolve the worker nodes by the host names that are recorded in Kubernetes. If the API server cannot resolve the node names, then proxied API calls can fail, and you cannot retrieve logs from pods. | |
| Routes |
| Add a wildcard DNS A/AAAA or CNAME record that refers to the load balancer that targets the machines that run the Ingress router pods, which are the worker nodes by default. These records must be resolvable by both clients external to the cluster and from all the nodes within the cluster. |
| Bootstrap |
| Add a DNS A/AAAA or CNAME record, and a DNS PTR record, to identify the bootstrap machine. These records must be resolvable by the nodes within the cluster. |
| Master hosts |
| DNS A/AAAA or CNAME records and DNS PTR records to identify each machine for the control plane nodes (also known as the master nodes). These records must be resolvable by the nodes within the cluster. |
| Worker hosts |
| Add DNS A/AAAA or CNAME records and DNS PTR records to identify each machine for the worker nodes. These records must be resolvable by the nodes within the cluster. |
You can use the nslookup <hostname> command to verify name resolution. You can use the dig -x <ip_address> command to verify reverse name resolution for the PTR records.
The following example of a BIND zone file shows sample A records for name resolution. The purpose of the example is to show the records that are needed. The example is not meant to provide advice for choosing one name resolution service over another.
Example 10.1. Sample DNS zone database
$TTL 1W
@ IN SOA ns1.example.com. root (
2019070700 ; serial
3H ; refresh (3 hours)
30M ; retry (30 minutes)
2W ; expiry (2 weeks)
1W ) ; minimum (1 week)
IN NS ns1.example.com.
IN MX 10 smtp.example.com.
;
;
ns1 IN A 192.168.1.5
smtp IN A 192.168.1.5
;
helper IN A 192.168.1.5
helper.ocp4 IN A 192.168.1.5
;
; The api identifies the IP of your load balancer.
api.ocp4 IN A 192.168.1.5
api-int.ocp4 IN A 192.168.1.5
;
; The wildcard also identifies the load balancer.
*.apps.ocp4 IN A 192.168.1.5
;
; Create an entry for the bootstrap host.
bootstrap.ocp4 IN A 192.168.1.96
;
; Create entries for the master hosts.
master0.ocp4 IN A 192.168.1.97
master1.ocp4 IN A 192.168.1.98
master2.ocp4 IN A 192.168.1.99
;
; Create entries for the worker hosts.
worker0.ocp4 IN A 192.168.1.11
worker1.ocp4 IN A 192.168.1.7
;
;EOFThe following example BIND zone file shows sample PTR records for reverse name resolution.
Example 10.2. Sample DNS zone database for reverse records
$TTL 1W
@ IN SOA ns1.example.com. root (
2019070700 ; serial
3H ; refresh (3 hours)
30M ; retry (30 minutes)
2W ; expiry (2 weeks)
1W ) ; minimum (1 week)
IN NS ns1.example.com.
;
; The syntax is "last octet" and the host must have an FQDN
; with a trailing dot.
97 IN PTR master0.ocp4.example.com.
98 IN PTR master1.ocp4.example.com.
99 IN PTR master2.ocp4.example.com.
;
96 IN PTR bootstrap.ocp4.example.com.
;
5 IN PTR api.ocp4.example.com.
5 IN PTR api-int.ocp4.example.com.
;
11 IN PTR worker0.ocp4.example.com.
7 IN PTR worker1.ocp4.example.com.
;
;EOF10.1.5. Generating an SSH private key and adding it to the agent
If you want to perform installation debugging or disaster recovery on your cluster, you must provide an SSH key to both your ssh-agent and the installation program. You can use this key to access the bootstrap machine in a public cluster to troubleshoot installation issues.
In a production environment, you require disaster recovery and debugging.
Do not skip this procedure in production environments where disaster recovery and debugging is required.
You can use this key to SSH into the master nodes as the user core. When you deploy the cluster, the key is added to the core user’s ~/.ssh/authorized_keys list.
Procedure
If you do not have an SSH key that is configured for password-less authentication on your computer, create one. For example, on a computer that uses a Linux operating system, run the following command:
$ ssh-keygen -t ed25519 -N '' \ -f <path>/<file_name>1 - 1
- Specify the path and file name, such as
~/.ssh/id_rsa, of the new SSH key. If you have an existing key pair, ensure your public key is in the your~/.sshdirectory.
Running this command generates an SSH key that does not require a password in the location that you specified.
NoteIf you plan to install an OpenShift Container Platform cluster that uses FIPS Validated / Modules in Process cryptographic libraries on the
x86_64architecture, do not create a key that uses theed25519algorithm. Instead, create a key that uses thersaorecdsaalgorithm.Start the
ssh-agentprocess as a background task:$ eval "$(ssh-agent -s)"Example output
Agent pid 31874NoteIf your cluster is in FIPS mode, only use FIPS-compliant algorithms to generate the SSH key. The key must be either RSA or ECDSA.
Add your SSH private key to the
ssh-agent:$ ssh-add <path>/<file_name>1 Example output
Identity added: /home/<you>/<path>/<file_name> (<computer_name>)- 1
- Specify the path and file name for your SSH private key, such as
~/.ssh/id_rsa
Next steps
- When you install OpenShift Container Platform, provide the SSH public key to the installation program.
10.1.6. Obtaining the installation program
Before you install OpenShift Container Platform, download the installation file on your provisioning machine.
Prerequisites
- You have a machine that runs Linux, for example Red Hat Enterprise Linux 8, with 500 MB of local disk space
Procedure
- Access the Infrastructure Provider page on the OpenShift Cluster Manager site. If you have a Red Hat account, log in with your credentials. If you do not, create an account.
- Select your infrastructure provider.
Navigate to the page for your installation type, download the installation program for your operating system, and place the file in the directory where you will store the installation configuration files.
ImportantThe installation program creates several files on the computer that you use to install your cluster. You must keep the installation program and the files that the installation program creates after you finish installing the cluster. Both files are required to delete the cluster.
ImportantDeleting the files created by the installation program does not remove your cluster, even if the cluster failed during installation. To remove your cluster, complete the OpenShift Container Platform uninstallation procedures for your specific cloud provider.
Extract the installation program. For example, on a computer that uses a Linux operating system, run the following command:
$ tar xvf openshift-install-linux.tar.gz- Download your installation pull secret from the Red Hat OpenShift Cluster Manager. This pull secret allows you to authenticate with the services that are provided by the included authorities, including Quay.io, which serves the container images for OpenShift Container Platform components.
10.1.7. Installing the OpenShift CLI by downloading the binary
You can install the OpenShift CLI (oc) to interact with OpenShift Container Platform from a command-line interface. You can install oc on Linux, Windows, or macOS.
If you installed an earlier version of oc, you cannot use it to complete all of the commands in OpenShift Container Platform 4.7. Download and install the new version of oc.
10.1.7.1. Installing the OpenShift CLI on Linux
You can install the OpenShift CLI (oc) binary on Linux by using the following procedure.
Procedure
- Navigate to the OpenShift Container Platform downloads page on the Red Hat Customer Portal.
- Select the appropriate version in the Version drop-down menu.
- Click Download Now next to the OpenShift v4.7 Linux Client entry and save the file.
Unpack the archive:
$ tar xvzf <file>Place the
ocbinary in a directory that is on yourPATH.To check your
PATH, execute the following command:$ echo $PATH
After you install the OpenShift CLI, it is available using the oc command:
$ oc <command>10.1.7.2. Installing the OpenShift CLI on Windows
You can install the OpenShift CLI (oc) binary on Windows by using the following procedure.
Procedure
- Navigate to the OpenShift Container Platform downloads page on the Red Hat Customer Portal.
- Select the appropriate version in the Version drop-down menu.
- Click Download Now next to the OpenShift v4.7 Windows Client entry and save the file.
- Unzip the archive with a ZIP program.
Move the
ocbinary to a directory that is on yourPATH.To check your
PATH, open the command prompt and execute the following command:C:\> path
After you install the OpenShift CLI, it is available using the oc command:
C:\> oc <command>10.1.7.3. Installing the OpenShift CLI on macOS
You can install the OpenShift CLI (oc) binary on macOS by using the following procedure.
Procedure
- Navigate to the OpenShift Container Platform downloads page on the Red Hat Customer Portal.
- Select the appropriate version in the Version drop-down menu.
- Click Download Now next to the OpenShift v4.7 MacOSX Client entry and save the file.
- Unpack and unzip the archive.
Move the
ocbinary to a directory on your PATH.To check your
PATH, open a terminal and execute the following command:$ echo $PATH
After you install the OpenShift CLI, it is available using the oc command:
$ oc <command>10.1.8. Manually creating the installation configuration file
For installations of OpenShift Container Platform that use user-provisioned infrastructure, you manually generate your installation configuration file.
Prerequisites
- Obtain the OpenShift Container Platform installation program and the access token for your cluster.
Procedure
Create an installation directory to store your required installation assets in:
$ mkdir <installation_directory>ImportantYou must create a directory. Some installation assets, like bootstrap X.509 certificates have short expiration intervals, so you must not reuse an installation directory. If you want to reuse individual files from another cluster installation, you can copy them into your directory. However, the file names for the installation assets might change between releases. Use caution when copying installation files from an earlier OpenShift Container Platform version.
Customize the following
install-config.yamlfile template and save it in the<installation_directory>.NoteYou must name this configuration file
install-config.yaml.Back up the
install-config.yamlfile so that you can use it to install multiple clusters.ImportantThe
install-config.yamlfile is consumed during the next step of the installation process. You must back it up now.
10.1.8.1. Sample install-config.yaml file for IBM Z
You can customize the install-config.yaml file to specify more details about your OpenShift Container Platform cluster’s platform or modify the values of the required parameters.
apiVersion: v1
baseDomain: example.com
compute:
- hyperthreading: Enabled
name: worker
replicas: 0
architecture : s390x
controlPlane:
hyperthreading: Enabled
name: master
replicas: 3
architecture : s390x
metadata:
name: test
networking:
clusterNetwork:
- cidr: 10.128.0.0/14
hostPrefix: 23
networkType: OpenShiftSDN
serviceNetwork:
- 172.30.0.0/16
platform:
none: {}
fips: false
pullSecret: '{"auths": ...}'
sshKey: 'ssh-ed25519 AAAA...' - 1
- The base domain of the cluster. All DNS records must be sub-domains of this base and include the cluster name.
- 2 5
- The
controlPlanesection is a single mapping, but thecomputesection is a sequence of mappings. To meet the requirements of the different data structures, the first line of thecomputesection must begin with a hyphen,-, and the first line of thecontrolPlanesection must not. Only one control plane pool is used. - 3 6
- Whether to enable or disable simultaneous multithreading (SMT), or
hyperthreading. By default, SMT is enabled to increase the performance of your machines' cores. You can disable it by setting the parameter value toDisabled. If you disable SMT, you must disable it in all cluster machines; this includes both control plane and compute machines.NoteSimultaneous multithreading (SMT) is enabled by default. If SMT is not enabled in your BIOS settings, the
hyperthreadingparameter has no effect.ImportantIf you disable
hyperthreading, whether in the BIOS or in theinstall-config.yaml, ensure that your capacity planning accounts for the dramatically decreased machine performance. - 4
- You must set the value of the
replicasparameter to0. This parameter controls the number of workers that the cluster creates and manages for you, which are functions that the cluster does not perform when you use user-provisioned infrastructure. You must manually deploy worker machines for the cluster to use before you finish installing OpenShift Container Platform. - 7
- The number of control plane machines that you add to the cluster. Because the cluster uses these values as the number of etcd endpoints in the cluster, the value must match the number of control plane machines that you deploy.
- 8
- The cluster name that you specified in your DNS records.
- 9
- A block of IP addresses from which pod IP addresses are allocated. This block must not overlap with existing physical networks. These IP addresses are used for the pod network. If you need to access the pods from an external network, you must configure load balancers and routers to manage the traffic.Note
Class E CIDR range is reserved for a future use. To use the Class E CIDR range, you must ensure your networking environment accepts the IP addresses within the Class E CIDR range.
- 10
- The subnet prefix length to assign to each individual node. For example, if
hostPrefixis set to23, then each node is assigned a/23subnet out of the givencidr, which allows for 510 (2^(32 - 23) - 2) pod IPs addresses. If you are required to provide access to nodes from an external network, configure load balancers and routers to manage the traffic. - 11
- The IP address pool to use for service IP addresses. You can enter only one IP address pool. This block must not overlap with existing physical networks. If you need to access the services from an external network, configure load balancers and routers to manage the traffic.
- 12
- You must set the platform to
none. You cannot provide additional platform configuration variables for IBM Z infrastructure.WarningRed Hat Virtualization does not currently support installation with user-provisioned infrastructure on the oVirt platform. Therefore, you must set the platform to
none, allowing OpenShift Container Platform to identify each node as a bare-metal node and the cluster as a bare-metal cluster. This is the same as installing a cluster on any platform, and has the following limitations:- There will be no cluster provider so you must manually add each machine and there will be no node scaling capabilities.
- The oVirt CSI driver will not be installed and there will be no CSI capabilities.
- 13
- Whether to enable or disable FIPS mode. By default, FIPS mode is not enabled. If FIPS mode is enabled, the Red Hat Enterprise Linux CoreOS (RHCOS) machines that OpenShift Container Platform runs on bypass the default Kubernetes cryptography suite and use the cryptography modules that are provided with RHCOS instead.Important
The use of FIPS Validated / Modules in Process cryptographic libraries is only supported on OpenShift Container Platform deployments on the
x86_64architecture. - 14
- The pull secret from the Red Hat OpenShift Cluster Manager. This pull secret allows you to authenticate with the services that are provided by the included authorities, including Quay.io, which serves the container images for OpenShift Container Platform components.
- 15
- The public portion of the default SSH key for the
coreuser in Red Hat Enterprise Linux CoreOS (RHCOS).NoteFor production OpenShift Container Platform clusters on which you want to perform installation debugging or disaster recovery, specify an SSH key that your
ssh-agentprocess uses.
10.1.9. Configuring the cluster-wide proxy during installation
Production environments can deny direct access to the Internet and instead have an HTTP or HTTPS proxy available. You can configure a new OpenShift Container Platform cluster to use a proxy by configuring the proxy settings in the install-config.yaml file.
Prerequisites
-
You have an existing
install-config.yamlfile. You reviewed the sites that your cluster requires access to and determined whether any of them need to bypass the proxy. By default, all cluster egress traffic is proxied, including calls to hosting cloud provider APIs. You added sites to the
Proxyobject’sspec.noProxyfield to bypass the proxy if necessary.NoteThe
Proxyobjectstatus.noProxyfield is populated with the values of thenetworking.machineNetwork[].cidr,networking.clusterNetwork[].cidr, andnetworking.serviceNetwork[]fields from your installation configuration.For installations on Amazon Web Services (AWS), Google Cloud Platform (GCP), Microsoft Azure, and Red Hat OpenStack Platform (RHOSP), the
Proxyobjectstatus.noProxyfield is also populated with the instance metadata endpoint (169.254.169.254).
Procedure
Edit your
install-config.yamlfile and add the proxy settings. For example:apiVersion: v1 baseDomain: my.domain.com proxy: httpProxy: http://<username>:<pswd>@<ip>:<port>1 httpsProxy: https://<username>:<pswd>@<ip>:<port>2 noProxy: example.com3 additionalTrustBundle: |4 -----BEGIN CERTIFICATE----- <MY_TRUSTED_CA_CERT> -----END CERTIFICATE----- ...- 1
- A proxy URL to use for creating HTTP connections outside the cluster. The URL scheme must be
http. - 2
- A proxy URL to use for creating HTTPS connections outside the cluster.
- 3
- A comma-separated list of destination domain names, IP addresses, or other network CIDRs to exclude from proxying. Preface a domain with
.to match subdomains only. For example,.y.commatchesx.y.com, but noty.com. Use*to bypass the proxy for all destinations. - 4
- If provided, the installation program generates a config map that is named
user-ca-bundlein theopenshift-confignamespace to hold the additional CA certificates. If you provideadditionalTrustBundleand at least one proxy setting, theProxyobject is configured to reference theuser-ca-bundleconfig map in thetrustedCAfield. The Cluster Network Operator then creates atrusted-ca-bundleconfig map that merges the contents specified for thetrustedCAparameter with the RHCOS trust bundle. TheadditionalTrustBundlefield is required unless the proxy’s identity certificate is signed by an authority from the RHCOS trust bundle.
NoteThe installation program does not support the proxy
readinessEndpointsfield.- Save the file and reference it when installing OpenShift Container Platform.
The installation program creates a cluster-wide proxy that is named cluster that uses the proxy settings in the provided install-config.yaml file. If no proxy settings are provided, a cluster Proxy object is still created, but it will have a nil spec.
Only the Proxy object named cluster is supported, and no additional proxies can be created.
10.1.10. Creating the Kubernetes manifest and Ignition config files
Because you must modify some cluster definition files and manually start the cluster machines, you must generate the Kubernetes manifest and Ignition config files that the cluster needs to make its machines.
The installation configuration file transforms into the Kubernetes manifests. The manifests wrap into the Ignition configuration files, which are later used to create the cluster.
The Ignition config files that the installation program generates contain certificates that expire after 24 hours, which are then renewed at that time. If the cluster is shut down before renewing the certificates and the cluster is later restarted after the 24 hours have elapsed, the cluster automatically recovers the expired certificates. The exception is that you must manually approve the pending node-bootstrapper certificate signing requests (CSRs) to recover kubelet certificates. See the documentation for Recovering from expired control plane certificates for more information.
The installation program that generates the manifest and Ignition files is architecture specific and can be obtained from the client image mirror. The Linux version of the installation program runs on s390x only. This installer program is also available as a Mac OS version.
Prerequisites
- You obtained the OpenShift Container Platform installation program.
-
You created the
install-config.yamlinstallation configuration file.
Procedure
Change to the directory that contains the installation program and generate the Kubernetes manifests for the cluster:
$ ./openshift-install create manifests --dir <installation_directory>1 - 1
- For
<installation_directory>, specify the installation directory that contains theinstall-config.yamlfile you created.
WarningIf you are installing a three-node cluster, skip the following step to allow the control plane nodes to be schedulable.
ImportantWhen you configure control plane nodes from the default unschedulable to schedulable, additional subscriptions are required. This is because control plane nodes then become worker nodes.
Check that the
mastersSchedulableparameter in the<installation_directory>/manifests/cluster-scheduler-02-config.ymlKubernetes manifest file is set tofalse. This setting prevents pods from being scheduled on the control plane machines:-
Open the
<installation_directory>/manifests/cluster-scheduler-02-config.ymlfile. -
Locate the
mastersSchedulableparameter and ensure that it is set tofalse. - Save and exit the file.
-
Open the
To create the Ignition configuration files, run the following command from the directory that contains the installation program:
$ ./openshift-install create ignition-configs --dir <installation_directory>1 - 1
- For
<installation_directory>, specify the same installation directory.
The following files are generated in the directory:
. ├── auth │ ├── kubeadmin-password │ └── kubeconfig ├── bootstrap.ign ├── master.ign ├── metadata.json └── worker.ign
10.1.11. Fast-track installation: Creating Red Hat Enterprise Linux CoreOS (RHCOS) machines
Before you install a cluster on IBM Z infrastructure that you provision, you must install RHCOS as Red Hat Enterprise Linux (RHEL) guest virtual machines for the cluster to use. Complete the following steps to create the machines in a fast-track installation of Red Hat Enterprise Linux CoreOS (RHCOS), importing a prepackaged Red Hat Enterprise Linux CoreOS (RHCOS) QEMU copy-on-write (QCOW2) disk image.
Prerequisites
- At least one LPAR running RHEL 8.4 with KVM, referred to as RHEL KVM host in this procedure.
- The KVM/QEMU hypervisor is installed on the RHEL KVM host.
- A domain name server (DNS) that can perform hostname and reverse lookup for the nodes.
- A DHCP server that provides IP addresses.
Procedure
Obtain the RHEL QEMU copy-on-write (QCOW2) disk image file from the Product Downloads page on the Red Hat Customer Portal or from the RHCOS image mirror page.
ImportantThe RHCOS images might not change with every release of OpenShift Container Platform. You must download images with the highest version that is less than or equal to the OpenShift Container Platform version that you install. Only use the appropriate RHCOS QCOW2 image described in the following procedure.
Download the QCOW2 disk image and Ignition files to a common directory on the RHEL KVM host.
For example:
/var/lib/libvirt/imagesNoteThe Ignition files are generated by the OpenShift Container Platform installer.
Create a new disk image with the QCOW2 disk image backing file for each KVM guest node.
$ qemu-img create -f qcow2 -F qcow2 -b /var/lib/libvirt/images/{source_rhcos_qemu} /var/lib/libvirt/images/{vmname}.qcow2 {size}Create the new KVM guest nodes using the Ignition file and the new disk image.
$ virt-install --noautoconsole \ --connect qemu:///system \ --name {vn_name} \ --memory {memory} \ --vcpus {vcpus} \ --disk {disk} \ --import \ --network network={network},mac={mac} \ --qemu-commandline="-drive \ if=none,id=ignition,format=raw,file={ign_file},readonly=on -device virtio-blk,serial=ignition,drive=ignition"
10.1.12. Full installation: Creating Red Hat Enterprise Linux CoreOS (RHCOS) machines
Before you install a cluster on IBM Z infrastructure that you provision, you must install RHCOS as Red Hat Enterprise Linux (RHEL) guest virtual machines for the cluster to use. Complete the following steps to create the machines in a full installation on a new QEMU copy-on-write (QCOW2) disk image.
Prerequisites
- At least 1 LPAR running RHEL 8.3 with KVM, referred to as RHEL KVM host in this procedure.
- The KVM/QEMU hypervisor is installed on the RHEL KVM host.
- A domain name server (DNS) that can perform hostname and reverse lookup for the nodes.
- An HTTP or HTTPS server is set up.
Procedure
Obtain the RHEL kernel, initramfs, and rootfs files from the Product Downloads page on the Red Hat Customer Portal or from the RHCOS image mirror page.
ImportantThe RHCOS images might not change with every release of OpenShift Container Platform. You must download images with the highest version that is less than or equal to the OpenShift Container Platform version that you install. Only use the appropriate RHCOS QCOW2 image described in the following procedure.
The file names contain the OpenShift Container Platform version number. They resemble the following examples:
-
kernel:
rhcos-<version>-live-kernel-<architecture> -
initramfs:
rhcos-<version>-live-initramfs.<architecture>.img -
rootfs:
rhcos-<version>-live-rootfs.<architecture>.img
-
kernel:
Move the downloaded RHEL live kernel, initramfs, and rootfs as well as the Ignition files to an HTTP or HTTPS server before you launch
virt-install.NoteThe Ignition files are generated by the OpenShift Container Platform installer.
Create the new KVM guest nodes using the RHEL kernel, initramfs, and Ignition files, the new disk image, and adjusted parm line arguments.
-
For
--location, specify the location of the kernel/initrd on the HTTP or HTTPS server. -
For
coreos.inst.ignition_url=, specify the Ignition file for the machine role. Usebootstrap.ign,master.ign, orworker.ign. Only HTTP and HTTPS protocols are supported. For
coreos.live.rootfs_url=, specify the matching rootfs artifact for the kernel and initramfs you are booting. Only HTTP and HTTPS protocols are supported.$ virt-install \ --connect qemu:///system \ --name {vn_name} \ --vcpus {vcpus} \ --memory {memory_mb} \ --disk {vn_name}.qcow2,size={image_size| default(10,true)} \ --network network={virt_network_parm} \ --boot hd \ --location {media_location},kernel={rhcos_kernel},initrd={rhcos_initrd} \ --extra-args "rd.neednet=1 dfltcc=off coreos.inst=yes coreos.inst.install_dev=vda coreos.live.rootfs_url={rhcos_liveos} ip={ip}::{default_gateway}:{subnet_mask_length}:{vn_name}:enc1:none:{MTU} nameserver={dns} coreos.inst.ignition_url={rhcos_ign}" \ --noautoconsole \ --waitNotedfltcc=offis required for IBM z15 and LinuxONE III.
-
For
10.1.13. Creating the cluster
To create the OpenShift Container Platform cluster, you wait for the bootstrap process to complete on the machines that you provisioned by using the Ignition config files that you generated with the installation program.
Prerequisites
- Create the required infrastructure for the cluster.
- You obtained the installation program and generated the Ignition config files for your cluster.
- You used the Ignition config files to create RHCOS machines for your cluster.
- Your machines have direct Internet access or have an HTTP or HTTPS proxy available.
Procedure
Monitor the bootstrap process:
$ ./openshift-install --dir <installation_directory> wait-for bootstrap-complete \1 --log-level=info2 Example output
INFO Waiting up to 30m0s for the Kubernetes API at https://api.test.example.com:6443... INFO API v1.20.0 up INFO Waiting up to 30m0s for bootstrapping to complete... INFO It is now safe to remove the bootstrap resourcesThe command succeeds when the Kubernetes API server signals that it has been bootstrapped on the control plane machines.
After bootstrap process is complete, remove the bootstrap machine from the load balancer.
ImportantYou must remove the bootstrap machine from the load balancer at this point. You can also remove or reformat the machine itself.
10.1.14. Logging in to the cluster by using the CLI
You can log in to your cluster as a default system user by exporting the cluster kubeconfig file. The kubeconfig file contains information about the cluster that is used by the CLI to connect a client to the correct cluster and API server. The file is specific to a cluster and is created during OpenShift Container Platform installation.
Prerequisites
- You deployed an OpenShift Container Platform cluster.
-
You installed the
ocCLI.
Procedure
Export the
kubeadmincredentials:$ export KUBECONFIG=<installation_directory>/auth/kubeconfig1 - 1
- For
<installation_directory>, specify the path to the directory that you stored the installation files in.
Verify you can run
occommands successfully using the exported configuration:$ oc whoamiExample output
system:admin
10.1.15. Approving the certificate signing requests for your machines
When you add machines to a cluster, two pending certificate signing requests (CSRs) are generated for each machine that you added. You must confirm that these CSRs are approved or, if necessary, approve them yourself. The client requests must be approved first, followed by the server requests.
Prerequisites
- You added machines to your cluster.
Procedure
Confirm that the cluster recognizes the machines:
$ oc get nodesExample output
NAME STATUS ROLES AGE VERSION master-0 Ready master 63m v1.20.0 master-1 Ready master 63m v1.20.0 master-2 Ready master 64m v1.20.0The output lists all of the machines that you created.
NoteThe preceding output might not include the compute nodes, also known as worker nodes, until some CSRs are approved.
Review the pending CSRs and ensure that you see the client requests with the
PendingorApprovedstatus for each machine that you added to the cluster:$ oc get csrExample output
NAME AGE REQUESTOR CONDITION csr-mddf5 20m system:node:master-01.example.com Approved,Issued csr-z5rln 16m system:node:worker-21.example.com Approved,IssuedIf the CSRs were not approved, after all of the pending CSRs for the machines you added are in
Pendingstatus, approve the CSRs for your cluster machines:NoteBecause the CSRs rotate automatically, approve your CSRs within an hour of adding the machines to the cluster. If you do not approve them within an hour, the certificates will rotate, and more than two certificates will be present for each node. You must approve all of these certificates. Once the client CSR is approved, the Kubelet creates a secondary CSR for the serving certificate, which requires manual approval. Then, subsequent serving certificate renewal requests are automatically approved by the
machine-approverif the Kubelet requests a new certificate with identical parameters.NoteFor clusters running on platforms that are not machine API enabled, such as bare metal and other user-provisioned infrastructure, you must implement a method of automatically approving the kubelet serving certificate requests (CSRs). If a request is not approved, then the
oc exec,oc rsh, andoc logscommands cannot succeed, because a serving certificate is required when the API server connects to the kubelet. Any operation that contacts the Kubelet endpoint requires this certificate approval to be in place. The method must watch for new CSRs, confirm that the CSR was submitted by thenode-bootstrapperservice account in thesystem:nodeorsystem:admingroups, and confirm the identity of the node.To approve them individually, run the following command for each valid CSR:
$ oc adm certificate approve <csr_name>1 - 1
<csr_name>is the name of a CSR from the list of current CSRs.
To approve all pending CSRs, run the following command:
$ oc get csr -o go-template='{{range .items}}{{if not .status}}{{.metadata.name}}{{"\n"}}{{end}}{{end}}' | xargs --no-run-if-empty oc adm certificate approveNoteSome Operators might not become available until some CSRs are approved.
Now that your client requests are approved, you must review the server requests for each machine that you added to the cluster:
$ oc get csrExample output
NAME AGE REQUESTOR CONDITION csr-bfd72 5m26s system:node:ip-10-0-50-126.us-east-2.compute.internal Pending csr-c57lv 5m26s system:node:ip-10-0-95-157.us-east-2.compute.internal Pending ...If the remaining CSRs are not approved, and are in the
Pendingstatus, approve the CSRs for your cluster machines:To approve them individually, run the following command for each valid CSR:
$ oc adm certificate approve <csr_name>1 - 1
<csr_name>is the name of a CSR from the list of current CSRs.
To approve all pending CSRs, run the following command:
$ oc get csr -o go-template='{{range .items}}{{if not .status}}{{.metadata.name}}{{"\n"}}{{end}}{{end}}' | xargs oc adm certificate approve
After all client and server CSRs have been approved, the machines have the
Readystatus. Verify this by running the following command:$ oc get nodesExample output
NAME STATUS ROLES AGE VERSION master-0 Ready master 73m v1.20.0 master-1 Ready master 73m v1.20.0 master-2 Ready master 74m v1.20.0 worker-0 Ready worker 11m v1.20.0 worker-1 Ready worker 11m v1.20.0NoteIt can take a few minutes after approval of the server CSRs for the machines to transition to the
Readystatus.
Additional information
- For more information on CSRs, see Certificate Signing Requests.
10.1.16. Initial Operator configuration
After the control plane initializes, you must immediately configure some Operators so that they all become available.
Prerequisites
- Your control plane has initialized.
Procedure
Watch the cluster components come online:
$ watch -n5 oc get clusteroperatorsExample output
NAME VERSION AVAILABLE PROGRESSING DEGRADED SINCE authentication 4.7.0 True False False 3h56m baremetal 4.7.0 True False False 29h cloud-credential 4.7.0 True False False 29h cluster-autoscaler 4.7.0 True False False 29h config-operator 4.7.0 True False False 6h39m console 4.7.0 True False False 3h59m csi-snapshot-controller 4.7.0 True False False 4h12m dns 4.7.0 True False False 4h15m etcd 4.7.0 True False False 29h image-registry 4.7.0 True False False 3h59m ingress 4.7.0 True False False 4h30m insights 4.7.0 True False False 29h kube-apiserver 4.7.0 True False False 29h kube-controller-manager 4.7.0 True False False 29h kube-scheduler 4.7.0 True False False 29h kube-storage-version-migrator 4.7.0 True False False 4h2m machine-api 4.7.0 True False False 29h machine-approver 4.7.0 True False False 6h34m machine-config 4.7.0 True False False 3h56m marketplace 4.7.0 True False False 4h2m monitoring 4.7.0 True False False 6h31m network 4.7.0 True False False 29h node-tuning 4.7.0 True False False 4h30m openshift-apiserver 4.7.0 True False False 3h56m openshift-controller-manager 4.7.0 True False False 4h36m openshift-samples 4.7.0 True False False 4h30m operator-lifecycle-manager 4.7.0 True False False 29h operator-lifecycle-manager-catalog 4.7.0 True False False 29h operator-lifecycle-manager-packageserver 4.7.0 True False False 3h59m service-ca 4.7.0 True False False 29h storage 4.7.0 True False False 4h30m- Configure the Operators that are not available.
10.1.16.1. Image registry storage configuration
The Image Registry Operator is not initially available for platforms that do not provide default storage. After installation, you must configure your registry to use storage so that the Registry Operator is made available.
Instructions are shown for configuring a persistent volume, which is required for production clusters. Where applicable, instructions are shown for configuring an empty directory as the storage location, which is available for only non-production clusters.
Additional instructions are provided for allowing the image registry to use block storage types by using the Recreate rollout strategy during upgrades.
10.1.16.1.1. Configuring registry storage for IBM Z
As a cluster administrator, following installation you must configure your registry to use storage.
Prerequisites
- Cluster administrator permissions.
- A cluster on IBM Z.
Persistent storage provisioned for your cluster.
ImportantOpenShift Container Platform supports
ReadWriteOnceaccess for image registry storage when you have only one replica. To deploy an image registry that supports high availability with two or more replicas,ReadWriteManyaccess is required.- Must have 100Gi capacity.
Procedure
To configure your registry to use storage, change the
spec.storage.pvcin theconfigs.imageregistry/clusterresource.NoteWhen using shared storage, review your security settings to prevent outside access.
Verify that you do not have a registry pod:
$ oc get pod -n openshift-image-registry -l docker-registry=defaultExample output
No resourses found in openshift-image-registry namespaceNoteIf you do have a registry pod in your output, you do not need to continue with this procedure.
Check the registry configuration:
$ oc edit configs.imageregistry.operator.openshift.ioExample output
storage: pvc: claim:Leave the
claimfield blank to allow the automatic creation of animage-registry-storagePVC.Check the
clusteroperatorstatus:$ oc get clusteroperator image-registryExample output
NAME VERSION AVAILABLE PROGRESSING DEGRADED SINCE MESSAGE image-registry 4.7 True False False 6h50mEnsure that your registry is set to managed to enable building and pushing of images.
Run:
$ oc edit configs.imageregistry/clusterThen, change the line
managementState: Removedto
managementState: Managed
10.1.16.1.2. Configuring storage for the image registry in non-production clusters
You must configure storage for the Image Registry Operator. For non-production clusters, you can set the image registry to an empty directory. If you do so, all images are lost if you restart the registry.
Procedure
To set the image registry storage to an empty directory:
$ oc patch configs.imageregistry.operator.openshift.io cluster --type merge --patch '{"spec":{"storage":{"emptyDir":{}}}}'WarningConfigure this option for only non-production clusters.
If you run this command before the Image Registry Operator initializes its components, the
oc patchcommand fails with the following error:Error from server (NotFound): configs.imageregistry.operator.openshift.io "cluster" not foundWait a few minutes and run the command again.
10.1.17. Completing installation on user-provisioned infrastructure
After you complete the Operator configuration, you can finish installing the cluster on infrastructure that you provide.
Prerequisites
- Your control plane has initialized.
- You have completed the initial Operator configuration.
Procedure
Confirm that all the cluster components are online with the following command:
$ watch -n5 oc get clusteroperatorsExample output
NAME VERSION AVAILABLE PROGRESSING DEGRADED SINCE authentication 4.7.0 True False False 3h56m baremetal 4.7.0 True False False 29h cloud-credential 4.7.0 True False False 29h cluster-autoscaler 4.7.0 True False False 29h config-operator 4.7.0 True False False 6h39m console 4.7.0 True False False 3h59m csi-snapshot-controller 4.7.0 True False False 4h12m dns 4.7.0 True False False 4h15m etcd 4.7.0 True False False 29h image-registry 4.7.0 True False False 3h59m ingress 4.7.0 True False False 4h30m insights 4.7.0 True False False 29h kube-apiserver 4.7.0 True False False 29h kube-controller-manager 4.7.0 True False False 29h kube-scheduler 4.7.0 True False False 29h kube-storage-version-migrator 4.7.0 True False False 4h2m machine-api 4.7.0 True False False 29h machine-approver 4.7.0 True False False 6h34m machine-config 4.7.0 True False False 3h56m marketplace 4.7.0 True False False 4h2m monitoring 4.7.0 True False False 6h31m network 4.7.0 True False False 29h node-tuning 4.7.0 True False False 4h30m openshift-apiserver 4.7.0 True False False 3h56m openshift-controller-manager 4.7.0 True False False 4h36m openshift-samples 4.7.0 True False False 4h30m operator-lifecycle-manager 4.7.0 True False False 29h operator-lifecycle-manager-catalog 4.7.0 True False False 29h operator-lifecycle-manager-packageserver 4.7.0 True False False 3h59m service-ca 4.7.0 True False False 29h storage 4.7.0 True False False 4h30mAlternatively, the following command notifies you when all of the clusters are available. It also retrieves and displays credentials:
$ ./openshift-install --dir <installation_directory> wait-for install-complete1 - 1
- For
<installation_directory>, specify the path to the directory that you stored the installation files in.
Example output
INFO Waiting up to 30m0s for the cluster to initialize...The command succeeds when the Cluster Version Operator finishes deploying the OpenShift Container Platform cluster from Kubernetes API server.
Important-
The Ignition config files that the installation program generates contain certificates that expire after 24 hours, which are then renewed at that time. If the cluster is shut down before renewing the certificates and the cluster is later restarted after the 24 hours have elapsed, the cluster automatically recovers the expired certificates. The exception is that you must manually approve the pending
node-bootstrappercertificate signing requests (CSRs) to recover kubelet certificates. See the documentation for Recovering from expired control plane certificates for more information. - It is recommended that you use Ignition config files within 12 hours after they are generated because the 24-hour certificate rotates from 16 to 22 hours after the cluster is installed. By using the Ignition config files within 12 hours, you can avoid installation failure if the certificate update runs during installation.
Confirm that the Kubernetes API server is communicating with the pods.
To view a list of all pods, use the following command:
$ oc get pods --all-namespacesExample output
NAMESPACE NAME READY STATUS RESTARTS AGE openshift-apiserver-operator openshift-apiserver-operator-85cb746d55-zqhs8 1/1 Running 1 9m openshift-apiserver apiserver-67b9g 1/1 Running 0 3m openshift-apiserver apiserver-ljcmx 1/1 Running 0 1m openshift-apiserver apiserver-z25h4 1/1 Running 0 2m openshift-authentication-operator authentication-operator-69d5d8bf84-vh2n8 1/1 Running 0 5m ...View the logs for a pod that is listed in the output of the previous command by using the following command:
$ oc logs <pod_name> -n <namespace>1 - 1
- Specify the pod name and namespace, as shown in the output of the previous command.
If the pod logs display, the Kubernetes API server can communicate with the cluster machines.
For an installation with Fibre Channel Protocol (FCP), additional steps are required to enable multipathing. Do not enable multipathing during installation.
See "Enabling multipathing with kernel arguments on RHCOS" in the Post-installation configuration documentation for more information.
All the worker nodes are restarted. To monitor the process, enter the following command:
$ oc get nodes -wNoteIf you have additional machine types such as infrastructure nodes, repeat the process for these types.
10.1.18. Telemetry access for OpenShift Container Platform
In OpenShift Container Platform 4.7, the Telemetry service, which runs by default to provide metrics about cluster health and the success of updates, requires internet access. If your cluster is connected to the internet, Telemetry runs automatically, and your cluster is registered to OpenShift Cluster Manager.
After you confirm that your OpenShift Cluster Manager inventory is correct, either maintained automatically by Telemetry or manually by using OpenShift Cluster Manager, use subscription watch to track your OpenShift Container Platform subscriptions at the account or multi-cluster level.
10.1.19. Collecting debugging information
You can gather debugging information that might help you to troubleshoot and debug certain issues with an OpenShift Container Platform installation on IBM Z.
Prerequisites
-
The
ocCLI tool installed.
Procedure
Log in to the cluster:
$ oc login -u <username>On the node you want to gather hardware information about, start a debugging container:
$ oc debug node/<nodename>Change to the /host file system and start
toolbox:$ chroot /host $ toolboxCollect the
dbginfodata:$ dbginfo.sh-
You can then retrieve the data, for example, using
scp.
10.1.20. Next steps
- Customize your cluster.
- If necessary, you can opt out of remote health reporting.
10.2. Installing a cluster with RHEL KVM on IBM Z and LinuxONE in a restricted network
In OpenShift Container Platform version 4.7, you can install a cluster on IBM Z and LinuxONE infrastructure that you provision in a restricted network.
While this document refers to only IBM Z, all information in it also applies to LinuxONE.
Additional considerations exist for non-bare metal platforms. Review the information in the guidelines for deploying OpenShift Container Platform on non-tested platforms before you install an OpenShift Container Platform cluster.
10.2.1. Prerequisites
-
Create a registry on your mirror host and obtain the
imageContentSourcesdata for your version of OpenShift Container Platform. Move or remove any existing installation files, before you begin the installation process. This ensures that the required installation files are created and updated during the installation process.
ImportantEnsure that installation steps are done from a machine with access to the installation media.
-
* You provisioned persistent storage using NFS for your cluster. To deploy a private image registry, you must set up persistent storage with
ReadWriteManyaccess. - Review details about the OpenShift Container Platform installation and update processes.
- If you use a firewall, you must configure it to allow the sites that your cluster requires access to.
You provisioned a RHEL Kernel Virtual Machine (KVM) system that is hosted on the logical partition (LPAR) and based on RHEL 8.4 or later.
NoteBe sure to also review this site list if you are configuring a proxy.
10.2.2. About installations in restricted networks
In OpenShift Container Platform 4.7, you can perform an installation that does not require an active connection to the Internet to obtain software components. Restricted network installations can be completed using installer-provisioned infrastructure or user-provisioned infrastructure, depending on the cloud platform to which you are installing the cluster.
If you choose to perform a restricted network installation on a cloud platform, you still require access to its cloud APIs. Some cloud functions, like Amazon Web Service’s Route 53 DNS and IAM services, require internet access. Depending on your network, you might require less Internet access for an installation on bare metal hardware or on VMware vSphere.
To complete a restricted network installation, you must create a registry that mirrors the contents of the OpenShift Container Platform registry and contains the installation media. You can create this registry on a mirror host, which can access both the Internet and your closed network, or by using other methods that meet your restrictions.
Because of the complexity of the configuration for user-provisioned installations, consider completing a standard user-provisioned infrastructure installation before you attempt a restricted network installation using user-provisioned infrastructure. Completing this test installation might make it easier to isolate and troubleshoot any issues that might arise during your installation in a restricted network.
10.2.2.1. Additional limits
Clusters in restricted networks have the following additional limitations and restrictions:
-
The
ClusterVersionstatus includes anUnable to retrieve available updateserror. - By default, you cannot use the contents of the Developer Catalog because you cannot access the required image stream tags.
10.2.3. Machine requirements for a cluster with user-provisioned infrastructure
For a cluster that contains user-provisioned infrastructure, you must deploy all of the required machines.
One or more KVM host machines based on RHEL 8.4 or later. Each RHEL KVM host machine must have libvirt installed and running. The virtual machines are provisioned under each RHEL KVM host machine.
10.2.3.1. Required machines
The smallest OpenShift Container Platform clusters require the following nodes:
- One temporary bootstrap machine
- Three control plane, or master, machines
- At least two compute machines, which are also known as worker machines
The cluster requires the bootstrap machine to deploy the OpenShift Container Platform cluster on the three control plane machines. You can remove the bootstrap machine after you install the cluster.
To improve high availability of your cluster, distribute the control plane machines over different RHEL instances on at least two physical machines.
The bootstrap, control plane, and compute machines must use Red Hat Enterprise Linux CoreOS (RHCOS) as the operating system.
See Red Hat Enterprise Linux technology capabilities and limits.
10.2.3.2. Network connectivity requirements
The OpenShift Container Platform installer creates the Ignition files, which are necessary for all the Red Hat Enterprise Linux CoreOS (RHCOS) virtual machines. The automated installation of OpenShift Container Platform is performed by the bootstrap machine. It starts the installation of OpenShift Container Platform on each node, starts the Kubernetes cluster, and then finishes. During this bootstrap, the virtual machine must have an established network connection either through a Dynamic Host Configuration Protocol (DHCP) server or static IP address.
10.2.3.3. IBM Z network connectivity requirements
To install on IBM Z under RHEL KVM, you need:
- A RHEL KVM host configured with an OSA or RoCE network adapter.
Either a RHEL KVM host that is configured to use bridged networking in libvirt or MacVTap to connect the network to the guests.
10.2.3.4. Host machine resource requirements
The RHEL KVM host in your environment must meet the following requirements to host the virtual machines that you plan for the OpenShift Container Platform environment. See Getting started with virtualization.
You can install OpenShift Container Platform version 4.7 on the following IBM hardware:
- IBM z15 (all models), IBM z14 (all models), IBM z13, and IBM z13s
- LinuxONE, any version
10.2.3.5. Minimum IBM Z system environment
Hardware requirements
- The equivalent of six IFLs, which are SMT2 enabled, for each cluster.
-
At least one network connection to both connect to the
LoadBalancerservice and to serve data for traffic outside the cluster.
You can use dedicated or shared IFLs to assign sufficient compute resources. Resource sharing is one of the key strengths of IBM Z. However, you must adjust capacity correctly on each hypervisor layer and ensure sufficient resources for every OpenShift Container Platform cluster.
Since the overall performance of the cluster can be impacted, the LPARs that are used to setup the OpenShift Container Platform clusters must provide sufficient compute capacity. In this context, LPAR weight management, entitlements, and CPU shares on the hypervisor level play an important role.
Operating system requirements
- One LPAR running RHEL 8.4 or later with KVM, which is managed by libvirt
On your RHEL KVM host, set up:
- Three guest virtual machines for OpenShift Container Platform control plane machines
- Two guest virtual machines for OpenShift Container Platform compute machines
- One guest virtual machine for the temporary OpenShift Container Platform bootstrap machine
10.2.3.6. Minimum resource requirements
Each cluster virtual machine must meet the following minimum requirements:
| Virtual Machine | Operating System | vCPU [1] | Virtual RAM | Storage | IOPS |
|---|---|---|---|---|---|
| Bootstrap | RHCOS | 4 | 16 GB | 100 GB | N/A |
| Control plane | RHCOS | 4 | 16 GB | 100 GB | N/A |
| Compute | RHCOS | 2 | 8 GB | 100 GB | N/A |
- One physical core (IFL) provides two logical cores (threads) when SMT-2 is enabled. The hypervisor can provide two or more vCPUs.
10.2.3.7. Preferred IBM Z system environment
Hardware requirements
- Three LPARS that each have the equivalent of six IFLs, which are SMT2 enabled, for each cluster.
-
Two network connections to connect to both connect to the
LoadBalancerservice and to serve data for traffic outside the cluster.
Operating system requirements
- For high availability, two or three LPARs running RHEL 8.4 or later with KVM, which are managed by libvirt.
On your RHEL KVM host, set up:
- Three guest virtual machines for OpenShift Container Platform control plane machines, distributed across the RHEL KVM host machines.
- At least six guest virtual machines for OpenShift Container Platform compute machines, distributed across the RHEL KVM host machines.
- One guest virtual machine for the temporary OpenShift Container Platform bootstrap machine.
-
To ensure the availability of integral components in an overcommitted environment, increase the priority of the control plane by using
cpu_shares. Do the same for infrastructure nodes, if they exist. See schedinfo in IBM Documentation.
10.2.3.8. Preferred resource requirements
The preferred requirements for each cluster virtual machine are:
| Virtual Machine | Operating System | vCPU | Virtual RAM | Storage |
|---|---|---|---|---|
| Bootstrap | RHCOS | 4 | 16 GB | 120 GB |
| Control plane | RHCOS | 8 | 16 GB | 120 GB |
| Compute | RHCOS | 6 | 8 GB | 120 GB |
10.2.3.9. Certificate signing requests management
Because your cluster has limited access to automatic machine management when you use infrastructure that you provision, you must provide a mechanism for approving cluster certificate signing requests (CSRs) after installation. The kube-controller-manager only approves the kubelet client CSRs. The machine-approver cannot guarantee the validity of a serving certificate that is requested by using kubelet credentials because it cannot confirm that the correct machine issued the request. You must determine and implement a method of verifying the validity of the kubelet serving certificate requests and approving them.
10.2.4. Internet access for OpenShift Container Platform
In OpenShift Container Platform 4.7, you require access to the Internet to obtain the images that are necessary to install your cluster.
You must have Internet access to:
- Access OpenShift Cluster Manager to download the installation program and perform subscription management. If the cluster has internet access and you do not disable Telemetry, that service automatically entitles your cluster.
- Access Quay.io to obtain the packages that are required to install your cluster.
- Obtain the packages that are required to perform cluster updates.
If your cluster cannot have direct Internet access, you can perform a restricted network installation on some types of infrastructure that you provision. During that process, you download the content that is required and use it to populate a mirror registry with the packages that you need to install a cluster and generate the installation program. With some installation types, the environment that you install your cluster in will not require Internet access. Before you update the cluster, you update the content of the mirror registry.
10.2.5. Creating the user-provisioned infrastructure
Before you deploy an OpenShift Container Platform cluster that uses user-provisioned infrastructure, you must create the underlying infrastructure.
Prerequisites
- Review the OpenShift Container Platform 4.x Tested Integrations page before you create the supporting infrastructure for your cluster.
Procedure
- Set up static IP addresses.
- Set up an HTTP or HTTPS server to provide Ignition files to the cluster nodes.
- Choose to perform either a fast track installation of Red Hat Enterprise Linux CoreOS (RHCOS) or a full installation of Red Hat Enterprise Linux CoreOS (RHCOS). For the full installation you must set up an HTTP or HTTPS server to provide Ignition files and install images to the cluster nodes. For the fast track installation an HTTP or HTTPS server is not required, however, a DHCP server is required. See sections “Fast-track installation: Creating Red Hat Enterprise Linux CoreOS (RHCOS) machines" and “Full installation: Creating Red Hat Enterprise Linux CoreOS (RHCOS) machines".
- Provision the required load balancers.
- Configure the ports for your machines.
- Configure DNS.
- Ensure network connectivity.
10.2.5.1. Networking requirements for user-provisioned infrastructure
All the Red Hat Enterprise Linux CoreOS (RHCOS) machines require network in initramfs during boot to fetch Ignition config from the machine config server.
During the initial boot, the machines require an HTTP or HTTPS server to establish a network connection to download their Ignition config files.
Ensure that the machines have persistent IP addresses and host names.
The Kubernetes API server must be able to resolve the node names of the cluster machines. If the API servers and worker nodes are in different zones, you can configure a default DNS search zone to allow the API server to resolve the node names. Another supported approach is to always refer to hosts by their fully-qualified domain names in both the node objects and all DNS requests.
You must configure the network connectivity between machines to allow cluster components to communicate. Each machine must be able to resolve the host names of all other machines in the cluster.
| Protocol | Port | Description |
|---|---|---|
| ICMP | N/A | Network reachability tests |
| TCP |
| Metrics |
|
|
Host level services, including the node exporter on ports | |
|
| The default ports that Kubernetes reserves | |
|
| openshift-sdn | |
| UDP |
| VXLAN and Geneve |
|
| VXLAN and Geneve | |
|
|
Host level services, including the node exporter on ports | |
| TCP/UDP |
| Kubernetes node port |
| Protocol | Port | Description |
|---|---|---|
| TCP |
| Kubernetes API |
| Protocol | Port | Description |
|---|---|---|
| TCP |
| etcd server and peer ports |
Network topology requirements
The infrastructure that you provision for your cluster must meet the following network topology requirements.
OpenShift Container Platform requires all nodes to have internet access to pull images for platform containers and provide telemetry data to Red Hat.
Load balancers
Before you install OpenShift Container Platform, you must provision two load balancers that meet the following requirements:
API load balancer: Provides a common endpoint for users, both human and machine, to interact with and configure the platform. Configure the following conditions:
- Layer 4 load balancing only. This can be referred to as Raw TCP, SSL Passthrough, or SSL Bridge mode. If you use SSL Bridge mode, you must enable Server Name Indication (SNI) for the API routes.
- A stateless load balancing algorithm. The options vary based on the load balancer implementation.
ImportantDo not configure session persistence for an API load balancer.
Configure the following ports on both the front and back of the load balancers:
Expand Table 10.10. API load balancer Port Back-end machines (pool members) Internal External Description 6443Bootstrap and control plane. You remove the bootstrap machine from the load balancer after the bootstrap machine initializes the cluster control plane. You must configure the
/readyzendpoint for the API server health check probe.X
X
Kubernetes API server
22623Bootstrap and control plane. You remove the bootstrap machine from the load balancer after the bootstrap machine initializes the cluster control plane.
X
Machine config server
NoteThe load balancer must be configured to take a maximum of 30 seconds from the time the API server turns off the
/readyzendpoint to the removal of the API server instance from the pool. Within the time frame after/readyzreturns an error or becomes healthy, the endpoint must have been removed or added. Probing every 5 or 10 seconds, with two successful requests to become healthy and three to become unhealthy, are well-tested values.Application Ingress load balancer: Provides an Ingress point for application traffic flowing in from outside the cluster. Configure the following conditions:
- Layer 4 load balancing only. This can be referred to as Raw TCP, SSL Passthrough, or SSL Bridge mode. If you use SSL Bridge mode, you must enable Server Name Indication (SNI) for the Ingress routes.
- A connection-based or session-based persistence is recommended, based on the options available and types of applications that will be hosted on the platform.
Configure the following ports on both the front and back of the load balancers:
Expand Table 10.11. Application Ingress load balancer Port Back-end machines (pool members) Internal External Description 443The machines that run the Ingress router pods, compute, or worker, by default.
X
X
HTTPS traffic
80The machines that run the Ingress router pods, compute, or worker, by default.
X
X
HTTP traffic
If the true IP address of the client can be seen by the load balancer, enabling source IP-based session persistence can improve performance for applications that use end-to-end TLS encryption.
A working configuration for the Ingress router is required for an OpenShift Container Platform cluster. You must configure the Ingress router after the control plane initializes.
NTP configuration
OpenShift Container Platform clusters are configured to use a public Network Time Protocol (NTP) server by default. If you want to use a local enterprise NTP server, or if your cluster is being deployed in a disconnected network, you can configure the cluster to use a specific time server. For more information, see the documentation for Configuring chrony time service.
10.2.5.2. User-provisioned DNS requirements
DNS is used for name resolution and reverse name resolution. DNS A/AAAA or CNAME records are used for name resolution and PTR records are used for reverse name resolution. The reverse records are important because Red Hat Enterprise Linux CoreOS (RHCOS) uses the reverse records to set the host name for all the nodes. Additionally, the reverse records are used to generate the certificate signing requests (CSR) that OpenShift Container Platform needs to operate.
The following DNS records are required for an OpenShift Container Platform cluster that uses user-provisioned infrastructure. In each record, <cluster_name> is the cluster name and <base_domain> is the cluster base domain that you specify in the install-config.yaml file. A complete DNS record takes the form: <component>.<cluster_name>.<base_domain>..
| Component | Record | Description |
|---|---|---|
| Kubernetes API |
| Add a DNS A/AAAA or CNAME record, and a DNS PTR record, to identify the load balancer for the control plane machines. These records must be resolvable by both clients external to the cluster and from all the nodes within the cluster. |
|
| Add a DNS A/AAAA or CNAME record, and a DNS PTR record, to identify the load balancer for the control plane machines. These records must be resolvable from all the nodes within the cluster. Important The API server must be able to resolve the worker nodes by the host names that are recorded in Kubernetes. If the API server cannot resolve the node names, then proxied API calls can fail, and you cannot retrieve logs from pods. | |
| Routes |
| Add a wildcard DNS A/AAAA or CNAME record that refers to the load balancer that targets the machines that run the Ingress router pods, which are the worker nodes by default. These records must be resolvable by both clients external to the cluster and from all the nodes within the cluster. |
| Bootstrap |
| Add a DNS A/AAAA or CNAME record, and a DNS PTR record, to identify the bootstrap machine. These records must be resolvable by the nodes within the cluster. |
| Master hosts |
| DNS A/AAAA or CNAME records and DNS PTR records to identify each machine for the control plane nodes (also known as the master nodes). These records must be resolvable by the nodes within the cluster. |
| Worker hosts |
| Add DNS A/AAAA or CNAME records and DNS PTR records to identify each machine for the worker nodes. These records must be resolvable by the nodes within the cluster. |
You can use the nslookup <hostname> command to verify name resolution. You can use the dig -x <ip_address> command to verify reverse name resolution for the PTR records.
The following example of a BIND zone file shows sample A records for name resolution. The purpose of the example is to show the records that are needed. The example is not meant to provide advice for choosing one name resolution service over another.
Example 10.3. Sample DNS zone database
$TTL 1W
@ IN SOA ns1.example.com. root (
2019070700 ; serial
3H ; refresh (3 hours)
30M ; retry (30 minutes)
2W ; expiry (2 weeks)
1W ) ; minimum (1 week)
IN NS ns1.example.com.
IN MX 10 smtp.example.com.
;
;
ns1 IN A 192.168.1.5
smtp IN A 192.168.1.5
;
helper IN A 192.168.1.5
helper.ocp4 IN A 192.168.1.5
;
; The api identifies the IP of your load balancer.
api.ocp4 IN A 192.168.1.5
api-int.ocp4 IN A 192.168.1.5
;
; The wildcard also identifies the load balancer.
*.apps.ocp4 IN A 192.168.1.5
;
; Create an entry for the bootstrap host.
bootstrap.ocp4 IN A 192.168.1.96
;
; Create entries for the master hosts.
master0.ocp4 IN A 192.168.1.97
master1.ocp4 IN A 192.168.1.98
master2.ocp4 IN A 192.168.1.99
;
; Create entries for the worker hosts.
worker0.ocp4 IN A 192.168.1.11
worker1.ocp4 IN A 192.168.1.7
;
;EOFThe following example BIND zone file shows sample PTR records for reverse name resolution.
Example 10.4. Sample DNS zone database for reverse records
$TTL 1W
@ IN SOA ns1.example.com. root (
2019070700 ; serial
3H ; refresh (3 hours)
30M ; retry (30 minutes)
2W ; expiry (2 weeks)
1W ) ; minimum (1 week)
IN NS ns1.example.com.
;
; The syntax is "last octet" and the host must have an FQDN
; with a trailing dot.
97 IN PTR master0.ocp4.example.com.
98 IN PTR master1.ocp4.example.com.
99 IN PTR master2.ocp4.example.com.
;
96 IN PTR bootstrap.ocp4.example.com.
;
5 IN PTR api.ocp4.example.com.
5 IN PTR api-int.ocp4.example.com.
;
11 IN PTR worker0.ocp4.example.com.
7 IN PTR worker1.ocp4.example.com.
;
;EOF10.2.6. Generating an SSH private key and adding it to the agent
If you want to perform installation debugging or disaster recovery on your cluster, you must provide an SSH key to both your ssh-agent and the installation program. You can use this key to access the bootstrap machine in a public cluster to troubleshoot installation issues.
In a production environment, you require disaster recovery and debugging.
Do not skip this procedure in production environments where disaster recovery and debugging is required.
You can use this key to SSH into the master nodes as the user core. When you deploy the cluster, the key is added to the core user’s ~/.ssh/authorized_keys list.
Procedure
If you do not have an SSH key that is configured for password-less authentication on your computer, create one. For example, on a computer that uses a Linux operating system, run the following command:
$ ssh-keygen -t ed25519 -N '' \ -f <path>/<file_name>1 - 1
- Specify the path and file name, such as
~/.ssh/id_rsa, of the new SSH key. If you have an existing key pair, ensure your public key is in the your~/.sshdirectory.
Running this command generates an SSH key that does not require a password in the location that you specified.
NoteIf you plan to install an OpenShift Container Platform cluster that uses FIPS Validated / Modules in Process cryptographic libraries on the
x86_64architecture, do not create a key that uses theed25519algorithm. Instead, create a key that uses thersaorecdsaalgorithm.Start the
ssh-agentprocess as a background task:$ eval "$(ssh-agent -s)"Example output
Agent pid 31874NoteIf your cluster is in FIPS mode, only use FIPS-compliant algorithms to generate the SSH key. The key must be either RSA or ECDSA.
Add your SSH private key to the
ssh-agent:$ ssh-add <path>/<file_name>1 Example output
Identity added: /home/<you>/<path>/<file_name> (<computer_name>)- 1
- Specify the path and file name for your SSH private key, such as
~/.ssh/id_rsa
Next steps
- When you install OpenShift Container Platform, provide the SSH public key to the installation program.
10.2.7. Manually creating the installation configuration file
For installations of OpenShift Container Platform that use user-provisioned infrastructure, you manually generate your installation configuration file.
Prerequisites
- Obtain the OpenShift Container Platform installation program and the access token for your cluster.
Procedure
Create an installation directory to store your required installation assets in:
$ mkdir <installation_directory>ImportantYou must create a directory. Some installation assets, like bootstrap X.509 certificates have short expiration intervals, so you must not reuse an installation directory. If you want to reuse individual files from another cluster installation, you can copy them into your directory. However, the file names for the installation assets might change between releases. Use caution when copying installation files from an earlier OpenShift Container Platform version.
Customize the following
install-config.yamlfile template and save it in the<installation_directory>.NoteYou must name this configuration file
install-config.yaml.Back up the
install-config.yamlfile so that you can use it to install multiple clusters.ImportantThe
install-config.yamlfile is consumed during the next step of the installation process. You must back it up now.
10.2.7.1. Sample install-config.yaml file for IBM Z
You can customize the install-config.yaml file to specify more details about your OpenShift Container Platform cluster’s platform or modify the values of the required parameters.
apiVersion: v1
baseDomain: example.com
compute:
- hyperthreading: Enabled
name: worker
replicas: 0
architecture : s390x
controlPlane:
hyperthreading: Enabled
name: master
replicas: 3
architecture : s390x
metadata:
name: test
networking:
clusterNetwork:
- cidr: 10.128.0.0/14
hostPrefix: 23
networkType: OpenShiftSDN
serviceNetwork:
- 172.30.0.0/16
platform:
none: {}
fips: false
pullSecret: '{"auths":{"<local_registry>": {"auth": "<credentials>","email": "you@example.com"}}}'
sshKey: 'ssh-ed25519 AAAA...'
additionalTrustBundle: |
-----BEGIN CERTIFICATE-----
ZZZZZZZZZZZZZZZZZZZZZZZZZZZZZZZZZZZZZZZZZZZZZZZZZZZZZZZZZZZZZZZZ
-----END CERTIFICATE-----
imageContentSources:
- mirrors:
- <local_repository>/ocp4/openshift4
source: quay.io/openshift-release-dev/ocp-release
- mirrors:
- <local_repository>/ocp4/openshift4
source: quay.io/openshift-release-dev/ocp-v4.0-art-dev- 1
- The base domain of the cluster. All DNS records must be sub-domains of this base and include the cluster name.
- 2 5
- The
controlPlanesection is a single mapping, but thecomputesection is a sequence of mappings. To meet the requirements of the different data structures, the first line of thecomputesection must begin with a hyphen,-, and the first line of thecontrolPlanesection must not. Only one control plane pool is used. - 3 6
- Whether to enable or disable simultaneous multithreading (SMT), or
hyperthreading. By default, SMT is enabled to increase the performance of your machines' cores. You can disable it by setting the parameter value toDisabled. If you disable SMT, you must disable it in all cluster machines; this includes both control plane and compute machines.NoteSimultaneous multithreading (SMT) is enabled by default. If SMT is not enabled in your BIOS settings, the
hyperthreadingparameter has no effect.ImportantIf you disable
hyperthreading, whether in the BIOS or in theinstall-config.yaml, ensure that your capacity planning accounts for the dramatically decreased machine performance. - 4
- You must set the value of the
replicasparameter to0. This parameter controls the number of workers that the cluster creates and manages for you, which are functions that the cluster does not perform when you use user-provisioned infrastructure. You must manually deploy worker machines for the cluster to use before you finish installing OpenShift Container Platform. - 7
- The number of control plane machines that you add to the cluster. Because the cluster uses these values as the number of etcd endpoints in the cluster, the value must match the number of control plane machines that you deploy.
- 8
- The cluster name that you specified in your DNS records.
- 9
- A block of IP addresses from which pod IP addresses are allocated. This block must not overlap with existing physical networks. These IP addresses are used for the pod network. If you need to access the pods from an external network, you must configure load balancers and routers to manage the traffic.Note
Class E CIDR range is reserved for a future use. To use the Class E CIDR range, you must ensure your networking environment accepts the IP addresses within the Class E CIDR range.
- 10
- The subnet prefix length to assign to each individual node. For example, if
hostPrefixis set to23, then each node is assigned a/23subnet out of the givencidr, which allows for 510 (2^(32 - 23) - 2) pod IPs addresses. If you are required to provide access to nodes from an external network, configure load balancers and routers to manage the traffic. - 11
- The IP address pool to use for service IP addresses. You can enter only one IP address pool. This block must not overlap with existing physical networks. If you need to access the services from an external network, configure load balancers and routers to manage the traffic.
- 12
- You must set the platform to
none. You cannot provide additional platform configuration variables for IBM Z infrastructure.WarningRed Hat Virtualization does not currently support installation with user-provisioned infrastructure on the oVirt platform. Therefore, you must set the platform to
none, allowing OpenShift Container Platform to identify each node as a bare-metal node and the cluster as a bare-metal cluster. This is the same as installing a cluster on any platform, and has the following limitations:- There will be no cluster provider so you must manually add each machine and there will be no node scaling capabilities.
- The oVirt CSI driver will not be installed and there will be no CSI capabilities.
- 13
- Whether to enable or disable FIPS mode. By default, FIPS mode is not enabled. If FIPS mode is enabled, the Red Hat Enterprise Linux CoreOS (RHCOS) machines that OpenShift Container Platform runs on bypass the default Kubernetes cryptography suite and use the cryptography modules that are provided with RHCOS instead.Important
The use of FIPS Validated / Modules in Process cryptographic libraries is only supported on OpenShift Container Platform deployments on the
x86_64architecture. - 14
- For
<local_registry>, specify the registry domain name, and optionally the port, that your mirror registry uses to serve content. For example,registry.example.comorregistry.example.com:5000. For<credentials>, specify the base64-encoded user name and password for your mirror registry. - 15
- The public portion of the default SSH key for the
coreuser in Red Hat Enterprise Linux CoreOS (RHCOS).NoteFor production OpenShift Container Platform clusters on which you want to perform installation debugging or disaster recovery, specify an SSH key that your
ssh-agentprocess uses. - 16
- Add the
additionalTrustBundleparameter and value. The value must be the contents of the certificate file that you used for your mirror registry, which can be an existing, trusted certificate authority or the self-signed certificate that you generated for the mirror registry. - 17
- Provide the
imageContentSourcessection from the output of the command to mirror the repository.
10.2.7.2. Configuring the cluster-wide proxy during installation
Production environments can deny direct access to the Internet and instead have an HTTP or HTTPS proxy available. You can configure a new OpenShift Container Platform cluster to use a proxy by configuring the proxy settings in the install-config.yaml file.
Prerequisites
-
You have an existing
install-config.yamlfile. You reviewed the sites that your cluster requires access to and determined whether any of them need to bypass the proxy. By default, all cluster egress traffic is proxied, including calls to hosting cloud provider APIs. You added sites to the
Proxyobject’sspec.noProxyfield to bypass the proxy if necessary.NoteThe
Proxyobjectstatus.noProxyfield is populated with the values of thenetworking.machineNetwork[].cidr,networking.clusterNetwork[].cidr, andnetworking.serviceNetwork[]fields from your installation configuration.For installations on Amazon Web Services (AWS), Google Cloud Platform (GCP), Microsoft Azure, and Red Hat OpenStack Platform (RHOSP), the
Proxyobjectstatus.noProxyfield is also populated with the instance metadata endpoint (169.254.169.254).
Procedure
Edit your
install-config.yamlfile and add the proxy settings. For example:apiVersion: v1 baseDomain: my.domain.com proxy: httpProxy: http://<username>:<pswd>@<ip>:<port>1 httpsProxy: https://<username>:<pswd>@<ip>:<port>2 noProxy: example.com3 additionalTrustBundle: |4 -----BEGIN CERTIFICATE----- <MY_TRUSTED_CA_CERT> -----END CERTIFICATE----- ...- 1
- A proxy URL to use for creating HTTP connections outside the cluster. The URL scheme must be
http. - 2
- A proxy URL to use for creating HTTPS connections outside the cluster.
- 3
- A comma-separated list of destination domain names, IP addresses, or other network CIDRs to exclude from proxying. Preface a domain with
.to match subdomains only. For example,.y.commatchesx.y.com, but noty.com. Use*to bypass the proxy for all destinations. - 4
- If provided, the installation program generates a config map that is named
user-ca-bundlein theopenshift-confignamespace to hold the additional CA certificates. If you provideadditionalTrustBundleand at least one proxy setting, theProxyobject is configured to reference theuser-ca-bundleconfig map in thetrustedCAfield. The Cluster Network Operator then creates atrusted-ca-bundleconfig map that merges the contents specified for thetrustedCAparameter with the RHCOS trust bundle. TheadditionalTrustBundlefield is required unless the proxy’s identity certificate is signed by an authority from the RHCOS trust bundle.
NoteThe installation program does not support the proxy
readinessEndpointsfield.- Save the file and reference it when installing OpenShift Container Platform.
The installation program creates a cluster-wide proxy that is named cluster that uses the proxy settings in the provided install-config.yaml file. If no proxy settings are provided, a cluster Proxy object is still created, but it will have a nil spec.
Only the Proxy object named cluster is supported, and no additional proxies can be created.
10.2.8. Creating the Kubernetes manifest and Ignition config files
Because you must modify some cluster definition files and manually start the cluster machines, you must generate the Kubernetes manifest and Ignition config files that the cluster needs to make its machines.
The installation configuration file transforms into the Kubernetes manifests. The manifests wrap into the Ignition configuration files, which are later used to create the cluster.
The Ignition config files that the installation program generates contain certificates that expire after 24 hours, which are then renewed at that time. If the cluster is shut down before renewing the certificates and the cluster is later restarted after the 24 hours have elapsed, the cluster automatically recovers the expired certificates. The exception is that you must manually approve the pending node-bootstrapper certificate signing requests (CSRs) to recover kubelet certificates. See the documentation for Recovering from expired control plane certificates for more information.
The installation program that generates the manifest and Ignition files is architecture specific and can be obtained from the client image mirror. The Linux version of the installation program runs on s390x only. This installer program is also available as a Mac OS version.
Prerequisites
- You obtained the OpenShift Container Platform installation program. For a restricted network installation, these files are on your mirror host.
-
You created the
install-config.yamlinstallation configuration file.
Procedure
Change to the directory that contains the installation program and generate the Kubernetes manifests for the cluster:
$ ./openshift-install create manifests --dir <installation_directory>1 - 1
- For
<installation_directory>, specify the installation directory that contains theinstall-config.yamlfile you created.
WarningIf you are installing a three-node cluster, skip the following step to allow the control plane nodes to be schedulable.
ImportantWhen you configure control plane nodes from the default unschedulable to schedulable, additional subscriptions are required. This is because control plane nodes then become worker nodes.
Check that the
mastersSchedulableparameter in the<installation_directory>/manifests/cluster-scheduler-02-config.ymlKubernetes manifest file is set tofalse. This setting prevents pods from being scheduled on the control plane machines:-
Open the
<installation_directory>/manifests/cluster-scheduler-02-config.ymlfile. -
Locate the
mastersSchedulableparameter and ensure that it is set tofalse. - Save and exit the file.
-
Open the
To create the Ignition configuration files, run the following command from the directory that contains the installation program:
$ ./openshift-install create ignition-configs --dir <installation_directory>1 - 1
- For
<installation_directory>, specify the same installation directory.
The following files are generated in the directory:
. ├── auth │ ├── kubeadmin-password │ └── kubeconfig ├── bootstrap.ign ├── master.ign ├── metadata.json └── worker.ign
10.2.9. Fast-track installation: Creating Red Hat Enterprise Linux CoreOS (RHCOS) machines
Before you install a cluster on IBM Z infrastructure that you provision, you must install RHCOS as Red Hat Enterprise Linux (RHEL) guest virtual machines for the cluster to use. Complete the following steps to create the machines in a fast-track installation of Red Hat Enterprise Linux CoreOS (RHCOS), importing a prepackaged Red Hat Enterprise Linux CoreOS (RHCOS) QEMU copy-on-write (QCOW2) disk image.
Prerequisites
- At least one LPAR running RHEL 8.4 with KVM, referred to as RHEL KVM host in this procedure.
- The KVM/QEMU hypervisor is installed on the RHEL KVM host.
- A domain name server (DNS) that can perform hostname and reverse lookup for the nodes.
- A DHCP server that provides IP addresses.
Procedure
Obtain the RHEL QEMU copy-on-write (QCOW2) disk image file from the Product Downloads page on the Red Hat Customer Portal or from the RHCOS image mirror page.
ImportantThe RHCOS images might not change with every release of OpenShift Container Platform. You must download images with the highest version that is less than or equal to the OpenShift Container Platform version that you install. Only use the appropriate RHCOS QCOW2 image described in the following procedure.
Download the QCOW2 disk image and Ignition files to a common directory on the RHEL KVM host.
For example:
/var/lib/libvirt/imagesNoteThe Ignition files are generated by the OpenShift Container Platform installer.
Create a new disk image with the QCOW2 disk image backing file for each KVM guest node.
$ qemu-img create -f qcow2 -F qcow2 -b /var/lib/libvirt/images/{source_rhcos_qemu} /var/lib/libvirt/images/{vmname}.qcow2 {size}Create the new KVM guest nodes using the Ignition file and the new disk image.
$ virt-install --noautoconsole \ --connect qemu:///system \ --name {vn_name} \ --memory {memory} \ --vcpus {vcpus} \ --disk {disk} \ --import \ --network network={network},mac={mac} \ --qemu-commandline="-drive \ if=none,id=ignition,format=raw,file={ign_file},readonly=on -device virtio-blk,serial=ignition,drive=ignition"
10.2.10. Full installation: Creating Red Hat Enterprise Linux CoreOS (RHCOS) machines
Before you install a cluster on IBM Z infrastructure that you provision, you must install RHCOS as Red Hat Enterprise Linux (RHEL) guest virtual machines for the cluster to use. Complete the following steps to create the machines in a full installation on a new QEMU copy-on-write (QCOW2) disk image.
Prerequisites
- At least 1 LPAR running RHEL 8.3 with KVM, referred to as RHEL KVM host in this procedure.
- The KVM/QEMU hypervisor is installed on the RHEL KVM host.
- A domain name server (DNS) that can perform hostname and reverse lookup for the nodes.
- An HTTP or HTTPS server is set up.
Procedure
Obtain the RHEL kernel, initramfs, and rootfs files from the Product Downloads page on the Red Hat Customer Portal or from the RHCOS image mirror page.
ImportantThe RHCOS images might not change with every release of OpenShift Container Platform. You must download images with the highest version that is less than or equal to the OpenShift Container Platform version that you install. Only use the appropriate RHCOS QCOW2 image described in the following procedure.
The file names contain the OpenShift Container Platform version number. They resemble the following examples:
-
kernel:
rhcos-<version>-live-kernel-<architecture> -
initramfs:
rhcos-<version>-live-initramfs.<architecture>.img -
rootfs:
rhcos-<version>-live-rootfs.<architecture>.img
-
kernel:
Move the downloaded RHEL live kernel, initramfs, and rootfs as well as the Ignition files to an HTTP or HTTPS server before you launch
virt-install.NoteThe Ignition files are generated by the OpenShift Container Platform installer.
Create the new KVM guest nodes using the RHEL kernel, initramfs, and Ignition files, the new disk image, and adjusted parm line arguments.
-
For
--location, specify the location of the kernel/initrd on the HTTP or HTTPS server. -
For
coreos.inst.ignition_url=, specify the Ignition file for the machine role. Usebootstrap.ign,master.ign, orworker.ign. Only HTTP and HTTPS protocols are supported. For
coreos.live.rootfs_url=, specify the matching rootfs artifact for the kernel and initramfs you are booting. Only HTTP and HTTPS protocols are supported.$ virt-install \ --connect qemu:///system \ --name {vn_name} \ --vcpus {vcpus} \ --memory {memory_mb} \ --disk {vn_name}.qcow2,size={image_size| default(10,true)} \ --network network={virt_network_parm} \ --boot hd \ --location {media_location},kernel={rhcos_kernel},initrd={rhcos_initrd} \ --extra-args "rd.neednet=1 dfltcc=off coreos.inst=yes coreos.inst.install_dev=vda coreos.live.rootfs_url={rhcos_liveos} ip={ip}::{default_gateway}:{subnet_mask_length}:{vn_name}:enc1:none:{MTU} nameserver={dns} coreos.inst.ignition_url={rhcos_ign}" \ --noautoconsole \ --waitNotedfltcc=offis required for IBM z15 and LinuxONE III.
-
For
10.2.11. Creating the cluster
To create the OpenShift Container Platform cluster, you wait for the bootstrap process to complete on the machines that you provisioned by using the Ignition config files that you generated with the installation program.
Prerequisites
- Create the required infrastructure for the cluster.
- You obtained the installation program and generated the Ignition config files for your cluster.
- You used the Ignition config files to create RHCOS machines for your cluster.
- Your machines have direct Internet access or have an HTTP or HTTPS proxy available.
Procedure
Monitor the bootstrap process:
$ ./openshift-install --dir <installation_directory> wait-for bootstrap-complete \1 --log-level=info2 Example output
INFO Waiting up to 30m0s for the Kubernetes API at https://api.test.example.com:6443... INFO API v1.20.0 up INFO Waiting up to 30m0s for bootstrapping to complete... INFO It is now safe to remove the bootstrap resourcesThe command succeeds when the Kubernetes API server signals that it has been bootstrapped on the control plane machines.
After bootstrap process is complete, remove the bootstrap machine from the load balancer.
ImportantYou must remove the bootstrap machine from the load balancer at this point. You can also remove or reformat the machine itself.
10.2.12. Logging in to the cluster by using the CLI
You can log in to your cluster as a default system user by exporting the cluster kubeconfig file. The kubeconfig file contains information about the cluster that is used by the CLI to connect a client to the correct cluster and API server. The file is specific to a cluster and is created during OpenShift Container Platform installation.
Prerequisites
- You deployed an OpenShift Container Platform cluster.
-
You installed the
ocCLI.
Procedure
Export the
kubeadmincredentials:$ export KUBECONFIG=<installation_directory>/auth/kubeconfig1 - 1
- For
<installation_directory>, specify the path to the directory that you stored the installation files in.
Verify you can run
occommands successfully using the exported configuration:$ oc whoamiExample output
system:admin
10.2.13. Approving the certificate signing requests for your machines
When you add machines to a cluster, two pending certificate signing requests (CSRs) are generated for each machine that you added. You must confirm that these CSRs are approved or, if necessary, approve them yourself. The client requests must be approved first, followed by the server requests.
Prerequisites
- You added machines to your cluster.
Procedure
Confirm that the cluster recognizes the machines:
$ oc get nodesExample output
NAME STATUS ROLES AGE VERSION master-0 Ready master 63m v1.20.0 master-1 Ready master 63m v1.20.0 master-2 Ready master 64m v1.20.0The output lists all of the machines that you created.
NoteThe preceding output might not include the compute nodes, also known as worker nodes, until some CSRs are approved.
Review the pending CSRs and ensure that you see the client requests with the
PendingorApprovedstatus for each machine that you added to the cluster:$ oc get csrExample output
NAME AGE REQUESTOR CONDITION csr-mddf5 20m system:node:master-01.example.com Approved,Issued csr-z5rln 16m system:node:worker-21.example.com Approved,IssuedIf the CSRs were not approved, after all of the pending CSRs for the machines you added are in
Pendingstatus, approve the CSRs for your cluster machines:NoteBecause the CSRs rotate automatically, approve your CSRs within an hour of adding the machines to the cluster. If you do not approve them within an hour, the certificates will rotate, and more than two certificates will be present for each node. You must approve all of these certificates. Once the client CSR is approved, the Kubelet creates a secondary CSR for the serving certificate, which requires manual approval. Then, subsequent serving certificate renewal requests are automatically approved by the
machine-approverif the Kubelet requests a new certificate with identical parameters.NoteFor clusters running on platforms that are not machine API enabled, such as bare metal and other user-provisioned infrastructure, you must implement a method of automatically approving the kubelet serving certificate requests (CSRs). If a request is not approved, then the
oc exec,oc rsh, andoc logscommands cannot succeed, because a serving certificate is required when the API server connects to the kubelet. Any operation that contacts the Kubelet endpoint requires this certificate approval to be in place. The method must watch for new CSRs, confirm that the CSR was submitted by thenode-bootstrapperservice account in thesystem:nodeorsystem:admingroups, and confirm the identity of the node.To approve them individually, run the following command for each valid CSR:
$ oc adm certificate approve <csr_name>1 - 1
<csr_name>is the name of a CSR from the list of current CSRs.
To approve all pending CSRs, run the following command:
$ oc get csr -o go-template='{{range .items}}{{if not .status}}{{.metadata.name}}{{"\n"}}{{end}}{{end}}' | xargs --no-run-if-empty oc adm certificate approveNoteSome Operators might not become available until some CSRs are approved.
Now that your client requests are approved, you must review the server requests for each machine that you added to the cluster:
$ oc get csrExample output
NAME AGE REQUESTOR CONDITION csr-bfd72 5m26s system:node:ip-10-0-50-126.us-east-2.compute.internal Pending csr-c57lv 5m26s system:node:ip-10-0-95-157.us-east-2.compute.internal Pending ...If the remaining CSRs are not approved, and are in the
Pendingstatus, approve the CSRs for your cluster machines:To approve them individually, run the following command for each valid CSR:
$ oc adm certificate approve <csr_name>1 - 1
<csr_name>is the name of a CSR from the list of current CSRs.
To approve all pending CSRs, run the following command:
$ oc get csr -o go-template='{{range .items}}{{if not .status}}{{.metadata.name}}{{"\n"}}{{end}}{{end}}' | xargs oc adm certificate approve
After all client and server CSRs have been approved, the machines have the
Readystatus. Verify this by running the following command:$ oc get nodesExample output
NAME STATUS ROLES AGE VERSION master-0 Ready master 73m v1.20.0 master-1 Ready master 73m v1.20.0 master-2 Ready master 74m v1.20.0 worker-0 Ready worker 11m v1.20.0 worker-1 Ready worker 11m v1.20.0NoteIt can take a few minutes after approval of the server CSRs for the machines to transition to the
Readystatus.
Additional information
- For more information on CSRs, see Certificate Signing Requests.
10.2.14. Initial Operator configuration
After the control plane initializes, you must immediately configure some Operators so that they all become available.
Prerequisites
- Your control plane has initialized.
Procedure
Watch the cluster components come online:
$ watch -n5 oc get clusteroperatorsExample output
NAME VERSION AVAILABLE PROGRESSING DEGRADED SINCE authentication 4.7.0 True False False 3h56m baremetal 4.7.0 True False False 29h cloud-credential 4.7.0 True False False 29h cluster-autoscaler 4.7.0 True False False 29h config-operator 4.7.0 True False False 6h39m console 4.7.0 True False False 3h59m csi-snapshot-controller 4.7.0 True False False 4h12m dns 4.7.0 True False False 4h15m etcd 4.7.0 True False False 29h image-registry 4.7.0 True False False 3h59m ingress 4.7.0 True False False 4h30m insights 4.7.0 True False False 29h kube-apiserver 4.7.0 True False False 29h kube-controller-manager 4.7.0 True False False 29h kube-scheduler 4.7.0 True False False 29h kube-storage-version-migrator 4.7.0 True False False 4h2m machine-api 4.7.0 True False False 29h machine-approver 4.7.0 True False False 6h34m machine-config 4.7.0 True False False 3h56m marketplace 4.7.0 True False False 4h2m monitoring 4.7.0 True False False 6h31m network 4.7.0 True False False 29h node-tuning 4.7.0 True False False 4h30m openshift-apiserver 4.7.0 True False False 3h56m openshift-controller-manager 4.7.0 True False False 4h36m openshift-samples 4.7.0 True False False 4h30m operator-lifecycle-manager 4.7.0 True False False 29h operator-lifecycle-manager-catalog 4.7.0 True False False 29h operator-lifecycle-manager-packageserver 4.7.0 True False False 3h59m service-ca 4.7.0 True False False 29h storage 4.7.0 True False False 4h30m- Configure the Operators that are not available.
10.2.14.1. Disabling the default OperatorHub sources
Operator catalogs that source content provided by Red Hat and community projects are configured for OperatorHub by default during an OpenShift Container Platform installation. In a restricted network environment, you must disable the default catalogs as a cluster administrator.
Procedure
Disable the sources for the default catalogs by adding
disableAllDefaultSources: trueto theOperatorHubobject:$ oc patch OperatorHub cluster --type json \ -p '[{"op": "add", "path": "/spec/disableAllDefaultSources", "value": true}]'
Alternatively, you can use the web console to manage catalog sources. From the Administration → Cluster Settings → Global Configuration → OperatorHub page, click the Sources tab, where you can create, delete, disable, and enable individual sources.
10.2.14.2. Image registry storage configuration
The Image Registry Operator is not initially available for platforms that do not provide default storage. After installation, you must configure your registry to use storage so that the Registry Operator is made available.
Instructions are shown for configuring a persistent volume, which is required for production clusters. Where applicable, instructions are shown for configuring an empty directory as the storage location, which is available for only non-production clusters.
Additional instructions are provided for allowing the image registry to use block storage types by using the Recreate rollout strategy during upgrades.
10.2.14.2.1. Configuring registry storage for IBM Z
As a cluster administrator, following installation you must configure your registry to use storage.
Prerequisites
- Cluster administrator permissions.
- A cluster on IBM Z.
Persistent storage provisioned for your cluster.
ImportantOpenShift Container Platform supports
ReadWriteOnceaccess for image registry storage when you have only one replica. To deploy an image registry that supports high availability with two or more replicas,ReadWriteManyaccess is required.- Must have 100Gi capacity.
Procedure
To configure your registry to use storage, change the
spec.storage.pvcin theconfigs.imageregistry/clusterresource.NoteWhen using shared storage, review your security settings to prevent outside access.
Verify that you do not have a registry pod:
$ oc get pod -n openshift-image-registry -l docker-registry=defaultExample output
No resourses found in openshift-image-registry namespaceNoteIf you do have a registry pod in your output, you do not need to continue with this procedure.
Check the registry configuration:
$ oc edit configs.imageregistry.operator.openshift.ioExample output
storage: pvc: claim:Leave the
claimfield blank to allow the automatic creation of animage-registry-storagePVC.Check the
clusteroperatorstatus:$ oc get clusteroperator image-registryExample output
NAME VERSION AVAILABLE PROGRESSING DEGRADED SINCE MESSAGE image-registry 4.7 True False False 6h50mEnsure that your registry is set to managed to enable building and pushing of images.
Run:
$ oc edit configs.imageregistry/clusterThen, change the line
managementState: Removedto
managementState: Managed
10.2.14.2.2. Configuring storage for the image registry in non-production clusters
You must configure storage for the Image Registry Operator. For non-production clusters, you can set the image registry to an empty directory. If you do so, all images are lost if you restart the registry.
Procedure
To set the image registry storage to an empty directory:
$ oc patch configs.imageregistry.operator.openshift.io cluster --type merge --patch '{"spec":{"storage":{"emptyDir":{}}}}'WarningConfigure this option for only non-production clusters.
If you run this command before the Image Registry Operator initializes its components, the
oc patchcommand fails with the following error:Error from server (NotFound): configs.imageregistry.operator.openshift.io "cluster" not foundWait a few minutes and run the command again.
10.2.15. Completing installation on user-provisioned infrastructure
After you complete the Operator configuration, you can finish installing the cluster on infrastructure that you provide.
Prerequisites
- Your control plane has initialized.
- You have completed the initial Operator configuration.
Procedure
Confirm that all the cluster components are online with the following command:
$ watch -n5 oc get clusteroperatorsExample output
NAME VERSION AVAILABLE PROGRESSING DEGRADED SINCE authentication 4.7.0 True False False 3h56m baremetal 4.7.0 True False False 29h cloud-credential 4.7.0 True False False 29h cluster-autoscaler 4.7.0 True False False 29h config-operator 4.7.0 True False False 6h39m console 4.7.0 True False False 3h59m csi-snapshot-controller 4.7.0 True False False 4h12m dns 4.7.0 True False False 4h15m etcd 4.7.0 True False False 29h image-registry 4.7.0 True False False 3h59m ingress 4.7.0 True False False 4h30m insights 4.7.0 True False False 29h kube-apiserver 4.7.0 True False False 29h kube-controller-manager 4.7.0 True False False 29h kube-scheduler 4.7.0 True False False 29h kube-storage-version-migrator 4.7.0 True False False 4h2m machine-api 4.7.0 True False False 29h machine-approver 4.7.0 True False False 6h34m machine-config 4.7.0 True False False 3h56m marketplace 4.7.0 True False False 4h2m monitoring 4.7.0 True False False 6h31m network 4.7.0 True False False 29h node-tuning 4.7.0 True False False 4h30m openshift-apiserver 4.7.0 True False False 3h56m openshift-controller-manager 4.7.0 True False False 4h36m openshift-samples 4.7.0 True False False 4h30m operator-lifecycle-manager 4.7.0 True False False 29h operator-lifecycle-manager-catalog 4.7.0 True False False 29h operator-lifecycle-manager-packageserver 4.7.0 True False False 3h59m service-ca 4.7.0 True False False 29h storage 4.7.0 True False False 4h30mAlternatively, the following command notifies you when all of the clusters are available. It also retrieves and displays credentials:
$ ./openshift-install --dir <installation_directory> wait-for install-complete1 - 1
- For
<installation_directory>, specify the path to the directory that you stored the installation files in.
Example output
INFO Waiting up to 30m0s for the cluster to initialize...The command succeeds when the Cluster Version Operator finishes deploying the OpenShift Container Platform cluster from Kubernetes API server.
Important-
The Ignition config files that the installation program generates contain certificates that expire after 24 hours, which are then renewed at that time. If the cluster is shut down before renewing the certificates and the cluster is later restarted after the 24 hours have elapsed, the cluster automatically recovers the expired certificates. The exception is that you must manually approve the pending
node-bootstrappercertificate signing requests (CSRs) to recover kubelet certificates. See the documentation for Recovering from expired control plane certificates for more information. - It is recommended that you use Ignition config files within 12 hours after they are generated because the 24-hour certificate rotates from 16 to 22 hours after the cluster is installed. By using the Ignition config files within 12 hours, you can avoid installation failure if the certificate update runs during installation.
Confirm that the Kubernetes API server is communicating with the pods.
To view a list of all pods, use the following command:
$ oc get pods --all-namespacesExample output
NAMESPACE NAME READY STATUS RESTARTS AGE openshift-apiserver-operator openshift-apiserver-operator-85cb746d55-zqhs8 1/1 Running 1 9m openshift-apiserver apiserver-67b9g 1/1 Running 0 3m openshift-apiserver apiserver-ljcmx 1/1 Running 0 1m openshift-apiserver apiserver-z25h4 1/1 Running 0 2m openshift-authentication-operator authentication-operator-69d5d8bf84-vh2n8 1/1 Running 0 5m ...View the logs for a pod that is listed in the output of the previous command by using the following command:
$ oc logs <pod_name> -n <namespace>1 - 1
- Specify the pod name and namespace, as shown in the output of the previous command.
If the pod logs display, the Kubernetes API server can communicate with the cluster machines.
For an installation with Fibre Channel Protocol (FCP), additional steps are required to enable multipathing. Do not enable multipathing during installation.
See "Enabling multipathing with kernel arguments on RHCOS" in the Post-installation configuration documentation for more information.
All the worker nodes are restarted. To monitor the process, enter the following command:
$ oc get nodes -wNoteIf you have additional machine types such as infrastructure nodes, repeat the process for these types.
10.2.16. Telemetry access for OpenShift Container Platform
In OpenShift Container Platform 4.7, the Telemetry service, which runs by default to provide metrics about cluster health and the success of updates, requires internet access. If your cluster is connected to the internet, Telemetry runs automatically, and your cluster is registered to OpenShift Cluster Manager.
After you confirm that your OpenShift Cluster Manager inventory is correct, either maintained automatically by Telemetry or manually by using OpenShift Cluster Manager, use subscription watch to track your OpenShift Container Platform subscriptions at the account or multi-cluster level.
10.2.17. Collecting debugging information
You can gather debugging information that might help you to troubleshoot and debug certain issues with an OpenShift Container Platform installation on IBM Z.
Prerequisites
-
The
ocCLI tool installed.
Procedure
Log in to the cluster:
$ oc login -u <username>On the node you want to gather hardware information about, start a debugging container:
$ oc debug node/<nodename>Change to the /host file system and start
toolbox:$ chroot /host $ toolboxCollect the
dbginfodata:$ dbginfo.sh-
You can then retrieve the data, for example, using
scp.
10.2.18. Next steps
- Customize your cluster.
- If the mirror registry that you used to install your cluster has a trusted CA, add it to the cluster by configuring additional trust stores.
Chapter 11. Installing on IBM Power Systems
11.1. Installing a cluster on IBM Power Systems
In OpenShift Container Platform version 4.7, you can install a cluster on IBM Power Systems infrastructure that you provision.
Additional considerations exist for non-bare metal platforms. Review the information in the guidelines for deploying OpenShift Container Platform on non-tested platforms before you install an OpenShift Container Platform cluster.
Prerequisites
- Before you begin the installation process, you must clean the installation directory. This ensures that the required installation files are created and updated during the installation process.
-
Provision persistent storage using NFS for your cluster. To deploy a private image registry, your storage must provide
ReadWriteManyaccess modes. - Review details about the OpenShift Container Platform installation and update processes.
If you use a firewall, you must configure it to allow the sites that your cluster requires access to.
NoteBe sure to also review this site list if you are configuring a proxy.
11.1.1. Internet access for OpenShift Container Platform
In OpenShift Container Platform 4.7, you require access to the Internet to install your cluster.
You must have Internet access to:
- Access OpenShift Cluster Manager to download the installation program and perform subscription management. If the cluster has internet access and you do not disable Telemetry, that service automatically entitles your cluster.
- Access Quay.io to obtain the packages that are required to install your cluster.
- Obtain the packages that are required to perform cluster updates.
If your cluster cannot have direct Internet access, you can perform a restricted network installation on some types of infrastructure that you provision. During that process, you download the content that is required and use it to populate a mirror registry with the packages that you need to install a cluster and generate the installation program. With some installation types, the environment that you install your cluster in will not require Internet access. Before you update the cluster, you update the content of the mirror registry.
11.1.2. Machine requirements for a cluster with user-provisioned infrastructure
For a cluster that contains user-provisioned infrastructure, you must deploy all of the required machines.
11.1.2.1. Required machines
The smallest OpenShift Container Platform clusters require the following hosts:
- One temporary bootstrap machine
- Three control plane, or master, machines
- At least two compute machines, which are also known as worker machines.
The cluster requires the bootstrap machine to deploy the OpenShift Container Platform cluster on the three control plane machines. You can remove the bootstrap machine after you install the cluster.
To improve high availability of your cluster, distribute the control plane machines over different z/VM instances on at least two physical machines.
The bootstrap and control plane machines must use Red Hat Enterprise Linux CoreOS (RHCOS) as the operating system. However, the compute machines can choose between Red Hat Enterprise Linux CoreOS (RHCOS) or Red Hat Enterprise Linux (RHEL) 7.9.
Note that RHCOS is based on Red Hat Enterprise Linux (RHEL) 8 and inherits all of its hardware certifications and requirements. See Red Hat Enterprise Linux technology capabilities and limits.
11.1.2.2. Network connectivity requirements
All the Red Hat Enterprise Linux CoreOS (RHCOS) machines require network in initramfs during boot to fetch Ignition config files from the Machine Config Server. The machines are configured with static IP addresses. No DHCP server is required. Additionally, each OpenShift Container Platform node in the cluster must have access to a Network Time Protocol (NTP) server.
11.1.2.3. IBM Z network connectivity requirements
To install on IBM Z under z/VM, you require a single z/VM virtual NIC in layer 2 mode. You also need:
- A direct-attached OSA or RoCE network adapter
- A z/VM VSwitch set up. For a preferred setup, use OSA link aggregation.
11.1.2.4. Minimum resource requirements
Each cluster machine must meet the following minimum requirements:
| Machine | Operating System | vCPU [1] | Virtual RAM | Storage | IOPS |
|---|---|---|---|---|---|
| Bootstrap | RHCOS | 2 | 16 GB | 100 GB | N/A |
| Control plane | RHCOS | 2 | 16 GB | 100 GB | N/A |
| Compute | RHCOS | 2 | 8 GB | 100 GB | N/A |
- One physical core (IFL) provides two logical cores (threads) when SMT-2 is enabled. The hypervisor can provide two or more vCPUs.
11.1.2.5. Minimum IBM Power Systems requirements
You can install OpenShift Container Platform version 4.7 on the following IBM hardware:
- IBM POWER8 or POWER9 processor-based systems
Hardware requirements
- 6 IBM Power bare metal servers or 6 LPARs across multiple PowerVM servers
Operating system requirements
- One instance of an IBM POWER8 or POWER9 processor-based system
On your IBM Power instance, set up:
- 3 guest virtual machines for OpenShift Container Platform control plane machines
- 2 guest virtual machines for OpenShift Container Platform compute machines
- 1 guest virtual machine for the temporary OpenShift Container Platform bootstrap machine
Disk storage for the IBM Power guest virtual machines
- Storage provisioned by the Virtual I/O Server using vSCSI, NPIV (N-Port ID Virtualization) or SSP (shared storage pools)
Network for the PowerVM guest virtual machines
- Virtualized by the Virtual I/O Server using Shared Ethernet Adapter
- Virtualized by the Virtual I/O Server using IBM vNIC
Storage / main memory
- 100 GB / 16 GB for OpenShift Container Platform control plane machines
- 100 GB / 8 GB for OpenShift Container Platform compute machines
- 100 GB / 16 GB for the temporary OpenShift Container Platform bootstrap machine
11.1.2.6. Recommended IBM Power system requirements
Hardware requirements
- 6 IBM Power bare metal servers or 6 LPARs across multiple PowerVM servers
Operating system requirements
- One instance of an IBM POWER8 or POWER9 processor-based system
On your IBM Power instance, set up:
- 3 guest virtual machines for OpenShift Container Platform control plane machines
- 2 guest virtual machines for OpenShift Container Platform compute machines
- 1 guest virtual machine for the temporary OpenShift Container Platform bootstrap machine
Disk storage for the IBM Power guest virtual machines
- Storage provisioned by the Virtual I/O Server using vSCSI, NPIV (N-Port ID Virtualization) or SSP (shared storage pools)
Network for the PowerVM guest virtual machines
- Virtualized by the Virtual I/O Server using Shared Ethernet Adapter
- Virtualized by the Virtual I/O Server using IBM vNIC
Storage / main memory
- 120 GB / 32 GB for OpenShift Container Platform control plane machines
- 120 GB / 32 GB for OpenShift Container Platform compute machines
- 120 GB / 16 GB for the temporary OpenShift Container Platform bootstrap machine
11.1.2.7. Certificate signing requests management
Because your cluster has limited access to automatic machine management when you use infrastructure that you provision, you must provide a mechanism for approving cluster certificate signing requests (CSRs) after installation. The kube-controller-manager only approves the kubelet client CSRs. The machine-approver cannot guarantee the validity of a serving certificate that is requested by using kubelet credentials because it cannot confirm that the correct machine issued the request. You must determine and implement a method of verifying the validity of the kubelet serving certificate requests and approving them.
11.1.3. Creating the user-provisioned infrastructure
Before you deploy an OpenShift Container Platform cluster that uses user-provisioned infrastructure, you must create the underlying infrastructure.
Prerequisites
- Review the OpenShift Container Platform 4.x Tested Integrations page before you create the supporting infrastructure for your cluster.
Procedure
- Set up static IP addresses.
- Set up an HTTP or HTTPS server to provide Ignition files to the cluster nodes.
- Provision the required load balancers.
- Configure the ports for your machines.
- Configure DNS.
- Ensure network connectivity.
11.1.3.1. Networking requirements for user-provisioned infrastructure
All the Red Hat Enterprise Linux CoreOS (RHCOS) machines require network in initramfs during boot to fetch Ignition config from the machine config server.
During the initial boot, the machines require an HTTP or HTTPS server to establish a network connection to download their Ignition config files.
Ensure that the machines have persistent IP addresses and host names.
The Kubernetes API server must be able to resolve the node names of the cluster machines. If the API servers and worker nodes are in different zones, you can configure a default DNS search zone to allow the API server to resolve the node names. Another supported approach is to always refer to hosts by their fully-qualified domain names in both the node objects and all DNS requests.
You must configure the network connectivity between machines to allow cluster components to communicate. Each machine must be able to resolve the host names of all other machines in the cluster.
| Protocol | Port | Description |
|---|---|---|
| ICMP | N/A | Network reachability tests |
| TCP |
| Metrics |
|
|
Host level services, including the node exporter on ports | |
|
| The default ports that Kubernetes reserves | |
|
| openshift-sdn | |
| UDP |
| VXLAN and Geneve |
|
| VXLAN and Geneve | |
|
|
Host level services, including the node exporter on ports | |
| TCP/UDP |
| Kubernetes node port |
| Protocol | Port | Description |
|---|---|---|
| TCP |
| Kubernetes API |
| Protocol | Port | Description |
|---|---|---|
| TCP |
| etcd server and peer ports |
Network topology requirements
The infrastructure that you provision for your cluster must meet the following network topology requirements.
OpenShift Container Platform requires all nodes to have internet access to pull images for platform containers and provide telemetry data to Red Hat.
Load balancers
Before you install OpenShift Container Platform, you must provision two load balancers that meet the following requirements:
API load balancer: Provides a common endpoint for users, both human and machine, to interact with and configure the platform. Configure the following conditions:
- Layer 4 load balancing only. This can be referred to as Raw TCP, SSL Passthrough, or SSL Bridge mode. If you use SSL Bridge mode, you must enable Server Name Indication (SNI) for the API routes.
- A stateless load balancing algorithm. The options vary based on the load balancer implementation.
ImportantDo not configure session persistence for an API load balancer.
Configure the following ports on both the front and back of the load balancers:
Expand Table 11.5. API load balancer Port Back-end machines (pool members) Internal External Description 6443Bootstrap and control plane. You remove the bootstrap machine from the load balancer after the bootstrap machine initializes the cluster control plane. You must configure the
/readyzendpoint for the API server health check probe.X
X
Kubernetes API server
22623Bootstrap and control plane. You remove the bootstrap machine from the load balancer after the bootstrap machine initializes the cluster control plane.
X
Machine config server
NoteThe load balancer must be configured to take a maximum of 30 seconds from the time the API server turns off the
/readyzendpoint to the removal of the API server instance from the pool. Within the time frame after/readyzreturns an error or becomes healthy, the endpoint must have been removed or added. Probing every 5 or 10 seconds, with two successful requests to become healthy and three to become unhealthy, are well-tested values.Application Ingress load balancer: Provides an Ingress point for application traffic flowing in from outside the cluster. Configure the following conditions:
- Layer 4 load balancing only. This can be referred to as Raw TCP, SSL Passthrough, or SSL Bridge mode. If you use SSL Bridge mode, you must enable Server Name Indication (SNI) for the Ingress routes.
- A connection-based or session-based persistence is recommended, based on the options available and types of applications that will be hosted on the platform.
Configure the following ports on both the front and back of the load balancers:
Expand Table 11.6. Application Ingress load balancer Port Back-end machines (pool members) Internal External Description 443The machines that run the Ingress router pods, compute, or worker, by default.
X
X
HTTPS traffic
80The machines that run the Ingress router pods, compute, or worker, by default.
X
X
HTTP traffic
If the true IP address of the client can be seen by the load balancer, enabling source IP-based session persistence can improve performance for applications that use end-to-end TLS encryption.
A working configuration for the Ingress router is required for an OpenShift Container Platform cluster. You must configure the Ingress router after the control plane initializes.
NTP configuration
OpenShift Container Platform clusters are configured to use a public Network Time Protocol (NTP) server by default. If you want to use a local enterprise NTP server, or if your cluster is being deployed in a disconnected network, you can configure the cluster to use a specific time server. For more information, see the documentation for Configuring chrony time service.
11.1.3.2. User-provisioned DNS requirements
DNS is used for name resolution and reverse name resolution. DNS A/AAAA or CNAME records are used for name resolution and PTR records are used for reverse name resolution. The reverse records are important because Red Hat Enterprise Linux CoreOS (RHCOS) uses the reverse records to set the host name for all the nodes. Additionally, the reverse records are used to generate the certificate signing requests (CSR) that OpenShift Container Platform needs to operate.
The following DNS records are required for an OpenShift Container Platform cluster that uses user-provisioned infrastructure. In each record, <cluster_name> is the cluster name and <base_domain> is the cluster base domain that you specify in the install-config.yaml file. A complete DNS record takes the form: <component>.<cluster_name>.<base_domain>..
| Component | Record | Description |
|---|---|---|
| Kubernetes API |
| Add a DNS A/AAAA or CNAME record, and a DNS PTR record, to identify the load balancer for the control plane machines. These records must be resolvable by both clients external to the cluster and from all the nodes within the cluster. |
|
| Add a DNS A/AAAA or CNAME record, and a DNS PTR record, to identify the load balancer for the control plane machines. These records must be resolvable from all the nodes within the cluster. Important The API server must be able to resolve the worker nodes by the host names that are recorded in Kubernetes. If the API server cannot resolve the node names, then proxied API calls can fail, and you cannot retrieve logs from pods. | |
| Routes |
| Add a wildcard DNS A/AAAA or CNAME record that refers to the load balancer that targets the machines that run the Ingress router pods, which are the worker nodes by default. These records must be resolvable by both clients external to the cluster and from all the nodes within the cluster. |
| Bootstrap |
| Add a DNS A/AAAA or CNAME record, and a DNS PTR record, to identify the bootstrap machine. These records must be resolvable by the nodes within the cluster. |
| Master hosts |
| DNS A/AAAA or CNAME records and DNS PTR records to identify each machine for the control plane nodes (also known as the master nodes). These records must be resolvable by the nodes within the cluster. |
| Worker hosts |
| Add DNS A/AAAA or CNAME records and DNS PTR records to identify each machine for the worker nodes. These records must be resolvable by the nodes within the cluster. |
You can use the nslookup <hostname> command to verify name resolution. You can use the dig -x <ip_address> command to verify reverse name resolution for the PTR records.
The following example of a BIND zone file shows sample A records for name resolution. The purpose of the example is to show the records that are needed. The example is not meant to provide advice for choosing one name resolution service over another.
Example 11.1. Sample DNS zone database
$TTL 1W
@ IN SOA ns1.example.com. root (
2019070700 ; serial
3H ; refresh (3 hours)
30M ; retry (30 minutes)
2W ; expiry (2 weeks)
1W ) ; minimum (1 week)
IN NS ns1.example.com.
IN MX 10 smtp.example.com.
;
;
ns1 IN A 192.168.1.5
smtp IN A 192.168.1.5
;
helper IN A 192.168.1.5
helper.ocp4 IN A 192.168.1.5
;
; The api identifies the IP of your load balancer.
api.ocp4 IN A 192.168.1.5
api-int.ocp4 IN A 192.168.1.5
;
; The wildcard also identifies the load balancer.
*.apps.ocp4 IN A 192.168.1.5
;
; Create an entry for the bootstrap host.
bootstrap.ocp4 IN A 192.168.1.96
;
; Create entries for the master hosts.
master0.ocp4 IN A 192.168.1.97
master1.ocp4 IN A 192.168.1.98
master2.ocp4 IN A 192.168.1.99
;
; Create entries for the worker hosts.
worker0.ocp4 IN A 192.168.1.11
worker1.ocp4 IN A 192.168.1.7
;
;EOFThe following example BIND zone file shows sample PTR records for reverse name resolution.
Example 11.2. Sample DNS zone database for reverse records
$TTL 1W
@ IN SOA ns1.example.com. root (
2019070700 ; serial
3H ; refresh (3 hours)
30M ; retry (30 minutes)
2W ; expiry (2 weeks)
1W ) ; minimum (1 week)
IN NS ns1.example.com.
;
; The syntax is "last octet" and the host must have an FQDN
; with a trailing dot.
97 IN PTR master0.ocp4.example.com.
98 IN PTR master1.ocp4.example.com.
99 IN PTR master2.ocp4.example.com.
;
96 IN PTR bootstrap.ocp4.example.com.
;
5 IN PTR api.ocp4.example.com.
5 IN PTR api-int.ocp4.example.com.
;
11 IN PTR worker0.ocp4.example.com.
7 IN PTR worker1.ocp4.example.com.
;
;EOF11.1.4. Generating an SSH private key and adding it to the agent
If you want to perform installation debugging or disaster recovery on your cluster, you must provide an SSH key to both your ssh-agent and the installation program. You can use this key to access the bootstrap machine in a public cluster to troubleshoot installation issues.
In a production environment, you require disaster recovery and debugging.
Do not skip this procedure in production environments where disaster recovery and debugging is required.
You can use this key to SSH into the master nodes as the user core. When you deploy the cluster, the key is added to the core user’s ~/.ssh/authorized_keys list.
Procedure
If you do not have an SSH key that is configured for password-less authentication on your computer, create one. For example, on a computer that uses a Linux operating system, run the following command:
$ ssh-keygen -t ed25519 -N '' \ -f <path>/<file_name>1 - 1
- Specify the path and file name, such as
~/.ssh/id_rsa, of the new SSH key. If you have an existing key pair, ensure your public key is in the your~/.sshdirectory.
Running this command generates an SSH key that does not require a password in the location that you specified.
NoteIf you plan to install an OpenShift Container Platform cluster that uses FIPS Validated / Modules in Process cryptographic libraries on the
x86_64architecture, do not create a key that uses theed25519algorithm. Instead, create a key that uses thersaorecdsaalgorithm.Start the
ssh-agentprocess as a background task:$ eval "$(ssh-agent -s)"Example output
Agent pid 31874NoteIf your cluster is in FIPS mode, only use FIPS-compliant algorithms to generate the SSH key. The key must be either RSA or ECDSA.
Add your SSH private key to the
ssh-agent:$ ssh-add <path>/<file_name>1 Example output
Identity added: /home/<you>/<path>/<file_name> (<computer_name>)- 1
- Specify the path and file name for your SSH private key, such as
~/.ssh/id_rsa
Next steps
- When you install OpenShift Container Platform, provide the SSH public key to the installation program.
11.1.5. Obtaining the installation program
Before you install OpenShift Container Platform, download the installation file on your provisioning machine.
Prerequisites
- You have a machine that runs Linux, for example Red Hat Enterprise Linux 8, with 500 MB of local disk space
Procedure
- Access the Infrastructure Provider page on the OpenShift Cluster Manager site. If you have a Red Hat account, log in with your credentials. If you do not, create an account.
- Select your infrastructure provider.
Navigate to the page for your installation type, download the installation program for your operating system, and place the file in the directory where you will store the installation configuration files.
ImportantThe installation program creates several files on the computer that you use to install your cluster. You must keep the installation program and the files that the installation program creates after you finish installing the cluster. Both files are required to delete the cluster.
ImportantDeleting the files created by the installation program does not remove your cluster, even if the cluster failed during installation. To remove your cluster, complete the OpenShift Container Platform uninstallation procedures for your specific cloud provider.
Extract the installation program. For example, on a computer that uses a Linux operating system, run the following command:
$ tar xvf openshift-install-linux.tar.gz- Download your installation pull secret from the Red Hat OpenShift Cluster Manager. This pull secret allows you to authenticate with the services that are provided by the included authorities, including Quay.io, which serves the container images for OpenShift Container Platform components.
11.1.6. Installing the OpenShift CLI by downloading the binary
You can install the OpenShift CLI (oc) to interact with OpenShift Container Platform from a command-line interface. You can install oc on Linux, Windows, or macOS.
If you installed an earlier version of oc, you cannot use it to complete all of the commands in OpenShift Container Platform 4.7. Download and install the new version of oc.
11.1.6.1. Installing the OpenShift CLI on Linux
You can install the OpenShift CLI (oc) binary on Linux by using the following procedure.
Procedure
- Navigate to the OpenShift Container Platform downloads page on the Red Hat Customer Portal.
- Select the appropriate version in the Version drop-down menu.
- Click Download Now next to the OpenShift v4.7 Linux Client entry and save the file.
Unpack the archive:
$ tar xvzf <file>Place the
ocbinary in a directory that is on yourPATH.To check your
PATH, execute the following command:$ echo $PATH
After you install the OpenShift CLI, it is available using the oc command:
$ oc <command>11.1.6.2. Installing the OpenShift CLI on Windows
You can install the OpenShift CLI (oc) binary on Windows by using the following procedure.
Procedure
- Navigate to the OpenShift Container Platform downloads page on the Red Hat Customer Portal.
- Select the appropriate version in the Version drop-down menu.
- Click Download Now next to the OpenShift v4.7 Windows Client entry and save the file.
- Unzip the archive with a ZIP program.
Move the
ocbinary to a directory that is on yourPATH.To check your
PATH, open the command prompt and execute the following command:C:\> path
After you install the OpenShift CLI, it is available using the oc command:
C:\> oc <command>11.1.6.3. Installing the OpenShift CLI on macOS
You can install the OpenShift CLI (oc) binary on macOS by using the following procedure.
Procedure
- Navigate to the OpenShift Container Platform downloads page on the Red Hat Customer Portal.
- Select the appropriate version in the Version drop-down menu.
- Click Download Now next to the OpenShift v4.7 MacOSX Client entry and save the file.
- Unpack and unzip the archive.
Move the
ocbinary to a directory on your PATH.To check your
PATH, open a terminal and execute the following command:$ echo $PATH
After you install the OpenShift CLI, it is available using the oc command:
$ oc <command>11.1.7. Manually creating the installation configuration file
For installations of OpenShift Container Platform that use user-provisioned infrastructure, you manually generate your installation configuration file.
Prerequisites
- Obtain the OpenShift Container Platform installation program and the access token for your cluster.
Procedure
Create an installation directory to store your required installation assets in:
$ mkdir <installation_directory>ImportantYou must create a directory. Some installation assets, like bootstrap X.509 certificates have short expiration intervals, so you must not reuse an installation directory. If you want to reuse individual files from another cluster installation, you can copy them into your directory. However, the file names for the installation assets might change between releases. Use caution when copying installation files from an earlier OpenShift Container Platform version.
Customize the following
install-config.yamlfile template and save it in the<installation_directory>.NoteYou must name this configuration file
install-config.yaml.Back up the
install-config.yamlfile so that you can use it to install multiple clusters.ImportantThe
install-config.yamlfile is consumed during the next step of the installation process. You must back it up now.
11.1.7.1. Sample install-config.yaml file for IBM Z
11.1.7.2. Sample install-config.yaml file for IBM Power Systems
You can customize the install-config.yaml file to specify more details about your OpenShift Container Platform cluster’s platform or modify the values of the required parameters.
apiVersion: v1
baseDomain: example.com
compute:
- hyperthreading: Enabled
name: worker
replicas: 0
architecture : ppc64le
controlPlane:
hyperthreading: Enabled
name: master
replicas: 3
architecture : ppc64le
metadata:
name: test
networking:
clusterNetwork:
- cidr: 10.128.0.0/14
hostPrefix: 23
networkType: OpenShiftSDN
serviceNetwork:
- 172.30.0.0/16
platform:
none: {}
fips: false
pullSecret: '{"auths": ...}'
sshKey: 'ssh-ed25519 AAAA...' - 1
- The base domain of the cluster. All DNS records must be sub-domains of this base and include the cluster name.
- 2 5
- The
controlPlanesection is a single mapping, but thecomputesection is a sequence of mappings. To meet the requirements of the different data structures, the first line of thecomputesection must begin with a hyphen,-, and the first line of thecontrolPlanesection must not. Only one control plane pool is used. - 3 6
- Whether to enable or disable simultaneous multithreading (SMT), or
hyperthreading. By default, SMT is enabled to increase the performance of your machines' cores. You can disable it by setting the parameter value toDisabled. If you disable SMT, you must disable it in all cluster machines; this includes both control plane and compute machines.NoteSimultaneous multithreading (SMT) is enabled by default. If SMT is not enabled in your BIOS settings, the
hyperthreadingparameter has no effect.ImportantIf you disable
hyperthreading, whether in the BIOS or in theinstall-config.yaml, ensure that your capacity planning accounts for the dramatically decreased machine performance. - 4
- You must set the value of the
replicasparameter to0. This parameter controls the number of workers that the cluster creates and manages for you, which are functions that the cluster does not perform when you use user-provisioned infrastructure. You must manually deploy worker machines for the cluster to use before you finish installing OpenShift Container Platform. - 7
- The number of control plane machines that you add to the cluster. Because the cluster uses these values as the number of etcd endpoints in the cluster, the value must match the number of control plane machines that you deploy.
- 8
- The cluster name that you specified in your DNS records.
- 9
- A block of IP addresses from which pod IP addresses are allocated. This block must not overlap with existing physical networks. These IP addresses are used for the pod network. If you need to access the pods from an external network, you must configure load balancers and routers to manage the traffic.Note
Class E CIDR range is reserved for a future use. To use the Class E CIDR range, you must ensure your networking environment accepts the IP addresses within the Class E CIDR range.
- 10
- The subnet prefix length to assign to each individual node. For example, if
hostPrefixis set to23, then each node is assigned a/23subnet out of the givencidr, which allows for 510 (2^(32 - 23) - 2) pod IPs addresses. If you are required to provide access to nodes from an external network, configure load balancers and routers to manage the traffic. - 11
- The IP address pool to use for service IP addresses. You can enter only one IP address pool. This block must not overlap with existing physical networks. If you need to access the services from an external network, configure load balancers and routers to manage the traffic.
- 12
- You must set the platform to
none. You cannot provide additional platform configuration variables for IBM Z infrastructure. IBM Power Systems infrastructure.WarningRed Hat Virtualization does not currently support installation with user-provisioned infrastructure on the oVirt platform. Therefore, you must set the platform to
none, allowing OpenShift Container Platform to identify each node as a bare-metal node and the cluster as a bare-metal cluster. This is the same as installing a cluster on any platform, and has the following limitations:- There will be no cluster provider so you must manually add each machine and there will be no node scaling capabilities.
- The oVirt CSI driver will not be installed and there will be no CSI capabilities.
- 13
- Whether to enable or disable FIPS mode. By default, FIPS mode is not enabled. If FIPS mode is enabled, the Red Hat Enterprise Linux CoreOS (RHCOS) machines that OpenShift Container Platform runs on bypass the default Kubernetes cryptography suite and use the cryptography modules that are provided with RHCOS instead.Important
The use of FIPS Validated / Modules in Process cryptographic libraries is only supported on OpenShift Container Platform deployments on the
x86_64architecture. - 14
- The pull secret from the Red Hat OpenShift Cluster Manager. This pull secret allows you to authenticate with the services that are provided by the included authorities, including Quay.io, which serves the container images for OpenShift Container Platform components.
- 15
- The public portion of the default SSH key for the
coreuser in Red Hat Enterprise Linux CoreOS (RHCOS).NoteFor production OpenShift Container Platform clusters on which you want to perform installation debugging or disaster recovery, specify an SSH key that your
ssh-agentprocess uses.
11.1.7.3. Configuring the cluster-wide proxy during installation
Production environments can deny direct access to the Internet and instead have an HTTP or HTTPS proxy available. You can configure a new OpenShift Container Platform cluster to use a proxy by configuring the proxy settings in the install-config.yaml file.
Prerequisites
-
You have an existing
install-config.yamlfile. You reviewed the sites that your cluster requires access to and determined whether any of them need to bypass the proxy. By default, all cluster egress traffic is proxied, including calls to hosting cloud provider APIs. You added sites to the
Proxyobject’sspec.noProxyfield to bypass the proxy if necessary.NoteThe
Proxyobjectstatus.noProxyfield is populated with the values of thenetworking.machineNetwork[].cidr,networking.clusterNetwork[].cidr, andnetworking.serviceNetwork[]fields from your installation configuration.For installations on Amazon Web Services (AWS), Google Cloud Platform (GCP), Microsoft Azure, and Red Hat OpenStack Platform (RHOSP), the
Proxyobjectstatus.noProxyfield is also populated with the instance metadata endpoint (169.254.169.254).
Procedure
Edit your
install-config.yamlfile and add the proxy settings. For example:apiVersion: v1 baseDomain: my.domain.com proxy: httpProxy: http://<username>:<pswd>@<ip>:<port>1 httpsProxy: https://<username>:<pswd>@<ip>:<port>2 noProxy: example.com3 additionalTrustBundle: |4 -----BEGIN CERTIFICATE----- <MY_TRUSTED_CA_CERT> -----END CERTIFICATE----- ...- 1
- A proxy URL to use for creating HTTP connections outside the cluster. The URL scheme must be
http. - 2
- A proxy URL to use for creating HTTPS connections outside the cluster.
- 3
- A comma-separated list of destination domain names, IP addresses, or other network CIDRs to exclude from proxying. Preface a domain with
.to match subdomains only. For example,.y.commatchesx.y.com, but noty.com. Use*to bypass the proxy for all destinations. - 4
- If provided, the installation program generates a config map that is named
user-ca-bundlein theopenshift-confignamespace to hold the additional CA certificates. If you provideadditionalTrustBundleand at least one proxy setting, theProxyobject is configured to reference theuser-ca-bundleconfig map in thetrustedCAfield. The Cluster Network Operator then creates atrusted-ca-bundleconfig map that merges the contents specified for thetrustedCAparameter with the RHCOS trust bundle. TheadditionalTrustBundlefield is required unless the proxy’s identity certificate is signed by an authority from the RHCOS trust bundle.
NoteThe installation program does not support the proxy
readinessEndpointsfield.- Save the file and reference it when installing OpenShift Container Platform.
The installation program creates a cluster-wide proxy that is named cluster that uses the proxy settings in the provided install-config.yaml file. If no proxy settings are provided, a cluster Proxy object is still created, but it will have a nil spec.
Only the Proxy object named cluster is supported, and no additional proxies can be created.
11.1.8. Creating the Kubernetes manifest and Ignition config files
Because you must modify some cluster definition files and manually start the cluster machines, you must generate the Kubernetes manifest and Ignition config files that the cluster needs to make its machines.
The installation configuration file transforms into the Kubernetes manifests. The manifests wrap into the Ignition configuration files, which are later used to create the cluster.
The Ignition config files that the installation program generates contain certificates that expire after 24 hours, which are then renewed at that time. If the cluster is shut down before renewing the certificates and the cluster is later restarted after the 24 hours have elapsed, the cluster automatically recovers the expired certificates. The exception is that you must manually approve the pending node-bootstrapper certificate signing requests (CSRs) to recover kubelet certificates. See the documentation for Recovering from expired control plane certificates for more information.
The installation program that generates the manifest and Ignition files is architecture specific and can be obtained from the client image mirror. The Linux version of the installation program runs on s390x only. This installer program is also available as a Mac OS version.
The installation program that generates the manifest and Ignition files is architecture specific and can be obtained from the client image mirror. The Linux version of the installation program runs on ppc64le only. This installer program is also available as a Mac OS version.
Prerequisites
- You obtained the OpenShift Container Platform installation program.
-
You created the
install-config.yamlinstallation configuration file.
Procedure
Change to the directory that contains the installation program and generate the Kubernetes manifests for the cluster:
$ ./openshift-install create manifests --dir <installation_directory>1 - 1
- For
<installation_directory>, specify the installation directory that contains theinstall-config.yamlfile you created.
WarningIf you are installing a three-node cluster, skip the following step to allow the control plane nodes to be schedulable.
ImportantWhen you configure control plane nodes from the default unschedulable to schedulable, additional subscriptions are required. This is because control plane nodes then become worker nodes.
Check that the
mastersSchedulableparameter in the<installation_directory>/manifests/cluster-scheduler-02-config.ymlKubernetes manifest file is set tofalse. This setting prevents pods from being scheduled on the control plane machines:-
Open the
<installation_directory>/manifests/cluster-scheduler-02-config.ymlfile. -
Locate the
mastersSchedulableparameter and ensure that it is set tofalse. - Save and exit the file.
-
Open the
To create the Ignition configuration files, run the following command from the directory that contains the installation program:
$ ./openshift-install create ignition-configs --dir <installation_directory>1 - 1
- For
<installation_directory>, specify the same installation directory.
The following files are generated in the directory:
. ├── auth │ ├── kubeadmin-password │ └── kubeconfig ├── bootstrap.ign ├── master.ign ├── metadata.json └── worker.ign
11.1.9. Creating Red Hat Enterprise Linux CoreOS (RHCOS) machines
Before you install a cluster on IBM Power Systems infrastructure that you provision, you must create RHCOS machines for it to use. Follow either the steps to use an ISO image or network PXE booting to create the machines.
11.1.9.1. Creating Red Hat Enterprise Linux CoreOS (RHCOS) machines using an ISO image
Before you install a cluster on IBM Power Systems infrastructure that you provision, you must create RHCOS machines for it to use. You can use an ISO image to create the machines.
Prerequisites
- Obtain the Ignition config files for your cluster.
- Have access to an HTTP server that can be accessed from your computer, and from the machines that you create.
Procedure
Upload the control plane, compute, and bootstrap Ignition config files that the installation program created to your HTTP server. Note the URLs of these files.
ImportantIf you plan to add more compute machines to your cluster after you finish installation, do not delete these files.
Obtain the RHCOS images that are required for your preferred method of installing operating system instances from the RHCOS image mirror page.
ImportantThe RHCOS images might not change with every release of OpenShift Container Platform. You must download images with the highest version that is less than or equal to the OpenShift Container Platform version that you install. Use the image versions that match your OpenShift Container Platform version if they are available. Use only ISO images for this procedure. RHCOS qcow2 images are not supported for this installation type.
ISO file names resemble the following example:
rhcos-<version>-live.<architecture>.isoUse the ISO to start the RHCOS installation. Use one of the following installation options:
- Burn the ISO image to a disk and boot it directly.
- Use ISO redirection via a LOM interface.
-
Boot the ISO image. You can interrupt the installation boot process to add kernel arguments. However, for this ISO procedure you should use the
coreos-installercommand instead of adding kernel arguments. If you run the live installer without options or interruption, the installer boots up to a shell prompt on the live system, ready for you to install RHCOS to disk. -
Review the Advanced RHCOS installation reference section for different ways of configuring features, such as networking and disk partitions, before running the
coreos-installer. Run the
coreos-installercommand. At a minimum, you must identify the Ignition config file location for your node type, and the location of the disk you are installing to. Here is an example:$ sudo coreos-installer install \ --ignition-url=https://host/worker.ign /dev/sda- After RHCOS installs, the system reboots. During the system reboot, it applies the Ignition config file that you specified.
Continue to create the other machines for your cluster.
ImportantYou must create the bootstrap and control plane machines at this time. If the control plane machines are not made schedulable, which is the default, also create at least two compute machines before you install the cluster.
11.1.9.1.1. Advanced RHCOS installation reference
This section illustrates the networking configuration and other advanced options that allow you to modify the Red Hat Enterprise Linux CoreOS (RHCOS) manual installation process. The following tables describe the kernel arguments and command-line options you can use with the RHCOS live installer and the coreos-installer command.
Routing and bonding options at RHCOS boot prompt
If you install RHCOS from an ISO image, you can add kernel arguments manually when you boot that image to configure the node’s networking. If no networking arguments are used, the installation defaults to using DHCP.
When adding networking arguments, you must also add the rd.neednet=1 kernel argument.
The following table describes how to use ip=, nameserver=, and bond= kernel arguments for live ISO installs.
Ordering is important when adding kernel arguments: ip=, nameserver=, and then bond=.
Routing and bonding options for ISO
The following table provides examples for configuring networking of your Red Hat Enterprise Linux CoreOS (RHCOS) nodes. These are networking options that are passed to the dracut tool during system boot. For more information about the networking options supported by dracut, see the dracut.cmdline manual page.
| Description | Examples |
|---|---|
|
To configure an IP address, either use DHCP (
|
|
|
Specify multiple network interfaces by specifying multiple |
|
|
Optional: You can configure routes to additional networks by setting an If the additional network gateway is different from the primary network gateway, the default gateway must be the primary network gateway. | To configure the default gateway: To configure the route for the additional network: |
| Disable DHCP on a single interface, such as when there are two or more network interfaces and only one interface is being used. |
|
| You can combine DHCP and static IP configurations on systems with multiple network interfaces. |
|
|
Optional: You can configure VLANs on individual interfaces by using the | To configure a VLAN on a network interface and use a static IP address: To configure a VLAN on a network interface and to use DHCP: |
|
You can provide multiple DNS servers by adding a |
|
|
Optional: Bonding multiple network interfaces to a single interface is supported using the
|
To configure the bonded interface to use DHCP, set the bond’s IP address to To configure the bonded interface to use a static IP address, enter the specific IP address you want and related information. For example: |
|
Optional: You can configure VLANs on bonded interfaces by using the | To configure the bonded interface with a VLAN and to use DHCP: To configure the bonded interface with a VLAN and to use a static IP address: |
|
Optional: Network teaming can be used as an alternative to bonding by using the
Note Teaming is planned to be deprecated when RHCOS switches to an upcoming version of RHEL. For more information, see this Red Hat Knowledgebase Article. | To configure a network team: |
11.1.9.2. Creating Red Hat Enterprise Linux CoreOS (RHCOS) machines by PXE or iPXE booting
Before you install a cluster that uses manually-provisioned RHCOS nodes, such as bare metal, you must create RHCOS machines for it to use. You can use PXE or iPXE booting to create the machines.
Prerequisites
- Obtain the Ignition config files for your cluster.
- Configure suitable PXE or iPXE infrastructure.
- Have access to an HTTP server that you can access from your computer.
Procedure
Upload the master, worker, and bootstrap Ignition config files that the installation program created to your HTTP server. Note the URLs of these files.
ImportantYou can add or change configuration settings in your Ignition configs before saving them to your HTTP server. If you plan to add more compute machines to your cluster after you finish installation, do not delete these files.
Obtain the RHCOS
kernel,initramfsandrootfsfiles from the RHCOS image mirror page.ImportantThe RHCOS artifacts might not change with every release of OpenShift Container Platform. You must download artifacts with the highest version that is less than or equal to the OpenShift Container Platform version that you install. Only use the appropriate
kernel,initramfs, androotfsartifacts described below for this procedure. RHCOS qcow2 images are not supported for this installation type.The file names contain the OpenShift Container Platform version number. They resemble the following examples:
-
kernel:rhcos-<version>-live-kernel-<architecture> -
initramfs:rhcos-<version>-live-initramfs.<architecture>.img -
rootfs:rhcos-<version>-live-rootfs.<architecture>.img
-
Upload the additional files that are required for your booting method:
-
For traditional PXE, upload the
kernelandinitramfsfiles to your TFTP server and therootfsfile to your HTTP server. For iPXE, upload the
kernel,initramfs, androotfsfiles to your HTTP server.ImportantIf you plan to add more compute machines to your cluster after you finish installation, do not delete these files.
-
For traditional PXE, upload the
- Configure the network boot infrastructure so that the machines boot from their local disks after RHCOS is installed on them.
Configure PXE or iPXE installation for the RHCOS images.
Modify one of the following example menu entries for your environment and verify that the image and Ignition files are properly accessible:
For PXE:
DEFAULT pxeboot TIMEOUT 20 PROMPT 0 LABEL pxeboot KERNEL http://<HTTP_server>/rhcos-<version>-live-kernel-<architecture>1 APPEND initrd=http://<HTTP_server>/rhcos-<version>-live-initramfs.<architecture>.img coreos.live.rootfs_url=http://<HTTP_server>/rhcos-<version>-live-rootfs.<architecture>.img coreos.inst.install_dev=/dev/sda coreos.inst.ignition_url=http://<HTTP_server>/bootstrap.ign2 3 - 1
- Specify the location of the live
kernelfile that you uploaded to your HTTP server. The URL must be HTTP, TFTP, or FTP; HTTPS and NFS are not supported. - 2
- If you use multiple NICs, specify a single interface in the
ipoption. For example, to use DHCP on a NIC that is namedeno1, setip=eno1:dhcp. - 3
- Specify locations of the RHCOS files that you uploaded to your HTTP server. The
initrdparameter value is the location of theinitramfsfile, thecoreos.live.rootfs_urlparameter value is the location of therootfsfile, and thecoreos.inst.ignition_urlparameter value is the location of the bootstrap Ignition config file. You can also add more kernel arguments to theAPPENDline to configure networking or other boot options.
NoteThis configuration does not enable serial console access on machines with a graphical console. To configure a different console, add one or more
console=arguments to theAPPENDline. For example, addconsole=tty0 console=ttyS0to set the first PC serial port as the primary console and the graphical console as a secondary console. For more information, see How does one set up a serial terminal and/or console in Red Hat Enterprise Linux?.For iPXE:
kernel http://<HTTP_server>/rhcos-<version>-live-kernel-<architecture> initrd=main coreos.live.rootfs_url=http://<HTTP_server>/rhcos-<version>-live-rootfs.<architecture>.img coreos.inst.install_dev=/dev/sda coreos.inst.ignition_url=http://<HTTP_server>/bootstrap.ign1 2 initrd --name main http://<HTTP_server>/rhcos-<version>-live-initramfs.<architecture>.img3 boot- 1
- Specify locations of the RHCOS files that you uploaded to your HTTP server. The
kernelparameter value is the location of thekernelfile, theinitrd=mainargument is needed for booting on UEFI systems, thecoreos.live.rootfs_urlparameter value is the location of therootfsfile, and thecoreos.inst.ignition_urlparameter value is the location of the bootstrap Ignition config file. - 2
- If you use multiple NICs, specify a single interface in the
ipoption. For example, to use DHCP on a NIC that is namedeno1, setip=eno1:dhcp. - 3
- Specify the location of the
initramfsfile that you uploaded to your HTTP server.
NoteThis configuration does not enable serial console access on machines with a graphical console. To configure a different console, add one or more
console=arguments to thekernelline. For example, addconsole=tty0 console=ttyS0to set the first PC serial port as the primary console and the graphical console as a secondary console. For more information, see How does one set up a serial terminal and/or console in Red Hat Enterprise Linux?.
If you use PXE UEFI, perform the following actions:
Provide the
shimx64.efiandgrubx64.efiEFI binaries and thegrub.cfgfile that are required for booting the system.Extract the necessary EFI binaries by mounting the RHCOS ISO to your host and then mounting the
images/efiboot.imgfile to your host:$ mkdir -p /mnt/iso$ mkdir -p /mnt/efiboot$ mount -o loop rhcos-installer.x86_64.iso /mnt/iso$ mount -o loop,ro /mnt/iso/images/efiboot.img /mnt/efibootFrom the
efiboot.imgmount point, copy theEFI/redhat/shimx64.efiandEFI/redhat/grubx64.efifiles to your TFTP server:$ cp /mnt/efiboot/EFI/redhat/shimx64.efi .$ cp /mnt/efiboot/EFI/redhat/grubx64.efi .$ umount /mnt/efiboot$ umount /mnt/iso-
Copy the
EFI/redhat/grub.cfgfile that is included in the RHCOS ISO to your TFTP server.
Edit the
grub.cfgfile to include arguments similar to the following:menuentry 'Install Red Hat Enterprise Linux CoreOS' --class fedora --class gnu-linux --class gnu --class os { linuxefi rhcos-<version>-live-kernel-<architecture> coreos.inst.install_dev=/dev/sda coreos.live.rootfs_url=http://<HTTP_server>/rhcos-<version>-live-rootfs.<architecture>.img coreos.inst.ignition_url=http://<HTTP_server>/bootstrap.ign initrdefi rhcos-<version>-live-initramfs.<architecture>.img }where:
rhcos-<version>-live-kernel-<architecture>-
Specifies the
kernelfile that you uploaded to your TFTP server. http://<HTTP_server>/rhcos-<version>-live-rootfs.<architecture>.img- Specifies the location of the live rootfs image that you uploaded to your HTTP server.
http://<HTTP_server>/bootstrap.ign- Specifies the location of the bootstrap Ignition config file that you uploaded to your HTTP server.
rhcos-<version>-live-initramfs.<architecture>.img-
Specifies the location of the
initramfsfile that you uploaded to your TFTP server.
NoteFor more information on how to configure a PXE server for UEFI boot, see the Red Hat Knowledgebase article: How to configure/setup a PXE server for UEFI boot for Red Hat Enterprise Linux?.
Continue to create the machines for your cluster.
ImportantYou must create the bootstrap and control plane machines at this time. If the control plane machines are not made schedulable, which is the default, also create at least two compute machines before you install the cluster.
11.1.10. Creating the cluster
To create the OpenShift Container Platform cluster, you wait for the bootstrap process to complete on the machines that you provisioned by using the Ignition config files that you generated with the installation program.
Prerequisites
- Create the required infrastructure for the cluster.
- You obtained the installation program and generated the Ignition config files for your cluster.
- You used the Ignition config files to create RHCOS machines for your cluster.
- Your machines have direct Internet access or have an HTTP or HTTPS proxy available.
Procedure
Monitor the bootstrap process:
$ ./openshift-install --dir <installation_directory> wait-for bootstrap-complete \1 --log-level=info2 Example output
INFO Waiting up to 30m0s for the Kubernetes API at https://api.test.example.com:6443... INFO API v1.20.0 up INFO Waiting up to 30m0s for bootstrapping to complete... INFO It is now safe to remove the bootstrap resourcesThe command succeeds when the Kubernetes API server signals that it has been bootstrapped on the control plane machines.
After bootstrap process is complete, remove the bootstrap machine from the load balancer.
ImportantYou must remove the bootstrap machine from the load balancer at this point. You can also remove or reformat the machine itself.
11.1.11. Logging in to the cluster by using the CLI
You can log in to your cluster as a default system user by exporting the cluster kubeconfig file. The kubeconfig file contains information about the cluster that is used by the CLI to connect a client to the correct cluster and API server. The file is specific to a cluster and is created during OpenShift Container Platform installation.
Prerequisites
- You deployed an OpenShift Container Platform cluster.
-
You installed the
ocCLI.
Procedure
Export the
kubeadmincredentials:$ export KUBECONFIG=<installation_directory>/auth/kubeconfig1 - 1
- For
<installation_directory>, specify the path to the directory that you stored the installation files in.
Verify you can run
occommands successfully using the exported configuration:$ oc whoamiExample output
system:admin
11.1.12. Approving the certificate signing requests for your machines
When you add machines to a cluster, two pending certificate signing requests (CSRs) are generated for each machine that you added. You must confirm that these CSRs are approved or, if necessary, approve them yourself. The client requests must be approved first, followed by the server requests.
Prerequisites
- You added machines to your cluster.
Procedure
Confirm that the cluster recognizes the machines:
$ oc get nodesExample output
NAME STATUS ROLES AGE VERSION master-0 Ready master 63m v1.20.0 master-1 Ready master 63m v1.20.0 master-2 Ready master 64m v1.20.0The output lists all of the machines that you created.
NoteThe preceding output might not include the compute nodes, also known as worker nodes, until some CSRs are approved.
Review the pending CSRs and ensure that you see the client requests with the
PendingorApprovedstatus for each machine that you added to the cluster:$ oc get csrExample output
NAME AGE REQUESTOR CONDITION csr-mddf5 20m system:node:master-01.example.com Approved,Issued csr-z5rln 16m system:node:worker-21.example.com Approved,IssuedIf the CSRs were not approved, after all of the pending CSRs for the machines you added are in
Pendingstatus, approve the CSRs for your cluster machines:NoteBecause the CSRs rotate automatically, approve your CSRs within an hour of adding the machines to the cluster. If you do not approve them within an hour, the certificates will rotate, and more than two certificates will be present for each node. You must approve all of these certificates. Once the client CSR is approved, the Kubelet creates a secondary CSR for the serving certificate, which requires manual approval. Then, subsequent serving certificate renewal requests are automatically approved by the
machine-approverif the Kubelet requests a new certificate with identical parameters.NoteFor clusters running on platforms that are not machine API enabled, such as bare metal and other user-provisioned infrastructure, you must implement a method of automatically approving the kubelet serving certificate requests (CSRs). If a request is not approved, then the
oc exec,oc rsh, andoc logscommands cannot succeed, because a serving certificate is required when the API server connects to the kubelet. Any operation that contacts the Kubelet endpoint requires this certificate approval to be in place. The method must watch for new CSRs, confirm that the CSR was submitted by thenode-bootstrapperservice account in thesystem:nodeorsystem:admingroups, and confirm the identity of the node.To approve them individually, run the following command for each valid CSR:
$ oc adm certificate approve <csr_name>1 - 1
<csr_name>is the name of a CSR from the list of current CSRs.
To approve all pending CSRs, run the following command:
$ oc get csr -o go-template='{{range .items}}{{if not .status}}{{.metadata.name}}{{"\n"}}{{end}}{{end}}' | xargs --no-run-if-empty oc adm certificate approveNoteSome Operators might not become available until some CSRs are approved.
Now that your client requests are approved, you must review the server requests for each machine that you added to the cluster:
$ oc get csrExample output
NAME AGE REQUESTOR CONDITION csr-bfd72 5m26s system:node:ip-10-0-50-126.us-east-2.compute.internal Pending csr-c57lv 5m26s system:node:ip-10-0-95-157.us-east-2.compute.internal Pending ...If the remaining CSRs are not approved, and are in the
Pendingstatus, approve the CSRs for your cluster machines:To approve them individually, run the following command for each valid CSR:
$ oc adm certificate approve <csr_name>1 - 1
<csr_name>is the name of a CSR from the list of current CSRs.
To approve all pending CSRs, run the following command:
$ oc get csr -o go-template='{{range .items}}{{if not .status}}{{.metadata.name}}{{"\n"}}{{end}}{{end}}' | xargs oc adm certificate approve
After all client and server CSRs have been approved, the machines have the
Readystatus. Verify this by running the following command:$ oc get nodesExample output
NAME STATUS ROLES AGE VERSION master-0 Ready master 73m v1.20.0 master-1 Ready master 73m v1.20.0 master-2 Ready master 74m v1.20.0 worker-0 Ready worker 11m v1.20.0 worker-1 Ready worker 11m v1.20.0NoteIt can take a few minutes after approval of the server CSRs for the machines to transition to the
Readystatus.
Additional information
- For more information on CSRs, see Certificate Signing Requests.
11.1.13. Initial Operator configuration
After the control plane initializes, you must immediately configure some Operators so that they all become available.
Prerequisites
- Your control plane has initialized.
Procedure
Watch the cluster components come online:
$ watch -n5 oc get clusteroperatorsExample output
NAME VERSION AVAILABLE PROGRESSING DEGRADED SINCE authentication 4.7.0 True False False 3h56m baremetal 4.7.0 True False False 29h cloud-credential 4.7.0 True False False 29h cluster-autoscaler 4.7.0 True False False 29h config-operator 4.7.0 True False False 6h39m console 4.7.0 True False False 3h59m csi-snapshot-controller 4.7.0 True False False 4h12m dns 4.7.0 True False False 4h15m etcd 4.7.0 True False False 29h image-registry 4.7.0 True False False 3h59m ingress 4.7.0 True False False 4h30m insights 4.7.0 True False False 29h kube-apiserver 4.7.0 True False False 29h kube-controller-manager 4.7.0 True False False 29h kube-scheduler 4.7.0 True False False 29h kube-storage-version-migrator 4.7.0 True False False 4h2m machine-api 4.7.0 True False False 29h machine-approver 4.7.0 True False False 6h34m machine-config 4.7.0 True False False 3h56m marketplace 4.7.0 True False False 4h2m monitoring 4.7.0 True False False 6h31m network 4.7.0 True False False 29h node-tuning 4.7.0 True False False 4h30m openshift-apiserver 4.7.0 True False False 3h56m openshift-controller-manager 4.7.0 True False False 4h36m openshift-samples 4.7.0 True False False 4h30m operator-lifecycle-manager 4.7.0 True False False 29h operator-lifecycle-manager-catalog 4.7.0 True False False 29h operator-lifecycle-manager-packageserver 4.7.0 True False False 3h59m service-ca 4.7.0 True False False 29h storage 4.7.0 True False False 4h30m- Configure the Operators that are not available.
11.1.13.1. Image registry storage configuration
The Image Registry Operator is not initially available for platforms that do not provide default storage. After installation, you must configure your registry to use storage so that the Registry Operator is made available.
Instructions are shown for configuring a persistent volume, which is required for production clusters. Where applicable, instructions are shown for configuring an empty directory as the storage location, which is available for only non-production clusters.
Additional instructions are provided for allowing the image registry to use block storage types by using the Recreate rollout strategy during upgrades.
11.1.13.1.1. Configuring registry storage for IBM Z
11.1.13.1.2. Configuring registry storage for IBM Power Systems
As a cluster administrator, following installation you must configure your registry to use storage.
Prerequisites
- Cluster administrator permissions.
- A cluster on IBM Z. on IBM Power Systems.
Persistent storage provisioned for your cluster.
ImportantOpenShift Container Platform supports
ReadWriteOnceaccess for image registry storage when you have only one replica. To deploy an image registry that supports high availability with two or more replicas,ReadWriteManyaccess is required.- Must have 100Gi capacity.
Procedure
To configure your registry to use storage, change the
spec.storage.pvcin theconfigs.imageregistry/clusterresource.NoteWhen using shared storage, review your security settings to prevent outside access.
Verify that you do not have a registry pod:
$ oc get pod -n openshift-image-registry -l docker-registry=defaultExample output
No resourses found in openshift-image-registry namespaceNoteIf you do have a registry pod in your output, you do not need to continue with this procedure.
Check the registry configuration:
$ oc edit configs.imageregistry.operator.openshift.ioExample output
storage: pvc: claim:Leave the
claimfield blank to allow the automatic creation of animage-registry-storagePVC.Check the
clusteroperatorstatus:$ oc get clusteroperator image-registryExample output
NAME VERSION AVAILABLE PROGRESSING DEGRADED SINCE MESSAGE image-registry 4.7 True False False 6h50mEnsure that your registry is set to managed to enable building and pushing of images.
Run:
$ oc edit configs.imageregistry/clusterThen, change the line
managementState: Removedto
managementState: Managed
11.1.13.1.3. Configuring storage for the image registry in non-production clusters
You must configure storage for the Image Registry Operator. For non-production clusters, you can set the image registry to an empty directory. If you do so, all images are lost if you restart the registry.
Procedure
To set the image registry storage to an empty directory:
$ oc patch configs.imageregistry.operator.openshift.io cluster --type merge --patch '{"spec":{"storage":{"emptyDir":{}}}}'WarningConfigure this option for only non-production clusters.
If you run this command before the Image Registry Operator initializes its components, the
oc patchcommand fails with the following error:Error from server (NotFound): configs.imageregistry.operator.openshift.io "cluster" not foundWait a few minutes and run the command again.
11.1.14. Completing installation on user-provisioned infrastructure
After you complete the Operator configuration, you can finish installing the cluster on infrastructure that you provide.
Prerequisites
- Your control plane has initialized.
- You have completed the initial Operator configuration.
Procedure
Confirm that all the cluster components are online with the following command:
$ watch -n5 oc get clusteroperatorsExample output
NAME VERSION AVAILABLE PROGRESSING DEGRADED SINCE authentication 4.7.0 True False False 3h56m baremetal 4.7.0 True False False 29h cloud-credential 4.7.0 True False False 29h cluster-autoscaler 4.7.0 True False False 29h config-operator 4.7.0 True False False 6h39m console 4.7.0 True False False 3h59m csi-snapshot-controller 4.7.0 True False False 4h12m dns 4.7.0 True False False 4h15m etcd 4.7.0 True False False 29h image-registry 4.7.0 True False False 3h59m ingress 4.7.0 True False False 4h30m insights 4.7.0 True False False 29h kube-apiserver 4.7.0 True False False 29h kube-controller-manager 4.7.0 True False False 29h kube-scheduler 4.7.0 True False False 29h kube-storage-version-migrator 4.7.0 True False False 4h2m machine-api 4.7.0 True False False 29h machine-approver 4.7.0 True False False 6h34m machine-config 4.7.0 True False False 3h56m marketplace 4.7.0 True False False 4h2m monitoring 4.7.0 True False False 6h31m network 4.7.0 True False False 29h node-tuning 4.7.0 True False False 4h30m openshift-apiserver 4.7.0 True False False 3h56m openshift-controller-manager 4.7.0 True False False 4h36m openshift-samples 4.7.0 True False False 4h30m operator-lifecycle-manager 4.7.0 True False False 29h operator-lifecycle-manager-catalog 4.7.0 True False False 29h operator-lifecycle-manager-packageserver 4.7.0 True False False 3h59m service-ca 4.7.0 True False False 29h storage 4.7.0 True False False 4h30mAlternatively, the following command notifies you when all of the clusters are available. It also retrieves and displays credentials:
$ ./openshift-install --dir <installation_directory> wait-for install-complete1 - 1
- For
<installation_directory>, specify the path to the directory that you stored the installation files in.
Example output
INFO Waiting up to 30m0s for the cluster to initialize...The command succeeds when the Cluster Version Operator finishes deploying the OpenShift Container Platform cluster from Kubernetes API server.
Important-
The Ignition config files that the installation program generates contain certificates that expire after 24 hours, which are then renewed at that time. If the cluster is shut down before renewing the certificates and the cluster is later restarted after the 24 hours have elapsed, the cluster automatically recovers the expired certificates. The exception is that you must manually approve the pending
node-bootstrappercertificate signing requests (CSRs) to recover kubelet certificates. See the documentation for Recovering from expired control plane certificates for more information. - It is recommended that you use Ignition config files within 12 hours after they are generated because the 24-hour certificate rotates from 16 to 22 hours after the cluster is installed. By using the Ignition config files within 12 hours, you can avoid installation failure if the certificate update runs during installation.
Confirm that the Kubernetes API server is communicating with the pods.
To view a list of all pods, use the following command:
$ oc get pods --all-namespacesExample output
NAMESPACE NAME READY STATUS RESTARTS AGE openshift-apiserver-operator openshift-apiserver-operator-85cb746d55-zqhs8 1/1 Running 1 9m openshift-apiserver apiserver-67b9g 1/1 Running 0 3m openshift-apiserver apiserver-ljcmx 1/1 Running 0 1m openshift-apiserver apiserver-z25h4 1/1 Running 0 2m openshift-authentication-operator authentication-operator-69d5d8bf84-vh2n8 1/1 Running 0 5m ...View the logs for a pod that is listed in the output of the previous command by using the following command:
$ oc logs <pod_name> -n <namespace>1 - 1
- Specify the pod name and namespace, as shown in the output of the previous command.
If the pod logs display, the Kubernetes API server can communicate with the cluster machines.
For an installation with Fibre Channel Protocol (FCP), additional steps are required to enable multipathing. Do not enable multipathing during installation.
See "Enabling multipathing with kernel arguments on RHCOS" in the Post-installation configuration documentation for more information.
To display a boot list and specify the possible boot devices if the system is booted in normal mode, enter the following command:
$ bootlist -m normal -o sdaTo update the boot list for normal mode and add alternate device names, enter the following command:
$ bootlist -m normal -o /dev/sdc /dev/sdd /dev/sde sdc sdd sdeIf the original boot disk path is down, the node reboots from the alternate device registered in the normal boot device list.
All the worker nodes are restarted. To monitor the process, enter the following command:
$ oc get nodes -wNoteIf you have additional machine types such as infrastructure nodes, repeat the process for these types.
11.1.15. Telemetry access for OpenShift Container Platform
In OpenShift Container Platform 4.7, the Telemetry service, which runs by default to provide metrics about cluster health and the success of updates, requires internet access. If your cluster is connected to the internet, Telemetry runs automatically, and your cluster is registered to OpenShift Cluster Manager.
After you confirm that your OpenShift Cluster Manager inventory is correct, either maintained automatically by Telemetry or manually by using OpenShift Cluster Manager, use subscription watch to track your OpenShift Container Platform subscriptions at the account or multi-cluster level.
11.1.16. Next steps
- Customize your cluster.
- If necessary, you can opt out of remote health reporting.
11.2. Installing a cluster on IBM Power Systems in a restricted network
In OpenShift Container Platform version 4.7, you can install a cluster on IBM Power Systems infrastructure that you provision in a restricted network.
Additional considerations exist for non-bare metal platforms. Review the information in the guidelines for deploying OpenShift Container Platform on non-tested platforms before you install an OpenShift Container Platform cluster.
Prerequisites
-
Create a mirror registry for installation in a restricted network and obtain the
imageContentSourcesdata for your version of OpenShift Container Platform. Before you begin the installation process, you must move or remove any existing installation files. This ensures that the required installation files are created and updated during the installation process.
ImportantEnsure that installation steps are performed on a machine with access to the installation media.
-
Provision persistent storage for your cluster. To deploy a private image registry, your storage must provide
ReadWriteManyaccess modes. - Review details about the OpenShift Container Platform installation and update processes.
If you use a firewall and plan to use telemetry, you must configure the firewall to allow the sites that your cluster requires access to.
NoteBe sure to also review this site list if you are configuring a proxy.
11.2.1. About installations in restricted networks
In OpenShift Container Platform 4.7, you can perform an installation that does not require an active connection to the Internet to obtain software components. Restricted network installations can be completed using installer-provisioned infrastructure or user-provisioned infrastructure, depending on the cloud platform to which you are installing the cluster.
To complete a restricted network installation, you must create a registry that mirrors the contents of the OpenShift Container Platform registry and contains the installation media. You can create this registry on a mirror host, which can access both the Internet and your closed network, or by using other methods that meet your restrictions.
Because of the complexity of the configuration for user-provisioned installations, consider completing a standard user-provisioned infrastructure installation before you attempt a restricted network installation using user-provisioned infrastructure. Completing this test installation might make it easier to isolate and troubleshoot any issues that might arise during your installation in a restricted network.
11.2.1.1. Additional limits
Clusters in restricted networks have the following additional limitations and restrictions:
-
The
ClusterVersionstatus includes anUnable to retrieve available updateserror. - By default, you cannot use the contents of the Developer Catalog because you cannot access the required image stream tags.
11.2.2. Internet access for OpenShift Container Platform
In OpenShift Container Platform 4.7, you require access to the Internet to obtain the images that are necessary to install your cluster.
You must have Internet access to:
- Access OpenShift Cluster Manager to download the installation program and perform subscription management. If the cluster has internet access and you do not disable Telemetry, that service automatically entitles your cluster.
- Access Quay.io to obtain the packages that are required to install your cluster.
- Obtain the packages that are required to perform cluster updates.
If your cluster cannot have direct Internet access, you can perform a restricted network installation on some types of infrastructure that you provision. During that process, you download the content that is required and use it to populate a mirror registry with the packages that you need to install a cluster and generate the installation program. With some installation types, the environment that you install your cluster in will not require Internet access. Before you update the cluster, you update the content of the mirror registry.
11.2.3. Machine requirements for a cluster with user-provisioned infrastructure
For a cluster that contains user-provisioned infrastructure, you must deploy all of the required machines.
11.2.3.1. Required machines
The smallest OpenShift Container Platform clusters require the following hosts:
- One temporary bootstrap machine
- Three control plane, or master, machines
- At least two compute machines, which are also known as worker machines.
The cluster requires the bootstrap machine to deploy the OpenShift Container Platform cluster on the three control plane machines. You can remove the bootstrap machine after you install the cluster.
To improve high availability of your cluster, distribute the control plane machines over different z/VM instances on at least two physical machines.
The bootstrap and control plane machines must use Red Hat Enterprise Linux CoreOS (RHCOS) as the operating system. However, the compute machines can choose between Red Hat Enterprise Linux CoreOS (RHCOS) or Red Hat Enterprise Linux (RHEL) 7.9.
Note that RHCOS is based on Red Hat Enterprise Linux (RHEL) 8 and inherits all of its hardware certifications and requirements. See Red Hat Enterprise Linux technology capabilities and limits.
11.2.3.2. Network connectivity requirements
All the Red Hat Enterprise Linux CoreOS (RHCOS) machines require network in initramfs during boot to fetch Ignition config files from the Machine Config Server. The machines are configured with static IP addresses. No DHCP server is required. Additionally, each OpenShift Container Platform node in the cluster must have access to a Network Time Protocol (NTP) server.
11.2.3.3. IBM Z network connectivity requirements
To install on IBM Z under z/VM, you require a single z/VM virtual NIC in layer 2 mode. You also need:
- A direct-attached OSA or RoCE network adapter
- A z/VM VSwitch set up. For a preferred setup, use OSA link aggregation.
11.2.3.4. Minimum resource requirements
Each cluster machine must meet the following minimum requirements:
| Machine | Operating System | vCPU [1] | Virtual RAM | Storage | IOPS |
|---|---|---|---|---|---|
| Bootstrap | RHCOS | 2 | 16 GB | 100 GB | N/A |
| Control plane | RHCOS | 2 | 16 GB | 100 GB | N/A |
| Compute | RHCOS | 2 | 8 GB | 100 GB | N/A |
- One physical core (IFL) provides two logical cores (threads) when SMT-2 is enabled. The hypervisor can provide two or more vCPUs.
11.2.3.5. Minimum IBM Power Systems requirements
You can install OpenShift Container Platform version 4.7 on the following IBM hardware:
- IBM POWER8 or POWER9 processor-based systems
Hardware requirements
- 6 IBM Power bare metal servers or 6 LPARs across multiple PowerVM servers
Operating system requirements
- One instance of an IBM POWER8 or POWER9 processor-based system
On your IBM Power instance, set up:
- 3 guest virtual machines for OpenShift Container Platform control plane machines
- 2 guest virtual machines for OpenShift Container Platform compute machines
- 1 guest virtual machine for the temporary OpenShift Container Platform bootstrap machine
Disk storage for the IBM Power guest virtual machines
- Storage provisioned by the Virtual I/O Server using vSCSI, NPIV (N-Port ID Virtualization) or SSP (shared storage pools)
Network for the PowerVM guest virtual machines
- Virtualized by the Virtual I/O Server using Shared Ethernet Adapter
- Virtualized by the Virtual I/O Server using IBM vNIC
Storage / main memory
- 100 GB / 16 GB for OpenShift Container Platform control plane machines
- 100 GB / 8 GB for OpenShift Container Platform compute machines
- 100 GB / 16 GB for the temporary OpenShift Container Platform bootstrap machine
11.2.3.6. Recommended IBM Power system requirements
Hardware requirements
- 6 IBM Power bare metal servers or 6 LPARs across multiple PowerVM servers
Operating system requirements
- One instance of an IBM POWER8 or POWER9 processor-based system
On your IBM Power instance, set up:
- 3 guest virtual machines for OpenShift Container Platform control plane machines
- 2 guest virtual machines for OpenShift Container Platform compute machines
- 1 guest virtual machine for the temporary OpenShift Container Platform bootstrap machine
Disk storage for the IBM Power guest virtual machines
- Storage provisioned by the Virtual I/O Server using vSCSI, NPIV (N-Port ID Virtualization) or SSP (shared storage pools)
Network for the PowerVM guest virtual machines
- Virtualized by the Virtual I/O Server using Shared Ethernet Adapter
- Virtualized by the Virtual I/O Server using IBM vNIC
Storage / main memory
- 120 GB / 32 GB for OpenShift Container Platform control plane machines
- 120 GB / 32 GB for OpenShift Container Platform compute machines
- 120 GB / 16 GB for the temporary OpenShift Container Platform bootstrap machine
11.2.3.7. Certificate signing requests management
Because your cluster has limited access to automatic machine management when you use infrastructure that you provision, you must provide a mechanism for approving cluster certificate signing requests (CSRs) after installation. The kube-controller-manager only approves the kubelet client CSRs. The machine-approver cannot guarantee the validity of a serving certificate that is requested by using kubelet credentials because it cannot confirm that the correct machine issued the request. You must determine and implement a method of verifying the validity of the kubelet serving certificate requests and approving them.
11.2.4. Creating the user-provisioned infrastructure
Before you deploy an OpenShift Container Platform cluster that uses user-provisioned infrastructure, you must create the underlying infrastructure.
Prerequisites
- Review the OpenShift Container Platform 4.x Tested Integrations page before you create the supporting infrastructure for your cluster.
Procedure
- Set up static IP addresses.
- Set up an HTTP or HTTPS server to provide Ignition files to the cluster nodes.
- Provision the required load balancers.
- Configure the ports for your machines.
- Configure DNS.
- Ensure network connectivity.
11.2.4.1. Networking requirements for user-provisioned infrastructure
All the Red Hat Enterprise Linux CoreOS (RHCOS) machines require network in initramfs during boot to fetch Ignition config from the machine config server.
During the initial boot, the machines require an HTTP or HTTPS server to establish a network connection to download their Ignition config files.
Ensure that the machines have persistent IP addresses and host names.
The Kubernetes API server must be able to resolve the node names of the cluster machines. If the API servers and worker nodes are in different zones, you can configure a default DNS search zone to allow the API server to resolve the node names. Another supported approach is to always refer to hosts by their fully-qualified domain names in both the node objects and all DNS requests.
You must configure the network connectivity between machines to allow cluster components to communicate. Each machine must be able to resolve the host names of all other machines in the cluster.
| Protocol | Port | Description |
|---|---|---|
| ICMP | N/A | Network reachability tests |
| TCP |
| Metrics |
|
|
Host level services, including the node exporter on ports | |
|
| The default ports that Kubernetes reserves | |
|
| openshift-sdn | |
| UDP |
| VXLAN and Geneve |
|
| VXLAN and Geneve | |
|
|
Host level services, including the node exporter on ports | |
| TCP/UDP |
| Kubernetes node port |
| Protocol | Port | Description |
|---|---|---|
| TCP |
| Kubernetes API |
| Protocol | Port | Description |
|---|---|---|
| TCP |
| etcd server and peer ports |
Network topology requirements
The infrastructure that you provision for your cluster must meet the following network topology requirements.
Load balancers
Before you install OpenShift Container Platform, you must provision two load balancers that meet the following requirements:
API load balancer: Provides a common endpoint for users, both human and machine, to interact with and configure the platform. Configure the following conditions:
- Layer 4 load balancing only. This can be referred to as Raw TCP, SSL Passthrough, or SSL Bridge mode. If you use SSL Bridge mode, you must enable Server Name Indication (SNI) for the API routes.
- A stateless load balancing algorithm. The options vary based on the load balancer implementation.
ImportantDo not configure session persistence for an API load balancer.
Configure the following ports on both the front and back of the load balancers:
Expand Table 11.12. API load balancer Port Back-end machines (pool members) Internal External Description 6443Bootstrap and control plane. You remove the bootstrap machine from the load balancer after the bootstrap machine initializes the cluster control plane. You must configure the
/readyzendpoint for the API server health check probe.X
X
Kubernetes API server
22623Bootstrap and control plane. You remove the bootstrap machine from the load balancer after the bootstrap machine initializes the cluster control plane.
X
Machine config server
NoteThe load balancer must be configured to take a maximum of 30 seconds from the time the API server turns off the
/readyzendpoint to the removal of the API server instance from the pool. Within the time frame after/readyzreturns an error or becomes healthy, the endpoint must have been removed or added. Probing every 5 or 10 seconds, with two successful requests to become healthy and three to become unhealthy, are well-tested values.Application Ingress load balancer: Provides an Ingress point for application traffic flowing in from outside the cluster. Configure the following conditions:
- Layer 4 load balancing only. This can be referred to as Raw TCP, SSL Passthrough, or SSL Bridge mode. If you use SSL Bridge mode, you must enable Server Name Indication (SNI) for the Ingress routes.
- A connection-based or session-based persistence is recommended, based on the options available and types of applications that will be hosted on the platform.
Configure the following ports on both the front and back of the load balancers:
Expand Table 11.13. Application Ingress load balancer Port Back-end machines (pool members) Internal External Description 443The machines that run the Ingress router pods, compute, or worker, by default.
X
X
HTTPS traffic
80The machines that run the Ingress router pods, compute, or worker, by default.
X
X
HTTP traffic
If the true IP address of the client can be seen by the load balancer, enabling source IP-based session persistence can improve performance for applications that use end-to-end TLS encryption.
A working configuration for the Ingress router is required for an OpenShift Container Platform cluster. You must configure the Ingress router after the control plane initializes.
NTP configuration
OpenShift Container Platform clusters are configured to use a public Network Time Protocol (NTP) server by default. If you want to use a local enterprise NTP server, or if your cluster is being deployed in a disconnected network, you can configure the cluster to use a specific time server. For more information, see the documentation for Configuring chrony time service.
11.2.4.2. User-provisioned DNS requirements
DNS is used for name resolution and reverse name resolution. DNS A/AAAA or CNAME records are used for name resolution and PTR records are used for reverse name resolution. The reverse records are important because Red Hat Enterprise Linux CoreOS (RHCOS) uses the reverse records to set the host name for all the nodes. Additionally, the reverse records are used to generate the certificate signing requests (CSR) that OpenShift Container Platform needs to operate.
The following DNS records are required for an OpenShift Container Platform cluster that uses user-provisioned infrastructure. In each record, <cluster_name> is the cluster name and <base_domain> is the cluster base domain that you specify in the install-config.yaml file. A complete DNS record takes the form: <component>.<cluster_name>.<base_domain>..
| Component | Record | Description |
|---|---|---|
| Kubernetes API |
| Add a DNS A/AAAA or CNAME record, and a DNS PTR record, to identify the load balancer for the control plane machines. These records must be resolvable by both clients external to the cluster and from all the nodes within the cluster. |
|
| Add a DNS A/AAAA or CNAME record, and a DNS PTR record, to identify the load balancer for the control plane machines. These records must be resolvable from all the nodes within the cluster. Important The API server must be able to resolve the worker nodes by the host names that are recorded in Kubernetes. If the API server cannot resolve the node names, then proxied API calls can fail, and you cannot retrieve logs from pods. | |
| Routes |
| Add a wildcard DNS A/AAAA or CNAME record that refers to the load balancer that targets the machines that run the Ingress router pods, which are the worker nodes by default. These records must be resolvable by both clients external to the cluster and from all the nodes within the cluster. |
| Bootstrap |
| Add a DNS A/AAAA or CNAME record, and a DNS PTR record, to identify the bootstrap machine. These records must be resolvable by the nodes within the cluster. |
| Master hosts |
| DNS A/AAAA or CNAME records and DNS PTR records to identify each machine for the control plane nodes (also known as the master nodes). These records must be resolvable by the nodes within the cluster. |
| Worker hosts |
| Add DNS A/AAAA or CNAME records and DNS PTR records to identify each machine for the worker nodes. These records must be resolvable by the nodes within the cluster. |
You can use the nslookup <hostname> command to verify name resolution. You can use the dig -x <ip_address> command to verify reverse name resolution for the PTR records.
The following example of a BIND zone file shows sample A records for name resolution. The purpose of the example is to show the records that are needed. The example is not meant to provide advice for choosing one name resolution service over another.
Example 11.3. Sample DNS zone database
$TTL 1W
@ IN SOA ns1.example.com. root (
2019070700 ; serial
3H ; refresh (3 hours)
30M ; retry (30 minutes)
2W ; expiry (2 weeks)
1W ) ; minimum (1 week)
IN NS ns1.example.com.
IN MX 10 smtp.example.com.
;
;
ns1 IN A 192.168.1.5
smtp IN A 192.168.1.5
;
helper IN A 192.168.1.5
helper.ocp4 IN A 192.168.1.5
;
; The api identifies the IP of your load balancer.
api.ocp4 IN A 192.168.1.5
api-int.ocp4 IN A 192.168.1.5
;
; The wildcard also identifies the load balancer.
*.apps.ocp4 IN A 192.168.1.5
;
; Create an entry for the bootstrap host.
bootstrap.ocp4 IN A 192.168.1.96
;
; Create entries for the master hosts.
master0.ocp4 IN A 192.168.1.97
master1.ocp4 IN A 192.168.1.98
master2.ocp4 IN A 192.168.1.99
;
; Create entries for the worker hosts.
worker0.ocp4 IN A 192.168.1.11
worker1.ocp4 IN A 192.168.1.7
;
;EOFThe following example BIND zone file shows sample PTR records for reverse name resolution.
Example 11.4. Sample DNS zone database for reverse records
$TTL 1W
@ IN SOA ns1.example.com. root (
2019070700 ; serial
3H ; refresh (3 hours)
30M ; retry (30 minutes)
2W ; expiry (2 weeks)
1W ) ; minimum (1 week)
IN NS ns1.example.com.
;
; The syntax is "last octet" and the host must have an FQDN
; with a trailing dot.
97 IN PTR master0.ocp4.example.com.
98 IN PTR master1.ocp4.example.com.
99 IN PTR master2.ocp4.example.com.
;
96 IN PTR bootstrap.ocp4.example.com.
;
5 IN PTR api.ocp4.example.com.
5 IN PTR api-int.ocp4.example.com.
;
11 IN PTR worker0.ocp4.example.com.
7 IN PTR worker1.ocp4.example.com.
;
;EOF11.2.5. Generating an SSH private key and adding it to the agent
If you want to perform installation debugging or disaster recovery on your cluster, you must provide an SSH key to both your ssh-agent and the installation program. You can use this key to access the bootstrap machine in a public cluster to troubleshoot installation issues.
In a production environment, you require disaster recovery and debugging.
Do not skip this procedure in production environments where disaster recovery and debugging is required.
You can use this key to SSH into the master nodes as the user core. When you deploy the cluster, the key is added to the core user’s ~/.ssh/authorized_keys list.
Procedure
If you do not have an SSH key that is configured for password-less authentication on your computer, create one. For example, on a computer that uses a Linux operating system, run the following command:
$ ssh-keygen -t ed25519 -N '' \ -f <path>/<file_name>1 - 1
- Specify the path and file name, such as
~/.ssh/id_rsa, of the new SSH key. If you have an existing key pair, ensure your public key is in the your~/.sshdirectory.
Running this command generates an SSH key that does not require a password in the location that you specified.
NoteIf you plan to install an OpenShift Container Platform cluster that uses FIPS Validated / Modules in Process cryptographic libraries on the
x86_64architecture, do not create a key that uses theed25519algorithm. Instead, create a key that uses thersaorecdsaalgorithm.Start the
ssh-agentprocess as a background task:$ eval "$(ssh-agent -s)"Example output
Agent pid 31874NoteIf your cluster is in FIPS mode, only use FIPS-compliant algorithms to generate the SSH key. The key must be either RSA or ECDSA.
Add your SSH private key to the
ssh-agent:$ ssh-add <path>/<file_name>1 Example output
Identity added: /home/<you>/<path>/<file_name> (<computer_name>)- 1
- Specify the path and file name for your SSH private key, such as
~/.ssh/id_rsa
Next steps
- When you install OpenShift Container Platform, provide the SSH public key to the installation program.
11.2.6. Manually creating the installation configuration file
For installations of OpenShift Container Platform that use user-provisioned infrastructure, you manually generate your installation configuration file.
Prerequisites
- Obtain the OpenShift Container Platform installation program and the access token for your cluster.
Procedure
Create an installation directory to store your required installation assets in:
$ mkdir <installation_directory>ImportantYou must create a directory. Some installation assets, like bootstrap X.509 certificates have short expiration intervals, so you must not reuse an installation directory. If you want to reuse individual files from another cluster installation, you can copy them into your directory. However, the file names for the installation assets might change between releases. Use caution when copying installation files from an earlier OpenShift Container Platform version.
Customize the following
install-config.yamlfile template and save it in the<installation_directory>.NoteYou must name this configuration file
install-config.yaml.Back up the
install-config.yamlfile so that you can use it to install multiple clusters.ImportantThe
install-config.yamlfile is consumed during the next step of the installation process. You must back it up now.
11.2.6.1. Sample install-config.yaml file for IBM Z
11.2.6.2. Sample install-config.yaml file for IBM Power Systems
You can customize the install-config.yaml file to specify more details about your OpenShift Container Platform cluster’s platform or modify the values of the required parameters.
apiVersion: v1
baseDomain: example.com
compute:
- hyperthreading: Enabled
name: worker
replicas: 0
architecture : ppc64le
controlPlane:
hyperthreading: Enabled
name: master
replicas: 3
architecture : ppc64le
metadata:
name: test
networking:
clusterNetwork:
- cidr: 10.128.0.0/14
hostPrefix: 23
networkType: OpenShiftSDN
serviceNetwork:
- 172.30.0.0/16
platform:
none: {}
fips: false
pullSecret: '{"auths":{"<local_registry>": {"auth": "<credentials>","email": "you@example.com"}}}'
sshKey: 'ssh-ed25519 AAAA...'
additionalTrustBundle: |
-----BEGIN CERTIFICATE-----
ZZZZZZZZZZZZZZZZZZZZZZZZZZZZZZZZZZZZZZZZZZZZZZZZZZZZZZZZZZZZZZZZ
-----END CERTIFICATE-----
imageContentSources:
- mirrors:
- <local_repository>/ocp4/openshift4
source: quay.io/openshift-release-dev/ocp-release
- mirrors:
- <local_repository>/ocp4/openshift4
source: quay.io/openshift-release-dev/ocp-v4.0-art-dev- 1
- The base domain of the cluster. All DNS records must be sub-domains of this base and include the cluster name.
- 2 5
- The
controlPlanesection is a single mapping, but thecomputesection is a sequence of mappings. To meet the requirements of the different data structures, the first line of thecomputesection must begin with a hyphen,-, and the first line of thecontrolPlanesection must not. Only one control plane pool is used. - 3 6
- Whether to enable or disable simultaneous multithreading (SMT), or
hyperthreading. By default, SMT is enabled to increase the performance of your machines' cores. You can disable it by setting the parameter value toDisabled. If you disable SMT, you must disable it in all cluster machines; this includes both control plane and compute machines.NoteSimultaneous multithreading (SMT) is enabled by default. If SMT is not enabled in your BIOS settings, the
hyperthreadingparameter has no effect.ImportantIf you disable
hyperthreading, whether in the BIOS or in theinstall-config.yaml, ensure that your capacity planning accounts for the dramatically decreased machine performance. - 4
- You must set the value of the
replicasparameter to0. This parameter controls the number of workers that the cluster creates and manages for you, which are functions that the cluster does not perform when you use user-provisioned infrastructure. You must manually deploy worker machines for the cluster to use before you finish installing OpenShift Container Platform. - 7
- The number of control plane machines that you add to the cluster. Because the cluster uses these values as the number of etcd endpoints in the cluster, the value must match the number of control plane machines that you deploy.
- 8
- The cluster name that you specified in your DNS records.
- 9
- A block of IP addresses from which pod IP addresses are allocated. This block must not overlap with existing physical networks. These IP addresses are used for the pod network. If you need to access the pods from an external network, you must configure load balancers and routers to manage the traffic.Note
Class E CIDR range is reserved for a future use. To use the Class E CIDR range, you must ensure your networking environment accepts the IP addresses within the Class E CIDR range.
- 10
- The subnet prefix length to assign to each individual node. For example, if
hostPrefixis set to23, then each node is assigned a/23subnet out of the givencidr, which allows for 510 (2^(32 - 23) - 2) pod IPs addresses. If you are required to provide access to nodes from an external network, configure load balancers and routers to manage the traffic. - 11
- The IP address pool to use for service IP addresses. You can enter only one IP address pool. This block must not overlap with existing physical networks. If you need to access the services from an external network, configure load balancers and routers to manage the traffic.
- 12
- You must set the platform to
none. You cannot provide additional platform configuration variables for IBM Z infrastructure. IBM Power Systems infrastructure.WarningRed Hat Virtualization does not currently support installation with user-provisioned infrastructure on the oVirt platform. Therefore, you must set the platform to
none, allowing OpenShift Container Platform to identify each node as a bare-metal node and the cluster as a bare-metal cluster. This is the same as installing a cluster on any platform, and has the following limitations:- There will be no cluster provider so you must manually add each machine and there will be no node scaling capabilities.
- The oVirt CSI driver will not be installed and there will be no CSI capabilities.
- 13
- Whether to enable or disable FIPS mode. By default, FIPS mode is not enabled. If FIPS mode is enabled, the Red Hat Enterprise Linux CoreOS (RHCOS) machines that OpenShift Container Platform runs on bypass the default Kubernetes cryptography suite and use the cryptography modules that are provided with RHCOS instead.Important
The use of FIPS Validated / Modules in Process cryptographic libraries is only supported on OpenShift Container Platform deployments on the
x86_64architecture. - 14
- For
<local_registry>, specify the registry domain name, and optionally the port, that your mirror registry uses to serve content. For example,registry.example.comorregistry.example.com:5000. For<credentials>, specify the base64-encoded user name and password for your mirror registry. - 15
- The public portion of the default SSH key for the
coreuser in Red Hat Enterprise Linux CoreOS (RHCOS).NoteFor production OpenShift Container Platform clusters on which you want to perform installation debugging or disaster recovery, specify an SSH key that your
ssh-agentprocess uses. - 16
- Add the
additionalTrustBundleparameter and value. The value must be the contents of the certificate file that you used for your mirror registry, which can be an existing, trusted certificate authority or the self-signed certificate that you generated for the mirror registry. - 17
- Provide the
imageContentSourcessection from the output of the command to mirror the repository.
11.2.6.3. Configuring the cluster-wide proxy during installation
Production environments can deny direct access to the Internet and instead have an HTTP or HTTPS proxy available. You can configure a new OpenShift Container Platform cluster to use a proxy by configuring the proxy settings in the install-config.yaml file.
Prerequisites
-
You have an existing
install-config.yamlfile. You reviewed the sites that your cluster requires access to and determined whether any of them need to bypass the proxy. By default, all cluster egress traffic is proxied, including calls to hosting cloud provider APIs. You added sites to the
Proxyobject’sspec.noProxyfield to bypass the proxy if necessary.NoteThe
Proxyobjectstatus.noProxyfield is populated with the values of thenetworking.machineNetwork[].cidr,networking.clusterNetwork[].cidr, andnetworking.serviceNetwork[]fields from your installation configuration.For installations on Amazon Web Services (AWS), Google Cloud Platform (GCP), Microsoft Azure, and Red Hat OpenStack Platform (RHOSP), the
Proxyobjectstatus.noProxyfield is also populated with the instance metadata endpoint (169.254.169.254).
Procedure
Edit your
install-config.yamlfile and add the proxy settings. For example:apiVersion: v1 baseDomain: my.domain.com proxy: httpProxy: http://<username>:<pswd>@<ip>:<port>1 httpsProxy: https://<username>:<pswd>@<ip>:<port>2 noProxy: example.com3 additionalTrustBundle: |4 -----BEGIN CERTIFICATE----- <MY_TRUSTED_CA_CERT> -----END CERTIFICATE----- ...- 1
- A proxy URL to use for creating HTTP connections outside the cluster. The URL scheme must be
http. - 2
- A proxy URL to use for creating HTTPS connections outside the cluster.
- 3
- A comma-separated list of destination domain names, IP addresses, or other network CIDRs to exclude from proxying. Preface a domain with
.to match subdomains only. For example,.y.commatchesx.y.com, but noty.com. Use*to bypass the proxy for all destinations. - 4
- If provided, the installation program generates a config map that is named
user-ca-bundlein theopenshift-confignamespace to hold the additional CA certificates. If you provideadditionalTrustBundleand at least one proxy setting, theProxyobject is configured to reference theuser-ca-bundleconfig map in thetrustedCAfield. The Cluster Network Operator then creates atrusted-ca-bundleconfig map that merges the contents specified for thetrustedCAparameter with the RHCOS trust bundle. TheadditionalTrustBundlefield is required unless the proxy’s identity certificate is signed by an authority from the RHCOS trust bundle.
NoteThe installation program does not support the proxy
readinessEndpointsfield.- Save the file and reference it when installing OpenShift Container Platform.
The installation program creates a cluster-wide proxy that is named cluster that uses the proxy settings in the provided install-config.yaml file. If no proxy settings are provided, a cluster Proxy object is still created, but it will have a nil spec.
Only the Proxy object named cluster is supported, and no additional proxies can be created.
11.2.7. Creating the Kubernetes manifest and Ignition config files
Because you must modify some cluster definition files and manually start the cluster machines, you must generate the Kubernetes manifest and Ignition config files that the cluster needs to make its machines.
The installation configuration file transforms into the Kubernetes manifests. The manifests wrap into the Ignition configuration files, which are later used to create the cluster.
The Ignition config files that the installation program generates contain certificates that expire after 24 hours, which are then renewed at that time. If the cluster is shut down before renewing the certificates and the cluster is later restarted after the 24 hours have elapsed, the cluster automatically recovers the expired certificates. The exception is that you must manually approve the pending node-bootstrapper certificate signing requests (CSRs) to recover kubelet certificates. See the documentation for Recovering from expired control plane certificates for more information.
The installation program that generates the manifest and Ignition files is architecture specific and can be obtained from the client image mirror. The Linux version of the installation program runs on s390x only. This installer program is also available as a Mac OS version.
The installation program that generates the manifest and Ignition files is architecture specific and can be obtained from the client image mirror. The Linux version of the installation program runs on ppc64le only. This installer program is also available as a Mac OS version.
Prerequisites
- You obtained the OpenShift Container Platform installation program. For a restricted network installation, these files are on your mirror host.
-
You created the
install-config.yamlinstallation configuration file.
Procedure
Change to the directory that contains the installation program and generate the Kubernetes manifests for the cluster:
$ ./openshift-install create manifests --dir <installation_directory>1 - 1
- For
<installation_directory>, specify the installation directory that contains theinstall-config.yamlfile you created.
WarningIf you are installing a three-node cluster, skip the following step to allow the control plane nodes to be schedulable.
ImportantWhen you configure control plane nodes from the default unschedulable to schedulable, additional subscriptions are required. This is because control plane nodes then become worker nodes.
Check that the
mastersSchedulableparameter in the<installation_directory>/manifests/cluster-scheduler-02-config.ymlKubernetes manifest file is set tofalse. This setting prevents pods from being scheduled on the control plane machines:-
Open the
<installation_directory>/manifests/cluster-scheduler-02-config.ymlfile. -
Locate the
mastersSchedulableparameter and ensure that it is set tofalse. - Save and exit the file.
-
Open the
To create the Ignition configuration files, run the following command from the directory that contains the installation program:
$ ./openshift-install create ignition-configs --dir <installation_directory>1 - 1
- For
<installation_directory>, specify the same installation directory.
The following files are generated in the directory:
. ├── auth │ ├── kubeadmin-password │ └── kubeconfig ├── bootstrap.ign ├── master.ign ├── metadata.json └── worker.ign
11.2.8. Creating Red Hat Enterprise Linux CoreOS (RHCOS) machines
Before you install a cluster on IBM Power Systems infrastructure that you provision, you must create RHCOS machines for it to use. Follow either the steps to use an ISO image or network PXE booting to create the machines.
11.2.8.1. Creating Red Hat Enterprise Linux CoreOS (RHCOS) machines using an ISO image
Before you install a cluster on IBM Power Systems infrastructure that you provision, you must create RHCOS machines for it to use. You can use an ISO image to create the machines.
Prerequisites
- Obtain the Ignition config files for your cluster.
- Have access to an HTTP server that can be accessed from your computer, and from the machines that you create.
Procedure
Upload the control plane, compute, and bootstrap Ignition config files that the installation program created to your HTTP server. Note the URLs of these files.
ImportantIf you plan to add more compute machines to your cluster after you finish installation, do not delete these files.
Obtain the RHCOS images that are required for your preferred method of installing operating system instances from the RHCOS image mirror page.
ImportantThe RHCOS images might not change with every release of OpenShift Container Platform. You must download images with the highest version that is less than or equal to the OpenShift Container Platform version that you install. Use the image versions that match your OpenShift Container Platform version if they are available. Use only ISO images for this procedure. RHCOS qcow2 images are not supported for this installation type.
ISO file names resemble the following example:
rhcos-<version>-live.<architecture>.isoUse the ISO to start the RHCOS installation. Use one of the following installation options:
- Burn the ISO image to a disk and boot it directly.
- Use ISO redirection via a LOM interface.
-
Boot the ISO image. You can interrupt the installation boot process to add kernel arguments. However, for this ISO procedure you should use the
coreos-installercommand instead of adding kernel arguments. If you run the live installer without options or interruption, the installer boots up to a shell prompt on the live system, ready for you to install RHCOS to disk. -
Review the Advanced RHCOS installation reference section for different ways of configuring features, such as networking and disk partitions, before running the
coreos-installer. Run the
coreos-installercommand. At a minimum, you must identify the Ignition config file location for your node type, and the location of the disk you are installing to. Here is an example:$ sudo coreos-installer install \ --ignition-url=https://host/worker.ign /dev/sda- After RHCOS installs, the system reboots. During the system reboot, it applies the Ignition config file that you specified.
Continue to create the other machines for your cluster.
ImportantYou must create the bootstrap and control plane machines at this time. If the control plane machines are not made schedulable, which is the default, also create at least two compute machines before you install the cluster.
11.2.8.1.1. Advanced RHCOS installation reference
This section illustrates the networking configuration and other advanced options that allow you to modify the Red Hat Enterprise Linux CoreOS (RHCOS) manual installation process. The following tables describe the kernel arguments and command-line options you can use with the RHCOS live installer and the coreos-installer command.
Routing and bonding options at RHCOS boot prompt
If you install RHCOS from an ISO image, you can add kernel arguments manually when you boot that image to configure the node’s networking. If no networking arguments are used, the installation defaults to using DHCP.
When adding networking arguments, you must also add the rd.neednet=1 kernel argument.
The following table describes how to use ip=, nameserver=, and bond= kernel arguments for live ISO installs.
Ordering is important when adding kernel arguments: ip=, nameserver=, and then bond=.
Routing and bonding options for ISO
The following table provides examples for configuring networking of your Red Hat Enterprise Linux CoreOS (RHCOS) nodes. These are networking options that are passed to the dracut tool during system boot. For more information about the networking options supported by dracut, see the dracut.cmdline manual page.
| Description | Examples |
|---|---|
|
To configure an IP address, either use DHCP (
|
|
|
Specify multiple network interfaces by specifying multiple |
|
|
Optional: You can configure routes to additional networks by setting an If the additional network gateway is different from the primary network gateway, the default gateway must be the primary network gateway. | To configure the default gateway: To configure the route for the additional network: |
| Disable DHCP on a single interface, such as when there are two or more network interfaces and only one interface is being used. |
|
| You can combine DHCP and static IP configurations on systems with multiple network interfaces. |
|
|
Optional: You can configure VLANs on individual interfaces by using the | To configure a VLAN on a network interface and use a static IP address: To configure a VLAN on a network interface and to use DHCP: |
|
You can provide multiple DNS servers by adding a |
|
|
Optional: Bonding multiple network interfaces to a single interface is supported using the
|
To configure the bonded interface to use DHCP, set the bond’s IP address to To configure the bonded interface to use a static IP address, enter the specific IP address you want and related information. For example: |
|
Optional: You can configure VLANs on bonded interfaces by using the | To configure the bonded interface with a VLAN and to use DHCP: To configure the bonded interface with a VLAN and to use a static IP address: |
|
Optional: Network teaming can be used as an alternative to bonding by using the
Note Teaming is planned to be deprecated when RHCOS switches to an upcoming version of RHEL. For more information, see this Red Hat Knowledgebase Article. | To configure a network team: |
11.2.8.2. Creating Red Hat Enterprise Linux CoreOS (RHCOS) machines by PXE or iPXE booting
Before you install a cluster that uses manually-provisioned RHCOS nodes, such as bare metal, you must create RHCOS machines for it to use. You can use PXE or iPXE booting to create the machines.
Prerequisites
- Obtain the Ignition config files for your cluster.
- Configure suitable PXE or iPXE infrastructure.
- Have access to an HTTP server that you can access from your computer.
Procedure
Upload the master, worker, and bootstrap Ignition config files that the installation program created to your HTTP server. Note the URLs of these files.
ImportantYou can add or change configuration settings in your Ignition configs before saving them to your HTTP server. If you plan to add more compute machines to your cluster after you finish installation, do not delete these files.
Obtain the RHCOS
kernel,initramfsandrootfsfiles from the RHCOS image mirror page.ImportantThe RHCOS artifacts might not change with every release of OpenShift Container Platform. You must download artifacts with the highest version that is less than or equal to the OpenShift Container Platform version that you install. Only use the appropriate
kernel,initramfs, androotfsartifacts described below for this procedure. RHCOS qcow2 images are not supported for this installation type.The file names contain the OpenShift Container Platform version number. They resemble the following examples:
-
kernel:rhcos-<version>-live-kernel-<architecture> -
initramfs:rhcos-<version>-live-initramfs.<architecture>.img -
rootfs:rhcos-<version>-live-rootfs.<architecture>.img
-
Upload the additional files that are required for your booting method:
-
For traditional PXE, upload the
kernelandinitramfsfiles to your TFTP server and therootfsfile to your HTTP server. For iPXE, upload the
kernel,initramfs, androotfsfiles to your HTTP server.ImportantIf you plan to add more compute machines to your cluster after you finish installation, do not delete these files.
-
For traditional PXE, upload the
- Configure the network boot infrastructure so that the machines boot from their local disks after RHCOS is installed on them.
Configure PXE or iPXE installation for the RHCOS images.
Modify one of the following example menu entries for your environment and verify that the image and Ignition files are properly accessible:
For PXE:
DEFAULT pxeboot TIMEOUT 20 PROMPT 0 LABEL pxeboot KERNEL http://<HTTP_server>/rhcos-<version>-live-kernel-<architecture>1 APPEND initrd=http://<HTTP_server>/rhcos-<version>-live-initramfs.<architecture>.img coreos.live.rootfs_url=http://<HTTP_server>/rhcos-<version>-live-rootfs.<architecture>.img coreos.inst.install_dev=/dev/sda coreos.inst.ignition_url=http://<HTTP_server>/bootstrap.ign2 3 - 1
- Specify the location of the live
kernelfile that you uploaded to your HTTP server. The URL must be HTTP, TFTP, or FTP; HTTPS and NFS are not supported. - 2
- If you use multiple NICs, specify a single interface in the
ipoption. For example, to use DHCP on a NIC that is namedeno1, setip=eno1:dhcp. - 3
- Specify locations of the RHCOS files that you uploaded to your HTTP server. The
initrdparameter value is the location of theinitramfsfile, thecoreos.live.rootfs_urlparameter value is the location of therootfsfile, and thecoreos.inst.ignition_urlparameter value is the location of the bootstrap Ignition config file. You can also add more kernel arguments to theAPPENDline to configure networking or other boot options.
NoteThis configuration does not enable serial console access on machines with a graphical console. To configure a different console, add one or more
console=arguments to theAPPENDline. For example, addconsole=tty0 console=ttyS0to set the first PC serial port as the primary console and the graphical console as a secondary console. For more information, see How does one set up a serial terminal and/or console in Red Hat Enterprise Linux?.For iPXE:
kernel http://<HTTP_server>/rhcos-<version>-live-kernel-<architecture> initrd=main coreos.live.rootfs_url=http://<HTTP_server>/rhcos-<version>-live-rootfs.<architecture>.img coreos.inst.install_dev=/dev/sda coreos.inst.ignition_url=http://<HTTP_server>/bootstrap.ign1 2 initrd --name main http://<HTTP_server>/rhcos-<version>-live-initramfs.<architecture>.img3 boot- 1
- Specify locations of the RHCOS files that you uploaded to your HTTP server. The
kernelparameter value is the location of thekernelfile, theinitrd=mainargument is needed for booting on UEFI systems, thecoreos.live.rootfs_urlparameter value is the location of therootfsfile, and thecoreos.inst.ignition_urlparameter value is the location of the bootstrap Ignition config file. - 2
- If you use multiple NICs, specify a single interface in the
ipoption. For example, to use DHCP on a NIC that is namedeno1, setip=eno1:dhcp. - 3
- Specify the location of the
initramfsfile that you uploaded to your HTTP server.
NoteThis configuration does not enable serial console access on machines with a graphical console. To configure a different console, add one or more
console=arguments to thekernelline. For example, addconsole=tty0 console=ttyS0to set the first PC serial port as the primary console and the graphical console as a secondary console. For more information, see How does one set up a serial terminal and/or console in Red Hat Enterprise Linux?.
If you use PXE UEFI, perform the following actions:
Provide the
shimx64.efiandgrubx64.efiEFI binaries and thegrub.cfgfile that are required for booting the system.Extract the necessary EFI binaries by mounting the RHCOS ISO to your host and then mounting the
images/efiboot.imgfile to your host:$ mkdir -p /mnt/iso$ mkdir -p /mnt/efiboot$ mount -o loop rhcos-installer.x86_64.iso /mnt/iso$ mount -o loop,ro /mnt/iso/images/efiboot.img /mnt/efibootFrom the
efiboot.imgmount point, copy theEFI/redhat/shimx64.efiandEFI/redhat/grubx64.efifiles to your TFTP server:$ cp /mnt/efiboot/EFI/redhat/shimx64.efi .$ cp /mnt/efiboot/EFI/redhat/grubx64.efi .$ umount /mnt/efiboot$ umount /mnt/iso-
Copy the
EFI/redhat/grub.cfgfile that is included in the RHCOS ISO to your TFTP server.
Edit the
grub.cfgfile to include arguments similar to the following:menuentry 'Install Red Hat Enterprise Linux CoreOS' --class fedora --class gnu-linux --class gnu --class os { linuxefi rhcos-<version>-live-kernel-<architecture> coreos.inst.install_dev=/dev/sda coreos.live.rootfs_url=http://<HTTP_server>/rhcos-<version>-live-rootfs.<architecture>.img coreos.inst.ignition_url=http://<HTTP_server>/bootstrap.ign initrdefi rhcos-<version>-live-initramfs.<architecture>.img }where:
rhcos-<version>-live-kernel-<architecture>-
Specifies the
kernelfile that you uploaded to your TFTP server. http://<HTTP_server>/rhcos-<version>-live-rootfs.<architecture>.img- Specifies the location of the live rootfs image that you uploaded to your HTTP server.
http://<HTTP_server>/bootstrap.ign- Specifies the location of the bootstrap Ignition config file that you uploaded to your HTTP server.
rhcos-<version>-live-initramfs.<architecture>.img-
Specifies the location of the
initramfsfile that you uploaded to your TFTP server.
NoteFor more information on how to configure a PXE server for UEFI boot, see the Red Hat Knowledgebase article: How to configure/setup a PXE server for UEFI boot for Red Hat Enterprise Linux?.
Continue to create the machines for your cluster.
ImportantYou must create the bootstrap and control plane machines at this time. If the control plane machines are not made schedulable, which is the default, also create at least two compute machines before you install the cluster.
11.2.9. Creating the cluster
To create the OpenShift Container Platform cluster, you wait for the bootstrap process to complete on the machines that you provisioned by using the Ignition config files that you generated with the installation program.
Prerequisites
- Create the required infrastructure for the cluster.
- You obtained the installation program and generated the Ignition config files for your cluster.
- You used the Ignition config files to create RHCOS machines for your cluster.
Procedure
Monitor the bootstrap process:
$ ./openshift-install --dir <installation_directory> wait-for bootstrap-complete \1 --log-level=info2 Example output
INFO Waiting up to 30m0s for the Kubernetes API at https://api.test.example.com:6443... INFO API v1.20.0 up INFO Waiting up to 30m0s for bootstrapping to complete... INFO It is now safe to remove the bootstrap resourcesThe command succeeds when the Kubernetes API server signals that it has been bootstrapped on the control plane machines.
After bootstrap process is complete, remove the bootstrap machine from the load balancer.
ImportantYou must remove the bootstrap machine from the load balancer at this point. You can also remove or reformat the machine itself.
11.2.10. Logging in to the cluster by using the CLI
You can log in to your cluster as a default system user by exporting the cluster kubeconfig file. The kubeconfig file contains information about the cluster that is used by the CLI to connect a client to the correct cluster and API server. The file is specific to a cluster and is created during OpenShift Container Platform installation.
Prerequisites
- You deployed an OpenShift Container Platform cluster.
-
You installed the
ocCLI.
Procedure
Export the
kubeadmincredentials:$ export KUBECONFIG=<installation_directory>/auth/kubeconfig1 - 1
- For
<installation_directory>, specify the path to the directory that you stored the installation files in.
Verify you can run
occommands successfully using the exported configuration:$ oc whoamiExample output
system:admin
11.2.11. Approving the certificate signing requests for your machines
When you add machines to a cluster, two pending certificate signing requests (CSRs) are generated for each machine that you added. You must confirm that these CSRs are approved or, if necessary, approve them yourself. The client requests must be approved first, followed by the server requests.
Prerequisites
- You added machines to your cluster.
Procedure
Confirm that the cluster recognizes the machines:
$ oc get nodesExample output
NAME STATUS ROLES AGE VERSION master-0 Ready master 63m v1.20.0 master-1 Ready master 63m v1.20.0 master-2 Ready master 64m v1.20.0The output lists all of the machines that you created.
NoteThe preceding output might not include the compute nodes, also known as worker nodes, until some CSRs are approved.
Review the pending CSRs and ensure that you see the client requests with the
PendingorApprovedstatus for each machine that you added to the cluster:$ oc get csrExample output
NAME AGE REQUESTOR CONDITION csr-mddf5 20m system:node:master-01.example.com Approved,Issued csr-z5rln 16m system:node:worker-21.example.com Approved,IssuedIf the CSRs were not approved, after all of the pending CSRs for the machines you added are in
Pendingstatus, approve the CSRs for your cluster machines:NoteBecause the CSRs rotate automatically, approve your CSRs within an hour of adding the machines to the cluster. If you do not approve them within an hour, the certificates will rotate, and more than two certificates will be present for each node. You must approve all of these certificates. Once the client CSR is approved, the Kubelet creates a secondary CSR for the serving certificate, which requires manual approval. Then, subsequent serving certificate renewal requests are automatically approved by the
machine-approverif the Kubelet requests a new certificate with identical parameters.NoteFor clusters running on platforms that are not machine API enabled, such as bare metal and other user-provisioned infrastructure, you must implement a method of automatically approving the kubelet serving certificate requests (CSRs). If a request is not approved, then the
oc exec,oc rsh, andoc logscommands cannot succeed, because a serving certificate is required when the API server connects to the kubelet. Any operation that contacts the Kubelet endpoint requires this certificate approval to be in place. The method must watch for new CSRs, confirm that the CSR was submitted by thenode-bootstrapperservice account in thesystem:nodeorsystem:admingroups, and confirm the identity of the node.To approve them individually, run the following command for each valid CSR:
$ oc adm certificate approve <csr_name>1 - 1
<csr_name>is the name of a CSR from the list of current CSRs.
To approve all pending CSRs, run the following command:
$ oc get csr -o go-template='{{range .items}}{{if not .status}}{{.metadata.name}}{{"\n"}}{{end}}{{end}}' | xargs --no-run-if-empty oc adm certificate approveNoteSome Operators might not become available until some CSRs are approved.
Now that your client requests are approved, you must review the server requests for each machine that you added to the cluster:
$ oc get csrExample output
NAME AGE REQUESTOR CONDITION csr-bfd72 5m26s system:node:ip-10-0-50-126.us-east-2.compute.internal Pending csr-c57lv 5m26s system:node:ip-10-0-95-157.us-east-2.compute.internal Pending ...If the remaining CSRs are not approved, and are in the
Pendingstatus, approve the CSRs for your cluster machines:To approve them individually, run the following command for each valid CSR:
$ oc adm certificate approve <csr_name>1 - 1
<csr_name>is the name of a CSR from the list of current CSRs.
To approve all pending CSRs, run the following command:
$ oc get csr -o go-template='{{range .items}}{{if not .status}}{{.metadata.name}}{{"\n"}}{{end}}{{end}}' | xargs oc adm certificate approve
After all client and server CSRs have been approved, the machines have the
Readystatus. Verify this by running the following command:$ oc get nodesExample output
NAME STATUS ROLES AGE VERSION master-0 Ready master 73m v1.20.0 master-1 Ready master 73m v1.20.0 master-2 Ready master 74m v1.20.0 worker-0 Ready worker 11m v1.20.0 worker-1 Ready worker 11m v1.20.0NoteIt can take a few minutes after approval of the server CSRs for the machines to transition to the
Readystatus.
Additional information
- For more information on CSRs, see Certificate Signing Requests.
11.2.12. Initial Operator configuration
After the control plane initializes, you must immediately configure some Operators so that they all become available.
Prerequisites
- Your control plane has initialized.
Procedure
Watch the cluster components come online:
$ watch -n5 oc get clusteroperatorsExample output
NAME VERSION AVAILABLE PROGRESSING DEGRADED SINCE authentication 4.7.0 True False False 3h56m baremetal 4.7.0 True False False 29h cloud-credential 4.7.0 True False False 29h cluster-autoscaler 4.7.0 True False False 29h config-operator 4.7.0 True False False 6h39m console 4.7.0 True False False 3h59m csi-snapshot-controller 4.7.0 True False False 4h12m dns 4.7.0 True False False 4h15m etcd 4.7.0 True False False 29h image-registry 4.7.0 True False False 3h59m ingress 4.7.0 True False False 4h30m insights 4.7.0 True False False 29h kube-apiserver 4.7.0 True False False 29h kube-controller-manager 4.7.0 True False False 29h kube-scheduler 4.7.0 True False False 29h kube-storage-version-migrator 4.7.0 True False False 4h2m machine-api 4.7.0 True False False 29h machine-approver 4.7.0 True False False 6h34m machine-config 4.7.0 True False False 3h56m marketplace 4.7.0 True False False 4h2m monitoring 4.7.0 True False False 6h31m network 4.7.0 True False False 29h node-tuning 4.7.0 True False False 4h30m openshift-apiserver 4.7.0 True False False 3h56m openshift-controller-manager 4.7.0 True False False 4h36m openshift-samples 4.7.0 True False False 4h30m operator-lifecycle-manager 4.7.0 True False False 29h operator-lifecycle-manager-catalog 4.7.0 True False False 29h operator-lifecycle-manager-packageserver 4.7.0 True False False 3h59m service-ca 4.7.0 True False False 29h storage 4.7.0 True False False 4h30m- Configure the Operators that are not available.
11.2.12.1. Disabling the default OperatorHub sources
Operator catalogs that source content provided by Red Hat and community projects are configured for OperatorHub by default during an OpenShift Container Platform installation. In a restricted network environment, you must disable the default catalogs as a cluster administrator.
Procedure
Disable the sources for the default catalogs by adding
disableAllDefaultSources: trueto theOperatorHubobject:$ oc patch OperatorHub cluster --type json \ -p '[{"op": "add", "path": "/spec/disableAllDefaultSources", "value": true}]'
Alternatively, you can use the web console to manage catalog sources. From the Administration → Cluster Settings → Global Configuration → OperatorHub page, click the Sources tab, where you can create, delete, disable, and enable individual sources.
11.2.12.2. Image registry storage configuration
The Image Registry Operator is not initially available for platforms that do not provide default storage. After installation, you must configure your registry to use storage so that the Registry Operator is made available.
Instructions are shown for configuring a persistent volume, which is required for production clusters. Where applicable, instructions are shown for configuring an empty directory as the storage location, which is available for only non-production clusters.
Additional instructions are provided for allowing the image registry to use block storage types by using the Recreate rollout strategy during upgrades.
11.2.12.2.1. Changing the image registry’s management state
To start the image registry, you must change the Image Registry Operator configuration’s managementState from Removed to Managed.
Procedure
Change
managementStateImage Registry Operator configuration fromRemovedtoManaged. For example:$ oc patch configs.imageregistry.operator.openshift.io cluster --type merge --patch '{"spec":{"managementState":"Managed"}}'
11.2.12.2.2. Configuring registry storage for IBM Z
11.2.12.2.3. Configuring registry storage for IBM Power Systems
As a cluster administrator, following installation you must configure your registry to use storage.
Prerequisites
- Cluster administrator permissions.
- A cluster on IBM Z. on IBM Power Systems.
Persistent storage provisioned for your cluster.
ImportantOpenShift Container Platform supports
ReadWriteOnceaccess for image registry storage when you have only one replica. To deploy an image registry that supports high availability with two or more replicas,ReadWriteManyaccess is required.- Must have 100Gi capacity.
Procedure
To configure your registry to use storage, change the
spec.storage.pvcin theconfigs.imageregistry/clusterresource.NoteWhen using shared storage, review your security settings to prevent outside access.
Verify that you do not have a registry pod:
$ oc get pod -n openshift-image-registry -l docker-registry=defaultExample output
No resourses found in openshift-image-registry namespaceNoteIf you do have a registry pod in your output, you do not need to continue with this procedure.
Check the registry configuration:
$ oc edit configs.imageregistry.operator.openshift.ioExample output
storage: pvc: claim:Leave the
claimfield blank to allow the automatic creation of animage-registry-storagePVC.Check the
clusteroperatorstatus:$ oc get clusteroperator image-registryExample output
NAME VERSION AVAILABLE PROGRESSING DEGRADED SINCE MESSAGE image-registry 4.7 True False False 6h50mEnsure that your registry is set to managed to enable building and pushing of images.
Run:
$ oc edit configs.imageregistry/clusterThen, change the line
managementState: Removedto
managementState: Managed
11.2.12.2.4. Configuring storage for the image registry in non-production clusters
You must configure storage for the Image Registry Operator. For non-production clusters, you can set the image registry to an empty directory. If you do so, all images are lost if you restart the registry.
Procedure
To set the image registry storage to an empty directory:
$ oc patch configs.imageregistry.operator.openshift.io cluster --type merge --patch '{"spec":{"storage":{"emptyDir":{}}}}'WarningConfigure this option for only non-production clusters.
If you run this command before the Image Registry Operator initializes its components, the
oc patchcommand fails with the following error:Error from server (NotFound): configs.imageregistry.operator.openshift.io "cluster" not foundWait a few minutes and run the command again.
11.2.13. Completing installation on user-provisioned infrastructure
After you complete the Operator configuration, you can finish installing the cluster on infrastructure that you provide.
Prerequisites
- Your control plane has initialized.
- You have completed the initial Operator configuration.
Procedure
Confirm that all the cluster components are online with the following command:
$ watch -n5 oc get clusteroperatorsExample output
NAME VERSION AVAILABLE PROGRESSING DEGRADED SINCE authentication 4.7.0 True False False 3h56m baremetal 4.7.0 True False False 29h cloud-credential 4.7.0 True False False 29h cluster-autoscaler 4.7.0 True False False 29h config-operator 4.7.0 True False False 6h39m console 4.7.0 True False False 3h59m csi-snapshot-controller 4.7.0 True False False 4h12m dns 4.7.0 True False False 4h15m etcd 4.7.0 True False False 29h image-registry 4.7.0 True False False 3h59m ingress 4.7.0 True False False 4h30m insights 4.7.0 True False False 29h kube-apiserver 4.7.0 True False False 29h kube-controller-manager 4.7.0 True False False 29h kube-scheduler 4.7.0 True False False 29h kube-storage-version-migrator 4.7.0 True False False 4h2m machine-api 4.7.0 True False False 29h machine-approver 4.7.0 True False False 6h34m machine-config 4.7.0 True False False 3h56m marketplace 4.7.0 True False False 4h2m monitoring 4.7.0 True False False 6h31m network 4.7.0 True False False 29h node-tuning 4.7.0 True False False 4h30m openshift-apiserver 4.7.0 True False False 3h56m openshift-controller-manager 4.7.0 True False False 4h36m openshift-samples 4.7.0 True False False 4h30m operator-lifecycle-manager 4.7.0 True False False 29h operator-lifecycle-manager-catalog 4.7.0 True False False 29h operator-lifecycle-manager-packageserver 4.7.0 True False False 3h59m service-ca 4.7.0 True False False 29h storage 4.7.0 True False False 4h30mAlternatively, the following command notifies you when all of the clusters are available. It also retrieves and displays credentials:
$ ./openshift-install --dir <installation_directory> wait-for install-complete1 - 1
- For
<installation_directory>, specify the path to the directory that you stored the installation files in.
Example output
INFO Waiting up to 30m0s for the cluster to initialize...The command succeeds when the Cluster Version Operator finishes deploying the OpenShift Container Platform cluster from Kubernetes API server.
Important-
The Ignition config files that the installation program generates contain certificates that expire after 24 hours, which are then renewed at that time. If the cluster is shut down before renewing the certificates and the cluster is later restarted after the 24 hours have elapsed, the cluster automatically recovers the expired certificates. The exception is that you must manually approve the pending
node-bootstrappercertificate signing requests (CSRs) to recover kubelet certificates. See the documentation for Recovering from expired control plane certificates for more information. - It is recommended that you use Ignition config files within 12 hours after they are generated because the 24-hour certificate rotates from 16 to 22 hours after the cluster is installed. By using the Ignition config files within 12 hours, you can avoid installation failure if the certificate update runs during installation.
Confirm that the Kubernetes API server is communicating with the pods.
To view a list of all pods, use the following command:
$ oc get pods --all-namespacesExample output
NAMESPACE NAME READY STATUS RESTARTS AGE openshift-apiserver-operator openshift-apiserver-operator-85cb746d55-zqhs8 1/1 Running 1 9m openshift-apiserver apiserver-67b9g 1/1 Running 0 3m openshift-apiserver apiserver-ljcmx 1/1 Running 0 1m openshift-apiserver apiserver-z25h4 1/1 Running 0 2m openshift-authentication-operator authentication-operator-69d5d8bf84-vh2n8 1/1 Running 0 5m ...View the logs for a pod that is listed in the output of the previous command by using the following command:
$ oc logs <pod_name> -n <namespace>1 - 1
- Specify the pod name and namespace, as shown in the output of the previous command.
If the pod logs display, the Kubernetes API server can communicate with the cluster machines.
For an installation with Fibre Channel Protocol (FCP), additional steps are required to enable multipathing. Do not enable multipathing during installation.
See "Enabling multipathing with kernel arguments on RHCOS" in the Post-installation configuration documentation for more information.
To display a boot list and specify the possible boot devices if the system is booted in normal mode, enter the following command:
$ bootlist -m normal -o sdaTo update the boot list for normal mode and add alternate device names, enter the following command:
$ bootlist -m normal -o /dev/sdc /dev/sdd /dev/sde sdc sdd sdeIf the original boot disk path is down, the node reboots from the alternate device registered in the normal boot device list.
All the worker nodes are restarted. To monitor the process, enter the following command:
$ oc get nodes -wNoteIf you have additional machine types such as infrastructure nodes, repeat the process for these types.
- Register your cluster on the Cluster registration page.
11.2.14. Telemetry access for OpenShift Container Platform
In OpenShift Container Platform 4.7, the Telemetry service, which runs by default to provide metrics about cluster health and the success of updates, requires internet access. If your cluster is connected to the internet, Telemetry runs automatically, and your cluster is registered to OpenShift Cluster Manager.
After you confirm that your OpenShift Cluster Manager inventory is correct, either maintained automatically by Telemetry or manually by using OpenShift Cluster Manager, use subscription watch to track your OpenShift Container Platform subscriptions at the account or multi-cluster level.
11.2.15. Next steps
- Customize your cluster.
- If the mirror registry that you used to install your cluster has a trusted CA, add it to the cluster by configuring additional trust stores.
Chapter 12. Installing on OpenStack
12.1. Installing a cluster on OpenStack with customizations
In OpenShift Container Platform version 4.7, you can install a customized cluster on Red Hat OpenStack Platform (RHOSP). To customize the installation, modify parameters in the install-config.yaml before you install the cluster.
12.1.1. Prerequisites
Review details about the OpenShift Container Platform installation and update processes.
- Verify that OpenShift Container Platform 4.7 is compatible with your RHOSP version by using the "Supported platforms for OpenShift clusters" section. You can also compare platform support across different versions by viewing the OpenShift Container Platform on RHOSP support matrix.
- Verify that your network configuration does not rely on a provider network. Provider networks are not supported.
- Have a storage service installed in RHOSP, like block storage (Cinder) or object storage (Swift). Object storage is the recommended storage technology for OpenShift Container Platform registry cluster deployment. For more information, see Optimizing storage.
- Have metadata service enabled in RHOSP
12.1.2. Resource guidelines for installing OpenShift Container Platform on RHOSP
To support an OpenShift Container Platform installation, your Red Hat OpenStack Platform (RHOSP) quota must meet the following requirements:
| Resource | Value |
|---|---|
| Floating IP addresses | 3 |
| Ports | 15 |
| Routers | 1 |
| Subnets | 1 |
| RAM | 112 GB |
| vCPUs | 28 |
| Volume storage | 275 GB |
| Instances | 7 |
| Security groups | 3 |
| Security group rules | 60 |
A cluster might function with fewer than recommended resources, but its performance is not guaranteed.
If RHOSP object storage (Swift) is available and operated by a user account with the swiftoperator role, it is used as the default backend for the OpenShift Container Platform image registry. In this case, the volume storage requirement is 175 GB. Swift space requirements vary depending on the size of the image registry.
By default, your security group and security group rule quotas might be low. If you encounter problems, run openstack quota set --secgroups 3 --secgroup-rules 60 <project> as an administrator to increase them.
An OpenShift Container Platform deployment comprises control plane machines, compute machines, and a bootstrap machine.
12.1.2.1. Control plane machines
By default, the OpenShift Container Platform installation process creates three control plane machines.
Each machine requires:
- An instance from the RHOSP quota
- A port from the RHOSP quota
- A flavor with at least 16 GB memory, 4 vCPUs, and 100 GB storage space
12.1.2.2. Compute machines
By default, the OpenShift Container Platform installation process creates three compute machines.
Each machine requires:
- An instance from the RHOSP quota
- A port from the RHOSP quota
- A flavor with at least 8 GB memory, 2 vCPUs, and 100 GB storage space
Compute machines host the applications that you run on OpenShift Container Platform; aim to run as many as you can.
12.1.2.3. Bootstrap machine
During installation, a bootstrap machine is temporarily provisioned to stand up the control plane. After the production control plane is ready, the bootstrap machine is deprovisioned.
The bootstrap machine requires:
- An instance from the RHOSP quota
- A port from the RHOSP quota
- A flavor with at least 16 GB memory, 4 vCPUs, and 100 GB storage space
12.1.3. Internet access for OpenShift Container Platform
In OpenShift Container Platform 4.7, you require access to the Internet to install your cluster.
You must have Internet access to:
- Access OpenShift Cluster Manager to download the installation program and perform subscription management. If the cluster has internet access and you do not disable Telemetry, that service automatically entitles your cluster.
- Access Quay.io to obtain the packages that are required to install your cluster.
- Obtain the packages that are required to perform cluster updates.
If your cluster cannot have direct Internet access, you can perform a restricted network installation on some types of infrastructure that you provision. During that process, you download the content that is required and use it to populate a mirror registry with the packages that you need to install a cluster and generate the installation program. With some installation types, the environment that you install your cluster in will not require Internet access. Before you update the cluster, you update the content of the mirror registry.
12.1.4. Enabling Swift on RHOSP
Swift is operated by a user account with the swiftoperator role. Add the role to an account before you run the installation program.
If the Red Hat OpenStack Platform (RHOSP) object storage service, commonly known as Swift, is available, OpenShift Container Platform uses it as the image registry storage. If it is unavailable, the installation program relies on the RHOSP block storage service, commonly known as Cinder.
If Swift is present and you want to use it, you must enable access to it. If it is not present, or if you do not want to use it, skip this section.
Prerequisites
- You have a RHOSP administrator account on the target environment.
- The Swift service is installed.
-
On Ceph RGW, the
account in urloption is enabled.
Procedure
To enable Swift on RHOSP:
As an administrator in the RHOSP CLI, add the
swiftoperatorrole to the account that will access Swift:$ openstack role add --user <user> --project <project> swiftoperator
Your RHOSP deployment can now use Swift for the image registry.
12.1.5. Verifying external network access
The OpenShift Container Platform installation process requires external network access. You must provide an external network value to it, or deployment fails. Before you begin the process, verify that a network with the external router type exists in Red Hat OpenStack Platform (RHOSP).
Prerequisites
Procedure
Using the RHOSP CLI, verify the name and ID of the 'External' network:
$ openstack network list --long -c ID -c Name -c "Router Type"Example output
+--------------------------------------+----------------+-------------+ | ID | Name | Router Type | +--------------------------------------+----------------+-------------+ | 148a8023-62a7-4672-b018-003462f8d7dc | public_network | External | +--------------------------------------+----------------+-------------+
A network with an external router type appears in the network list. If at least one does not, see Creating a default floating IP network and Creating a default provider network.
If the external network’s CIDR range overlaps one of the default network ranges, you must change the matching network ranges in the install-config.yaml file before you start the installation process.
The default network ranges are:
| Network | Range |
|---|---|
|
| 10.0.0.0/16 |
|
| 172.30.0.0/16 |
|
| 10.128.0.0/14 |
If the installation program finds multiple networks with the same name, it sets one of them at random. To avoid this behavior, create unique names for resources in RHOSP.
If the Neutron trunk service plug-in is enabled, a trunk port is created by default. For more information, see Neutron trunk port.
12.1.6. Defining parameters for the installation program
The OpenShift Container Platform installation program relies on a file that is called clouds.yaml. The file describes Red Hat OpenStack Platform (RHOSP) configuration parameters, including the project name, log in information, and authorization service URLs.
Procedure
Create the
clouds.yamlfile:If your RHOSP distribution includes the Horizon web UI, generate a
clouds.yamlfile in it.ImportantRemember to add a password to the
authfield. You can also keep secrets in a separate file fromclouds.yaml.If your RHOSP distribution does not include the Horizon web UI, or you do not want to use Horizon, create the file yourself. For detailed information about
clouds.yaml, see Config files in the RHOSP documentation.clouds: shiftstack: auth: auth_url: http://10.10.14.42:5000/v3 project_name: shiftstack username: shiftstack_user password: XXX user_domain_name: Default project_domain_name: Default dev-env: region_name: RegionOne auth: username: 'devuser' password: XXX project_name: 'devonly' auth_url: 'https://10.10.14.22:5001/v2.0'
If your RHOSP installation uses self-signed certificate authority (CA) certificates for endpoint authentication:
- Copy the certificate authority file to your machine.
Add the
cacertskey to theclouds.yamlfile. The value must be an absolute, non-root-accessible path to the CA certificate:clouds: shiftstack: ... cacert: "/etc/pki/ca-trust/source/anchors/ca.crt.pem"TipAfter you run the installer with a custom CA certificate, you can update the certificate by editing the value of the
ca-cert.pemkey in thecloud-provider-configkeymap. On a command line, run:$ oc edit configmap -n openshift-config cloud-provider-config
Place the
clouds.yamlfile in one of the following locations:-
The value of the
OS_CLIENT_CONFIG_FILEenvironment variable - The current directory
-
A Unix-specific user configuration directory, for example
~/.config/openstack/clouds.yaml A Unix-specific site configuration directory, for example
/etc/openstack/clouds.yamlThe installation program searches for
clouds.yamlin that order.
-
The value of the
12.1.7. Obtaining the installation program
Before you install OpenShift Container Platform, download the installation file on your provisioning machine.
Prerequisites
- You have a machine that runs Linux, for example Red Hat Enterprise Linux 8, with 500 MB of local disk space
Procedure
- Access the Infrastructure Provider page on the OpenShift Cluster Manager site. If you have a Red Hat account, log in with your credentials. If you do not, create an account.
- Select your infrastructure provider.
Navigate to the page for your installation type, download the installation program for your operating system, and place the file in the directory where you will store the installation configuration files.
ImportantThe installation program creates several files on the computer that you use to install your cluster. You must keep the installation program and the files that the installation program creates after you finish installing the cluster. Both files are required to delete the cluster.
ImportantDeleting the files created by the installation program does not remove your cluster, even if the cluster failed during installation. To remove your cluster, complete the OpenShift Container Platform uninstallation procedures for your specific cloud provider.
Extract the installation program. For example, on a computer that uses a Linux operating system, run the following command:
$ tar xvf openshift-install-linux.tar.gz- Download your installation pull secret from the Red Hat OpenShift Cluster Manager. This pull secret allows you to authenticate with the services that are provided by the included authorities, including Quay.io, which serves the container images for OpenShift Container Platform components.
12.1.8. Creating the installation configuration file
You can customize the OpenShift Container Platform cluster you install on Red Hat OpenStack Platform (RHOSP).
Prerequisites
- Obtain the OpenShift Container Platform installation program and the pull secret for your cluster.
- Obtain service principal permissions at the subscription level.
Procedure
Create the
install-config.yamlfile.Change to the directory that contains the installation program and run the following command:
$ ./openshift-install create install-config --dir <installation_directory>1 - 1
- For
<installation_directory>, specify the directory name to store the files that the installation program creates.
ImportantSpecify an empty directory. Some installation assets, like bootstrap X.509 certificates have short expiration intervals, so you must not reuse an installation directory. If you want to reuse individual files from another cluster installation, you can copy them into your directory. However, the file names for the installation assets might change between releases. Use caution when copying installation files from an earlier OpenShift Container Platform version.
At the prompts, provide the configuration details for your cloud:
Optional: Select an SSH key to use to access your cluster machines.
NoteFor production OpenShift Container Platform clusters on which you want to perform installation debugging or disaster recovery, specify an SSH key that your
ssh-agentprocess uses.- Select openstack as the platform to target.
- Specify the Red Hat OpenStack Platform (RHOSP) external network name to use for installing the cluster.
- Specify the floating IP address to use for external access to the OpenShift API.
- Specify a RHOSP flavor with at least 16 GB RAM to use for control plane nodes and 8 GB RAM for compute nodes.
- Select the base domain to deploy the cluster to. All DNS records will be sub-domains of this base and will also include the cluster name.
- Enter a name for your cluster. The name must be 14 or fewer characters long.
- Paste the pull secret from the Red Hat OpenShift Cluster Manager.
-
Modify the
install-config.yamlfile. You can find more information about the available parameters in the "Installation configuration parameters" section. Back up the
install-config.yamlfile so that you can use it to install multiple clusters.ImportantThe
install-config.yamlfile is consumed during the installation process. If you want to reuse the file, you must back it up now.
12.1.8.1. Configuring the cluster-wide proxy during installation
Production environments can deny direct access to the Internet and instead have an HTTP or HTTPS proxy available. You can configure a new OpenShift Container Platform cluster to use a proxy by configuring the proxy settings in the install-config.yaml file.
Prerequisites
-
You have an existing
install-config.yamlfile. You reviewed the sites that your cluster requires access to and determined whether any of them need to bypass the proxy. By default, all cluster egress traffic is proxied, including calls to hosting cloud provider APIs. You added sites to the
Proxyobject’sspec.noProxyfield to bypass the proxy if necessary.NoteThe
Proxyobjectstatus.noProxyfield is populated with the values of thenetworking.machineNetwork[].cidr,networking.clusterNetwork[].cidr, andnetworking.serviceNetwork[]fields from your installation configuration.For installations on Amazon Web Services (AWS), Google Cloud Platform (GCP), Microsoft Azure, and Red Hat OpenStack Platform (RHOSP), the
Proxyobjectstatus.noProxyfield is also populated with the instance metadata endpoint (169.254.169.254).
Procedure
Edit your
install-config.yamlfile and add the proxy settings. For example:apiVersion: v1 baseDomain: my.domain.com proxy: httpProxy: http://<username>:<pswd>@<ip>:<port>1 httpsProxy: https://<username>:<pswd>@<ip>:<port>2 noProxy: example.com3 additionalTrustBundle: |4 -----BEGIN CERTIFICATE----- <MY_TRUSTED_CA_CERT> -----END CERTIFICATE----- ...- 1
- A proxy URL to use for creating HTTP connections outside the cluster. The URL scheme must be
http. - 2
- A proxy URL to use for creating HTTPS connections outside the cluster.
- 3
- A comma-separated list of destination domain names, IP addresses, or other network CIDRs to exclude from proxying. Preface a domain with
.to match subdomains only. For example,.y.commatchesx.y.com, but noty.com. Use*to bypass the proxy for all destinations. - 4
- If provided, the installation program generates a config map that is named
user-ca-bundlein theopenshift-confignamespace to hold the additional CA certificates. If you provideadditionalTrustBundleand at least one proxy setting, theProxyobject is configured to reference theuser-ca-bundleconfig map in thetrustedCAfield. The Cluster Network Operator then creates atrusted-ca-bundleconfig map that merges the contents specified for thetrustedCAparameter with the RHCOS trust bundle. TheadditionalTrustBundlefield is required unless the proxy’s identity certificate is signed by an authority from the RHCOS trust bundle.
NoteThe installation program does not support the proxy
readinessEndpointsfield.- Save the file and reference it when installing OpenShift Container Platform.
The installation program creates a cluster-wide proxy that is named cluster that uses the proxy settings in the provided install-config.yaml file. If no proxy settings are provided, a cluster Proxy object is still created, but it will have a nil spec.
Only the Proxy object named cluster is supported, and no additional proxies can be created.
12.1.9. Installation configuration parameters
Before you deploy an OpenShift Container Platform cluster, you provide parameter values to describe your account on the cloud platform that hosts your cluster and optionally customize your cluster’s platform. When you create the install-config.yaml installation configuration file, you provide values for the required parameters through the command line. If you customize your cluster, you can modify the install-config.yaml file to provide more details about the platform.
After installation, you cannot modify these parameters in the install-config.yaml file.
The openshift-install command does not validate field names for parameters. If an incorrect name is specified, the related file or object is not created, and no error is reported. Ensure that the field names for any parameters that are specified are correct.
12.1.9.1. Required configuration parameters
Required installation configuration parameters are described in the following table:
| Parameter | Description | Values |
|---|---|---|
|
|
The API version for the | String |
|
|
The base domain of your cloud provider. The base domain is used to create routes to your OpenShift Container Platform cluster components. The full DNS name for your cluster is a combination of the |
A fully-qualified domain or subdomain name, such as |
|
|
Kubernetes resource | Object |
|
|
The name of the cluster. DNS records for the cluster are all subdomains of |
String of lowercase letters, hyphens ( |
|
|
The configuration for the specific platform upon which to perform the installation: | Object |
|
| Get a pull secret from the Red Hat OpenShift Cluster Manager to authenticate downloading container images for OpenShift Container Platform components from services such as Quay.io. |
|
12.1.9.2. Network configuration parameters
You can customize your installation configuration based on the requirements of your existing network infrastructure. For example, you can expand the IP address block for the cluster network or provide different IP address blocks than the defaults.
Only IPv4 addresses are supported.
| Parameter | Description | Values |
|---|---|---|
|
| The configuration for the cluster network. | Object Note
You cannot modify parameters specified by the |
|
| The cluster network provider Container Network Interface (CNI) plug-in to install. |
Either |
|
| The IP address blocks for pods.
The default value is If you specify multiple IP address blocks, the blocks must not overlap. | An array of objects. For example: |
|
|
Required if you use An IPv4 network. |
An IP address block in Classless Inter-Domain Routing (CIDR) notation. The prefix length for an IPv4 block is between |
|
|
The subnet prefix length to assign to each individual node. For example, if | A subnet prefix.
The default value is |
|
|
The IP address block for services. The default value is The OpenShift SDN and OVN-Kubernetes network providers support only a single IP address block for the service network. | An array with an IP address block in CIDR format. For example: |
|
| The IP address blocks for machines. If you specify multiple IP address blocks, the blocks must not overlap.
If you specify multiple IP kernel arguments, the | An array of objects. For example: |
|
|
Required if you use | An IP network block in CIDR notation.
For example, Note
Set the |
12.1.9.3. Optional configuration parameters
Optional installation configuration parameters are described in the following table:
| Parameter | Description | Values |
|---|---|---|
|
| A PEM-encoded X.509 certificate bundle that is added to the nodes' trusted certificate store. This trust bundle may also be used when a proxy has been configured. | String |
|
| The configuration for the machines that comprise the compute nodes. |
Array of |
|
|
Determines the instruction set architecture of the machines in the pool. Currently, heteregeneous clusters are not supported, so all pools must specify the same architecture. Valid values are | String |
|
|
Whether to enable or disable simultaneous multithreading, or Important If you disable simultaneous multithreading, ensure that your capacity planning accounts for the dramatically decreased machine performance. |
|
|
|
Required if you use |
|
|
|
Required if you use |
|
|
| The number of compute machines, which are also known as worker machines, to provision. |
A positive integer greater than or equal to |
|
| The configuration for the machines that comprise the control plane. |
Array of |
|
|
Determines the instruction set architecture of the machines in the pool. Currently, heterogeneous clusters are not supported, so all pools must specify the same architecture. Valid values are | String |
|
|
Whether to enable or disable simultaneous multithreading, or Important If you disable simultaneous multithreading, ensure that your capacity planning accounts for the dramatically decreased machine performance. |
|
|
|
Required if you use |
|
|
|
Required if you use |
|
|
| The number of control plane machines to provision. |
The only supported value is |
|
| The Cloud Credential Operator (CCO) mode. If no mode is specified, the CCO dynamically tries to determine the capabilities of the provided credentials, with a preference for mint mode on the platforms where multiple modes are supported. Note Not all CCO modes are supported for all cloud providers. For more information on CCO modes, see the Cloud Credential Operator entry in the Cluster Operators reference content. |
|
|
|
Enable or disable FIPS mode. The default is Important
The use of FIPS Validated / Modules in Process cryptographic libraries is only supported on OpenShift Container Platform deployments on the Note If you are using Azure File storage, you cannot enable FIPS mode. |
|
|
| Sources and repositories for the release-image content. |
Array of objects. Includes a |
|
|
Required if you use | String |
|
| Specify one or more repositories that may also contain the same images. | Array of strings |
|
| How to publish or expose the user-facing endpoints of your cluster, such as the Kubernetes API, OpenShift routes. |
Setting this field to Important
If the value of the field is set to |
|
| The SSH key or keys to authenticate access your cluster machines. Note
For production OpenShift Container Platform clusters on which you want to perform installation debugging or disaster recovery, specify an SSH key that your | One or more keys. For example: |
12.1.9.4. Additional Red Hat OpenStack Platform (RHOSP) configuration parameters
Additional RHOSP configuration parameters are described in the following table:
| Parameter | Description | Values |
|---|---|---|
|
| For compute machines, the size in gigabytes of the root volume. If you do not set this value, machines use ephemeral storage. |
Integer, for example |
|
| For compute machines, the root volume’s type. |
String, for example |
|
| For control plane machines, the size in gigabytes of the root volume. If you do not set this value, machines use ephemeral storage. |
Integer, for example |
|
| For control plane machines, the root volume’s type. |
String, for example |
|
|
The name of the RHOSP cloud to use from the list of clouds in the |
String, for example |
|
| The RHOSP external network name to be used for installation. |
String, for example |
|
| The RHOSP flavor to use for control plane and compute machines.
This property is deprecated. To use a flavor as the default for all machine pools, add it as the value of the |
String, for example |
12.1.9.5. Optional RHOSP configuration parameters
Optional RHOSP configuration parameters are described in the following table:
| Parameter | Description | Values |
|---|---|---|
|
| Additional networks that are associated with compute machines. Allowed address pairs are not created for additional networks. |
A list of one or more UUIDs as strings. For example, |
|
| Additional security groups that are associated with compute machines. |
A list of one or more UUIDs as strings. For example, |
|
| RHOSP Compute (Nova) availability zones (AZs) to install machines on. If this parameter is not set, the installer relies on the default settings for Nova that the RHOSP administrator configured. On clusters that use Kuryr, RHOSP Octavia does not support availability zones. Load balancers and, if you are using the Amphora provider driver, OpenShift Container Platform services that rely on Amphora VMs, are not created according to the value of this property. |
A list of strings. For example, |
|
| Additional networks that are associated with control plane machines. Allowed address pairs are not created for additional networks. |
A list of one or more UUIDs as strings. For example, |
|
| Additional security groups that are associated with control plane machines. |
A list of one or more UUIDs as strings. For example, |
|
| RHOSP Compute (Nova) availability zones (AZs) to install machines on. If this parameter is not set, the installer relies on the default settings for Nova that the RHOSP administrator configured. On clusters that use Kuryr, RHOSP Octavia does not support availability zones. Load balancers and, if you are using the Amphora provider driver, OpenShift Container Platform services that rely on Amphora VMs, are not created according to the value of this property. |
A list of strings. For example, |
|
| The location from which the installer downloads the RHCOS image. You must set this parameter to perform an installation in a restricted network. | An HTTP or HTTPS URL, optionally with an SHA-256 checksum.
For example, |
|
|
Properties to add to the installer-uploaded ClusterOSImage in Glance. This property is ignored if
You can use this property to exceed the default persistent volume (PV) limit for RHOSP of 26 PVs per node. To exceed the limit, set the
You can also use this property to enable the QEMU guest agent by including the |
A list of key-value string pairs. For example, |
|
| The default machine pool platform configuration. |
|
|
|
An existing floating IP address to associate with the Ingress port. To use this property, you must also define the |
An IP address, for example |
|
|
An existing floating IP address to associate with the API load balancer. To use this property, you must also define the |
An IP address, for example |
|
| IP addresses for external DNS servers that cluster instances use for DNS resolution. |
A list of IP addresses as strings. For example, |
|
| The UUID of a RHOSP subnet that the cluster’s nodes use. Nodes and virtual IP (VIP) ports are created on this subnet.
The first item in If you deploy to a custom subnet, you cannot specify an external DNS server to the OpenShift Container Platform installer. Instead, add DNS to the subnet in RHOSP. |
A UUID as a string. For example, |
12.1.9.6. Custom subnets in RHOSP deployments
Optionally, you can deploy a cluster on a Red Hat OpenStack Platform (RHOSP) subnet of your choice. The subnet’s GUID is passed as the value of platform.openstack.machinesSubnet in the install-config.yaml file.
This subnet is used as the cluster’s primary subnet. By default, nodes and ports are created on it. You can create nodes and ports on a different RHOSP subnet by setting the value of the platform.openstack.machinesSubnet property to the subnet’s UUID.
Before you run the OpenShift Container Platform installer with a custom subnet, verify that your configuration meets the following requirements:
-
The subnet that is used by
platform.openstack.machinesSubnethas DHCP enabled. -
The CIDR of
platform.openstack.machinesSubnetmatches the CIDR ofnetworking.machineNetwork. - The installation program user has permission to create ports on this network, including ports with fixed IP addresses.
Clusters that use custom subnets have the following limitations:
-
If you plan to install a cluster that uses floating IP addresses, the
platform.openstack.machinesSubnetsubnet must be attached to a router that is connected to theexternalNetworknetwork. -
If the
platform.openstack.machinesSubnetvalue is set in theinstall-config.yamlfile, the installation program does not create a private network or subnet for your RHOSP machines. -
You cannot use the
platform.openstack.externalDNSproperty at the same time as a custom subnet. To add DNS to a cluster that uses a custom subnet, configure DNS on the RHOSP network.
By default, the API VIP takes x.x.x.5 and the Ingress VIP takes x.x.x.7 from your network’s CIDR block. To override these default values, set values for platform.openstack.apiVIP and platform.openstack.ingressVIP that are outside of the DHCP allocation pool.
12.1.9.7. Deploying a cluster with bare metal machines
If you want your cluster to use bare metal machines, modify the install-config.yaml file. Your cluster can have both control plane and compute machines running on bare metal, or just compute machines.
Bare-metal compute machines are not supported on clusters that use Kuryr.
Be sure that your install-config.yaml file reflects whether the RHOSP network that you use for bare metal workers supports floating IP addresses or not.
Prerequisites
- The RHOSP Bare Metal service (Ironic) is enabled and accessible via the RHOSP Compute API.
- Bare metal is available as a RHOSP flavor.
- The RHOSP network supports both VM and bare metal server attachment.
- Your network configuration does not rely on a provider network. Provider networks are not supported.
- If you want to deploy the machines on a pre-existing network, a RHOSP subnet is provisioned.
- If you want to deploy the machines on an installer-provisioned network, the RHOSP Bare Metal service (Ironic) is able to listen for and interact with Preboot eXecution Environment (PXE) boot machines that run on tenant networks.
-
You created an
install-config.yamlfile as part of the OpenShift Container Platform installation process.
Procedure
In the
install-config.yamlfile, edit the flavors for machines:-
If you want to use bare-metal control plane machines, change the value of
controlPlane.platform.openstack.typeto a bare metal flavor. -
Change the value of
compute.platform.openstack.typeto a bare metal flavor. If you want to deploy your machines on a pre-existing network, change the value of
platform.openstack.machinesSubnetto the RHOSP subnet UUID of the network. Control plane and compute machines must use the same subnet.An example bare metal
install-config.yamlfilecontrolPlane: platform: openstack: type: <bare_metal_control_plane_flavor>1 ... compute: - architecture: amd64 hyperthreading: Enabled name: worker platform: openstack: type: <bare_metal_compute_flavor>2 replicas: 3 ... platform: openstack: machinesSubnet: <subnet_UUID>3 ...
-
If you want to use bare-metal control plane machines, change the value of
Use the updated install-config.yaml file to complete the installation process. The compute machines that are created during deployment use the flavor that you added to the file.
The installer may time out while waiting for bare metal machines to boot.
If the installer times out, restart and then complete the deployment by using the wait-for command of the installer. For example:
./openshift-install wait-for install-complete --log-level debug12.1.9.8. Sample customized install-config.yaml file for RHOSP
This sample install-config.yaml demonstrates all of the possible Red Hat OpenStack Platform (RHOSP) customization options.
This sample file is provided for reference only. You must obtain your install-config.yaml file by using the installation program.
apiVersion: v1
baseDomain: example.com
controlPlane:
name: master
platform: {}
replicas: 3
compute:
- name: worker
platform:
openstack:
type: ml.large
replicas: 3
metadata:
name: example
networking:
clusterNetwork:
- cidr: 10.128.0.0/14
hostPrefix: 23
machineNetwork:
- cidr: 10.0.0.0/16
serviceNetwork:
- 172.30.0.0/16
networkType: OpenShiftSDN
platform:
openstack:
cloud: mycloud
externalNetwork: external
computeFlavor: m1.xlarge
apiFloatingIP: 128.0.0.1
fips: false
pullSecret: '{"auths": ...}'
sshKey: ssh-ed25519 AAAA...12.1.10. Setting compute machine affinity
Optionally, you can set the affinity policy for compute machines during installation. The installer does not select an affinity policy for compute machines by default.
You can also create machine sets that use particular RHOSP server groups after installation.
Control plane machines are created with a soft-anti-affinity policy.
You can learn more about RHOSP instance scheduling and placement in the RHOSP documentation.
Prerequisites
-
Create the
install-config.yamlfile and complete any modifications to it.
Procedure
Using the RHOSP command-line interface, create a server group for your compute machines. For example:
$ openstack \ --os-compute-api-version=2.15 \ server group create \ --policy anti-affinity \ my-openshift-worker-groupFor more information, see the
server group createcommand documentation.Change to the directory that contains the installation program and create the manifests:
$ ./openshift-install create manifests --dir=<installation_directory>where:
installation_directory-
Specifies the name of the directory that contains the
install-config.yamlfile for your cluster.
-
Open
manifests/99_openshift-cluster-api_worker-machineset-0.yaml, theMachineSetdefinition file. Add the property
serverGroupIDto the definition beneath thespec.template.spec.providerSpec.valueproperty. For example:apiVersion: machine.openshift.io/v1beta1 kind: MachineSet metadata: labels: machine.openshift.io/cluster-api-cluster: <infrastructure_ID> machine.openshift.io/cluster-api-machine-role: <node_role> machine.openshift.io/cluster-api-machine-type: <node_role> name: <infrastructure_ID>-<node_role> namespace: openshift-machine-api spec: replicas: <number_of_replicas> selector: matchLabels: machine.openshift.io/cluster-api-cluster: <infrastructure_ID> machine.openshift.io/cluster-api-machineset: <infrastructure_ID>-<node_role> template: metadata: labels: machine.openshift.io/cluster-api-cluster: <infrastructure_ID> machine.openshift.io/cluster-api-machine-role: <node_role> machine.openshift.io/cluster-api-machine-type: <node_role> machine.openshift.io/cluster-api-machineset: <infrastructure_ID>-<node_role> spec: providerSpec: value: apiVersion: openstackproviderconfig.openshift.io/v1alpha1 cloudName: openstack cloudsSecret: name: openstack-cloud-credentials namespace: openshift-machine-api flavor: <nova_flavor> image: <glance_image_name_or_location> serverGroupID: aaaaaaaa-bbbb-cccc-dddd-eeeeeeeeeeee1 kind: OpenstackProviderSpec networks: - filter: {} subnets: - filter: name: <subnet_name> tags: openshiftClusterID=<infrastructure_ID> securityGroups: - filter: {} name: <infrastructure_ID>-<node_role> serverMetadata: Name: <infrastructure_ID>-<node_role> openshiftClusterID: <infrastructure_ID> tags: - openshiftClusterID=<infrastructure_ID> trunk: true userDataSecret: name: <node_role>-user-data availabilityZone: <optional_openstack_availability_zone>- 1
- Add the UUID of your server group here.
-
Optional: Back up the
manifests/99_openshift-cluster-api_worker-machineset-0.yamlfile. The installation program deletes themanifests/directory when creating the cluster.
When you install the cluster, the installer uses the MachineSet definition that you modified to create compute machines within your RHOSP server group.
12.1.11. Generating an SSH private key and adding it to the agent
If you want to perform installation debugging or disaster recovery on your cluster, you must provide an SSH key to both your ssh-agent and the installation program. You can use this key to access the bootstrap machine in a public cluster to troubleshoot installation issues.
In a production environment, you require disaster recovery and debugging.
Do not skip this procedure in production environments where disaster recovery and debugging is required.
You can use this key to SSH into the master nodes as the user core. When you deploy the cluster, the key is added to the core user’s ~/.ssh/authorized_keys list.
Procedure
If you do not have an SSH key that is configured for password-less authentication on your computer, create one. For example, on a computer that uses a Linux operating system, run the following command:
$ ssh-keygen -t ed25519 -N '' \ -f <path>/<file_name>1 - 1
- Specify the path and file name, such as
~/.ssh/id_rsa, of the new SSH key. If you have an existing key pair, ensure your public key is in the your~/.sshdirectory.
Running this command generates an SSH key that does not require a password in the location that you specified.
NoteIf you plan to install an OpenShift Container Platform cluster that uses FIPS Validated / Modules in Process cryptographic libraries on the
x86_64architecture, do not create a key that uses theed25519algorithm. Instead, create a key that uses thersaorecdsaalgorithm.Start the
ssh-agentprocess as a background task:$ eval "$(ssh-agent -s)"Example output
Agent pid 31874NoteIf your cluster is in FIPS mode, only use FIPS-compliant algorithms to generate the SSH key. The key must be either RSA or ECDSA.
Add your SSH private key to the
ssh-agent:$ ssh-add <path>/<file_name>1 Example output
Identity added: /home/<you>/<path>/<file_name> (<computer_name>)- 1
- Specify the path and file name for your SSH private key, such as
~/.ssh/id_rsa
Next steps
- When you install OpenShift Container Platform, provide the SSH public key to the installation program.
12.1.12. Enabling access to the environment
At deployment, all OpenShift Container Platform machines are created in a Red Hat OpenStack Platform (RHOSP)-tenant network. Therefore, they are not accessible directly in most RHOSP deployments.
You can configure OpenShift Container Platform API and application access by using floating IP addresses (FIPs) during installation. You can also complete an installation without configuring FIPs, but the installer will not configure a way to reach the API or applications externally.
12.1.12.1. Enabling access with floating IP addresses
Create floating IP (FIP) addresses for external access to the OpenShift Container Platform API and cluster applications.
Procedure
Using the Red Hat OpenStack Platform (RHOSP) CLI, create the API FIP:
$ openstack floating ip create --description "API <cluster_name>.<base_domain>" <external_network>Using the Red Hat OpenStack Platform (RHOSP) CLI, create the apps, or Ingress, FIP:
$ openstack floating ip create --description "Ingress <cluster_name>.<base_domain>" <external_network>Add records that follow these patterns to your DNS server for the API and Ingress FIPs:
api.<cluster_name>.<base_domain>. IN A <API_FIP> *.apps.<cluster_name>.<base_domain>. IN A <apps_FIP>NoteIf you do not control the DNS server, you can access the cluster by adding the cluster domain names such as the following to your
/etc/hostsfile:-
<api_floating_ip> api.<cluster_name>.<base_domain> -
<application_floating_ip> grafana-openshift-monitoring.apps.<cluster_name>.<base_domain> -
<application_floating_ip> prometheus-k8s-openshift-monitoring.apps.<cluster_name>.<base_domain> -
<application_floating_ip> oauth-openshift.apps.<cluster_name>.<base_domain> -
<application_floating_ip> console-openshift-console.apps.<cluster_name>.<base_domain> -
application_floating_ip integrated-oauth-server-openshift-authentication.apps.<cluster_name>.<base_domain>
The cluster domain names in the
/etc/hostsfile grant access to the web console and the monitoring interface of your cluster locally. You can also use thekubectloroc. You can access the user applications by using the additional entries pointing to the <application_floating_ip>. This action makes the API and applications accessible to only you, which is not suitable for production deployment, but does allow installation for development and testing.-
Add the FIPs to the
install-config.yamlfile as the values of the following parameters:-
platform.openstack.ingressFloatingIP -
platform.openstack.apiFloatingIP
-
If you use these values, you must also enter an external network as the value of the platform.openstack.externalNetwork parameter in the install-config.yaml file.
You can make OpenShift Container Platform resources available outside of the cluster by assigning a floating IP address and updating your firewall configuration.
12.1.12.2. Completing installation without floating IP addresses
You can install OpenShift Container Platform on Red Hat OpenStack Platform (RHOSP) without providing floating IP addresses.
In the install-config.yaml file, do not define the following parameters:
-
platform.openstack.ingressFloatingIP -
platform.openstack.apiFloatingIP
If you cannot provide an external network, you can also leave platform.openstack.externalNetwork blank. If you do not provide a value for platform.openstack.externalNetwork, a router is not created for you, and, without additional action, the installer will fail to retrieve an image from Glance. You must configure external connectivity on your own.
If you run the installer from a system that cannot reach the cluster API due to a lack of floating IP addresses or name resolution, installation fails. To prevent installation failure in these cases, you can use a proxy network or run the installer from a system that is on the same network as your machines.
You can enable name resolution by creating DNS records for the API and Ingress ports. For example:
api.<cluster_name>.<base_domain>. IN A <api_port_IP>
*.apps.<cluster_name>.<base_domain>. IN A <ingress_port_IP>
If you do not control the DNS server, you can add the record to your /etc/hosts file. This action makes the API accessible to only you, which is not suitable for production deployment but does allow installation for development and testing.
12.1.13. Deploying the cluster
You can install OpenShift Container Platform on a compatible cloud platform.
You can run the create cluster command of the installation program only once, during initial installation.
Prerequisites
- Obtain the OpenShift Container Platform installation program and the pull secret for your cluster.
Procedure
Change to the directory that contains the installation program and initialize the cluster deployment:
$ ./openshift-install create cluster --dir <installation_directory> \1 --log-level=info2 NoteIf the cloud provider account that you configured on your host does not have sufficient permissions to deploy the cluster, the installation process stops, and the missing permissions are displayed.
When the cluster deployment completes, directions for accessing your cluster, including a link to its web console and credentials for the
kubeadminuser, display in your terminal.Example output
... INFO Install complete! INFO To access the cluster as the system:admin user when using 'oc', run 'export KUBECONFIG=/home/myuser/install_dir/auth/kubeconfig' INFO Access the OpenShift web-console here: https://console-openshift-console.apps.mycluster.example.com INFO Login to the console with user: "kubeadmin", and password: "4vYBz-Ee6gm-ymBZj-Wt5AL" INFO Time elapsed: 36m22sNoteThe cluster access and credential information also outputs to
<installation_directory>/.openshift_install.logwhen an installation succeeds.Important-
The Ignition config files that the installation program generates contain certificates that expire after 24 hours, which are then renewed at that time. If the cluster is shut down before renewing the certificates and the cluster is later restarted after the 24 hours have elapsed, the cluster automatically recovers the expired certificates. The exception is that you must manually approve the pending
node-bootstrappercertificate signing requests (CSRs) to recover kubelet certificates. See the documentation for Recovering from expired control plane certificates for more information. - It is recommended that you use Ignition config files within 12 hours after they are generated because the 24-hour certificate rotates from 16 to 22 hours after the cluster is installed. By using the Ignition config files within 12 hours, you can avoid installation failure if the certificate update runs during installation.
ImportantYou must not delete the installation program or the files that the installation program creates. Both are required to delete the cluster.
-
The Ignition config files that the installation program generates contain certificates that expire after 24 hours, which are then renewed at that time. If the cluster is shut down before renewing the certificates and the cluster is later restarted after the 24 hours have elapsed, the cluster automatically recovers the expired certificates. The exception is that you must manually approve the pending
12.1.14. Verifying cluster status
You can verify your OpenShift Container Platform cluster’s status during or after installation.
Procedure
In the cluster environment, export the administrator’s kubeconfig file:
$ export KUBECONFIG=<installation_directory>/auth/kubeconfig1 - 1
- For
<installation_directory>, specify the path to the directory that you stored the installation files in.
The
kubeconfigfile contains information about the cluster that is used by the CLI to connect a client to the correct cluster and API server.View the control plane and compute machines created after a deployment:
$ oc get nodesView your cluster’s version:
$ oc get clusterversionView your Operators' status:
$ oc get clusteroperatorView all running pods in the cluster:
$ oc get pods -A
12.1.15. Logging in to the cluster by using the CLI
You can log in to your cluster as a default system user by exporting the cluster kubeconfig file. The kubeconfig file contains information about the cluster that is used by the CLI to connect a client to the correct cluster and API server. The file is specific to a cluster and is created during OpenShift Container Platform installation.
Prerequisites
- You deployed an OpenShift Container Platform cluster.
-
You installed the
ocCLI.
Procedure
Export the
kubeadmincredentials:$ export KUBECONFIG=<installation_directory>/auth/kubeconfig1 - 1
- For
<installation_directory>, specify the path to the directory that you stored the installation files in.
Verify you can run
occommands successfully using the exported configuration:$ oc whoamiExample output
system:admin
12.1.16. Telemetry access for OpenShift Container Platform
In OpenShift Container Platform 4.7, the Telemetry service, which runs by default to provide metrics about cluster health and the success of updates, requires internet access. If your cluster is connected to the internet, Telemetry runs automatically, and your cluster is registered to OpenShift Cluster Manager.
After you confirm that your OpenShift Cluster Manager inventory is correct, either maintained automatically by Telemetry or manually by using OpenShift Cluster Manager, use subscription watch to track your OpenShift Container Platform subscriptions at the account or multi-cluster level.
12.1.17. Next steps
- Customize your cluster.
- If necessary, you can opt out of remote health reporting.
- If you need to enable external access to node ports, configure ingress cluster traffic by using a node port.
- If you did not configure RHOSP to accept application traffic over floating IP addresses, configure RHOSP access with floating IP addresses.
12.2. Installing a cluster on OpenStack with Kuryr
In OpenShift Container Platform version 4.7, you can install a customized cluster on Red Hat OpenStack Platform (RHOSP) that uses Kuryr SDN. To customize the installation, modify parameters in the install-config.yaml before you install the cluster.
12.2.1. Prerequisites
Review details about the OpenShift Container Platform installation and update processes.
- Verify that OpenShift Container Platform 4.7 is compatible with your RHOSP version by using the "Supported platforms for OpenShift clusters" section. You can also compare platform support across different versions by viewing the OpenShift Container Platform on RHOSP support matrix.
- Verify that your network configuration does not rely on a provider network. Provider networks are not supported.
- Have a storage service installed in RHOSP, like block storage (Cinder) or object storage (Swift). Object storage is the recommended storage technology for OpenShift Container Platform registry cluster deployment. For more information, see Optimizing storage.
12.2.2. About Kuryr SDN
Kuryr is a container network interface (CNI) plug-in solution that uses the Neutron and Octavia Red Hat OpenStack Platform (RHOSP) services to provide networking for pods and Services.
Kuryr and OpenShift Container Platform integration is primarily designed for OpenShift Container Platform clusters running on RHOSP VMs. Kuryr improves the network performance by plugging OpenShift Container Platform pods into RHOSP SDN. In addition, it provides interconnectivity between pods and RHOSP virtual instances.
Kuryr components are installed as pods in OpenShift Container Platform using the openshift-kuryr namespace:
-
kuryr-controller- a single service instance installed on amasternode. This is modeled in OpenShift Container Platform as aDeploymentobject. -
kuryr-cni- a container installing and configuring Kuryr as a CNI driver on each OpenShift Container Platform node. This is modeled in OpenShift Container Platform as aDaemonSetobject.
The Kuryr controller watches the OpenShift Container Platform API server for pod, service, and namespace create, update, and delete events. It maps the OpenShift Container Platform API calls to corresponding objects in Neutron and Octavia. This means that every network solution that implements the Neutron trunk port functionality can be used to back OpenShift Container Platform via Kuryr. This includes open source solutions such as Open vSwitch (OVS) and Open Virtual Network (OVN) as well as Neutron-compatible commercial SDNs.
Kuryr is recommended for OpenShift Container Platform deployments on encapsulated RHOSP tenant networks to avoid double encapsulation, such as running an encapsulated OpenShift Container Platform SDN over an RHOSP network.
If you use provider networks or tenant VLANs, you do not need to use Kuryr to avoid double encapsulation. The performance benefit is negligible. Depending on your configuration, though, using Kuryr to avoid having two overlays might still be beneficial.
Kuryr is not recommended in deployments where all of the following criteria are true:
- The RHOSP version is less than 16.
- The deployment uses UDP services, or a large number of TCP services on few hypervisors.
or
-
The
ovn-octaviaOctavia driver is disabled. - The deployment uses a large number of TCP services on few hypervisors.
12.2.3. Resource guidelines for installing OpenShift Container Platform on RHOSP with Kuryr
When using Kuryr SDN, the pods, services, namespaces, and network policies are using resources from the RHOSP quota; this increases the minimum requirements. Kuryr also has some additional requirements on top of what a default install requires.
Use the following quota to satisfy a default cluster’s minimum requirements:
| Resource | Value |
|---|---|
| Floating IP addresses | 3 - plus the expected number of Services of LoadBalancer type |
| Ports | 1500 - 1 needed per Pod |
| Routers | 1 |
| Subnets | 250 - 1 needed per Namespace/Project |
| Networks | 250 - 1 needed per Namespace/Project |
| RAM | 112 GB |
| vCPUs | 28 |
| Volume storage | 275 GB |
| Instances | 7 |
| Security groups | 250 - 1 needed per Service and per NetworkPolicy |
| Security group rules | 1000 |
| Load balancers | 100 - 1 needed per Service |
| Load balancer listeners | 500 - 1 needed per Service-exposed port |
| Load balancer pools | 500 - 1 needed per Service-exposed port |
A cluster might function with fewer than recommended resources, but its performance is not guaranteed.
If RHOSP object storage (Swift) is available and operated by a user account with the swiftoperator role, it is used as the default backend for the OpenShift Container Platform image registry. In this case, the volume storage requirement is 175 GB. Swift space requirements vary depending on the size of the image registry.
If you are using Red Hat OpenStack Platform (RHOSP) version 16 with the Amphora driver rather than the OVN Octavia driver, security groups are associated with service accounts instead of user projects.
Take the following notes into consideration when setting resources:
- The number of ports that are required is larger than the number of pods. Kuryr uses ports pools to have pre-created ports ready to be used by pods and speed up the pods' booting time.
-
Each network policy is mapped into an RHOSP security group, and depending on the
NetworkPolicyspec, one or more rules are added to the security group. Each service is mapped to an RHOSP load balancer. Consider this requirement when estimating the number of security groups required for the quota.
If you are using RHOSP version 15 or earlier, or the
ovn-octavia driver, each load balancer has a security group with the user project.The quota does not account for load balancer resources (such as VM resources), but you must consider these resources when you decide the RHOSP deployment’s size. The default installation will have more than 50 load balancers; the clusters must be able to accommodate them.
If you are using RHOSP version 16 with the OVN Octavia driver enabled, only one load balancer VM is generated; services are load balanced through OVN flows.
An OpenShift Container Platform deployment comprises control plane machines, compute machines, and a bootstrap machine.
To enable Kuryr SDN, your environment must meet the following requirements:
- Run RHOSP 13+.
- Have Overcloud with Octavia.
- Use Neutron Trunk ports extension.
-
Use
openvswitchfirewall driver if ML2/OVS Neutron driver is used instead ofovs-hybrid.
12.2.3.1. Increasing quota
When using Kuryr SDN, you must increase quotas to satisfy the Red Hat OpenStack Platform (RHOSP) resources used by pods, services, namespaces, and network policies.
Procedure
Increase the quotas for a project by running the following command:
$ sudo openstack quota set --secgroups 250 --secgroup-rules 1000 --ports 1500 --subnets 250 --networks 250 <project>
12.2.3.2. Configuring Neutron
Kuryr CNI leverages the Neutron Trunks extension to plug containers into the Red Hat OpenStack Platform (RHOSP) SDN, so you must use the trunks extension for Kuryr to properly work.
In addition, if you leverage the default ML2/OVS Neutron driver, the firewall must be set to openvswitch instead of ovs_hybrid so that security groups are enforced on trunk subports and Kuryr can properly handle network policies.
12.2.3.3. Configuring Octavia
Kuryr SDN uses Red Hat OpenStack Platform (RHOSP)'s Octavia LBaaS to implement OpenShift Container Platform services. Thus, you must install and configure Octavia components in RHOSP to use Kuryr SDN.
To enable Octavia, you must include the Octavia service during the installation of the RHOSP Overcloud, or upgrade the Octavia service if the Overcloud already exists. The following steps for enabling Octavia apply to both a clean install of the Overcloud or an Overcloud update.
The following steps only capture the key pieces required during the deployment of RHOSP when dealing with Octavia. It is also important to note that registry methods vary.
This example uses the local registry method.
Procedure
If you are using the local registry, create a template to upload the images to the registry. For example:
(undercloud) $ openstack overcloud container image prepare \ -e /usr/share/openstack-tripleo-heat-templates/environments/services-docker/octavia.yaml \ --namespace=registry.access.redhat.com/rhosp13 \ --push-destination=<local-ip-from-undercloud.conf>:8787 \ --prefix=openstack- \ --tag-from-label {version}-{product-version} \ --output-env-file=/home/stack/templates/overcloud_images.yaml \ --output-images-file /home/stack/local_registry_images.yamlVerify that the
local_registry_images.yamlfile contains the Octavia images. For example:... - imagename: registry.access.redhat.com/rhosp13/openstack-octavia-api:13.0-43 push_destination: <local-ip-from-undercloud.conf>:8787 - imagename: registry.access.redhat.com/rhosp13/openstack-octavia-health-manager:13.0-45 push_destination: <local-ip-from-undercloud.conf>:8787 - imagename: registry.access.redhat.com/rhosp13/openstack-octavia-housekeeping:13.0-45 push_destination: <local-ip-from-undercloud.conf>:8787 - imagename: registry.access.redhat.com/rhosp13/openstack-octavia-worker:13.0-44 push_destination: <local-ip-from-undercloud.conf>:8787NoteThe Octavia container versions vary depending upon the specific RHOSP release installed.
Pull the container images from
registry.redhat.ioto the Undercloud node:(undercloud) $ sudo openstack overcloud container image upload \ --config-file /home/stack/local_registry_images.yaml \ --verboseThis may take some time depending on the speed of your network and Undercloud disk.
Since an Octavia load balancer is used to access the OpenShift Container Platform API, you must increase their listeners' default timeouts for the connections. The default timeout is 50 seconds. Increase the timeout to 20 minutes by passing the following file to the Overcloud deploy command:
(undercloud) $ cat octavia_timeouts.yaml parameter_defaults: OctaviaTimeoutClientData: 1200000 OctaviaTimeoutMemberData: 1200000NoteThis is not needed for RHOSP 13.0.13+.
Install or update your Overcloud environment with Octavia:
$ openstack overcloud deploy --templates \ -e /usr/share/openstack-tripleo-heat-templates/environments/services-docker/octavia.yaml \ -e octavia_timeouts.yamlNoteThis command only includes the files associated with Octavia; it varies based on your specific installation of RHOSP. See the RHOSP documentation for further information. For more information on customizing your Octavia installation, see installation of Octavia using Director.
NoteWhen leveraging Kuryr SDN, the Overcloud installation requires the Neutron
trunkextension. This is available by default on director deployments. Use theopenvswitchfirewall instead of the defaultovs-hybridwhen the Neutron backend is ML2/OVS. There is no need for modifications if the backend is ML2/OVN.In RHOSP versions earlier than 13.0.13, add the project ID to the
octavia.confconfiguration file after you create the project.To enforce network policies across services, like when traffic goes through the Octavia load balancer, you must ensure Octavia creates the Amphora VM security groups on the user project.
This change ensures that required load balancer security groups belong to that project, and that they can be updated to enforce services isolation.
NoteThis task is unnecessary in RHOSP version 13.0.13 or later.
Octavia implements a new ACL API that restricts access to the load balancers VIP.
Get the project ID
$ openstack project show <project>Example output
+-------------+----------------------------------+ | Field | Value | +-------------+----------------------------------+ | description | | | domain_id | default | | enabled | True | | id | PROJECT_ID | | is_domain | False | | name | *<project>* | | parent_id | default | | tags | [] | +-------------+----------------------------------+Add the project ID to
octavia.conffor the controllers.Source the
stackrcfile:$ source stackrc # Undercloud credentialsList the Overcloud controllers:
$ openstack server listExample output
+--------------------------------------+--------------+--------+-----------------------+----------------+------------+ │ | ID | Name | Status | Networks | Image | Flavor | │ +--------------------------------------+--------------+--------+-----------------------+----------------+------------+ │ | 6bef8e73-2ba5-4860-a0b1-3937f8ca7e01 | controller-0 | ACTIVE | ctlplane=192.168.24.8 | overcloud-full | controller | │ | dda3173a-ab26-47f8-a2dc-8473b4a67ab9 | compute-0 | ACTIVE | ctlplane=192.168.24.6 | overcloud-full | compute | │ +--------------------------------------+--------------+--------+-----------------------+----------------+------------+SSH into the controller(s).
$ ssh heat-admin@192.168.24.8Edit the
octavia.conffile to add the project into the list of projects where Amphora security groups are on the user’s account.# List of project IDs that are allowed to have Load balancer security groups # belonging to them. amp_secgroup_allowed_projects = PROJECT_ID
Restart the Octavia worker so the new configuration loads.
controller-0$ sudo docker restart octavia_worker
Depending on your RHOSP environment, Octavia might not support UDP listeners. If you use Kuryr SDN on RHOSP version 13.0.13 or earlier, UDP services are not supported. RHOSP version 16 or later support UDP.
12.2.3.3.1. The Octavia OVN Driver
Octavia supports multiple provider drivers through the Octavia API.
To see all available Octavia provider drivers, on a command line, enter:
$ openstack loadbalancer provider listExample output
+---------+-------------------------------------------------+
| name | description |
+---------+-------------------------------------------------+
| amphora | The Octavia Amphora driver. |
| octavia | Deprecated alias of the Octavia Amphora driver. |
| ovn | Octavia OVN driver. |
+---------+-------------------------------------------------+
Beginning with RHOSP version 16, the Octavia OVN provider driver (ovn) is supported on OpenShift Container Platform on RHOSP deployments.
ovn is an integration driver for the load balancing that Octavia and OVN provide. It supports basic load balancing capabilities, and is based on OpenFlow rules. The driver is automatically enabled in Octavia by Director on deployments that use OVN Neutron ML2.
The Amphora provider driver is the default driver. If ovn is enabled, however, Kuryr uses it.
If Kuryr uses ovn instead of Amphora, it offers the following benefits:
- Decreased resource requirements. Kuryr does not require a load balancer VM for each service.
- Reduced network latency.
- Increased service creation speed by using OpenFlow rules instead of a VM for each service.
- Distributed load balancing actions across all nodes instead of centralized on Amphora VMs.
You can configure your cluster to use the Octavia OVN driver after your RHOSP cloud is upgraded from version 13 to version 16.
12.2.3.4. Known limitations of installing with Kuryr
Using OpenShift Container Platform with Kuryr SDN has several known limitations.
RHOSP general limitations
Using OpenShift Container Platform with Kuryr SDN has several limitations that apply to all versions and environments:
-
Serviceobjects with theNodePorttype are not supported. -
Clusters that use the OVN Octavia provider driver support
Serviceobjects for which the.spec.selectorproperty is unspecified only if the.subsets.addressesproperty of theEndpointsobject includes the subnet of the nodes or pods. -
If the subnet on which machines are created is not connected to a router, or if the subnet is connected, but the router has no external gateway set, Kuryr cannot create floating IPs for
Serviceobjects with typeLoadBalancer. -
Configuring the
sessionAffinity=ClientIPproperty onServiceobjects does not have an effect. Kuryr does not support this setting.
RHOSP version limitations
Using OpenShift Container Platform with Kuryr SDN has several limitations that depend on the RHOSP version.
RHOSP versions before 16 use the default Octavia load balancer driver (Amphora). This driver requires that one Amphora load balancer VM is deployed per OpenShift Container Platform service. Creating too many services can cause you to run out of resources.
Deployments of later versions of RHOSP that have the OVN Octavia driver disabled also use the Amphora driver. They are subject to the same resource concerns as earlier versions of RHOSP.
- Octavia RHOSP versions before 13.0.13 do not support UDP listeners. Therefore, OpenShift Container Platform UDP services are not supported.
- Octavia RHOSP versions before 13.0.13 cannot listen to multiple protocols on the same port. Services that expose the same port to different protocols, like TCP and UDP, are not supported.
- Kuryr SDN does not support automatic unidling by a service.
RHOSP environment limitations
There are limitations when using Kuryr SDN that depend on your deployment environment.
Because of Octavia’s lack of support for the UDP protocol and multiple listeners, if the RHOSP version is earlier than 13.0.13, Kuryr forces pods to use TCP for DNS resolution.
In Go versions 1.12 and earlier, applications that are compiled with CGO support disabled use UDP only. In this case, the native Go resolver does not recognize the use-vc option in resolv.conf, which controls whether TCP is forced for DNS resolution. As a result, UDP is still used for DNS resolution, which fails.
To ensure that TCP forcing is allowed, compile applications either with the environment variable CGO_ENABLED set to 1, i.e. CGO_ENABLED=1, or ensure that the variable is absent.
In Go versions 1.13 and later, TCP is used automatically if DNS resolution using UDP fails.
musl-based containers, including Alpine-based containers, do not support the use-vc option.
RHOSP upgrade limitations
As a result of the RHOSP upgrade process, the Octavia API might be changed, and upgrades to the Amphora images that are used for load balancers might be required.
You can address API changes on an individual basis.
If the Amphora image is upgraded, the RHOSP operator can handle existing load balancer VMs in two ways:
- Upgrade each VM by triggering a load balancer failover.
- Leave responsibility for upgrading the VMs to users.
If the operator takes the first option, there might be short downtimes during failovers.
If the operator takes the second option, the existing load balancers will not support upgraded Octavia API features, like UDP listeners. In this case, users must recreate their Services to use these features.
If OpenShift Container Platform detects a new Octavia version that supports UDP load balancing, it recreates the DNS service automatically. The service recreation ensures that the service default supports UDP load balancing.
The recreation causes the DNS service approximately one minute of downtime.
12.2.3.5. Control plane machines
By default, the OpenShift Container Platform installation process creates three control plane machines.
Each machine requires:
- An instance from the RHOSP quota
- A port from the RHOSP quota
- A flavor with at least 16 GB memory, 4 vCPUs, and 100 GB storage space
12.2.3.6. Compute machines
By default, the OpenShift Container Platform installation process creates three compute machines.
Each machine requires:
- An instance from the RHOSP quota
- A port from the RHOSP quota
- A flavor with at least 8 GB memory, 2 vCPUs, and 100 GB storage space
Compute machines host the applications that you run on OpenShift Container Platform; aim to run as many as you can.
12.2.3.7. Bootstrap machine
During installation, a bootstrap machine is temporarily provisioned to stand up the control plane. After the production control plane is ready, the bootstrap machine is deprovisioned.
The bootstrap machine requires:
- An instance from the RHOSP quota
- A port from the RHOSP quota
- A flavor with at least 16 GB memory, 4 vCPUs, and 100 GB storage space
12.2.4. Internet access for OpenShift Container Platform
In OpenShift Container Platform 4.7, you require access to the Internet to install your cluster.
You must have Internet access to:
- Access OpenShift Cluster Manager to download the installation program and perform subscription management. If the cluster has internet access and you do not disable Telemetry, that service automatically entitles your cluster.
- Access Quay.io to obtain the packages that are required to install your cluster.
- Obtain the packages that are required to perform cluster updates.
If your cluster cannot have direct Internet access, you can perform a restricted network installation on some types of infrastructure that you provision. During that process, you download the content that is required and use it to populate a mirror registry with the packages that you need to install a cluster and generate the installation program. With some installation types, the environment that you install your cluster in will not require Internet access. Before you update the cluster, you update the content of the mirror registry.
12.2.5. Enabling Swift on RHOSP
Swift is operated by a user account with the swiftoperator role. Add the role to an account before you run the installation program.
If the Red Hat OpenStack Platform (RHOSP) object storage service, commonly known as Swift, is available, OpenShift Container Platform uses it as the image registry storage. If it is unavailable, the installation program relies on the RHOSP block storage service, commonly known as Cinder.
If Swift is present and you want to use it, you must enable access to it. If it is not present, or if you do not want to use it, skip this section.
Prerequisites
- You have a RHOSP administrator account on the target environment.
- The Swift service is installed.
-
On Ceph RGW, the
account in urloption is enabled.
Procedure
To enable Swift on RHOSP:
As an administrator in the RHOSP CLI, add the
swiftoperatorrole to the account that will access Swift:$ openstack role add --user <user> --project <project> swiftoperator
Your RHOSP deployment can now use Swift for the image registry.
12.2.6. Verifying external network access
The OpenShift Container Platform installation process requires external network access. You must provide an external network value to it, or deployment fails. Before you begin the process, verify that a network with the external router type exists in Red Hat OpenStack Platform (RHOSP).
Prerequisites
Procedure
Using the RHOSP CLI, verify the name and ID of the 'External' network:
$ openstack network list --long -c ID -c Name -c "Router Type"Example output
+--------------------------------------+----------------+-------------+ | ID | Name | Router Type | +--------------------------------------+----------------+-------------+ | 148a8023-62a7-4672-b018-003462f8d7dc | public_network | External | +--------------------------------------+----------------+-------------+
A network with an external router type appears in the network list. If at least one does not, see Creating a default floating IP network and Creating a default provider network.
If the external network’s CIDR range overlaps one of the default network ranges, you must change the matching network ranges in the install-config.yaml file before you start the installation process.
The default network ranges are:
| Network | Range |
|---|---|
|
| 10.0.0.0/16 |
|
| 172.30.0.0/16 |
|
| 10.128.0.0/14 |
If the installation program finds multiple networks with the same name, it sets one of them at random. To avoid this behavior, create unique names for resources in RHOSP.
If the Neutron trunk service plug-in is enabled, a trunk port is created by default. For more information, see Neutron trunk port.
12.2.7. Defining parameters for the installation program
The OpenShift Container Platform installation program relies on a file that is called clouds.yaml. The file describes Red Hat OpenStack Platform (RHOSP) configuration parameters, including the project name, log in information, and authorization service URLs.
Procedure
Create the
clouds.yamlfile:If your RHOSP distribution includes the Horizon web UI, generate a
clouds.yamlfile in it.ImportantRemember to add a password to the
authfield. You can also keep secrets in a separate file fromclouds.yaml.If your RHOSP distribution does not include the Horizon web UI, or you do not want to use Horizon, create the file yourself. For detailed information about
clouds.yaml, see Config files in the RHOSP documentation.clouds: shiftstack: auth: auth_url: http://10.10.14.42:5000/v3 project_name: shiftstack username: shiftstack_user password: XXX user_domain_name: Default project_domain_name: Default dev-env: region_name: RegionOne auth: username: 'devuser' password: XXX project_name: 'devonly' auth_url: 'https://10.10.14.22:5001/v2.0'
If your RHOSP installation uses self-signed certificate authority (CA) certificates for endpoint authentication:
- Copy the certificate authority file to your machine.
Add the
cacertskey to theclouds.yamlfile. The value must be an absolute, non-root-accessible path to the CA certificate:clouds: shiftstack: ... cacert: "/etc/pki/ca-trust/source/anchors/ca.crt.pem"TipAfter you run the installer with a custom CA certificate, you can update the certificate by editing the value of the
ca-cert.pemkey in thecloud-provider-configkeymap. On a command line, run:$ oc edit configmap -n openshift-config cloud-provider-config
Place the
clouds.yamlfile in one of the following locations:-
The value of the
OS_CLIENT_CONFIG_FILEenvironment variable - The current directory
-
A Unix-specific user configuration directory, for example
~/.config/openstack/clouds.yaml A Unix-specific site configuration directory, for example
/etc/openstack/clouds.yamlThe installation program searches for
clouds.yamlin that order.
-
The value of the
12.2.8. Obtaining the installation program
Before you install OpenShift Container Platform, download the installation file on your provisioning machine.
Prerequisites
- You have a machine that runs Linux, for example Red Hat Enterprise Linux 8, with 500 MB of local disk space
Procedure
- Access the Infrastructure Provider page on the OpenShift Cluster Manager site. If you have a Red Hat account, log in with your credentials. If you do not, create an account.
- Select your infrastructure provider.
Navigate to the page for your installation type, download the installation program for your operating system, and place the file in the directory where you will store the installation configuration files.
ImportantThe installation program creates several files on the computer that you use to install your cluster. You must keep the installation program and the files that the installation program creates after you finish installing the cluster. Both files are required to delete the cluster.
ImportantDeleting the files created by the installation program does not remove your cluster, even if the cluster failed during installation. To remove your cluster, complete the OpenShift Container Platform uninstallation procedures for your specific cloud provider.
Extract the installation program. For example, on a computer that uses a Linux operating system, run the following command:
$ tar xvf openshift-install-linux.tar.gz- Download your installation pull secret from the Red Hat OpenShift Cluster Manager. This pull secret allows you to authenticate with the services that are provided by the included authorities, including Quay.io, which serves the container images for OpenShift Container Platform components.
12.2.9. Creating the installation configuration file
You can customize the OpenShift Container Platform cluster you install on Red Hat OpenStack Platform (RHOSP).
Prerequisites
- Obtain the OpenShift Container Platform installation program and the pull secret for your cluster.
- Obtain service principal permissions at the subscription level.
Procedure
Create the
install-config.yamlfile.Change to the directory that contains the installation program and run the following command:
$ ./openshift-install create install-config --dir <installation_directory>1 - 1
- For
<installation_directory>, specify the directory name to store the files that the installation program creates.
ImportantSpecify an empty directory. Some installation assets, like bootstrap X.509 certificates have short expiration intervals, so you must not reuse an installation directory. If you want to reuse individual files from another cluster installation, you can copy them into your directory. However, the file names for the installation assets might change between releases. Use caution when copying installation files from an earlier OpenShift Container Platform version.
At the prompts, provide the configuration details for your cloud:
Optional: Select an SSH key to use to access your cluster machines.
NoteFor production OpenShift Container Platform clusters on which you want to perform installation debugging or disaster recovery, specify an SSH key that your
ssh-agentprocess uses.- Select openstack as the platform to target.
- Specify the Red Hat OpenStack Platform (RHOSP) external network name to use for installing the cluster.
- Specify the floating IP address to use for external access to the OpenShift API.
- Specify a RHOSP flavor with at least 16 GB RAM to use for control plane nodes and 8 GB RAM for compute nodes.
- Select the base domain to deploy the cluster to. All DNS records will be sub-domains of this base and will also include the cluster name.
- Enter a name for your cluster. The name must be 14 or fewer characters long.
- Paste the pull secret from the Red Hat OpenShift Cluster Manager.
-
Modify the
install-config.yamlfile. You can find more information about the available parameters in the "Installation configuration parameters" section. Back up the
install-config.yamlfile so that you can use it to install multiple clusters.ImportantThe
install-config.yamlfile is consumed during the installation process. If you want to reuse the file, you must back it up now.
12.2.9.1. Configuring the cluster-wide proxy during installation
Production environments can deny direct access to the Internet and instead have an HTTP or HTTPS proxy available. You can configure a new OpenShift Container Platform cluster to use a proxy by configuring the proxy settings in the install-config.yaml file.
Prerequisites
-
You have an existing
install-config.yamlfile. You reviewed the sites that your cluster requires access to and determined whether any of them need to bypass the proxy. By default, all cluster egress traffic is proxied, including calls to hosting cloud provider APIs. You added sites to the
Proxyobject’sspec.noProxyfield to bypass the proxy if necessary.NoteThe
Proxyobjectstatus.noProxyfield is populated with the values of thenetworking.machineNetwork[].cidr,networking.clusterNetwork[].cidr, andnetworking.serviceNetwork[]fields from your installation configuration.For installations on Amazon Web Services (AWS), Google Cloud Platform (GCP), Microsoft Azure, and Red Hat OpenStack Platform (RHOSP), the
Proxyobjectstatus.noProxyfield is also populated with the instance metadata endpoint (169.254.169.254).
Procedure
Edit your
install-config.yamlfile and add the proxy settings. For example:apiVersion: v1 baseDomain: my.domain.com proxy: httpProxy: http://<username>:<pswd>@<ip>:<port>1 httpsProxy: https://<username>:<pswd>@<ip>:<port>2 noProxy: example.com3 additionalTrustBundle: |4 -----BEGIN CERTIFICATE----- <MY_TRUSTED_CA_CERT> -----END CERTIFICATE----- ...- 1
- A proxy URL to use for creating HTTP connections outside the cluster. The URL scheme must be
http. - 2
- A proxy URL to use for creating HTTPS connections outside the cluster.
- 3
- A comma-separated list of destination domain names, IP addresses, or other network CIDRs to exclude from proxying. Preface a domain with
.to match subdomains only. For example,.y.commatchesx.y.com, but noty.com. Use*to bypass the proxy for all destinations. - 4
- If provided, the installation program generates a config map that is named
user-ca-bundlein theopenshift-confignamespace to hold the additional CA certificates. If you provideadditionalTrustBundleand at least one proxy setting, theProxyobject is configured to reference theuser-ca-bundleconfig map in thetrustedCAfield. The Cluster Network Operator then creates atrusted-ca-bundleconfig map that merges the contents specified for thetrustedCAparameter with the RHCOS trust bundle. TheadditionalTrustBundlefield is required unless the proxy’s identity certificate is signed by an authority from the RHCOS trust bundle.
NoteThe installation program does not support the proxy
readinessEndpointsfield.- Save the file and reference it when installing OpenShift Container Platform.
The installation program creates a cluster-wide proxy that is named cluster that uses the proxy settings in the provided install-config.yaml file. If no proxy settings are provided, a cluster Proxy object is still created, but it will have a nil spec.
Only the Proxy object named cluster is supported, and no additional proxies can be created.
12.2.10. Installation configuration parameters
Before you deploy an OpenShift Container Platform cluster, you provide parameter values to describe your account on the cloud platform that hosts your cluster and optionally customize your cluster’s platform. When you create the install-config.yaml installation configuration file, you provide values for the required parameters through the command line. If you customize your cluster, you can modify the install-config.yaml file to provide more details about the platform.
After installation, you cannot modify these parameters in the install-config.yaml file.
The openshift-install command does not validate field names for parameters. If an incorrect name is specified, the related file or object is not created, and no error is reported. Ensure that the field names for any parameters that are specified are correct.
12.2.10.1. Required configuration parameters
Required installation configuration parameters are described in the following table:
| Parameter | Description | Values |
|---|---|---|
|
|
The API version for the | String |
|
|
The base domain of your cloud provider. The base domain is used to create routes to your OpenShift Container Platform cluster components. The full DNS name for your cluster is a combination of the |
A fully-qualified domain or subdomain name, such as |
|
|
Kubernetes resource | Object |
|
|
The name of the cluster. DNS records for the cluster are all subdomains of |
String of lowercase letters, hyphens ( |
|
|
The configuration for the specific platform upon which to perform the installation: | Object |
|
| Get a pull secret from the Red Hat OpenShift Cluster Manager to authenticate downloading container images for OpenShift Container Platform components from services such as Quay.io. |
|
12.2.10.2. Network configuration parameters
You can customize your installation configuration based on the requirements of your existing network infrastructure. For example, you can expand the IP address block for the cluster network or provide different IP address blocks than the defaults.
Only IPv4 addresses are supported.
| Parameter | Description | Values |
|---|---|---|
|
| The configuration for the cluster network. | Object Note
You cannot modify parameters specified by the |
|
| The cluster network provider Container Network Interface (CNI) plug-in to install. |
Either |
|
| The IP address blocks for pods.
The default value is If you specify multiple IP address blocks, the blocks must not overlap. | An array of objects. For example: |
|
|
Required if you use An IPv4 network. |
An IP address block in Classless Inter-Domain Routing (CIDR) notation. The prefix length for an IPv4 block is between |
|
|
The subnet prefix length to assign to each individual node. For example, if | A subnet prefix.
The default value is |
|
|
The IP address block for services. The default value is The OpenShift SDN and OVN-Kubernetes network providers support only a single IP address block for the service network. | An array with an IP address block in CIDR format. For example: |
|
| The IP address blocks for machines. If you specify multiple IP address blocks, the blocks must not overlap.
If you specify multiple IP kernel arguments, the | An array of objects. For example: |
|
|
Required if you use | An IP network block in CIDR notation.
For example, Note
Set the |
12.2.10.3. Optional configuration parameters
Optional installation configuration parameters are described in the following table:
| Parameter | Description | Values |
|---|---|---|
|
| A PEM-encoded X.509 certificate bundle that is added to the nodes' trusted certificate store. This trust bundle may also be used when a proxy has been configured. | String |
|
| The configuration for the machines that comprise the compute nodes. |
Array of |
|
|
Determines the instruction set architecture of the machines in the pool. Currently, heteregeneous clusters are not supported, so all pools must specify the same architecture. Valid values are | String |
|
|
Whether to enable or disable simultaneous multithreading, or Important If you disable simultaneous multithreading, ensure that your capacity planning accounts for the dramatically decreased machine performance. |
|
|
|
Required if you use |
|
|
|
Required if you use |
|
|
| The number of compute machines, which are also known as worker machines, to provision. |
A positive integer greater than or equal to |
|
| The configuration for the machines that comprise the control plane. |
Array of |
|
|
Determines the instruction set architecture of the machines in the pool. Currently, heterogeneous clusters are not supported, so all pools must specify the same architecture. Valid values are | String |
|
|
Whether to enable or disable simultaneous multithreading, or Important If you disable simultaneous multithreading, ensure that your capacity planning accounts for the dramatically decreased machine performance. |
|
|
|
Required if you use |
|
|
|
Required if you use |
|
|
| The number of control plane machines to provision. |
The only supported value is |
|
| The Cloud Credential Operator (CCO) mode. If no mode is specified, the CCO dynamically tries to determine the capabilities of the provided credentials, with a preference for mint mode on the platforms where multiple modes are supported. Note Not all CCO modes are supported for all cloud providers. For more information on CCO modes, see the Cloud Credential Operator entry in the Cluster Operators reference content. |
|
|
|
Enable or disable FIPS mode. The default is Important
The use of FIPS Validated / Modules in Process cryptographic libraries is only supported on OpenShift Container Platform deployments on the Note If you are using Azure File storage, you cannot enable FIPS mode. |
|
|
| Sources and repositories for the release-image content. |
Array of objects. Includes a |
|
|
Required if you use | String |
|
| Specify one or more repositories that may also contain the same images. | Array of strings |
|
| How to publish or expose the user-facing endpoints of your cluster, such as the Kubernetes API, OpenShift routes. |
Setting this field to Important
If the value of the field is set to |
|
| The SSH key or keys to authenticate access your cluster machines. Note
For production OpenShift Container Platform clusters on which you want to perform installation debugging or disaster recovery, specify an SSH key that your | One or more keys. For example: |
12.2.10.4. Additional Red Hat OpenStack Platform (RHOSP) configuration parameters
Additional RHOSP configuration parameters are described in the following table:
| Parameter | Description | Values |
|---|---|---|
|
| For compute machines, the size in gigabytes of the root volume. If you do not set this value, machines use ephemeral storage. |
Integer, for example |
|
| For compute machines, the root volume’s type. |
String, for example |
|
| For control plane machines, the size in gigabytes of the root volume. If you do not set this value, machines use ephemeral storage. |
Integer, for example |
|
| For control plane machines, the root volume’s type. |
String, for example |
|
|
The name of the RHOSP cloud to use from the list of clouds in the |
String, for example |
|
| The RHOSP external network name to be used for installation. |
String, for example |
|
| The RHOSP flavor to use for control plane and compute machines.
This property is deprecated. To use a flavor as the default for all machine pools, add it as the value of the |
String, for example |
12.2.10.5. Optional RHOSP configuration parameters
Optional RHOSP configuration parameters are described in the following table:
| Parameter | Description | Values |
|---|---|---|
|
| Additional networks that are associated with compute machines. Allowed address pairs are not created for additional networks. |
A list of one or more UUIDs as strings. For example, |
|
| Additional security groups that are associated with compute machines. |
A list of one or more UUIDs as strings. For example, |
|
| RHOSP Compute (Nova) availability zones (AZs) to install machines on. If this parameter is not set, the installer relies on the default settings for Nova that the RHOSP administrator configured. On clusters that use Kuryr, RHOSP Octavia does not support availability zones. Load balancers and, if you are using the Amphora provider driver, OpenShift Container Platform services that rely on Amphora VMs, are not created according to the value of this property. |
A list of strings. For example, |
|
| Additional networks that are associated with control plane machines. Allowed address pairs are not created for additional networks. |
A list of one or more UUIDs as strings. For example, |
|
| Additional security groups that are associated with control plane machines. |
A list of one or more UUIDs as strings. For example, |
|
| RHOSP Compute (Nova) availability zones (AZs) to install machines on. If this parameter is not set, the installer relies on the default settings for Nova that the RHOSP administrator configured. On clusters that use Kuryr, RHOSP Octavia does not support availability zones. Load balancers and, if you are using the Amphora provider driver, OpenShift Container Platform services that rely on Amphora VMs, are not created according to the value of this property. |
A list of strings. For example, |
|
| The location from which the installer downloads the RHCOS image. You must set this parameter to perform an installation in a restricted network. | An HTTP or HTTPS URL, optionally with an SHA-256 checksum.
For example, |
|
|
Properties to add to the installer-uploaded ClusterOSImage in Glance. This property is ignored if
You can use this property to exceed the default persistent volume (PV) limit for RHOSP of 26 PVs per node. To exceed the limit, set the
You can also use this property to enable the QEMU guest agent by including the |
A list of key-value string pairs. For example, |
|
| The default machine pool platform configuration. |
|
|
|
An existing floating IP address to associate with the Ingress port. To use this property, you must also define the |
An IP address, for example |
|
|
An existing floating IP address to associate with the API load balancer. To use this property, you must also define the |
An IP address, for example |
|
| IP addresses for external DNS servers that cluster instances use for DNS resolution. |
A list of IP addresses as strings. For example, |
|
| The UUID of a RHOSP subnet that the cluster’s nodes use. Nodes and virtual IP (VIP) ports are created on this subnet.
The first item in If you deploy to a custom subnet, you cannot specify an external DNS server to the OpenShift Container Platform installer. Instead, add DNS to the subnet in RHOSP. |
A UUID as a string. For example, |
12.2.10.6. Custom subnets in RHOSP deployments
Optionally, you can deploy a cluster on a Red Hat OpenStack Platform (RHOSP) subnet of your choice. The subnet’s GUID is passed as the value of platform.openstack.machinesSubnet in the install-config.yaml file.
This subnet is used as the cluster’s primary subnet. By default, nodes and ports are created on it. You can create nodes and ports on a different RHOSP subnet by setting the value of the platform.openstack.machinesSubnet property to the subnet’s UUID.
Before you run the OpenShift Container Platform installer with a custom subnet, verify that your configuration meets the following requirements:
-
The subnet that is used by
platform.openstack.machinesSubnethas DHCP enabled. -
The CIDR of
platform.openstack.machinesSubnetmatches the CIDR ofnetworking.machineNetwork. - The installation program user has permission to create ports on this network, including ports with fixed IP addresses.
Clusters that use custom subnets have the following limitations:
-
If you plan to install a cluster that uses floating IP addresses, the
platform.openstack.machinesSubnetsubnet must be attached to a router that is connected to theexternalNetworknetwork. -
If the
platform.openstack.machinesSubnetvalue is set in theinstall-config.yamlfile, the installation program does not create a private network or subnet for your RHOSP machines. -
You cannot use the
platform.openstack.externalDNSproperty at the same time as a custom subnet. To add DNS to a cluster that uses a custom subnet, configure DNS on the RHOSP network.
By default, the API VIP takes x.x.x.5 and the Ingress VIP takes x.x.x.7 from your network’s CIDR block. To override these default values, set values for platform.openstack.apiVIP and platform.openstack.ingressVIP that are outside of the DHCP allocation pool.
12.2.10.7. Sample customized install-config.yaml file for RHOSP with Kuryr
To deploy with Kuryr SDN instead of the default OpenShift SDN, you must modify the install-config.yaml file to include Kuryr as the desired networking.networkType and proceed with the default OpenShift Container Platform SDN installation steps. This sample install-config.yaml demonstrates all of the possible Red Hat OpenStack Platform (RHOSP) customization options.
This sample file is provided for reference only. You must obtain your install-config.yaml file by using the installation program.
apiVersion: v1
baseDomain: example.com
controlPlane:
name: master
platform: {}
replicas: 3
compute:
- name: worker
platform:
openstack:
type: ml.large
replicas: 3
metadata:
name: example
networking:
clusterNetwork:
- cidr: 10.128.0.0/14
hostPrefix: 23
machineNetwork:
- cidr: 10.0.0.0/16
serviceNetwork:
- 172.30.0.0/16
networkType: Kuryr
platform:
openstack:
cloud: mycloud
externalNetwork: external
computeFlavor: m1.xlarge
apiFloatingIP: 128.0.0.1
trunkSupport: true
octaviaSupport: true
pullSecret: '{"auths": ...}'
sshKey: ssh-ed25519 AAAA...- 1
- The Amphora Octavia driver creates two ports per load balancer. As a result, the service subnet that the installer creates is twice the size of the CIDR that is specified as the value of the
serviceNetworkproperty. The larger range is required to prevent IP address conflicts. - 2 3
- Both
trunkSupportandoctaviaSupportare automatically discovered by the installer, so there is no need to set them. But if your environment does not meet both requirements, Kuryr SDN will not properly work. Trunks are needed to connect the pods to the RHOSP network and Octavia is required to create the OpenShift Container Platform services.
12.2.10.8. Kuryr ports pools
A Kuryr ports pool maintains a number of ports on standby for pod creation.
Keeping ports on standby minimizes pod creation time. Without ports pools, Kuryr must explicitly request port creation or deletion whenever a pod is created or deleted.
The Neutron ports that Kuryr uses are created in subnets that are tied to namespaces. These pod ports are also added as subports to the primary port of OpenShift Container Platform cluster nodes.
Because Kuryr keeps each namespace in a separate subnet, a separate ports pool is maintained for each namespace-worker pair.
Prior to installing a cluster, you can set the following parameters in the cluster-network-03-config.yml manifest file to configure ports pool behavior:
-
The
enablePortPoolsPrepopulationparameter controls pool prepopulation, which forces Kuryr to add ports to the pool when it is created, such as when a new host is added, or a new namespace is created. The default value isfalse. -
The
poolMinPortsparameter is the minimum number of free ports that are kept in the pool. The default value is1. The
poolMaxPortsparameter is the maximum number of free ports that are kept in the pool. A value of0disables that upper bound. This is the default setting.If your OpenStack port quota is low, or you have a limited number of IP addresses on the pod network, consider setting this option to ensure that unneeded ports are deleted.
-
The
poolBatchPortsparameter defines the maximum number of Neutron ports that can be created at once. The default value is3.
12.2.10.9. Adjusting Kuryr ports pools during installation
During installation, you can configure how Kuryr manages Red Hat OpenStack Platform (RHOSP) Neutron ports to control the speed and efficiency of pod creation.
Prerequisites
-
Create and modify the
install-config.yamlfile.
Procedure
From a command line, create the manifest files:
$ ./openshift-install create manifests --dir <installation_directory>1 - 1
- For
<installation_directory>, specify the name of the directory that contains theinstall-config.yamlfile for your cluster.
Create a file that is named
cluster-network-03-config.ymlin the<installation_directory>/manifests/directory:$ touch <installation_directory>/manifests/cluster-network-03-config.yml1 - 1
- For
<installation_directory>, specify the directory name that contains themanifests/directory for your cluster.
After creating the file, several network configuration files are in the
manifests/directory, as shown:$ ls <installation_directory>/manifests/cluster-network-*Example output
cluster-network-01-crd.yml cluster-network-02-config.yml cluster-network-03-config.ymlOpen the
cluster-network-03-config.ymlfile in an editor, and enter a custom resource (CR) that describes the Cluster Network Operator configuration that you want:$ oc edit networks.operator.openshift.io clusterEdit the settings to meet your requirements. The following file is provided as an example:
apiVersion: operator.openshift.io/v1 kind: Network metadata: name: cluster spec: clusterNetwork: - cidr: 10.128.0.0/14 hostPrefix: 23 serviceNetwork: - 172.30.0.0/16 defaultNetwork: type: Kuryr kuryrConfig: enablePortPoolsPrepopulation: false1 poolMinPorts: 12 poolBatchPorts: 33 poolMaxPorts: 54 openstackServiceNetwork: 172.30.0.0/155 - 1
- Set the value of
enablePortPoolsPrepopulationtotrueto make Kuryr create new Neutron ports after a namespace is created or a new node is added to the cluster. This setting raises the Neutron ports quota but can reduce the time that is required to spawn pods. The default value isfalse. - 2
- Kuryr creates new ports for a pool if the number of free ports in that pool is lower than the value of
poolMinPorts. The default value is1. - 3
poolBatchPortscontrols the number of new ports that are created if the number of free ports is lower than the value ofpoolMinPorts. The default value is3.- 4
- If the number of free ports in a pool is higher than the value of
poolMaxPorts, Kuryr deletes them until the number matches that value. Setting this value to0disables this upper bound, preventing pools from shrinking. The default value is0. - 5
- The
openStackServiceNetworkparameter defines the CIDR range of the network from which IP addresses are allocated to RHOSP Octavia’s LoadBalancers.
If this parameter is used with the Amphora driver, Octavia takes two IP addresses from this network for each load balancer: one for OpenShift and the other for VRRP connections. Because these IP addresses are managed by OpenShift Container Platform and Neutron respectively, they must come from different pools. Therefore, the value of
openStackServiceNetworkmust be at least twice the size of the value ofserviceNetwork, and the value ofserviceNetworkmust overlap entirely with the range that is defined byopenStackServiceNetwork.The CNO verifies that VRRP IP addresses that are taken from the range that is defined by this parameter do not overlap with the range that is defined by the
serviceNetworkparameter.If this parameter is not set, the CNO uses an expanded value of
serviceNetworkthat is determined by decrementing the prefix size by 1.-
Save the
cluster-network-03-config.ymlfile, and exit the text editor. -
Optional: Back up the
manifests/cluster-network-03-config.ymlfile. The installation program deletes themanifests/directory while creating the cluster.
12.2.11. Setting compute machine affinity
Optionally, you can set the affinity policy for compute machines during installation. The installer does not select an affinity policy for compute machines by default.
You can also create machine sets that use particular RHOSP server groups after installation.
Control plane machines are created with a soft-anti-affinity policy.
You can learn more about RHOSP instance scheduling and placement in the RHOSP documentation.
Prerequisites
-
Create the
install-config.yamlfile and complete any modifications to it.
Procedure
Using the RHOSP command-line interface, create a server group for your compute machines. For example:
$ openstack \ --os-compute-api-version=2.15 \ server group create \ --policy anti-affinity \ my-openshift-worker-groupFor more information, see the
server group createcommand documentation.Change to the directory that contains the installation program and create the manifests:
$ ./openshift-install create manifests --dir=<installation_directory>where:
installation_directory-
Specifies the name of the directory that contains the
install-config.yamlfile for your cluster.
-
Open
manifests/99_openshift-cluster-api_worker-machineset-0.yaml, theMachineSetdefinition file. Add the property
serverGroupIDto the definition beneath thespec.template.spec.providerSpec.valueproperty. For example:apiVersion: machine.openshift.io/v1beta1 kind: MachineSet metadata: labels: machine.openshift.io/cluster-api-cluster: <infrastructure_ID> machine.openshift.io/cluster-api-machine-role: <node_role> machine.openshift.io/cluster-api-machine-type: <node_role> name: <infrastructure_ID>-<node_role> namespace: openshift-machine-api spec: replicas: <number_of_replicas> selector: matchLabels: machine.openshift.io/cluster-api-cluster: <infrastructure_ID> machine.openshift.io/cluster-api-machineset: <infrastructure_ID>-<node_role> template: metadata: labels: machine.openshift.io/cluster-api-cluster: <infrastructure_ID> machine.openshift.io/cluster-api-machine-role: <node_role> machine.openshift.io/cluster-api-machine-type: <node_role> machine.openshift.io/cluster-api-machineset: <infrastructure_ID>-<node_role> spec: providerSpec: value: apiVersion: openstackproviderconfig.openshift.io/v1alpha1 cloudName: openstack cloudsSecret: name: openstack-cloud-credentials namespace: openshift-machine-api flavor: <nova_flavor> image: <glance_image_name_or_location> serverGroupID: aaaaaaaa-bbbb-cccc-dddd-eeeeeeeeeeee1 kind: OpenstackProviderSpec networks: - filter: {} subnets: - filter: name: <subnet_name> tags: openshiftClusterID=<infrastructure_ID> securityGroups: - filter: {} name: <infrastructure_ID>-<node_role> serverMetadata: Name: <infrastructure_ID>-<node_role> openshiftClusterID: <infrastructure_ID> tags: - openshiftClusterID=<infrastructure_ID> trunk: true userDataSecret: name: <node_role>-user-data availabilityZone: <optional_openstack_availability_zone>- 1
- Add the UUID of your server group here.
-
Optional: Back up the
manifests/99_openshift-cluster-api_worker-machineset-0.yamlfile. The installation program deletes themanifests/directory when creating the cluster.
When you install the cluster, the installer uses the MachineSet definition that you modified to create compute machines within your RHOSP server group.
12.2.12. Generating an SSH private key and adding it to the agent
If you want to perform installation debugging or disaster recovery on your cluster, you must provide an SSH key to both your ssh-agent and the installation program. You can use this key to access the bootstrap machine in a public cluster to troubleshoot installation issues.
In a production environment, you require disaster recovery and debugging.
Do not skip this procedure in production environments where disaster recovery and debugging is required.
You can use this key to SSH into the master nodes as the user core. When you deploy the cluster, the key is added to the core user’s ~/.ssh/authorized_keys list.
Procedure
If you do not have an SSH key that is configured for password-less authentication on your computer, create one. For example, on a computer that uses a Linux operating system, run the following command:
$ ssh-keygen -t ed25519 -N '' \ -f <path>/<file_name>1 - 1
- Specify the path and file name, such as
~/.ssh/id_rsa, of the new SSH key. If you have an existing key pair, ensure your public key is in the your~/.sshdirectory.
Running this command generates an SSH key that does not require a password in the location that you specified.
NoteIf you plan to install an OpenShift Container Platform cluster that uses FIPS Validated / Modules in Process cryptographic libraries on the
x86_64architecture, do not create a key that uses theed25519algorithm. Instead, create a key that uses thersaorecdsaalgorithm.Start the
ssh-agentprocess as a background task:$ eval "$(ssh-agent -s)"Example output
Agent pid 31874NoteIf your cluster is in FIPS mode, only use FIPS-compliant algorithms to generate the SSH key. The key must be either RSA or ECDSA.
Add your SSH private key to the
ssh-agent:$ ssh-add <path>/<file_name>1 Example output
Identity added: /home/<you>/<path>/<file_name> (<computer_name>)- 1
- Specify the path and file name for your SSH private key, such as
~/.ssh/id_rsa
Next steps
- When you install OpenShift Container Platform, provide the SSH public key to the installation program.
12.2.13. Enabling access to the environment
At deployment, all OpenShift Container Platform machines are created in a Red Hat OpenStack Platform (RHOSP)-tenant network. Therefore, they are not accessible directly in most RHOSP deployments.
You can configure OpenShift Container Platform API and application access by using floating IP addresses (FIPs) during installation. You can also complete an installation without configuring FIPs, but the installer will not configure a way to reach the API or applications externally.
12.2.13.1. Enabling access with floating IP addresses
Create floating IP (FIP) addresses for external access to the OpenShift Container Platform API and cluster applications.
Procedure
Using the Red Hat OpenStack Platform (RHOSP) CLI, create the API FIP:
$ openstack floating ip create --description "API <cluster_name>.<base_domain>" <external_network>Using the Red Hat OpenStack Platform (RHOSP) CLI, create the apps, or Ingress, FIP:
$ openstack floating ip create --description "Ingress <cluster_name>.<base_domain>" <external_network>Add records that follow these patterns to your DNS server for the API and Ingress FIPs:
api.<cluster_name>.<base_domain>. IN A <API_FIP> *.apps.<cluster_name>.<base_domain>. IN A <apps_FIP>NoteIf you do not control the DNS server, you can access the cluster by adding the cluster domain names such as the following to your
/etc/hostsfile:-
<api_floating_ip> api.<cluster_name>.<base_domain> -
<application_floating_ip> grafana-openshift-monitoring.apps.<cluster_name>.<base_domain> -
<application_floating_ip> prometheus-k8s-openshift-monitoring.apps.<cluster_name>.<base_domain> -
<application_floating_ip> oauth-openshift.apps.<cluster_name>.<base_domain> -
<application_floating_ip> console-openshift-console.apps.<cluster_name>.<base_domain> -
application_floating_ip integrated-oauth-server-openshift-authentication.apps.<cluster_name>.<base_domain>
The cluster domain names in the
/etc/hostsfile grant access to the web console and the monitoring interface of your cluster locally. You can also use thekubectloroc. You can access the user applications by using the additional entries pointing to the <application_floating_ip>. This action makes the API and applications accessible to only you, which is not suitable for production deployment, but does allow installation for development and testing.-
Add the FIPs to the
install-config.yamlfile as the values of the following parameters:-
platform.openstack.ingressFloatingIP -
platform.openstack.apiFloatingIP
-
If you use these values, you must also enter an external network as the value of the platform.openstack.externalNetwork parameter in the install-config.yaml file.
You can make OpenShift Container Platform resources available outside of the cluster by assigning a floating IP address and updating your firewall configuration.
12.2.13.2. Completing installation without floating IP addresses
You can install OpenShift Container Platform on Red Hat OpenStack Platform (RHOSP) without providing floating IP addresses.
In the install-config.yaml file, do not define the following parameters:
-
platform.openstack.ingressFloatingIP -
platform.openstack.apiFloatingIP
If you cannot provide an external network, you can also leave platform.openstack.externalNetwork blank. If you do not provide a value for platform.openstack.externalNetwork, a router is not created for you, and, without additional action, the installer will fail to retrieve an image from Glance. You must configure external connectivity on your own.
If you run the installer from a system that cannot reach the cluster API due to a lack of floating IP addresses or name resolution, installation fails. To prevent installation failure in these cases, you can use a proxy network or run the installer from a system that is on the same network as your machines.
You can enable name resolution by creating DNS records for the API and Ingress ports. For example:
api.<cluster_name>.<base_domain>. IN A <api_port_IP>
*.apps.<cluster_name>.<base_domain>. IN A <ingress_port_IP>
If you do not control the DNS server, you can add the record to your /etc/hosts file. This action makes the API accessible to only you, which is not suitable for production deployment but does allow installation for development and testing.
12.2.14. Deploying the cluster
You can install OpenShift Container Platform on a compatible cloud platform.
You can run the create cluster command of the installation program only once, during initial installation.
Prerequisites
- Obtain the OpenShift Container Platform installation program and the pull secret for your cluster.
Procedure
Change to the directory that contains the installation program and initialize the cluster deployment:
$ ./openshift-install create cluster --dir <installation_directory> \1 --log-level=info2 NoteIf the cloud provider account that you configured on your host does not have sufficient permissions to deploy the cluster, the installation process stops, and the missing permissions are displayed.
When the cluster deployment completes, directions for accessing your cluster, including a link to its web console and credentials for the
kubeadminuser, display in your terminal.Example output
... INFO Install complete! INFO To access the cluster as the system:admin user when using 'oc', run 'export KUBECONFIG=/home/myuser/install_dir/auth/kubeconfig' INFO Access the OpenShift web-console here: https://console-openshift-console.apps.mycluster.example.com INFO Login to the console with user: "kubeadmin", and password: "4vYBz-Ee6gm-ymBZj-Wt5AL" INFO Time elapsed: 36m22sNoteThe cluster access and credential information also outputs to
<installation_directory>/.openshift_install.logwhen an installation succeeds.Important-
The Ignition config files that the installation program generates contain certificates that expire after 24 hours, which are then renewed at that time. If the cluster is shut down before renewing the certificates and the cluster is later restarted after the 24 hours have elapsed, the cluster automatically recovers the expired certificates. The exception is that you must manually approve the pending
node-bootstrappercertificate signing requests (CSRs) to recover kubelet certificates. See the documentation for Recovering from expired control plane certificates for more information. - It is recommended that you use Ignition config files within 12 hours after they are generated because the 24-hour certificate rotates from 16 to 22 hours after the cluster is installed. By using the Ignition config files within 12 hours, you can avoid installation failure if the certificate update runs during installation.
ImportantYou must not delete the installation program or the files that the installation program creates. Both are required to delete the cluster.
-
The Ignition config files that the installation program generates contain certificates that expire after 24 hours, which are then renewed at that time. If the cluster is shut down before renewing the certificates and the cluster is later restarted after the 24 hours have elapsed, the cluster automatically recovers the expired certificates. The exception is that you must manually approve the pending
12.2.15. Verifying cluster status
You can verify your OpenShift Container Platform cluster’s status during or after installation.
Procedure
In the cluster environment, export the administrator’s kubeconfig file:
$ export KUBECONFIG=<installation_directory>/auth/kubeconfig1 - 1
- For
<installation_directory>, specify the path to the directory that you stored the installation files in.
The
kubeconfigfile contains information about the cluster that is used by the CLI to connect a client to the correct cluster and API server.View the control plane and compute machines created after a deployment:
$ oc get nodesView your cluster’s version:
$ oc get clusterversionView your Operators' status:
$ oc get clusteroperatorView all running pods in the cluster:
$ oc get pods -A
12.2.16. Logging in to the cluster by using the CLI
You can log in to your cluster as a default system user by exporting the cluster kubeconfig file. The kubeconfig file contains information about the cluster that is used by the CLI to connect a client to the correct cluster and API server. The file is specific to a cluster and is created during OpenShift Container Platform installation.
Prerequisites
- You deployed an OpenShift Container Platform cluster.
-
You installed the
ocCLI.
Procedure
Export the
kubeadmincredentials:$ export KUBECONFIG=<installation_directory>/auth/kubeconfig1 - 1
- For
<installation_directory>, specify the path to the directory that you stored the installation files in.
Verify you can run
occommands successfully using the exported configuration:$ oc whoamiExample output
system:admin
12.2.17. Telemetry access for OpenShift Container Platform
In OpenShift Container Platform 4.7, the Telemetry service, which runs by default to provide metrics about cluster health and the success of updates, requires internet access. If your cluster is connected to the internet, Telemetry runs automatically, and your cluster is registered to OpenShift Cluster Manager.
After you confirm that your OpenShift Cluster Manager inventory is correct, either maintained automatically by Telemetry or manually by using OpenShift Cluster Manager, use subscription watch to track your OpenShift Container Platform subscriptions at the account or multi-cluster level.
12.2.18. Next steps
- Customize your cluster.
- If necessary, you can opt out of remote health reporting.
- If you need to enable external access to node ports, configure ingress cluster traffic by using a node port.
- If you did not configure RHOSP to accept application traffic over floating IP addresses, configure RHOSP access with floating IP addresses.
12.3. Installing a cluster on OpenStack on your own infrastructure
In OpenShift Container Platform version 4.7, you can install a cluster on Red Hat OpenStack Platform (RHOSP) that runs on user-provisioned infrastructure.
Using your own infrastructure allows you to integrate your cluster with existing infrastructure and modifications. The process requires more labor on your part than installer-provisioned installations, because you must create all RHOSP resources, like Nova servers, Neutron ports, and security groups. However, Red Hat provides Ansible playbooks to help you in the deployment process.
12.3.1. Prerequisites
Review details about the OpenShift Container Platform installation and update processes.
- Verify that OpenShift Container Platform 4.7 is compatible with your RHOSP version by using the "Supported platforms for OpenShift clusters" section. You can also compare platform support across different versions by viewing the OpenShift Container Platform on RHOSP support matrix.
- Verify that your network configuration does not rely on a provider network. Provider networks are not supported.
- Have an RHOSP account where you want to install OpenShift Container Platform.
On the machine from which you run the installation program, have:
- A single directory in which you can keep the files you create during the installation process
- Python 3
12.3.2. Internet access for OpenShift Container Platform
In OpenShift Container Platform 4.7, you require access to the Internet to install your cluster.
You must have Internet access to:
- Access OpenShift Cluster Manager to download the installation program and perform subscription management. If the cluster has internet access and you do not disable Telemetry, that service automatically entitles your cluster.
- Access Quay.io to obtain the packages that are required to install your cluster.
- Obtain the packages that are required to perform cluster updates.
If your cluster cannot have direct Internet access, you can perform a restricted network installation on some types of infrastructure that you provision. During that process, you download the content that is required and use it to populate a mirror registry with the packages that you need to install a cluster and generate the installation program. With some installation types, the environment that you install your cluster in will not require Internet access. Before you update the cluster, you update the content of the mirror registry.
12.3.3. Resource guidelines for installing OpenShift Container Platform on RHOSP
To support an OpenShift Container Platform installation, your Red Hat OpenStack Platform (RHOSP) quota must meet the following requirements:
| Resource | Value |
|---|---|
| Floating IP addresses | 3 |
| Ports | 15 |
| Routers | 1 |
| Subnets | 1 |
| RAM | 112 GB |
| vCPUs | 28 |
| Volume storage | 275 GB |
| Instances | 7 |
| Security groups | 3 |
| Security group rules | 60 |
A cluster might function with fewer than recommended resources, but its performance is not guaranteed.
If RHOSP object storage (Swift) is available and operated by a user account with the swiftoperator role, it is used as the default backend for the OpenShift Container Platform image registry. In this case, the volume storage requirement is 175 GB. Swift space requirements vary depending on the size of the image registry.
By default, your security group and security group rule quotas might be low. If you encounter problems, run openstack quota set --secgroups 3 --secgroup-rules 60 <project> as an administrator to increase them.
An OpenShift Container Platform deployment comprises control plane machines, compute machines, and a bootstrap machine.
12.3.3.1. Control plane machines
By default, the OpenShift Container Platform installation process creates three control plane machines.
Each machine requires:
- An instance from the RHOSP quota
- A port from the RHOSP quota
- A flavor with at least 16 GB memory, 4 vCPUs, and 100 GB storage space
12.3.3.2. Compute machines
By default, the OpenShift Container Platform installation process creates three compute machines.
Each machine requires:
- An instance from the RHOSP quota
- A port from the RHOSP quota
- A flavor with at least 8 GB memory, 2 vCPUs, and 100 GB storage space
Compute machines host the applications that you run on OpenShift Container Platform; aim to run as many as you can.
12.3.3.3. Bootstrap machine
During installation, a bootstrap machine is temporarily provisioned to stand up the control plane. After the production control plane is ready, the bootstrap machine is deprovisioned.
The bootstrap machine requires:
- An instance from the RHOSP quota
- A port from the RHOSP quota
- A flavor with at least 16 GB memory, 4 vCPUs, and 100 GB storage space
12.3.4. Downloading playbook dependencies
The Ansible playbooks that simplify the installation process on user-provisioned infrastructure require several Python modules. On the machine where you will run the installer, add the modules' repositories and then download them.
These instructions assume that you are using Red Hat Enterprise Linux (RHEL) 8.
Prerequisites
- Python 3 is installed on your machine.
Procedure
On a command line, add the repositories:
Register with Red Hat Subscription Manager:
$ sudo subscription-manager register # If not done alreadyPull the latest subscription data:
$ sudo subscription-manager attach --pool=$YOUR_POOLID # If not done alreadyDisable the current repositories:
$ sudo subscription-manager repos --disable=* # If not done alreadyAdd the required repositories:
$ sudo subscription-manager repos \ --enable=rhel-8-for-x86_64-baseos-rpms \ --enable=openstack-16-tools-for-rhel-8-x86_64-rpms \ --enable=ansible-2.9-for-rhel-8-x86_64-rpms \ --enable=rhel-8-for-x86_64-appstream-rpms
Install the modules:
$ sudo yum install python3-openstackclient ansible python3-openstacksdk python3-netaddrEnsure that the
pythoncommand points topython3:$ sudo alternatives --set python /usr/bin/python3
12.3.5. Downloading the installation playbooks
Download Ansible playbooks that you can use to install OpenShift Container Platform on your own Red Hat OpenStack Platform (RHOSP) infrastructure.
Prerequisites
- The curl command-line tool is available on your machine.
Procedure
To download the playbooks to your working directory, run the following script from a command line:
$ xargs -n 1 curl -O <<< ' https://raw.githubusercontent.com/openshift/installer/release-4.7/upi/openstack/bootstrap.yaml https://raw.githubusercontent.com/openshift/installer/release-4.7/upi/openstack/common.yaml https://raw.githubusercontent.com/openshift/installer/release-4.7/upi/openstack/compute-nodes.yaml https://raw.githubusercontent.com/openshift/installer/release-4.7/upi/openstack/control-plane.yaml https://raw.githubusercontent.com/openshift/installer/release-4.7/upi/openstack/inventory.yaml https://raw.githubusercontent.com/openshift/installer/release-4.7/upi/openstack/network.yaml https://raw.githubusercontent.com/openshift/installer/release-4.7/upi/openstack/security-groups.yaml https://raw.githubusercontent.com/openshift/installer/release-4.7/upi/openstack/down-bootstrap.yaml https://raw.githubusercontent.com/openshift/installer/release-4.7/upi/openstack/down-compute-nodes.yaml https://raw.githubusercontent.com/openshift/installer/release-4.7/upi/openstack/down-control-plane.yaml https://raw.githubusercontent.com/openshift/installer/release-4.7/upi/openstack/down-load-balancers.yaml https://raw.githubusercontent.com/openshift/installer/release-4.7/upi/openstack/down-network.yaml https://raw.githubusercontent.com/openshift/installer/release-4.7/upi/openstack/down-security-groups.yaml https://raw.githubusercontent.com/openshift/installer/release-4.7/upi/openstack/down-containers.yaml'
The playbooks are downloaded to your machine.
During the installation process, you can modify the playbooks to configure your deployment.
Retain all playbooks for the life of your cluster. You must have the playbooks to remove your OpenShift Container Platform cluster from RHOSP.
You must match any edits you make in the bootstrap.yaml, compute-nodes.yaml, control-plane.yaml, network.yaml, and security-groups.yaml files to the corresponding playbooks that are prefixed with down-. For example, edits to the bootstrap.yaml file must be reflected in the down-bootstrap.yaml file, too. If you do not edit both files, the supported cluster removal process will fail.
12.3.6. Obtaining the installation program
Before you install OpenShift Container Platform, download the installation file on your provisioning machine.
Prerequisites
- You have a machine that runs Linux, for example Red Hat Enterprise Linux 8, with 500 MB of local disk space
Procedure
- Access the Infrastructure Provider page on the OpenShift Cluster Manager site. If you have a Red Hat account, log in with your credentials. If you do not, create an account.
- Select your infrastructure provider.
Navigate to the page for your installation type, download the installation program for your operating system, and place the file in the directory where you will store the installation configuration files.
ImportantThe installation program creates several files on the computer that you use to install your cluster. You must keep the installation program and the files that the installation program creates after you finish installing the cluster. Both files are required to delete the cluster.
ImportantDeleting the files created by the installation program does not remove your cluster, even if the cluster failed during installation. To remove your cluster, complete the OpenShift Container Platform uninstallation procedures for your specific cloud provider.
Extract the installation program. For example, on a computer that uses a Linux operating system, run the following command:
$ tar xvf openshift-install-linux.tar.gz- Download your installation pull secret from the Red Hat OpenShift Cluster Manager. This pull secret allows you to authenticate with the services that are provided by the included authorities, including Quay.io, which serves the container images for OpenShift Container Platform components.
12.3.7. Generating an SSH private key and adding it to the agent
If you want to perform installation debugging or disaster recovery on your cluster, you must provide an SSH key to both your ssh-agent and the installation program. You can use this key to access the bootstrap machine in a public cluster to troubleshoot installation issues.
In a production environment, you require disaster recovery and debugging.
Do not skip this procedure in production environments where disaster recovery and debugging is required.
You can use this key to SSH into the master nodes as the user core. When you deploy the cluster, the key is added to the core user’s ~/.ssh/authorized_keys list.
Procedure
If you do not have an SSH key that is configured for password-less authentication on your computer, create one. For example, on a computer that uses a Linux operating system, run the following command:
$ ssh-keygen -t ed25519 -N '' \ -f <path>/<file_name>1 - 1
- Specify the path and file name, such as
~/.ssh/id_rsa, of the new SSH key. If you have an existing key pair, ensure your public key is in the your~/.sshdirectory.
Running this command generates an SSH key that does not require a password in the location that you specified.
NoteIf you plan to install an OpenShift Container Platform cluster that uses FIPS Validated / Modules in Process cryptographic libraries on the
x86_64architecture, do not create a key that uses theed25519algorithm. Instead, create a key that uses thersaorecdsaalgorithm.Start the
ssh-agentprocess as a background task:$ eval "$(ssh-agent -s)"Example output
Agent pid 31874NoteIf your cluster is in FIPS mode, only use FIPS-compliant algorithms to generate the SSH key. The key must be either RSA or ECDSA.
Add your SSH private key to the
ssh-agent:$ ssh-add <path>/<file_name>1 Example output
Identity added: /home/<you>/<path>/<file_name> (<computer_name>)- 1
- Specify the path and file name for your SSH private key, such as
~/.ssh/id_rsa
Next steps
- When you install OpenShift Container Platform, provide the SSH public key to the installation program.
12.3.8. Creating the Red Hat Enterprise Linux CoreOS (RHCOS) image
The OpenShift Container Platform installation program requires that a Red Hat Enterprise Linux CoreOS (RHCOS) image be present in the Red Hat OpenStack Platform (RHOSP) cluster. Retrieve the latest RHCOS image, then upload it using the RHOSP CLI.
Prerequisites
- The RHOSP CLI is installed.
Procedure
- Log in to the Red Hat Customer Portal’s Product Downloads page.
Under Version, select the most recent release of OpenShift Container Platform 4.7 for Red Hat Enterprise Linux (RHEL) 8.
ImportantThe RHCOS images might not change with every release of OpenShift Container Platform. You must download images with the highest version that is less than or equal to the OpenShift Container Platform version that you install. Use the image versions that match your OpenShift Container Platform version if they are available.
- Download the Red Hat Enterprise Linux CoreOS (RHCOS) - OpenStack Image (QCOW).
Decompress the image.
NoteYou must decompress the RHOSP image before the cluster can use it. The name of the downloaded file might not contain a compression extension, like
.gzor.tgz. To find out if or how the file is compressed, in a command line, enter:$ file <name_of_downloaded_file>From the image that you downloaded, create an image that is named
rhcosin your cluster by using the RHOSP CLI:$ openstack image create --container-format=bare --disk-format=qcow2 --file rhcos-${RHCOS_VERSION}-openstack.qcow2 rhcosImportantDepending on your RHOSP environment, you might be able to upload the image in either
.rawor.qcow2formats. If you use Ceph, you must use the.rawformat.WarningIf the installation program finds multiple images with the same name, it chooses one of them at random. To avoid this behavior, create unique names for resources in RHOSP.
After you upload the image to RHOSP, it is usable in the installation process.
12.3.9. Verifying external network access
The OpenShift Container Platform installation process requires external network access. You must provide an external network value to it, or deployment fails. Before you begin the process, verify that a network with the external router type exists in Red Hat OpenStack Platform (RHOSP).
Prerequisites
Procedure
Using the RHOSP CLI, verify the name and ID of the 'External' network:
$ openstack network list --long -c ID -c Name -c "Router Type"Example output
+--------------------------------------+----------------+-------------+ | ID | Name | Router Type | +--------------------------------------+----------------+-------------+ | 148a8023-62a7-4672-b018-003462f8d7dc | public_network | External | +--------------------------------------+----------------+-------------+
A network with an external router type appears in the network list. If at least one does not, see Creating a default floating IP network and Creating a default provider network.
If the Neutron trunk service plug-in is enabled, a trunk port is created by default. For more information, see Neutron trunk port.
12.3.10. Enabling access to the environment
At deployment, all OpenShift Container Platform machines are created in a Red Hat OpenStack Platform (RHOSP)-tenant network. Therefore, they are not accessible directly in most RHOSP deployments.
You can configure OpenShift Container Platform API and application access by using floating IP addresses (FIPs) during installation. You can also complete an installation without configuring FIPs, but the installer will not configure a way to reach the API or applications externally.
12.3.10.1. Enabling access with floating IP addresses
Create floating IP (FIP) addresses for external access to the OpenShift Container Platform API, cluster applications, and the bootstrap process.
Procedure
Using the Red Hat OpenStack Platform (RHOSP) CLI, create the API FIP:
$ openstack floating ip create --description "API <cluster_name>.<base_domain>" <external_network>Using the Red Hat OpenStack Platform (RHOSP) CLI, create the apps, or Ingress, FIP:
$ openstack floating ip create --description "Ingress <cluster_name>.<base_domain>" <external_network>By using the Red Hat OpenStack Platform (RHOSP) CLI, create the bootstrap FIP:
$ openstack floating ip create --description "bootstrap machine" <external_network>Add records that follow these patterns to your DNS server for the API and Ingress FIPs:
api.<cluster_name>.<base_domain>. IN A <API_FIP> *.apps.<cluster_name>.<base_domain>. IN A <apps_FIP>NoteIf you do not control the DNS server, you can access the cluster by adding the cluster domain names such as the following to your
/etc/hostsfile:-
<api_floating_ip> api.<cluster_name>.<base_domain> -
<application_floating_ip> grafana-openshift-monitoring.apps.<cluster_name>.<base_domain> -
<application_floating_ip> prometheus-k8s-openshift-monitoring.apps.<cluster_name>.<base_domain> -
<application_floating_ip> oauth-openshift.apps.<cluster_name>.<base_domain> -
<application_floating_ip> console-openshift-console.apps.<cluster_name>.<base_domain> -
application_floating_ip integrated-oauth-server-openshift-authentication.apps.<cluster_name>.<base_domain>
The cluster domain names in the
/etc/hostsfile grant access to the web console and the monitoring interface of your cluster locally. You can also use thekubectloroc. You can access the user applications by using the additional entries pointing to the <application_floating_ip>. This action makes the API and applications accessible to only you, which is not suitable for production deployment, but does allow installation for development and testing.-
Add the FIPs to the
inventory.yamlfile as the values of the following variables:-
os_api_fip -
os_bootstrap_fip -
os_ingress_fip
-
If you use these values, you must also enter an external network as the value of the os_external_network variable in the inventory.yaml file.
You can make OpenShift Container Platform resources available outside of the cluster by assigning a floating IP address and updating your firewall configuration.
12.3.10.2. Completing installation without floating IP addresses
You can install OpenShift Container Platform on Red Hat OpenStack Platform (RHOSP) without providing floating IP addresses.
In the inventory.yaml file, do not define the following variables:
-
os_api_fip -
os_bootstrap_fip -
os_ingress_fip
If you cannot provide an external network, you can also leave os_external_network blank. If you do not provide a value for os_external_network, a router is not created for you, and, without additional action, the installer will fail to retrieve an image from Glance. Later in the installation process, when you create network resources, you must configure external connectivity on your own.
If you run the installer with the wait-for command from a system that cannot reach the cluster API due to a lack of floating IP addresses or name resolution, installation fails. To prevent installation failure in these cases, you can use a proxy network or run the installer from a system that is on the same network as your machines.
You can enable name resolution by creating DNS records for the API and Ingress ports. For example:
api.<cluster_name>.<base_domain>. IN A <api_port_IP>
*.apps.<cluster_name>.<base_domain>. IN A <ingress_port_IP>
If you do not control the DNS server, you can add the record to your /etc/hosts file. This action makes the API accessible to only you, which is not suitable for production deployment but does allow installation for development and testing.
12.3.11. Defining parameters for the installation program
The OpenShift Container Platform installation program relies on a file that is called clouds.yaml. The file describes Red Hat OpenStack Platform (RHOSP) configuration parameters, including the project name, log in information, and authorization service URLs.
Procedure
Create the
clouds.yamlfile:If your RHOSP distribution includes the Horizon web UI, generate a
clouds.yamlfile in it.ImportantRemember to add a password to the
authfield. You can also keep secrets in a separate file fromclouds.yaml.If your RHOSP distribution does not include the Horizon web UI, or you do not want to use Horizon, create the file yourself. For detailed information about
clouds.yaml, see Config files in the RHOSP documentation.clouds: shiftstack: auth: auth_url: http://10.10.14.42:5000/v3 project_name: shiftstack username: shiftstack_user password: XXX user_domain_name: Default project_domain_name: Default dev-env: region_name: RegionOne auth: username: 'devuser' password: XXX project_name: 'devonly' auth_url: 'https://10.10.14.22:5001/v2.0'
If your RHOSP installation uses self-signed certificate authority (CA) certificates for endpoint authentication:
- Copy the certificate authority file to your machine.
Add the
cacertskey to theclouds.yamlfile. The value must be an absolute, non-root-accessible path to the CA certificate:clouds: shiftstack: ... cacert: "/etc/pki/ca-trust/source/anchors/ca.crt.pem"TipAfter you run the installer with a custom CA certificate, you can update the certificate by editing the value of the
ca-cert.pemkey in thecloud-provider-configkeymap. On a command line, run:$ oc edit configmap -n openshift-config cloud-provider-config
Place the
clouds.yamlfile in one of the following locations:-
The value of the
OS_CLIENT_CONFIG_FILEenvironment variable - The current directory
-
A Unix-specific user configuration directory, for example
~/.config/openstack/clouds.yaml A Unix-specific site configuration directory, for example
/etc/openstack/clouds.yamlThe installation program searches for
clouds.yamlin that order.
-
The value of the
12.3.12. Creating the installation configuration file
You can customize the OpenShift Container Platform cluster you install on Red Hat OpenStack Platform (RHOSP).
Prerequisites
- Obtain the OpenShift Container Platform installation program and the pull secret for your cluster.
- Obtain service principal permissions at the subscription level.
Procedure
Create the
install-config.yamlfile.Change to the directory that contains the installation program and run the following command:
$ ./openshift-install create install-config --dir <installation_directory>1 - 1
- For
<installation_directory>, specify the directory name to store the files that the installation program creates.
ImportantSpecify an empty directory. Some installation assets, like bootstrap X.509 certificates have short expiration intervals, so you must not reuse an installation directory. If you want to reuse individual files from another cluster installation, you can copy them into your directory. However, the file names for the installation assets might change between releases. Use caution when copying installation files from an earlier OpenShift Container Platform version.
At the prompts, provide the configuration details for your cloud:
Optional: Select an SSH key to use to access your cluster machines.
NoteFor production OpenShift Container Platform clusters on which you want to perform installation debugging or disaster recovery, specify an SSH key that your
ssh-agentprocess uses.- Select openstack as the platform to target.
- Specify the Red Hat OpenStack Platform (RHOSP) external network name to use for installing the cluster.
- Specify the floating IP address to use for external access to the OpenShift API.
- Specify a RHOSP flavor with at least 16 GB RAM to use for control plane nodes and 8 GB RAM for compute nodes.
- Select the base domain to deploy the cluster to. All DNS records will be sub-domains of this base and will also include the cluster name.
- Enter a name for your cluster. The name must be 14 or fewer characters long.
- Paste the pull secret from the Red Hat OpenShift Cluster Manager.
-
Modify the
install-config.yamlfile. You can find more information about the available parameters in the "Installation configuration parameters" section. Back up the
install-config.yamlfile so that you can use it to install multiple clusters.ImportantThe
install-config.yamlfile is consumed during the installation process. If you want to reuse the file, you must back it up now.
You now have the file install-config.yaml in the directory that you specified.
12.3.13. Installation configuration parameters
Before you deploy an OpenShift Container Platform cluster, you provide parameter values to describe your account on the cloud platform that hosts your cluster and optionally customize your cluster’s platform. When you create the install-config.yaml installation configuration file, you provide values for the required parameters through the command line. If you customize your cluster, you can modify the install-config.yaml file to provide more details about the platform.
After installation, you cannot modify these parameters in the install-config.yaml file.
The openshift-install command does not validate field names for parameters. If an incorrect name is specified, the related file or object is not created, and no error is reported. Ensure that the field names for any parameters that are specified are correct.
12.3.13.1. Required configuration parameters
Required installation configuration parameters are described in the following table:
| Parameter | Description | Values |
|---|---|---|
|
|
The API version for the | String |
|
|
The base domain of your cloud provider. The base domain is used to create routes to your OpenShift Container Platform cluster components. The full DNS name for your cluster is a combination of the |
A fully-qualified domain or subdomain name, such as |
|
|
Kubernetes resource | Object |
|
|
The name of the cluster. DNS records for the cluster are all subdomains of |
String of lowercase letters, hyphens ( |
|
|
The configuration for the specific platform upon which to perform the installation: | Object |
|
| Get a pull secret from the Red Hat OpenShift Cluster Manager to authenticate downloading container images for OpenShift Container Platform components from services such as Quay.io. |
|
12.3.13.2. Network configuration parameters
You can customize your installation configuration based on the requirements of your existing network infrastructure. For example, you can expand the IP address block for the cluster network or provide different IP address blocks than the defaults.
Only IPv4 addresses are supported.
| Parameter | Description | Values |
|---|---|---|
|
| The configuration for the cluster network. | Object Note
You cannot modify parameters specified by the |
|
| The cluster network provider Container Network Interface (CNI) plug-in to install. |
Either |
|
| The IP address blocks for pods.
The default value is If you specify multiple IP address blocks, the blocks must not overlap. | An array of objects. For example: |
|
|
Required if you use An IPv4 network. |
An IP address block in Classless Inter-Domain Routing (CIDR) notation. The prefix length for an IPv4 block is between |
|
|
The subnet prefix length to assign to each individual node. For example, if | A subnet prefix.
The default value is |
|
|
The IP address block for services. The default value is The OpenShift SDN and OVN-Kubernetes network providers support only a single IP address block for the service network. | An array with an IP address block in CIDR format. For example: |
|
| The IP address blocks for machines. If you specify multiple IP address blocks, the blocks must not overlap.
If you specify multiple IP kernel arguments, the | An array of objects. For example: |
|
|
Required if you use | An IP network block in CIDR notation.
For example, Note
Set the |
12.3.13.3. Optional configuration parameters
Optional installation configuration parameters are described in the following table:
| Parameter | Description | Values |
|---|---|---|
|
| A PEM-encoded X.509 certificate bundle that is added to the nodes' trusted certificate store. This trust bundle may also be used when a proxy has been configured. | String |
|
| The configuration for the machines that comprise the compute nodes. |
Array of |
|
|
Determines the instruction set architecture of the machines in the pool. Currently, heteregeneous clusters are not supported, so all pools must specify the same architecture. Valid values are | String |
|
|
Whether to enable or disable simultaneous multithreading, or Important If you disable simultaneous multithreading, ensure that your capacity planning accounts for the dramatically decreased machine performance. |
|
|
|
Required if you use |
|
|
|
Required if you use |
|
|
| The number of compute machines, which are also known as worker machines, to provision. |
A positive integer greater than or equal to |
|
| The configuration for the machines that comprise the control plane. |
Array of |
|
|
Determines the instruction set architecture of the machines in the pool. Currently, heterogeneous clusters are not supported, so all pools must specify the same architecture. Valid values are | String |
|
|
Whether to enable or disable simultaneous multithreading, or Important If you disable simultaneous multithreading, ensure that your capacity planning accounts for the dramatically decreased machine performance. |
|
|
|
Required if you use |
|
|
|
Required if you use |
|
|
| The number of control plane machines to provision. |
The only supported value is |
|
| The Cloud Credential Operator (CCO) mode. If no mode is specified, the CCO dynamically tries to determine the capabilities of the provided credentials, with a preference for mint mode on the platforms where multiple modes are supported. Note Not all CCO modes are supported for all cloud providers. For more information on CCO modes, see the Cloud Credential Operator entry in the Cluster Operators reference content. |
|
|
|
Enable or disable FIPS mode. The default is Important
The use of FIPS Validated / Modules in Process cryptographic libraries is only supported on OpenShift Container Platform deployments on the Note If you are using Azure File storage, you cannot enable FIPS mode. |
|
|
| Sources and repositories for the release-image content. |
Array of objects. Includes a |
|
|
Required if you use | String |
|
| Specify one or more repositories that may also contain the same images. | Array of strings |
|
| How to publish or expose the user-facing endpoints of your cluster, such as the Kubernetes API, OpenShift routes. |
Setting this field to Important
If the value of the field is set to |
|
| The SSH key or keys to authenticate access your cluster machines. Note
For production OpenShift Container Platform clusters on which you want to perform installation debugging or disaster recovery, specify an SSH key that your | One or more keys. For example: |
12.3.13.4. Additional Red Hat OpenStack Platform (RHOSP) configuration parameters
Additional RHOSP configuration parameters are described in the following table:
| Parameter | Description | Values |
|---|---|---|
|
| For compute machines, the size in gigabytes of the root volume. If you do not set this value, machines use ephemeral storage. |
Integer, for example |
|
| For compute machines, the root volume’s type. |
String, for example |
|
| For control plane machines, the size in gigabytes of the root volume. If you do not set this value, machines use ephemeral storage. |
Integer, for example |
|
| For control plane machines, the root volume’s type. |
String, for example |
|
|
The name of the RHOSP cloud to use from the list of clouds in the |
String, for example |
|
| The RHOSP external network name to be used for installation. |
String, for example |
|
| The RHOSP flavor to use for control plane and compute machines.
This property is deprecated. To use a flavor as the default for all machine pools, add it as the value of the |
String, for example |
12.3.13.5. Optional RHOSP configuration parameters
Optional RHOSP configuration parameters are described in the following table:
| Parameter | Description | Values |
|---|---|---|
|
| Additional networks that are associated with compute machines. Allowed address pairs are not created for additional networks. |
A list of one or more UUIDs as strings. For example, |
|
| Additional security groups that are associated with compute machines. |
A list of one or more UUIDs as strings. For example, |
|
| RHOSP Compute (Nova) availability zones (AZs) to install machines on. If this parameter is not set, the installer relies on the default settings for Nova that the RHOSP administrator configured. On clusters that use Kuryr, RHOSP Octavia does not support availability zones. Load balancers and, if you are using the Amphora provider driver, OpenShift Container Platform services that rely on Amphora VMs, are not created according to the value of this property. |
A list of strings. For example, |
|
| Additional networks that are associated with control plane machines. Allowed address pairs are not created for additional networks. |
A list of one or more UUIDs as strings. For example, |
|
| Additional security groups that are associated with control plane machines. |
A list of one or more UUIDs as strings. For example, |
|
| RHOSP Compute (Nova) availability zones (AZs) to install machines on. If this parameter is not set, the installer relies on the default settings for Nova that the RHOSP administrator configured. On clusters that use Kuryr, RHOSP Octavia does not support availability zones. Load balancers and, if you are using the Amphora provider driver, OpenShift Container Platform services that rely on Amphora VMs, are not created according to the value of this property. |
A list of strings. For example, |
|
| The location from which the installer downloads the RHCOS image. You must set this parameter to perform an installation in a restricted network. | An HTTP or HTTPS URL, optionally with an SHA-256 checksum.
For example, |
|
|
Properties to add to the installer-uploaded ClusterOSImage in Glance. This property is ignored if
You can use this property to exceed the default persistent volume (PV) limit for RHOSP of 26 PVs per node. To exceed the limit, set the
You can also use this property to enable the QEMU guest agent by including the |
A list of key-value string pairs. For example, |
|
| The default machine pool platform configuration. |
|
|
|
An existing floating IP address to associate with the Ingress port. To use this property, you must also define the |
An IP address, for example |
|
|
An existing floating IP address to associate with the API load balancer. To use this property, you must also define the |
An IP address, for example |
|
| IP addresses for external DNS servers that cluster instances use for DNS resolution. |
A list of IP addresses as strings. For example, |
|
| The UUID of a RHOSP subnet that the cluster’s nodes use. Nodes and virtual IP (VIP) ports are created on this subnet.
The first item in If you deploy to a custom subnet, you cannot specify an external DNS server to the OpenShift Container Platform installer. Instead, add DNS to the subnet in RHOSP. |
A UUID as a string. For example, |
12.3.13.6. Custom subnets in RHOSP deployments
Optionally, you can deploy a cluster on a Red Hat OpenStack Platform (RHOSP) subnet of your choice. The subnet’s GUID is passed as the value of platform.openstack.machinesSubnet in the install-config.yaml file.
This subnet is used as the cluster’s primary subnet. By default, nodes and ports are created on it. You can create nodes and ports on a different RHOSP subnet by setting the value of the platform.openstack.machinesSubnet property to the subnet’s UUID.
Before you run the OpenShift Container Platform installer with a custom subnet, verify that your configuration meets the following requirements:
-
The subnet that is used by
platform.openstack.machinesSubnethas DHCP enabled. -
The CIDR of
platform.openstack.machinesSubnetmatches the CIDR ofnetworking.machineNetwork. - The installation program user has permission to create ports on this network, including ports with fixed IP addresses.
Clusters that use custom subnets have the following limitations:
-
If you plan to install a cluster that uses floating IP addresses, the
platform.openstack.machinesSubnetsubnet must be attached to a router that is connected to theexternalNetworknetwork. -
If the
platform.openstack.machinesSubnetvalue is set in theinstall-config.yamlfile, the installation program does not create a private network or subnet for your RHOSP machines. -
You cannot use the
platform.openstack.externalDNSproperty at the same time as a custom subnet. To add DNS to a cluster that uses a custom subnet, configure DNS on the RHOSP network.
By default, the API VIP takes x.x.x.5 and the Ingress VIP takes x.x.x.7 from your network’s CIDR block. To override these default values, set values for platform.openstack.apiVIP and platform.openstack.ingressVIP that are outside of the DHCP allocation pool.
12.3.13.7. Sample customized install-config.yaml file for RHOSP
This sample install-config.yaml demonstrates all of the possible Red Hat OpenStack Platform (RHOSP) customization options.
This sample file is provided for reference only. You must obtain your install-config.yaml file by using the installation program.
apiVersion: v1
baseDomain: example.com
controlPlane:
name: master
platform: {}
replicas: 3
compute:
- name: worker
platform:
openstack:
type: ml.large
replicas: 3
metadata:
name: example
networking:
clusterNetwork:
- cidr: 10.128.0.0/14
hostPrefix: 23
machineNetwork:
- cidr: 10.0.0.0/16
serviceNetwork:
- 172.30.0.0/16
networkType: OpenShiftSDN
platform:
openstack:
cloud: mycloud
externalNetwork: external
computeFlavor: m1.xlarge
apiFloatingIP: 128.0.0.1
fips: false
pullSecret: '{"auths": ...}'
sshKey: ssh-ed25519 AAAA...12.3.13.8. Setting a custom subnet for machines
The IP range that the installation program uses by default might not match the Neutron subnet that you create when you install OpenShift Container Platform. If necessary, update the CIDR value for new machines by editing the installation configuration file.
Prerequisites
-
You have the
install-config.yamlfile that was generated by the OpenShift Container Platform installation program.
Procedure
-
On a command line, browse to the directory that contains
install-config.yaml. From that directory, either run a script to edit the
install-config.yamlfile or update the file manually:To set the value by using a script, run:
$ python -c ' import yaml; path = "install-config.yaml"; data = yaml.safe_load(open(path)); data["networking"]["machineNetwork"] = [{"cidr": "192.168.0.0/18"}];1 open(path, "w").write(yaml.dump(data, default_flow_style=False))'- 1
- Insert a value that matches your intended Neutron subnet, e.g.
192.0.2.0/24.
-
To set the value manually, open the file and set the value of
networking.machineCIDRto something that matches your intended Neutron subnet.
12.3.13.9. Emptying compute machine pools
To proceed with an installation that uses your own infrastructure, set the number of compute machines in the installation configuration file to zero. Later, you create these machines manually.
Prerequisites
-
You have the
install-config.yamlfile that was generated by the OpenShift Container Platform installation program.
Procedure
-
On a command line, browse to the directory that contains
install-config.yaml. From that directory, either run a script to edit the
install-config.yamlfile or update the file manually:To set the value by using a script, run:
$ python -c ' import yaml; path = "install-config.yaml"; data = yaml.safe_load(open(path)); data["compute"][0]["replicas"] = 0; open(path, "w").write(yaml.dump(data, default_flow_style=False))'-
To set the value manually, open the file and set the value of
compute.<first entry>.replicasto0.
12.3.14. Creating the Kubernetes manifest and Ignition config files
Because you must modify some cluster definition files and manually start the cluster machines, you must generate the Kubernetes manifest and Ignition config files that the cluster needs to make its machines.
The installation configuration file transforms into the Kubernetes manifests. The manifests wrap into the Ignition configuration files, which are later used to create the cluster.
The Ignition config files that the installation program generates contain certificates that expire after 24 hours, which are then renewed at that time. If the cluster is shut down before renewing the certificates and the cluster is later restarted after the 24 hours have elapsed, the cluster automatically recovers the expired certificates. The exception is that you must manually approve the pending node-bootstrapper certificate signing requests (CSRs) to recover kubelet certificates. See the documentation for Recovering from expired control plane certificates for more information.
The installation program that generates the manifest and Ignition files is architecture specific and can be obtained from the client image mirror. The Linux version of the installation program runs on s390x only. This installer program is also available as a Mac OS version.
Prerequisites
- You obtained the OpenShift Container Platform installation program.
-
You created the
install-config.yamlinstallation configuration file.
Procedure
Change to the directory that contains the installation program and generate the Kubernetes manifests for the cluster:
$ ./openshift-install create manifests --dir <installation_directory>1 - 1
- For
<installation_directory>, specify the installation directory that contains theinstall-config.yamlfile you created.
Remove the Kubernetes manifest files that define the control plane machines and compute machine sets:
$ rm -f openshift/99_openshift-cluster-api_master-machines-*.yaml openshift/99_openshift-cluster-api_worker-machineset-*.yamlBecause you create and manage these resources yourself, you do not have to initialize them.
- You can preserve the machine set files to create compute machines by using the machine API, but you must update references to them to match your environment.
WarningIf you are installing a three-node cluster, skip the following step to allow the control plane nodes to be schedulable.
+
ImportantWhen you configure control plane nodes from the default unschedulable to schedulable, additional subscriptions are required. This is because control plane nodes then become worker nodes.
Check that the
mastersSchedulableparameter in the<installation_directory>/manifests/cluster-scheduler-02-config.ymlKubernetes manifest file is set tofalse. This setting prevents pods from being scheduled on the control plane machines:-
Open the
<installation_directory>/manifests/cluster-scheduler-02-config.ymlfile. -
Locate the
mastersSchedulableparameter and ensure that it is set tofalse. - Save and exit the file.
-
Open the
To create the Ignition configuration files, run the following command from the directory that contains the installation program:
$ ./openshift-install create ignition-configs --dir <installation_directory>1 - 1
- For
<installation_directory>, specify the same installation directory.
The following files are generated in the directory:
. ├── auth │ ├── kubeadmin-password │ └── kubeconfig ├── bootstrap.ign ├── master.ign ├── metadata.json └── worker.ignExport the metadata file’s
infraIDkey as an environment variable:$ export INFRA_ID=$(jq -r .infraID metadata.json)
Extract the infraID key from metadata.json and use it as a prefix for all of the RHOSP resources that you create. By doing so, you avoid name conflicts when making multiple deployments in the same project.
12.3.15. Preparing the bootstrap Ignition files
The OpenShift Container Platform installation process relies on bootstrap machines that are created from a bootstrap Ignition configuration file.
Edit the file and upload it. Then, create a secondary bootstrap Ignition configuration file that Red Hat OpenStack Platform (RHOSP) uses to download the primary file.
Prerequisites
-
You have the bootstrap Ignition file that the installer program generates,
bootstrap.ign. The infrastructure ID from the installer’s metadata file is set as an environment variable (
$INFRA_ID).- If the variable is not set, see Creating the Kubernetes manifest and Ignition config files.
You have an HTTP(S)-accessible way to store the bootstrap Ignition file.
- The documented procedure uses the RHOSP image service (Glance), but you can also use the RHOSP storage service (Swift), Amazon S3, an internal HTTP server, or an ad hoc Nova server.
Procedure
Run the following Python script. The script modifies the bootstrap Ignition file to set the hostname and, if available, CA certificate file when it runs:
import base64 import json import os with open('bootstrap.ign', 'r') as f: ignition = json.load(f) files = ignition['storage'].get('files', []) infra_id = os.environ.get('INFRA_ID', 'openshift').encode() hostname_b64 = base64.standard_b64encode(infra_id + b'-bootstrap\n').decode().strip() files.append( { 'path': '/etc/hostname', 'mode': 420, 'contents': { 'source': 'data:text/plain;charset=utf-8;base64,' + hostname_b64 } }) ca_cert_path = os.environ.get('OS_CACERT', '') if ca_cert_path: with open(ca_cert_path, 'r') as f: ca_cert = f.read().encode() ca_cert_b64 = base64.standard_b64encode(ca_cert).decode().strip() files.append( { 'path': '/opt/openshift/tls/cloud-ca-cert.pem', 'mode': 420, 'contents': { 'source': 'data:text/plain;charset=utf-8;base64,' + ca_cert_b64 } }) ignition['storage']['files'] = files; with open('bootstrap.ign', 'w') as f: json.dump(ignition, f)Using the RHOSP CLI, create an image that uses the bootstrap Ignition file:
$ openstack image create --disk-format=raw --container-format=bare --file bootstrap.ign <image_name>Get the image’s details:
$ openstack image show <image_name>Make a note of the
filevalue; it follows the patternv2/images/<image_ID>/file.NoteVerify that the image you created is active.
Retrieve the image service’s public address:
$ openstack catalog show image-
Combine the public address with the image
filevalue and save the result as the storage location. The location follows the pattern<image_service_public_URL>/v2/images/<image_ID>/file. Generate an auth token and save the token ID:
$ openstack token issue -c id -f valueInsert the following content into a file called
$INFRA_ID-bootstrap-ignition.jsonand edit the placeholders to match your own values:{ "ignition": { "config": { "merge": [{ "source": "<storage_url>",1 "httpHeaders": [{ "name": "X-Auth-Token",2 "value": "<token_ID>"3 }] }] }, "security": { "tls": { "certificateAuthorities": [{ "source": "data:text/plain;charset=utf-8;base64,<base64_encoded_certificate>"4 }] } }, "version": "3.2.0" } }- 1
- Replace the value of
ignition.config.merge.sourcewith the bootstrap Ignition file storage URL. - 2
- Set
nameinhttpHeadersto"X-Auth-Token". - 3
- Set
valueinhttpHeadersto your token’s ID. - 4
- If the bootstrap Ignition file server uses a self-signed certificate, include the base64-encoded certificate.
- Save the secondary Ignition config file.
The bootstrap Ignition data will be passed to RHOSP during installation.
The bootstrap Ignition file contains sensitive information, like clouds.yaml credentials. Ensure that you store it in a secure place, and delete it after you complete the installation process.
12.3.16. Creating control plane Ignition config files on RHOSP
Installing OpenShift Container Platform on Red Hat OpenStack Platform (RHOSP) on your own infrastructure requires control plane Ignition config files. You must create multiple config files.
As with the bootstrap Ignition configuration, you must explicitly define a hostname for each control plane machine.
Prerequisites
The infrastructure ID from the installation program’s metadata file is set as an environment variable (
$INFRA_ID).- If the variable is not set, see "Creating the Kubernetes manifest and Ignition config files".
Procedure
On a command line, run the following Python script:
$ for index in $(seq 0 2); do MASTER_HOSTNAME="$INFRA_ID-master-$index\n" python -c "import base64, json, sys; ignition = json.load(sys.stdin); storage = ignition.get('storage', {}); files = storage.get('files', []); files.append({'path': '/etc/hostname', 'mode': 420, 'contents': {'source': 'data:text/plain;charset=utf-8;base64,' + base64.standard_b64encode(b'$MASTER_HOSTNAME').decode().strip(), 'verification': {}}, 'filesystem': 'root'}); storage['files'] = files; ignition['storage'] = storage json.dump(ignition, sys.stdout)" <master.ign >"$INFRA_ID-master-$index-ignition.json" doneYou now have three control plane Ignition files:
<INFRA_ID>-master-0-ignition.json,<INFRA_ID>-master-1-ignition.json, and<INFRA_ID>-master-2-ignition.json.
12.3.17. Creating network resources on RHOSP
Create the network resources that an OpenShift Container Platform on Red Hat OpenStack Platform (RHOSP) installation on your own infrastructure requires. To save time, run supplied Ansible playbooks that generate security groups, networks, subnets, routers, and ports.
Prerequisites
- Python 3 is installed on your machine.
- You downloaded the modules in "Downloading playbook dependencies".
- You downloaded the playbooks in "Downloading the installation playbooks".
Procedure
Optional: Add an external network value to the
inventory.yamlplaybook:Example external network value in the
inventory.yamlAnsible playbook... # The public network providing connectivity to the cluster. If not # provided, the cluster external connectivity must be provided in another # way. # Required for os_api_fip, os_ingress_fip, os_bootstrap_fip. os_external_network: 'external' ...ImportantIf you did not provide a value for
os_external_networkin theinventory.yamlfile, you must ensure that VMs can access Glance and an external connection yourself.Optional: Add external network and floating IP (FIP) address values to the
inventory.yamlplaybook:Example FIP values in the
inventory.yamlAnsible playbook... # OpenShift API floating IP address. If this value is non-empty, the # corresponding floating IP will be attached to the Control Plane to # serve the OpenShift API. os_api_fip: '203.0.113.23' # OpenShift Ingress floating IP address. If this value is non-empty, the # corresponding floating IP will be attached to the worker nodes to serve # the applications. os_ingress_fip: '203.0.113.19' # If this value is non-empty, the corresponding floating IP will be # attached to the bootstrap machine. This is needed for collecting logs # in case of install failure. os_bootstrap_fip: '203.0.113.20'ImportantIf you do not define values for
os_api_fipandos_ingress_fip, you must perform post-installation network configuration.If you do not define a value for
os_bootstrap_fip, the installer cannot download debugging information from failed installations.See "Enabling access to the environment" for more information.
On a command line, create security groups by running the
security-groups.yamlplaybook:$ ansible-playbook -i inventory.yaml security-groups.yamlOn a command line, create a network, subnet, and router by running the
network.yamlplaybook:$ ansible-playbook -i inventory.yaml network.yamlOptional: If you want to control the default resolvers that Nova servers use, run the RHOSP CLI command:
$ openstack subnet set --dns-nameserver <server_1> --dns-nameserver <server_2> "$INFRA_ID-nodes"
Optionally, you can use the inventory.yaml file that you created to customize your installation. For example, you can deploy a cluster that uses bare metal machines.
12.3.17.1. Deploying a cluster with bare metal machines
If you want your cluster to use bare metal machines, modify the inventory.yaml file. Your cluster can have both control plane and compute machines running on bare metal, or just compute machines.
Bare-metal compute machines are not supported on clusters that use Kuryr.
Be sure that your install-config.yaml file reflects whether the RHOSP network that you use for bare metal workers supports floating IP addresses or not.
Prerequisites
- The RHOSP Bare Metal service (Ironic) is enabled and accessible via the RHOSP Compute API.
- Bare metal is available as a RHOSP flavor.
- The RHOSP network supports both VM and bare metal server attachment.
- Your network configuration does not rely on a provider network. Provider networks are not supported.
- If you want to deploy the machines on a pre-existing network, a RHOSP subnet is provisioned.
- If you want to deploy the machines on an installer-provisioned network, the RHOSP Bare Metal service (Ironic) is able to listen for and interact with Preboot eXecution Environment (PXE) boot machines that run on tenant networks.
-
You created an
inventory.yamlfile as part of the OpenShift Container Platform installation process.
Procedure
In the
inventory.yamlfile, edit the flavors for machines:-
If you want to use bare-metal control plane machines, change the value of
os_flavor_masterto a bare metal flavor. Change the value of
os_flavor_workerto a bare metal flavor.An example bare metal
inventory.yamlfileall: hosts: localhost: ansible_connection: local ansible_python_interpreter: "{{ansible_playbook_python}}" # User-provided values os_subnet_range: '10.0.0.0/16' os_flavor_master: 'my-bare-metal-flavor'1 os_flavor_worker: 'my-bare-metal-flavor'2 os_image_rhcos: 'rhcos' os_external_network: 'external' ...
-
If you want to use bare-metal control plane machines, change the value of
Use the updated inventory.yaml file to complete the installation process. Machines that are created during deployment use the flavor that you added to the file.
The installer may time out while waiting for bare metal machines to boot.
If the installer times out, restart and then complete the deployment by using the wait-for command of the installer. For example:
./openshift-install wait-for install-complete --log-level debug12.3.18. Creating the bootstrap machine on RHOSP
Create a bootstrap machine and give it the network access it needs to run on Red Hat OpenStack Platform (RHOSP). Red Hat provides an Ansible playbook that you run to simplify this process.
Prerequisites
- You downloaded the modules in "Downloading playbook dependencies".
- You downloaded the playbooks in "Downloading the installation playbooks".
-
The
inventory.yaml,common.yaml, andbootstrap.yamlAnsible playbooks are in a common directory. -
The
metadata.jsonfile that the installation program created is in the same directory as the Ansible playbooks.
Procedure
- On a command line, change the working directory to the location of the playbooks.
On a command line, run the
bootstrap.yamlplaybook:$ ansible-playbook -i inventory.yaml bootstrap.yamlAfter the bootstrap server is active, view the logs to verify that the Ignition files were received:
$ openstack console log show "$INFRA_ID-bootstrap"
12.3.19. Creating the control plane machines on RHOSP
Create three control plane machines by using the Ignition config files that you generated. Red Hat provides an Ansible playbook that you run to simplify this process.
Prerequisites
- You downloaded the modules in "Downloading playbook dependencies".
- You downloaded the playbooks in "Downloading the installation playbooks".
-
The infrastructure ID from the installation program’s metadata file is set as an environment variable (
$INFRA_ID). -
The
inventory.yaml,common.yaml, andcontrol-plane.yamlAnsible playbooks are in a common directory. - You have the three Ignition files that were created in "Creating control plane Ignition config files".
Procedure
- On a command line, change the working directory to the location of the playbooks.
- If the control plane Ignition config files aren’t already in your working directory, copy them into it.
On a command line, run the
control-plane.yamlplaybook:$ ansible-playbook -i inventory.yaml control-plane.yamlRun the following command to monitor the bootstrapping process:
$ openshift-install wait-for bootstrap-completeYou will see messages that confirm that the control plane machines are running and have joined the cluster:
INFO API v1.14.6+f9b5405 up INFO Waiting up to 30m0s for bootstrapping to complete... ... INFO It is now safe to remove the bootstrap resources
12.3.20. Logging in to the cluster by using the CLI
You can log in to your cluster as a default system user by exporting the cluster kubeconfig file. The kubeconfig file contains information about the cluster that is used by the CLI to connect a client to the correct cluster and API server. The file is specific to a cluster and is created during OpenShift Container Platform installation.
Prerequisites
- You deployed an OpenShift Container Platform cluster.
-
You installed the
ocCLI.
Procedure
Export the
kubeadmincredentials:$ export KUBECONFIG=<installation_directory>/auth/kubeconfig1 - 1
- For
<installation_directory>, specify the path to the directory that you stored the installation files in.
Verify you can run
occommands successfully using the exported configuration:$ oc whoamiExample output
system:admin
12.3.21. Deleting bootstrap resources from RHOSP
Delete the bootstrap resources that you no longer need.
Prerequisites
- You downloaded the modules in "Downloading playbook dependencies".
- You downloaded the playbooks in "Downloading the installation playbooks".
-
The
inventory.yaml,common.yaml, anddown-bootstrap.yamlAnsible playbooks are in a common directory. The control plane machines are running.
- If you do not know the status of the machines, see "Verifying cluster status".
Procedure
- On a command line, change the working directory to the location of the playbooks.
On a command line, run the
down-bootstrap.yamlplaybook:$ ansible-playbook -i inventory.yaml down-bootstrap.yaml
The bootstrap port, server, and floating IP address are deleted.
If you did not disable the bootstrap Ignition file URL earlier, do so now.
12.3.22. Creating compute machines on RHOSP
After standing up the control plane, create compute machines. Red Hat provides an Ansible playbook that you run to simplify this process.
Prerequisites
- You downloaded the modules in "Downloading playbook dependencies".
- You downloaded the playbooks in "Downloading the installation playbooks".
-
The
inventory.yaml,common.yaml, andcompute-nodes.yamlAnsible playbooks are in a common directory. -
The
metadata.jsonfile that the installation program created is in the same directory as the Ansible playbooks. - The control plane is active.
Procedure
- On a command line, change the working directory to the location of the playbooks.
On a command line, run the playbook:
$ ansible-playbook -i inventory.yaml compute-nodes.yaml
Next steps
- Approve the certificate signing requests for the machines.
12.3.23. Approving the certificate signing requests for your machines
When you add machines to a cluster, two pending certificate signing requests (CSRs) are generated for each machine that you added. You must confirm that these CSRs are approved or, if necessary, approve them yourself. The client requests must be approved first, followed by the server requests.
Prerequisites
- You added machines to your cluster.
Procedure
Confirm that the cluster recognizes the machines:
$ oc get nodesExample output
NAME STATUS ROLES AGE VERSION master-0 Ready master 63m v1.20.0 master-1 Ready master 63m v1.20.0 master-2 Ready master 64m v1.20.0The output lists all of the machines that you created.
NoteThe preceding output might not include the compute nodes, also known as worker nodes, until some CSRs are approved.
Review the pending CSRs and ensure that you see the client requests with the
PendingorApprovedstatus for each machine that you added to the cluster:$ oc get csrExample output
NAME AGE REQUESTOR CONDITION csr-mddf5 20m system:node:master-01.example.com Approved,Issued csr-z5rln 16m system:node:worker-21.example.com Approved,IssuedIf the CSRs were not approved, after all of the pending CSRs for the machines you added are in
Pendingstatus, approve the CSRs for your cluster machines:NoteBecause the CSRs rotate automatically, approve your CSRs within an hour of adding the machines to the cluster. If you do not approve them within an hour, the certificates will rotate, and more than two certificates will be present for each node. You must approve all of these certificates. Once the client CSR is approved, the Kubelet creates a secondary CSR for the serving certificate, which requires manual approval. Then, subsequent serving certificate renewal requests are automatically approved by the
machine-approverif the Kubelet requests a new certificate with identical parameters.NoteFor clusters running on platforms that are not machine API enabled, such as bare metal and other user-provisioned infrastructure, you must implement a method of automatically approving the kubelet serving certificate requests (CSRs). If a request is not approved, then the
oc exec,oc rsh, andoc logscommands cannot succeed, because a serving certificate is required when the API server connects to the kubelet. Any operation that contacts the Kubelet endpoint requires this certificate approval to be in place. The method must watch for new CSRs, confirm that the CSR was submitted by thenode-bootstrapperservice account in thesystem:nodeorsystem:admingroups, and confirm the identity of the node.To approve them individually, run the following command for each valid CSR:
$ oc adm certificate approve <csr_name>1 - 1
<csr_name>is the name of a CSR from the list of current CSRs.
To approve all pending CSRs, run the following command:
$ oc get csr -o go-template='{{range .items}}{{if not .status}}{{.metadata.name}}{{"\n"}}{{end}}{{end}}' | xargs --no-run-if-empty oc adm certificate approveNoteSome Operators might not become available until some CSRs are approved.
Now that your client requests are approved, you must review the server requests for each machine that you added to the cluster:
$ oc get csrExample output
NAME AGE REQUESTOR CONDITION csr-bfd72 5m26s system:node:ip-10-0-50-126.us-east-2.compute.internal Pending csr-c57lv 5m26s system:node:ip-10-0-95-157.us-east-2.compute.internal Pending ...If the remaining CSRs are not approved, and are in the
Pendingstatus, approve the CSRs for your cluster machines:To approve them individually, run the following command for each valid CSR:
$ oc adm certificate approve <csr_name>1 - 1
<csr_name>is the name of a CSR from the list of current CSRs.
To approve all pending CSRs, run the following command:
$ oc get csr -o go-template='{{range .items}}{{if not .status}}{{.metadata.name}}{{"\n"}}{{end}}{{end}}' | xargs oc adm certificate approve
After all client and server CSRs have been approved, the machines have the
Readystatus. Verify this by running the following command:$ oc get nodesExample output
NAME STATUS ROLES AGE VERSION master-0 Ready master 73m v1.20.0 master-1 Ready master 73m v1.20.0 master-2 Ready master 74m v1.20.0 worker-0 Ready worker 11m v1.20.0 worker-1 Ready worker 11m v1.20.0NoteIt can take a few minutes after approval of the server CSRs for the machines to transition to the
Readystatus.
Additional information
- For more information on CSRs, see Certificate Signing Requests.
12.3.24. Verifying a successful installation
Verify that the OpenShift Container Platform installation is complete.
Prerequisites
-
You have the installation program (
openshift-install)
Procedure
On a command line, enter:
$ openshift-install --log-level debug wait-for install-complete
The program outputs the console URL, as well as the administrator’s login information.
12.3.25. Telemetry access for OpenShift Container Platform
In OpenShift Container Platform 4.7, the Telemetry service, which runs by default to provide metrics about cluster health and the success of updates, requires internet access. If your cluster is connected to the internet, Telemetry runs automatically, and your cluster is registered to OpenShift Cluster Manager.
After you confirm that your OpenShift Cluster Manager inventory is correct, either maintained automatically by Telemetry or manually by using OpenShift Cluster Manager, use subscription watch to track your OpenShift Container Platform subscriptions at the account or multi-cluster level.
12.3.26. Next steps
- Customize your cluster.
- If necessary, you can opt out of remote health reporting.
- If you need to enable external access to node ports, configure ingress cluster traffic by using a node port.
- If you did not configure RHOSP to accept application traffic over floating IP addresses, configure RHOSP access with floating IP addresses.
12.4. Installing a cluster on OpenStack with Kuryr on your own infrastructure
In OpenShift Container Platform version 4.7, you can install a cluster on Red Hat OpenStack Platform (RHOSP) that runs on user-provisioned infrastructure.
Using your own infrastructure allows you to integrate your cluster with existing infrastructure and modifications. The process requires more labor on your part than installer-provisioned installations, because you must create all RHOSP resources, like Nova servers, Neutron ports, and security groups. However, Red Hat provides Ansible playbooks to help you in the deployment process.
12.4.1. Prerequisites
Review details about the OpenShift Container Platform installation and update processes.
- Verify that OpenShift Container Platform 4.7 is compatible with your RHOSP version by using the "Supported platforms for OpenShift clusters" section. You can also compare platform support across different versions by viewing the OpenShift Container Platform on RHOSP support matrix.
- Verify that your network configuration does not rely on a provider network. Provider networks are not supported.
- Have an RHOSP account where you want to install OpenShift Container Platform.
On the machine from which you run the installation program, have:
- A single directory in which you can keep the files you create during the installation process
- Python 3
12.4.2. About Kuryr SDN
Kuryr is a container network interface (CNI) plug-in solution that uses the Neutron and Octavia Red Hat OpenStack Platform (RHOSP) services to provide networking for pods and Services.
Kuryr and OpenShift Container Platform integration is primarily designed for OpenShift Container Platform clusters running on RHOSP VMs. Kuryr improves the network performance by plugging OpenShift Container Platform pods into RHOSP SDN. In addition, it provides interconnectivity between pods and RHOSP virtual instances.
Kuryr components are installed as pods in OpenShift Container Platform using the openshift-kuryr namespace:
-
kuryr-controller- a single service instance installed on amasternode. This is modeled in OpenShift Container Platform as aDeploymentobject. -
kuryr-cni- a container installing and configuring Kuryr as a CNI driver on each OpenShift Container Platform node. This is modeled in OpenShift Container Platform as aDaemonSetobject.
The Kuryr controller watches the OpenShift Container Platform API server for pod, service, and namespace create, update, and delete events. It maps the OpenShift Container Platform API calls to corresponding objects in Neutron and Octavia. This means that every network solution that implements the Neutron trunk port functionality can be used to back OpenShift Container Platform via Kuryr. This includes open source solutions such as Open vSwitch (OVS) and Open Virtual Network (OVN) as well as Neutron-compatible commercial SDNs.
Kuryr is recommended for OpenShift Container Platform deployments on encapsulated RHOSP tenant networks to avoid double encapsulation, such as running an encapsulated OpenShift Container Platform SDN over an RHOSP network.
If you use provider networks or tenant VLANs, you do not need to use Kuryr to avoid double encapsulation. The performance benefit is negligible. Depending on your configuration, though, using Kuryr to avoid having two overlays might still be beneficial.
Kuryr is not recommended in deployments where all of the following criteria are true:
- The RHOSP version is less than 16.
- The deployment uses UDP services, or a large number of TCP services on few hypervisors.
or
-
The
ovn-octaviaOctavia driver is disabled. - The deployment uses a large number of TCP services on few hypervisors.
12.4.3. Resource guidelines for installing OpenShift Container Platform on RHOSP with Kuryr
When using Kuryr SDN, the pods, services, namespaces, and network policies are using resources from the RHOSP quota; this increases the minimum requirements. Kuryr also has some additional requirements on top of what a default install requires.
Use the following quota to satisfy a default cluster’s minimum requirements:
| Resource | Value |
|---|---|
| Floating IP addresses | 3 - plus the expected number of Services of LoadBalancer type |
| Ports | 1500 - 1 needed per Pod |
| Routers | 1 |
| Subnets | 250 - 1 needed per Namespace/Project |
| Networks | 250 - 1 needed per Namespace/Project |
| RAM | 112 GB |
| vCPUs | 28 |
| Volume storage | 275 GB |
| Instances | 7 |
| Security groups | 250 - 1 needed per Service and per NetworkPolicy |
| Security group rules | 1000 |
| Load balancers | 100 - 1 needed per Service |
| Load balancer listeners | 500 - 1 needed per Service-exposed port |
| Load balancer pools | 500 - 1 needed per Service-exposed port |
A cluster might function with fewer than recommended resources, but its performance is not guaranteed.
If RHOSP object storage (Swift) is available and operated by a user account with the swiftoperator role, it is used as the default backend for the OpenShift Container Platform image registry. In this case, the volume storage requirement is 175 GB. Swift space requirements vary depending on the size of the image registry.
If you are using Red Hat OpenStack Platform (RHOSP) version 16 with the Amphora driver rather than the OVN Octavia driver, security groups are associated with service accounts instead of user projects.
Take the following notes into consideration when setting resources:
- The number of ports that are required is larger than the number of pods. Kuryr uses ports pools to have pre-created ports ready to be used by pods and speed up the pods' booting time.
-
Each network policy is mapped into an RHOSP security group, and depending on the
NetworkPolicyspec, one or more rules are added to the security group. Each service is mapped to an RHOSP load balancer. Consider this requirement when estimating the number of security groups required for the quota.
If you are using RHOSP version 15 or earlier, or the
ovn-octavia driver, each load balancer has a security group with the user project.The quota does not account for load balancer resources (such as VM resources), but you must consider these resources when you decide the RHOSP deployment’s size. The default installation will have more than 50 load balancers; the clusters must be able to accommodate them.
If you are using RHOSP version 16 with the OVN Octavia driver enabled, only one load balancer VM is generated; services are load balanced through OVN flows.
An OpenShift Container Platform deployment comprises control plane machines, compute machines, and a bootstrap machine.
To enable Kuryr SDN, your environment must meet the following requirements:
- Run RHOSP 13+.
- Have Overcloud with Octavia.
- Use Neutron Trunk ports extension.
-
Use
openvswitchfirewall driver if ML2/OVS Neutron driver is used instead ofovs-hybrid.
12.4.3.1. Increasing quota
When using Kuryr SDN, you must increase quotas to satisfy the Red Hat OpenStack Platform (RHOSP) resources used by pods, services, namespaces, and network policies.
Procedure
Increase the quotas for a project by running the following command:
$ sudo openstack quota set --secgroups 250 --secgroup-rules 1000 --ports 1500 --subnets 250 --networks 250 <project>
12.4.3.2. Configuring Neutron
Kuryr CNI leverages the Neutron Trunks extension to plug containers into the Red Hat OpenStack Platform (RHOSP) SDN, so you must use the trunks extension for Kuryr to properly work.
In addition, if you leverage the default ML2/OVS Neutron driver, the firewall must be set to openvswitch instead of ovs_hybrid so that security groups are enforced on trunk subports and Kuryr can properly handle network policies.
12.4.3.3. Configuring Octavia
Kuryr SDN uses Red Hat OpenStack Platform (RHOSP)'s Octavia LBaaS to implement OpenShift Container Platform services. Thus, you must install and configure Octavia components in RHOSP to use Kuryr SDN.
To enable Octavia, you must include the Octavia service during the installation of the RHOSP Overcloud, or upgrade the Octavia service if the Overcloud already exists. The following steps for enabling Octavia apply to both a clean install of the Overcloud or an Overcloud update.
The following steps only capture the key pieces required during the deployment of RHOSP when dealing with Octavia. It is also important to note that registry methods vary.
This example uses the local registry method.
Procedure
If you are using the local registry, create a template to upload the images to the registry. For example:
(undercloud) $ openstack overcloud container image prepare \ -e /usr/share/openstack-tripleo-heat-templates/environments/services-docker/octavia.yaml \ --namespace=registry.access.redhat.com/rhosp13 \ --push-destination=<local-ip-from-undercloud.conf>:8787 \ --prefix=openstack- \ --tag-from-label {version}-{product-version} \ --output-env-file=/home/stack/templates/overcloud_images.yaml \ --output-images-file /home/stack/local_registry_images.yamlVerify that the
local_registry_images.yamlfile contains the Octavia images. For example:... - imagename: registry.access.redhat.com/rhosp13/openstack-octavia-api:13.0-43 push_destination: <local-ip-from-undercloud.conf>:8787 - imagename: registry.access.redhat.com/rhosp13/openstack-octavia-health-manager:13.0-45 push_destination: <local-ip-from-undercloud.conf>:8787 - imagename: registry.access.redhat.com/rhosp13/openstack-octavia-housekeeping:13.0-45 push_destination: <local-ip-from-undercloud.conf>:8787 - imagename: registry.access.redhat.com/rhosp13/openstack-octavia-worker:13.0-44 push_destination: <local-ip-from-undercloud.conf>:8787NoteThe Octavia container versions vary depending upon the specific RHOSP release installed.
Pull the container images from
registry.redhat.ioto the Undercloud node:(undercloud) $ sudo openstack overcloud container image upload \ --config-file /home/stack/local_registry_images.yaml \ --verboseThis may take some time depending on the speed of your network and Undercloud disk.
Since an Octavia load balancer is used to access the OpenShift Container Platform API, you must increase their listeners' default timeouts for the connections. The default timeout is 50 seconds. Increase the timeout to 20 minutes by passing the following file to the Overcloud deploy command:
(undercloud) $ cat octavia_timeouts.yaml parameter_defaults: OctaviaTimeoutClientData: 1200000 OctaviaTimeoutMemberData: 1200000NoteThis is not needed for RHOSP 13.0.13+.
Install or update your Overcloud environment with Octavia:
$ openstack overcloud deploy --templates \ -e /usr/share/openstack-tripleo-heat-templates/environments/services-docker/octavia.yaml \ -e octavia_timeouts.yamlNoteThis command only includes the files associated with Octavia; it varies based on your specific installation of RHOSP. See the RHOSP documentation for further information. For more information on customizing your Octavia installation, see installation of Octavia using Director.
NoteWhen leveraging Kuryr SDN, the Overcloud installation requires the Neutron
trunkextension. This is available by default on director deployments. Use theopenvswitchfirewall instead of the defaultovs-hybridwhen the Neutron backend is ML2/OVS. There is no need for modifications if the backend is ML2/OVN.In RHOSP versions earlier than 13.0.13, add the project ID to the
octavia.confconfiguration file after you create the project.To enforce network policies across services, like when traffic goes through the Octavia load balancer, you must ensure Octavia creates the Amphora VM security groups on the user project.
This change ensures that required load balancer security groups belong to that project, and that they can be updated to enforce services isolation.
NoteThis task is unnecessary in RHOSP version 13.0.13 or later.
Octavia implements a new ACL API that restricts access to the load balancers VIP.
Get the project ID
$ openstack project show <project>Example output
+-------------+----------------------------------+ | Field | Value | +-------------+----------------------------------+ | description | | | domain_id | default | | enabled | True | | id | PROJECT_ID | | is_domain | False | | name | *<project>* | | parent_id | default | | tags | [] | +-------------+----------------------------------+Add the project ID to
octavia.conffor the controllers.Source the
stackrcfile:$ source stackrc # Undercloud credentialsList the Overcloud controllers:
$ openstack server listExample output
+--------------------------------------+--------------+--------+-----------------------+----------------+------------+ │ | ID | Name | Status | Networks | Image | Flavor | │ +--------------------------------------+--------------+--------+-----------------------+----------------+------------+ │ | 6bef8e73-2ba5-4860-a0b1-3937f8ca7e01 | controller-0 | ACTIVE | ctlplane=192.168.24.8 | overcloud-full | controller | │ | dda3173a-ab26-47f8-a2dc-8473b4a67ab9 | compute-0 | ACTIVE | ctlplane=192.168.24.6 | overcloud-full | compute | │ +--------------------------------------+--------------+--------+-----------------------+----------------+------------+SSH into the controller(s).
$ ssh heat-admin@192.168.24.8Edit the
octavia.conffile to add the project into the list of projects where Amphora security groups are on the user’s account.# List of project IDs that are allowed to have Load balancer security groups # belonging to them. amp_secgroup_allowed_projects = PROJECT_ID
Restart the Octavia worker so the new configuration loads.
controller-0$ sudo docker restart octavia_worker
Depending on your RHOSP environment, Octavia might not support UDP listeners. If you use Kuryr SDN on RHOSP version 13.0.13 or earlier, UDP services are not supported. RHOSP version 16 or later support UDP.
12.4.3.3.1. The Octavia OVN Driver
Octavia supports multiple provider drivers through the Octavia API.
To see all available Octavia provider drivers, on a command line, enter:
$ openstack loadbalancer provider listExample output
+---------+-------------------------------------------------+
| name | description |
+---------+-------------------------------------------------+
| amphora | The Octavia Amphora driver. |
| octavia | Deprecated alias of the Octavia Amphora driver. |
| ovn | Octavia OVN driver. |
+---------+-------------------------------------------------+
Beginning with RHOSP version 16, the Octavia OVN provider driver (ovn) is supported on OpenShift Container Platform on RHOSP deployments.
ovn is an integration driver for the load balancing that Octavia and OVN provide. It supports basic load balancing capabilities, and is based on OpenFlow rules. The driver is automatically enabled in Octavia by Director on deployments that use OVN Neutron ML2.
The Amphora provider driver is the default driver. If ovn is enabled, however, Kuryr uses it.
If Kuryr uses ovn instead of Amphora, it offers the following benefits:
- Decreased resource requirements. Kuryr does not require a load balancer VM for each service.
- Reduced network latency.
- Increased service creation speed by using OpenFlow rules instead of a VM for each service.
- Distributed load balancing actions across all nodes instead of centralized on Amphora VMs.
12.4.3.4. Known limitations of installing with Kuryr
Using OpenShift Container Platform with Kuryr SDN has several known limitations.
RHOSP general limitations
Using OpenShift Container Platform with Kuryr SDN has several limitations that apply to all versions and environments:
-
Serviceobjects with theNodePorttype are not supported. -
Clusters that use the OVN Octavia provider driver support
Serviceobjects for which the.spec.selectorproperty is unspecified only if the.subsets.addressesproperty of theEndpointsobject includes the subnet of the nodes or pods. -
If the subnet on which machines are created is not connected to a router, or if the subnet is connected, but the router has no external gateway set, Kuryr cannot create floating IPs for
Serviceobjects with typeLoadBalancer. -
Configuring the
sessionAffinity=ClientIPproperty onServiceobjects does not have an effect. Kuryr does not support this setting.
RHOSP version limitations
Using OpenShift Container Platform with Kuryr SDN has several limitations that depend on the RHOSP version.
RHOSP versions before 16 use the default Octavia load balancer driver (Amphora). This driver requires that one Amphora load balancer VM is deployed per OpenShift Container Platform service. Creating too many services can cause you to run out of resources.
Deployments of later versions of RHOSP that have the OVN Octavia driver disabled also use the Amphora driver. They are subject to the same resource concerns as earlier versions of RHOSP.
- Octavia RHOSP versions before 13.0.13 do not support UDP listeners. Therefore, OpenShift Container Platform UDP services are not supported.
- Octavia RHOSP versions before 13.0.13 cannot listen to multiple protocols on the same port. Services that expose the same port to different protocols, like TCP and UDP, are not supported.
- Kuryr SDN does not support automatic unidling by a service.
RHOSP environment limitations
There are limitations when using Kuryr SDN that depend on your deployment environment.
Because of Octavia’s lack of support for the UDP protocol and multiple listeners, if the RHOSP version is earlier than 13.0.13, Kuryr forces pods to use TCP for DNS resolution.
In Go versions 1.12 and earlier, applications that are compiled with CGO support disabled use UDP only. In this case, the native Go resolver does not recognize the use-vc option in resolv.conf, which controls whether TCP is forced for DNS resolution. As a result, UDP is still used for DNS resolution, which fails.
To ensure that TCP forcing is allowed, compile applications either with the environment variable CGO_ENABLED set to 1, i.e. CGO_ENABLED=1, or ensure that the variable is absent.
In Go versions 1.13 and later, TCP is used automatically if DNS resolution using UDP fails.
musl-based containers, including Alpine-based containers, do not support the use-vc option.
RHOSP upgrade limitations
As a result of the RHOSP upgrade process, the Octavia API might be changed, and upgrades to the Amphora images that are used for load balancers might be required.
You can address API changes on an individual basis.
If the Amphora image is upgraded, the RHOSP operator can handle existing load balancer VMs in two ways:
- Upgrade each VM by triggering a load balancer failover.
- Leave responsibility for upgrading the VMs to users.
If the operator takes the first option, there might be short downtimes during failovers.
If the operator takes the second option, the existing load balancers will not support upgraded Octavia API features, like UDP listeners. In this case, users must recreate their Services to use these features.
If OpenShift Container Platform detects a new Octavia version that supports UDP load balancing, it recreates the DNS service automatically. The service recreation ensures that the service default supports UDP load balancing.
The recreation causes the DNS service approximately one minute of downtime.
12.4.3.5. Control plane machines
By default, the OpenShift Container Platform installation process creates three control plane machines.
Each machine requires:
- An instance from the RHOSP quota
- A port from the RHOSP quota
- A flavor with at least 16 GB memory, 4 vCPUs, and 100 GB storage space
12.4.3.6. Compute machines
By default, the OpenShift Container Platform installation process creates three compute machines.
Each machine requires:
- An instance from the RHOSP quota
- A port from the RHOSP quota
- A flavor with at least 8 GB memory, 2 vCPUs, and 100 GB storage space
Compute machines host the applications that you run on OpenShift Container Platform; aim to run as many as you can.
12.4.3.7. Bootstrap machine
During installation, a bootstrap machine is temporarily provisioned to stand up the control plane. After the production control plane is ready, the bootstrap machine is deprovisioned.
The bootstrap machine requires:
- An instance from the RHOSP quota
- A port from the RHOSP quota
- A flavor with at least 16 GB memory, 4 vCPUs, and 100 GB storage space
12.4.4. Internet access for OpenShift Container Platform
In OpenShift Container Platform 4.7, you require access to the Internet to install your cluster.
You must have Internet access to:
- Access OpenShift Cluster Manager to download the installation program and perform subscription management. If the cluster has internet access and you do not disable Telemetry, that service automatically entitles your cluster.
- Access Quay.io to obtain the packages that are required to install your cluster.
- Obtain the packages that are required to perform cluster updates.
If your cluster cannot have direct Internet access, you can perform a restricted network installation on some types of infrastructure that you provision. During that process, you download the content that is required and use it to populate a mirror registry with the packages that you need to install a cluster and generate the installation program. With some installation types, the environment that you install your cluster in will not require Internet access. Before you update the cluster, you update the content of the mirror registry.
12.4.5. Downloading playbook dependencies
The Ansible playbooks that simplify the installation process on user-provisioned infrastructure require several Python modules. On the machine where you will run the installer, add the modules' repositories and then download them.
These instructions assume that you are using Red Hat Enterprise Linux (RHEL) 8.
Prerequisites
- Python 3 is installed on your machine.
Procedure
On a command line, add the repositories:
Register with Red Hat Subscription Manager:
$ sudo subscription-manager register # If not done alreadyPull the latest subscription data:
$ sudo subscription-manager attach --pool=$YOUR_POOLID # If not done alreadyDisable the current repositories:
$ sudo subscription-manager repos --disable=* # If not done alreadyAdd the required repositories:
$ sudo subscription-manager repos \ --enable=rhel-8-for-x86_64-baseos-rpms \ --enable=openstack-16-tools-for-rhel-8-x86_64-rpms \ --enable=ansible-2.9-for-rhel-8-x86_64-rpms \ --enable=rhel-8-for-x86_64-appstream-rpms
Install the modules:
$ sudo yum install python3-openstackclient ansible python3-openstacksdk python3-netaddrEnsure that the
pythoncommand points topython3:$ sudo alternatives --set python /usr/bin/python3
12.4.6. Downloading the installation playbooks
Download Ansible playbooks that you can use to install OpenShift Container Platform on your own Red Hat OpenStack Platform (RHOSP) infrastructure.
Prerequisites
- The curl command-line tool is available on your machine.
Procedure
To download the playbooks to your working directory, run the following script from a command line:
$ xargs -n 1 curl -O <<< ' https://raw.githubusercontent.com/openshift/installer/release-4.7/upi/openstack/bootstrap.yaml https://raw.githubusercontent.com/openshift/installer/release-4.7/upi/openstack/common.yaml https://raw.githubusercontent.com/openshift/installer/release-4.7/upi/openstack/compute-nodes.yaml https://raw.githubusercontent.com/openshift/installer/release-4.7/upi/openstack/control-plane.yaml https://raw.githubusercontent.com/openshift/installer/release-4.7/upi/openstack/inventory.yaml https://raw.githubusercontent.com/openshift/installer/release-4.7/upi/openstack/network.yaml https://raw.githubusercontent.com/openshift/installer/release-4.7/upi/openstack/security-groups.yaml https://raw.githubusercontent.com/openshift/installer/release-4.7/upi/openstack/down-bootstrap.yaml https://raw.githubusercontent.com/openshift/installer/release-4.7/upi/openstack/down-compute-nodes.yaml https://raw.githubusercontent.com/openshift/installer/release-4.7/upi/openstack/down-control-plane.yaml https://raw.githubusercontent.com/openshift/installer/release-4.7/upi/openstack/down-load-balancers.yaml https://raw.githubusercontent.com/openshift/installer/release-4.7/upi/openstack/down-network.yaml https://raw.githubusercontent.com/openshift/installer/release-4.7/upi/openstack/down-security-groups.yaml https://raw.githubusercontent.com/openshift/installer/release-4.7/upi/openstack/down-containers.yaml'
The playbooks are downloaded to your machine.
During the installation process, you can modify the playbooks to configure your deployment.
Retain all playbooks for the life of your cluster. You must have the playbooks to remove your OpenShift Container Platform cluster from RHOSP.
You must match any edits you make in the bootstrap.yaml, compute-nodes.yaml, control-plane.yaml, network.yaml, and security-groups.yaml files to the corresponding playbooks that are prefixed with down-. For example, edits to the bootstrap.yaml file must be reflected in the down-bootstrap.yaml file, too. If you do not edit both files, the supported cluster removal process will fail.
12.4.7. Obtaining the installation program
Before you install OpenShift Container Platform, download the installation file on your provisioning machine.
Prerequisites
- You have a machine that runs Linux, for example Red Hat Enterprise Linux 8, with 500 MB of local disk space
Procedure
- Access the Infrastructure Provider page on the OpenShift Cluster Manager site. If you have a Red Hat account, log in with your credentials. If you do not, create an account.
- Select your infrastructure provider.
Navigate to the page for your installation type, download the installation program for your operating system, and place the file in the directory where you will store the installation configuration files.
ImportantThe installation program creates several files on the computer that you use to install your cluster. You must keep the installation program and the files that the installation program creates after you finish installing the cluster. Both files are required to delete the cluster.
ImportantDeleting the files created by the installation program does not remove your cluster, even if the cluster failed during installation. To remove your cluster, complete the OpenShift Container Platform uninstallation procedures for your specific cloud provider.
Extract the installation program. For example, on a computer that uses a Linux operating system, run the following command:
$ tar xvf openshift-install-linux.tar.gz- Download your installation pull secret from the Red Hat OpenShift Cluster Manager. This pull secret allows you to authenticate with the services that are provided by the included authorities, including Quay.io, which serves the container images for OpenShift Container Platform components.
12.4.8. Generating an SSH private key and adding it to the agent
If you want to perform installation debugging or disaster recovery on your cluster, you must provide an SSH key to both your ssh-agent and the installation program. You can use this key to access the bootstrap machine in a public cluster to troubleshoot installation issues.
In a production environment, you require disaster recovery and debugging.
Do not skip this procedure in production environments where disaster recovery and debugging is required.
You can use this key to SSH into the master nodes as the user core. When you deploy the cluster, the key is added to the core user’s ~/.ssh/authorized_keys list.
Procedure
If you do not have an SSH key that is configured for password-less authentication on your computer, create one. For example, on a computer that uses a Linux operating system, run the following command:
$ ssh-keygen -t ed25519 -N '' \ -f <path>/<file_name>1 - 1
- Specify the path and file name, such as
~/.ssh/id_rsa, of the new SSH key. If you have an existing key pair, ensure your public key is in the your~/.sshdirectory.
Running this command generates an SSH key that does not require a password in the location that you specified.
NoteIf you plan to install an OpenShift Container Platform cluster that uses FIPS Validated / Modules in Process cryptographic libraries on the
x86_64architecture, do not create a key that uses theed25519algorithm. Instead, create a key that uses thersaorecdsaalgorithm.Start the
ssh-agentprocess as a background task:$ eval "$(ssh-agent -s)"Example output
Agent pid 31874NoteIf your cluster is in FIPS mode, only use FIPS-compliant algorithms to generate the SSH key. The key must be either RSA or ECDSA.
Add your SSH private key to the
ssh-agent:$ ssh-add <path>/<file_name>1 Example output
Identity added: /home/<you>/<path>/<file_name> (<computer_name>)- 1
- Specify the path and file name for your SSH private key, such as
~/.ssh/id_rsa
Next steps
- When you install OpenShift Container Platform, provide the SSH public key to the installation program.
12.4.9. Creating the Red Hat Enterprise Linux CoreOS (RHCOS) image
The OpenShift Container Platform installation program requires that a Red Hat Enterprise Linux CoreOS (RHCOS) image be present in the Red Hat OpenStack Platform (RHOSP) cluster. Retrieve the latest RHCOS image, then upload it using the RHOSP CLI.
Prerequisites
- The RHOSP CLI is installed.
Procedure
- Log in to the Red Hat Customer Portal’s Product Downloads page.
Under Version, select the most recent release of OpenShift Container Platform 4.7 for Red Hat Enterprise Linux (RHEL) 8.
ImportantThe RHCOS images might not change with every release of OpenShift Container Platform. You must download images with the highest version that is less than or equal to the OpenShift Container Platform version that you install. Use the image versions that match your OpenShift Container Platform version if they are available.
- Download the Red Hat Enterprise Linux CoreOS (RHCOS) - OpenStack Image (QCOW).
Decompress the image.
NoteYou must decompress the RHOSP image before the cluster can use it. The name of the downloaded file might not contain a compression extension, like
.gzor.tgz. To find out if or how the file is compressed, in a command line, enter:$ file <name_of_downloaded_file>From the image that you downloaded, create an image that is named
rhcosin your cluster by using the RHOSP CLI:$ openstack image create --container-format=bare --disk-format=qcow2 --file rhcos-${RHCOS_VERSION}-openstack.qcow2 rhcosImportantDepending on your RHOSP environment, you might be able to upload the image in either
.rawor.qcow2formats. If you use Ceph, you must use the.rawformat.WarningIf the installation program finds multiple images with the same name, it chooses one of them at random. To avoid this behavior, create unique names for resources in RHOSP.
After you upload the image to RHOSP, it is usable in the installation process.
12.4.10. Verifying external network access
The OpenShift Container Platform installation process requires external network access. You must provide an external network value to it, or deployment fails. Before you begin the process, verify that a network with the external router type exists in Red Hat OpenStack Platform (RHOSP).
Prerequisites
Procedure
Using the RHOSP CLI, verify the name and ID of the 'External' network:
$ openstack network list --long -c ID -c Name -c "Router Type"Example output
+--------------------------------------+----------------+-------------+ | ID | Name | Router Type | +--------------------------------------+----------------+-------------+ | 148a8023-62a7-4672-b018-003462f8d7dc | public_network | External | +--------------------------------------+----------------+-------------+
A network with an external router type appears in the network list. If at least one does not, see Creating a default floating IP network and Creating a default provider network.
If the Neutron trunk service plug-in is enabled, a trunk port is created by default. For more information, see Neutron trunk port.
12.4.11. Enabling access to the environment
At deployment, all OpenShift Container Platform machines are created in a Red Hat OpenStack Platform (RHOSP)-tenant network. Therefore, they are not accessible directly in most RHOSP deployments.
You can configure OpenShift Container Platform API and application access by using floating IP addresses (FIPs) during installation. You can also complete an installation without configuring FIPs, but the installer will not configure a way to reach the API or applications externally.
12.4.11.1. Enabling access with floating IP addresses
Create floating IP (FIP) addresses for external access to the OpenShift Container Platform API, cluster applications, and the bootstrap process.
Procedure
Using the Red Hat OpenStack Platform (RHOSP) CLI, create the API FIP:
$ openstack floating ip create --description "API <cluster_name>.<base_domain>" <external_network>Using the Red Hat OpenStack Platform (RHOSP) CLI, create the apps, or Ingress, FIP:
$ openstack floating ip create --description "Ingress <cluster_name>.<base_domain>" <external_network>By using the Red Hat OpenStack Platform (RHOSP) CLI, create the bootstrap FIP:
$ openstack floating ip create --description "bootstrap machine" <external_network>Add records that follow these patterns to your DNS server for the API and Ingress FIPs:
api.<cluster_name>.<base_domain>. IN A <API_FIP> *.apps.<cluster_name>.<base_domain>. IN A <apps_FIP>NoteIf you do not control the DNS server, you can access the cluster by adding the cluster domain names such as the following to your
/etc/hostsfile:-
<api_floating_ip> api.<cluster_name>.<base_domain> -
<application_floating_ip> grafana-openshift-monitoring.apps.<cluster_name>.<base_domain> -
<application_floating_ip> prometheus-k8s-openshift-monitoring.apps.<cluster_name>.<base_domain> -
<application_floating_ip> oauth-openshift.apps.<cluster_name>.<base_domain> -
<application_floating_ip> console-openshift-console.apps.<cluster_name>.<base_domain> -
application_floating_ip integrated-oauth-server-openshift-authentication.apps.<cluster_name>.<base_domain>
The cluster domain names in the
/etc/hostsfile grant access to the web console and the monitoring interface of your cluster locally. You can also use thekubectloroc. You can access the user applications by using the additional entries pointing to the <application_floating_ip>. This action makes the API and applications accessible to only you, which is not suitable for production deployment, but does allow installation for development and testing.-
Add the FIPs to the
inventory.yamlfile as the values of the following variables:-
os_api_fip -
os_bootstrap_fip -
os_ingress_fip
-
If you use these values, you must also enter an external network as the value of the os_external_network variable in the inventory.yaml file.
You can make OpenShift Container Platform resources available outside of the cluster by assigning a floating IP address and updating your firewall configuration.
12.4.11.2. Completing installation without floating IP addresses
You can install OpenShift Container Platform on Red Hat OpenStack Platform (RHOSP) without providing floating IP addresses.
In the inventory.yaml file, do not define the following variables:
-
os_api_fip -
os_bootstrap_fip -
os_ingress_fip
If you cannot provide an external network, you can also leave os_external_network blank. If you do not provide a value for os_external_network, a router is not created for you, and, without additional action, the installer will fail to retrieve an image from Glance. Later in the installation process, when you create network resources, you must configure external connectivity on your own.
If you run the installer with the wait-for command from a system that cannot reach the cluster API due to a lack of floating IP addresses or name resolution, installation fails. To prevent installation failure in these cases, you can use a proxy network or run the installer from a system that is on the same network as your machines.
You can enable name resolution by creating DNS records for the API and Ingress ports. For example:
api.<cluster_name>.<base_domain>. IN A <api_port_IP>
*.apps.<cluster_name>.<base_domain>. IN A <ingress_port_IP>
If you do not control the DNS server, you can add the record to your /etc/hosts file. This action makes the API accessible to only you, which is not suitable for production deployment but does allow installation for development and testing.
12.4.12. Defining parameters for the installation program
The OpenShift Container Platform installation program relies on a file that is called clouds.yaml. The file describes Red Hat OpenStack Platform (RHOSP) configuration parameters, including the project name, log in information, and authorization service URLs.
Procedure
Create the
clouds.yamlfile:If your RHOSP distribution includes the Horizon web UI, generate a
clouds.yamlfile in it.ImportantRemember to add a password to the
authfield. You can also keep secrets in a separate file fromclouds.yaml.If your RHOSP distribution does not include the Horizon web UI, or you do not want to use Horizon, create the file yourself. For detailed information about
clouds.yaml, see Config files in the RHOSP documentation.clouds: shiftstack: auth: auth_url: http://10.10.14.42:5000/v3 project_name: shiftstack username: shiftstack_user password: XXX user_domain_name: Default project_domain_name: Default dev-env: region_name: RegionOne auth: username: 'devuser' password: XXX project_name: 'devonly' auth_url: 'https://10.10.14.22:5001/v2.0'
If your RHOSP installation uses self-signed certificate authority (CA) certificates for endpoint authentication:
- Copy the certificate authority file to your machine.
Add the
cacertskey to theclouds.yamlfile. The value must be an absolute, non-root-accessible path to the CA certificate:clouds: shiftstack: ... cacert: "/etc/pki/ca-trust/source/anchors/ca.crt.pem"TipAfter you run the installer with a custom CA certificate, you can update the certificate by editing the value of the
ca-cert.pemkey in thecloud-provider-configkeymap. On a command line, run:$ oc edit configmap -n openshift-config cloud-provider-config
Place the
clouds.yamlfile in one of the following locations:-
The value of the
OS_CLIENT_CONFIG_FILEenvironment variable - The current directory
-
A Unix-specific user configuration directory, for example
~/.config/openstack/clouds.yaml A Unix-specific site configuration directory, for example
/etc/openstack/clouds.yamlThe installation program searches for
clouds.yamlin that order.
-
The value of the
12.4.13. Creating the installation configuration file
You can customize the OpenShift Container Platform cluster you install on Red Hat OpenStack Platform (RHOSP).
Prerequisites
- Obtain the OpenShift Container Platform installation program and the pull secret for your cluster.
- Obtain service principal permissions at the subscription level.
Procedure
Create the
install-config.yamlfile.Change to the directory that contains the installation program and run the following command:
$ ./openshift-install create install-config --dir <installation_directory>1 - 1
- For
<installation_directory>, specify the directory name to store the files that the installation program creates.
ImportantSpecify an empty directory. Some installation assets, like bootstrap X.509 certificates have short expiration intervals, so you must not reuse an installation directory. If you want to reuse individual files from another cluster installation, you can copy them into your directory. However, the file names for the installation assets might change between releases. Use caution when copying installation files from an earlier OpenShift Container Platform version.
At the prompts, provide the configuration details for your cloud:
Optional: Select an SSH key to use to access your cluster machines.
NoteFor production OpenShift Container Platform clusters on which you want to perform installation debugging or disaster recovery, specify an SSH key that your
ssh-agentprocess uses.- Select openstack as the platform to target.
- Specify the Red Hat OpenStack Platform (RHOSP) external network name to use for installing the cluster.
- Specify the floating IP address to use for external access to the OpenShift API.
- Specify a RHOSP flavor with at least 16 GB RAM to use for control plane nodes and 8 GB RAM for compute nodes.
- Select the base domain to deploy the cluster to. All DNS records will be sub-domains of this base and will also include the cluster name.
- Enter a name for your cluster. The name must be 14 or fewer characters long.
- Paste the pull secret from the Red Hat OpenShift Cluster Manager.
-
Modify the
install-config.yamlfile. You can find more information about the available parameters in the "Installation configuration parameters" section. Back up the
install-config.yamlfile so that you can use it to install multiple clusters.ImportantThe
install-config.yamlfile is consumed during the installation process. If you want to reuse the file, you must back it up now.
You now have the file install-config.yaml in the directory that you specified.
12.4.14. Installation configuration parameters
Before you deploy an OpenShift Container Platform cluster, you provide parameter values to describe your account on the cloud platform that hosts your cluster and optionally customize your cluster’s platform. When you create the install-config.yaml installation configuration file, you provide values for the required parameters through the command line. If you customize your cluster, you can modify the install-config.yaml file to provide more details about the platform.
After installation, you cannot modify these parameters in the install-config.yaml file.
The openshift-install command does not validate field names for parameters. If an incorrect name is specified, the related file or object is not created, and no error is reported. Ensure that the field names for any parameters that are specified are correct.
12.4.14.1. Required configuration parameters
Required installation configuration parameters are described in the following table:
| Parameter | Description | Values |
|---|---|---|
|
|
The API version for the | String |
|
|
The base domain of your cloud provider. The base domain is used to create routes to your OpenShift Container Platform cluster components. The full DNS name for your cluster is a combination of the |
A fully-qualified domain or subdomain name, such as |
|
|
Kubernetes resource | Object |
|
|
The name of the cluster. DNS records for the cluster are all subdomains of |
String of lowercase letters, hyphens ( |
|
|
The configuration for the specific platform upon which to perform the installation: | Object |
|
| Get a pull secret from the Red Hat OpenShift Cluster Manager to authenticate downloading container images for OpenShift Container Platform components from services such as Quay.io. |
|
12.4.14.2. Network configuration parameters
You can customize your installation configuration based on the requirements of your existing network infrastructure. For example, you can expand the IP address block for the cluster network or provide different IP address blocks than the defaults.
Only IPv4 addresses are supported.
| Parameter | Description | Values |
|---|---|---|
|
| The configuration for the cluster network. | Object Note
You cannot modify parameters specified by the |
|
| The cluster network provider Container Network Interface (CNI) plug-in to install. |
Either |
|
| The IP address blocks for pods.
The default value is If you specify multiple IP address blocks, the blocks must not overlap. | An array of objects. For example: |
|
|
Required if you use An IPv4 network. |
An IP address block in Classless Inter-Domain Routing (CIDR) notation. The prefix length for an IPv4 block is between |
|
|
The subnet prefix length to assign to each individual node. For example, if | A subnet prefix.
The default value is |
|
|
The IP address block for services. The default value is The OpenShift SDN and OVN-Kubernetes network providers support only a single IP address block for the service network. | An array with an IP address block in CIDR format. For example: |
|
| The IP address blocks for machines. If you specify multiple IP address blocks, the blocks must not overlap.
If you specify multiple IP kernel arguments, the | An array of objects. For example: |
|
|
Required if you use | An IP network block in CIDR notation.
For example, Note
Set the |
12.4.14.3. Optional configuration parameters
Optional installation configuration parameters are described in the following table:
| Parameter | Description | Values |
|---|---|---|
|
| A PEM-encoded X.509 certificate bundle that is added to the nodes' trusted certificate store. This trust bundle may also be used when a proxy has been configured. | String |
|
| The configuration for the machines that comprise the compute nodes. |
Array of |
|
|
Determines the instruction set architecture of the machines in the pool. Currently, heteregeneous clusters are not supported, so all pools must specify the same architecture. Valid values are | String |
|
|
Whether to enable or disable simultaneous multithreading, or Important If you disable simultaneous multithreading, ensure that your capacity planning accounts for the dramatically decreased machine performance. |
|
|
|
Required if you use |
|
|
|
Required if you use |
|
|
| The number of compute machines, which are also known as worker machines, to provision. |
A positive integer greater than or equal to |
|
| The configuration for the machines that comprise the control plane. |
Array of |
|
|
Determines the instruction set architecture of the machines in the pool. Currently, heterogeneous clusters are not supported, so all pools must specify the same architecture. Valid values are | String |
|
|
Whether to enable or disable simultaneous multithreading, or Important If you disable simultaneous multithreading, ensure that your capacity planning accounts for the dramatically decreased machine performance. |
|
|
|
Required if you use |
|
|
|
Required if you use |
|
|
| The number of control plane machines to provision. |
The only supported value is |
|
| The Cloud Credential Operator (CCO) mode. If no mode is specified, the CCO dynamically tries to determine the capabilities of the provided credentials, with a preference for mint mode on the platforms where multiple modes are supported. Note Not all CCO modes are supported for all cloud providers. For more information on CCO modes, see the Cloud Credential Operator entry in the Cluster Operators reference content. |
|
|
|
Enable or disable FIPS mode. The default is Important
The use of FIPS Validated / Modules in Process cryptographic libraries is only supported on OpenShift Container Platform deployments on the Note If you are using Azure File storage, you cannot enable FIPS mode. |
|
|
| Sources and repositories for the release-image content. |
Array of objects. Includes a |
|
|
Required if you use | String |
|
| Specify one or more repositories that may also contain the same images. | Array of strings |
|
| How to publish or expose the user-facing endpoints of your cluster, such as the Kubernetes API, OpenShift routes. |
Setting this field to Important
If the value of the field is set to |
|
| The SSH key or keys to authenticate access your cluster machines. Note
For production OpenShift Container Platform clusters on which you want to perform installation debugging or disaster recovery, specify an SSH key that your | One or more keys. For example: |
12.4.14.4. Additional Red Hat OpenStack Platform (RHOSP) configuration parameters
Additional RHOSP configuration parameters are described in the following table:
| Parameter | Description | Values |
|---|---|---|
|
| For compute machines, the size in gigabytes of the root volume. If you do not set this value, machines use ephemeral storage. |
Integer, for example |
|
| For compute machines, the root volume’s type. |
String, for example |
|
| For control plane machines, the size in gigabytes of the root volume. If you do not set this value, machines use ephemeral storage. |
Integer, for example |
|
| For control plane machines, the root volume’s type. |
String, for example |
|
|
The name of the RHOSP cloud to use from the list of clouds in the |
String, for example |
|
| The RHOSP external network name to be used for installation. |
String, for example |
|
| The RHOSP flavor to use for control plane and compute machines.
This property is deprecated. To use a flavor as the default for all machine pools, add it as the value of the |
String, for example |
12.4.14.5. Optional RHOSP configuration parameters
Optional RHOSP configuration parameters are described in the following table:
| Parameter | Description | Values |
|---|---|---|
|
| Additional networks that are associated with compute machines. Allowed address pairs are not created for additional networks. |
A list of one or more UUIDs as strings. For example, |
|
| Additional security groups that are associated with compute machines. |
A list of one or more UUIDs as strings. For example, |
|
| RHOSP Compute (Nova) availability zones (AZs) to install machines on. If this parameter is not set, the installer relies on the default settings for Nova that the RHOSP administrator configured. On clusters that use Kuryr, RHOSP Octavia does not support availability zones. Load balancers and, if you are using the Amphora provider driver, OpenShift Container Platform services that rely on Amphora VMs, are not created according to the value of this property. |
A list of strings. For example, |
|
| Additional networks that are associated with control plane machines. Allowed address pairs are not created for additional networks. |
A list of one or more UUIDs as strings. For example, |
|
| Additional security groups that are associated with control plane machines. |
A list of one or more UUIDs as strings. For example, |
|
| RHOSP Compute (Nova) availability zones (AZs) to install machines on. If this parameter is not set, the installer relies on the default settings for Nova that the RHOSP administrator configured. On clusters that use Kuryr, RHOSP Octavia does not support availability zones. Load balancers and, if you are using the Amphora provider driver, OpenShift Container Platform services that rely on Amphora VMs, are not created according to the value of this property. |
A list of strings. For example, |
|
| The location from which the installer downloads the RHCOS image. You must set this parameter to perform an installation in a restricted network. | An HTTP or HTTPS URL, optionally with an SHA-256 checksum.
For example, |
|
|
Properties to add to the installer-uploaded ClusterOSImage in Glance. This property is ignored if
You can use this property to exceed the default persistent volume (PV) limit for RHOSP of 26 PVs per node. To exceed the limit, set the
You can also use this property to enable the QEMU guest agent by including the |
A list of key-value string pairs. For example, |
|
| The default machine pool platform configuration. |
|
|
|
An existing floating IP address to associate with the Ingress port. To use this property, you must also define the |
An IP address, for example |
|
|
An existing floating IP address to associate with the API load balancer. To use this property, you must also define the |
An IP address, for example |
|
| IP addresses for external DNS servers that cluster instances use for DNS resolution. |
A list of IP addresses as strings. For example, |
|
| The UUID of a RHOSP subnet that the cluster’s nodes use. Nodes and virtual IP (VIP) ports are created on this subnet.
The first item in If you deploy to a custom subnet, you cannot specify an external DNS server to the OpenShift Container Platform installer. Instead, add DNS to the subnet in RHOSP. |
A UUID as a string. For example, |
12.4.14.6. Custom subnets in RHOSP deployments
Optionally, you can deploy a cluster on a Red Hat OpenStack Platform (RHOSP) subnet of your choice. The subnet’s GUID is passed as the value of platform.openstack.machinesSubnet in the install-config.yaml file.
This subnet is used as the cluster’s primary subnet. By default, nodes and ports are created on it. You can create nodes and ports on a different RHOSP subnet by setting the value of the platform.openstack.machinesSubnet property to the subnet’s UUID.
Before you run the OpenShift Container Platform installer with a custom subnet, verify that your configuration meets the following requirements:
-
The subnet that is used by
platform.openstack.machinesSubnethas DHCP enabled. -
The CIDR of
platform.openstack.machinesSubnetmatches the CIDR ofnetworking.machineNetwork. - The installation program user has permission to create ports on this network, including ports with fixed IP addresses.
Clusters that use custom subnets have the following limitations:
-
If you plan to install a cluster that uses floating IP addresses, the
platform.openstack.machinesSubnetsubnet must be attached to a router that is connected to theexternalNetworknetwork. -
If the
platform.openstack.machinesSubnetvalue is set in theinstall-config.yamlfile, the installation program does not create a private network or subnet for your RHOSP machines. -
You cannot use the
platform.openstack.externalDNSproperty at the same time as a custom subnet. To add DNS to a cluster that uses a custom subnet, configure DNS on the RHOSP network.
By default, the API VIP takes x.x.x.5 and the Ingress VIP takes x.x.x.7 from your network’s CIDR block. To override these default values, set values for platform.openstack.apiVIP and platform.openstack.ingressVIP that are outside of the DHCP allocation pool.
12.4.14.7. Sample customized install-config.yaml file for RHOSP with Kuryr
To deploy with Kuryr SDN instead of the default OpenShift SDN, you must modify the install-config.yaml file to include Kuryr as the desired networking.networkType and proceed with the default OpenShift Container Platform SDN installation steps. This sample install-config.yaml demonstrates all of the possible Red Hat OpenStack Platform (RHOSP) customization options.
This sample file is provided for reference only. You must obtain your install-config.yaml file by using the installation program.
apiVersion: v1
baseDomain: example.com
controlPlane:
name: master
platform: {}
replicas: 3
compute:
- name: worker
platform:
openstack:
type: ml.large
replicas: 3
metadata:
name: example
networking:
clusterNetwork:
- cidr: 10.128.0.0/14
hostPrefix: 23
machineNetwork:
- cidr: 10.0.0.0/16
serviceNetwork:
- 172.30.0.0/16
networkType: Kuryr
platform:
openstack:
cloud: mycloud
externalNetwork: external
computeFlavor: m1.xlarge
apiFloatingIP: 128.0.0.1
trunkSupport: true
octaviaSupport: true
pullSecret: '{"auths": ...}'
sshKey: ssh-ed25519 AAAA...- 1
- The Amphora Octavia driver creates two ports per load balancer. As a result, the service subnet that the installer creates is twice the size of the CIDR that is specified as the value of the
serviceNetworkproperty. The larger range is required to prevent IP address conflicts. - 2 3
- Both
trunkSupportandoctaviaSupportare automatically discovered by the installer, so there is no need to set them. But if your environment does not meet both requirements, Kuryr SDN will not properly work. Trunks are needed to connect the pods to the RHOSP network and Octavia is required to create the OpenShift Container Platform services.
12.4.14.8. Kuryr ports pools
A Kuryr ports pool maintains a number of ports on standby for pod creation.
Keeping ports on standby minimizes pod creation time. Without ports pools, Kuryr must explicitly request port creation or deletion whenever a pod is created or deleted.
The Neutron ports that Kuryr uses are created in subnets that are tied to namespaces. These pod ports are also added as subports to the primary port of OpenShift Container Platform cluster nodes.
Because Kuryr keeps each namespace in a separate subnet, a separate ports pool is maintained for each namespace-worker pair.
Prior to installing a cluster, you can set the following parameters in the cluster-network-03-config.yml manifest file to configure ports pool behavior:
-
The
enablePortPoolsPrepopulationparameter controls pool prepopulation, which forces Kuryr to add ports to the pool when it is created, such as when a new host is added, or a new namespace is created. The default value isfalse. -
The
poolMinPortsparameter is the minimum number of free ports that are kept in the pool. The default value is1. The
poolMaxPortsparameter is the maximum number of free ports that are kept in the pool. A value of0disables that upper bound. This is the default setting.If your OpenStack port quota is low, or you have a limited number of IP addresses on the pod network, consider setting this option to ensure that unneeded ports are deleted.
-
The
poolBatchPortsparameter defines the maximum number of Neutron ports that can be created at once. The default value is3.
12.4.14.9. Adjusting Kuryr ports pools during installation
During installation, you can configure how Kuryr manages Red Hat OpenStack Platform (RHOSP) Neutron ports to control the speed and efficiency of pod creation.
Prerequisites
-
Create and modify the
install-config.yamlfile.
Procedure
From a command line, create the manifest files:
$ ./openshift-install create manifests --dir <installation_directory>1 - 1
- For
<installation_directory>, specify the name of the directory that contains theinstall-config.yamlfile for your cluster.
Create a file that is named
cluster-network-03-config.ymlin the<installation_directory>/manifests/directory:$ touch <installation_directory>/manifests/cluster-network-03-config.yml1 - 1
- For
<installation_directory>, specify the directory name that contains themanifests/directory for your cluster.
After creating the file, several network configuration files are in the
manifests/directory, as shown:$ ls <installation_directory>/manifests/cluster-network-*Example output
cluster-network-01-crd.yml cluster-network-02-config.yml cluster-network-03-config.ymlOpen the
cluster-network-03-config.ymlfile in an editor, and enter a custom resource (CR) that describes the Cluster Network Operator configuration that you want:$ oc edit networks.operator.openshift.io clusterEdit the settings to meet your requirements. The following file is provided as an example:
apiVersion: operator.openshift.io/v1 kind: Network metadata: name: cluster spec: clusterNetwork: - cidr: 10.128.0.0/14 hostPrefix: 23 serviceNetwork: - 172.30.0.0/16 defaultNetwork: type: Kuryr kuryrConfig: enablePortPoolsPrepopulation: false1 poolMinPorts: 12 poolBatchPorts: 33 poolMaxPorts: 54 openstackServiceNetwork: 172.30.0.0/155 - 1
- Set the value of
enablePortPoolsPrepopulationtotrueto make Kuryr create new Neutron ports after a namespace is created or a new node is added to the cluster. This setting raises the Neutron ports quota but can reduce the time that is required to spawn pods. The default value isfalse. - 2
- Kuryr creates new ports for a pool if the number of free ports in that pool is lower than the value of
poolMinPorts. The default value is1. - 3
poolBatchPortscontrols the number of new ports that are created if the number of free ports is lower than the value ofpoolMinPorts. The default value is3.- 4
- If the number of free ports in a pool is higher than the value of
poolMaxPorts, Kuryr deletes them until the number matches that value. Setting this value to0disables this upper bound, preventing pools from shrinking. The default value is0. - 5
- The
openStackServiceNetworkparameter defines the CIDR range of the network from which IP addresses are allocated to RHOSP Octavia’s LoadBalancers.
If this parameter is used with the Amphora driver, Octavia takes two IP addresses from this network for each load balancer: one for OpenShift and the other for VRRP connections. Because these IP addresses are managed by OpenShift Container Platform and Neutron respectively, they must come from different pools. Therefore, the value of
openStackServiceNetworkmust be at least twice the size of the value ofserviceNetwork, and the value ofserviceNetworkmust overlap entirely with the range that is defined byopenStackServiceNetwork.The CNO verifies that VRRP IP addresses that are taken from the range that is defined by this parameter do not overlap with the range that is defined by the
serviceNetworkparameter.If this parameter is not set, the CNO uses an expanded value of
serviceNetworkthat is determined by decrementing the prefix size by 1.-
Save the
cluster-network-03-config.ymlfile, and exit the text editor. -
Optional: Back up the
manifests/cluster-network-03-config.ymlfile. The installation program deletes themanifests/directory while creating the cluster.
12.4.14.10. Setting a custom subnet for machines
The IP range that the installation program uses by default might not match the Neutron subnet that you create when you install OpenShift Container Platform. If necessary, update the CIDR value for new machines by editing the installation configuration file.
Prerequisites
-
You have the
install-config.yamlfile that was generated by the OpenShift Container Platform installation program.
Procedure
-
On a command line, browse to the directory that contains
install-config.yaml. From that directory, either run a script to edit the
install-config.yamlfile or update the file manually:To set the value by using a script, run:
$ python -c ' import yaml; path = "install-config.yaml"; data = yaml.safe_load(open(path)); data["networking"]["machineNetwork"] = [{"cidr": "192.168.0.0/18"}];1 open(path, "w").write(yaml.dump(data, default_flow_style=False))'- 1
- Insert a value that matches your intended Neutron subnet, e.g.
192.0.2.0/24.
-
To set the value manually, open the file and set the value of
networking.machineCIDRto something that matches your intended Neutron subnet.
12.4.14.11. Emptying compute machine pools
To proceed with an installation that uses your own infrastructure, set the number of compute machines in the installation configuration file to zero. Later, you create these machines manually.
Prerequisites
-
You have the
install-config.yamlfile that was generated by the OpenShift Container Platform installation program.
Procedure
-
On a command line, browse to the directory that contains
install-config.yaml. From that directory, either run a script to edit the
install-config.yamlfile or update the file manually:To set the value by using a script, run:
$ python -c ' import yaml; path = "install-config.yaml"; data = yaml.safe_load(open(path)); data["compute"][0]["replicas"] = 0; open(path, "w").write(yaml.dump(data, default_flow_style=False))'-
To set the value manually, open the file and set the value of
compute.<first entry>.replicasto0.
12.4.14.12. Modifying the network type
By default, the installation program selects the OpenShiftSDN network type. To use Kuryr instead, change the value in the installation configuration file that the program generated.
Prerequisites
-
You have the file
install-config.yamlthat was generated by the OpenShift Container Platform installation program
Procedure
-
In a command prompt, browse to the directory that contains
install-config.yaml. From that directory, either run a script to edit the
install-config.yamlfile or update the file manually:To set the value by using a script, run:
$ python -c ' import yaml; path = "install-config.yaml"; data = yaml.safe_load(open(path)); data["networking"]["networkType"] = "Kuryr"; open(path, "w").write(yaml.dump(data, default_flow_style=False))'-
To set the value manually, open the file and set
networking.networkTypeto"Kuryr".
12.4.15. Creating the Kubernetes manifest and Ignition config files
Because you must modify some cluster definition files and manually start the cluster machines, you must generate the Kubernetes manifest and Ignition config files that the cluster needs to make its machines.
The installation configuration file transforms into the Kubernetes manifests. The manifests wrap into the Ignition configuration files, which are later used to create the cluster.
The Ignition config files that the installation program generates contain certificates that expire after 24 hours, which are then renewed at that time. If the cluster is shut down before renewing the certificates and the cluster is later restarted after the 24 hours have elapsed, the cluster automatically recovers the expired certificates. The exception is that you must manually approve the pending node-bootstrapper certificate signing requests (CSRs) to recover kubelet certificates. See the documentation for Recovering from expired control plane certificates for more information.
The installation program that generates the manifest and Ignition files is architecture specific and can be obtained from the client image mirror. The Linux version of the installation program runs on s390x only. This installer program is also available as a Mac OS version.
Prerequisites
- You obtained the OpenShift Container Platform installation program.
-
You created the
install-config.yamlinstallation configuration file.
Procedure
Change to the directory that contains the installation program and generate the Kubernetes manifests for the cluster:
$ ./openshift-install create manifests --dir <installation_directory>1 - 1
- For
<installation_directory>, specify the installation directory that contains theinstall-config.yamlfile you created.
Remove the Kubernetes manifest files that define the control plane machines and compute machine sets:
$ rm -f openshift/99_openshift-cluster-api_master-machines-*.yaml openshift/99_openshift-cluster-api_worker-machineset-*.yamlBecause you create and manage these resources yourself, you do not have to initialize them.
- You can preserve the machine set files to create compute machines by using the machine API, but you must update references to them to match your environment.
WarningIf you are installing a three-node cluster, skip the following step to allow the control plane nodes to be schedulable.
+
ImportantWhen you configure control plane nodes from the default unschedulable to schedulable, additional subscriptions are required. This is because control plane nodes then become worker nodes.
Check that the
mastersSchedulableparameter in the<installation_directory>/manifests/cluster-scheduler-02-config.ymlKubernetes manifest file is set tofalse. This setting prevents pods from being scheduled on the control plane machines:-
Open the
<installation_directory>/manifests/cluster-scheduler-02-config.ymlfile. -
Locate the
mastersSchedulableparameter and ensure that it is set tofalse. - Save and exit the file.
-
Open the
To create the Ignition configuration files, run the following command from the directory that contains the installation program:
$ ./openshift-install create ignition-configs --dir <installation_directory>1 - 1
- For
<installation_directory>, specify the same installation directory.
The following files are generated in the directory:
. ├── auth │ ├── kubeadmin-password │ └── kubeconfig ├── bootstrap.ign ├── master.ign ├── metadata.json └── worker.ignExport the metadata file’s
infraIDkey as an environment variable:$ export INFRA_ID=$(jq -r .infraID metadata.json)
Extract the infraID key from metadata.json and use it as a prefix for all of the RHOSP resources that you create. By doing so, you avoid name conflicts when making multiple deployments in the same project.
12.4.16. Preparing the bootstrap Ignition files
The OpenShift Container Platform installation process relies on bootstrap machines that are created from a bootstrap Ignition configuration file.
Edit the file and upload it. Then, create a secondary bootstrap Ignition configuration file that Red Hat OpenStack Platform (RHOSP) uses to download the primary file.
Prerequisites
-
You have the bootstrap Ignition file that the installer program generates,
bootstrap.ign. The infrastructure ID from the installer’s metadata file is set as an environment variable (
$INFRA_ID).- If the variable is not set, see Creating the Kubernetes manifest and Ignition config files.
You have an HTTP(S)-accessible way to store the bootstrap Ignition file.
- The documented procedure uses the RHOSP image service (Glance), but you can also use the RHOSP storage service (Swift), Amazon S3, an internal HTTP server, or an ad hoc Nova server.
Procedure
Run the following Python script. The script modifies the bootstrap Ignition file to set the hostname and, if available, CA certificate file when it runs:
import base64 import json import os with open('bootstrap.ign', 'r') as f: ignition = json.load(f) files = ignition['storage'].get('files', []) infra_id = os.environ.get('INFRA_ID', 'openshift').encode() hostname_b64 = base64.standard_b64encode(infra_id + b'-bootstrap\n').decode().strip() files.append( { 'path': '/etc/hostname', 'mode': 420, 'contents': { 'source': 'data:text/plain;charset=utf-8;base64,' + hostname_b64 } }) ca_cert_path = os.environ.get('OS_CACERT', '') if ca_cert_path: with open(ca_cert_path, 'r') as f: ca_cert = f.read().encode() ca_cert_b64 = base64.standard_b64encode(ca_cert).decode().strip() files.append( { 'path': '/opt/openshift/tls/cloud-ca-cert.pem', 'mode': 420, 'contents': { 'source': 'data:text/plain;charset=utf-8;base64,' + ca_cert_b64 } }) ignition['storage']['files'] = files; with open('bootstrap.ign', 'w') as f: json.dump(ignition, f)Using the RHOSP CLI, create an image that uses the bootstrap Ignition file:
$ openstack image create --disk-format=raw --container-format=bare --file bootstrap.ign <image_name>Get the image’s details:
$ openstack image show <image_name>Make a note of the
filevalue; it follows the patternv2/images/<image_ID>/file.NoteVerify that the image you created is active.
Retrieve the image service’s public address:
$ openstack catalog show image-
Combine the public address with the image
filevalue and save the result as the storage location. The location follows the pattern<image_service_public_URL>/v2/images/<image_ID>/file. Generate an auth token and save the token ID:
$ openstack token issue -c id -f valueInsert the following content into a file called
$INFRA_ID-bootstrap-ignition.jsonand edit the placeholders to match your own values:{ "ignition": { "config": { "merge": [{ "source": "<storage_url>",1 "httpHeaders": [{ "name": "X-Auth-Token",2 "value": "<token_ID>"3 }] }] }, "security": { "tls": { "certificateAuthorities": [{ "source": "data:text/plain;charset=utf-8;base64,<base64_encoded_certificate>"4 }] } }, "version": "3.2.0" } }- 1
- Replace the value of
ignition.config.merge.sourcewith the bootstrap Ignition file storage URL. - 2
- Set
nameinhttpHeadersto"X-Auth-Token". - 3
- Set
valueinhttpHeadersto your token’s ID. - 4
- If the bootstrap Ignition file server uses a self-signed certificate, include the base64-encoded certificate.
- Save the secondary Ignition config file.
The bootstrap Ignition data will be passed to RHOSP during installation.
The bootstrap Ignition file contains sensitive information, like clouds.yaml credentials. Ensure that you store it in a secure place, and delete it after you complete the installation process.
12.4.17. Creating control plane Ignition config files on RHOSP
Installing OpenShift Container Platform on Red Hat OpenStack Platform (RHOSP) on your own infrastructure requires control plane Ignition config files. You must create multiple config files.
As with the bootstrap Ignition configuration, you must explicitly define a hostname for each control plane machine.
Prerequisites
The infrastructure ID from the installation program’s metadata file is set as an environment variable (
$INFRA_ID).- If the variable is not set, see "Creating the Kubernetes manifest and Ignition config files".
Procedure
On a command line, run the following Python script:
$ for index in $(seq 0 2); do MASTER_HOSTNAME="$INFRA_ID-master-$index\n" python -c "import base64, json, sys; ignition = json.load(sys.stdin); storage = ignition.get('storage', {}); files = storage.get('files', []); files.append({'path': '/etc/hostname', 'mode': 420, 'contents': {'source': 'data:text/plain;charset=utf-8;base64,' + base64.standard_b64encode(b'$MASTER_HOSTNAME').decode().strip(), 'verification': {}}, 'filesystem': 'root'}); storage['files'] = files; ignition['storage'] = storage json.dump(ignition, sys.stdout)" <master.ign >"$INFRA_ID-master-$index-ignition.json" doneYou now have three control plane Ignition files:
<INFRA_ID>-master-0-ignition.json,<INFRA_ID>-master-1-ignition.json, and<INFRA_ID>-master-2-ignition.json.
12.4.18. Creating network resources on RHOSP
Create the network resources that an OpenShift Container Platform on Red Hat OpenStack Platform (RHOSP) installation on your own infrastructure requires. To save time, run supplied Ansible playbooks that generate security groups, networks, subnets, routers, and ports.
Prerequisites
- Python 3 is installed on your machine.
- You downloaded the modules in "Downloading playbook dependencies".
- You downloaded the playbooks in "Downloading the installation playbooks".
Procedure
Optional: Add an external network value to the
inventory.yamlplaybook:Example external network value in the
inventory.yamlAnsible playbook... # The public network providing connectivity to the cluster. If not # provided, the cluster external connectivity must be provided in another # way. # Required for os_api_fip, os_ingress_fip, os_bootstrap_fip. os_external_network: 'external' ...ImportantIf you did not provide a value for
os_external_networkin theinventory.yamlfile, you must ensure that VMs can access Glance and an external connection yourself.Optional: Add external network and floating IP (FIP) address values to the
inventory.yamlplaybook:Example FIP values in the
inventory.yamlAnsible playbook... # OpenShift API floating IP address. If this value is non-empty, the # corresponding floating IP will be attached to the Control Plane to # serve the OpenShift API. os_api_fip: '203.0.113.23' # OpenShift Ingress floating IP address. If this value is non-empty, the # corresponding floating IP will be attached to the worker nodes to serve # the applications. os_ingress_fip: '203.0.113.19' # If this value is non-empty, the corresponding floating IP will be # attached to the bootstrap machine. This is needed for collecting logs # in case of install failure. os_bootstrap_fip: '203.0.113.20'ImportantIf you do not define values for
os_api_fipandos_ingress_fip, you must perform post-installation network configuration.If you do not define a value for
os_bootstrap_fip, the installer cannot download debugging information from failed installations.See "Enabling access to the environment" for more information.
On a command line, create security groups by running the
security-groups.yamlplaybook:$ ansible-playbook -i inventory.yaml security-groups.yamlOn a command line, create a network, subnet, and router by running the
network.yamlplaybook:$ ansible-playbook -i inventory.yaml network.yamlOptional: If you want to control the default resolvers that Nova servers use, run the RHOSP CLI command:
$ openstack subnet set --dns-nameserver <server_1> --dns-nameserver <server_2> "$INFRA_ID-nodes"
12.4.19. Creating the bootstrap machine on RHOSP
Create a bootstrap machine and give it the network access it needs to run on Red Hat OpenStack Platform (RHOSP). Red Hat provides an Ansible playbook that you run to simplify this process.
Prerequisites
- You downloaded the modules in "Downloading playbook dependencies".
- You downloaded the playbooks in "Downloading the installation playbooks".
-
The
inventory.yaml,common.yaml, andbootstrap.yamlAnsible playbooks are in a common directory. -
The
metadata.jsonfile that the installation program created is in the same directory as the Ansible playbooks.
Procedure
- On a command line, change the working directory to the location of the playbooks.
On a command line, run the
bootstrap.yamlplaybook:$ ansible-playbook -i inventory.yaml bootstrap.yamlAfter the bootstrap server is active, view the logs to verify that the Ignition files were received:
$ openstack console log show "$INFRA_ID-bootstrap"
12.4.20. Creating the control plane machines on RHOSP
Create three control plane machines by using the Ignition config files that you generated. Red Hat provides an Ansible playbook that you run to simplify this process.
Prerequisites
- You downloaded the modules in "Downloading playbook dependencies".
- You downloaded the playbooks in "Downloading the installation playbooks".
-
The infrastructure ID from the installation program’s metadata file is set as an environment variable (
$INFRA_ID). -
The
inventory.yaml,common.yaml, andcontrol-plane.yamlAnsible playbooks are in a common directory. - You have the three Ignition files that were created in "Creating control plane Ignition config files".
Procedure
- On a command line, change the working directory to the location of the playbooks.
- If the control plane Ignition config files aren’t already in your working directory, copy them into it.
On a command line, run the
control-plane.yamlplaybook:$ ansible-playbook -i inventory.yaml control-plane.yamlRun the following command to monitor the bootstrapping process:
$ openshift-install wait-for bootstrap-completeYou will see messages that confirm that the control plane machines are running and have joined the cluster:
INFO API v1.14.6+f9b5405 up INFO Waiting up to 30m0s for bootstrapping to complete... ... INFO It is now safe to remove the bootstrap resources
12.4.21. Logging in to the cluster by using the CLI
You can log in to your cluster as a default system user by exporting the cluster kubeconfig file. The kubeconfig file contains information about the cluster that is used by the CLI to connect a client to the correct cluster and API server. The file is specific to a cluster and is created during OpenShift Container Platform installation.
Prerequisites
- You deployed an OpenShift Container Platform cluster.
-
You installed the
ocCLI.
Procedure
Export the
kubeadmincredentials:$ export KUBECONFIG=<installation_directory>/auth/kubeconfig1 - 1
- For
<installation_directory>, specify the path to the directory that you stored the installation files in.
Verify you can run
occommands successfully using the exported configuration:$ oc whoamiExample output
system:admin
12.4.22. Deleting bootstrap resources from RHOSP
Delete the bootstrap resources that you no longer need.
Prerequisites
- You downloaded the modules in "Downloading playbook dependencies".
- You downloaded the playbooks in "Downloading the installation playbooks".
-
The
inventory.yaml,common.yaml, anddown-bootstrap.yamlAnsible playbooks are in a common directory. The control plane machines are running.
- If you do not know the status of the machines, see "Verifying cluster status".
Procedure
- On a command line, change the working directory to the location of the playbooks.
On a command line, run the
down-bootstrap.yamlplaybook:$ ansible-playbook -i inventory.yaml down-bootstrap.yaml
The bootstrap port, server, and floating IP address are deleted.
If you did not disable the bootstrap Ignition file URL earlier, do so now.
12.4.23. Creating compute machines on RHOSP
After standing up the control plane, create compute machines. Red Hat provides an Ansible playbook that you run to simplify this process.
Prerequisites
- You downloaded the modules in "Downloading playbook dependencies".
- You downloaded the playbooks in "Downloading the installation playbooks".
-
The
inventory.yaml,common.yaml, andcompute-nodes.yamlAnsible playbooks are in a common directory. -
The
metadata.jsonfile that the installation program created is in the same directory as the Ansible playbooks. - The control plane is active.
Procedure
- On a command line, change the working directory to the location of the playbooks.
On a command line, run the playbook:
$ ansible-playbook -i inventory.yaml compute-nodes.yaml
Next steps
- Approve the certificate signing requests for the machines.
12.4.24. Approving the certificate signing requests for your machines
When you add machines to a cluster, two pending certificate signing requests (CSRs) are generated for each machine that you added. You must confirm that these CSRs are approved or, if necessary, approve them yourself. The client requests must be approved first, followed by the server requests.
Prerequisites
- You added machines to your cluster.
Procedure
Confirm that the cluster recognizes the machines:
$ oc get nodesExample output
NAME STATUS ROLES AGE VERSION master-0 Ready master 63m v1.20.0 master-1 Ready master 63m v1.20.0 master-2 Ready master 64m v1.20.0The output lists all of the machines that you created.
NoteThe preceding output might not include the compute nodes, also known as worker nodes, until some CSRs are approved.
Review the pending CSRs and ensure that you see the client requests with the
PendingorApprovedstatus for each machine that you added to the cluster:$ oc get csrExample output
NAME AGE REQUESTOR CONDITION csr-mddf5 20m system:node:master-01.example.com Approved,Issued csr-z5rln 16m system:node:worker-21.example.com Approved,IssuedIf the CSRs were not approved, after all of the pending CSRs for the machines you added are in
Pendingstatus, approve the CSRs for your cluster machines:NoteBecause the CSRs rotate automatically, approve your CSRs within an hour of adding the machines to the cluster. If you do not approve them within an hour, the certificates will rotate, and more than two certificates will be present for each node. You must approve all of these certificates. Once the client CSR is approved, the Kubelet creates a secondary CSR for the serving certificate, which requires manual approval. Then, subsequent serving certificate renewal requests are automatically approved by the
machine-approverif the Kubelet requests a new certificate with identical parameters.NoteFor clusters running on platforms that are not machine API enabled, such as bare metal and other user-provisioned infrastructure, you must implement a method of automatically approving the kubelet serving certificate requests (CSRs). If a request is not approved, then the
oc exec,oc rsh, andoc logscommands cannot succeed, because a serving certificate is required when the API server connects to the kubelet. Any operation that contacts the Kubelet endpoint requires this certificate approval to be in place. The method must watch for new CSRs, confirm that the CSR was submitted by thenode-bootstrapperservice account in thesystem:nodeorsystem:admingroups, and confirm the identity of the node.To approve them individually, run the following command for each valid CSR:
$ oc adm certificate approve <csr_name>1 - 1
<csr_name>is the name of a CSR from the list of current CSRs.
To approve all pending CSRs, run the following command:
$ oc get csr -o go-template='{{range .items}}{{if not .status}}{{.metadata.name}}{{"\n"}}{{end}}{{end}}' | xargs --no-run-if-empty oc adm certificate approveNoteSome Operators might not become available until some CSRs are approved.
Now that your client requests are approved, you must review the server requests for each machine that you added to the cluster:
$ oc get csrExample output
NAME AGE REQUESTOR CONDITION csr-bfd72 5m26s system:node:ip-10-0-50-126.us-east-2.compute.internal Pending csr-c57lv 5m26s system:node:ip-10-0-95-157.us-east-2.compute.internal Pending ...If the remaining CSRs are not approved, and are in the
Pendingstatus, approve the CSRs for your cluster machines:To approve them individually, run the following command for each valid CSR:
$ oc adm certificate approve <csr_name>1 - 1
<csr_name>is the name of a CSR from the list of current CSRs.
To approve all pending CSRs, run the following command:
$ oc get csr -o go-template='{{range .items}}{{if not .status}}{{.metadata.name}}{{"\n"}}{{end}}{{end}}' | xargs oc adm certificate approve
After all client and server CSRs have been approved, the machines have the
Readystatus. Verify this by running the following command:$ oc get nodesExample output
NAME STATUS ROLES AGE VERSION master-0 Ready master 73m v1.20.0 master-1 Ready master 73m v1.20.0 master-2 Ready master 74m v1.20.0 worker-0 Ready worker 11m v1.20.0 worker-1 Ready worker 11m v1.20.0NoteIt can take a few minutes after approval of the server CSRs for the machines to transition to the
Readystatus.
Additional information
- For more information on CSRs, see Certificate Signing Requests.
12.4.25. Verifying a successful installation
Verify that the OpenShift Container Platform installation is complete.
Prerequisites
-
You have the installation program (
openshift-install)
Procedure
On a command line, enter:
$ openshift-install --log-level debug wait-for install-complete
The program outputs the console URL, as well as the administrator’s login information.
12.4.26. Telemetry access for OpenShift Container Platform
In OpenShift Container Platform 4.7, the Telemetry service, which runs by default to provide metrics about cluster health and the success of updates, requires internet access. If your cluster is connected to the internet, Telemetry runs automatically, and your cluster is registered to OpenShift Cluster Manager.
After you confirm that your OpenShift Cluster Manager inventory is correct, either maintained automatically by Telemetry or manually by using OpenShift Cluster Manager, use subscription watch to track your OpenShift Container Platform subscriptions at the account or multi-cluster level.
12.4.27. Next steps
- Customize your cluster.
- If necessary, you can opt out of remote health reporting.
- If you need to enable external access to node ports, configure ingress cluster traffic by using a node port.
- If you did not configure RHOSP to accept application traffic over floating IP addresses, configure RHOSP access with floating IP addresses.
12.5. Installing a cluster on OpenStack on your own SR-IOV infrastructure
In OpenShift Container Platform 4.7, you can install a cluster on Red Hat OpenStack Platform (RHOSP) that runs on user-provisioned infrastructure and uses single-root input/output virtualization (SR-IOV) networks to run compute machines.
Using your own infrastructure allows you to integrate your cluster with existing infrastructure and modifications. The process requires more labor on your part than installer-provisioned installations, because you must create all RHOSP resources, such as Nova servers, Neutron ports, and security groups. However, Red Hat provides Ansible playbooks to help you in the deployment process.
12.5.1. Prerequisites
Review details about the OpenShift Container Platform installation and update processes.
- Verify that OpenShift Container Platform 4.7 is compatible with your RHOSP version by using the "Supported platforms for OpenShift clusters" section. You can also compare platform support across different versions by viewing the OpenShift Container Platform on RHOSP support matrix.
- Verify that your network configuration does not rely on a provider network. Provider networks are not supported.
- Have an RHOSP account where you want to install OpenShift Container Platform.
On the machine where you run the installation program, have:
- A single directory in which you can keep the files you create during the installation process
- Python 3
12.5.2. Internet access for OpenShift Container Platform
In OpenShift Container Platform 4.7, you require access to the Internet to install your cluster.
You must have Internet access to:
- Access OpenShift Cluster Manager to download the installation program and perform subscription management. If the cluster has internet access and you do not disable Telemetry, that service automatically entitles your cluster.
- Access Quay.io to obtain the packages that are required to install your cluster.
- Obtain the packages that are required to perform cluster updates.
If your cluster cannot have direct Internet access, you can perform a restricted network installation on some types of infrastructure that you provision. During that process, you download the content that is required and use it to populate a mirror registry with the packages that you need to install a cluster and generate the installation program. With some installation types, the environment that you install your cluster in will not require Internet access. Before you update the cluster, you update the content of the mirror registry.
12.5.3. Resource guidelines for installing OpenShift Container Platform on RHOSP
To support an OpenShift Container Platform installation, your Red Hat OpenStack Platform (RHOSP) quota must meet the following requirements:
| Resource | Value |
|---|---|
| Floating IP addresses | 3 |
| Ports | 15 |
| Routers | 1 |
| Subnets | 1 |
| RAM | 112 GB |
| vCPUs | 28 |
| Volume storage | 275 GB |
| Instances | 7 |
| Security groups | 3 |
| Security group rules | 60 |
A cluster might function with fewer than recommended resources, but its performance is not guaranteed.
If RHOSP object storage (Swift) is available and operated by a user account with the swiftoperator role, it is used as the default backend for the OpenShift Container Platform image registry. In this case, the volume storage requirement is 175 GB. Swift space requirements vary depending on the size of the image registry.
By default, your security group and security group rule quotas might be low. If you encounter problems, run openstack quota set --secgroups 3 --secgroup-rules 60 <project> as an administrator to increase them.
An OpenShift Container Platform deployment comprises control plane machines, compute machines, and a bootstrap machine.
12.5.3.1. Control plane machines
By default, the OpenShift Container Platform installation process creates three control plane machines.
Each machine requires:
- An instance from the RHOSP quota
- A port from the RHOSP quota
- A flavor with at least 16 GB memory, 4 vCPUs, and 100 GB storage space
12.5.3.2. Compute machines
By default, the OpenShift Container Platform installation process creates three compute machines.
Each machine requires:
- An instance from the RHOSP quota
- A port from the RHOSP quota
- A flavor with at least 8 GB memory, 2 vCPUs, and 100 GB storage space
Compute machines host the applications that you run on OpenShift Container Platform; aim to run as many as you can.
Additionally, for clusters that use single-root input/output virtualization (SR-IOV), RHOSP compute nodes require a flavor that supports huge pages.
SR-IOV deployments often employ performance optimizations, such as dedicated or isolated CPUs. For maximum performance, configure your underlying RHOSP deployment to use these optimizations, and then run OpenShift Container Platform compute machines on the optimized infrastructure.
12.5.3.3. Bootstrap machine
During installation, a bootstrap machine is temporarily provisioned to stand up the control plane. After the production control plane is ready, the bootstrap machine is deprovisioned.
The bootstrap machine requires:
- An instance from the RHOSP quota
- A port from the RHOSP quota
- A flavor with at least 16 GB memory, 4 vCPUs, and 100 GB storage space
12.5.4. Downloading playbook dependencies
The Ansible playbooks that simplify the installation process on user-provisioned infrastructure require several Python modules. On the machine where you will run the installer, add the modules' repositories and then download them.
These instructions assume that you are using Red Hat Enterprise Linux (RHEL) 8.
Prerequisites
- Python 3 is installed on your machine.
Procedure
On a command line, add the repositories:
Register with Red Hat Subscription Manager:
$ sudo subscription-manager register # If not done alreadyPull the latest subscription data:
$ sudo subscription-manager attach --pool=$YOUR_POOLID # If not done alreadyDisable the current repositories:
$ sudo subscription-manager repos --disable=* # If not done alreadyAdd the required repositories:
$ sudo subscription-manager repos \ --enable=rhel-8-for-x86_64-baseos-rpms \ --enable=openstack-16-tools-for-rhel-8-x86_64-rpms \ --enable=ansible-2.9-for-rhel-8-x86_64-rpms \ --enable=rhel-8-for-x86_64-appstream-rpms
Install the modules:
$ sudo yum install python3-openstackclient ansible python3-openstacksdk python3-netaddrEnsure that the
pythoncommand points topython3:$ sudo alternatives --set python /usr/bin/python3
12.5.5. Downloading the installation playbooks
Download Ansible playbooks that you can use to install OpenShift Container Platform on your own Red Hat OpenStack Platform (RHOSP) infrastructure.
Prerequisites
- The curl command-line tool is available on your machine.
Procedure
To download the playbooks to your working directory, run the following script from a command line:
$ xargs -n 1 curl -O <<< ' https://raw.githubusercontent.com/openshift/installer/release-4.7/upi/openstack/bootstrap.yaml https://raw.githubusercontent.com/openshift/installer/release-4.7/upi/openstack/common.yaml https://raw.githubusercontent.com/openshift/installer/release-4.7/upi/openstack/compute-nodes.yaml https://raw.githubusercontent.com/openshift/installer/release-4.7/upi/openstack/control-plane.yaml https://raw.githubusercontent.com/openshift/installer/release-4.7/upi/openstack/inventory.yaml https://raw.githubusercontent.com/openshift/installer/release-4.7/upi/openstack/network.yaml https://raw.githubusercontent.com/openshift/installer/release-4.7/upi/openstack/security-groups.yaml https://raw.githubusercontent.com/openshift/installer/release-4.7/upi/openstack/down-bootstrap.yaml https://raw.githubusercontent.com/openshift/installer/release-4.7/upi/openstack/down-compute-nodes.yaml https://raw.githubusercontent.com/openshift/installer/release-4.7/upi/openstack/down-control-plane.yaml https://raw.githubusercontent.com/openshift/installer/release-4.7/upi/openstack/down-load-balancers.yaml https://raw.githubusercontent.com/openshift/installer/release-4.7/upi/openstack/down-network.yaml https://raw.githubusercontent.com/openshift/installer/release-4.7/upi/openstack/down-security-groups.yaml https://raw.githubusercontent.com/openshift/installer/release-4.7/upi/openstack/down-containers.yaml'
The playbooks are downloaded to your machine.
During the installation process, you can modify the playbooks to configure your deployment.
Retain all playbooks for the life of your cluster. You must have the playbooks to remove your OpenShift Container Platform cluster from RHOSP.
You must match any edits you make in the bootstrap.yaml, compute-nodes.yaml, control-plane.yaml, network.yaml, and security-groups.yaml files to the corresponding playbooks that are prefixed with down-. For example, edits to the bootstrap.yaml file must be reflected in the down-bootstrap.yaml file, too. If you do not edit both files, the supported cluster removal process will fail.
12.5.6. Obtaining the installation program
Before you install OpenShift Container Platform, download the installation file on your provisioning machine.
Prerequisites
- You have a machine that runs Linux, for example Red Hat Enterprise Linux 8, with 500 MB of local disk space
Procedure
- Access the Infrastructure Provider page on the OpenShift Cluster Manager site. If you have a Red Hat account, log in with your credentials. If you do not, create an account.
- Select your infrastructure provider.
Navigate to the page for your installation type, download the installation program for your operating system, and place the file in the directory where you will store the installation configuration files.
ImportantThe installation program creates several files on the computer that you use to install your cluster. You must keep the installation program and the files that the installation program creates after you finish installing the cluster. Both files are required to delete the cluster.
ImportantDeleting the files created by the installation program does not remove your cluster, even if the cluster failed during installation. To remove your cluster, complete the OpenShift Container Platform uninstallation procedures for your specific cloud provider.
Extract the installation program. For example, on a computer that uses a Linux operating system, run the following command:
$ tar xvf openshift-install-linux.tar.gz- Download your installation pull secret from the Red Hat OpenShift Cluster Manager. This pull secret allows you to authenticate with the services that are provided by the included authorities, including Quay.io, which serves the container images for OpenShift Container Platform components.
12.5.7. Generating an SSH private key and adding it to the agent
If you want to perform installation debugging or disaster recovery on your cluster, you must provide an SSH key to both your ssh-agent and the installation program. You can use this key to access the bootstrap machine in a public cluster to troubleshoot installation issues.
In a production environment, you require disaster recovery and debugging.
Do not skip this procedure in production environments where disaster recovery and debugging is required.
You can use this key to SSH into the master nodes as the user core. When you deploy the cluster, the key is added to the core user’s ~/.ssh/authorized_keys list.
Procedure
If you do not have an SSH key that is configured for password-less authentication on your computer, create one. For example, on a computer that uses a Linux operating system, run the following command:
$ ssh-keygen -t ed25519 -N '' \ -f <path>/<file_name>1 - 1
- Specify the path and file name, such as
~/.ssh/id_rsa, of the new SSH key. If you have an existing key pair, ensure your public key is in the your~/.sshdirectory.
Running this command generates an SSH key that does not require a password in the location that you specified.
NoteIf you plan to install an OpenShift Container Platform cluster that uses FIPS Validated / Modules in Process cryptographic libraries on the
x86_64architecture, do not create a key that uses theed25519algorithm. Instead, create a key that uses thersaorecdsaalgorithm.Start the
ssh-agentprocess as a background task:$ eval "$(ssh-agent -s)"Example output
Agent pid 31874NoteIf your cluster is in FIPS mode, only use FIPS-compliant algorithms to generate the SSH key. The key must be either RSA or ECDSA.
Add your SSH private key to the
ssh-agent:$ ssh-add <path>/<file_name>1 Example output
Identity added: /home/<you>/<path>/<file_name> (<computer_name>)- 1
- Specify the path and file name for your SSH private key, such as
~/.ssh/id_rsa
Next steps
- When you install OpenShift Container Platform, provide the SSH public key to the installation program.
12.5.8. Creating the Red Hat Enterprise Linux CoreOS (RHCOS) image
The OpenShift Container Platform installation program requires that a Red Hat Enterprise Linux CoreOS (RHCOS) image be present in the Red Hat OpenStack Platform (RHOSP) cluster. Retrieve the latest RHCOS image, then upload it using the RHOSP CLI.
Prerequisites
- The RHOSP CLI is installed.
Procedure
- Log in to the Red Hat Customer Portal’s Product Downloads page.
Under Version, select the most recent release of OpenShift Container Platform 4.7 for Red Hat Enterprise Linux (RHEL) 8.
ImportantThe RHCOS images might not change with every release of OpenShift Container Platform. You must download images with the highest version that is less than or equal to the OpenShift Container Platform version that you install. Use the image versions that match your OpenShift Container Platform version if they are available.
- Download the Red Hat Enterprise Linux CoreOS (RHCOS) - OpenStack Image (QCOW).
Decompress the image.
NoteYou must decompress the RHOSP image before the cluster can use it. The name of the downloaded file might not contain a compression extension, like
.gzor.tgz. To find out if or how the file is compressed, in a command line, enter:$ file <name_of_downloaded_file>From the image that you downloaded, create an image that is named
rhcosin your cluster by using the RHOSP CLI:$ openstack image create --container-format=bare --disk-format=qcow2 --file rhcos-${RHCOS_VERSION}-openstack.qcow2 rhcosImportantDepending on your RHOSP environment, you might be able to upload the image in either
.rawor.qcow2formats. If you use Ceph, you must use the.rawformat.WarningIf the installation program finds multiple images with the same name, it chooses one of them at random. To avoid this behavior, create unique names for resources in RHOSP.
After you upload the image to RHOSP, it is usable in the installation process.
12.5.9. Verifying external network access
The OpenShift Container Platform installation process requires external network access. You must provide an external network value to it, or deployment fails. Before you begin the process, verify that a network with the external router type exists in Red Hat OpenStack Platform (RHOSP).
Prerequisites
Procedure
Using the RHOSP CLI, verify the name and ID of the 'External' network:
$ openstack network list --long -c ID -c Name -c "Router Type"Example output
+--------------------------------------+----------------+-------------+ | ID | Name | Router Type | +--------------------------------------+----------------+-------------+ | 148a8023-62a7-4672-b018-003462f8d7dc | public_network | External | +--------------------------------------+----------------+-------------+
A network with an external router type appears in the network list. If at least one does not, see Creating a default floating IP network and Creating a default provider network.
If the Neutron trunk service plug-in is enabled, a trunk port is created by default. For more information, see Neutron trunk port.
12.5.10. Enabling access to the environment
At deployment, all OpenShift Container Platform machines are created in a Red Hat OpenStack Platform (RHOSP)-tenant network. Therefore, they are not accessible directly in most RHOSP deployments.
You can configure OpenShift Container Platform API and application access by using floating IP addresses (FIPs) during installation. You can also complete an installation without configuring FIPs, but the installer will not configure a way to reach the API or applications externally.
12.5.10.1. Enabling access with floating IP addresses
Create floating IP (FIP) addresses for external access to the OpenShift Container Platform API, cluster applications, and the bootstrap process.
Procedure
Using the Red Hat OpenStack Platform (RHOSP) CLI, create the API FIP:
$ openstack floating ip create --description "API <cluster_name>.<base_domain>" <external_network>Using the Red Hat OpenStack Platform (RHOSP) CLI, create the apps, or Ingress, FIP:
$ openstack floating ip create --description "Ingress <cluster_name>.<base_domain>" <external_network>By using the Red Hat OpenStack Platform (RHOSP) CLI, create the bootstrap FIP:
$ openstack floating ip create --description "bootstrap machine" <external_network>Add records that follow these patterns to your DNS server for the API and Ingress FIPs:
api.<cluster_name>.<base_domain>. IN A <API_FIP> *.apps.<cluster_name>.<base_domain>. IN A <apps_FIP>NoteIf you do not control the DNS server, you can access the cluster by adding the cluster domain names such as the following to your
/etc/hostsfile:-
<api_floating_ip> api.<cluster_name>.<base_domain> -
<application_floating_ip> grafana-openshift-monitoring.apps.<cluster_name>.<base_domain> -
<application_floating_ip> prometheus-k8s-openshift-monitoring.apps.<cluster_name>.<base_domain> -
<application_floating_ip> oauth-openshift.apps.<cluster_name>.<base_domain> -
<application_floating_ip> console-openshift-console.apps.<cluster_name>.<base_domain> -
application_floating_ip integrated-oauth-server-openshift-authentication.apps.<cluster_name>.<base_domain>
The cluster domain names in the
/etc/hostsfile grant access to the web console and the monitoring interface of your cluster locally. You can also use thekubectloroc. You can access the user applications by using the additional entries pointing to the <application_floating_ip>. This action makes the API and applications accessible to only you, which is not suitable for production deployment, but does allow installation for development and testing.-
Add the FIPs to the
inventory.yamlfile as the values of the following variables:-
os_api_fip -
os_bootstrap_fip -
os_ingress_fip
-
If you use these values, you must also enter an external network as the value of the os_external_network variable in the inventory.yaml file.
You can make OpenShift Container Platform resources available outside of the cluster by assigning a floating IP address and updating your firewall configuration.
12.5.10.2. Completing installation without floating IP addresses
You can install OpenShift Container Platform on Red Hat OpenStack Platform (RHOSP) without providing floating IP addresses.
In the inventory.yaml file, do not define the following variables:
-
os_api_fip -
os_bootstrap_fip -
os_ingress_fip
If you cannot provide an external network, you can also leave os_external_network blank. If you do not provide a value for os_external_network, a router is not created for you, and, without additional action, the installer will fail to retrieve an image from Glance. Later in the installation process, when you create network resources, you must configure external connectivity on your own.
If you run the installer with the wait-for command from a system that cannot reach the cluster API due to a lack of floating IP addresses or name resolution, installation fails. To prevent installation failure in these cases, you can use a proxy network or run the installer from a system that is on the same network as your machines.
You can enable name resolution by creating DNS records for the API and Ingress ports. For example:
api.<cluster_name>.<base_domain>. IN A <api_port_IP>
*.apps.<cluster_name>.<base_domain>. IN A <ingress_port_IP>
If you do not control the DNS server, you can add the record to your /etc/hosts file. This action makes the API accessible to only you, which is not suitable for production deployment but does allow installation for development and testing.
12.5.11. Defining parameters for the installation program
The OpenShift Container Platform installation program relies on a file that is called clouds.yaml. The file describes Red Hat OpenStack Platform (RHOSP) configuration parameters, including the project name, log in information, and authorization service URLs.
Procedure
Create the
clouds.yamlfile:If your RHOSP distribution includes the Horizon web UI, generate a
clouds.yamlfile in it.ImportantRemember to add a password to the
authfield. You can also keep secrets in a separate file fromclouds.yaml.If your RHOSP distribution does not include the Horizon web UI, or you do not want to use Horizon, create the file yourself. For detailed information about
clouds.yaml, see Config files in the RHOSP documentation.clouds: shiftstack: auth: auth_url: http://10.10.14.42:5000/v3 project_name: shiftstack username: shiftstack_user password: XXX user_domain_name: Default project_domain_name: Default dev-env: region_name: RegionOne auth: username: 'devuser' password: XXX project_name: 'devonly' auth_url: 'https://10.10.14.22:5001/v2.0'
If your RHOSP installation uses self-signed certificate authority (CA) certificates for endpoint authentication:
- Copy the certificate authority file to your machine.
Add the
cacertskey to theclouds.yamlfile. The value must be an absolute, non-root-accessible path to the CA certificate:clouds: shiftstack: ... cacert: "/etc/pki/ca-trust/source/anchors/ca.crt.pem"TipAfter you run the installer with a custom CA certificate, you can update the certificate by editing the value of the
ca-cert.pemkey in thecloud-provider-configkeymap. On a command line, run:$ oc edit configmap -n openshift-config cloud-provider-config
Place the
clouds.yamlfile in one of the following locations:-
The value of the
OS_CLIENT_CONFIG_FILEenvironment variable - The current directory
-
A Unix-specific user configuration directory, for example
~/.config/openstack/clouds.yaml A Unix-specific site configuration directory, for example
/etc/openstack/clouds.yamlThe installation program searches for
clouds.yamlin that order.
-
The value of the
12.5.12. Creating the installation configuration file
You can customize the OpenShift Container Platform cluster you install on Red Hat OpenStack Platform (RHOSP).
Prerequisites
- Obtain the OpenShift Container Platform installation program and the pull secret for your cluster.
- Obtain service principal permissions at the subscription level.
Procedure
Create the
install-config.yamlfile.Change to the directory that contains the installation program and run the following command:
$ ./openshift-install create install-config --dir <installation_directory>1 - 1
- For
<installation_directory>, specify the directory name to store the files that the installation program creates.
ImportantSpecify an empty directory. Some installation assets, like bootstrap X.509 certificates have short expiration intervals, so you must not reuse an installation directory. If you want to reuse individual files from another cluster installation, you can copy them into your directory. However, the file names for the installation assets might change between releases. Use caution when copying installation files from an earlier OpenShift Container Platform version.
At the prompts, provide the configuration details for your cloud:
Optional: Select an SSH key to use to access your cluster machines.
NoteFor production OpenShift Container Platform clusters on which you want to perform installation debugging or disaster recovery, specify an SSH key that your
ssh-agentprocess uses.- Select openstack as the platform to target.
- Specify the Red Hat OpenStack Platform (RHOSP) external network name to use for installing the cluster.
- Specify the floating IP address to use for external access to the OpenShift API.
- Specify a RHOSP flavor with at least 16 GB RAM to use for control plane nodes and 8 GB RAM for compute nodes.
- Select the base domain to deploy the cluster to. All DNS records will be sub-domains of this base and will also include the cluster name.
- Enter a name for your cluster. The name must be 14 or fewer characters long.
- Paste the pull secret from the Red Hat OpenShift Cluster Manager.
-
Modify the
install-config.yamlfile. You can find more information about the available parameters in the "Installation configuration parameters" section. Back up the
install-config.yamlfile so that you can use it to install multiple clusters.ImportantThe
install-config.yamlfile is consumed during the installation process. If you want to reuse the file, you must back it up now.
You now have the file install-config.yaml in the directory that you specified.
12.5.13. Installation configuration parameters
Before you deploy an OpenShift Container Platform cluster, you provide parameter values to describe your account on the cloud platform that hosts your cluster and optionally customize your cluster’s platform. When you create the install-config.yaml installation configuration file, you provide values for the required parameters through the command line. If you customize your cluster, you can modify the install-config.yaml file to provide more details about the platform.
After installation, you cannot modify these parameters in the install-config.yaml file.
The openshift-install command does not validate field names for parameters. If an incorrect name is specified, the related file or object is not created, and no error is reported. Ensure that the field names for any parameters that are specified are correct.
12.5.13.1. Required configuration parameters
Required installation configuration parameters are described in the following table:
| Parameter | Description | Values |
|---|---|---|
|
|
The API version for the | String |
|
|
The base domain of your cloud provider. The base domain is used to create routes to your OpenShift Container Platform cluster components. The full DNS name for your cluster is a combination of the |
A fully-qualified domain or subdomain name, such as |
|
|
Kubernetes resource | Object |
|
|
The name of the cluster. DNS records for the cluster are all subdomains of |
String of lowercase letters, hyphens ( |
|
|
The configuration for the specific platform upon which to perform the installation: | Object |
|
| Get a pull secret from the Red Hat OpenShift Cluster Manager to authenticate downloading container images for OpenShift Container Platform components from services such as Quay.io. |
|
12.5.13.2. Network configuration parameters
You can customize your installation configuration based on the requirements of your existing network infrastructure. For example, you can expand the IP address block for the cluster network or provide different IP address blocks than the defaults.
Only IPv4 addresses are supported.
| Parameter | Description | Values |
|---|---|---|
|
| The configuration for the cluster network. | Object Note
You cannot modify parameters specified by the |
|
| The cluster network provider Container Network Interface (CNI) plug-in to install. |
Either |
|
| The IP address blocks for pods.
The default value is If you specify multiple IP address blocks, the blocks must not overlap. | An array of objects. For example: |
|
|
Required if you use An IPv4 network. |
An IP address block in Classless Inter-Domain Routing (CIDR) notation. The prefix length for an IPv4 block is between |
|
|
The subnet prefix length to assign to each individual node. For example, if | A subnet prefix.
The default value is |
|
|
The IP address block for services. The default value is The OpenShift SDN and OVN-Kubernetes network providers support only a single IP address block for the service network. | An array with an IP address block in CIDR format. For example: |
|
| The IP address blocks for machines. If you specify multiple IP address blocks, the blocks must not overlap.
If you specify multiple IP kernel arguments, the | An array of objects. For example: |
|
|
Required if you use | An IP network block in CIDR notation.
For example, Note
Set the |
12.5.13.3. Optional configuration parameters
Optional installation configuration parameters are described in the following table:
| Parameter | Description | Values |
|---|---|---|
|
| A PEM-encoded X.509 certificate bundle that is added to the nodes' trusted certificate store. This trust bundle may also be used when a proxy has been configured. | String |
|
| The configuration for the machines that comprise the compute nodes. |
Array of |
|
|
Determines the instruction set architecture of the machines in the pool. Currently, heteregeneous clusters are not supported, so all pools must specify the same architecture. Valid values are | String |
|
|
Whether to enable or disable simultaneous multithreading, or Important If you disable simultaneous multithreading, ensure that your capacity planning accounts for the dramatically decreased machine performance. |
|
|
|
Required if you use |
|
|
|
Required if you use |
|
|
| The number of compute machines, which are also known as worker machines, to provision. |
A positive integer greater than or equal to |
|
| The configuration for the machines that comprise the control plane. |
Array of |
|
|
Determines the instruction set architecture of the machines in the pool. Currently, heterogeneous clusters are not supported, so all pools must specify the same architecture. Valid values are | String |
|
|
Whether to enable or disable simultaneous multithreading, or Important If you disable simultaneous multithreading, ensure that your capacity planning accounts for the dramatically decreased machine performance. |
|
|
|
Required if you use |
|
|
|
Required if you use |
|
|
| The number of control plane machines to provision. |
The only supported value is |
|
| The Cloud Credential Operator (CCO) mode. If no mode is specified, the CCO dynamically tries to determine the capabilities of the provided credentials, with a preference for mint mode on the platforms where multiple modes are supported. Note Not all CCO modes are supported for all cloud providers. For more information on CCO modes, see the Cloud Credential Operator entry in the Cluster Operators reference content. |
|
|
|
Enable or disable FIPS mode. The default is Important
The use of FIPS Validated / Modules in Process cryptographic libraries is only supported on OpenShift Container Platform deployments on the Note If you are using Azure File storage, you cannot enable FIPS mode. |
|
|
| Sources and repositories for the release-image content. |
Array of objects. Includes a |
|
|
Required if you use | String |
|
| Specify one or more repositories that may also contain the same images. | Array of strings |
|
| How to publish or expose the user-facing endpoints of your cluster, such as the Kubernetes API, OpenShift routes. |
Setting this field to Important
If the value of the field is set to |
|
| The SSH key or keys to authenticate access your cluster machines. Note
For production OpenShift Container Platform clusters on which you want to perform installation debugging or disaster recovery, specify an SSH key that your | One or more keys. For example: |
12.5.13.4. Additional Red Hat OpenStack Platform (RHOSP) configuration parameters
Additional RHOSP configuration parameters are described in the following table:
| Parameter | Description | Values |
|---|---|---|
|
| For compute machines, the size in gigabytes of the root volume. If you do not set this value, machines use ephemeral storage. |
Integer, for example |
|
| For compute machines, the root volume’s type. |
String, for example |
|
| For control plane machines, the size in gigabytes of the root volume. If you do not set this value, machines use ephemeral storage. |
Integer, for example |
|
| For control plane machines, the root volume’s type. |
String, for example |
|
|
The name of the RHOSP cloud to use from the list of clouds in the |
String, for example |
|
| The RHOSP external network name to be used for installation. |
String, for example |
|
| The RHOSP flavor to use for control plane and compute machines.
This property is deprecated. To use a flavor as the default for all machine pools, add it as the value of the |
String, for example |
12.5.13.5. Optional RHOSP configuration parameters
Optional RHOSP configuration parameters are described in the following table:
| Parameter | Description | Values |
|---|---|---|
|
| Additional networks that are associated with compute machines. Allowed address pairs are not created for additional networks. |
A list of one or more UUIDs as strings. For example, |
|
| Additional security groups that are associated with compute machines. |
A list of one or more UUIDs as strings. For example, |
|
| RHOSP Compute (Nova) availability zones (AZs) to install machines on. If this parameter is not set, the installer relies on the default settings for Nova that the RHOSP administrator configured. On clusters that use Kuryr, RHOSP Octavia does not support availability zones. Load balancers and, if you are using the Amphora provider driver, OpenShift Container Platform services that rely on Amphora VMs, are not created according to the value of this property. |
A list of strings. For example, |
|
| Additional networks that are associated with control plane machines. Allowed address pairs are not created for additional networks. |
A list of one or more UUIDs as strings. For example, |
|
| Additional security groups that are associated with control plane machines. |
A list of one or more UUIDs as strings. For example, |
|
| RHOSP Compute (Nova) availability zones (AZs) to install machines on. If this parameter is not set, the installer relies on the default settings for Nova that the RHOSP administrator configured. On clusters that use Kuryr, RHOSP Octavia does not support availability zones. Load balancers and, if you are using the Amphora provider driver, OpenShift Container Platform services that rely on Amphora VMs, are not created according to the value of this property. |
A list of strings. For example, |
|
| The location from which the installer downloads the RHCOS image. You must set this parameter to perform an installation in a restricted network. | An HTTP or HTTPS URL, optionally with an SHA-256 checksum.
For example, |
|
|
Properties to add to the installer-uploaded ClusterOSImage in Glance. This property is ignored if
You can use this property to exceed the default persistent volume (PV) limit for RHOSP of 26 PVs per node. To exceed the limit, set the
You can also use this property to enable the QEMU guest agent by including the |
A list of key-value string pairs. For example, |
|
| The default machine pool platform configuration. |
|
|
|
An existing floating IP address to associate with the Ingress port. To use this property, you must also define the |
An IP address, for example |
|
|
An existing floating IP address to associate with the API load balancer. To use this property, you must also define the |
An IP address, for example |
|
| IP addresses for external DNS servers that cluster instances use for DNS resolution. |
A list of IP addresses as strings. For example, |
|
| The UUID of a RHOSP subnet that the cluster’s nodes use. Nodes and virtual IP (VIP) ports are created on this subnet.
The first item in If you deploy to a custom subnet, you cannot specify an external DNS server to the OpenShift Container Platform installer. Instead, add DNS to the subnet in RHOSP. |
A UUID as a string. For example, |
12.5.13.6. Sample customized install-config.yaml file for RHOSP
This sample install-config.yaml demonstrates all of the possible Red Hat OpenStack Platform (RHOSP) customization options.
This sample file is provided for reference only. You must obtain your install-config.yaml file by using the installation program.
apiVersion: v1
baseDomain: example.com
controlPlane:
name: master
platform: {}
replicas: 3
compute:
- name: worker
platform:
openstack:
type: ml.large
replicas: 3
metadata:
name: example
networking:
clusterNetwork:
- cidr: 10.128.0.0/14
hostPrefix: 23
machineNetwork:
- cidr: 10.0.0.0/16
serviceNetwork:
- 172.30.0.0/16
networkType: OpenShiftSDN
platform:
openstack:
cloud: mycloud
externalNetwork: external
computeFlavor: m1.xlarge
apiFloatingIP: 128.0.0.1
fips: false
pullSecret: '{"auths": ...}'
sshKey: ssh-ed25519 AAAA...12.5.13.7. Custom subnets in RHOSP deployments
Optionally, you can deploy a cluster on a Red Hat OpenStack Platform (RHOSP) subnet of your choice. The subnet’s GUID is passed as the value of platform.openstack.machinesSubnet in the install-config.yaml file.
This subnet is used as the cluster’s primary subnet. By default, nodes and ports are created on it. You can create nodes and ports on a different RHOSP subnet by setting the value of the platform.openstack.machinesSubnet property to the subnet’s UUID.
Before you run the OpenShift Container Platform installer with a custom subnet, verify that your configuration meets the following requirements:
-
The subnet that is used by
platform.openstack.machinesSubnethas DHCP enabled. -
The CIDR of
platform.openstack.machinesSubnetmatches the CIDR ofnetworking.machineNetwork. - The installation program user has permission to create ports on this network, including ports with fixed IP addresses.
Clusters that use custom subnets have the following limitations:
-
If you plan to install a cluster that uses floating IP addresses, the
platform.openstack.machinesSubnetsubnet must be attached to a router that is connected to theexternalNetworknetwork. -
If the
platform.openstack.machinesSubnetvalue is set in theinstall-config.yamlfile, the installation program does not create a private network or subnet for your RHOSP machines. -
You cannot use the
platform.openstack.externalDNSproperty at the same time as a custom subnet. To add DNS to a cluster that uses a custom subnet, configure DNS on the RHOSP network.
By default, the API VIP takes x.x.x.5 and the Ingress VIP takes x.x.x.7 from your network’s CIDR block. To override these default values, set values for platform.openstack.apiVIP and platform.openstack.ingressVIP that are outside of the DHCP allocation pool.
12.5.13.8. Setting a custom subnet for machines
The IP range that the installation program uses by default might not match the Neutron subnet that you create when you install OpenShift Container Platform. If necessary, update the CIDR value for new machines by editing the installation configuration file.
Prerequisites
-
You have the
install-config.yamlfile that was generated by the OpenShift Container Platform installation program.
Procedure
-
On a command line, browse to the directory that contains
install-config.yaml. From that directory, either run a script to edit the
install-config.yamlfile or update the file manually:To set the value by using a script, run:
$ python -c ' import yaml; path = "install-config.yaml"; data = yaml.safe_load(open(path)); data["networking"]["machineNetwork"] = [{"cidr": "192.168.0.0/18"}];1 open(path, "w").write(yaml.dump(data, default_flow_style=False))'- 1
- Insert a value that matches your intended Neutron subnet, e.g.
192.0.2.0/24.
-
To set the value manually, open the file and set the value of
networking.machineCIDRto something that matches your intended Neutron subnet.
12.5.13.9. Emptying compute machine pools
To proceed with an installation that uses your own infrastructure, set the number of compute machines in the installation configuration file to zero. Later, you create these machines manually.
Prerequisites
-
You have the
install-config.yamlfile that was generated by the OpenShift Container Platform installation program.
Procedure
-
On a command line, browse to the directory that contains
install-config.yaml. From that directory, either run a script to edit the
install-config.yamlfile or update the file manually:To set the value by using a script, run:
$ python -c ' import yaml; path = "install-config.yaml"; data = yaml.safe_load(open(path)); data["compute"][0]["replicas"] = 0; open(path, "w").write(yaml.dump(data, default_flow_style=False))'-
To set the value manually, open the file and set the value of
compute.<first entry>.replicasto0.
12.5.14. Creating the Kubernetes manifest and Ignition config files
Because you must modify some cluster definition files and manually start the cluster machines, you must generate the Kubernetes manifest and Ignition config files that the cluster needs to make its machines.
The installation configuration file transforms into the Kubernetes manifests. The manifests wrap into the Ignition configuration files, which are later used to create the cluster.
The Ignition config files that the installation program generates contain certificates that expire after 24 hours, which are then renewed at that time. If the cluster is shut down before renewing the certificates and the cluster is later restarted after the 24 hours have elapsed, the cluster automatically recovers the expired certificates. The exception is that you must manually approve the pending node-bootstrapper certificate signing requests (CSRs) to recover kubelet certificates. See the documentation for Recovering from expired control plane certificates for more information.
The installation program that generates the manifest and Ignition files is architecture specific and can be obtained from the client image mirror. The Linux version of the installation program runs on s390x only. This installer program is also available as a Mac OS version.
Prerequisites
- You obtained the OpenShift Container Platform installation program.
-
You created the
install-config.yamlinstallation configuration file.
Procedure
Change to the directory that contains the installation program and generate the Kubernetes manifests for the cluster:
$ ./openshift-install create manifests --dir <installation_directory>1 - 1
- For
<installation_directory>, specify the installation directory that contains theinstall-config.yamlfile you created.
Remove the Kubernetes manifest files that define the control plane machines and compute machine sets:
$ rm -f openshift/99_openshift-cluster-api_master-machines-*.yaml openshift/99_openshift-cluster-api_worker-machineset-*.yamlBecause you create and manage these resources yourself, you do not have to initialize them.
- You can preserve the machine set files to create compute machines by using the machine API, but you must update references to them to match your environment.
WarningIf you are installing a three-node cluster, skip the following step to allow the control plane nodes to be schedulable.
+
ImportantWhen you configure control plane nodes from the default unschedulable to schedulable, additional subscriptions are required. This is because control plane nodes then become worker nodes.
Check that the
mastersSchedulableparameter in the<installation_directory>/manifests/cluster-scheduler-02-config.ymlKubernetes manifest file is set tofalse. This setting prevents pods from being scheduled on the control plane machines:-
Open the
<installation_directory>/manifests/cluster-scheduler-02-config.ymlfile. -
Locate the
mastersSchedulableparameter and ensure that it is set tofalse. - Save and exit the file.
-
Open the
To create the Ignition configuration files, run the following command from the directory that contains the installation program:
$ ./openshift-install create ignition-configs --dir <installation_directory>1 - 1
- For
<installation_directory>, specify the same installation directory.
The following files are generated in the directory:
. ├── auth │ ├── kubeadmin-password │ └── kubeconfig ├── bootstrap.ign ├── master.ign ├── metadata.json └── worker.ignExport the metadata file’s
infraIDkey as an environment variable:$ export INFRA_ID=$(jq -r .infraID metadata.json)
Extract the infraID key from metadata.json and use it as a prefix for all of the RHOSP resources that you create. By doing so, you avoid name conflicts when making multiple deployments in the same project.
12.5.15. Preparing the bootstrap Ignition files
The OpenShift Container Platform installation process relies on bootstrap machines that are created from a bootstrap Ignition configuration file.
Edit the file and upload it. Then, create a secondary bootstrap Ignition configuration file that Red Hat OpenStack Platform (RHOSP) uses to download the primary file.
Prerequisites
-
You have the bootstrap Ignition file that the installer program generates,
bootstrap.ign. The infrastructure ID from the installer’s metadata file is set as an environment variable (
$INFRA_ID).- If the variable is not set, see Creating the Kubernetes manifest and Ignition config files.
You have an HTTP(S)-accessible way to store the bootstrap Ignition file.
- The documented procedure uses the RHOSP image service (Glance), but you can also use the RHOSP storage service (Swift), Amazon S3, an internal HTTP server, or an ad hoc Nova server.
Procedure
Run the following Python script. The script modifies the bootstrap Ignition file to set the hostname and, if available, CA certificate file when it runs:
import base64 import json import os with open('bootstrap.ign', 'r') as f: ignition = json.load(f) files = ignition['storage'].get('files', []) infra_id = os.environ.get('INFRA_ID', 'openshift').encode() hostname_b64 = base64.standard_b64encode(infra_id + b'-bootstrap\n').decode().strip() files.append( { 'path': '/etc/hostname', 'mode': 420, 'contents': { 'source': 'data:text/plain;charset=utf-8;base64,' + hostname_b64 } }) ca_cert_path = os.environ.get('OS_CACERT', '') if ca_cert_path: with open(ca_cert_path, 'r') as f: ca_cert = f.read().encode() ca_cert_b64 = base64.standard_b64encode(ca_cert).decode().strip() files.append( { 'path': '/opt/openshift/tls/cloud-ca-cert.pem', 'mode': 420, 'contents': { 'source': 'data:text/plain;charset=utf-8;base64,' + ca_cert_b64 } }) ignition['storage']['files'] = files; with open('bootstrap.ign', 'w') as f: json.dump(ignition, f)Using the RHOSP CLI, create an image that uses the bootstrap Ignition file:
$ openstack image create --disk-format=raw --container-format=bare --file bootstrap.ign <image_name>Get the image’s details:
$ openstack image show <image_name>Make a note of the
filevalue; it follows the patternv2/images/<image_ID>/file.NoteVerify that the image you created is active.
Retrieve the image service’s public address:
$ openstack catalog show image-
Combine the public address with the image
filevalue and save the result as the storage location. The location follows the pattern<image_service_public_URL>/v2/images/<image_ID>/file. Generate an auth token and save the token ID:
$ openstack token issue -c id -f valueInsert the following content into a file called
$INFRA_ID-bootstrap-ignition.jsonand edit the placeholders to match your own values:{ "ignition": { "config": { "merge": [{ "source": "<storage_url>",1 "httpHeaders": [{ "name": "X-Auth-Token",2 "value": "<token_ID>"3 }] }] }, "security": { "tls": { "certificateAuthorities": [{ "source": "data:text/plain;charset=utf-8;base64,<base64_encoded_certificate>"4 }] } }, "version": "3.2.0" } }- 1
- Replace the value of
ignition.config.merge.sourcewith the bootstrap Ignition file storage URL. - 2
- Set
nameinhttpHeadersto"X-Auth-Token". - 3
- Set
valueinhttpHeadersto your token’s ID. - 4
- If the bootstrap Ignition file server uses a self-signed certificate, include the base64-encoded certificate.
- Save the secondary Ignition config file.
The bootstrap Ignition data will be passed to RHOSP during installation.
The bootstrap Ignition file contains sensitive information, like clouds.yaml credentials. Ensure that you store it in a secure place, and delete it after you complete the installation process.
12.5.16. Creating control plane Ignition config files on RHOSP
Installing OpenShift Container Platform on Red Hat OpenStack Platform (RHOSP) on your own infrastructure requires control plane Ignition config files. You must create multiple config files.
As with the bootstrap Ignition configuration, you must explicitly define a hostname for each control plane machine.
Prerequisites
The infrastructure ID from the installation program’s metadata file is set as an environment variable (
$INFRA_ID).- If the variable is not set, see "Creating the Kubernetes manifest and Ignition config files".
Procedure
On a command line, run the following Python script:
$ for index in $(seq 0 2); do MASTER_HOSTNAME="$INFRA_ID-master-$index\n" python -c "import base64, json, sys; ignition = json.load(sys.stdin); storage = ignition.get('storage', {}); files = storage.get('files', []); files.append({'path': '/etc/hostname', 'mode': 420, 'contents': {'source': 'data:text/plain;charset=utf-8;base64,' + base64.standard_b64encode(b'$MASTER_HOSTNAME').decode().strip(), 'verification': {}}, 'filesystem': 'root'}); storage['files'] = files; ignition['storage'] = storage json.dump(ignition, sys.stdout)" <master.ign >"$INFRA_ID-master-$index-ignition.json" doneYou now have three control plane Ignition files:
<INFRA_ID>-master-0-ignition.json,<INFRA_ID>-master-1-ignition.json, and<INFRA_ID>-master-2-ignition.json.
12.5.17. Creating network resources on RHOSP
Create the network resources that an OpenShift Container Platform on Red Hat OpenStack Platform (RHOSP) installation on your own infrastructure requires. To save time, run supplied Ansible playbooks that generate security groups, networks, subnets, routers, and ports.
Prerequisites
- Python 3 is installed on your machine.
- You downloaded the modules in "Downloading playbook dependencies".
- You downloaded the playbooks in "Downloading the installation playbooks".
Procedure
Optional: Add an external network value to the
inventory.yamlplaybook:Example external network value in the
inventory.yamlAnsible playbook... # The public network providing connectivity to the cluster. If not # provided, the cluster external connectivity must be provided in another # way. # Required for os_api_fip, os_ingress_fip, os_bootstrap_fip. os_external_network: 'external' ...ImportantIf you did not provide a value for
os_external_networkin theinventory.yamlfile, you must ensure that VMs can access Glance and an external connection yourself.Optional: Add external network and floating IP (FIP) address values to the
inventory.yamlplaybook:Example FIP values in the
inventory.yamlAnsible playbook... # OpenShift API floating IP address. If this value is non-empty, the # corresponding floating IP will be attached to the Control Plane to # serve the OpenShift API. os_api_fip: '203.0.113.23' # OpenShift Ingress floating IP address. If this value is non-empty, the # corresponding floating IP will be attached to the worker nodes to serve # the applications. os_ingress_fip: '203.0.113.19' # If this value is non-empty, the corresponding floating IP will be # attached to the bootstrap machine. This is needed for collecting logs # in case of install failure. os_bootstrap_fip: '203.0.113.20'ImportantIf you do not define values for
os_api_fipandos_ingress_fip, you must perform post-installation network configuration.If you do not define a value for
os_bootstrap_fip, the installer cannot download debugging information from failed installations.See "Enabling access to the environment" for more information.
On a command line, create security groups by running the
security-groups.yamlplaybook:$ ansible-playbook -i inventory.yaml security-groups.yamlOn a command line, create a network, subnet, and router by running the
network.yamlplaybook:$ ansible-playbook -i inventory.yaml network.yamlOptional: If you want to control the default resolvers that Nova servers use, run the RHOSP CLI command:
$ openstack subnet set --dns-nameserver <server_1> --dns-nameserver <server_2> "$INFRA_ID-nodes"
Optionally, you can use the inventory.yaml file that you created to customize your installation. For example, you can deploy a cluster that uses bare metal machines.
12.5.17.1. Deploying a cluster with bare metal machines
If you want your cluster to use bare metal machines, modify the inventory.yaml file. Your cluster can have both control plane and compute machines running on bare metal, or just compute machines.
Bare-metal compute machines are not supported on clusters that use Kuryr.
Be sure that your install-config.yaml file reflects whether the RHOSP network that you use for bare metal workers supports floating IP addresses or not.
Prerequisites
- The RHOSP Bare Metal service (Ironic) is enabled and accessible via the RHOSP Compute API.
- Bare metal is available as a RHOSP flavor.
- The RHOSP network supports both VM and bare metal server attachment.
- Your network configuration does not rely on a provider network. Provider networks are not supported.
- If you want to deploy the machines on a pre-existing network, a RHOSP subnet is provisioned.
- If you want to deploy the machines on an installer-provisioned network, the RHOSP Bare Metal service (Ironic) is able to listen for and interact with Preboot eXecution Environment (PXE) boot machines that run on tenant networks.
-
You created an
inventory.yamlfile as part of the OpenShift Container Platform installation process.
Procedure
In the
inventory.yamlfile, edit the flavors for machines:-
If you want to use bare-metal control plane machines, change the value of
os_flavor_masterto a bare metal flavor. Change the value of
os_flavor_workerto a bare metal flavor.An example bare metal
inventory.yamlfileall: hosts: localhost: ansible_connection: local ansible_python_interpreter: "{{ansible_playbook_python}}" # User-provided values os_subnet_range: '10.0.0.0/16' os_flavor_master: 'my-bare-metal-flavor'1 os_flavor_worker: 'my-bare-metal-flavor'2 os_image_rhcos: 'rhcos' os_external_network: 'external' ...
-
If you want to use bare-metal control plane machines, change the value of
Use the updated inventory.yaml file to complete the installation process. Machines that are created during deployment use the flavor that you added to the file.
The installer may time out while waiting for bare metal machines to boot.
If the installer times out, restart and then complete the deployment by using the wait-for command of the installer. For example:
./openshift-install wait-for install-complete --log-level debug12.5.18. Creating the bootstrap machine on RHOSP
Create a bootstrap machine and give it the network access it needs to run on Red Hat OpenStack Platform (RHOSP). Red Hat provides an Ansible playbook that you run to simplify this process.
Prerequisites
- You downloaded the modules in "Downloading playbook dependencies".
- You downloaded the playbooks in "Downloading the installation playbooks".
-
The
inventory.yaml,common.yaml, andbootstrap.yamlAnsible playbooks are in a common directory. -
The
metadata.jsonfile that the installation program created is in the same directory as the Ansible playbooks.
Procedure
- On a command line, change the working directory to the location of the playbooks.
On a command line, run the
bootstrap.yamlplaybook:$ ansible-playbook -i inventory.yaml bootstrap.yamlAfter the bootstrap server is active, view the logs to verify that the Ignition files were received:
$ openstack console log show "$INFRA_ID-bootstrap"
12.5.19. Creating the control plane machines on RHOSP
Create three control plane machines by using the Ignition config files that you generated. Red Hat provides an Ansible playbook that you run to simplify this process.
Prerequisites
- You downloaded the modules in "Downloading playbook dependencies".
- You downloaded the playbooks in "Downloading the installation playbooks".
-
The infrastructure ID from the installation program’s metadata file is set as an environment variable (
$INFRA_ID). -
The
inventory.yaml,common.yaml, andcontrol-plane.yamlAnsible playbooks are in a common directory. - You have the three Ignition files that were created in "Creating control plane Ignition config files".
Procedure
- On a command line, change the working directory to the location of the playbooks.
- If the control plane Ignition config files aren’t already in your working directory, copy them into it.
On a command line, run the
control-plane.yamlplaybook:$ ansible-playbook -i inventory.yaml control-plane.yamlRun the following command to monitor the bootstrapping process:
$ openshift-install wait-for bootstrap-completeYou will see messages that confirm that the control plane machines are running and have joined the cluster:
INFO API v1.14.6+f9b5405 up INFO Waiting up to 30m0s for bootstrapping to complete... ... INFO It is now safe to remove the bootstrap resources
12.5.20. Logging in to the cluster by using the CLI
You can log in to your cluster as a default system user by exporting the cluster kubeconfig file. The kubeconfig file contains information about the cluster that is used by the CLI to connect a client to the correct cluster and API server. The file is specific to a cluster and is created during OpenShift Container Platform installation.
Prerequisites
- You deployed an OpenShift Container Platform cluster.
-
You installed the
ocCLI.
Procedure
Export the
kubeadmincredentials:$ export KUBECONFIG=<installation_directory>/auth/kubeconfig1 - 1
- For
<installation_directory>, specify the path to the directory that you stored the installation files in.
Verify you can run
occommands successfully using the exported configuration:$ oc whoamiExample output
system:admin
12.5.21. Deleting bootstrap resources from RHOSP
Delete the bootstrap resources that you no longer need.
Prerequisites
- You downloaded the modules in "Downloading playbook dependencies".
- You downloaded the playbooks in "Downloading the installation playbooks".
-
The
inventory.yaml,common.yaml, anddown-bootstrap.yamlAnsible playbooks are in a common directory. The control plane machines are running.
- If you do not know the status of the machines, see "Verifying cluster status".
Procedure
- On a command line, change the working directory to the location of the playbooks.
On a command line, run the
down-bootstrap.yamlplaybook:$ ansible-playbook -i inventory.yaml down-bootstrap.yaml
The bootstrap port, server, and floating IP address are deleted.
If you did not disable the bootstrap Ignition file URL earlier, do so now.
12.5.22. Creating SR-IOV networks for compute machines
If your Red Hat OpenStack Platform (RHOSP) deployment supports single root I/O virtualization (SR-IOV), you can provision SR-IOV networks that compute machines run on.
The following instructions entail creating an external flat network and an external, VLAN-based network that can be attached to a compute machine. Depending on your RHOSP deployment, other network types might be required.
Prerequisites
Your cluster supports SR-IOV.
NoteIf you are unsure about what your cluster supports, review the OpenShift Container Platform SR-IOV hardware networks documentation.
-
You created radio and uplink provider networks as part of your RHOSP deployment. The names
radioanduplinkare used in all example commands to represent these networks.
Procedure
On a command line, create a radio RHOSP network:
$ openstack network create radio --provider-physical-network radio --provider-network-type flat --externalCreate an uplink RHOSP network:
$ openstack network create uplink --provider-physical-network uplink --provider-network-type vlan --externalCreate a subnet for the radio network:
$ openstack subnet create --network radio --subnet-range <radio_network_subnet_range> radioCreate a subnet for the uplink network:
$ openstack subnet create --network uplink --subnet-range <uplink_network_subnet_range> uplink
12.5.23. Creating compute machines that run on SR-IOV networks
After standing up the control plane, create compute machines that run on the SR-IOV networks that you created in "Creating SR-IOV networks for compute machines".
Prerequisites
- You downloaded the modules in "Downloading playbook dependencies".
- You downloaded the playbooks in "Downloading the installation playbooks".
-
The
metadata.yamlfile that the installation program created is in the same directory as the Ansible playbooks. - The control plane is active.
-
You created
radioanduplinkSR-IOV networks as described in "Creating SR-IOV networks for compute machines".
Procedure
-
On a command line, change the working directory to the location of the
inventory.yamlandcommon.yamlfiles. Add the
radioanduplinknetworks to the end of theinventory.yamlfile by using theadditionalNetworksparameter:.... # If this value is non-empty, the corresponding floating IP will be # attached to the bootstrap machine. This is needed for collecting logs # in case of install failure. os_bootstrap_fip: '203.0.113.20' additionalNetworks: - id: radio count: 41 type: direct port_security_enabled: no - id: uplink count: 42 type: direct port_security_enabled: noReplace the content of the
compute-nodes.yamlfile with the following text:Example 12.1.
compute-nodes.yaml- import_playbook: common.yaml - hosts: all gather_facts: no vars: worker_list: [] port_name_list: [] nic_list: [] tasks: # Create the SDN/primary port for each worker node - name: 'Create the Compute ports' os_port: name: "{{ item.1 }}-{{ item.0 }}" network: "{{ os_network }}" security_groups: - "{{ os_sg_worker }}" allowed_address_pairs: - ip_address: "{{ os_ingressVIP }}" with_indexed_items: "{{ [os_port_worker] * os_compute_nodes_number }}" register: ports # Tag each SDN/primary port with cluster name - name: 'Set Compute ports tag' command: cmd: "openstack port set --tag {{ cluster_id_tag }} {{ item.1 }}-{{ item.0 }}" with_indexed_items: "{{ [os_port_worker] * os_compute_nodes_number }}" - name: 'List the Compute Trunks' command: cmd: "openstack network trunk list" when: os_networking_type == "Kuryr" register: compute_trunks - name: 'Create the Compute trunks' command: cmd: "openstack network trunk create --parent-port {{ item.1.id }} {{ os_compute_trunk_name }}-{{ item.0 }}" with_indexed_items: "{{ ports.results }}" when: - os_networking_type == "Kuryr" - "os_compute_trunk_name|string not in compute_trunks.stdout" - name: ‘Call additional-port processing’ include_tasks: additional-ports.yaml # Create additional ports in OpenStack - name: ‘Create additionalNetworks ports’ os_port: name: "{{ item.0 }}-{{ item.1.name }}" vnic_type: "{{ item.1.type }}" network: "{{ item.1.uuid }}" port_security_enabled: "{{ item.1.port_security_enabled|default(omit) }}" no_security_groups: "{{ 'true' if item.1.security_groups is not defined else omit }}" security_groups: "{{ item.1.security_groups | default(omit) }}" with_nested: - "{{ worker_list }}" - "{{ port_name_list }}" # Tag the ports with the cluster info - name: 'Set additionalNetworks ports tag' command: cmd: "openstack port set --tag {{ cluster_id_tag }} {{ item.0 }}-{{ item.1.name }}" with_nested: - "{{ worker_list }}" - "{{ port_name_list }}" # Build the nic list to use for server create - name: Build nic list set_fact: nic_list: "{{ nic_list | default([]) + [ item.name ] }}" with_items: "{{ port_name_list }}" # Create the servers - name: 'Create the Compute servers' vars: worker_nics: "{{ [ item.1 ] | product(nic_list) | map('join','-') | map('regex_replace', '(.*)', 'port-name=\\1') | list }}" os_server: name: "{{ item.1 }}" image: "{{ os_image_rhcos }}" flavor: "{{ os_flavor_worker }}" auto_ip: no userdata: "{{ lookup('file', 'worker.ign') | string }}" security_groups: [] nics: "{{ [ 'port-name=' + os_port_worker + '-' + item.0|string ] + worker_nics }}" config_drive: yes with_indexed_items: "{{ worker_list }}"Insert the following content into a local file that is called
additional-ports.yaml:Example 12.2.
additional-ports.yaml# Build a list of worker nodes with indexes - name: ‘Build worker list’ set_fact: worker_list: "{{ worker_list | default([]) + [ item.1 + '-' + item.0 | string ] }}" with_indexed_items: "{{ [ os_compute_server_name ] * os_compute_nodes_number }}" # Ensure that each network specified in additionalNetworks exists - name: ‘Verify additionalNetworks’ os_networks_info: name: "{{ item.id }}" with_items: "{{ additionalNetworks }}" register: network_info # Expand additionalNetworks by the count parameter in each network definition - name: ‘Build port and port index list for additionalNetworks’ set_fact: port_list: "{{ port_list | default([]) + [ { 'net_name' : item.1.id, 'uuid' : network_info.results[item.0].openstack_networks[0].id, 'type' : item.1.type|default('normal'), 'security_groups' : item.1.security_groups|default(omit), 'port_security_enabled' : item.1.port_security_enabled|default(omit) } ] * item.1.count|default(1) }}" index_list: "{{ index_list | default([]) + range(item.1.count|default(1)) | list }}" with_indexed_items: "{{ additionalNetworks }}" # Calculate and save the name of the port # The format of the name is cluster_name-worker-workerID-networkUUID(partial)-count # i.e. fdp-nz995-worker-1-99bcd111-1 - name: ‘Calculate port name’ set_fact: port_name_list: "{{ port_name_list | default([]) + [ item.1 | combine( {'name' : item.1.uuid | regex_search('([^-]+)') + '-' + index_list[item.0]|string } ) ] }}" with_indexed_items: "{{ port_list }}" when: port_list is definedOn a command line, run the
compute-nodes.yamlplaybook:$ ansible-playbook -i inventory.yaml compute-nodes.yaml
12.5.24. Approving the certificate signing requests for your machines
When you add machines to a cluster, two pending certificate signing requests (CSRs) are generated for each machine that you added. You must confirm that these CSRs are approved or, if necessary, approve them yourself. The client requests must be approved first, followed by the server requests.
Prerequisites
- You added machines to your cluster.
Procedure
Confirm that the cluster recognizes the machines:
$ oc get nodesExample output
NAME STATUS ROLES AGE VERSION master-0 Ready master 63m v1.20.0 master-1 Ready master 63m v1.20.0 master-2 Ready master 64m v1.20.0The output lists all of the machines that you created.
NoteThe preceding output might not include the compute nodes, also known as worker nodes, until some CSRs are approved.
Review the pending CSRs and ensure that you see the client requests with the
PendingorApprovedstatus for each machine that you added to the cluster:$ oc get csrExample output
NAME AGE REQUESTOR CONDITION csr-mddf5 20m system:node:master-01.example.com Approved,Issued csr-z5rln 16m system:node:worker-21.example.com Approved,IssuedIf the CSRs were not approved, after all of the pending CSRs for the machines you added are in
Pendingstatus, approve the CSRs for your cluster machines:NoteBecause the CSRs rotate automatically, approve your CSRs within an hour of adding the machines to the cluster. If you do not approve them within an hour, the certificates will rotate, and more than two certificates will be present for each node. You must approve all of these certificates. Once the client CSR is approved, the Kubelet creates a secondary CSR for the serving certificate, which requires manual approval. Then, subsequent serving certificate renewal requests are automatically approved by the
machine-approverif the Kubelet requests a new certificate with identical parameters.NoteFor clusters running on platforms that are not machine API enabled, such as bare metal and other user-provisioned infrastructure, you must implement a method of automatically approving the kubelet serving certificate requests (CSRs). If a request is not approved, then the
oc exec,oc rsh, andoc logscommands cannot succeed, because a serving certificate is required when the API server connects to the kubelet. Any operation that contacts the Kubelet endpoint requires this certificate approval to be in place. The method must watch for new CSRs, confirm that the CSR was submitted by thenode-bootstrapperservice account in thesystem:nodeorsystem:admingroups, and confirm the identity of the node.To approve them individually, run the following command for each valid CSR:
$ oc adm certificate approve <csr_name>1 - 1
<csr_name>is the name of a CSR from the list of current CSRs.
To approve all pending CSRs, run the following command:
$ oc get csr -o go-template='{{range .items}}{{if not .status}}{{.metadata.name}}{{"\n"}}{{end}}{{end}}' | xargs --no-run-if-empty oc adm certificate approveNoteSome Operators might not become available until some CSRs are approved.
Now that your client requests are approved, you must review the server requests for each machine that you added to the cluster:
$ oc get csrExample output
NAME AGE REQUESTOR CONDITION csr-bfd72 5m26s system:node:ip-10-0-50-126.us-east-2.compute.internal Pending csr-c57lv 5m26s system:node:ip-10-0-95-157.us-east-2.compute.internal Pending ...If the remaining CSRs are not approved, and are in the
Pendingstatus, approve the CSRs for your cluster machines:To approve them individually, run the following command for each valid CSR:
$ oc adm certificate approve <csr_name>1 - 1
<csr_name>is the name of a CSR from the list of current CSRs.
To approve all pending CSRs, run the following command:
$ oc get csr -o go-template='{{range .items}}{{if not .status}}{{.metadata.name}}{{"\n"}}{{end}}{{end}}' | xargs oc adm certificate approve
After all client and server CSRs have been approved, the machines have the
Readystatus. Verify this by running the following command:$ oc get nodesExample output
NAME STATUS ROLES AGE VERSION master-0 Ready master 73m v1.20.0 master-1 Ready master 73m v1.20.0 master-2 Ready master 74m v1.20.0 worker-0 Ready worker 11m v1.20.0 worker-1 Ready worker 11m v1.20.0NoteIt can take a few minutes after approval of the server CSRs for the machines to transition to the
Readystatus.
Additional information
- For more information on CSRs, see Certificate Signing Requests.
12.5.25. Verifying a successful installation
Verify that the OpenShift Container Platform installation is complete.
Prerequisites
-
You have the installation program (
openshift-install)
Procedure
On a command line, enter:
$ openshift-install --log-level debug wait-for install-complete
The program outputs the console URL, as well as the administrator’s login information.
The cluster is operational. Before you can configure it for SR-IOV networks though, you must perform additional tasks.
12.5.26. Preparing a cluster that runs on RHOSP for SR-IOV
Before you use single root I/O virtualization (SR-IOV) on a cluster that runs on Red Hat OpenStack Platform (RHOSP), make the RHOSP metadata service mountable as a drive and enable the No-IOMMU Operator for the virtual function I/O (VFIO) driver.
12.5.26.1. Enabling the RHOSP metadata service as a mountable drive
You can apply a machine config to your machine pool that makes the Red Hat OpenStack Platform (RHOSP) metadata service available as a mountable drive.
The following machine config enables the display of RHOSP network UUIDs from within the SR-IOV Network Operator. This configuration simplifies the association of SR-IOV resources to cluster SR-IOV resources.
Procedure
Create a machine config file from the following template:
A mountable metadata service machine config file
kind: MachineConfig apiVersion: machineconfiguration.openshift.io/v1 metadata: name: 20-mount-config1 labels: machineconfiguration.openshift.io/role: worker spec: config: ignition: version: 3.2.0 systemd: units: - name: create-mountpoint-var-config.service enabled: true contents: | [Unit] Description=Create mountpoint /var/config Before=kubelet.service [Service] ExecStart=/bin/mkdir -p /var/config [Install] WantedBy=var-config.mount - name: var-config.mount enabled: true contents: | [Unit] Before=local-fs.target [Mount] Where=/var/config What=/dev/disk/by-label/config-2 [Install] WantedBy=local-fs.target- 1
- You can substitute a name of your choice.
From a command line, apply the machine config:
$ oc apply -f <machine_config_file_name>.yaml
12.5.26.2. Enabling the No-IOMMU feature for the RHOSP VFIO driver
You can apply a machine config to your machine pool that enables the No-IOMMU feature for the Red Hat OpenStack Platform (RHOSP) virtual function I/O (VFIO) driver. The RHOSP vfio-pci driver requires this feature.
Procedure
Create a machine config file from the following template:
A No-IOMMU VFIO machine config file
kind: MachineConfig apiVersion: machineconfiguration.openshift.io/v1 metadata: name: 99-vfio-noiommu1 labels: machineconfiguration.openshift.io/role: worker spec: config: ignition: version: 3.2.0 storage: files: - path: /etc/modprobe.d/vfio-noiommu.conf mode: 0644 contents: source: data:;base64,b3B0aW9ucyB2ZmlvIGVuYWJsZV91bnNhZmVfbm9pb21tdV9tb2RlPTEK- 1
- You can substitute a name of your choice.
From a command line, apply the machine config:
$ oc apply -f <machine_config_file_name>.yaml
After you apply the machine config to the machine pool, you can watch the machine config pool status to see when the machines are available.
The cluster is installed and prepared for SR-IOV configuration. You must now perform the SR-IOV configuration tasks in "Next steps".
12.5.27. Telemetry access for OpenShift Container Platform
In OpenShift Container Platform 4.7, the Telemetry service, which runs by default to provide metrics about cluster health and the success of updates, requires internet access. If your cluster is connected to the internet, Telemetry runs automatically, and your cluster is registered to OpenShift Cluster Manager.
After you confirm that your OpenShift Cluster Manager inventory is correct, either maintained automatically by Telemetry or manually by using OpenShift Cluster Manager, use subscription watch to track your OpenShift Container Platform subscriptions at the account or multi-cluster level.
12.5.29. Next steps
To complete SR-IOV configuration for your cluster:
- Customize your cluster.
- If necessary, you can opt out of remote health reporting.
- If you need to enable external access to node ports, configure ingress cluster traffic by using a node port.
- If you did not configure RHOSP to accept application traffic over floating IP addresses, configure RHOSP access with floating IP addresses.
12.6. Installing a cluster on OpenStack in a restricted network
In OpenShift Container Platform 4.7, you can install a cluster on Red Hat OpenStack Platform (RHOSP) in a restricted network by creating an internal mirror of the installation release content.
Prerequisites
Create a registry on your mirror host and obtain the
imageContentSourcesdata for your version of OpenShift Container Platform.ImportantBecause the installation media is on the mirror host, you can use that computer to complete all installation steps.
Review details about the OpenShift Container Platform installation and update processes.
- Verify that OpenShift Container Platform 4.7 is compatible with your RHOSP version by using the "Supported platforms for OpenShift clusters" section. You can also compare platform support across different versions by viewing the OpenShift Container Platform on RHOSP support matrix.
- Verify that your network configuration does not rely on a provider network. Provider networks are not supported.
- Have the metadata service enabled in RHOSP.
12.6.1. About installations in restricted networks
In OpenShift Container Platform 4.7, you can perform an installation that does not require an active connection to the Internet to obtain software components. Restricted network installations can be completed using installer-provisioned infrastructure or user-provisioned infrastructure, depending on the cloud platform to which you are installing the cluster.
If you choose to perform a restricted network installation on a cloud platform, you still require access to its cloud APIs. Some cloud functions, like Amazon Web Service’s Route 53 DNS and IAM services, require internet access. Depending on your network, you might require less Internet access for an installation on bare metal hardware or on VMware vSphere.
To complete a restricted network installation, you must create a registry that mirrors the contents of the OpenShift Container Platform registry and contains the installation media. You can create this registry on a mirror host, which can access both the Internet and your closed network, or by using other methods that meet your restrictions.
12.6.1.1. Additional limits
Clusters in restricted networks have the following additional limitations and restrictions:
-
The
ClusterVersionstatus includes anUnable to retrieve available updateserror. - By default, you cannot use the contents of the Developer Catalog because you cannot access the required image stream tags.
12.6.2. Resource guidelines for installing OpenShift Container Platform on RHOSP
To support an OpenShift Container Platform installation, your Red Hat OpenStack Platform (RHOSP) quota must meet the following requirements:
| Resource | Value |
|---|---|
| Floating IP addresses | 3 |
| Ports | 15 |
| Routers | 1 |
| Subnets | 1 |
| RAM | 112 GB |
| vCPUs | 28 |
| Volume storage | 275 GB |
| Instances | 7 |
| Security groups | 3 |
| Security group rules | 60 |
A cluster might function with fewer than recommended resources, but its performance is not guaranteed.
If RHOSP object storage (Swift) is available and operated by a user account with the swiftoperator role, it is used as the default backend for the OpenShift Container Platform image registry. In this case, the volume storage requirement is 175 GB. Swift space requirements vary depending on the size of the image registry.
By default, your security group and security group rule quotas might be low. If you encounter problems, run openstack quota set --secgroups 3 --secgroup-rules 60 <project> as an administrator to increase them.
An OpenShift Container Platform deployment comprises control plane machines, compute machines, and a bootstrap machine.
12.6.2.1. Control plane machines
By default, the OpenShift Container Platform installation process creates three control plane machines.
Each machine requires:
- An instance from the RHOSP quota
- A port from the RHOSP quota
- A flavor with at least 16 GB memory, 4 vCPUs, and 100 GB storage space
12.6.2.2. Compute machines
By default, the OpenShift Container Platform installation process creates three compute machines.
Each machine requires:
- An instance from the RHOSP quota
- A port from the RHOSP quota
- A flavor with at least 8 GB memory, 2 vCPUs, and 100 GB storage space
Compute machines host the applications that you run on OpenShift Container Platform; aim to run as many as you can.
12.6.2.3. Bootstrap machine
During installation, a bootstrap machine is temporarily provisioned to stand up the control plane. After the production control plane is ready, the bootstrap machine is deprovisioned.
The bootstrap machine requires:
- An instance from the RHOSP quota
- A port from the RHOSP quota
- A flavor with at least 16 GB memory, 4 vCPUs, and 100 GB storage space
12.6.3. Internet access for OpenShift Container Platform
In OpenShift Container Platform 4.7, you require access to the Internet to obtain the images that are necessary to install your cluster.
You must have Internet access to:
- Access OpenShift Cluster Manager to download the installation program and perform subscription management. If the cluster has internet access and you do not disable Telemetry, that service automatically entitles your cluster.
- Access Quay.io to obtain the packages that are required to install your cluster.
- Obtain the packages that are required to perform cluster updates.
If your cluster cannot have direct Internet access, you can perform a restricted network installation on some types of infrastructure that you provision. During that process, you download the content that is required and use it to populate a mirror registry with the packages that you need to install a cluster and generate the installation program. With some installation types, the environment that you install your cluster in will not require Internet access. Before you update the cluster, you update the content of the mirror registry.
12.6.4. Enabling Swift on RHOSP
Swift is operated by a user account with the swiftoperator role. Add the role to an account before you run the installation program.
If the Red Hat OpenStack Platform (RHOSP) object storage service, commonly known as Swift, is available, OpenShift Container Platform uses it as the image registry storage. If it is unavailable, the installation program relies on the RHOSP block storage service, commonly known as Cinder.
If Swift is present and you want to use it, you must enable access to it. If it is not present, or if you do not want to use it, skip this section.
Prerequisites
- You have a RHOSP administrator account on the target environment.
- The Swift service is installed.
-
On Ceph RGW, the
account in urloption is enabled.
Procedure
To enable Swift on RHOSP:
As an administrator in the RHOSP CLI, add the
swiftoperatorrole to the account that will access Swift:$ openstack role add --user <user> --project <project> swiftoperator
Your RHOSP deployment can now use Swift for the image registry.
12.6.5. Defining parameters for the installation program
The OpenShift Container Platform installation program relies on a file that is called clouds.yaml. The file describes Red Hat OpenStack Platform (RHOSP) configuration parameters, including the project name, log in information, and authorization service URLs.
Procedure
Create the
clouds.yamlfile:If your RHOSP distribution includes the Horizon web UI, generate a
clouds.yamlfile in it.ImportantRemember to add a password to the
authfield. You can also keep secrets in a separate file fromclouds.yaml.If your RHOSP distribution does not include the Horizon web UI, or you do not want to use Horizon, create the file yourself. For detailed information about
clouds.yaml, see Config files in the RHOSP documentation.clouds: shiftstack: auth: auth_url: http://10.10.14.42:5000/v3 project_name: shiftstack username: shiftstack_user password: XXX user_domain_name: Default project_domain_name: Default dev-env: region_name: RegionOne auth: username: 'devuser' password: XXX project_name: 'devonly' auth_url: 'https://10.10.14.22:5001/v2.0'
If your RHOSP installation uses self-signed certificate authority (CA) certificates for endpoint authentication:
- Copy the certificate authority file to your machine.
Add the
cacertskey to theclouds.yamlfile. The value must be an absolute, non-root-accessible path to the CA certificate:clouds: shiftstack: ... cacert: "/etc/pki/ca-trust/source/anchors/ca.crt.pem"TipAfter you run the installer with a custom CA certificate, you can update the certificate by editing the value of the
ca-cert.pemkey in thecloud-provider-configkeymap. On a command line, run:$ oc edit configmap -n openshift-config cloud-provider-config
Place the
clouds.yamlfile in one of the following locations:-
The value of the
OS_CLIENT_CONFIG_FILEenvironment variable - The current directory
-
A Unix-specific user configuration directory, for example
~/.config/openstack/clouds.yaml A Unix-specific site configuration directory, for example
/etc/openstack/clouds.yamlThe installation program searches for
clouds.yamlin that order.
-
The value of the
12.6.6. Creating the RHCOS image for restricted network installations
Download the Red Hat Enterprise Linux CoreOS (RHCOS) image to install OpenShift Container Platform on a restricted network Red Hat OpenStack Platform (RHOSP) environment.
Prerequisites
- Obtain the OpenShift Container Platform installation program. For a restricted network installation, the program is on your mirror registry host.
Procedure
- Log in to the Red Hat Customer Portal’s Product Downloads page.
Under Version, select the most recent release of OpenShift Container Platform 4.7 for RHEL 8.
ImportantThe RHCOS images might not change with every release of OpenShift Container Platform. You must download images with the highest version that is less than or equal to the OpenShift Container Platform version that you install. Use the image versions that match your OpenShift Container Platform version if they are available.
- Download the Red Hat Enterprise Linux CoreOS (RHCOS) - OpenStack Image (QCOW) image.
Decompress the image.
NoteYou must decompress the image before the cluster can use it. The name of the downloaded file might not contain a compression extension, like
.gzor.tgz. To find out if or how the file is compressed, in a command line, enter:$ file <name_of_downloaded_file>Upload the image that you decompressed to a location that is accessible from the bastion server, like Glance. For example:
$ openstack image create --file rhcos-44.81.202003110027-0-openstack.x86_64.qcow2 --disk-format qcow2 rhcos-${RHCOS_VERSION}ImportantDepending on your RHOSP environment, you might be able to upload the image in either
.rawor.qcow2formats. If you use Ceph, you must use the.rawformat.WarningIf the installation program finds multiple images with the same name, it chooses one of them at random. To avoid this behavior, create unique names for resources in RHOSP.
The image is now available for a restricted installation. Note the image name or location for use in OpenShift Container Platform deployment.
12.6.7. Creating the installation configuration file
You can customize the OpenShift Container Platform cluster you install on Red Hat OpenStack Platform (RHOSP).
Prerequisites
- Obtain the OpenShift Container Platform installation program and the pull secret for your cluster. For a restricted network installation, these files are on your mirror host.
-
Have the
imageContentSourcesvalues that were generated during mirror registry creation. - Obtain the contents of the certificate for your mirror registry.
- Retrieve a Red Hat Enterprise Linux CoreOS (RHCOS) image and upload it to an accessible location.
- Obtain service principal permissions at the subscription level.
Procedure
Create the
install-config.yamlfile.Change to the directory that contains the installation program and run the following command:
$ ./openshift-install create install-config --dir <installation_directory>1 - 1
- For
<installation_directory>, specify the directory name to store the files that the installation program creates.
ImportantSpecify an empty directory. Some installation assets, like bootstrap X.509 certificates have short expiration intervals, so you must not reuse an installation directory. If you want to reuse individual files from another cluster installation, you can copy them into your directory. However, the file names for the installation assets might change between releases. Use caution when copying installation files from an earlier OpenShift Container Platform version.
At the prompts, provide the configuration details for your cloud:
Optional: Select an SSH key to use to access your cluster machines.
NoteFor production OpenShift Container Platform clusters on which you want to perform installation debugging or disaster recovery, specify an SSH key that your
ssh-agentprocess uses.- Select openstack as the platform to target.
- Specify the Red Hat OpenStack Platform (RHOSP) external network name to use for installing the cluster.
- Specify the floating IP address to use for external access to the OpenShift API.
- Specify a RHOSP flavor with at least 16 GB RAM to use for control plane nodes and 8 GB RAM for compute nodes.
- Select the base domain to deploy the cluster to. All DNS records will be sub-domains of this base and will also include the cluster name.
- Enter a name for your cluster. The name must be 14 or fewer characters long.
- Paste the pull secret from the Red Hat OpenShift Cluster Manager.
In the
install-config.yamlfile, set the value ofplatform.openstack.clusterOSImageto the image location or name. For example:platform: openstack: clusterOSImage: http://mirror.example.com/images/rhcos-43.81.201912131630.0-openstack.x86_64.qcow2.gz?sha256=ffebbd68e8a1f2a245ca19522c16c86f67f9ac8e4e0c1f0a812b068b16f7265dEdit the
install-config.yamlfile to provide the additional information that is required for an installation in a restricted network.Update the
pullSecretvalue to contain the authentication information for your registry:pullSecret: '{"auths":{"<mirror_host_name>:5000": {"auth": "<credentials>","email": "you@example.com"}}}'For
<mirror_host_name>, specify the registry domain name that you specified in the certificate for your mirror registry, and for<credentials>, specify the base64-encoded user name and password for your mirror registry.Add the
additionalTrustBundleparameter and value.additionalTrustBundle: | -----BEGIN CERTIFICATE----- ZZZZZZZZZZZZZZZZZZZZZZZZZZZZZZZZZZZZZZZZZZZZZZZZZZZZZZZZZZZZZZZZ -----END CERTIFICATE-----The value must be the contents of the certificate file that you used for your mirror registry, which can be an existing, trusted certificate authority or the self-signed certificate that you generated for the mirror registry.
Add the image content resources, which look like this excerpt:
imageContentSources: - mirrors: - <mirror_host_name>:5000/<repo_name>/release source: quay.example.com/openshift-release-dev/ocp-release - mirrors: - <mirror_host_name>:5000/<repo_name>/release source: registry.example.com/ocp/releaseTo complete these values, use the
imageContentSourcesthat you recorded during mirror registry creation.
-
Make any other modifications to the
install-config.yamlfile that you require. You can find more information about the available parameters in the Installation configuration parameters section. Back up the
install-config.yamlfile so that you can use it to install multiple clusters.ImportantThe
install-config.yamlfile is consumed during the installation process. If you want to reuse the file, you must back it up now.
12.6.7.1. Configuring the cluster-wide proxy during installation
Production environments can deny direct access to the Internet and instead have an HTTP or HTTPS proxy available. You can configure a new OpenShift Container Platform cluster to use a proxy by configuring the proxy settings in the install-config.yaml file.
Prerequisites
-
You have an existing
install-config.yamlfile. You reviewed the sites that your cluster requires access to and determined whether any of them need to bypass the proxy. By default, all cluster egress traffic is proxied, including calls to hosting cloud provider APIs. You added sites to the
Proxyobject’sspec.noProxyfield to bypass the proxy if necessary.NoteThe
Proxyobjectstatus.noProxyfield is populated with the values of thenetworking.machineNetwork[].cidr,networking.clusterNetwork[].cidr, andnetworking.serviceNetwork[]fields from your installation configuration.For installations on Amazon Web Services (AWS), Google Cloud Platform (GCP), Microsoft Azure, and Red Hat OpenStack Platform (RHOSP), the
Proxyobjectstatus.noProxyfield is also populated with the instance metadata endpoint (169.254.169.254).
Procedure
Edit your
install-config.yamlfile and add the proxy settings. For example:apiVersion: v1 baseDomain: my.domain.com proxy: httpProxy: http://<username>:<pswd>@<ip>:<port>1 httpsProxy: https://<username>:<pswd>@<ip>:<port>2 noProxy: example.com3 additionalTrustBundle: |4 -----BEGIN CERTIFICATE----- <MY_TRUSTED_CA_CERT> -----END CERTIFICATE----- ...- 1
- A proxy URL to use for creating HTTP connections outside the cluster. The URL scheme must be
http. - 2
- A proxy URL to use for creating HTTPS connections outside the cluster.
- 3
- A comma-separated list of destination domain names, IP addresses, or other network CIDRs to exclude from proxying. Preface a domain with
.to match subdomains only. For example,.y.commatchesx.y.com, but noty.com. Use*to bypass the proxy for all destinations. - 4
- If provided, the installation program generates a config map that is named
user-ca-bundlein theopenshift-confignamespace to hold the additional CA certificates. If you provideadditionalTrustBundleand at least one proxy setting, theProxyobject is configured to reference theuser-ca-bundleconfig map in thetrustedCAfield. The Cluster Network Operator then creates atrusted-ca-bundleconfig map that merges the contents specified for thetrustedCAparameter with the RHCOS trust bundle. TheadditionalTrustBundlefield is required unless the proxy’s identity certificate is signed by an authority from the RHCOS trust bundle.
NoteThe installation program does not support the proxy
readinessEndpointsfield.- Save the file and reference it when installing OpenShift Container Platform.
The installation program creates a cluster-wide proxy that is named cluster that uses the proxy settings in the provided install-config.yaml file. If no proxy settings are provided, a cluster Proxy object is still created, but it will have a nil spec.
Only the Proxy object named cluster is supported, and no additional proxies can be created.
12.6.7.2. Installation configuration parameters
Before you deploy an OpenShift Container Platform cluster, you provide parameter values to describe your account on the cloud platform that hosts your cluster and optionally customize your cluster’s platform. When you create the install-config.yaml installation configuration file, you provide values for the required parameters through the command line. If you customize your cluster, you can modify the install-config.yaml file to provide more details about the platform.
After installation, you cannot modify these parameters in the install-config.yaml file.
The openshift-install command does not validate field names for parameters. If an incorrect name is specified, the related file or object is not created, and no error is reported. Ensure that the field names for any parameters that are specified are correct.
12.6.7.2.1. Required configuration parameters
Required installation configuration parameters are described in the following table:
| Parameter | Description | Values |
|---|---|---|
|
|
The API version for the | String |
|
|
The base domain of your cloud provider. The base domain is used to create routes to your OpenShift Container Platform cluster components. The full DNS name for your cluster is a combination of the |
A fully-qualified domain or subdomain name, such as |
|
|
Kubernetes resource | Object |
|
|
The name of the cluster. DNS records for the cluster are all subdomains of |
String of lowercase letters, hyphens ( |
|
|
The configuration for the specific platform upon which to perform the installation: | Object |
|
| Get a pull secret from the Red Hat OpenShift Cluster Manager to authenticate downloading container images for OpenShift Container Platform components from services such as Quay.io. |
|
12.6.7.2.2. Network configuration parameters
You can customize your installation configuration based on the requirements of your existing network infrastructure. For example, you can expand the IP address block for the cluster network or provide different IP address blocks than the defaults.
Only IPv4 addresses are supported.
| Parameter | Description | Values |
|---|---|---|
|
| The configuration for the cluster network. | Object Note
You cannot modify parameters specified by the |
|
| The cluster network provider Container Network Interface (CNI) plug-in to install. |
Either |
|
| The IP address blocks for pods.
The default value is If you specify multiple IP address blocks, the blocks must not overlap. | An array of objects. For example: |
|
|
Required if you use An IPv4 network. |
An IP address block in Classless Inter-Domain Routing (CIDR) notation. The prefix length for an IPv4 block is between |
|
|
The subnet prefix length to assign to each individual node. For example, if | A subnet prefix.
The default value is |
|
|
The IP address block for services. The default value is The OpenShift SDN and OVN-Kubernetes network providers support only a single IP address block for the service network. | An array with an IP address block in CIDR format. For example: |
|
| The IP address blocks for machines. If you specify multiple IP address blocks, the blocks must not overlap.
If you specify multiple IP kernel arguments, the | An array of objects. For example: |
|
|
Required if you use | An IP network block in CIDR notation.
For example, Note
Set the |
12.6.7.2.3. Optional configuration parameters
Optional installation configuration parameters are described in the following table:
| Parameter | Description | Values |
|---|---|---|
|
| A PEM-encoded X.509 certificate bundle that is added to the nodes' trusted certificate store. This trust bundle may also be used when a proxy has been configured. | String |
|
| The configuration for the machines that comprise the compute nodes. |
Array of |
|
|
Determines the instruction set architecture of the machines in the pool. Currently, heteregeneous clusters are not supported, so all pools must specify the same architecture. Valid values are | String |
|
|
Whether to enable or disable simultaneous multithreading, or Important If you disable simultaneous multithreading, ensure that your capacity planning accounts for the dramatically decreased machine performance. |
|
|
|
Required if you use |
|
|
|
Required if you use |
|
|
| The number of compute machines, which are also known as worker machines, to provision. |
A positive integer greater than or equal to |
|
| The configuration for the machines that comprise the control plane. |
Array of |
|
|
Determines the instruction set architecture of the machines in the pool. Currently, heterogeneous clusters are not supported, so all pools must specify the same architecture. Valid values are | String |
|
|
Whether to enable or disable simultaneous multithreading, or Important If you disable simultaneous multithreading, ensure that your capacity planning accounts for the dramatically decreased machine performance. |
|
|
|
Required if you use |
|
|
|
Required if you use |
|
|
| The number of control plane machines to provision. |
The only supported value is |
|
| The Cloud Credential Operator (CCO) mode. If no mode is specified, the CCO dynamically tries to determine the capabilities of the provided credentials, with a preference for mint mode on the platforms where multiple modes are supported. Note Not all CCO modes are supported for all cloud providers. For more information on CCO modes, see the Cloud Credential Operator entry in the Cluster Operators reference content. |
|
|
|
Enable or disable FIPS mode. The default is Important
The use of FIPS Validated / Modules in Process cryptographic libraries is only supported on OpenShift Container Platform deployments on the Note If you are using Azure File storage, you cannot enable FIPS mode. |
|
|
| Sources and repositories for the release-image content. |
Array of objects. Includes a |
|
|
Required if you use | String |
|
| Specify one or more repositories that may also contain the same images. | Array of strings |
|
| How to publish or expose the user-facing endpoints of your cluster, such as the Kubernetes API, OpenShift routes. |
Setting this field to Important
If the value of the field is set to |
|
| The SSH key or keys to authenticate access your cluster machines. Note
For production OpenShift Container Platform clusters on which you want to perform installation debugging or disaster recovery, specify an SSH key that your | One or more keys. For example: |
12.6.7.2.4. Additional Red Hat OpenStack Platform (RHOSP) configuration parameters
Additional RHOSP configuration parameters are described in the following table:
| Parameter | Description | Values |
|---|---|---|
|
| For compute machines, the size in gigabytes of the root volume. If you do not set this value, machines use ephemeral storage. |
Integer, for example |
|
| For compute machines, the root volume’s type. |
String, for example |
|
| For control plane machines, the size in gigabytes of the root volume. If you do not set this value, machines use ephemeral storage. |
Integer, for example |
|
| For control plane machines, the root volume’s type. |
String, for example |
|
|
The name of the RHOSP cloud to use from the list of clouds in the |
String, for example |
|
| The RHOSP external network name to be used for installation. |
String, for example |
|
| The RHOSP flavor to use for control plane and compute machines.
This property is deprecated. To use a flavor as the default for all machine pools, add it as the value of the |
String, for example |
12.6.7.2.5. Optional RHOSP configuration parameters
Optional RHOSP configuration parameters are described in the following table:
| Parameter | Description | Values |
|---|---|---|
|
| Additional networks that are associated with compute machines. Allowed address pairs are not created for additional networks. |
A list of one or more UUIDs as strings. For example, |
|
| Additional security groups that are associated with compute machines. |
A list of one or more UUIDs as strings. For example, |
|
| RHOSP Compute (Nova) availability zones (AZs) to install machines on. If this parameter is not set, the installer relies on the default settings for Nova that the RHOSP administrator configured. On clusters that use Kuryr, RHOSP Octavia does not support availability zones. Load balancers and, if you are using the Amphora provider driver, OpenShift Container Platform services that rely on Amphora VMs, are not created according to the value of this property. |
A list of strings. For example, |
|
| Additional networks that are associated with control plane machines. Allowed address pairs are not created for additional networks. |
A list of one or more UUIDs as strings. For example, |
|
| Additional security groups that are associated with control plane machines. |
A list of one or more UUIDs as strings. For example, |
|
| RHOSP Compute (Nova) availability zones (AZs) to install machines on. If this parameter is not set, the installer relies on the default settings for Nova that the RHOSP administrator configured. On clusters that use Kuryr, RHOSP Octavia does not support availability zones. Load balancers and, if you are using the Amphora provider driver, OpenShift Container Platform services that rely on Amphora VMs, are not created according to the value of this property. |
A list of strings. For example, |
|
| The location from which the installer downloads the RHCOS image. You must set this parameter to perform an installation in a restricted network. | An HTTP or HTTPS URL, optionally with an SHA-256 checksum.
For example, |
|
|
Properties to add to the installer-uploaded ClusterOSImage in Glance. This property is ignored if
You can use this property to exceed the default persistent volume (PV) limit for RHOSP of 26 PVs per node. To exceed the limit, set the
You can also use this property to enable the QEMU guest agent by including the |
A list of key-value string pairs. For example, |
|
| The default machine pool platform configuration. |
|
|
|
An existing floating IP address to associate with the Ingress port. To use this property, you must also define the |
An IP address, for example |
|
|
An existing floating IP address to associate with the API load balancer. To use this property, you must also define the |
An IP address, for example |
|
| IP addresses for external DNS servers that cluster instances use for DNS resolution. |
A list of IP addresses as strings. For example, |
|
| The UUID of a RHOSP subnet that the cluster’s nodes use. Nodes and virtual IP (VIP) ports are created on this subnet.
The first item in If you deploy to a custom subnet, you cannot specify an external DNS server to the OpenShift Container Platform installer. Instead, add DNS to the subnet in RHOSP. |
A UUID as a string. For example, |
12.6.7.3. Sample customized install-config.yaml file for restricted OpenStack installations
This sample install-config.yaml demonstrates all of the possible Red Hat OpenStack Platform (RHOSP) customization options.
This sample file is provided for reference only. You must obtain your install-config.yaml file by using the installation program.
apiVersion: v1
baseDomain: example.com
controlPlane:
name: master
platform: {}
replicas: 3
compute:
- name: worker
platform:
openstack:
type: ml.large
replicas: 3
metadata:
name: example
networking:
clusterNetwork:
- cidr: 10.128.0.0/14
hostPrefix: 23
machineCIDR: 10.0.0.0/16
serviceNetwork:
- 172.30.0.0/16
networkType: OpenShiftSDN
platform:
openstack:
region: region1
cloud: mycloud
externalNetwork: external
computeFlavor: m1.xlarge
apiFloatingIP: 128.0.0.1
fips: false
pullSecret: '{"auths": ...}'
sshKey: ssh-ed25519 AAAA...
additionalTrustBundle: |
-----BEGIN CERTIFICATE-----
ZZZZZZZZZZZZZZZZZZZZZZZZZZZZZZZZZZZZZZZZZZZZZZZZZZZZZZZZZZZZZZZZ
-----END CERTIFICATE-----
imageContentSources:
- mirrors:
- <mirror_registry>/<repo_name>/release
source: quay.io/openshift-release-dev/ocp-release
- mirrors:
- <mirror_registry>/<repo_name>/release
source: quay.io/openshift-release-dev/ocp-v4.0-art-dev12.6.8. Setting compute machine affinity
Optionally, you can set the affinity policy for compute machines during installation. The installer does not select an affinity policy for compute machines by default.
You can also create machine sets that use particular RHOSP server groups after installation.
Control plane machines are created with a soft-anti-affinity policy.
You can learn more about RHOSP instance scheduling and placement in the RHOSP documentation.
Prerequisites
-
Create the
install-config.yamlfile and complete any modifications to it.
Procedure
Using the RHOSP command-line interface, create a server group for your compute machines. For example:
$ openstack \ --os-compute-api-version=2.15 \ server group create \ --policy anti-affinity \ my-openshift-worker-groupFor more information, see the
server group createcommand documentation.Change to the directory that contains the installation program and create the manifests:
$ ./openshift-install create manifests --dir=<installation_directory>where:
installation_directory-
Specifies the name of the directory that contains the
install-config.yamlfile for your cluster.
-
Open
manifests/99_openshift-cluster-api_worker-machineset-0.yaml, theMachineSetdefinition file. Add the property
serverGroupIDto the definition beneath thespec.template.spec.providerSpec.valueproperty. For example:apiVersion: machine.openshift.io/v1beta1 kind: MachineSet metadata: labels: machine.openshift.io/cluster-api-cluster: <infrastructure_ID> machine.openshift.io/cluster-api-machine-role: <node_role> machine.openshift.io/cluster-api-machine-type: <node_role> name: <infrastructure_ID>-<node_role> namespace: openshift-machine-api spec: replicas: <number_of_replicas> selector: matchLabels: machine.openshift.io/cluster-api-cluster: <infrastructure_ID> machine.openshift.io/cluster-api-machineset: <infrastructure_ID>-<node_role> template: metadata: labels: machine.openshift.io/cluster-api-cluster: <infrastructure_ID> machine.openshift.io/cluster-api-machine-role: <node_role> machine.openshift.io/cluster-api-machine-type: <node_role> machine.openshift.io/cluster-api-machineset: <infrastructure_ID>-<node_role> spec: providerSpec: value: apiVersion: openstackproviderconfig.openshift.io/v1alpha1 cloudName: openstack cloudsSecret: name: openstack-cloud-credentials namespace: openshift-machine-api flavor: <nova_flavor> image: <glance_image_name_or_location> serverGroupID: aaaaaaaa-bbbb-cccc-dddd-eeeeeeeeeeee1 kind: OpenstackProviderSpec networks: - filter: {} subnets: - filter: name: <subnet_name> tags: openshiftClusterID=<infrastructure_ID> securityGroups: - filter: {} name: <infrastructure_ID>-<node_role> serverMetadata: Name: <infrastructure_ID>-<node_role> openshiftClusterID: <infrastructure_ID> tags: - openshiftClusterID=<infrastructure_ID> trunk: true userDataSecret: name: <node_role>-user-data availabilityZone: <optional_openstack_availability_zone>- 1
- Add the UUID of your server group here.
-
Optional: Back up the
manifests/99_openshift-cluster-api_worker-machineset-0.yamlfile. The installation program deletes themanifests/directory when creating the cluster.
When you install the cluster, the installer uses the MachineSet definition that you modified to create compute machines within your RHOSP server group.
12.6.9. Generating an SSH private key and adding it to the agent
If you want to perform installation debugging or disaster recovery on your cluster, you must provide an SSH key to both your ssh-agent and the installation program. You can use this key to access the bootstrap machine in a public cluster to troubleshoot installation issues.
In a production environment, you require disaster recovery and debugging.
Do not skip this procedure in production environments where disaster recovery and debugging is required.
You can use this key to SSH into the master nodes as the user core. When you deploy the cluster, the key is added to the core user’s ~/.ssh/authorized_keys list.
Procedure
If you do not have an SSH key that is configured for password-less authentication on your computer, create one. For example, on a computer that uses a Linux operating system, run the following command:
$ ssh-keygen -t ed25519 -N '' \ -f <path>/<file_name>1 - 1
- Specify the path and file name, such as
~/.ssh/id_rsa, of the new SSH key. If you have an existing key pair, ensure your public key is in the your~/.sshdirectory.
Running this command generates an SSH key that does not require a password in the location that you specified.
NoteIf you plan to install an OpenShift Container Platform cluster that uses FIPS Validated / Modules in Process cryptographic libraries on the
x86_64architecture, do not create a key that uses theed25519algorithm. Instead, create a key that uses thersaorecdsaalgorithm.Start the
ssh-agentprocess as a background task:$ eval "$(ssh-agent -s)"Example output
Agent pid 31874NoteIf your cluster is in FIPS mode, only use FIPS-compliant algorithms to generate the SSH key. The key must be either RSA or ECDSA.
Add your SSH private key to the
ssh-agent:$ ssh-add <path>/<file_name>1 Example output
Identity added: /home/<you>/<path>/<file_name> (<computer_name>)- 1
- Specify the path and file name for your SSH private key, such as
~/.ssh/id_rsa
Next steps
- When you install OpenShift Container Platform, provide the SSH public key to the installation program.
12.6.10. Enabling access to the environment
At deployment, all OpenShift Container Platform machines are created in a Red Hat OpenStack Platform (RHOSP)-tenant network. Therefore, they are not accessible directly in most RHOSP deployments.
You can configure OpenShift Container Platform API and application access by using floating IP addresses (FIPs) during installation. You can also complete an installation without configuring FIPs, but the installer will not configure a way to reach the API or applications externally.
12.6.10.1. Enabling access with floating IP addresses
Create floating IP (FIP) addresses for external access to the OpenShift Container Platform API and cluster applications.
Procedure
Using the Red Hat OpenStack Platform (RHOSP) CLI, create the API FIP:
$ openstack floating ip create --description "API <cluster_name>.<base_domain>" <external_network>Using the Red Hat OpenStack Platform (RHOSP) CLI, create the apps, or Ingress, FIP:
$ openstack floating ip create --description "Ingress <cluster_name>.<base_domain>" <external_network>Add records that follow these patterns to your DNS server for the API and Ingress FIPs:
api.<cluster_name>.<base_domain>. IN A <API_FIP> *.apps.<cluster_name>.<base_domain>. IN A <apps_FIP>NoteIf you do not control the DNS server, you can access the cluster by adding the cluster domain names such as the following to your
/etc/hostsfile:-
<api_floating_ip> api.<cluster_name>.<base_domain> -
<application_floating_ip> grafana-openshift-monitoring.apps.<cluster_name>.<base_domain> -
<application_floating_ip> prometheus-k8s-openshift-monitoring.apps.<cluster_name>.<base_domain> -
<application_floating_ip> oauth-openshift.apps.<cluster_name>.<base_domain> -
<application_floating_ip> console-openshift-console.apps.<cluster_name>.<base_domain> -
application_floating_ip integrated-oauth-server-openshift-authentication.apps.<cluster_name>.<base_domain>
The cluster domain names in the
/etc/hostsfile grant access to the web console and the monitoring interface of your cluster locally. You can also use thekubectloroc. You can access the user applications by using the additional entries pointing to the <application_floating_ip>. This action makes the API and applications accessible to only you, which is not suitable for production deployment, but does allow installation for development and testing.-
Add the FIPs to the
install-config.yamlfile as the values of the following parameters:-
platform.openstack.ingressFloatingIP -
platform.openstack.apiFloatingIP
-
If you use these values, you must also enter an external network as the value of the platform.openstack.externalNetwork parameter in the install-config.yaml file.
You can make OpenShift Container Platform resources available outside of the cluster by assigning a floating IP address and updating your firewall configuration.
12.6.10.2. Completing installation without floating IP addresses
You can install OpenShift Container Platform on Red Hat OpenStack Platform (RHOSP) without providing floating IP addresses.
In the install-config.yaml file, do not define the following parameters:
-
platform.openstack.ingressFloatingIP -
platform.openstack.apiFloatingIP
If you cannot provide an external network, you can also leave platform.openstack.externalNetwork blank. If you do not provide a value for platform.openstack.externalNetwork, a router is not created for you, and, without additional action, the installer will fail to retrieve an image from Glance. You must configure external connectivity on your own.
If you run the installer from a system that cannot reach the cluster API due to a lack of floating IP addresses or name resolution, installation fails. To prevent installation failure in these cases, you can use a proxy network or run the installer from a system that is on the same network as your machines.
You can enable name resolution by creating DNS records for the API and Ingress ports. For example:
api.<cluster_name>.<base_domain>. IN A <api_port_IP>
*.apps.<cluster_name>.<base_domain>. IN A <ingress_port_IP>
If you do not control the DNS server, you can add the record to your /etc/hosts file. This action makes the API accessible to only you, which is not suitable for production deployment but does allow installation for development and testing.
12.6.11. Deploying the cluster
You can install OpenShift Container Platform on a compatible cloud platform.
You can run the create cluster command of the installation program only once, during initial installation.
Prerequisites
- Obtain the OpenShift Container Platform installation program and the pull secret for your cluster.
Procedure
Change to the directory that contains the installation program and initialize the cluster deployment:
$ ./openshift-install create cluster --dir <installation_directory> \1 --log-level=info2 NoteIf the cloud provider account that you configured on your host does not have sufficient permissions to deploy the cluster, the installation process stops, and the missing permissions are displayed.
When the cluster deployment completes, directions for accessing your cluster, including a link to its web console and credentials for the
kubeadminuser, display in your terminal.Example output
... INFO Install complete! INFO To access the cluster as the system:admin user when using 'oc', run 'export KUBECONFIG=/home/myuser/install_dir/auth/kubeconfig' INFO Access the OpenShift web-console here: https://console-openshift-console.apps.mycluster.example.com INFO Login to the console with user: "kubeadmin", and password: "4vYBz-Ee6gm-ymBZj-Wt5AL" INFO Time elapsed: 36m22sNoteThe cluster access and credential information also outputs to
<installation_directory>/.openshift_install.logwhen an installation succeeds.Important-
The Ignition config files that the installation program generates contain certificates that expire after 24 hours, which are then renewed at that time. If the cluster is shut down before renewing the certificates and the cluster is later restarted after the 24 hours have elapsed, the cluster automatically recovers the expired certificates. The exception is that you must manually approve the pending
node-bootstrappercertificate signing requests (CSRs) to recover kubelet certificates. See the documentation for Recovering from expired control plane certificates for more information. - It is recommended that you use Ignition config files within 12 hours after they are generated because the 24-hour certificate rotates from 16 to 22 hours after the cluster is installed. By using the Ignition config files within 12 hours, you can avoid installation failure if the certificate update runs during installation.
ImportantYou must not delete the installation program or the files that the installation program creates. Both are required to delete the cluster.
-
The Ignition config files that the installation program generates contain certificates that expire after 24 hours, which are then renewed at that time. If the cluster is shut down before renewing the certificates and the cluster is later restarted after the 24 hours have elapsed, the cluster automatically recovers the expired certificates. The exception is that you must manually approve the pending
12.6.12. Verifying cluster status
You can verify your OpenShift Container Platform cluster’s status during or after installation.
Procedure
In the cluster environment, export the administrator’s kubeconfig file:
$ export KUBECONFIG=<installation_directory>/auth/kubeconfig1 - 1
- For
<installation_directory>, specify the path to the directory that you stored the installation files in.
The
kubeconfigfile contains information about the cluster that is used by the CLI to connect a client to the correct cluster and API server.View the control plane and compute machines created after a deployment:
$ oc get nodesView your cluster’s version:
$ oc get clusterversionView your Operators' status:
$ oc get clusteroperatorView all running pods in the cluster:
$ oc get pods -A
12.6.13. Logging in to the cluster by using the CLI
You can log in to your cluster as a default system user by exporting the cluster kubeconfig file. The kubeconfig file contains information about the cluster that is used by the CLI to connect a client to the correct cluster and API server. The file is specific to a cluster and is created during OpenShift Container Platform installation.
Prerequisites
- You deployed an OpenShift Container Platform cluster.
-
You installed the
ocCLI.
Procedure
Export the
kubeadmincredentials:$ export KUBECONFIG=<installation_directory>/auth/kubeconfig1 - 1
- For
<installation_directory>, specify the path to the directory that you stored the installation files in.
Verify you can run
occommands successfully using the exported configuration:$ oc whoamiExample output
system:admin
12.6.14. Disabling the default OperatorHub sources
Operator catalogs that source content provided by Red Hat and community projects are configured for OperatorHub by default during an OpenShift Container Platform installation. In a restricted network environment, you must disable the default catalogs as a cluster administrator.
Procedure
Disable the sources for the default catalogs by adding
disableAllDefaultSources: trueto theOperatorHubobject:$ oc patch OperatorHub cluster --type json \ -p '[{"op": "add", "path": "/spec/disableAllDefaultSources", "value": true}]'
Alternatively, you can use the web console to manage catalog sources. From the Administration → Cluster Settings → Global Configuration → OperatorHub page, click the Sources tab, where you can create, delete, disable, and enable individual sources.
12.6.15. Telemetry access for OpenShift Container Platform
In OpenShift Container Platform 4.7, the Telemetry service, which runs by default to provide metrics about cluster health and the success of updates, requires internet access. If your cluster is connected to the internet, Telemetry runs automatically, and your cluster is registered to OpenShift Cluster Manager.
After you confirm that your OpenShift Cluster Manager inventory is correct, either maintained automatically by Telemetry or manually by using OpenShift Cluster Manager, use subscription watch to track your OpenShift Container Platform subscriptions at the account or multi-cluster level.
12.6.16. Next steps
- Customize your cluster.
- If the mirror registry that you used to install your cluster has a trusted CA, add it to the cluster by configuring additional trust stores.
- If necessary, you can opt out of remote health reporting.
-
Configure image streams for the Cluster Samples Operator and the
must-gathertool. - Learn how to use Operator Lifecycle Manager (OLM) on restricted networks.
- If you did not configure RHOSP to accept application traffic over floating IP addresses, configure RHOSP access with floating IP addresses.
12.7. Uninstalling a cluster on OpenStack
You can remove a cluster that you deployed to Red Hat OpenStack Platform (RHOSP).
12.7.1. Removing a cluster that uses installer-provisioned infrastructure
You can remove a cluster that uses installer-provisioned infrastructure from your cloud.
After uninstallation, check your cloud provider for any resources not removed properly, especially with User Provisioned Infrastructure (UPI) clusters. There might be resources that the installer did not create or that the installer is unable to access.
Prerequisites
- Have a copy of the installation program that you used to deploy the cluster.
- Have the files that the installation program generated when you created your cluster.
Procedure
From the directory that contains the installation program on the computer that you used to install the cluster, run the following command:
$ ./openshift-install destroy cluster \ --dir <installation_directory> --log-level info1 2 NoteYou must specify the directory that contains the cluster definition files for your cluster. The installation program requires the
metadata.jsonfile in this directory to delete the cluster.-
Optional: Delete the
<installation_directory>directory and the OpenShift Container Platform installation program.
12.8. Uninstalling a cluster on RHOSP from your own infrastructure
You can remove a cluster that you deployed to Red Hat OpenStack Platform (RHOSP) on user-provisioned infrastructure.
12.8.1. Downloading playbook dependencies
The Ansible playbooks that simplify the removal process on user-provisioned infrastructure require several Python modules. On the machine where you will run the process, add the modules' repositories and then download them.
These instructions assume that you are using Red Hat Enterprise Linux (RHEL) 8.
Prerequisites
- Python 3 is installed on your machine.
Procedure
On a command line, add the repositories:
Register with Red Hat Subscription Manager:
$ sudo subscription-manager register # If not done alreadyPull the latest subscription data:
$ sudo subscription-manager attach --pool=$YOUR_POOLID # If not done alreadyDisable the current repositories:
$ sudo subscription-manager repos --disable=* # If not done alreadyAdd the required repositories:
$ sudo subscription-manager repos \ --enable=rhel-8-for-x86_64-baseos-rpms \ --enable=openstack-16-tools-for-rhel-8-x86_64-rpms \ --enable=ansible-2.9-for-rhel-8-x86_64-rpms \ --enable=rhel-8-for-x86_64-appstream-rpms
Install the modules:
$ sudo yum install python3-openstackclient ansible python3-openstacksdkEnsure that the
pythoncommand points topython3:$ sudo alternatives --set python /usr/bin/python3
12.8.2. Removing a cluster from RHOSP that uses your own infrastructure
You can remove an OpenShift Container Platform cluster on Red Hat OpenStack Platform (RHOSP) that uses your own infrastructure. To complete the removal process quickly, run several Ansible playbooks.
Prerequisites
- Python 3 is installed on your machine.
- You downloaded the modules in "Downloading playbook dependencies."
- You have the playbooks that you used to install the cluster.
-
You modified the playbooks that are prefixed with
down-to reflect any changes that you made to their corresponding installation playbooks. For example, changes to thebootstrap.yamlfile are reflected in thedown-bootstrap.yamlfile. - All of the playbooks are in a common directory.
Procedure
On a command line, run the playbooks that you downloaded:
$ ansible-playbook -i inventory.yaml \ down-bootstrap.yaml \ down-control-plane.yaml \ down-compute-nodes.yaml \ down-load-balancers.yaml \ down-network.yaml \ down-security-groups.yaml- Remove any DNS record changes you made for the OpenShift Container Platform installation.
OpenShift Container Platform is removed from your infrastructure.
Chapter 13. Installing on RHV
13.1. Installing a cluster quickly on RHV
You can quickly install a default, non-customized, OpenShift Container Platform cluster on a Red Hat Virtualization (RHV) cluster, similar to the one shown in the following diagram.

The installation program uses installer-provisioned infrastructure to automate creating and deploying the cluster.
To install a default cluster, you prepare the environment, run the installation program and answer its prompts. Then, the installation program creates the OpenShift Container Platform cluster.
For an alternative to installing a default cluster, see Installing a cluster with customizations.
This installation program is available for Linux and macOS only.
13.1.1. Prerequisites
- Review details about the OpenShift Container Platform installation and update processes.
- You have a supported combination of versions in the Support Matrix for OpenShift Container Platform on Red Hat Virtualization (RHV).
- If you use a firewall, configure it to allow the sites that your cluster requires access to.
13.1.2. Internet access for OpenShift Container Platform
In OpenShift Container Platform 4.7, you require access to the Internet to install your cluster.
You must have Internet access to:
- Access OpenShift Cluster Manager to download the installation program and perform subscription management. If the cluster has internet access and you do not disable Telemetry, that service automatically entitles your cluster.
- Access Quay.io to obtain the packages that are required to install your cluster.
- Obtain the packages that are required to perform cluster updates.
If your cluster cannot have direct Internet access, you can perform a restricted network installation on some types of infrastructure that you provision. During that process, you download the content that is required and use it to populate a mirror registry with the packages that you need to install a cluster and generate the installation program. With some installation types, the environment that you install your cluster in will not require Internet access. Before you update the cluster, you update the content of the mirror registry.
13.1.3. Requirements for the RHV environment
To install and run an OpenShift Container Platform version 4.7 cluster, the RHV environment must meet the following requirements.
Not meeting these requirements can cause the installation or process to fail. Additionally, not meeting these requirements can cause the OpenShift Container Platform cluster to fail days or weeks after installation.
The following requirements for CPU, memory, and storage resources are based on default values multiplied by the default number of virtual machines the installation program creates. These resources must be available in addition to what the RHV environment uses for non-OpenShift Container Platform operations.
By default, the installation program creates seven virtual machines during the installation process. First, it creates a bootstrap virtual machine to provide temporary services and a control plane while it creates the rest of the OpenShift Container Platform cluster. When the installation program finishes creating the cluster, deleting the bootstrap machine frees up its resources.
If you increase the number of virtual machines in the RHV environment, you must increase the resources accordingly.
Requirements
- The RHV version is 4.4.
- The RHV environment has one data center whose state is Up.
- The RHV data center contains an RHV cluster.
The RHV cluster has the following resources exclusively for the OpenShift Container Platform cluster:
- Minimum 28 vCPUs: four for each of the seven virtual machines created during installation.
112 GiB RAM or more, including:
- 16 GiB or more for the bootstrap machine, which provides the temporary control plane.
- 16 GiB or more for each of the three control plane machines which provide the control plane.
- 16 GiB or more for each of the three compute machines, which run the application workloads.
- The RHV storage domain must meet these etcd backend performance requirements.
- In production environments, each virtual machine must have 120 GiB or more. Therefore, the storage domain must provide 840 GiB or more for the default OpenShift Container Platform cluster. In resource-constrained or non-production environments, each virtual machine must have 32 GiB or more, so the storage domain must have 230 GiB or more for the default OpenShift Container Platform cluster.
- To download images from the Red Hat Ecosystem Catalog during installation and update procedures, the RHV cluster must have access to an internet connection. The Telemetry service also needs an internet connection to simplify the subscription and entitlement process.
- The RHV cluster must have a virtual network with access to the REST API on the RHV Manager. Ensure that DHCP is enabled on this network, because the VMs that the installer creates obtain their IP address by using DHCP.
A user account and group with the following least privileges for installing and managing an OpenShift Container Platform cluster on the target RHV cluster:
-
DiskOperator -
DiskCreator -
UserTemplateBasedVm -
TemplateOwner -
TemplateCreator -
ClusterAdminon the target cluster
-
Apply the principle of least privilege: Avoid using an administrator account with SuperUser privileges on RHV during the installation process. The installation program saves the credentials you provide to a temporary ovirt-config.yaml file that might be compromised.
13.1.4. Verifying the requirements for the RHV environment
Verify that the RHV environment meets the requirements to install and run an OpenShift Container Platform cluster. Not meeting these requirements can cause failures.
These requirements are based on the default resources the installation program uses to create control plane and compute machines. These resources include vCPUs, memory, and storage. If you change these resources or increase the number of OpenShift Container Platform machines, adjust these requirements accordingly.
Procedure
Check that the RHV version supports installation of OpenShift Container Platform version 4.7.
- In the RHV Administration Portal, click the ? help icon in the upper-right corner and select About.
- In the window that opens, make a note of the RHV Software Version.
- Confirm that the RHV version is 4.4. For more information about supported version combinations, see Support Matrix for OpenShift Container Platform on RHV.
Inspect the data center, cluster, and storage.
- In the RHV Administration Portal, click Compute → Data Centers.
- Confirm that the data center where you plan to install OpenShift Container Platform is accessible.
- Click the name of that data center.
- In the data center details, on the Storage tab, confirm the storage domain where you plan to install OpenShift Container Platform is Active.
- Record the Domain Name for use later on.
- Confirm Free Space has at least 230 GiB.
- Confirm that the storage domain meets these etcd backend performance requirements, which you can measure by using the fio performance benchmarking tool.
- In the data center details, click the Clusters tab.
- Find the RHV cluster where you plan to install OpenShift Container Platform. Record the cluster name for use later on.
Inspect the RHV host resources.
- In the RHV Administration Portal, click Compute > Clusters.
- Click the cluster where you plan to install OpenShift Container Platform.
- In the cluster details, click the Hosts tab.
- Inspect the hosts and confirm they have a combined total of at least 28 Logical CPU Cores available exclusively for the OpenShift Container Platform cluster.
- Record the number of available Logical CPU Cores for use later on.
- Confirm that these CPU cores are distributed so that each of the seven virtual machines created during installation can have four cores.
Confirm that, all together, the hosts have 112 GiB of Max free Memory for scheduling new virtual machines distributed to meet the requirements for each of the following OpenShift Container Platform machines:
- 16 GiB required for the bootstrap machine
- 16 GiB required for each of the three control plane machines
- 16 GiB for each of the three compute machines
- Record the amount of Max free Memory for scheduling new virtual machines for use later on.
Verify that the virtual network for installing OpenShift Container Platform has access to the RHV Manager’s REST API. From a virtual machine on this network, use curl to reach the RHV Manager’s REST API:
$ curl -k -u <username>@<profile>:<password> \1 https://<engine-fqdn>/ovirt-engine/api2 - 1
- For
<username>, specify the user name of an RHV account with privileges to create and manage an OpenShift Container Platform cluster on RHV. For<profile>, specify the login profile, which you can get by going to the RHV Administration Portal login page and reviewing the Profile dropdown list. For<password>, specify the password for that user name. - 2
- For
<engine-fqdn>, specify the fully qualified domain name of the RHV environment.
For example:
$ curl -k -u ocpadmin@internal:pw123 \ https://rhv-env.virtlab.example.com/ovirt-engine/api
13.1.5. Preparing the network environment on RHV
Configure two static IP addresses for the OpenShift Container Platform cluster and create DNS entries using these addresses.
Procedure
Reserve two static IP addresses
- On the network where you plan to install OpenShift Container Platform, identify two static IP addresses that are outside the DHCP lease pool.
Connect to a host on this network and verify that each of the IP addresses is not in use. For example, use Address Resolution Protocol (ARP) to check that none of the IP addresses have entries:
$ arp 10.35.1.19Example output
10.35.1.19 (10.35.1.19) -- no entry- Reserve two static IP addresses following the standard practices for your network environment.
- Record these IP addresses for future reference.
Create DNS entries for the OpenShift Container Platform REST API and apps domain names using this format:
api.<cluster-name>.<base-domain> <ip-address>1 *.apps.<cluster-name>.<base-domain> <ip-address>2 For example:
api.my-cluster.virtlab.example.com 10.35.1.19 *.apps.my-cluster.virtlab.example.com 10.35.1.20
13.1.6. Installing OpenShift Container Platform on RHV in insecure mode
By default, the installer creates a CA certificate, prompts you for confirmation, and stores the certificate to use during installation. You do not need to create or install one manually.
Although it is not recommended, you can override this functionality and install OpenShift Container Platform without verifying a certificate by installing OpenShift Container Platform on RHV in insecure mode.
Installing in insecure mode is not recommended, because it enables a potential attacker to perform a Man-in-the-Middle attack and capture sensitive credentials on the network.
Procedure
-
Create a file named
~/.ovirt/ovirt-config.yaml. Add the following content to
ovirt-config.yaml:ovirt_url: https://ovirt.example.com/ovirt-engine/api1 ovirt_fqdn: ovirt.example.com2 ovirt_pem_url: "" ovirt_username: ocpadmin@internal ovirt_password: super-secret-password3 ovirt_insecure: true- Run the installer.
13.1.7. Generating an SSH private key and adding it to the agent
If you want to perform installation debugging or disaster recovery on your cluster, you must provide an SSH key to both your ssh-agent and the installation program. You can use this key to access the bootstrap machine in a public cluster to troubleshoot installation issues.
In a production environment, you require disaster recovery and debugging.
Do not skip this procedure in production environments where disaster recovery and debugging is required.
You can use this key to SSH into the master nodes as the user core. When you deploy the cluster, the key is added to the core user’s ~/.ssh/authorized_keys list.
Procedure
If you do not have an SSH key that is configured for password-less authentication on your computer, create one. For example, on a computer that uses a Linux operating system, run the following command:
$ ssh-keygen -t ed25519 -N '' \ -f <path>/<file_name>1 - 1
- Specify the path and file name, such as
~/.ssh/id_rsa, of the new SSH key. If you have an existing key pair, ensure your public key is in the your~/.sshdirectory.
Running this command generates an SSH key that does not require a password in the location that you specified.
NoteIf you plan to install an OpenShift Container Platform cluster that uses FIPS Validated / Modules in Process cryptographic libraries on the
x86_64architecture, do not create a key that uses theed25519algorithm. Instead, create a key that uses thersaorecdsaalgorithm.Start the
ssh-agentprocess as a background task:$ eval "$(ssh-agent -s)"Example output
Agent pid 31874NoteIf your cluster is in FIPS mode, only use FIPS-compliant algorithms to generate the SSH key. The key must be either RSA or ECDSA.
Add your SSH private key to the
ssh-agent:$ ssh-add <path>/<file_name>1 Example output
Identity added: /home/<you>/<path>/<file_name> (<computer_name>)- 1
- Specify the path and file name for your SSH private key, such as
~/.ssh/id_rsa
Next steps
- When you install OpenShift Container Platform, provide the SSH public key to the installation program.
13.1.8. Obtaining the installation program
Before you install OpenShift Container Platform, download the installation file on your provisioning machine.
Prerequisites
- You have a machine that runs Linux, for example Red Hat Enterprise Linux 8, with 500 MB of local disk space
Procedure
- Access the Infrastructure Provider page on the OpenShift Cluster Manager site. If you have a Red Hat account, log in with your credentials. If you do not, create an account.
- Select your infrastructure provider.
Navigate to the page for your installation type, download the installation program for your operating system, and place the file in the directory where you will store the installation configuration files.
ImportantThe installation program creates several files on the computer that you use to install your cluster. You must keep the installation program and the files that the installation program creates after you finish installing the cluster. Both files are required to delete the cluster.
ImportantDeleting the files created by the installation program does not remove your cluster, even if the cluster failed during installation. To remove your cluster, complete the OpenShift Container Platform uninstallation procedures for your specific cloud provider.
Extract the installation program. For example, on a computer that uses a Linux operating system, run the following command:
$ tar xvf openshift-install-linux.tar.gz- Download your installation pull secret from the Red Hat OpenShift Cluster Manager. This pull secret allows you to authenticate with the services that are provided by the included authorities, including Quay.io, which serves the container images for OpenShift Container Platform components.
13.1.9. Deploying the cluster
You can install OpenShift Container Platform on a compatible cloud platform.
You can run the create cluster command of the installation program only once, during initial installation.
Prerequisites
-
Open the
ovirt-imageioport to the Manager from the machine running the installer. By default, the port is54322. - Obtain the OpenShift Container Platform installation program and the pull secret for your cluster.
Procedure
Change to the directory that contains the installation program and initialize the cluster deployment:
$ ./openshift-install create cluster --dir <installation_directory> \1 --log-level=info2 ImportantSpecify an empty directory. Some installation assets, like bootstrap X.509 certificates have short expiration intervals, so you must not reuse an installation directory. If you want to reuse individual files from another cluster installation, you can copy them into your directory. However, the file names for the installation assets might change between releases. Use caution when copying installation files from an earlier OpenShift Container Platform version.
Respond to the installation program prompts.
Optional: For
SSH Public Key, select a password-less public key, such as~/.ssh/id_rsa.pub. This key authenticates connections with the new OpenShift Container Platform cluster.NoteFor production OpenShift Container Platform clusters on which you want to perform installation debugging or disaster recovery, select an SSH key that your
ssh-agentprocess uses.-
For
Platform, selectovirt. For
Engine FQDN[:PORT], enter the fully qualified domain name (FQDN) of the RHV environment.For example:
rhv-env.virtlab.example.com:443-
The installer automatically generates a CA certificate. For
Would you like to use the above certificate to connect to the Manager?, answeryorN. If you answerN, you must install OpenShift Container Platform in insecure mode. For
Engine username, enter the user name and profile of the RHV administrator using this format:<username>@<profile>1 - 1
- For
<username>, specify the user name of an RHV administrator. For<profile>, specify the login profile, which you can get by going to the RHV Administration Portal login page and reviewing the Profile dropdown list. For example:admin@internal.
-
For
Engine password, enter the RHV admin password. -
For
Cluster, select the RHV cluster for installing OpenShift Container Platform. -
For
Storage domain, select the storage domain for installing OpenShift Container Platform. -
For
Network, select a virtual network that has access to the RHV Manager REST API. -
For
Internal API Virtual IP, enter the static IP address you set aside for the cluster’s REST API. -
For
Ingress virtual IP, enter the static IP address you reserved for the wildcard apps domain. -
For
Base Domain, enter the base domain of the OpenShift Container Platform cluster. If this cluster is exposed to the outside world, this must be a valid domain recognized by DNS infrastructure. For example, enter:virtlab.example.com -
For
Cluster Name, enter the name of the cluster. For example,my-cluster. Use cluster name from the externally registered/resolvable DNS entries you created for the OpenShift Container Platform REST API and apps domain names. The installation program also gives this name to the cluster in the RHV environment. -
For
Pull Secret, copy the pull secret from thepull-secret.txtfile you downloaded earlier and paste it here. You can also get a copy of the same pull secret from the Red Hat OpenShift Cluster Manager.
NoteIf the cloud provider account that you configured on your host does not have sufficient permissions to deploy the cluster, the installation process stops, and the missing permissions are displayed.
When the cluster deployment completes, directions for accessing your cluster, including a link to its web console and credentials for the
kubeadminuser, display in your terminal.Example output
... INFO Install complete! INFO To access the cluster as the system:admin user when using 'oc', run 'export KUBECONFIG=/home/myuser/install_dir/auth/kubeconfig' INFO Access the OpenShift web-console here: https://console-openshift-console.apps.mycluster.example.com INFO Login to the console with user: "kubeadmin", and password: "4vYBz-Ee6gm-ymBZj-Wt5AL" INFO Time elapsed: 36m22sNoteThe cluster access and credential information also outputs to
<installation_directory>/.openshift_install.logwhen an installation succeeds.Important-
The Ignition config files that the installation program generates contain certificates that expire after 24 hours, which are then renewed at that time. If the cluster is shut down before renewing the certificates and the cluster is later restarted after the 24 hours have elapsed, the cluster automatically recovers the expired certificates. The exception is that you must manually approve the pending
node-bootstrappercertificate signing requests (CSRs) to recover kubelet certificates. See the documentation for Recovering from expired control plane certificates for more information. - It is recommended that you use Ignition config files within 12 hours after they are generated because the 24-hour certificate rotates from 16 to 22 hours after the cluster is installed. By using the Ignition config files within 12 hours, you can avoid installation failure if the certificate update runs during installation.
ImportantYou must not delete the installation program or the files that the installation program creates. Both are required to delete the cluster.
You have completed the steps required to install the cluster. The remaining steps show you how to verify the cluster and troubleshoot the installation.
13.1.10. Installing the OpenShift CLI by downloading the binary
You can install the OpenShift CLI (oc) to interact with OpenShift Container Platform from a command-line interface. You can install oc on Linux, Windows, or macOS.
If you installed an earlier version of oc, you cannot use it to complete all of the commands in OpenShift Container Platform 4.7. Download and install the new version of oc.
13.1.10.1. Installing the OpenShift CLI on Linux
You can install the OpenShift CLI (oc) binary on Linux by using the following procedure.
Procedure
- Navigate to the OpenShift Container Platform downloads page on the Red Hat Customer Portal.
- Select the appropriate version in the Version drop-down menu.
- Click Download Now next to the OpenShift v4.7 Linux Client entry and save the file.
Unpack the archive:
$ tar xvzf <file>Place the
ocbinary in a directory that is on yourPATH.To check your
PATH, execute the following command:$ echo $PATH
After you install the OpenShift CLI, it is available using the oc command:
$ oc <command>13.1.10.2. Installing the OpenShift CLI on Windows
You can install the OpenShift CLI (oc) binary on Windows by using the following procedure.
Procedure
- Navigate to the OpenShift Container Platform downloads page on the Red Hat Customer Portal.
- Select the appropriate version in the Version drop-down menu.
- Click Download Now next to the OpenShift v4.7 Windows Client entry and save the file.
- Unzip the archive with a ZIP program.
Move the
ocbinary to a directory that is on yourPATH.To check your
PATH, open the command prompt and execute the following command:C:\> path
After you install the OpenShift CLI, it is available using the oc command:
C:\> oc <command>13.1.10.3. Installing the OpenShift CLI on macOS
You can install the OpenShift CLI (oc) binary on macOS by using the following procedure.
Procedure
- Navigate to the OpenShift Container Platform downloads page on the Red Hat Customer Portal.
- Select the appropriate version in the Version drop-down menu.
- Click Download Now next to the OpenShift v4.7 MacOSX Client entry and save the file.
- Unpack and unzip the archive.
Move the
ocbinary to a directory on your PATH.To check your
PATH, open a terminal and execute the following command:$ echo $PATH
After you install the OpenShift CLI, it is available using the oc command:
$ oc <command>To learn more, see Getting started with the OpenShift CLI.
13.1.11. Logging in to the cluster by using the CLI
You can log in to your cluster as a default system user by exporting the cluster kubeconfig file. The kubeconfig file contains information about the cluster that is used by the CLI to connect a client to the correct cluster and API server. The file is specific to a cluster and is created during OpenShift Container Platform installation.
Prerequisites
- You deployed an OpenShift Container Platform cluster.
-
You installed the
ocCLI.
Procedure
Export the
kubeadmincredentials:$ export KUBECONFIG=<installation_directory>/auth/kubeconfig1 - 1
- For
<installation_directory>, specify the path to the directory that you stored the installation files in.
Verify you can run
occommands successfully using the exported configuration:$ oc whoamiExample output
system:admin
13.1.12. Verifying cluster status
You can verify your OpenShift Container Platform cluster’s status during or after installation.
Procedure
In the cluster environment, export the administrator’s kubeconfig file:
$ export KUBECONFIG=<installation_directory>/auth/kubeconfig1 - 1
- For
<installation_directory>, specify the path to the directory that you stored the installation files in.
The
kubeconfigfile contains information about the cluster that is used by the CLI to connect a client to the correct cluster and API server.View the control plane and compute machines created after a deployment:
$ oc get nodesView your cluster’s version:
$ oc get clusterversionView your Operators' status:
$ oc get clusteroperatorView all running pods in the cluster:
$ oc get pods -A
Troubleshooting
If the installation fails, the installation program times out and displays an error message. To learn more, see Troubleshooting installation issues.
13.1.13. Accessing the OpenShift Container Platform web console on RHV
After the OpenShift Container Platform cluster initializes, you can log in to the OpenShift Container Platform web console.
Procedure
- Optional: In the Red Hat Virtualization (RHV) Administration Portal, open Compute → Cluster.
- Verify that the installation program creates the virtual machines.
- Return to the command line where the installation program is running. When the installation program finishes, it displays the user name and temporary password for logging into the OpenShift Container Platform web console.
In a browser, open the URL of the OpenShift Container Platform web console. The URL uses this format:
console-openshift-console.apps.<clustername>.<basedomain>1 - 1
- For
<clustername>.<basedomain>, specify the cluster name and base domain.
For example:
console-openshift-console.apps.my-cluster.virtlab.example.com
13.1.14. Telemetry access for OpenShift Container Platform
In OpenShift Container Platform 4.7, the Telemetry service, which runs by default to provide metrics about cluster health and the success of updates, requires internet access. If your cluster is connected to the internet, Telemetry runs automatically, and your cluster is registered to OpenShift Cluster Manager.
After you confirm that your OpenShift Cluster Manager inventory is correct, either maintained automatically by Telemetry or manually by using OpenShift Cluster Manager, use subscription watch to track your OpenShift Container Platform subscriptions at the account or multi-cluster level.
13.1.15. Troubleshooting common issues with installing on Red Hat Virtualization (RHV)
Here are some common issues you might encounter, along with proposed causes and solutions.
13.1.15.1. CPU load increases and nodes go into a Not Ready state
-
Symptom: CPU load increases significantly and nodes start going into a
Not Readystate. - Cause: The storage domain latency might be too high, especially for control plane nodes (also known as the master nodes).
Solution:
Make the nodes ready again by restarting the kubelet service:
$ systemctl restart kubeletInspect the OpenShift Container Platform metrics service, which automatically gathers and reports on some valuable data such as the etcd disk sync duration. If the cluster is operational, use this data to help determine whether storage latency or throughput is the root issue. If so, consider using a storage resource that has lower latency and higher throughput.
To get raw metrics, enter the following command as kubeadmin or user with cluster-admin privileges:
$ oc get --insecure-skip-tls-verify --server=https://localhost:<port> --raw=/metricsTo learn more, see Exploring Application Endpoints for the purposes of Debugging with OpenShift 4.x
13.1.15.2. Trouble connecting the OpenShift Container Platform cluster API
Symptom: The installation program completes but the OpenShift Container Platform cluster API is not available. The bootstrap virtual machine remains up after the bootstrap process is complete. When you enter the following command, the response will time out.
$ oc login -u kubeadmin -p *** <apiurl>- Cause: The bootstrap VM was not deleted by the installation program and has not released the cluster’s API IP address.
Solution: Use the
wait-forsubcommand to be notified when the bootstrap process is complete:$ ./openshift-install wait-for bootstrap-completeWhen the bootstrap process is complete, delete the bootstrap virtual machine:
$ ./openshift-install destroy bootstrap
13.1.16. Post-installation tasks
After the OpenShift Container Platform cluster initializes, you can perform the following tasks.
- Optional: After deployment, add or replace SSH keys using the Machine Config Operator (MCO) in OpenShift Container Platform.
-
Optional: Remove the
kubeadminuser. Instead, use the authentication provider to create a user with cluster-admin privileges.
13.2. Installing a cluster on RHV with customizations
You can customize and install an OpenShift Container Platform cluster on Red Hat Virtualization (RHV), similar to the one shown in the following diagram.
The installation program uses installer-provisioned infrastructure to automate creating and deploying the cluster.
To install a customized cluster, you prepare the environment and perform the following steps:
-
Create an installation configuration file, the
install-config.yamlfile, by running the installation program and answering its prompts. -
Inspect and modify parameters in the
install-config.yamlfile. -
Make a working copy of the
install-config.yamlfile. -
Run the installation program with a copy of the
install-config.yamlfile.
Then, the installation program creates the OpenShift Container Platform cluster.
For an alternative to installing a customized cluster, see Installing a default cluster.
This installation program is available for Linux and macOS only.
13.2.1. Prerequisites
- Review details about the OpenShift Container Platform installation and update processes.
- You have a supported combination of versions in the Support Matrix for OpenShift Container Platform on Red Hat Virtualization (RHV).
- If you use a firewall, configure it to allow the sites that your cluster requires access to.
13.2.2. Internet access for OpenShift Container Platform
In OpenShift Container Platform 4.7, you require access to the Internet to install your cluster.
You must have Internet access to:
- Access OpenShift Cluster Manager to download the installation program and perform subscription management. If the cluster has internet access and you do not disable Telemetry, that service automatically entitles your cluster.
- Access Quay.io to obtain the packages that are required to install your cluster.
- Obtain the packages that are required to perform cluster updates.
If your cluster cannot have direct Internet access, you can perform a restricted network installation on some types of infrastructure that you provision. During that process, you download the content that is required and use it to populate a mirror registry with the packages that you need to install a cluster and generate the installation program. With some installation types, the environment that you install your cluster in will not require Internet access. Before you update the cluster, you update the content of the mirror registry.
13.2.3. Requirements for the RHV environment
To install and run an OpenShift Container Platform version 4.7 cluster, the RHV environment must meet the following requirements.
Not meeting these requirements can cause the installation or process to fail. Additionally, not meeting these requirements can cause the OpenShift Container Platform cluster to fail days or weeks after installation.
The following requirements for CPU, memory, and storage resources are based on default values multiplied by the default number of virtual machines the installation program creates. These resources must be available in addition to what the RHV environment uses for non-OpenShift Container Platform operations.
By default, the installation program creates seven virtual machines during the installation process. First, it creates a bootstrap virtual machine to provide temporary services and a control plane while it creates the rest of the OpenShift Container Platform cluster. When the installation program finishes creating the cluster, deleting the bootstrap machine frees up its resources.
If you increase the number of virtual machines in the RHV environment, you must increase the resources accordingly.
Requirements
- The RHV version is 4.4.
- The RHV environment has one data center whose state is Up.
- The RHV data center contains an RHV cluster.
The RHV cluster has the following resources exclusively for the OpenShift Container Platform cluster:
- Minimum 28 vCPUs: four for each of the seven virtual machines created during installation.
112 GiB RAM or more, including:
- 16 GiB or more for the bootstrap machine, which provides the temporary control plane.
- 16 GiB or more for each of the three control plane machines which provide the control plane.
- 16 GiB or more for each of the three compute machines, which run the application workloads.
- The RHV storage domain must meet these etcd backend performance requirements.
- In production environments, each virtual machine must have 120 GiB or more. Therefore, the storage domain must provide 840 GiB or more for the default OpenShift Container Platform cluster. In resource-constrained or non-production environments, each virtual machine must have 32 GiB or more, so the storage domain must have 230 GiB or more for the default OpenShift Container Platform cluster.
- To download images from the Red Hat Ecosystem Catalog during installation and update procedures, the RHV cluster must have access to an internet connection. The Telemetry service also needs an internet connection to simplify the subscription and entitlement process.
- The RHV cluster must have a virtual network with access to the REST API on the RHV Manager. Ensure that DHCP is enabled on this network, because the VMs that the installer creates obtain their IP address by using DHCP.
A user account and group with the following least privileges for installing and managing an OpenShift Container Platform cluster on the target RHV cluster:
-
DiskOperator -
DiskCreator -
UserTemplateBasedVm -
TemplateOwner -
TemplateCreator -
ClusterAdminon the target cluster
-
Apply the principle of least privilege: Avoid using an administrator account with SuperUser privileges on RHV during the installation process. The installation program saves the credentials you provide to a temporary ovirt-config.yaml file that might be compromised.
13.2.4. Verifying the requirements for the RHV environment
Verify that the RHV environment meets the requirements to install and run an OpenShift Container Platform cluster. Not meeting these requirements can cause failures.
These requirements are based on the default resources the installation program uses to create control plane and compute machines. These resources include vCPUs, memory, and storage. If you change these resources or increase the number of OpenShift Container Platform machines, adjust these requirements accordingly.
Procedure
Check that the RHV version supports installation of OpenShift Container Platform version 4.7.
- In the RHV Administration Portal, click the ? help icon in the upper-right corner and select About.
- In the window that opens, make a note of the RHV Software Version.
- Confirm that the RHV version is 4.4. For more information about supported version combinations, see Support Matrix for OpenShift Container Platform on RHV.
Inspect the data center, cluster, and storage.
- In the RHV Administration Portal, click Compute → Data Centers.
- Confirm that the data center where you plan to install OpenShift Container Platform is accessible.
- Click the name of that data center.
- In the data center details, on the Storage tab, confirm the storage domain where you plan to install OpenShift Container Platform is Active.
- Record the Domain Name for use later on.
- Confirm Free Space has at least 230 GiB.
- Confirm that the storage domain meets these etcd backend performance requirements, which you can measure by using the fio performance benchmarking tool.
- In the data center details, click the Clusters tab.
- Find the RHV cluster where you plan to install OpenShift Container Platform. Record the cluster name for use later on.
Inspect the RHV host resources.
- In the RHV Administration Portal, click Compute > Clusters.
- Click the cluster where you plan to install OpenShift Container Platform.
- In the cluster details, click the Hosts tab.
- Inspect the hosts and confirm they have a combined total of at least 28 Logical CPU Cores available exclusively for the OpenShift Container Platform cluster.
- Record the number of available Logical CPU Cores for use later on.
- Confirm that these CPU cores are distributed so that each of the seven virtual machines created during installation can have four cores.
Confirm that, all together, the hosts have 112 GiB of Max free Memory for scheduling new virtual machines distributed to meet the requirements for each of the following OpenShift Container Platform machines:
- 16 GiB required for the bootstrap machine
- 16 GiB required for each of the three control plane machines
- 16 GiB for each of the three compute machines
- Record the amount of Max free Memory for scheduling new virtual machines for use later on.
Verify that the virtual network for installing OpenShift Container Platform has access to the RHV Manager’s REST API. From a virtual machine on this network, use curl to reach the RHV Manager’s REST API:
$ curl -k -u <username>@<profile>:<password> \1 https://<engine-fqdn>/ovirt-engine/api2 - 1
- For
<username>, specify the user name of an RHV account with privileges to create and manage an OpenShift Container Platform cluster on RHV. For<profile>, specify the login profile, which you can get by going to the RHV Administration Portal login page and reviewing the Profile dropdown list. For<password>, specify the password for that user name. - 2
- For
<engine-fqdn>, specify the fully qualified domain name of the RHV environment.
For example:
$ curl -k -u ocpadmin@internal:pw123 \ https://rhv-env.virtlab.example.com/ovirt-engine/api
13.2.5. Preparing the network environment on RHV
Configure two static IP addresses for the OpenShift Container Platform cluster and create DNS entries using these addresses.
Procedure
Reserve two static IP addresses
- On the network where you plan to install OpenShift Container Platform, identify two static IP addresses that are outside the DHCP lease pool.
Connect to a host on this network and verify that each of the IP addresses is not in use. For example, use Address Resolution Protocol (ARP) to check that none of the IP addresses have entries:
$ arp 10.35.1.19Example output
10.35.1.19 (10.35.1.19) -- no entry- Reserve two static IP addresses following the standard practices for your network environment.
- Record these IP addresses for future reference.
Create DNS entries for the OpenShift Container Platform REST API and apps domain names using this format:
api.<cluster-name>.<base-domain> <ip-address>1 *.apps.<cluster-name>.<base-domain> <ip-address>2 For example:
api.my-cluster.virtlab.example.com 10.35.1.19 *.apps.my-cluster.virtlab.example.com 10.35.1.20
13.2.6. Installing OpenShift Container Platform on RHV in insecure mode
By default, the installer creates a CA certificate, prompts you for confirmation, and stores the certificate to use during installation. You do not need to create or install one manually.
Although it is not recommended, you can override this functionality and install OpenShift Container Platform without verifying a certificate by installing OpenShift Container Platform on RHV in insecure mode.
Installing in insecure mode is not recommended, because it enables a potential attacker to perform a Man-in-the-Middle attack and capture sensitive credentials on the network.
Procedure
-
Create a file named
~/.ovirt/ovirt-config.yaml. Add the following content to
ovirt-config.yaml:ovirt_url: https://ovirt.example.com/ovirt-engine/api1 ovirt_fqdn: ovirt.example.com2 ovirt_pem_url: "" ovirt_username: ocpadmin@internal ovirt_password: super-secret-password3 ovirt_insecure: true- Run the installer.
13.2.7. Generating an SSH private key and adding it to the agent
If you want to perform installation debugging or disaster recovery on your cluster, you must provide an SSH key to both your ssh-agent and the installation program. You can use this key to access the bootstrap machine in a public cluster to troubleshoot installation issues.
In a production environment, you require disaster recovery and debugging.
Do not skip this procedure in production environments where disaster recovery and debugging is required.
You can use this key to SSH into the master nodes as the user core. When you deploy the cluster, the key is added to the core user’s ~/.ssh/authorized_keys list.
Procedure
If you do not have an SSH key that is configured for password-less authentication on your computer, create one. For example, on a computer that uses a Linux operating system, run the following command:
$ ssh-keygen -t ed25519 -N '' \ -f <path>/<file_name>1 - 1
- Specify the path and file name, such as
~/.ssh/id_rsa, of the new SSH key. If you have an existing key pair, ensure your public key is in the your~/.sshdirectory.
Running this command generates an SSH key that does not require a password in the location that you specified.
NoteIf you plan to install an OpenShift Container Platform cluster that uses FIPS Validated / Modules in Process cryptographic libraries on the
x86_64architecture, do not create a key that uses theed25519algorithm. Instead, create a key that uses thersaorecdsaalgorithm.Start the
ssh-agentprocess as a background task:$ eval "$(ssh-agent -s)"Example output
Agent pid 31874NoteIf your cluster is in FIPS mode, only use FIPS-compliant algorithms to generate the SSH key. The key must be either RSA or ECDSA.
Add your SSH private key to the
ssh-agent:$ ssh-add <path>/<file_name>1 Example output
Identity added: /home/<you>/<path>/<file_name> (<computer_name>)- 1
- Specify the path and file name for your SSH private key, such as
~/.ssh/id_rsa
Next steps
- When you install OpenShift Container Platform, provide the SSH public key to the installation program.
13.2.8. Obtaining the installation program
Before you install OpenShift Container Platform, download the installation file on your provisioning machine.
Prerequisites
- You have a machine that runs Linux, for example Red Hat Enterprise Linux 8, with 500 MB of local disk space
Procedure
- Access the Infrastructure Provider page on the OpenShift Cluster Manager site. If you have a Red Hat account, log in with your credentials. If you do not, create an account.
- Select your infrastructure provider.
Navigate to the page for your installation type, download the installation program for your operating system, and place the file in the directory where you will store the installation configuration files.
ImportantThe installation program creates several files on the computer that you use to install your cluster. You must keep the installation program and the files that the installation program creates after you finish installing the cluster. Both files are required to delete the cluster.
ImportantDeleting the files created by the installation program does not remove your cluster, even if the cluster failed during installation. To remove your cluster, complete the OpenShift Container Platform uninstallation procedures for your specific cloud provider.
Extract the installation program. For example, on a computer that uses a Linux operating system, run the following command:
$ tar xvf openshift-install-linux.tar.gz- Download your installation pull secret from the Red Hat OpenShift Cluster Manager. This pull secret allows you to authenticate with the services that are provided by the included authorities, including Quay.io, which serves the container images for OpenShift Container Platform components.
13.2.9. Creating the installation configuration file
You can customize the OpenShift Container Platform cluster you install on Red Hat Virtualization (RHV).
Prerequisites
- Obtain the OpenShift Container Platform installation program and the pull secret for your cluster.
- Obtain service principal permissions at the subscription level.
Procedure
Create the
install-config.yamlfile.Change to the directory that contains the installation program and run the following command:
$ ./openshift-install create install-config --dir <installation_directory>1 - 1
- For
<installation_directory>, specify the directory name to store the files that the installation program creates.
ImportantSpecify an empty directory. Some installation assets, like bootstrap X.509 certificates have short expiration intervals, so you must not reuse an installation directory. If you want to reuse individual files from another cluster installation, you can copy them into your directory. However, the file names for the installation assets might change between releases. Use caution when copying installation files from an earlier OpenShift Container Platform version.
Respond to the installation program prompts.
For
SSH Public Key, select a password-less public key, such as~/.ssh/id_rsa.pub. This key authenticates connections with the new OpenShift Container Platform cluster.NoteFor production OpenShift Container Platform clusters on which you want to perform installation debugging or disaster recovery, select an SSH key that your
ssh-agentprocess uses.-
For
Platform, selectovirt. For
Enter oVirt’s API endpoint URL, enter the URL of the RHV API using this format:https://<engine-fqdn>/ovirt-engine/api1 - 1
- For
<engine-fqdn>, specify the fully qualified domain name of the RHV environment.
For example:
$ curl -k -u ocpadmin@internal:pw123 \ https://rhv-env.virtlab.example.com/ovirt-engine/api-
For
Is the oVirt CA trusted locally?, enterYes, because you have already set up a CA certificate. Otherwise, enterNo. -
For
oVirt’s CA bundle, if you enteredYesfor the preceding question, copy the certificate content from/etc/pki/ca-trust/source/anchors/ca.pemand paste it here. Then, pressEntertwice. Otherwise, if you enteredNofor the preceding question, this question does not appear. For
oVirt engine username, enter the user name and profile of the RHV administrator using this format:<username>@<profile>1 - 1
- For
<username>, specify the user name of an RHV administrator. For<profile>, specify the login profile, which you can get by going to the RHV Administration Portal login page and reviewing the Profile dropdown list. Together, the user name and profile should look similar to this example:
ocpadmin@internal-
For
oVirt engine password, enter the RHV admin password. -
For
oVirt cluster, select the cluster for installing OpenShift Container Platform. -
For
oVirt storage domain, select the storage domain for installing OpenShift Container Platform. -
For
oVirt network, select a virtual network that has access to the RHV Manager REST API. -
For
Internal API Virtual IP, enter the static IP address you set aside for the cluster’s REST API. -
For
Ingress virtual IP, enter the static IP address you reserved for the wildcard apps domain. -
For
Base Domain, enter the base domain of the OpenShift Container Platform cluster. If this cluster is exposed to the outside world, this must be a valid domain recognized by DNS infrastructure. For example, enter:virtlab.example.com -
For
Cluster Name, enter the name of the cluster. For example,my-cluster. Use cluster name from the externally registered/resolvable DNS entries you created for the OpenShift Container Platform REST API and apps domain names. The installation program also gives this name to the cluster in the RHV environment. -
For
Pull Secret, copy the pull secret from thepull-secret.txtfile you downloaded earlier and paste it here. You can also get a copy of the same pull secret from the Red Hat OpenShift Cluster Manager.
Modify the
install-config.yamlfile. You can find more information about the available parameters in the "Installation configuration parameters" section.NoteIf you have any intermediate CA certificates on the Manager, verify that the certificates appear in the
ovirt-config.yamlfile and theinstall-config.yamlfile. If they do not appear, add them as follows:In the
~/.ovirt/ovirt-config.yamlfile:[ovirt_ca_bundle]: | -----BEGIN CERTIFICATE----- <MY_TRUSTED_CA> -----END CERTIFICATE----- -----BEGIN CERTIFICATE----- <INTERMEDIATE_CA> -----END CERTIFICATE-----In the
install-config.yamlfile:[additionalTrustBundle]: | -----BEGIN CERTIFICATE----- <MY_TRUSTED_CA> -----END CERTIFICATE----- -----BEGIN CERTIFICATE----- <INTERMEDIATE_CA> -----END CERTIFICATE-----
Back up the
install-config.yamlfile so that you can use it to install multiple clusters.ImportantThe
install-config.yamlfile is consumed during the installation process. If you want to reuse the file, you must back it up now.
13.2.9.1. Example install-config.yaml files for Red Hat Virtualization (RHV)
You can customize the OpenShift Container Platform cluster the installation program creates by changing the parameters and parameter values in the install-config.yaml file.
The following example is specific to installing OpenShift Container Platform on RHV.
This file is located in the <installation_directory> you specified when you ran the following command.
$ ./openshift-install create install-config --dir <installation_directory>-
These example files are provided for reference only. You must obtain your
install-config.yamlfile by using the installation program. -
Changing the
install-config.yamlfile can increase the resources your cluster requires. Verify that your RHV environment has those additional resources. Otherwise, the installation or cluster will fail.
Example: This is the default install-config.yaml file
apiVersion: v1
baseDomain: example.com
compute:
- architecture: amd64
hyperthreading: Enabled
name: worker
platform: {}
replicas: 3
controlPlane:
architecture: amd64
hyperthreading: Enabled
name: master
platform: {}
replicas: 3
metadata:
creationTimestamp: null
name: my-cluster
networking:
clusterNetwork:
- cidr: 10.128.0.0/14
hostPrefix: 23
machineNetwork:
- cidr: 10.0.0.0/16
networkType: OpenShiftSDN
serviceNetwork:
- 172.30.0.0/16
platform:
ovirt:
api_vip: 10.46.8.230
ingress_vip: 192.168.1.5
ovirt_cluster_id: 68833f9f-e89c-4891-b768-e2ba0815b76b
ovirt_storage_domain_id: ed7b0f4e-0e96-492a-8fff-279213ee1468
ovirt_network_name: ovirtmgmt
vnicProfileID: 3fa86930-0be5-4052-b667-b79f0a729692
publish: External
pullSecret: '{"auths": ...}'
sshKey: ssh-ed12345 AAAA...Example: A minimal install-config.yaml file
apiVersion: v1
baseDomain: example.com
metadata:
name: test-cluster
platform:
ovirt:
api_vip: 10.46.8.230
ingress_vip: 10.46.8.232
ovirt_cluster_id: 68833f9f-e89c-4891-b768-e2ba0815b76b
ovirt_storage_domain_id: ed7b0f4e-0e96-492a-8fff-279213ee1468
ovirt_network_name: ovirtmgmt
vnicProfileID: 3fa86930-0be5-4052-b667-b79f0a729692
pullSecret: '{"auths": ...}'
sshKey: ssh-ed12345 AAAA...Example: Custom machine pools in an install-config.yaml file
apiVersion: v1
baseDomain: example.com
controlPlane:
name: master
platform:
ovirt:
cpu:
cores: 4
sockets: 2
memoryMB: 65536
osDisk:
sizeGB: 100
vmType: server
replicas: 3
compute:
- name: worker
platform:
ovirt:
cpu:
cores: 4
sockets: 4
memoryMB: 65536
osDisk:
sizeGB: 200
vmType: server
replicas: 5
metadata:
name: test-cluster
platform:
ovirt:
api_vip: 10.46.8.230
ingress_vip: 10.46.8.232
ovirt_cluster_id: 68833f9f-e89c-4891-b768-e2ba0815b76b
ovirt_storage_domain_id: ed7b0f4e-0e96-492a-8fff-279213ee1468
ovirt_network_name: ovirtmgmt
vnicProfileID: 3fa86930-0be5-4052-b667-b79f0a729692
pullSecret: '{"auths": ...}'
sshKey: ssh-ed25519 AAAA...13.2.9.2. Installation configuration parameters
Before you deploy an OpenShift Container Platform cluster, you provide parameter values to describe your account on the cloud platform that hosts your cluster and optionally customize your cluster’s platform. When you create the install-config.yaml installation configuration file, you provide values for the required parameters through the command line. If you customize your cluster, you can modify the install-config.yaml file to provide more details about the platform.
After installation, you cannot modify these parameters in the install-config.yaml file.
The openshift-install command does not validate field names for parameters. If an incorrect name is specified, the related file or object is not created, and no error is reported. Ensure that the field names for any parameters that are specified are correct.
13.2.9.2.1. Required configuration parameters
Required installation configuration parameters are described in the following table:
| Parameter | Description | Values |
|---|---|---|
|
|
The API version for the | String |
|
|
The base domain of your cloud provider. The base domain is used to create routes to your OpenShift Container Platform cluster components. The full DNS name for your cluster is a combination of the |
A fully-qualified domain or subdomain name, such as |
|
|
Kubernetes resource | Object |
|
|
The name of the cluster. DNS records for the cluster are all subdomains of |
String of lowercase letters, hyphens ( |
|
|
The configuration for the specific platform upon which to perform the installation: | Object |
|
| Get a pull secret from the Red Hat OpenShift Cluster Manager to authenticate downloading container images for OpenShift Container Platform components from services such as Quay.io. |
|
13.2.9.2.2. Network configuration parameters
You can customize your installation configuration based on the requirements of your existing network infrastructure. For example, you can expand the IP address block for the cluster network or provide different IP address blocks than the defaults.
Only IPv4 addresses are supported.
| Parameter | Description | Values |
|---|---|---|
|
| The configuration for the cluster network. | Object Note
You cannot modify parameters specified by the |
|
| The cluster network provider Container Network Interface (CNI) plug-in to install. |
Either |
|
| The IP address blocks for pods.
The default value is If you specify multiple IP address blocks, the blocks must not overlap. | An array of objects. For example: |
|
|
Required if you use An IPv4 network. |
An IP address block in Classless Inter-Domain Routing (CIDR) notation. The prefix length for an IPv4 block is between |
|
|
The subnet prefix length to assign to each individual node. For example, if | A subnet prefix.
The default value is |
|
|
The IP address block for services. The default value is The OpenShift SDN and OVN-Kubernetes network providers support only a single IP address block for the service network. | An array with an IP address block in CIDR format. For example: |
|
| The IP address blocks for machines. If you specify multiple IP address blocks, the blocks must not overlap.
If you specify multiple IP kernel arguments, the | An array of objects. For example: |
|
|
Required if you use | An IP network block in CIDR notation.
For example, Note
Set the |
13.2.9.2.3. Optional configuration parameters
Optional installation configuration parameters are described in the following table:
| Parameter | Description | Values |
|---|---|---|
|
| A PEM-encoded X.509 certificate bundle that is added to the nodes' trusted certificate store. This trust bundle may also be used when a proxy has been configured. | String |
|
| The configuration for the machines that comprise the compute nodes. |
Array of |
|
|
Determines the instruction set architecture of the machines in the pool. Currently, heteregeneous clusters are not supported, so all pools must specify the same architecture. Valid values are | String |
|
|
Whether to enable or disable simultaneous multithreading, or Important If you disable simultaneous multithreading, ensure that your capacity planning accounts for the dramatically decreased machine performance. |
|
|
|
Required if you use |
|
|
|
Required if you use |
|
|
| The number of compute machines, which are also known as worker machines, to provision. |
A positive integer greater than or equal to |
|
| The configuration for the machines that comprise the control plane. |
Array of |
|
|
Determines the instruction set architecture of the machines in the pool. Currently, heterogeneous clusters are not supported, so all pools must specify the same architecture. Valid values are | String |
|
|
Whether to enable or disable simultaneous multithreading, or Important If you disable simultaneous multithreading, ensure that your capacity planning accounts for the dramatically decreased machine performance. |
|
|
|
Required if you use |
|
|
|
Required if you use |
|
|
| The number of control plane machines to provision. |
The only supported value is |
|
| The Cloud Credential Operator (CCO) mode. If no mode is specified, the CCO dynamically tries to determine the capabilities of the provided credentials, with a preference for mint mode on the platforms where multiple modes are supported. Note Not all CCO modes are supported for all cloud providers. For more information on CCO modes, see the Cloud Credential Operator entry in the Cluster Operators reference content. |
|
|
|
Enable or disable FIPS mode. The default is Important
The use of FIPS Validated / Modules in Process cryptographic libraries is only supported on OpenShift Container Platform deployments on the Note If you are using Azure File storage, you cannot enable FIPS mode. |
|
|
| Sources and repositories for the release-image content. |
Array of objects. Includes a |
|
|
Required if you use | String |
|
| Specify one or more repositories that may also contain the same images. | Array of strings |
|
| How to publish or expose the user-facing endpoints of your cluster, such as the Kubernetes API, OpenShift routes. |
Setting this field to Important
If the value of the field is set to |
|
| The SSH key or keys to authenticate access your cluster machines. Note
For production OpenShift Container Platform clusters on which you want to perform installation debugging or disaster recovery, specify an SSH key that your | One or more keys. For example: |
13.2.9.2.4. Additional Red Hat Virtualization (RHV) configuration parameters
Additional RHV configuration parameters are described in the following table:
| Parameter | Description | Values |
|---|---|---|
|
| Required. The Cluster where the VMs will be created. |
String. For example: |
|
| Required. The Storage Domain ID where the VM disks will be created. |
String. For example: |
|
| Required. The network name where the VM nics will be created. |
String. For example: |
|
| Required. The vNIC profile ID of the VM network interfaces. This can be inferred if the cluster network has a single profile. |
String. For example: |
|
| Required. An IP address on the machine network that will be assigned to the API virtual IP (VIP). You can access the OpenShift API at this endpoint. |
String. Example: |
|
| Required. An IP address on the machine network that will be assigned to the Ingress virtual IP (VIP). |
String. Example: |
13.2.9.2.5. Additional RHV parameters for machine pools
Additional RHV configuration parameters for machine pools are described in the following table:
| Parameter | Description | Values |
|---|---|---|
|
| Optional. Defines the CPU of the VM. | Object |
|
|
Required if you use | Integer |
|
|
Required if you use | Integer |
|
| Optional. Memory of the VM in MiB. | Integer |
|
|
Optional. An instance type UUID, such as Warning
The | String of UUID |
|
| Optional. Defines the first and bootable disk of the VM. | String |
|
|
Required if you use | Number |
|
|
Optional. The VM workload type, such as Note
| String |
You can replace <machine-pool> with controlPlane or compute.
13.2.10. Deploying the cluster
You can install OpenShift Container Platform on a compatible cloud platform.
You can run the create cluster command of the installation program only once, during initial installation.
Prerequisites
-
Open the
ovirt-imageioport to the Manager from the machine running the installer. By default, the port is54322. - Obtain the OpenShift Container Platform installation program and the pull secret for your cluster.
Procedure
Change to the directory that contains the installation program and initialize the cluster deployment:
$ ./openshift-install create cluster --dir <installation_directory> \1 --log-level=info2 NoteIf the cloud provider account that you configured on your host does not have sufficient permissions to deploy the cluster, the installation process stops, and the missing permissions are displayed.
When the cluster deployment completes, directions for accessing your cluster, including a link to its web console and credentials for the
kubeadminuser, display in your terminal.Example output
... INFO Install complete! INFO To access the cluster as the system:admin user when using 'oc', run 'export KUBECONFIG=/home/myuser/install_dir/auth/kubeconfig' INFO Access the OpenShift web-console here: https://console-openshift-console.apps.mycluster.example.com INFO Login to the console with user: "kubeadmin", and password: "4vYBz-Ee6gm-ymBZj-Wt5AL" INFO Time elapsed: 36m22sNoteThe cluster access and credential information also outputs to
<installation_directory>/.openshift_install.logwhen an installation succeeds.Important-
The Ignition config files that the installation program generates contain certificates that expire after 24 hours, which are then renewed at that time. If the cluster is shut down before renewing the certificates and the cluster is later restarted after the 24 hours have elapsed, the cluster automatically recovers the expired certificates. The exception is that you must manually approve the pending
node-bootstrappercertificate signing requests (CSRs) to recover kubelet certificates. See the documentation for Recovering from expired control plane certificates for more information. - It is recommended that you use Ignition config files within 12 hours after they are generated because the 24-hour certificate rotates from 16 to 22 hours after the cluster is installed. By using the Ignition config files within 12 hours, you can avoid installation failure if the certificate update runs during installation.
ImportantYou must not delete the installation program or the files that the installation program creates. Both are required to delete the cluster.
-
The Ignition config files that the installation program generates contain certificates that expire after 24 hours, which are then renewed at that time. If the cluster is shut down before renewing the certificates and the cluster is later restarted after the 24 hours have elapsed, the cluster automatically recovers the expired certificates. The exception is that you must manually approve the pending
You have completed the steps required to install the cluster. The remaining steps show you how to verify the cluster and troubleshoot the installation.
13.2.11. Installing the OpenShift CLI by downloading the binary
You can install the OpenShift CLI (oc) to interact with OpenShift Container Platform from a command-line interface. You can install oc on Linux, Windows, or macOS.
If you installed an earlier version of oc, you cannot use it to complete all of the commands in OpenShift Container Platform 4.7. Download and install the new version of oc.
13.2.11.1. Installing the OpenShift CLI on Linux
You can install the OpenShift CLI (oc) binary on Linux by using the following procedure.
Procedure
- Navigate to the OpenShift Container Platform downloads page on the Red Hat Customer Portal.
- Select the appropriate version in the Version drop-down menu.
- Click Download Now next to the OpenShift v4.7 Linux Client entry and save the file.
Unpack the archive:
$ tar xvzf <file>Place the
ocbinary in a directory that is on yourPATH.To check your
PATH, execute the following command:$ echo $PATH
After you install the OpenShift CLI, it is available using the oc command:
$ oc <command>13.2.11.2. Installing the OpenShift CLI on Windows
You can install the OpenShift CLI (oc) binary on Windows by using the following procedure.
Procedure
- Navigate to the OpenShift Container Platform downloads page on the Red Hat Customer Portal.
- Select the appropriate version in the Version drop-down menu.
- Click Download Now next to the OpenShift v4.7 Windows Client entry and save the file.
- Unzip the archive with a ZIP program.
Move the
ocbinary to a directory that is on yourPATH.To check your
PATH, open the command prompt and execute the following command:C:\> path
After you install the OpenShift CLI, it is available using the oc command:
C:\> oc <command>13.2.11.3. Installing the OpenShift CLI on macOS
You can install the OpenShift CLI (oc) binary on macOS by using the following procedure.
Procedure
- Navigate to the OpenShift Container Platform downloads page on the Red Hat Customer Portal.
- Select the appropriate version in the Version drop-down menu.
- Click Download Now next to the OpenShift v4.7 MacOSX Client entry and save the file.
- Unpack and unzip the archive.
Move the
ocbinary to a directory on your PATH.To check your
PATH, open a terminal and execute the following command:$ echo $PATH
After you install the OpenShift CLI, it is available using the oc command:
$ oc <command>13.2.12. Logging in to the cluster by using the CLI
You can log in to your cluster as a default system user by exporting the cluster kubeconfig file. The kubeconfig file contains information about the cluster that is used by the CLI to connect a client to the correct cluster and API server. The file is specific to a cluster and is created during OpenShift Container Platform installation.
Prerequisites
- You deployed an OpenShift Container Platform cluster.
-
You installed the
ocCLI.
Procedure
Export the
kubeadmincredentials:$ export KUBECONFIG=<installation_directory>/auth/kubeconfig1 - 1
- For
<installation_directory>, specify the path to the directory that you stored the installation files in.
Verify you can run
occommands successfully using the exported configuration:$ oc whoamiExample output
system:admin
To learn more, see Getting started with the OpenShift CLI.
13.2.13. Verifying cluster status
You can verify your OpenShift Container Platform cluster’s status during or after installation.
Procedure
In the cluster environment, export the administrator’s kubeconfig file:
$ export KUBECONFIG=<installation_directory>/auth/kubeconfig1 - 1
- For
<installation_directory>, specify the path to the directory that you stored the installation files in.
The
kubeconfigfile contains information about the cluster that is used by the CLI to connect a client to the correct cluster and API server.View the control plane and compute machines created after a deployment:
$ oc get nodesView your cluster’s version:
$ oc get clusterversionView your Operators' status:
$ oc get clusteroperatorView all running pods in the cluster:
$ oc get pods -A
Troubleshooting
If the installation fails, the installation program times out and displays an error message. To learn more, see Troubleshooting installation issues.
13.2.14. Accessing the OpenShift Container Platform web console on RHV
After the OpenShift Container Platform cluster initializes, you can log in to the OpenShift Container Platform web console.
Procedure
- Optional: In the Red Hat Virtualization (RHV) Administration Portal, open Compute → Cluster.
- Verify that the installation program creates the virtual machines.
- Return to the command line where the installation program is running. When the installation program finishes, it displays the user name and temporary password for logging into the OpenShift Container Platform web console.
In a browser, open the URL of the OpenShift Container Platform web console. The URL uses this format:
console-openshift-console.apps.<clustername>.<basedomain>1 - 1
- For
<clustername>.<basedomain>, specify the cluster name and base domain.
For example:
console-openshift-console.apps.my-cluster.virtlab.example.com
13.2.15. Telemetry access for OpenShift Container Platform
In OpenShift Container Platform 4.7, the Telemetry service, which runs by default to provide metrics about cluster health and the success of updates, requires internet access. If your cluster is connected to the internet, Telemetry runs automatically, and your cluster is registered to OpenShift Cluster Manager.
After you confirm that your OpenShift Cluster Manager inventory is correct, either maintained automatically by Telemetry or manually by using OpenShift Cluster Manager, use subscription watch to track your OpenShift Container Platform subscriptions at the account or multi-cluster level.
13.2.16. Troubleshooting common issues with installing on Red Hat Virtualization (RHV)
Here are some common issues you might encounter, along with proposed causes and solutions.
13.2.16.1. CPU load increases and nodes go into a Not Ready state
-
Symptom: CPU load increases significantly and nodes start going into a
Not Readystate. - Cause: The storage domain latency might be too high, especially for control plane nodes (also known as the master nodes).
Solution:
Make the nodes ready again by restarting the kubelet service:
$ systemctl restart kubeletInspect the OpenShift Container Platform metrics service, which automatically gathers and reports on some valuable data such as the etcd disk sync duration. If the cluster is operational, use this data to help determine whether storage latency or throughput is the root issue. If so, consider using a storage resource that has lower latency and higher throughput.
To get raw metrics, enter the following command as kubeadmin or user with cluster-admin privileges:
$ oc get --insecure-skip-tls-verify --server=https://localhost:<port> --raw=/metricsTo learn more, see Exploring Application Endpoints for the purposes of Debugging with OpenShift 4.x
13.2.16.2. Trouble connecting the OpenShift Container Platform cluster API
Symptom: The installation program completes but the OpenShift Container Platform cluster API is not available. The bootstrap virtual machine remains up after the bootstrap process is complete. When you enter the following command, the response will time out.
$ oc login -u kubeadmin -p *** <apiurl>- Cause: The bootstrap VM was not deleted by the installation program and has not released the cluster’s API IP address.
Solution: Use the
wait-forsubcommand to be notified when the bootstrap process is complete:$ ./openshift-install wait-for bootstrap-completeWhen the bootstrap process is complete, delete the bootstrap virtual machine:
$ ./openshift-install destroy bootstrap
13.2.17. Post-installation tasks
After the OpenShift Container Platform cluster initializes, you can perform the following tasks.
- Optional: After deployment, add or replace SSH keys using the Machine Config Operator (MCO) in OpenShift Container Platform.
-
Optional: Remove the
kubeadminuser. Instead, use the authentication provider to create a user with cluster-admin privileges.
13.2.18. Next steps
- Customize your cluster.
- If necessary, you can opt out of remote health reporting.
13.3. Installing a cluster on RHV with user-provisioned infrastructure
In OpenShift Container Platform version 4.7, you can install a customized OpenShift Container Platform cluster on Red Hat Virtualization (RHV) and other infrastructure that you provide. The OpenShift Container Platform documentation uses the term user-provisioned infrastructure to refer to this infrastructure type.
The following diagram shows an example of a potential OpenShift Container Platform cluster running on a RHV cluster.
The RHV hosts run virtual machines that contain both control plane and compute pods. One of the hosts also runs a Manager virtual machine and a bootstrap virtual machine that contains a temporary control plane pod.]
13.3.1. Prerequisites
The following items are required to install an OpenShift Container Platform cluster on a RHV environment.
- You have a supported combination of versions in the Support Matrix for OpenShift Container Platform on RHV.
- You have a supported combination of versions in the Support Matrix for OpenShift Container Platform on Red Hat Virtualization (RHV).
- You are familiar with the OpenShift Container Platform installation and update processes.
13.3.2. Internet access for OpenShift Container Platform
In OpenShift Container Platform 4.7, you require access to the Internet to install your cluster.
You must have Internet access to:
- Access OpenShift Cluster Manager to download the installation program and perform subscription management. If the cluster has internet access and you do not disable Telemetry, that service automatically entitles your cluster.
- Access Quay.io to obtain the packages that are required to install your cluster.
- Obtain the packages that are required to perform cluster updates.
If your cluster cannot have direct Internet access, you can perform a restricted network installation on some types of infrastructure that you provision. During that process, you download the content that is required and use it to populate a mirror registry with the packages that you need to install a cluster and generate the installation program. With some installation types, the environment that you install your cluster in will not require Internet access. Before you update the cluster, you update the content of the mirror registry.
13.3.3. Requirements for the RHV environment
To install and run an OpenShift Container Platform version 4.7 cluster, the RHV environment must meet the following requirements.
Not meeting these requirements can cause the installation or process to fail. Additionally, not meeting these requirements can cause the OpenShift Container Platform cluster to fail days or weeks after installation.
The following requirements for CPU, memory, and storage resources are based on default values multiplied by the default number of virtual machines the installation program creates. These resources must be available in addition to what the RHV environment uses for non-OpenShift Container Platform operations.
By default, the installation program creates seven virtual machines during the installation process. First, it creates a bootstrap virtual machine to provide temporary services and a control plane while it creates the rest of the OpenShift Container Platform cluster. When the installation program finishes creating the cluster, deleting the bootstrap machine frees up its resources.
If you increase the number of virtual machines in the RHV environment, you must increase the resources accordingly.
Requirements
- The RHV version is 4.4.
- The RHV environment has one data center whose state is Up.
- The RHV data center contains an RHV cluster.
The RHV cluster has the following resources exclusively for the OpenShift Container Platform cluster:
- Minimum 28 vCPUs: four for each of the seven virtual machines created during installation.
112 GiB RAM or more, including:
- 16 GiB or more for the bootstrap machine, which provides the temporary control plane.
- 16 GiB or more for each of the three control plane machines which provide the control plane.
- 16 GiB or more for each of the three compute machines, which run the application workloads.
- The RHV storage domain must meet these etcd backend performance requirements.
- In production environments, each virtual machine must have 120 GiB or more. Therefore, the storage domain must provide 840 GiB or more for the default OpenShift Container Platform cluster. In resource-constrained or non-production environments, each virtual machine must have 32 GiB or more, so the storage domain must have 230 GiB or more for the default OpenShift Container Platform cluster.
- To download images from the Red Hat Ecosystem Catalog during installation and update procedures, the RHV cluster must have access to an internet connection. The Telemetry service also needs an internet connection to simplify the subscription and entitlement process.
- The RHV cluster must have a virtual network with access to the REST API on the RHV Manager. Ensure that DHCP is enabled on this network, because the VMs that the installer creates obtain their IP address by using DHCP.
A user account and group with the following least privileges for installing and managing an OpenShift Container Platform cluster on the target RHV cluster:
-
DiskOperator -
DiskCreator -
UserTemplateBasedVm -
TemplateOwner -
TemplateCreator -
ClusterAdminon the target cluster
-
Apply the principle of least privilege: Avoid using an administrator account with SuperUser privileges on RHV during the installation process. The installation program saves the credentials you provide to a temporary ovirt-config.yaml file that might be compromised.
13.3.4. Verifying the requirements for the RHV environment
Verify that the RHV environment meets the requirements to install and run an OpenShift Container Platform cluster. Not meeting these requirements can cause failures.
These requirements are based on the default resources the installation program uses to create control plane and compute machines. These resources include vCPUs, memory, and storage. If you change these resources or increase the number of OpenShift Container Platform machines, adjust these requirements accordingly.
Procedure
Check that the RHV version supports installation of OpenShift Container Platform version 4.7.
- In the RHV Administration Portal, click the ? help icon in the upper-right corner and select About.
- In the window that opens, make a note of the RHV Software Version.
- Confirm that the RHV version is 4.4. For more information about supported version combinations, see Support Matrix for OpenShift Container Platform on RHV.
Inspect the data center, cluster, and storage.
- In the RHV Administration Portal, click Compute → Data Centers.
- Confirm that the data center where you plan to install OpenShift Container Platform is accessible.
- Click the name of that data center.
- In the data center details, on the Storage tab, confirm the storage domain where you plan to install OpenShift Container Platform is Active.
- Record the Domain Name for use later on.
- Confirm Free Space has at least 230 GiB.
- Confirm that the storage domain meets these etcd backend performance requirements, which you can measure by using the fio performance benchmarking tool.
- In the data center details, click the Clusters tab.
- Find the RHV cluster where you plan to install OpenShift Container Platform. Record the cluster name for use later on.
Inspect the RHV host resources.
- In the RHV Administration Portal, click Compute > Clusters.
- Click the cluster where you plan to install OpenShift Container Platform.
- In the cluster details, click the Hosts tab.
- Inspect the hosts and confirm they have a combined total of at least 28 Logical CPU Cores available exclusively for the OpenShift Container Platform cluster.
- Record the number of available Logical CPU Cores for use later on.
- Confirm that these CPU cores are distributed so that each of the seven virtual machines created during installation can have four cores.
Confirm that, all together, the hosts have 112 GiB of Max free Memory for scheduling new virtual machines distributed to meet the requirements for each of the following OpenShift Container Platform machines:
- 16 GiB required for the bootstrap machine
- 16 GiB required for each of the three control plane machines
- 16 GiB for each of the three compute machines
- Record the amount of Max free Memory for scheduling new virtual machines for use later on.
Verify that the virtual network for installing OpenShift Container Platform has access to the RHV Manager’s REST API. From a virtual machine on this network, use curl to reach the RHV Manager’s REST API:
$ curl -k -u <username>@<profile>:<password> \1 https://<engine-fqdn>/ovirt-engine/api2 - 1
- For
<username>, specify the user name of an RHV account with privileges to create and manage an OpenShift Container Platform cluster on RHV. For<profile>, specify the login profile, which you can get by going to the RHV Administration Portal login page and reviewing the Profile dropdown list. For<password>, specify the password for that user name. - 2
- For
<engine-fqdn>, specify the fully qualified domain name of the RHV environment.
For example:
$ curl -k -u ocpadmin@internal:pw123 \ https://rhv-env.virtlab.example.com/ovirt-engine/api
13.3.5. Networking requirements for user-provisioned infrastructure
All the Red Hat Enterprise Linux CoreOS (RHCOS) machines require network in initramfs during boot to fetch Ignition config from the machine config server.
During the initial boot, the machines require an HTTP or HTTPS server to establish a network connection to download their Ignition config files.
Ensure that the machines have persistent IP addresses and host names.
The Kubernetes API server must be able to resolve the node names of the cluster machines. If the API servers and worker nodes are in different zones, you can configure a default DNS search zone to allow the API server to resolve the node names. Another supported approach is to always refer to hosts by their fully-qualified domain names in both the node objects and all DNS requests.
You must configure the network connectivity between machines to allow cluster components to communicate. Each machine must be able to resolve the host names of all other machines in the cluster.
Firewall
Configure your firewall so your cluster has access to required sites.
See also:
Load balancers
Configure one or preferably two layer-4 load balancers:
-
Provide load balancing for ports
6443and22623on the control plane and bootstrap machines. Port6443provides access to the Kubernetes API server and must be reachable both internally and externally. Port22623must be accessible to nodes within the cluster. -
Provide load balancing for port
443and80for machines that run the Ingress router, which are usually compute nodes in the default configuration. Both ports must be accessible from within and outside the cluster.
DNS
Configure infrastructure-provided DNS to allow the correct resolution of the main components and services. If you use only one load balancer, these DNS records can point to the same IP address.
-
Create DNS records for
api.<cluster_name>.<base_domain>(internal and external resolution) andapi-int.<cluster_name>.<base_domain>(internal resolution) that point to the load balancer for the control plane machines. -
Create a DNS record for
*.apps.<cluster_name>.<base_domain>that points to the load balancer for the Ingress router. For example, ports443and80of the compute machines.
| Protocol | Port | Description |
|---|---|---|
| ICMP | N/A | Network reachability tests |
| TCP |
| Metrics |
|
|
Host level services, including the node exporter on ports | |
|
| The default ports that Kubernetes reserves | |
|
| openshift-sdn | |
| UDP |
| VXLAN and Geneve |
|
| VXLAN and Geneve | |
|
|
Host level services, including the node exporter on ports | |
| TCP/UDP |
| Kubernetes node port |
| Protocol | Port | Description |
|---|---|---|
| TCP |
| Kubernetes API |
| Protocol | Port | Description |
|---|---|---|
| TCP |
| etcd server and peer ports |
Network topology requirements
The infrastructure that you provision for your cluster must meet the following network topology requirements.
OpenShift Container Platform requires all nodes to have internet access to pull images for platform containers and provide telemetry data to Red Hat.
Load balancers
Before you install OpenShift Container Platform, you must provision two load balancers that meet the following requirements:
API load balancer: Provides a common endpoint for users, both human and machine, to interact with and configure the platform. Configure the following conditions:
- Layer 4 load balancing only. This can be referred to as Raw TCP, SSL Passthrough, or SSL Bridge mode. If you use SSL Bridge mode, you must enable Server Name Indication (SNI) for the API routes.
- A stateless load balancing algorithm. The options vary based on the load balancer implementation.
ImportantDo not configure session persistence for an API load balancer.
Configure the following ports on both the front and back of the load balancers:
Expand Table 13.9. API load balancer Port Back-end machines (pool members) Internal External Description 6443Bootstrap and control plane. You remove the bootstrap machine from the load balancer after the bootstrap machine initializes the cluster control plane. You must configure the
/readyzendpoint for the API server health check probe.X
X
Kubernetes API server
22623Bootstrap and control plane. You remove the bootstrap machine from the load balancer after the bootstrap machine initializes the cluster control plane.
X
Machine config server
NoteThe load balancer must be configured to take a maximum of 30 seconds from the time the API server turns off the
/readyzendpoint to the removal of the API server instance from the pool. Within the time frame after/readyzreturns an error or becomes healthy, the endpoint must have been removed or added. Probing every 5 or 10 seconds, with two successful requests to become healthy and three to become unhealthy, are well-tested values.Application Ingress load balancer: Provides an Ingress point for application traffic flowing in from outside the cluster. Configure the following conditions:
- Layer 4 load balancing only. This can be referred to as Raw TCP, SSL Passthrough, or SSL Bridge mode. If you use SSL Bridge mode, you must enable Server Name Indication (SNI) for the Ingress routes.
- A connection-based or session-based persistence is recommended, based on the options available and types of applications that will be hosted on the platform.
Configure the following ports on both the front and back of the load balancers:
Expand Table 13.10. Application Ingress load balancer Port Back-end machines (pool members) Internal External Description 443The machines that run the Ingress router pods, compute, or worker, by default.
X
X
HTTPS traffic
80The machines that run the Ingress router pods, compute, or worker, by default.
X
X
HTTP traffic
If the true IP address of the client can be seen by the load balancer, enabling source IP-based session persistence can improve performance for applications that use end-to-end TLS encryption.
A working configuration for the Ingress router is required for an OpenShift Container Platform cluster. You must configure the Ingress router after the control plane initializes.
NTP configuration
OpenShift Container Platform clusters are configured to use a public Network Time Protocol (NTP) server by default. If you want to use a local enterprise NTP server, or if your cluster is being deployed in a disconnected network, you can configure the cluster to use a specific time server. For more information, see the documentation for Configuring chrony time service.
13.3.6. Setting up the installation machine
To run the binary openshift-install installation program and Ansible scripts, set up the RHV Manager or an Red Hat Enterprise Linux (RHEL) computer with network access to the RHV environment and the REST API on the Manager.
Procedure
Update or install Python3 and Ansible. For example:
# dnf update python3 ansible-
Install the
python3-ovirt-engine-sdk4package to get the Python Software Development Kit. Install the
ovirt.image-templateAnsible role. On the RHV Manager and other Red Hat Enterprise Linux (RHEL) machines, this role is distributed as theovirt-ansible-image-templatepackage. For example, enter:# dnf install ovirt-ansible-image-templateInstall the
ovirt.vm-infraAnsible role. On the RHV Manager and other RHEL machines, this role is distributed as theovirt-ansible-vm-infrapackage.# dnf install ovirt-ansible-vm-infraCreate an environment variable and assign an absolute or relative path to it. For example, enter:
$ export ASSETS_DIR=./wrkNoteThe installation program uses this variable to create a directory where it saves important installation-related files. Later, the installation process reuses this variable to locate those asset files. Avoid deleting this assets directory; it is required for uninstalling the cluster.
13.3.7. Installing OpenShift Container Platform on RHV in insecure mode
By default, the installer creates a CA certificate, prompts you for confirmation, and stores the certificate to use during installation. You do not need to create or install one manually.
Although it is not recommended, you can override this functionality and install OpenShift Container Platform without verifying a certificate by installing OpenShift Container Platform on RHV in insecure mode.
Installing in insecure mode is not recommended, because it enables a potential attacker to perform a Man-in-the-Middle attack and capture sensitive credentials on the network.
Procedure
-
Create a file named
~/.ovirt/ovirt-config.yaml. Add the following content to
ovirt-config.yaml:ovirt_url: https://ovirt.example.com/ovirt-engine/api1 ovirt_fqdn: ovirt.example.com2 ovirt_pem_url: "" ovirt_username: ocpadmin@internal ovirt_password: super-secret-password3 ovirt_insecure: true- Run the installer.
13.3.8. Generating an SSH private key and adding it to the agent
If you want to perform installation debugging or disaster recovery on your cluster, you must provide an SSH key to both your ssh-agent and the installation program. You can use this key to access the bootstrap machine in a public cluster to troubleshoot installation issues.
In a production environment, you require disaster recovery and debugging.
Do not skip this procedure in production environments where disaster recovery and debugging is required.
You can use this key to SSH into the master nodes as the user core. When you deploy the cluster, the key is added to the core user’s ~/.ssh/authorized_keys list.
Procedure
If you do not have an SSH key that is configured for password-less authentication on your computer, create one. For example, on a computer that uses a Linux operating system, run the following command:
$ ssh-keygen -t ed25519 -N '' \ -f <path>/<file_name>1 - 1
- Specify the path and file name, such as
~/.ssh/id_rsa, of the new SSH key. If you have an existing key pair, ensure your public key is in the your~/.sshdirectory.
Running this command generates an SSH key that does not require a password in the location that you specified.
NoteIf you plan to install an OpenShift Container Platform cluster that uses FIPS Validated / Modules in Process cryptographic libraries on the
x86_64architecture, do not create a key that uses theed25519algorithm. Instead, create a key that uses thersaorecdsaalgorithm.Start the
ssh-agentprocess as a background task:$ eval "$(ssh-agent -s)"Example output
Agent pid 31874NoteIf your cluster is in FIPS mode, only use FIPS-compliant algorithms to generate the SSH key. The key must be either RSA or ECDSA.
Add your SSH private key to the
ssh-agent:$ ssh-add <path>/<file_name>1 Example output
Identity added: /home/<you>/<path>/<file_name> (<computer_name>)- 1
- Specify the path and file name for your SSH private key, such as
~/.ssh/id_rsa
Next steps
- When you install OpenShift Container Platform, provide the SSH public key to the installation program.
13.3.9. Obtaining the installation program
Before you install OpenShift Container Platform, download the installation file on your provisioning machine.
Prerequisites
- You have a machine that runs Linux, for example Red Hat Enterprise Linux 8, with 500 MB of local disk space
Procedure
- Access the Infrastructure Provider page on the OpenShift Cluster Manager site. If you have a Red Hat account, log in with your credentials. If you do not, create an account.
- Select your infrastructure provider.
Navigate to the page for your installation type, download the installation program for your operating system, and place the file in the directory where you will store the installation configuration files.
ImportantThe installation program creates several files on the computer that you use to install your cluster. You must keep the installation program and the files that the installation program creates after you finish installing the cluster. Both files are required to delete the cluster.
ImportantDeleting the files created by the installation program does not remove your cluster, even if the cluster failed during installation. To remove your cluster, complete the OpenShift Container Platform uninstallation procedures for your specific cloud provider.
Extract the installation program. For example, on a computer that uses a Linux operating system, run the following command:
$ tar xvf openshift-install-linux.tar.gz- Download your installation pull secret from the Red Hat OpenShift Cluster Manager. This pull secret allows you to authenticate with the services that are provided by the included authorities, including Quay.io, which serves the container images for OpenShift Container Platform components.
13.3.10. Downloading the Ansible playbooks
Download the Ansible playbooks for installing OpenShift Container Platform version 4.7 on RHV.
Procedure
On your installation machine, run the following commands:
$ mkdir playbooks$ cd playbooks$ curl -s -L -X GET https://api.github.com/repos/openshift/installer/contents/upi/ovirt?ref=release-4.7 | grep 'download_url.*\.yml' | awk '{ print $2 }' | sed -r 's/("|",)//g' | xargs -n 1 curl -O
Next steps
-
After you download these Ansible playbooks, you must also create the environment variable for the assets directory and customize the
inventory.ymlfile before you create an installation configuration file by running the installation program.
13.3.11. The inventory.yml file
You use the inventory.yml file to define and create elements of the OpenShift Container Platform cluster you are installing. This includes elements such as the Red Hat Enterprise Linux CoreOS (RHCOS) image, virtual machine templates, bootstrap machine, control plane nodes, and worker nodes. You also use inventory.yml to destroy the cluster.
The following inventory.yml example shows you the parameters and their default values. The quantities and numbers in these default values meet the requirements for running a production OpenShift Container Platform cluster in a RHV environment.
Example inventory.yml file
---
all:
vars:
ovirt_cluster: "Default"
ocp:
assets_dir: "{{ lookup('env', 'ASSETS_DIR') }}"
ovirt_config_path: "{{ lookup('env', 'HOME') }}/.ovirt/ovirt-config.yaml"
# ---
# {op-system} section
# ---
rhcos:
image_url: "https://mirror.openshift.com/pub/openshift-v4/dependencies/rhcos/4.7/latest/rhcos-openstack.x86_64.qcow2.gz"
local_cmp_image_path: "/tmp/rhcos.qcow2.gz"
local_image_path: "/tmp/rhcos.qcow2"
# ---
# Profiles section
# ---
control_plane:
cluster: "{{ ovirt_cluster }}"
memory: 16GiB
sockets: 4
cores: 1
template: rhcos_tpl
operating_system: "rhcos_x64"
type: high_performance
graphical_console:
headless_mode: false
protocol:
- spice
- vnc
disks:
- size: 120GiB
name: os
interface: virtio_scsi
storage_domain: depot_nvme
nics:
- name: nic1
network: lab
profile: lab
compute:
cluster: "{{ ovirt_cluster }}"
memory: 16GiB
sockets: 4
cores: 1
template: worker_rhcos_tpl
operating_system: "rhcos_x64"
type: high_performance
graphical_console:
headless_mode: false
protocol:
- spice
- vnc
disks:
- size: 120GiB
name: os
interface: virtio_scsi
storage_domain: depot_nvme
nics:
- name: nic1
network: lab
profile: lab
# ---
# Virtual machines section
# ---
vms:
- name: "{{ metadata.infraID }}-bootstrap"
ocp_type: bootstrap
profile: "{{ control_plane }}"
type: server
- name: "{{ metadata.infraID }}-master0"
ocp_type: master
profile: "{{ control_plane }}"
- name: "{{ metadata.infraID }}-master1"
ocp_type: master
profile: "{{ control_plane }}"
- name: "{{ metadata.infraID }}-master2"
ocp_type: master
profile: "{{ control_plane }}"
- name: "{{ metadata.infraID }}-worker0"
ocp_type: worker
profile: "{{ compute }}"
- name: "{{ metadata.infraID }}-worker1"
ocp_type: worker
profile: "{{ compute }}"
- name: "{{ metadata.infraID }}-worker2"
ocp_type: worker
profile: "{{ compute }}"Enter values for parameters whose descriptions begin with "Enter." Otherwise, you can use the default value or replace it with a new value.
General section
-
ovirt_cluster: Enter the name of an existing RHV cluster in which to install the OpenShift Container Platform cluster. -
ocp.assets_dir: The path of a directory theopenshift-installinstallation program creates to store the files that it generates. -
ocp.ovirt_config_path: The path of theovirt-config.yamlfile the installation program generates, for example,./wrk/install-config.yaml. This file contains the credentials required to interact with the REST API of the Manager.
Red Hat Enterprise Linux CoreOS (RHCOS) section
-
image_url: Enter the URL of the RHCOS image you specified for download. -
local_cmp_image_path: The path of a local download directory for the compressed RHCOS image. -
local_image_path: The path of a local directory for the extracted RHCOS image.
Profiles section
This section consists of two profiles:
-
control_plane: The profile of the bootstrap and control plane nodes. -
compute: The profile of workers nodes in the compute plane.
These profiles have the following parameters. The default values of the parameters meet the minimum requirements for running a production cluster. You can increase or customize these values to meet your workload requirements.
-
cluster: The value gets the cluster name fromovirt_clusterin the General Section. -
memory: The amount of memory, in GB, for the virtual machine. -
sockets: The number of sockets for the virtual machine. -
cores: The number of cores for the virtual machine. -
template: The name of the virtual machine template. If plan to install multiple clusters, and these clusters use templates that contain different specifications, prepend the template name with the ID of the cluster. -
operating_system: The type of guest operating system in the virtual machine. With oVirt/RHV version 4.4, this value must berhcos_x64so the value ofIgnition scriptcan be passed to the VM. type: Enterserveras the type of the virtual machine.ImportantYou must change the value of the
typeparameter fromhigh_performancetoserver.-
disks: The disk specifications. Thecontrol_planeandcomputenodes can have different storage domains. -
size: The minimum disk size. -
name: Enter the name of a disk connected to the target cluster in RHV. -
interface: Enter the interface type of the disk you specified. -
storage_domain: Enter the storage domain of the disk you specified. -
nics: Enter thenameandnetworkthe virtual machines use. You can also specify the virtual network interface profile. By default, NICs obtain their MAC addresses from the oVirt/RHV MAC pool.
Virtual machines section
This final section, vms, defines the virtual machines you plan to create and deploy in the cluster. By default, it provides the minimum number of control plane and worker nodes for a production environment.
vms contains three required elements:
-
name: The name of the virtual machine. In this case,metadata.infraIDprepends the virtual machine name with the infrastructure ID from themetadata.ymlfile. -
ocp_type: The role of the virtual machine in the OCP cluster. Possible values arebootstrap,master,worker. profile: The name of the profile from which each virtual machine inherits specifications. Possible values in this example arecontrol_planeorcompute.You can override the value a virtual machine inherits from its profile. To do this, you add the name of the profile attribute to the virtual machine in
inventory.ymland assign it an overriding value. To see an example of this, examine thename: "{{ metadata.infraID }}-bootstrap"virtual machine in the precedinginventory.ymlexample: It has atypeattribute whose value,server, overrides the value of thetypeattribute this virtual machine would otherwise inherit from thecontrol_planeprofile.
Metadata variables
For virtual machines, metadata.infraID prepends the name of the virtual machine with the infrastructure ID from the metadata.json file you create when you build the Ignition files.
The playbooks use the following code to read infraID from the specific file located in the ocp.assets_dir.
---
- name: include metadata.json vars
include_vars:
file: "{{ ocp.assets_dir }}/metadata.json"
name: metadata
...13.3.12. Specifying the RHCOS image settings
Update the Red Hat Enterprise Linux CoreOS (RHCOS) image settings of the inventory.yml file. Later, when you run this file one of the playbooks, it downloads a compressed Red Hat Enterprise Linux CoreOS (RHCOS) image from the image_url URL to the local_cmp_image_path directory. The playbook then uncompresses the image to the local_image_path directory and uses it to create oVirt/RHV templates.
Procedure
- Locate the RHCOS image download page for the version of OpenShift Container Platform you are installing, such as Index of /pub/openshift-v4/dependencies/rhcos/latest/latest.
-
From that download page, copy the URL of an OpenStack
qcow2image, such ashttps://mirror.openshift.com/pub/openshift-v4/dependencies/rhcos/4.7/latest/rhcos-openstack.x86_64.qcow2.gz. Edit the
inventory.ymlplaybook you downloaded earlier. In it, paste the URL as the value forimage_url. For example:rhcos: "https://mirror.openshift.com/pub/openshift-v4/dependencies/rhcos/4.7/latest/rhcos-openstack.x86_64.qcow2.gz"
13.3.13. Creating the install config file
You create an installation configuration file by running the installation program, openshift-install, and responding to its prompts with information you specified or gathered earlier.
When you finish responding to the prompts, the installation program creates an initial version of the install-config.yaml file in the assets directory you specified earlier, for example, ./wrk/install-config.yaml
The installation program also creates a file, $HOME/.ovirt/ovirt-config.yaml, that contains all the connection parameters that are required to reach the Manager and use its REST API.
NOTE: The installation process does not use values you supply for some parameters, such as Internal API virtual IP and Ingress virtual IP, because you have already configured them in your infrastructure DNS.
It also uses the values you supply for parameters in inventory.yml, like the ones for oVirt cluster, oVirt storage, and oVirt network. And uses a script to remove or replace these same values from install-config.yaml with the previously mentioned virtual IPs.
Procedure
Run the installation program:
$ openshift-install create install-config --dir $ASSETS_DIRRespond to the installation program’s prompts with information about your system.
Example output
? SSH Public Key /home/user/.ssh/id_dsa.pub ? Platform <ovirt> ? Engine FQDN[:PORT] [? for help] <engine.fqdn> ? Enter ovirt-engine username <ocpadmin@internal> ? Enter password <******> ? oVirt cluster <cluster> ? oVirt storage <storage> ? oVirt network <net> ? Internal API virtual IP <172.16.0.252> ? Ingress virtual IP <172.16.0.251> ? Base Domain <example.org> ? Cluster Name <ocp4> ? Pull Secret [? for help] <********>
? SSH Public Key /home/user/.ssh/id_dsa.pub
? Platform <ovirt>
? Engine FQDN[:PORT] [? for help] <engine.fqdn>
? Enter ovirt-engine username <ocpadmin@internal>
? Enter password <******>
? oVirt cluster <cluster>
? oVirt storage <storage>
? oVirt network <net>
? Internal API virtual IP <172.16.0.252>
? Ingress virtual IP <172.16.0.251>
? Base Domain <example.org>
? Cluster Name <ocp4>
? Pull Secret [? for help] <********>
For Internal API virtual IP and Ingress virtual IP, supply the IP addresses you specified when you configured the DNS service.
Together, the values you enter for the oVirt cluster and Base Domain prompts form the FQDN portion of URLs for the REST API and any applications you create, such as https://api.ocp4.example.org:6443/ and https://console-openshift-console.apps.ocp4.example.org.
You can get the pull secret from the Red Hat OpenShift Cluster Manager.
13.3.14. Customizing install-config.yaml
Here, you use three Python scripts to override some of the installation program’s default behaviors:
- By default, the installation program uses the machine API to create nodes. To override this default behavior, you set the number of compute nodes to zero replicas. Later, you use Ansible playbooks to create the compute nodes.
- By default, the installation program sets the IP range of the machine network for nodes. To override this default behavior, you set the IP range to match your infrastructure.
-
By default, the installation program sets the platform to
ovirt. However, installing a cluster on user-provisioned infrastructure is more similar to installing a cluster on bare metal. Therefore, you delete the ovirt platform section frominstall-config.yamland change the platform tonone. Instead, you useinventory.ymlto specify all of the required settings.
These snippets work with Python 3 and Python 2.
Procedure
Set the number of compute nodes to zero replicas:
$ python3 -c 'import os, yaml path = "%s/install-config.yaml" % os.environ["ASSETS_DIR"] conf = yaml.safe_load(open(path)) conf["compute"][0]["replicas"] = 0 open(path, "w").write(yaml.dump(conf, default_flow_style=False))'Set the IP range of the machine network. For example, to set the range to
172.16.0.0/16, enter:$ python3 -c 'import os, yaml path = "%s/install-config.yaml" % os.environ["ASSETS_DIR"] conf = yaml.safe_load(open(path)) conf["networking"]["machineNetwork"][0]["cidr"] = "172.16.0.0/16" open(path, "w").write(yaml.dump(conf, default_flow_style=False))'Remove the
ovirtsection and change the platform tonone:$ python3 -c 'import os, yaml path = "%s/install-config.yaml" % os.environ["ASSETS_DIR"] conf = yaml.safe_load(open(path)) platform = conf["platform"] del platform["ovirt"] platform["none"] = {} open(path, "w").write(yaml.dump(conf, default_flow_style=False))'WarningRed Hat Virtualization does not currently support installation with user-provisioned infrastructure on the oVirt platform. Therefore, you must set the platform to
none, allowing OpenShift Container Platform to identify each node as a bare-metal node and the cluster as a bare-metal cluster. This is the same as installing a cluster on any platform, and has the following limitations:- There will be no cluster provider so you must manually add each machine and there will be no node scaling capabilities.
- The oVirt CSI driver will not be installed and there will be no CSI capabilities.
13.3.15. Generate manifest files
Use the installation program to generate a set of manifest files in the assets directory.
The command to generate the manifest files displays a warning message before it consumes the install-config.yaml file.
If you plan to reuse the install-config.yaml file, create a backup copy of it before you back it up before you generate the manifest files.
Procedure
Optional: Create a backup copy of the
install-config.yamlfile:$ cp install-config.yaml install-config.yaml.backupGenerate a set of manifests in your assets directory:
$ openshift-install create manifests --dir $ASSETS_DIRThis command displays the following messages.
Example output
INFO Consuming Install Config from target directory WARNING Making control-plane schedulable by setting MastersSchedulable to true for Scheduler cluster settingsThe command generates the following manifest files:
Example output
$ tree . └── wrk ├── manifests │ ├── 04-openshift-machine-config-operator.yaml │ ├── cluster-config.yaml │ ├── cluster-dns-02-config.yml │ ├── cluster-infrastructure-02-config.yml │ ├── cluster-ingress-02-config.yml │ ├── cluster-network-01-crd.yml │ ├── cluster-network-02-config.yml │ ├── cluster-proxy-01-config.yaml │ ├── cluster-scheduler-02-config.yml │ ├── cvo-overrides.yaml │ ├── etcd-ca-bundle-configmap.yaml │ ├── etcd-client-secret.yaml │ ├── etcd-host-service-endpoints.yaml │ ├── etcd-host-service.yaml │ ├── etcd-metric-client-secret.yaml │ ├── etcd-metric-serving-ca-configmap.yaml │ ├── etcd-metric-signer-secret.yaml │ ├── etcd-namespace.yaml │ ├── etcd-service.yaml │ ├── etcd-serving-ca-configmap.yaml │ ├── etcd-signer-secret.yaml │ ├── kube-cloud-config.yaml │ ├── kube-system-configmap-root-ca.yaml │ ├── machine-config-server-tls-secret.yaml │ └── openshift-config-secret-pull-secret.yaml └── openshift ├── 99_kubeadmin-password-secret.yaml ├── 99_openshift-cluster-api_master-user-data-secret.yaml ├── 99_openshift-cluster-api_worker-user-data-secret.yaml ├── 99_openshift-machineconfig_99-master-ssh.yaml ├── 99_openshift-machineconfig_99-worker-ssh.yaml └── openshift-install-manifests.yaml
Next steps
- Make control plane nodes non-schedulable.
13.3.16. Making control-plane nodes non-schedulable
Because you are manually creating and deploying the control plane machines, you must configure a manifest file to make the control plane nodes non-schedulable.
Procedure
To make the control plane nodes non-schedulable, enter:
$ python3 -c 'import os, yaml path = "%s/manifests/cluster-scheduler-02-config.yml" % os.environ["ASSETS_DIR"] data = yaml.safe_load(open(path)) data["spec"]["mastersSchedulable"] = False open(path, "w").write(yaml.dump(data, default_flow_style=False))'
13.3.17. Building the Ignition files
To build the Ignition files from the manifest files you just generated and modified, you run the installation program. This action creates a Red Hat Enterprise Linux CoreOS (RHCOS) machine, initramfs, which fetches the Ignition files and performs the configurations needed to create a node.
In addition to the Ignition files, the installation program generates the following:
-
An
authdirectory that contains the admin credentials for connecting to the cluster with theocandkubectlutilities. -
A
metadata.jsonfile that contains information such as the OpenShift Container Platform cluster name, cluster ID, and infrastructure ID for the current installation.
The Ansible playbooks for this installation process use the value of infraID as a prefix for the virtual machines they create. This prevents naming conflicts when there are multiple installations in the same oVirt/RHV cluster.
Certificates in Ignition configuration files expire after 24 hours. Complete the cluster installation and keep the cluster running in a non-degraded state for 24 hours so that the first certificate rotation can finish.
Procedure
To build the Ignition files, enter:
$ openshift-install create ignition-configs --dir $ASSETS_DIRExample output
$ tree . └── wrk ├── auth │ ├── kubeadmin-password │ └── kubeconfig ├── bootstrap.ign ├── master.ign ├── metadata.json └── worker.ign
13.3.18. Creating templates and virtual machines
After confirming the variables in the inventory.yml, you run the first Ansible provisioning playbook, create-templates-and-vms.yml.
This playbook uses the connection parameters for the RHV Manager from $HOME/.ovirt/ovirt-config.yaml and reads metadata.json in the assets directory.
If a local Red Hat Enterprise Linux CoreOS (RHCOS) image is not already present, the playbook downloads one from the URL you specified for image_url in inventory.yml. It extracts the image and uploads it to RHV to create templates.
The playbook creates a template based on the control_plane and compute profiles in the inventory.yml file. If these profiles have different names, it creates two templates.
When the playbook finishes, the virtual machines it creates are stopped. You can get information from them to help configure other infrastructure elements. For example, you can get the virtual machines' MAC addresses to configure DHCP to assign permanent IP addresses to the virtual machines.
Procedure
-
In
inventory.yml, under thecontrol_planeandcomputevariables, change both instances oftype: high_performancetotype: server. Optional: If you plan to perform multiple installations to the same cluster, create different templates for each OCP installation. In the
inventory.ymlfile, prepend the value oftemplatewithinfraID. For example:control_plane: cluster: "{{ ovirt_cluster }}" memory: 16GiB sockets: 4 cores: 1 template: "{{ metadata.infraID }}-rhcos_tpl" operating_system: "rhcos_x64" ...Create the templates and virtual machines:
$ ansible-playbook -i inventory.yml create-templates-and-vms.yml
13.3.19. Creating the bootstrap machine
You create a bootstrap machine by running the bootstrap.yml playbook. This playbook starts the bootstrap virtual machine, and passes it the bootstrap.ign Ignition file from the assets directory. The bootstrap node configures itself so it can serve Ignition files to the control plane nodes.
To monitor the bootstrap process, you use the console in the RHV Administration Portal or connect to the virtual machine by using SSH.
Procedure
Create the bootstrap machine:
$ ansible-playbook -i inventory.yml bootstrap.ymlConnect to the bootstrap machine using a console in the Administration Portal or SSH. Replace
<bootstrap_ip>with the bootstrap node IP address. To use SSH, enter:$ ssh core@<boostrap.ip>Collect
bootkube.servicejournald unit logs for the release image service from the bootstrap node:[core@ocp4-lk6b4-bootstrap ~]$ journalctl -b -f -u release-image.service -u bootkube.serviceNoteThe
bootkube.servicelog on the bootstrap node outputs etcdconnection refusederrors, indicating that the bootstrap server is unable to connect to etcd on control plane nodes (also known as the master nodes). After etcd has started on each control plane node and the nodes have joined the cluster, the errors should stop.
13.3.20. Creating the control plane nodes
You create the control plane nodes by running the masters.yml playbook. This playbook passes the master.ign Ignition file to each of the virtual machines. The Ignition file contains a directive for the control plane node to get the Ignition from a URL such as https://api-int.ocp4.example.org:22623/config/master. The port number in this URL is managed by the load balancer, and is accessible only inside the cluster.
Procedure
Create the control plane nodes:
$ ansible-playbook -i inventory.yml masters.ymlWhile the playbook creates your control plane, monitor the bootstrapping process:
$ openshift-install wait-for bootstrap-complete --dir $ASSETS_DIRExample output
INFO API v1.18.3+b74c5ed up INFO Waiting up to 40m0s for bootstrapping to complete...When all the pods on the control plane nodes and etcd are up and running, the installation program displays the following output.
Example output
INFO It is now safe to remove the bootstrap resources
13.3.21. Verifying cluster status
You can verify your OpenShift Container Platform cluster’s status during or after installation.
Procedure
In the cluster environment, export the administrator’s kubeconfig file:
$ export KUBECONFIG=$ASSETS_DIR/auth/kubeconfigThe
kubeconfigfile contains information about the cluster that is used by the CLI to connect a client to the correct cluster and API server.View the control plane and compute machines created after a deployment:
$ oc get nodesView your cluster’s version:
$ oc get clusterversionView your Operators' status:
$ oc get clusteroperatorView all running pods in the cluster:
$ oc get pods -A
13.3.22. Removing the bootstrap machine
After the wait-for command shows that the bootstrap process is complete, you must remove the bootstrap virtual machine to free up compute, memory, and storage resources. Also, remove settings for the bootstrap machine from the load balancer directives.
Procedure
To remove the bootstrap machine from the cluster, enter:
$ ansible-playbook -i inventory.yml retire-bootstrap.yml- Remove settings for the bootstrap machine from the load balancer directives.
13.3.23. Creating the worker nodes and completing the installation
Creating worker nodes is similar to creating control plane nodes. However, worker nodes workers do not automatically join the cluster. To add them to the cluster, you review and approve the workers' pending CSRs (Certificate Signing Requests).
After approving the first requests, you continue approving CSR until all of the worker nodes are approved. When you complete this process, the worker nodes become Ready and can have pods scheduled to run on them.
Finally, monitor the command line to see when the installation process completes.
Procedure
Create the worker nodes:
$ ansible-playbook -i inventory.yml workers.ymlTo list all of the CSRs, enter:
$ oc get csr -AEventually, this command displays one CSR per node. For example:
Example output
NAME AGE SIGNERNAME REQUESTOR CONDITION csr-2lnxd 63m kubernetes.io/kubelet-serving system:node:ocp4-lk6b4-master0.ocp4.example.org Approved,Issued csr-hff4q 64m kubernetes.io/kube-apiserver-client-kubelet system:serviceaccount:openshift-machine-config-operator:node-bootstrapper Approved,Issued csr-hsn96 60m kubernetes.io/kubelet-serving system:node:ocp4-lk6b4-master2.ocp4.example.org Approved,Issued csr-m724n 6m2s kubernetes.io/kube-apiserver-client-kubelet system:serviceaccount:openshift-machine-config-operator:node-bootstrapper Pending csr-p4dz2 60m kubernetes.io/kube-apiserver-client-kubelet system:serviceaccount:openshift-machine-config-operator:node-bootstrapper Approved,Issued csr-t9vfj 60m kubernetes.io/kubelet-serving system:node:ocp4-lk6b4-master1.ocp4.example.org Approved,Issued csr-tggtr 61m kubernetes.io/kube-apiserver-client-kubelet system:serviceaccount:openshift-machine-config-operator:node-bootstrapper Approved,Issued csr-wcbrf 7m6s kubernetes.io/kube-apiserver-client-kubelet system:serviceaccount:openshift-machine-config-operator:node-bootstrapper PendingTo filter the list and see only pending CSRs, enter:
$ watch "oc get csr -A | grep pending -i"This command refreshes the output every two seconds and displays only pending CSRs. For example:
Example output
Every 2.0s: oc get csr -A | grep pending -i csr-m724n 10m kubernetes.io/kube-apiserver-client-kubelet system:serviceaccount:openshift-machine-config-operator:node-bootstrapper Pending csr-wcbrf 11m kubernetes.io/kube-apiserver-client-kubelet system:serviceaccount:openshift-machine-config-operator:node-bootstrapper PendingInspect each pending request. For example:
Example output
$ oc describe csr csr-m724nExample output
Name: csr-m724n Labels: <none> Annotations: <none> CreationTimestamp: Sun, 19 Jul 2020 15:59:37 +0200 Requesting User: system:serviceaccount:openshift-machine-config-operator:node-bootstrapper Signer: kubernetes.io/kube-apiserver-client-kubelet Status: Pending Subject: Common Name: system:node:ocp4-lk6b4-worker1.ocp4.example.org Serial Number: Organization: system:nodes Events: <none>If the CSR information is correct, approve the request:
$ oc adm certificate approve csr-m724nWait for the installation process to finish:
$ openshift-install wait-for install-complete --dir $ASSETS_DIR --log-level debugWhen the installation completes, the command line displays the URL of the OpenShift Container Platform web console and the administrator user name and password.
13.3.24. Telemetry access for OpenShift Container Platform
In OpenShift Container Platform 4.7, the Telemetry service, which runs by default to provide metrics about cluster health and the success of updates, requires internet access. If your cluster is connected to the internet, Telemetry runs automatically, and your cluster is registered to OpenShift Cluster Manager.
After you confirm that your OpenShift Cluster Manager inventory is correct, either maintained automatically by Telemetry or manually by using OpenShift Cluster Manager, use subscription watch to track your OpenShift Container Platform subscriptions at the account or multi-cluster level.
13.4. Installing a cluster on RHV in a restricted network
In OpenShift Container Platform version 4.7, you can install a customized OpenShift Container Platform cluster on Red Hat Virtualization (RHV) in a restricted network by creating an internal mirror of the installation release content.
13.4.1. Prerequisites
The following items are required to install an OpenShift Container Platform cluster on a RHV environment.
- You have a supported combination of versions in the Support Matrix for OpenShift Container Platform on RHV.
- You are familiar with the OpenShift Container Platform installation and update processes.
Create a registry on your mirror host and obtain the
imageContentSourcesdata for your version of OpenShift Container Platform.ImportantBecause the installation media is on the mirror host, you can use that computer to complete all installation steps.
- Provision persistent storage for your cluster. To deploy a private image registry, your storage must provide ReadWriteMany access modes.
- Review details about the OpenShift Container Platform installation and update processes.
If you use a firewall and plan to use telemetry, you must configure the firewall to allow the sites that your cluster requires access to.
NoteBe sure to also review this site list if you are configuring a proxy.
13.4.2. About installations in restricted networks
In OpenShift Container Platform 4.7, you can perform an installation that does not require an active connection to the Internet to obtain software components. Restricted network installations can be completed using installer-provisioned infrastructure or user-provisioned infrastructure, depending on the cloud platform to which you are installing the cluster.
If you choose to perform a restricted network installation on a cloud platform, you still require access to its cloud APIs. Some cloud functions, like Amazon Web Service’s Route 53 DNS and IAM services, require internet access. Depending on your network, you might require less Internet access for an installation on bare metal hardware or on VMware vSphere.
To complete a restricted network installation, you must create a registry that mirrors the contents of the OpenShift Container Platform registry and contains the installation media. You can create this registry on a mirror host, which can access both the Internet and your closed network, or by using other methods that meet your restrictions.
13.4.2.1. Additional limits
Clusters in restricted networks have the following additional limitations and restrictions:
-
The
ClusterVersionstatus includes anUnable to retrieve available updateserror. - By default, you cannot use the contents of the Developer Catalog because you cannot access the required image stream tags.
13.4.3. Internet access for OpenShift Container Platform
In OpenShift Container Platform 4.7, you require access to the Internet to obtain the images that are necessary to install your cluster.
You must have Internet access to:
- Access OpenShift Cluster Manager to download the installation program and perform subscription management. If the cluster has internet access and you do not disable Telemetry, that service automatically entitles your cluster.
- Access Quay.io to obtain the packages that are required to install your cluster.
- Obtain the packages that are required to perform cluster updates.
If your cluster cannot have direct Internet access, you can perform a restricted network installation on some types of infrastructure that you provision. During that process, you download the content that is required and use it to populate a mirror registry with the packages that you need to install a cluster and generate the installation program. With some installation types, the environment that you install your cluster in will not require Internet access. Before you update the cluster, you update the content of the mirror registry.
13.4.4. Requirements for the RHV environment
To install and run an OpenShift Container Platform version 4.7 cluster, the RHV environment must meet the following requirements.
Not meeting these requirements can cause the installation or process to fail. Additionally, not meeting these requirements can cause the OpenShift Container Platform cluster to fail days or weeks after installation.
The following requirements for CPU, memory, and storage resources are based on default values multiplied by the default number of virtual machines the installation program creates. These resources must be available in addition to what the RHV environment uses for non-OpenShift Container Platform operations.
By default, the installation program creates seven virtual machines during the installation process. First, it creates a bootstrap virtual machine to provide temporary services and a control plane while it creates the rest of the OpenShift Container Platform cluster. When the installation program finishes creating the cluster, deleting the bootstrap machine frees up its resources.
If you increase the number of virtual machines in the RHV environment, you must increase the resources accordingly.
Requirements
- The RHV version is 4.4.
- The RHV environment has one data center whose state is Up.
- The RHV data center contains an RHV cluster.
The RHV cluster has the following resources exclusively for the OpenShift Container Platform cluster:
- Minimum 28 vCPUs: four for each of the seven virtual machines created during installation.
112 GiB RAM or more, including:
- 16 GiB or more for the bootstrap machine, which provides the temporary control plane.
- 16 GiB or more for each of the three control plane machines which provide the control plane.
- 16 GiB or more for each of the three compute machines, which run the application workloads.
- The RHV storage domain must meet these etcd backend performance requirements.
- In production environments, each virtual machine must have 120 GiB or more. Therefore, the storage domain must provide 840 GiB or more for the default OpenShift Container Platform cluster. In resource-constrained or non-production environments, each virtual machine must have 32 GiB or more, so the storage domain must have 230 GiB or more for the default OpenShift Container Platform cluster.
- To download images from the Red Hat Ecosystem Catalog during installation and update procedures, the RHV cluster must have access to an internet connection. The Telemetry service also needs an internet connection to simplify the subscription and entitlement process.
- The RHV cluster must have a virtual network with access to the REST API on the RHV Manager. Ensure that DHCP is enabled on this network, because the VMs that the installer creates obtain their IP address by using DHCP.
A user account and group with the following least privileges for installing and managing an OpenShift Container Platform cluster on the target RHV cluster:
-
DiskOperator -
DiskCreator -
UserTemplateBasedVm -
TemplateOwner -
TemplateCreator -
ClusterAdminon the target cluster
-
Apply the principle of least privilege: Avoid using an administrator account with SuperUser privileges on RHV during the installation process. The installation program saves the credentials you provide to a temporary ovirt-config.yaml file that might be compromised.
13.4.5. Verifying the requirements for the RHV environment
Verify that the RHV environment meets the requirements to install and run an OpenShift Container Platform cluster. Not meeting these requirements can cause failures.
These requirements are based on the default resources the installation program uses to create control plane and compute machines. These resources include vCPUs, memory, and storage. If you change these resources or increase the number of OpenShift Container Platform machines, adjust these requirements accordingly.
Procedure
Check that the RHV version supports installation of OpenShift Container Platform version 4.7.
- In the RHV Administration Portal, click the ? help icon in the upper-right corner and select About.
- In the window that opens, make a note of the RHV Software Version.
- Confirm that the RHV version is 4.4. For more information about supported version combinations, see Support Matrix for OpenShift Container Platform on RHV.
Inspect the data center, cluster, and storage.
- In the RHV Administration Portal, click Compute → Data Centers.
- Confirm that the data center where you plan to install OpenShift Container Platform is accessible.
- Click the name of that data center.
- In the data center details, on the Storage tab, confirm the storage domain where you plan to install OpenShift Container Platform is Active.
- Record the Domain Name for use later on.
- Confirm Free Space has at least 230 GiB.
- Confirm that the storage domain meets these etcd backend performance requirements, which you can measure by using the fio performance benchmarking tool.
- In the data center details, click the Clusters tab.
- Find the RHV cluster where you plan to install OpenShift Container Platform. Record the cluster name for use later on.
Inspect the RHV host resources.
- In the RHV Administration Portal, click Compute > Clusters.
- Click the cluster where you plan to install OpenShift Container Platform.
- In the cluster details, click the Hosts tab.
- Inspect the hosts and confirm they have a combined total of at least 28 Logical CPU Cores available exclusively for the OpenShift Container Platform cluster.
- Record the number of available Logical CPU Cores for use later on.
- Confirm that these CPU cores are distributed so that each of the seven virtual machines created during installation can have four cores.
Confirm that, all together, the hosts have 112 GiB of Max free Memory for scheduling new virtual machines distributed to meet the requirements for each of the following OpenShift Container Platform machines:
- 16 GiB required for the bootstrap machine
- 16 GiB required for each of the three control plane machines
- 16 GiB for each of the three compute machines
- Record the amount of Max free Memory for scheduling new virtual machines for use later on.
Verify that the virtual network for installing OpenShift Container Platform has access to the RHV Manager’s REST API. From a virtual machine on this network, use curl to reach the RHV Manager’s REST API:
$ curl -k -u <username>@<profile>:<password> \1 https://<engine-fqdn>/ovirt-engine/api2 - 1
- For
<username>, specify the user name of an RHV account with privileges to create and manage an OpenShift Container Platform cluster on RHV. For<profile>, specify the login profile, which you can get by going to the RHV Administration Portal login page and reviewing the Profile dropdown list. For<password>, specify the password for that user name. - 2
- For
<engine-fqdn>, specify the fully qualified domain name of the RHV environment.
For example:
$ curl -k -u ocpadmin@internal:pw123 \ https://rhv-env.virtlab.example.com/ovirt-engine/api
13.4.6. Networking requirements for user-provisioned infrastructure
All the Red Hat Enterprise Linux CoreOS (RHCOS) machines require network in initramfs during boot to fetch Ignition config from the machine config server.
During the initial boot, the machines require an HTTP or HTTPS server to establish a network connection to download their Ignition config files.
Ensure that the machines have persistent IP addresses and host names.
The Kubernetes API server must be able to resolve the node names of the cluster machines. If the API servers and worker nodes are in different zones, you can configure a default DNS search zone to allow the API server to resolve the node names. Another supported approach is to always refer to hosts by their fully-qualified domain names in both the node objects and all DNS requests.
You must configure the network connectivity between machines to allow cluster components to communicate. Each machine must be able to resolve the host names of all other machines in the cluster.
Firewall
Configure your firewall so your cluster has access to required sites.
See also:
DNS
Configure infrastructure-provided DNS to allow the correct resolution of the main components and services. If you use only one load balancer, these DNS records can point to the same IP address.
-
Create DNS records for
api.<cluster_name>.<base_domain>(internal and external resolution) andapi-int.<cluster_name>.<base_domain>(internal resolution) that point to the load balancer for the control plane machines. -
Create a DNS record for
*.apps.<cluster_name>.<base_domain>that points to the load balancer for the Ingress router. For example, ports443and80of the compute machines.
| Protocol | Port | Description |
|---|---|---|
| ICMP | N/A | Network reachability tests |
| TCP |
| Metrics |
|
|
Host level services, including the node exporter on ports | |
|
| The default ports that Kubernetes reserves | |
|
| openshift-sdn | |
| UDP |
| VXLAN and Geneve |
|
| VXLAN and Geneve | |
|
|
Host level services, including the node exporter on ports | |
| TCP/UDP |
| Kubernetes node port |
| Protocol | Port | Description |
|---|---|---|
| TCP |
| Kubernetes API |
| Protocol | Port | Description |
|---|---|---|
| TCP |
| etcd server and peer ports |
Network topology requirements
The infrastructure that you provision for your cluster must meet the following network topology requirements.
OpenShift Container Platform requires all nodes to have internet access to pull images for platform containers and provide telemetry data to Red Hat.
Load balancers
Before you install OpenShift Container Platform, you must provision two load balancers that meet the following requirements:
API load balancer: Provides a common endpoint for users, both human and machine, to interact with and configure the platform. Configure the following conditions:
- Layer 4 load balancing only. This can be referred to as Raw TCP, SSL Passthrough, or SSL Bridge mode. If you use SSL Bridge mode, you must enable Server Name Indication (SNI) for the API routes.
- A stateless load balancing algorithm. The options vary based on the load balancer implementation.
ImportantDo not configure session persistence for an API load balancer.
Configure the following ports on both the front and back of the load balancers:
Expand Table 13.14. API load balancer Port Back-end machines (pool members) Internal External Description 6443Bootstrap and control plane. You remove the bootstrap machine from the load balancer after the bootstrap machine initializes the cluster control plane. You must configure the
/readyzendpoint for the API server health check probe.X
X
Kubernetes API server
22623Bootstrap and control plane. You remove the bootstrap machine from the load balancer after the bootstrap machine initializes the cluster control plane.
X
Machine config server
NoteThe load balancer must be configured to take a maximum of 30 seconds from the time the API server turns off the
/readyzendpoint to the removal of the API server instance from the pool. Within the time frame after/readyzreturns an error or becomes healthy, the endpoint must have been removed or added. Probing every 5 or 10 seconds, with two successful requests to become healthy and three to become unhealthy, are well-tested values.Application Ingress load balancer: Provides an Ingress point for application traffic flowing in from outside the cluster. Configure the following conditions:
- Layer 4 load balancing only. This can be referred to as Raw TCP, SSL Passthrough, or SSL Bridge mode. If you use SSL Bridge mode, you must enable Server Name Indication (SNI) for the Ingress routes.
- A connection-based or session-based persistence is recommended, based on the options available and types of applications that will be hosted on the platform.
Configure the following ports on both the front and back of the load balancers:
Expand Table 13.15. Application Ingress load balancer Port Back-end machines (pool members) Internal External Description 443The machines that run the Ingress router pods, compute, or worker, by default.
X
X
HTTPS traffic
80The machines that run the Ingress router pods, compute, or worker, by default.
X
X
HTTP traffic
If the true IP address of the client can be seen by the load balancer, enabling source IP-based session persistence can improve performance for applications that use end-to-end TLS encryption.
A working configuration for the Ingress router is required for an OpenShift Container Platform cluster. You must configure the Ingress router after the control plane initializes.
NTP configuration
OpenShift Container Platform clusters are configured to use a public Network Time Protocol (NTP) server by default. If you want to use a local enterprise NTP server, or if your cluster is being deployed in a disconnected network, you can configure the cluster to use a specific time server. For more information, see the documentation for Configuring chrony time service.
13.4.7. User-provisioned DNS requirements
DNS is used for name resolution and reverse name resolution. DNS A/AAAA or CNAME records are used for name resolution and PTR records are used for reverse name resolution. The reverse records are important because Red Hat Enterprise Linux CoreOS (RHCOS) uses the reverse records to set the host name for all the nodes. Additionally, the reverse records are used to generate the certificate signing requests (CSR) that OpenShift Container Platform needs to operate.
The following DNS records are required for an OpenShift Container Platform cluster that uses user-provisioned infrastructure. In each record, <cluster_name> is the cluster name and <base_domain> is the cluster base domain that you specify in the install-config.yaml file. A complete DNS record takes the form: <component>.<cluster_name>.<base_domain>..
| Component | Record | Description |
|---|---|---|
| Kubernetes API |
| Add a DNS A/AAAA or CNAME record, and a DNS PTR record, to identify the load balancer for the control plane machines. These records must be resolvable by both clients external to the cluster and from all the nodes within the cluster. |
|
| Add a DNS A/AAAA or CNAME record, and a DNS PTR record, to identify the load balancer for the control plane machines. These records must be resolvable from all the nodes within the cluster. Important The API server must be able to resolve the worker nodes by the host names that are recorded in Kubernetes. If the API server cannot resolve the node names, then proxied API calls can fail, and you cannot retrieve logs from pods. | |
| Routes |
| Add a wildcard DNS A/AAAA or CNAME record that refers to the load balancer that targets the machines that run the Ingress router pods, which are the worker nodes by default. These records must be resolvable by both clients external to the cluster and from all the nodes within the cluster. |
| Bootstrap |
| Add a DNS A/AAAA or CNAME record, and a DNS PTR record, to identify the bootstrap machine. These records must be resolvable by the nodes within the cluster. |
| Master hosts |
| DNS A/AAAA or CNAME records and DNS PTR records to identify each machine for the control plane nodes (also known as the master nodes). These records must be resolvable by the nodes within the cluster. |
| Worker hosts |
| Add DNS A/AAAA or CNAME records and DNS PTR records to identify each machine for the worker nodes. These records must be resolvable by the nodes within the cluster. |
You can use the nslookup <hostname> command to verify name resolution. You can use the dig -x <ip_address> command to verify reverse name resolution for the PTR records.
The following example of a BIND zone file shows sample A records for name resolution. The purpose of the example is to show the records that are needed. The example is not meant to provide advice for choosing one name resolution service over another.
Example 13.1. Sample DNS zone database
$TTL 1W
@ IN SOA ns1.example.com. root (
2019070700 ; serial
3H ; refresh (3 hours)
30M ; retry (30 minutes)
2W ; expiry (2 weeks)
1W ) ; minimum (1 week)
IN NS ns1.example.com.
IN MX 10 smtp.example.com.
;
;
ns1 IN A 192.168.1.5
smtp IN A 192.168.1.5
;
helper IN A 192.168.1.5
helper.ocp4 IN A 192.168.1.5
;
; The api identifies the IP of your load balancer.
api.ocp4 IN A 192.168.1.5
api-int.ocp4 IN A 192.168.1.5
;
; The wildcard also identifies the load balancer.
*.apps.ocp4 IN A 192.168.1.5
;
; Create an entry for the bootstrap host.
bootstrap.ocp4 IN A 192.168.1.96
;
; Create entries for the master hosts.
master0.ocp4 IN A 192.168.1.97
master1.ocp4 IN A 192.168.1.98
master2.ocp4 IN A 192.168.1.99
;
; Create entries for the worker hosts.
worker0.ocp4 IN A 192.168.1.11
worker1.ocp4 IN A 192.168.1.7
;
;EOFThe following example BIND zone file shows sample PTR records for reverse name resolution.
Example 13.2. Sample DNS zone database for reverse records
$TTL 1W
@ IN SOA ns1.example.com. root (
2019070700 ; serial
3H ; refresh (3 hours)
30M ; retry (30 minutes)
2W ; expiry (2 weeks)
1W ) ; minimum (1 week)
IN NS ns1.example.com.
;
; The syntax is "last octet" and the host must have an FQDN
; with a trailing dot.
97 IN PTR master0.ocp4.example.com.
98 IN PTR master1.ocp4.example.com.
99 IN PTR master2.ocp4.example.com.
;
96 IN PTR bootstrap.ocp4.example.com.
;
5 IN PTR api.ocp4.example.com.
5 IN PTR api-int.ocp4.example.com.
;
11 IN PTR worker0.ocp4.example.com.
7 IN PTR worker1.ocp4.example.com.
;
;EOF13.4.8. Setting up the installation machine
To run the binary openshift-install installation program and Ansible scripts, set up the RHV Manager or an Red Hat Enterprise Linux (RHEL) computer with network access to the RHV environment and the REST API on the Manager.
Procedure
Update or install Python3 and Ansible. For example:
# dnf update python3 ansible-
Install the
python3-ovirt-engine-sdk4package to get the Python Software Development Kit. Install the
ovirt.image-templateAnsible role. On the RHV Manager and other Red Hat Enterprise Linux (RHEL) machines, this role is distributed as theovirt-ansible-image-templatepackage. For example, enter:# dnf install ovirt-ansible-image-templateInstall the
ovirt.vm-infraAnsible role. On the RHV Manager and other RHEL machines, this role is distributed as theovirt-ansible-vm-infrapackage.# dnf install ovirt-ansible-vm-infraCreate an environment variable and assign an absolute or relative path to it. For example, enter:
$ export ASSETS_DIR=./wrkNoteThe installation program uses this variable to create a directory where it saves important installation-related files. Later, the installation process reuses this variable to locate those asset files. Avoid deleting this assets directory; it is required for uninstalling the cluster.
13.4.9. Setting up the CA certificate for RHV
Download the CA certificate from the Red Hat Virtualization (RHV) Manager and set it up on the installation machine.
You can download the certificate from a webpage on the RHV Manager or by using a curl command.
Later, you provide the certificate to the installation program.
Procedure
Use either of these two methods to download the CA certificate:
-
Go to the Manager’s webpage,
https://<engine-fqdn>/ovirt-engine/. Then, under Downloads, click the CA Certificate link. Run the following command:
$ curl -k 'https://<engine-fqdn>/ovirt-engine/services/pki-resource?resource=ca-certificate&format=X509-PEM-CA' -o /tmp/ca.pem1 - 1
- For
<engine-fqdn>, specify the fully qualified domain name of the RHV Manager, such asrhv-env.virtlab.example.com.
-
Go to the Manager’s webpage,
Configure the CA file to grant rootless user access to the Manager. Set the CA file permissions to have an octal value of
0644(symbolic value:-rw-r—r--):$ sudo chmod 0644 /tmp/ca.pemFor Linux, copy the CA certificate to the directory for server certificates. Use
-pto preserve the permissions:$ sudo cp -p /tmp/ca.pem /etc/pki/ca-trust/source/anchors/ca.pemAdd the certificate to the certificate manager for your operating system:
- For macOS, double-click the certificate file and use the Keychain Access utility to add the file to the System keychain.
For Linux, update the CA trust:
$ sudo update-ca-trustNoteIf you use your own certificate authority, make sure the system trusts it.
13.4.10. Generating an SSH private key and adding it to the agent
If you want to perform installation debugging or disaster recovery on your cluster, you must provide an SSH key to both your ssh-agent and the installation program. You can use this key to access the bootstrap machine in a public cluster to troubleshoot installation issues.
In a production environment, you require disaster recovery and debugging.
Do not skip this procedure in production environments where disaster recovery and debugging is required.
You can use this key to SSH into the master nodes as the user core. When you deploy the cluster, the key is added to the core user’s ~/.ssh/authorized_keys list.
Procedure
If you do not have an SSH key that is configured for password-less authentication on your computer, create one. For example, on a computer that uses a Linux operating system, run the following command:
$ ssh-keygen -t ed25519 -N '' \ -f <path>/<file_name>1 - 1
- Specify the path and file name, such as
~/.ssh/id_rsa, of the new SSH key. If you have an existing key pair, ensure your public key is in the your~/.sshdirectory.
Running this command generates an SSH key that does not require a password in the location that you specified.
NoteIf you plan to install an OpenShift Container Platform cluster that uses FIPS Validated / Modules in Process cryptographic libraries on the
x86_64architecture, do not create a key that uses theed25519algorithm. Instead, create a key that uses thersaorecdsaalgorithm.Start the
ssh-agentprocess as a background task:$ eval "$(ssh-agent -s)"Example output
Agent pid 31874NoteIf your cluster is in FIPS mode, only use FIPS-compliant algorithms to generate the SSH key. The key must be either RSA or ECDSA.
Add your SSH private key to the
ssh-agent:$ ssh-add <path>/<file_name>1 Example output
Identity added: /home/<you>/<path>/<file_name> (<computer_name>)- 1
- Specify the path and file name for your SSH private key, such as
~/.ssh/id_rsa
Next steps
- When you install OpenShift Container Platform, provide the SSH public key to the installation program.
13.4.11. Downloading the Ansible playbooks
Download the Ansible playbooks for installing OpenShift Container Platform version 4.7 on RHV.
Procedure
On your installation machine, run the following commands:
$ mkdir playbooks$ cd playbooks$ curl -s -L -X GET https://api.github.com/repos/openshift/installer/contents/upi/ovirt?ref=release-4.7 | grep 'download_url.*\.yml' | awk '{ print $2 }' | sed -r 's/("|",)//g' | xargs -n 1 curl -O
Next steps
-
After you download these Ansible playbooks, you must also create the environment variable for the assets directory and customize the
inventory.ymlfile before you create an installation configuration file by running the installation program.
13.4.12. The inventory.yml file
You use the inventory.yml file to define and create elements of the OpenShift Container Platform cluster you are installing. This includes elements such as the Red Hat Enterprise Linux CoreOS (RHCOS) image, virtual machine templates, bootstrap machine, control plane nodes, and worker nodes. You also use inventory.yml to destroy the cluster.
The following inventory.yml example shows you the parameters and their default values. The quantities and numbers in these default values meet the requirements for running a production OpenShift Container Platform cluster in a RHV environment.
Example inventory.yml file
---
all:
vars:
ovirt_cluster: "Default"
ocp:
assets_dir: "{{ lookup('env', 'ASSETS_DIR') }}"
ovirt_config_path: "{{ lookup('env', 'HOME') }}/.ovirt/ovirt-config.yaml"
# ---
# {op-system} section
# ---
rhcos:
image_url: "https://mirror.openshift.com/pub/openshift-v4/dependencies/rhcos/4.7/latest/rhcos-openstack.x86_64.qcow2.gz"
local_cmp_image_path: "/tmp/rhcos.qcow2.gz"
local_image_path: "/tmp/rhcos.qcow2"
# ---
# Profiles section
# ---
control_plane:
cluster: "{{ ovirt_cluster }}"
memory: 16GiB
sockets: 4
cores: 1
template: rhcos_tpl
operating_system: "rhcos_x64"
type: high_performance
graphical_console:
headless_mode: false
protocol:
- spice
- vnc
disks:
- size: 120GiB
name: os
interface: virtio_scsi
storage_domain: depot_nvme
nics:
- name: nic1
network: lab
profile: lab
compute:
cluster: "{{ ovirt_cluster }}"
memory: 16GiB
sockets: 4
cores: 1
template: worker_rhcos_tpl
operating_system: "rhcos_x64"
type: high_performance
graphical_console:
headless_mode: false
protocol:
- spice
- vnc
disks:
- size: 120GiB
name: os
interface: virtio_scsi
storage_domain: depot_nvme
nics:
- name: nic1
network: lab
profile: lab
# ---
# Virtual machines section
# ---
vms:
- name: "{{ metadata.infraID }}-bootstrap"
ocp_type: bootstrap
profile: "{{ control_plane }}"
type: server
- name: "{{ metadata.infraID }}-master0"
ocp_type: master
profile: "{{ control_plane }}"
- name: "{{ metadata.infraID }}-master1"
ocp_type: master
profile: "{{ control_plane }}"
- name: "{{ metadata.infraID }}-master2"
ocp_type: master
profile: "{{ control_plane }}"
- name: "{{ metadata.infraID }}-worker0"
ocp_type: worker
profile: "{{ compute }}"
- name: "{{ metadata.infraID }}-worker1"
ocp_type: worker
profile: "{{ compute }}"
- name: "{{ metadata.infraID }}-worker2"
ocp_type: worker
profile: "{{ compute }}"Enter values for parameters whose descriptions begin with "Enter." Otherwise, you can use the default value or replace it with a new value.
General section
-
ovirt_cluster: Enter the name of an existing RHV cluster in which to install the OpenShift Container Platform cluster. -
ocp.assets_dir: The path of a directory theopenshift-installinstallation program creates to store the files that it generates. -
ocp.ovirt_config_path: The path of theovirt-config.yamlfile the installation program generates, for example,./wrk/install-config.yaml. This file contains the credentials required to interact with the REST API of the Manager.
Red Hat Enterprise Linux CoreOS (RHCOS) section
-
image_url: Enter the URL of the RHCOS image you specified for download. -
local_cmp_image_path: The path of a local download directory for the compressed RHCOS image. -
local_image_path: The path of a local directory for the extracted RHCOS image.
Profiles section
This section consists of two profiles:
-
control_plane: The profile of the bootstrap and control plane nodes. -
compute: The profile of workers nodes in the compute plane.
These profiles have the following parameters. The default values of the parameters meet the minimum requirements for running a production cluster. You can increase or customize these values to meet your workload requirements.
-
cluster: The value gets the cluster name fromovirt_clusterin the General Section. -
memory: The amount of memory, in GB, for the virtual machine. -
sockets: The number of sockets for the virtual machine. -
cores: The number of cores for the virtual machine. -
template: The name of the virtual machine template. If plan to install multiple clusters, and these clusters use templates that contain different specifications, prepend the template name with the ID of the cluster. -
operating_system: The type of guest operating system in the virtual machine. With oVirt/RHV version 4.4, this value must berhcos_x64so the value ofIgnition scriptcan be passed to the VM. type: Enterserveras the type of the virtual machine.ImportantYou must change the value of the
typeparameter fromhigh_performancetoserver.-
disks: The disk specifications. Thecontrol_planeandcomputenodes can have different storage domains. -
size: The minimum disk size. -
name: Enter the name of a disk connected to the target cluster in RHV. -
interface: Enter the interface type of the disk you specified. -
storage_domain: Enter the storage domain of the disk you specified. -
nics: Enter thenameandnetworkthe virtual machines use. You can also specify the virtual network interface profile. By default, NICs obtain their MAC addresses from the oVirt/RHV MAC pool.
Virtual machines section
This final section, vms, defines the virtual machines you plan to create and deploy in the cluster. By default, it provides the minimum number of control plane and worker nodes for a production environment.
vms contains three required elements:
-
name: The name of the virtual machine. In this case,metadata.infraIDprepends the virtual machine name with the infrastructure ID from themetadata.ymlfile. -
ocp_type: The role of the virtual machine in the OCP cluster. Possible values arebootstrap,master,worker. profile: The name of the profile from which each virtual machine inherits specifications. Possible values in this example arecontrol_planeorcompute.You can override the value a virtual machine inherits from its profile. To do this, you add the name of the profile attribute to the virtual machine in
inventory.ymland assign it an overriding value. To see an example of this, examine thename: "{{ metadata.infraID }}-bootstrap"virtual machine in the precedinginventory.ymlexample: It has atypeattribute whose value,server, overrides the value of thetypeattribute this virtual machine would otherwise inherit from thecontrol_planeprofile.
Metadata variables
For virtual machines, metadata.infraID prepends the name of the virtual machine with the infrastructure ID from the metadata.json file you create when you build the Ignition files.
The playbooks use the following code to read infraID from the specific file located in the ocp.assets_dir.
---
- name: include metadata.json vars
include_vars:
file: "{{ ocp.assets_dir }}/metadata.json"
name: metadata
...13.4.13. Specifying the RHCOS image settings
Update the Red Hat Enterprise Linux CoreOS (RHCOS) image settings of the inventory.yml file. Later, when you run this file one of the playbooks, it downloads a compressed Red Hat Enterprise Linux CoreOS (RHCOS) image from the image_url URL to the local_cmp_image_path directory. The playbook then uncompresses the image to the local_image_path directory and uses it to create oVirt/RHV templates.
Procedure
- Locate the RHCOS image download page for the version of OpenShift Container Platform you are installing, such as Index of /pub/openshift-v4/dependencies/rhcos/latest/latest.
-
From that download page, copy the URL of an OpenStack
qcow2image, such ashttps://mirror.openshift.com/pub/openshift-v4/dependencies/rhcos/4.7/latest/rhcos-openstack.x86_64.qcow2.gz. Edit the
inventory.ymlplaybook you downloaded earlier. In it, paste the URL as the value forimage_url. For example:rhcos: "https://mirror.openshift.com/pub/openshift-v4/dependencies/rhcos/4.7/latest/rhcos-openstack.x86_64.qcow2.gz"
13.4.14. Creating the install config file
You create an installation configuration file by running the installation program, openshift-install, and responding to its prompts with information you specified or gathered earlier.
When you finish responding to the prompts, the installation program creates an initial version of the install-config.yaml file in the assets directory you specified earlier, for example, ./wrk/install-config.yaml
The installation program also creates a file, $HOME/.ovirt/ovirt-config.yaml, that contains all the connection parameters that are required to reach the Manager and use its REST API.
NOTE: The installation process does not use values you supply for some parameters, such as Internal API virtual IP and Ingress virtual IP, because you have already configured them in your infrastructure DNS.
It also uses the values you supply for parameters in inventory.yml, like the ones for oVirt cluster, oVirt storage, and oVirt network. And uses a script to remove or replace these same values from install-config.yaml with the previously mentioned virtual IPs.
Procedure
Run the installation program:
$ openshift-install create install-config --dir $ASSETS_DIRRespond to the installation program’s prompts with information about your system.
Example output
? SSH Public Key /home/user/.ssh/id_dsa.pub ? Platform <ovirt> ? Engine FQDN[:PORT] [? for help] <engine.fqdn> ? Enter ovirt-engine username <ocpadmin@internal> ? Enter password <******> ? oVirt cluster <cluster> ? oVirt storage <storage> ? oVirt network <net> ? Internal API virtual IP <172.16.0.252> ? Ingress virtual IP <172.16.0.251> ? Base Domain <example.org> ? Cluster Name <ocp4> ? Pull Secret [? for help] <********>
? SSH Public Key /home/user/.ssh/id_dsa.pub
? Platform <ovirt>
? Engine FQDN[:PORT] [? for help] <engine.fqdn>
? Enter ovirt-engine username <ocpadmin@internal>
? Enter password <******>
? oVirt cluster <cluster>
? oVirt storage <storage>
? oVirt network <net>
? Internal API virtual IP <172.16.0.252>
? Ingress virtual IP <172.16.0.251>
? Base Domain <example.org>
? Cluster Name <ocp4>
? Pull Secret [? for help] <********>
For Internal API virtual IP and Ingress virtual IP, supply the IP addresses you specified when you configured the DNS service.
Together, the values you enter for the oVirt cluster and Base Domain prompts form the FQDN portion of URLs for the REST API and any applications you create, such as https://api.ocp4.example.org:6443/ and https://console-openshift-console.apps.ocp4.example.org.
You can get the pull secret from the Red Hat OpenShift Cluster Manager.
13.4.15. Sample install-config.yaml file for IBM Z
13.4.16. Sample install-config.yaml file for RHV
You can customize the install-config.yaml file to specify more details about your OpenShift Container Platform cluster’s platform or modify the values of the required parameters.
apiVersion: v1
baseDomain: example.com
compute:
- hyperthreading: Enabled
name: worker
replicas: 0
controlPlane:
hyperthreading: Enabled
name: master
replicas: 3
metadata:
name: test
networking:
clusterNetwork:
- cidr: 10.128.0.0/14
hostPrefix: 23
networkType: OpenShiftSDN
serviceNetwork:
- 172.30.0.0/16
platform:
none: {}
fips: false
pullSecret: '{"auths": ...}'
sshKey: 'ssh-ed25519 AAAA...' - 1
- The base domain of the cluster. All DNS records must be sub-domains of this base and include the cluster name.
- 2 5
- The
controlPlanesection is a single mapping, but thecomputesection is a sequence of mappings. To meet the requirements of the different data structures, the first line of thecomputesection must begin with a hyphen,-, and the first line of thecontrolPlanesection must not. Only one control plane pool is used. - 3 6
- Whether to enable or disable simultaneous multithreading (SMT), or
hyperthreading. By default, SMT is enabled to increase the performance of your machines' cores. You can disable it by setting the parameter value toDisabled. If you disable SMT, you must disable it in all cluster machines; this includes both control plane and compute machines.NoteSimultaneous multithreading (SMT) is enabled by default. If SMT is not enabled in your BIOS settings, the
hyperthreadingparameter has no effect.ImportantIf you disable
hyperthreading, whether in the BIOS or in theinstall-config.yaml, ensure that your capacity planning accounts for the dramatically decreased machine performance. - 4
- You must set the value of the
replicasparameter to0. This parameter controls the number of workers that the cluster creates and manages for you, which are functions that the cluster does not perform when you use user-provisioned infrastructure. You must manually deploy worker machines for the cluster to use before you finish installing OpenShift Container Platform. - 7
- The number of control plane machines that you add to the cluster. Because the cluster uses these values as the number of etcd endpoints in the cluster, the value must match the number of control plane machines that you deploy.
- 8
- The cluster name that you specified in your DNS records.
- 9
- A block of IP addresses from which pod IP addresses are allocated. This block must not overlap with existing physical networks. These IP addresses are used for the pod network. If you need to access the pods from an external network, you must configure load balancers and routers to manage the traffic.Note
Class E CIDR range is reserved for a future use. To use the Class E CIDR range, you must ensure your networking environment accepts the IP addresses within the Class E CIDR range.
- 10
- The subnet prefix length to assign to each individual node. For example, if
hostPrefixis set to23, then each node is assigned a/23subnet out of the givencidr, which allows for 510 (2^(32 - 23) - 2) pod IPs addresses. If you are required to provide access to nodes from an external network, configure load balancers and routers to manage the traffic. - 11
- The IP address pool to use for service IP addresses. You can enter only one IP address pool. This block must not overlap with existing physical networks. If you need to access the services from an external network, configure load balancers and routers to manage the traffic.
- 12
- You must set the platform to
none. You cannot provide additional platform configuration variables for IBM Z infrastructure. RHV infrastructure.WarningRed Hat Virtualization does not currently support installation with user-provisioned infrastructure on the oVirt platform. Therefore, you must set the platform to
none, allowing OpenShift Container Platform to identify each node as a bare-metal node and the cluster as a bare-metal cluster. This is the same as installing a cluster on any platform, and has the following limitations:- There will be no cluster provider so you must manually add each machine and there will be no node scaling capabilities.
- The oVirt CSI driver will not be installed and there will be no CSI capabilities.
- 13
- Whether to enable or disable FIPS mode. By default, FIPS mode is not enabled. If FIPS mode is enabled, the Red Hat Enterprise Linux CoreOS (RHCOS) machines that OpenShift Container Platform runs on bypass the default Kubernetes cryptography suite and use the cryptography modules that are provided with RHCOS instead.Important
The use of FIPS Validated / Modules in Process cryptographic libraries is only supported on OpenShift Container Platform deployments on the
x86_64architecture. - 14
- The pull secret from the Red Hat OpenShift Cluster Manager. This pull secret allows you to authenticate with the services that are provided by the included authorities, including Quay.io, which serves the container images for OpenShift Container Platform components.
- 15
- The public portion of the default SSH key for the
coreuser in Red Hat Enterprise Linux CoreOS (RHCOS).NoteFor production OpenShift Container Platform clusters on which you want to perform installation debugging or disaster recovery, specify an SSH key that your
ssh-agentprocess uses.
13.4.16.1. Configuring the cluster-wide proxy during installation
Production environments can deny direct access to the Internet and instead have an HTTP or HTTPS proxy available. You can configure a new OpenShift Container Platform cluster to use a proxy by configuring the proxy settings in the install-config.yaml file.
Prerequisites
-
You have an existing
install-config.yamlfile. You reviewed the sites that your cluster requires access to and determined whether any of them need to bypass the proxy. By default, all cluster egress traffic is proxied, including calls to hosting cloud provider APIs. You added sites to the
Proxyobject’sspec.noProxyfield to bypass the proxy if necessary.NoteThe
Proxyobjectstatus.noProxyfield is populated with the values of thenetworking.machineNetwork[].cidr,networking.clusterNetwork[].cidr, andnetworking.serviceNetwork[]fields from your installation configuration.For installations on Amazon Web Services (AWS), Google Cloud Platform (GCP), Microsoft Azure, and Red Hat OpenStack Platform (RHOSP), the
Proxyobjectstatus.noProxyfield is also populated with the instance metadata endpoint (169.254.169.254).
Procedure
Edit your
install-config.yamlfile and add the proxy settings. For example:apiVersion: v1 baseDomain: my.domain.com proxy: httpProxy: http://<username>:<pswd>@<ip>:<port>1 httpsProxy: https://<username>:<pswd>@<ip>:<port>2 noProxy: example.com3 additionalTrustBundle: |4 -----BEGIN CERTIFICATE----- <MY_TRUSTED_CA_CERT> -----END CERTIFICATE----- ...- 1
- A proxy URL to use for creating HTTP connections outside the cluster. The URL scheme must be
http. - 2
- A proxy URL to use for creating HTTPS connections outside the cluster.
- 3
- A comma-separated list of destination domain names, IP addresses, or other network CIDRs to exclude from proxying. Preface a domain with
.to match subdomains only. For example,.y.commatchesx.y.com, but noty.com. Use*to bypass the proxy for all destinations. - 4
- If provided, the installation program generates a config map that is named
user-ca-bundlein theopenshift-confignamespace to hold the additional CA certificates. If you provideadditionalTrustBundleand at least one proxy setting, theProxyobject is configured to reference theuser-ca-bundleconfig map in thetrustedCAfield. The Cluster Network Operator then creates atrusted-ca-bundleconfig map that merges the contents specified for thetrustedCAparameter with the RHCOS trust bundle. TheadditionalTrustBundlefield is required unless the proxy’s identity certificate is signed by an authority from the RHCOS trust bundle.
NoteThe installation program does not support the proxy
readinessEndpointsfield.- Save the file and reference it when installing OpenShift Container Platform.
The installation program creates a cluster-wide proxy that is named cluster that uses the proxy settings in the provided install-config.yaml file. If no proxy settings are provided, a cluster Proxy object is still created, but it will have a nil spec.
Only the Proxy object named cluster is supported, and no additional proxies can be created.
13.4.17. Customizing install-config.yaml
Here, you use three Python scripts to override some of the installation program’s default behaviors:
- By default, the installation program uses the machine API to create nodes. To override this default behavior, you set the number of compute nodes to zero replicas. Later, you use Ansible playbooks to create the compute nodes.
- By default, the installation program sets the IP range of the machine network for nodes. To override this default behavior, you set the IP range to match your infrastructure.
-
By default, the installation program sets the platform to
ovirt. However, installing a cluster on user-provisioned infrastructure is more similar to installing a cluster on bare metal. Therefore, you delete the ovirt platform section frominstall-config.yamland change the platform tonone. Instead, you useinventory.ymlto specify all of the required settings.
These snippets work with Python 3 and Python 2.
Procedure
Set the number of compute nodes to zero replicas:
$ python3 -c 'import os, yaml path = "%s/install-config.yaml" % os.environ["ASSETS_DIR"] conf = yaml.safe_load(open(path)) conf["compute"][0]["replicas"] = 0 open(path, "w").write(yaml.dump(conf, default_flow_style=False))'Set the IP range of the machine network. For example, to set the range to
172.16.0.0/16, enter:$ python3 -c 'import os, yaml path = "%s/install-config.yaml" % os.environ["ASSETS_DIR"] conf = yaml.safe_load(open(path)) conf["networking"]["machineNetwork"][0]["cidr"] = "172.16.0.0/16" open(path, "w").write(yaml.dump(conf, default_flow_style=False))'Remove the
ovirtsection and change the platform tonone:$ python3 -c 'import os, yaml path = "%s/install-config.yaml" % os.environ["ASSETS_DIR"] conf = yaml.safe_load(open(path)) platform = conf["platform"] del platform["ovirt"] platform["none"] = {} open(path, "w").write(yaml.dump(conf, default_flow_style=False))'WarningRed Hat Virtualization does not currently support installation with user-provisioned infrastructure on the oVirt platform. Therefore, you must set the platform to
none, allowing OpenShift Container Platform to identify each node as a bare-metal node and the cluster as a bare-metal cluster. This is the same as installing a cluster on any platform, and has the following limitations:- There will be no cluster provider so you must manually add each machine and there will be no node scaling capabilities.
- The oVirt CSI driver will not be installed and there will be no CSI capabilities.
13.4.18. Generate manifest files
Use the installation program to generate a set of manifest files in the assets directory.
The command to generate the manifest files displays a warning message before it consumes the install-config.yaml file.
If you plan to reuse the install-config.yaml file, create a backup copy of it before you back it up before you generate the manifest files.
Procedure
Optional: Create a backup copy of the
install-config.yamlfile:$ cp install-config.yaml install-config.yaml.backupGenerate a set of manifests in your assets directory:
$ openshift-install create manifests --dir $ASSETS_DIRThis command displays the following messages.
Example output
INFO Consuming Install Config from target directory WARNING Making control-plane schedulable by setting MastersSchedulable to true for Scheduler cluster settingsThe command generates the following manifest files:
Example output
$ tree . └── wrk ├── manifests │ ├── 04-openshift-machine-config-operator.yaml │ ├── cluster-config.yaml │ ├── cluster-dns-02-config.yml │ ├── cluster-infrastructure-02-config.yml │ ├── cluster-ingress-02-config.yml │ ├── cluster-network-01-crd.yml │ ├── cluster-network-02-config.yml │ ├── cluster-proxy-01-config.yaml │ ├── cluster-scheduler-02-config.yml │ ├── cvo-overrides.yaml │ ├── etcd-ca-bundle-configmap.yaml │ ├── etcd-client-secret.yaml │ ├── etcd-host-service-endpoints.yaml │ ├── etcd-host-service.yaml │ ├── etcd-metric-client-secret.yaml │ ├── etcd-metric-serving-ca-configmap.yaml │ ├── etcd-metric-signer-secret.yaml │ ├── etcd-namespace.yaml │ ├── etcd-service.yaml │ ├── etcd-serving-ca-configmap.yaml │ ├── etcd-signer-secret.yaml │ ├── kube-cloud-config.yaml │ ├── kube-system-configmap-root-ca.yaml │ ├── machine-config-server-tls-secret.yaml │ └── openshift-config-secret-pull-secret.yaml └── openshift ├── 99_kubeadmin-password-secret.yaml ├── 99_openshift-cluster-api_master-user-data-secret.yaml ├── 99_openshift-cluster-api_worker-user-data-secret.yaml ├── 99_openshift-machineconfig_99-master-ssh.yaml ├── 99_openshift-machineconfig_99-worker-ssh.yaml └── openshift-install-manifests.yaml
Next steps
- Make control plane nodes non-schedulable.
13.4.19. Making control-plane nodes non-schedulable
Because you are manually creating and deploying the control plane machines, you must configure a manifest file to make the control plane nodes non-schedulable.
Procedure
To make the control plane nodes non-schedulable, enter:
$ python3 -c 'import os, yaml path = "%s/manifests/cluster-scheduler-02-config.yml" % os.environ["ASSETS_DIR"] data = yaml.safe_load(open(path)) data["spec"]["mastersSchedulable"] = False open(path, "w").write(yaml.dump(data, default_flow_style=False))'
13.4.20. Building the Ignition files
To build the Ignition files from the manifest files you just generated and modified, you run the installation program. This action creates a Red Hat Enterprise Linux CoreOS (RHCOS) machine, initramfs, which fetches the Ignition files and performs the configurations needed to create a node.
In addition to the Ignition files, the installation program generates the following:
-
An
authdirectory that contains the admin credentials for connecting to the cluster with theocandkubectlutilities. -
A
metadata.jsonfile that contains information such as the OpenShift Container Platform cluster name, cluster ID, and infrastructure ID for the current installation.
The Ansible playbooks for this installation process use the value of infraID as a prefix for the virtual machines they create. This prevents naming conflicts when there are multiple installations in the same oVirt/RHV cluster.
Certificates in Ignition configuration files expire after 24 hours. Complete the cluster installation and keep the cluster running in a non-degraded state for 24 hours so that the first certificate rotation can finish.
Procedure
To build the Ignition files, enter:
$ openshift-install create ignition-configs --dir $ASSETS_DIRExample output
$ tree . └── wrk ├── auth │ ├── kubeadmin-password │ └── kubeconfig ├── bootstrap.ign ├── master.ign ├── metadata.json └── worker.ign
13.4.21. Creating templates and virtual machines
After confirming the variables in the inventory.yml, you run the first Ansible provisioning playbook, create-templates-and-vms.yml.
This playbook uses the connection parameters for the RHV Manager from $HOME/.ovirt/ovirt-config.yaml and reads metadata.json in the assets directory.
If a local Red Hat Enterprise Linux CoreOS (RHCOS) image is not already present, the playbook downloads one from the URL you specified for image_url in inventory.yml. It extracts the image and uploads it to RHV to create templates.
The playbook creates a template based on the control_plane and compute profiles in the inventory.yml file. If these profiles have different names, it creates two templates.
When the playbook finishes, the virtual machines it creates are stopped. You can get information from them to help configure other infrastructure elements. For example, you can get the virtual machines' MAC addresses to configure DHCP to assign permanent IP addresses to the virtual machines.
Procedure
-
In
inventory.yml, under thecontrol_planeandcomputevariables, change both instances oftype: high_performancetotype: server. Optional: If you plan to perform multiple installations to the same cluster, create different templates for each OCP installation. In the
inventory.ymlfile, prepend the value oftemplatewithinfraID. For example:control_plane: cluster: "{{ ovirt_cluster }}" memory: 16GiB sockets: 4 cores: 1 template: "{{ metadata.infraID }}-rhcos_tpl" operating_system: "rhcos_x64" ...Create the templates and virtual machines:
$ ansible-playbook -i inventory.yml create-templates-and-vms.yml
13.4.22. Creating the bootstrap machine
You create a bootstrap machine by running the bootstrap.yml playbook. This playbook starts the bootstrap virtual machine, and passes it the bootstrap.ign Ignition file from the assets directory. The bootstrap node configures itself so it can serve Ignition files to the control plane nodes.
To monitor the bootstrap process, you use the console in the RHV Administration Portal or connect to the virtual machine by using SSH.
Procedure
Create the bootstrap machine:
$ ansible-playbook -i inventory.yml bootstrap.ymlConnect to the bootstrap machine using a console in the Administration Portal or SSH. Replace
<bootstrap_ip>with the bootstrap node IP address. To use SSH, enter:$ ssh core@<boostrap.ip>Collect
bootkube.servicejournald unit logs for the release image service from the bootstrap node:[core@ocp4-lk6b4-bootstrap ~]$ journalctl -b -f -u release-image.service -u bootkube.serviceNoteThe
bootkube.servicelog on the bootstrap node outputs etcdconnection refusederrors, indicating that the bootstrap server is unable to connect to etcd on control plane nodes (also known as the master nodes). After etcd has started on each control plane node and the nodes have joined the cluster, the errors should stop.
13.4.23. Creating the control plane nodes
You create the control plane nodes by running the masters.yml playbook. This playbook passes the master.ign Ignition file to each of the virtual machines. The Ignition file contains a directive for the control plane node to get the Ignition from a URL such as https://api-int.ocp4.example.org:22623/config/master. The port number in this URL is managed by the load balancer, and is accessible only inside the cluster.
Procedure
Create the control plane nodes:
$ ansible-playbook -i inventory.yml masters.ymlWhile the playbook creates your control plane, monitor the bootstrapping process:
$ openshift-install wait-for bootstrap-complete --dir $ASSETS_DIRExample output
INFO API v1.18.3+b74c5ed up INFO Waiting up to 40m0s for bootstrapping to complete...When all the pods on the control plane nodes and etcd are up and running, the installation program displays the following output.
Example output
INFO It is now safe to remove the bootstrap resources
13.4.24. Verifying cluster status
You can verify your OpenShift Container Platform cluster’s status during or after installation.
Procedure
In the cluster environment, export the administrator’s kubeconfig file:
$ export KUBECONFIG=$ASSETS_DIR/auth/kubeconfigThe
kubeconfigfile contains information about the cluster that is used by the CLI to connect a client to the correct cluster and API server.View the control plane and compute machines created after a deployment:
$ oc get nodesView your cluster’s version:
$ oc get clusterversionView your Operators' status:
$ oc get clusteroperatorView all running pods in the cluster:
$ oc get pods -A
13.4.25. Removing the bootstrap machine
After the wait-for command shows that the bootstrap process is complete, you must remove the bootstrap virtual machine to free up compute, memory, and storage resources. Also, remove settings for the bootstrap machine from the load balancer directives.
Procedure
To remove the bootstrap machine from the cluster, enter:
$ ansible-playbook -i inventory.yml retire-bootstrap.yml- Remove settings for the bootstrap machine from the load balancer directives.
13.4.26. Creating the worker nodes and completing the installation
Creating worker nodes is similar to creating control plane nodes. However, worker nodes workers do not automatically join the cluster. To add them to the cluster, you review and approve the workers' pending CSRs (Certificate Signing Requests).
After approving the first requests, you continue approving CSR until all of the worker nodes are approved. When you complete this process, the worker nodes become Ready and can have pods scheduled to run on them.
Finally, monitor the command line to see when the installation process completes.
Procedure
Create the worker nodes:
$ ansible-playbook -i inventory.yml workers.ymlTo list all of the CSRs, enter:
$ oc get csr -AEventually, this command displays one CSR per node. For example:
Example output
NAME AGE SIGNERNAME REQUESTOR CONDITION csr-2lnxd 63m kubernetes.io/kubelet-serving system:node:ocp4-lk6b4-master0.ocp4.example.org Approved,Issued csr-hff4q 64m kubernetes.io/kube-apiserver-client-kubelet system:serviceaccount:openshift-machine-config-operator:node-bootstrapper Approved,Issued csr-hsn96 60m kubernetes.io/kubelet-serving system:node:ocp4-lk6b4-master2.ocp4.example.org Approved,Issued csr-m724n 6m2s kubernetes.io/kube-apiserver-client-kubelet system:serviceaccount:openshift-machine-config-operator:node-bootstrapper Pending csr-p4dz2 60m kubernetes.io/kube-apiserver-client-kubelet system:serviceaccount:openshift-machine-config-operator:node-bootstrapper Approved,Issued csr-t9vfj 60m kubernetes.io/kubelet-serving system:node:ocp4-lk6b4-master1.ocp4.example.org Approved,Issued csr-tggtr 61m kubernetes.io/kube-apiserver-client-kubelet system:serviceaccount:openshift-machine-config-operator:node-bootstrapper Approved,Issued csr-wcbrf 7m6s kubernetes.io/kube-apiserver-client-kubelet system:serviceaccount:openshift-machine-config-operator:node-bootstrapper PendingTo filter the list and see only pending CSRs, enter:
$ watch "oc get csr -A | grep pending -i"This command refreshes the output every two seconds and displays only pending CSRs. For example:
Example output
Every 2.0s: oc get csr -A | grep pending -i csr-m724n 10m kubernetes.io/kube-apiserver-client-kubelet system:serviceaccount:openshift-machine-config-operator:node-bootstrapper Pending csr-wcbrf 11m kubernetes.io/kube-apiserver-client-kubelet system:serviceaccount:openshift-machine-config-operator:node-bootstrapper PendingInspect each pending request. For example:
Example output
$ oc describe csr csr-m724nExample output
Name: csr-m724n Labels: <none> Annotations: <none> CreationTimestamp: Sun, 19 Jul 2020 15:59:37 +0200 Requesting User: system:serviceaccount:openshift-machine-config-operator:node-bootstrapper Signer: kubernetes.io/kube-apiserver-client-kubelet Status: Pending Subject: Common Name: system:node:ocp4-lk6b4-worker1.ocp4.example.org Serial Number: Organization: system:nodes Events: <none>If the CSR information is correct, approve the request:
$ oc adm certificate approve csr-m724nWait for the installation process to finish:
$ openshift-install wait-for install-complete --dir $ASSETS_DIR --log-level debugWhen the installation completes, the command line displays the URL of the OpenShift Container Platform web console and the administrator user name and password.
13.4.27. Telemetry access for OpenShift Container Platform
In OpenShift Container Platform 4.7, the Telemetry service, which runs by default to provide metrics about cluster health and the success of updates, requires internet access. If your cluster is connected to the internet, Telemetry runs automatically, and your cluster is registered to OpenShift Cluster Manager.
After you confirm that your OpenShift Cluster Manager inventory is correct, either maintained automatically by Telemetry or manually by using OpenShift Cluster Manager, use subscription watch to track your OpenShift Container Platform subscriptions at the account or multi-cluster level.
13.4.28. Disabling the default OperatorHub sources
Operator catalogs that source content provided by Red Hat and community projects are configured for OperatorHub by default during an OpenShift Container Platform installation. In a restricted network environment, you must disable the default catalogs as a cluster administrator.
Procedure
Disable the sources for the default catalogs by adding
disableAllDefaultSources: trueto theOperatorHubobject:$ oc patch OperatorHub cluster --type json \ -p '[{"op": "add", "path": "/spec/disableAllDefaultSources", "value": true}]'
Alternatively, you can use the web console to manage catalog sources. From the Administration → Cluster Settings → Global Configuration → OperatorHub page, click the Sources tab, where you can create, delete, disable, and enable individual sources.
13.5. Uninstalling a cluster on RHV
You can remove an OpenShift Container Platform cluster from Red Hat Virtualization (RHV).
13.5.1. Removing a cluster that uses installer-provisioned infrastructure
You can remove a cluster that uses installer-provisioned infrastructure from your cloud.
After uninstallation, check your cloud provider for any resources not removed properly, especially with User Provisioned Infrastructure (UPI) clusters. There might be resources that the installer did not create or that the installer is unable to access.
Prerequisites
- Have a copy of the installation program that you used to deploy the cluster.
- Have the files that the installation program generated when you created your cluster.
Procedure
From the directory that contains the installation program on the computer that you used to install the cluster, run the following command:
$ ./openshift-install destroy cluster \ --dir <installation_directory> --log-level info1 2 NoteYou must specify the directory that contains the cluster definition files for your cluster. The installation program requires the
metadata.jsonfile in this directory to delete the cluster.-
Optional: Delete the
<installation_directory>directory and the OpenShift Container Platform installation program.
13.5.2. Removing a cluster that uses user-provisioned infrastructure
When you are finished using the cluster, you can remove a cluster that uses user-provisioned infrastructure from your cloud.
Prerequisites
-
Have the original playbook files, assets directory and files, and
$ASSETS_DIRenvironment variable that you used to you install the cluster. Typically, you can achieve this by using the same computer you used when you installed the cluster.
Procedure
To remove the cluster, enter:
$ ansible-playbook -i inventory.yml \ retire-bootstrap.yml \ retire-masters.yml \ retire-workers.yml- Remove any configurations you added to DNS, load balancers, and any other infrastructure for this cluster.
Chapter 14. Installing on vSphere
14.1. Installing a cluster on vSphere
In OpenShift Container Platform version 4.7, you can install a cluster on your VMware vSphere instance by using installer-provisioned infrastructure.
OpenShift Container Platform supports deploying a cluster to a single VMware vCenter only. Deploying a cluster with machines/machine sets on multiple vCenters is not supported.
14.1.1. Prerequisites
-
Provision persistent storage for your cluster. To deploy a private image registry, your storage must provide
ReadWriteManyaccess modes. - Review details about the OpenShift Container Platform installation and update processes.
- The OpenShift Container Platform installer requires access to port 443 on the vCenter and ESXi hosts. You verified that port 443 is accessible.
- If you use a firewall, you confirmed with the administrator that port 443 is accessible. Control plane nodes must be able to reach vCenter and ESXi hosts on port 443 for the installation to succeed.
If you use a firewall, you must configure it to allow the sites that your cluster requires access to.
NoteBe sure to also review this site list if you are configuring a proxy.
14.1.2. Internet access for OpenShift Container Platform
In OpenShift Container Platform 4.7, you require access to the Internet to install your cluster.
You must have Internet access to:
- Access OpenShift Cluster Manager to download the installation program and perform subscription management. If the cluster has internet access and you do not disable Telemetry, that service automatically entitles your cluster.
- Access Quay.io to obtain the packages that are required to install your cluster.
- Obtain the packages that are required to perform cluster updates.
If your cluster cannot have direct Internet access, you can perform a restricted network installation on some types of infrastructure that you provision. During that process, you download the content that is required and use it to populate a mirror registry with the packages that you need to install a cluster and generate the installation program. With some installation types, the environment that you install your cluster in will not require Internet access. Before you update the cluster, you update the content of the mirror registry.
14.1.3. VMware vSphere infrastructure requirements
You must install the OpenShift Container Platform cluster on a VMware vSphere version 6 or 7 instance that meets the requirements for the components that you use.
| Component | Minimum supported versions | Description |
|---|---|---|
| Hypervisor | vSphere 6.5 and later with HW version 13 | This version is the minimum version that Red Hat Enterprise Linux CoreOS (RHCOS) supports. See the Red Hat Enterprise Linux 8 supported hypervisors list. |
| Storage with in-tree drivers | vSphere 6.5 and later | This plug-in creates vSphere storage by using the in-tree storage drivers for vSphere included in OpenShift Container Platform. |
| Optional: Networking (NSX-T) | vSphere 6.5U3 or vSphere 6.7U2 and later | vSphere 6.5U3 or vSphere 6.7U2+ are required for OpenShift Container Platform. VMware’s NSX Container Plug-in (NCP) is certified with OpenShift Container Platform 4.6 and NSX-T 3.x+. |
If you use a vSphere version 6.5 instance, consider upgrading to 6.7U3 or 7.0 before you install OpenShift Container Platform.
You must ensure that the time on your ESXi hosts is synchronized before you install OpenShift Container Platform. See Edit Time Configuration for a Host in the VMware documentation.
Virtual machines (VMs) configured to use virtual hardware version 14 or greater might result in a failed installation. It is recommended to configure VMs with virtual hardware version 13. This is a known issue that is being addressed in BZ#1935539.
14.1.4. Network connectivity requirements
You must configure the network connectivity between machines to allow OpenShift Container Platform cluster components to communicate.
Review the following details about the required network ports.
| Protocol | Port | Description |
|---|---|---|
| ICMP | N/A | Network reachability tests |
| TCP |
| Metrics |
|
|
Host level services, including the node exporter on ports | |
|
| The default ports that Kubernetes reserves | |
|
| openshift-sdn | |
| UDP |
| virtual extensible LAN (VXLAN) |
|
| Geneve | |
|
|
Host level services, including the node exporter on ports | |
|
| IPsec IKE packets | |
|
| IPsec NAT-T packets | |
| TCP/UDP |
| Kubernetes node port |
| ESP | N/A | IPsec Encapsulating Security Payload (ESP) |
| Protocol | Port | Description |
|---|---|---|
| TCP |
| Kubernetes API |
| Protocol | Port | Description |
|---|---|---|
| TCP |
| etcd server and peer ports |
14.1.5. vCenter requirements
Before you install an OpenShift Container Platform cluster on your vCenter that uses infrastructure that the installer provisions, you must prepare your environment.
Required vCenter account privileges
To install an OpenShift Container Platform cluster in a vCenter, the installation program requires access to an account with privileges to read and create the required resources. Using an account that has global administrative privileges is the simplest way to access all of the necessary permissions.
If you cannot use an account with global administrative privileges, you must create roles to grant the privileges necessary for OpenShift Container Platform cluster installation. While most of the privileges are always required, some are required only if you plan for the installation program to provision a folder to contain the OpenShift Container Platform cluster on your vCenter instance, which is the default behavior. You must create or amend vSphere roles for the specified objects to grant the required privileges.
An additional role is required if the installation program is to create a vSphere virtual machine folder.
Example 14.1. Roles and privileges required for installation
| vSphere object for role | When required | Required privileges |
|---|---|---|
| vSphere vCenter | Always |
|
| vSphere vCenter Cluster | Always |
|
| vSphere Datastore | Always |
|
| vSphere Port Group | Always |
|
| Virtual Machine Folder | Always |
|
| vSphere vCenter Datacenter | If the installation program creates the virtual machine folder |
|
Additionally, the user requires some ReadOnly permissions, and some of the roles require permission to propogate the permissions to child objects. These settings vary depending on whether or not you install the cluster into an existing folder.
Example 14.2. Required permissions and propagation settings
| vSphere object | Folder type | Propagate to children | Permissions required |
|---|---|---|---|
| vSphere vCenter | Always | False | Listed required privileges |
| vSphere vCenter Datacenter | Existing folder | False |
|
| Installation program creates the folder | True | Listed required privileges | |
| vSphere vCenter Cluster | Always | True | Listed required privileges |
| vSphere vCenter Datastore | Always | False | Listed required privileges |
| vSphere Switch | Always | False |
|
| vSphere Port Group | Always | False | Listed required privileges |
| vSphere vCenter Virtual Machine Folder | Existing folder | True | Listed required privileges |
For more information about creating an account with only the required privileges, see vSphere Permissions and User Management Tasks in the vSphere documentation.
Using OpenShift Container Platform with vMotion
If you intend on using vMotion in your vSphere environment, consider the following before installing a OpenShift Container Platform cluster.
OpenShift Container Platform generally supports compute-only vMotion. Using Storage vMotion can cause issues and is not supported.
To help ensure the uptime of your compute and control plane nodes, it is recommended that you follow the VMware best practices for vMotion. It is also recommended to use VMware anti-affinity rules to improve the availability of OpenShift Container Platform during maintenance or hardware issues.
For more information about vMotion and anti-affinity rules, see the VMware vSphere documentation for vMotion networking requirements and VM anti-affinity rules.
- If you are using vSphere volumes in your pods, migrating a VM across datastores either manually or through Storage vMotion causes, invalid references within OpenShift Container Platform persistent volume (PV) objects. These references prevent affected pods from starting up and can result in data loss.
- Similarly, OpenShift Container Platform does not support selective migration of VMDKs across datastores, using datastore clusters for VM provisioning or for dynamic or static provisioning of PVs, or using a datastore that is part of a datastore cluster for dynamic or static provisioning of PVs.
Cluster resources
When you deploy an OpenShift Container Platform cluster that uses installer-provisioned infrastructure, the installation program must be able to create several resources in your vCenter instance.
A standard OpenShift Container Platform installation creates the following vCenter resources:
- 1 Folder
- 1 Tag category
- 1 Tag
Virtual machines:
- 1 template
- 1 temporary bootstrap node
- 3 control plane nodes
- 3 compute machines
Although these resources use 856 GB of storage, the bootstrap node is destroyed during the cluster installation process. A minimum of 800 GB of storage is required to use a standard cluster.
If you deploy more compute machines, the OpenShift Container Platform cluster will use more storage.
Cluster limits
Available resources vary between clusters. The number of possible clusters within a vCenter is limited primarily by available storage space and any limitations on the number of required resources. Be sure to consider both limitations to the vCenter resources that the cluster creates and the resources that you require to deploy a cluster, such as IP addresses and networks.
Networking requirements
You must use DHCP for the network and ensure that the DHCP server is configured to provide persistent IP addresses to the cluster machines. All nodes must be in the same VLAN. You cannot scale the cluster using a second VLAN as a Day 2 operation. Additionally, you must create the following networking resources before you install the OpenShift Container Platform cluster:
It is recommended that each OpenShift Container Platform node in the cluster must have access to a Network Time Protocol (NTP) server that is discoverable via DHCP. Installation is possible without an NTP server. However, asynchronous server clocks will cause errors, which NTP server prevents.
Required IP Addresses
An installer-provisioned vSphere installation requires two static IP addresses:
- The API address is used to access the cluster API.
- The Ingress address is used for cluster ingress traffic.
You must provide these IP addresses to the installation program when you install the OpenShift Container Platform cluster.
DNS records
You must create DNS records for two static IP addresses in the appropriate DNS server for the vCenter instance that hosts your OpenShift Container Platform cluster. In each record, <cluster_name> is the cluster name and <base_domain> is the cluster base domain that you specify when you install the cluster. A complete DNS record takes the form: <component>.<cluster_name>.<base_domain>..
| Component | Record | Description |
|---|---|---|
| API VIP |
| This DNS A/AAAA or CNAME record must point to the load balancer for the control plane machines. This record must be resolvable by both clients external to the cluster and from all the nodes within the cluster. |
| Ingress VIP |
| A wildcard DNS A/AAAA or CNAME record that points to the load balancer that targets the machines that run the Ingress router pods, which are the worker nodes by default. This record must be resolvable by both clients external to the cluster and from all the nodes within the cluster. |
14.1.6. Generating an SSH private key and adding it to the agent
If you want to perform installation debugging or disaster recovery on your cluster, you must provide an SSH key to both your ssh-agent and the installation program. You can use this key to access the bootstrap machine in a public cluster to troubleshoot installation issues.
In a production environment, you require disaster recovery and debugging.
Do not skip this procedure in production environments where disaster recovery and debugging is required.
You can use this key to SSH into the master nodes as the user core. When you deploy the cluster, the key is added to the core user’s ~/.ssh/authorized_keys list.
Procedure
If you do not have an SSH key that is configured for password-less authentication on your computer, create one. For example, on a computer that uses a Linux operating system, run the following command:
$ ssh-keygen -t ed25519 -N '' \ -f <path>/<file_name>1 - 1
- Specify the path and file name, such as
~/.ssh/id_rsa, of the new SSH key. If you have an existing key pair, ensure your public key is in the your~/.sshdirectory.
Running this command generates an SSH key that does not require a password in the location that you specified.
NoteIf you plan to install an OpenShift Container Platform cluster that uses FIPS Validated / Modules in Process cryptographic libraries on the
x86_64architecture, do not create a key that uses theed25519algorithm. Instead, create a key that uses thersaorecdsaalgorithm.Start the
ssh-agentprocess as a background task:$ eval "$(ssh-agent -s)"Example output
Agent pid 31874NoteIf your cluster is in FIPS mode, only use FIPS-compliant algorithms to generate the SSH key. The key must be either RSA or ECDSA.
Add your SSH private key to the
ssh-agent:$ ssh-add <path>/<file_name>1 Example output
Identity added: /home/<you>/<path>/<file_name> (<computer_name>)- 1
- Specify the path and file name for your SSH private key, such as
~/.ssh/id_rsa
Next steps
- When you install OpenShift Container Platform, provide the SSH public key to the installation program.
14.1.7. Obtaining the installation program
Before you install OpenShift Container Platform, download the installation file on your provisioning machine.
Prerequisites
- You have a machine that runs Linux, for example Red Hat Enterprise Linux 8, with 500 MB of local disk space
Procedure
- Access the Infrastructure Provider page on the OpenShift Cluster Manager site. If you have a Red Hat account, log in with your credentials. If you do not, create an account.
- Select your infrastructure provider.
Navigate to the page for your installation type, download the installation program for your operating system, and place the file in the directory where you will store the installation configuration files.
ImportantThe installation program creates several files on the computer that you use to install your cluster. You must keep the installation program and the files that the installation program creates after you finish installing the cluster. Both files are required to delete the cluster.
ImportantDeleting the files created by the installation program does not remove your cluster, even if the cluster failed during installation. To remove your cluster, complete the OpenShift Container Platform uninstallation procedures for your specific cloud provider.
Extract the installation program. For example, on a computer that uses a Linux operating system, run the following command:
$ tar xvf openshift-install-linux.tar.gz- Download your installation pull secret from the Red Hat OpenShift Cluster Manager. This pull secret allows you to authenticate with the services that are provided by the included authorities, including Quay.io, which serves the container images for OpenShift Container Platform components.
14.1.8. Adding vCenter root CA certificates to your system trust
Because the installation program requires access to your vCenter’s API, you must add your vCenter’s trusted root CA certificates to your system trust before you install an OpenShift Container Platform cluster.
Procedure
-
From the vCenter home page, download the vCenter’s root CA certificates. Click Download trusted root CA certificates in the vSphere Web Services SDK section. The
<vCenter>/certs/download.zipfile downloads. Extract the compressed file that contains the vCenter root CA certificates. The contents of the compressed file resemble the following file structure:
certs ├── lin │ ├── 108f4d17.0 │ ├── 108f4d17.r1 │ ├── 7e757f6a.0 │ ├── 8e4f8471.0 │ └── 8e4f8471.r0 ├── mac │ ├── 108f4d17.0 │ ├── 108f4d17.r1 │ ├── 7e757f6a.0 │ ├── 8e4f8471.0 │ └── 8e4f8471.r0 └── win ├── 108f4d17.0.crt ├── 108f4d17.r1.crl ├── 7e757f6a.0.crt ├── 8e4f8471.0.crt └── 8e4f8471.r0.crl 3 directories, 15 filesAdd the files for your operating system to the system trust. For example, on a Fedora operating system, run the following command:
# cp certs/lin/* /etc/pki/ca-trust/source/anchorsUpdate your system trust. For example, on a Fedora operating system, run the following command:
# update-ca-trust extract
14.1.9. Deploying the cluster
You can install OpenShift Container Platform on a compatible cloud platform.
You can run the create cluster command of the installation program only once, during initial installation.
Prerequisites
- Obtain the OpenShift Container Platform installation program and the pull secret for your cluster.
Procedure
Change to the directory that contains the installation program and initialize the cluster deployment:
$ ./openshift-install create cluster --dir <installation_directory> \1 --log-level=info2 ImportantSpecify an empty directory. Some installation assets, like bootstrap X.509 certificates have short expiration intervals, so you must not reuse an installation directory. If you want to reuse individual files from another cluster installation, you can copy them into your directory. However, the file names for the installation assets might change between releases. Use caution when copying installation files from an earlier OpenShift Container Platform version.
Provide values at the prompts:
Optional: Select an SSH key to use to access your cluster machines.
NoteFor production OpenShift Container Platform clusters on which you want to perform installation debugging or disaster recovery, specify an SSH key that your
ssh-agentprocess uses.- Select vsphere as the platform to target.
- Specify the name of your vCenter instance.
Specify the user name and password for the vCenter account that has the required permissions to create the cluster.
The installation program connects to your vCenter instance.
- Select the datacenter in your vCenter instance to connect to.
Select the default vCenter datastore to use.
NoteDatastore and cluster names cannot exceed 60 characters; therefore, ensure the combined string length does not exceed the 60 character limit.
- Select the vCenter cluster to install the OpenShift Container Platform cluster in. The installation program uses the root resource pool of the vSphere cluster as the default resource pool.
- Select the network in the vCenter instance that contains the virtual IP addresses and DNS records that you configured.
- Enter the virtual IP address that you configured for control plane API access.
- Enter the virtual IP address that you configured for cluster ingress.
- Enter the base domain. This base domain must be the same one that you used in the DNS records that you configured.
Enter a descriptive name for your cluster. The cluster name must be the same one that you used in the DNS records that you configured.
NoteDatastore and cluster names cannot exceed 60 characters; therefore, ensure the combined string length does not exceed the 60 character limit.
- Paste the pull secret from the Red Hat OpenShift Cluster Manager.
+ When the cluster deployment completes, directions for accessing your cluster, including a link to its web console and credentials for the
kubeadminuser, display in your terminal.+ .Example output
...
INFO Install complete!
INFO To access the cluster as the system:admin user when using 'oc', run 'export KUBECONFIG=/home/myuser/install_dir/auth/kubeconfig'
INFO Access the OpenShift web-console here: https://console-openshift-console.apps.mycluster.example.com
INFO Login to the console with user: "kubeadmin", and password: "4vYBz-Ee6gm-ymBZj-Wt5AL"
INFO Time elapsed: 36m22s+
The cluster access and credential information also outputs to <installation_directory>/.openshift_install.log when an installation succeeds.
+
-
The Ignition config files that the installation program generates contain certificates that expire after 24 hours, which are then renewed at that time. If the cluster is shut down before renewing the certificates and the cluster is later restarted after the 24 hours have elapsed, the cluster automatically recovers the expired certificates. The exception is that you must manually approve the pending
node-bootstrappercertificate signing requests (CSRs) to recover kubelet certificates. See the documentation for Recovering from expired control plane certificates for more information. - It is recommended that you use Ignition config files within 12 hours after they are generated because the 24-hour certificate rotates from 16 to 22 hours after the cluster is installed. By using the Ignition config files within 12 hours, you can avoid installation failure if the certificate update runs during installation.
+
You must not delete the installation program or the files that the installation program creates. Both are required to delete the cluster.
14.1.10. Installing the OpenShift CLI by downloading the binary
You can install the OpenShift CLI (oc) to interact with OpenShift Container Platform from a command-line interface. You can install oc on Linux, Windows, or macOS.
If you installed an earlier version of oc, you cannot use it to complete all of the commands in OpenShift Container Platform 4.7. Download and install the new version of oc.
14.1.10.1. Installing the OpenShift CLI on Linux
You can install the OpenShift CLI (oc) binary on Linux by using the following procedure.
Procedure
- Navigate to the OpenShift Container Platform downloads page on the Red Hat Customer Portal.
- Select the appropriate version in the Version drop-down menu.
- Click Download Now next to the OpenShift v4.7 Linux Client entry and save the file.
Unpack the archive:
$ tar xvzf <file>Place the
ocbinary in a directory that is on yourPATH.To check your
PATH, execute the following command:$ echo $PATH
After you install the OpenShift CLI, it is available using the oc command:
$ oc <command>14.1.10.2. Installing the OpenShift CLI on Windows
You can install the OpenShift CLI (oc) binary on Windows by using the following procedure.
Procedure
- Navigate to the OpenShift Container Platform downloads page on the Red Hat Customer Portal.
- Select the appropriate version in the Version drop-down menu.
- Click Download Now next to the OpenShift v4.7 Windows Client entry and save the file.
- Unzip the archive with a ZIP program.
Move the
ocbinary to a directory that is on yourPATH.To check your
PATH, open the command prompt and execute the following command:C:\> path
After you install the OpenShift CLI, it is available using the oc command:
C:\> oc <command>14.1.10.3. Installing the OpenShift CLI on macOS
You can install the OpenShift CLI (oc) binary on macOS by using the following procedure.
Procedure
- Navigate to the OpenShift Container Platform downloads page on the Red Hat Customer Portal.
- Select the appropriate version in the Version drop-down menu.
- Click Download Now next to the OpenShift v4.7 MacOSX Client entry and save the file.
- Unpack and unzip the archive.
Move the
ocbinary to a directory on your PATH.To check your
PATH, open a terminal and execute the following command:$ echo $PATH
After you install the OpenShift CLI, it is available using the oc command:
$ oc <command>14.1.11. Logging in to the cluster by using the CLI
You can log in to your cluster as a default system user by exporting the cluster kubeconfig file. The kubeconfig file contains information about the cluster that is used by the CLI to connect a client to the correct cluster and API server. The file is specific to a cluster and is created during OpenShift Container Platform installation.
Prerequisites
- You deployed an OpenShift Container Platform cluster.
-
You installed the
ocCLI.
Procedure
Export the
kubeadmincredentials:$ export KUBECONFIG=<installation_directory>/auth/kubeconfig1 - 1
- For
<installation_directory>, specify the path to the directory that you stored the installation files in.
Verify you can run
occommands successfully using the exported configuration:$ oc whoamiExample output
system:admin
14.1.12. Creating registry storage
After you install the cluster, you must create storage for the registry Operator.
14.1.12.1. Image registry removed during installation
On platforms that do not provide shareable object storage, the OpenShift Image Registry Operator bootstraps itself as Removed. This allows openshift-installer to complete installations on these platform types.
After installation, you must edit the Image Registry Operator configuration to switch the managementState from Removed to Managed.
The Prometheus console provides an ImageRegistryRemoved alert, for example:
"Image Registry has been removed. ImageStreamTags, BuildConfigs and DeploymentConfigs which reference ImageStreamTags may not work as expected. Please configure storage and update the config to Managed state by editing configs.imageregistry.operator.openshift.io."
14.1.12.2. Image registry storage configuration
The Image Registry Operator is not initially available for platforms that do not provide default storage. After installation, you must configure your registry to use storage so that the Registry Operator is made available.
Instructions are shown for configuring a persistent volume, which is required for production clusters. Where applicable, instructions are shown for configuring an empty directory as the storage location, which is available for only non-production clusters.
Additional instructions are provided for allowing the image registry to use block storage types by using the Recreate rollout strategy during upgrades.
14.1.12.2.1. Configuring registry storage for VMware vSphere
As a cluster administrator, following installation you must configure your registry to use storage.
Prerequisites
- Cluster administrator permissions.
- A cluster on VMware vSphere.
Persistent storage provisioned for your cluster, such as Red Hat OpenShift Container Storage.
ImportantOpenShift Container Platform supports
ReadWriteOnceaccess for image registry storage when you have only one replica. To deploy an image registry that supports high availability with two or more replicas,ReadWriteManyaccess is required.- Must have "100Gi" capacity.
Testing shows issues with using the NFS server on RHEL as storage backend for core services. This includes the OpenShift Container Registry and Quay, Prometheus for monitoring storage, and Elasticsearch for logging storage. Therefore, using RHEL NFS to back PVs used by core services is not recommended.
Other NFS implementations on the marketplace might not have these issues. Contact the individual NFS implementation vendor for more information on any testing that was possibly completed against these OpenShift Container Platform core components.
Procedure
To configure your registry to use storage, change the
spec.storage.pvcin theconfigs.imageregistry/clusterresource.NoteWhen using shared storage, review your security settings to prevent outside access.
Verify that you do not have a registry pod:
$ oc get pod -n openshift-image-registry -l docker-registry=defaultExample output
No resourses found in openshift-image-registry namespaceNoteIf you do have a registry pod in your output, you do not need to continue with this procedure.
Check the registry configuration:
$ oc edit configs.imageregistry.operator.openshift.ioExample output
storage: pvc: claim:1 - 1
- Leave the
claimfield blank to allow the automatic creation of animage-registry-storagePVC.
Check the
clusteroperatorstatus:$ oc get clusteroperator image-registryExample output
NAME VERSION AVAILABLE PROGRESSING DEGRADED SINCE MESSAGE image-registry 4.7 True False False 6h50m
14.1.12.2.2. Configuring block registry storage for VMware vSphere
To allow the image registry to use block storage types such as vSphere Virtual Machine Disk (VMDK) during upgrades as a cluster administrator, you can use the Recreate rollout strategy.
Block storage volumes are supported but not recommended for use with image registry on production clusters. An installation where the registry is configured on block storage is not highly available because the registry cannot have more than one replica.
Procedure
To set the image registry storage as a block storage type, patch the registry so that it uses the
Recreaterollout strategy and runs with only1replica:$ oc patch config.imageregistry.operator.openshift.io/cluster --type=merge -p '{"spec":{"rolloutStrategy":"Recreate","replicas":1}}'Provision the PV for the block storage device, and create a PVC for that volume. The requested block volume uses the ReadWriteOnce (RWO) access mode.
Create a
pvc.yamlfile with the following contents to define a VMware vSpherePersistentVolumeClaimobject:kind: PersistentVolumeClaim apiVersion: v1 metadata: name: image-registry-storage1 namespace: openshift-image-registry2 spec: accessModes: - ReadWriteOnce3 resources: requests: storage: 100Gi4 - 1
- A unique name that represents the
PersistentVolumeClaimobject. - 2
- The namespace for the
PersistentVolumeClaimobject, which isopenshift-image-registry. - 3
- The access mode of the persistent volume claim. With
ReadWriteOnce, the volume can be mounted with read and write permissions by a single node. - 4
- The size of the persistent volume claim.
Create the
PersistentVolumeClaimobject from the file:$ oc create -f pvc.yaml -n openshift-image-registry
Edit the registry configuration so that it references the correct PVC:
$ oc edit config.imageregistry.operator.openshift.io -o yamlExample output
storage: pvc: claim:1 - 1
- Creating a custom PVC allows you to leave the
claimfield blank for the default automatic creation of animage-registry-storagePVC.
For instructions about configuring registry storage so that it references the correct PVC, see Configuring the registry for vSphere.
14.1.13. Backing up VMware vSphere volumes
OpenShift Container Platform provisions new volumes as independent persistent disks to freely attach and detach the volume on any node in the cluster. As a consequence, it is not possible to back up volumes that use snapshots, or to restore volumes from snapshots. See Snapshot Limitations for more information.
Procedure
To create a backup of persistent volumes:
- Stop the application that is using the persistent volume.
- Clone the persistent volume.
- Restart the application.
- Create a backup of the cloned volume.
- Delete the cloned volume.
14.1.14. Telemetry access for OpenShift Container Platform
In OpenShift Container Platform 4.7, the Telemetry service, which runs by default to provide metrics about cluster health and the success of updates, requires internet access. If your cluster is connected to the internet, Telemetry runs automatically, and your cluster is registered to OpenShift Cluster Manager.
After you confirm that your OpenShift Cluster Manager inventory is correct, either maintained automatically by Telemetry or manually by using OpenShift Cluster Manager, use subscription watch to track your OpenShift Container Platform subscriptions at the account or multi-cluster level.
14.1.15. Next steps
- Customize your cluster.
- If necessary, you can opt out of remote health reporting.
- Set up your registry and configure registry storage.
- Optional: View the events from the vSphere Problem Detector Operator to determine if the cluster has permission or storage configuration issues.
14.2. Installing a cluster on vSphere with customizations
In OpenShift Container Platform version 4.7, you can install a cluster on your VMware vSphere instance by using installer-provisioned infrastructure. To customize the installation, you modify parameters in the install-config.yaml file before you install the cluster.
OpenShift Container Platform supports deploying a cluster to a single VMware vCenter only. Deploying a cluster with machines/machine sets on multiple vCenters is not supported.
14.2.1. Prerequisites
-
Provision persistent storage for your cluster. To deploy a private image registry, your storage must provide
ReadWriteManyaccess modes. - Review details about the OpenShift Container Platform installation and update processes.
- The OpenShift Container Platform installer requires access to port 443 on the vCenter and ESXi hosts. You verified that port 443 is accessible.
- If you use a firewall, you confirmed with the administrator that port 443 is accessible. Control plane nodes must be able to reach vCenter and ESXi hosts on port 443 for the installation to succeed.
If you use a firewall, you must configure it to allow the sites that your cluster requires access to.
NoteBe sure to also review this site list if you are configuring a proxy.
14.2.2. Internet access for OpenShift Container Platform
In OpenShift Container Platform 4.7, you require access to the Internet to install your cluster.
You must have Internet access to:
- Access OpenShift Cluster Manager to download the installation program and perform subscription management. If the cluster has internet access and you do not disable Telemetry, that service automatically entitles your cluster.
- Access Quay.io to obtain the packages that are required to install your cluster.
- Obtain the packages that are required to perform cluster updates.
If your cluster cannot have direct Internet access, you can perform a restricted network installation on some types of infrastructure that you provision. During that process, you download the content that is required and use it to populate a mirror registry with the packages that you need to install a cluster and generate the installation program. With some installation types, the environment that you install your cluster in will not require Internet access. Before you update the cluster, you update the content of the mirror registry.
14.2.3. VMware vSphere infrastructure requirements
You must install the OpenShift Container Platform cluster on a VMware vSphere version 6 or 7 instance that meets the requirements for the components that you use.
| Component | Minimum supported versions | Description |
|---|---|---|
| Hypervisor | vSphere 6.5 and later with HW version 13 | This version is the minimum version that Red Hat Enterprise Linux CoreOS (RHCOS) supports. See the Red Hat Enterprise Linux 8 supported hypervisors list. |
| Storage with in-tree drivers | vSphere 6.5 and later | This plug-in creates vSphere storage by using the in-tree storage drivers for vSphere included in OpenShift Container Platform. |
| Optional: Networking (NSX-T) | vSphere 6.5U3 or vSphere 6.7U2 and later | vSphere 6.5U3 or vSphere 6.7U2+ are required for OpenShift Container Platform. VMware’s NSX Container Plug-in (NCP) is certified with OpenShift Container Platform 4.6 and NSX-T 3.x+. |
If you use a vSphere version 6.5 instance, consider upgrading to 6.7U3 or 7.0 before you install OpenShift Container Platform.
You must ensure that the time on your ESXi hosts is synchronized before you install OpenShift Container Platform. See Edit Time Configuration for a Host in the VMware documentation.
Virtual machines (VMs) configured to use virtual hardware version 14 or greater might result in a failed installation. It is recommended to configure VMs with virtual hardware version 13. This is a known issue that is being addressed in BZ#1935539.
14.2.4. Network connectivity requirements
You must configure the network connectivity between machines to allow OpenShift Container Platform cluster components to communicate.
Review the following details about the required network ports.
| Protocol | Port | Description |
|---|---|---|
| ICMP | N/A | Network reachability tests |
| TCP |
| Metrics |
|
|
Host level services, including the node exporter on ports | |
|
| The default ports that Kubernetes reserves | |
|
| openshift-sdn | |
| UDP |
| virtual extensible LAN (VXLAN) |
|
| Geneve | |
|
|
Host level services, including the node exporter on ports | |
|
| IPsec IKE packets | |
|
| IPsec NAT-T packets | |
| TCP/UDP |
| Kubernetes node port |
| ESP | N/A | IPsec Encapsulating Security Payload (ESP) |
| Protocol | Port | Description |
|---|---|---|
| TCP |
| Kubernetes API |
| Protocol | Port | Description |
|---|---|---|
| TCP |
| etcd server and peer ports |
14.2.5. vCenter requirements
Before you install an OpenShift Container Platform cluster on your vCenter that uses infrastructure that the installer provisions, you must prepare your environment.
Required vCenter account privileges
To install an OpenShift Container Platform cluster in a vCenter, the installation program requires access to an account with privileges to read and create the required resources. Using an account that has global administrative privileges is the simplest way to access all of the necessary permissions.
If you cannot use an account with global administrative privileges, you must create roles to grant the privileges necessary for OpenShift Container Platform cluster installation. While most of the privileges are always required, some are required only if you plan for the installation program to provision a folder to contain the OpenShift Container Platform cluster on your vCenter instance, which is the default behavior. You must create or amend vSphere roles for the specified objects to grant the required privileges.
An additional role is required if the installation program is to create a vSphere virtual machine folder.
Example 14.3. Roles and privileges required for installation
| vSphere object for role | When required | Required privileges |
|---|---|---|
| vSphere vCenter | Always |
|
| vSphere vCenter Cluster | Always |
|
| vSphere Datastore | Always |
|
| vSphere Port Group | Always |
|
| Virtual Machine Folder | Always |
|
| vSphere vCenter Datacenter | If the installation program creates the virtual machine folder |
|
Additionally, the user requires some ReadOnly permissions, and some of the roles require permission to propogate the permissions to child objects. These settings vary depending on whether or not you install the cluster into an existing folder.
Example 14.4. Required permissions and propagation settings
| vSphere object | Folder type | Propagate to children | Permissions required |
|---|---|---|---|
| vSphere vCenter | Always | False | Listed required privileges |
| vSphere vCenter Datacenter | Existing folder | False |
|
| Installation program creates the folder | True | Listed required privileges | |
| vSphere vCenter Cluster | Always | True | Listed required privileges |
| vSphere vCenter Datastore | Always | False | Listed required privileges |
| vSphere Switch | Always | False |
|
| vSphere Port Group | Always | False | Listed required privileges |
| vSphere vCenter Virtual Machine Folder | Existing folder | True | Listed required privileges |
For more information about creating an account with only the required privileges, see vSphere Permissions and User Management Tasks in the vSphere documentation.
Using OpenShift Container Platform with vMotion
If you intend on using vMotion in your vSphere environment, consider the following before installing a OpenShift Container Platform cluster.
OpenShift Container Platform generally supports compute-only vMotion. Using Storage vMotion can cause issues and is not supported.
To help ensure the uptime of your compute and control plane nodes, it is recommended that you follow the VMware best practices for vMotion. It is also recommended to use VMware anti-affinity rules to improve the availability of OpenShift Container Platform during maintenance or hardware issues.
For more information about vMotion and anti-affinity rules, see the VMware vSphere documentation for vMotion networking requirements and VM anti-affinity rules.
- If you are using vSphere volumes in your pods, migrating a VM across datastores either manually or through Storage vMotion causes, invalid references within OpenShift Container Platform persistent volume (PV) objects. These references prevent affected pods from starting up and can result in data loss.
- Similarly, OpenShift Container Platform does not support selective migration of VMDKs across datastores, using datastore clusters for VM provisioning or for dynamic or static provisioning of PVs, or using a datastore that is part of a datastore cluster for dynamic or static provisioning of PVs.
Cluster resources
When you deploy an OpenShift Container Platform cluster that uses installer-provisioned infrastructure, the installation program must be able to create several resources in your vCenter instance.
A standard OpenShift Container Platform installation creates the following vCenter resources:
- 1 Folder
- 1 Tag category
- 1 Tag
Virtual machines:
- 1 template
- 1 temporary bootstrap node
- 3 control plane nodes
- 3 compute machines
Although these resources use 856 GB of storage, the bootstrap node is destroyed during the cluster installation process. A minimum of 800 GB of storage is required to use a standard cluster.
If you deploy more compute machines, the OpenShift Container Platform cluster will use more storage.
Cluster limits
Available resources vary between clusters. The number of possible clusters within a vCenter is limited primarily by available storage space and any limitations on the number of required resources. Be sure to consider both limitations to the vCenter resources that the cluster creates and the resources that you require to deploy a cluster, such as IP addresses and networks.
Networking requirements
You must use DHCP for the network and ensure that the DHCP server is configured to provide persistent IP addresses to the cluster machines. All nodes must be in the same VLAN. You cannot scale the cluster using a second VLAN as a Day 2 operation. Additionally, you must create the following networking resources before you install the OpenShift Container Platform cluster:
It is recommended that each OpenShift Container Platform node in the cluster must have access to a Network Time Protocol (NTP) server that is discoverable via DHCP. Installation is possible without an NTP server. However, asynchronous server clocks will cause errors, which NTP server prevents.
Required IP Addresses
An installer-provisioned vSphere installation requires two static IP addresses:
- The API address is used to access the cluster API.
- The Ingress address is used for cluster ingress traffic.
You must provide these IP addresses to the installation program when you install the OpenShift Container Platform cluster.
DNS records
You must create DNS records for two static IP addresses in the appropriate DNS server for the vCenter instance that hosts your OpenShift Container Platform cluster. In each record, <cluster_name> is the cluster name and <base_domain> is the cluster base domain that you specify when you install the cluster. A complete DNS record takes the form: <component>.<cluster_name>.<base_domain>..
| Component | Record | Description |
|---|---|---|
| API VIP |
| This DNS A/AAAA or CNAME record must point to the load balancer for the control plane machines. This record must be resolvable by both clients external to the cluster and from all the nodes within the cluster. |
| Ingress VIP |
| A wildcard DNS A/AAAA or CNAME record that points to the load balancer that targets the machines that run the Ingress router pods, which are the worker nodes by default. This record must be resolvable by both clients external to the cluster and from all the nodes within the cluster. |
14.2.6. Generating an SSH private key and adding it to the agent
If you want to perform installation debugging or disaster recovery on your cluster, you must provide an SSH key to both your ssh-agent and the installation program. You can use this key to access the bootstrap machine in a public cluster to troubleshoot installation issues.
In a production environment, you require disaster recovery and debugging.
Do not skip this procedure in production environments where disaster recovery and debugging is required.
You can use this key to SSH into the master nodes as the user core. When you deploy the cluster, the key is added to the core user’s ~/.ssh/authorized_keys list.
Procedure
If you do not have an SSH key that is configured for password-less authentication on your computer, create one. For example, on a computer that uses a Linux operating system, run the following command:
$ ssh-keygen -t ed25519 -N '' \ -f <path>/<file_name>1 - 1
- Specify the path and file name, such as
~/.ssh/id_rsa, of the new SSH key. If you have an existing key pair, ensure your public key is in the your~/.sshdirectory.
Running this command generates an SSH key that does not require a password in the location that you specified.
NoteIf you plan to install an OpenShift Container Platform cluster that uses FIPS Validated / Modules in Process cryptographic libraries on the
x86_64architecture, do not create a key that uses theed25519algorithm. Instead, create a key that uses thersaorecdsaalgorithm.Start the
ssh-agentprocess as a background task:$ eval "$(ssh-agent -s)"Example output
Agent pid 31874NoteIf your cluster is in FIPS mode, only use FIPS-compliant algorithms to generate the SSH key. The key must be either RSA or ECDSA.
Add your SSH private key to the
ssh-agent:$ ssh-add <path>/<file_name>1 Example output
Identity added: /home/<you>/<path>/<file_name> (<computer_name>)- 1
- Specify the path and file name for your SSH private key, such as
~/.ssh/id_rsa
Next steps
- When you install OpenShift Container Platform, provide the SSH public key to the installation program.
14.2.7. Obtaining the installation program
Before you install OpenShift Container Platform, download the installation file on your provisioning machine.
Prerequisites
- You have a machine that runs Linux, for example Red Hat Enterprise Linux 8, with 500 MB of local disk space
Procedure
- Access the Infrastructure Provider page on the OpenShift Cluster Manager site. If you have a Red Hat account, log in with your credentials. If you do not, create an account.
- Select your infrastructure provider.
Navigate to the page for your installation type, download the installation program for your operating system, and place the file in the directory where you will store the installation configuration files.
ImportantThe installation program creates several files on the computer that you use to install your cluster. You must keep the installation program and the files that the installation program creates after you finish installing the cluster. Both files are required to delete the cluster.
ImportantDeleting the files created by the installation program does not remove your cluster, even if the cluster failed during installation. To remove your cluster, complete the OpenShift Container Platform uninstallation procedures for your specific cloud provider.
Extract the installation program. For example, on a computer that uses a Linux operating system, run the following command:
$ tar xvf openshift-install-linux.tar.gz- Download your installation pull secret from the Red Hat OpenShift Cluster Manager. This pull secret allows you to authenticate with the services that are provided by the included authorities, including Quay.io, which serves the container images for OpenShift Container Platform components.
14.2.8. Adding vCenter root CA certificates to your system trust
Because the installation program requires access to your vCenter’s API, you must add your vCenter’s trusted root CA certificates to your system trust before you install an OpenShift Container Platform cluster.
Procedure
-
From the vCenter home page, download the vCenter’s root CA certificates. Click Download trusted root CA certificates in the vSphere Web Services SDK section. The
<vCenter>/certs/download.zipfile downloads. Extract the compressed file that contains the vCenter root CA certificates. The contents of the compressed file resemble the following file structure:
certs ├── lin │ ├── 108f4d17.0 │ ├── 108f4d17.r1 │ ├── 7e757f6a.0 │ ├── 8e4f8471.0 │ └── 8e4f8471.r0 ├── mac │ ├── 108f4d17.0 │ ├── 108f4d17.r1 │ ├── 7e757f6a.0 │ ├── 8e4f8471.0 │ └── 8e4f8471.r0 └── win ├── 108f4d17.0.crt ├── 108f4d17.r1.crl ├── 7e757f6a.0.crt ├── 8e4f8471.0.crt └── 8e4f8471.r0.crl 3 directories, 15 filesAdd the files for your operating system to the system trust. For example, on a Fedora operating system, run the following command:
# cp certs/lin/* /etc/pki/ca-trust/source/anchorsUpdate your system trust. For example, on a Fedora operating system, run the following command:
# update-ca-trust extract
14.2.9. Creating the installation configuration file
You can customize the OpenShift Container Platform cluster you install on VMware vSphere.
Prerequisites
- Obtain the OpenShift Container Platform installation program and the pull secret for your cluster.
- Obtain service principal permissions at the subscription level.
Procedure
Create the
install-config.yamlfile.Change to the directory that contains the installation program and run the following command:
$ ./openshift-install create install-config --dir <installation_directory>1 - 1
- For
<installation_directory>, specify the directory name to store the files that the installation program creates.
ImportantSpecify an empty directory. Some installation assets, like bootstrap X.509 certificates have short expiration intervals, so you must not reuse an installation directory. If you want to reuse individual files from another cluster installation, you can copy them into your directory. However, the file names for the installation assets might change between releases. Use caution when copying installation files from an earlier OpenShift Container Platform version.
At the prompts, provide the configuration details for your cloud:
Optional: Select an SSH key to use to access your cluster machines.
NoteFor production OpenShift Container Platform clusters on which you want to perform installation debugging or disaster recovery, specify an SSH key that your
ssh-agentprocess uses.- Select vsphere as the platform to target.
- Specify the name of your vCenter instance.
Specify the user name and password for the vCenter account that has the required permissions to create the cluster.
The installation program connects to your vCenter instance.
- Select the datacenter in your vCenter instance to connect to.
- Select the default vCenter datastore to use.
- Select the vCenter cluster to install the OpenShift Container Platform cluster in. The installation program uses the root resource pool of the vSphere cluster as the default resource pool.
- Select the network in the vCenter instance that contains the virtual IP addresses and DNS records that you configured.
- Enter the virtual IP address that you configured for control plane API access.
- Enter the virtual IP address that you configured for cluster ingress.
- Enter the base domain. This base domain must be the same one that you used in the DNS records that you configured.
- Enter a descriptive name for your cluster. The cluster name must be the same one that you used in the DNS records that you configured.
- Paste the pull secret from the Red Hat OpenShift Cluster Manager.
-
Modify the
install-config.yamlfile. You can find more information about the available parameters in the "Installation configuration parameters" section. Back up the
install-config.yamlfile so that you can use it to install multiple clusters.ImportantThe
install-config.yamlfile is consumed during the installation process. If you want to reuse the file, you must back it up now.
14.2.9.1. Installation configuration parameters
Before you deploy an OpenShift Container Platform cluster, you provide parameter values to describe your account on the cloud platform that hosts your cluster and optionally customize your cluster’s platform. When you create the install-config.yaml installation configuration file, you provide values for the required parameters through the command line. If you customize your cluster, you can modify the install-config.yaml file to provide more details about the platform.
After installation, you cannot modify these parameters in the install-config.yaml file.
The openshift-install command does not validate field names for parameters. If an incorrect name is specified, the related file or object is not created, and no error is reported. Ensure that the field names for any parameters that are specified are correct.
14.2.9.1.1. Required configuration parameters
Required installation configuration parameters are described in the following table:
| Parameter | Description | Values |
|---|---|---|
|
|
The API version for the | String |
|
|
The base domain of your cloud provider. The base domain is used to create routes to your OpenShift Container Platform cluster components. The full DNS name for your cluster is a combination of the |
A fully-qualified domain or subdomain name, such as |
|
|
Kubernetes resource | Object |
|
|
The name of the cluster. DNS records for the cluster are all subdomains of |
String of lowercase letters and hyphens ( |
|
|
The configuration for the specific platform upon which to perform the installation: | Object |
|
| Get a pull secret from the Red Hat OpenShift Cluster Manager to authenticate downloading container images for OpenShift Container Platform components from services such as Quay.io. |
|
14.2.9.1.2. Network configuration parameters
You can customize your installation configuration based on the requirements of your existing network infrastructure. For example, you can expand the IP address block for the cluster network or provide different IP address blocks than the defaults.
Only IPv4 addresses are supported.
| Parameter | Description | Values |
|---|---|---|
|
| The configuration for the cluster network. | Object Note
You cannot modify parameters specified by the |
|
| The cluster network provider Container Network Interface (CNI) plug-in to install. |
Either |
|
| The IP address blocks for pods.
The default value is If you specify multiple IP address blocks, the blocks must not overlap. | An array of objects. For example: |
|
|
Required if you use An IPv4 network. |
An IP address block in Classless Inter-Domain Routing (CIDR) notation. The prefix length for an IPv4 block is between |
|
|
The subnet prefix length to assign to each individual node. For example, if | A subnet prefix.
The default value is |
|
|
The IP address block for services. The default value is The OpenShift SDN and OVN-Kubernetes network providers support only a single IP address block for the service network. | An array with an IP address block in CIDR format. For example: |
|
| The IP address blocks for machines. If you specify multiple IP address blocks, the blocks must not overlap.
If you specify multiple IP kernel arguments, the | An array of objects. For example: |
|
|
Required if you use | An IP network block in CIDR notation.
For example, Note
Set the |
14.2.9.1.3. Optional configuration parameters
Optional installation configuration parameters are described in the following table:
| Parameter | Description | Values |
|---|---|---|
|
| A PEM-encoded X.509 certificate bundle that is added to the nodes' trusted certificate store. This trust bundle may also be used when a proxy has been configured. | String |
|
| The configuration for the machines that comprise the compute nodes. |
Array of |
|
|
Determines the instruction set architecture of the machines in the pool. Currently, heteregeneous clusters are not supported, so all pools must specify the same architecture. Valid values are | String |
|
|
Whether to enable or disable simultaneous multithreading, or Important If you disable simultaneous multithreading, ensure that your capacity planning accounts for the dramatically decreased machine performance. |
|
|
|
Required if you use |
|
|
|
Required if you use |
|
|
| The number of compute machines, which are also known as worker machines, to provision. |
A positive integer greater than or equal to |
|
| The configuration for the machines that comprise the control plane. |
Array of |
|
|
Determines the instruction set architecture of the machines in the pool. Currently, heterogeneous clusters are not supported, so all pools must specify the same architecture. Valid values are | String |
|
|
Whether to enable or disable simultaneous multithreading, or Important If you disable simultaneous multithreading, ensure that your capacity planning accounts for the dramatically decreased machine performance. |
|
|
|
Required if you use |
|
|
|
Required if you use |
|
|
| The number of control plane machines to provision. |
The only supported value is |
|
| The Cloud Credential Operator (CCO) mode. If no mode is specified, the CCO dynamically tries to determine the capabilities of the provided credentials, with a preference for mint mode on the platforms where multiple modes are supported. Note Not all CCO modes are supported for all cloud providers. For more information on CCO modes, see the Cloud Credential Operator entry in the Cluster Operators reference content. |
|
|
|
Enable or disable FIPS mode. The default is Important
The use of FIPS Validated / Modules in Process cryptographic libraries is only supported on OpenShift Container Platform deployments on the Note If you are using Azure File storage, you cannot enable FIPS mode. |
|
|
| Sources and repositories for the release-image content. |
Array of objects. Includes a |
|
|
Required if you use | String |
|
| Specify one or more repositories that may also contain the same images. | Array of strings |
|
| How to publish or expose the user-facing endpoints of your cluster, such as the Kubernetes API, OpenShift routes. |
Setting this field to Important
If the value of the field is set to |
|
| The SSH key or keys to authenticate access your cluster machines. Note
For production OpenShift Container Platform clusters on which you want to perform installation debugging or disaster recovery, specify an SSH key that your | One or more keys. For example: |
14.2.9.1.4. Additional VMware vSphere configuration parameters
Additional VMware vSphere configuration parameters are described in the following table:
| Parameter | Description | Values |
|---|---|---|
|
| The fully-qualified hostname or IP address of the vCenter server. | String |
|
| The user name to use to connect to the vCenter instance with. This user must have at least the roles and privileges that are required for static or dynamic persistent volume provisioning in vSphere. | String |
|
| The password for the vCenter user name. | String |
|
| The name of the datacenter to use in the vCenter instance. | String |
|
| The name of the default datastore to use for provisioning volumes. | String |
|
| Optional. The absolute path of an existing folder where the installation program creates the virtual machines. If you do not provide this value, the installation program creates a folder that is named with the infrastructure ID in the datacenter virtual machine folder. |
String, for example, |
|
| The network in the vCenter instance that contains the virtual IP addresses and DNS records that you configured. | String |
|
| The vCenter cluster to install the OpenShift Container Platform cluster in. | String |
|
| The virtual IP (VIP) address that you configured for control plane API access. |
An IP address, for example |
|
| The virtual IP (VIP) address that you configured for cluster ingress. |
An IP address, for example |
14.2.9.1.5. Optional VMware vSphere machine pool configuration parameters
Optional VMware vSphere machine pool configuration parameters are described in the following table:
| Parameter | Description | Values |
|---|---|---|
|
| The location from which the installer downloads the RHCOS image. You must set this parameter to perform an installation in a restricted network. |
An HTTP or HTTPS URL, optionally with a SHA-256 checksum. For example, |
|
| The size of the disk in gigabytes. | Integer |
|
| The total number of virtual processor cores to assign a virtual machine. | Integer |
|
|
The number of cores per socket in a virtual machine. The number of virtual sockets on the virtual machine is | Integer |
|
| The size of a virtual machine’s memory in megabytes. | Integer |
14.2.9.2. Sample install-config.yaml file for an installer-provisioned VMware vSphere cluster
You can customize the install-config.yaml file to specify more details about your OpenShift Container Platform cluster’s platform or modify the values of the required parameters.
apiVersion: v1
baseDomain: example.com
compute:
- hyperthreading: Enabled
name: worker
replicas: 3
platform:
vsphere:
cpus: 2
coresPerSocket: 2
memoryMB: 8192
osDisk:
diskSizeGB: 120
controlPlane:
hyperthreading: Enabled
name: master
replicas: 3
platform:
vsphere:
cpus: 4
coresPerSocket: 2
memoryMB: 16384
osDisk:
diskSizeGB: 120
metadata:
name: cluster
platform:
vsphere:
vcenter: your.vcenter.server
username: username
password: password
datacenter: datacenter
defaultDatastore: datastore
folder: folder
network: VM_Network
cluster: vsphere_cluster_name
apiVIP: api_vip
ingressVIP: ingress_vip
fips: false
pullSecret: '{"auths": ...}'
sshKey: 'ssh-ed25519 AAAA...'- 1
- The base domain of the cluster. All DNS records must be sub-domains of this base and include the cluster name.
- 2 5
- The
controlPlanesection is a single mapping, but thecomputesection is a sequence of mappings. To meet the requirements of the different data structures, the first line of thecomputesection must begin with a hyphen,-, and the first line of thecontrolPlanesection must not. Only one control plane pool is used. - 3 6
- Whether to enable or disable simultaneous multithreading, or
hyperthreading. By default, simultaneous multithreading is enabled to increase the performance of your machines' cores. You can disable it by setting the parameter value toDisabled. If you disable simultaneous multithreading in some cluster machines, you must disable it in all cluster machines.ImportantIf you disable simultaneous multithreading, ensure that your capacity planning accounts for the dramatically decreased machine performance. Your machines must use at least 8 CPUs and 32 GB of RAM if you disable simultaneous multithreading.
- 4 7
- Optional: Provide additional configuration for the machine pool parameters for the compute and control plane machines.
- 8
- The cluster name that you specified in your DNS records.
- 9
- The vSphere cluster to install the OpenShift Container Platform cluster in. The installation program uses the root resource pool of the vSphere cluster as the default resource pool.
14.2.9.3. Configuring the cluster-wide proxy during installation
Production environments can deny direct access to the Internet and instead have an HTTP or HTTPS proxy available. You can configure a new OpenShift Container Platform cluster to use a proxy by configuring the proxy settings in the install-config.yaml file.
Prerequisites
-
You have an existing
install-config.yamlfile. You reviewed the sites that your cluster requires access to and determined whether any of them need to bypass the proxy. By default, all cluster egress traffic is proxied, including calls to hosting cloud provider APIs. You added sites to the
Proxyobject’sspec.noProxyfield to bypass the proxy if necessary.NoteThe
Proxyobjectstatus.noProxyfield is populated with the values of thenetworking.machineNetwork[].cidr,networking.clusterNetwork[].cidr, andnetworking.serviceNetwork[]fields from your installation configuration.For installations on Amazon Web Services (AWS), Google Cloud Platform (GCP), Microsoft Azure, and Red Hat OpenStack Platform (RHOSP), the
Proxyobjectstatus.noProxyfield is also populated with the instance metadata endpoint (169.254.169.254).
Procedure
Edit your
install-config.yamlfile and add the proxy settings. For example:apiVersion: v1 baseDomain: my.domain.com proxy: httpProxy: http://<username>:<pswd>@<ip>:<port>1 httpsProxy: https://<username>:<pswd>@<ip>:<port>2 noProxy: example.com3 additionalTrustBundle: |4 -----BEGIN CERTIFICATE----- <MY_TRUSTED_CA_CERT> -----END CERTIFICATE----- ...- 1
- A proxy URL to use for creating HTTP connections outside the cluster. The URL scheme must be
http. - 2
- A proxy URL to use for creating HTTPS connections outside the cluster.
- 3
- A comma-separated list of destination domain names, IP addresses, or other network CIDRs to exclude from proxying. Preface a domain with
.to match subdomains only. For example,.y.commatchesx.y.com, but noty.com. Use*to bypass the proxy for all destinations. You must include vCenter’s IP address and the IP range that you use for its machines. - 4
- If provided, the installation program generates a config map that is named
user-ca-bundlein theopenshift-confignamespace to hold the additional CA certificates. If you provideadditionalTrustBundleand at least one proxy setting, theProxyobject is configured to reference theuser-ca-bundleconfig map in thetrustedCAfield. The Cluster Network Operator then creates atrusted-ca-bundleconfig map that merges the contents specified for thetrustedCAparameter with the RHCOS trust bundle. TheadditionalTrustBundlefield is required unless the proxy’s identity certificate is signed by an authority from the RHCOS trust bundle.
NoteThe installation program does not support the proxy
readinessEndpointsfield.- Save the file and reference it when installing OpenShift Container Platform.
The installation program creates a cluster-wide proxy that is named cluster that uses the proxy settings in the provided install-config.yaml file. If no proxy settings are provided, a cluster Proxy object is still created, but it will have a nil spec.
Only the Proxy object named cluster is supported, and no additional proxies can be created.
14.2.10. Deploying the cluster
You can install OpenShift Container Platform on a compatible cloud platform.
You can run the create cluster command of the installation program only once, during initial installation.
Prerequisites
- Obtain the OpenShift Container Platform installation program and the pull secret for your cluster.
Procedure
Change to the directory that contains the installation program and initialize the cluster deployment:
$ ./openshift-install create cluster --dir <installation_directory> \1 --log-level=info2 - 1
- For
<installation_directory>, specify the location of your customized./install-config.yamlfile. - 2
- To view different installation details, specify
warn,debug, orerrorinstead ofinfo.When the cluster deployment completes, directions for accessing your cluster, including a link to its web console and credentials for the
kubeadminuser, display in your terminal.
...
INFO Install complete!
INFO To access the cluster as the system:admin user when using 'oc', run 'export KUBECONFIG=/home/myuser/install_dir/auth/kubeconfig'
INFO Access the OpenShift web-console here: https://console-openshift-console.apps.mycluster.example.com
INFO Login to the console with user: "kubeadmin", and password: "4vYBz-Ee6gm-ymBZj-Wt5AL"
INFO Time elapsed: 36m22s+
The cluster access and credential information also outputs to <installation_directory>/.openshift_install.log when an installation succeeds.
+
-
The Ignition config files that the installation program generates contain certificates that expire after 24 hours, which are then renewed at that time. If the cluster is shut down before renewing the certificates and the cluster is later restarted after the 24 hours have elapsed, the cluster automatically recovers the expired certificates. The exception is that you must manually approve the pending
node-bootstrappercertificate signing requests (CSRs) to recover kubelet certificates. See the documentation for Recovering from expired control plane certificates for more information. - It is recommended that you use Ignition config files within 12 hours after they are generated because the 24-hour certificate rotates from 16 to 22 hours after the cluster is installed. By using the Ignition config files within 12 hours, you can avoid installation failure if the certificate update runs during installation.
+
You must not delete the installation program or the files that the installation program creates. Both are required to delete the cluster.
14.2.11. Installing the OpenShift CLI by downloading the binary
You can install the OpenShift CLI (oc) to interact with OpenShift Container Platform from a command-line interface. You can install oc on Linux, Windows, or macOS.
If you installed an earlier version of oc, you cannot use it to complete all of the commands in OpenShift Container Platform 4.7. Download and install the new version of oc.
14.2.11.1. Installing the OpenShift CLI on Linux
You can install the OpenShift CLI (oc) binary on Linux by using the following procedure.
Procedure
- Navigate to the OpenShift Container Platform downloads page on the Red Hat Customer Portal.
- Select the appropriate version in the Version drop-down menu.
- Click Download Now next to the OpenShift v4.7 Linux Client entry and save the file.
Unpack the archive:
$ tar xvzf <file>Place the
ocbinary in a directory that is on yourPATH.To check your
PATH, execute the following command:$ echo $PATH
After you install the OpenShift CLI, it is available using the oc command:
$ oc <command>14.2.11.2. Installing the OpenShift CLI on Windows
You can install the OpenShift CLI (oc) binary on Windows by using the following procedure.
Procedure
- Navigate to the OpenShift Container Platform downloads page on the Red Hat Customer Portal.
- Select the appropriate version in the Version drop-down menu.
- Click Download Now next to the OpenShift v4.7 Windows Client entry and save the file.
- Unzip the archive with a ZIP program.
Move the
ocbinary to a directory that is on yourPATH.To check your
PATH, open the command prompt and execute the following command:C:\> path
After you install the OpenShift CLI, it is available using the oc command:
C:\> oc <command>14.2.11.3. Installing the OpenShift CLI on macOS
You can install the OpenShift CLI (oc) binary on macOS by using the following procedure.
Procedure
- Navigate to the OpenShift Container Platform downloads page on the Red Hat Customer Portal.
- Select the appropriate version in the Version drop-down menu.
- Click Download Now next to the OpenShift v4.7 MacOSX Client entry and save the file.
- Unpack and unzip the archive.
Move the
ocbinary to a directory on your PATH.To check your
PATH, open a terminal and execute the following command:$ echo $PATH
After you install the OpenShift CLI, it is available using the oc command:
$ oc <command>14.2.12. Logging in to the cluster by using the CLI
You can log in to your cluster as a default system user by exporting the cluster kubeconfig file. The kubeconfig file contains information about the cluster that is used by the CLI to connect a client to the correct cluster and API server. The file is specific to a cluster and is created during OpenShift Container Platform installation.
Prerequisites
- You deployed an OpenShift Container Platform cluster.
-
You installed the
ocCLI.
Procedure
Export the
kubeadmincredentials:$ export KUBECONFIG=<installation_directory>/auth/kubeconfig1 - 1
- For
<installation_directory>, specify the path to the directory that you stored the installation files in.
Verify you can run
occommands successfully using the exported configuration:$ oc whoamiExample output
system:admin
14.2.13. Creating registry storage
After you install the cluster, you must create storage for the registry Operator.
14.2.13.1. Image registry removed during installation
On platforms that do not provide shareable object storage, the OpenShift Image Registry Operator bootstraps itself as Removed. This allows openshift-installer to complete installations on these platform types.
After installation, you must edit the Image Registry Operator configuration to switch the managementState from Removed to Managed.
The Prometheus console provides an ImageRegistryRemoved alert, for example:
"Image Registry has been removed. ImageStreamTags, BuildConfigs and DeploymentConfigs which reference ImageStreamTags may not work as expected. Please configure storage and update the config to Managed state by editing configs.imageregistry.operator.openshift.io."
14.2.13.2. Image registry storage configuration
The Image Registry Operator is not initially available for platforms that do not provide default storage. After installation, you must configure your registry to use storage so that the Registry Operator is made available.
Instructions are shown for configuring a persistent volume, which is required for production clusters. Where applicable, instructions are shown for configuring an empty directory as the storage location, which is available for only non-production clusters.
Additional instructions are provided for allowing the image registry to use block storage types by using the Recreate rollout strategy during upgrades.
14.2.13.2.1. Configuring registry storage for VMware vSphere
As a cluster administrator, following installation you must configure your registry to use storage.
Prerequisites
- Cluster administrator permissions.
- A cluster on VMware vSphere.
Persistent storage provisioned for your cluster, such as Red Hat OpenShift Container Storage.
ImportantOpenShift Container Platform supports
ReadWriteOnceaccess for image registry storage when you have only one replica. To deploy an image registry that supports high availability with two or more replicas,ReadWriteManyaccess is required.- Must have "100Gi" capacity.
Testing shows issues with using the NFS server on RHEL as storage backend for core services. This includes the OpenShift Container Registry and Quay, Prometheus for monitoring storage, and Elasticsearch for logging storage. Therefore, using RHEL NFS to back PVs used by core services is not recommended.
Other NFS implementations on the marketplace might not have these issues. Contact the individual NFS implementation vendor for more information on any testing that was possibly completed against these OpenShift Container Platform core components.
Procedure
To configure your registry to use storage, change the
spec.storage.pvcin theconfigs.imageregistry/clusterresource.NoteWhen using shared storage, review your security settings to prevent outside access.
Verify that you do not have a registry pod:
$ oc get pod -n openshift-image-registry -l docker-registry=defaultExample output
No resourses found in openshift-image-registry namespaceNoteIf you do have a registry pod in your output, you do not need to continue with this procedure.
Check the registry configuration:
$ oc edit configs.imageregistry.operator.openshift.ioExample output
storage: pvc: claim:1 - 1
- Leave the
claimfield blank to allow the automatic creation of animage-registry-storagePVC.
Check the
clusteroperatorstatus:$ oc get clusteroperator image-registryExample output
NAME VERSION AVAILABLE PROGRESSING DEGRADED SINCE MESSAGE image-registry 4.7 True False False 6h50m
14.2.13.2.2. Configuring block registry storage for VMware vSphere
To allow the image registry to use block storage types such as vSphere Virtual Machine Disk (VMDK) during upgrades as a cluster administrator, you can use the Recreate rollout strategy.
Block storage volumes are supported but not recommended for use with image registry on production clusters. An installation where the registry is configured on block storage is not highly available because the registry cannot have more than one replica.
Procedure
To set the image registry storage as a block storage type, patch the registry so that it uses the
Recreaterollout strategy and runs with only1replica:$ oc patch config.imageregistry.operator.openshift.io/cluster --type=merge -p '{"spec":{"rolloutStrategy":"Recreate","replicas":1}}'Provision the PV for the block storage device, and create a PVC for that volume. The requested block volume uses the ReadWriteOnce (RWO) access mode.
Create a
pvc.yamlfile with the following contents to define a VMware vSpherePersistentVolumeClaimobject:kind: PersistentVolumeClaim apiVersion: v1 metadata: name: image-registry-storage1 namespace: openshift-image-registry2 spec: accessModes: - ReadWriteOnce3 resources: requests: storage: 100Gi4 - 1
- A unique name that represents the
PersistentVolumeClaimobject. - 2
- The namespace for the
PersistentVolumeClaimobject, which isopenshift-image-registry. - 3
- The access mode of the persistent volume claim. With
ReadWriteOnce, the volume can be mounted with read and write permissions by a single node. - 4
- The size of the persistent volume claim.
Create the
PersistentVolumeClaimobject from the file:$ oc create -f pvc.yaml -n openshift-image-registry
Edit the registry configuration so that it references the correct PVC:
$ oc edit config.imageregistry.operator.openshift.io -o yamlExample output
storage: pvc: claim:1 - 1
- Creating a custom PVC allows you to leave the
claimfield blank for the default automatic creation of animage-registry-storagePVC.
For instructions about configuring registry storage so that it references the correct PVC, see Configuring the registry for vSphere.
14.2.14. Backing up VMware vSphere volumes
OpenShift Container Platform provisions new volumes as independent persistent disks to freely attach and detach the volume on any node in the cluster. As a consequence, it is not possible to back up volumes that use snapshots, or to restore volumes from snapshots. See Snapshot Limitations for more information.
Procedure
To create a backup of persistent volumes:
- Stop the application that is using the persistent volume.
- Clone the persistent volume.
- Restart the application.
- Create a backup of the cloned volume.
- Delete the cloned volume.
14.2.15. Telemetry access for OpenShift Container Platform
In OpenShift Container Platform 4.7, the Telemetry service, which runs by default to provide metrics about cluster health and the success of updates, requires internet access. If your cluster is connected to the internet, Telemetry runs automatically, and your cluster is registered to OpenShift Cluster Manager.
After you confirm that your OpenShift Cluster Manager inventory is correct, either maintained automatically by Telemetry or manually by using OpenShift Cluster Manager, use subscription watch to track your OpenShift Container Platform subscriptions at the account or multi-cluster level.
14.2.16. Next steps
- Customize your cluster.
- If necessary, you can opt out of remote health reporting.
- Set up your registry and configure registry storage.
- Optional: View the events from the vSphere Problem Detector Operator to determine if the cluster has permission or storage configuration issues.
14.3. Installing a cluster on vSphere with network customizations
In OpenShift Container Platform version 4.7, you can install a cluster on your VMware vSphere instance by using installer-provisioned infrastructure with customized network configuration options. By customizing your network configuration, your cluster can coexist with existing IP address allocations in your environment and integrate with existing MTU and VXLAN configurations. To customize the installation, you modify parameters in the install-config.yaml file before you install the cluster.
You must set most of the network configuration parameters during installation, and you can modify only kubeProxy configuration parameters in a running cluster.
OpenShift Container Platform supports deploying a cluster to a single VMware vCenter only. Deploying a cluster with machines/machine sets on multiple vCenters is not supported.
14.3.1. Prerequisites
-
Provision persistent storage for your cluster. To deploy a private image registry, your storage must provide
ReadWriteManyaccess modes. - Review details about the OpenShift Container Platform installation and update processes.
- The OpenShift Container Platform installer requires access to port 443 on the vCenter and ESXi hosts. You verified that port 443 is accessible.
- If you use a firewall, confirm with the administrator that port 443 is accessible. Control plane nodes must be able to reach vCenter and ESXi hosts on port 443 for the installation to succeed.
If you use a firewall, you must configure it to allow the sites that your cluster requires access to.
NoteBe sure to also review this site list if you are configuring a proxy.
14.3.2. Internet access for OpenShift Container Platform
In OpenShift Container Platform 4.7, you require access to the Internet to install your cluster.
You must have Internet access to:
- Access OpenShift Cluster Manager to download the installation program and perform subscription management. If the cluster has internet access and you do not disable Telemetry, that service automatically entitles your cluster.
- Access Quay.io to obtain the packages that are required to install your cluster.
- Obtain the packages that are required to perform cluster updates.
If your cluster cannot have direct Internet access, you can perform a restricted network installation on some types of infrastructure that you provision. During that process, you download the content that is required and use it to populate a mirror registry with the packages that you need to install a cluster and generate the installation program. With some installation types, the environment that you install your cluster in will not require Internet access. Before you update the cluster, you update the content of the mirror registry.
14.3.3. VMware vSphere infrastructure requirements
You must install the OpenShift Container Platform cluster on a VMware vSphere version 6 or 7 instance that meets the requirements for the components that you use.
| Component | Minimum supported versions | Description |
|---|---|---|
| Hypervisor | vSphere 6.5 and later with HW version 13 | This version is the minimum version that Red Hat Enterprise Linux CoreOS (RHCOS) supports. See the Red Hat Enterprise Linux 8 supported hypervisors list. |
| Storage with in-tree drivers | vSphere 6.5 and later | This plug-in creates vSphere storage by using the in-tree storage drivers for vSphere included in OpenShift Container Platform. |
| Optional: Networking (NSX-T) | vSphere 6.5U3 or vSphere 6.7U2 and later | vSphere 6.5U3 or vSphere 6.7U2+ are required for OpenShift Container Platform. VMware’s NSX Container Plug-in (NCP) is certified with OpenShift Container Platform 4.6 and NSX-T 3.x+. |
If you use a vSphere version 6.5 instance, consider upgrading to 6.7U3 or 7.0 before you install OpenShift Container Platform.
You must ensure that the time on your ESXi hosts is synchronized before you install OpenShift Container Platform. See Edit Time Configuration for a Host in the VMware documentation.
Virtual machines (VMs) configured to use virtual hardware version 14 or greater might result in a failed installation. It is recommended to configure VMs with virtual hardware version 13. This is a known issue that is being addressed in BZ#1935539.
14.3.4. Network connectivity requirements
You must configure the network connectivity between machines to allow OpenShift Container Platform cluster components to communicate.
Review the following details about the required network ports.
| Protocol | Port | Description |
|---|---|---|
| ICMP | N/A | Network reachability tests |
| TCP |
| Metrics |
|
|
Host level services, including the node exporter on ports | |
|
| The default ports that Kubernetes reserves | |
|
| openshift-sdn | |
| UDP |
| virtual extensible LAN (VXLAN) |
|
| Geneve | |
|
|
Host level services, including the node exporter on ports | |
|
| IPsec IKE packets | |
|
| IPsec NAT-T packets | |
| TCP/UDP |
| Kubernetes node port |
| ESP | N/A | IPsec Encapsulating Security Payload (ESP) |
| Protocol | Port | Description |
|---|---|---|
| TCP |
| Kubernetes API |
| Protocol | Port | Description |
|---|---|---|
| TCP |
| etcd server and peer ports |
14.3.5. vCenter requirements
Before you install an OpenShift Container Platform cluster on your vCenter that uses infrastructure that the installer provisions, you must prepare your environment.
Required vCenter account privileges
To install an OpenShift Container Platform cluster in a vCenter, the installation program requires access to an account with privileges to read and create the required resources. Using an account that has global administrative privileges is the simplest way to access all of the necessary permissions.
If you cannot use an account with global administrative privileges, you must create roles to grant the privileges necessary for OpenShift Container Platform cluster installation. While most of the privileges are always required, some are required only if you plan for the installation program to provision a folder to contain the OpenShift Container Platform cluster on your vCenter instance, which is the default behavior. You must create or amend vSphere roles for the specified objects to grant the required privileges.
An additional role is required if the installation program is to create a vSphere virtual machine folder.
Example 14.5. Roles and privileges required for installation
| vSphere object for role | When required | Required privileges |
|---|---|---|
| vSphere vCenter | Always |
|
| vSphere vCenter Cluster | Always |
|
| vSphere Datastore | Always |
|
| vSphere Port Group | Always |
|
| Virtual Machine Folder | Always |
|
| vSphere vCenter Datacenter | If the installation program creates the virtual machine folder |
|
Additionally, the user requires some ReadOnly permissions, and some of the roles require permission to propogate the permissions to child objects. These settings vary depending on whether or not you install the cluster into an existing folder.
Example 14.6. Required permissions and propagation settings
| vSphere object | Folder type | Propagate to children | Permissions required |
|---|---|---|---|
| vSphere vCenter | Always | False | Listed required privileges |
| vSphere vCenter Datacenter | Existing folder | False |
|
| Installation program creates the folder | True | Listed required privileges | |
| vSphere vCenter Cluster | Always | True | Listed required privileges |
| vSphere vCenter Datastore | Always | False | Listed required privileges |
| vSphere Switch | Always | False |
|
| vSphere Port Group | Always | False | Listed required privileges |
| vSphere vCenter Virtual Machine Folder | Existing folder | True | Listed required privileges |
For more information about creating an account with only the required privileges, see vSphere Permissions and User Management Tasks in the vSphere documentation.
Using OpenShift Container Platform with vMotion
If you intend on using vMotion in your vSphere environment, consider the following before installing a OpenShift Container Platform cluster.
OpenShift Container Platform generally supports compute-only vMotion. Using Storage vMotion can cause issues and is not supported.
To help ensure the uptime of your compute and control plane nodes, it is recommended that you follow the VMware best practices for vMotion. It is also recommended to use VMware anti-affinity rules to improve the availability of OpenShift Container Platform during maintenance or hardware issues.
For more information about vMotion and anti-affinity rules, see the VMware vSphere documentation for vMotion networking requirements and VM anti-affinity rules.
- If you are using vSphere volumes in your pods, migrating a VM across datastores either manually or through Storage vMotion causes, invalid references within OpenShift Container Platform persistent volume (PV) objects. These references prevent affected pods from starting up and can result in data loss.
- Similarly, OpenShift Container Platform does not support selective migration of VMDKs across datastores, using datastore clusters for VM provisioning or for dynamic or static provisioning of PVs, or using a datastore that is part of a datastore cluster for dynamic or static provisioning of PVs.
Cluster resources
When you deploy an OpenShift Container Platform cluster that uses installer-provisioned infrastructure, the installation program must be able to create several resources in your vCenter instance.
A standard OpenShift Container Platform installation creates the following vCenter resources:
- 1 Folder
- 1 Tag category
- 1 Tag
Virtual machines:
- 1 template
- 1 temporary bootstrap node
- 3 control plane nodes
- 3 compute machines
Although these resources use 856 GB of storage, the bootstrap node is destroyed during the cluster installation process. A minimum of 800 GB of storage is required to use a standard cluster.
If you deploy more compute machines, the OpenShift Container Platform cluster will use more storage.
Cluster limits
Available resources vary between clusters. The number of possible clusters within a vCenter is limited primarily by available storage space and any limitations on the number of required resources. Be sure to consider both limitations to the vCenter resources that the cluster creates and the resources that you require to deploy a cluster, such as IP addresses and networks.
Networking requirements
You must use DHCP for the network and ensure that the DHCP server is configured to provide persistent IP addresses to the cluster machines. All nodes must be in the same VLAN. You cannot scale the cluster using a second VLAN as a Day 2 operation. Additionally, you must create the following networking resources before you install the OpenShift Container Platform cluster:
It is recommended that each OpenShift Container Platform node in the cluster must have access to a Network Time Protocol (NTP) server that is discoverable via DHCP. Installation is possible without an NTP server. However, asynchronous server clocks will cause errors, which NTP server prevents.
Required IP Addresses
An installer-provisioned vSphere installation requires two static IP addresses:
- The API address is used to access the cluster API.
- The Ingress address is used for cluster ingress traffic.
You must provide these IP addresses to the installation program when you install the OpenShift Container Platform cluster.
DNS records
You must create DNS records for two static IP addresses in the appropriate DNS server for the vCenter instance that hosts your OpenShift Container Platform cluster. In each record, <cluster_name> is the cluster name and <base_domain> is the cluster base domain that you specify when you install the cluster. A complete DNS record takes the form: <component>.<cluster_name>.<base_domain>..
| Component | Record | Description |
|---|---|---|
| API VIP |
| This DNS A/AAAA or CNAME record must point to the load balancer for the control plane machines. This record must be resolvable by both clients external to the cluster and from all the nodes within the cluster. |
| Ingress VIP |
| A wildcard DNS A/AAAA or CNAME record that points to the load balancer that targets the machines that run the Ingress router pods, which are the worker nodes by default. This record must be resolvable by both clients external to the cluster and from all the nodes within the cluster. |
14.3.6. Generating an SSH private key and adding it to the agent
If you want to perform installation debugging or disaster recovery on your cluster, you must provide an SSH key to both your ssh-agent and the installation program. You can use this key to access the bootstrap machine in a public cluster to troubleshoot installation issues.
In a production environment, you require disaster recovery and debugging.
Do not skip this procedure in production environments where disaster recovery and debugging is required.
You can use this key to SSH into the master nodes as the user core. When you deploy the cluster, the key is added to the core user’s ~/.ssh/authorized_keys list.
Procedure
If you do not have an SSH key that is configured for password-less authentication on your computer, create one. For example, on a computer that uses a Linux operating system, run the following command:
$ ssh-keygen -t ed25519 -N '' \ -f <path>/<file_name>1 - 1
- Specify the path and file name, such as
~/.ssh/id_rsa, of the new SSH key. If you have an existing key pair, ensure your public key is in the your~/.sshdirectory.
Running this command generates an SSH key that does not require a password in the location that you specified.
NoteIf you plan to install an OpenShift Container Platform cluster that uses FIPS Validated / Modules in Process cryptographic libraries on the
x86_64architecture, do not create a key that uses theed25519algorithm. Instead, create a key that uses thersaorecdsaalgorithm.Start the
ssh-agentprocess as a background task:$ eval "$(ssh-agent -s)"Example output
Agent pid 31874NoteIf your cluster is in FIPS mode, only use FIPS-compliant algorithms to generate the SSH key. The key must be either RSA or ECDSA.
Add your SSH private key to the
ssh-agent:$ ssh-add <path>/<file_name>1 Example output
Identity added: /home/<you>/<path>/<file_name> (<computer_name>)- 1
- Specify the path and file name for your SSH private key, such as
~/.ssh/id_rsa
Next steps
- When you install OpenShift Container Platform, provide the SSH public key to the installation program.
14.3.7. Obtaining the installation program
Before you install OpenShift Container Platform, download the installation file on your provisioning machine.
Prerequisites
- You have a machine that runs Linux, for example Red Hat Enterprise Linux 8, with 500 MB of local disk space
Procedure
- Access the Infrastructure Provider page on the OpenShift Cluster Manager site. If you have a Red Hat account, log in with your credentials. If you do not, create an account.
- Select your infrastructure provider.
Navigate to the page for your installation type, download the installation program for your operating system, and place the file in the directory where you will store the installation configuration files.
ImportantThe installation program creates several files on the computer that you use to install your cluster. You must keep the installation program and the files that the installation program creates after you finish installing the cluster. Both files are required to delete the cluster.
ImportantDeleting the files created by the installation program does not remove your cluster, even if the cluster failed during installation. To remove your cluster, complete the OpenShift Container Platform uninstallation procedures for your specific cloud provider.
Extract the installation program. For example, on a computer that uses a Linux operating system, run the following command:
$ tar xvf openshift-install-linux.tar.gz- Download your installation pull secret from the Red Hat OpenShift Cluster Manager. This pull secret allows you to authenticate with the services that are provided by the included authorities, including Quay.io, which serves the container images for OpenShift Container Platform components.
14.3.8. Adding vCenter root CA certificates to your system trust
Because the installation program requires access to your vCenter’s API, you must add your vCenter’s trusted root CA certificates to your system trust before you install an OpenShift Container Platform cluster.
Procedure
-
From the vCenter home page, download the vCenter’s root CA certificates. Click Download trusted root CA certificates in the vSphere Web Services SDK section. The
<vCenter>/certs/download.zipfile downloads. Extract the compressed file that contains the vCenter root CA certificates. The contents of the compressed file resemble the following file structure:
certs ├── lin │ ├── 108f4d17.0 │ ├── 108f4d17.r1 │ ├── 7e757f6a.0 │ ├── 8e4f8471.0 │ └── 8e4f8471.r0 ├── mac │ ├── 108f4d17.0 │ ├── 108f4d17.r1 │ ├── 7e757f6a.0 │ ├── 8e4f8471.0 │ └── 8e4f8471.r0 └── win ├── 108f4d17.0.crt ├── 108f4d17.r1.crl ├── 7e757f6a.0.crt ├── 8e4f8471.0.crt └── 8e4f8471.r0.crl 3 directories, 15 filesAdd the files for your operating system to the system trust. For example, on a Fedora operating system, run the following command:
# cp certs/lin/* /etc/pki/ca-trust/source/anchorsUpdate your system trust. For example, on a Fedora operating system, run the following command:
# update-ca-trust extract
14.3.9. Creating the installation configuration file
You can customize the OpenShift Container Platform cluster you install on VMware vSphere.
Prerequisites
- Obtain the OpenShift Container Platform installation program and the pull secret for your cluster.
- Obtain service principal permissions at the subscription level.
Procedure
Create the
install-config.yamlfile.Change to the directory that contains the installation program and run the following command:
$ ./openshift-install create install-config --dir <installation_directory>1 - 1
- For
<installation_directory>, specify the directory name to store the files that the installation program creates.
ImportantSpecify an empty directory. Some installation assets, like bootstrap X.509 certificates have short expiration intervals, so you must not reuse an installation directory. If you want to reuse individual files from another cluster installation, you can copy them into your directory. However, the file names for the installation assets might change between releases. Use caution when copying installation files from an earlier OpenShift Container Platform version.
At the prompts, provide the configuration details for your cloud:
Optional: Select an SSH key to use to access your cluster machines.
NoteFor production OpenShift Container Platform clusters on which you want to perform installation debugging or disaster recovery, specify an SSH key that your
ssh-agentprocess uses.- Select vsphere as the platform to target.
- Specify the name of your vCenter instance.
Specify the user name and password for the vCenter account that has the required permissions to create the cluster.
The installation program connects to your vCenter instance.
- Select the datacenter in your vCenter instance to connect to.
- Select the default vCenter datastore to use.
- Select the vCenter cluster to install the OpenShift Container Platform cluster in. The installation program uses the root resource pool of the vSphere cluster as the default resource pool.
- Select the network in the vCenter instance that contains the virtual IP addresses and DNS records that you configured.
- Enter the virtual IP address that you configured for control plane API access.
- Enter the virtual IP address that you configured for cluster ingress.
- Enter the base domain. This base domain must be the same one that you used in the DNS records that you configured.
- Enter a descriptive name for your cluster. The cluster name must be the same one that you used in the DNS records that you configured.
- Paste the pull secret from the Red Hat OpenShift Cluster Manager.
-
Modify the
install-config.yamlfile. You can find more information about the available parameters in the "Installation configuration parameters" section. Back up the
install-config.yamlfile so that you can use it to install multiple clusters.ImportantThe
install-config.yamlfile is consumed during the installation process. If you want to reuse the file, you must back it up now.
14.3.9.1. Installation configuration parameters
Before you deploy an OpenShift Container Platform cluster, you provide parameter values to describe your account on the cloud platform that hosts your cluster and optionally customize your cluster’s platform. When you create the install-config.yaml installation configuration file, you provide values for the required parameters through the command line. If you customize your cluster, you can modify the install-config.yaml file to provide more details about the platform.
After installation, you cannot modify these parameters in the install-config.yaml file.
The openshift-install command does not validate field names for parameters. If an incorrect name is specified, the related file or object is not created, and no error is reported. Ensure that the field names for any parameters that are specified are correct.
14.3.9.1.1. Required configuration parameters
Required installation configuration parameters are described in the following table:
| Parameter | Description | Values |
|---|---|---|
|
|
The API version for the | String |
|
|
The base domain of your cloud provider. The base domain is used to create routes to your OpenShift Container Platform cluster components. The full DNS name for your cluster is a combination of the |
A fully-qualified domain or subdomain name, such as |
|
|
Kubernetes resource | Object |
|
|
The name of the cluster. DNS records for the cluster are all subdomains of |
String of lowercase letters and hyphens ( |
|
|
The configuration for the specific platform upon which to perform the installation: | Object |
|
| Get a pull secret from the Red Hat OpenShift Cluster Manager to authenticate downloading container images for OpenShift Container Platform components from services such as Quay.io. |
|
14.3.9.1.2. Network configuration parameters
You can customize your installation configuration based on the requirements of your existing network infrastructure. For example, you can expand the IP address block for the cluster network or provide different IP address blocks than the defaults.
Only IPv4 addresses are supported.
| Parameter | Description | Values |
|---|---|---|
|
| The configuration for the cluster network. | Object Note
You cannot modify parameters specified by the |
|
| The cluster network provider Container Network Interface (CNI) plug-in to install. |
Either |
|
| The IP address blocks for pods.
The default value is If you specify multiple IP address blocks, the blocks must not overlap. | An array of objects. For example: |
|
|
Required if you use An IPv4 network. |
An IP address block in Classless Inter-Domain Routing (CIDR) notation. The prefix length for an IPv4 block is between |
|
|
The subnet prefix length to assign to each individual node. For example, if | A subnet prefix.
The default value is |
|
|
The IP address block for services. The default value is The OpenShift SDN and OVN-Kubernetes network providers support only a single IP address block for the service network. | An array with an IP address block in CIDR format. For example: |
|
| The IP address blocks for machines. If you specify multiple IP address blocks, the blocks must not overlap.
If you specify multiple IP kernel arguments, the | An array of objects. For example: |
|
|
Required if you use | An IP network block in CIDR notation.
For example, Note
Set the |
14.3.9.1.3. Optional configuration parameters
Optional installation configuration parameters are described in the following table:
| Parameter | Description | Values |
|---|---|---|
|
| A PEM-encoded X.509 certificate bundle that is added to the nodes' trusted certificate store. This trust bundle may also be used when a proxy has been configured. | String |
|
| The configuration for the machines that comprise the compute nodes. |
Array of |
|
|
Determines the instruction set architecture of the machines in the pool. Currently, heteregeneous clusters are not supported, so all pools must specify the same architecture. Valid values are | String |
|
|
Whether to enable or disable simultaneous multithreading, or Important If you disable simultaneous multithreading, ensure that your capacity planning accounts for the dramatically decreased machine performance. |
|
|
|
Required if you use |
|
|
|
Required if you use |
|
|
| The number of compute machines, which are also known as worker machines, to provision. |
A positive integer greater than or equal to |
|
| The configuration for the machines that comprise the control plane. |
Array of |
|
|
Determines the instruction set architecture of the machines in the pool. Currently, heterogeneous clusters are not supported, so all pools must specify the same architecture. Valid values are | String |
|
|
Whether to enable or disable simultaneous multithreading, or Important If you disable simultaneous multithreading, ensure that your capacity planning accounts for the dramatically decreased machine performance. |
|
|
|
Required if you use |
|
|
|
Required if you use |
|
|
| The number of control plane machines to provision. |
The only supported value is |
|
| The Cloud Credential Operator (CCO) mode. If no mode is specified, the CCO dynamically tries to determine the capabilities of the provided credentials, with a preference for mint mode on the platforms where multiple modes are supported. Note Not all CCO modes are supported for all cloud providers. For more information on CCO modes, see the Cloud Credential Operator entry in the Cluster Operators reference content. |
|
|
|
Enable or disable FIPS mode. The default is Important
The use of FIPS Validated / Modules in Process cryptographic libraries is only supported on OpenShift Container Platform deployments on the Note If you are using Azure File storage, you cannot enable FIPS mode. |
|
|
| Sources and repositories for the release-image content. |
Array of objects. Includes a |
|
|
Required if you use | String |
|
| Specify one or more repositories that may also contain the same images. | Array of strings |
|
| How to publish or expose the user-facing endpoints of your cluster, such as the Kubernetes API, OpenShift routes. |
Setting this field to Important
If the value of the field is set to |
|
| The SSH key or keys to authenticate access your cluster machines. Note
For production OpenShift Container Platform clusters on which you want to perform installation debugging or disaster recovery, specify an SSH key that your | One or more keys. For example: |
14.3.9.1.4. Additional VMware vSphere configuration parameters
Additional VMware vSphere configuration parameters are described in the following table:
| Parameter | Description | Values |
|---|---|---|
|
| The fully-qualified hostname or IP address of the vCenter server. | String |
|
| The user name to use to connect to the vCenter instance with. This user must have at least the roles and privileges that are required for static or dynamic persistent volume provisioning in vSphere. | String |
|
| The password for the vCenter user name. | String |
|
| The name of the datacenter to use in the vCenter instance. | String |
|
| The name of the default datastore to use for provisioning volumes. | String |
|
| Optional. The absolute path of an existing folder where the installation program creates the virtual machines. If you do not provide this value, the installation program creates a folder that is named with the infrastructure ID in the datacenter virtual machine folder. |
String, for example, |
|
| The network in the vCenter instance that contains the virtual IP addresses and DNS records that you configured. | String |
|
| The vCenter cluster to install the OpenShift Container Platform cluster in. | String |
|
| The virtual IP (VIP) address that you configured for control plane API access. |
An IP address, for example |
|
| The virtual IP (VIP) address that you configured for cluster ingress. |
An IP address, for example |
14.3.9.1.5. Optional VMware vSphere machine pool configuration parameters
Optional VMware vSphere machine pool configuration parameters are described in the following table:
| Parameter | Description | Values |
|---|---|---|
|
| The location from which the installer downloads the RHCOS image. You must set this parameter to perform an installation in a restricted network. |
An HTTP or HTTPS URL, optionally with a SHA-256 checksum. For example, |
|
| The size of the disk in gigabytes. | Integer |
|
| The total number of virtual processor cores to assign a virtual machine. | Integer |
|
|
The number of cores per socket in a virtual machine. The number of virtual sockets on the virtual machine is | Integer |
|
| The size of a virtual machine’s memory in megabytes. | Integer |
14.3.9.2. Sample install-config.yaml file for an installer-provisioned VMware vSphere cluster
You can customize the install-config.yaml file to specify more details about your OpenShift Container Platform cluster’s platform or modify the values of the required parameters.
apiVersion: v1
baseDomain: example.com
compute:
- hyperthreading: Enabled
name: worker
replicas: 3
platform:
vsphere:
cpus: 2
coresPerSocket: 2
memoryMB: 8192
osDisk:
diskSizeGB: 120
controlPlane:
hyperthreading: Enabled
name: master
replicas: 3
platform:
vsphere:
cpus: 4
coresPerSocket: 2
memoryMB: 16384
osDisk:
diskSizeGB: 120
metadata:
name: cluster
networking:
clusterNetwork:
- cidr: 10.128.0.0/14
hostPrefix: 23
machineNetwork:
- cidr: 10.0.0.0/16
networkType: OpenShiftSDN
serviceNetwork:
- 172.30.0.0/16
platform:
vsphere:
vcenter: your.vcenter.server
username: username
password: password
datacenter: datacenter
defaultDatastore: datastore
folder: folder
network: VM_Network
cluster: vsphere_cluster_name
apiVIP: api_vip
ingressVIP: ingress_vip
fips: false
pullSecret: '{"auths": ...}'
sshKey: 'ssh-ed25519 AAAA...'- 1
- The base domain of the cluster. All DNS records must be sub-domains of this base and include the cluster name.
- 2 5
- The
controlPlanesection is a single mapping, but thecomputesection is a sequence of mappings. To meet the requirements of the different data structures, the first line of thecomputesection must begin with a hyphen,-, and the first line of thecontrolPlanesection must not. Only one control plane pool is used. - 3 6
- Whether to enable or disable simultaneous multithreading, or
hyperthreading. By default, simultaneous multithreading is enabled to increase the performance of your machines' cores. You can disable it by setting the parameter value toDisabled. If you disable simultaneous multithreading in some cluster machines, you must disable it in all cluster machines.ImportantIf you disable simultaneous multithreading, ensure that your capacity planning accounts for the dramatically decreased machine performance. Your machines must use at least 8 CPUs and 32 GB of RAM if you disable simultaneous multithreading.
- 4 7
- Optional: Provide additional configuration for the machine pool parameters for the compute and control plane machines.
- 8
- The cluster name that you specified in your DNS records.
- 9
- The vSphere cluster to install the OpenShift Container Platform cluster in. The installation program uses the root resource pool of the vSphere cluster as the default resource pool.
14.3.9.3. Configuring the cluster-wide proxy during installation
Production environments can deny direct access to the Internet and instead have an HTTP or HTTPS proxy available. You can configure a new OpenShift Container Platform cluster to use a proxy by configuring the proxy settings in the install-config.yaml file.
Prerequisites
-
You have an existing
install-config.yamlfile. You reviewed the sites that your cluster requires access to and determined whether any of them need to bypass the proxy. By default, all cluster egress traffic is proxied, including calls to hosting cloud provider APIs. You added sites to the
Proxyobject’sspec.noProxyfield to bypass the proxy if necessary.NoteThe
Proxyobjectstatus.noProxyfield is populated with the values of thenetworking.machineNetwork[].cidr,networking.clusterNetwork[].cidr, andnetworking.serviceNetwork[]fields from your installation configuration.For installations on Amazon Web Services (AWS), Google Cloud Platform (GCP), Microsoft Azure, and Red Hat OpenStack Platform (RHOSP), the
Proxyobjectstatus.noProxyfield is also populated with the instance metadata endpoint (169.254.169.254).
Procedure
Edit your
install-config.yamlfile and add the proxy settings. For example:apiVersion: v1 baseDomain: my.domain.com proxy: httpProxy: http://<username>:<pswd>@<ip>:<port>1 httpsProxy: https://<username>:<pswd>@<ip>:<port>2 noProxy: example.com3 additionalTrustBundle: |4 -----BEGIN CERTIFICATE----- <MY_TRUSTED_CA_CERT> -----END CERTIFICATE----- ...- 1
- A proxy URL to use for creating HTTP connections outside the cluster. The URL scheme must be
http. - 2
- A proxy URL to use for creating HTTPS connections outside the cluster.
- 3
- A comma-separated list of destination domain names, IP addresses, or other network CIDRs to exclude from proxying. Preface a domain with
.to match subdomains only. For example,.y.commatchesx.y.com, but noty.com. Use*to bypass the proxy for all destinations. You must include vCenter’s IP address and the IP range that you use for its machines. - 4
- If provided, the installation program generates a config map that is named
user-ca-bundlein theopenshift-confignamespace to hold the additional CA certificates. If you provideadditionalTrustBundleand at least one proxy setting, theProxyobject is configured to reference theuser-ca-bundleconfig map in thetrustedCAfield. The Cluster Network Operator then creates atrusted-ca-bundleconfig map that merges the contents specified for thetrustedCAparameter with the RHCOS trust bundle. TheadditionalTrustBundlefield is required unless the proxy’s identity certificate is signed by an authority from the RHCOS trust bundle.
NoteThe installation program does not support the proxy
readinessEndpointsfield.- Save the file and reference it when installing OpenShift Container Platform.
The installation program creates a cluster-wide proxy that is named cluster that uses the proxy settings in the provided install-config.yaml file. If no proxy settings are provided, a cluster Proxy object is still created, but it will have a nil spec.
Only the Proxy object named cluster is supported, and no additional proxies can be created.
14.3.10. Network configuration phases
When specifying a cluster configuration prior to installation, there are several phases in the installation procedures when you can modify the network configuration:
- Phase 1
After entering the
openshift-install create install-configcommand. In theinstall-config.yamlfile, you can customize the following network-related fields:-
networking.networkType -
networking.clusterNetwork -
networking.serviceNetwork networking.machineNetworkFor more information on these fields, refer to "Installation configuration parameters".
NoteSet the
networking.machineNetworkto match the CIDR that the preferred NIC resides in.
-
- Phase 2
-
After entering the
openshift-install create manifestscommand. If you must specify advanced network configuration, during this phase you can define a customized Cluster Network Operator manifest with only the fields you want to modify.
You cannot override the values specified in phase 1 in the install-config.yaml file during phase 2. However, you can further customize the cluster network provider during phase 2.
14.3.11. Specifying advanced network configuration
You can use advanced configuration customization to integrate your cluster into your existing network environment by specifying additional configuration for your cluster network provider. You can specify advanced network configuration only before you install the cluster.
Modifying the OpenShift Container Platform manifest files created by the installation program is not supported. Applying a manifest file that you create, as in the following procedure, is supported.
Prerequisites
-
Create the
install-config.yamlfile and complete any modifications to it.
Procedure
Change to the directory that contains the installation program and create the manifests:
$ ./openshift-install create manifests --dir <installation_directory>where:
<installation_directory>-
Specifies the name of the directory that contains the
install-config.yamlfile for your cluster.
Create a stub manifest file for the advanced network configuration that is named
cluster-network-03-config.ymlin the<installation_directory>/manifests/directory:$ cat <<EOF > <installation_directory>/manifests/cluster-network-03-config.yml apiVersion: operator.openshift.io/v1 kind: Network metadata: name: cluster spec: EOFwhere:
<installation_directory>-
Specifies the directory name that contains the
manifests/directory for your cluster.
Open the
cluster-network-03-config.ymlfile in an editor and specify the advanced network configuration for your cluster, such as in the following examples:Specify a different VXLAN port for the OpenShift SDN network provider
apiVersion: operator.openshift.io/v1 kind: Network metadata: name: cluster spec: defaultNetwork: openshiftSDNConfig: vxlanPort: 4800Enable IPsec for the OVN-Kubernetes network provider
apiVersion: operator.openshift.io/v1 kind: Network metadata: name: cluster spec: defaultNetwork: ovnKubernetesConfig: ipsecConfig: {}-
Save the
cluster-network-03-config.ymlfile and quit the text editor. -
Optional: Back up the
manifests/cluster-network-03-config.ymlfile. The installation program deletes themanifests/directory when creating the cluster.
14.3.12. Cluster Network Operator configuration
The configuration for the cluster network is specified as part of the Cluster Network Operator (CNO) configuration and stored in a custom resource (CR) object that is named cluster. The CR specifies the fields for the Network API in the operator.openshift.io API group.
The CNO configuration inherits the following fields during cluster installation from the Network API in the Network.config.openshift.io API group and these fields cannot be changed:
clusterNetwork- IP address pools from which pod IP addresses are allocated.
serviceNetwork- IP address pool for services.
defaultNetwork.type- Cluster network provider, such as OpenShift SDN or OVN-Kubernetes.
You can specify the cluster network provider configuration for your cluster by setting the fields for the defaultNetwork object in the CNO object named cluster.
14.3.12.1. Cluster Network Operator configuration object
The fields for the Cluster Network Operator (CNO) are described in the following table:
| Field | Type | Description |
|---|---|---|
|
|
|
The name of the CNO object. This name is always |
|
|
| A list specifying the blocks of IP addresses from which pod IP addresses are allocated and the subnet prefix length assigned to each individual node in the cluster. For example:
This value is ready-only and specified in the |
|
|
| A block of IP addresses for services. The OpenShift SDN and OVN-Kubernetes Container Network Interface (CNI) network providers support only a single IP address block for the service network. For example:
This value is ready-only and specified in the |
|
|
| Configures the Container Network Interface (CNI) cluster network provider for the cluster network. |
|
|
| The fields for this object specify the kube-proxy configuration. If you are using the OVN-Kubernetes cluster network provider, the kube-proxy configuration has no effect. |
defaultNetwork object configuration
The values for the defaultNetwork object are defined in the following table:
| Field | Type | Description |
|---|---|---|
|
|
|
Either Note OpenShift Container Platform uses the OpenShift SDN Container Network Interface (CNI) cluster network provider by default. |
|
|
| This object is only valid for the OpenShift SDN cluster network provider. |
|
|
| This object is only valid for the OVN-Kubernetes cluster network provider. |
Configuration for the OpenShift SDN CNI cluster network provider
The following table describes the configuration fields for the OpenShift SDN Container Network Interface (CNI) cluster network provider.
| Field | Type | Description |
|---|---|---|
|
|
|
Configures the network isolation mode for OpenShift SDN. The default value is
The values |
|
|
| The maximum transmission unit (MTU) for the VXLAN overlay network. This is detected automatically based on the MTU of the primary network interface. You do not normally need to override the detected MTU. If the auto-detected value is not what you expected it to be, confirm that the MTU on the primary network interface on your nodes is correct. You cannot use this option to change the MTU value of the primary network interface on the nodes.
If your cluster requires different MTU values for different nodes, you must set this value to This value cannot be changed after cluster installation. |
|
|
|
The port to use for all VXLAN packets. The default value is If you are running in a virtualized environment with existing nodes that are part of another VXLAN network, then you might be required to change this. For example, when running an OpenShift SDN overlay on top of VMware NSX-T, you must select an alternate port for the VXLAN, because both SDNs use the same default VXLAN port number.
On Amazon Web Services (AWS), you can select an alternate port for the VXLAN between port |
Example OpenShift SDN configuration
defaultNetwork:
type: OpenShiftSDN
openshiftSDNConfig:
mode: NetworkPolicy
mtu: 1450
vxlanPort: 4789Configuration for the OVN-Kubernetes CNI cluster network provider
The following table describes the configuration fields for the OVN-Kubernetes CNI cluster network provider.
| Field | Type | Description |
|---|---|---|
|
|
| The maximum transmission unit (MTU) for the Geneve (Generic Network Virtualization Encapsulation) overlay network. This is detected automatically based on the MTU of the primary network interface. You do not normally need to override the detected MTU. If the auto-detected value is not what you expected it to be, confirm that the MTU on the primary network interface on your nodes is correct. You cannot use this option to change the MTU value of the primary network interface on the nodes.
If your cluster requires different MTU values for different nodes, you must set this value to This value cannot be changed after cluster installation. |
|
|
|
The port to use for all Geneve packets. The default value is |
|
|
| Specify an empty object to enable IPsec encryption. This value cannot be changed after cluster installation. |
Example OVN-Kubernetes configuration
defaultNetwork:
type: OVNKubernetes
ovnKubernetesConfig:
mtu: 1400
genevePort: 6081
ipsecConfig: {}kubeProxyConfig object configuration
The values for the kubeProxyConfig object are defined in the following table:
| Field | Type | Description |
|---|---|---|
|
|
|
The refresh period for Note
Because of performance improvements introduced in OpenShift Container Platform 4.3 and greater, adjusting the |
|
|
|
The minimum duration before refreshing |
14.3.13. Deploying the cluster
You can install OpenShift Container Platform on a compatible cloud platform.
You can run the create cluster command of the installation program only once, during initial installation.
Prerequisites
- Obtain the OpenShift Container Platform installation program and the pull secret for your cluster.
Procedure
Change to the directory that contains the installation program and initialize the cluster deployment:
$ ./openshift-install create cluster --dir <installation_directory> \1 --log-level=info2 - 1
- For
<installation_directory>, specify the location of your customized./install-config.yamlfile. - 2
- To view different installation details, specify
warn,debug, orerrorinstead ofinfo.When the cluster deployment completes, directions for accessing your cluster, including a link to its web console and credentials for the
kubeadminuser, display in your terminal.
...
INFO Install complete!
INFO To access the cluster as the system:admin user when using 'oc', run 'export KUBECONFIG=/home/myuser/install_dir/auth/kubeconfig'
INFO Access the OpenShift web-console here: https://console-openshift-console.apps.mycluster.example.com
INFO Login to the console with user: "kubeadmin", and password: "4vYBz-Ee6gm-ymBZj-Wt5AL"
INFO Time elapsed: 36m22s+
The cluster access and credential information also outputs to <installation_directory>/.openshift_install.log when an installation succeeds.
+
-
The Ignition config files that the installation program generates contain certificates that expire after 24 hours, which are then renewed at that time. If the cluster is shut down before renewing the certificates and the cluster is later restarted after the 24 hours have elapsed, the cluster automatically recovers the expired certificates. The exception is that you must manually approve the pending
node-bootstrappercertificate signing requests (CSRs) to recover kubelet certificates. See the documentation for Recovering from expired control plane certificates for more information. - It is recommended that you use Ignition config files within 12 hours after they are generated because the 24-hour certificate rotates from 16 to 22 hours after the cluster is installed. By using the Ignition config files within 12 hours, you can avoid installation failure if the certificate update runs during installation.
+
You must not delete the installation program or the files that the installation program creates. Both are required to delete the cluster.
14.3.14. Installing the OpenShift CLI by downloading the binary
You can install the OpenShift CLI (oc) to interact with OpenShift Container Platform from a command-line interface. You can install oc on Linux, Windows, or macOS.
If you installed an earlier version of oc, you cannot use it to complete all of the commands in OpenShift Container Platform 4.7. Download and install the new version of oc.
14.3.14.1. Installing the OpenShift CLI on Linux
You can install the OpenShift CLI (oc) binary on Linux by using the following procedure.
Procedure
- Navigate to the OpenShift Container Platform downloads page on the Red Hat Customer Portal.
- Select the appropriate version in the Version drop-down menu.
- Click Download Now next to the OpenShift v4.7 Linux Client entry and save the file.
Unpack the archive:
$ tar xvzf <file>Place the
ocbinary in a directory that is on yourPATH.To check your
PATH, execute the following command:$ echo $PATH
After you install the OpenShift CLI, it is available using the oc command:
$ oc <command>14.3.14.2. Installing the OpenShift CLI on Windows
You can install the OpenShift CLI (oc) binary on Windows by using the following procedure.
Procedure
- Navigate to the OpenShift Container Platform downloads page on the Red Hat Customer Portal.
- Select the appropriate version in the Version drop-down menu.
- Click Download Now next to the OpenShift v4.7 Windows Client entry and save the file.
- Unzip the archive with a ZIP program.
Move the
ocbinary to a directory that is on yourPATH.To check your
PATH, open the command prompt and execute the following command:C:\> path
After you install the OpenShift CLI, it is available using the oc command:
C:\> oc <command>14.3.14.3. Installing the OpenShift CLI on macOS
You can install the OpenShift CLI (oc) binary on macOS by using the following procedure.
Procedure
- Navigate to the OpenShift Container Platform downloads page on the Red Hat Customer Portal.
- Select the appropriate version in the Version drop-down menu.
- Click Download Now next to the OpenShift v4.7 MacOSX Client entry and save the file.
- Unpack and unzip the archive.
Move the
ocbinary to a directory on your PATH.To check your
PATH, open a terminal and execute the following command:$ echo $PATH
After you install the OpenShift CLI, it is available using the oc command:
$ oc <command>14.3.15. Logging in to the cluster by using the CLI
You can log in to your cluster as a default system user by exporting the cluster kubeconfig file. The kubeconfig file contains information about the cluster that is used by the CLI to connect a client to the correct cluster and API server. The file is specific to a cluster and is created during OpenShift Container Platform installation.
Prerequisites
- You deployed an OpenShift Container Platform cluster.
-
You installed the
ocCLI.
Procedure
Export the
kubeadmincredentials:$ export KUBECONFIG=<installation_directory>/auth/kubeconfig1 - 1
- For
<installation_directory>, specify the path to the directory that you stored the installation files in.
Verify you can run
occommands successfully using the exported configuration:$ oc whoamiExample output
system:admin
14.3.16. Creating registry storage
After you install the cluster, you must create storage for the registry Operator.
14.3.16.1. Image registry removed during installation
On platforms that do not provide shareable object storage, the OpenShift Image Registry Operator bootstraps itself as Removed. This allows openshift-installer to complete installations on these platform types.
After installation, you must edit the Image Registry Operator configuration to switch the managementState from Removed to Managed.
The Prometheus console provides an ImageRegistryRemoved alert, for example:
"Image Registry has been removed. ImageStreamTags, BuildConfigs and DeploymentConfigs which reference ImageStreamTags may not work as expected. Please configure storage and update the config to Managed state by editing configs.imageregistry.operator.openshift.io."
14.3.16.2. Image registry storage configuration
The Image Registry Operator is not initially available for platforms that do not provide default storage. After installation, you must configure your registry to use storage so that the Registry Operator is made available.
Instructions are shown for configuring a persistent volume, which is required for production clusters. Where applicable, instructions are shown for configuring an empty directory as the storage location, which is available for only non-production clusters.
Additional instructions are provided for allowing the image registry to use block storage types by using the Recreate rollout strategy during upgrades.
14.3.16.2.1. Configuring registry storage for VMware vSphere
As a cluster administrator, following installation you must configure your registry to use storage.
Prerequisites
- Cluster administrator permissions.
- A cluster on VMware vSphere.
Persistent storage provisioned for your cluster, such as Red Hat OpenShift Container Storage.
ImportantOpenShift Container Platform supports
ReadWriteOnceaccess for image registry storage when you have only one replica. To deploy an image registry that supports high availability with two or more replicas,ReadWriteManyaccess is required.- Must have "100Gi" capacity.
Testing shows issues with using the NFS server on RHEL as storage backend for core services. This includes the OpenShift Container Registry and Quay, Prometheus for monitoring storage, and Elasticsearch for logging storage. Therefore, using RHEL NFS to back PVs used by core services is not recommended.
Other NFS implementations on the marketplace might not have these issues. Contact the individual NFS implementation vendor for more information on any testing that was possibly completed against these OpenShift Container Platform core components.
Procedure
To configure your registry to use storage, change the
spec.storage.pvcin theconfigs.imageregistry/clusterresource.NoteWhen using shared storage, review your security settings to prevent outside access.
Verify that you do not have a registry pod:
$ oc get pod -n openshift-image-registry -l docker-registry=defaultExample output
No resourses found in openshift-image-registry namespaceNoteIf you do have a registry pod in your output, you do not need to continue with this procedure.
Check the registry configuration:
$ oc edit configs.imageregistry.operator.openshift.ioExample output
storage: pvc: claim:1 - 1
- Leave the
claimfield blank to allow the automatic creation of animage-registry-storagePVC.
Check the
clusteroperatorstatus:$ oc get clusteroperator image-registryExample output
NAME VERSION AVAILABLE PROGRESSING DEGRADED SINCE MESSAGE image-registry 4.7 True False False 6h50m
14.3.16.2.2. Configuring block registry storage for VMware vSphere
To allow the image registry to use block storage types such as vSphere Virtual Machine Disk (VMDK) during upgrades as a cluster administrator, you can use the Recreate rollout strategy.
Block storage volumes are supported but not recommended for use with image registry on production clusters. An installation where the registry is configured on block storage is not highly available because the registry cannot have more than one replica.
Procedure
To set the image registry storage as a block storage type, patch the registry so that it uses the
Recreaterollout strategy and runs with only1replica:$ oc patch config.imageregistry.operator.openshift.io/cluster --type=merge -p '{"spec":{"rolloutStrategy":"Recreate","replicas":1}}'Provision the PV for the block storage device, and create a PVC for that volume. The requested block volume uses the ReadWriteOnce (RWO) access mode.
Create a
pvc.yamlfile with the following contents to define a VMware vSpherePersistentVolumeClaimobject:kind: PersistentVolumeClaim apiVersion: v1 metadata: name: image-registry-storage1 namespace: openshift-image-registry2 spec: accessModes: - ReadWriteOnce3 resources: requests: storage: 100Gi4 - 1
- A unique name that represents the
PersistentVolumeClaimobject. - 2
- The namespace for the
PersistentVolumeClaimobject, which isopenshift-image-registry. - 3
- The access mode of the persistent volume claim. With
ReadWriteOnce, the volume can be mounted with read and write permissions by a single node. - 4
- The size of the persistent volume claim.
Create the
PersistentVolumeClaimobject from the file:$ oc create -f pvc.yaml -n openshift-image-registry
Edit the registry configuration so that it references the correct PVC:
$ oc edit config.imageregistry.operator.openshift.io -o yamlExample output
storage: pvc: claim:1 - 1
- Creating a custom PVC allows you to leave the
claimfield blank for the default automatic creation of animage-registry-storagePVC.
For instructions about configuring registry storage so that it references the correct PVC, see Configuring the registry for vSphere.
14.3.17. Backing up VMware vSphere volumes
OpenShift Container Platform provisions new volumes as independent persistent disks to freely attach and detach the volume on any node in the cluster. As a consequence, it is not possible to back up volumes that use snapshots, or to restore volumes from snapshots. See Snapshot Limitations for more information.
Procedure
To create a backup of persistent volumes:
- Stop the application that is using the persistent volume.
- Clone the persistent volume.
- Restart the application.
- Create a backup of the cloned volume.
- Delete the cloned volume.
14.3.18. Telemetry access for OpenShift Container Platform
In OpenShift Container Platform 4.7, the Telemetry service, which runs by default to provide metrics about cluster health and the success of updates, requires internet access. If your cluster is connected to the internet, Telemetry runs automatically, and your cluster is registered to OpenShift Cluster Manager.
After you confirm that your OpenShift Cluster Manager inventory is correct, either maintained automatically by Telemetry or manually by using OpenShift Cluster Manager, use subscription watch to track your OpenShift Container Platform subscriptions at the account or multi-cluster level.
14.3.19. Next steps
- Customize your cluster.
- If necessary, you can opt out of remote health reporting.
- Set up your registry and configure registry storage.
- Optional: View the events from the vSphere Problem Detector Operator to determine if the cluster has permission or storage configuration issues.
14.4. Installing a cluster on vSphere with user-provisioned infrastructure
In OpenShift Container Platform version 4.7, you can install a cluster on VMware vSphere infrastructure that you provision.
OpenShift Container Platform supports deploying a cluster to a single VMware vCenter only. Deploying a cluster with machines/machine sets on multiple vCenters is not supported.
The steps for performing a user-provisioned infrastructure installation are provided as an example only. Installing a cluster with infrastructure you provide requires knowledge of the vSphere platform and the installation process of OpenShift Container Platform. Use the user-provisioned infrastructure installation instructions as a guide; you are free to create the required resources through other methods.
14.4.1. Prerequisites
-
Provision persistent storage for your cluster. To deploy a private image registry, your storage must provide
ReadWriteManyaccess modes. - Review details about the OpenShift Container Platform installation and update processes.
- Completing the installation requires that you upload the Red Hat Enterprise Linux CoreOS (RHCOS) OVA on vSphere hosts. The machine from which you complete this process requires access to port 443 on the vCenter and ESXi hosts. You verified that port 443 is accessible.
- If you use a firewall, you confirmed with the administrator that port 443 is accessible. Control plane nodes must be able to reach vCenter and ESXi hosts on port 443 for the installation to succeed.
If you use a firewall, you must configure it to allow the sites that your cluster requires access to.
NoteBe sure to also review this site list if you are configuring a proxy.
14.4.2. Internet access for OpenShift Container Platform
In OpenShift Container Platform 4.7, you require access to the Internet to install your cluster.
You must have Internet access to:
- Access OpenShift Cluster Manager to download the installation program and perform subscription management. If the cluster has internet access and you do not disable Telemetry, that service automatically entitles your cluster.
- Access Quay.io to obtain the packages that are required to install your cluster.
- Obtain the packages that are required to perform cluster updates.
If your cluster cannot have direct Internet access, you can perform a restricted network installation on some types of infrastructure that you provision. During that process, you download the content that is required and use it to populate a mirror registry with the packages that you need to install a cluster and generate the installation program. With some installation types, the environment that you install your cluster in will not require Internet access. Before you update the cluster, you update the content of the mirror registry.
14.4.3. VMware vSphere infrastructure requirements
You must install the OpenShift Container Platform cluster on a VMware vSphere version 6 or 7 instance that meets the requirements for the components that you use.
| Component | Minimum supported versions | Description |
|---|---|---|
| Hypervisor | vSphere 6.5 and later with HW version 13 | This version is the minimum version that Red Hat Enterprise Linux CoreOS (RHCOS) supports. See the Red Hat Enterprise Linux 8 supported hypervisors list. |
| Storage with in-tree drivers | vSphere 6.5 and later | This plug-in creates vSphere storage by using the in-tree storage drivers for vSphere included in OpenShift Container Platform. |
| Optional: Networking (NSX-T) | vSphere 6.5U3 or vSphere 6.7U2 and later | vSphere 6.5U3 or vSphere 6.7U2+ are required for OpenShift Container Platform. VMware’s NSX Container Plug-in (NCP) is certified with OpenShift Container Platform 4.6 and NSX-T 3.x+. |
If you use a vSphere version 6.5 instance, consider upgrading to 6.7U3 or 7.0 before you install OpenShift Container Platform.
You must ensure that the time on your ESXi hosts is synchronized before you install OpenShift Container Platform. See Edit Time Configuration for a Host in the VMware documentation.
Virtual machines (VMs) configured to use virtual hardware version 14 or greater might result in a failed installation. It is recommended to configure VMs with virtual hardware version 13. This is a known issue that is being addressed in BZ#1935539.
14.4.4. Machine requirements for a cluster with user-provisioned infrastructure
For a cluster that contains user-provisioned infrastructure, you must deploy all of the required machines.
14.4.4.1. Required machines
The smallest OpenShift Container Platform clusters require the following hosts:
- One temporary bootstrap machine
- Three control plane, or master, machines
- At least two compute machines, which are also known as worker machines.
The cluster requires the bootstrap machine to deploy the OpenShift Container Platform cluster on the three control plane machines. You can remove the bootstrap machine after you install the cluster.
To improve high availability of your cluster, distribute the control plane machines over different z/VM instances on at least two physical machines.
The bootstrap and control plane machines must use Red Hat Enterprise Linux CoreOS (RHCOS) as the operating system. However, the compute machines can choose between Red Hat Enterprise Linux CoreOS (RHCOS) or Red Hat Enterprise Linux (RHEL) 7.9.
Note that RHCOS is based on Red Hat Enterprise Linux (RHEL) 8 and inherits all of its hardware certifications and requirements. See Red Hat Enterprise Linux technology capabilities and limits.
All virtual machines must reside in the same datastore and in the same folder as the installer.
14.4.4.2. Network connectivity requirements
All the Red Hat Enterprise Linux CoreOS (RHCOS) machines require network in initramfs during boot to fetch Ignition config files from the Machine Config Server. The machines are configured with static IP addresses. No DHCP server is required. Additionally, each OpenShift Container Platform node in the cluster must have access to a Network Time Protocol (NTP) server.
14.4.4.3. IBM Z network connectivity requirements
To install on IBM Z under z/VM, you require a single z/VM virtual NIC in layer 2 mode. You also need:
- A direct-attached OSA or RoCE network adapter
- A z/VM VSwitch set up. For a preferred setup, use OSA link aggregation.
14.4.4.4. Minimum resource requirements
Each cluster machine must meet the following minimum requirements:
| Machine | Operating System | vCPU [1] | Virtual RAM | Storage | IOPS |
|---|---|---|---|---|---|
| Bootstrap | RHCOS | 4 | 16 GB | 100 GB | N/A |
| Control plane | RHCOS | 4 | 16 GB | 100 GB | N/A |
| Compute | RHCOS | 2 | 8 GB | 100 GB | N/A |
- One physical core (IFL) provides two logical cores (threads) when SMT-2 is enabled. The hypervisor can provide two or more vCPUs.
14.4.4.5. Certificate signing requests management
Because your cluster has limited access to automatic machine management when you use infrastructure that you provision, you must provide a mechanism for approving cluster certificate signing requests (CSRs) after installation. The kube-controller-manager only approves the kubelet client CSRs. The machine-approver cannot guarantee the validity of a serving certificate that is requested by using kubelet credentials because it cannot confirm that the correct machine issued the request. You must determine and implement a method of verifying the validity of the kubelet serving certificate requests and approving them.
14.4.5. Creating the user-provisioned infrastructure
Before you deploy an OpenShift Container Platform cluster that uses user-provisioned infrastructure, you must create the underlying infrastructure.
Prerequisites
- Review the OpenShift Container Platform 4.x Tested Integrations page before you create the supporting infrastructure for your cluster.
Procedure
- Set up static IP addresses.
- Set up an HTTP or HTTPS server to provide Ignition files to the cluster nodes.
- Provision the required load balancers.
- Configure the ports for your machines.
- Configure DNS.
- Ensure network connectivity.
14.4.5.1. Networking requirements for user-provisioned infrastructure
All the Red Hat Enterprise Linux CoreOS (RHCOS) machines require network in initramfs during boot to fetch Ignition config from the machine config server.
During the initial boot, the machines require an HTTP or HTTPS server to establish a network connection to download their Ignition config files.
Ensure that the machines have persistent IP addresses and host names.
The Kubernetes API server must be able to resolve the node names of the cluster machines. If the API servers and worker nodes are in different zones, you can configure a default DNS search zone to allow the API server to resolve the node names. Another supported approach is to always refer to hosts by their fully-qualified domain names in both the node objects and all DNS requests.
You must configure the network connectivity between machines to allow cluster components to communicate. Each machine must be able to resolve the host names of all other machines in the cluster.
| Protocol | Port | Description |
|---|---|---|
| ICMP | N/A | Network reachability tests |
| TCP |
| Metrics |
|
|
Host level services, including the node exporter on ports | |
|
| The default ports that Kubernetes reserves | |
|
| openshift-sdn | |
| UDP |
| VXLAN and Geneve |
|
| VXLAN and Geneve | |
|
|
Host level services, including the node exporter on ports | |
| TCP/UDP |
| Kubernetes node port |
| Protocol | Port | Description |
|---|---|---|
| TCP |
| Kubernetes API |
| Protocol | Port | Description |
|---|---|---|
| TCP |
| etcd server and peer ports |
Network topology requirements
The infrastructure that you provision for your cluster must meet the following network topology requirements.
OpenShift Container Platform requires all nodes to have internet access to pull images for platform containers and provide telemetry data to Red Hat.
Load balancers
Before you install OpenShift Container Platform, you must provision two load balancers that meet the following requirements:
API load balancer: Provides a common endpoint for users, both human and machine, to interact with and configure the platform. Configure the following conditions:
- Layer 4 load balancing only. This can be referred to as Raw TCP, SSL Passthrough, or SSL Bridge mode. If you use SSL Bridge mode, you must enable Server Name Indication (SNI) for the API routes.
- A stateless load balancing algorithm. The options vary based on the load balancer implementation.
ImportantDo not configure session persistence for an API load balancer.
Configure the following ports on both the front and back of the load balancers:
Expand Table 14.36. API load balancer Port Back-end machines (pool members) Internal External Description 6443Bootstrap and control plane. You remove the bootstrap machine from the load balancer after the bootstrap machine initializes the cluster control plane. You must configure the
/readyzendpoint for the API server health check probe.X
X
Kubernetes API server
22623Bootstrap and control plane. You remove the bootstrap machine from the load balancer after the bootstrap machine initializes the cluster control plane.
X
Machine config server
NoteThe load balancer must be configured to take a maximum of 30 seconds from the time the API server turns off the
/readyzendpoint to the removal of the API server instance from the pool. Within the time frame after/readyzreturns an error or becomes healthy, the endpoint must have been removed or added. Probing every 5 or 10 seconds, with two successful requests to become healthy and three to become unhealthy, are well-tested values.Application Ingress load balancer: Provides an Ingress point for application traffic flowing in from outside the cluster. Configure the following conditions:
- Layer 4 load balancing only. This can be referred to as Raw TCP, SSL Passthrough, or SSL Bridge mode. If you use SSL Bridge mode, you must enable Server Name Indication (SNI) for the Ingress routes.
- A connection-based or session-based persistence is recommended, based on the options available and types of applications that will be hosted on the platform.
Configure the following ports on both the front and back of the load balancers:
Expand Table 14.37. Application Ingress load balancer Port Back-end machines (pool members) Internal External Description 443The machines that run the Ingress router pods, compute, or worker, by default.
X
X
HTTPS traffic
80The machines that run the Ingress router pods, compute, or worker, by default.
X
X
HTTP traffic
If the true IP address of the client can be seen by the load balancer, enabling source IP-based session persistence can improve performance for applications that use end-to-end TLS encryption.
A working configuration for the Ingress router is required for an OpenShift Container Platform cluster. You must configure the Ingress router after the control plane initializes.
Ethernet adaptor hardware address requirements
When provisioning VMs for the cluster, the ethernet interfaces configured for each VM must use a MAC address from the VMware Organizationally Unique Identifier (OUI) allocation ranges:
-
00:05:69:00:00:00to00:05:69:FF:FF:FF -
00:0c:29:00:00:00to00:0c:29:FF:FF:FF -
00:1c:14:00:00:00to00:1c:14:FF:FF:FF -
00:50:56:00:00:00to00:50:56:FF:FF:FF
If a MAC address outside the VMware OUI is used, the cluster installation will not succeed.
NTP configuration
OpenShift Container Platform clusters are configured to use a public Network Time Protocol (NTP) server by default. If you want to use a local enterprise NTP server, or if your cluster is being deployed in a disconnected network, you can configure the cluster to use a specific time server. For more information, see the documentation for Configuring chrony time service.
14.4.5.2. User-provisioned DNS requirements
DNS is used for name resolution and reverse name resolution. DNS A/AAAA or CNAME records are used for name resolution and PTR records are used for reverse name resolution. The reverse records are important because Red Hat Enterprise Linux CoreOS (RHCOS) uses the reverse records to set the host name for all the nodes. Additionally, the reverse records are used to generate the certificate signing requests (CSR) that OpenShift Container Platform needs to operate.
The following DNS records are required for an OpenShift Container Platform cluster that uses user-provisioned infrastructure. In each record, <cluster_name> is the cluster name and <base_domain> is the cluster base domain that you specify in the install-config.yaml file. A complete DNS record takes the form: <component>.<cluster_name>.<base_domain>..
| Component | Record | Description |
|---|---|---|
| Kubernetes API |
| Add a DNS A/AAAA or CNAME record, and a DNS PTR record, to identify the load balancer for the control plane machines. These records must be resolvable by both clients external to the cluster and from all the nodes within the cluster. |
|
| Add a DNS A/AAAA or CNAME record, and a DNS PTR record, to identify the load balancer for the control plane machines. These records must be resolvable from all the nodes within the cluster. Important The API server must be able to resolve the worker nodes by the host names that are recorded in Kubernetes. If the API server cannot resolve the node names, then proxied API calls can fail, and you cannot retrieve logs from pods. | |
| Routes |
| Add a wildcard DNS A/AAAA or CNAME record that refers to the load balancer that targets the machines that run the Ingress router pods, which are the worker nodes by default. These records must be resolvable by both clients external to the cluster and from all the nodes within the cluster. |
| Bootstrap |
| Add a DNS A/AAAA or CNAME record, and a DNS PTR record, to identify the bootstrap machine. These records must be resolvable by the nodes within the cluster. |
| Master hosts |
| DNS A/AAAA or CNAME records and DNS PTR records to identify each machine for the control plane nodes (also known as the master nodes). These records must be resolvable by the nodes within the cluster. |
| Worker hosts |
| Add DNS A/AAAA or CNAME records and DNS PTR records to identify each machine for the worker nodes. These records must be resolvable by the nodes within the cluster. |
You can use the nslookup <hostname> command to verify name resolution. You can use the dig -x <ip_address> command to verify reverse name resolution for the PTR records.
The following example of a BIND zone file shows sample A records for name resolution. The purpose of the example is to show the records that are needed. The example is not meant to provide advice for choosing one name resolution service over another.
Example 14.7. Sample DNS zone database
$TTL 1W
@ IN SOA ns1.example.com. root (
2019070700 ; serial
3H ; refresh (3 hours)
30M ; retry (30 minutes)
2W ; expiry (2 weeks)
1W ) ; minimum (1 week)
IN NS ns1.example.com.
IN MX 10 smtp.example.com.
;
;
ns1 IN A 192.168.1.5
smtp IN A 192.168.1.5
;
helper IN A 192.168.1.5
helper.ocp4 IN A 192.168.1.5
;
; The api identifies the IP of your load balancer.
api.ocp4 IN A 192.168.1.5
api-int.ocp4 IN A 192.168.1.5
;
; The wildcard also identifies the load balancer.
*.apps.ocp4 IN A 192.168.1.5
;
; Create an entry for the bootstrap host.
bootstrap.ocp4 IN A 192.168.1.96
;
; Create entries for the master hosts.
master0.ocp4 IN A 192.168.1.97
master1.ocp4 IN A 192.168.1.98
master2.ocp4 IN A 192.168.1.99
;
; Create entries for the worker hosts.
worker0.ocp4 IN A 192.168.1.11
worker1.ocp4 IN A 192.168.1.7
;
;EOFThe following example BIND zone file shows sample PTR records for reverse name resolution.
Example 14.8. Sample DNS zone database for reverse records
$TTL 1W
@ IN SOA ns1.example.com. root (
2019070700 ; serial
3H ; refresh (3 hours)
30M ; retry (30 minutes)
2W ; expiry (2 weeks)
1W ) ; minimum (1 week)
IN NS ns1.example.com.
;
; The syntax is "last octet" and the host must have an FQDN
; with a trailing dot.
97 IN PTR master0.ocp4.example.com.
98 IN PTR master1.ocp4.example.com.
99 IN PTR master2.ocp4.example.com.
;
96 IN PTR bootstrap.ocp4.example.com.
;
5 IN PTR api.ocp4.example.com.
5 IN PTR api-int.ocp4.example.com.
;
11 IN PTR worker0.ocp4.example.com.
7 IN PTR worker1.ocp4.example.com.
;
;EOF14.4.6. Generating an SSH private key and adding it to the agent
If you want to perform installation debugging or disaster recovery on your cluster, you must provide an SSH key to both your ssh-agent and the installation program. You can use this key to access the bootstrap machine in a public cluster to troubleshoot installation issues.
In a production environment, you require disaster recovery and debugging.
Do not skip this procedure in production environments where disaster recovery and debugging is required.
You can use this key to SSH into the master nodes as the user core. When you deploy the cluster, the key is added to the core user’s ~/.ssh/authorized_keys list.
Procedure
If you do not have an SSH key that is configured for password-less authentication on your computer, create one. For example, on a computer that uses a Linux operating system, run the following command:
$ ssh-keygen -t ed25519 -N '' \ -f <path>/<file_name>1 - 1
- Specify the path and file name, such as
~/.ssh/id_rsa, of the new SSH key. If you have an existing key pair, ensure your public key is in the your~/.sshdirectory.
Running this command generates an SSH key that does not require a password in the location that you specified.
NoteIf you plan to install an OpenShift Container Platform cluster that uses FIPS Validated / Modules in Process cryptographic libraries on the
x86_64architecture, do not create a key that uses theed25519algorithm. Instead, create a key that uses thersaorecdsaalgorithm.Start the
ssh-agentprocess as a background task:$ eval "$(ssh-agent -s)"Example output
Agent pid 31874NoteIf your cluster is in FIPS mode, only use FIPS-compliant algorithms to generate the SSH key. The key must be either RSA or ECDSA.
Add your SSH private key to the
ssh-agent:$ ssh-add <path>/<file_name>1 Example output
Identity added: /home/<you>/<path>/<file_name> (<computer_name>)- 1
- Specify the path and file name for your SSH private key, such as
~/.ssh/id_rsa
Next steps
- When you install OpenShift Container Platform, provide the SSH public key to the installation program. If you install a cluster on infrastructure that you provision, you must provide this key to your cluster’s machines.
14.4.7. Obtaining the installation program
Before you install OpenShift Container Platform, download the installation file on your provisioning machine.
Prerequisites
- You have a machine that runs Linux, for example Red Hat Enterprise Linux 8, with 500 MB of local disk space
Procedure
- Access the Infrastructure Provider page on the OpenShift Cluster Manager site. If you have a Red Hat account, log in with your credentials. If you do not, create an account.
- Select your infrastructure provider.
Navigate to the page for your installation type, download the installation program for your operating system, and place the file in the directory where you will store the installation configuration files.
ImportantThe installation program creates several files on the computer that you use to install your cluster. You must keep the installation program and the files that the installation program creates after you finish installing the cluster. Both files are required to delete the cluster.
ImportantDeleting the files created by the installation program does not remove your cluster, even if the cluster failed during installation. To remove your cluster, complete the OpenShift Container Platform uninstallation procedures for your specific cloud provider.
Extract the installation program. For example, on a computer that uses a Linux operating system, run the following command:
$ tar xvf openshift-install-linux.tar.gz- Download your installation pull secret from the Red Hat OpenShift Cluster Manager. This pull secret allows you to authenticate with the services that are provided by the included authorities, including Quay.io, which serves the container images for OpenShift Container Platform components.
14.4.8. Manually creating the installation configuration file
For installations of OpenShift Container Platform that use user-provisioned infrastructure, you manually generate your installation configuration file.
Prerequisites
- Obtain the OpenShift Container Platform installation program and the access token for your cluster.
Procedure
Create an installation directory to store your required installation assets in:
$ mkdir <installation_directory>ImportantYou must create a directory. Some installation assets, like bootstrap X.509 certificates have short expiration intervals, so you must not reuse an installation directory. If you want to reuse individual files from another cluster installation, you can copy them into your directory. However, the file names for the installation assets might change between releases. Use caution when copying installation files from an earlier OpenShift Container Platform version.
Customize the following
install-config.yamlfile template and save it in the<installation_directory>.NoteYou must name this configuration file
install-config.yaml.Back up the
install-config.yamlfile so that you can use it to install multiple clusters.ImportantThe
install-config.yamlfile is consumed during the next step of the installation process. You must back it up now.
14.4.8.1. Sample install-config.yaml file for VMware vSphere
You can customize the install-config.yaml file to specify more details about your OpenShift Container Platform cluster’s platform or modify the values of the required parameters.
apiVersion: v1
baseDomain: example.com
compute:
- hyperthreading: Enabled
name: worker
replicas: 0
controlPlane:
hyperthreading: Enabled
name: master
replicas: 3
metadata:
name: test
platform:
vsphere:
vcenter: your.vcenter.server
username: username
password: password
datacenter: datacenter
defaultDatastore: datastore
folder: "/<datacenter_name>/vm/<folder_name>/<subfolder_name>"
fips: false
pullSecret: '{"auths": ...}'
sshKey: 'ssh-ed25519 AAAA...' - 1
- The base domain of the cluster. All DNS records must be sub-domains of this base and include the cluster name.
- 2 5
- The
controlPlanesection is a single mapping, but the compute section is a sequence of mappings. To meet the requirements of the different data structures, the first line of thecomputesection must begin with a hyphen,-, and the first line of thecontrolPlanesection must not. Although both sections currently define a single machine pool, it is possible that future versions of OpenShift Container Platform will support defining multiple compute pools during installation. Only one control plane pool is used. - 3 6
- Whether to enable or disable simultaneous multithreading, or
hyperthreading. By default, simultaneous multithreading is enabled to increase the performance of your machines' cores. You can disable it by setting the parameter value toDisabled. If you disable simultaneous multithreading in some cluster machines, you must disable it in all cluster machines.ImportantIf you disable simultaneous multithreading, ensure that your capacity planning accounts for the dramatically decreased machine performance. Your machines must use at least 8 CPUs and 32 GB of RAM if you disable simultaneous multithreading.
- 4
- You must set the value of the
replicasparameter to0. This parameter controls the number of workers that the cluster creates and manages for you, which are functions that the cluster does not perform when you use user-provisioned infrastructure. You must manually deploy worker machines for the cluster to use before you finish installing OpenShift Container Platform. - 7
- The number of control plane machines that you add to the cluster. Because the cluster uses this values as the number of etcd endpoints in the cluster, the value must match the number of control plane machines that you deploy.
- 8
- The cluster name that you specified in your DNS records.
- 9
- The fully-qualified hostname or IP address of the vCenter server.
- 10
- The name of the user for accessing the server. This user must have at least the roles and privileges that are required for static or dynamic persistent volume provisioning in vSphere.
- 11
- The password associated with the vSphere user.
- 12
- The vSphere datacenter.
- 13
- The default vSphere datastore to use.
- 14
- Optional: For installer-provisioned infrastructure, the absolute path of an existing folder where the installation program creates the virtual machines, for example,
/<datacenter_name>/vm/<folder_name>/<subfolder_name>. If you do not provide this value, the installation program creates a top-level folder in the datacenter virtual machine folder that is named with the infrastructure ID. If you are providing the infrastructure for the cluster, omit this parameter. - 15
- Whether to enable or disable FIPS mode. By default, FIPS mode is not enabled. If FIPS mode is enabled, the Red Hat Enterprise Linux CoreOS (RHCOS) machines that OpenShift Container Platform runs on bypass the default Kubernetes cryptography suite and use the cryptography modules that are provided with RHCOS instead.Important
The use of FIPS Validated / Modules in Process cryptographic libraries is only supported on OpenShift Container Platform deployments on the
x86_64architecture. - 16
- The pull secret that you obtained from OpenShift Cluster Manager. This pull secret allows you to authenticate with the services that are provided by the included authorities, including Quay.io, which serves the container images for OpenShift Container Platform components.
- 17
- The public portion of the default SSH key for the
coreuser in Red Hat Enterprise Linux CoreOS (RHCOS).
14.4.8.2. Configuring the cluster-wide proxy during installation
Production environments can deny direct access to the Internet and instead have an HTTP or HTTPS proxy available. You can configure a new OpenShift Container Platform cluster to use a proxy by configuring the proxy settings in the install-config.yaml file.
Prerequisites
-
You have an existing
install-config.yamlfile. You reviewed the sites that your cluster requires access to and determined whether any of them need to bypass the proxy. By default, all cluster egress traffic is proxied, including calls to hosting cloud provider APIs. You added sites to the
Proxyobject’sspec.noProxyfield to bypass the proxy if necessary.NoteThe
Proxyobjectstatus.noProxyfield is populated with the values of thenetworking.machineNetwork[].cidr,networking.clusterNetwork[].cidr, andnetworking.serviceNetwork[]fields from your installation configuration.For installations on Amazon Web Services (AWS), Google Cloud Platform (GCP), Microsoft Azure, and Red Hat OpenStack Platform (RHOSP), the
Proxyobjectstatus.noProxyfield is also populated with the instance metadata endpoint (169.254.169.254).
Procedure
Edit your
install-config.yamlfile and add the proxy settings. For example:apiVersion: v1 baseDomain: my.domain.com proxy: httpProxy: http://<username>:<pswd>@<ip>:<port>1 httpsProxy: https://<username>:<pswd>@<ip>:<port>2 noProxy: example.com3 additionalTrustBundle: |4 -----BEGIN CERTIFICATE----- <MY_TRUSTED_CA_CERT> -----END CERTIFICATE----- ...- 1
- A proxy URL to use for creating HTTP connections outside the cluster. The URL scheme must be
http. - 2
- A proxy URL to use for creating HTTPS connections outside the cluster.
- 3
- A comma-separated list of destination domain names, IP addresses, or other network CIDRs to exclude from proxying. Preface a domain with
.to match subdomains only. For example,.y.commatchesx.y.com, but noty.com. Use*to bypass the proxy for all destinations. You must include vCenter’s IP address and the IP range that you use for its machines. - 4
- If provided, the installation program generates a config map that is named
user-ca-bundlein theopenshift-confignamespace to hold the additional CA certificates. If you provideadditionalTrustBundleand at least one proxy setting, theProxyobject is configured to reference theuser-ca-bundleconfig map in thetrustedCAfield. The Cluster Network Operator then creates atrusted-ca-bundleconfig map that merges the contents specified for thetrustedCAparameter with the RHCOS trust bundle. TheadditionalTrustBundlefield is required unless the proxy’s identity certificate is signed by an authority from the RHCOS trust bundle.
NoteThe installation program does not support the proxy
readinessEndpointsfield.- Save the file and reference it when installing OpenShift Container Platform.
The installation program creates a cluster-wide proxy that is named cluster that uses the proxy settings in the provided install-config.yaml file. If no proxy settings are provided, a cluster Proxy object is still created, but it will have a nil spec.
Only the Proxy object named cluster is supported, and no additional proxies can be created.
14.4.9. Creating the Kubernetes manifest and Ignition config files
Because you must modify some cluster definition files and manually start the cluster machines, you must generate the Kubernetes manifest and Ignition config files that the cluster needs to make its machines.
The installation configuration file transforms into the Kubernetes manifests. The manifests wrap into the Ignition configuration files, which are later used to create the cluster.
The Ignition config files that the installation program generates contain certificates that expire after 24 hours, which are then renewed at that time. If the cluster is shut down before renewing the certificates and the cluster is later restarted after the 24 hours have elapsed, the cluster automatically recovers the expired certificates. The exception is that you must manually approve the pending node-bootstrapper certificate signing requests (CSRs) to recover kubelet certificates. See the documentation for Recovering from expired control plane certificates for more information.
The installation program that generates the manifest and Ignition files is architecture specific and can be obtained from the client image mirror. The Linux version of the installation program runs on s390x only. This installer program is also available as a Mac OS version.
Prerequisites
- You obtained the OpenShift Container Platform installation program.
-
You created the
install-config.yamlinstallation configuration file.
Procedure
Change to the directory that contains the installation program and generate the Kubernetes manifests for the cluster:
$ ./openshift-install create manifests --dir <installation_directory>1 - 1
- For
<installation_directory>, specify the installation directory that contains theinstall-config.yamlfile you created.
Remove the Kubernetes manifest files that define the control plane machines and compute machine sets:
$ rm -f openshift/99_openshift-cluster-api_master-machines-*.yaml openshift/99_openshift-cluster-api_worker-machineset-*.yamlBecause you create and manage these resources yourself, you do not have to initialize them.
- You can preserve the machine set files to create compute machines by using the machine API, but you must update references to them to match your environment.
WarningIf you are installing a three-node cluster, skip the following step to allow the control plane nodes to be schedulable.
+
ImportantWhen you configure control plane nodes from the default unschedulable to schedulable, additional subscriptions are required. This is because control plane nodes then become worker nodes.
Check that the
mastersSchedulableparameter in the<installation_directory>/manifests/cluster-scheduler-02-config.ymlKubernetes manifest file is set tofalse. This setting prevents pods from being scheduled on the control plane machines:-
Open the
<installation_directory>/manifests/cluster-scheduler-02-config.ymlfile. -
Locate the
mastersSchedulableparameter and ensure that it is set tofalse. - Save and exit the file.
-
Open the
To create the Ignition configuration files, run the following command from the directory that contains the installation program:
$ ./openshift-install create ignition-configs --dir <installation_directory>1 - 1
- For
<installation_directory>, specify the same installation directory.
The following files are generated in the directory:
. ├── auth │ ├── kubeadmin-password │ └── kubeconfig ├── bootstrap.ign ├── master.ign ├── metadata.json └── worker.ign
14.4.10. Extracting the infrastructure name
The Ignition config files contain a unique cluster identifier that you can use to uniquely identify your cluster in VMware vSphere. If you plan to use the cluster identifier as the name of your virtual machine folder, you must extract it.
Prerequisites
- You obtained the OpenShift Container Platform installation program and the pull secret for your cluster.
- You generated the Ignition config files for your cluster.
-
You installed the
jqpackage.
Procedure
To extract and view the infrastructure name from the Ignition config file metadata, run the following command:
$ jq -r .infraID <installation_directory>/metadata.json1 - 1
- For
<installation_directory>, specify the path to the directory that you stored the installation files in.
Example output
openshift-vw9j61 - 1
- The output of this command is your cluster name and a random string.
14.4.11. Creating Red Hat Enterprise Linux CoreOS (RHCOS) machines in vSphere
Before you install a cluster that contains user-provisioned infrastructure on VMware vSphere, you must create RHCOS machines on vSphere hosts for it to use.
Prerequisites
- You have obtained the Ignition config files for your cluster.
- You have access to an HTTP server that you can access from your computer and that the machines that you create can access.
- You have created a vSphere cluster.
Procedure
-
Upload the bootstrap Ignition config file, which is named
<installation_directory>/bootstrap.ign, that the installation program created to your HTTP server. Note the URL of this file. Save the following secondary Ignition config file for your bootstrap node to your computer as
<installation_directory>/merge-bootstrap.ign:{ "ignition": { "config": { "merge": [ { "source": "<bootstrap_ignition_config_url>",1 "verification": {} } ] }, "timeouts": {}, "version": "3.2.0" }, "networkd": {}, "passwd": {}, "storage": {}, "systemd": {} }- 1
- Specify the URL of the bootstrap Ignition config file that you hosted.
When you create the virtual machine (VM) for the bootstrap machine, you use this Ignition config file.
Locate the following Ignition config files that the installation program created:
-
<installation_directory>/master.ign -
<installation_directory>/worker.ign -
<installation_directory>/merge-bootstrap.ign
-
Convert the Ignition config files to Base64 encoding. Later in this procedure, you must add these files to the extra configuration parameter
guestinfo.ignition.config.datain your VM.For example, if you use a Linux operating system, you can use the
base64command to encode the files.$ base64 -w0 <installation_directory>/master.ign > <installation_directory>/master.64$ base64 -w0 <installation_directory>/worker.ign > <installation_directory>/worker.64$ base64 -w0 <installation_directory>/merge-bootstrap.ign > <installation_directory>/merge-bootstrap.64ImportantIf you plan to add more compute machines to your cluster after you finish installation, do not delete these files.
Obtain the RHCOS OVA image. Images are available from the RHCOS image mirror page.
ImportantThe RHCOS images might not change with every release of OpenShift Container Platform. You must download an image with the highest version that is less than or equal to the OpenShift Container Platform version that you install. Use the image version that matches your OpenShift Container Platform version if it is available.
The filename contains the OpenShift Container Platform version number in the format
rhcos-vmware.<architecture>.ova.In the vSphere Client, create a folder in your datacenter to store your VMs.
- Click the VMs and Templates view.
- Right-click the name of your datacenter.
- Click New Folder → New VM and Template Folder.
-
In the window that is displayed, enter the folder name. If you did not specify an existing folder in the
install-config.yamlfile, then create a folder with the same name as the infrastructure ID. You use this folder name so vCenter dynamically provisions storage in the appropriate location for its Workspace configuration.
In the vSphere Client, create a template for the OVA image and then clone the template as needed.
NoteIn the following steps, you create a template and then clone the template for all of your cluster machines. You then provide the location for the Ignition config file for that cloned machine type when you provision the VMs.
- From the Hosts and Clusters tab, right-click your cluster name and select Deploy OVF Template.
- On the Select an OVF tab, specify the name of the RHCOS OVA file that you downloaded.
-
On the Select a name and folder tab, set a Virtual machine name for your template, such as
Template-RHCOS. Click the name of your vSphere cluster and select the folder you created in the previous step. - On the Select a compute resource tab, click the name of your vSphere cluster.
On the Select storage tab, configure the storage options for your VM.
- Select Thin Provision or Thick Provision, based on your storage preferences.
-
Select the datastore that you specified in your
install-config.yamlfile.
- On the Select network tab, specify the network that you configured for the cluster, if available.
When creating the OVF template, do not specify values on the Customize template tab or configure the template any further.
ImportantDo not start the original VM template. The VM template must remain off and must be cloned for new RHCOS machines. Starting the VM template configures the VM template as a VM on the platform, which prevents it from being used as a template that machine sets can apply configurations to.
After the template deploys, deploy a VM for a machine in the cluster.
- Right-click the template name and click Clone → Clone to Virtual Machine.
-
On the Select a name and folder tab, specify a name for the VM. You might include the machine type in the name, such as
control-plane-0orcompute-1. - On the Select a name and folder tab, select the name of the folder that you created for the cluster.
- On the Select a compute resource tab, select the name of a host in your datacenter.
- Optional: On the Select storage tab, customize the storage options.
- On the Select clone options, select Customize this virtual machine’s hardware.
On the Customize hardware tab, click VM Options → Advanced.
Optional: Override default DHCP networking in vSphere. To enable static IP networking:
Set your static IP configuration:
$ export IPCFG="ip=<ip>::<gateway>:<netmask>:<hostname>:<iface>:none nameserver=srv1 [nameserver=srv2 [nameserver=srv3 [...]]]"Example command
$ export IPCFG="ip=192.168.100.101::192.168.100.254:255.255.255.0:::none nameserver=8.8.8.8"Set the
guestinfo.afterburn.initrd.network-kargsproperty before booting a VM from an OVA in vSphere:$ govc vm.change -vm "<vm_name>" -e "guestinfo.afterburn.initrd.network-kargs=${IPCFG}"
Optional: In the event of cluster performance issues, from the Latency Sensitivity list, select High. Ensure that your VM’s CPU and memory reservation have the following values:
- Memory reservation value must be equal to its configured memory size.
- CPU reservation value must be at least the number of low latency virtual CPUs multiplied by the measured physical CPU speed.
Click Edit Configuration, and on the Configuration Parameters window, click Add Configuration Params. Define the following parameter names and values:
-
guestinfo.ignition.config.data: Locate the base-64 encoded files that you created previously in this procedure, and paste the contents of the base64-encoded Ignition config file for this machine type. -
guestinfo.ignition.config.data.encoding: Specifybase64. -
disk.EnableUUID: SpecifyTRUE.
-
- In the Virtual Hardware panel of the Customize hardware tab, modify the specified values as required. Ensure that the amount of RAM, CPU, and disk storage meets the minimum requirements for the machine type.
- Complete the configuration and power on the VM.
Create the rest of the machines for your cluster by following the preceding steps for each machine.
ImportantYou must create the bootstrap and control plane machines at this time. Because some pods are deployed on compute machines by default, also create at least two compute machines before you install the cluster.
14.4.12. Creating more Red Hat Enterprise Linux CoreOS (RHCOS) machines in vSphere
You can create more compute machines for your cluster that uses user-provisioned infrastructure on VMware vSphere.
Prerequisites
- Obtain the base64-encoded Ignition file for your compute machines.
- You have access to the vSphere template that you created for your cluster.
Procedure
After the template deploys, deploy a VM for a machine in the cluster.
- Right-click the template’s name and click Clone → Clone to Virtual Machine.
-
On the Select a name and folder tab, specify a name for the VM. You might include the machine type in the name, such as
compute-1. - On the Select a name and folder tab, select the name of the folder that you created for the cluster.
- On the Select a compute resource tab, select the name of a host in your datacenter.
- Optional: On the Select storage tab, customize the storage options.
- On the Select clone options, select Customize this virtual machine’s hardware.
On the Customize hardware tab, click VM Options → Advanced.
- From the Latency Sensitivity list, select High.
Click Edit Configuration, and on the Configuration Parameters window, click Add Configuration Params. Define the following parameter names and values:
-
guestinfo.ignition.config.data: Paste the contents of the base64-encoded compute Ignition config file for this machine type. -
guestinfo.ignition.config.data.encoding: Specifybase64. -
disk.EnableUUID: SpecifyTRUE.
-
- In the Virtual Hardware panel of the Customize hardware tab, modify the specified values as required. Ensure that the amount of RAM, CPU, and disk storage meets the minimum requirements for the machine type. Also, make sure to select the correct network under Add network adapter if there are multiple networks available.
- Complete the configuration and power on the VM.
- Continue to create more compute machines for your cluster.
14.4.13. Disk partitioning
In most cases, data partitions are originally created by installing RHCOS, rather than by installing another operating system. In such cases, the OpenShift Container Platform installer should be allowed to configure your disk partitions.
However, there are two cases where you might want to intervene to override the default partitioning when installing an OpenShift Container Platform node:
Create separate partitions: For greenfield installations on an empty disk, you might want to add separate storage to a partition. This is officially supported for making
/varor a subdirectory of/var, such as/var/lib/etcd, a separate partition, but not both.ImportantKubernetes supports only two filesystem partitions. If you add more than one partition to the original configuration, Kubernetes cannot monitor all of them.
-
Retain existing partitions: For a brownfield installation where you are reinstalling OpenShift Container Platform on an existing node and want to retain data partitions installed from your previous operating system, there are both boot arguments and options to
coreos-installerthat allow you to retain existing data partitions.
Creating a separate /var partition
In general, disk partitioning for OpenShift Container Platform should be left to the installer. However, there are cases where you might want to create separate partitions in a part of the filesystem that you expect to grow.
OpenShift Container Platform supports the addition of a single partition to attach storage to either the /var partition or a subdirectory of /var. For example:
-
/var/lib/containers: Holds container-related content that can grow as more images and containers are added to a system. -
/var/lib/etcd: Holds data that you might want to keep separate for purposes such as performance optimization of etcd storage. -
/var: Holds data that you might want to keep separate for purposes such as auditing.
Storing the contents of a /var directory separately makes it easier to grow storage for those areas as needed and reinstall OpenShift Container Platform at a later date and keep that data intact. With this method, you will not have to pull all your containers again, nor will you have to copy massive log files when you update systems.
Because /var must be in place before a fresh installation of Red Hat Enterprise Linux CoreOS (RHCOS), the following procedure sets up the separate /var partition by creating a machine config that is inserted during the openshift-install preparation phases of an OpenShift Container Platform installation.
Procedure
Create a directory to hold the OpenShift Container Platform installation files:
$ mkdir $HOME/clusterconfigRun
openshift-installto create a set of files in themanifestandopenshiftsubdirectories. Answer the system questions as you are prompted:$ openshift-install create manifests --dir $HOME/clusterconfig ? SSH Public Key ... $ ls $HOME/clusterconfig/openshift/ 99_kubeadmin-password-secret.yaml 99_openshift-cluster-api_master-machines-0.yaml 99_openshift-cluster-api_master-machines-1.yaml 99_openshift-cluster-api_master-machines-2.yaml ...Create a
MachineConfigobject and add it to a file in theopenshiftdirectory. For example, name the file98-var-partition.yaml, change the disk device name to the name of the storage device on theworkersystems, and set the storage size as appropriate. This example places the/vardirectory on a separate partition:apiVersion: machineconfiguration.openshift.io/v1 kind: MachineConfig metadata: labels: machineconfiguration.openshift.io/role: worker name: 98-var-partition spec: config: ignition: version: 3.2.0 storage: disks: - device: /dev/<device_name>1 partitions: - label: var startMiB: <partition_start_offset>2 sizeMiB: <partition_size>3 filesystems: - device: /dev/disk/by-partlabel/var path: /var format: xfs systemd: units: - name: var.mount4 enabled: true contents: | [Unit] Before=local-fs.target [Mount] What=/dev/disk/by-partlabel/var Where=/var Options=defaults,prjquota5 [Install] WantedBy=local-fs.target- 1
- The storage device name of the disk that you want to partition.
- 2
- When adding a data partition to the boot disk, a minimum value of 25000 mebibytes is recommended. The root file system is automatically resized to fill all available space up to the specified offset. If no value is specified, or if the specified value is smaller than the recommended minimum, the resulting root file system will be too small, and future reinstalls of RHCOS might overwrite the beginning of the data partition.
- 3
- The size of the data partition in mebibytes.
- 4
- The name of the mount unit must match the directory specified in the
Where=directive. For example, for a filesystem mounted on/var/lib/containers, the unit must be namedvar-lib-containers.mount. - 5
- The
prjquotamount option must be enabled for filesystems used for container storage.
NoteWhen creating a separate
/varpartition, you cannot use different instance types for worker nodes, if the different instance types do not have the same device name.Run
openshift-installagain to create Ignition configs from a set of files in themanifestandopenshiftsubdirectories:$ openshift-install create ignition-configs --dir $HOME/clusterconfig $ ls $HOME/clusterconfig/ auth bootstrap.ign master.ign metadata.json worker.ign
Now you can use the Ignition config files as input to the vSphere installation procedures to install Red Hat Enterprise Linux CoreOS (RHCOS) systems.
14.4.14. Updating the bootloader using bootupd
To update the bootloader by using bootupd, you must either install bootupd on RHCOS machines manually or provide a machine config with the enabled systemd unit. Unlike grubby or other bootloader tools, bootupd does not manage kernel space configuration such as passing kernel arguments.
After you have installed bootupd, you can manage it remotely from the OpenShift Container Platform cluster.
It is recommended that you use bootupd only on bare metal or virtualized hypervisor installations, such as for protection against the BootHole vulnerability.
Manual install method
You can manually install bootupd by using the bootctl command-line tool.
Inspect the system status:
# bootupctl statusExample output
Component EFI Installed: grub2-efi-x64-1:2.04-31.fc33.x86_64,shim-x64-15-8.x86_64 Update: At latest version
RHCOS images created without
bootupdinstalled on them require an explicit adoption phase.If the system status is
Adoptable, perform the adoption:# bootupctl adopt-and-updateExample output
Updated: grub2-efi-x64-1:2.04-31.fc33.x86_64,shim-x64-15-8.x86_64If an update is available, apply the update so that the changes take effect on the next reboot:
# bootupctl updateExample output
Updated: grub2-efi-x64-1:2.04-31.fc33.x86_64,shim-x64-15-8.x86_64
Machine config method
Another way to enable bootupd is by providing a machine config.
Provide a machine config file with the enabled
systemdunit, as shown in the following example:Example output
variant: rhcos version: 1.1.0 systemd: units: - name: custom-bootupd-auto.service enabled: true contents: | [Unit] Description=Bootupd automatic update [Service] ExecStart=/usr/bin/bootupctl update RemainAfterExit=yes [Install] WantedBy=multi-user.target
14.4.15. Installing the OpenShift CLI by downloading the binary
You can install the OpenShift CLI (oc) to interact with OpenShift Container Platform from a command-line interface. You can install oc on Linux, Windows, or macOS.
If you installed an earlier version of oc, you cannot use it to complete all of the commands in OpenShift Container Platform 4.7. Download and install the new version of oc.
14.4.15.1. Installing the OpenShift CLI on Linux
You can install the OpenShift CLI (oc) binary on Linux by using the following procedure.
Procedure
- Navigate to the OpenShift Container Platform downloads page on the Red Hat Customer Portal.
- Select the appropriate version in the Version drop-down menu.
- Click Download Now next to the OpenShift v4.7 Linux Client entry and save the file.
Unpack the archive:
$ tar xvzf <file>Place the
ocbinary in a directory that is on yourPATH.To check your
PATH, execute the following command:$ echo $PATH
After you install the OpenShift CLI, it is available using the oc command:
$ oc <command>14.4.15.2. Installing the OpenShift CLI on Windows
You can install the OpenShift CLI (oc) binary on Windows by using the following procedure.
Procedure
- Navigate to the OpenShift Container Platform downloads page on the Red Hat Customer Portal.
- Select the appropriate version in the Version drop-down menu.
- Click Download Now next to the OpenShift v4.7 Windows Client entry and save the file.
- Unzip the archive with a ZIP program.
Move the
ocbinary to a directory that is on yourPATH.To check your
PATH, open the command prompt and execute the following command:C:\> path
After you install the OpenShift CLI, it is available using the oc command:
C:\> oc <command>14.4.15.3. Installing the OpenShift CLI on macOS
You can install the OpenShift CLI (oc) binary on macOS by using the following procedure.
Procedure
- Navigate to the OpenShift Container Platform downloads page on the Red Hat Customer Portal.
- Select the appropriate version in the Version drop-down menu.
- Click Download Now next to the OpenShift v4.7 MacOSX Client entry and save the file.
- Unpack and unzip the archive.
Move the
ocbinary to a directory on your PATH.To check your
PATH, open a terminal and execute the following command:$ echo $PATH
After you install the OpenShift CLI, it is available using the oc command:
$ oc <command>14.4.16. Creating the cluster
To create the OpenShift Container Platform cluster, you wait for the bootstrap process to complete on the machines that you provisioned by using the Ignition config files that you generated with the installation program.
Prerequisites
- Create the required infrastructure for the cluster.
- You obtained the installation program and generated the Ignition config files for your cluster.
- You used the Ignition config files to create RHCOS machines for your cluster.
- Your machines have direct Internet access or have an HTTP or HTTPS proxy available.
Procedure
Monitor the bootstrap process:
$ ./openshift-install --dir <installation_directory> wait-for bootstrap-complete \1 --log-level=info2 Example output
INFO Waiting up to 30m0s for the Kubernetes API at https://api.test.example.com:6443... INFO API v1.20.0 up INFO Waiting up to 30m0s for bootstrapping to complete... INFO It is now safe to remove the bootstrap resourcesThe command succeeds when the Kubernetes API server signals that it has been bootstrapped on the control plane machines.
After bootstrap process is complete, remove the bootstrap machine from the load balancer.
ImportantYou must remove the bootstrap machine from the load balancer at this point. You can also remove or reformat the machine itself.
14.4.17. Logging in to the cluster by using the CLI
You can log in to your cluster as a default system user by exporting the cluster kubeconfig file. The kubeconfig file contains information about the cluster that is used by the CLI to connect a client to the correct cluster and API server. The file is specific to a cluster and is created during OpenShift Container Platform installation.
Prerequisites
- You deployed an OpenShift Container Platform cluster.
-
You installed the
ocCLI.
Procedure
Export the
kubeadmincredentials:$ export KUBECONFIG=<installation_directory>/auth/kubeconfig1 - 1
- For
<installation_directory>, specify the path to the directory that you stored the installation files in.
Verify you can run
occommands successfully using the exported configuration:$ oc whoamiExample output
system:admin
14.4.18. Approving the certificate signing requests for your machines
When you add machines to a cluster, two pending certificate signing requests (CSRs) are generated for each machine that you added. You must confirm that these CSRs are approved or, if necessary, approve them yourself. The client requests must be approved first, followed by the server requests.
Prerequisites
- You added machines to your cluster.
Procedure
Confirm that the cluster recognizes the machines:
$ oc get nodesExample output
NAME STATUS ROLES AGE VERSION master-0 Ready master 63m v1.20.0 master-1 Ready master 63m v1.20.0 master-2 Ready master 64m v1.20.0The output lists all of the machines that you created.
NoteThe preceding output might not include the compute nodes, also known as worker nodes, until some CSRs are approved.
Review the pending CSRs and ensure that you see the client requests with the
PendingorApprovedstatus for each machine that you added to the cluster:$ oc get csrExample output
NAME AGE REQUESTOR CONDITION csr-mddf5 20m system:node:master-01.example.com Approved,Issued csr-z5rln 16m system:node:worker-21.example.com Approved,IssuedIf the CSRs were not approved, after all of the pending CSRs for the machines you added are in
Pendingstatus, approve the CSRs for your cluster machines:NoteBecause the CSRs rotate automatically, approve your CSRs within an hour of adding the machines to the cluster. If you do not approve them within an hour, the certificates will rotate, and more than two certificates will be present for each node. You must approve all of these certificates. Once the client CSR is approved, the Kubelet creates a secondary CSR for the serving certificate, which requires manual approval. Then, subsequent serving certificate renewal requests are automatically approved by the
machine-approverif the Kubelet requests a new certificate with identical parameters.NoteFor clusters running on platforms that are not machine API enabled, such as bare metal and other user-provisioned infrastructure, you must implement a method of automatically approving the kubelet serving certificate requests (CSRs). If a request is not approved, then the
oc exec,oc rsh, andoc logscommands cannot succeed, because a serving certificate is required when the API server connects to the kubelet. Any operation that contacts the Kubelet endpoint requires this certificate approval to be in place. The method must watch for new CSRs, confirm that the CSR was submitted by thenode-bootstrapperservice account in thesystem:nodeorsystem:admingroups, and confirm the identity of the node.To approve them individually, run the following command for each valid CSR:
$ oc adm certificate approve <csr_name>1 - 1
<csr_name>is the name of a CSR from the list of current CSRs.
To approve all pending CSRs, run the following command:
$ oc get csr -o go-template='{{range .items}}{{if not .status}}{{.metadata.name}}{{"\n"}}{{end}}{{end}}' | xargs --no-run-if-empty oc adm certificate approveNoteSome Operators might not become available until some CSRs are approved.
Now that your client requests are approved, you must review the server requests for each machine that you added to the cluster:
$ oc get csrExample output
NAME AGE REQUESTOR CONDITION csr-bfd72 5m26s system:node:ip-10-0-50-126.us-east-2.compute.internal Pending csr-c57lv 5m26s system:node:ip-10-0-95-157.us-east-2.compute.internal Pending ...If the remaining CSRs are not approved, and are in the
Pendingstatus, approve the CSRs for your cluster machines:To approve them individually, run the following command for each valid CSR:
$ oc adm certificate approve <csr_name>1 - 1
<csr_name>is the name of a CSR from the list of current CSRs.
To approve all pending CSRs, run the following command:
$ oc get csr -o go-template='{{range .items}}{{if not .status}}{{.metadata.name}}{{"\n"}}{{end}}{{end}}' | xargs oc adm certificate approve
After all client and server CSRs have been approved, the machines have the
Readystatus. Verify this by running the following command:$ oc get nodesExample output
NAME STATUS ROLES AGE VERSION master-0 Ready master 73m v1.20.0 master-1 Ready master 73m v1.20.0 master-2 Ready master 74m v1.20.0 worker-0 Ready worker 11m v1.20.0 worker-1 Ready worker 11m v1.20.0NoteIt can take a few minutes after approval of the server CSRs for the machines to transition to the
Readystatus.
Additional information
- For more information on CSRs, see Certificate Signing Requests.
14.4.19. Initial Operator configuration
After the control plane initializes, you must immediately configure some Operators so that they all become available.
Prerequisites
- Your control plane has initialized.
Procedure
Watch the cluster components come online:
$ watch -n5 oc get clusteroperatorsExample output
NAME VERSION AVAILABLE PROGRESSING DEGRADED SINCE authentication 4.7.0 True False False 3h56m baremetal 4.7.0 True False False 29h cloud-credential 4.7.0 True False False 29h cluster-autoscaler 4.7.0 True False False 29h config-operator 4.7.0 True False False 6h39m console 4.7.0 True False False 3h59m csi-snapshot-controller 4.7.0 True False False 4h12m dns 4.7.0 True False False 4h15m etcd 4.7.0 True False False 29h image-registry 4.7.0 True False False 3h59m ingress 4.7.0 True False False 4h30m insights 4.7.0 True False False 29h kube-apiserver 4.7.0 True False False 29h kube-controller-manager 4.7.0 True False False 29h kube-scheduler 4.7.0 True False False 29h kube-storage-version-migrator 4.7.0 True False False 4h2m machine-api 4.7.0 True False False 29h machine-approver 4.7.0 True False False 6h34m machine-config 4.7.0 True False False 3h56m marketplace 4.7.0 True False False 4h2m monitoring 4.7.0 True False False 6h31m network 4.7.0 True False False 29h node-tuning 4.7.0 True False False 4h30m openshift-apiserver 4.7.0 True False False 3h56m openshift-controller-manager 4.7.0 True False False 4h36m openshift-samples 4.7.0 True False False 4h30m operator-lifecycle-manager 4.7.0 True False False 29h operator-lifecycle-manager-catalog 4.7.0 True False False 29h operator-lifecycle-manager-packageserver 4.7.0 True False False 3h59m service-ca 4.7.0 True False False 29h storage 4.7.0 True False False 4h30m- Configure the Operators that are not available.
14.4.19.1. Image registry removed during installation
On platforms that do not provide shareable object storage, the OpenShift Image Registry Operator bootstraps itself as Removed. This allows openshift-installer to complete installations on these platform types.
After installation, you must edit the Image Registry Operator configuration to switch the managementState from Removed to Managed.
The Prometheus console provides an ImageRegistryRemoved alert, for example:
"Image Registry has been removed. ImageStreamTags, BuildConfigs and DeploymentConfigs which reference ImageStreamTags may not work as expected. Please configure storage and update the config to Managed state by editing configs.imageregistry.operator.openshift.io."
14.4.19.2. Image registry storage configuration
The Image Registry Operator is not initially available for platforms that do not provide default storage. After installation, you must configure your registry to use storage so that the Registry Operator is made available.
Instructions are shown for configuring a persistent volume, which is required for production clusters. Where applicable, instructions are shown for configuring an empty directory as the storage location, which is available for only non-production clusters.
Additional instructions are provided for allowing the image registry to use block storage types by using the Recreate rollout strategy during upgrades.
14.4.19.2.1. Configuring registry storage for VMware vSphere
As a cluster administrator, following installation you must configure your registry to use storage.
Prerequisites
- Cluster administrator permissions.
- A cluster on VMware vSphere.
Persistent storage provisioned for your cluster, such as Red Hat OpenShift Container Storage.
ImportantOpenShift Container Platform supports
ReadWriteOnceaccess for image registry storage when you have only one replica. To deploy an image registry that supports high availability with two or more replicas,ReadWriteManyaccess is required.- Must have "100Gi" capacity.
Testing shows issues with using the NFS server on RHEL as storage backend for core services. This includes the OpenShift Container Registry and Quay, Prometheus for monitoring storage, and Elasticsearch for logging storage. Therefore, using RHEL NFS to back PVs used by core services is not recommended.
Other NFS implementations on the marketplace might not have these issues. Contact the individual NFS implementation vendor for more information on any testing that was possibly completed against these OpenShift Container Platform core components.
Procedure
To configure your registry to use storage, change the
spec.storage.pvcin theconfigs.imageregistry/clusterresource.NoteWhen using shared storage, review your security settings to prevent outside access.
Verify that you do not have a registry pod:
$ oc get pod -n openshift-image-registry -l docker-registry=defaultExample output
No resourses found in openshift-image-registry namespaceNoteIf you do have a registry pod in your output, you do not need to continue with this procedure.
Check the registry configuration:
$ oc edit configs.imageregistry.operator.openshift.ioExample output
storage: pvc: claim:1 - 1
- Leave the
claimfield blank to allow the automatic creation of animage-registry-storagePVC.
Check the
clusteroperatorstatus:$ oc get clusteroperator image-registryExample output
NAME VERSION AVAILABLE PROGRESSING DEGRADED SINCE MESSAGE image-registry 4.7 True False False 6h50m
14.4.19.2.2. Configuring storage for the image registry in non-production clusters
You must configure storage for the Image Registry Operator. For non-production clusters, you can set the image registry to an empty directory. If you do so, all images are lost if you restart the registry.
Procedure
To set the image registry storage to an empty directory:
$ oc patch configs.imageregistry.operator.openshift.io cluster --type merge --patch '{"spec":{"storage":{"emptyDir":{}}}}'WarningConfigure this option for only non-production clusters.
If you run this command before the Image Registry Operator initializes its components, the
oc patchcommand fails with the following error:Error from server (NotFound): configs.imageregistry.operator.openshift.io "cluster" not foundWait a few minutes and run the command again.
14.4.19.2.3. Configuring block registry storage for VMware vSphere
To allow the image registry to use block storage types such as vSphere Virtual Machine Disk (VMDK) during upgrades as a cluster administrator, you can use the Recreate rollout strategy.
Block storage volumes are supported but not recommended for use with image registry on production clusters. An installation where the registry is configured on block storage is not highly available because the registry cannot have more than one replica.
Procedure
To set the image registry storage as a block storage type, patch the registry so that it uses the
Recreaterollout strategy and runs with only1replica:$ oc patch config.imageregistry.operator.openshift.io/cluster --type=merge -p '{"spec":{"rolloutStrategy":"Recreate","replicas":1}}'Provision the PV for the block storage device, and create a PVC for that volume. The requested block volume uses the ReadWriteOnce (RWO) access mode.
Create a
pvc.yamlfile with the following contents to define a VMware vSpherePersistentVolumeClaimobject:kind: PersistentVolumeClaim apiVersion: v1 metadata: name: image-registry-storage1 namespace: openshift-image-registry2 spec: accessModes: - ReadWriteOnce3 resources: requests: storage: 100Gi4 - 1
- A unique name that represents the
PersistentVolumeClaimobject. - 2
- The namespace for the
PersistentVolumeClaimobject, which isopenshift-image-registry. - 3
- The access mode of the persistent volume claim. With
ReadWriteOnce, the volume can be mounted with read and write permissions by a single node. - 4
- The size of the persistent volume claim.
Create the
PersistentVolumeClaimobject from the file:$ oc create -f pvc.yaml -n openshift-image-registry
Edit the registry configuration so that it references the correct PVC:
$ oc edit config.imageregistry.operator.openshift.io -o yamlExample output
storage: pvc: claim:1 - 1
- Creating a custom PVC allows you to leave the
claimfield blank for the default automatic creation of animage-registry-storagePVC.
For instructions about configuring registry storage so that it references the correct PVC, see Configuring the registry for vSphere.
14.4.20. Completing installation on user-provisioned infrastructure
After you complete the Operator configuration, you can finish installing the cluster on infrastructure that you provide.
Prerequisites
- Your control plane has initialized.
- You have completed the initial Operator configuration.
Procedure
Confirm that all the cluster components are online with the following command:
$ watch -n5 oc get clusteroperatorsExample output
NAME VERSION AVAILABLE PROGRESSING DEGRADED SINCE authentication 4.7.0 True False False 3h56m baremetal 4.7.0 True False False 29h cloud-credential 4.7.0 True False False 29h cluster-autoscaler 4.7.0 True False False 29h config-operator 4.7.0 True False False 6h39m console 4.7.0 True False False 3h59m csi-snapshot-controller 4.7.0 True False False 4h12m dns 4.7.0 True False False 4h15m etcd 4.7.0 True False False 29h image-registry 4.7.0 True False False 3h59m ingress 4.7.0 True False False 4h30m insights 4.7.0 True False False 29h kube-apiserver 4.7.0 True False False 29h kube-controller-manager 4.7.0 True False False 29h kube-scheduler 4.7.0 True False False 29h kube-storage-version-migrator 4.7.0 True False False 4h2m machine-api 4.7.0 True False False 29h machine-approver 4.7.0 True False False 6h34m machine-config 4.7.0 True False False 3h56m marketplace 4.7.0 True False False 4h2m monitoring 4.7.0 True False False 6h31m network 4.7.0 True False False 29h node-tuning 4.7.0 True False False 4h30m openshift-apiserver 4.7.0 True False False 3h56m openshift-controller-manager 4.7.0 True False False 4h36m openshift-samples 4.7.0 True False False 4h30m operator-lifecycle-manager 4.7.0 True False False 29h operator-lifecycle-manager-catalog 4.7.0 True False False 29h operator-lifecycle-manager-packageserver 4.7.0 True False False 3h59m service-ca 4.7.0 True False False 29h storage 4.7.0 True False False 4h30mAlternatively, the following command notifies you when all of the clusters are available. It also retrieves and displays credentials:
$ ./openshift-install --dir <installation_directory> wait-for install-complete1 - 1
- For
<installation_directory>, specify the path to the directory that you stored the installation files in.
Example output
INFO Waiting up to 30m0s for the cluster to initialize...The command succeeds when the Cluster Version Operator finishes deploying the OpenShift Container Platform cluster from Kubernetes API server.
Important-
The Ignition config files that the installation program generates contain certificates that expire after 24 hours, which are then renewed at that time. If the cluster is shut down before renewing the certificates and the cluster is later restarted after the 24 hours have elapsed, the cluster automatically recovers the expired certificates. The exception is that you must manually approve the pending
node-bootstrappercertificate signing requests (CSRs) to recover kubelet certificates. See the documentation for Recovering from expired control plane certificates for more information. - It is recommended that you use Ignition config files within 12 hours after they are generated because the 24-hour certificate rotates from 16 to 22 hours after the cluster is installed. By using the Ignition config files within 12 hours, you can avoid installation failure if the certificate update runs during installation.
Confirm that the Kubernetes API server is communicating with the pods.
To view a list of all pods, use the following command:
$ oc get pods --all-namespacesExample output
NAMESPACE NAME READY STATUS RESTARTS AGE openshift-apiserver-operator openshift-apiserver-operator-85cb746d55-zqhs8 1/1 Running 1 9m openshift-apiserver apiserver-67b9g 1/1 Running 0 3m openshift-apiserver apiserver-ljcmx 1/1 Running 0 1m openshift-apiserver apiserver-z25h4 1/1 Running 0 2m openshift-authentication-operator authentication-operator-69d5d8bf84-vh2n8 1/1 Running 0 5m ...View the logs for a pod that is listed in the output of the previous command by using the following command:
$ oc logs <pod_name> -n <namespace>1 - 1
- Specify the pod name and namespace, as shown in the output of the previous command.
If the pod logs display, the Kubernetes API server can communicate with the cluster machines.
For an installation with Fibre Channel Protocol (FCP), additional steps are required to enable multipathing. Do not enable multipathing during installation.
See "Enabling multipathing with kernel arguments on RHCOS" in the Post-installation configuration documentation for more information.
All the worker nodes are restarted. To monitor the process, enter the following command:
$ oc get nodes -wNoteIf you have additional machine types such as infrastructure nodes, repeat the process for these types.
You can add extra compute machines after the cluster installation is completed by following Adding compute machines to vSphere.
14.4.21. Backing up VMware vSphere volumes
OpenShift Container Platform provisions new volumes as independent persistent disks to freely attach and detach the volume on any node in the cluster. As a consequence, it is not possible to back up volumes that use snapshots, or to restore volumes from snapshots. See Snapshot Limitations for more information.
Procedure
To create a backup of persistent volumes:
- Stop the application that is using the persistent volume.
- Clone the persistent volume.
- Restart the application.
- Create a backup of the cloned volume.
- Delete the cloned volume.
14.4.22. Telemetry access for OpenShift Container Platform
In OpenShift Container Platform 4.7, the Telemetry service, which runs by default to provide metrics about cluster health and the success of updates, requires internet access. If your cluster is connected to the internet, Telemetry runs automatically, and your cluster is registered to OpenShift Cluster Manager.
After you confirm that your OpenShift Cluster Manager inventory is correct, either maintained automatically by Telemetry or manually by using OpenShift Cluster Manager, use subscription watch to track your OpenShift Container Platform subscriptions at the account or multi-cluster level.
14.4.23. Next steps
- Customize your cluster.
- If necessary, you can opt out of remote health reporting.
- Set up your registry and configure registry storage.
- Optional: View the events from the vSphere Problem Detector Operator to determine if the cluster has permission or storage configuration issues.
14.5. Installing a cluster on vSphere with network customizations
In OpenShift Container Platform version 4.7, you can install a cluster on VMware vSphere infrastructure that you provision with customized network configuration options. By customizing your network configuration, your cluster can coexist with existing IP address allocations in your environment and integrate with existing MTU and VXLAN configurations.
You must set most of the network configuration parameters during installation, and you can modify only kubeProxy configuration parameters in a running cluster.
OpenShift Container Platform supports deploying a cluster to a single VMware vCenter only. Deploying a cluster with machines/machine sets on multiple vCenters is not supported.
The steps for performing a user-provisioned infrastructure installation are provided as an example only. Installing a cluster with infrastructure you provide requires knowledge of the vSphere platform and the installation process of OpenShift Container Platform. Use the user-provisioned infrastructure installation instructions as a guide; you are free to create the required resources through other methods.
14.5.1. Prerequisites
- Review details about the OpenShift Container Platform installation and update processes.
- Completing the installation requires that you upload the Red Hat Enterprise Linux CoreOS (RHCOS) OVA on vSphere hosts. The machine from which you complete this process requires access to port 443 on the vCenter and ESXi hosts. Verify that port 443 is accessible.
- If you use a firewall, you confirmed with the administrator that port 443 is accessible. Control plane nodes must be able to reach vCenter and ESXi hosts on port 443 for the installation to succeed.
- If you use a firewall, you must configure it to access Red Hat Insights.
14.5.2. Internet access for OpenShift Container Platform
In OpenShift Container Platform 4.7, you require access to the Internet to install your cluster.
You must have Internet access to:
- Access OpenShift Cluster Manager to download the installation program and perform subscription management. If the cluster has internet access and you do not disable Telemetry, that service automatically entitles your cluster.
- Access Quay.io to obtain the packages that are required to install your cluster.
- Obtain the packages that are required to perform cluster updates.
If your cluster cannot have direct Internet access, you can perform a restricted network installation on some types of infrastructure that you provision. During that process, you download the content that is required and use it to populate a mirror registry with the packages that you need to install a cluster and generate the installation program. With some installation types, the environment that you install your cluster in will not require Internet access. Before you update the cluster, you update the content of the mirror registry.
14.5.3. VMware vSphere infrastructure requirements
You must install the OpenShift Container Platform cluster on a VMware vSphere version 6 or 7 instance that meets the requirements for the components that you use.
| Component | Minimum supported versions | Description |
|---|---|---|
| Hypervisor | vSphere 6.5 and later with HW version 13 | This version is the minimum version that Red Hat Enterprise Linux CoreOS (RHCOS) supports. See the Red Hat Enterprise Linux 8 supported hypervisors list. |
| Storage with in-tree drivers | vSphere 6.5 and later | This plug-in creates vSphere storage by using the in-tree storage drivers for vSphere included in OpenShift Container Platform. |
| Optional: Networking (NSX-T) | vSphere 6.5U3 or vSphere 6.7U2 and later | vSphere 6.5U3 or vSphere 6.7U2+ are required for OpenShift Container Platform. VMware’s NSX Container Plug-in (NCP) is certified with OpenShift Container Platform 4.6 and NSX-T 3.x+. |
If you use a vSphere version 6.5 instance, consider upgrading to 6.7U3 or 7.0 before you install OpenShift Container Platform.
You must ensure that the time on your ESXi hosts is synchronized before you install OpenShift Container Platform. See Edit Time Configuration for a Host in the VMware documentation.
Virtual machines (VMs) configured to use virtual hardware version 14 or greater might result in a failed installation. It is recommended to configure VMs with virtual hardware version 13. This is a known issue that is being addressed in BZ#1935539.
14.5.4. Machine requirements for a cluster with user-provisioned infrastructure
For a cluster that contains user-provisioned infrastructure, you must deploy all of the required machines.
14.5.4.1. Required machines
The smallest OpenShift Container Platform clusters require the following hosts:
- One temporary bootstrap machine
- Three control plane, or master, machines
- At least two compute machines, which are also known as worker machines.
The cluster requires the bootstrap machine to deploy the OpenShift Container Platform cluster on the three control plane machines. You can remove the bootstrap machine after you install the cluster.
To improve high availability of your cluster, distribute the control plane machines over different z/VM instances on at least two physical machines.
The bootstrap and control plane machines must use Red Hat Enterprise Linux CoreOS (RHCOS) as the operating system. However, the compute machines can choose between Red Hat Enterprise Linux CoreOS (RHCOS) or Red Hat Enterprise Linux (RHEL) 7.9.
Note that RHCOS is based on Red Hat Enterprise Linux (RHEL) 8 and inherits all of its hardware certifications and requirements. See Red Hat Enterprise Linux technology capabilities and limits.
All virtual machines must reside in the same datastore and in the same folder as the installer.
14.5.4.2. Network connectivity requirements
All the Red Hat Enterprise Linux CoreOS (RHCOS) machines require network in initramfs during boot to fetch Ignition config files from the Machine Config Server. The machines are configured with static IP addresses. No DHCP server is required. Additionally, each OpenShift Container Platform node in the cluster must have access to a Network Time Protocol (NTP) server.
14.5.4.3. IBM Z network connectivity requirements
To install on IBM Z under z/VM, you require a single z/VM virtual NIC in layer 2 mode. You also need:
- A direct-attached OSA or RoCE network adapter
- A z/VM VSwitch set up. For a preferred setup, use OSA link aggregation.
14.5.4.4. Minimum resource requirements
Each cluster machine must meet the following minimum requirements:
| Machine | Operating System | vCPU [1] | Virtual RAM | Storage | IOPS |
|---|---|---|---|---|---|
| Bootstrap | RHCOS | 4 | 16 GB | 100 GB | N/A |
| Control plane | RHCOS | 4 | 16 GB | 100 GB | N/A |
| Compute | RHCOS | 2 | 8 GB | 100 GB | N/A |
- One physical core (IFL) provides two logical cores (threads) when SMT-2 is enabled. The hypervisor can provide two or more vCPUs.
14.5.4.5. Certificate signing requests management
Because your cluster has limited access to automatic machine management when you use infrastructure that you provision, you must provide a mechanism for approving cluster certificate signing requests (CSRs) after installation. The kube-controller-manager only approves the kubelet client CSRs. The machine-approver cannot guarantee the validity of a serving certificate that is requested by using kubelet credentials because it cannot confirm that the correct machine issued the request. You must determine and implement a method of verifying the validity of the kubelet serving certificate requests and approving them.
14.5.5. Creating the user-provisioned infrastructure
Before you deploy an OpenShift Container Platform cluster that uses user-provisioned infrastructure, you must create the underlying infrastructure.
Prerequisites
- Review the OpenShift Container Platform 4.x Tested Integrations page before you create the supporting infrastructure for your cluster.
Procedure
- Set up static IP addresses.
- Set up an HTTP or HTTPS server to provide Ignition files to the cluster nodes.
- Provision the required load balancers.
- Configure the ports for your machines.
- Configure DNS.
- Ensure network connectivity.
14.5.5.1. Networking requirements for user-provisioned infrastructure
All the Red Hat Enterprise Linux CoreOS (RHCOS) machines require network in initramfs during boot to fetch Ignition config from the machine config server.
During the initial boot, the machines require an HTTP or HTTPS server to establish a network connection to download their Ignition config files.
Ensure that the machines have persistent IP addresses and host names.
The Kubernetes API server must be able to resolve the node names of the cluster machines. If the API servers and worker nodes are in different zones, you can configure a default DNS search zone to allow the API server to resolve the node names. Another supported approach is to always refer to hosts by their fully-qualified domain names in both the node objects and all DNS requests.
You must configure the network connectivity between machines to allow cluster components to communicate. Each machine must be able to resolve the host names of all other machines in the cluster.
| Protocol | Port | Description |
|---|---|---|
| ICMP | N/A | Network reachability tests |
| TCP |
| Metrics |
|
|
Host level services, including the node exporter on ports | |
|
| The default ports that Kubernetes reserves | |
|
| openshift-sdn | |
| UDP |
| VXLAN and Geneve |
|
| VXLAN and Geneve | |
|
|
Host level services, including the node exporter on ports | |
| TCP/UDP |
| Kubernetes node port |
| Protocol | Port | Description |
|---|---|---|
| TCP |
| Kubernetes API |
| Protocol | Port | Description |
|---|---|---|
| TCP |
| etcd server and peer ports |
Network topology requirements
The infrastructure that you provision for your cluster must meet the following network topology requirements.
OpenShift Container Platform requires all nodes to have internet access to pull images for platform containers and provide telemetry data to Red Hat.
Load balancers
Before you install OpenShift Container Platform, you must provision two load balancers that meet the following requirements:
API load balancer: Provides a common endpoint for users, both human and machine, to interact with and configure the platform. Configure the following conditions:
- Layer 4 load balancing only. This can be referred to as Raw TCP, SSL Passthrough, or SSL Bridge mode. If you use SSL Bridge mode, you must enable Server Name Indication (SNI) for the API routes.
- A stateless load balancing algorithm. The options vary based on the load balancer implementation.
ImportantDo not configure session persistence for an API load balancer.
Configure the following ports on both the front and back of the load balancers:
Expand Table 14.44. API load balancer Port Back-end machines (pool members) Internal External Description 6443Bootstrap and control plane. You remove the bootstrap machine from the load balancer after the bootstrap machine initializes the cluster control plane. You must configure the
/readyzendpoint for the API server health check probe.X
X
Kubernetes API server
22623Bootstrap and control plane. You remove the bootstrap machine from the load balancer after the bootstrap machine initializes the cluster control plane.
X
Machine config server
NoteThe load balancer must be configured to take a maximum of 30 seconds from the time the API server turns off the
/readyzendpoint to the removal of the API server instance from the pool. Within the time frame after/readyzreturns an error or becomes healthy, the endpoint must have been removed or added. Probing every 5 or 10 seconds, with two successful requests to become healthy and three to become unhealthy, are well-tested values.Application Ingress load balancer: Provides an Ingress point for application traffic flowing in from outside the cluster. Configure the following conditions:
- Layer 4 load balancing only. This can be referred to as Raw TCP, SSL Passthrough, or SSL Bridge mode. If you use SSL Bridge mode, you must enable Server Name Indication (SNI) for the Ingress routes.
- A connection-based or session-based persistence is recommended, based on the options available and types of applications that will be hosted on the platform.
Configure the following ports on both the front and back of the load balancers:
Expand Table 14.45. Application Ingress load balancer Port Back-end machines (pool members) Internal External Description 443The machines that run the Ingress router pods, compute, or worker, by default.
X
X
HTTPS traffic
80The machines that run the Ingress router pods, compute, or worker, by default.
X
X
HTTP traffic
If the true IP address of the client can be seen by the load balancer, enabling source IP-based session persistence can improve performance for applications that use end-to-end TLS encryption.
A working configuration for the Ingress router is required for an OpenShift Container Platform cluster. You must configure the Ingress router after the control plane initializes.
Ethernet adaptor hardware address requirements
When provisioning VMs for the cluster, the ethernet interfaces configured for each VM must use a MAC address from the VMware Organizationally Unique Identifier (OUI) allocation ranges:
-
00:05:69:00:00:00to00:05:69:FF:FF:FF -
00:0c:29:00:00:00to00:0c:29:FF:FF:FF -
00:1c:14:00:00:00to00:1c:14:FF:FF:FF -
00:50:56:00:00:00to00:50:56:FF:FF:FF
If a MAC address outside the VMware OUI is used, the cluster installation will not succeed.
NTP configuration
OpenShift Container Platform clusters are configured to use a public Network Time Protocol (NTP) server by default. If you want to use a local enterprise NTP server, or if your cluster is being deployed in a disconnected network, you can configure the cluster to use a specific time server. For more information, see the documentation for Configuring chrony time service.
14.5.5.2. User-provisioned DNS requirements
DNS is used for name resolution and reverse name resolution. DNS A/AAAA or CNAME records are used for name resolution and PTR records are used for reverse name resolution. The reverse records are important because Red Hat Enterprise Linux CoreOS (RHCOS) uses the reverse records to set the host name for all the nodes. Additionally, the reverse records are used to generate the certificate signing requests (CSR) that OpenShift Container Platform needs to operate.
The following DNS records are required for an OpenShift Container Platform cluster that uses user-provisioned infrastructure. In each record, <cluster_name> is the cluster name and <base_domain> is the cluster base domain that you specify in the install-config.yaml file. A complete DNS record takes the form: <component>.<cluster_name>.<base_domain>..
| Component | Record | Description |
|---|---|---|
| Kubernetes API |
| Add a DNS A/AAAA or CNAME record, and a DNS PTR record, to identify the load balancer for the control plane machines. These records must be resolvable by both clients external to the cluster and from all the nodes within the cluster. |
|
| Add a DNS A/AAAA or CNAME record, and a DNS PTR record, to identify the load balancer for the control plane machines. These records must be resolvable from all the nodes within the cluster. Important The API server must be able to resolve the worker nodes by the host names that are recorded in Kubernetes. If the API server cannot resolve the node names, then proxied API calls can fail, and you cannot retrieve logs from pods. | |
| Routes |
| Add a wildcard DNS A/AAAA or CNAME record that refers to the load balancer that targets the machines that run the Ingress router pods, which are the worker nodes by default. These records must be resolvable by both clients external to the cluster and from all the nodes within the cluster. |
| Bootstrap |
| Add a DNS A/AAAA or CNAME record, and a DNS PTR record, to identify the bootstrap machine. These records must be resolvable by the nodes within the cluster. |
| Master hosts |
| DNS A/AAAA or CNAME records and DNS PTR records to identify each machine for the control plane nodes (also known as the master nodes). These records must be resolvable by the nodes within the cluster. |
| Worker hosts |
| Add DNS A/AAAA or CNAME records and DNS PTR records to identify each machine for the worker nodes. These records must be resolvable by the nodes within the cluster. |
You can use the nslookup <hostname> command to verify name resolution. You can use the dig -x <ip_address> command to verify reverse name resolution for the PTR records.
The following example of a BIND zone file shows sample A records for name resolution. The purpose of the example is to show the records that are needed. The example is not meant to provide advice for choosing one name resolution service over another.
Example 14.9. Sample DNS zone database
$TTL 1W
@ IN SOA ns1.example.com. root (
2019070700 ; serial
3H ; refresh (3 hours)
30M ; retry (30 minutes)
2W ; expiry (2 weeks)
1W ) ; minimum (1 week)
IN NS ns1.example.com.
IN MX 10 smtp.example.com.
;
;
ns1 IN A 192.168.1.5
smtp IN A 192.168.1.5
;
helper IN A 192.168.1.5
helper.ocp4 IN A 192.168.1.5
;
; The api identifies the IP of your load balancer.
api.ocp4 IN A 192.168.1.5
api-int.ocp4 IN A 192.168.1.5
;
; The wildcard also identifies the load balancer.
*.apps.ocp4 IN A 192.168.1.5
;
; Create an entry for the bootstrap host.
bootstrap.ocp4 IN A 192.168.1.96
;
; Create entries for the master hosts.
master0.ocp4 IN A 192.168.1.97
master1.ocp4 IN A 192.168.1.98
master2.ocp4 IN A 192.168.1.99
;
; Create entries for the worker hosts.
worker0.ocp4 IN A 192.168.1.11
worker1.ocp4 IN A 192.168.1.7
;
;EOFThe following example BIND zone file shows sample PTR records for reverse name resolution.
Example 14.10. Sample DNS zone database for reverse records
$TTL 1W
@ IN SOA ns1.example.com. root (
2019070700 ; serial
3H ; refresh (3 hours)
30M ; retry (30 minutes)
2W ; expiry (2 weeks)
1W ) ; minimum (1 week)
IN NS ns1.example.com.
;
; The syntax is "last octet" and the host must have an FQDN
; with a trailing dot.
97 IN PTR master0.ocp4.example.com.
98 IN PTR master1.ocp4.example.com.
99 IN PTR master2.ocp4.example.com.
;
96 IN PTR bootstrap.ocp4.example.com.
;
5 IN PTR api.ocp4.example.com.
5 IN PTR api-int.ocp4.example.com.
;
11 IN PTR worker0.ocp4.example.com.
7 IN PTR worker1.ocp4.example.com.
;
;EOF14.5.6. Generating an SSH private key and adding it to the agent
If you want to perform installation debugging or disaster recovery on your cluster, you must provide an SSH key to both your ssh-agent and the installation program. You can use this key to access the bootstrap machine in a public cluster to troubleshoot installation issues.
In a production environment, you require disaster recovery and debugging.
Do not skip this procedure in production environments where disaster recovery and debugging is required.
You can use this key to SSH into the master nodes as the user core. When you deploy the cluster, the key is added to the core user’s ~/.ssh/authorized_keys list.
Procedure
If you do not have an SSH key that is configured for password-less authentication on your computer, create one. For example, on a computer that uses a Linux operating system, run the following command:
$ ssh-keygen -t ed25519 -N '' \ -f <path>/<file_name>1 - 1
- Specify the path and file name, such as
~/.ssh/id_rsa, of the new SSH key. If you have an existing key pair, ensure your public key is in the your~/.sshdirectory.
Running this command generates an SSH key that does not require a password in the location that you specified.
NoteIf you plan to install an OpenShift Container Platform cluster that uses FIPS Validated / Modules in Process cryptographic libraries on the
x86_64architecture, do not create a key that uses theed25519algorithm. Instead, create a key that uses thersaorecdsaalgorithm.Start the
ssh-agentprocess as a background task:$ eval "$(ssh-agent -s)"Example output
Agent pid 31874NoteIf your cluster is in FIPS mode, only use FIPS-compliant algorithms to generate the SSH key. The key must be either RSA or ECDSA.
Add your SSH private key to the
ssh-agent:$ ssh-add <path>/<file_name>1 Example output
Identity added: /home/<you>/<path>/<file_name> (<computer_name>)- 1
- Specify the path and file name for your SSH private key, such as
~/.ssh/id_rsa
Next steps
- When you install OpenShift Container Platform, provide the SSH public key to the installation program.
14.5.7. Obtaining the installation program
Before you install OpenShift Container Platform, download the installation file on your provisioning machine.
Prerequisites
- You have a machine that runs Linux, for example Red Hat Enterprise Linux 8, with 500 MB of local disk space
Procedure
- Access the Infrastructure Provider page on the OpenShift Cluster Manager site. If you have a Red Hat account, log in with your credentials. If you do not, create an account.
- Select your infrastructure provider.
Navigate to the page for your installation type, download the installation program for your operating system, and place the file in the directory where you will store the installation configuration files.
ImportantThe installation program creates several files on the computer that you use to install your cluster. You must keep the installation program and the files that the installation program creates after you finish installing the cluster. Both files are required to delete the cluster.
ImportantDeleting the files created by the installation program does not remove your cluster, even if the cluster failed during installation. To remove your cluster, complete the OpenShift Container Platform uninstallation procedures for your specific cloud provider.
Extract the installation program. For example, on a computer that uses a Linux operating system, run the following command:
$ tar xvf openshift-install-linux.tar.gz- Download your installation pull secret from the Red Hat OpenShift Cluster Manager. This pull secret allows you to authenticate with the services that are provided by the included authorities, including Quay.io, which serves the container images for OpenShift Container Platform components.
14.5.8. Manually creating the installation configuration file
For installations of OpenShift Container Platform that use user-provisioned infrastructure, you manually generate your installation configuration file.
Prerequisites
- Obtain the OpenShift Container Platform installation program and the access token for your cluster.
Procedure
Create an installation directory to store your required installation assets in:
$ mkdir <installation_directory>ImportantYou must create a directory. Some installation assets, like bootstrap X.509 certificates have short expiration intervals, so you must not reuse an installation directory. If you want to reuse individual files from another cluster installation, you can copy them into your directory. However, the file names for the installation assets might change between releases. Use caution when copying installation files from an earlier OpenShift Container Platform version.
Customize the following
install-config.yamlfile template and save it in the<installation_directory>.NoteYou must name this configuration file
install-config.yaml.Back up the
install-config.yamlfile so that you can use it to install multiple clusters.ImportantThe
install-config.yamlfile is consumed during the next step of the installation process. You must back it up now.
14.5.8.1. Sample install-config.yaml file for VMware vSphere
You can customize the install-config.yaml file to specify more details about your OpenShift Container Platform cluster’s platform or modify the values of the required parameters.
apiVersion: v1
baseDomain: example.com
compute:
- hyperthreading: Enabled
name: worker
replicas: 0
controlPlane:
hyperthreading: Enabled
name: master
replicas: 3
metadata:
name: test
platform:
vsphere:
vcenter: your.vcenter.server
username: username
password: password
datacenter: datacenter
defaultDatastore: datastore
folder: "/<datacenter_name>/vm/<folder_name>/<subfolder_name>"
fips: false
pullSecret: '{"auths": ...}'
sshKey: 'ssh-ed25519 AAAA...' - 1
- The base domain of the cluster. All DNS records must be sub-domains of this base and include the cluster name.
- 2 5
- The
controlPlanesection is a single mapping, but the compute section is a sequence of mappings. To meet the requirements of the different data structures, the first line of thecomputesection must begin with a hyphen,-, and the first line of thecontrolPlanesection must not. Although both sections currently define a single machine pool, it is possible that future versions of OpenShift Container Platform will support defining multiple compute pools during installation. Only one control plane pool is used. - 3 6
- Whether to enable or disable simultaneous multithreading, or
hyperthreading. By default, simultaneous multithreading is enabled to increase the performance of your machines' cores. You can disable it by setting the parameter value toDisabled. If you disable simultaneous multithreading in some cluster machines, you must disable it in all cluster machines.ImportantIf you disable simultaneous multithreading, ensure that your capacity planning accounts for the dramatically decreased machine performance. Your machines must use at least 8 CPUs and 32 GB of RAM if you disable simultaneous multithreading.
- 4
- You must set the value of the
replicasparameter to0. This parameter controls the number of workers that the cluster creates and manages for you, which are functions that the cluster does not perform when you use user-provisioned infrastructure. You must manually deploy worker machines for the cluster to use before you finish installing OpenShift Container Platform. - 7
- The number of control plane machines that you add to the cluster. Because the cluster uses this values as the number of etcd endpoints in the cluster, the value must match the number of control plane machines that you deploy.
- 8
- The cluster name that you specified in your DNS records.
- 9
- The fully-qualified hostname or IP address of the vCenter server.
- 10
- The name of the user for accessing the server. This user must have at least the roles and privileges that are required for static or dynamic persistent volume provisioning in vSphere.
- 11
- The password associated with the vSphere user.
- 12
- The vSphere datacenter.
- 13
- The default vSphere datastore to use.
- 14
- Optional: For installer-provisioned infrastructure, the absolute path of an existing folder where the installation program creates the virtual machines, for example,
/<datacenter_name>/vm/<folder_name>/<subfolder_name>. If you do not provide this value, the installation program creates a top-level folder in the datacenter virtual machine folder that is named with the infrastructure ID. If you are providing the infrastructure for the cluster, omit this parameter. - 15
- Whether to enable or disable FIPS mode. By default, FIPS mode is not enabled. If FIPS mode is enabled, the Red Hat Enterprise Linux CoreOS (RHCOS) machines that OpenShift Container Platform runs on bypass the default Kubernetes cryptography suite and use the cryptography modules that are provided with RHCOS instead.Important
The use of FIPS Validated / Modules in Process cryptographic libraries is only supported on OpenShift Container Platform deployments on the
x86_64architecture. - 16
- The pull secret that you obtained from OpenShift Cluster Manager. This pull secret allows you to authenticate with the services that are provided by the included authorities, including Quay.io, which serves the container images for OpenShift Container Platform components.
- 17
- The public portion of the default SSH key for the
coreuser in Red Hat Enterprise Linux CoreOS (RHCOS).
14.5.8.2. Configuring the cluster-wide proxy during installation
Production environments can deny direct access to the Internet and instead have an HTTP or HTTPS proxy available. You can configure a new OpenShift Container Platform cluster to use a proxy by configuring the proxy settings in the install-config.yaml file.
Prerequisites
-
You have an existing
install-config.yamlfile. You reviewed the sites that your cluster requires access to and determined whether any of them need to bypass the proxy. By default, all cluster egress traffic is proxied, including calls to hosting cloud provider APIs. You added sites to the
Proxyobject’sspec.noProxyfield to bypass the proxy if necessary.NoteThe
Proxyobjectstatus.noProxyfield is populated with the values of thenetworking.machineNetwork[].cidr,networking.clusterNetwork[].cidr, andnetworking.serviceNetwork[]fields from your installation configuration.For installations on Amazon Web Services (AWS), Google Cloud Platform (GCP), Microsoft Azure, and Red Hat OpenStack Platform (RHOSP), the
Proxyobjectstatus.noProxyfield is also populated with the instance metadata endpoint (169.254.169.254).
Procedure
Edit your
install-config.yamlfile and add the proxy settings. For example:apiVersion: v1 baseDomain: my.domain.com proxy: httpProxy: http://<username>:<pswd>@<ip>:<port>1 httpsProxy: https://<username>:<pswd>@<ip>:<port>2 noProxy: example.com3 additionalTrustBundle: |4 -----BEGIN CERTIFICATE----- <MY_TRUSTED_CA_CERT> -----END CERTIFICATE----- ...- 1
- A proxy URL to use for creating HTTP connections outside the cluster. The URL scheme must be
http. - 2
- A proxy URL to use for creating HTTPS connections outside the cluster.
- 3
- A comma-separated list of destination domain names, IP addresses, or other network CIDRs to exclude from proxying. Preface a domain with
.to match subdomains only. For example,.y.commatchesx.y.com, but noty.com. Use*to bypass the proxy for all destinations. You must include vCenter’s IP address and the IP range that you use for its machines. - 4
- If provided, the installation program generates a config map that is named
user-ca-bundlein theopenshift-confignamespace to hold the additional CA certificates. If you provideadditionalTrustBundleand at least one proxy setting, theProxyobject is configured to reference theuser-ca-bundleconfig map in thetrustedCAfield. The Cluster Network Operator then creates atrusted-ca-bundleconfig map that merges the contents specified for thetrustedCAparameter with the RHCOS trust bundle. TheadditionalTrustBundlefield is required unless the proxy’s identity certificate is signed by an authority from the RHCOS trust bundle.
NoteThe installation program does not support the proxy
readinessEndpointsfield.- Save the file and reference it when installing OpenShift Container Platform.
The installation program creates a cluster-wide proxy that is named cluster that uses the proxy settings in the provided install-config.yaml file. If no proxy settings are provided, a cluster Proxy object is still created, but it will have a nil spec.
Only the Proxy object named cluster is supported, and no additional proxies can be created.
14.5.9. Network configuration phases
When specifying a cluster configuration prior to installation, there are several phases in the installation procedures when you can modify the network configuration:
- Phase 1
After entering the
openshift-install create install-configcommand. In theinstall-config.yamlfile, you can customize the following network-related fields:-
networking.networkType -
networking.clusterNetwork -
networking.serviceNetwork networking.machineNetworkFor more information on these fields, refer to "Installation configuration parameters".
NoteSet the
networking.machineNetworkto match the CIDR that the preferred NIC resides in.
-
- Phase 2
-
After entering the
openshift-install create manifestscommand. If you must specify advanced network configuration, during this phase you can define a customized Cluster Network Operator manifest with only the fields you want to modify.
You cannot override the values specified in phase 1 in the install-config.yaml file during phase 2. However, you can further customize the cluster network provider during phase 2.
14.5.10. Specifying advanced network configuration
You can use advanced configuration customization to integrate your cluster into your existing network environment by specifying additional configuration for your cluster network provider. You can specify advanced network configuration only before you install the cluster.
Modifying the OpenShift Container Platform manifest files created by the installation program is not supported. Applying a manifest file that you create, as in the following procedure, is supported.
Prerequisites
-
Create the
install-config.yamlfile and complete any modifications to it. - Create the Ignition config files for your cluster.
Procedure
Change to the directory that contains the installation program and create the manifests:
$ ./openshift-install create manifests --dir <installation_directory>where:
<installation_directory>-
Specifies the name of the directory that contains the
install-config.yamlfile for your cluster.
Create a stub manifest file for the advanced network configuration that is named
cluster-network-03-config.ymlin the<installation_directory>/manifests/directory:$ cat <<EOF > <installation_directory>/manifests/cluster-network-03-config.yml apiVersion: operator.openshift.io/v1 kind: Network metadata: name: cluster spec: EOFwhere:
<installation_directory>-
Specifies the directory name that contains the
manifests/directory for your cluster.
Open the
cluster-network-03-config.ymlfile in an editor and specify the advanced network configuration for your cluster, such as in the following examples:Specify a different VXLAN port for the OpenShift SDN network provider
apiVersion: operator.openshift.io/v1 kind: Network metadata: name: cluster spec: defaultNetwork: openshiftSDNConfig: vxlanPort: 4800Enable IPsec for the OVN-Kubernetes network provider
apiVersion: operator.openshift.io/v1 kind: Network metadata: name: cluster spec: defaultNetwork: ovnKubernetesConfig: ipsecConfig: {}-
Save the
cluster-network-03-config.ymlfile and quit the text editor. -
Optional: Back up the
manifests/cluster-network-03-config.ymlfile. The installation program deletes themanifests/directory when creating the cluster. Remove the Kubernetes manifest files that define the control plane machines and compute machineSets:
$ rm -f openshift/99_openshift-cluster-api_master-machines-*.yaml openshift/99_openshift-cluster-api_worker-machineset-*.yamlBecause you create and manage these resources yourself, you do not have to initialize them.
- You can preserve the MachineSet files to create compute machines by using the machine API, but you must update references to them to match your environment.
14.5.11. Cluster Network Operator configuration
The configuration for the cluster network is specified as part of the Cluster Network Operator (CNO) configuration and stored in a custom resource (CR) object that is named cluster. The CR specifies the fields for the Network API in the operator.openshift.io API group.
The CNO configuration inherits the following fields during cluster installation from the Network API in the Network.config.openshift.io API group and these fields cannot be changed:
clusterNetwork- IP address pools from which pod IP addresses are allocated.
serviceNetwork- IP address pool for services.
defaultNetwork.type- Cluster network provider, such as OpenShift SDN or OVN-Kubernetes.
You can specify the cluster network provider configuration for your cluster by setting the fields for the defaultNetwork object in the CNO object named cluster.
14.5.11.1. Cluster Network Operator configuration object
The fields for the Cluster Network Operator (CNO) are described in the following table:
| Field | Type | Description |
|---|---|---|
|
|
|
The name of the CNO object. This name is always |
|
|
| A list specifying the blocks of IP addresses from which pod IP addresses are allocated and the subnet prefix length assigned to each individual node in the cluster. For example:
This value is ready-only and specified in the |
|
|
| A block of IP addresses for services. The OpenShift SDN and OVN-Kubernetes Container Network Interface (CNI) network providers support only a single IP address block for the service network. For example:
This value is ready-only and specified in the |
|
|
| Configures the Container Network Interface (CNI) cluster network provider for the cluster network. |
|
|
| The fields for this object specify the kube-proxy configuration. If you are using the OVN-Kubernetes cluster network provider, the kube-proxy configuration has no effect. |
defaultNetwork object configuration
The values for the defaultNetwork object are defined in the following table:
| Field | Type | Description |
|---|---|---|
|
|
|
Either Note OpenShift Container Platform uses the OpenShift SDN Container Network Interface (CNI) cluster network provider by default. |
|
|
| This object is only valid for the OpenShift SDN cluster network provider. |
|
|
| This object is only valid for the OVN-Kubernetes cluster network provider. |
Configuration for the OpenShift SDN CNI cluster network provider
The following table describes the configuration fields for the OpenShift SDN Container Network Interface (CNI) cluster network provider.
| Field | Type | Description |
|---|---|---|
|
|
|
Configures the network isolation mode for OpenShift SDN. The default value is
The values |
|
|
| The maximum transmission unit (MTU) for the VXLAN overlay network. This is detected automatically based on the MTU of the primary network interface. You do not normally need to override the detected MTU. If the auto-detected value is not what you expected it to be, confirm that the MTU on the primary network interface on your nodes is correct. You cannot use this option to change the MTU value of the primary network interface on the nodes.
If your cluster requires different MTU values for different nodes, you must set this value to This value cannot be changed after cluster installation. |
|
|
|
The port to use for all VXLAN packets. The default value is If you are running in a virtualized environment with existing nodes that are part of another VXLAN network, then you might be required to change this. For example, when running an OpenShift SDN overlay on top of VMware NSX-T, you must select an alternate port for the VXLAN, because both SDNs use the same default VXLAN port number.
On Amazon Web Services (AWS), you can select an alternate port for the VXLAN between port |
Example OpenShift SDN configuration
defaultNetwork:
type: OpenShiftSDN
openshiftSDNConfig:
mode: NetworkPolicy
mtu: 1450
vxlanPort: 4789Configuration for the OVN-Kubernetes CNI cluster network provider
The following table describes the configuration fields for the OVN-Kubernetes CNI cluster network provider.
| Field | Type | Description |
|---|---|---|
|
|
| The maximum transmission unit (MTU) for the Geneve (Generic Network Virtualization Encapsulation) overlay network. This is detected automatically based on the MTU of the primary network interface. You do not normally need to override the detected MTU. If the auto-detected value is not what you expected it to be, confirm that the MTU on the primary network interface on your nodes is correct. You cannot use this option to change the MTU value of the primary network interface on the nodes.
If your cluster requires different MTU values for different nodes, you must set this value to This value cannot be changed after cluster installation. |
|
|
|
The port to use for all Geneve packets. The default value is |
|
|
| Specify an empty object to enable IPsec encryption. This value cannot be changed after cluster installation. |
Example OVN-Kubernetes configuration
defaultNetwork:
type: OVNKubernetes
ovnKubernetesConfig:
mtu: 1400
genevePort: 6081
ipsecConfig: {}kubeProxyConfig object configuration
The values for the kubeProxyConfig object are defined in the following table:
| Field | Type | Description |
|---|---|---|
|
|
|
The refresh period for Note
Because of performance improvements introduced in OpenShift Container Platform 4.3 and greater, adjusting the |
|
|
|
The minimum duration before refreshing |
14.5.12. Creating the Ignition config files
Because you must manually start the cluster machines, you must generate the Ignition config files that the cluster needs to make its machines.
-
The Ignition config files that the installation program generates contain certificates that expire after 24 hours, which are then renewed at that time. If the cluster is shut down before renewing the certificates and the cluster is later restarted after the 24 hours have elapsed, the cluster automatically recovers the expired certificates. The exception is that you must manually approve the pending
node-bootstrappercertificate signing requests (CSRs) to recover kubelet certificates. See the documentation for Recovering from expired control plane certificates for more information. - It is recommended that you use Ignition config files within 12 hours after they are generated because the 24-hour certificate rotates from 16 to 22 hours after the cluster is installed. By using the Ignition config files within 12 hours, you can avoid installation failure if the certificate update runs during installation.
Prerequisites
- Obtain the OpenShift Container Platform installation program and the pull secret for your cluster.
Procedure
Obtain the Ignition config files:
$ ./openshift-install create ignition-configs --dir <installation_directory>1 - 1
- For
<installation_directory>, specify the directory name to store the files that the installation program creates.
ImportantIf you created an
install-config.yamlfile, specify the directory that contains it. Otherwise, specify an empty directory. Some installation assets, like bootstrap X.509 certificates have short expiration intervals, so you must not reuse an installation directory. If you want to reuse individual files from another cluster installation, you can copy them into your directory. However, the file names for the installation assets might change between releases. Use caution when copying installation files from an earlier OpenShift Container Platform version.The following files are generated in the directory:
. ├── auth │ ├── kubeadmin-password │ └── kubeconfig ├── bootstrap.ign ├── master.ign ├── metadata.json └── worker.ign
14.5.13. Extracting the infrastructure name
The Ignition config files contain a unique cluster identifier that you can use to uniquely identify your cluster in VMware vSphere. If you plan to use the cluster identifier as the name of your virtual machine folder, you must extract it.
Prerequisites
- You obtained the OpenShift Container Platform installation program and the pull secret for your cluster.
- You generated the Ignition config files for your cluster.
-
You installed the
jqpackage.
Procedure
To extract and view the infrastructure name from the Ignition config file metadata, run the following command:
$ jq -r .infraID <installation_directory>/metadata.json1 - 1
- For
<installation_directory>, specify the path to the directory that you stored the installation files in.
Example output
openshift-vw9j61 - 1
- The output of this command is your cluster name and a random string.
14.5.14. Creating Red Hat Enterprise Linux CoreOS (RHCOS) machines in vSphere
Before you install a cluster that contains user-provisioned infrastructure on VMware vSphere, you must create RHCOS machines on vSphere hosts for it to use.
Prerequisites
- You have obtained the Ignition config files for your cluster.
- You have access to an HTTP server that you can access from your computer and that the machines that you create can access.
- You have created a vSphere cluster.
Procedure
-
Upload the bootstrap Ignition config file, which is named
<installation_directory>/bootstrap.ign, that the installation program created to your HTTP server. Note the URL of this file. Save the following secondary Ignition config file for your bootstrap node to your computer as
<installation_directory>/merge-bootstrap.ign:{ "ignition": { "config": { "merge": [ { "source": "<bootstrap_ignition_config_url>",1 "verification": {} } ] }, "timeouts": {}, "version": "3.2.0" }, "networkd": {}, "passwd": {}, "storage": {}, "systemd": {} }- 1
- Specify the URL of the bootstrap Ignition config file that you hosted.
When you create the virtual machine (VM) for the bootstrap machine, you use this Ignition config file.
Locate the following Ignition config files that the installation program created:
-
<installation_directory>/master.ign -
<installation_directory>/worker.ign -
<installation_directory>/merge-bootstrap.ign
-
Convert the Ignition config files to Base64 encoding. Later in this procedure, you must add these files to the extra configuration parameter
guestinfo.ignition.config.datain your VM.For example, if you use a Linux operating system, you can use the
base64command to encode the files.$ base64 -w0 <installation_directory>/master.ign > <installation_directory>/master.64$ base64 -w0 <installation_directory>/worker.ign > <installation_directory>/worker.64$ base64 -w0 <installation_directory>/merge-bootstrap.ign > <installation_directory>/merge-bootstrap.64ImportantIf you plan to add more compute machines to your cluster after you finish installation, do not delete these files.
Obtain the RHCOS OVA image. Images are available from the RHCOS image mirror page.
ImportantThe RHCOS images might not change with every release of OpenShift Container Platform. You must download an image with the highest version that is less than or equal to the OpenShift Container Platform version that you install. Use the image version that matches your OpenShift Container Platform version if it is available.
The filename contains the OpenShift Container Platform version number in the format
rhcos-vmware.<architecture>.ova.In the vSphere Client, create a folder in your datacenter to store your VMs.
- Click the VMs and Templates view.
- Right-click the name of your datacenter.
- Click New Folder → New VM and Template Folder.
-
In the window that is displayed, enter the folder name. If you did not specify an existing folder in the
install-config.yamlfile, then create a folder with the same name as the infrastructure ID. You use this folder name so vCenter dynamically provisions storage in the appropriate location for its Workspace configuration.
In the vSphere Client, create a template for the OVA image and then clone the template as needed.
NoteIn the following steps, you create a template and then clone the template for all of your cluster machines. You then provide the location for the Ignition config file for that cloned machine type when you provision the VMs.
- From the Hosts and Clusters tab, right-click your cluster name and select Deploy OVF Template.
- On the Select an OVF tab, specify the name of the RHCOS OVA file that you downloaded.
-
On the Select a name and folder tab, set a Virtual machine name for your template, such as
Template-RHCOS. Click the name of your vSphere cluster and select the folder you created in the previous step. - On the Select a compute resource tab, click the name of your vSphere cluster.
On the Select storage tab, configure the storage options for your VM.
- Select Thin Provision or Thick Provision, based on your storage preferences.
-
Select the datastore that you specified in your
install-config.yamlfile.
- On the Select network tab, specify the network that you configured for the cluster, if available.
When creating the OVF template, do not specify values on the Customize template tab or configure the template any further.
ImportantDo not start the original VM template. The VM template must remain off and must be cloned for new RHCOS machines. Starting the VM template configures the VM template as a VM on the platform, which prevents it from being used as a template that machine sets can apply configurations to.
After the template deploys, deploy a VM for a machine in the cluster.
- Right-click the template name and click Clone → Clone to Virtual Machine.
-
On the Select a name and folder tab, specify a name for the VM. You might include the machine type in the name, such as
control-plane-0orcompute-1. - On the Select a name and folder tab, select the name of the folder that you created for the cluster.
- On the Select a compute resource tab, select the name of a host in your datacenter.
- Optional: On the Select storage tab, customize the storage options.
- On the Select clone options, select Customize this virtual machine’s hardware.
On the Customize hardware tab, click VM Options → Advanced.
Optional: Override default DHCP networking in vSphere. To enable static IP networking:
Set your static IP configuration:
$ export IPCFG="ip=<ip>::<gateway>:<netmask>:<hostname>:<iface>:none nameserver=srv1 [nameserver=srv2 [nameserver=srv3 [...]]]"Example command
$ export IPCFG="ip=192.168.100.101::192.168.100.254:255.255.255.0:::none nameserver=8.8.8.8"Set the
guestinfo.afterburn.initrd.network-kargsproperty before booting a VM from an OVA in vSphere:$ govc vm.change -vm "<vm_name>" -e "guestinfo.afterburn.initrd.network-kargs=${IPCFG}"
Optional: In the event of cluster performance issues, from the Latency Sensitivity list, select High. Ensure that your VM’s CPU and memory reservation have the following values:
- Memory reservation value must be equal to its configured memory size.
- CPU reservation value must be at least the number of low latency virtual CPUs multiplied by the measured physical CPU speed.
Click Edit Configuration, and on the Configuration Parameters window, click Add Configuration Params. Define the following parameter names and values:
-
guestinfo.ignition.config.data: Locate the base-64 encoded files that you created previously in this procedure, and paste the contents of the base64-encoded Ignition config file for this machine type. -
guestinfo.ignition.config.data.encoding: Specifybase64. -
disk.EnableUUID: SpecifyTRUE.
-
- In the Virtual Hardware panel of the Customize hardware tab, modify the specified values as required. Ensure that the amount of RAM, CPU, and disk storage meets the minimum requirements for the machine type.
- Complete the configuration and power on the VM.
Create the rest of the machines for your cluster by following the preceding steps for each machine.
ImportantYou must create the bootstrap and control plane machines at this time. Because some pods are deployed on compute machines by default, also create at least two compute machines before you install the cluster.
14.5.15. Creating more Red Hat Enterprise Linux CoreOS (RHCOS) machines in vSphere
You can create more compute machines for your cluster that uses user-provisioned infrastructure on VMware vSphere.
Prerequisites
- Obtain the base64-encoded Ignition file for your compute machines.
- You have access to the vSphere template that you created for your cluster.
Procedure
After the template deploys, deploy a VM for a machine in the cluster.
- Right-click the template’s name and click Clone → Clone to Virtual Machine.
-
On the Select a name and folder tab, specify a name for the VM. You might include the machine type in the name, such as
compute-1. - On the Select a name and folder tab, select the name of the folder that you created for the cluster.
- On the Select a compute resource tab, select the name of a host in your datacenter.
- Optional: On the Select storage tab, customize the storage options.
- On the Select clone options, select Customize this virtual machine’s hardware.
On the Customize hardware tab, click VM Options → Advanced.
- From the Latency Sensitivity list, select High.
Click Edit Configuration, and on the Configuration Parameters window, click Add Configuration Params. Define the following parameter names and values:
-
guestinfo.ignition.config.data: Paste the contents of the base64-encoded compute Ignition config file for this machine type. -
guestinfo.ignition.config.data.encoding: Specifybase64. -
disk.EnableUUID: SpecifyTRUE.
-
- In the Virtual Hardware panel of the Customize hardware tab, modify the specified values as required. Ensure that the amount of RAM, CPU, and disk storage meets the minimum requirements for the machine type. Also, make sure to select the correct network under Add network adapter if there are multiple networks available.
- Complete the configuration and power on the VM.
- Continue to create more compute machines for your cluster.
14.5.16. Disk partitioning
In most cases, data partitions are originally created by installing RHCOS, rather than by installing another operating system. In such cases, the OpenShift Container Platform installer should be allowed to configure your disk partitions.
However, there are two cases where you might want to intervene to override the default partitioning when installing an OpenShift Container Platform node:
Create separate partitions: For greenfield installations on an empty disk, you might want to add separate storage to a partition. This is officially supported for making
/varor a subdirectory of/var, such as/var/lib/etcd, a separate partition, but not both.ImportantKubernetes supports only two filesystem partitions. If you add more than one partition to the original configuration, Kubernetes cannot monitor all of them.
-
Retain existing partitions: For a brownfield installation where you are reinstalling OpenShift Container Platform on an existing node and want to retain data partitions installed from your previous operating system, there are both boot arguments and options to
coreos-installerthat allow you to retain existing data partitions.
Creating a separate /var partition
In general, disk partitioning for OpenShift Container Platform should be left to the installer. However, there are cases where you might want to create separate partitions in a part of the filesystem that you expect to grow.
OpenShift Container Platform supports the addition of a single partition to attach storage to either the /var partition or a subdirectory of /var. For example:
-
/var/lib/containers: Holds container-related content that can grow as more images and containers are added to a system. -
/var/lib/etcd: Holds data that you might want to keep separate for purposes such as performance optimization of etcd storage. -
/var: Holds data that you might want to keep separate for purposes such as auditing.
Storing the contents of a /var directory separately makes it easier to grow storage for those areas as needed and reinstall OpenShift Container Platform at a later date and keep that data intact. With this method, you will not have to pull all your containers again, nor will you have to copy massive log files when you update systems.
Because /var must be in place before a fresh installation of Red Hat Enterprise Linux CoreOS (RHCOS), the following procedure sets up the separate /var partition by creating a machine config that is inserted during the openshift-install preparation phases of an OpenShift Container Platform installation.
Procedure
Create a directory to hold the OpenShift Container Platform installation files:
$ mkdir $HOME/clusterconfigRun
openshift-installto create a set of files in themanifestandopenshiftsubdirectories. Answer the system questions as you are prompted:$ openshift-install create manifests --dir $HOME/clusterconfig ? SSH Public Key ... $ ls $HOME/clusterconfig/openshift/ 99_kubeadmin-password-secret.yaml 99_openshift-cluster-api_master-machines-0.yaml 99_openshift-cluster-api_master-machines-1.yaml 99_openshift-cluster-api_master-machines-2.yaml ...Create a
MachineConfigobject and add it to a file in theopenshiftdirectory. For example, name the file98-var-partition.yaml, change the disk device name to the name of the storage device on theworkersystems, and set the storage size as appropriate. This example places the/vardirectory on a separate partition:apiVersion: machineconfiguration.openshift.io/v1 kind: MachineConfig metadata: labels: machineconfiguration.openshift.io/role: worker name: 98-var-partition spec: config: ignition: version: 3.2.0 storage: disks: - device: /dev/<device_name>1 partitions: - label: var startMiB: <partition_start_offset>2 sizeMiB: <partition_size>3 filesystems: - device: /dev/disk/by-partlabel/var path: /var format: xfs systemd: units: - name: var.mount4 enabled: true contents: | [Unit] Before=local-fs.target [Mount] What=/dev/disk/by-partlabel/var Where=/var Options=defaults,prjquota5 [Install] WantedBy=local-fs.target- 1
- The storage device name of the disk that you want to partition.
- 2
- When adding a data partition to the boot disk, a minimum value of 25000 mebibytes is recommended. The root file system is automatically resized to fill all available space up to the specified offset. If no value is specified, or if the specified value is smaller than the recommended minimum, the resulting root file system will be too small, and future reinstalls of RHCOS might overwrite the beginning of the data partition.
- 3
- The size of the data partition in mebibytes.
- 4
- The name of the mount unit must match the directory specified in the
Where=directive. For example, for a filesystem mounted on/var/lib/containers, the unit must be namedvar-lib-containers.mount. - 5
- The
prjquotamount option must be enabled for filesystems used for container storage.
NoteWhen creating a separate
/varpartition, you cannot use different instance types for worker nodes, if the different instance types do not have the same device name.Run
openshift-installagain to create Ignition configs from a set of files in themanifestandopenshiftsubdirectories:$ openshift-install create ignition-configs --dir $HOME/clusterconfig $ ls $HOME/clusterconfig/ auth bootstrap.ign master.ign metadata.json worker.ign
Now you can use the Ignition config files as input to the vSphere installation procedures to install Red Hat Enterprise Linux CoreOS (RHCOS) systems.
14.5.17. Updating the bootloader using bootupd
To update the bootloader by using bootupd, you must either install bootupd on RHCOS machines manually or provide a machine config with the enabled systemd unit. Unlike grubby or other bootloader tools, bootupd does not manage kernel space configuration such as passing kernel arguments.
After you have installed bootupd, you can manage it remotely from the OpenShift Container Platform cluster.
It is recommended that you use bootupd only on bare metal or virtualized hypervisor installations, such as for protection against the BootHole vulnerability.
Manual install method
You can manually install bootupd by using the bootctl command-line tool.
Inspect the system status:
# bootupctl statusExample output
Component EFI Installed: grub2-efi-x64-1:2.04-31.fc33.x86_64,shim-x64-15-8.x86_64 Update: At latest version
RHCOS images created without
bootupdinstalled on them require an explicit adoption phase.If the system status is
Adoptable, perform the adoption:# bootupctl adopt-and-updateExample output
Updated: grub2-efi-x64-1:2.04-31.fc33.x86_64,shim-x64-15-8.x86_64If an update is available, apply the update so that the changes take effect on the next reboot:
# bootupctl updateExample output
Updated: grub2-efi-x64-1:2.04-31.fc33.x86_64,shim-x64-15-8.x86_64
Machine config method
Another way to enable bootupd is by providing a machine config.
Provide a machine config file with the enabled
systemdunit, as shown in the following example:Example output
variant: rhcos version: 1.1.0 systemd: units: - name: custom-bootupd-auto.service enabled: true contents: | [Unit] Description=Bootupd automatic update [Service] ExecStart=/usr/bin/bootupctl update RemainAfterExit=yes [Install] WantedBy=multi-user.target
14.5.18. Creating the cluster
To create the OpenShift Container Platform cluster, you wait for the bootstrap process to complete on the machines that you provisioned by using the Ignition config files that you generated with the installation program.
Prerequisites
- Create the required infrastructure for the cluster.
- You obtained the installation program and generated the Ignition config files for your cluster.
- You used the Ignition config files to create RHCOS machines for your cluster.
- Your machines have direct Internet access or have an HTTP or HTTPS proxy available.
Procedure
Monitor the bootstrap process:
$ ./openshift-install --dir <installation_directory> wait-for bootstrap-complete \1 --log-level=info2 Example output
INFO Waiting up to 30m0s for the Kubernetes API at https://api.test.example.com:6443... INFO API v1.20.0 up INFO Waiting up to 30m0s for bootstrapping to complete... INFO It is now safe to remove the bootstrap resourcesThe command succeeds when the Kubernetes API server signals that it has been bootstrapped on the control plane machines.
After bootstrap process is complete, remove the bootstrap machine from the load balancer.
ImportantYou must remove the bootstrap machine from the load balancer at this point. You can also remove or reformat the machine itself.
14.5.19. Logging in to the cluster by using the CLI
You can log in to your cluster as a default system user by exporting the cluster kubeconfig file. The kubeconfig file contains information about the cluster that is used by the CLI to connect a client to the correct cluster and API server. The file is specific to a cluster and is created during OpenShift Container Platform installation.
Prerequisites
- You deployed an OpenShift Container Platform cluster.
-
You installed the
ocCLI.
Procedure
Export the
kubeadmincredentials:$ export KUBECONFIG=<installation_directory>/auth/kubeconfig1 - 1
- For
<installation_directory>, specify the path to the directory that you stored the installation files in.
Verify you can run
occommands successfully using the exported configuration:$ oc whoamiExample output
system:admin
14.5.20. Approving the certificate signing requests for your machines
When you add machines to a cluster, two pending certificate signing requests (CSRs) are generated for each machine that you added. You must confirm that these CSRs are approved or, if necessary, approve them yourself. The client requests must be approved first, followed by the server requests.
Prerequisites
- You added machines to your cluster.
Procedure
Confirm that the cluster recognizes the machines:
$ oc get nodesExample output
NAME STATUS ROLES AGE VERSION master-0 Ready master 63m v1.20.0 master-1 Ready master 63m v1.20.0 master-2 Ready master 64m v1.20.0The output lists all of the machines that you created.
NoteThe preceding output might not include the compute nodes, also known as worker nodes, until some CSRs are approved.
Review the pending CSRs and ensure that you see the client requests with the
PendingorApprovedstatus for each machine that you added to the cluster:$ oc get csrExample output
NAME AGE REQUESTOR CONDITION csr-mddf5 20m system:node:master-01.example.com Approved,Issued csr-z5rln 16m system:node:worker-21.example.com Approved,IssuedIf the CSRs were not approved, after all of the pending CSRs for the machines you added are in
Pendingstatus, approve the CSRs for your cluster machines:NoteBecause the CSRs rotate automatically, approve your CSRs within an hour of adding the machines to the cluster. If you do not approve them within an hour, the certificates will rotate, and more than two certificates will be present for each node. You must approve all of these certificates. Once the client CSR is approved, the Kubelet creates a secondary CSR for the serving certificate, which requires manual approval. Then, subsequent serving certificate renewal requests are automatically approved by the
machine-approverif the Kubelet requests a new certificate with identical parameters.NoteFor clusters running on platforms that are not machine API enabled, such as bare metal and other user-provisioned infrastructure, you must implement a method of automatically approving the kubelet serving certificate requests (CSRs). If a request is not approved, then the
oc exec,oc rsh, andoc logscommands cannot succeed, because a serving certificate is required when the API server connects to the kubelet. Any operation that contacts the Kubelet endpoint requires this certificate approval to be in place. The method must watch for new CSRs, confirm that the CSR was submitted by thenode-bootstrapperservice account in thesystem:nodeorsystem:admingroups, and confirm the identity of the node.To approve them individually, run the following command for each valid CSR:
$ oc adm certificate approve <csr_name>1 - 1
<csr_name>is the name of a CSR from the list of current CSRs.
To approve all pending CSRs, run the following command:
$ oc get csr -o go-template='{{range .items}}{{if not .status}}{{.metadata.name}}{{"\n"}}{{end}}{{end}}' | xargs --no-run-if-empty oc adm certificate approveNoteSome Operators might not become available until some CSRs are approved.
Now that your client requests are approved, you must review the server requests for each machine that you added to the cluster:
$ oc get csrExample output
NAME AGE REQUESTOR CONDITION csr-bfd72 5m26s system:node:ip-10-0-50-126.us-east-2.compute.internal Pending csr-c57lv 5m26s system:node:ip-10-0-95-157.us-east-2.compute.internal Pending ...If the remaining CSRs are not approved, and are in the
Pendingstatus, approve the CSRs for your cluster machines:To approve them individually, run the following command for each valid CSR:
$ oc adm certificate approve <csr_name>1 - 1
<csr_name>is the name of a CSR from the list of current CSRs.
To approve all pending CSRs, run the following command:
$ oc get csr -o go-template='{{range .items}}{{if not .status}}{{.metadata.name}}{{"\n"}}{{end}}{{end}}' | xargs oc adm certificate approve
After all client and server CSRs have been approved, the machines have the
Readystatus. Verify this by running the following command:$ oc get nodesExample output
NAME STATUS ROLES AGE VERSION master-0 Ready master 73m v1.20.0 master-1 Ready master 73m v1.20.0 master-2 Ready master 74m v1.20.0 worker-0 Ready worker 11m v1.20.0 worker-1 Ready worker 11m v1.20.0NoteIt can take a few minutes after approval of the server CSRs for the machines to transition to the
Readystatus.
Additional information
- For more information on CSRs, see Certificate Signing Requests.
14.5.20.1. Initial Operator configuration
After the control plane initializes, you must immediately configure some Operators so that they all become available.
Prerequisites
- Your control plane has initialized.
Procedure
Watch the cluster components come online:
$ watch -n5 oc get clusteroperatorsExample output
NAME VERSION AVAILABLE PROGRESSING DEGRADED SINCE authentication 4.7.0 True False False 3h56m baremetal 4.7.0 True False False 29h cloud-credential 4.7.0 True False False 29h cluster-autoscaler 4.7.0 True False False 29h config-operator 4.7.0 True False False 6h39m console 4.7.0 True False False 3h59m csi-snapshot-controller 4.7.0 True False False 4h12m dns 4.7.0 True False False 4h15m etcd 4.7.0 True False False 29h image-registry 4.7.0 True False False 3h59m ingress 4.7.0 True False False 4h30m insights 4.7.0 True False False 29h kube-apiserver 4.7.0 True False False 29h kube-controller-manager 4.7.0 True False False 29h kube-scheduler 4.7.0 True False False 29h kube-storage-version-migrator 4.7.0 True False False 4h2m machine-api 4.7.0 True False False 29h machine-approver 4.7.0 True False False 6h34m machine-config 4.7.0 True False False 3h56m marketplace 4.7.0 True False False 4h2m monitoring 4.7.0 True False False 6h31m network 4.7.0 True False False 29h node-tuning 4.7.0 True False False 4h30m openshift-apiserver 4.7.0 True False False 3h56m openshift-controller-manager 4.7.0 True False False 4h36m openshift-samples 4.7.0 True False False 4h30m operator-lifecycle-manager 4.7.0 True False False 29h operator-lifecycle-manager-catalog 4.7.0 True False False 29h operator-lifecycle-manager-packageserver 4.7.0 True False False 3h59m service-ca 4.7.0 True False False 29h storage 4.7.0 True False False 4h30m- Configure the Operators that are not available.
14.5.20.2. Image registry removed during installation
On platforms that do not provide shareable object storage, the OpenShift Image Registry Operator bootstraps itself as Removed. This allows openshift-installer to complete installations on these platform types.
After installation, you must edit the Image Registry Operator configuration to switch the managementState from Removed to Managed.
The Prometheus console provides an ImageRegistryRemoved alert, for example:
"Image Registry has been removed. ImageStreamTags, BuildConfigs and DeploymentConfigs which reference ImageStreamTags may not work as expected. Please configure storage and update the config to Managed state by editing configs.imageregistry.operator.openshift.io."
14.5.20.3. Image registry storage configuration
The Image Registry Operator is not initially available for platforms that do not provide default storage. After installation, you must configure your registry to use storage so that the Registry Operator is made available.
Instructions are shown for configuring a persistent volume, which is required for production clusters. Where applicable, instructions are shown for configuring an empty directory as the storage location, which is available for only non-production clusters.
Additional instructions are provided for allowing the image registry to use block storage types by using the Recreate rollout strategy during upgrades.
14.5.20.3.1. Configuring block registry storage for VMware vSphere
To allow the image registry to use block storage types such as vSphere Virtual Machine Disk (VMDK) during upgrades as a cluster administrator, you can use the Recreate rollout strategy.
Block storage volumes are supported but not recommended for use with image registry on production clusters. An installation where the registry is configured on block storage is not highly available because the registry cannot have more than one replica.
Procedure
To set the image registry storage as a block storage type, patch the registry so that it uses the
Recreaterollout strategy and runs with only1replica:$ oc patch config.imageregistry.operator.openshift.io/cluster --type=merge -p '{"spec":{"rolloutStrategy":"Recreate","replicas":1}}'Provision the PV for the block storage device, and create a PVC for that volume. The requested block volume uses the ReadWriteOnce (RWO) access mode.
Create a
pvc.yamlfile with the following contents to define a VMware vSpherePersistentVolumeClaimobject:kind: PersistentVolumeClaim apiVersion: v1 metadata: name: image-registry-storage1 namespace: openshift-image-registry2 spec: accessModes: - ReadWriteOnce3 resources: requests: storage: 100Gi4 - 1
- A unique name that represents the
PersistentVolumeClaimobject. - 2
- The namespace for the
PersistentVolumeClaimobject, which isopenshift-image-registry. - 3
- The access mode of the persistent volume claim. With
ReadWriteOnce, the volume can be mounted with read and write permissions by a single node. - 4
- The size of the persistent volume claim.
Create the
PersistentVolumeClaimobject from the file:$ oc create -f pvc.yaml -n openshift-image-registry
Edit the registry configuration so that it references the correct PVC:
$ oc edit config.imageregistry.operator.openshift.io -o yamlExample output
storage: pvc: claim:1 - 1
- Creating a custom PVC allows you to leave the
claimfield blank for the default automatic creation of animage-registry-storagePVC.
For instructions about configuring registry storage so that it references the correct PVC, see Configuring the registry for vSphere.
14.5.21. Completing installation on user-provisioned infrastructure
After you complete the Operator configuration, you can finish installing the cluster on infrastructure that you provide.
Prerequisites
- Your control plane has initialized.
- You have completed the initial Operator configuration.
Procedure
Confirm that all the cluster components are online with the following command:
$ watch -n5 oc get clusteroperatorsExample output
NAME VERSION AVAILABLE PROGRESSING DEGRADED SINCE authentication 4.7.0 True False False 3h56m baremetal 4.7.0 True False False 29h cloud-credential 4.7.0 True False False 29h cluster-autoscaler 4.7.0 True False False 29h config-operator 4.7.0 True False False 6h39m console 4.7.0 True False False 3h59m csi-snapshot-controller 4.7.0 True False False 4h12m dns 4.7.0 True False False 4h15m etcd 4.7.0 True False False 29h image-registry 4.7.0 True False False 3h59m ingress 4.7.0 True False False 4h30m insights 4.7.0 True False False 29h kube-apiserver 4.7.0 True False False 29h kube-controller-manager 4.7.0 True False False 29h kube-scheduler 4.7.0 True False False 29h kube-storage-version-migrator 4.7.0 True False False 4h2m machine-api 4.7.0 True False False 29h machine-approver 4.7.0 True False False 6h34m machine-config 4.7.0 True False False 3h56m marketplace 4.7.0 True False False 4h2m monitoring 4.7.0 True False False 6h31m network 4.7.0 True False False 29h node-tuning 4.7.0 True False False 4h30m openshift-apiserver 4.7.0 True False False 3h56m openshift-controller-manager 4.7.0 True False False 4h36m openshift-samples 4.7.0 True False False 4h30m operator-lifecycle-manager 4.7.0 True False False 29h operator-lifecycle-manager-catalog 4.7.0 True False False 29h operator-lifecycle-manager-packageserver 4.7.0 True False False 3h59m service-ca 4.7.0 True False False 29h storage 4.7.0 True False False 4h30mAlternatively, the following command notifies you when all of the clusters are available. It also retrieves and displays credentials:
$ ./openshift-install --dir <installation_directory> wait-for install-complete1 - 1
- For
<installation_directory>, specify the path to the directory that you stored the installation files in.
Example output
INFO Waiting up to 30m0s for the cluster to initialize...The command succeeds when the Cluster Version Operator finishes deploying the OpenShift Container Platform cluster from Kubernetes API server.
Important-
The Ignition config files that the installation program generates contain certificates that expire after 24 hours, which are then renewed at that time. If the cluster is shut down before renewing the certificates and the cluster is later restarted after the 24 hours have elapsed, the cluster automatically recovers the expired certificates. The exception is that you must manually approve the pending
node-bootstrappercertificate signing requests (CSRs) to recover kubelet certificates. See the documentation for Recovering from expired control plane certificates for more information. - It is recommended that you use Ignition config files within 12 hours after they are generated because the 24-hour certificate rotates from 16 to 22 hours after the cluster is installed. By using the Ignition config files within 12 hours, you can avoid installation failure if the certificate update runs during installation.
Confirm that the Kubernetes API server is communicating with the pods.
To view a list of all pods, use the following command:
$ oc get pods --all-namespacesExample output
NAMESPACE NAME READY STATUS RESTARTS AGE openshift-apiserver-operator openshift-apiserver-operator-85cb746d55-zqhs8 1/1 Running 1 9m openshift-apiserver apiserver-67b9g 1/1 Running 0 3m openshift-apiserver apiserver-ljcmx 1/1 Running 0 1m openshift-apiserver apiserver-z25h4 1/1 Running 0 2m openshift-authentication-operator authentication-operator-69d5d8bf84-vh2n8 1/1 Running 0 5m ...View the logs for a pod that is listed in the output of the previous command by using the following command:
$ oc logs <pod_name> -n <namespace>1 - 1
- Specify the pod name and namespace, as shown in the output of the previous command.
If the pod logs display, the Kubernetes API server can communicate with the cluster machines.
For an installation with Fibre Channel Protocol (FCP), additional steps are required to enable multipathing. Do not enable multipathing during installation.
See "Enabling multipathing with kernel arguments on RHCOS" in the Post-installation configuration documentation for more information.
All the worker nodes are restarted. To monitor the process, enter the following command:
$ oc get nodes -wNoteIf you have additional machine types such as infrastructure nodes, repeat the process for these types.
You can add extra compute machines after the cluster installation is completed by following Adding compute machines to vSphere.
14.5.22. Backing up VMware vSphere volumes
OpenShift Container Platform provisions new volumes as independent persistent disks to freely attach and detach the volume on any node in the cluster. As a consequence, it is not possible to back up volumes that use snapshots, or to restore volumes from snapshots. See Snapshot Limitations for more information.
Procedure
To create a backup of persistent volumes:
- Stop the application that is using the persistent volume.
- Clone the persistent volume.
- Restart the application.
- Create a backup of the cloned volume.
- Delete the cloned volume.
14.5.23. Telemetry access for OpenShift Container Platform
In OpenShift Container Platform 4.7, the Telemetry service, which runs by default to provide metrics about cluster health and the success of updates, requires internet access. If your cluster is connected to the internet, Telemetry runs automatically, and your cluster is registered to OpenShift Cluster Manager.
After you confirm that your OpenShift Cluster Manager inventory is correct, either maintained automatically by Telemetry or manually by using OpenShift Cluster Manager, use subscription watch to track your OpenShift Container Platform subscriptions at the account or multi-cluster level.
14.5.24. Next steps
- Customize your cluster.
- If necessary, you can opt out of remote health reporting.
- Set up your registry and configure registry storage.
- Optional: View the events from the vSphere Problem Detector Operator to determine if the cluster has permission or storage configuration issues.
14.6. Installing a cluster on vSphere in a restricted network
In OpenShift Container Platform 4.7, you can install a cluster on VMware vSphere infrastructure in a restricted network by creating an internal mirror of the installation release content.
OpenShift Container Platform supports deploying a cluster to a single VMware vCenter only. Deploying a cluster with machines/machine sets on multiple vCenters is not supported.
14.6.1. Prerequisites
Create a registry on your mirror host and obtain the
imageContentSourcesdata for your version of OpenShift Container Platform.ImportantBecause the installation media is on the mirror host, you can use that computer to complete all installation steps.
- Provision persistent storage for your cluster. To deploy a private image registry, your storage must provide the ReadWriteMany access mode.
- Review details about the OpenShift Container Platform installation and update processes.
- The OpenShift Container Platform installer requires access to port 443 on the vCenter and ESXi hosts. You verified that port 443 is accessible.
- If you use a firewall, you confirmed with the administrator that port 443 is accessible. Control plane nodes must be able to reach vCenter and ESXi hosts on port 443 for the installation to succeed.
If you use a firewall and plan to use telemetry, you must configure the firewall to allow the sites that your cluster requires access to.
NoteIf you are configuring a proxy, be sure to also review this site list.
14.6.2. About installations in restricted networks
In OpenShift Container Platform 4.7, you can perform an installation that does not require an active connection to the Internet to obtain software components. Restricted network installations can be completed using installer-provisioned infrastructure or user-provisioned infrastructure, depending on the cloud platform to which you are installing the cluster.
If you choose to perform a restricted network installation on a cloud platform, you still require access to its cloud APIs. Some cloud functions, like Amazon Web Service’s Route 53 DNS and IAM services, require internet access. Depending on your network, you might require less Internet access for an installation on bare metal hardware or on VMware vSphere.
To complete a restricted network installation, you must create a registry that mirrors the contents of the OpenShift Container Platform registry and contains the installation media. You can create this registry on a mirror host, which can access both the Internet and your closed network, or by using other methods that meet your restrictions.
14.6.2.1. Additional limits
Clusters in restricted networks have the following additional limitations and restrictions:
-
The
ClusterVersionstatus includes anUnable to retrieve available updateserror. - By default, you cannot use the contents of the Developer Catalog because you cannot access the required image stream tags.
14.6.3. Internet access for OpenShift Container Platform
In OpenShift Container Platform 4.7, you require access to the Internet to obtain the images that are necessary to install your cluster.
You must have Internet access to:
- Access OpenShift Cluster Manager to download the installation program and perform subscription management. If the cluster has internet access and you do not disable Telemetry, that service automatically entitles your cluster.
- Access Quay.io to obtain the packages that are required to install your cluster.
- Obtain the packages that are required to perform cluster updates.
If your cluster cannot have direct Internet access, you can perform a restricted network installation on some types of infrastructure that you provision. During that process, you download the content that is required and use it to populate a mirror registry with the packages that you need to install a cluster and generate the installation program. With some installation types, the environment that you install your cluster in will not require Internet access. Before you update the cluster, you update the content of the mirror registry.
14.6.4. VMware vSphere infrastructure requirements
You must install the OpenShift Container Platform cluster on a VMware vSphere version 6 or 7 instance that meets the requirements for the components that you use.
| Component | Minimum supported versions | Description |
|---|---|---|
| Hypervisor | vSphere 6.5 and later with HW version 13 | This version is the minimum version that Red Hat Enterprise Linux CoreOS (RHCOS) supports. See the Red Hat Enterprise Linux 8 supported hypervisors list. |
| Storage with in-tree drivers | vSphere 6.5 and later | This plug-in creates vSphere storage by using the in-tree storage drivers for vSphere included in OpenShift Container Platform. |
| Optional: Networking (NSX-T) | vSphere 6.5U3 or vSphere 6.7U2 and later | vSphere 6.5U3 or vSphere 6.7U2+ are required for OpenShift Container Platform. VMware’s NSX Container Plug-in (NCP) is certified with OpenShift Container Platform 4.6 and NSX-T 3.x+. |
If you use a vSphere version 6.5 instance, consider upgrading to 6.7U3 or 7.0 before you install OpenShift Container Platform.
You must ensure that the time on your ESXi hosts is synchronized before you install OpenShift Container Platform. See Edit Time Configuration for a Host in the VMware documentation.
Virtual machines (VMs) configured to use virtual hardware version 14 or greater might result in a failed installation. It is recommended to configure VMs with virtual hardware version 13. This is a known issue that is being addressed in BZ#1935539.
14.6.5. Network connectivity requirements
You must configure the network connectivity between machines to allow OpenShift Container Platform cluster components to communicate.
Review the following details about the required network ports.
| Protocol | Port | Description |
|---|---|---|
| ICMP | N/A | Network reachability tests |
| TCP |
| Metrics |
|
|
Host level services, including the node exporter on ports | |
|
| The default ports that Kubernetes reserves | |
|
| openshift-sdn | |
| UDP |
| virtual extensible LAN (VXLAN) |
|
| Geneve | |
|
|
Host level services, including the node exporter on ports | |
|
| IPsec IKE packets | |
|
| IPsec NAT-T packets | |
| TCP/UDP |
| Kubernetes node port |
| ESP | N/A | IPsec Encapsulating Security Payload (ESP) |
| Protocol | Port | Description |
|---|---|---|
| TCP |
| Kubernetes API |
| Protocol | Port | Description |
|---|---|---|
| TCP |
| etcd server and peer ports |
14.6.6. vCenter requirements
Before you install an OpenShift Container Platform cluster on your vCenter that uses infrastructure that the installer provisions, you must prepare your environment.
Required vCenter account privileges
To install an OpenShift Container Platform cluster in a vCenter, the installation program requires access to an account with privileges to read and create the required resources. Using an account that has global administrative privileges is the simplest way to access all of the necessary permissions.
If you cannot use an account with global administrative privileges, you must create roles to grant the privileges necessary for OpenShift Container Platform cluster installation. While most of the privileges are always required, some are required only if you plan for the installation program to provision a folder to contain the OpenShift Container Platform cluster on your vCenter instance, which is the default behavior. You must create or amend vSphere roles for the specified objects to grant the required privileges.
An additional role is required if the installation program is to create a vSphere virtual machine folder.
Example 14.11. Roles and privileges required for installation
| vSphere object for role | When required | Required privileges |
|---|---|---|
| vSphere vCenter | Always |
|
| vSphere vCenter Cluster | Always |
|
| vSphere Datastore | Always |
|
| vSphere Port Group | Always |
|
| Virtual Machine Folder | Always |
|
| vSphere vCenter Datacenter | If the installation program creates the virtual machine folder |
|
Additionally, the user requires some ReadOnly permissions, and some of the roles require permission to propogate the permissions to child objects. These settings vary depending on whether or not you install the cluster into an existing folder.
Example 14.12. Required permissions and propagation settings
| vSphere object | Folder type | Propagate to children | Permissions required |
|---|---|---|---|
| vSphere vCenter | Always | False | Listed required privileges |
| vSphere vCenter Datacenter | Existing folder | False |
|
| Installation program creates the folder | True | Listed required privileges | |
| vSphere vCenter Cluster | Always | True | Listed required privileges |
| vSphere vCenter Datastore | Always | False | Listed required privileges |
| vSphere Switch | Always | False |
|
| vSphere Port Group | Always | False | Listed required privileges |
| vSphere vCenter Virtual Machine Folder | Existing folder | True | Listed required privileges |
For more information about creating an account with only the required privileges, see vSphere Permissions and User Management Tasks in the vSphere documentation.
Using OpenShift Container Platform with vMotion
If you intend on using vMotion in your vSphere environment, consider the following before installing a OpenShift Container Platform cluster.
OpenShift Container Platform generally supports compute-only vMotion. Using Storage vMotion can cause issues and is not supported.
To help ensure the uptime of your compute and control plane nodes, it is recommended that you follow the VMware best practices for vMotion. It is also recommended to use VMware anti-affinity rules to improve the availability of OpenShift Container Platform during maintenance or hardware issues.
For more information about vMotion and anti-affinity rules, see the VMware vSphere documentation for vMotion networking requirements and VM anti-affinity rules.
- If you are using vSphere volumes in your pods, migrating a VM across datastores either manually or through Storage vMotion causes, invalid references within OpenShift Container Platform persistent volume (PV) objects. These references prevent affected pods from starting up and can result in data loss.
- Similarly, OpenShift Container Platform does not support selective migration of VMDKs across datastores, using datastore clusters for VM provisioning or for dynamic or static provisioning of PVs, or using a datastore that is part of a datastore cluster for dynamic or static provisioning of PVs.
Cluster resources
When you deploy an OpenShift Container Platform cluster that uses installer-provisioned infrastructure, the installation program must be able to create several resources in your vCenter instance.
A standard OpenShift Container Platform installation creates the following vCenter resources:
- 1 Folder
- 1 Tag category
- 1 Tag
Virtual machines:
- 1 template
- 1 temporary bootstrap node
- 3 control plane nodes
- 3 compute machines
Although these resources use 856 GB of storage, the bootstrap node is destroyed during the cluster installation process. A minimum of 800 GB of storage is required to use a standard cluster.
If you deploy more compute machines, the OpenShift Container Platform cluster will use more storage.
Cluster limits
Available resources vary between clusters. The number of possible clusters within a vCenter is limited primarily by available storage space and any limitations on the number of required resources. Be sure to consider both limitations to the vCenter resources that the cluster creates and the resources that you require to deploy a cluster, such as IP addresses and networks.
Networking requirements
You must use DHCP for the network and ensure that the DHCP server is configured to provide persistent IP addresses to the cluster machines. All nodes must be in the same VLAN. You cannot scale the cluster using a second VLAN as a Day 2 operation. The VM in your restricted network must have access to vCenter so that it can provision and manage nodes, persistent volume claims (PVCs), and other resources. Additionally, you must create the following networking resources before you install the OpenShift Container Platform cluster:
It is recommended that each OpenShift Container Platform node in the cluster must have access to a Network Time Protocol (NTP) server that is discoverable via DHCP. Installation is possible without an NTP server. However, asynchronous server clocks will cause errors, which NTP server prevents.
Required IP Addresses
An installer-provisioned vSphere installation requires two static IP addresses:
- The API address is used to access the cluster API.
- The Ingress address is used for cluster ingress traffic.
You must provide these IP addresses to the installation program when you install the OpenShift Container Platform cluster.
DNS records
You must create DNS records for two static IP addresses in the appropriate DNS server for the vCenter instance that hosts your OpenShift Container Platform cluster. In each record, <cluster_name> is the cluster name and <base_domain> is the cluster base domain that you specify when you install the cluster. A complete DNS record takes the form: <component>.<cluster_name>.<base_domain>..
| Component | Record | Description |
|---|---|---|
| API VIP |
| This DNS A/AAAA or CNAME record must point to the load balancer for the control plane machines. This record must be resolvable by both clients external to the cluster and from all the nodes within the cluster. |
| Ingress VIP |
| A wildcard DNS A/AAAA or CNAME record that points to the load balancer that targets the machines that run the Ingress router pods, which are the worker nodes by default. This record must be resolvable by both clients external to the cluster and from all the nodes within the cluster. |
14.6.7. Generating an SSH private key and adding it to the agent
If you want to perform installation debugging or disaster recovery on your cluster, you must provide an SSH key to both your ssh-agent and the installation program. You can use this key to access the bootstrap machine in a public cluster to troubleshoot installation issues.
In a production environment, you require disaster recovery and debugging.
Do not skip this procedure in production environments where disaster recovery and debugging is required.
You can use this key to SSH into the master nodes as the user core. When you deploy the cluster, the key is added to the core user’s ~/.ssh/authorized_keys list.
Procedure
If you do not have an SSH key that is configured for password-less authentication on your computer, create one. For example, on a computer that uses a Linux operating system, run the following command:
$ ssh-keygen -t ed25519 -N '' \ -f <path>/<file_name>1 - 1
- Specify the path and file name, such as
~/.ssh/id_rsa, of the new SSH key. If you have an existing key pair, ensure your public key is in the your~/.sshdirectory.
Running this command generates an SSH key that does not require a password in the location that you specified.
NoteIf you plan to install an OpenShift Container Platform cluster that uses FIPS Validated / Modules in Process cryptographic libraries on the
x86_64architecture, do not create a key that uses theed25519algorithm. Instead, create a key that uses thersaorecdsaalgorithm.Start the
ssh-agentprocess as a background task:$ eval "$(ssh-agent -s)"Example output
Agent pid 31874NoteIf your cluster is in FIPS mode, only use FIPS-compliant algorithms to generate the SSH key. The key must be either RSA or ECDSA.
Add your SSH private key to the
ssh-agent:$ ssh-add <path>/<file_name>1 Example output
Identity added: /home/<you>/<path>/<file_name> (<computer_name>)- 1
- Specify the path and file name for your SSH private key, such as
~/.ssh/id_rsa
Next steps
- When you install OpenShift Container Platform, provide the SSH public key to the installation program.
14.6.8. Adding vCenter root CA certificates to your system trust
Because the installation program requires access to your vCenter’s API, you must add your vCenter’s trusted root CA certificates to your system trust before you install an OpenShift Container Platform cluster.
Procedure
-
From the vCenter home page, download the vCenter’s root CA certificates. Click Download trusted root CA certificates in the vSphere Web Services SDK section. The
<vCenter>/certs/download.zipfile downloads. Extract the compressed file that contains the vCenter root CA certificates. The contents of the compressed file resemble the following file structure:
certs ├── lin │ ├── 108f4d17.0 │ ├── 108f4d17.r1 │ ├── 7e757f6a.0 │ ├── 8e4f8471.0 │ └── 8e4f8471.r0 ├── mac │ ├── 108f4d17.0 │ ├── 108f4d17.r1 │ ├── 7e757f6a.0 │ ├── 8e4f8471.0 │ └── 8e4f8471.r0 └── win ├── 108f4d17.0.crt ├── 108f4d17.r1.crl ├── 7e757f6a.0.crt ├── 8e4f8471.0.crt └── 8e4f8471.r0.crl 3 directories, 15 filesAdd the files for your operating system to the system trust. For example, on a Fedora operating system, run the following command:
# cp certs/lin/* /etc/pki/ca-trust/source/anchorsUpdate your system trust. For example, on a Fedora operating system, run the following command:
# update-ca-trust extract
14.6.9. Creating the RHCOS image for restricted network installations
Download the Red Hat Enterprise Linux CoreOS (RHCOS) image to install OpenShift Container Platform on a restricted network VMware vSphere environment.
Prerequisites
- Obtain the OpenShift Container Platform installation program. For a restricted network installation, the program is on your mirror registry host.
Procedure
- Log in to the Red Hat Customer Portal’s Product Downloads page.
Under Version, select the most recent release of OpenShift Container Platform 4.7 for RHEL 8.
ImportantThe RHCOS images might not change with every release of OpenShift Container Platform. You must download images with the highest version that is less than or equal to the OpenShift Container Platform version that you install. Use the image versions that match your OpenShift Container Platform version if they are available.
- Download the Red Hat Enterprise Linux CoreOS (RHCOS) - vSphere image.
- Upload the image you downloaded to a location that is accessible from the bastion server.
The image is now available for a restricted installation. Note the image name or location for use in OpenShift Container Platform deployment.
14.6.10. Creating the installation configuration file
You can customize the OpenShift Container Platform cluster you install on VMware vSphere.
Prerequisites
- Obtain the OpenShift Container Platform installation program and the pull secret for your cluster. For a restricted network installation, these files are on your mirror host.
-
Have the
imageContentSourcesvalues that were generated during mirror registry creation. - Obtain the contents of the certificate for your mirror registry.
- Retrieve a Red Hat Enterprise Linux CoreOS (RHCOS) image and upload it to an accessible location.
- Obtain service principal permissions at the subscription level.
Procedure
Create the
install-config.yamlfile.Change to the directory that contains the installation program and run the following command:
$ ./openshift-install create install-config --dir <installation_directory>1 - 1
- For
<installation_directory>, specify the directory name to store the files that the installation program creates.
ImportantSpecify an empty directory. Some installation assets, like bootstrap X.509 certificates have short expiration intervals, so you must not reuse an installation directory. If you want to reuse individual files from another cluster installation, you can copy them into your directory. However, the file names for the installation assets might change between releases. Use caution when copying installation files from an earlier OpenShift Container Platform version.
At the prompts, provide the configuration details for your cloud:
Optional: Select an SSH key to use to access your cluster machines.
NoteFor production OpenShift Container Platform clusters on which you want to perform installation debugging or disaster recovery, specify an SSH key that your
ssh-agentprocess uses.- Select vsphere as the platform to target.
- Specify the name of your vCenter instance.
Specify the user name and password for the vCenter account that has the required permissions to create the cluster.
The installation program connects to your vCenter instance.
- Select the datacenter in your vCenter instance to connect to.
- Select the default vCenter datastore to use.
- Select the vCenter cluster to install the OpenShift Container Platform cluster in. The installation program uses the root resource pool of the vSphere cluster as the default resource pool.
- Select the network in the vCenter instance that contains the virtual IP addresses and DNS records that you configured.
- Enter the virtual IP address that you configured for control plane API access.
- Enter the virtual IP address that you configured for cluster ingress.
- Enter the base domain. This base domain must be the same one that you used in the DNS records that you configured.
- Enter a descriptive name for your cluster. The cluster name must be the same one that you used in the DNS records that you configured.
- Paste the pull secret from the Red Hat OpenShift Cluster Manager.
In the
install-config.yamlfile, set the value ofplatform.vsphere.clusterOSImageto the image location or name. For example:platform: vsphere: clusterOSImage: http://mirror.example.com/images/rhcos-43.81.201912131630.0-vmware.x86_64.ova?sha256=ffebbd68e8a1f2a245ca19522c16c86f67f9ac8e4e0c1f0a812b068b16f7265dEdit the
install-config.yamlfile to provide the additional information that is required for an installation in a restricted network.Update the
pullSecretvalue to contain the authentication information for your registry:pullSecret: '{"auths":{"<mirror_host_name>:5000": {"auth": "<credentials>","email": "you@example.com"}}}'For
<mirror_host_name>, specify the registry domain name that you specified in the certificate for your mirror registry, and for<credentials>, specify the base64-encoded user name and password for your mirror registry.Add the
additionalTrustBundleparameter and value.additionalTrustBundle: | -----BEGIN CERTIFICATE----- ZZZZZZZZZZZZZZZZZZZZZZZZZZZZZZZZZZZZZZZZZZZZZZZZZZZZZZZZZZZZZZZZ -----END CERTIFICATE-----The value must be the contents of the certificate file that you used for your mirror registry, which can be an existing, trusted certificate authority or the self-signed certificate that you generated for the mirror registry.
Add the image content resources, which look like this excerpt:
imageContentSources: - mirrors: - <mirror_host_name>:5000/<repo_name>/release source: quay.example.com/openshift-release-dev/ocp-release - mirrors: - <mirror_host_name>:5000/<repo_name>/release source: registry.example.com/ocp/releaseTo complete these values, use the
imageContentSourcesthat you recorded during mirror registry creation.
-
Make any other modifications to the
install-config.yamlfile that you require. You can find more information about the available parameters in the Installation configuration parameters section. Back up the
install-config.yamlfile so that you can use it to install multiple clusters.ImportantThe
install-config.yamlfile is consumed during the installation process. If you want to reuse the file, you must back it up now.
14.6.10.1. Installation configuration parameters
Before you deploy an OpenShift Container Platform cluster, you provide parameter values to describe your account on the cloud platform that hosts your cluster and optionally customize your cluster’s platform. When you create the install-config.yaml installation configuration file, you provide values for the required parameters through the command line. If you customize your cluster, you can modify the install-config.yaml file to provide more details about the platform.
After installation, you cannot modify these parameters in the install-config.yaml file.
The openshift-install command does not validate field names for parameters. If an incorrect name is specified, the related file or object is not created, and no error is reported. Ensure that the field names for any parameters that are specified are correct.
14.6.10.1.1. Required configuration parameters
Required installation configuration parameters are described in the following table:
| Parameter | Description | Values |
|---|---|---|
|
|
The API version for the | String |
|
|
The base domain of your cloud provider. The base domain is used to create routes to your OpenShift Container Platform cluster components. The full DNS name for your cluster is a combination of the |
A fully-qualified domain or subdomain name, such as |
|
|
Kubernetes resource | Object |
|
|
The name of the cluster. DNS records for the cluster are all subdomains of |
String of lowercase letters and hyphens ( |
|
|
The configuration for the specific platform upon which to perform the installation: | Object |
|
| Get a pull secret from the Red Hat OpenShift Cluster Manager to authenticate downloading container images for OpenShift Container Platform components from services such as Quay.io. |
|
14.6.10.1.2. Network configuration parameters
You can customize your installation configuration based on the requirements of your existing network infrastructure. For example, you can expand the IP address block for the cluster network or provide different IP address blocks than the defaults.
Only IPv4 addresses are supported.
| Parameter | Description | Values |
|---|---|---|
|
| The configuration for the cluster network. | Object Note
You cannot modify parameters specified by the |
|
| The cluster network provider Container Network Interface (CNI) plug-in to install. |
Either |
|
| The IP address blocks for pods.
The default value is If you specify multiple IP address blocks, the blocks must not overlap. | An array of objects. For example: |
|
|
Required if you use An IPv4 network. |
An IP address block in Classless Inter-Domain Routing (CIDR) notation. The prefix length for an IPv4 block is between |
|
|
The subnet prefix length to assign to each individual node. For example, if | A subnet prefix.
The default value is |
|
|
The IP address block for services. The default value is The OpenShift SDN and OVN-Kubernetes network providers support only a single IP address block for the service network. | An array with an IP address block in CIDR format. For example: |
|
| The IP address blocks for machines. If you specify multiple IP address blocks, the blocks must not overlap.
If you specify multiple IP kernel arguments, the | An array of objects. For example: |
|
|
Required if you use | An IP network block in CIDR notation.
For example, Note
Set the |
14.6.10.1.3. Optional configuration parameters
Optional installation configuration parameters are described in the following table:
| Parameter | Description | Values |
|---|---|---|
|
| A PEM-encoded X.509 certificate bundle that is added to the nodes' trusted certificate store. This trust bundle may also be used when a proxy has been configured. | String |
|
| The configuration for the machines that comprise the compute nodes. |
Array of |
|
|
Determines the instruction set architecture of the machines in the pool. Currently, heteregeneous clusters are not supported, so all pools must specify the same architecture. Valid values are | String |
|
|
Whether to enable or disable simultaneous multithreading, or Important If you disable simultaneous multithreading, ensure that your capacity planning accounts for the dramatically decreased machine performance. |
|
|
|
Required if you use |
|
|
|
Required if you use |
|
|
| The number of compute machines, which are also known as worker machines, to provision. |
A positive integer greater than or equal to |
|
| The configuration for the machines that comprise the control plane. |
Array of |
|
|
Determines the instruction set architecture of the machines in the pool. Currently, heterogeneous clusters are not supported, so all pools must specify the same architecture. Valid values are | String |
|
|
Whether to enable or disable simultaneous multithreading, or Important If you disable simultaneous multithreading, ensure that your capacity planning accounts for the dramatically decreased machine performance. |
|
|
|
Required if you use |
|
|
|
Required if you use |
|
|
| The number of control plane machines to provision. |
The only supported value is |
|
| The Cloud Credential Operator (CCO) mode. If no mode is specified, the CCO dynamically tries to determine the capabilities of the provided credentials, with a preference for mint mode on the platforms where multiple modes are supported. Note Not all CCO modes are supported for all cloud providers. For more information on CCO modes, see the Cloud Credential Operator entry in the Cluster Operators reference content. |
|
|
|
Enable or disable FIPS mode. The default is Important
The use of FIPS Validated / Modules in Process cryptographic libraries is only supported on OpenShift Container Platform deployments on the Note If you are using Azure File storage, you cannot enable FIPS mode. |
|
|
| Sources and repositories for the release-image content. |
Array of objects. Includes a |
|
|
Required if you use | String |
|
| Specify one or more repositories that may also contain the same images. | Array of strings |
|
| How to publish or expose the user-facing endpoints of your cluster, such as the Kubernetes API, OpenShift routes. |
Setting this field to Important
If the value of the field is set to |
|
| The SSH key or keys to authenticate access your cluster machines. Note
For production OpenShift Container Platform clusters on which you want to perform installation debugging or disaster recovery, specify an SSH key that your | One or more keys. For example: |
14.6.10.1.4. Additional VMware vSphere configuration parameters
Additional VMware vSphere configuration parameters are described in the following table:
| Parameter | Description | Values |
|---|---|---|
|
| The fully-qualified hostname or IP address of the vCenter server. | String |
|
| The user name to use to connect to the vCenter instance with. This user must have at least the roles and privileges that are required for static or dynamic persistent volume provisioning in vSphere. | String |
|
| The password for the vCenter user name. | String |
|
| The name of the datacenter to use in the vCenter instance. | String |
|
| The name of the default datastore to use for provisioning volumes. | String |
|
| Optional. The absolute path of an existing folder where the installation program creates the virtual machines. If you do not provide this value, the installation program creates a folder that is named with the infrastructure ID in the datacenter virtual machine folder. |
String, for example, |
|
| The network in the vCenter instance that contains the virtual IP addresses and DNS records that you configured. | String |
|
| The vCenter cluster to install the OpenShift Container Platform cluster in. | String |
|
| The virtual IP (VIP) address that you configured for control plane API access. |
An IP address, for example |
|
| The virtual IP (VIP) address that you configured for cluster ingress. |
An IP address, for example |
14.6.10.1.5. Optional VMware vSphere machine pool configuration parameters
Optional VMware vSphere machine pool configuration parameters are described in the following table:
| Parameter | Description | Values |
|---|---|---|
|
| The location from which the installer downloads the RHCOS image. You must set this parameter to perform an installation in a restricted network. |
An HTTP or HTTPS URL, optionally with a SHA-256 checksum. For example, |
|
| The size of the disk in gigabytes. | Integer |
|
| The total number of virtual processor cores to assign a virtual machine. | Integer |
|
|
The number of cores per socket in a virtual machine. The number of virtual sockets on the virtual machine is | Integer |
|
| The size of a virtual machine’s memory in megabytes. | Integer |
14.6.10.2. Sample install-config.yaml file for an installer-provisioned VMware vSphere cluster
You can customize the install-config.yaml file to specify more details about your OpenShift Container Platform cluster’s platform or modify the values of the required parameters.
apiVersion: v1
baseDomain: example.com
compute:
- hyperthreading: Enabled
name: worker
replicas: 3
platform:
vsphere:
cpus: 2
coresPerSocket: 2
memoryMB: 8192
osDisk:
diskSizeGB: 120
controlPlane:
hyperthreading: Enabled
name: master
replicas: 3
platform:
vsphere:
cpus: 4
coresPerSocket: 2
memoryMB: 16384
osDisk:
diskSizeGB: 120
metadata:
name: cluster
platform:
vsphere:
vcenter: your.vcenter.server
username: username
password: password
datacenter: datacenter
defaultDatastore: datastore
folder: folder
network: VM_Network
cluster: vsphere_cluster_name
apiVIP: api_vip
ingressVIP: ingress_vip
clusterOSImage: http://mirror.example.com/images/rhcos-48.83.202103221318-0-vmware.x86_64.ova
fips: false
pullSecret: '{"auths":{"<local_registry>": {"auth": "<credentials>","email": "you@example.com"}}}'
sshKey: 'ssh-ed25519 AAAA...'
additionalTrustBundle: |
-----BEGIN CERTIFICATE-----
ZZZZZZZZZZZZZZZZZZZZZZZZZZZZZZZZZZZZZZZZZZZZZZZZZZZZZZZZZZZZZZZZ
-----END CERTIFICATE-----
imageContentSources:
- mirrors:
- <local_registry>/<local_repository_name>/release
source: quay.io/openshift-release-dev/ocp-release
- mirrors:
- <local_registry>/<local_repository_name>/release
source: quay.io/openshift-release-dev/ocp-v4.0-art-dev- 1
- The base domain of the cluster. All DNS records must be sub-domains of this base and include the cluster name.
- 2 5
- The
controlPlanesection is a single mapping, but thecomputesection is a sequence of mappings. To meet the requirements of the different data structures, the first line of thecomputesection must begin with a hyphen,-, and the first line of thecontrolPlanesection must not. Only one control plane pool is used. - 3 6
- Whether to enable or disable simultaneous multithreading, or
hyperthreading. By default, simultaneous multithreading is enabled to increase the performance of your machines' cores. You can disable it by setting the parameter value toDisabled. If you disable simultaneous multithreading in some cluster machines, you must disable it in all cluster machines.ImportantIf you disable simultaneous multithreading, ensure that your capacity planning accounts for the dramatically decreased machine performance. Your machines must use at least 8 CPUs and 32 GB of RAM if you disable simultaneous multithreading.
- 4 7
- Optional: Provide additional configuration for the machine pool parameters for the compute and control plane machines.
- 8
- The cluster name that you specified in your DNS records.
- 9
- The vSphere cluster to install the OpenShift Container Platform cluster in. The installation program uses the root resource pool of the vSphere cluster as the default resource pool.
- 10
- The location of the Red Hat Enterprise Linux CoreOS (RHCOS) image that is accessible from the bastion server.
- 11
- For
<local_registry>, specify the registry domain name, and optionally the port, that your mirror registry uses to serve content. For exampleregistry.example.comorregistry.example.com:5000. For<credentials>, specify the base64-encoded user name and password for your mirror registry. - 12
- Provide the contents of the certificate file that you used for your mirror registry.
- 13
- Provide the
imageContentSourcessection from the output of the command to mirror the repository.
14.6.10.3. Configuring the cluster-wide proxy during installation
Production environments can deny direct access to the Internet and instead have an HTTP or HTTPS proxy available. You can configure a new OpenShift Container Platform cluster to use a proxy by configuring the proxy settings in the install-config.yaml file.
Prerequisites
-
You have an existing
install-config.yamlfile. You reviewed the sites that your cluster requires access to and determined whether any of them need to bypass the proxy. By default, all cluster egress traffic is proxied, including calls to hosting cloud provider APIs. You added sites to the
Proxyobject’sspec.noProxyfield to bypass the proxy if necessary.NoteThe
Proxyobjectstatus.noProxyfield is populated with the values of thenetworking.machineNetwork[].cidr,networking.clusterNetwork[].cidr, andnetworking.serviceNetwork[]fields from your installation configuration.For installations on Amazon Web Services (AWS), Google Cloud Platform (GCP), Microsoft Azure, and Red Hat OpenStack Platform (RHOSP), the
Proxyobjectstatus.noProxyfield is also populated with the instance metadata endpoint (169.254.169.254).
Procedure
Edit your
install-config.yamlfile and add the proxy settings. For example:apiVersion: v1 baseDomain: my.domain.com proxy: httpProxy: http://<username>:<pswd>@<ip>:<port>1 httpsProxy: https://<username>:<pswd>@<ip>:<port>2 noProxy: example.com3 additionalTrustBundle: |4 -----BEGIN CERTIFICATE----- <MY_TRUSTED_CA_CERT> -----END CERTIFICATE----- ...- 1
- A proxy URL to use for creating HTTP connections outside the cluster. The URL scheme must be
http. - 2
- A proxy URL to use for creating HTTPS connections outside the cluster.
- 3
- A comma-separated list of destination domain names, IP addresses, or other network CIDRs to exclude from proxying. Preface a domain with
.to match subdomains only. For example,.y.commatchesx.y.com, but noty.com. Use*to bypass the proxy for all destinations. You must include vCenter’s IP address and the IP range that you use for its machines. - 4
- If provided, the installation program generates a config map that is named
user-ca-bundlein theopenshift-confignamespace to hold the additional CA certificates. If you provideadditionalTrustBundleand at least one proxy setting, theProxyobject is configured to reference theuser-ca-bundleconfig map in thetrustedCAfield. The Cluster Network Operator then creates atrusted-ca-bundleconfig map that merges the contents specified for thetrustedCAparameter with the RHCOS trust bundle. TheadditionalTrustBundlefield is required unless the proxy’s identity certificate is signed by an authority from the RHCOS trust bundle.
NoteThe installation program does not support the proxy
readinessEndpointsfield.- Save the file and reference it when installing OpenShift Container Platform.
The installation program creates a cluster-wide proxy that is named cluster that uses the proxy settings in the provided install-config.yaml file. If no proxy settings are provided, a cluster Proxy object is still created, but it will have a nil spec.
Only the Proxy object named cluster is supported, and no additional proxies can be created.
14.6.11. Deploying the cluster
You can install OpenShift Container Platform on a compatible cloud platform.
You can run the create cluster command of the installation program only once, during initial installation.
Prerequisites
- Obtain the OpenShift Container Platform installation program and the pull secret for your cluster.
Procedure
Change to the directory that contains the installation program and initialize the cluster deployment:
$ ./openshift-install create cluster --dir <installation_directory> \1 --log-level=info2 - 1
- For
<installation_directory>, specify the location of your customized./install-config.yamlfile. - 2
- To view different installation details, specify
warn,debug, orerrorinstead ofinfo.When the cluster deployment completes, directions for accessing your cluster, including a link to its web console and credentials for the
kubeadminuser, display in your terminal.
...
INFO Install complete!
INFO To access the cluster as the system:admin user when using 'oc', run 'export KUBECONFIG=/home/myuser/install_dir/auth/kubeconfig'
INFO Access the OpenShift web-console here: https://console-openshift-console.apps.mycluster.example.com
INFO Login to the console with user: "kubeadmin", and password: "4vYBz-Ee6gm-ymBZj-Wt5AL"
INFO Time elapsed: 36m22s+
The cluster access and credential information also outputs to <installation_directory>/.openshift_install.log when an installation succeeds.
+
-
The Ignition config files that the installation program generates contain certificates that expire after 24 hours, which are then renewed at that time. If the cluster is shut down before renewing the certificates and the cluster is later restarted after the 24 hours have elapsed, the cluster automatically recovers the expired certificates. The exception is that you must manually approve the pending
node-bootstrappercertificate signing requests (CSRs) to recover kubelet certificates. See the documentation for Recovering from expired control plane certificates for more information. - It is recommended that you use Ignition config files within 12 hours after they are generated because the 24-hour certificate rotates from 16 to 22 hours after the cluster is installed. By using the Ignition config files within 12 hours, you can avoid installation failure if the certificate update runs during installation.
+
You must not delete the installation program or the files that the installation program creates. Both are required to delete the cluster.
14.6.12. Installing the OpenShift CLI by downloading the binary
You can install the OpenShift CLI (oc) to interact with OpenShift Container Platform from a command-line interface. You can install oc on Linux, Windows, or macOS.
If you installed an earlier version of oc, you cannot use it to complete all of the commands in OpenShift Container Platform 4.7. Download and install the new version of oc.
14.6.12.1. Installing the OpenShift CLI on Linux
You can install the OpenShift CLI (oc) binary on Linux by using the following procedure.
Procedure
- Navigate to the OpenShift Container Platform downloads page on the Red Hat Customer Portal.
- Select the appropriate version in the Version drop-down menu.
- Click Download Now next to the OpenShift v4.7 Linux Client entry and save the file.
Unpack the archive:
$ tar xvzf <file>Place the
ocbinary in a directory that is on yourPATH.To check your
PATH, execute the following command:$ echo $PATH
After you install the OpenShift CLI, it is available using the oc command:
$ oc <command>14.6.12.2. Installing the OpenShift CLI on Windows
You can install the OpenShift CLI (oc) binary on Windows by using the following procedure.
Procedure
- Navigate to the OpenShift Container Platform downloads page on the Red Hat Customer Portal.
- Select the appropriate version in the Version drop-down menu.
- Click Download Now next to the OpenShift v4.7 Windows Client entry and save the file.
- Unzip the archive with a ZIP program.
Move the
ocbinary to a directory that is on yourPATH.To check your
PATH, open the command prompt and execute the following command:C:\> path
After you install the OpenShift CLI, it is available using the oc command:
C:\> oc <command>14.6.12.3. Installing the OpenShift CLI on macOS
You can install the OpenShift CLI (oc) binary on macOS by using the following procedure.
Procedure
- Navigate to the OpenShift Container Platform downloads page on the Red Hat Customer Portal.
- Select the appropriate version in the Version drop-down menu.
- Click Download Now next to the OpenShift v4.7 MacOSX Client entry and save the file.
- Unpack and unzip the archive.
Move the
ocbinary to a directory on your PATH.To check your
PATH, open a terminal and execute the following command:$ echo $PATH
After you install the OpenShift CLI, it is available using the oc command:
$ oc <command>14.6.13. Logging in to the cluster by using the CLI
You can log in to your cluster as a default system user by exporting the cluster kubeconfig file. The kubeconfig file contains information about the cluster that is used by the CLI to connect a client to the correct cluster and API server. The file is specific to a cluster and is created during OpenShift Container Platform installation.
Prerequisites
- You deployed an OpenShift Container Platform cluster.
-
You installed the
ocCLI.
Procedure
Export the
kubeadmincredentials:$ export KUBECONFIG=<installation_directory>/auth/kubeconfig1 - 1
- For
<installation_directory>, specify the path to the directory that you stored the installation files in.
Verify you can run
occommands successfully using the exported configuration:$ oc whoamiExample output
system:admin
14.6.14. Disabling the default OperatorHub sources
Operator catalogs that source content provided by Red Hat and community projects are configured for OperatorHub by default during an OpenShift Container Platform installation. In a restricted network environment, you must disable the default catalogs as a cluster administrator.
Procedure
Disable the sources for the default catalogs by adding
disableAllDefaultSources: trueto theOperatorHubobject:$ oc patch OperatorHub cluster --type json \ -p '[{"op": "add", "path": "/spec/disableAllDefaultSources", "value": true}]'
Alternatively, you can use the web console to manage catalog sources. From the Administration → Cluster Settings → Global Configuration → OperatorHub page, click the Sources tab, where you can create, delete, disable, and enable individual sources.
14.6.15. Creating registry storage
After you install the cluster, you must create storage for the Registry Operator.
14.6.15.1. Image registry removed during installation
On platforms that do not provide shareable object storage, the OpenShift Image Registry Operator bootstraps itself as Removed. This allows openshift-installer to complete installations on these platform types.
After installation, you must edit the Image Registry Operator configuration to switch the managementState from Removed to Managed.
The Prometheus console provides an ImageRegistryRemoved alert, for example:
"Image Registry has been removed. ImageStreamTags, BuildConfigs and DeploymentConfigs which reference ImageStreamTags may not work as expected. Please configure storage and update the config to Managed state by editing configs.imageregistry.operator.openshift.io."
14.6.15.2. Image registry storage configuration
The Image Registry Operator is not initially available for platforms that do not provide default storage. After installation, you must configure your registry to use storage so that the Registry Operator is made available.
Instructions are shown for configuring a persistent volume, which is required for production clusters. Where applicable, instructions are shown for configuring an empty directory as the storage location, which is available for only non-production clusters.
Additional instructions are provided for allowing the image registry to use block storage types by using the Recreate rollout strategy during upgrades.
14.6.15.2.1. Configuring registry storage for VMware vSphere
As a cluster administrator, following installation you must configure your registry to use storage.
Prerequisites
- Cluster administrator permissions.
- A cluster on VMware vSphere.
Persistent storage provisioned for your cluster, such as Red Hat OpenShift Container Storage.
ImportantOpenShift Container Platform supports
ReadWriteOnceaccess for image registry storage when you have only one replica. To deploy an image registry that supports high availability with two or more replicas,ReadWriteManyaccess is required.- Must have "100Gi" capacity.
Testing shows issues with using the NFS server on RHEL as storage backend for core services. This includes the OpenShift Container Registry and Quay, Prometheus for monitoring storage, and Elasticsearch for logging storage. Therefore, using RHEL NFS to back PVs used by core services is not recommended.
Other NFS implementations on the marketplace might not have these issues. Contact the individual NFS implementation vendor for more information on any testing that was possibly completed against these OpenShift Container Platform core components.
Procedure
To configure your registry to use storage, change the
spec.storage.pvcin theconfigs.imageregistry/clusterresource.NoteWhen using shared storage, review your security settings to prevent outside access.
Verify that you do not have a registry pod:
$ oc get pod -n openshift-image-registry -l docker-registry=defaultExample output
No resourses found in openshift-image-registry namespaceNoteIf you do have a registry pod in your output, you do not need to continue with this procedure.
Check the registry configuration:
$ oc edit configs.imageregistry.operator.openshift.ioExample output
storage: pvc: claim:1 - 1
- Leave the
claimfield blank to allow the automatic creation of animage-registry-storagePVC.
Check the
clusteroperatorstatus:$ oc get clusteroperator image-registryExample output
NAME VERSION AVAILABLE PROGRESSING DEGRADED SINCE MESSAGE image-registry 4.7 True False False 6h50m
14.6.16. Telemetry access for OpenShift Container Platform
In OpenShift Container Platform 4.7, the Telemetry service, which runs by default to provide metrics about cluster health and the success of updates, requires internet access. If your cluster is connected to the internet, Telemetry runs automatically, and your cluster is registered to OpenShift Cluster Manager.
After you confirm that your OpenShift Cluster Manager inventory is correct, either maintained automatically by Telemetry or manually by using OpenShift Cluster Manager, use subscription watch to track your OpenShift Container Platform subscriptions at the account or multi-cluster level.
14.6.17. Next steps
- Customize your cluster.
- If necessary, you can opt out of remote health reporting.
- Set up your registry and configure registry storage.
14.7. Installing a cluster on vSphere in a restricted network with user-provisioned infrastructure
In OpenShift Container Platform version 4.7, you can install a cluster on VMware vSphere infrastructure that you provision in a restricted network.
OpenShift Container Platform supports deploying a cluster to a single VMware vCenter only. Deploying a cluster with machines/machine sets on multiple vCenters is not supported.
The steps for performing a user-provisioned infrastructure installation are provided as an example only. Installing a cluster with infrastructure you provide requires knowledge of the vSphere platform and the installation process of OpenShift Container Platform. Use the user-provisioned infrastructure installation instructions as a guide; you are free to create the required resources through other methods.
14.7.1. Prerequisites
Create a registry on your mirror host and obtain the
imageContentSourcesdata for your version of OpenShift Container Platform.ImportantBecause the installation media is on the mirror host, you can use that computer to complete all installation steps.
-
Provision persistent storage for your cluster. To deploy a private image registry, your storage must provide
ReadWriteManyaccess modes. - Review details about the OpenShift Container Platform installation and update processes.
- Completing the installation requires that you upload the Red Hat Enterprise Linux CoreOS (RHCOS) OVA on vSphere hosts. The machine from which you complete this process requires access to port 443 on the vCenter and ESXi hosts. You verified that port 443 is accessible.
- If you use a firewall, you confirmed with the administrator that port 443 is accessible. Control plane nodes must be able to reach vCenter and ESXi hosts on port 443 for the installation to succeed.
If you use a firewall and plan to use telemetry, you must configure the firewall to allow the sites that your cluster requires access to.
NoteBe sure to also review this site list if you are configuring a proxy.
14.7.2. About installations in restricted networks
In OpenShift Container Platform 4.7, you can perform an installation that does not require an active connection to the Internet to obtain software components. Restricted network installations can be completed using installer-provisioned infrastructure or user-provisioned infrastructure, depending on the cloud platform to which you are installing the cluster.
If you choose to perform a restricted network installation on a cloud platform, you still require access to its cloud APIs. Some cloud functions, like Amazon Web Service’s Route 53 DNS and IAM services, require internet access. Depending on your network, you might require less Internet access for an installation on bare metal hardware or on VMware vSphere.
To complete a restricted network installation, you must create a registry that mirrors the contents of the OpenShift Container Platform registry and contains the installation media. You can create this registry on a mirror host, which can access both the Internet and your closed network, or by using other methods that meet your restrictions.
Because of the complexity of the configuration for user-provisioned installations, consider completing a standard user-provisioned infrastructure installation before you attempt a restricted network installation using user-provisioned infrastructure. Completing this test installation might make it easier to isolate and troubleshoot any issues that might arise during your installation in a restricted network.
14.7.2.1. Additional limits
Clusters in restricted networks have the following additional limitations and restrictions:
-
The
ClusterVersionstatus includes anUnable to retrieve available updateserror. - By default, you cannot use the contents of the Developer Catalog because you cannot access the required image stream tags.
14.7.3. Internet access for OpenShift Container Platform
In OpenShift Container Platform 4.7, you require access to the Internet to obtain the images that are necessary to install your cluster.
You must have Internet access to:
- Access OpenShift Cluster Manager to download the installation program and perform subscription management. If the cluster has internet access and you do not disable Telemetry, that service automatically entitles your cluster.
- Access Quay.io to obtain the packages that are required to install your cluster.
- Obtain the packages that are required to perform cluster updates.
If your cluster cannot have direct Internet access, you can perform a restricted network installation on some types of infrastructure that you provision. During that process, you download the content that is required and use it to populate a mirror registry with the packages that you need to install a cluster and generate the installation program. With some installation types, the environment that you install your cluster in will not require Internet access. Before you update the cluster, you update the content of the mirror registry.
14.7.4. VMware vSphere infrastructure requirements
You must install the OpenShift Container Platform cluster on a VMware vSphere version 6 or 7 instance that meets the requirements for the components that you use.
| Component | Minimum supported versions | Description |
|---|---|---|
| Hypervisor | vSphere 6.5 and later with HW version 13 | This version is the minimum version that Red Hat Enterprise Linux CoreOS (RHCOS) supports. See the Red Hat Enterprise Linux 8 supported hypervisors list. |
| Storage with in-tree drivers | vSphere 6.5 and later | This plug-in creates vSphere storage by using the in-tree storage drivers for vSphere included in OpenShift Container Platform. |
| Optional: Networking (NSX-T) | vSphere 6.5U3 or vSphere 6.7U2 and later | vSphere 6.5U3 or vSphere 6.7U2+ are required for OpenShift Container Platform. VMware’s NSX Container Plug-in (NCP) is certified with OpenShift Container Platform 4.6 and NSX-T 3.x+. |
If you use a vSphere version 6.5 instance, consider upgrading to 6.7U3 or 7.0 before you install OpenShift Container Platform.
You must ensure that the time on your ESXi hosts is synchronized before you install OpenShift Container Platform. See Edit Time Configuration for a Host in the VMware documentation.
Virtual machines (VMs) configured to use virtual hardware version 14 or greater might result in a failed installation. It is recommended to configure VMs with virtual hardware version 13. This is a known issue that is being addressed in BZ#1935539.
14.7.5. Machine requirements for a cluster with user-provisioned infrastructure
For a cluster that contains user-provisioned infrastructure, you must deploy all of the required machines.
14.7.5.1. Required machines
The smallest OpenShift Container Platform clusters require the following hosts:
- One temporary bootstrap machine
- Three control plane, or master, machines
- At least two compute machines, which are also known as worker machines.
The cluster requires the bootstrap machine to deploy the OpenShift Container Platform cluster on the three control plane machines. You can remove the bootstrap machine after you install the cluster.
To improve high availability of your cluster, distribute the control plane machines over different z/VM instances on at least two physical machines.
The bootstrap and control plane machines must use Red Hat Enterprise Linux CoreOS (RHCOS) as the operating system. However, the compute machines can choose between Red Hat Enterprise Linux CoreOS (RHCOS) or Red Hat Enterprise Linux (RHEL) 7.9.
Note that RHCOS is based on Red Hat Enterprise Linux (RHEL) 8 and inherits all of its hardware certifications and requirements. See Red Hat Enterprise Linux technology capabilities and limits.
All virtual machines must reside in the same datastore and in the same folder as the installer.
14.7.5.2. Network connectivity requirements
All the Red Hat Enterprise Linux CoreOS (RHCOS) machines require network in initramfs during boot to fetch Ignition config files from the Machine Config Server. The machines are configured with static IP addresses. No DHCP server is required. Additionally, each OpenShift Container Platform node in the cluster must have access to a Network Time Protocol (NTP) server.
14.7.5.3. IBM Z network connectivity requirements
To install on IBM Z under z/VM, you require a single z/VM virtual NIC in layer 2 mode. You also need:
- A direct-attached OSA or RoCE network adapter
- A z/VM VSwitch set up. For a preferred setup, use OSA link aggregation.
14.7.5.4. Minimum resource requirements
Each cluster machine must meet the following minimum requirements:
| Machine | Operating System | vCPU [1] | Virtual RAM | Storage | IOPS |
|---|---|---|---|---|---|
| Bootstrap | RHCOS | 4 | 16 GB | 100 GB | N/A |
| Control plane | RHCOS | 4 | 16 GB | 100 GB | N/A |
| Compute | RHCOS | 2 | 8 GB | 100 GB | N/A |
- One physical core (IFL) provides two logical cores (threads) when SMT-2 is enabled. The hypervisor can provide two or more vCPUs.
14.7.5.5. Certificate signing requests management
Because your cluster has limited access to automatic machine management when you use infrastructure that you provision, you must provide a mechanism for approving cluster certificate signing requests (CSRs) after installation. The kube-controller-manager only approves the kubelet client CSRs. The machine-approver cannot guarantee the validity of a serving certificate that is requested by using kubelet credentials because it cannot confirm that the correct machine issued the request. You must determine and implement a method of verifying the validity of the kubelet serving certificate requests and approving them.
14.7.6. Creating the user-provisioned infrastructure
Before you deploy an OpenShift Container Platform cluster that uses user-provisioned infrastructure, you must create the underlying infrastructure.
Prerequisites
- Review the OpenShift Container Platform 4.x Tested Integrations page before you create the supporting infrastructure for your cluster.
Procedure
- Set up static IP addresses.
- Set up an HTTP or HTTPS server to provide Ignition files to the cluster nodes.
- Provision the required load balancers.
- Configure the ports for your machines.
- Configure DNS.
- Ensure network connectivity.
14.7.6.1. Networking requirements for user-provisioned infrastructure
All the Red Hat Enterprise Linux CoreOS (RHCOS) machines require network in initramfs during boot to fetch Ignition config from the machine config server.
During the initial boot, the machines require an HTTP or HTTPS server to establish a network connection to download their Ignition config files.
Ensure that the machines have persistent IP addresses and host names.
The Kubernetes API server must be able to resolve the node names of the cluster machines. If the API servers and worker nodes are in different zones, you can configure a default DNS search zone to allow the API server to resolve the node names. Another supported approach is to always refer to hosts by their fully-qualified domain names in both the node objects and all DNS requests.
You must configure the network connectivity between machines to allow cluster components to communicate. Each machine must be able to resolve the host names of all other machines in the cluster.
| Protocol | Port | Description |
|---|---|---|
| ICMP | N/A | Network reachability tests |
| TCP |
| Metrics |
|
|
Host level services, including the node exporter on ports | |
|
| The default ports that Kubernetes reserves | |
|
| openshift-sdn | |
| UDP |
| VXLAN and Geneve |
|
| VXLAN and Geneve | |
|
|
Host level services, including the node exporter on ports | |
| TCP/UDP |
| Kubernetes node port |
| Protocol | Port | Description |
|---|---|---|
| TCP |
| Kubernetes API |
| Protocol | Port | Description |
|---|---|---|
| TCP |
| etcd server and peer ports |
Network topology requirements
The infrastructure that you provision for your cluster must meet the following network topology requirements.
OpenShift Container Platform requires all nodes to have internet access to pull images for platform containers and provide telemetry data to Red Hat.
Load balancers
Before you install OpenShift Container Platform, you must provision two load balancers that meet the following requirements:
API load balancer: Provides a common endpoint for users, both human and machine, to interact with and configure the platform. Configure the following conditions:
- Layer 4 load balancing only. This can be referred to as Raw TCP, SSL Passthrough, or SSL Bridge mode. If you use SSL Bridge mode, you must enable Server Name Indication (SNI) for the API routes.
- A stateless load balancing algorithm. The options vary based on the load balancer implementation.
ImportantDo not configure session persistence for an API load balancer.
Configure the following ports on both the front and back of the load balancers:
Expand Table 14.67. API load balancer Port Back-end machines (pool members) Internal External Description 6443Bootstrap and control plane. You remove the bootstrap machine from the load balancer after the bootstrap machine initializes the cluster control plane. You must configure the
/readyzendpoint for the API server health check probe.X
X
Kubernetes API server
22623Bootstrap and control plane. You remove the bootstrap machine from the load balancer after the bootstrap machine initializes the cluster control plane.
X
Machine config server
NoteThe load balancer must be configured to take a maximum of 30 seconds from the time the API server turns off the
/readyzendpoint to the removal of the API server instance from the pool. Within the time frame after/readyzreturns an error or becomes healthy, the endpoint must have been removed or added. Probing every 5 or 10 seconds, with two successful requests to become healthy and three to become unhealthy, are well-tested values.Application Ingress load balancer: Provides an Ingress point for application traffic flowing in from outside the cluster. Configure the following conditions:
- Layer 4 load balancing only. This can be referred to as Raw TCP, SSL Passthrough, or SSL Bridge mode. If you use SSL Bridge mode, you must enable Server Name Indication (SNI) for the Ingress routes.
- A connection-based or session-based persistence is recommended, based on the options available and types of applications that will be hosted on the platform.
Configure the following ports on both the front and back of the load balancers:
Expand Table 14.68. Application Ingress load balancer Port Back-end machines (pool members) Internal External Description 443The machines that run the Ingress router pods, compute, or worker, by default.
X
X
HTTPS traffic
80The machines that run the Ingress router pods, compute, or worker, by default.
X
X
HTTP traffic
If the true IP address of the client can be seen by the load balancer, enabling source IP-based session persistence can improve performance for applications that use end-to-end TLS encryption.
A working configuration for the Ingress router is required for an OpenShift Container Platform cluster. You must configure the Ingress router after the control plane initializes.
Ethernet adaptor hardware address requirements
When provisioning VMs for the cluster, the ethernet interfaces configured for each VM must use a MAC address from the VMware Organizationally Unique Identifier (OUI) allocation ranges:
-
00:05:69:00:00:00to00:05:69:FF:FF:FF -
00:0c:29:00:00:00to00:0c:29:FF:FF:FF -
00:1c:14:00:00:00to00:1c:14:FF:FF:FF -
00:50:56:00:00:00to00:50:56:FF:FF:FF
If a MAC address outside the VMware OUI is used, the cluster installation will not succeed.
NTP configuration
OpenShift Container Platform clusters are configured to use a public Network Time Protocol (NTP) server by default. If you want to use a local enterprise NTP server, or if your cluster is being deployed in a disconnected network, you can configure the cluster to use a specific time server. For more information, see the documentation for Configuring chrony time service.
14.7.6.2. User-provisioned DNS requirements
DNS is used for name resolution and reverse name resolution. DNS A/AAAA or CNAME records are used for name resolution and PTR records are used for reverse name resolution. The reverse records are important because Red Hat Enterprise Linux CoreOS (RHCOS) uses the reverse records to set the host name for all the nodes. Additionally, the reverse records are used to generate the certificate signing requests (CSR) that OpenShift Container Platform needs to operate.
The following DNS records are required for an OpenShift Container Platform cluster that uses user-provisioned infrastructure. In each record, <cluster_name> is the cluster name and <base_domain> is the cluster base domain that you specify in the install-config.yaml file. A complete DNS record takes the form: <component>.<cluster_name>.<base_domain>..
| Component | Record | Description |
|---|---|---|
| Kubernetes API |
| Add a DNS A/AAAA or CNAME record, and a DNS PTR record, to identify the load balancer for the control plane machines. These records must be resolvable by both clients external to the cluster and from all the nodes within the cluster. |
|
| Add a DNS A/AAAA or CNAME record, and a DNS PTR record, to identify the load balancer for the control plane machines. These records must be resolvable from all the nodes within the cluster. Important The API server must be able to resolve the worker nodes by the host names that are recorded in Kubernetes. If the API server cannot resolve the node names, then proxied API calls can fail, and you cannot retrieve logs from pods. | |
| Routes |
| Add a wildcard DNS A/AAAA or CNAME record that refers to the load balancer that targets the machines that run the Ingress router pods, which are the worker nodes by default. These records must be resolvable by both clients external to the cluster and from all the nodes within the cluster. |
| Bootstrap |
| Add a DNS A/AAAA or CNAME record, and a DNS PTR record, to identify the bootstrap machine. These records must be resolvable by the nodes within the cluster. |
| Master hosts |
| DNS A/AAAA or CNAME records and DNS PTR records to identify each machine for the control plane nodes (also known as the master nodes). These records must be resolvable by the nodes within the cluster. |
| Worker hosts |
| Add DNS A/AAAA or CNAME records and DNS PTR records to identify each machine for the worker nodes. These records must be resolvable by the nodes within the cluster. |
You can use the nslookup <hostname> command to verify name resolution. You can use the dig -x <ip_address> command to verify reverse name resolution for the PTR records.
The following example of a BIND zone file shows sample A records for name resolution. The purpose of the example is to show the records that are needed. The example is not meant to provide advice for choosing one name resolution service over another.
Example 14.13. Sample DNS zone database
$TTL 1W
@ IN SOA ns1.example.com. root (
2019070700 ; serial
3H ; refresh (3 hours)
30M ; retry (30 minutes)
2W ; expiry (2 weeks)
1W ) ; minimum (1 week)
IN NS ns1.example.com.
IN MX 10 smtp.example.com.
;
;
ns1 IN A 192.168.1.5
smtp IN A 192.168.1.5
;
helper IN A 192.168.1.5
helper.ocp4 IN A 192.168.1.5
;
; The api identifies the IP of your load balancer.
api.ocp4 IN A 192.168.1.5
api-int.ocp4 IN A 192.168.1.5
;
; The wildcard also identifies the load balancer.
*.apps.ocp4 IN A 192.168.1.5
;
; Create an entry for the bootstrap host.
bootstrap.ocp4 IN A 192.168.1.96
;
; Create entries for the master hosts.
master0.ocp4 IN A 192.168.1.97
master1.ocp4 IN A 192.168.1.98
master2.ocp4 IN A 192.168.1.99
;
; Create entries for the worker hosts.
worker0.ocp4 IN A 192.168.1.11
worker1.ocp4 IN A 192.168.1.7
;
;EOFThe following example BIND zone file shows sample PTR records for reverse name resolution.
Example 14.14. Sample DNS zone database for reverse records
$TTL 1W
@ IN SOA ns1.example.com. root (
2019070700 ; serial
3H ; refresh (3 hours)
30M ; retry (30 minutes)
2W ; expiry (2 weeks)
1W ) ; minimum (1 week)
IN NS ns1.example.com.
;
; The syntax is "last octet" and the host must have an FQDN
; with a trailing dot.
97 IN PTR master0.ocp4.example.com.
98 IN PTR master1.ocp4.example.com.
99 IN PTR master2.ocp4.example.com.
;
96 IN PTR bootstrap.ocp4.example.com.
;
5 IN PTR api.ocp4.example.com.
5 IN PTR api-int.ocp4.example.com.
;
11 IN PTR worker0.ocp4.example.com.
7 IN PTR worker1.ocp4.example.com.
;
;EOF14.7.7. Generating an SSH private key and adding it to the agent
If you want to perform installation debugging or disaster recovery on your cluster, you must provide an SSH key to both your ssh-agent and the installation program. You can use this key to access the bootstrap machine in a public cluster to troubleshoot installation issues.
In a production environment, you require disaster recovery and debugging.
Do not skip this procedure in production environments where disaster recovery and debugging is required.
You can use this key to SSH into the master nodes as the user core. When you deploy the cluster, the key is added to the core user’s ~/.ssh/authorized_keys list.
Procedure
If you do not have an SSH key that is configured for password-less authentication on your computer, create one. For example, on a computer that uses a Linux operating system, run the following command:
$ ssh-keygen -t ed25519 -N '' \ -f <path>/<file_name>1 - 1
- Specify the path and file name, such as
~/.ssh/id_rsa, of the new SSH key. If you have an existing key pair, ensure your public key is in the your~/.sshdirectory.
Running this command generates an SSH key that does not require a password in the location that you specified.
NoteIf you plan to install an OpenShift Container Platform cluster that uses FIPS Validated / Modules in Process cryptographic libraries on the
x86_64architecture, do not create a key that uses theed25519algorithm. Instead, create a key that uses thersaorecdsaalgorithm.Start the
ssh-agentprocess as a background task:$ eval "$(ssh-agent -s)"Example output
Agent pid 31874NoteIf your cluster is in FIPS mode, only use FIPS-compliant algorithms to generate the SSH key. The key must be either RSA or ECDSA.
Add your SSH private key to the
ssh-agent:$ ssh-add <path>/<file_name>1 Example output
Identity added: /home/<you>/<path>/<file_name> (<computer_name>)- 1
- Specify the path and file name for your SSH private key, such as
~/.ssh/id_rsa
Next steps
- When you install OpenShift Container Platform, provide the SSH public key to the installation program. If you install a cluster on infrastructure that you provision, you must provide this key to your cluster’s machines.
14.7.8. Manually creating the installation configuration file
For installations of OpenShift Container Platform that use user-provisioned infrastructure, you manually generate your installation configuration file.
Prerequisites
- Obtain the OpenShift Container Platform installation program and the access token for your cluster.
-
Obtain the
imageContentSourcessection from the output of the command to mirror the repository. - Obtain the contents of the certificate for your mirror registry.
Procedure
Create an installation directory to store your required installation assets in:
$ mkdir <installation_directory>ImportantYou must create a directory. Some installation assets, like bootstrap X.509 certificates have short expiration intervals, so you must not reuse an installation directory. If you want to reuse individual files from another cluster installation, you can copy them into your directory. However, the file names for the installation assets might change between releases. Use caution when copying installation files from an earlier OpenShift Container Platform version.
Customize the following
install-config.yamlfile template and save it in the<installation_directory>.NoteYou must name this configuration file
install-config.yaml.-
Unless you use a registry that RHCOS trusts by default, such as
docker.io, you must provide the contents of the certificate for your mirror repository in theadditionalTrustBundlesection. In most cases, you must provide the certificate for your mirror. -
You must include the
imageContentSourcessection from the output of the command to mirror the repository.
-
Unless you use a registry that RHCOS trusts by default, such as
Back up the
install-config.yamlfile so that you can use it to install multiple clusters.ImportantThe
install-config.yamlfile is consumed during the next step of the installation process. You must back it up now.
14.7.8.1. Sample install-config.yaml file for VMware vSphere
You can customize the install-config.yaml file to specify more details about your OpenShift Container Platform cluster’s platform or modify the values of the required parameters.
apiVersion: v1
baseDomain: example.com
compute:
- hyperthreading: Enabled
name: worker
replicas: 0
controlPlane:
hyperthreading: Enabled
name: master
replicas: 3
metadata:
name: test
platform:
vsphere:
vcenter: your.vcenter.server
username: username
password: password
datacenter: datacenter
defaultDatastore: datastore
folder: "/<datacenter_name>/vm/<folder_name>/<subfolder_name>"
fips: false
pullSecret: '{"auths":{"<local_registry>": {"auth": "<credentials>","email": "you@example.com"}}}'
sshKey: 'ssh-ed25519 AAAA...'
additionalTrustBundle: |
-----BEGIN CERTIFICATE-----
ZZZZZZZZZZZZZZZZZZZZZZZZZZZZZZZZZZZZZZZZZZZZZZZZZZZZZZZZZZZZZZZZ
-----END CERTIFICATE-----
imageContentSources:
- mirrors:
- <local_registry>/<local_repository_name>/release
source: quay.io/openshift-release-dev/ocp-release
- mirrors:
- <local_registry>/<local_repository_name>/release
source: quay.io/openshift-release-dev/ocp-v4.0-art-dev- 1
- The base domain of the cluster. All DNS records must be sub-domains of this base and include the cluster name.
- 2 5
- The
controlPlanesection is a single mapping, but the compute section is a sequence of mappings. To meet the requirements of the different data structures, the first line of thecomputesection must begin with a hyphen,-, and the first line of thecontrolPlanesection must not. Although both sections currently define a single machine pool, it is possible that future versions of OpenShift Container Platform will support defining multiple compute pools during installation. Only one control plane pool is used. - 3 6
- Whether to enable or disable simultaneous multithreading, or
hyperthreading. By default, simultaneous multithreading is enabled to increase the performance of your machines' cores. You can disable it by setting the parameter value toDisabled. If you disable simultaneous multithreading in some cluster machines, you must disable it in all cluster machines.ImportantIf you disable simultaneous multithreading, ensure that your capacity planning accounts for the dramatically decreased machine performance. Your machines must use at least 8 CPUs and 32 GB of RAM if you disable simultaneous multithreading.
- 4
- You must set the value of the
replicasparameter to0. This parameter controls the number of workers that the cluster creates and manages for you, which are functions that the cluster does not perform when you use user-provisioned infrastructure. You must manually deploy worker machines for the cluster to use before you finish installing OpenShift Container Platform. - 7
- The number of control plane machines that you add to the cluster. Because the cluster uses this values as the number of etcd endpoints in the cluster, the value must match the number of control plane machines that you deploy.
- 8
- The cluster name that you specified in your DNS records.
- 9
- The fully-qualified hostname or IP address of the vCenter server.
- 10
- The name of the user for accessing the server. This user must have at least the roles and privileges that are required for static or dynamic persistent volume provisioning in vSphere.
- 11
- The password associated with the vSphere user.
- 12
- The vSphere datacenter.
- 13
- The default vSphere datastore to use.
- 14
- Optional: For installer-provisioned infrastructure, the absolute path of an existing folder where the installation program creates the virtual machines, for example,
/<datacenter_name>/vm/<folder_name>/<subfolder_name>. If you do not provide this value, the installation program creates a top-level folder in the datacenter virtual machine folder that is named with the infrastructure ID. If you are providing the infrastructure for the cluster, omit this parameter. - 15
- Whether to enable or disable FIPS mode. By default, FIPS mode is not enabled. If FIPS mode is enabled, the Red Hat Enterprise Linux CoreOS (RHCOS) machines that OpenShift Container Platform runs on bypass the default Kubernetes cryptography suite and use the cryptography modules that are provided with RHCOS instead.Important
The use of FIPS Validated / Modules in Process cryptographic libraries is only supported on OpenShift Container Platform deployments on the
x86_64architecture. - 16
- For
<local_registry>, specify the registry domain name, and optionally the port, that your mirror registry uses to serve content. For exampleregistry.example.comorregistry.example.com:5000. For<credentials>, specify the base64-encoded user name and password for your mirror registry. - 17
- The public portion of the default SSH key for the
coreuser in Red Hat Enterprise Linux CoreOS (RHCOS).NoteFor production OpenShift Container Platform clusters on which you want to perform installation debugging or disaster recovery, specify an SSH key that your
ssh-agentprocess uses. - 18
- Provide the contents of the certificate file that you used for your mirror registry.
- 19
- Provide the
imageContentSourcessection from the output of the command to mirror the repository.
14.7.8.2. Configuring the cluster-wide proxy during installation
Production environments can deny direct access to the Internet and instead have an HTTP or HTTPS proxy available. You can configure a new OpenShift Container Platform cluster to use a proxy by configuring the proxy settings in the install-config.yaml file.
Prerequisites
-
You have an existing
install-config.yamlfile. You reviewed the sites that your cluster requires access to and determined whether any of them need to bypass the proxy. By default, all cluster egress traffic is proxied, including calls to hosting cloud provider APIs. You added sites to the
Proxyobject’sspec.noProxyfield to bypass the proxy if necessary.NoteThe
Proxyobjectstatus.noProxyfield is populated with the values of thenetworking.machineNetwork[].cidr,networking.clusterNetwork[].cidr, andnetworking.serviceNetwork[]fields from your installation configuration.For installations on Amazon Web Services (AWS), Google Cloud Platform (GCP), Microsoft Azure, and Red Hat OpenStack Platform (RHOSP), the
Proxyobjectstatus.noProxyfield is also populated with the instance metadata endpoint (169.254.169.254).
Procedure
Edit your
install-config.yamlfile and add the proxy settings. For example:apiVersion: v1 baseDomain: my.domain.com proxy: httpProxy: http://<username>:<pswd>@<ip>:<port>1 httpsProxy: https://<username>:<pswd>@<ip>:<port>2 noProxy: example.com3 additionalTrustBundle: |4 -----BEGIN CERTIFICATE----- <MY_TRUSTED_CA_CERT> -----END CERTIFICATE----- ...- 1
- A proxy URL to use for creating HTTP connections outside the cluster. The URL scheme must be
http. - 2
- A proxy URL to use for creating HTTPS connections outside the cluster.
- 3
- A comma-separated list of destination domain names, IP addresses, or other network CIDRs to exclude from proxying. Preface a domain with
.to match subdomains only. For example,.y.commatchesx.y.com, but noty.com. Use*to bypass the proxy for all destinations. You must include vCenter’s IP address and the IP range that you use for its machines. - 4
- If provided, the installation program generates a config map that is named
user-ca-bundlein theopenshift-confignamespace to hold the additional CA certificates. If you provideadditionalTrustBundleand at least one proxy setting, theProxyobject is configured to reference theuser-ca-bundleconfig map in thetrustedCAfield. The Cluster Network Operator then creates atrusted-ca-bundleconfig map that merges the contents specified for thetrustedCAparameter with the RHCOS trust bundle. TheadditionalTrustBundlefield is required unless the proxy’s identity certificate is signed by an authority from the RHCOS trust bundle.
NoteThe installation program does not support the proxy
readinessEndpointsfield.- Save the file and reference it when installing OpenShift Container Platform.
The installation program creates a cluster-wide proxy that is named cluster that uses the proxy settings in the provided install-config.yaml file. If no proxy settings are provided, a cluster Proxy object is still created, but it will have a nil spec.
Only the Proxy object named cluster is supported, and no additional proxies can be created.
14.7.9. Creating the Kubernetes manifest and Ignition config files
Because you must modify some cluster definition files and manually start the cluster machines, you must generate the Kubernetes manifest and Ignition config files that the cluster needs to make its machines.
The installation configuration file transforms into the Kubernetes manifests. The manifests wrap into the Ignition configuration files, which are later used to create the cluster.
The Ignition config files that the installation program generates contain certificates that expire after 24 hours, which are then renewed at that time. If the cluster is shut down before renewing the certificates and the cluster is later restarted after the 24 hours have elapsed, the cluster automatically recovers the expired certificates. The exception is that you must manually approve the pending node-bootstrapper certificate signing requests (CSRs) to recover kubelet certificates. See the documentation for Recovering from expired control plane certificates for more information.
The installation program that generates the manifest and Ignition files is architecture specific and can be obtained from the client image mirror. The Linux version of the installation program runs on s390x only. This installer program is also available as a Mac OS version.
Prerequisites
- You obtained the OpenShift Container Platform installation program. For a restricted network installation, these files are on your mirror host.
-
You created the
install-config.yamlinstallation configuration file.
Procedure
Change to the directory that contains the installation program and generate the Kubernetes manifests for the cluster:
$ ./openshift-install create manifests --dir <installation_directory>1 - 1
- For
<installation_directory>, specify the installation directory that contains theinstall-config.yamlfile you created.
Remove the Kubernetes manifest files that define the control plane machines and compute machine sets:
$ rm -f openshift/99_openshift-cluster-api_master-machines-*.yaml openshift/99_openshift-cluster-api_worker-machineset-*.yamlBecause you create and manage these resources yourself, you do not have to initialize them.
- You can preserve the machine set files to create compute machines by using the machine API, but you must update references to them to match your environment.
WarningIf you are installing a three-node cluster, skip the following step to allow the control plane nodes to be schedulable.
+
ImportantWhen you configure control plane nodes from the default unschedulable to schedulable, additional subscriptions are required. This is because control plane nodes then become worker nodes.
Check that the
mastersSchedulableparameter in the<installation_directory>/manifests/cluster-scheduler-02-config.ymlKubernetes manifest file is set tofalse. This setting prevents pods from being scheduled on the control plane machines:-
Open the
<installation_directory>/manifests/cluster-scheduler-02-config.ymlfile. -
Locate the
mastersSchedulableparameter and ensure that it is set tofalse. - Save and exit the file.
-
Open the
To create the Ignition configuration files, run the following command from the directory that contains the installation program:
$ ./openshift-install create ignition-configs --dir <installation_directory>1 - 1
- For
<installation_directory>, specify the same installation directory.
The following files are generated in the directory:
. ├── auth │ ├── kubeadmin-password │ └── kubeconfig ├── bootstrap.ign ├── master.ign ├── metadata.json └── worker.ign
14.7.10. Configuring chrony time service
You must set the time server and related settings used by the chrony time service (chronyd) by modifying the contents of the chrony.conf file and passing those contents to your nodes as a machine config.
Procedure
Create the contents of the
chrony.conffile and encode it as base64. For example:$ cat << EOF | base64 pool 0.rhel.pool.ntp.org iburst1 driftfile /var/lib/chrony/drift makestep 1.0 3 rtcsync logdir /var/log/chrony EOF- 1
- Specify any valid, reachable time source, such as the one provided by your DHCP server.
Example output
ICAgIHNlcnZlciBjbG9jay5yZWRoYXQuY29tIGlidXJzdAogICAgZHJpZnRmaWxlIC92YXIvbGli L2Nocm9ueS9kcmlmdAogICAgbWFrZXN0ZXAgMS4wIDMKICAgIHJ0Y3N5bmMKICAgIGxvZ2RpciAv dmFyL2xvZy9jaHJvbnkKCreate the
MachineConfigobject file, replacing the base64 string with the one you just created. This example adds the file tomasternodes. You can change it toworkeror make an additional MachineConfig for theworkerrole. Create MachineConfig files for each type of machine that your cluster uses:$ cat << EOF > ./99-masters-chrony-configuration.yaml apiVersion: machineconfiguration.openshift.io/v1 kind: MachineConfig metadata: labels: machineconfiguration.openshift.io/role: master name: 99-masters-chrony-configuration spec: config: ignition: config: {} security: tls: {} timeouts: {} version: 3.2.0 networkd: {} passwd: {} storage: files: - contents: source: data:text/plain;charset=utf-8;base64,ICAgIHNlcnZlciBjbG9jay5yZWRoYXQuY29tIGlidXJzdAogICAgZHJpZnRmaWxlIC92YXIvbGliL2Nocm9ueS9kcmlmdAogICAgbWFrZXN0ZXAgMS4wIDMKICAgIHJ0Y3N5bmMKICAgIGxvZ2RpciAvdmFyL2xvZy9jaHJvbnkK mode: 4201 overwrite: true path: /etc/chrony.conf osImageURL: "" EOF- 1
- Specify an octal value mode for the
modefield in the machine config file. After creating the file and applying the changes, themodeis converted to a decimal value. You can check the YAML file with the commandoc get mc <mc-name> -o yaml.
- Make a backup copy of the configuration files.
Apply the configurations in one of two ways:
-
If the cluster is not up yet, after you generate manifest files, add this file to the
<installation_directory>/openshiftdirectory, and then continue to create the cluster. If the cluster is already running, apply the file:
$ oc apply -f ./99-masters-chrony-configuration.yaml
-
If the cluster is not up yet, after you generate manifest files, add this file to the
14.7.11. Extracting the infrastructure name
The Ignition config files contain a unique cluster identifier that you can use to uniquely identify your cluster in VMware vSphere. If you plan to use the cluster identifier as the name of your virtual machine folder, you must extract it.
Prerequisites
- You obtained the OpenShift Container Platform installation program and the pull secret for your cluster.
- You generated the Ignition config files for your cluster.
-
You installed the
jqpackage.
Procedure
To extract and view the infrastructure name from the Ignition config file metadata, run the following command:
$ jq -r .infraID <installation_directory>/metadata.json1 - 1
- For
<installation_directory>, specify the path to the directory that you stored the installation files in.
Example output
openshift-vw9j61 - 1
- The output of this command is your cluster name and a random string.
14.7.12. Creating Red Hat Enterprise Linux CoreOS (RHCOS) machines in vSphere
Before you install a cluster that contains user-provisioned infrastructure on VMware vSphere, you must create RHCOS machines on vSphere hosts for it to use.
Prerequisites
- You have obtained the Ignition config files for your cluster.
- You have access to an HTTP server that you can access from your computer and that the machines that you create can access.
- You have created a vSphere cluster.
Procedure
-
Upload the bootstrap Ignition config file, which is named
<installation_directory>/bootstrap.ign, that the installation program created to your HTTP server. Note the URL of this file. Save the following secondary Ignition config file for your bootstrap node to your computer as
<installation_directory>/merge-bootstrap.ign:{ "ignition": { "config": { "merge": [ { "source": "<bootstrap_ignition_config_url>",1 "verification": {} } ] }, "timeouts": {}, "version": "3.2.0" }, "networkd": {}, "passwd": {}, "storage": {}, "systemd": {} }- 1
- Specify the URL of the bootstrap Ignition config file that you hosted.
When you create the virtual machine (VM) for the bootstrap machine, you use this Ignition config file.
Locate the following Ignition config files that the installation program created:
-
<installation_directory>/master.ign -
<installation_directory>/worker.ign -
<installation_directory>/merge-bootstrap.ign
-
Convert the Ignition config files to Base64 encoding. Later in this procedure, you must add these files to the extra configuration parameter
guestinfo.ignition.config.datain your VM.For example, if you use a Linux operating system, you can use the
base64command to encode the files.$ base64 -w0 <installation_directory>/master.ign > <installation_directory>/master.64$ base64 -w0 <installation_directory>/worker.ign > <installation_directory>/worker.64$ base64 -w0 <installation_directory>/merge-bootstrap.ign > <installation_directory>/merge-bootstrap.64ImportantIf you plan to add more compute machines to your cluster after you finish installation, do not delete these files.
Obtain the RHCOS OVA image. Images are available from the RHCOS image mirror page.
ImportantThe RHCOS images might not change with every release of OpenShift Container Platform. You must download an image with the highest version that is less than or equal to the OpenShift Container Platform version that you install. Use the image version that matches your OpenShift Container Platform version if it is available.
The filename contains the OpenShift Container Platform version number in the format
rhcos-vmware.<architecture>.ova.In the vSphere Client, create a folder in your datacenter to store your VMs.
- Click the VMs and Templates view.
- Right-click the name of your datacenter.
- Click New Folder → New VM and Template Folder.
-
In the window that is displayed, enter the folder name. If you did not specify an existing folder in the
install-config.yamlfile, then create a folder with the same name as the infrastructure ID. You use this folder name so vCenter dynamically provisions storage in the appropriate location for its Workspace configuration.
In the vSphere Client, create a template for the OVA image and then clone the template as needed.
NoteIn the following steps, you create a template and then clone the template for all of your cluster machines. You then provide the location for the Ignition config file for that cloned machine type when you provision the VMs.
- From the Hosts and Clusters tab, right-click your cluster name and select Deploy OVF Template.
- On the Select an OVF tab, specify the name of the RHCOS OVA file that you downloaded.
-
On the Select a name and folder tab, set a Virtual machine name for your template, such as
Template-RHCOS. Click the name of your vSphere cluster and select the folder you created in the previous step. - On the Select a compute resource tab, click the name of your vSphere cluster.
On the Select storage tab, configure the storage options for your VM.
- Select Thin Provision or Thick Provision, based on your storage preferences.
-
Select the datastore that you specified in your
install-config.yamlfile.
- On the Select network tab, specify the network that you configured for the cluster, if available.
When creating the OVF template, do not specify values on the Customize template tab or configure the template any further.
ImportantDo not start the original VM template. The VM template must remain off and must be cloned for new RHCOS machines. Starting the VM template configures the VM template as a VM on the platform, which prevents it from being used as a template that machine sets can apply configurations to.
After the template deploys, deploy a VM for a machine in the cluster.
- Right-click the template name and click Clone → Clone to Virtual Machine.
-
On the Select a name and folder tab, specify a name for the VM. You might include the machine type in the name, such as
control-plane-0orcompute-1. - On the Select a name and folder tab, select the name of the folder that you created for the cluster.
- On the Select a compute resource tab, select the name of a host in your datacenter.
- Optional: On the Select storage tab, customize the storage options.
- On the Select clone options, select Customize this virtual machine’s hardware.
On the Customize hardware tab, click VM Options → Advanced.
Optional: Override default DHCP networking in vSphere. To enable static IP networking:
Set your static IP configuration:
$ export IPCFG="ip=<ip>::<gateway>:<netmask>:<hostname>:<iface>:none nameserver=srv1 [nameserver=srv2 [nameserver=srv3 [...]]]"Example command
$ export IPCFG="ip=192.168.100.101::192.168.100.254:255.255.255.0:::none nameserver=8.8.8.8"Set the
guestinfo.afterburn.initrd.network-kargsproperty before booting a VM from an OVA in vSphere:$ govc vm.change -vm "<vm_name>" -e "guestinfo.afterburn.initrd.network-kargs=${IPCFG}"
Optional: In the event of cluster performance issues, from the Latency Sensitivity list, select High. Ensure that your VM’s CPU and memory reservation have the following values:
- Memory reservation value must be equal to its configured memory size.
- CPU reservation value must be at least the number of low latency virtual CPUs multiplied by the measured physical CPU speed.
Click Edit Configuration, and on the Configuration Parameters window, click Add Configuration Params. Define the following parameter names and values:
-
guestinfo.ignition.config.data: Locate the base-64 encoded files that you created previously in this procedure, and paste the contents of the base64-encoded Ignition config file for this machine type. -
guestinfo.ignition.config.data.encoding: Specifybase64. -
disk.EnableUUID: SpecifyTRUE.
-
- In the Virtual Hardware panel of the Customize hardware tab, modify the specified values as required. Ensure that the amount of RAM, CPU, and disk storage meets the minimum requirements for the machine type.
- Complete the configuration and power on the VM.
Create the rest of the machines for your cluster by following the preceding steps for each machine.
ImportantYou must create the bootstrap and control plane machines at this time. Because some pods are deployed on compute machines by default, also create at least two compute machines before you install the cluster.
14.7.13. Creating more Red Hat Enterprise Linux CoreOS (RHCOS) machines in vSphere
You can create more compute machines for your cluster that uses user-provisioned infrastructure on VMware vSphere.
Prerequisites
- Obtain the base64-encoded Ignition file for your compute machines.
- You have access to the vSphere template that you created for your cluster.
Procedure
After the template deploys, deploy a VM for a machine in the cluster.
- Right-click the template’s name and click Clone → Clone to Virtual Machine.
-
On the Select a name and folder tab, specify a name for the VM. You might include the machine type in the name, such as
compute-1. - On the Select a name and folder tab, select the name of the folder that you created for the cluster.
- On the Select a compute resource tab, select the name of a host in your datacenter.
- Optional: On the Select storage tab, customize the storage options.
- On the Select clone options, select Customize this virtual machine’s hardware.
On the Customize hardware tab, click VM Options → Advanced.
- From the Latency Sensitivity list, select High.
Click Edit Configuration, and on the Configuration Parameters window, click Add Configuration Params. Define the following parameter names and values:
-
guestinfo.ignition.config.data: Paste the contents of the base64-encoded compute Ignition config file for this machine type. -
guestinfo.ignition.config.data.encoding: Specifybase64. -
disk.EnableUUID: SpecifyTRUE.
-
- In the Virtual Hardware panel of the Customize hardware tab, modify the specified values as required. Ensure that the amount of RAM, CPU, and disk storage meets the minimum requirements for the machine type. Also, make sure to select the correct network under Add network adapter if there are multiple networks available.
- Complete the configuration and power on the VM.
- Continue to create more compute machines for your cluster.
14.7.14. Disk partitioning
In most cases, data partitions are originally created by installing RHCOS, rather than by installing another operating system. In such cases, the OpenShift Container Platform installer should be allowed to configure your disk partitions.
However, there are two cases where you might want to intervene to override the default partitioning when installing an OpenShift Container Platform node:
Create separate partitions: For greenfield installations on an empty disk, you might want to add separate storage to a partition. This is officially supported for making
/varor a subdirectory of/var, such as/var/lib/etcd, a separate partition, but not both.ImportantKubernetes supports only two filesystem partitions. If you add more than one partition to the original configuration, Kubernetes cannot monitor all of them.
-
Retain existing partitions: For a brownfield installation where you are reinstalling OpenShift Container Platform on an existing node and want to retain data partitions installed from your previous operating system, there are both boot arguments and options to
coreos-installerthat allow you to retain existing data partitions.
Creating a separate /var partition
In general, disk partitioning for OpenShift Container Platform should be left to the installer. However, there are cases where you might want to create separate partitions in a part of the filesystem that you expect to grow.
OpenShift Container Platform supports the addition of a single partition to attach storage to either the /var partition or a subdirectory of /var. For example:
-
/var/lib/containers: Holds container-related content that can grow as more images and containers are added to a system. -
/var/lib/etcd: Holds data that you might want to keep separate for purposes such as performance optimization of etcd storage. -
/var: Holds data that you might want to keep separate for purposes such as auditing.
Storing the contents of a /var directory separately makes it easier to grow storage for those areas as needed and reinstall OpenShift Container Platform at a later date and keep that data intact. With this method, you will not have to pull all your containers again, nor will you have to copy massive log files when you update systems.
Because /var must be in place before a fresh installation of Red Hat Enterprise Linux CoreOS (RHCOS), the following procedure sets up the separate /var partition by creating a machine config that is inserted during the openshift-install preparation phases of an OpenShift Container Platform installation.
Procedure
Create a directory to hold the OpenShift Container Platform installation files:
$ mkdir $HOME/clusterconfigRun
openshift-installto create a set of files in themanifestandopenshiftsubdirectories. Answer the system questions as you are prompted:$ openshift-install create manifests --dir $HOME/clusterconfig ? SSH Public Key ... $ ls $HOME/clusterconfig/openshift/ 99_kubeadmin-password-secret.yaml 99_openshift-cluster-api_master-machines-0.yaml 99_openshift-cluster-api_master-machines-1.yaml 99_openshift-cluster-api_master-machines-2.yaml ...Create a
MachineConfigobject and add it to a file in theopenshiftdirectory. For example, name the file98-var-partition.yaml, change the disk device name to the name of the storage device on theworkersystems, and set the storage size as appropriate. This example places the/vardirectory on a separate partition:apiVersion: machineconfiguration.openshift.io/v1 kind: MachineConfig metadata: labels: machineconfiguration.openshift.io/role: worker name: 98-var-partition spec: config: ignition: version: 3.2.0 storage: disks: - device: /dev/<device_name>1 partitions: - label: var startMiB: <partition_start_offset>2 sizeMiB: <partition_size>3 filesystems: - device: /dev/disk/by-partlabel/var path: /var format: xfs systemd: units: - name: var.mount4 enabled: true contents: | [Unit] Before=local-fs.target [Mount] What=/dev/disk/by-partlabel/var Where=/var Options=defaults,prjquota5 [Install] WantedBy=local-fs.target- 1
- The storage device name of the disk that you want to partition.
- 2
- When adding a data partition to the boot disk, a minimum value of 25000 mebibytes is recommended. The root file system is automatically resized to fill all available space up to the specified offset. If no value is specified, or if the specified value is smaller than the recommended minimum, the resulting root file system will be too small, and future reinstalls of RHCOS might overwrite the beginning of the data partition.
- 3
- The size of the data partition in mebibytes.
- 4
- The name of the mount unit must match the directory specified in the
Where=directive. For example, for a filesystem mounted on/var/lib/containers, the unit must be namedvar-lib-containers.mount. - 5
- The
prjquotamount option must be enabled for filesystems used for container storage.
NoteWhen creating a separate
/varpartition, you cannot use different instance types for worker nodes, if the different instance types do not have the same device name.Run
openshift-installagain to create Ignition configs from a set of files in themanifestandopenshiftsubdirectories:$ openshift-install create ignition-configs --dir $HOME/clusterconfig $ ls $HOME/clusterconfig/ auth bootstrap.ign master.ign metadata.json worker.ign
Now you can use the Ignition config files as input to the vSphere installation procedures to install Red Hat Enterprise Linux CoreOS (RHCOS) systems.
14.7.15. Updating the bootloader using bootupd
To update the bootloader by using bootupd, you must either install bootupd on RHCOS machines manually or provide a machine config with the enabled systemd unit. Unlike grubby or other bootloader tools, bootupd does not manage kernel space configuration such as passing kernel arguments.
After you have installed bootupd, you can manage it remotely from the OpenShift Container Platform cluster.
It is recommended that you use bootupd only on bare metal or virtualized hypervisor installations, such as for protection against the BootHole vulnerability.
Manual install method
You can manually install bootupd by using the bootctl command-line tool.
Inspect the system status:
# bootupctl statusExample output
Component EFI Installed: grub2-efi-x64-1:2.04-31.fc33.x86_64,shim-x64-15-8.x86_64 Update: At latest version
RHCOS images created without
bootupdinstalled on them require an explicit adoption phase.If the system status is
Adoptable, perform the adoption:# bootupctl adopt-and-updateExample output
Updated: grub2-efi-x64-1:2.04-31.fc33.x86_64,shim-x64-15-8.x86_64If an update is available, apply the update so that the changes take effect on the next reboot:
# bootupctl updateExample output
Updated: grub2-efi-x64-1:2.04-31.fc33.x86_64,shim-x64-15-8.x86_64
Machine config method
Another way to enable bootupd is by providing a machine config.
Provide a machine config file with the enabled
systemdunit, as shown in the following example:Example output
variant: rhcos version: 1.1.0 systemd: units: - name: custom-bootupd-auto.service enabled: true contents: | [Unit] Description=Bootupd automatic update [Service] ExecStart=/usr/bin/bootupctl update RemainAfterExit=yes [Install] WantedBy=multi-user.target
14.7.16. Creating the cluster
To create the OpenShift Container Platform cluster, you wait for the bootstrap process to complete on the machines that you provisioned by using the Ignition config files that you generated with the installation program.
Prerequisites
- Create the required infrastructure for the cluster.
- You obtained the installation program and generated the Ignition config files for your cluster.
- You used the Ignition config files to create RHCOS machines for your cluster.
Procedure
Monitor the bootstrap process:
$ ./openshift-install --dir <installation_directory> wait-for bootstrap-complete \1 --log-level=info2 Example output
INFO Waiting up to 30m0s for the Kubernetes API at https://api.test.example.com:6443... INFO API v1.20.0 up INFO Waiting up to 30m0s for bootstrapping to complete... INFO It is now safe to remove the bootstrap resourcesThe command succeeds when the Kubernetes API server signals that it has been bootstrapped on the control plane machines.
After bootstrap process is complete, remove the bootstrap machine from the load balancer.
ImportantYou must remove the bootstrap machine from the load balancer at this point. You can also remove or reformat the machine itself.
14.7.17. Logging in to the cluster by using the CLI
You can log in to your cluster as a default system user by exporting the cluster kubeconfig file. The kubeconfig file contains information about the cluster that is used by the CLI to connect a client to the correct cluster and API server. The file is specific to a cluster and is created during OpenShift Container Platform installation.
Prerequisites
- You deployed an OpenShift Container Platform cluster.
-
You installed the
ocCLI.
Procedure
Export the
kubeadmincredentials:$ export KUBECONFIG=<installation_directory>/auth/kubeconfig1 - 1
- For
<installation_directory>, specify the path to the directory that you stored the installation files in.
Verify you can run
occommands successfully using the exported configuration:$ oc whoamiExample output
system:admin
14.7.18. Approving the certificate signing requests for your machines
When you add machines to a cluster, two pending certificate signing requests (CSRs) are generated for each machine that you added. You must confirm that these CSRs are approved or, if necessary, approve them yourself. The client requests must be approved first, followed by the server requests.
Prerequisites
- You added machines to your cluster.
Procedure
Confirm that the cluster recognizes the machines:
$ oc get nodesExample output
NAME STATUS ROLES AGE VERSION master-0 Ready master 63m v1.20.0 master-1 Ready master 63m v1.20.0 master-2 Ready master 64m v1.20.0The output lists all of the machines that you created.
NoteThe preceding output might not include the compute nodes, also known as worker nodes, until some CSRs are approved.
Review the pending CSRs and ensure that you see the client requests with the
PendingorApprovedstatus for each machine that you added to the cluster:$ oc get csrExample output
NAME AGE REQUESTOR CONDITION csr-mddf5 20m system:node:master-01.example.com Approved,Issued csr-z5rln 16m system:node:worker-21.example.com Approved,IssuedIf the CSRs were not approved, after all of the pending CSRs for the machines you added are in
Pendingstatus, approve the CSRs for your cluster machines:NoteBecause the CSRs rotate automatically, approve your CSRs within an hour of adding the machines to the cluster. If you do not approve them within an hour, the certificates will rotate, and more than two certificates will be present for each node. You must approve all of these certificates. Once the client CSR is approved, the Kubelet creates a secondary CSR for the serving certificate, which requires manual approval. Then, subsequent serving certificate renewal requests are automatically approved by the
machine-approverif the Kubelet requests a new certificate with identical parameters.NoteFor clusters running on platforms that are not machine API enabled, such as bare metal and other user-provisioned infrastructure, you must implement a method of automatically approving the kubelet serving certificate requests (CSRs). If a request is not approved, then the
oc exec,oc rsh, andoc logscommands cannot succeed, because a serving certificate is required when the API server connects to the kubelet. Any operation that contacts the Kubelet endpoint requires this certificate approval to be in place. The method must watch for new CSRs, confirm that the CSR was submitted by thenode-bootstrapperservice account in thesystem:nodeorsystem:admingroups, and confirm the identity of the node.To approve them individually, run the following command for each valid CSR:
$ oc adm certificate approve <csr_name>1 - 1
<csr_name>is the name of a CSR from the list of current CSRs.
To approve all pending CSRs, run the following command:
$ oc get csr -o go-template='{{range .items}}{{if not .status}}{{.metadata.name}}{{"\n"}}{{end}}{{end}}' | xargs --no-run-if-empty oc adm certificate approveNoteSome Operators might not become available until some CSRs are approved.
Now that your client requests are approved, you must review the server requests for each machine that you added to the cluster:
$ oc get csrExample output
NAME AGE REQUESTOR CONDITION csr-bfd72 5m26s system:node:ip-10-0-50-126.us-east-2.compute.internal Pending csr-c57lv 5m26s system:node:ip-10-0-95-157.us-east-2.compute.internal Pending ...If the remaining CSRs are not approved, and are in the
Pendingstatus, approve the CSRs for your cluster machines:To approve them individually, run the following command for each valid CSR:
$ oc adm certificate approve <csr_name>1 - 1
<csr_name>is the name of a CSR from the list of current CSRs.
To approve all pending CSRs, run the following command:
$ oc get csr -o go-template='{{range .items}}{{if not .status}}{{.metadata.name}}{{"\n"}}{{end}}{{end}}' | xargs oc adm certificate approve
After all client and server CSRs have been approved, the machines have the
Readystatus. Verify this by running the following command:$ oc get nodesExample output
NAME STATUS ROLES AGE VERSION master-0 Ready master 73m v1.20.0 master-1 Ready master 73m v1.20.0 master-2 Ready master 74m v1.20.0 worker-0 Ready worker 11m v1.20.0 worker-1 Ready worker 11m v1.20.0NoteIt can take a few minutes after approval of the server CSRs for the machines to transition to the
Readystatus.
Additional information
- For more information on CSRs, see Certificate Signing Requests.
14.7.19. Initial Operator configuration
After the control plane initializes, you must immediately configure some Operators so that they all become available.
Prerequisites
- Your control plane has initialized.
Procedure
Watch the cluster components come online:
$ watch -n5 oc get clusteroperatorsExample output
NAME VERSION AVAILABLE PROGRESSING DEGRADED SINCE authentication 4.7.0 True False False 3h56m baremetal 4.7.0 True False False 29h cloud-credential 4.7.0 True False False 29h cluster-autoscaler 4.7.0 True False False 29h config-operator 4.7.0 True False False 6h39m console 4.7.0 True False False 3h59m csi-snapshot-controller 4.7.0 True False False 4h12m dns 4.7.0 True False False 4h15m etcd 4.7.0 True False False 29h image-registry 4.7.0 True False False 3h59m ingress 4.7.0 True False False 4h30m insights 4.7.0 True False False 29h kube-apiserver 4.7.0 True False False 29h kube-controller-manager 4.7.0 True False False 29h kube-scheduler 4.7.0 True False False 29h kube-storage-version-migrator 4.7.0 True False False 4h2m machine-api 4.7.0 True False False 29h machine-approver 4.7.0 True False False 6h34m machine-config 4.7.0 True False False 3h56m marketplace 4.7.0 True False False 4h2m monitoring 4.7.0 True False False 6h31m network 4.7.0 True False False 29h node-tuning 4.7.0 True False False 4h30m openshift-apiserver 4.7.0 True False False 3h56m openshift-controller-manager 4.7.0 True False False 4h36m openshift-samples 4.7.0 True False False 4h30m operator-lifecycle-manager 4.7.0 True False False 29h operator-lifecycle-manager-catalog 4.7.0 True False False 29h operator-lifecycle-manager-packageserver 4.7.0 True False False 3h59m service-ca 4.7.0 True False False 29h storage 4.7.0 True False False 4h30m- Configure the Operators that are not available.
14.7.19.1. Disabling the default OperatorHub sources
Operator catalogs that source content provided by Red Hat and community projects are configured for OperatorHub by default during an OpenShift Container Platform installation. In a restricted network environment, you must disable the default catalogs as a cluster administrator.
Procedure
Disable the sources for the default catalogs by adding
disableAllDefaultSources: trueto theOperatorHubobject:$ oc patch OperatorHub cluster --type json \ -p '[{"op": "add", "path": "/spec/disableAllDefaultSources", "value": true}]'
Alternatively, you can use the web console to manage catalog sources. From the Administration → Cluster Settings → Global Configuration → OperatorHub page, click the Sources tab, where you can create, delete, disable, and enable individual sources.
14.7.19.2. Image registry storage configuration
The Image Registry Operator is not initially available for platforms that do not provide default storage. After installation, you must configure your registry to use storage so that the Registry Operator is made available.
Instructions are shown for configuring a persistent volume, which is required for production clusters. Where applicable, instructions are shown for configuring an empty directory as the storage location, which is available for only non-production clusters.
Additional instructions are provided for allowing the image registry to use block storage types by using the Recreate rollout strategy during upgrades.
14.7.19.2.1. Configuring registry storage for VMware vSphere
As a cluster administrator, following installation you must configure your registry to use storage.
Prerequisites
- Cluster administrator permissions.
- A cluster on VMware vSphere.
Persistent storage provisioned for your cluster, such as Red Hat OpenShift Container Storage.
ImportantOpenShift Container Platform supports
ReadWriteOnceaccess for image registry storage when you have only one replica. To deploy an image registry that supports high availability with two or more replicas,ReadWriteManyaccess is required.- Must have "100Gi" capacity.
Testing shows issues with using the NFS server on RHEL as storage backend for core services. This includes the OpenShift Container Registry and Quay, Prometheus for monitoring storage, and Elasticsearch for logging storage. Therefore, using RHEL NFS to back PVs used by core services is not recommended.
Other NFS implementations on the marketplace might not have these issues. Contact the individual NFS implementation vendor for more information on any testing that was possibly completed against these OpenShift Container Platform core components.
Procedure
To configure your registry to use storage, change the
spec.storage.pvcin theconfigs.imageregistry/clusterresource.NoteWhen using shared storage, review your security settings to prevent outside access.
Verify that you do not have a registry pod:
$ oc get pod -n openshift-image-registry -l docker-registry=defaultExample output
No resourses found in openshift-image-registry namespaceNoteIf you do have a registry pod in your output, you do not need to continue with this procedure.
Check the registry configuration:
$ oc edit configs.imageregistry.operator.openshift.ioExample output
storage: pvc: claim:1 - 1
- Leave the
claimfield blank to allow the automatic creation of animage-registry-storagePVC.
Check the
clusteroperatorstatus:$ oc get clusteroperator image-registryExample output
NAME VERSION AVAILABLE PROGRESSING DEGRADED SINCE MESSAGE image-registry 4.7 True False False 6h50m
14.7.19.2.2. Configuring storage for the image registry in non-production clusters
You must configure storage for the Image Registry Operator. For non-production clusters, you can set the image registry to an empty directory. If you do so, all images are lost if you restart the registry.
Procedure
To set the image registry storage to an empty directory:
$ oc patch configs.imageregistry.operator.openshift.io cluster --type merge --patch '{"spec":{"storage":{"emptyDir":{}}}}'WarningConfigure this option for only non-production clusters.
If you run this command before the Image Registry Operator initializes its components, the
oc patchcommand fails with the following error:Error from server (NotFound): configs.imageregistry.operator.openshift.io "cluster" not foundWait a few minutes and run the command again.
14.7.19.2.3. Configuring block registry storage for VMware vSphere
To allow the image registry to use block storage types such as vSphere Virtual Machine Disk (VMDK) during upgrades as a cluster administrator, you can use the Recreate rollout strategy.
Block storage volumes are supported but not recommended for use with image registry on production clusters. An installation where the registry is configured on block storage is not highly available because the registry cannot have more than one replica.
Procedure
To set the image registry storage as a block storage type, patch the registry so that it uses the
Recreaterollout strategy and runs with only1replica:$ oc patch config.imageregistry.operator.openshift.io/cluster --type=merge -p '{"spec":{"rolloutStrategy":"Recreate","replicas":1}}'Provision the PV for the block storage device, and create a PVC for that volume. The requested block volume uses the ReadWriteOnce (RWO) access mode.
Create a
pvc.yamlfile with the following contents to define a VMware vSpherePersistentVolumeClaimobject:kind: PersistentVolumeClaim apiVersion: v1 metadata: name: image-registry-storage1 namespace: openshift-image-registry2 spec: accessModes: - ReadWriteOnce3 resources: requests: storage: 100Gi4 - 1
- A unique name that represents the
PersistentVolumeClaimobject. - 2
- The namespace for the
PersistentVolumeClaimobject, which isopenshift-image-registry. - 3
- The access mode of the persistent volume claim. With
ReadWriteOnce, the volume can be mounted with read and write permissions by a single node. - 4
- The size of the persistent volume claim.
Create the
PersistentVolumeClaimobject from the file:$ oc create -f pvc.yaml -n openshift-image-registry
Edit the registry configuration so that it references the correct PVC:
$ oc edit config.imageregistry.operator.openshift.io -o yamlExample output
storage: pvc: claim:1 - 1
- Creating a custom PVC allows you to leave the
claimfield blank for the default automatic creation of animage-registry-storagePVC.
For instructions about configuring registry storage so that it references the correct PVC, see Configuring the registry for vSphere.
14.7.20. Completing installation on user-provisioned infrastructure
After you complete the Operator configuration, you can finish installing the cluster on infrastructure that you provide.
Prerequisites
- Your control plane has initialized.
- You have completed the initial Operator configuration.
Procedure
Confirm that all the cluster components are online with the following command:
$ watch -n5 oc get clusteroperatorsExample output
NAME VERSION AVAILABLE PROGRESSING DEGRADED SINCE authentication 4.7.0 True False False 3h56m baremetal 4.7.0 True False False 29h cloud-credential 4.7.0 True False False 29h cluster-autoscaler 4.7.0 True False False 29h config-operator 4.7.0 True False False 6h39m console 4.7.0 True False False 3h59m csi-snapshot-controller 4.7.0 True False False 4h12m dns 4.7.0 True False False 4h15m etcd 4.7.0 True False False 29h image-registry 4.7.0 True False False 3h59m ingress 4.7.0 True False False 4h30m insights 4.7.0 True False False 29h kube-apiserver 4.7.0 True False False 29h kube-controller-manager 4.7.0 True False False 29h kube-scheduler 4.7.0 True False False 29h kube-storage-version-migrator 4.7.0 True False False 4h2m machine-api 4.7.0 True False False 29h machine-approver 4.7.0 True False False 6h34m machine-config 4.7.0 True False False 3h56m marketplace 4.7.0 True False False 4h2m monitoring 4.7.0 True False False 6h31m network 4.7.0 True False False 29h node-tuning 4.7.0 True False False 4h30m openshift-apiserver 4.7.0 True False False 3h56m openshift-controller-manager 4.7.0 True False False 4h36m openshift-samples 4.7.0 True False False 4h30m operator-lifecycle-manager 4.7.0 True False False 29h operator-lifecycle-manager-catalog 4.7.0 True False False 29h operator-lifecycle-manager-packageserver 4.7.0 True False False 3h59m service-ca 4.7.0 True False False 29h storage 4.7.0 True False False 4h30mAlternatively, the following command notifies you when all of the clusters are available. It also retrieves and displays credentials:
$ ./openshift-install --dir <installation_directory> wait-for install-complete1 - 1
- For
<installation_directory>, specify the path to the directory that you stored the installation files in.
Example output
INFO Waiting up to 30m0s for the cluster to initialize...The command succeeds when the Cluster Version Operator finishes deploying the OpenShift Container Platform cluster from Kubernetes API server.
Important-
The Ignition config files that the installation program generates contain certificates that expire after 24 hours, which are then renewed at that time. If the cluster is shut down before renewing the certificates and the cluster is later restarted after the 24 hours have elapsed, the cluster automatically recovers the expired certificates. The exception is that you must manually approve the pending
node-bootstrappercertificate signing requests (CSRs) to recover kubelet certificates. See the documentation for Recovering from expired control plane certificates for more information. - It is recommended that you use Ignition config files within 12 hours after they are generated because the 24-hour certificate rotates from 16 to 22 hours after the cluster is installed. By using the Ignition config files within 12 hours, you can avoid installation failure if the certificate update runs during installation.
Confirm that the Kubernetes API server is communicating with the pods.
To view a list of all pods, use the following command:
$ oc get pods --all-namespacesExample output
NAMESPACE NAME READY STATUS RESTARTS AGE openshift-apiserver-operator openshift-apiserver-operator-85cb746d55-zqhs8 1/1 Running 1 9m openshift-apiserver apiserver-67b9g 1/1 Running 0 3m openshift-apiserver apiserver-ljcmx 1/1 Running 0 1m openshift-apiserver apiserver-z25h4 1/1 Running 0 2m openshift-authentication-operator authentication-operator-69d5d8bf84-vh2n8 1/1 Running 0 5m ...View the logs for a pod that is listed in the output of the previous command by using the following command:
$ oc logs <pod_name> -n <namespace>1 - 1
- Specify the pod name and namespace, as shown in the output of the previous command.
If the pod logs display, the Kubernetes API server can communicate with the cluster machines.
For an installation with Fibre Channel Protocol (FCP), additional steps are required to enable multipathing. Do not enable multipathing during installation.
See "Enabling multipathing with kernel arguments on RHCOS" in the Post-installation configuration documentation for more information.
All the worker nodes are restarted. To monitor the process, enter the following command:
$ oc get nodes -wNoteIf you have additional machine types such as infrastructure nodes, repeat the process for these types.
- Register your cluster on the Cluster registration page.
You can add extra compute machines after the cluster installation is completed by following Adding compute machines to vSphere.
14.7.21. Backing up VMware vSphere volumes
OpenShift Container Platform provisions new volumes as independent persistent disks to freely attach and detach the volume on any node in the cluster. As a consequence, it is not possible to back up volumes that use snapshots, or to restore volumes from snapshots. See Snapshot Limitations for more information.
Procedure
To create a backup of persistent volumes:
- Stop the application that is using the persistent volume.
- Clone the persistent volume.
- Restart the application.
- Create a backup of the cloned volume.
- Delete the cloned volume.
14.7.22. Telemetry access for OpenShift Container Platform
In OpenShift Container Platform 4.7, the Telemetry service, which runs by default to provide metrics about cluster health and the success of updates, requires internet access. If your cluster is connected to the internet, Telemetry runs automatically, and your cluster is registered to OpenShift Cluster Manager.
After you confirm that your OpenShift Cluster Manager inventory is correct, either maintained automatically by Telemetry or manually by using OpenShift Cluster Manager, use subscription watch to track your OpenShift Container Platform subscriptions at the account or multi-cluster level.
14.7.23. Next steps
- Customize your cluster.
- If the mirror registry that you used to install your cluster has a trusted CA, add it to the cluster by configuring additional trust stores.
- If necessary, you can opt out of remote health reporting.
- Optional: View the events from the vSphere Problem Detector Operator to determine if the cluster has permission or storage configuration issues.
14.8. Uninstalling a cluster on vSphere that uses installer-provisioned infrastructure
You can remove a cluster that you deployed in your VMware vSphere instance by using installer-provisioned infrastructure.
When you run the openshift-install destroy cluster command to uninstall OpenShift Container Platform, vSphere volumes are not automatically deleted. The cluster administrator must manually find the vSphere volumes and delete them.
14.8.1. Removing a cluster that uses installer-provisioned infrastructure
You can remove a cluster that uses installer-provisioned infrastructure from your cloud.
After uninstallation, check your cloud provider for any resources not removed properly, especially with User Provisioned Infrastructure (UPI) clusters. There might be resources that the installer did not create or that the installer is unable to access.
Prerequisites
- Have a copy of the installation program that you used to deploy the cluster.
- Have the files that the installation program generated when you created your cluster.
Procedure
From the directory that contains the installation program on the computer that you used to install the cluster, run the following command:
$ ./openshift-install destroy cluster \ --dir <installation_directory> --log-level info1 2 NoteYou must specify the directory that contains the cluster definition files for your cluster. The installation program requires the
metadata.jsonfile in this directory to delete the cluster.-
Optional: Delete the
<installation_directory>directory and the OpenShift Container Platform installation program.
14.9. Using the vSphere Problem Detector Operator
14.9.1. About the vSphere Problem Detector Operator
The vSphere Problem Detector Operator checks clusters that are deployed on vSphere for common installation and misconfiguration issues that are related to storage.
The Operator runs in the openshift-cluster-storage-operator namespace and is started by the Cluster Storage Operator when the Cluster Storage Operator detects that the cluster is deployed on vSphere. The vSphere Problem Detector Operator communicates with the vSphere vCenter Server to determine the virtual machines in the cluster, the default datastore, and other information about the vSphere vCenter Server configuration. The Operator uses the credentials from the Cloud Credential Operator to connect to vSphere.
The Operator runs the checks according to the following schedule:
- The checks run every 8 hours.
- If any check fails, the Operator runs the checks again in intervals of 1 minute, 2 minutes, 4, 8, and so on. The Operator doubles the interval up to a maximum interval of 8 hours.
- When all checks pass, the schedule returns to an 8 hour interval.
The Operator increases the frequency of the checks after a failure so that the Operator can report success quickly after the failure condition is remedied. You can run the Operator manually for immediate troubleshooting information.
14.9.2. Running the vSphere Problem Detector Operator checks
You can override the schedule for running the vSphere Problem Detector Operator checks and run the checks immediately.
The vSphere Problem Detector Operator automatically runs the checks every 8 hours. However, when the Operator starts, it runs the checks immediately. The Operator is started by the Cluster Storage Operator when the Cluster Storage Operator starts and determines that the cluster is running on vSphere. To run the checks immediately, you can scale the vSphere Problem Detector Operator to 0 and back to 1 so that it restarts the vSphere Problem Detector Operator.
Prerequisites
-
Access to the cluster as a user with the
cluster-adminrole.
Procedure
Scale the Operator to
0:$ oc scale deployment/vsphere-problem-detector-operator --replicas=0 \ -n openshift-cluster-storage-operatorIf the deployment does not scale to zero immediately, you can run the following command to wait for the pods to exit:
$ oc wait pods -l name=vsphere-problem-detector-operator \ --for=delete --timeout=5m -n openshift-cluster-storage-operatorScale the Operator back to
1:$ oc scale deployment/vsphere-problem-detector-operator --replicas=1 \ -n openshift-cluster-storage-operatorDelete the old leader lock to speed up the new leader election for the Cluster Storage Operator:
$ oc delete -n openshift-cluster-storage-operator \ cm vsphere-problem-detector-lock
Verification
- View the events or logs that are generated by the vSphere Problem Detector Operator. Confirm that the events or logs have recent timestamps.
14.9.3. Viewing the events from the vSphere Problem Detector Operator
After the vSphere Problem Detector Operator runs and performs the configuration checks, it creates events that can be viewed from the command line or from the OpenShift Container Platform web console.
Procedure
To view the events by using the command line, run the following command:
$ oc get event -n openshift-cluster-storage-operator \ --sort-by={.metadata.creationTimestamp}Example output
16m Normal Started pod/vsphere-problem-detector-operator-xxxxx Started container vsphere-problem-detector 16m Normal Created pod/vsphere-problem-detector-operator-xxxxx Created container vsphere-problem-detector 16m Normal LeaderElection configmap/vsphere-problem-detector-lock vsphere-problem-detector-operator-xxxxx became leader-
To view the events by using the OpenShift Container Platform web console, navigate to Home → Events and select
openshift-cluster-storage-operatorfrom the Project menu.
14.9.4. Viewing the logs from the vSphere Problem Detector Operator
After the vSphere Problem Detector Operator runs and performs the configuration checks, it creates log records that can be viewed from the command line or from the OpenShift Container Platform web console.
Procedure
To view the logs by using the command line, run the following command:
$ oc logs deployment/vsphere-problem-detector-operator \ -n openshift-cluster-storage-operatorExample output
I0108 08:32:28.445696 1 operator.go:209] ClusterInfo passed I0108 08:32:28.451029 1 datastore.go:57] CheckStorageClasses checked 1 storage classes, 0 problems found I0108 08:32:28.451047 1 operator.go:209] CheckStorageClasses passed I0108 08:32:28.452160 1 operator.go:209] CheckDefaultDatastore passed I0108 08:32:28.480648 1 operator.go:271] CheckNodeDiskUUID:<host_name> passed I0108 08:32:28.480685 1 operator.go:271] CheckNodeProviderID:<host_name> passedTo view the Operator logs with the OpenShift Container Platform web console, perform the following steps:
- Navigate to Workloads → Pods.
-
Select
openshift-cluster-storage-operatorfrom the Projects menu. -
Click the link for the
vsphere-problem-detector-operatorpod. - Click the Logs tab on the Pod details page to view the logs.
14.9.5. Configuration checks run by the vSphere Problem Detector Operator
The following tables identify the configuration checks that the vSphere Problem Detector Operator runs. Some checks verify the configuration of the cluster. Other checks verify the configuration of each node in the cluster.
| Name | Description |
|---|---|
|
| Verifies that the default datastore name in the vSphere configuration is short enough for use with dynamic provisioning. If this check fails, you can expect the following:
If this check fails, reconfigure vSphere with a shorter name for the default datastore. |
|
|
Verifies the permission to list volumes in the default datastore. This permission is required to create volumes. The Operator verifies the permission by listing the If this check fails, review the required permissions for the vCenter account that was specified during the OpenShift Container Platform installation. |
|
| Verifies the following:
|
|
| Verifies the permission to list recent tasks and datastores. |
|
| Collects the cluster version and UUID from vSphere vCenter. |
| Name | Description |
|---|---|
|
|
Verifies that all the vSphere virtual machines are configured with If this check fails, see the How to check 'disk.EnableUUID' parameter from VM in vSphere Red Hat Knowledgebase solution. |
|
|
Verifies that all nodes are configured with the If this check fails, refer to the vSphere product documentation for information about setting the provider ID for each node in the cluster. |
|
| Reports the version of the ESXi hosts that run nodes. |
|
| Reports the virtual machine hardware version for a node. |
14.9.6. About the storage class configuration check
The names for persistent volumes that use vSphere storage are related to the datastore name and cluster ID.
When a persistent volume is created, systemd creates a mount unit for the persistent volume. The systemd process has a 255 character limit for the length of the fully qualified path to the VDMK file that is used for the persistent volume.
The fully qualified path is based on the naming conventions for systemd and vSphere. The naming conventions use the following pattern:
/var/lib/kubelet/plugins/kubernetes.io/vsphere-volume/mounts/[<datastore>] 00000000-0000-0000-0000-000000000000/<cluster_id>-dynamic-pvc-00000000-0000-0000-0000-000000000000.vmdk- The naming conventions require 205 characters of the 255 character limit.
- The datastore name and the cluster ID are determined from the deployment.
-
The datastore name and cluster ID are substituted into the preceding pattern. Then the path is processed with the
systemd-escapecommand to escape special characters. For example, a hyphen character uses four characters after it is escaped. The escaped value is\x2d. -
After processing with
systemd-escapeto ensure thatsystemdcan access the fully qualified path to the VDMK file, the length of the path must be less than 255 characters.
14.9.7. Metrics for the vSphere Problem Detector Operator
The vSphere Problem Detector Operator exposes the following metrics for use by the OpenShift Container Platform monitoring stack.
| Name | Description |
|---|---|
|
| Cumulative number of cluster-level checks that the vSphere Problem Detector Operator performed. This count includes both successes and failures. |
|
|
Number of failed cluster-level checks that the vSphere Problem Detector Operator performed. For example, a value of |
|
| Number of ESXi hosts with a specific version. Be aware that if a host runs more than one node, the host is counted only once. |
|
| Cumulative number of node-level checks that the vSphere Problem Detector Operator performed. This count includes both successes and failures. |
|
|
Number of failed node-level checks that the vSphere Problem Detector Operator performed. For example, a value of |
|
| Number of vSphere nodes with a specific hardware version. |
|
| Information about the vSphere vCenter Server. |
Chapter 15. Installing on VMC
15.1. Installing a cluster on VMC
In OpenShift Container Platform version 4.7, you can install a cluster on VMware vSphere by deploying it to VMware Cloud (VMC) on AWS.
Once you have configured your VMC environment for OpenShift Container Platform deployment, you use the OpenShift Container Platform installation program from the bastion management host, co-located in the VMC environment. The installation program and control plane automates the process of deploying and managing the resources needed for the OpenShift Container Platform cluster.
OpenShift Container Platform supports deploying a cluster to a single VMware vCenter only. Deploying a cluster with machines/machine sets on multiple vCenters is not supported.
15.1.1. Setting up VMC for vSphere
You can install OpenShift Container Platform on VMware Cloud (VMC) on AWS hosted vSphere clusters to enable applications to be deployed and managed both on-premise and off-premise, across the hybrid cloud.
You must configure several options in your VMC environment prior to installing OpenShift Container Platform on VMware vSphere. Ensure your VMC environment has the following prerequisites:
- Create a non-exclusive, DHCP-enabled, NSX-T network segment and subnet. Other virtual machines (VMs) can be hosted on the subnet, but at least eight IP addresses must be available for the OpenShift Container Platform deployment.
Allocate two IP addresses, outside the DHCP range, and configure them with reverse DNS records.
-
A DNS record for
api.<cluster_name>.<base_domain>pointing to the allocated IP address. -
A DNS record for
*.apps.<cluster_name>.<base_domain>pointing to the allocated IP address.
-
A DNS record for
Configure the following firewall rules:
- An ANY:ANY firewall rule between the OpenShift Container Platform compute network and the Internet. This is used by nodes and applications to download container images.
- An ANY:ANY firewall rule between the installation host and the software-defined data center (SDDC) management network on port 443. This allows you to upload the Red Hat Enterprise Linux CoreOS (RHCOS) OVA during deployment.
- An HTTPS firewall rule between the OpenShift Container Platform compute network and vCenter. This connection allows OpenShift Container Platform to communicate with vCenter for provisioning and managing nodes, persistent volume claims (PVCs), and other resources.
You must have the following information to deploy OpenShift Container Platform:
-
The OpenShift Container Platform cluster name, such as
vmc-prod-1. -
The base DNS name, such as
companyname.com. -
If not using the default, the pod network CIDR and services network CIDR must be identified, which are set by default to
10.128.0.0/14and172.30.0.0/16, respectively. These CIDRs are used for pod-to-pod and pod-to-service communication and are not accessible externally; however, they must not overlap with existing subnets in your organization. The following vCenter information:
- vCenter hostname, username, and password
-
Datacenter name, such as
SDDC-Datacenter -
Cluster name, such as
Cluster-1 - Network name
Datastore name, such as
WorkloadDatastoreNoteIt is recommended to move your vSphere cluster to the VMC
Compute-ResourcePoolresource pool after your cluster installation is finished.
-
The OpenShift Container Platform cluster name, such as
A Linux-based host deployed to VMC as a bastion.
- The bastion host can be Red Hat Enterprise Linux (RHEL) or any another Linux-based host; it must have Internet connectivity and the ability to upload an OVA to the ESXi hosts.
Download and install the OpenShift CLI tools to the bastion host.
-
The
openshift-installinstallation program -
The OpenShift CLI (
oc) tool
-
The
You cannot use the VMware NSX Container Plugin for Kubernetes (NCP), and NSX is not used as the OpenShift SDN. The version of NSX currently available with VMC is incompatible with the version of NCP certified with OpenShift Container Platform.
However, the NSX DHCP service is used for virtual machine IP management with the full-stack automated OpenShift Container Platform deployment and with nodes provisioned, either manually or automatically, by the Machine API integration with vSphere. Additionally, NSX firewall rules are created to enable access with the OpenShift Container Platform cluster and between the bastion host and the VMC vSphere hosts.
15.1.1.1. VMC Sizer tool
VMware Cloud on AWS is built on top of AWS bare metal infrastructure; this is the same bare metal infrastructure which runs AWS native services. When a VMware cloud on AWS software-defined data center (SDDC) is deployed, you consume these physical server nodes and run the VMware ESXi hypervisor in a single tenant fashion. This means the physical infrastructure is not accessible to anyone else using VMC. It is important to consider how many physical hosts you will need to host your virtual infrastructure.
To determine this, VMware provides the VMC on AWS Sizer. With this tool, you can define the resources you intend to host on VMC:
- Types of workloads
- Total number of virtual machines
Specification information such as:
- Storage requirements
- vCPUs
- vRAM
- Overcommit ratios
With these details, the sizer tool can generate a report, based on VMware best practices, and recommend your cluster configuration and the number of hosts you will need.
15.1.2. vSphere prerequisites
- Provision block registry storage. For more information on persistent storage, see Understanding persistent storage.
- Review details about the OpenShift Container Platform installation and update processes.
If you use a firewall, you must configure it to allow the sites that your cluster requires access to.
NoteBe sure to also review this site list if you are configuring a proxy.
15.1.3. Internet access for OpenShift Container Platform
In OpenShift Container Platform 4.7, you require access to the Internet to install your cluster.
You must have Internet access to:
- Access OpenShift Cluster Manager to download the installation program and perform subscription management. If the cluster has internet access and you do not disable Telemetry, that service automatically entitles your cluster.
- Access Quay.io to obtain the packages that are required to install your cluster.
- Obtain the packages that are required to perform cluster updates.
If your cluster cannot have direct Internet access, you can perform a restricted network installation on some types of infrastructure that you provision. During that process, you download the content that is required and use it to populate a mirror registry with the packages that you need to install a cluster and generate the installation program. With some installation types, the environment that you install your cluster in will not require Internet access. Before you update the cluster, you update the content of the mirror registry.
15.1.4. VMware vSphere infrastructure requirements
You must install the OpenShift Container Platform cluster on a VMware vSphere version 6 or 7 instance that meets the requirements for the components that you use.
| Component | Minimum supported versions | Description |
|---|---|---|
| Hypervisor | vSphere 6.5 and later with HW version 13 | This version is the minimum version that Red Hat Enterprise Linux CoreOS (RHCOS) supports. See the Red Hat Enterprise Linux 8 supported hypervisors list. |
| Storage with in-tree drivers | vSphere 6.5 and later | This plug-in creates vSphere storage by using the in-tree storage drivers for vSphere included in OpenShift Container Platform. |
If you use a vSphere version 6.5 instance, consider upgrading to 6.7U3 or 7.0 before you install OpenShift Container Platform.
You must ensure that the time on your ESXi hosts is synchronized before you install OpenShift Container Platform. See Edit Time Configuration for a Host in the VMware documentation.
Virtual machines (VMs) configured to use virtual hardware version 14 or greater might result in a failed installation. It is recommended to configure VMs with virtual hardware version 13. This is a known issue that is being addressed in BZ#1935539.
15.1.5. Network connectivity requirements
You must configure the network connectivity between machines to allow OpenShift Container Platform cluster components to communicate.
Review the following details about the required network ports.
| Protocol | Port | Description |
|---|---|---|
| ICMP | N/A | Network reachability tests |
| TCP |
| Metrics |
|
|
Host level services, including the node exporter on ports | |
|
| The default ports that Kubernetes reserves | |
|
| openshift-sdn | |
| UDP |
| virtual extensible LAN (VXLAN) |
|
| Geneve | |
|
|
Host level services, including the node exporter on ports | |
|
| IPsec IKE packets | |
|
| IPsec NAT-T packets | |
| TCP/UDP |
| Kubernetes node port |
| ESP | N/A | IPsec Encapsulating Security Payload (ESP) |
| Protocol | Port | Description |
|---|---|---|
| TCP |
| Kubernetes API |
| Protocol | Port | Description |
|---|---|---|
| TCP |
| etcd server and peer ports |
15.1.6. vCenter requirements
Before you install an OpenShift Container Platform cluster on your vCenter that uses infrastructure that the installer provisions, you must prepare your environment.
Required vCenter account privileges
To install an OpenShift Container Platform cluster in a vCenter, the installation program requires access to an account with privileges to read and create the required resources. Using an account that has global administrative privileges is the simplest way to access all of the necessary permissions.
If you cannot use an account with global administrative privileges, you must create roles to grant the privileges necessary for OpenShift Container Platform cluster installation. While most of the privileges are always required, some are required only if you plan for the installation program to provision a folder to contain the OpenShift Container Platform cluster on your vCenter instance, which is the default behavior. You must create or amend vSphere roles for the specified objects to grant the required privileges.
An additional role is required if the installation program is to create a vSphere virtual machine folder.
Example 15.1. Roles and privileges required for installation
| vSphere object for role | When required | Required privileges |
|---|---|---|
| vSphere vCenter | Always |
|
| vSphere vCenter Cluster | Always |
|
| vSphere Datastore | Always |
|
| vSphere Port Group | Always |
|
| Virtual Machine Folder | Always |
|
| vSphere vCenter Datacenter | If the installation program creates the virtual machine folder |
|
Additionally, the user requires some ReadOnly permissions, and some of the roles require permission to propogate the permissions to child objects. These settings vary depending on whether or not you install the cluster into an existing folder.
Example 15.2. Required permissions and propagation settings
| vSphere object | Folder type | Propagate to children | Permissions required |
|---|---|---|---|
| vSphere vCenter | Always | False | Listed required privileges |
| vSphere vCenter Datacenter | Existing folder | False |
|
| Installation program creates the folder | True | Listed required privileges | |
| vSphere vCenter Cluster | Always | True | Listed required privileges |
| vSphere vCenter Datastore | Always | False | Listed required privileges |
| vSphere Switch | Always | False |
|
| vSphere Port Group | Always | False | Listed required privileges |
| vSphere vCenter Virtual Machine Folder | Existing folder | True | Listed required privileges |
For more information about creating an account with only the required privileges, see vSphere Permissions and User Management Tasks in the vSphere documentation.
Using OpenShift Container Platform with vMotion
If you intend on using vMotion in your vSphere environment, consider the following before installing a OpenShift Container Platform cluster.
OpenShift Container Platform generally supports compute-only vMotion. Using Storage vMotion can cause issues and is not supported.
To help ensure the uptime of your compute and control plane nodes, it is recommended that you follow the VMware best practices for vMotion. It is also recommended to use VMware anti-affinity rules to improve the availability of OpenShift Container Platform during maintenance or hardware issues.
For more information about vMotion and anti-affinity rules, see the VMware vSphere documentation for vMotion networking requirements and VM anti-affinity rules.
- If you are using vSphere volumes in your pods, migrating a VM across datastores either manually or through Storage vMotion causes, invalid references within OpenShift Container Platform persistent volume (PV) objects. These references prevent affected pods from starting up and can result in data loss.
- Similarly, OpenShift Container Platform does not support selective migration of VMDKs across datastores, using datastore clusters for VM provisioning or for dynamic or static provisioning of PVs, or using a datastore that is part of a datastore cluster for dynamic or static provisioning of PVs.
Cluster resources
When you deploy an OpenShift Container Platform cluster that uses installer-provisioned infrastructure, the installation program must be able to create several resources in your vCenter instance.
A standard OpenShift Container Platform installation creates the following vCenter resources:
- 1 Folder
- 1 Tag category
- 1 Tag
Virtual machines:
- 1 template
- 1 temporary bootstrap node
- 3 control plane nodes
- 3 compute machines
Although these resources use 856 GB of storage, the bootstrap node is destroyed during the cluster installation process. A minimum of 800 GB of storage is required to use a standard cluster.
If you deploy more compute machines, the OpenShift Container Platform cluster will use more storage.
Cluster limits
Available resources vary between clusters. The number of possible clusters within a vCenter is limited primarily by available storage space and any limitations on the number of required resources. Be sure to consider both limitations to the vCenter resources that the cluster creates and the resources that you require to deploy a cluster, such as IP addresses and networks.
Networking requirements
You must use DHCP for the network and ensure that the DHCP server is configured to provide persistent IP addresses to the cluster machines. All nodes must be in the same VLAN. You cannot scale the cluster using a second VLAN as a Day 2 operation. Additionally, you must create the following networking resources before you install the OpenShift Container Platform cluster:
It is recommended that each OpenShift Container Platform node in the cluster must have access to a Network Time Protocol (NTP) server that is discoverable via DHCP. Installation is possible without an NTP server. However, asynchronous server clocks will cause errors, which NTP server prevents.
Required IP Addresses
An installer-provisioned vSphere installation requires two static IP addresses:
- The API address is used to access the cluster API.
- The Ingress address is used for cluster ingress traffic.
You must provide these IP addresses to the installation program when you install the OpenShift Container Platform cluster.
DNS records
You must create DNS records for two static IP addresses in the appropriate DNS server for the vCenter instance that hosts your OpenShift Container Platform cluster. In each record, <cluster_name> is the cluster name and <base_domain> is the cluster base domain that you specify when you install the cluster. A complete DNS record takes the form: <component>.<cluster_name>.<base_domain>..
| Component | Record | Description |
|---|---|---|
| API VIP |
| This DNS A/AAAA or CNAME record must point to the load balancer for the control plane machines. This record must be resolvable by both clients external to the cluster and from all the nodes within the cluster. |
| Ingress VIP |
| A wildcard DNS A/AAAA or CNAME record that points to the load balancer that targets the machines that run the Ingress router pods, which are the worker nodes by default. This record must be resolvable by both clients external to the cluster and from all the nodes within the cluster. |
15.1.7. Generating an SSH private key and adding it to the agent
If you want to perform installation debugging or disaster recovery on your cluster, you must provide an SSH key to both your ssh-agent and the installation program. You can use this key to access the bootstrap machine in a public cluster to troubleshoot installation issues.
In a production environment, you require disaster recovery and debugging.
Do not skip this procedure in production environments where disaster recovery and debugging is required.
You can use this key to SSH into the master nodes as the user core. When you deploy the cluster, the key is added to the core user’s ~/.ssh/authorized_keys list.
Procedure
If you do not have an SSH key that is configured for password-less authentication on your computer, create one. For example, on a computer that uses a Linux operating system, run the following command:
$ ssh-keygen -t ed25519 -N '' \ -f <path>/<file_name>1 - 1
- Specify the path and file name, such as
~/.ssh/id_rsa, of the new SSH key. If you have an existing key pair, ensure your public key is in the your~/.sshdirectory.
Running this command generates an SSH key that does not require a password in the location that you specified.
NoteIf you plan to install an OpenShift Container Platform cluster that uses FIPS Validated / Modules in Process cryptographic libraries on the
x86_64architecture, do not create a key that uses theed25519algorithm. Instead, create a key that uses thersaorecdsaalgorithm.Start the
ssh-agentprocess as a background task:$ eval "$(ssh-agent -s)"Example output
Agent pid 31874NoteIf your cluster is in FIPS mode, only use FIPS-compliant algorithms to generate the SSH key. The key must be either RSA or ECDSA.
Add your SSH private key to the
ssh-agent:$ ssh-add <path>/<file_name>1 Example output
Identity added: /home/<you>/<path>/<file_name> (<computer_name>)- 1
- Specify the path and file name for your SSH private key, such as
~/.ssh/id_rsa
Next steps
- When you install OpenShift Container Platform, provide the SSH public key to the installation program.
15.1.8. Obtaining the installation program
Before you install OpenShift Container Platform, download the installation file on your provisioning machine.
Prerequisites
- You have a machine that runs Linux, for example Red Hat Enterprise Linux 8, with 500 MB of local disk space
Procedure
- Access the Infrastructure Provider page on the OpenShift Cluster Manager site. If you have a Red Hat account, log in with your credentials. If you do not, create an account.
- Select your infrastructure provider.
Navigate to the page for your installation type, download the installation program for your operating system, and place the file in the directory where you will store the installation configuration files.
ImportantThe installation program creates several files on the computer that you use to install your cluster. You must keep the installation program and the files that the installation program creates after you finish installing the cluster. Both files are required to delete the cluster.
ImportantDeleting the files created by the installation program does not remove your cluster, even if the cluster failed during installation. To remove your cluster, complete the OpenShift Container Platform uninstallation procedures for your specific cloud provider.
Extract the installation program. For example, on a computer that uses a Linux operating system, run the following command:
$ tar xvf openshift-install-linux.tar.gz- Download your installation pull secret from the Red Hat OpenShift Cluster Manager. This pull secret allows you to authenticate with the services that are provided by the included authorities, including Quay.io, which serves the container images for OpenShift Container Platform components.
15.1.9. Adding vCenter root CA certificates to your system trust
Because the installation program requires access to your vCenter’s API, you must add your vCenter’s trusted root CA certificates to your system trust before you install an OpenShift Container Platform cluster.
Procedure
-
From the vCenter home page, download the vCenter’s root CA certificates. Click Download trusted root CA certificates in the vSphere Web Services SDK section. The
<vCenter>/certs/download.zipfile downloads. Extract the compressed file that contains the vCenter root CA certificates. The contents of the compressed file resemble the following file structure:
certs ├── lin │ ├── 108f4d17.0 │ ├── 108f4d17.r1 │ ├── 7e757f6a.0 │ ├── 8e4f8471.0 │ └── 8e4f8471.r0 ├── mac │ ├── 108f4d17.0 │ ├── 108f4d17.r1 │ ├── 7e757f6a.0 │ ├── 8e4f8471.0 │ └── 8e4f8471.r0 └── win ├── 108f4d17.0.crt ├── 108f4d17.r1.crl ├── 7e757f6a.0.crt ├── 8e4f8471.0.crt └── 8e4f8471.r0.crl 3 directories, 15 filesAdd the files for your operating system to the system trust. For example, on a Fedora operating system, run the following command:
# cp certs/lin/* /etc/pki/ca-trust/source/anchorsUpdate your system trust. For example, on a Fedora operating system, run the following command:
# update-ca-trust extract
15.1.10. Deploying the cluster
You can install OpenShift Container Platform on a compatible cloud platform.
You can run the create cluster command of the installation program only once, during initial installation.
Prerequisites
- Configure an account with the cloud platform that hosts your cluster.
- Obtain the OpenShift Container Platform installation program and the pull secret for your cluster.
Procedure
Change to the directory that contains the installation program and initialize the cluster deployment:
$ ./openshift-install create cluster --dir <installation_directory> \1 --log-level=info2 ImportantSpecify an empty directory. Some installation assets, like bootstrap X.509 certificates have short expiration intervals, so you must not reuse an installation directory. If you want to reuse individual files from another cluster installation, you can copy them into your directory. However, the file names for the installation assets might change between releases. Use caution when copying installation files from an earlier OpenShift Container Platform version.
Provide values at the prompts:
Optional: Select an SSH key to use to access your cluster machines.
NoteFor production OpenShift Container Platform clusters on which you want to perform installation debugging or disaster recovery, specify an SSH key that your
ssh-agentprocess uses.- Select vsphere as the platform to target.
- Specify the name of your vCenter instance.
Specify the user name and password for the vCenter account that has the required permissions to create the cluster.
The installation program connects to your vCenter instance.
- Select the datacenter in your vCenter instance to connect to.
Select the default vCenter datastore to use.
NoteDatastore and cluster names cannot exceed 60 characters; therefore, ensure the combined string length does not exceed the 60 character limit.
- Select the vCenter cluster to install the OpenShift Container Platform cluster in. The installation program uses the root resource pool of the vSphere cluster as the default resource pool.
- Select the network in the vCenter instance that contains the virtual IP addresses and DNS records that you configured.
- Enter the virtual IP address that you configured for control plane API access.
- Enter the virtual IP address that you configured for cluster ingress.
- Enter the base domain. This base domain must be the same one that you used in the DNS records that you configured.
Enter a descriptive name for your cluster. The cluster name must be the same one that you used in the DNS records that you configured.
NoteDatastore and cluster names cannot exceed 60 characters; therefore, ensure the combined string length does not exceed the 60 character limit.
- Paste the pull secret from the Red Hat OpenShift Cluster Manager.
ImportantUse the
openshift-installcommand from the bastion hosted in the VMC environment.NoteIf the cloud provider account that you configured on your host does not have sufficient permissions to deploy the cluster, the installation process stops, and the missing permissions are displayed.
When the cluster deployment completes, directions for accessing your cluster, including a link to its web console and credentials for the
kubeadminuser, display in your terminal.Example output
... INFO Install complete! INFO To access the cluster as the system:admin user when using 'oc', run 'export KUBECONFIG=/home/myuser/install_dir/auth/kubeconfig' INFO Access the OpenShift web-console here: https://console-openshift-console.apps.mycluster.example.com INFO Login to the console with user: "kubeadmin", and password: "4vYBz-Ee6gm-ymBZj-Wt5AL" INFO Time elapsed: 36m22sNoteThe cluster access and credential information also outputs to
<installation_directory>/.openshift_install.logwhen an installation succeeds.Important-
The Ignition config files that the installation program generates contain certificates that expire after 24 hours, which are then renewed at that time. If the cluster is shut down before renewing the certificates and the cluster is later restarted after the 24 hours have elapsed, the cluster automatically recovers the expired certificates. The exception is that you must manually approve the pending
node-bootstrappercertificate signing requests (CSRs) to recover kubelet certificates. See the documentation for Recovering from expired control plane certificates for more information. - It is recommended that you use Ignition config files within 12 hours after they are generated because the 24-hour certificate rotates from 16 to 22 hours after the cluster is installed. By using the Ignition config files within 12 hours, you can avoid installation failure if the certificate update runs during installation.
ImportantYou must not delete the installation program or the files that the installation program creates. Both are required to delete the cluster.
15.1.11. Installing the OpenShift CLI by downloading the binary
You can install the OpenShift CLI (oc) to interact with OpenShift Container Platform from a command-line interface. You can install oc on Linux, Windows, or macOS.
If you installed an earlier version of oc, you cannot use it to complete all of the commands in OpenShift Container Platform 4.7. Download and install the new version of oc.
15.1.11.1. Installing the OpenShift CLI on Linux
You can install the OpenShift CLI (oc) binary on Linux by using the following procedure.
Procedure
- Navigate to the OpenShift Container Platform downloads page on the Red Hat Customer Portal.
- Select the appropriate version in the Version drop-down menu.
- Click Download Now next to the OpenShift v4.7 Linux Client entry and save the file.
Unpack the archive:
$ tar xvzf <file>Place the
ocbinary in a directory that is on yourPATH.To check your
PATH, execute the following command:$ echo $PATH
After you install the OpenShift CLI, it is available using the oc command:
$ oc <command>15.1.11.2. Installing the OpenShift CLI on Windows
You can install the OpenShift CLI (oc) binary on Windows by using the following procedure.
Procedure
- Navigate to the OpenShift Container Platform downloads page on the Red Hat Customer Portal.
- Select the appropriate version in the Version drop-down menu.
- Click Download Now next to the OpenShift v4.7 Windows Client entry and save the file.
- Unzip the archive with a ZIP program.
Move the
ocbinary to a directory that is on yourPATH.To check your
PATH, open the command prompt and execute the following command:C:\> path
After you install the OpenShift CLI, it is available using the oc command:
C:\> oc <command>15.1.11.3. Installing the OpenShift CLI on macOS
You can install the OpenShift CLI (oc) binary on macOS by using the following procedure.
Procedure
- Navigate to the OpenShift Container Platform downloads page on the Red Hat Customer Portal.
- Select the appropriate version in the Version drop-down menu.
- Click Download Now next to the OpenShift v4.7 MacOSX Client entry and save the file.
- Unpack and unzip the archive.
Move the
ocbinary to a directory on your PATH.To check your
PATH, open a terminal and execute the following command:$ echo $PATH
After you install the OpenShift CLI, it is available using the oc command:
$ oc <command>15.1.12. Logging in to the cluster by using the CLI
You can log in to your cluster as a default system user by exporting the cluster kubeconfig file. The kubeconfig file contains information about the cluster that is used by the CLI to connect a client to the correct cluster and API server. The file is specific to a cluster and is created during OpenShift Container Platform installation.
Prerequisites
- You deployed an OpenShift Container Platform cluster.
-
You installed the
ocCLI.
Procedure
Export the
kubeadmincredentials:$ export KUBECONFIG=<installation_directory>/auth/kubeconfig1 - 1
- For
<installation_directory>, specify the path to the directory that you stored the installation files in.
Verify you can run
occommands successfully using the exported configuration:$ oc whoamiExample output
system:admin
15.1.13. Creating registry storage
After you install the cluster, you must create storage for the registry Operator.
15.1.13.1. Image registry removed during installation
On platforms that do not provide shareable object storage, the OpenShift Image Registry Operator bootstraps itself as Removed. This allows openshift-installer to complete installations on these platform types.
After installation, you must edit the Image Registry Operator configuration to switch the managementState from Removed to Managed.
The Prometheus console provides an ImageRegistryRemoved alert, for example:
"Image Registry has been removed. ImageStreamTags, BuildConfigs and DeploymentConfigs which reference ImageStreamTags may not work as expected. Please configure storage and update the config to Managed state by editing configs.imageregistry.operator.openshift.io."
15.1.13.2. Image registry storage configuration
The Image Registry Operator is not initially available for platforms that do not provide default storage. After installation, you must configure your registry to use storage so that the Registry Operator is made available.
Instructions are shown for configuring a persistent volume, which is required for production clusters. Where applicable, instructions are shown for configuring an empty directory as the storage location, which is available for only non-production clusters.
Additional instructions are provided for allowing the image registry to use block storage types by using the Recreate rollout strategy during upgrades.
15.1.13.2.1. Configuring registry storage for VMware vSphere
As a cluster administrator, following installation you must configure your registry to use storage.
Prerequisites
- Cluster administrator permissions.
- A cluster on VMware vSphere.
Persistent storage provisioned for your cluster, such as Red Hat OpenShift Container Storage.
ImportantOpenShift Container Platform supports
ReadWriteOnceaccess for image registry storage when you have only one replica. To deploy an image registry that supports high availability with two or more replicas,ReadWriteManyaccess is required.- Must have "100Gi" capacity.
Testing shows issues with using the NFS server on RHEL as storage backend for core services. This includes the OpenShift Container Registry and Quay, Prometheus for monitoring storage, and Elasticsearch for logging storage. Therefore, using RHEL NFS to back PVs used by core services is not recommended.
Other NFS implementations on the marketplace might not have these issues. Contact the individual NFS implementation vendor for more information on any testing that was possibly completed against these OpenShift Container Platform core components.
Procedure
To configure your registry to use storage, change the
spec.storage.pvcin theconfigs.imageregistry/clusterresource.NoteWhen using shared storage, review your security settings to prevent outside access.
Verify that you do not have a registry pod:
$ oc get pod -n openshift-image-registry -l docker-registry=defaultExample output
No resourses found in openshift-image-registry namespaceNoteIf you do have a registry pod in your output, you do not need to continue with this procedure.
Check the registry configuration:
$ oc edit configs.imageregistry.operator.openshift.ioExample output
storage: pvc: claim:1 - 1
- Leave the
claimfield blank to allow the automatic creation of animage-registry-storagePVC.
Check the
clusteroperatorstatus:$ oc get clusteroperator image-registryExample output
NAME VERSION AVAILABLE PROGRESSING DEGRADED SINCE MESSAGE image-registry 4.7 True False False 6h50m
15.1.13.2.2. Configuring block registry storage for VMware vSphere
To allow the image registry to use block storage types such as vSphere Virtual Machine Disk (VMDK) during upgrades as a cluster administrator, you can use the Recreate rollout strategy.
Block storage volumes are supported but not recommended for use with image registry on production clusters. An installation where the registry is configured on block storage is not highly available because the registry cannot have more than one replica.
Procedure
To set the image registry storage as a block storage type, patch the registry so that it uses the
Recreaterollout strategy and runs with only1replica:$ oc patch config.imageregistry.operator.openshift.io/cluster --type=merge -p '{"spec":{"rolloutStrategy":"Recreate","replicas":1}}'Provision the PV for the block storage device, and create a PVC for that volume. The requested block volume uses the ReadWriteOnce (RWO) access mode.
Create a
pvc.yamlfile with the following contents to define a VMware vSpherePersistentVolumeClaimobject:kind: PersistentVolumeClaim apiVersion: v1 metadata: name: image-registry-storage1 namespace: openshift-image-registry2 spec: accessModes: - ReadWriteOnce3 resources: requests: storage: 100Gi4 - 1
- A unique name that represents the
PersistentVolumeClaimobject. - 2
- The namespace for the
PersistentVolumeClaimobject, which isopenshift-image-registry. - 3
- The access mode of the persistent volume claim. With
ReadWriteOnce, the volume can be mounted with read and write permissions by a single node. - 4
- The size of the persistent volume claim.
Create the
PersistentVolumeClaimobject from the file:$ oc create -f pvc.yaml -n openshift-image-registry
Edit the registry configuration so that it references the correct PVC:
$ oc edit config.imageregistry.operator.openshift.io -o yamlExample output
storage: pvc: claim:1 - 1
- Creating a custom PVC allows you to leave the
claimfield blank for the default automatic creation of animage-registry-storagePVC.
For instructions about configuring registry storage so that it references the correct PVC, see Configuring the registry for vSphere.
15.1.14. Backing up VMware vSphere volumes
OpenShift Container Platform provisions new volumes as independent persistent disks to freely attach and detach the volume on any node in the cluster. As a consequence, it is not possible to back up volumes that use snapshots, or to restore volumes from snapshots. See Snapshot Limitations for more information.
Procedure
To create a backup of persistent volumes:
- Stop the application that is using the persistent volume.
- Clone the persistent volume.
- Restart the application.
- Create a backup of the cloned volume.
- Delete the cloned volume.
15.1.15. Telemetry access for OpenShift Container Platform
In OpenShift Container Platform 4.7, the Telemetry service, which runs by default to provide metrics about cluster health and the success of updates, requires internet access. If your cluster is connected to the internet, Telemetry runs automatically, and your cluster is registered to OpenShift Cluster Manager.
After you confirm that your OpenShift Cluster Manager inventory is correct, either maintained automatically by Telemetry or manually by using OpenShift Cluster Manager, use subscription watch to track your OpenShift Container Platform subscriptions at the account or multi-cluster level.
15.1.16. Next steps
- Customize your cluster.
- If necessary, you can opt out of remote health reporting.
- Set up your registry and configure registry storage.
- Optional: View the events from the vSphere Problem Detector Operator to determine if the cluster has permission or storage configuration issues.
15.2. Installing a cluster on VMC with customizations
In OpenShift Container Platform version 4.7, you can install a cluster on your VMware vSphere instance using installer-provisioned infrastructure by deploying it to VMware Cloud (VMC) on AWS.
Once you configure your VMC environment for OpenShift Container Platform deployment, you use the OpenShift Container Platform installation program from the bastion management host, co-located in the VMC environment. The installation program and control plane automates the process of deploying and managing the resources needed for the OpenShift Container Platform cluster.
To customize the OpenShift Container Platform installation, you modify parameters in the install-config.yaml file before you install the cluster.
OpenShift Container Platform supports deploying a cluster to a single VMware vCenter only. Deploying a cluster with machines/machine sets on multiple vCenters is not supported.
15.2.1. Setting up VMC for vSphere
You can install OpenShift Container Platform on VMware Cloud (VMC) on AWS hosted vSphere clusters to enable applications to be deployed and managed both on-premise and off-premise, across the hybrid cloud.
You must configure several options in your VMC environment prior to installing OpenShift Container Platform on VMware vSphere. Ensure your VMC environment has the following prerequisites:
- Create a non-exclusive, DHCP-enabled, NSX-T network segment and subnet. Other virtual machines (VMs) can be hosted on the subnet, but at least eight IP addresses must be available for the OpenShift Container Platform deployment.
Allocate two IP addresses, outside the DHCP range, and configure them with reverse DNS records.
-
A DNS record for
api.<cluster_name>.<base_domain>pointing to the allocated IP address. -
A DNS record for
*.apps.<cluster_name>.<base_domain>pointing to the allocated IP address.
-
A DNS record for
Configure the following firewall rules:
- An ANY:ANY firewall rule between the OpenShift Container Platform compute network and the Internet. This is used by nodes and applications to download container images.
- An ANY:ANY firewall rule between the installation host and the software-defined data center (SDDC) management network on port 443. This allows you to upload the Red Hat Enterprise Linux CoreOS (RHCOS) OVA during deployment.
- An HTTPS firewall rule between the OpenShift Container Platform compute network and vCenter. This connection allows OpenShift Container Platform to communicate with vCenter for provisioning and managing nodes, persistent volume claims (PVCs), and other resources.
You must have the following information to deploy OpenShift Container Platform:
-
The OpenShift Container Platform cluster name, such as
vmc-prod-1. -
The base DNS name, such as
companyname.com. -
If not using the default, the pod network CIDR and services network CIDR must be identified, which are set by default to
10.128.0.0/14and172.30.0.0/16, respectively. These CIDRs are used for pod-to-pod and pod-to-service communication and are not accessible externally; however, they must not overlap with existing subnets in your organization. The following vCenter information:
- vCenter hostname, username, and password
-
Datacenter name, such as
SDDC-Datacenter -
Cluster name, such as
Cluster-1 - Network name
Datastore name, such as
WorkloadDatastoreNoteIt is recommended to move your vSphere cluster to the VMC
Compute-ResourcePoolresource pool after your cluster installation is finished.
-
The OpenShift Container Platform cluster name, such as
A Linux-based host deployed to VMC as a bastion.
- The bastion host can be Red Hat Enterprise Linux (RHEL) or any another Linux-based host; it must have Internet connectivity and the ability to upload an OVA to the ESXi hosts.
Download and install the OpenShift CLI tools to the bastion host.
-
The
openshift-installinstallation program -
The OpenShift CLI (
oc) tool
-
The
You cannot use the VMware NSX Container Plugin for Kubernetes (NCP), and NSX is not used as the OpenShift SDN. The version of NSX currently available with VMC is incompatible with the version of NCP certified with OpenShift Container Platform.
However, the NSX DHCP service is used for virtual machine IP management with the full-stack automated OpenShift Container Platform deployment and with nodes provisioned, either manually or automatically, by the Machine API integration with vSphere. Additionally, NSX firewall rules are created to enable access with the OpenShift Container Platform cluster and between the bastion host and the VMC vSphere hosts.
15.2.1.1. VMC Sizer tool
VMware Cloud on AWS is built on top of AWS bare metal infrastructure; this is the same bare metal infrastructure which runs AWS native services. When a VMware cloud on AWS software-defined data center (SDDC) is deployed, you consume these physical server nodes and run the VMware ESXi hypervisor in a single tenant fashion. This means the physical infrastructure is not accessible to anyone else using VMC. It is important to consider how many physical hosts you will need to host your virtual infrastructure.
To determine this, VMware provides the VMC on AWS Sizer. With this tool, you can define the resources you intend to host on VMC:
- Types of workloads
- Total number of virtual machines
Specification information such as:
- Storage requirements
- vCPUs
- vRAM
- Overcommit ratios
With these details, the sizer tool can generate a report, based on VMware best practices, and recommend your cluster configuration and the number of hosts you will need.
15.2.2. vSphere prerequisites
- Provision block registry storage. For more information on persistent storage, see Understanding persistent storage.
- Review details about the OpenShift Container Platform installation and update processes.
If you use a firewall, you must configure it to allow the sites that your cluster requires access to.
NoteBe sure to also review this site list if you are configuring a proxy.
15.2.3. Internet access for OpenShift Container Platform
In OpenShift Container Platform 4.7, you require access to the Internet to install your cluster.
You must have Internet access to:
- Access OpenShift Cluster Manager to download the installation program and perform subscription management. If the cluster has internet access and you do not disable Telemetry, that service automatically entitles your cluster.
- Access Quay.io to obtain the packages that are required to install your cluster.
- Obtain the packages that are required to perform cluster updates.
If your cluster cannot have direct Internet access, you can perform a restricted network installation on some types of infrastructure that you provision. During that process, you download the content that is required and use it to populate a mirror registry with the packages that you need to install a cluster and generate the installation program. With some installation types, the environment that you install your cluster in will not require Internet access. Before you update the cluster, you update the content of the mirror registry.
15.2.4. VMware vSphere infrastructure requirements
You must install the OpenShift Container Platform cluster on a VMware vSphere version 6 or 7 instance that meets the requirements for the components that you use.
| Component | Minimum supported versions | Description |
|---|---|---|
| Hypervisor | vSphere 6.5 and later with HW version 13 | This version is the minimum version that Red Hat Enterprise Linux CoreOS (RHCOS) supports. See the Red Hat Enterprise Linux 8 supported hypervisors list. |
| Storage with in-tree drivers | vSphere 6.5 and later | This plug-in creates vSphere storage by using the in-tree storage drivers for vSphere included in OpenShift Container Platform. |
If you use a vSphere version 6.5 instance, consider upgrading to 6.7U3 or 7.0 before you install OpenShift Container Platform.
You must ensure that the time on your ESXi hosts is synchronized before you install OpenShift Container Platform. See Edit Time Configuration for a Host in the VMware documentation.
Virtual machines (VMs) configured to use virtual hardware version 14 or greater might result in a failed installation. It is recommended to configure VMs with virtual hardware version 13. This is a known issue that is being addressed in BZ#1935539.
15.2.5. Network connectivity requirements
You must configure the network connectivity between machines to allow OpenShift Container Platform cluster components to communicate.
Review the following details about the required network ports.
| Protocol | Port | Description |
|---|---|---|
| ICMP | N/A | Network reachability tests |
| TCP |
| Metrics |
|
|
Host level services, including the node exporter on ports | |
|
| The default ports that Kubernetes reserves | |
|
| openshift-sdn | |
| UDP |
| virtual extensible LAN (VXLAN) |
|
| Geneve | |
|
|
Host level services, including the node exporter on ports | |
|
| IPsec IKE packets | |
|
| IPsec NAT-T packets | |
| TCP/UDP |
| Kubernetes node port |
| ESP | N/A | IPsec Encapsulating Security Payload (ESP) |
| Protocol | Port | Description |
|---|---|---|
| TCP |
| Kubernetes API |
| Protocol | Port | Description |
|---|---|---|
| TCP |
| etcd server and peer ports |
15.2.6. vCenter requirements
Before you install an OpenShift Container Platform cluster on your vCenter that uses infrastructure that the installer provisions, you must prepare your environment.
Required vCenter account privileges
To install an OpenShift Container Platform cluster in a vCenter, the installation program requires access to an account with privileges to read and create the required resources. Using an account that has global administrative privileges is the simplest way to access all of the necessary permissions.
If you cannot use an account with global administrative privileges, you must create roles to grant the privileges necessary for OpenShift Container Platform cluster installation. While most of the privileges are always required, some are required only if you plan for the installation program to provision a folder to contain the OpenShift Container Platform cluster on your vCenter instance, which is the default behavior. You must create or amend vSphere roles for the specified objects to grant the required privileges.
An additional role is required if the installation program is to create a vSphere virtual machine folder.
Example 15.3. Roles and privileges required for installation
| vSphere object for role | When required | Required privileges |
|---|---|---|
| vSphere vCenter | Always |
|
| vSphere vCenter Cluster | Always |
|
| vSphere Datastore | Always |
|
| vSphere Port Group | Always |
|
| Virtual Machine Folder | Always |
|
| vSphere vCenter Datacenter | If the installation program creates the virtual machine folder |
|
Additionally, the user requires some ReadOnly permissions, and some of the roles require permission to propogate the permissions to child objects. These settings vary depending on whether or not you install the cluster into an existing folder.
Example 15.4. Required permissions and propagation settings
| vSphere object | Folder type | Propagate to children | Permissions required |
|---|---|---|---|
| vSphere vCenter | Always | False | Listed required privileges |
| vSphere vCenter Datacenter | Existing folder | False |
|
| Installation program creates the folder | True | Listed required privileges | |
| vSphere vCenter Cluster | Always | True | Listed required privileges |
| vSphere vCenter Datastore | Always | False | Listed required privileges |
| vSphere Switch | Always | False |
|
| vSphere Port Group | Always | False | Listed required privileges |
| vSphere vCenter Virtual Machine Folder | Existing folder | True | Listed required privileges |
For more information about creating an account with only the required privileges, see vSphere Permissions and User Management Tasks in the vSphere documentation.
Using OpenShift Container Platform with vMotion
If you intend on using vMotion in your vSphere environment, consider the following before installing a OpenShift Container Platform cluster.
OpenShift Container Platform generally supports compute-only vMotion. Using Storage vMotion can cause issues and is not supported.
To help ensure the uptime of your compute and control plane nodes, it is recommended that you follow the VMware best practices for vMotion. It is also recommended to use VMware anti-affinity rules to improve the availability of OpenShift Container Platform during maintenance or hardware issues.
For more information about vMotion and anti-affinity rules, see the VMware vSphere documentation for vMotion networking requirements and VM anti-affinity rules.
- If you are using vSphere volumes in your pods, migrating a VM across datastores either manually or through Storage vMotion causes, invalid references within OpenShift Container Platform persistent volume (PV) objects. These references prevent affected pods from starting up and can result in data loss.
- Similarly, OpenShift Container Platform does not support selective migration of VMDKs across datastores, using datastore clusters for VM provisioning or for dynamic or static provisioning of PVs, or using a datastore that is part of a datastore cluster for dynamic or static provisioning of PVs.
Cluster resources
When you deploy an OpenShift Container Platform cluster that uses installer-provisioned infrastructure, the installation program must be able to create several resources in your vCenter instance.
A standard OpenShift Container Platform installation creates the following vCenter resources:
- 1 Folder
- 1 Tag category
- 1 Tag
Virtual machines:
- 1 template
- 1 temporary bootstrap node
- 3 control plane nodes
- 3 compute machines
Although these resources use 856 GB of storage, the bootstrap node is destroyed during the cluster installation process. A minimum of 800 GB of storage is required to use a standard cluster.
If you deploy more compute machines, the OpenShift Container Platform cluster will use more storage.
Cluster limits
Available resources vary between clusters. The number of possible clusters within a vCenter is limited primarily by available storage space and any limitations on the number of required resources. Be sure to consider both limitations to the vCenter resources that the cluster creates and the resources that you require to deploy a cluster, such as IP addresses and networks.
Networking requirements
You must use DHCP for the network and ensure that the DHCP server is configured to provide persistent IP addresses to the cluster machines. All nodes must be in the same VLAN. You cannot scale the cluster using a second VLAN as a Day 2 operation. Additionally, you must create the following networking resources before you install the OpenShift Container Platform cluster:
It is recommended that each OpenShift Container Platform node in the cluster must have access to a Network Time Protocol (NTP) server that is discoverable via DHCP. Installation is possible without an NTP server. However, asynchronous server clocks will cause errors, which NTP server prevents.
Required IP Addresses
An installer-provisioned vSphere installation requires two static IP addresses:
- The API address is used to access the cluster API.
- The Ingress address is used for cluster ingress traffic.
You must provide these IP addresses to the installation program when you install the OpenShift Container Platform cluster.
DNS records
You must create DNS records for two static IP addresses in the appropriate DNS server for the vCenter instance that hosts your OpenShift Container Platform cluster. In each record, <cluster_name> is the cluster name and <base_domain> is the cluster base domain that you specify when you install the cluster. A complete DNS record takes the form: <component>.<cluster_name>.<base_domain>..
| Component | Record | Description |
|---|---|---|
| API VIP |
| This DNS A/AAAA or CNAME record must point to the load balancer for the control plane machines. This record must be resolvable by both clients external to the cluster and from all the nodes within the cluster. |
| Ingress VIP |
| A wildcard DNS A/AAAA or CNAME record that points to the load balancer that targets the machines that run the Ingress router pods, which are the worker nodes by default. This record must be resolvable by both clients external to the cluster and from all the nodes within the cluster. |
15.2.7. Generating an SSH private key and adding it to the agent
If you want to perform installation debugging or disaster recovery on your cluster, you must provide an SSH key to both your ssh-agent and the installation program. You can use this key to access the bootstrap machine in a public cluster to troubleshoot installation issues.
In a production environment, you require disaster recovery and debugging.
Do not skip this procedure in production environments where disaster recovery and debugging is required.
You can use this key to SSH into the master nodes as the user core. When you deploy the cluster, the key is added to the core user’s ~/.ssh/authorized_keys list.
Procedure
If you do not have an SSH key that is configured for password-less authentication on your computer, create one. For example, on a computer that uses a Linux operating system, run the following command:
$ ssh-keygen -t ed25519 -N '' \ -f <path>/<file_name>1 - 1
- Specify the path and file name, such as
~/.ssh/id_rsa, of the new SSH key. If you have an existing key pair, ensure your public key is in the your~/.sshdirectory.
Running this command generates an SSH key that does not require a password in the location that you specified.
NoteIf you plan to install an OpenShift Container Platform cluster that uses FIPS Validated / Modules in Process cryptographic libraries on the
x86_64architecture, do not create a key that uses theed25519algorithm. Instead, create a key that uses thersaorecdsaalgorithm.Start the
ssh-agentprocess as a background task:$ eval "$(ssh-agent -s)"Example output
Agent pid 31874NoteIf your cluster is in FIPS mode, only use FIPS-compliant algorithms to generate the SSH key. The key must be either RSA or ECDSA.
Add your SSH private key to the
ssh-agent:$ ssh-add <path>/<file_name>1 Example output
Identity added: /home/<you>/<path>/<file_name> (<computer_name>)- 1
- Specify the path and file name for your SSH private key, such as
~/.ssh/id_rsa
Next steps
- When you install OpenShift Container Platform, provide the SSH public key to the installation program.
15.2.8. Obtaining the installation program
Before you install OpenShift Container Platform, download the installation file on your provisioning machine.
Prerequisites
- You have a machine that runs Linux, for example Red Hat Enterprise Linux 8, with 500 MB of local disk space
Procedure
- Access the Infrastructure Provider page on the OpenShift Cluster Manager site. If you have a Red Hat account, log in with your credentials. If you do not, create an account.
- Select your infrastructure provider.
Navigate to the page for your installation type, download the installation program for your operating system, and place the file in the directory where you will store the installation configuration files.
ImportantThe installation program creates several files on the computer that you use to install your cluster. You must keep the installation program and the files that the installation program creates after you finish installing the cluster. Both files are required to delete the cluster.
ImportantDeleting the files created by the installation program does not remove your cluster, even if the cluster failed during installation. To remove your cluster, complete the OpenShift Container Platform uninstallation procedures for your specific cloud provider.
Extract the installation program. For example, on a computer that uses a Linux operating system, run the following command:
$ tar xvf openshift-install-linux.tar.gz- Download your installation pull secret from the Red Hat OpenShift Cluster Manager. This pull secret allows you to authenticate with the services that are provided by the included authorities, including Quay.io, which serves the container images for OpenShift Container Platform components.
15.2.9. Adding vCenter root CA certificates to your system trust
Because the installation program requires access to your vCenter’s API, you must add your vCenter’s trusted root CA certificates to your system trust before you install an OpenShift Container Platform cluster.
Procedure
-
From the vCenter home page, download the vCenter’s root CA certificates. Click Download trusted root CA certificates in the vSphere Web Services SDK section. The
<vCenter>/certs/download.zipfile downloads. Extract the compressed file that contains the vCenter root CA certificates. The contents of the compressed file resemble the following file structure:
certs ├── lin │ ├── 108f4d17.0 │ ├── 108f4d17.r1 │ ├── 7e757f6a.0 │ ├── 8e4f8471.0 │ └── 8e4f8471.r0 ├── mac │ ├── 108f4d17.0 │ ├── 108f4d17.r1 │ ├── 7e757f6a.0 │ ├── 8e4f8471.0 │ └── 8e4f8471.r0 └── win ├── 108f4d17.0.crt ├── 108f4d17.r1.crl ├── 7e757f6a.0.crt ├── 8e4f8471.0.crt └── 8e4f8471.r0.crl 3 directories, 15 filesAdd the files for your operating system to the system trust. For example, on a Fedora operating system, run the following command:
# cp certs/lin/* /etc/pki/ca-trust/source/anchorsUpdate your system trust. For example, on a Fedora operating system, run the following command:
# update-ca-trust extract
15.2.10. Creating the installation configuration file
You can customize the OpenShift Container Platform cluster you install on VMware vSphere.
Prerequisites
- Obtain the OpenShift Container Platform installation program and the pull secret for your cluster.
- Obtain service principal permissions at the subscription level.
Procedure
Create the
install-config.yamlfile.Change to the directory that contains the installation program and run the following command:
$ ./openshift-install create install-config --dir <installation_directory>1 - 1
- For
<installation_directory>, specify the directory name to store the files that the installation program creates.
ImportantSpecify an empty directory. Some installation assets, like bootstrap X.509 certificates have short expiration intervals, so you must not reuse an installation directory. If you want to reuse individual files from another cluster installation, you can copy them into your directory. However, the file names for the installation assets might change between releases. Use caution when copying installation files from an earlier OpenShift Container Platform version.
At the prompts, provide the configuration details for your cloud:
Optional: Select an SSH key to use to access your cluster machines.
NoteFor production OpenShift Container Platform clusters on which you want to perform installation debugging or disaster recovery, specify an SSH key that your
ssh-agentprocess uses.- Select vsphere as the platform to target.
- Specify the name of your vCenter instance.
Specify the user name and password for the vCenter account that has the required permissions to create the cluster.
The installation program connects to your vCenter instance.
- Select the datacenter in your vCenter instance to connect to.
- Select the default vCenter datastore to use.
- Select the vCenter cluster to install the OpenShift Container Platform cluster in. The installation program uses the root resource pool of the vSphere cluster as the default resource pool.
- Select the network in the vCenter instance that contains the virtual IP addresses and DNS records that you configured.
- Enter the virtual IP address that you configured for control plane API access.
- Enter the virtual IP address that you configured for cluster ingress.
- Enter the base domain. This base domain must be the same one that you used in the DNS records that you configured.
- Enter a descriptive name for your cluster. The cluster name must be the same one that you used in the DNS records that you configured.
- Paste the pull secret from the Red Hat OpenShift Cluster Manager.
-
Modify the
install-config.yamlfile. You can find more information about the available parameters in the "Installation configuration parameters" section. Back up the
install-config.yamlfile so that you can use it to install multiple clusters.ImportantThe
install-config.yamlfile is consumed during the installation process. If you want to reuse the file, you must back it up now.
15.2.10.1. Installation configuration parameters
Before you deploy an OpenShift Container Platform cluster, you provide parameter values to describe your account on the cloud platform that hosts your cluster and optionally customize your cluster’s platform. When you create the install-config.yaml installation configuration file, you provide values for the required parameters through the command line. If you customize your cluster, you can modify the install-config.yaml file to provide more details about the platform.
After installation, you cannot modify these parameters in the install-config.yaml file.
The openshift-install command does not validate field names for parameters. If an incorrect name is specified, the related file or object is not created, and no error is reported. Ensure that the field names for any parameters that are specified are correct.
15.2.10.1.1. Required configuration parameters
Required installation configuration parameters are described in the following table:
| Parameter | Description | Values |
|---|---|---|
|
|
The API version for the | String |
|
|
The base domain of your cloud provider. The base domain is used to create routes to your OpenShift Container Platform cluster components. The full DNS name for your cluster is a combination of the |
A fully-qualified domain or subdomain name, such as |
|
|
Kubernetes resource | Object |
|
|
The name of the cluster. DNS records for the cluster are all subdomains of |
String of lowercase letters and hyphens ( |
|
|
The configuration for the specific platform upon which to perform the installation: | Object |
|
| Get a pull secret from the Red Hat OpenShift Cluster Manager to authenticate downloading container images for OpenShift Container Platform components from services such as Quay.io. |
|
15.2.10.1.2. Network configuration parameters
You can customize your installation configuration based on the requirements of your existing network infrastructure. For example, you can expand the IP address block for the cluster network or provide different IP address blocks than the defaults.
Only IPv4 addresses are supported.
| Parameter | Description | Values |
|---|---|---|
|
| The configuration for the cluster network. | Object Note
You cannot modify parameters specified by the |
|
| The cluster network provider Container Network Interface (CNI) plug-in to install. |
Either |
|
| The IP address blocks for pods.
The default value is If you specify multiple IP address blocks, the blocks must not overlap. | An array of objects. For example: |
|
|
Required if you use An IPv4 network. |
An IP address block in Classless Inter-Domain Routing (CIDR) notation. The prefix length for an IPv4 block is between |
|
|
The subnet prefix length to assign to each individual node. For example, if | A subnet prefix.
The default value is |
|
|
The IP address block for services. The default value is The OpenShift SDN and OVN-Kubernetes network providers support only a single IP address block for the service network. | An array with an IP address block in CIDR format. For example: |
|
| The IP address blocks for machines. If you specify multiple IP address blocks, the blocks must not overlap.
If you specify multiple IP kernel arguments, the | An array of objects. For example: |
|
|
Required if you use | An IP network block in CIDR notation.
For example, Note
Set the |
15.2.10.1.3. Optional configuration parameters
Optional installation configuration parameters are described in the following table:
| Parameter | Description | Values |
|---|---|---|
|
| A PEM-encoded X.509 certificate bundle that is added to the nodes' trusted certificate store. This trust bundle may also be used when a proxy has been configured. | String |
|
| The configuration for the machines that comprise the compute nodes. |
Array of |
|
|
Determines the instruction set architecture of the machines in the pool. Currently, heteregeneous clusters are not supported, so all pools must specify the same architecture. Valid values are | String |
|
|
Whether to enable or disable simultaneous multithreading, or Important If you disable simultaneous multithreading, ensure that your capacity planning accounts for the dramatically decreased machine performance. |
|
|
|
Required if you use |
|
|
|
Required if you use |
|
|
| The number of compute machines, which are also known as worker machines, to provision. |
A positive integer greater than or equal to |
|
| The configuration for the machines that comprise the control plane. |
Array of |
|
|
Determines the instruction set architecture of the machines in the pool. Currently, heterogeneous clusters are not supported, so all pools must specify the same architecture. Valid values are | String |
|
|
Whether to enable or disable simultaneous multithreading, or Important If you disable simultaneous multithreading, ensure that your capacity planning accounts for the dramatically decreased machine performance. |
|
|
|
Required if you use |
|
|
|
Required if you use |
|
|
| The number of control plane machines to provision. |
The only supported value is |
|
| The Cloud Credential Operator (CCO) mode. If no mode is specified, the CCO dynamically tries to determine the capabilities of the provided credentials, with a preference for mint mode on the platforms where multiple modes are supported. Note Not all CCO modes are supported for all cloud providers. For more information on CCO modes, see the Cloud Credential Operator entry in the Cluster Operators reference content. |
|
|
|
Enable or disable FIPS mode. The default is Important
The use of FIPS Validated / Modules in Process cryptographic libraries is only supported on OpenShift Container Platform deployments on the Note If you are using Azure File storage, you cannot enable FIPS mode. |
|
|
| Sources and repositories for the release-image content. |
Array of objects. Includes a |
|
|
Required if you use | String |
|
| Specify one or more repositories that may also contain the same images. | Array of strings |
|
| How to publish or expose the user-facing endpoints of your cluster, such as the Kubernetes API, OpenShift routes. |
Setting this field to Important
If the value of the field is set to |
|
| The SSH key or keys to authenticate access your cluster machines. Note
For production OpenShift Container Platform clusters on which you want to perform installation debugging or disaster recovery, specify an SSH key that your | One or more keys. For example: |
15.2.10.1.4. Additional VMware vSphere configuration parameters
Additional VMware vSphere configuration parameters are described in the following table:
| Parameter | Description | Values |
|---|---|---|
|
| The fully-qualified hostname or IP address of the vCenter server. | String |
|
| The user name to use to connect to the vCenter instance with. This user must have at least the roles and privileges that are required for static or dynamic persistent volume provisioning in vSphere. | String |
|
| The password for the vCenter user name. | String |
|
| The name of the datacenter to use in the vCenter instance. | String |
|
| The name of the default datastore to use for provisioning volumes. | String |
|
| Optional. The absolute path of an existing folder where the installation program creates the virtual machines. If you do not provide this value, the installation program creates a folder that is named with the infrastructure ID in the datacenter virtual machine folder. |
String, for example, |
|
| The network in the vCenter instance that contains the virtual IP addresses and DNS records that you configured. | String |
|
| The vCenter cluster to install the OpenShift Container Platform cluster in. | String |
|
| The virtual IP (VIP) address that you configured for control plane API access. |
An IP address, for example |
|
| The virtual IP (VIP) address that you configured for cluster ingress. |
An IP address, for example |
15.2.10.1.5. Optional VMware vSphere machine pool configuration parameters
Optional VMware vSphere machine pool configuration parameters are described in the following table:
| Parameter | Description | Values |
|---|---|---|
|
| The location from which the installer downloads the RHCOS image. You must set this parameter to perform an installation in a restricted network. |
An HTTP or HTTPS URL, optionally with a SHA-256 checksum. For example, |
|
| The size of the disk in gigabytes. | Integer |
|
| The total number of virtual processor cores to assign a virtual machine. | Integer |
|
|
The number of cores per socket in a virtual machine. The number of virtual sockets on the virtual machine is | Integer |
|
| The size of a virtual machine’s memory in megabytes. | Integer |
15.2.10.2. Sample install-config.yaml file for an installer-provisioned VMware vSphere cluster
You can customize the install-config.yaml file to specify more details about your OpenShift Container Platform cluster’s platform or modify the values of the required parameters.
apiVersion: v1
baseDomain: example.com
compute:
- hyperthreading: Enabled
name: worker
replicas: 3
platform:
vsphere:
cpus: 2
coresPerSocket: 2
memoryMB: 8192
osDisk:
diskSizeGB: 120
controlPlane:
hyperthreading: Enabled
name: master
replicas: 3
platform:
vsphere:
cpus: 4
coresPerSocket: 2
memoryMB: 16384
osDisk:
diskSizeGB: 120
metadata:
name: cluster
platform:
vsphere:
vcenter: your.vcenter.server
username: username
password: password
datacenter: datacenter
defaultDatastore: datastore
folder: folder
network: VM_Network
cluster: vsphere_cluster_name
apiVIP: api_vip
ingressVIP: ingress_vip
fips: false
pullSecret: '{"auths": ...}'
sshKey: 'ssh-ed25519 AAAA...'- 1
- The base domain of the cluster. All DNS records must be sub-domains of this base and include the cluster name.
- 2 5
- The
controlPlanesection is a single mapping, but thecomputesection is a sequence of mappings. To meet the requirements of the different data structures, the first line of thecomputesection must begin with a hyphen,-, and the first line of thecontrolPlanesection must not. Only one control plane pool is used. - 3 6
- Whether to enable or disable simultaneous multithreading, or
hyperthreading. By default, simultaneous multithreading is enabled to increase the performance of your machines' cores. You can disable it by setting the parameter value toDisabled. If you disable simultaneous multithreading in some cluster machines, you must disable it in all cluster machines.ImportantIf you disable simultaneous multithreading, ensure that your capacity planning accounts for the dramatically decreased machine performance. Your machines must use at least 8 CPUs and 32 GB of RAM if you disable simultaneous multithreading.
- 4 7
- Optional: Provide additional configuration for the machine pool parameters for the compute and control plane machines.
- 8
- The cluster name that you specified in your DNS records.
- 9
- The vSphere cluster to install the OpenShift Container Platform cluster in. The installation program uses the root resource pool of the vSphere cluster as the default resource pool.
15.2.10.3. Configuring the cluster-wide proxy during installation
Production environments can deny direct access to the Internet and instead have an HTTP or HTTPS proxy available. You can configure a new OpenShift Container Platform cluster to use a proxy by configuring the proxy settings in the install-config.yaml file.
Prerequisites
-
You have an existing
install-config.yamlfile. You reviewed the sites that your cluster requires access to and determined whether any of them need to bypass the proxy. By default, all cluster egress traffic is proxied, including calls to hosting cloud provider APIs. You added sites to the
Proxyobject’sspec.noProxyfield to bypass the proxy if necessary.NoteThe
Proxyobjectstatus.noProxyfield is populated with the values of thenetworking.machineNetwork[].cidr,networking.clusterNetwork[].cidr, andnetworking.serviceNetwork[]fields from your installation configuration.For installations on Amazon Web Services (AWS), Google Cloud Platform (GCP), Microsoft Azure, and Red Hat OpenStack Platform (RHOSP), the
Proxyobjectstatus.noProxyfield is also populated with the instance metadata endpoint (169.254.169.254).
Procedure
Edit your
install-config.yamlfile and add the proxy settings. For example:apiVersion: v1 baseDomain: my.domain.com proxy: httpProxy: http://<username>:<pswd>@<ip>:<port>1 httpsProxy: https://<username>:<pswd>@<ip>:<port>2 noProxy: example.com3 additionalTrustBundle: |4 -----BEGIN CERTIFICATE----- <MY_TRUSTED_CA_CERT> -----END CERTIFICATE----- ...- 1
- A proxy URL to use for creating HTTP connections outside the cluster. The URL scheme must be
http. - 2
- A proxy URL to use for creating HTTPS connections outside the cluster.
- 3
- A comma-separated list of destination domain names, IP addresses, or other network CIDRs to exclude from proxying. Preface a domain with
.to match subdomains only. For example,.y.commatchesx.y.com, but noty.com. Use*to bypass the proxy for all destinations. You must include vCenter’s IP address and the IP range that you use for its machines. - 4
- If provided, the installation program generates a config map that is named
user-ca-bundlein theopenshift-confignamespace to hold the additional CA certificates. If you provideadditionalTrustBundleand at least one proxy setting, theProxyobject is configured to reference theuser-ca-bundleconfig map in thetrustedCAfield. The Cluster Network Operator then creates atrusted-ca-bundleconfig map that merges the contents specified for thetrustedCAparameter with the RHCOS trust bundle. TheadditionalTrustBundlefield is required unless the proxy’s identity certificate is signed by an authority from the RHCOS trust bundle.
NoteThe installation program does not support the proxy
readinessEndpointsfield.- Save the file and reference it when installing OpenShift Container Platform.
The installation program creates a cluster-wide proxy that is named cluster that uses the proxy settings in the provided install-config.yaml file. If no proxy settings are provided, a cluster Proxy object is still created, but it will have a nil spec.
Only the Proxy object named cluster is supported, and no additional proxies can be created.
15.2.11. Deploying the cluster
You can install OpenShift Container Platform on a compatible cloud platform.
You can run the create cluster command of the installation program only once, during initial installation.
Prerequisites
- Configure an account with the cloud platform that hosts your cluster.
- Obtain the OpenShift Container Platform installation program and the pull secret for your cluster.
Procedure
Change to the directory that contains the installation program and initialize the cluster deployment:
$ ./openshift-install create cluster --dir <installation_directory> \1 --log-level=info2 ImportantUse the
openshift-installcommand from the bastion hosted in the VMC environment.NoteIf the cloud provider account that you configured on your host does not have sufficient permissions to deploy the cluster, the installation process stops, and the missing permissions are displayed.
When the cluster deployment completes, directions for accessing your cluster, including a link to its web console and credentials for the
kubeadminuser, display in your terminal.Example output
... INFO Install complete! INFO To access the cluster as the system:admin user when using 'oc', run 'export KUBECONFIG=/home/myuser/install_dir/auth/kubeconfig' INFO Access the OpenShift web-console here: https://console-openshift-console.apps.mycluster.example.com INFO Login to the console with user: "kubeadmin", and password: "4vYBz-Ee6gm-ymBZj-Wt5AL" INFO Time elapsed: 36m22sNoteThe cluster access and credential information also outputs to
<installation_directory>/.openshift_install.logwhen an installation succeeds.Important-
The Ignition config files that the installation program generates contain certificates that expire after 24 hours, which are then renewed at that time. If the cluster is shut down before renewing the certificates and the cluster is later restarted after the 24 hours have elapsed, the cluster automatically recovers the expired certificates. The exception is that you must manually approve the pending
node-bootstrappercertificate signing requests (CSRs) to recover kubelet certificates. See the documentation for Recovering from expired control plane certificates for more information. - It is recommended that you use Ignition config files within 12 hours after they are generated because the 24-hour certificate rotates from 16 to 22 hours after the cluster is installed. By using the Ignition config files within 12 hours, you can avoid installation failure if the certificate update runs during installation.
ImportantYou must not delete the installation program or the files that the installation program creates. Both are required to delete the cluster.
-
The Ignition config files that the installation program generates contain certificates that expire after 24 hours, which are then renewed at that time. If the cluster is shut down before renewing the certificates and the cluster is later restarted after the 24 hours have elapsed, the cluster automatically recovers the expired certificates. The exception is that you must manually approve the pending
15.2.12. Installing the OpenShift CLI by downloading the binary
You can install the OpenShift CLI (oc) to interact with OpenShift Container Platform from a command-line interface. You can install oc on Linux, Windows, or macOS.
If you installed an earlier version of oc, you cannot use it to complete all of the commands in OpenShift Container Platform 4.7. Download and install the new version of oc.
15.2.12.1. Installing the OpenShift CLI on Linux
You can install the OpenShift CLI (oc) binary on Linux by using the following procedure.
Procedure
- Navigate to the OpenShift Container Platform downloads page on the Red Hat Customer Portal.
- Select the appropriate version in the Version drop-down menu.
- Click Download Now next to the OpenShift v4.7 Linux Client entry and save the file.
Unpack the archive:
$ tar xvzf <file>Place the
ocbinary in a directory that is on yourPATH.To check your
PATH, execute the following command:$ echo $PATH
After you install the OpenShift CLI, it is available using the oc command:
$ oc <command>15.2.12.2. Installing the OpenShift CLI on Windows
You can install the OpenShift CLI (oc) binary on Windows by using the following procedure.
Procedure
- Navigate to the OpenShift Container Platform downloads page on the Red Hat Customer Portal.
- Select the appropriate version in the Version drop-down menu.
- Click Download Now next to the OpenShift v4.7 Windows Client entry and save the file.
- Unzip the archive with a ZIP program.
Move the
ocbinary to a directory that is on yourPATH.To check your
PATH, open the command prompt and execute the following command:C:\> path
After you install the OpenShift CLI, it is available using the oc command:
C:\> oc <command>15.2.12.3. Installing the OpenShift CLI on macOS
You can install the OpenShift CLI (oc) binary on macOS by using the following procedure.
Procedure
- Navigate to the OpenShift Container Platform downloads page on the Red Hat Customer Portal.
- Select the appropriate version in the Version drop-down menu.
- Click Download Now next to the OpenShift v4.7 MacOSX Client entry and save the file.
- Unpack and unzip the archive.
Move the
ocbinary to a directory on your PATH.To check your
PATH, open a terminal and execute the following command:$ echo $PATH
After you install the OpenShift CLI, it is available using the oc command:
$ oc <command>15.2.13. Logging in to the cluster by using the CLI
You can log in to your cluster as a default system user by exporting the cluster kubeconfig file. The kubeconfig file contains information about the cluster that is used by the CLI to connect a client to the correct cluster and API server. The file is specific to a cluster and is created during OpenShift Container Platform installation.
Prerequisites
- You deployed an OpenShift Container Platform cluster.
-
You installed the
ocCLI.
Procedure
Export the
kubeadmincredentials:$ export KUBECONFIG=<installation_directory>/auth/kubeconfig1 - 1
- For
<installation_directory>, specify the path to the directory that you stored the installation files in.
Verify you can run
occommands successfully using the exported configuration:$ oc whoamiExample output
system:admin
15.2.14. Creating registry storage
After you install the cluster, you must create storage for the Registry Operator.
15.2.14.1. Image registry removed during installation
On platforms that do not provide shareable object storage, the OpenShift Image Registry Operator bootstraps itself as Removed. This allows openshift-installer to complete installations on these platform types.
After installation, you must edit the Image Registry Operator configuration to switch the managementState from Removed to Managed.
The Prometheus console provides an ImageRegistryRemoved alert, for example:
"Image Registry has been removed. ImageStreamTags, BuildConfigs and DeploymentConfigs which reference ImageStreamTags may not work as expected. Please configure storage and update the config to Managed state by editing configs.imageregistry.operator.openshift.io."
15.2.14.2. Image registry storage configuration
The Image Registry Operator is not initially available for platforms that do not provide default storage. After installation, you must configure your registry to use storage so that the Registry Operator is made available.
Instructions are shown for configuring a persistent volume, which is required for production clusters. Where applicable, instructions are shown for configuring an empty directory as the storage location, which is available for only non-production clusters.
Additional instructions are provided for allowing the image registry to use block storage types by using the Recreate rollout strategy during upgrades.
15.2.14.2.1. Configuring registry storage for VMware vSphere
As a cluster administrator, following installation you must configure your registry to use storage.
Prerequisites
- Cluster administrator permissions.
- A cluster on VMware vSphere.
Persistent storage provisioned for your cluster, such as Red Hat OpenShift Container Storage.
ImportantOpenShift Container Platform supports
ReadWriteOnceaccess for image registry storage when you have only one replica. To deploy an image registry that supports high availability with two or more replicas,ReadWriteManyaccess is required.- Must have "100Gi" capacity.
Testing shows issues with using the NFS server on RHEL as storage backend for core services. This includes the OpenShift Container Registry and Quay, Prometheus for monitoring storage, and Elasticsearch for logging storage. Therefore, using RHEL NFS to back PVs used by core services is not recommended.
Other NFS implementations on the marketplace might not have these issues. Contact the individual NFS implementation vendor for more information on any testing that was possibly completed against these OpenShift Container Platform core components.
Procedure
To configure your registry to use storage, change the
spec.storage.pvcin theconfigs.imageregistry/clusterresource.NoteWhen using shared storage, review your security settings to prevent outside access.
Verify that you do not have a registry pod:
$ oc get pod -n openshift-image-registry -l docker-registry=defaultExample output
No resourses found in openshift-image-registry namespaceNoteIf you do have a registry pod in your output, you do not need to continue with this procedure.
Check the registry configuration:
$ oc edit configs.imageregistry.operator.openshift.ioExample output
storage: pvc: claim:1 - 1
- Leave the
claimfield blank to allow the automatic creation of animage-registry-storagePVC.
Check the
clusteroperatorstatus:$ oc get clusteroperator image-registryExample output
NAME VERSION AVAILABLE PROGRESSING DEGRADED SINCE MESSAGE image-registry 4.7 True False False 6h50m
15.2.14.2.2. Configuring block registry storage for VMware vSphere
To allow the image registry to use block storage types such as vSphere Virtual Machine Disk (VMDK) during upgrades as a cluster administrator, you can use the Recreate rollout strategy.
Block storage volumes are supported but not recommended for use with image registry on production clusters. An installation where the registry is configured on block storage is not highly available because the registry cannot have more than one replica.
Procedure
To set the image registry storage as a block storage type, patch the registry so that it uses the
Recreaterollout strategy and runs with only1replica:$ oc patch config.imageregistry.operator.openshift.io/cluster --type=merge -p '{"spec":{"rolloutStrategy":"Recreate","replicas":1}}'Provision the PV for the block storage device, and create a PVC for that volume. The requested block volume uses the ReadWriteOnce (RWO) access mode.
Create a
pvc.yamlfile with the following contents to define a VMware vSpherePersistentVolumeClaimobject:kind: PersistentVolumeClaim apiVersion: v1 metadata: name: image-registry-storage1 namespace: openshift-image-registry2 spec: accessModes: - ReadWriteOnce3 resources: requests: storage: 100Gi4 - 1
- A unique name that represents the
PersistentVolumeClaimobject. - 2
- The namespace for the
PersistentVolumeClaimobject, which isopenshift-image-registry. - 3
- The access mode of the persistent volume claim. With
ReadWriteOnce, the volume can be mounted with read and write permissions by a single node. - 4
- The size of the persistent volume claim.
Create the
PersistentVolumeClaimobject from the file:$ oc create -f pvc.yaml -n openshift-image-registry
Edit the registry configuration so that it references the correct PVC:
$ oc edit config.imageregistry.operator.openshift.io -o yamlExample output
storage: pvc: claim:1 - 1
- Creating a custom PVC allows you to leave the
claimfield blank for the default automatic creation of animage-registry-storagePVC.
For instructions about configuring registry storage so that it references the correct PVC, see Configuring the registry for vSphere.
15.2.15. Backing up VMware vSphere volumes
OpenShift Container Platform provisions new volumes as independent persistent disks to freely attach and detach the volume on any node in the cluster. As a consequence, it is not possible to back up volumes that use snapshots, or to restore volumes from snapshots. See Snapshot Limitations for more information.
Procedure
To create a backup of persistent volumes:
- Stop the application that is using the persistent volume.
- Clone the persistent volume.
- Restart the application.
- Create a backup of the cloned volume.
- Delete the cloned volume.
15.2.16. Telemetry access for OpenShift Container Platform
In OpenShift Container Platform 4.7, the Telemetry service, which runs by default to provide metrics about cluster health and the success of updates, requires internet access. If your cluster is connected to the internet, Telemetry runs automatically, and your cluster is registered to OpenShift Cluster Manager.
After you confirm that your OpenShift Cluster Manager inventory is correct, either maintained automatically by Telemetry or manually by using OpenShift Cluster Manager, use subscription watch to track your OpenShift Container Platform subscriptions at the account or multi-cluster level.
15.2.17. Next steps
- Customize your cluster.
- If necessary, you can opt out of remote health reporting.
- Set up your registry and configure registry storage.
- Optional: View the events from the vSphere Problem Detector Operator to determine if the cluster has permission or storage configuration issues.
15.3. Installing a cluster on VMC with network customizations
In OpenShift Container Platform version 4.7, you can install a cluster on your VMware vSphere instance using installer-provisioned infrastructure with customized network configuration options by deploying it to VMware Cloud (VMC) on AWS.
Once you configure your VMC environment for OpenShift Container Platform deployment, you use the OpenShift Container Platform installation program from the bastion management host, co-located in the VMC environment. The installation program and control plane automates the process of deploying and managing the resources needed for the OpenShift Container Platform cluster.
By customizing your OpenShift Container Platform network configuration, your cluster can coexist with existing IP address allocations in your environment and integrate with existing VXLAN configurations. To customize the installation, you modify parameters in the install-config.yaml file before you install the cluster. You must set most of the network configuration parameters during installation, and you can modify only kubeProxy configuration parameters in a running cluster.
OpenShift Container Platform supports deploying a cluster to a single VMware vCenter only. Deploying a cluster with machines/machine sets on multiple vCenters is not supported.
15.3.1. Setting up VMC for vSphere
You can install OpenShift Container Platform on VMware Cloud (VMC) on AWS hosted vSphere clusters to enable applications to be deployed and managed both on-premise and off-premise, across the hybrid cloud.
You must configure several options in your VMC environment prior to installing OpenShift Container Platform on VMware vSphere. Ensure your VMC environment has the following prerequisites:
- Create a non-exclusive, DHCP-enabled, NSX-T network segment and subnet. Other virtual machines (VMs) can be hosted on the subnet, but at least eight IP addresses must be available for the OpenShift Container Platform deployment.
Allocate two IP addresses, outside the DHCP range, and configure them with reverse DNS records.
-
A DNS record for
api.<cluster_name>.<base_domain>pointing to the allocated IP address. -
A DNS record for
*.apps.<cluster_name>.<base_domain>pointing to the allocated IP address.
-
A DNS record for
Configure the following firewall rules:
- An ANY:ANY firewall rule between the OpenShift Container Platform compute network and the Internet. This is used by nodes and applications to download container images.
- An ANY:ANY firewall rule between the installation host and the software-defined data center (SDDC) management network on port 443. This allows you to upload the Red Hat Enterprise Linux CoreOS (RHCOS) OVA during deployment.
- An HTTPS firewall rule between the OpenShift Container Platform compute network and vCenter. This connection allows OpenShift Container Platform to communicate with vCenter for provisioning and managing nodes, persistent volume claims (PVCs), and other resources.
You must have the following information to deploy OpenShift Container Platform:
-
The OpenShift Container Platform cluster name, such as
vmc-prod-1. -
The base DNS name, such as
companyname.com. -
If not using the default, the pod network CIDR and services network CIDR must be identified, which are set by default to
10.128.0.0/14and172.30.0.0/16, respectively. These CIDRs are used for pod-to-pod and pod-to-service communication and are not accessible externally; however, they must not overlap with existing subnets in your organization. The following vCenter information:
- vCenter hostname, username, and password
-
Datacenter name, such as
SDDC-Datacenter -
Cluster name, such as
Cluster-1 - Network name
Datastore name, such as
WorkloadDatastoreNoteIt is recommended to move your vSphere cluster to the VMC
Compute-ResourcePoolresource pool after your cluster installation is finished.
-
The OpenShift Container Platform cluster name, such as
A Linux-based host deployed to VMC as a bastion.
- The bastion host can be Red Hat Enterprise Linux (RHEL) or any another Linux-based host; it must have Internet connectivity and the ability to upload an OVA to the ESXi hosts.
Download and install the OpenShift CLI tools to the bastion host.
-
The
openshift-installinstallation program -
The OpenShift CLI (
oc) tool
-
The
You cannot use the VMware NSX Container Plugin for Kubernetes (NCP), and NSX is not used as the OpenShift SDN. The version of NSX currently available with VMC is incompatible with the version of NCP certified with OpenShift Container Platform.
However, the NSX DHCP service is used for virtual machine IP management with the full-stack automated OpenShift Container Platform deployment and with nodes provisioned, either manually or automatically, by the Machine API integration with vSphere. Additionally, NSX firewall rules are created to enable access with the OpenShift Container Platform cluster and between the bastion host and the VMC vSphere hosts.
15.3.1.1. VMC Sizer tool
VMware Cloud on AWS is built on top of AWS bare metal infrastructure; this is the same bare metal infrastructure which runs AWS native services. When a VMware cloud on AWS software-defined data center (SDDC) is deployed, you consume these physical server nodes and run the VMware ESXi hypervisor in a single tenant fashion. This means the physical infrastructure is not accessible to anyone else using VMC. It is important to consider how many physical hosts you will need to host your virtual infrastructure.
To determine this, VMware provides the VMC on AWS Sizer. With this tool, you can define the resources you intend to host on VMC:
- Types of workloads
- Total number of virtual machines
Specification information such as:
- Storage requirements
- vCPUs
- vRAM
- Overcommit ratios
With these details, the sizer tool can generate a report, based on VMware best practices, and recommend your cluster configuration and the number of hosts you will need.
15.3.2. vSphere prerequisites
- Provision block registry storage. For more information on persistent storage, see Understanding persistent storage.
- Review details about the OpenShift Container Platform installation and update processes.
If you use a firewall, you must configure it to allow the sites that your cluster requires access to.
NoteBe sure to also review this site list if you are configuring a proxy.
15.3.3. Internet access for OpenShift Container Platform
In OpenShift Container Platform 4.7, you require access to the Internet to install your cluster.
You must have Internet access to:
- Access OpenShift Cluster Manager to download the installation program and perform subscription management. If the cluster has internet access and you do not disable Telemetry, that service automatically entitles your cluster.
- Access Quay.io to obtain the packages that are required to install your cluster.
- Obtain the packages that are required to perform cluster updates.
If your cluster cannot have direct Internet access, you can perform a restricted network installation on some types of infrastructure that you provision. During that process, you download the content that is required and use it to populate a mirror registry with the packages that you need to install a cluster and generate the installation program. With some installation types, the environment that you install your cluster in will not require Internet access. Before you update the cluster, you update the content of the mirror registry.
15.3.4. VMware vSphere infrastructure requirements
You must install the OpenShift Container Platform cluster on a VMware vSphere version 6 or 7 instance that meets the requirements for the components that you use.
| Component | Minimum supported versions | Description |
|---|---|---|
| Hypervisor | vSphere 6.5 and later with HW version 13 | This version is the minimum version that Red Hat Enterprise Linux CoreOS (RHCOS) supports. See the Red Hat Enterprise Linux 8 supported hypervisors list. |
| Storage with in-tree drivers | vSphere 6.5 and later | This plug-in creates vSphere storage by using the in-tree storage drivers for vSphere included in OpenShift Container Platform. |
If you use a vSphere version 6.5 instance, consider upgrading to 6.7U3 or 7.0 before you install OpenShift Container Platform.
You must ensure that the time on your ESXi hosts is synchronized before you install OpenShift Container Platform. See Edit Time Configuration for a Host in the VMware documentation.
Virtual machines (VMs) configured to use virtual hardware version 14 or greater might result in a failed installation. It is recommended to configure VMs with virtual hardware version 13. This is a known issue that is being addressed in BZ#1935539.
15.3.5. Network connectivity requirements
You must configure the network connectivity between machines to allow OpenShift Container Platform cluster components to communicate.
Review the following details about the required network ports.
| Protocol | Port | Description |
|---|---|---|
| ICMP | N/A | Network reachability tests |
| TCP |
| Metrics |
|
|
Host level services, including the node exporter on ports | |
|
| The default ports that Kubernetes reserves | |
|
| openshift-sdn | |
| UDP |
| virtual extensible LAN (VXLAN) |
|
| Geneve | |
|
|
Host level services, including the node exporter on ports | |
|
| IPsec IKE packets | |
|
| IPsec NAT-T packets | |
| TCP/UDP |
| Kubernetes node port |
| ESP | N/A | IPsec Encapsulating Security Payload (ESP) |
| Protocol | Port | Description |
|---|---|---|
| TCP |
| Kubernetes API |
| Protocol | Port | Description |
|---|---|---|
| TCP |
| etcd server and peer ports |
15.3.6. vCenter requirements
Before you install an OpenShift Container Platform cluster on your vCenter that uses infrastructure that the installer provisions, you must prepare your environment.
Required vCenter account privileges
To install an OpenShift Container Platform cluster in a vCenter, the installation program requires access to an account with privileges to read and create the required resources. Using an account that has global administrative privileges is the simplest way to access all of the necessary permissions.
If you cannot use an account with global administrative privileges, you must create roles to grant the privileges necessary for OpenShift Container Platform cluster installation. While most of the privileges are always required, some are required only if you plan for the installation program to provision a folder to contain the OpenShift Container Platform cluster on your vCenter instance, which is the default behavior. You must create or amend vSphere roles for the specified objects to grant the required privileges.
An additional role is required if the installation program is to create a vSphere virtual machine folder.
Example 15.5. Roles and privileges required for installation
| vSphere object for role | When required | Required privileges |
|---|---|---|
| vSphere vCenter | Always |
|
| vSphere vCenter Cluster | Always |
|
| vSphere Datastore | Always |
|
| vSphere Port Group | Always |
|
| Virtual Machine Folder | Always |
|
| vSphere vCenter Datacenter | If the installation program creates the virtual machine folder |
|
Additionally, the user requires some ReadOnly permissions, and some of the roles require permission to propogate the permissions to child objects. These settings vary depending on whether or not you install the cluster into an existing folder.
Example 15.6. Required permissions and propagation settings
| vSphere object | Folder type | Propagate to children | Permissions required |
|---|---|---|---|
| vSphere vCenter | Always | False | Listed required privileges |
| vSphere vCenter Datacenter | Existing folder | False |
|
| Installation program creates the folder | True | Listed required privileges | |
| vSphere vCenter Cluster | Always | True | Listed required privileges |
| vSphere vCenter Datastore | Always | False | Listed required privileges |
| vSphere Switch | Always | False |
|
| vSphere Port Group | Always | False | Listed required privileges |
| vSphere vCenter Virtual Machine Folder | Existing folder | True | Listed required privileges |
For more information about creating an account with only the required privileges, see vSphere Permissions and User Management Tasks in the vSphere documentation.
Using OpenShift Container Platform with vMotion
If you intend on using vMotion in your vSphere environment, consider the following before installing a OpenShift Container Platform cluster.
OpenShift Container Platform generally supports compute-only vMotion. Using Storage vMotion can cause issues and is not supported.
To help ensure the uptime of your compute and control plane nodes, it is recommended that you follow the VMware best practices for vMotion. It is also recommended to use VMware anti-affinity rules to improve the availability of OpenShift Container Platform during maintenance or hardware issues.
For more information about vMotion and anti-affinity rules, see the VMware vSphere documentation for vMotion networking requirements and VM anti-affinity rules.
- If you are using vSphere volumes in your pods, migrating a VM across datastores either manually or through Storage vMotion causes, invalid references within OpenShift Container Platform persistent volume (PV) objects. These references prevent affected pods from starting up and can result in data loss.
- Similarly, OpenShift Container Platform does not support selective migration of VMDKs across datastores, using datastore clusters for VM provisioning or for dynamic or static provisioning of PVs, or using a datastore that is part of a datastore cluster for dynamic or static provisioning of PVs.
Cluster resources
When you deploy an OpenShift Container Platform cluster that uses installer-provisioned infrastructure, the installation program must be able to create several resources in your vCenter instance.
A standard OpenShift Container Platform installation creates the following vCenter resources:
- 1 Folder
- 1 Tag category
- 1 Tag
Virtual machines:
- 1 template
- 1 temporary bootstrap node
- 3 control plane nodes
- 3 compute machines
Although these resources use 856 GB of storage, the bootstrap node is destroyed during the cluster installation process. A minimum of 800 GB of storage is required to use a standard cluster.
If you deploy more compute machines, the OpenShift Container Platform cluster will use more storage.
Cluster limits
Available resources vary between clusters. The number of possible clusters within a vCenter is limited primarily by available storage space and any limitations on the number of required resources. Be sure to consider both limitations to the vCenter resources that the cluster creates and the resources that you require to deploy a cluster, such as IP addresses and networks.
Networking requirements
You must use DHCP for the network and ensure that the DHCP server is configured to provide persistent IP addresses to the cluster machines. All nodes must be in the same VLAN. You cannot scale the cluster using a second VLAN as a Day 2 operation. Additionally, you must create the following networking resources before you install the OpenShift Container Platform cluster:
It is recommended that each OpenShift Container Platform node in the cluster must have access to a Network Time Protocol (NTP) server that is discoverable via DHCP. Installation is possible without an NTP server. However, asynchronous server clocks will cause errors, which NTP server prevents.
Required IP Addresses
An installer-provisioned vSphere installation requires two static IP addresses:
- The API address is used to access the cluster API.
- The Ingress address is used for cluster ingress traffic.
You must provide these IP addresses to the installation program when you install the OpenShift Container Platform cluster.
DNS records
You must create DNS records for two static IP addresses in the appropriate DNS server for the vCenter instance that hosts your OpenShift Container Platform cluster. In each record, <cluster_name> is the cluster name and <base_domain> is the cluster base domain that you specify when you install the cluster. A complete DNS record takes the form: <component>.<cluster_name>.<base_domain>..
| Component | Record | Description |
|---|---|---|
| API VIP |
| This DNS A/AAAA or CNAME record must point to the load balancer for the control plane machines. This record must be resolvable by both clients external to the cluster and from all the nodes within the cluster. |
| Ingress VIP |
| A wildcard DNS A/AAAA or CNAME record that points to the load balancer that targets the machines that run the Ingress router pods, which are the worker nodes by default. This record must be resolvable by both clients external to the cluster and from all the nodes within the cluster. |
15.3.7. Generating an SSH private key and adding it to the agent
If you want to perform installation debugging or disaster recovery on your cluster, you must provide an SSH key to both your ssh-agent and the installation program. You can use this key to access the bootstrap machine in a public cluster to troubleshoot installation issues.
In a production environment, you require disaster recovery and debugging.
Do not skip this procedure in production environments where disaster recovery and debugging is required.
You can use this key to SSH into the master nodes as the user core. When you deploy the cluster, the key is added to the core user’s ~/.ssh/authorized_keys list.
Procedure
If you do not have an SSH key that is configured for password-less authentication on your computer, create one. For example, on a computer that uses a Linux operating system, run the following command:
$ ssh-keygen -t ed25519 -N '' \ -f <path>/<file_name>1 - 1
- Specify the path and file name, such as
~/.ssh/id_rsa, of the new SSH key. If you have an existing key pair, ensure your public key is in the your~/.sshdirectory.
Running this command generates an SSH key that does not require a password in the location that you specified.
NoteIf you plan to install an OpenShift Container Platform cluster that uses FIPS Validated / Modules in Process cryptographic libraries on the
x86_64architecture, do not create a key that uses theed25519algorithm. Instead, create a key that uses thersaorecdsaalgorithm.Start the
ssh-agentprocess as a background task:$ eval "$(ssh-agent -s)"Example output
Agent pid 31874NoteIf your cluster is in FIPS mode, only use FIPS-compliant algorithms to generate the SSH key. The key must be either RSA or ECDSA.
Add your SSH private key to the
ssh-agent:$ ssh-add <path>/<file_name>1 Example output
Identity added: /home/<you>/<path>/<file_name> (<computer_name>)- 1
- Specify the path and file name for your SSH private key, such as
~/.ssh/id_rsa
Next steps
- When you install OpenShift Container Platform, provide the SSH public key to the installation program.
15.3.8. Obtaining the installation program
Before you install OpenShift Container Platform, download the installation file on your provisioning machine.
Prerequisites
- You have a machine that runs Linux, for example Red Hat Enterprise Linux 8, with 500 MB of local disk space
Procedure
- Access the Infrastructure Provider page on the OpenShift Cluster Manager site. If you have a Red Hat account, log in with your credentials. If you do not, create an account.
- Select your infrastructure provider.
Navigate to the page for your installation type, download the installation program for your operating system, and place the file in the directory where you will store the installation configuration files.
ImportantThe installation program creates several files on the computer that you use to install your cluster. You must keep the installation program and the files that the installation program creates after you finish installing the cluster. Both files are required to delete the cluster.
ImportantDeleting the files created by the installation program does not remove your cluster, even if the cluster failed during installation. To remove your cluster, complete the OpenShift Container Platform uninstallation procedures for your specific cloud provider.
Extract the installation program. For example, on a computer that uses a Linux operating system, run the following command:
$ tar xvf openshift-install-linux.tar.gz- Download your installation pull secret from the Red Hat OpenShift Cluster Manager. This pull secret allows you to authenticate with the services that are provided by the included authorities, including Quay.io, which serves the container images for OpenShift Container Platform components.
15.3.9. Adding vCenter root CA certificates to your system trust
Because the installation program requires access to your vCenter’s API, you must add your vCenter’s trusted root CA certificates to your system trust before you install an OpenShift Container Platform cluster.
Procedure
-
From the vCenter home page, download the vCenter’s root CA certificates. Click Download trusted root CA certificates in the vSphere Web Services SDK section. The
<vCenter>/certs/download.zipfile downloads. Extract the compressed file that contains the vCenter root CA certificates. The contents of the compressed file resemble the following file structure:
certs ├── lin │ ├── 108f4d17.0 │ ├── 108f4d17.r1 │ ├── 7e757f6a.0 │ ├── 8e4f8471.0 │ └── 8e4f8471.r0 ├── mac │ ├── 108f4d17.0 │ ├── 108f4d17.r1 │ ├── 7e757f6a.0 │ ├── 8e4f8471.0 │ └── 8e4f8471.r0 └── win ├── 108f4d17.0.crt ├── 108f4d17.r1.crl ├── 7e757f6a.0.crt ├── 8e4f8471.0.crt └── 8e4f8471.r0.crl 3 directories, 15 filesAdd the files for your operating system to the system trust. For example, on a Fedora operating system, run the following command:
# cp certs/lin/* /etc/pki/ca-trust/source/anchorsUpdate your system trust. For example, on a Fedora operating system, run the following command:
# update-ca-trust extract
15.3.10. Creating the installation configuration file
You can customize the OpenShift Container Platform cluster you install on VMware vSphere.
Prerequisites
- Obtain the OpenShift Container Platform installation program and the pull secret for your cluster.
- Obtain service principal permissions at the subscription level.
Procedure
Create the
install-config.yamlfile.Change to the directory that contains the installation program and run the following command:
$ ./openshift-install create install-config --dir <installation_directory>1 - 1
- For
<installation_directory>, specify the directory name to store the files that the installation program creates.
ImportantSpecify an empty directory. Some installation assets, like bootstrap X.509 certificates have short expiration intervals, so you must not reuse an installation directory. If you want to reuse individual files from another cluster installation, you can copy them into your directory. However, the file names for the installation assets might change between releases. Use caution when copying installation files from an earlier OpenShift Container Platform version.
At the prompts, provide the configuration details for your cloud:
Optional: Select an SSH key to use to access your cluster machines.
NoteFor production OpenShift Container Platform clusters on which you want to perform installation debugging or disaster recovery, specify an SSH key that your
ssh-agentprocess uses.- Select vsphere as the platform to target.
- Specify the name of your vCenter instance.
Specify the user name and password for the vCenter account that has the required permissions to create the cluster.
The installation program connects to your vCenter instance.
- Select the datacenter in your vCenter instance to connect to.
- Select the default vCenter datastore to use.
- Select the vCenter cluster to install the OpenShift Container Platform cluster in. The installation program uses the root resource pool of the vSphere cluster as the default resource pool.
- Select the network in the vCenter instance that contains the virtual IP addresses and DNS records that you configured.
- Enter the virtual IP address that you configured for control plane API access.
- Enter the virtual IP address that you configured for cluster ingress.
- Enter the base domain. This base domain must be the same one that you used in the DNS records that you configured.
- Enter a descriptive name for your cluster. The cluster name must be the same one that you used in the DNS records that you configured.
- Paste the pull secret from the Red Hat OpenShift Cluster Manager.
-
Modify the
install-config.yamlfile. You can find more information about the available parameters in the "Installation configuration parameters" section. Back up the
install-config.yamlfile so that you can use it to install multiple clusters.ImportantThe
install-config.yamlfile is consumed during the installation process. If you want to reuse the file, you must back it up now.
15.3.10.1. Installation configuration parameters
Before you deploy an OpenShift Container Platform cluster, you provide parameter values to describe your account on the cloud platform that hosts your cluster and optionally customize your cluster’s platform. When you create the install-config.yaml installation configuration file, you provide values for the required parameters through the command line. If you customize your cluster, you can modify the install-config.yaml file to provide more details about the platform.
After installation, you cannot modify these parameters in the install-config.yaml file.
The openshift-install command does not validate field names for parameters. If an incorrect name is specified, the related file or object is not created, and no error is reported. Ensure that the field names for any parameters that are specified are correct.
15.3.10.1.1. Required configuration parameters
Required installation configuration parameters are described in the following table:
| Parameter | Description | Values |
|---|---|---|
|
|
The API version for the | String |
|
|
The base domain of your cloud provider. The base domain is used to create routes to your OpenShift Container Platform cluster components. The full DNS name for your cluster is a combination of the |
A fully-qualified domain or subdomain name, such as |
|
|
Kubernetes resource | Object |
|
|
The name of the cluster. DNS records for the cluster are all subdomains of |
String of lowercase letters and hyphens ( |
|
|
The configuration for the specific platform upon which to perform the installation: | Object |
|
| Get a pull secret from the Red Hat OpenShift Cluster Manager to authenticate downloading container images for OpenShift Container Platform components from services such as Quay.io. |
|
15.3.10.1.2. Network configuration parameters
You can customize your installation configuration based on the requirements of your existing network infrastructure. For example, you can expand the IP address block for the cluster network or provide different IP address blocks than the defaults.
Only IPv4 addresses are supported.
| Parameter | Description | Values |
|---|---|---|
|
| The configuration for the cluster network. | Object Note
You cannot modify parameters specified by the |
|
| The cluster network provider Container Network Interface (CNI) plug-in to install. |
Either |
|
| The IP address blocks for pods.
The default value is If you specify multiple IP address blocks, the blocks must not overlap. | An array of objects. For example: |
|
|
Required if you use An IPv4 network. |
An IP address block in Classless Inter-Domain Routing (CIDR) notation. The prefix length for an IPv4 block is between |
|
|
The subnet prefix length to assign to each individual node. For example, if | A subnet prefix.
The default value is |
|
|
The IP address block for services. The default value is The OpenShift SDN and OVN-Kubernetes network providers support only a single IP address block for the service network. | An array with an IP address block in CIDR format. For example: |
|
| The IP address blocks for machines. If you specify multiple IP address blocks, the blocks must not overlap.
If you specify multiple IP kernel arguments, the | An array of objects. For example: |
|
|
Required if you use | An IP network block in CIDR notation.
For example, Note
Set the |
15.3.10.1.3. Optional configuration parameters
Optional installation configuration parameters are described in the following table:
| Parameter | Description | Values |
|---|---|---|
|
| A PEM-encoded X.509 certificate bundle that is added to the nodes' trusted certificate store. This trust bundle may also be used when a proxy has been configured. | String |
|
| The configuration for the machines that comprise the compute nodes. |
Array of |
|
|
Determines the instruction set architecture of the machines in the pool. Currently, heteregeneous clusters are not supported, so all pools must specify the same architecture. Valid values are | String |
|
|
Whether to enable or disable simultaneous multithreading, or Important If you disable simultaneous multithreading, ensure that your capacity planning accounts for the dramatically decreased machine performance. |
|
|
|
Required if you use |
|
|
|
Required if you use |
|
|
| The number of compute machines, which are also known as worker machines, to provision. |
A positive integer greater than or equal to |
|
| The configuration for the machines that comprise the control plane. |
Array of |
|
|
Determines the instruction set architecture of the machines in the pool. Currently, heterogeneous clusters are not supported, so all pools must specify the same architecture. Valid values are | String |
|
|
Whether to enable or disable simultaneous multithreading, or Important If you disable simultaneous multithreading, ensure that your capacity planning accounts for the dramatically decreased machine performance. |
|
|
|
Required if you use |
|
|
|
Required if you use |
|
|
| The number of control plane machines to provision. |
The only supported value is |
|
| The Cloud Credential Operator (CCO) mode. If no mode is specified, the CCO dynamically tries to determine the capabilities of the provided credentials, with a preference for mint mode on the platforms where multiple modes are supported. Note Not all CCO modes are supported for all cloud providers. For more information on CCO modes, see the Cloud Credential Operator entry in the Cluster Operators reference content. |
|
|
|
Enable or disable FIPS mode. The default is Important
The use of FIPS Validated / Modules in Process cryptographic libraries is only supported on OpenShift Container Platform deployments on the Note If you are using Azure File storage, you cannot enable FIPS mode. |
|
|
| Sources and repositories for the release-image content. |
Array of objects. Includes a |
|
|
Required if you use | String |
|
| Specify one or more repositories that may also contain the same images. | Array of strings |
|
| How to publish or expose the user-facing endpoints of your cluster, such as the Kubernetes API, OpenShift routes. |
Setting this field to Important
If the value of the field is set to |
|
| The SSH key or keys to authenticate access your cluster machines. Note
For production OpenShift Container Platform clusters on which you want to perform installation debugging or disaster recovery, specify an SSH key that your | One or more keys. For example: |
15.3.10.1.4. Additional VMware vSphere configuration parameters
Additional VMware vSphere configuration parameters are described in the following table:
| Parameter | Description | Values |
|---|---|---|
|
| The fully-qualified hostname or IP address of the vCenter server. | String |
|
| The user name to use to connect to the vCenter instance with. This user must have at least the roles and privileges that are required for static or dynamic persistent volume provisioning in vSphere. | String |
|
| The password for the vCenter user name. | String |
|
| The name of the datacenter to use in the vCenter instance. | String |
|
| The name of the default datastore to use for provisioning volumes. | String |
|
| Optional. The absolute path of an existing folder where the installation program creates the virtual machines. If you do not provide this value, the installation program creates a folder that is named with the infrastructure ID in the datacenter virtual machine folder. |
String, for example, |
|
| The network in the vCenter instance that contains the virtual IP addresses and DNS records that you configured. | String |
|
| The vCenter cluster to install the OpenShift Container Platform cluster in. | String |
|
| The virtual IP (VIP) address that you configured for control plane API access. |
An IP address, for example |
|
| The virtual IP (VIP) address that you configured for cluster ingress. |
An IP address, for example |
15.3.10.1.5. Optional VMware vSphere machine pool configuration parameters
Optional VMware vSphere machine pool configuration parameters are described in the following table:
| Parameter | Description | Values |
|---|---|---|
|
| The location from which the installer downloads the RHCOS image. You must set this parameter to perform an installation in a restricted network. |
An HTTP or HTTPS URL, optionally with a SHA-256 checksum. For example, |
|
| The size of the disk in gigabytes. | Integer |
|
| The total number of virtual processor cores to assign a virtual machine. | Integer |
|
|
The number of cores per socket in a virtual machine. The number of virtual sockets on the virtual machine is | Integer |
|
| The size of a virtual machine’s memory in megabytes. | Integer |
15.3.10.2. Sample install-config.yaml file for an installer-provisioned VMware vSphere cluster
You can customize the install-config.yaml file to specify more details about your OpenShift Container Platform cluster’s platform or modify the values of the required parameters.
apiVersion: v1
baseDomain: example.com
compute:
- hyperthreading: Enabled
name: worker
replicas: 3
platform:
vsphere:
cpus: 2
coresPerSocket: 2
memoryMB: 8192
osDisk:
diskSizeGB: 120
controlPlane:
hyperthreading: Enabled
name: master
replicas: 3
platform:
vsphere:
cpus: 4
coresPerSocket: 2
memoryMB: 16384
osDisk:
diskSizeGB: 120
metadata:
name: cluster
networking:
clusterNetwork:
- cidr: 10.128.0.0/14
hostPrefix: 23
machineNetwork:
- cidr: 10.0.0.0/16
networkType: OpenShiftSDN
serviceNetwork:
- 172.30.0.0/16
platform:
vsphere:
vcenter: your.vcenter.server
username: username
password: password
datacenter: datacenter
defaultDatastore: datastore
folder: folder
network: VM_Network
cluster: vsphere_cluster_name
apiVIP: api_vip
ingressVIP: ingress_vip
fips: false
pullSecret: '{"auths": ...}'
sshKey: 'ssh-ed25519 AAAA...'- 1
- The base domain of the cluster. All DNS records must be sub-domains of this base and include the cluster name.
- 2 5
- The
controlPlanesection is a single mapping, but thecomputesection is a sequence of mappings. To meet the requirements of the different data structures, the first line of thecomputesection must begin with a hyphen,-, and the first line of thecontrolPlanesection must not. Only one control plane pool is used. - 3 6
- Whether to enable or disable simultaneous multithreading, or
hyperthreading. By default, simultaneous multithreading is enabled to increase the performance of your machines' cores. You can disable it by setting the parameter value toDisabled. If you disable simultaneous multithreading in some cluster machines, you must disable it in all cluster machines.ImportantIf you disable simultaneous multithreading, ensure that your capacity planning accounts for the dramatically decreased machine performance. Your machines must use at least 8 CPUs and 32 GB of RAM if you disable simultaneous multithreading.
- 4 7
- Optional: Provide additional configuration for the machine pool parameters for the compute and control plane machines.
- 8
- The cluster name that you specified in your DNS records.
- 9
- The vSphere cluster to install the OpenShift Container Platform cluster in. The installation program uses the root resource pool of the vSphere cluster as the default resource pool.
15.3.10.3. Configuring the cluster-wide proxy during installation
Production environments can deny direct access to the Internet and instead have an HTTP or HTTPS proxy available. You can configure a new OpenShift Container Platform cluster to use a proxy by configuring the proxy settings in the install-config.yaml file.
Prerequisites
-
You have an existing
install-config.yamlfile. You reviewed the sites that your cluster requires access to and determined whether any of them need to bypass the proxy. By default, all cluster egress traffic is proxied, including calls to hosting cloud provider APIs. You added sites to the
Proxyobject’sspec.noProxyfield to bypass the proxy if necessary.NoteThe
Proxyobjectstatus.noProxyfield is populated with the values of thenetworking.machineNetwork[].cidr,networking.clusterNetwork[].cidr, andnetworking.serviceNetwork[]fields from your installation configuration.For installations on Amazon Web Services (AWS), Google Cloud Platform (GCP), Microsoft Azure, and Red Hat OpenStack Platform (RHOSP), the
Proxyobjectstatus.noProxyfield is also populated with the instance metadata endpoint (169.254.169.254).
Procedure
Edit your
install-config.yamlfile and add the proxy settings. For example:apiVersion: v1 baseDomain: my.domain.com proxy: httpProxy: http://<username>:<pswd>@<ip>:<port>1 httpsProxy: https://<username>:<pswd>@<ip>:<port>2 noProxy: example.com3 additionalTrustBundle: |4 -----BEGIN CERTIFICATE----- <MY_TRUSTED_CA_CERT> -----END CERTIFICATE----- ...- 1
- A proxy URL to use for creating HTTP connections outside the cluster. The URL scheme must be
http. - 2
- A proxy URL to use for creating HTTPS connections outside the cluster.
- 3
- A comma-separated list of destination domain names, IP addresses, or other network CIDRs to exclude from proxying. Preface a domain with
.to match subdomains only. For example,.y.commatchesx.y.com, but noty.com. Use*to bypass the proxy for all destinations. You must include vCenter’s IP address and the IP range that you use for its machines. - 4
- If provided, the installation program generates a config map that is named
user-ca-bundlein theopenshift-confignamespace to hold the additional CA certificates. If you provideadditionalTrustBundleand at least one proxy setting, theProxyobject is configured to reference theuser-ca-bundleconfig map in thetrustedCAfield. The Cluster Network Operator then creates atrusted-ca-bundleconfig map that merges the contents specified for thetrustedCAparameter with the RHCOS trust bundle. TheadditionalTrustBundlefield is required unless the proxy’s identity certificate is signed by an authority from the RHCOS trust bundle.
NoteThe installation program does not support the proxy
readinessEndpointsfield.- Save the file and reference it when installing OpenShift Container Platform.
The installation program creates a cluster-wide proxy that is named cluster that uses the proxy settings in the provided install-config.yaml file. If no proxy settings are provided, a cluster Proxy object is still created, but it will have a nil spec.
Only the Proxy object named cluster is supported, and no additional proxies can be created.
15.3.11. Network configuration phases
When specifying a cluster configuration prior to installation, there are several phases in the installation procedures when you can modify the network configuration:
- Phase 1
After entering the
openshift-install create install-configcommand. In theinstall-config.yamlfile, you can customize the following network-related fields:-
networking.networkType -
networking.clusterNetwork -
networking.serviceNetwork networking.machineNetworkFor more information on these fields, refer to "Installation configuration parameters".
NoteSet the
networking.machineNetworkto match the CIDR that the preferred NIC resides in.
-
- Phase 2
-
After entering the
openshift-install create manifestscommand. If you must specify advanced network configuration, during this phase you can define a customized Cluster Network Operator manifest with only the fields you want to modify.
You cannot override the values specified in phase 1 in the install-config.yaml file during phase 2. However, you can further customize the cluster network provider during phase 2.
15.3.12. Specifying advanced network configuration
You can use advanced configuration customization to integrate your cluster into your existing network environment by specifying additional configuration for your cluster network provider. You can specify advanced network configuration only before you install the cluster.
Modifying the OpenShift Container Platform manifest files created by the installation program is not supported. Applying a manifest file that you create, as in the following procedure, is supported.
Prerequisites
-
Create the
install-config.yamlfile and complete any modifications to it.
Procedure
Change to the directory that contains the installation program and create the manifests:
$ ./openshift-install create manifests --dir <installation_directory>where:
<installation_directory>-
Specifies the name of the directory that contains the
install-config.yamlfile for your cluster.
Create a stub manifest file for the advanced network configuration that is named
cluster-network-03-config.ymlin the<installation_directory>/manifests/directory:$ cat <<EOF > <installation_directory>/manifests/cluster-network-03-config.yml apiVersion: operator.openshift.io/v1 kind: Network metadata: name: cluster spec: EOFwhere:
<installation_directory>-
Specifies the directory name that contains the
manifests/directory for your cluster.
Open the
cluster-network-03-config.ymlfile in an editor and specify the advanced network configuration for your cluster, such as in the following examples:Specify a different VXLAN port for the OpenShift SDN network provider
apiVersion: operator.openshift.io/v1 kind: Network metadata: name: cluster spec: defaultNetwork: openshiftSDNConfig: vxlanPort: 4800Enable IPsec for the OVN-Kubernetes network provider
apiVersion: operator.openshift.io/v1 kind: Network metadata: name: cluster spec: defaultNetwork: ovnKubernetesConfig: ipsecConfig: {}-
Save the
cluster-network-03-config.ymlfile and quit the text editor. -
Optional: Back up the
manifests/cluster-network-03-config.ymlfile. The installation program deletes themanifests/directory when creating the cluster.
15.3.13. Cluster Network Operator configuration
The configuration for the cluster network is specified as part of the Cluster Network Operator (CNO) configuration and stored in a custom resource (CR) object that is named cluster. The CR specifies the fields for the Network API in the operator.openshift.io API group.
The CNO configuration inherits the following fields during cluster installation from the Network API in the Network.config.openshift.io API group and these fields cannot be changed:
clusterNetwork- IP address pools from which pod IP addresses are allocated.
serviceNetwork- IP address pool for services.
defaultNetwork.type- Cluster network provider, such as OpenShift SDN or OVN-Kubernetes.
You can specify the cluster network provider configuration for your cluster by setting the fields for the defaultNetwork object in the CNO object named cluster.
15.3.13.1. Cluster Network Operator configuration object
The fields for the Cluster Network Operator (CNO) are described in the following table:
| Field | Type | Description |
|---|---|---|
|
|
|
The name of the CNO object. This name is always |
|
|
| A list specifying the blocks of IP addresses from which pod IP addresses are allocated and the subnet prefix length assigned to each individual node in the cluster. For example:
This value is ready-only and specified in the |
|
|
| A block of IP addresses for services. The OpenShift SDN and OVN-Kubernetes Container Network Interface (CNI) network providers support only a single IP address block for the service network. For example:
This value is ready-only and specified in the |
|
|
| Configures the Container Network Interface (CNI) cluster network provider for the cluster network. |
|
|
| The fields for this object specify the kube-proxy configuration. If you are using the OVN-Kubernetes cluster network provider, the kube-proxy configuration has no effect. |
defaultNetwork object configuration
The values for the defaultNetwork object are defined in the following table:
| Field | Type | Description |
|---|---|---|
|
|
|
Either Note OpenShift Container Platform uses the OpenShift SDN Container Network Interface (CNI) cluster network provider by default. |
|
|
| This object is only valid for the OpenShift SDN cluster network provider. |
|
|
| This object is only valid for the OVN-Kubernetes cluster network provider. |
Configuration for the OpenShift SDN CNI cluster network provider
The following table describes the configuration fields for the OpenShift SDN Container Network Interface (CNI) cluster network provider.
| Field | Type | Description |
|---|---|---|
|
|
|
Configures the network isolation mode for OpenShift SDN. The default value is
The values |
|
|
| The maximum transmission unit (MTU) for the VXLAN overlay network. This is detected automatically based on the MTU of the primary network interface. You do not normally need to override the detected MTU. If the auto-detected value is not what you expected it to be, confirm that the MTU on the primary network interface on your nodes is correct. You cannot use this option to change the MTU value of the primary network interface on the nodes.
If your cluster requires different MTU values for different nodes, you must set this value to This value cannot be changed after cluster installation. |
|
|
|
The port to use for all VXLAN packets. The default value is If you are running in a virtualized environment with existing nodes that are part of another VXLAN network, then you might be required to change this. For example, when running an OpenShift SDN overlay on top of VMware NSX-T, you must select an alternate port for the VXLAN, because both SDNs use the same default VXLAN port number.
On Amazon Web Services (AWS), you can select an alternate port for the VXLAN between port |
Example OpenShift SDN configuration
defaultNetwork:
type: OpenShiftSDN
openshiftSDNConfig:
mode: NetworkPolicy
mtu: 1450
vxlanPort: 4789Configuration for the OVN-Kubernetes CNI cluster network provider
The following table describes the configuration fields for the OVN-Kubernetes CNI cluster network provider.
| Field | Type | Description |
|---|---|---|
|
|
| The maximum transmission unit (MTU) for the Geneve (Generic Network Virtualization Encapsulation) overlay network. This is detected automatically based on the MTU of the primary network interface. You do not normally need to override the detected MTU. If the auto-detected value is not what you expected it to be, confirm that the MTU on the primary network interface on your nodes is correct. You cannot use this option to change the MTU value of the primary network interface on the nodes.
If your cluster requires different MTU values for different nodes, you must set this value to This value cannot be changed after cluster installation. |
|
|
|
The port to use for all Geneve packets. The default value is |
|
|
| Specify an empty object to enable IPsec encryption. This value cannot be changed after cluster installation. |
Example OVN-Kubernetes configuration
defaultNetwork:
type: OVNKubernetes
ovnKubernetesConfig:
mtu: 1400
genevePort: 6081
ipsecConfig: {}kubeProxyConfig object configuration
The values for the kubeProxyConfig object are defined in the following table:
| Field | Type | Description |
|---|---|---|
|
|
|
The refresh period for Note
Because of performance improvements introduced in OpenShift Container Platform 4.3 and greater, adjusting the |
|
|
|
The minimum duration before refreshing |
15.3.14. Deploying the cluster
You can install OpenShift Container Platform on a compatible cloud platform.
You can run the create cluster command of the installation program only once, during initial installation.
Prerequisites
- Configure an account with the cloud platform that hosts your cluster.
- Obtain the OpenShift Container Platform installation program and the pull secret for your cluster.
Procedure
Change to the directory that contains the installation program and initialize the cluster deployment:
$ ./openshift-install create cluster --dir <installation_directory> \1 --log-level=info2 ImportantUse the
openshift-installcommand from the bastion hosted in the VMC environment.NoteIf the cloud provider account that you configured on your host does not have sufficient permissions to deploy the cluster, the installation process stops, and the missing permissions are displayed.
When the cluster deployment completes, directions for accessing your cluster, including a link to its web console and credentials for the
kubeadminuser, display in your terminal.Example output
... INFO Install complete! INFO To access the cluster as the system:admin user when using 'oc', run 'export KUBECONFIG=/home/myuser/install_dir/auth/kubeconfig' INFO Access the OpenShift web-console here: https://console-openshift-console.apps.mycluster.example.com INFO Login to the console with user: "kubeadmin", and password: "4vYBz-Ee6gm-ymBZj-Wt5AL" INFO Time elapsed: 36m22sNoteThe cluster access and credential information also outputs to
<installation_directory>/.openshift_install.logwhen an installation succeeds.Important-
The Ignition config files that the installation program generates contain certificates that expire after 24 hours, which are then renewed at that time. If the cluster is shut down before renewing the certificates and the cluster is later restarted after the 24 hours have elapsed, the cluster automatically recovers the expired certificates. The exception is that you must manually approve the pending
node-bootstrappercertificate signing requests (CSRs) to recover kubelet certificates. See the documentation for Recovering from expired control plane certificates for more information. - It is recommended that you use Ignition config files within 12 hours after they are generated because the 24-hour certificate rotates from 16 to 22 hours after the cluster is installed. By using the Ignition config files within 12 hours, you can avoid installation failure if the certificate update runs during installation.
ImportantYou must not delete the installation program or the files that the installation program creates. Both are required to delete the cluster.
-
The Ignition config files that the installation program generates contain certificates that expire after 24 hours, which are then renewed at that time. If the cluster is shut down before renewing the certificates and the cluster is later restarted after the 24 hours have elapsed, the cluster automatically recovers the expired certificates. The exception is that you must manually approve the pending
15.3.15. Installing the OpenShift CLI by downloading the binary
You can install the OpenShift CLI (oc) to interact with OpenShift Container Platform from a command-line interface. You can install oc on Linux, Windows, or macOS.
If you installed an earlier version of oc, you cannot use it to complete all of the commands in OpenShift Container Platform 4.7. Download and install the new version of oc.
15.3.15.1. Installing the OpenShift CLI on Linux
You can install the OpenShift CLI (oc) binary on Linux by using the following procedure.
Procedure
- Navigate to the OpenShift Container Platform downloads page on the Red Hat Customer Portal.
- Select the appropriate version in the Version drop-down menu.
- Click Download Now next to the OpenShift v4.7 Linux Client entry and save the file.
Unpack the archive:
$ tar xvzf <file>Place the
ocbinary in a directory that is on yourPATH.To check your
PATH, execute the following command:$ echo $PATH
After you install the OpenShift CLI, it is available using the oc command:
$ oc <command>15.3.15.2. Installing the OpenShift CLI on Windows
You can install the OpenShift CLI (oc) binary on Windows by using the following procedure.
Procedure
- Navigate to the OpenShift Container Platform downloads page on the Red Hat Customer Portal.
- Select the appropriate version in the Version drop-down menu.
- Click Download Now next to the OpenShift v4.7 Windows Client entry and save the file.
- Unzip the archive with a ZIP program.
Move the
ocbinary to a directory that is on yourPATH.To check your
PATH, open the command prompt and execute the following command:C:\> path
After you install the OpenShift CLI, it is available using the oc command:
C:\> oc <command>15.3.15.3. Installing the OpenShift CLI on macOS
You can install the OpenShift CLI (oc) binary on macOS by using the following procedure.
Procedure
- Navigate to the OpenShift Container Platform downloads page on the Red Hat Customer Portal.
- Select the appropriate version in the Version drop-down menu.
- Click Download Now next to the OpenShift v4.7 MacOSX Client entry and save the file.
- Unpack and unzip the archive.
Move the
ocbinary to a directory on your PATH.To check your
PATH, open a terminal and execute the following command:$ echo $PATH
After you install the OpenShift CLI, it is available using the oc command:
$ oc <command>15.3.16. Logging in to the cluster by using the CLI
You can log in to your cluster as a default system user by exporting the cluster kubeconfig file. The kubeconfig file contains information about the cluster that is used by the CLI to connect a client to the correct cluster and API server. The file is specific to a cluster and is created during OpenShift Container Platform installation.
Prerequisites
- You deployed an OpenShift Container Platform cluster.
-
You installed the
ocCLI.
Procedure
Export the
kubeadmincredentials:$ export KUBECONFIG=<installation_directory>/auth/kubeconfig1 - 1
- For
<installation_directory>, specify the path to the directory that you stored the installation files in.
Verify you can run
occommands successfully using the exported configuration:$ oc whoamiExample output
system:admin
15.3.17. Creating registry storage
After you install the cluster, you must create storage for the registry Operator.
15.3.17.1. Image registry removed during installation
On platforms that do not provide shareable object storage, the OpenShift Image Registry Operator bootstraps itself as Removed. This allows openshift-installer to complete installations on these platform types.
After installation, you must edit the Image Registry Operator configuration to switch the managementState from Removed to Managed.
The Prometheus console provides an ImageRegistryRemoved alert, for example:
"Image Registry has been removed. ImageStreamTags, BuildConfigs and DeploymentConfigs which reference ImageStreamTags may not work as expected. Please configure storage and update the config to Managed state by editing configs.imageregistry.operator.openshift.io."
15.3.17.2. Image registry storage configuration
The Image Registry Operator is not initially available for platforms that do not provide default storage. After installation, you must configure your registry to use storage so that the Registry Operator is made available.
Instructions are shown for configuring a persistent volume, which is required for production clusters. Where applicable, instructions are shown for configuring an empty directory as the storage location, which is available for only non-production clusters.
Additional instructions are provided for allowing the image registry to use block storage types by using the Recreate rollout strategy during upgrades.
15.3.17.2.1. Configuring registry storage for VMware vSphere
As a cluster administrator, following installation you must configure your registry to use storage.
Prerequisites
- Cluster administrator permissions.
- A cluster on VMware vSphere.
Persistent storage provisioned for your cluster, such as Red Hat OpenShift Container Storage.
ImportantOpenShift Container Platform supports
ReadWriteOnceaccess for image registry storage when you have only one replica. To deploy an image registry that supports high availability with two or more replicas,ReadWriteManyaccess is required.- Must have "100Gi" capacity.
Testing shows issues with using the NFS server on RHEL as storage backend for core services. This includes the OpenShift Container Registry and Quay, Prometheus for monitoring storage, and Elasticsearch for logging storage. Therefore, using RHEL NFS to back PVs used by core services is not recommended.
Other NFS implementations on the marketplace might not have these issues. Contact the individual NFS implementation vendor for more information on any testing that was possibly completed against these OpenShift Container Platform core components.
Procedure
To configure your registry to use storage, change the
spec.storage.pvcin theconfigs.imageregistry/clusterresource.NoteWhen using shared storage, review your security settings to prevent outside access.
Verify that you do not have a registry pod:
$ oc get pod -n openshift-image-registry -l docker-registry=defaultExample output
No resourses found in openshift-image-registry namespaceNoteIf you do have a registry pod in your output, you do not need to continue with this procedure.
Check the registry configuration:
$ oc edit configs.imageregistry.operator.openshift.ioExample output
storage: pvc: claim:1 - 1
- Leave the
claimfield blank to allow the automatic creation of animage-registry-storagePVC.
Check the
clusteroperatorstatus:$ oc get clusteroperator image-registryExample output
NAME VERSION AVAILABLE PROGRESSING DEGRADED SINCE MESSAGE image-registry 4.7 True False False 6h50m
15.3.17.2.2. Configuring block registry storage for VMware vSphere
To allow the image registry to use block storage types such as vSphere Virtual Machine Disk (VMDK) during upgrades as a cluster administrator, you can use the Recreate rollout strategy.
Block storage volumes are supported but not recommended for use with image registry on production clusters. An installation where the registry is configured on block storage is not highly available because the registry cannot have more than one replica.
Procedure
To set the image registry storage as a block storage type, patch the registry so that it uses the
Recreaterollout strategy and runs with only1replica:$ oc patch config.imageregistry.operator.openshift.io/cluster --type=merge -p '{"spec":{"rolloutStrategy":"Recreate","replicas":1}}'Provision the PV for the block storage device, and create a PVC for that volume. The requested block volume uses the ReadWriteOnce (RWO) access mode.
Create a
pvc.yamlfile with the following contents to define a VMware vSpherePersistentVolumeClaimobject:kind: PersistentVolumeClaim apiVersion: v1 metadata: name: image-registry-storage1 namespace: openshift-image-registry2 spec: accessModes: - ReadWriteOnce3 resources: requests: storage: 100Gi4 - 1
- A unique name that represents the
PersistentVolumeClaimobject. - 2
- The namespace for the
PersistentVolumeClaimobject, which isopenshift-image-registry. - 3
- The access mode of the persistent volume claim. With
ReadWriteOnce, the volume can be mounted with read and write permissions by a single node. - 4
- The size of the persistent volume claim.
Create the
PersistentVolumeClaimobject from the file:$ oc create -f pvc.yaml -n openshift-image-registry
Edit the registry configuration so that it references the correct PVC:
$ oc edit config.imageregistry.operator.openshift.io -o yamlExample output
storage: pvc: claim:1 - 1
- Creating a custom PVC allows you to leave the
claimfield blank for the default automatic creation of animage-registry-storagePVC.
For instructions about configuring registry storage so that it references the correct PVC, see Configuring the registry for vSphere.
15.3.18. Backing up VMware vSphere volumes
OpenShift Container Platform provisions new volumes as independent persistent disks to freely attach and detach the volume on any node in the cluster. As a consequence, it is not possible to back up volumes that use snapshots, or to restore volumes from snapshots. See Snapshot Limitations for more information.
Procedure
To create a backup of persistent volumes:
- Stop the application that is using the persistent volume.
- Clone the persistent volume.
- Restart the application.
- Create a backup of the cloned volume.
- Delete the cloned volume.
15.3.19. Telemetry access for OpenShift Container Platform
In OpenShift Container Platform 4.7, the Telemetry service, which runs by default to provide metrics about cluster health and the success of updates, requires internet access. If your cluster is connected to the internet, Telemetry runs automatically, and your cluster is registered to OpenShift Cluster Manager.
After you confirm that your OpenShift Cluster Manager inventory is correct, either maintained automatically by Telemetry or manually by using OpenShift Cluster Manager, use subscription watch to track your OpenShift Container Platform subscriptions at the account or multi-cluster level.
15.3.20. Next steps
- Customize your cluster.
- If necessary, you can opt out of remote health reporting.
- Set up your registry and configure registry storage.
- Optional: View the events from the vSphere Problem Detector Operator to determine if the cluster has permission or storage configuration issues.
15.4. Installing a cluster on VMC in a restricted network
In OpenShift Container Platform version 4.7, you can install a cluster on VMware vSphere infrastructure in a restricted network by deploying it to VMware Cloud (VMC) on AWS.
Once you configure your VMC environment for OpenShift Container Platform deployment, you use the OpenShift Container Platform installation program from the bastion management host, co-located in the VMC environment. The installation program and control plane automates the process of deploying and managing the resources needed for the OpenShift Container Platform cluster.
OpenShift Container Platform supports deploying a cluster to a single VMware vCenter only. Deploying a cluster with machines/machine sets on multiple vCenters is not supported.
15.4.1. Setting up VMC for vSphere
You can install OpenShift Container Platform on VMware Cloud (VMC) on AWS hosted vSphere clusters to enable applications to be deployed and managed both on-premise and off-premise, across the hybrid cloud.
You must configure several options in your VMC environment prior to installing OpenShift Container Platform on VMware vSphere. Ensure your VMC environment has the following prerequisites:
- Create a non-exclusive, DHCP-enabled, NSX-T network segment and subnet. Other virtual machines (VMs) can be hosted on the subnet, but at least eight IP addresses must be available for the OpenShift Container Platform deployment.
Allocate two IP addresses, outside the DHCP range, and configure them with reverse DNS records.
-
A DNS record for
api.<cluster_name>.<base_domain>pointing to the allocated IP address. -
A DNS record for
*.apps.<cluster_name>.<base_domain>pointing to the allocated IP address.
-
A DNS record for
Configure the following firewall rules:
- An ANY:ANY firewall rule between the installation host and the software-defined data center (SDDC) management network on port 443. This allows you to upload the Red Hat Enterprise Linux CoreOS (RHCOS) OVA during deployment.
- An HTTPS firewall rule between the OpenShift Container Platform compute network and vCenter. This connection allows OpenShift Container Platform to communicate with vCenter for provisioning and managing nodes, persistent volume claims (PVCs), and other resources.
You must have the following information to deploy OpenShift Container Platform:
-
The OpenShift Container Platform cluster name, such as
vmc-prod-1. -
The base DNS name, such as
companyname.com. -
If not using the default, the pod network CIDR and services network CIDR must be identified, which are set by default to
10.128.0.0/14and172.30.0.0/16, respectively. These CIDRs are used for pod-to-pod and pod-to-service communication and are not accessible externally; however, they must not overlap with existing subnets in your organization. The following vCenter information:
- vCenter hostname, username, and password
-
Datacenter name, such as
SDDC-Datacenter -
Cluster name, such as
Cluster-1 - Network name
Datastore name, such as
WorkloadDatastoreNoteIt is recommended to move your vSphere cluster to the VMC
Compute-ResourcePoolresource pool after your cluster installation is finished.
-
The OpenShift Container Platform cluster name, such as
A Linux-based host deployed to VMC as a bastion.
- The bastion host can be Red Hat Enterprise Linux (RHEL) or any another Linux-based host; it must have Internet connectivity and the ability to upload an OVA to the ESXi hosts.
Download and install the OpenShift CLI tools to the bastion host.
-
The
openshift-installinstallation program -
The OpenShift CLI (
oc) tool
-
The
You cannot use the VMware NSX Container Plugin for Kubernetes (NCP), and NSX is not used as the OpenShift SDN. The version of NSX currently available with VMC is incompatible with the version of NCP certified with OpenShift Container Platform.
However, the NSX DHCP service is used for virtual machine IP management with the full-stack automated OpenShift Container Platform deployment and with nodes provisioned, either manually or automatically, by the Machine API integration with vSphere. Additionally, NSX firewall rules are created to enable access with the OpenShift Container Platform cluster and between the bastion host and the VMC vSphere hosts.
15.4.1.1. VMC Sizer tool
VMware Cloud on AWS is built on top of AWS bare metal infrastructure; this is the same bare metal infrastructure which runs AWS native services. When a VMware cloud on AWS software-defined data center (SDDC) is deployed, you consume these physical server nodes and run the VMware ESXi hypervisor in a single tenant fashion. This means the physical infrastructure is not accessible to anyone else using VMC. It is important to consider how many physical hosts you will need to host your virtual infrastructure.
To determine this, VMware provides the VMC on AWS Sizer. With this tool, you can define the resources you intend to host on VMC:
- Types of workloads
- Total number of virtual machines
Specification information such as:
- Storage requirements
- vCPUs
- vRAM
- Overcommit ratios
With these details, the sizer tool can generate a report, based on VMware best practices, and recommend your cluster configuration and the number of hosts you will need.
15.4.2. vSphere prerequisites
Create a registry on your mirror host and obtain the
imageContentSourcesdata for your version of OpenShift Container Platform.ImportantBecause the installation media is on the mirror host, you can use that computer to complete all installation steps.
- Provision block registry storage. For more information on persistent storage, see Understanding persistent storage.
- Review details about the OpenShift Container Platform installation and update processes.
If you use a firewall and plan to use telemetry, you must configure the firewall to allow the sites that your cluster requires access to.
NoteIf you are configuring a proxy, be sure to also review this site list.
15.4.3. About installations in restricted networks
In OpenShift Container Platform 4.7, you can perform an installation that does not require an active connection to the Internet to obtain software components. Restricted network installations can be completed using installer-provisioned infrastructure or user-provisioned infrastructure, depending on the cloud platform to which you are installing the cluster.
If you choose to perform a restricted network installation on a cloud platform, you still require access to its cloud APIs. Some cloud functions, like Amazon Web Service’s Route 53 DNS and IAM services, require internet access. Depending on your network, you might require less Internet access for an installation on bare metal hardware or on VMware vSphere.
To complete a restricted network installation, you must create a registry that mirrors the contents of the OpenShift Container Platform registry and contains the installation media. You can create this registry on a mirror host, which can access both the Internet and your closed network, or by using other methods that meet your restrictions.
15.4.3.1. Additional limits
Clusters in restricted networks have the following additional limitations and restrictions:
-
The
ClusterVersionstatus includes anUnable to retrieve available updateserror. - By default, you cannot use the contents of the Developer Catalog because you cannot access the required image stream tags.
15.4.4. Internet access for OpenShift Container Platform
In OpenShift Container Platform 4.7, you require access to the Internet to obtain the images that are necessary to install your cluster.
You must have Internet access to:
- Access OpenShift Cluster Manager to download the installation program and perform subscription management. If the cluster has internet access and you do not disable Telemetry, that service automatically entitles your cluster.
- Access Quay.io to obtain the packages that are required to install your cluster.
- Obtain the packages that are required to perform cluster updates.
If your cluster cannot have direct Internet access, you can perform a restricted network installation on some types of infrastructure that you provision. During that process, you download the content that is required and use it to populate a mirror registry with the packages that you need to install a cluster and generate the installation program. With some installation types, the environment that you install your cluster in will not require Internet access. Before you update the cluster, you update the content of the mirror registry.
15.4.5. VMware vSphere infrastructure requirements
You must install the OpenShift Container Platform cluster on a VMware vSphere version 6 or 7 instance that meets the requirements for the components that you use.
| Component | Minimum supported versions | Description |
|---|---|---|
| Hypervisor | vSphere 6.5 and later with HW version 13 | This version is the minimum version that Red Hat Enterprise Linux CoreOS (RHCOS) supports. See the Red Hat Enterprise Linux 8 supported hypervisors list. |
| Storage with in-tree drivers | vSphere 6.5 and later | This plug-in creates vSphere storage by using the in-tree storage drivers for vSphere included in OpenShift Container Platform. |
If you use a vSphere version 6.5 instance, consider upgrading to 6.7U3 or 7.0 before you install OpenShift Container Platform.
You must ensure that the time on your ESXi hosts is synchronized before you install OpenShift Container Platform. See Edit Time Configuration for a Host in the VMware documentation.
Virtual machines (VMs) configured to use virtual hardware version 14 or greater might result in a failed installation. It is recommended to configure VMs with virtual hardware version 13. This is a known issue that is being addressed in BZ#1935539.
15.4.6. Network connectivity requirements
You must configure the network connectivity between machines to allow OpenShift Container Platform cluster components to communicate.
Review the following details about the required network ports.
| Protocol | Port | Description |
|---|---|---|
| ICMP | N/A | Network reachability tests |
| TCP |
| Metrics |
|
|
Host level services, including the node exporter on ports | |
|
| The default ports that Kubernetes reserves | |
|
| openshift-sdn | |
| UDP |
| virtual extensible LAN (VXLAN) |
|
| Geneve | |
|
|
Host level services, including the node exporter on ports | |
|
| IPsec IKE packets | |
|
| IPsec NAT-T packets | |
| TCP/UDP |
| Kubernetes node port |
| ESP | N/A | IPsec Encapsulating Security Payload (ESP) |
| Protocol | Port | Description |
|---|---|---|
| TCP |
| Kubernetes API |
| Protocol | Port | Description |
|---|---|---|
| TCP |
| etcd server and peer ports |
15.4.7. vCenter requirements
Before you install an OpenShift Container Platform cluster on your vCenter that uses infrastructure that the installer provisions, you must prepare your environment.
Required vCenter account privileges
To install an OpenShift Container Platform cluster in a vCenter, the installation program requires access to an account with privileges to read and create the required resources. Using an account that has global administrative privileges is the simplest way to access all of the necessary permissions.
If you cannot use an account with global administrative privileges, you must create roles to grant the privileges necessary for OpenShift Container Platform cluster installation. While most of the privileges are always required, some are required only if you plan for the installation program to provision a folder to contain the OpenShift Container Platform cluster on your vCenter instance, which is the default behavior. You must create or amend vSphere roles for the specified objects to grant the required privileges.
An additional role is required if the installation program is to create a vSphere virtual machine folder.
Example 15.7. Roles and privileges required for installation
| vSphere object for role | When required | Required privileges |
|---|---|---|
| vSphere vCenter | Always |
|
| vSphere vCenter Cluster | Always |
|
| vSphere Datastore | Always |
|
| vSphere Port Group | Always |
|
| Virtual Machine Folder | Always |
|
| vSphere vCenter Datacenter | If the installation program creates the virtual machine folder |
|
Additionally, the user requires some ReadOnly permissions, and some of the roles require permission to propogate the permissions to child objects. These settings vary depending on whether or not you install the cluster into an existing folder.
Example 15.8. Required permissions and propagation settings
| vSphere object | Folder type | Propagate to children | Permissions required |
|---|---|---|---|
| vSphere vCenter | Always | False | Listed required privileges |
| vSphere vCenter Datacenter | Existing folder | False |
|
| Installation program creates the folder | True | Listed required privileges | |
| vSphere vCenter Cluster | Always | True | Listed required privileges |
| vSphere vCenter Datastore | Always | False | Listed required privileges |
| vSphere Switch | Always | False |
|
| vSphere Port Group | Always | False | Listed required privileges |
| vSphere vCenter Virtual Machine Folder | Existing folder | True | Listed required privileges |
For more information about creating an account with only the required privileges, see vSphere Permissions and User Management Tasks in the vSphere documentation.
Using OpenShift Container Platform with vMotion
If you intend on using vMotion in your vSphere environment, consider the following before installing a OpenShift Container Platform cluster.
OpenShift Container Platform generally supports compute-only vMotion. Using Storage vMotion can cause issues and is not supported.
To help ensure the uptime of your compute and control plane nodes, it is recommended that you follow the VMware best practices for vMotion. It is also recommended to use VMware anti-affinity rules to improve the availability of OpenShift Container Platform during maintenance or hardware issues.
For more information about vMotion and anti-affinity rules, see the VMware vSphere documentation for vMotion networking requirements and VM anti-affinity rules.
- If you are using vSphere volumes in your pods, migrating a VM across datastores either manually or through Storage vMotion causes, invalid references within OpenShift Container Platform persistent volume (PV) objects. These references prevent affected pods from starting up and can result in data loss.
- Similarly, OpenShift Container Platform does not support selective migration of VMDKs across datastores, using datastore clusters for VM provisioning or for dynamic or static provisioning of PVs, or using a datastore that is part of a datastore cluster for dynamic or static provisioning of PVs.
Cluster resources
When you deploy an OpenShift Container Platform cluster that uses installer-provisioned infrastructure, the installation program must be able to create several resources in your vCenter instance.
A standard OpenShift Container Platform installation creates the following vCenter resources:
- 1 Folder
- 1 Tag category
- 1 Tag
Virtual machines:
- 1 template
- 1 temporary bootstrap node
- 3 control plane nodes
- 3 compute machines
Although these resources use 856 GB of storage, the bootstrap node is destroyed during the cluster installation process. A minimum of 800 GB of storage is required to use a standard cluster.
If you deploy more compute machines, the OpenShift Container Platform cluster will use more storage.
Cluster limits
Available resources vary between clusters. The number of possible clusters within a vCenter is limited primarily by available storage space and any limitations on the number of required resources. Be sure to consider both limitations to the vCenter resources that the cluster creates and the resources that you require to deploy a cluster, such as IP addresses and networks.
Networking requirements
You must use DHCP for the network and ensure that the DHCP server is configured to provide persistent IP addresses to the cluster machines. All nodes must be in the same VLAN. You cannot scale the cluster using a second VLAN as a Day 2 operation. The VM in your restricted network must have access to vCenter so that it can provision and manage nodes, persistent volume claims (PVCs), and other resources. Additionally, you must create the following networking resources before you install the OpenShift Container Platform cluster:
It is recommended that each OpenShift Container Platform node in the cluster must have access to a Network Time Protocol (NTP) server that is discoverable via DHCP. Installation is possible without an NTP server. However, asynchronous server clocks will cause errors, which NTP server prevents.
Required IP Addresses
An installer-provisioned vSphere installation requires two static IP addresses:
- The API address is used to access the cluster API.
- The Ingress address is used for cluster ingress traffic.
You must provide these IP addresses to the installation program when you install the OpenShift Container Platform cluster.
DNS records
You must create DNS records for two static IP addresses in the appropriate DNS server for the vCenter instance that hosts your OpenShift Container Platform cluster. In each record, <cluster_name> is the cluster name and <base_domain> is the cluster base domain that you specify when you install the cluster. A complete DNS record takes the form: <component>.<cluster_name>.<base_domain>..
| Component | Record | Description |
|---|---|---|
| API VIP |
| This DNS A/AAAA or CNAME record must point to the load balancer for the control plane machines. This record must be resolvable by both clients external to the cluster and from all the nodes within the cluster. |
| Ingress VIP |
| A wildcard DNS A/AAAA or CNAME record that points to the load balancer that targets the machines that run the Ingress router pods, which are the worker nodes by default. This record must be resolvable by both clients external to the cluster and from all the nodes within the cluster. |
15.4.8. Generating an SSH private key and adding it to the agent
If you want to perform installation debugging or disaster recovery on your cluster, you must provide an SSH key to both your ssh-agent and the installation program. You can use this key to access the bootstrap machine in a public cluster to troubleshoot installation issues.
In a production environment, you require disaster recovery and debugging.
Do not skip this procedure in production environments where disaster recovery and debugging is required.
You can use this key to SSH into the master nodes as the user core. When you deploy the cluster, the key is added to the core user’s ~/.ssh/authorized_keys list.
Procedure
If you do not have an SSH key that is configured for password-less authentication on your computer, create one. For example, on a computer that uses a Linux operating system, run the following command:
$ ssh-keygen -t ed25519 -N '' \ -f <path>/<file_name>1 - 1
- Specify the path and file name, such as
~/.ssh/id_rsa, of the new SSH key. If you have an existing key pair, ensure your public key is in the your~/.sshdirectory.
Running this command generates an SSH key that does not require a password in the location that you specified.
NoteIf you plan to install an OpenShift Container Platform cluster that uses FIPS Validated / Modules in Process cryptographic libraries on the
x86_64architecture, do not create a key that uses theed25519algorithm. Instead, create a key that uses thersaorecdsaalgorithm.Start the
ssh-agentprocess as a background task:$ eval "$(ssh-agent -s)"Example output
Agent pid 31874NoteIf your cluster is in FIPS mode, only use FIPS-compliant algorithms to generate the SSH key. The key must be either RSA or ECDSA.
Add your SSH private key to the
ssh-agent:$ ssh-add <path>/<file_name>1 Example output
Identity added: /home/<you>/<path>/<file_name> (<computer_name>)- 1
- Specify the path and file name for your SSH private key, such as
~/.ssh/id_rsa
Next steps
- When you install OpenShift Container Platform, provide the SSH public key to the installation program.
15.4.9. Adding vCenter root CA certificates to your system trust
Because the installation program requires access to your vCenter’s API, you must add your vCenter’s trusted root CA certificates to your system trust before you install an OpenShift Container Platform cluster.
Procedure
-
From the vCenter home page, download the vCenter’s root CA certificates. Click Download trusted root CA certificates in the vSphere Web Services SDK section. The
<vCenter>/certs/download.zipfile downloads. Extract the compressed file that contains the vCenter root CA certificates. The contents of the compressed file resemble the following file structure:
certs ├── lin │ ├── 108f4d17.0 │ ├── 108f4d17.r1 │ ├── 7e757f6a.0 │ ├── 8e4f8471.0 │ └── 8e4f8471.r0 ├── mac │ ├── 108f4d17.0 │ ├── 108f4d17.r1 │ ├── 7e757f6a.0 │ ├── 8e4f8471.0 │ └── 8e4f8471.r0 └── win ├── 108f4d17.0.crt ├── 108f4d17.r1.crl ├── 7e757f6a.0.crt ├── 8e4f8471.0.crt └── 8e4f8471.r0.crl 3 directories, 15 filesAdd the files for your operating system to the system trust. For example, on a Fedora operating system, run the following command:
# cp certs/lin/* /etc/pki/ca-trust/source/anchorsUpdate your system trust. For example, on a Fedora operating system, run the following command:
# update-ca-trust extract
15.4.10. Creating the RHCOS image for restricted network installations
Download the Red Hat Enterprise Linux CoreOS (RHCOS) image to install OpenShift Container Platform on a restricted network VMware vSphere environment.
Prerequisites
- Obtain the OpenShift Container Platform installation program. For a restricted network installation, the program is on your mirror registry host.
Procedure
- Log in to the Red Hat Customer Portal’s Product Downloads page.
Under Version, select the most recent release of OpenShift Container Platform 4.7 for RHEL 8.
ImportantThe RHCOS images might not change with every release of OpenShift Container Platform. You must download images with the highest version that is less than or equal to the OpenShift Container Platform version that you install. Use the image versions that match your OpenShift Container Platform version if they are available.
- Download the Red Hat Enterprise Linux CoreOS (RHCOS) - vSphere image.
- Upload the image you downloaded to a location that is accessible from the bastion server.
The image is now available for a restricted installation. Note the image name or location for use in OpenShift Container Platform deployment.
15.4.11. Creating the installation configuration file
You can customize the OpenShift Container Platform cluster you install on VMware vSphere.
Prerequisites
- Obtain the OpenShift Container Platform installation program and the pull secret for your cluster. For a restricted network installation, these files are on your mirror host.
-
Have the
imageContentSourcesvalues that were generated during mirror registry creation. - Obtain the contents of the certificate for your mirror registry.
- Retrieve a Red Hat Enterprise Linux CoreOS (RHCOS) image and upload it to an accessible location.
- Obtain service principal permissions at the subscription level.
Procedure
Create the
install-config.yamlfile.Change to the directory that contains the installation program and run the following command:
$ ./openshift-install create install-config --dir <installation_directory>1 - 1
- For
<installation_directory>, specify the directory name to store the files that the installation program creates.
ImportantSpecify an empty directory. Some installation assets, like bootstrap X.509 certificates have short expiration intervals, so you must not reuse an installation directory. If you want to reuse individual files from another cluster installation, you can copy them into your directory. However, the file names for the installation assets might change between releases. Use caution when copying installation files from an earlier OpenShift Container Platform version.
At the prompts, provide the configuration details for your cloud:
Optional: Select an SSH key to use to access your cluster machines.
NoteFor production OpenShift Container Platform clusters on which you want to perform installation debugging or disaster recovery, specify an SSH key that your
ssh-agentprocess uses.- Select vsphere as the platform to target.
- Specify the name of your vCenter instance.
Specify the user name and password for the vCenter account that has the required permissions to create the cluster.
The installation program connects to your vCenter instance.
- Select the datacenter in your vCenter instance to connect to.
- Select the default vCenter datastore to use.
- Select the vCenter cluster to install the OpenShift Container Platform cluster in. The installation program uses the root resource pool of the vSphere cluster as the default resource pool.
- Select the network in the vCenter instance that contains the virtual IP addresses and DNS records that you configured.
- Enter the virtual IP address that you configured for control plane API access.
- Enter the virtual IP address that you configured for cluster ingress.
- Enter the base domain. This base domain must be the same one that you used in the DNS records that you configured.
- Enter a descriptive name for your cluster. The cluster name must be the same one that you used in the DNS records that you configured.
- Paste the pull secret from the Red Hat OpenShift Cluster Manager.
In the
install-config.yamlfile, set the value ofplatform.vsphere.clusterOSImageto the image location or name. For example:platform: vsphere: clusterOSImage: http://mirror.example.com/images/rhcos-43.81.201912131630.0-vmware.x86_64.ova?sha256=ffebbd68e8a1f2a245ca19522c16c86f67f9ac8e4e0c1f0a812b068b16f7265dEdit the
install-config.yamlfile to provide the additional information that is required for an installation in a restricted network.Update the
pullSecretvalue to contain the authentication information for your registry:pullSecret: '{"auths":{"<mirror_host_name>:5000": {"auth": "<credentials>","email": "you@example.com"}}}'For
<mirror_host_name>, specify the registry domain name that you specified in the certificate for your mirror registry, and for<credentials>, specify the base64-encoded user name and password for your mirror registry.Add the
additionalTrustBundleparameter and value.additionalTrustBundle: | -----BEGIN CERTIFICATE----- ZZZZZZZZZZZZZZZZZZZZZZZZZZZZZZZZZZZZZZZZZZZZZZZZZZZZZZZZZZZZZZZZ -----END CERTIFICATE-----The value must be the contents of the certificate file that you used for your mirror registry, which can be an existing, trusted certificate authority or the self-signed certificate that you generated for the mirror registry.
Add the image content resources, which look like this excerpt:
imageContentSources: - mirrors: - <mirror_host_name>:5000/<repo_name>/release source: quay.example.com/openshift-release-dev/ocp-release - mirrors: - <mirror_host_name>:5000/<repo_name>/release source: registry.example.com/ocp/releaseTo complete these values, use the
imageContentSourcesthat you recorded during mirror registry creation.
-
Make any other modifications to the
install-config.yamlfile that you require. You can find more information about the available parameters in the Installation configuration parameters section. Back up the
install-config.yamlfile so that you can use it to install multiple clusters.ImportantThe
install-config.yamlfile is consumed during the installation process. If you want to reuse the file, you must back it up now.
15.4.11.1. Installation configuration parameters
Before you deploy an OpenShift Container Platform cluster, you provide parameter values to describe your account on the cloud platform that hosts your cluster and optionally customize your cluster’s platform. When you create the install-config.yaml installation configuration file, you provide values for the required parameters through the command line. If you customize your cluster, you can modify the install-config.yaml file to provide more details about the platform.
After installation, you cannot modify these parameters in the install-config.yaml file.
The openshift-install command does not validate field names for parameters. If an incorrect name is specified, the related file or object is not created, and no error is reported. Ensure that the field names for any parameters that are specified are correct.
15.4.11.1.1. Required configuration parameters
Required installation configuration parameters are described in the following table:
| Parameter | Description | Values |
|---|---|---|
|
|
The API version for the | String |
|
|
The base domain of your cloud provider. The base domain is used to create routes to your OpenShift Container Platform cluster components. The full DNS name for your cluster is a combination of the |
A fully-qualified domain or subdomain name, such as |
|
|
Kubernetes resource | Object |
|
|
The name of the cluster. DNS records for the cluster are all subdomains of |
String of lowercase letters and hyphens ( |
|
|
The configuration for the specific platform upon which to perform the installation: | Object |
|
| Get a pull secret from the Red Hat OpenShift Cluster Manager to authenticate downloading container images for OpenShift Container Platform components from services such as Quay.io. |
|
15.4.11.1.2. Network configuration parameters
You can customize your installation configuration based on the requirements of your existing network infrastructure. For example, you can expand the IP address block for the cluster network or provide different IP address blocks than the defaults.
Only IPv4 addresses are supported.
| Parameter | Description | Values |
|---|---|---|
|
| The configuration for the cluster network. | Object Note
You cannot modify parameters specified by the |
|
| The cluster network provider Container Network Interface (CNI) plug-in to install. |
Either |
|
| The IP address blocks for pods.
The default value is If you specify multiple IP address blocks, the blocks must not overlap. | An array of objects. For example: |
|
|
Required if you use An IPv4 network. |
An IP address block in Classless Inter-Domain Routing (CIDR) notation. The prefix length for an IPv4 block is between |
|
|
The subnet prefix length to assign to each individual node. For example, if | A subnet prefix.
The default value is |
|
|
The IP address block for services. The default value is The OpenShift SDN and OVN-Kubernetes network providers support only a single IP address block for the service network. | An array with an IP address block in CIDR format. For example: |
|
| The IP address blocks for machines. If you specify multiple IP address blocks, the blocks must not overlap.
If you specify multiple IP kernel arguments, the | An array of objects. For example: |
|
|
Required if you use | An IP network block in CIDR notation.
For example, Note
Set the |
15.4.11.1.3. Optional configuration parameters
Optional installation configuration parameters are described in the following table:
| Parameter | Description | Values |
|---|---|---|
|
| A PEM-encoded X.509 certificate bundle that is added to the nodes' trusted certificate store. This trust bundle may also be used when a proxy has been configured. | String |
|
| The configuration for the machines that comprise the compute nodes. |
Array of |
|
|
Determines the instruction set architecture of the machines in the pool. Currently, heteregeneous clusters are not supported, so all pools must specify the same architecture. Valid values are | String |
|
|
Whether to enable or disable simultaneous multithreading, or Important If you disable simultaneous multithreading, ensure that your capacity planning accounts for the dramatically decreased machine performance. |
|
|
|
Required if you use |
|
|
|
Required if you use |
|
|
| The number of compute machines, which are also known as worker machines, to provision. |
A positive integer greater than or equal to |
|
| The configuration for the machines that comprise the control plane. |
Array of |
|
|
Determines the instruction set architecture of the machines in the pool. Currently, heterogeneous clusters are not supported, so all pools must specify the same architecture. Valid values are | String |
|
|
Whether to enable or disable simultaneous multithreading, or Important If you disable simultaneous multithreading, ensure that your capacity planning accounts for the dramatically decreased machine performance. |
|
|
|
Required if you use |
|
|
|
Required if you use |
|
|
| The number of control plane machines to provision. |
The only supported value is |
|
| The Cloud Credential Operator (CCO) mode. If no mode is specified, the CCO dynamically tries to determine the capabilities of the provided credentials, with a preference for mint mode on the platforms where multiple modes are supported. Note Not all CCO modes are supported for all cloud providers. For more information on CCO modes, see the Cloud Credential Operator entry in the Cluster Operators reference content. |
|
|
|
Enable or disable FIPS mode. The default is Important
The use of FIPS Validated / Modules in Process cryptographic libraries is only supported on OpenShift Container Platform deployments on the Note If you are using Azure File storage, you cannot enable FIPS mode. |
|
|
| Sources and repositories for the release-image content. |
Array of objects. Includes a |
|
|
Required if you use | String |
|
| Specify one or more repositories that may also contain the same images. | Array of strings |
|
| How to publish or expose the user-facing endpoints of your cluster, such as the Kubernetes API, OpenShift routes. |
Setting this field to Important
If the value of the field is set to |
|
| The SSH key or keys to authenticate access your cluster machines. Note
For production OpenShift Container Platform clusters on which you want to perform installation debugging or disaster recovery, specify an SSH key that your | One or more keys. For example: |
15.4.11.1.4. Additional VMware vSphere configuration parameters
Additional VMware vSphere configuration parameters are described in the following table:
| Parameter | Description | Values |
|---|---|---|
|
| The fully-qualified hostname or IP address of the vCenter server. | String |
|
| The user name to use to connect to the vCenter instance with. This user must have at least the roles and privileges that are required for static or dynamic persistent volume provisioning in vSphere. | String |
|
| The password for the vCenter user name. | String |
|
| The name of the datacenter to use in the vCenter instance. | String |
|
| The name of the default datastore to use for provisioning volumes. | String |
|
| Optional. The absolute path of an existing folder where the installation program creates the virtual machines. If you do not provide this value, the installation program creates a folder that is named with the infrastructure ID in the datacenter virtual machine folder. |
String, for example, |
|
| The network in the vCenter instance that contains the virtual IP addresses and DNS records that you configured. | String |
|
| The vCenter cluster to install the OpenShift Container Platform cluster in. | String |
|
| The virtual IP (VIP) address that you configured for control plane API access. |
An IP address, for example |
|
| The virtual IP (VIP) address that you configured for cluster ingress. |
An IP address, for example |
15.4.11.1.5. Optional VMware vSphere machine pool configuration parameters
Optional VMware vSphere machine pool configuration parameters are described in the following table:
| Parameter | Description | Values |
|---|---|---|
|
| The location from which the installer downloads the RHCOS image. You must set this parameter to perform an installation in a restricted network. |
An HTTP or HTTPS URL, optionally with a SHA-256 checksum. For example, |
|
| The size of the disk in gigabytes. | Integer |
|
| The total number of virtual processor cores to assign a virtual machine. | Integer |
|
|
The number of cores per socket in a virtual machine. The number of virtual sockets on the virtual machine is | Integer |
|
| The size of a virtual machine’s memory in megabytes. | Integer |
15.4.11.2. Sample install-config.yaml file for an installer-provisioned VMware vSphere cluster
You can customize the install-config.yaml file to specify more details about your OpenShift Container Platform cluster’s platform or modify the values of the required parameters.
apiVersion: v1
baseDomain: example.com
compute:
- hyperthreading: Enabled
name: worker
replicas: 3
platform:
vsphere:
cpus: 2
coresPerSocket: 2
memoryMB: 8192
osDisk:
diskSizeGB: 120
controlPlane:
hyperthreading: Enabled
name: master
replicas: 3
platform:
vsphere:
cpus: 4
coresPerSocket: 2
memoryMB: 16384
osDisk:
diskSizeGB: 120
metadata:
name: cluster
platform:
vsphere:
vcenter: your.vcenter.server
username: username
password: password
datacenter: datacenter
defaultDatastore: datastore
folder: folder
network: VM_Network
cluster: vsphere_cluster_name
apiVIP: api_vip
ingressVIP: ingress_vip
clusterOSImage: http://mirror.example.com/images/rhcos-48.83.202103221318-0-vmware.x86_64.ova
fips: false
pullSecret: '{"auths":{"<local_registry>": {"auth": "<credentials>","email": "you@example.com"}}}'
sshKey: 'ssh-ed25519 AAAA...'
additionalTrustBundle: |
-----BEGIN CERTIFICATE-----
ZZZZZZZZZZZZZZZZZZZZZZZZZZZZZZZZZZZZZZZZZZZZZZZZZZZZZZZZZZZZZZZZ
-----END CERTIFICATE-----
imageContentSources:
- mirrors:
- <local_registry>/<local_repository_name>/release
source: quay.io/openshift-release-dev/ocp-release
- mirrors:
- <local_registry>/<local_repository_name>/release
source: quay.io/openshift-release-dev/ocp-v4.0-art-dev- 1
- The base domain of the cluster. All DNS records must be sub-domains of this base and include the cluster name.
- 2 5
- The
controlPlanesection is a single mapping, but thecomputesection is a sequence of mappings. To meet the requirements of the different data structures, the first line of thecomputesection must begin with a hyphen,-, and the first line of thecontrolPlanesection must not. Only one control plane pool is used. - 3 6
- Whether to enable or disable simultaneous multithreading, or
hyperthreading. By default, simultaneous multithreading is enabled to increase the performance of your machines' cores. You can disable it by setting the parameter value toDisabled. If you disable simultaneous multithreading in some cluster machines, you must disable it in all cluster machines.ImportantIf you disable simultaneous multithreading, ensure that your capacity planning accounts for the dramatically decreased machine performance. Your machines must use at least 8 CPUs and 32 GB of RAM if you disable simultaneous multithreading.
- 4 7
- Optional: Provide additional configuration for the machine pool parameters for the compute and control plane machines.
- 8
- The cluster name that you specified in your DNS records.
- 9
- The vSphere cluster to install the OpenShift Container Platform cluster in. The installation program uses the root resource pool of the vSphere cluster as the default resource pool.
- 10
- The location of the Red Hat Enterprise Linux CoreOS (RHCOS) image that is accessible from the bastion server.
- 11
- For
<local_registry>, specify the registry domain name, and optionally the port, that your mirror registry uses to serve content. For exampleregistry.example.comorregistry.example.com:5000. For<credentials>, specify the base64-encoded user name and password for your mirror registry. - 12
- Provide the contents of the certificate file that you used for your mirror registry.
- 13
- Provide the
imageContentSourcessection from the output of the command to mirror the repository.
15.4.11.3. Configuring the cluster-wide proxy during installation
Production environments can deny direct access to the Internet and instead have an HTTP or HTTPS proxy available. You can configure a new OpenShift Container Platform cluster to use a proxy by configuring the proxy settings in the install-config.yaml file.
Prerequisites
-
You have an existing
install-config.yamlfile. You reviewed the sites that your cluster requires access to and determined whether any of them need to bypass the proxy. By default, all cluster egress traffic is proxied, including calls to hosting cloud provider APIs. You added sites to the
Proxyobject’sspec.noProxyfield to bypass the proxy if necessary.NoteThe
Proxyobjectstatus.noProxyfield is populated with the values of thenetworking.machineNetwork[].cidr,networking.clusterNetwork[].cidr, andnetworking.serviceNetwork[]fields from your installation configuration.For installations on Amazon Web Services (AWS), Google Cloud Platform (GCP), Microsoft Azure, and Red Hat OpenStack Platform (RHOSP), the
Proxyobjectstatus.noProxyfield is also populated with the instance metadata endpoint (169.254.169.254).
Procedure
Edit your
install-config.yamlfile and add the proxy settings. For example:apiVersion: v1 baseDomain: my.domain.com proxy: httpProxy: http://<username>:<pswd>@<ip>:<port>1 httpsProxy: https://<username>:<pswd>@<ip>:<port>2 noProxy: example.com3 additionalTrustBundle: |4 -----BEGIN CERTIFICATE----- <MY_TRUSTED_CA_CERT> -----END CERTIFICATE----- ...- 1
- A proxy URL to use for creating HTTP connections outside the cluster. The URL scheme must be
http. - 2
- A proxy URL to use for creating HTTPS connections outside the cluster.
- 3
- A comma-separated list of destination domain names, IP addresses, or other network CIDRs to exclude from proxying. Preface a domain with
.to match subdomains only. For example,.y.commatchesx.y.com, but noty.com. Use*to bypass the proxy for all destinations. You must include vCenter’s IP address and the IP range that you use for its machines. - 4
- If provided, the installation program generates a config map that is named
user-ca-bundlein theopenshift-confignamespace to hold the additional CA certificates. If you provideadditionalTrustBundleand at least one proxy setting, theProxyobject is configured to reference theuser-ca-bundleconfig map in thetrustedCAfield. The Cluster Network Operator then creates atrusted-ca-bundleconfig map that merges the contents specified for thetrustedCAparameter with the RHCOS trust bundle. TheadditionalTrustBundlefield is required unless the proxy’s identity certificate is signed by an authority from the RHCOS trust bundle.
NoteThe installation program does not support the proxy
readinessEndpointsfield.- Save the file and reference it when installing OpenShift Container Platform.
The installation program creates a cluster-wide proxy that is named cluster that uses the proxy settings in the provided install-config.yaml file. If no proxy settings are provided, a cluster Proxy object is still created, but it will have a nil spec.
Only the Proxy object named cluster is supported, and no additional proxies can be created.
15.4.12. Deploying the cluster
You can install OpenShift Container Platform on a compatible cloud platform.
You can run the create cluster command of the installation program only once, during initial installation.
Prerequisites
- Configure an account with the cloud platform that hosts your cluster.
- Obtain the OpenShift Container Platform installation program and the pull secret for your cluster.
Procedure
Change to the directory that contains the installation program and initialize the cluster deployment:
$ ./openshift-install create cluster --dir <installation_directory> \1 --log-level=info2 ImportantUse the
openshift-installcommand from the bastion hosted in the VMC environment.NoteIf the cloud provider account that you configured on your host does not have sufficient permissions to deploy the cluster, the installation process stops, and the missing permissions are displayed.
When the cluster deployment completes, directions for accessing your cluster, including a link to its web console and credentials for the
kubeadminuser, display in your terminal.Example output
... INFO Install complete! INFO To access the cluster as the system:admin user when using 'oc', run 'export KUBECONFIG=/home/myuser/install_dir/auth/kubeconfig' INFO Access the OpenShift web-console here: https://console-openshift-console.apps.mycluster.example.com INFO Login to the console with user: "kubeadmin", and password: "4vYBz-Ee6gm-ymBZj-Wt5AL" INFO Time elapsed: 36m22sNoteThe cluster access and credential information also outputs to
<installation_directory>/.openshift_install.logwhen an installation succeeds.Important-
The Ignition config files that the installation program generates contain certificates that expire after 24 hours, which are then renewed at that time. If the cluster is shut down before renewing the certificates and the cluster is later restarted after the 24 hours have elapsed, the cluster automatically recovers the expired certificates. The exception is that you must manually approve the pending
node-bootstrappercertificate signing requests (CSRs) to recover kubelet certificates. See the documentation for Recovering from expired control plane certificates for more information. - It is recommended that you use Ignition config files within 12 hours after they are generated because the 24-hour certificate rotates from 16 to 22 hours after the cluster is installed. By using the Ignition config files within 12 hours, you can avoid installation failure if the certificate update runs during installation.
ImportantYou must not delete the installation program or the files that the installation program creates. Both are required to delete the cluster.
-
The Ignition config files that the installation program generates contain certificates that expire after 24 hours, which are then renewed at that time. If the cluster is shut down before renewing the certificates and the cluster is later restarted after the 24 hours have elapsed, the cluster automatically recovers the expired certificates. The exception is that you must manually approve the pending
15.4.13. Installing the OpenShift CLI by downloading the binary
You can install the OpenShift CLI (oc) to interact with OpenShift Container Platform from a command-line interface. You can install oc on Linux, Windows, or macOS.
If you installed an earlier version of oc, you cannot use it to complete all of the commands in OpenShift Container Platform 4.7. Download and install the new version of oc.
15.4.13.1. Installing the OpenShift CLI on Linux
You can install the OpenShift CLI (oc) binary on Linux by using the following procedure.
Procedure
- Navigate to the OpenShift Container Platform downloads page on the Red Hat Customer Portal.
- Select the appropriate version in the Version drop-down menu.
- Click Download Now next to the OpenShift v4.7 Linux Client entry and save the file.
Unpack the archive:
$ tar xvzf <file>Place the
ocbinary in a directory that is on yourPATH.To check your
PATH, execute the following command:$ echo $PATH
After you install the OpenShift CLI, it is available using the oc command:
$ oc <command>15.4.13.2. Installing the OpenShift CLI on Windows
You can install the OpenShift CLI (oc) binary on Windows by using the following procedure.
Procedure
- Navigate to the OpenShift Container Platform downloads page on the Red Hat Customer Portal.
- Select the appropriate version in the Version drop-down menu.
- Click Download Now next to the OpenShift v4.7 Windows Client entry and save the file.
- Unzip the archive with a ZIP program.
Move the
ocbinary to a directory that is on yourPATH.To check your
PATH, open the command prompt and execute the following command:C:\> path
After you install the OpenShift CLI, it is available using the oc command:
C:\> oc <command>15.4.13.3. Installing the OpenShift CLI on macOS
You can install the OpenShift CLI (oc) binary on macOS by using the following procedure.
Procedure
- Navigate to the OpenShift Container Platform downloads page on the Red Hat Customer Portal.
- Select the appropriate version in the Version drop-down menu.
- Click Download Now next to the OpenShift v4.7 MacOSX Client entry and save the file.
- Unpack and unzip the archive.
Move the
ocbinary to a directory on your PATH.To check your
PATH, open a terminal and execute the following command:$ echo $PATH
After you install the OpenShift CLI, it is available using the oc command:
$ oc <command>15.4.14. Logging in to the cluster by using the CLI
You can log in to your cluster as a default system user by exporting the cluster kubeconfig file. The kubeconfig file contains information about the cluster that is used by the CLI to connect a client to the correct cluster and API server. The file is specific to a cluster and is created during OpenShift Container Platform installation.
Prerequisites
- You deployed an OpenShift Container Platform cluster.
-
You installed the
ocCLI.
Procedure
Export the
kubeadmincredentials:$ export KUBECONFIG=<installation_directory>/auth/kubeconfig1 - 1
- For
<installation_directory>, specify the path to the directory that you stored the installation files in.
Verify you can run
occommands successfully using the exported configuration:$ oc whoamiExample output
system:admin
15.4.15. Disabling the default OperatorHub sources
Operator catalogs that source content provided by Red Hat and community projects are configured for OperatorHub by default during an OpenShift Container Platform installation. In a restricted network environment, you must disable the default catalogs as a cluster administrator.
Procedure
Disable the sources for the default catalogs by adding
disableAllDefaultSources: trueto theOperatorHubobject:$ oc patch OperatorHub cluster --type json \ -p '[{"op": "add", "path": "/spec/disableAllDefaultSources", "value": true}]'
Alternatively, you can use the web console to manage catalog sources. From the Administration → Cluster Settings → Global Configuration → OperatorHub page, click the Sources tab, where you can create, delete, disable, and enable individual sources.
15.4.16. Creating registry storage
After you install the cluster, you must create storage for the Registry Operator.
15.4.16.1. Image registry removed during installation
On platforms that do not provide shareable object storage, the OpenShift Image Registry Operator bootstraps itself as Removed. This allows openshift-installer to complete installations on these platform types.
After installation, you must edit the Image Registry Operator configuration to switch the managementState from Removed to Managed.
The Prometheus console provides an ImageRegistryRemoved alert, for example:
"Image Registry has been removed. ImageStreamTags, BuildConfigs and DeploymentConfigs which reference ImageStreamTags may not work as expected. Please configure storage and update the config to Managed state by editing configs.imageregistry.operator.openshift.io."
15.4.16.2. Image registry storage configuration
The Image Registry Operator is not initially available for platforms that do not provide default storage. After installation, you must configure your registry to use storage so that the Registry Operator is made available.
Instructions are shown for configuring a persistent volume, which is required for production clusters. Where applicable, instructions are shown for configuring an empty directory as the storage location, which is available for only non-production clusters.
Additional instructions are provided for allowing the image registry to use block storage types by using the Recreate rollout strategy during upgrades.
15.4.16.2.1. Configuring registry storage for VMware vSphere
As a cluster administrator, following installation you must configure your registry to use storage.
Prerequisites
- Cluster administrator permissions.
- A cluster on VMware vSphere.
Persistent storage provisioned for your cluster, such as Red Hat OpenShift Container Storage.
ImportantOpenShift Container Platform supports
ReadWriteOnceaccess for image registry storage when you have only one replica. To deploy an image registry that supports high availability with two or more replicas,ReadWriteManyaccess is required.- Must have "100Gi" capacity.
Testing shows issues with using the NFS server on RHEL as storage backend for core services. This includes the OpenShift Container Registry and Quay, Prometheus for monitoring storage, and Elasticsearch for logging storage. Therefore, using RHEL NFS to back PVs used by core services is not recommended.
Other NFS implementations on the marketplace might not have these issues. Contact the individual NFS implementation vendor for more information on any testing that was possibly completed against these OpenShift Container Platform core components.
Procedure
To configure your registry to use storage, change the
spec.storage.pvcin theconfigs.imageregistry/clusterresource.NoteWhen using shared storage, review your security settings to prevent outside access.
Verify that you do not have a registry pod:
$ oc get pod -n openshift-image-registry -l docker-registry=defaultExample output
No resourses found in openshift-image-registry namespaceNoteIf you do have a registry pod in your output, you do not need to continue with this procedure.
Check the registry configuration:
$ oc edit configs.imageregistry.operator.openshift.ioExample output
storage: pvc: claim:1 - 1
- Leave the
claimfield blank to allow the automatic creation of animage-registry-storagePVC.
Check the
clusteroperatorstatus:$ oc get clusteroperator image-registryExample output
NAME VERSION AVAILABLE PROGRESSING DEGRADED SINCE MESSAGE image-registry 4.7 True False False 6h50m
15.4.17. Telemetry access for OpenShift Container Platform
In OpenShift Container Platform 4.7, the Telemetry service, which runs by default to provide metrics about cluster health and the success of updates, requires internet access. If your cluster is connected to the internet, Telemetry runs automatically, and your cluster is registered to OpenShift Cluster Manager.
After you confirm that your OpenShift Cluster Manager inventory is correct, either maintained automatically by Telemetry or manually by using OpenShift Cluster Manager, use subscription watch to track your OpenShift Container Platform subscriptions at the account or multi-cluster level.
15.4.18. Next steps
- Customize your cluster.
-
Configure image streams for the Cluster Samples Operator and the
must-gathertool. - Learn how to use Operator Lifecycle Manager (OLM) on restricted networks.
- If necessary, you can opt out of remote health reporting.
- Set up your registry and configure registry storage.
15.5. Installing a cluster on VMC with user-provisioned infrastructure
In OpenShift Container Platform version 4.7, you can install a cluster on VMware vSphere infrastructure that you provision by deploying it to VMware Cloud (VMC) on AWS.
Once you configure your VMC environment for OpenShift Container Platform deployment, you use the OpenShift Container Platform installation program from the bastion management host, co-located in the VMC environment. The installation program and control plane automates the process of deploying and managing the resources needed for the OpenShift Container Platform cluster.
OpenShift Container Platform supports deploying a cluster to a single VMware vCenter only. Deploying a cluster with machines/machine sets on multiple vCenters is not supported.
15.5.1. Setting up VMC for vSphere
You can install OpenShift Container Platform on VMware Cloud (VMC) on AWS hosted vSphere clusters to enable applications to be deployed and managed both on-premise and off-premise, across the hybrid cloud.
You must configure several options in your VMC environment prior to installing OpenShift Container Platform on VMware vSphere. Ensure your VMC environment has the following prerequisites:
- Create a non-exclusive, DHCP-enabled, NSX-T network segment and subnet. Other virtual machines (VMs) can be hosted on the subnet, but at least eight IP addresses must be available for the OpenShift Container Platform deployment.
Configure the following firewall rules:
- An ANY:ANY firewall rule between the OpenShift Container Platform compute network and the Internet. This is used by nodes and applications to download container images.
- An ANY:ANY firewall rule between the installation host and the software-defined data center (SDDC) management network on port 443. This allows you to upload the Red Hat Enterprise Linux CoreOS (RHCOS) OVA during deployment.
- An HTTPS firewall rule between the OpenShift Container Platform compute network and vCenter. This connection allows OpenShift Container Platform to communicate with vCenter for provisioning and managing nodes, persistent volume claims (PVCs), and other resources.
You must have the following information to deploy OpenShift Container Platform:
-
The OpenShift Container Platform cluster name, such as
vmc-prod-1. -
The base DNS name, such as
companyname.com. -
If not using the default, the pod network CIDR and services network CIDR must be identified, which are set by default to
10.128.0.0/14and172.30.0.0/16, respectively. These CIDRs are used for pod-to-pod and pod-to-service communication and are not accessible externally; however, they must not overlap with existing subnets in your organization. The following vCenter information:
- vCenter hostname, username, and password
-
Datacenter name, such as
SDDC-Datacenter -
Cluster name, such as
Cluster-1 - Network name
Datastore name, such as
WorkloadDatastoreNoteIt is recommended to move your vSphere cluster to the VMC
Compute-ResourcePoolresource pool after your cluster installation is finished.
-
The OpenShift Container Platform cluster name, such as
A Linux-based host deployed to VMC as a bastion.
- The bastion host can be Red Hat Enterprise Linux (RHEL) or any another Linux-based host; it must have Internet connectivity and the ability to upload an OVA to the ESXi hosts.
Download and install the OpenShift CLI tools to the bastion host.
-
The
openshift-installinstallation program -
The OpenShift CLI (
oc) tool
-
The
You cannot use the VMware NSX Container Plugin for Kubernetes (NCP), and NSX is not used as the OpenShift SDN. The version of NSX currently available with VMC is incompatible with the version of NCP certified with OpenShift Container Platform.
However, the NSX DHCP service is used for virtual machine IP management with the full-stack automated OpenShift Container Platform deployment and with nodes provisioned, either manually or automatically, by the Machine API integration with vSphere. Additionally, NSX firewall rules are created to enable access with the OpenShift Container Platform cluster and between the bastion host and the VMC vSphere hosts.
15.5.1.1. VMC Sizer tool
VMware Cloud on AWS is built on top of AWS bare metal infrastructure; this is the same bare metal infrastructure which runs AWS native services. When a VMware cloud on AWS software-defined data center (SDDC) is deployed, you consume these physical server nodes and run the VMware ESXi hypervisor in a single tenant fashion. This means the physical infrastructure is not accessible to anyone else using VMC. It is important to consider how many physical hosts you will need to host your virtual infrastructure.
To determine this, VMware provides the VMC on AWS Sizer. With this tool, you can define the resources you intend to host on VMC:
- Types of workloads
- Total number of virtual machines
Specification information such as:
- Storage requirements
- vCPUs
- vRAM
- Overcommit ratios
With these details, the sizer tool can generate a report, based on VMware best practices, and recommend your cluster configuration and the number of hosts you will need.
15.5.2. vSphere prerequisites
- Provision block registry storage. For more information on persistent storage, see Understanding persistent storage.
- Review details about the OpenShift Container Platform installation and update processes.
If you use a firewall, you must configure it to allow the sites that your cluster requires access to.
NoteBe sure to also review this site list if you are configuring a proxy.
15.5.3. Internet access for OpenShift Container Platform
In OpenShift Container Platform 4.7, you require access to the Internet to install your cluster.
You must have Internet access to:
- Access OpenShift Cluster Manager to download the installation program and perform subscription management. If the cluster has internet access and you do not disable Telemetry, that service automatically entitles your cluster.
- Access Quay.io to obtain the packages that are required to install your cluster.
- Obtain the packages that are required to perform cluster updates.
If your cluster cannot have direct Internet access, you can perform a restricted network installation on some types of infrastructure that you provision. During that process, you download the content that is required and use it to populate a mirror registry with the packages that you need to install a cluster and generate the installation program. With some installation types, the environment that you install your cluster in will not require Internet access. Before you update the cluster, you update the content of the mirror registry.
15.5.4. VMware vSphere infrastructure requirements
You must install the OpenShift Container Platform cluster on a VMware vSphere version 6 or 7 instance that meets the requirements for the components that you use.
| Component | Minimum supported versions | Description |
|---|---|---|
| Hypervisor | vSphere 6.5 and later with HW version 13 | This version is the minimum version that Red Hat Enterprise Linux CoreOS (RHCOS) supports. See the Red Hat Enterprise Linux 8 supported hypervisors list. |
| Storage with in-tree drivers | vSphere 6.5 and later | This plug-in creates vSphere storage by using the in-tree storage drivers for vSphere included in OpenShift Container Platform. |
If you use a vSphere version 6.5 instance, consider upgrading to 6.7U3 or 7.0 before you install OpenShift Container Platform.
You must ensure that the time on your ESXi hosts is synchronized before you install OpenShift Container Platform. See Edit Time Configuration for a Host in the VMware documentation.
Virtual machines (VMs) configured to use virtual hardware version 14 or greater might result in a failed installation. It is recommended to configure VMs with virtual hardware version 13. This is a known issue that is being addressed in BZ#1935539.
15.5.5. Machine requirements for a cluster with user-provisioned infrastructure
For a cluster that contains user-provisioned infrastructure, you must deploy all of the required machines.
15.5.5.1. Required machines
The smallest OpenShift Container Platform clusters require the following hosts:
- One temporary bootstrap machine
- Three control plane, or master, machines
- At least two compute machines, which are also known as worker machines.
The cluster requires the bootstrap machine to deploy the OpenShift Container Platform cluster on the three control plane machines. You can remove the bootstrap machine after you install the cluster.
To improve high availability of your cluster, distribute the control plane machines over different z/VM instances on at least two physical machines.
The bootstrap and control plane machines must use Red Hat Enterprise Linux CoreOS (RHCOS) as the operating system. However, the compute machines can choose between Red Hat Enterprise Linux CoreOS (RHCOS) or Red Hat Enterprise Linux (RHEL) 7.9.
Note that RHCOS is based on Red Hat Enterprise Linux (RHEL) 8 and inherits all of its hardware certifications and requirements. See Red Hat Enterprise Linux technology capabilities and limits.
15.5.5.2. Network connectivity requirements
All the Red Hat Enterprise Linux CoreOS (RHCOS) machines require network in initramfs during boot to fetch Ignition config files from the Machine Config Server. The machines are configured with static IP addresses. No DHCP server is required. Additionally, each OpenShift Container Platform node in the cluster must have access to a Network Time Protocol (NTP) server.
15.5.5.3. IBM Z network connectivity requirements
To install on IBM Z under z/VM, you require a single z/VM virtual NIC in layer 2 mode. You also need:
- A direct-attached OSA or RoCE network adapter
- A z/VM VSwitch set up. For a preferred setup, use OSA link aggregation.
15.5.5.4. Minimum resource requirements
Each cluster machine must meet the following minimum requirements:
| Machine | Operating System | vCPU [1] | Virtual RAM | Storage | IOPS |
|---|---|---|---|---|---|
| Bootstrap | RHCOS | 4 | 16 GB | 100 GB | N/A |
| Control plane | RHCOS | 4 | 16 GB | 100 GB | N/A |
| Compute | RHCOS | 2 | 8 GB | 100 GB | N/A |
- One physical core (IFL) provides two logical cores (threads) when SMT-2 is enabled. The hypervisor can provide two or more vCPUs.
15.5.5.5. Certificate signing requests management
Because your cluster has limited access to automatic machine management when you use infrastructure that you provision, you must provide a mechanism for approving cluster certificate signing requests (CSRs) after installation. The kube-controller-manager only approves the kubelet client CSRs. The machine-approver cannot guarantee the validity of a serving certificate that is requested by using kubelet credentials because it cannot confirm that the correct machine issued the request. You must determine and implement a method of verifying the validity of the kubelet serving certificate requests and approving them.
15.5.6. Creating the user-provisioned infrastructure
Before you deploy an OpenShift Container Platform cluster that uses user-provisioned infrastructure, you must create the underlying infrastructure.
Prerequisites
- Review the OpenShift Container Platform 4.x Tested Integrations page before you create the supporting infrastructure for your cluster.
Procedure
- Set up static IP addresses.
- Set up an HTTP or HTTPS server to provide Ignition files to the cluster nodes.
- Provision the required load balancers.
- Configure the ports for your machines.
- Configure DNS.
- Ensure network connectivity.
15.5.6.1. Networking requirements for user-provisioned infrastructure
All the Red Hat Enterprise Linux CoreOS (RHCOS) machines require network in initramfs during boot to fetch Ignition config from the machine config server.
During the initial boot, the machines require an HTTP or HTTPS server to establish a network connection to download their Ignition config files.
Ensure that the machines have persistent IP addresses and host names.
The Kubernetes API server must be able to resolve the node names of the cluster machines. If the API servers and worker nodes are in different zones, you can configure a default DNS search zone to allow the API server to resolve the node names. Another supported approach is to always refer to hosts by their fully-qualified domain names in both the node objects and all DNS requests.
You must configure the network connectivity between machines to allow cluster components to communicate. Each machine must be able to resolve the host names of all other machines in the cluster.
| Protocol | Port | Description |
|---|---|---|
| ICMP | N/A | Network reachability tests |
| TCP |
| Metrics |
|
|
Host level services, including the node exporter on ports | |
|
| The default ports that Kubernetes reserves | |
|
| openshift-sdn | |
| UDP |
| VXLAN and Geneve |
|
| VXLAN and Geneve | |
|
|
Host level services, including the node exporter on ports | |
| TCP/UDP |
| Kubernetes node port |
| Protocol | Port | Description |
|---|---|---|
| TCP |
| Kubernetes API |
| Protocol | Port | Description |
|---|---|---|
| TCP |
| etcd server and peer ports |
Network topology requirements
The infrastructure that you provision for your cluster must meet the following network topology requirements.
OpenShift Container Platform requires all nodes to have internet access to pull images for platform containers and provide telemetry data to Red Hat.
Load balancers
Before you install OpenShift Container Platform, you must provision two load balancers that meet the following requirements:
API load balancer: Provides a common endpoint for users, both human and machine, to interact with and configure the platform. Configure the following conditions:
- Layer 4 load balancing only. This can be referred to as Raw TCP, SSL Passthrough, or SSL Bridge mode. If you use SSL Bridge mode, you must enable Server Name Indication (SNI) for the API routes.
- A stateless load balancing algorithm. The options vary based on the load balancer implementation.
ImportantDo not configure session persistence for an API load balancer.
Configure the following ports on both the front and back of the load balancers:
Expand Table 15.46. API load balancer Port Back-end machines (pool members) Internal External Description 6443Bootstrap and control plane. You remove the bootstrap machine from the load balancer after the bootstrap machine initializes the cluster control plane. You must configure the
/readyzendpoint for the API server health check probe.X
X
Kubernetes API server
22623Bootstrap and control plane. You remove the bootstrap machine from the load balancer after the bootstrap machine initializes the cluster control plane.
X
Machine config server
NoteThe load balancer must be configured to take a maximum of 30 seconds from the time the API server turns off the
/readyzendpoint to the removal of the API server instance from the pool. Within the time frame after/readyzreturns an error or becomes healthy, the endpoint must have been removed or added. Probing every 5 or 10 seconds, with two successful requests to become healthy and three to become unhealthy, are well-tested values.Application Ingress load balancer: Provides an Ingress point for application traffic flowing in from outside the cluster. Configure the following conditions:
- Layer 4 load balancing only. This can be referred to as Raw TCP, SSL Passthrough, or SSL Bridge mode. If you use SSL Bridge mode, you must enable Server Name Indication (SNI) for the Ingress routes.
- A connection-based or session-based persistence is recommended, based on the options available and types of applications that will be hosted on the platform.
Configure the following ports on both the front and back of the load balancers:
Expand Table 15.47. Application Ingress load balancer Port Back-end machines (pool members) Internal External Description 443The machines that run the Ingress router pods, compute, or worker, by default.
X
X
HTTPS traffic
80The machines that run the Ingress router pods, compute, or worker, by default.
X
X
HTTP traffic
If the true IP address of the client can be seen by the load balancer, enabling source IP-based session persistence can improve performance for applications that use end-to-end TLS encryption.
A working configuration for the Ingress router is required for an OpenShift Container Platform cluster. You must configure the Ingress router after the control plane initializes.
NTP configuration
OpenShift Container Platform clusters are configured to use a public Network Time Protocol (NTP) server by default. If you want to use a local enterprise NTP server, or if your cluster is being deployed in a disconnected network, you can configure the cluster to use a specific time server. For more information, see the documentation for Configuring chrony time service.
15.5.6.2. User-provisioned DNS requirements
DNS is used for name resolution and reverse name resolution. DNS A/AAAA or CNAME records are used for name resolution and PTR records are used for reverse name resolution. The reverse records are important because Red Hat Enterprise Linux CoreOS (RHCOS) uses the reverse records to set the host name for all the nodes. Additionally, the reverse records are used to generate the certificate signing requests (CSR) that OpenShift Container Platform needs to operate.
The following DNS records are required for an OpenShift Container Platform cluster that uses user-provisioned infrastructure. In each record, <cluster_name> is the cluster name and <base_domain> is the cluster base domain that you specify in the install-config.yaml file. A complete DNS record takes the form: <component>.<cluster_name>.<base_domain>..
| Component | Record | Description |
|---|---|---|
| Kubernetes API |
| Add a DNS A/AAAA or CNAME record, and a DNS PTR record, to identify the load balancer for the control plane machines. These records must be resolvable by both clients external to the cluster and from all the nodes within the cluster. |
|
| Add a DNS A/AAAA or CNAME record, and a DNS PTR record, to identify the load balancer for the control plane machines. These records must be resolvable from all the nodes within the cluster. Important The API server must be able to resolve the worker nodes by the host names that are recorded in Kubernetes. If the API server cannot resolve the node names, then proxied API calls can fail, and you cannot retrieve logs from pods. | |
| Routes |
| Add a wildcard DNS A/AAAA or CNAME record that refers to the load balancer that targets the machines that run the Ingress router pods, which are the worker nodes by default. These records must be resolvable by both clients external to the cluster and from all the nodes within the cluster. |
| Bootstrap |
| Add a DNS A/AAAA or CNAME record, and a DNS PTR record, to identify the bootstrap machine. These records must be resolvable by the nodes within the cluster. |
| Master hosts |
| DNS A/AAAA or CNAME records and DNS PTR records to identify each machine for the control plane nodes (also known as the master nodes). These records must be resolvable by the nodes within the cluster. |
| Worker hosts |
| Add DNS A/AAAA or CNAME records and DNS PTR records to identify each machine for the worker nodes. These records must be resolvable by the nodes within the cluster. |
You can use the nslookup <hostname> command to verify name resolution. You can use the dig -x <ip_address> command to verify reverse name resolution for the PTR records.
The following example of a BIND zone file shows sample A records for name resolution. The purpose of the example is to show the records that are needed. The example is not meant to provide advice for choosing one name resolution service over another.
Example 15.9. Sample DNS zone database
$TTL 1W
@ IN SOA ns1.example.com. root (
2019070700 ; serial
3H ; refresh (3 hours)
30M ; retry (30 minutes)
2W ; expiry (2 weeks)
1W ) ; minimum (1 week)
IN NS ns1.example.com.
IN MX 10 smtp.example.com.
;
;
ns1 IN A 192.168.1.5
smtp IN A 192.168.1.5
;
helper IN A 192.168.1.5
helper.ocp4 IN A 192.168.1.5
;
; The api identifies the IP of your load balancer.
api.ocp4 IN A 192.168.1.5
api-int.ocp4 IN A 192.168.1.5
;
; The wildcard also identifies the load balancer.
*.apps.ocp4 IN A 192.168.1.5
;
; Create an entry for the bootstrap host.
bootstrap.ocp4 IN A 192.168.1.96
;
; Create entries for the master hosts.
master0.ocp4 IN A 192.168.1.97
master1.ocp4 IN A 192.168.1.98
master2.ocp4 IN A 192.168.1.99
;
; Create entries for the worker hosts.
worker0.ocp4 IN A 192.168.1.11
worker1.ocp4 IN A 192.168.1.7
;
;EOFThe following example BIND zone file shows sample PTR records for reverse name resolution.
Example 15.10. Sample DNS zone database for reverse records
$TTL 1W
@ IN SOA ns1.example.com. root (
2019070700 ; serial
3H ; refresh (3 hours)
30M ; retry (30 minutes)
2W ; expiry (2 weeks)
1W ) ; minimum (1 week)
IN NS ns1.example.com.
;
; The syntax is "last octet" and the host must have an FQDN
; with a trailing dot.
97 IN PTR master0.ocp4.example.com.
98 IN PTR master1.ocp4.example.com.
99 IN PTR master2.ocp4.example.com.
;
96 IN PTR bootstrap.ocp4.example.com.
;
5 IN PTR api.ocp4.example.com.
5 IN PTR api-int.ocp4.example.com.
;
11 IN PTR worker0.ocp4.example.com.
7 IN PTR worker1.ocp4.example.com.
;
;EOF15.5.7. Generating an SSH private key and adding it to the agent
If you want to perform installation debugging or disaster recovery on your cluster, you must provide an SSH key to both your ssh-agent and the installation program. You can use this key to access the bootstrap machine in a public cluster to troubleshoot installation issues.
In a production environment, you require disaster recovery and debugging.
Do not skip this procedure in production environments where disaster recovery and debugging is required.
You can use this key to SSH into the master nodes as the user core. When you deploy the cluster, the key is added to the core user’s ~/.ssh/authorized_keys list.
Procedure
If you do not have an SSH key that is configured for password-less authentication on your computer, create one. For example, on a computer that uses a Linux operating system, run the following command:
$ ssh-keygen -t ed25519 -N '' \ -f <path>/<file_name>1 - 1
- Specify the path and file name, such as
~/.ssh/id_rsa, of the new SSH key. If you have an existing key pair, ensure your public key is in the your~/.sshdirectory.
Running this command generates an SSH key that does not require a password in the location that you specified.
NoteIf you plan to install an OpenShift Container Platform cluster that uses FIPS Validated / Modules in Process cryptographic libraries on the
x86_64architecture, do not create a key that uses theed25519algorithm. Instead, create a key that uses thersaorecdsaalgorithm.Start the
ssh-agentprocess as a background task:$ eval "$(ssh-agent -s)"Example output
Agent pid 31874NoteIf your cluster is in FIPS mode, only use FIPS-compliant algorithms to generate the SSH key. The key must be either RSA or ECDSA.
Add your SSH private key to the
ssh-agent:$ ssh-add <path>/<file_name>1 Example output
Identity added: /home/<you>/<path>/<file_name> (<computer_name>)- 1
- Specify the path and file name for your SSH private key, such as
~/.ssh/id_rsa
Next steps
- When you install OpenShift Container Platform, provide the SSH public key to the installation program. If you install a cluster on infrastructure that you provision, you must provide this key to your cluster’s machines.
15.5.8. Obtaining the installation program
Before you install OpenShift Container Platform, download the installation file on your provisioning machine.
Prerequisites
- You have a machine that runs Linux, for example Red Hat Enterprise Linux 8, with 500 MB of local disk space
Procedure
- Access the Infrastructure Provider page on the OpenShift Cluster Manager site. If you have a Red Hat account, log in with your credentials. If you do not, create an account.
- Select your infrastructure provider.
Navigate to the page for your installation type, download the installation program for your operating system, and place the file in the directory where you will store the installation configuration files.
ImportantThe installation program creates several files on the computer that you use to install your cluster. You must keep the installation program and the files that the installation program creates after you finish installing the cluster. Both files are required to delete the cluster.
ImportantDeleting the files created by the installation program does not remove your cluster, even if the cluster failed during installation. To remove your cluster, complete the OpenShift Container Platform uninstallation procedures for your specific cloud provider.
Extract the installation program. For example, on a computer that uses a Linux operating system, run the following command:
$ tar xvf openshift-install-linux.tar.gz- Download your installation pull secret from the Red Hat OpenShift Cluster Manager. This pull secret allows you to authenticate with the services that are provided by the included authorities, including Quay.io, which serves the container images for OpenShift Container Platform components.
15.5.9. Manually creating the installation configuration file
For installations of OpenShift Container Platform that use user-provisioned infrastructure, you manually generate your installation configuration file.
Prerequisites
- Obtain the OpenShift Container Platform installation program and the access token for your cluster.
Procedure
Create an installation directory to store your required installation assets in:
$ mkdir <installation_directory>ImportantYou must create a directory. Some installation assets, like bootstrap X.509 certificates have short expiration intervals, so you must not reuse an installation directory. If you want to reuse individual files from another cluster installation, you can copy them into your directory. However, the file names for the installation assets might change between releases. Use caution when copying installation files from an earlier OpenShift Container Platform version.
Customize the following
install-config.yamlfile template and save it in the<installation_directory>.NoteYou must name this configuration file
install-config.yaml.Back up the
install-config.yamlfile so that you can use it to install multiple clusters.ImportantThe
install-config.yamlfile is consumed during the next step of the installation process. You must back it up now.
15.5.9.1. Sample install-config.yaml file for VMware vSphere
You can customize the install-config.yaml file to specify more details about your OpenShift Container Platform cluster’s platform or modify the values of the required parameters.
apiVersion: v1
baseDomain: example.com
compute:
- hyperthreading: Enabled
name: worker
replicas: 0
controlPlane:
hyperthreading: Enabled
name: master
replicas: 3
metadata:
name: test
platform:
vsphere:
vcenter: your.vcenter.server
username: username
password: password
datacenter: datacenter
defaultDatastore: datastore
folder: "/<datacenter_name>/vm/<folder_name>/<subfolder_name>"
fips: false
pullSecret: '{"auths": ...}'
sshKey: 'ssh-ed25519 AAAA...' - 1
- The base domain of the cluster. All DNS records must be sub-domains of this base and include the cluster name.
- 2 5
- The
controlPlanesection is a single mapping, but the compute section is a sequence of mappings. To meet the requirements of the different data structures, the first line of thecomputesection must begin with a hyphen,-, and the first line of thecontrolPlanesection must not. Although both sections currently define a single machine pool, it is possible that future versions of OpenShift Container Platform will support defining multiple compute pools during installation. Only one control plane pool is used. - 3 6
- Whether to enable or disable simultaneous multithreading, or
hyperthreading. By default, simultaneous multithreading is enabled to increase the performance of your machines' cores. You can disable it by setting the parameter value toDisabled. If you disable simultaneous multithreading in some cluster machines, you must disable it in all cluster machines.ImportantIf you disable simultaneous multithreading, ensure that your capacity planning accounts for the dramatically decreased machine performance. Your machines must use at least 8 CPUs and 32 GB of RAM if you disable simultaneous multithreading.
- 4
- You must set the value of the
replicasparameter to0. This parameter controls the number of workers that the cluster creates and manages for you, which are functions that the cluster does not perform when you use user-provisioned infrastructure. You must manually deploy worker machines for the cluster to use before you finish installing OpenShift Container Platform. - 7
- The number of control plane machines that you add to the cluster. Because the cluster uses this values as the number of etcd endpoints in the cluster, the value must match the number of control plane machines that you deploy.
- 8
- The cluster name that you specified in your DNS records.
- 9
- The fully-qualified hostname or IP address of the vCenter server.
- 10
- The name of the user for accessing the server. This user must have at least the roles and privileges that are required for static or dynamic persistent volume provisioning in vSphere.
- 11
- The password associated with the vSphere user.
- 12
- The vSphere datacenter.
- 13
- The default vSphere datastore to use.
- 14
- Optional: For installer-provisioned infrastructure, the absolute path of an existing folder where the installation program creates the virtual machines, for example,
/<datacenter_name>/vm/<folder_name>/<subfolder_name>. If you do not provide this value, the installation program creates a top-level folder in the datacenter virtual machine folder that is named with the infrastructure ID. If you are providing the infrastructure for the cluster, omit this parameter. - 15
- Whether to enable or disable FIPS mode. By default, FIPS mode is not enabled. If FIPS mode is enabled, the Red Hat Enterprise Linux CoreOS (RHCOS) machines that OpenShift Container Platform runs on bypass the default Kubernetes cryptography suite and use the cryptography modules that are provided with RHCOS instead.Important
The use of FIPS Validated / Modules in Process cryptographic libraries is only supported on OpenShift Container Platform deployments on the
x86_64architecture. - 16
- The pull secret that you obtained from OpenShift Cluster Manager. This pull secret allows you to authenticate with the services that are provided by the included authorities, including Quay.io, which serves the container images for OpenShift Container Platform components.
- 17
- The public portion of the default SSH key for the
coreuser in Red Hat Enterprise Linux CoreOS (RHCOS).
15.5.9.2. Configuring the cluster-wide proxy during installation
Production environments can deny direct access to the Internet and instead have an HTTP or HTTPS proxy available. You can configure a new OpenShift Container Platform cluster to use a proxy by configuring the proxy settings in the install-config.yaml file.
Prerequisites
-
You have an existing
install-config.yamlfile. You reviewed the sites that your cluster requires access to and determined whether any of them need to bypass the proxy. By default, all cluster egress traffic is proxied, including calls to hosting cloud provider APIs. You added sites to the
Proxyobject’sspec.noProxyfield to bypass the proxy if necessary.NoteThe
Proxyobjectstatus.noProxyfield is populated with the values of thenetworking.machineNetwork[].cidr,networking.clusterNetwork[].cidr, andnetworking.serviceNetwork[]fields from your installation configuration.For installations on Amazon Web Services (AWS), Google Cloud Platform (GCP), Microsoft Azure, and Red Hat OpenStack Platform (RHOSP), the
Proxyobjectstatus.noProxyfield is also populated with the instance metadata endpoint (169.254.169.254).
Procedure
Edit your
install-config.yamlfile and add the proxy settings. For example:apiVersion: v1 baseDomain: my.domain.com proxy: httpProxy: http://<username>:<pswd>@<ip>:<port>1 httpsProxy: https://<username>:<pswd>@<ip>:<port>2 noProxy: example.com3 additionalTrustBundle: |4 -----BEGIN CERTIFICATE----- <MY_TRUSTED_CA_CERT> -----END CERTIFICATE----- ...- 1
- A proxy URL to use for creating HTTP connections outside the cluster. The URL scheme must be
http. - 2
- A proxy URL to use for creating HTTPS connections outside the cluster.
- 3
- A comma-separated list of destination domain names, IP addresses, or other network CIDRs to exclude from proxying. Preface a domain with
.to match subdomains only. For example,.y.commatchesx.y.com, but noty.com. Use*to bypass the proxy for all destinations. You must include vCenter’s IP address and the IP range that you use for its machines. - 4
- If provided, the installation program generates a config map that is named
user-ca-bundlein theopenshift-confignamespace to hold the additional CA certificates. If you provideadditionalTrustBundleand at least one proxy setting, theProxyobject is configured to reference theuser-ca-bundleconfig map in thetrustedCAfield. The Cluster Network Operator then creates atrusted-ca-bundleconfig map that merges the contents specified for thetrustedCAparameter with the RHCOS trust bundle. TheadditionalTrustBundlefield is required unless the proxy’s identity certificate is signed by an authority from the RHCOS trust bundle.
NoteThe installation program does not support the proxy
readinessEndpointsfield.- Save the file and reference it when installing OpenShift Container Platform.
The installation program creates a cluster-wide proxy that is named cluster that uses the proxy settings in the provided install-config.yaml file. If no proxy settings are provided, a cluster Proxy object is still created, but it will have a nil spec.
Only the Proxy object named cluster is supported, and no additional proxies can be created.
15.5.10. Creating the Kubernetes manifest and Ignition config files
Because you must modify some cluster definition files and manually start the cluster machines, you must generate the Kubernetes manifest and Ignition config files that the cluster needs to make its machines.
The installation configuration file transforms into the Kubernetes manifests. The manifests wrap into the Ignition configuration files, which are later used to create the cluster.
The Ignition config files that the installation program generates contain certificates that expire after 24 hours, which are then renewed at that time. If the cluster is shut down before renewing the certificates and the cluster is later restarted after the 24 hours have elapsed, the cluster automatically recovers the expired certificates. The exception is that you must manually approve the pending node-bootstrapper certificate signing requests (CSRs) to recover kubelet certificates. See the documentation for Recovering from expired control plane certificates for more information.
The installation program that generates the manifest and Ignition files is architecture specific and can be obtained from the client image mirror. The Linux version of the installation program runs on s390x only. This installer program is also available as a Mac OS version.
Prerequisites
- You obtained the OpenShift Container Platform installation program.
-
You created the
install-config.yamlinstallation configuration file.
Procedure
Change to the directory that contains the installation program and generate the Kubernetes manifests for the cluster:
$ ./openshift-install create manifests --dir <installation_directory>1 - 1
- For
<installation_directory>, specify the installation directory that contains theinstall-config.yamlfile you created.
Remove the Kubernetes manifest files that define the control plane machines and compute machine sets:
$ rm -f openshift/99_openshift-cluster-api_master-machines-*.yaml openshift/99_openshift-cluster-api_worker-machineset-*.yamlBecause you create and manage these resources yourself, you do not have to initialize them.
- You can preserve the machine set files to create compute machines by using the machine API, but you must update references to them to match your environment.
WarningIf you are installing a three-node cluster, skip the following step to allow the control plane nodes to be schedulable.
+
ImportantWhen you configure control plane nodes from the default unschedulable to schedulable, additional subscriptions are required. This is because control plane nodes then become worker nodes.
Check that the
mastersSchedulableparameter in the<installation_directory>/manifests/cluster-scheduler-02-config.ymlKubernetes manifest file is set tofalse. This setting prevents pods from being scheduled on the control plane machines:-
Open the
<installation_directory>/manifests/cluster-scheduler-02-config.ymlfile. -
Locate the
mastersSchedulableparameter and ensure that it is set tofalse. - Save and exit the file.
-
Open the
To create the Ignition configuration files, run the following command from the directory that contains the installation program:
$ ./openshift-install create ignition-configs --dir <installation_directory>1 - 1
- For
<installation_directory>, specify the same installation directory.
The following files are generated in the directory:
. ├── auth │ ├── kubeadmin-password │ └── kubeconfig ├── bootstrap.ign ├── master.ign ├── metadata.json └── worker.ign
15.5.11. Extracting the infrastructure name
The Ignition config files contain a unique cluster identifier that you can use to uniquely identify your cluster in VMware Cloud on AWS. If you plan to use the cluster identifier as the name of your virtual machine folder, you must extract it.
Prerequisites
- You obtained the OpenShift Container Platform installation program and the pull secret for your cluster.
- You generated the Ignition config files for your cluster.
-
You installed the
jqpackage.
Procedure
To extract and view the infrastructure name from the Ignition config file metadata, run the following command:
$ jq -r .infraID <installation_directory>/metadata.json1 - 1
- For
<installation_directory>, specify the path to the directory that you stored the installation files in.
Example output
openshift-vw9j61 - 1
- The output of this command is your cluster name and a random string.
15.5.12. Creating Red Hat Enterprise Linux CoreOS (RHCOS) machines in vSphere
Before you install a cluster that contains user-provisioned infrastructure on VMware vSphere, you must create RHCOS machines on vSphere hosts for it to use.
Prerequisites
- You have obtained the Ignition config files for your cluster.
- You have access to an HTTP server that you can access from your computer and that the machines that you create can access.
- You have created a vSphere cluster.
Procedure
-
Upload the bootstrap Ignition config file, which is named
<installation_directory>/bootstrap.ign, that the installation program created to your HTTP server. Note the URL of this file. Save the following secondary Ignition config file for your bootstrap node to your computer as
<installation_directory>/merge-bootstrap.ign:{ "ignition": { "config": { "merge": [ { "source": "<bootstrap_ignition_config_url>",1 "verification": {} } ] }, "timeouts": {}, "version": "3.2.0" }, "networkd": {}, "passwd": {}, "storage": {}, "systemd": {} }- 1
- Specify the URL of the bootstrap Ignition config file that you hosted.
When you create the virtual machine (VM) for the bootstrap machine, you use this Ignition config file.
Locate the following Ignition config files that the installation program created:
-
<installation_directory>/master.ign -
<installation_directory>/worker.ign -
<installation_directory>/merge-bootstrap.ign
-
Convert the Ignition config files to Base64 encoding. Later in this procedure, you must add these files to the extra configuration parameter
guestinfo.ignition.config.datain your VM.For example, if you use a Linux operating system, you can use the
base64command to encode the files.$ base64 -w0 <installation_directory>/master.ign > <installation_directory>/master.64$ base64 -w0 <installation_directory>/worker.ign > <installation_directory>/worker.64$ base64 -w0 <installation_directory>/merge-bootstrap.ign > <installation_directory>/merge-bootstrap.64ImportantIf you plan to add more compute machines to your cluster after you finish installation, do not delete these files.
Obtain the RHCOS OVA image. Images are available from the RHCOS image mirror page.
ImportantThe RHCOS images might not change with every release of OpenShift Container Platform. You must download an image with the highest version that is less than or equal to the OpenShift Container Platform version that you install. Use the image version that matches your OpenShift Container Platform version if it is available.
The filename contains the OpenShift Container Platform version number in the format
rhcos-vmware.<architecture>.ova.In the vSphere Client, create a folder in your datacenter to store your VMs.
- Click the VMs and Templates view.
- Right-click the name of your datacenter.
- Click New Folder → New VM and Template Folder.
-
In the window that is displayed, enter the folder name. If you did not specify an existing folder in the
install-config.yamlfile, then create a folder with the same name as the infrastructure ID. You use this folder name so vCenter dynamically provisions storage in the appropriate location for its Workspace configuration.
In the vSphere Client, create a template for the OVA image and then clone the template as needed.
NoteIn the following steps, you create a template and then clone the template for all of your cluster machines. You then provide the location for the Ignition config file for that cloned machine type when you provision the VMs.
- From the Hosts and Clusters tab, right-click your cluster name and select Deploy OVF Template.
- On the Select an OVF tab, specify the name of the RHCOS OVA file that you downloaded.
-
On the Select a name and folder tab, set a Virtual machine name for your template, such as
Template-RHCOS. Click the name of your vSphere cluster and select the folder you created in the previous step. - On the Select a compute resource tab, click the name of your vSphere cluster.
On the Select storage tab, configure the storage options for your VM.
- Select Thin Provision or Thick Provision, based on your storage preferences.
-
Select the datastore that you specified in your
install-config.yamlfile.
- On the Select network tab, specify the network that you configured for the cluster, if available.
When creating the OVF template, do not specify values on the Customize template tab or configure the template any further.
ImportantDo not start the original VM template. The VM template must remain off and must be cloned for new RHCOS machines. Starting the VM template configures the VM template as a VM on the platform, which prevents it from being used as a template that machine sets can apply configurations to.
After the template deploys, deploy a VM for a machine in the cluster.
- Right-click the template name and click Clone → Clone to Virtual Machine.
-
On the Select a name and folder tab, specify a name for the VM. You might include the machine type in the name, such as
control-plane-0orcompute-1. - On the Select a name and folder tab, select the name of the folder that you created for the cluster.
- On the Select a compute resource tab, select the name of a host in your datacenter.
- Optional: On the Select storage tab, customize the storage options.
- On the Select clone options, select Customize this virtual machine’s hardware.
On the Customize hardware tab, click VM Options → Advanced.
Optional: Override default DHCP networking in vSphere. To enable static IP networking:
Set your static IP configuration:
$ export IPCFG="ip=<ip>::<gateway>:<netmask>:<hostname>:<iface>:none nameserver=srv1 [nameserver=srv2 [nameserver=srv3 [...]]]"Example command
$ export IPCFG="ip=192.168.100.101::192.168.100.254:255.255.255.0:::none nameserver=8.8.8.8"Set the
guestinfo.afterburn.initrd.network-kargsproperty before booting a VM from an OVA in vSphere:$ govc vm.change -vm "<vm_name>" -e "guestinfo.afterburn.initrd.network-kargs=${IPCFG}"
Optional: In the event of cluster performance issues, from the Latency Sensitivity list, select High. Ensure that your VM’s CPU and memory reservation have the following values:
- Memory reservation value must be equal to its configured memory size.
- CPU reservation value must be at least the number of low latency virtual CPUs multiplied by the measured physical CPU speed.
Click Edit Configuration, and on the Configuration Parameters window, click Add Configuration Params. Define the following parameter names and values:
-
guestinfo.ignition.config.data: Locate the base-64 encoded files that you created previously in this procedure, and paste the contents of the base64-encoded Ignition config file for this machine type. -
guestinfo.ignition.config.data.encoding: Specifybase64. -
disk.EnableUUID: SpecifyTRUE.
-
- In the Virtual Hardware panel of the Customize hardware tab, modify the specified values as required. Ensure that the amount of RAM, CPU, and disk storage meets the minimum requirements for the machine type.
- Complete the configuration and power on the VM.
Create the rest of the machines for your cluster by following the preceding steps for each machine.
ImportantYou must create the bootstrap and control plane machines at this time. Because some pods are deployed on compute machines by default, also create at least two compute machines before you install the cluster.
15.5.13. Creating more Red Hat Enterprise Linux CoreOS (RHCOS) machines in vSphere
You can create more compute machines for your cluster that uses user-provisioned infrastructure on VMware vSphere.
Prerequisites
- Obtain the base64-encoded Ignition file for your compute machines.
- You have access to the vSphere template that you created for your cluster.
Procedure
After the template deploys, deploy a VM for a machine in the cluster.
- Right-click the template’s name and click Clone → Clone to Virtual Machine.
-
On the Select a name and folder tab, specify a name for the VM. You might include the machine type in the name, such as
compute-1. - On the Select a name and folder tab, select the name of the folder that you created for the cluster.
- On the Select a compute resource tab, select the name of a host in your datacenter.
- Optional: On the Select storage tab, customize the storage options.
- On the Select clone options, select Customize this virtual machine’s hardware.
On the Customize hardware tab, click VM Options → Advanced.
- From the Latency Sensitivity list, select High.
Click Edit Configuration, and on the Configuration Parameters window, click Add Configuration Params. Define the following parameter names and values:
-
guestinfo.ignition.config.data: Paste the contents of the base64-encoded compute Ignition config file for this machine type. -
guestinfo.ignition.config.data.encoding: Specifybase64. -
disk.EnableUUID: SpecifyTRUE.
-
- In the Virtual Hardware panel of the Customize hardware tab, modify the specified values as required. Ensure that the amount of RAM, CPU, and disk storage meets the minimum requirements for the machine type. Also, make sure to select the correct network under Add network adapter if there are multiple networks available.
- Complete the configuration and power on the VM.
- Continue to create more compute machines for your cluster.
15.5.14. Disk partitioning
In most cases, data partitions are originally created by installing RHCOS, rather than by installing another operating system. In such cases, the OpenShift Container Platform installer should be allowed to configure your disk partitions.
However, there are two cases where you might want to intervene to override the default partitioning when installing an OpenShift Container Platform node:
Create separate partitions: For greenfield installations on an empty disk, you might want to add separate storage to a partition. This is officially supported for making
/varor a subdirectory of/var, such as/var/lib/etcd, a separate partition, but not both.ImportantKubernetes supports only two filesystem partitions. If you add more than one partition to the original configuration, Kubernetes cannot monitor all of them.
-
Retain existing partitions: For a brownfield installation where you are reinstalling OpenShift Container Platform on an existing node and want to retain data partitions installed from your previous operating system, there are both boot arguments and options to
coreos-installerthat allow you to retain existing data partitions.
Creating a separate /var partition
In general, disk partitioning for OpenShift Container Platform should be left to the installer. However, there are cases where you might want to create separate partitions in a part of the filesystem that you expect to grow.
OpenShift Container Platform supports the addition of a single partition to attach storage to either the /var partition or a subdirectory of /var. For example:
-
/var/lib/containers: Holds container-related content that can grow as more images and containers are added to a system. -
/var/lib/etcd: Holds data that you might want to keep separate for purposes such as performance optimization of etcd storage. -
/var: Holds data that you might want to keep separate for purposes such as auditing.
Storing the contents of a /var directory separately makes it easier to grow storage for those areas as needed and reinstall OpenShift Container Platform at a later date and keep that data intact. With this method, you will not have to pull all your containers again, nor will you have to copy massive log files when you update systems.
Because /var must be in place before a fresh installation of Red Hat Enterprise Linux CoreOS (RHCOS), the following procedure sets up the separate /var partition by creating a machine config that is inserted during the openshift-install preparation phases of an OpenShift Container Platform installation.
Procedure
Create a directory to hold the OpenShift Container Platform installation files:
$ mkdir $HOME/clusterconfigRun
openshift-installto create a set of files in themanifestandopenshiftsubdirectories. Answer the system questions as you are prompted:$ openshift-install create manifests --dir $HOME/clusterconfig ? SSH Public Key ... $ ls $HOME/clusterconfig/openshift/ 99_kubeadmin-password-secret.yaml 99_openshift-cluster-api_master-machines-0.yaml 99_openshift-cluster-api_master-machines-1.yaml 99_openshift-cluster-api_master-machines-2.yaml ...Create a
MachineConfigobject and add it to a file in theopenshiftdirectory. For example, name the file98-var-partition.yaml, change the disk device name to the name of the storage device on theworkersystems, and set the storage size as appropriate. This example places the/vardirectory on a separate partition:apiVersion: machineconfiguration.openshift.io/v1 kind: MachineConfig metadata: labels: machineconfiguration.openshift.io/role: worker name: 98-var-partition spec: config: ignition: version: 3.2.0 storage: disks: - device: /dev/<device_name>1 partitions: - label: var startMiB: <partition_start_offset>2 sizeMiB: <partition_size>3 filesystems: - device: /dev/disk/by-partlabel/var path: /var format: xfs systemd: units: - name: var.mount4 enabled: true contents: | [Unit] Before=local-fs.target [Mount] What=/dev/disk/by-partlabel/var Where=/var Options=defaults,prjquota5 [Install] WantedBy=local-fs.target- 1
- The storage device name of the disk that you want to partition.
- 2
- When adding a data partition to the boot disk, a minimum value of 25000 mebibytes is recommended. The root file system is automatically resized to fill all available space up to the specified offset. If no value is specified, or if the specified value is smaller than the recommended minimum, the resulting root file system will be too small, and future reinstalls of RHCOS might overwrite the beginning of the data partition.
- 3
- The size of the data partition in mebibytes.
- 4
- The name of the mount unit must match the directory specified in the
Where=directive. For example, for a filesystem mounted on/var/lib/containers, the unit must be namedvar-lib-containers.mount. - 5
- The
prjquotamount option must be enabled for filesystems used for container storage.
NoteWhen creating a separate
/varpartition, you cannot use different instance types for worker nodes, if the different instance types do not have the same device name.Run
openshift-installagain to create Ignition configs from a set of files in themanifestandopenshiftsubdirectories:$ openshift-install create ignition-configs --dir $HOME/clusterconfig $ ls $HOME/clusterconfig/ auth bootstrap.ign master.ign metadata.json worker.ign
Now you can use the Ignition config files as input to the vSphere installation procedures to install Red Hat Enterprise Linux CoreOS (RHCOS) systems.
15.5.15. Updating the bootloader using bootupd
To update the bootloader by using bootupd, you must either install bootupd on RHCOS machines manually or provide a machine config with the enabled systemd unit. Unlike grubby or other bootloader tools, bootupd does not manage kernel space configuration such as passing kernel arguments.
After you have installed bootupd, you can manage it remotely from the OpenShift Container Platform cluster.
It is recommended that you use bootupd only on bare metal or virtualized hypervisor installations, such as for protection against the BootHole vulnerability.
Manual install method
You can manually install bootupd by using the bootctl command-line tool.
Inspect the system status:
# bootupctl statusExample output
Component EFI Installed: grub2-efi-x64-1:2.04-31.fc33.x86_64,shim-x64-15-8.x86_64 Update: At latest version
RHCOS images created without
bootupdinstalled on them require an explicit adoption phase.If the system status is
Adoptable, perform the adoption:# bootupctl adopt-and-updateExample output
Updated: grub2-efi-x64-1:2.04-31.fc33.x86_64,shim-x64-15-8.x86_64If an update is available, apply the update so that the changes take effect on the next reboot:
# bootupctl updateExample output
Updated: grub2-efi-x64-1:2.04-31.fc33.x86_64,shim-x64-15-8.x86_64
Machine config method
Another way to enable bootupd is by providing a machine config.
Provide a machine config file with the enabled
systemdunit, as shown in the following example:Example output
variant: rhcos version: 1.1.0 systemd: units: - name: custom-bootupd-auto.service enabled: true contents: | [Unit] Description=Bootupd automatic update [Service] ExecStart=/usr/bin/bootupctl update RemainAfterExit=yes [Install] WantedBy=multi-user.target
15.5.16. Installing the OpenShift CLI by downloading the binary
You can install the OpenShift CLI (oc) to interact with OpenShift Container Platform from a command-line interface. You can install oc on Linux, Windows, or macOS.
If you installed an earlier version of oc, you cannot use it to complete all of the commands in OpenShift Container Platform 4.7. Download and install the new version of oc.
15.5.16.1. Installing the OpenShift CLI on Linux
You can install the OpenShift CLI (oc) binary on Linux by using the following procedure.
Procedure
- Navigate to the OpenShift Container Platform downloads page on the Red Hat Customer Portal.
- Select the appropriate version in the Version drop-down menu.
- Click Download Now next to the OpenShift v4.7 Linux Client entry and save the file.
Unpack the archive:
$ tar xvzf <file>Place the
ocbinary in a directory that is on yourPATH.To check your
PATH, execute the following command:$ echo $PATH
After you install the OpenShift CLI, it is available using the oc command:
$ oc <command>15.5.16.2. Installing the OpenShift CLI on Windows
You can install the OpenShift CLI (oc) binary on Windows by using the following procedure.
Procedure
- Navigate to the OpenShift Container Platform downloads page on the Red Hat Customer Portal.
- Select the appropriate version in the Version drop-down menu.
- Click Download Now next to the OpenShift v4.7 Windows Client entry and save the file.
- Unzip the archive with a ZIP program.
Move the
ocbinary to a directory that is on yourPATH.To check your
PATH, open the command prompt and execute the following command:C:\> path
After you install the OpenShift CLI, it is available using the oc command:
C:\> oc <command>15.5.16.3. Installing the OpenShift CLI on macOS
You can install the OpenShift CLI (oc) binary on macOS by using the following procedure.
Procedure
- Navigate to the OpenShift Container Platform downloads page on the Red Hat Customer Portal.
- Select the appropriate version in the Version drop-down menu.
- Click Download Now next to the OpenShift v4.7 MacOSX Client entry and save the file.
- Unpack and unzip the archive.
Move the
ocbinary to a directory on your PATH.To check your
PATH, open a terminal and execute the following command:$ echo $PATH
After you install the OpenShift CLI, it is available using the oc command:
$ oc <command>15.5.17. Creating the cluster
To create the OpenShift Container Platform cluster, you wait for the bootstrap process to complete on the machines that you provisioned by using the Ignition config files that you generated with the installation program.
Prerequisites
- Create the required infrastructure for the cluster.
- You obtained the installation program and generated the Ignition config files for your cluster.
- You used the Ignition config files to create RHCOS machines for your cluster.
- Your machines have direct Internet access or have an HTTP or HTTPS proxy available.
Procedure
Monitor the bootstrap process:
$ ./openshift-install --dir <installation_directory> wait-for bootstrap-complete \1 --log-level=info2 Example output
INFO Waiting up to 30m0s for the Kubernetes API at https://api.test.example.com:6443... INFO API v1.20.0 up INFO Waiting up to 30m0s for bootstrapping to complete... INFO It is now safe to remove the bootstrap resourcesThe command succeeds when the Kubernetes API server signals that it has been bootstrapped on the control plane machines.
After bootstrap process is complete, remove the bootstrap machine from the load balancer.
ImportantYou must remove the bootstrap machine from the load balancer at this point. You can also remove or reformat the machine itself.
15.5.18. Logging in to the cluster by using the CLI
You can log in to your cluster as a default system user by exporting the cluster kubeconfig file. The kubeconfig file contains information about the cluster that is used by the CLI to connect a client to the correct cluster and API server. The file is specific to a cluster and is created during OpenShift Container Platform installation.
Prerequisites
- You deployed an OpenShift Container Platform cluster.
-
You installed the
ocCLI.
Procedure
Export the
kubeadmincredentials:$ export KUBECONFIG=<installation_directory>/auth/kubeconfig1 - 1
- For
<installation_directory>, specify the path to the directory that you stored the installation files in.
Verify you can run
occommands successfully using the exported configuration:$ oc whoamiExample output
system:admin
15.5.19. Approving the certificate signing requests for your machines
When you add machines to a cluster, two pending certificate signing requests (CSRs) are generated for each machine that you added. You must confirm that these CSRs are approved or, if necessary, approve them yourself. The client requests must be approved first, followed by the server requests.
Prerequisites
- You added machines to your cluster.
Procedure
Confirm that the cluster recognizes the machines:
$ oc get nodesExample output
NAME STATUS ROLES AGE VERSION master-0 Ready master 63m v1.20.0 master-1 Ready master 63m v1.20.0 master-2 Ready master 64m v1.20.0The output lists all of the machines that you created.
NoteThe preceding output might not include the compute nodes, also known as worker nodes, until some CSRs are approved.
Review the pending CSRs and ensure that you see the client requests with the
PendingorApprovedstatus for each machine that you added to the cluster:$ oc get csrExample output
NAME AGE REQUESTOR CONDITION csr-mddf5 20m system:node:master-01.example.com Approved,Issued csr-z5rln 16m system:node:worker-21.example.com Approved,IssuedIf the CSRs were not approved, after all of the pending CSRs for the machines you added are in
Pendingstatus, approve the CSRs for your cluster machines:NoteBecause the CSRs rotate automatically, approve your CSRs within an hour of adding the machines to the cluster. If you do not approve them within an hour, the certificates will rotate, and more than two certificates will be present for each node. You must approve all of these certificates. Once the client CSR is approved, the Kubelet creates a secondary CSR for the serving certificate, which requires manual approval. Then, subsequent serving certificate renewal requests are automatically approved by the
machine-approverif the Kubelet requests a new certificate with identical parameters.NoteFor clusters running on platforms that are not machine API enabled, such as bare metal and other user-provisioned infrastructure, you must implement a method of automatically approving the kubelet serving certificate requests (CSRs). If a request is not approved, then the
oc exec,oc rsh, andoc logscommands cannot succeed, because a serving certificate is required when the API server connects to the kubelet. Any operation that contacts the Kubelet endpoint requires this certificate approval to be in place. The method must watch for new CSRs, confirm that the CSR was submitted by thenode-bootstrapperservice account in thesystem:nodeorsystem:admingroups, and confirm the identity of the node.To approve them individually, run the following command for each valid CSR:
$ oc adm certificate approve <csr_name>1 - 1
<csr_name>is the name of a CSR from the list of current CSRs.
To approve all pending CSRs, run the following command:
$ oc get csr -o go-template='{{range .items}}{{if not .status}}{{.metadata.name}}{{"\n"}}{{end}}{{end}}' | xargs --no-run-if-empty oc adm certificate approveNoteSome Operators might not become available until some CSRs are approved.
Now that your client requests are approved, you must review the server requests for each machine that you added to the cluster:
$ oc get csrExample output
NAME AGE REQUESTOR CONDITION csr-bfd72 5m26s system:node:ip-10-0-50-126.us-east-2.compute.internal Pending csr-c57lv 5m26s system:node:ip-10-0-95-157.us-east-2.compute.internal Pending ...If the remaining CSRs are not approved, and are in the
Pendingstatus, approve the CSRs for your cluster machines:To approve them individually, run the following command for each valid CSR:
$ oc adm certificate approve <csr_name>1 - 1
<csr_name>is the name of a CSR from the list of current CSRs.
To approve all pending CSRs, run the following command:
$ oc get csr -o go-template='{{range .items}}{{if not .status}}{{.metadata.name}}{{"\n"}}{{end}}{{end}}' | xargs oc adm certificate approve
After all client and server CSRs have been approved, the machines have the
Readystatus. Verify this by running the following command:$ oc get nodesExample output
NAME STATUS ROLES AGE VERSION master-0 Ready master 73m v1.20.0 master-1 Ready master 73m v1.20.0 master-2 Ready master 74m v1.20.0 worker-0 Ready worker 11m v1.20.0 worker-1 Ready worker 11m v1.20.0NoteIt can take a few minutes after approval of the server CSRs for the machines to transition to the
Readystatus.
Additional information
- For more information on CSRs, see Certificate Signing Requests.
15.5.20. Initial Operator configuration
After the control plane initializes, you must immediately configure some Operators so that they all become available.
Prerequisites
- Your control plane has initialized.
Procedure
Watch the cluster components come online:
$ watch -n5 oc get clusteroperatorsExample output
NAME VERSION AVAILABLE PROGRESSING DEGRADED SINCE authentication 4.7.0 True False False 3h56m baremetal 4.7.0 True False False 29h cloud-credential 4.7.0 True False False 29h cluster-autoscaler 4.7.0 True False False 29h config-operator 4.7.0 True False False 6h39m console 4.7.0 True False False 3h59m csi-snapshot-controller 4.7.0 True False False 4h12m dns 4.7.0 True False False 4h15m etcd 4.7.0 True False False 29h image-registry 4.7.0 True False False 3h59m ingress 4.7.0 True False False 4h30m insights 4.7.0 True False False 29h kube-apiserver 4.7.0 True False False 29h kube-controller-manager 4.7.0 True False False 29h kube-scheduler 4.7.0 True False False 29h kube-storage-version-migrator 4.7.0 True False False 4h2m machine-api 4.7.0 True False False 29h machine-approver 4.7.0 True False False 6h34m machine-config 4.7.0 True False False 3h56m marketplace 4.7.0 True False False 4h2m monitoring 4.7.0 True False False 6h31m network 4.7.0 True False False 29h node-tuning 4.7.0 True False False 4h30m openshift-apiserver 4.7.0 True False False 3h56m openshift-controller-manager 4.7.0 True False False 4h36m openshift-samples 4.7.0 True False False 4h30m operator-lifecycle-manager 4.7.0 True False False 29h operator-lifecycle-manager-catalog 4.7.0 True False False 29h operator-lifecycle-manager-packageserver 4.7.0 True False False 3h59m service-ca 4.7.0 True False False 29h storage 4.7.0 True False False 4h30m- Configure the Operators that are not available.
15.5.20.1. Image registry removed during installation
On platforms that do not provide shareable object storage, the OpenShift Image Registry Operator bootstraps itself as Removed. This allows openshift-installer to complete installations on these platform types.
After installation, you must edit the Image Registry Operator configuration to switch the managementState from Removed to Managed.
The Prometheus console provides an ImageRegistryRemoved alert, for example:
"Image Registry has been removed. ImageStreamTags, BuildConfigs and DeploymentConfigs which reference ImageStreamTags may not work as expected. Please configure storage and update the config to Managed state by editing configs.imageregistry.operator.openshift.io."
15.5.20.2. Image registry storage configuration
The Image Registry Operator is not initially available for platforms that do not provide default storage. After installation, you must configure your registry to use storage so that the Registry Operator is made available.
Instructions are shown for configuring a persistent volume, which is required for production clusters. Where applicable, instructions are shown for configuring an empty directory as the storage location, which is available for only non-production clusters.
Additional instructions are provided for allowing the image registry to use block storage types by using the Recreate rollout strategy during upgrades.
15.5.20.2.1. Configuring registry storage for VMware vSphere
As a cluster administrator, following installation you must configure your registry to use storage.
Prerequisites
- Cluster administrator permissions.
- A cluster on VMware vSphere.
Persistent storage provisioned for your cluster, such as Red Hat OpenShift Container Storage.
ImportantOpenShift Container Platform supports
ReadWriteOnceaccess for image registry storage when you have only one replica. To deploy an image registry that supports high availability with two or more replicas,ReadWriteManyaccess is required.- Must have "100Gi" capacity.
Testing shows issues with using the NFS server on RHEL as storage backend for core services. This includes the OpenShift Container Registry and Quay, Prometheus for monitoring storage, and Elasticsearch for logging storage. Therefore, using RHEL NFS to back PVs used by core services is not recommended.
Other NFS implementations on the marketplace might not have these issues. Contact the individual NFS implementation vendor for more information on any testing that was possibly completed against these OpenShift Container Platform core components.
Procedure
To configure your registry to use storage, change the
spec.storage.pvcin theconfigs.imageregistry/clusterresource.NoteWhen using shared storage, review your security settings to prevent outside access.
Verify that you do not have a registry pod:
$ oc get pod -n openshift-image-registry -l docker-registry=defaultExample output
No resourses found in openshift-image-registry namespaceNoteIf you do have a registry pod in your output, you do not need to continue with this procedure.
Check the registry configuration:
$ oc edit configs.imageregistry.operator.openshift.ioExample output
storage: pvc: claim:1 - 1
- Leave the
claimfield blank to allow the automatic creation of animage-registry-storagePVC.
Check the
clusteroperatorstatus:$ oc get clusteroperator image-registryExample output
NAME VERSION AVAILABLE PROGRESSING DEGRADED SINCE MESSAGE image-registry 4.7 True False False 6h50m
15.5.20.2.2. Configuring storage for the image registry in non-production clusters
You must configure storage for the Image Registry Operator. For non-production clusters, you can set the image registry to an empty directory. If you do so, all images are lost if you restart the registry.
Procedure
To set the image registry storage to an empty directory:
$ oc patch configs.imageregistry.operator.openshift.io cluster --type merge --patch '{"spec":{"storage":{"emptyDir":{}}}}'WarningConfigure this option for only non-production clusters.
If you run this command before the Image Registry Operator initializes its components, the
oc patchcommand fails with the following error:Error from server (NotFound): configs.imageregistry.operator.openshift.io "cluster" not foundWait a few minutes and run the command again.
15.5.20.2.3. Configuring block registry storage for VMware vSphere
To allow the image registry to use block storage types such as vSphere Virtual Machine Disk (VMDK) during upgrades as a cluster administrator, you can use the Recreate rollout strategy.
Block storage volumes are supported but not recommended for use with image registry on production clusters. An installation where the registry is configured on block storage is not highly available because the registry cannot have more than one replica.
Procedure
To set the image registry storage as a block storage type, patch the registry so that it uses the
Recreaterollout strategy and runs with only1replica:$ oc patch config.imageregistry.operator.openshift.io/cluster --type=merge -p '{"spec":{"rolloutStrategy":"Recreate","replicas":1}}'Provision the PV for the block storage device, and create a PVC for that volume. The requested block volume uses the ReadWriteOnce (RWO) access mode.
Create a
pvc.yamlfile with the following contents to define a VMware vSpherePersistentVolumeClaimobject:kind: PersistentVolumeClaim apiVersion: v1 metadata: name: image-registry-storage1 namespace: openshift-image-registry2 spec: accessModes: - ReadWriteOnce3 resources: requests: storage: 100Gi4 - 1
- A unique name that represents the
PersistentVolumeClaimobject. - 2
- The namespace for the
PersistentVolumeClaimobject, which isopenshift-image-registry. - 3
- The access mode of the persistent volume claim. With
ReadWriteOnce, the volume can be mounted with read and write permissions by a single node. - 4
- The size of the persistent volume claim.
Create the
PersistentVolumeClaimobject from the file:$ oc create -f pvc.yaml -n openshift-image-registry
Edit the registry configuration so that it references the correct PVC:
$ oc edit config.imageregistry.operator.openshift.io -o yamlExample output
storage: pvc: claim:1 - 1
- Creating a custom PVC allows you to leave the
claimfield blank for the default automatic creation of animage-registry-storagePVC.
For instructions about configuring registry storage so that it references the correct PVC, see Configuring the registry for vSphere.
15.5.21. Completing installation on user-provisioned infrastructure
After you complete the Operator configuration, you can finish installing the cluster on infrastructure that you provide.
Prerequisites
- Your control plane has initialized.
- You have completed the initial Operator configuration.
Procedure
Confirm that all the cluster components are online with the following command:
$ watch -n5 oc get clusteroperatorsExample output
NAME VERSION AVAILABLE PROGRESSING DEGRADED SINCE authentication 4.7.0 True False False 3h56m baremetal 4.7.0 True False False 29h cloud-credential 4.7.0 True False False 29h cluster-autoscaler 4.7.0 True False False 29h config-operator 4.7.0 True False False 6h39m console 4.7.0 True False False 3h59m csi-snapshot-controller 4.7.0 True False False 4h12m dns 4.7.0 True False False 4h15m etcd 4.7.0 True False False 29h image-registry 4.7.0 True False False 3h59m ingress 4.7.0 True False False 4h30m insights 4.7.0 True False False 29h kube-apiserver 4.7.0 True False False 29h kube-controller-manager 4.7.0 True False False 29h kube-scheduler 4.7.0 True False False 29h kube-storage-version-migrator 4.7.0 True False False 4h2m machine-api 4.7.0 True False False 29h machine-approver 4.7.0 True False False 6h34m machine-config 4.7.0 True False False 3h56m marketplace 4.7.0 True False False 4h2m monitoring 4.7.0 True False False 6h31m network 4.7.0 True False False 29h node-tuning 4.7.0 True False False 4h30m openshift-apiserver 4.7.0 True False False 3h56m openshift-controller-manager 4.7.0 True False False 4h36m openshift-samples 4.7.0 True False False 4h30m operator-lifecycle-manager 4.7.0 True False False 29h operator-lifecycle-manager-catalog 4.7.0 True False False 29h operator-lifecycle-manager-packageserver 4.7.0 True False False 3h59m service-ca 4.7.0 True False False 29h storage 4.7.0 True False False 4h30mAlternatively, the following command notifies you when all of the clusters are available. It also retrieves and displays credentials:
$ ./openshift-install --dir <installation_directory> wait-for install-complete1 - 1
- For
<installation_directory>, specify the path to the directory that you stored the installation files in.
Example output
INFO Waiting up to 30m0s for the cluster to initialize...The command succeeds when the Cluster Version Operator finishes deploying the OpenShift Container Platform cluster from Kubernetes API server.
Important-
The Ignition config files that the installation program generates contain certificates that expire after 24 hours, which are then renewed at that time. If the cluster is shut down before renewing the certificates and the cluster is later restarted after the 24 hours have elapsed, the cluster automatically recovers the expired certificates. The exception is that you must manually approve the pending
node-bootstrappercertificate signing requests (CSRs) to recover kubelet certificates. See the documentation for Recovering from expired control plane certificates for more information. - It is recommended that you use Ignition config files within 12 hours after they are generated because the 24-hour certificate rotates from 16 to 22 hours after the cluster is installed. By using the Ignition config files within 12 hours, you can avoid installation failure if the certificate update runs during installation.
Confirm that the Kubernetes API server is communicating with the pods.
To view a list of all pods, use the following command:
$ oc get pods --all-namespacesExample output
NAMESPACE NAME READY STATUS RESTARTS AGE openshift-apiserver-operator openshift-apiserver-operator-85cb746d55-zqhs8 1/1 Running 1 9m openshift-apiserver apiserver-67b9g 1/1 Running 0 3m openshift-apiserver apiserver-ljcmx 1/1 Running 0 1m openshift-apiserver apiserver-z25h4 1/1 Running 0 2m openshift-authentication-operator authentication-operator-69d5d8bf84-vh2n8 1/1 Running 0 5m ...View the logs for a pod that is listed in the output of the previous command by using the following command:
$ oc logs <pod_name> -n <namespace>1 - 1
- Specify the pod name and namespace, as shown in the output of the previous command.
If the pod logs display, the Kubernetes API server can communicate with the cluster machines.
For an installation with Fibre Channel Protocol (FCP), additional steps are required to enable multipathing. Do not enable multipathing during installation.
See "Enabling multipathing with kernel arguments on RHCOS" in the Post-installation configuration documentation for more information.
All the worker nodes are restarted. To monitor the process, enter the following command:
$ oc get nodes -wNoteIf you have additional machine types such as infrastructure nodes, repeat the process for these types.
You can add extra compute machines after the cluster installation is completed by following Adding compute machines to vSphere.
15.5.22. Backing up VMware vSphere volumes
OpenShift Container Platform provisions new volumes as independent persistent disks to freely attach and detach the volume on any node in the cluster. As a consequence, it is not possible to back up volumes that use snapshots, or to restore volumes from snapshots. See Snapshot Limitations for more information.
Procedure
To create a backup of persistent volumes:
- Stop the application that is using the persistent volume.
- Clone the persistent volume.
- Restart the application.
- Create a backup of the cloned volume.
- Delete the cloned volume.
15.5.23. Telemetry access for OpenShift Container Platform
In OpenShift Container Platform 4.7, the Telemetry service, which runs by default to provide metrics about cluster health and the success of updates, requires internet access. If your cluster is connected to the internet, Telemetry runs automatically, and your cluster is registered to OpenShift Cluster Manager.
After you confirm that your OpenShift Cluster Manager inventory is correct, either maintained automatically by Telemetry or manually by using OpenShift Cluster Manager, use subscription watch to track your OpenShift Container Platform subscriptions at the account or multi-cluster level.
15.5.24. Next steps
- Customize your cluster.
- If necessary, you can opt out of remote health reporting.
- Set up your registry and configure registry storage.
- Optional: View the events from the vSphere Problem Detector Operator to determine if the cluster has permission or storage configuration issues.
15.6. Installing a cluster on VMC with user-provisioned infrastructure and network customizations
In OpenShift Container Platform version 4.7, you can install a cluster on your VMware vSphere instance using infrastructure you provision with customized network configuration options by deploying it to VMware Cloud (VMC) on AWS.
Once you configure your VMC environment for OpenShift Container Platform deployment, you use the OpenShift Container Platform installation program from the bastion management host, co-located in the VMC environment. The installation program and control plane automates the process of deploying and managing the resources needed for the OpenShift Container Platform cluster.
By customizing your network configuration, your cluster can coexist with existing IP address allocations in your environment and integrate with existing VXLAN configurations. You must set most of the network configuration parameters during installation, and you can modify only kubeProxy configuration parameters in a running cluster.
OpenShift Container Platform supports deploying a cluster to a single VMware vCenter only. Deploying a cluster with machines/machine sets on multiple vCenters is not supported.
15.6.1. Setting up VMC for vSphere
You can install OpenShift Container Platform on VMware Cloud (VMC) on AWS hosted vSphere clusters to enable applications to be deployed and managed both on-premise and off-premise, across the hybrid cloud.
You must configure several options in your VMC environment prior to installing OpenShift Container Platform on VMware vSphere. Ensure your VMC environment has the following prerequisites:
- Create a non-exclusive, DHCP-enabled, NSX-T network segment and subnet. Other virtual machines (VMs) can be hosted on the subnet, but at least eight IP addresses must be available for the OpenShift Container Platform deployment.
Configure the following firewall rules:
- An ANY:ANY firewall rule between the OpenShift Container Platform compute network and the Internet. This is used by nodes and applications to download container images.
- An ANY:ANY firewall rule between the installation host and the software-defined data center (SDDC) management network on port 443. This allows you to upload the Red Hat Enterprise Linux CoreOS (RHCOS) OVA during deployment.
- An HTTPS firewall rule between the OpenShift Container Platform compute network and vCenter. This connection allows OpenShift Container Platform to communicate with vCenter for provisioning and managing nodes, persistent volume claims (PVCs), and other resources.
You must have the following information to deploy OpenShift Container Platform:
-
The OpenShift Container Platform cluster name, such as
vmc-prod-1. -
The base DNS name, such as
companyname.com. -
If not using the default, the pod network CIDR and services network CIDR must be identified, which are set by default to
10.128.0.0/14and172.30.0.0/16, respectively. These CIDRs are used for pod-to-pod and pod-to-service communication and are not accessible externally; however, they must not overlap with existing subnets in your organization. The following vCenter information:
- vCenter hostname, username, and password
-
Datacenter name, such as
SDDC-Datacenter -
Cluster name, such as
Cluster-1 - Network name
Datastore name, such as
WorkloadDatastoreNoteIt is recommended to move your vSphere cluster to the VMC
Compute-ResourcePoolresource pool after your cluster installation is finished.
-
The OpenShift Container Platform cluster name, such as
A Linux-based host deployed to VMC as a bastion.
- The bastion host can be Red Hat Enterprise Linux (RHEL) or any another Linux-based host; it must have Internet connectivity and the ability to upload an OVA to the ESXi hosts.
Download and install the OpenShift CLI tools to the bastion host.
-
The
openshift-installinstallation program -
The OpenShift CLI (
oc) tool
-
The
You cannot use the VMware NSX Container Plugin for Kubernetes (NCP), and NSX is not used as the OpenShift SDN. The version of NSX currently available with VMC is incompatible with the version of NCP certified with OpenShift Container Platform.
However, the NSX DHCP service is used for virtual machine IP management with the full-stack automated OpenShift Container Platform deployment and with nodes provisioned, either manually or automatically, by the Machine API integration with vSphere. Additionally, NSX firewall rules are created to enable access with the OpenShift Container Platform cluster and between the bastion host and the VMC vSphere hosts.
15.6.1.1. VMC Sizer tool
VMware Cloud on AWS is built on top of AWS bare metal infrastructure; this is the same bare metal infrastructure which runs AWS native services. When a VMware cloud on AWS software-defined data center (SDDC) is deployed, you consume these physical server nodes and run the VMware ESXi hypervisor in a single tenant fashion. This means the physical infrastructure is not accessible to anyone else using VMC. It is important to consider how many physical hosts you will need to host your virtual infrastructure.
To determine this, VMware provides the VMC on AWS Sizer. With this tool, you can define the resources you intend to host on VMC:
- Types of workloads
- Total number of virtual machines
Specification information such as:
- Storage requirements
- vCPUs
- vRAM
- Overcommit ratios
With these details, the sizer tool can generate a report, based on VMware best practices, and recommend your cluster configuration and the number of hosts you will need.
15.6.2. vSphere prerequisites
- Provision block registry storage. For more information on persistent storage, see Understanding persistent storage.
- Review details about the OpenShift Container Platform installation and update processes.
- If you use a firewall, you must configure it to access Red Hat Insights.
15.6.3. Internet access for OpenShift Container Platform
In OpenShift Container Platform 4.7, you require access to the Internet to install your cluster.
You must have Internet access to:
- Access OpenShift Cluster Manager to download the installation program and perform subscription management. If the cluster has internet access and you do not disable Telemetry, that service automatically entitles your cluster.
- Access Quay.io to obtain the packages that are required to install your cluster.
- Obtain the packages that are required to perform cluster updates.
If your cluster cannot have direct Internet access, you can perform a restricted network installation on some types of infrastructure that you provision. During that process, you download the content that is required and use it to populate a mirror registry with the packages that you need to install a cluster and generate the installation program. With some installation types, the environment that you install your cluster in will not require Internet access. Before you update the cluster, you update the content of the mirror registry.
15.6.4. VMware vSphere infrastructure requirements
You must install the OpenShift Container Platform cluster on a VMware vSphere version 6 or 7 instance that meets the requirements for the components that you use.
| Component | Minimum supported versions | Description |
|---|---|---|
| Hypervisor | vSphere 6.5 and later with HW version 13 | This version is the minimum version that Red Hat Enterprise Linux CoreOS (RHCOS) supports. See the Red Hat Enterprise Linux 8 supported hypervisors list. |
| Storage with in-tree drivers | vSphere 6.5 and later | This plug-in creates vSphere storage by using the in-tree storage drivers for vSphere included in OpenShift Container Platform. |
If you use a vSphere version 6.5 instance, consider upgrading to 6.7U3 or 7.0 before you install OpenShift Container Platform.
You must ensure that the time on your ESXi hosts is synchronized before you install OpenShift Container Platform. See Edit Time Configuration for a Host in the VMware documentation.
Virtual machines (VMs) configured to use virtual hardware version 14 or greater might result in a failed installation. It is recommended to configure VMs with virtual hardware version 13. This is a known issue that is being addressed in BZ#1935539.
15.6.5. Machine requirements for a cluster with user-provisioned infrastructure
For a cluster that contains user-provisioned infrastructure, you must deploy all of the required machines.
15.6.5.1. Required machines
The smallest OpenShift Container Platform clusters require the following hosts:
- One temporary bootstrap machine
- Three control plane, or master, machines
- At least two compute machines, which are also known as worker machines.
The cluster requires the bootstrap machine to deploy the OpenShift Container Platform cluster on the three control plane machines. You can remove the bootstrap machine after you install the cluster.
To improve high availability of your cluster, distribute the control plane machines over different z/VM instances on at least two physical machines.
The bootstrap and control plane machines must use Red Hat Enterprise Linux CoreOS (RHCOS) as the operating system. However, the compute machines can choose between Red Hat Enterprise Linux CoreOS (RHCOS) or Red Hat Enterprise Linux (RHEL) 7.9.
Note that RHCOS is based on Red Hat Enterprise Linux (RHEL) 8 and inherits all of its hardware certifications and requirements. See Red Hat Enterprise Linux technology capabilities and limits.
15.6.5.2. Network connectivity requirements
All the Red Hat Enterprise Linux CoreOS (RHCOS) machines require network in initramfs during boot to fetch Ignition config files from the Machine Config Server. The machines are configured with static IP addresses. No DHCP server is required. Additionally, each OpenShift Container Platform node in the cluster must have access to a Network Time Protocol (NTP) server.
15.6.5.3. IBM Z network connectivity requirements
To install on IBM Z under z/VM, you require a single z/VM virtual NIC in layer 2 mode. You also need:
- A direct-attached OSA or RoCE network adapter
- A z/VM VSwitch set up. For a preferred setup, use OSA link aggregation.
15.6.5.4. Minimum resource requirements
Each cluster machine must meet the following minimum requirements:
| Machine | Operating System | vCPU [1] | Virtual RAM | Storage | IOPS |
|---|---|---|---|---|---|
| Bootstrap | RHCOS | 4 | 16 GB | 100 GB | N/A |
| Control plane | RHCOS | 4 | 16 GB | 100 GB | N/A |
| Compute | RHCOS | 2 | 8 GB | 100 GB | N/A |
- One physical core (IFL) provides two logical cores (threads) when SMT-2 is enabled. The hypervisor can provide two or more vCPUs.
15.6.5.5. Certificate signing requests management
Because your cluster has limited access to automatic machine management when you use infrastructure that you provision, you must provide a mechanism for approving cluster certificate signing requests (CSRs) after installation. The kube-controller-manager only approves the kubelet client CSRs. The machine-approver cannot guarantee the validity of a serving certificate that is requested by using kubelet credentials because it cannot confirm that the correct machine issued the request. You must determine and implement a method of verifying the validity of the kubelet serving certificate requests and approving them.
15.6.6. Creating the user-provisioned infrastructure
Before you deploy an OpenShift Container Platform cluster that uses user-provisioned infrastructure, you must create the underlying infrastructure.
Prerequisites
- Review the OpenShift Container Platform 4.x Tested Integrations page before you create the supporting infrastructure for your cluster.
Procedure
- Set up static IP addresses.
- Set up an HTTP or HTTPS server to provide Ignition files to the cluster nodes.
- Provision the required load balancers.
- Configure the ports for your machines.
- Configure DNS.
- Ensure network connectivity.
15.6.6.1. Networking requirements for user-provisioned infrastructure
All the Red Hat Enterprise Linux CoreOS (RHCOS) machines require network in initramfs during boot to fetch Ignition config from the machine config server.
During the initial boot, the machines require an HTTP or HTTPS server to establish a network connection to download their Ignition config files.
Ensure that the machines have persistent IP addresses and host names.
The Kubernetes API server must be able to resolve the node names of the cluster machines. If the API servers and worker nodes are in different zones, you can configure a default DNS search zone to allow the API server to resolve the node names. Another supported approach is to always refer to hosts by their fully-qualified domain names in both the node objects and all DNS requests.
You must configure the network connectivity between machines to allow cluster components to communicate. Each machine must be able to resolve the host names of all other machines in the cluster.
| Protocol | Port | Description |
|---|---|---|
| ICMP | N/A | Network reachability tests |
| TCP |
| Metrics |
|
|
Host level services, including the node exporter on ports | |
|
| The default ports that Kubernetes reserves | |
|
| openshift-sdn | |
| UDP |
| VXLAN and Geneve |
|
| VXLAN and Geneve | |
|
|
Host level services, including the node exporter on ports | |
| TCP/UDP |
| Kubernetes node port |
| Protocol | Port | Description |
|---|---|---|
| TCP |
| Kubernetes API |
| Protocol | Port | Description |
|---|---|---|
| TCP |
| etcd server and peer ports |
Network topology requirements
The infrastructure that you provision for your cluster must meet the following network topology requirements.
OpenShift Container Platform requires all nodes to have internet access to pull images for platform containers and provide telemetry data to Red Hat.
Load balancers
Before you install OpenShift Container Platform, you must provision two load balancers that meet the following requirements:
API load balancer: Provides a common endpoint for users, both human and machine, to interact with and configure the platform. Configure the following conditions:
- Layer 4 load balancing only. This can be referred to as Raw TCP, SSL Passthrough, or SSL Bridge mode. If you use SSL Bridge mode, you must enable Server Name Indication (SNI) for the API routes.
- A stateless load balancing algorithm. The options vary based on the load balancer implementation.
ImportantDo not configure session persistence for an API load balancer.
Configure the following ports on both the front and back of the load balancers:
Expand Table 15.54. API load balancer Port Back-end machines (pool members) Internal External Description 6443Bootstrap and control plane. You remove the bootstrap machine from the load balancer after the bootstrap machine initializes the cluster control plane. You must configure the
/readyzendpoint for the API server health check probe.X
X
Kubernetes API server
22623Bootstrap and control plane. You remove the bootstrap machine from the load balancer after the bootstrap machine initializes the cluster control plane.
X
Machine config server
NoteThe load balancer must be configured to take a maximum of 30 seconds from the time the API server turns off the
/readyzendpoint to the removal of the API server instance from the pool. Within the time frame after/readyzreturns an error or becomes healthy, the endpoint must have been removed or added. Probing every 5 or 10 seconds, with two successful requests to become healthy and three to become unhealthy, are well-tested values.Application Ingress load balancer: Provides an Ingress point for application traffic flowing in from outside the cluster. Configure the following conditions:
- Layer 4 load balancing only. This can be referred to as Raw TCP, SSL Passthrough, or SSL Bridge mode. If you use SSL Bridge mode, you must enable Server Name Indication (SNI) for the Ingress routes.
- A connection-based or session-based persistence is recommended, based on the options available and types of applications that will be hosted on the platform.
Configure the following ports on both the front and back of the load balancers:
Expand Table 15.55. Application Ingress load balancer Port Back-end machines (pool members) Internal External Description 443The machines that run the Ingress router pods, compute, or worker, by default.
X
X
HTTPS traffic
80The machines that run the Ingress router pods, compute, or worker, by default.
X
X
HTTP traffic
If the true IP address of the client can be seen by the load balancer, enabling source IP-based session persistence can improve performance for applications that use end-to-end TLS encryption.
A working configuration for the Ingress router is required for an OpenShift Container Platform cluster. You must configure the Ingress router after the control plane initializes.
NTP configuration
OpenShift Container Platform clusters are configured to use a public Network Time Protocol (NTP) server by default. If you want to use a local enterprise NTP server, or if your cluster is being deployed in a disconnected network, you can configure the cluster to use a specific time server. For more information, see the documentation for Configuring chrony time service.
15.6.6.2. User-provisioned DNS requirements
DNS is used for name resolution and reverse name resolution. DNS A/AAAA or CNAME records are used for name resolution and PTR records are used for reverse name resolution. The reverse records are important because Red Hat Enterprise Linux CoreOS (RHCOS) uses the reverse records to set the host name for all the nodes. Additionally, the reverse records are used to generate the certificate signing requests (CSR) that OpenShift Container Platform needs to operate.
The following DNS records are required for an OpenShift Container Platform cluster that uses user-provisioned infrastructure. In each record, <cluster_name> is the cluster name and <base_domain> is the cluster base domain that you specify in the install-config.yaml file. A complete DNS record takes the form: <component>.<cluster_name>.<base_domain>..
| Component | Record | Description |
|---|---|---|
| Kubernetes API |
| Add a DNS A/AAAA or CNAME record, and a DNS PTR record, to identify the load balancer for the control plane machines. These records must be resolvable by both clients external to the cluster and from all the nodes within the cluster. |
|
| Add a DNS A/AAAA or CNAME record, and a DNS PTR record, to identify the load balancer for the control plane machines. These records must be resolvable from all the nodes within the cluster. Important The API server must be able to resolve the worker nodes by the host names that are recorded in Kubernetes. If the API server cannot resolve the node names, then proxied API calls can fail, and you cannot retrieve logs from pods. | |
| Routes |
| Add a wildcard DNS A/AAAA or CNAME record that refers to the load balancer that targets the machines that run the Ingress router pods, which are the worker nodes by default. These records must be resolvable by both clients external to the cluster and from all the nodes within the cluster. |
| Bootstrap |
| Add a DNS A/AAAA or CNAME record, and a DNS PTR record, to identify the bootstrap machine. These records must be resolvable by the nodes within the cluster. |
| Master hosts |
| DNS A/AAAA or CNAME records and DNS PTR records to identify each machine for the control plane nodes (also known as the master nodes). These records must be resolvable by the nodes within the cluster. |
| Worker hosts |
| Add DNS A/AAAA or CNAME records and DNS PTR records to identify each machine for the worker nodes. These records must be resolvable by the nodes within the cluster. |
You can use the nslookup <hostname> command to verify name resolution. You can use the dig -x <ip_address> command to verify reverse name resolution for the PTR records.
The following example of a BIND zone file shows sample A records for name resolution. The purpose of the example is to show the records that are needed. The example is not meant to provide advice for choosing one name resolution service over another.
Example 15.11. Sample DNS zone database
$TTL 1W
@ IN SOA ns1.example.com. root (
2019070700 ; serial
3H ; refresh (3 hours)
30M ; retry (30 minutes)
2W ; expiry (2 weeks)
1W ) ; minimum (1 week)
IN NS ns1.example.com.
IN MX 10 smtp.example.com.
;
;
ns1 IN A 192.168.1.5
smtp IN A 192.168.1.5
;
helper IN A 192.168.1.5
helper.ocp4 IN A 192.168.1.5
;
; The api identifies the IP of your load balancer.
api.ocp4 IN A 192.168.1.5
api-int.ocp4 IN A 192.168.1.5
;
; The wildcard also identifies the load balancer.
*.apps.ocp4 IN A 192.168.1.5
;
; Create an entry for the bootstrap host.
bootstrap.ocp4 IN A 192.168.1.96
;
; Create entries for the master hosts.
master0.ocp4 IN A 192.168.1.97
master1.ocp4 IN A 192.168.1.98
master2.ocp4 IN A 192.168.1.99
;
; Create entries for the worker hosts.
worker0.ocp4 IN A 192.168.1.11
worker1.ocp4 IN A 192.168.1.7
;
;EOFThe following example BIND zone file shows sample PTR records for reverse name resolution.
Example 15.12. Sample DNS zone database for reverse records
$TTL 1W
@ IN SOA ns1.example.com. root (
2019070700 ; serial
3H ; refresh (3 hours)
30M ; retry (30 minutes)
2W ; expiry (2 weeks)
1W ) ; minimum (1 week)
IN NS ns1.example.com.
;
; The syntax is "last octet" and the host must have an FQDN
; with a trailing dot.
97 IN PTR master0.ocp4.example.com.
98 IN PTR master1.ocp4.example.com.
99 IN PTR master2.ocp4.example.com.
;
96 IN PTR bootstrap.ocp4.example.com.
;
5 IN PTR api.ocp4.example.com.
5 IN PTR api-int.ocp4.example.com.
;
11 IN PTR worker0.ocp4.example.com.
7 IN PTR worker1.ocp4.example.com.
;
;EOF15.6.7. Generating an SSH private key and adding it to the agent
If you want to perform installation debugging or disaster recovery on your cluster, you must provide an SSH key to both your ssh-agent and the installation program. You can use this key to access the bootstrap machine in a public cluster to troubleshoot installation issues.
In a production environment, you require disaster recovery and debugging.
Do not skip this procedure in production environments where disaster recovery and debugging is required.
You can use this key to SSH into the master nodes as the user core. When you deploy the cluster, the key is added to the core user’s ~/.ssh/authorized_keys list.
Procedure
If you do not have an SSH key that is configured for password-less authentication on your computer, create one. For example, on a computer that uses a Linux operating system, run the following command:
$ ssh-keygen -t ed25519 -N '' \ -f <path>/<file_name>1 - 1
- Specify the path and file name, such as
~/.ssh/id_rsa, of the new SSH key. If you have an existing key pair, ensure your public key is in the your~/.sshdirectory.
Running this command generates an SSH key that does not require a password in the location that you specified.
NoteIf you plan to install an OpenShift Container Platform cluster that uses FIPS Validated / Modules in Process cryptographic libraries on the
x86_64architecture, do not create a key that uses theed25519algorithm. Instead, create a key that uses thersaorecdsaalgorithm.Start the
ssh-agentprocess as a background task:$ eval "$(ssh-agent -s)"Example output
Agent pid 31874NoteIf your cluster is in FIPS mode, only use FIPS-compliant algorithms to generate the SSH key. The key must be either RSA or ECDSA.
Add your SSH private key to the
ssh-agent:$ ssh-add <path>/<file_name>1 Example output
Identity added: /home/<you>/<path>/<file_name> (<computer_name>)- 1
- Specify the path and file name for your SSH private key, such as
~/.ssh/id_rsa
Next steps
- When you install OpenShift Container Platform, provide the SSH public key to the installation program.
15.6.8. Obtaining the installation program
Before you install OpenShift Container Platform, download the installation file on your provisioning machine.
Prerequisites
- You have a machine that runs Linux, for example Red Hat Enterprise Linux 8, with 500 MB of local disk space
Procedure
- Access the Infrastructure Provider page on the OpenShift Cluster Manager site. If you have a Red Hat account, log in with your credentials. If you do not, create an account.
- Select your infrastructure provider.
Navigate to the page for your installation type, download the installation program for your operating system, and place the file in the directory where you will store the installation configuration files.
ImportantThe installation program creates several files on the computer that you use to install your cluster. You must keep the installation program and the files that the installation program creates after you finish installing the cluster. Both files are required to delete the cluster.
ImportantDeleting the files created by the installation program does not remove your cluster, even if the cluster failed during installation. To remove your cluster, complete the OpenShift Container Platform uninstallation procedures for your specific cloud provider.
Extract the installation program. For example, on a computer that uses a Linux operating system, run the following command:
$ tar xvf openshift-install-linux.tar.gz- Download your installation pull secret from the Red Hat OpenShift Cluster Manager. This pull secret allows you to authenticate with the services that are provided by the included authorities, including Quay.io, which serves the container images for OpenShift Container Platform components.
15.6.9. Manually creating the installation configuration file
For installations of OpenShift Container Platform that use user-provisioned infrastructure, you manually generate your installation configuration file.
Prerequisites
- Obtain the OpenShift Container Platform installation program and the access token for your cluster.
Procedure
Create an installation directory to store your required installation assets in:
$ mkdir <installation_directory>ImportantYou must create a directory. Some installation assets, like bootstrap X.509 certificates have short expiration intervals, so you must not reuse an installation directory. If you want to reuse individual files from another cluster installation, you can copy them into your directory. However, the file names for the installation assets might change between releases. Use caution when copying installation files from an earlier OpenShift Container Platform version.
Customize the following
install-config.yamlfile template and save it in the<installation_directory>.NoteYou must name this configuration file
install-config.yaml.Back up the
install-config.yamlfile so that you can use it to install multiple clusters.ImportantThe
install-config.yamlfile is consumed during the next step of the installation process. You must back it up now.
15.6.9.1. Sample install-config.yaml file for VMware vSphere
You can customize the install-config.yaml file to specify more details about your OpenShift Container Platform cluster’s platform or modify the values of the required parameters.
apiVersion: v1
baseDomain: example.com
compute:
- hyperthreading: Enabled
name: worker
replicas: 0
controlPlane:
hyperthreading: Enabled
name: master
replicas: 3
metadata:
name: test
platform:
vsphere:
vcenter: your.vcenter.server
username: username
password: password
datacenter: datacenter
defaultDatastore: datastore
folder: "/<datacenter_name>/vm/<folder_name>/<subfolder_name>"
fips: false
pullSecret: '{"auths": ...}'
sshKey: 'ssh-ed25519 AAAA...' - 1
- The base domain of the cluster. All DNS records must be sub-domains of this base and include the cluster name.
- 2 5
- The
controlPlanesection is a single mapping, but the compute section is a sequence of mappings. To meet the requirements of the different data structures, the first line of thecomputesection must begin with a hyphen,-, and the first line of thecontrolPlanesection must not. Although both sections currently define a single machine pool, it is possible that future versions of OpenShift Container Platform will support defining multiple compute pools during installation. Only one control plane pool is used. - 3 6
- Whether to enable or disable simultaneous multithreading, or
hyperthreading. By default, simultaneous multithreading is enabled to increase the performance of your machines' cores. You can disable it by setting the parameter value toDisabled. If you disable simultaneous multithreading in some cluster machines, you must disable it in all cluster machines.ImportantIf you disable simultaneous multithreading, ensure that your capacity planning accounts for the dramatically decreased machine performance. Your machines must use at least 8 CPUs and 32 GB of RAM if you disable simultaneous multithreading.
- 4
- You must set the value of the
replicasparameter to0. This parameter controls the number of workers that the cluster creates and manages for you, which are functions that the cluster does not perform when you use user-provisioned infrastructure. You must manually deploy worker machines for the cluster to use before you finish installing OpenShift Container Platform. - 7
- The number of control plane machines that you add to the cluster. Because the cluster uses this values as the number of etcd endpoints in the cluster, the value must match the number of control plane machines that you deploy.
- 8
- The cluster name that you specified in your DNS records.
- 9
- The fully-qualified hostname or IP address of the vCenter server.
- 10
- The name of the user for accessing the server. This user must have at least the roles and privileges that are required for static or dynamic persistent volume provisioning in vSphere.
- 11
- The password associated with the vSphere user.
- 12
- The vSphere datacenter.
- 13
- The default vSphere datastore to use.
- 14
- Optional: For installer-provisioned infrastructure, the absolute path of an existing folder where the installation program creates the virtual machines, for example,
/<datacenter_name>/vm/<folder_name>/<subfolder_name>. If you do not provide this value, the installation program creates a top-level folder in the datacenter virtual machine folder that is named with the infrastructure ID. If you are providing the infrastructure for the cluster, omit this parameter. - 15
- Whether to enable or disable FIPS mode. By default, FIPS mode is not enabled. If FIPS mode is enabled, the Red Hat Enterprise Linux CoreOS (RHCOS) machines that OpenShift Container Platform runs on bypass the default Kubernetes cryptography suite and use the cryptography modules that are provided with RHCOS instead.Important
The use of FIPS Validated / Modules in Process cryptographic libraries is only supported on OpenShift Container Platform deployments on the
x86_64architecture. - 16
- The pull secret that you obtained from OpenShift Cluster Manager. This pull secret allows you to authenticate with the services that are provided by the included authorities, including Quay.io, which serves the container images for OpenShift Container Platform components.
- 17
- The public portion of the default SSH key for the
coreuser in Red Hat Enterprise Linux CoreOS (RHCOS).
15.6.9.2. Configuring the cluster-wide proxy during installation
Production environments can deny direct access to the Internet and instead have an HTTP or HTTPS proxy available. You can configure a new OpenShift Container Platform cluster to use a proxy by configuring the proxy settings in the install-config.yaml file.
Prerequisites
-
You have an existing
install-config.yamlfile. You reviewed the sites that your cluster requires access to and determined whether any of them need to bypass the proxy. By default, all cluster egress traffic is proxied, including calls to hosting cloud provider APIs. You added sites to the
Proxyobject’sspec.noProxyfield to bypass the proxy if necessary.NoteThe
Proxyobjectstatus.noProxyfield is populated with the values of thenetworking.machineNetwork[].cidr,networking.clusterNetwork[].cidr, andnetworking.serviceNetwork[]fields from your installation configuration.For installations on Amazon Web Services (AWS), Google Cloud Platform (GCP), Microsoft Azure, and Red Hat OpenStack Platform (RHOSP), the
Proxyobjectstatus.noProxyfield is also populated with the instance metadata endpoint (169.254.169.254).
Procedure
Edit your
install-config.yamlfile and add the proxy settings. For example:apiVersion: v1 baseDomain: my.domain.com proxy: httpProxy: http://<username>:<pswd>@<ip>:<port>1 httpsProxy: https://<username>:<pswd>@<ip>:<port>2 noProxy: example.com3 additionalTrustBundle: |4 -----BEGIN CERTIFICATE----- <MY_TRUSTED_CA_CERT> -----END CERTIFICATE----- ...- 1
- A proxy URL to use for creating HTTP connections outside the cluster. The URL scheme must be
http. - 2
- A proxy URL to use for creating HTTPS connections outside the cluster.
- 3
- A comma-separated list of destination domain names, IP addresses, or other network CIDRs to exclude from proxying. Preface a domain with
.to match subdomains only. For example,.y.commatchesx.y.com, but noty.com. Use*to bypass the proxy for all destinations. You must include vCenter’s IP address and the IP range that you use for its machines. - 4
- If provided, the installation program generates a config map that is named
user-ca-bundlein theopenshift-confignamespace to hold the additional CA certificates. If you provideadditionalTrustBundleand at least one proxy setting, theProxyobject is configured to reference theuser-ca-bundleconfig map in thetrustedCAfield. The Cluster Network Operator then creates atrusted-ca-bundleconfig map that merges the contents specified for thetrustedCAparameter with the RHCOS trust bundle. TheadditionalTrustBundlefield is required unless the proxy’s identity certificate is signed by an authority from the RHCOS trust bundle.
NoteThe installation program does not support the proxy
readinessEndpointsfield.- Save the file and reference it when installing OpenShift Container Platform.
The installation program creates a cluster-wide proxy that is named cluster that uses the proxy settings in the provided install-config.yaml file. If no proxy settings are provided, a cluster Proxy object is still created, but it will have a nil spec.
Only the Proxy object named cluster is supported, and no additional proxies can be created.
15.6.10. Specifying advanced network configuration
You can use advanced configuration customization to integrate your cluster into your existing network environment by specifying additional configuration for your cluster network provider. You can specify advanced network configuration only before you install the cluster.
Modifying the OpenShift Container Platform manifest files created by the installation program is not supported. Applying a manifest file that you create, as in the following procedure, is supported.
Prerequisites
-
Create the
install-config.yamlfile and complete any modifications to it. - Create the Ignition config files for your cluster.
Procedure
Change to the directory that contains the installation program and create the manifests:
$ ./openshift-install create manifests --dir <installation_directory>where:
<installation_directory>-
Specifies the name of the directory that contains the
install-config.yamlfile for your cluster.
Create a stub manifest file for the advanced network configuration that is named
cluster-network-03-config.ymlin the<installation_directory>/manifests/directory:$ cat <<EOF > <installation_directory>/manifests/cluster-network-03-config.yml apiVersion: operator.openshift.io/v1 kind: Network metadata: name: cluster spec: EOFwhere:
<installation_directory>-
Specifies the directory name that contains the
manifests/directory for your cluster.
Open the
cluster-network-03-config.ymlfile in an editor and specify the advanced network configuration for your cluster, such as in the following examples:Specify a different VXLAN port for the OpenShift SDN network provider
apiVersion: operator.openshift.io/v1 kind: Network metadata: name: cluster spec: defaultNetwork: openshiftSDNConfig: vxlanPort: 4800Enable IPsec for the OVN-Kubernetes network provider
apiVersion: operator.openshift.io/v1 kind: Network metadata: name: cluster spec: defaultNetwork: ovnKubernetesConfig: ipsecConfig: {}-
Save the
cluster-network-03-config.ymlfile and quit the text editor. -
Optional: Back up the
manifests/cluster-network-03-config.ymlfile. The installation program deletes themanifests/directory when creating the cluster. Remove the Kubernetes manifest files that define the control plane machines and compute machineSets:
$ rm -f openshift/99_openshift-cluster-api_master-machines-*.yaml openshift/99_openshift-cluster-api_worker-machineset-*.yamlBecause you create and manage these resources yourself, you do not have to initialize them.
- You can preserve the MachineSet files to create compute machines by using the machine API, but you must update references to them to match your environment.
15.6.11. Cluster Network Operator configuration
The configuration for the cluster network is specified as part of the Cluster Network Operator (CNO) configuration and stored in a custom resource (CR) object that is named cluster. The CR specifies the fields for the Network API in the operator.openshift.io API group.
The CNO configuration inherits the following fields during cluster installation from the Network API in the Network.config.openshift.io API group and these fields cannot be changed:
clusterNetwork- IP address pools from which pod IP addresses are allocated.
serviceNetwork- IP address pool for services.
defaultNetwork.type- Cluster network provider, such as OpenShift SDN or OVN-Kubernetes.
You can specify the cluster network provider configuration for your cluster by setting the fields for the defaultNetwork object in the CNO object named cluster.
15.6.11.1. Cluster Network Operator configuration object
The fields for the Cluster Network Operator (CNO) are described in the following table:
| Field | Type | Description |
|---|---|---|
|
|
|
The name of the CNO object. This name is always |
|
|
| A list specifying the blocks of IP addresses from which pod IP addresses are allocated and the subnet prefix length assigned to each individual node in the cluster. For example:
This value is ready-only and specified in the |
|
|
| A block of IP addresses for services. The OpenShift SDN and OVN-Kubernetes Container Network Interface (CNI) network providers support only a single IP address block for the service network. For example:
This value is ready-only and specified in the |
|
|
| Configures the Container Network Interface (CNI) cluster network provider for the cluster network. |
|
|
| The fields for this object specify the kube-proxy configuration. If you are using the OVN-Kubernetes cluster network provider, the kube-proxy configuration has no effect. |
defaultNetwork object configuration
The values for the defaultNetwork object are defined in the following table:
| Field | Type | Description |
|---|---|---|
|
|
|
Either Note OpenShift Container Platform uses the OpenShift SDN Container Network Interface (CNI) cluster network provider by default. |
|
|
| This object is only valid for the OpenShift SDN cluster network provider. |
|
|
| This object is only valid for the OVN-Kubernetes cluster network provider. |
Configuration for the OpenShift SDN CNI cluster network provider
The following table describes the configuration fields for the OpenShift SDN Container Network Interface (CNI) cluster network provider.
| Field | Type | Description |
|---|---|---|
|
|
|
Configures the network isolation mode for OpenShift SDN. The default value is
The values |
|
|
| The maximum transmission unit (MTU) for the VXLAN overlay network. This is detected automatically based on the MTU of the primary network interface. You do not normally need to override the detected MTU. If the auto-detected value is not what you expected it to be, confirm that the MTU on the primary network interface on your nodes is correct. You cannot use this option to change the MTU value of the primary network interface on the nodes.
If your cluster requires different MTU values for different nodes, you must set this value to This value cannot be changed after cluster installation. |
|
|
|
The port to use for all VXLAN packets. The default value is If you are running in a virtualized environment with existing nodes that are part of another VXLAN network, then you might be required to change this. For example, when running an OpenShift SDN overlay on top of VMware NSX-T, you must select an alternate port for the VXLAN, because both SDNs use the same default VXLAN port number.
On Amazon Web Services (AWS), you can select an alternate port for the VXLAN between port |
Example OpenShift SDN configuration
defaultNetwork:
type: OpenShiftSDN
openshiftSDNConfig:
mode: NetworkPolicy
mtu: 1450
vxlanPort: 4789Configuration for the OVN-Kubernetes CNI cluster network provider
The following table describes the configuration fields for the OVN-Kubernetes CNI cluster network provider.
| Field | Type | Description |
|---|---|---|
|
|
| The maximum transmission unit (MTU) for the Geneve (Generic Network Virtualization Encapsulation) overlay network. This is detected automatically based on the MTU of the primary network interface. You do not normally need to override the detected MTU. If the auto-detected value is not what you expected it to be, confirm that the MTU on the primary network interface on your nodes is correct. You cannot use this option to change the MTU value of the primary network interface on the nodes.
If your cluster requires different MTU values for different nodes, you must set this value to This value cannot be changed after cluster installation. |
|
|
|
The port to use for all Geneve packets. The default value is |
|
|
| Specify an empty object to enable IPsec encryption. This value cannot be changed after cluster installation. |
Example OVN-Kubernetes configuration
defaultNetwork:
type: OVNKubernetes
ovnKubernetesConfig:
mtu: 1400
genevePort: 6081
ipsecConfig: {}kubeProxyConfig object configuration
The values for the kubeProxyConfig object are defined in the following table:
| Field | Type | Description |
|---|---|---|
|
|
|
The refresh period for Note
Because of performance improvements introduced in OpenShift Container Platform 4.3 and greater, adjusting the |
|
|
|
The minimum duration before refreshing |
15.6.12. Creating the Ignition config files
Because you must manually start the cluster machines, you must generate the Ignition config files that the cluster needs to make its machines.
-
The Ignition config files that the installation program generates contain certificates that expire after 24 hours, which are then renewed at that time. If the cluster is shut down before renewing the certificates and the cluster is later restarted after the 24 hours have elapsed, the cluster automatically recovers the expired certificates. The exception is that you must manually approve the pending
node-bootstrappercertificate signing requests (CSRs) to recover kubelet certificates. See the documentation for Recovering from expired control plane certificates for more information. - It is recommended that you use Ignition config files within 12 hours after they are generated because the 24-hour certificate rotates from 16 to 22 hours after the cluster is installed. By using the Ignition config files within 12 hours, you can avoid installation failure if the certificate update runs during installation.
Prerequisites
- Obtain the OpenShift Container Platform installation program and the pull secret for your cluster. For a restricted network installation, these files are on your mirror host.
Procedure
Obtain the Ignition config files:
$ ./openshift-install create ignition-configs --dir <installation_directory>1 - 1
- For
<installation_directory>, specify the directory name to store the files that the installation program creates.
ImportantIf you created an
install-config.yamlfile, specify the directory that contains it. Otherwise, specify an empty directory. Some installation assets, like bootstrap X.509 certificates have short expiration intervals, so you must not reuse an installation directory. If you want to reuse individual files from another cluster installation, you can copy them into your directory. However, the file names for the installation assets might change between releases. Use caution when copying installation files from an earlier OpenShift Container Platform version.The following files are generated in the directory:
. ├── auth │ ├── kubeadmin-password │ └── kubeconfig ├── bootstrap.ign ├── master.ign ├── metadata.json └── worker.ign
15.6.13. Extracting the infrastructure name
The Ignition config files contain a unique cluster identifier that you can use to uniquely identify your cluster in VMware Cloud on AWS. If you plan to use the cluster identifier as the name of your virtual machine folder, you must extract it.
Prerequisites
- You obtained the OpenShift Container Platform installation program and the pull secret for your cluster.
- You generated the Ignition config files for your cluster.
-
You installed the
jqpackage.
Procedure
To extract and view the infrastructure name from the Ignition config file metadata, run the following command:
$ jq -r .infraID <installation_directory>/metadata.json1 - 1
- For
<installation_directory>, specify the path to the directory that you stored the installation files in.
Example output
openshift-vw9j61 - 1
- The output of this command is your cluster name and a random string.
15.6.14. Creating Red Hat Enterprise Linux CoreOS (RHCOS) machines in vSphere
Before you install a cluster that contains user-provisioned infrastructure on VMware vSphere, you must create RHCOS machines on vSphere hosts for it to use.
Prerequisites
- You have obtained the Ignition config files for your cluster.
- You have access to an HTTP server that you can access from your computer and that the machines that you create can access.
- You have created a vSphere cluster.
Procedure
-
Upload the bootstrap Ignition config file, which is named
<installation_directory>/bootstrap.ign, that the installation program created to your HTTP server. Note the URL of this file. Save the following secondary Ignition config file for your bootstrap node to your computer as
<installation_directory>/merge-bootstrap.ign:{ "ignition": { "config": { "merge": [ { "source": "<bootstrap_ignition_config_url>",1 "verification": {} } ] }, "timeouts": {}, "version": "3.2.0" }, "networkd": {}, "passwd": {}, "storage": {}, "systemd": {} }- 1
- Specify the URL of the bootstrap Ignition config file that you hosted.
When you create the virtual machine (VM) for the bootstrap machine, you use this Ignition config file.
Locate the following Ignition config files that the installation program created:
-
<installation_directory>/master.ign -
<installation_directory>/worker.ign -
<installation_directory>/merge-bootstrap.ign
-
Convert the Ignition config files to Base64 encoding. Later in this procedure, you must add these files to the extra configuration parameter
guestinfo.ignition.config.datain your VM.For example, if you use a Linux operating system, you can use the
base64command to encode the files.$ base64 -w0 <installation_directory>/master.ign > <installation_directory>/master.64$ base64 -w0 <installation_directory>/worker.ign > <installation_directory>/worker.64$ base64 -w0 <installation_directory>/merge-bootstrap.ign > <installation_directory>/merge-bootstrap.64ImportantIf you plan to add more compute machines to your cluster after you finish installation, do not delete these files.
Obtain the RHCOS OVA image. Images are available from the RHCOS image mirror page.
ImportantThe RHCOS images might not change with every release of OpenShift Container Platform. You must download an image with the highest version that is less than or equal to the OpenShift Container Platform version that you install. Use the image version that matches your OpenShift Container Platform version if it is available.
The filename contains the OpenShift Container Platform version number in the format
rhcos-vmware.<architecture>.ova.In the vSphere Client, create a folder in your datacenter to store your VMs.
- Click the VMs and Templates view.
- Right-click the name of your datacenter.
- Click New Folder → New VM and Template Folder.
-
In the window that is displayed, enter the folder name. If you did not specify an existing folder in the
install-config.yamlfile, then create a folder with the same name as the infrastructure ID. You use this folder name so vCenter dynamically provisions storage in the appropriate location for its Workspace configuration.
In the vSphere Client, create a template for the OVA image and then clone the template as needed.
NoteIn the following steps, you create a template and then clone the template for all of your cluster machines. You then provide the location for the Ignition config file for that cloned machine type when you provision the VMs.
- From the Hosts and Clusters tab, right-click your cluster name and select Deploy OVF Template.
- On the Select an OVF tab, specify the name of the RHCOS OVA file that you downloaded.
-
On the Select a name and folder tab, set a Virtual machine name for your template, such as
Template-RHCOS. Click the name of your vSphere cluster and select the folder you created in the previous step. - On the Select a compute resource tab, click the name of your vSphere cluster.
On the Select storage tab, configure the storage options for your VM.
- Select Thin Provision or Thick Provision, based on your storage preferences.
-
Select the datastore that you specified in your
install-config.yamlfile.
- On the Select network tab, specify the network that you configured for the cluster, if available.
When creating the OVF template, do not specify values on the Customize template tab or configure the template any further.
ImportantDo not start the original VM template. The VM template must remain off and must be cloned for new RHCOS machines. Starting the VM template configures the VM template as a VM on the platform, which prevents it from being used as a template that machine sets can apply configurations to.
After the template deploys, deploy a VM for a machine in the cluster.
- Right-click the template name and click Clone → Clone to Virtual Machine.
-
On the Select a name and folder tab, specify a name for the VM. You might include the machine type in the name, such as
control-plane-0orcompute-1. - On the Select a name and folder tab, select the name of the folder that you created for the cluster.
- On the Select a compute resource tab, select the name of a host in your datacenter.
- Optional: On the Select storage tab, customize the storage options.
- On the Select clone options, select Customize this virtual machine’s hardware.
On the Customize hardware tab, click VM Options → Advanced.
Optional: Override default DHCP networking in vSphere. To enable static IP networking:
Set your static IP configuration:
$ export IPCFG="ip=<ip>::<gateway>:<netmask>:<hostname>:<iface>:none nameserver=srv1 [nameserver=srv2 [nameserver=srv3 [...]]]"Example command
$ export IPCFG="ip=192.168.100.101::192.168.100.254:255.255.255.0:::none nameserver=8.8.8.8"Set the
guestinfo.afterburn.initrd.network-kargsproperty before booting a VM from an OVA in vSphere:$ govc vm.change -vm "<vm_name>" -e "guestinfo.afterburn.initrd.network-kargs=${IPCFG}"
Optional: In the event of cluster performance issues, from the Latency Sensitivity list, select High. Ensure that your VM’s CPU and memory reservation have the following values:
- Memory reservation value must be equal to its configured memory size.
- CPU reservation value must be at least the number of low latency virtual CPUs multiplied by the measured physical CPU speed.
Click Edit Configuration, and on the Configuration Parameters window, click Add Configuration Params. Define the following parameter names and values:
-
guestinfo.ignition.config.data: Locate the base-64 encoded files that you created previously in this procedure, and paste the contents of the base64-encoded Ignition config file for this machine type. -
guestinfo.ignition.config.data.encoding: Specifybase64. -
disk.EnableUUID: SpecifyTRUE.
-
- In the Virtual Hardware panel of the Customize hardware tab, modify the specified values as required. Ensure that the amount of RAM, CPU, and disk storage meets the minimum requirements for the machine type.
- Complete the configuration and power on the VM.
Create the rest of the machines for your cluster by following the preceding steps for each machine.
ImportantYou must create the bootstrap and control plane machines at this time. Because some pods are deployed on compute machines by default, also create at least two compute machines before you install the cluster.
15.6.15. Creating more Red Hat Enterprise Linux CoreOS (RHCOS) machines in vSphere
You can create more compute machines for your cluster that uses user-provisioned infrastructure on VMware vSphere.
Prerequisites
- Obtain the base64-encoded Ignition file for your compute machines.
- You have access to the vSphere template that you created for your cluster.
Procedure
After the template deploys, deploy a VM for a machine in the cluster.
- Right-click the template’s name and click Clone → Clone to Virtual Machine.
-
On the Select a name and folder tab, specify a name for the VM. You might include the machine type in the name, such as
compute-1. - On the Select a name and folder tab, select the name of the folder that you created for the cluster.
- On the Select a compute resource tab, select the name of a host in your datacenter.
- Optional: On the Select storage tab, customize the storage options.
- On the Select clone options, select Customize this virtual machine’s hardware.
On the Customize hardware tab, click VM Options → Advanced.
- From the Latency Sensitivity list, select High.
Click Edit Configuration, and on the Configuration Parameters window, click Add Configuration Params. Define the following parameter names and values:
-
guestinfo.ignition.config.data: Paste the contents of the base64-encoded compute Ignition config file for this machine type. -
guestinfo.ignition.config.data.encoding: Specifybase64. -
disk.EnableUUID: SpecifyTRUE.
-
- In the Virtual Hardware panel of the Customize hardware tab, modify the specified values as required. Ensure that the amount of RAM, CPU, and disk storage meets the minimum requirements for the machine type. Also, make sure to select the correct network under Add network adapter if there are multiple networks available.
- Complete the configuration and power on the VM.
- Continue to create more compute machines for your cluster.
15.6.16. Disk partitioning
In most cases, data partitions are originally created by installing RHCOS, rather than by installing another operating system. In such cases, the OpenShift Container Platform installer should be allowed to configure your disk partitions.
However, there are two cases where you might want to intervene to override the default partitioning when installing an OpenShift Container Platform node:
Create separate partitions: For greenfield installations on an empty disk, you might want to add separate storage to a partition. This is officially supported for making
/varor a subdirectory of/var, such as/var/lib/etcd, a separate partition, but not both.ImportantKubernetes supports only two filesystem partitions. If you add more than one partition to the original configuration, Kubernetes cannot monitor all of them.
-
Retain existing partitions: For a brownfield installation where you are reinstalling OpenShift Container Platform on an existing node and want to retain data partitions installed from your previous operating system, there are both boot arguments and options to
coreos-installerthat allow you to retain existing data partitions.
Creating a separate /var partition
In general, disk partitioning for OpenShift Container Platform should be left to the installer. However, there are cases where you might want to create separate partitions in a part of the filesystem that you expect to grow.
OpenShift Container Platform supports the addition of a single partition to attach storage to either the /var partition or a subdirectory of /var. For example:
-
/var/lib/containers: Holds container-related content that can grow as more images and containers are added to a system. -
/var/lib/etcd: Holds data that you might want to keep separate for purposes such as performance optimization of etcd storage. -
/var: Holds data that you might want to keep separate for purposes such as auditing.
Storing the contents of a /var directory separately makes it easier to grow storage for those areas as needed and reinstall OpenShift Container Platform at a later date and keep that data intact. With this method, you will not have to pull all your containers again, nor will you have to copy massive log files when you update systems.
Because /var must be in place before a fresh installation of Red Hat Enterprise Linux CoreOS (RHCOS), the following procedure sets up the separate /var partition by creating a machine config that is inserted during the openshift-install preparation phases of an OpenShift Container Platform installation.
Procedure
Create a directory to hold the OpenShift Container Platform installation files:
$ mkdir $HOME/clusterconfigRun
openshift-installto create a set of files in themanifestandopenshiftsubdirectories. Answer the system questions as you are prompted:$ openshift-install create manifests --dir $HOME/clusterconfig ? SSH Public Key ... $ ls $HOME/clusterconfig/openshift/ 99_kubeadmin-password-secret.yaml 99_openshift-cluster-api_master-machines-0.yaml 99_openshift-cluster-api_master-machines-1.yaml 99_openshift-cluster-api_master-machines-2.yaml ...Create a
MachineConfigobject and add it to a file in theopenshiftdirectory. For example, name the file98-var-partition.yaml, change the disk device name to the name of the storage device on theworkersystems, and set the storage size as appropriate. This example places the/vardirectory on a separate partition:apiVersion: machineconfiguration.openshift.io/v1 kind: MachineConfig metadata: labels: machineconfiguration.openshift.io/role: worker name: 98-var-partition spec: config: ignition: version: 3.2.0 storage: disks: - device: /dev/<device_name>1 partitions: - label: var startMiB: <partition_start_offset>2 sizeMiB: <partition_size>3 filesystems: - device: /dev/disk/by-partlabel/var path: /var format: xfs systemd: units: - name: var.mount4 enabled: true contents: | [Unit] Before=local-fs.target [Mount] What=/dev/disk/by-partlabel/var Where=/var Options=defaults,prjquota5 [Install] WantedBy=local-fs.target- 1
- The storage device name of the disk that you want to partition.
- 2
- When adding a data partition to the boot disk, a minimum value of 25000 mebibytes is recommended. The root file system is automatically resized to fill all available space up to the specified offset. If no value is specified, or if the specified value is smaller than the recommended minimum, the resulting root file system will be too small, and future reinstalls of RHCOS might overwrite the beginning of the data partition.
- 3
- The size of the data partition in mebibytes.
- 4
- The name of the mount unit must match the directory specified in the
Where=directive. For example, for a filesystem mounted on/var/lib/containers, the unit must be namedvar-lib-containers.mount. - 5
- The
prjquotamount option must be enabled for filesystems used for container storage.
NoteWhen creating a separate
/varpartition, you cannot use different instance types for worker nodes, if the different instance types do not have the same device name.Run
openshift-installagain to create Ignition configs from a set of files in themanifestandopenshiftsubdirectories:$ openshift-install create ignition-configs --dir $HOME/clusterconfig $ ls $HOME/clusterconfig/ auth bootstrap.ign master.ign metadata.json worker.ign
Now you can use the Ignition config files as input to the vSphere installation procedures to install Red Hat Enterprise Linux CoreOS (RHCOS) systems.
15.6.17. Updating the bootloader using bootupd
To update the bootloader by using bootupd, you must either install bootupd on RHCOS machines manually or provide a machine config with the enabled systemd unit. Unlike grubby or other bootloader tools, bootupd does not manage kernel space configuration such as passing kernel arguments.
After you have installed bootupd, you can manage it remotely from the OpenShift Container Platform cluster.
It is recommended that you use bootupd only on bare metal or virtualized hypervisor installations, such as for protection against the BootHole vulnerability.
Manual install method
You can manually install bootupd by using the bootctl command-line tool.
Inspect the system status:
# bootupctl statusExample output
Component EFI Installed: grub2-efi-x64-1:2.04-31.fc33.x86_64,shim-x64-15-8.x86_64 Update: At latest version
RHCOS images created without
bootupdinstalled on them require an explicit adoption phase.If the system status is
Adoptable, perform the adoption:# bootupctl adopt-and-updateExample output
Updated: grub2-efi-x64-1:2.04-31.fc33.x86_64,shim-x64-15-8.x86_64If an update is available, apply the update so that the changes take effect on the next reboot:
# bootupctl updateExample output
Updated: grub2-efi-x64-1:2.04-31.fc33.x86_64,shim-x64-15-8.x86_64
Machine config method
Another way to enable bootupd is by providing a machine config.
Provide a machine config file with the enabled
systemdunit, as shown in the following example:Example output
variant: rhcos version: 1.1.0 systemd: units: - name: custom-bootupd-auto.service enabled: true contents: | [Unit] Description=Bootupd automatic update [Service] ExecStart=/usr/bin/bootupctl update RemainAfterExit=yes [Install] WantedBy=multi-user.target
15.6.18. Creating the cluster
To create the OpenShift Container Platform cluster, you wait for the bootstrap process to complete on the machines that you provisioned by using the Ignition config files that you generated with the installation program.
Prerequisites
- Create the required infrastructure for the cluster.
- You obtained the installation program and generated the Ignition config files for your cluster.
- You used the Ignition config files to create RHCOS machines for your cluster.
- Your machines have direct Internet access or have an HTTP or HTTPS proxy available.
Procedure
Monitor the bootstrap process:
$ ./openshift-install --dir <installation_directory> wait-for bootstrap-complete \1 --log-level=info2 Example output
INFO Waiting up to 30m0s for the Kubernetes API at https://api.test.example.com:6443... INFO API v1.20.0 up INFO Waiting up to 30m0s for bootstrapping to complete... INFO It is now safe to remove the bootstrap resourcesThe command succeeds when the Kubernetes API server signals that it has been bootstrapped on the control plane machines.
After bootstrap process is complete, remove the bootstrap machine from the load balancer.
ImportantYou must remove the bootstrap machine from the load balancer at this point. You can also remove or reformat the machine itself.
15.6.19. Logging in to the cluster by using the CLI
You can log in to your cluster as a default system user by exporting the cluster kubeconfig file. The kubeconfig file contains information about the cluster that is used by the CLI to connect a client to the correct cluster and API server. The file is specific to a cluster and is created during OpenShift Container Platform installation.
Prerequisites
- You deployed an OpenShift Container Platform cluster.
-
You installed the
ocCLI.
Procedure
Export the
kubeadmincredentials:$ export KUBECONFIG=<installation_directory>/auth/kubeconfig1 - 1
- For
<installation_directory>, specify the path to the directory that you stored the installation files in.
Verify you can run
occommands successfully using the exported configuration:$ oc whoamiExample output
system:admin
15.6.20. Approving the certificate signing requests for your machines
When you add machines to a cluster, two pending certificate signing requests (CSRs) are generated for each machine that you added. You must confirm that these CSRs are approved or, if necessary, approve them yourself. The client requests must be approved first, followed by the server requests.
Prerequisites
- You added machines to your cluster.
Procedure
Confirm that the cluster recognizes the machines:
$ oc get nodesExample output
NAME STATUS ROLES AGE VERSION master-0 Ready master 63m v1.20.0 master-1 Ready master 63m v1.20.0 master-2 Ready master 64m v1.20.0The output lists all of the machines that you created.
NoteThe preceding output might not include the compute nodes, also known as worker nodes, until some CSRs are approved.
Review the pending CSRs and ensure that you see the client requests with the
PendingorApprovedstatus for each machine that you added to the cluster:$ oc get csrExample output
NAME AGE REQUESTOR CONDITION csr-mddf5 20m system:node:master-01.example.com Approved,Issued csr-z5rln 16m system:node:worker-21.example.com Approved,IssuedIf the CSRs were not approved, after all of the pending CSRs for the machines you added are in
Pendingstatus, approve the CSRs for your cluster machines:NoteBecause the CSRs rotate automatically, approve your CSRs within an hour of adding the machines to the cluster. If you do not approve them within an hour, the certificates will rotate, and more than two certificates will be present for each node. You must approve all of these certificates. Once the client CSR is approved, the Kubelet creates a secondary CSR for the serving certificate, which requires manual approval. Then, subsequent serving certificate renewal requests are automatically approved by the
machine-approverif the Kubelet requests a new certificate with identical parameters.NoteFor clusters running on platforms that are not machine API enabled, such as bare metal and other user-provisioned infrastructure, you must implement a method of automatically approving the kubelet serving certificate requests (CSRs). If a request is not approved, then the
oc exec,oc rsh, andoc logscommands cannot succeed, because a serving certificate is required when the API server connects to the kubelet. Any operation that contacts the Kubelet endpoint requires this certificate approval to be in place. The method must watch for new CSRs, confirm that the CSR was submitted by thenode-bootstrapperservice account in thesystem:nodeorsystem:admingroups, and confirm the identity of the node.To approve them individually, run the following command for each valid CSR:
$ oc adm certificate approve <csr_name>1 - 1
<csr_name>is the name of a CSR from the list of current CSRs.
To approve all pending CSRs, run the following command:
$ oc get csr -o go-template='{{range .items}}{{if not .status}}{{.metadata.name}}{{"\n"}}{{end}}{{end}}' | xargs --no-run-if-empty oc adm certificate approveNoteSome Operators might not become available until some CSRs are approved.
Now that your client requests are approved, you must review the server requests for each machine that you added to the cluster:
$ oc get csrExample output
NAME AGE REQUESTOR CONDITION csr-bfd72 5m26s system:node:ip-10-0-50-126.us-east-2.compute.internal Pending csr-c57lv 5m26s system:node:ip-10-0-95-157.us-east-2.compute.internal Pending ...If the remaining CSRs are not approved, and are in the
Pendingstatus, approve the CSRs for your cluster machines:To approve them individually, run the following command for each valid CSR:
$ oc adm certificate approve <csr_name>1 - 1
<csr_name>is the name of a CSR from the list of current CSRs.
To approve all pending CSRs, run the following command:
$ oc get csr -o go-template='{{range .items}}{{if not .status}}{{.metadata.name}}{{"\n"}}{{end}}{{end}}' | xargs oc adm certificate approve
After all client and server CSRs have been approved, the machines have the
Readystatus. Verify this by running the following command:$ oc get nodesExample output
NAME STATUS ROLES AGE VERSION master-0 Ready master 73m v1.20.0 master-1 Ready master 73m v1.20.0 master-2 Ready master 74m v1.20.0 worker-0 Ready worker 11m v1.20.0 worker-1 Ready worker 11m v1.20.0NoteIt can take a few minutes after approval of the server CSRs for the machines to transition to the
Readystatus.
Additional information
- For more information on CSRs, see Certificate Signing Requests.
15.6.21. Initial Operator configuration
After the control plane initializes, you must immediately configure some Operators so that they all become available.
Prerequisites
- Your control plane has initialized.
Procedure
Watch the cluster components come online:
$ watch -n5 oc get clusteroperatorsExample output
NAME VERSION AVAILABLE PROGRESSING DEGRADED SINCE authentication 4.7.0 True False False 3h56m baremetal 4.7.0 True False False 29h cloud-credential 4.7.0 True False False 29h cluster-autoscaler 4.7.0 True False False 29h config-operator 4.7.0 True False False 6h39m console 4.7.0 True False False 3h59m csi-snapshot-controller 4.7.0 True False False 4h12m dns 4.7.0 True False False 4h15m etcd 4.7.0 True False False 29h image-registry 4.7.0 True False False 3h59m ingress 4.7.0 True False False 4h30m insights 4.7.0 True False False 29h kube-apiserver 4.7.0 True False False 29h kube-controller-manager 4.7.0 True False False 29h kube-scheduler 4.7.0 True False False 29h kube-storage-version-migrator 4.7.0 True False False 4h2m machine-api 4.7.0 True False False 29h machine-approver 4.7.0 True False False 6h34m machine-config 4.7.0 True False False 3h56m marketplace 4.7.0 True False False 4h2m monitoring 4.7.0 True False False 6h31m network 4.7.0 True False False 29h node-tuning 4.7.0 True False False 4h30m openshift-apiserver 4.7.0 True False False 3h56m openshift-controller-manager 4.7.0 True False False 4h36m openshift-samples 4.7.0 True False False 4h30m operator-lifecycle-manager 4.7.0 True False False 29h operator-lifecycle-manager-catalog 4.7.0 True False False 29h operator-lifecycle-manager-packageserver 4.7.0 True False False 3h59m service-ca 4.7.0 True False False 29h storage 4.7.0 True False False 4h30m- Configure the Operators that are not available.
15.6.21.1. Image registry removed during installation
On platforms that do not provide shareable object storage, the OpenShift Image Registry Operator bootstraps itself as Removed. This allows openshift-installer to complete installations on these platform types.
After installation, you must edit the Image Registry Operator configuration to switch the managementState from Removed to Managed.
The Prometheus console provides an ImageRegistryRemoved alert, for example:
"Image Registry has been removed. ImageStreamTags, BuildConfigs and DeploymentConfigs which reference ImageStreamTags may not work as expected. Please configure storage and update the config to Managed state by editing configs.imageregistry.operator.openshift.io."
15.6.21.2. Image registry storage configuration
The Image Registry Operator is not initially available for platforms that do not provide default storage. After installation, you must configure your registry to use storage so that the Registry Operator is made available.
Instructions are shown for configuring a persistent volume, which is required for production clusters. Where applicable, instructions are shown for configuring an empty directory as the storage location, which is available for only non-production clusters.
Additional instructions are provided for allowing the image registry to use block storage types by using the Recreate rollout strategy during upgrades.
15.6.21.2.1. Configuring block registry storage for VMware vSphere
To allow the image registry to use block storage types such as vSphere Virtual Machine Disk (VMDK) during upgrades as a cluster administrator, you can use the Recreate rollout strategy.
Block storage volumes are supported but not recommended for use with image registry on production clusters. An installation where the registry is configured on block storage is not highly available because the registry cannot have more than one replica.
Procedure
To set the image registry storage as a block storage type, patch the registry so that it uses the
Recreaterollout strategy and runs with only1replica:$ oc patch config.imageregistry.operator.openshift.io/cluster --type=merge -p '{"spec":{"rolloutStrategy":"Recreate","replicas":1}}'Provision the PV for the block storage device, and create a PVC for that volume. The requested block volume uses the ReadWriteOnce (RWO) access mode.
Create a
pvc.yamlfile with the following contents to define a VMware vSpherePersistentVolumeClaimobject:kind: PersistentVolumeClaim apiVersion: v1 metadata: name: image-registry-storage1 namespace: openshift-image-registry2 spec: accessModes: - ReadWriteOnce3 resources: requests: storage: 100Gi4 - 1
- A unique name that represents the
PersistentVolumeClaimobject. - 2
- The namespace for the
PersistentVolumeClaimobject, which isopenshift-image-registry. - 3
- The access mode of the persistent volume claim. With
ReadWriteOnce, the volume can be mounted with read and write permissions by a single node. - 4
- The size of the persistent volume claim.
Create the
PersistentVolumeClaimobject from the file:$ oc create -f pvc.yaml -n openshift-image-registry
Edit the registry configuration so that it references the correct PVC:
$ oc edit config.imageregistry.operator.openshift.io -o yamlExample output
storage: pvc: claim:1 - 1
- Creating a custom PVC allows you to leave the
claimfield blank for the default automatic creation of animage-registry-storagePVC.
For instructions about configuring registry storage so that it references the correct PVC, see Configuring the registry for vSphere.
15.6.22. Completing installation on user-provisioned infrastructure
After you complete the Operator configuration, you can finish installing the cluster on infrastructure that you provide.
Prerequisites
- Your control plane has initialized.
- You have completed the initial Operator configuration.
Procedure
Confirm that all the cluster components are online with the following command:
$ watch -n5 oc get clusteroperatorsExample output
NAME VERSION AVAILABLE PROGRESSING DEGRADED SINCE authentication 4.7.0 True False False 3h56m baremetal 4.7.0 True False False 29h cloud-credential 4.7.0 True False False 29h cluster-autoscaler 4.7.0 True False False 29h config-operator 4.7.0 True False False 6h39m console 4.7.0 True False False 3h59m csi-snapshot-controller 4.7.0 True False False 4h12m dns 4.7.0 True False False 4h15m etcd 4.7.0 True False False 29h image-registry 4.7.0 True False False 3h59m ingress 4.7.0 True False False 4h30m insights 4.7.0 True False False 29h kube-apiserver 4.7.0 True False False 29h kube-controller-manager 4.7.0 True False False 29h kube-scheduler 4.7.0 True False False 29h kube-storage-version-migrator 4.7.0 True False False 4h2m machine-api 4.7.0 True False False 29h machine-approver 4.7.0 True False False 6h34m machine-config 4.7.0 True False False 3h56m marketplace 4.7.0 True False False 4h2m monitoring 4.7.0 True False False 6h31m network 4.7.0 True False False 29h node-tuning 4.7.0 True False False 4h30m openshift-apiserver 4.7.0 True False False 3h56m openshift-controller-manager 4.7.0 True False False 4h36m openshift-samples 4.7.0 True False False 4h30m operator-lifecycle-manager 4.7.0 True False False 29h operator-lifecycle-manager-catalog 4.7.0 True False False 29h operator-lifecycle-manager-packageserver 4.7.0 True False False 3h59m service-ca 4.7.0 True False False 29h storage 4.7.0 True False False 4h30mAlternatively, the following command notifies you when all of the clusters are available. It also retrieves and displays credentials:
$ ./openshift-install --dir <installation_directory> wait-for install-complete1 - 1
- For
<installation_directory>, specify the path to the directory that you stored the installation files in.
Example output
INFO Waiting up to 30m0s for the cluster to initialize...The command succeeds when the Cluster Version Operator finishes deploying the OpenShift Container Platform cluster from Kubernetes API server.
Important-
The Ignition config files that the installation program generates contain certificates that expire after 24 hours, which are then renewed at that time. If the cluster is shut down before renewing the certificates and the cluster is later restarted after the 24 hours have elapsed, the cluster automatically recovers the expired certificates. The exception is that you must manually approve the pending
node-bootstrappercertificate signing requests (CSRs) to recover kubelet certificates. See the documentation for Recovering from expired control plane certificates for more information. - It is recommended that you use Ignition config files within 12 hours after they are generated because the 24-hour certificate rotates from 16 to 22 hours after the cluster is installed. By using the Ignition config files within 12 hours, you can avoid installation failure if the certificate update runs during installation.
Confirm that the Kubernetes API server is communicating with the pods.
To view a list of all pods, use the following command:
$ oc get pods --all-namespacesExample output
NAMESPACE NAME READY STATUS RESTARTS AGE openshift-apiserver-operator openshift-apiserver-operator-85cb746d55-zqhs8 1/1 Running 1 9m openshift-apiserver apiserver-67b9g 1/1 Running 0 3m openshift-apiserver apiserver-ljcmx 1/1 Running 0 1m openshift-apiserver apiserver-z25h4 1/1 Running 0 2m openshift-authentication-operator authentication-operator-69d5d8bf84-vh2n8 1/1 Running 0 5m ...View the logs for a pod that is listed in the output of the previous command by using the following command:
$ oc logs <pod_name> -n <namespace>1 - 1
- Specify the pod name and namespace, as shown in the output of the previous command.
If the pod logs display, the Kubernetes API server can communicate with the cluster machines.
For an installation with Fibre Channel Protocol (FCP), additional steps are required to enable multipathing. Do not enable multipathing during installation.
See "Enabling multipathing with kernel arguments on RHCOS" in the Post-installation configuration documentation for more information.
All the worker nodes are restarted. To monitor the process, enter the following command:
$ oc get nodes -wNoteIf you have additional machine types such as infrastructure nodes, repeat the process for these types.
You can add extra compute machines after the cluster installation is completed by following Adding compute machines to vSphere.
15.6.23. Backing up VMware vSphere volumes
OpenShift Container Platform provisions new volumes as independent persistent disks to freely attach and detach the volume on any node in the cluster. As a consequence, it is not possible to back up volumes that use snapshots, or to restore volumes from snapshots. See Snapshot Limitations for more information.
Procedure
To create a backup of persistent volumes:
- Stop the application that is using the persistent volume.
- Clone the persistent volume.
- Restart the application.
- Create a backup of the cloned volume.
- Delete the cloned volume.
15.6.24. Telemetry access for OpenShift Container Platform
In OpenShift Container Platform 4.7, the Telemetry service, which runs by default to provide metrics about cluster health and the success of updates, requires internet access. If your cluster is connected to the internet, Telemetry runs automatically, and your cluster is registered to OpenShift Cluster Manager.
After you confirm that your OpenShift Cluster Manager inventory is correct, either maintained automatically by Telemetry or manually by using OpenShift Cluster Manager, use subscription watch to track your OpenShift Container Platform subscriptions at the account or multi-cluster level.
15.6.25. Next steps
- Customize your cluster.
- If necessary, you can opt out of remote health reporting.
- Set up your registry and configure registry storage.
- Optional: View the events from the vSphere Problem Detector Operator to determine if the cluster has permission or storage configuration issues.
15.7. Installing a cluster on VMC in a restricted network with user-provisioned infrastructure
In OpenShift Container Platform version 4.7, you can install a cluster on VMware vSphere infrastructure that you provision in a restricted network by deploying it to VMware Cloud (VMC) on AWS.
Once you configure your VMC environment for OpenShift Container Platform deployment, you use the OpenShift Container Platform installation program from the bastion management host, co-located in the VMC environment. The installation program and control plane automates the process of deploying and managing the resources needed for the OpenShift Container Platform cluster.
OpenShift Container Platform supports deploying a cluster to a single VMware vCenter only. Deploying a cluster with machines/machine sets on multiple vCenters is not supported.
15.7.1. Setting up VMC for vSphere
You can install OpenShift Container Platform on VMware Cloud (VMC) on AWS hosted vSphere clusters to enable applications to be deployed and managed both on-premise and off-premise, across the hybrid cloud.
You must configure several options in your VMC environment prior to installing OpenShift Container Platform on VMware vSphere. Ensure your VMC environment has the following prerequisites:
- Create a non-exclusive, DHCP-enabled, NSX-T network segment and subnet. Other virtual machines (VMs) can be hosted on the subnet, but at least eight IP addresses must be available for the OpenShift Container Platform deployment.
Configure the following firewall rules:
- An ANY:ANY firewall rule between the installation host and the software-defined data center (SDDC) management network on port 443. This allows you to upload the Red Hat Enterprise Linux CoreOS (RHCOS) OVA during deployment.
- An HTTPS firewall rule between the OpenShift Container Platform compute network and vCenter. This connection allows OpenShift Container Platform to communicate with vCenter for provisioning and managing nodes, persistent volume claims (PVCs), and other resources.
You must have the following information to deploy OpenShift Container Platform:
-
The OpenShift Container Platform cluster name, such as
vmc-prod-1. -
The base DNS name, such as
companyname.com. -
If not using the default, the pod network CIDR and services network CIDR must be identified, which are set by default to
10.128.0.0/14and172.30.0.0/16, respectively. These CIDRs are used for pod-to-pod and pod-to-service communication and are not accessible externally; however, they must not overlap with existing subnets in your organization. The following vCenter information:
- vCenter hostname, username, and password
-
Datacenter name, such as
SDDC-Datacenter -
Cluster name, such as
Cluster-1 - Network name
Datastore name, such as
WorkloadDatastoreNoteIt is recommended to move your vSphere cluster to the VMC
Compute-ResourcePoolresource pool after your cluster installation is finished.
-
The OpenShift Container Platform cluster name, such as
A Linux-based host deployed to VMC as a bastion.
- The bastion host can be Red Hat Enterprise Linux (RHEL) or any another Linux-based host; it must have Internet connectivity and the ability to upload an OVA to the ESXi hosts.
Download and install the OpenShift CLI tools to the bastion host.
-
The
openshift-installinstallation program -
The OpenShift CLI (
oc) tool
-
The
You cannot use the VMware NSX Container Plugin for Kubernetes (NCP), and NSX is not used as the OpenShift SDN. The version of NSX currently available with VMC is incompatible with the version of NCP certified with OpenShift Container Platform.
However, the NSX DHCP service is used for virtual machine IP management with the full-stack automated OpenShift Container Platform deployment and with nodes provisioned, either manually or automatically, by the Machine API integration with vSphere. Additionally, NSX firewall rules are created to enable access with the OpenShift Container Platform cluster and between the bastion host and the VMC vSphere hosts.
15.7.1.1. VMC Sizer tool
VMware Cloud on AWS is built on top of AWS bare metal infrastructure; this is the same bare metal infrastructure which runs AWS native services. When a VMware cloud on AWS software-defined data center (SDDC) is deployed, you consume these physical server nodes and run the VMware ESXi hypervisor in a single tenant fashion. This means the physical infrastructure is not accessible to anyone else using VMC. It is important to consider how many physical hosts you will need to host your virtual infrastructure.
To determine this, VMware provides the VMC on AWS Sizer. With this tool, you can define the resources you intend to host on VMC:
- Types of workloads
- Total number of virtual machines
Specification information such as:
- Storage requirements
- vCPUs
- vRAM
- Overcommit ratios
With these details, the sizer tool can generate a report, based on VMware best practices, and recommend your cluster configuration and the number of hosts you will need.
15.7.2. vSphere prerequisites
Create a registry on your mirror host and obtain the
imageContentSourcesdata for your version of OpenShift Container Platform.ImportantBecause the installation media is on the mirror host, you can use that computer to complete all installation steps.
- Provision block registry storage. For more information on persistent storage, see Understanding persistent storage.
- Review details about the OpenShift Container Platform installation and update processes.
If you use a firewall and plan to use telemetry, you must configure the firewall to allow the sites that your cluster requires access to.
NoteBe sure to also review this site list if you are configuring a proxy.
15.7.3. About installations in restricted networks
In OpenShift Container Platform 4.7, you can perform an installation that does not require an active connection to the Internet to obtain software components. Restricted network installations can be completed using installer-provisioned infrastructure or user-provisioned infrastructure, depending on the cloud platform to which you are installing the cluster.
If you choose to perform a restricted network installation on a cloud platform, you still require access to its cloud APIs. Some cloud functions, like Amazon Web Service’s Route 53 DNS and IAM services, require internet access. Depending on your network, you might require less Internet access for an installation on bare metal hardware or on VMware vSphere.
To complete a restricted network installation, you must create a registry that mirrors the contents of the OpenShift Container Platform registry and contains the installation media. You can create this registry on a mirror host, which can access both the Internet and your closed network, or by using other methods that meet your restrictions.
Because of the complexity of the configuration for user-provisioned installations, consider completing a standard user-provisioned infrastructure installation before you attempt a restricted network installation using user-provisioned infrastructure. Completing this test installation might make it easier to isolate and troubleshoot any issues that might arise during your installation in a restricted network.
15.7.3.1. Additional limits
Clusters in restricted networks have the following additional limitations and restrictions:
-
The
ClusterVersionstatus includes anUnable to retrieve available updateserror. - By default, you cannot use the contents of the Developer Catalog because you cannot access the required image stream tags.
15.7.4. Internet access for OpenShift Container Platform
In OpenShift Container Platform 4.7, you require access to the Internet to obtain the images that are necessary to install your cluster.
You must have Internet access to:
- Access OpenShift Cluster Manager to download the installation program and perform subscription management. If the cluster has internet access and you do not disable Telemetry, that service automatically entitles your cluster.
- Access Quay.io to obtain the packages that are required to install your cluster.
- Obtain the packages that are required to perform cluster updates.
If your cluster cannot have direct Internet access, you can perform a restricted network installation on some types of infrastructure that you provision. During that process, you download the content that is required and use it to populate a mirror registry with the packages that you need to install a cluster and generate the installation program. With some installation types, the environment that you install your cluster in will not require Internet access. Before you update the cluster, you update the content of the mirror registry.
15.7.5. VMware vSphere infrastructure requirements
You must install the OpenShift Container Platform cluster on a VMware vSphere version 6 or 7 instance that meets the requirements for the components that you use.
| Component | Minimum supported versions | Description |
|---|---|---|
| Hypervisor | vSphere 6.5 and later with HW version 13 | This version is the minimum version that Red Hat Enterprise Linux CoreOS (RHCOS) supports. See the Red Hat Enterprise Linux 8 supported hypervisors list. |
| Storage with in-tree drivers | vSphere 6.5 and later | This plug-in creates vSphere storage by using the in-tree storage drivers for vSphere included in OpenShift Container Platform. |
If you use a vSphere version 6.5 instance, consider upgrading to 6.7U3 or 7.0 before you install OpenShift Container Platform.
You must ensure that the time on your ESXi hosts is synchronized before you install OpenShift Container Platform. See Edit Time Configuration for a Host in the VMware documentation.
Virtual machines (VMs) configured to use virtual hardware version 14 or greater might result in a failed installation. It is recommended to configure VMs with virtual hardware version 13. This is a known issue that is being addressed in BZ#1935539.
15.7.6. Machine requirements for a cluster with user-provisioned infrastructure
For a cluster that contains user-provisioned infrastructure, you must deploy all of the required machines.
15.7.6.1. Required machines
The smallest OpenShift Container Platform clusters require the following hosts:
- One temporary bootstrap machine
- Three control plane, or master, machines
- At least two compute machines, which are also known as worker machines.
The cluster requires the bootstrap machine to deploy the OpenShift Container Platform cluster on the three control plane machines. You can remove the bootstrap machine after you install the cluster.
To improve high availability of your cluster, distribute the control plane machines over different z/VM instances on at least two physical machines.
The bootstrap and control plane machines must use Red Hat Enterprise Linux CoreOS (RHCOS) as the operating system. However, the compute machines can choose between Red Hat Enterprise Linux CoreOS (RHCOS) or Red Hat Enterprise Linux (RHEL) 7.9.
Note that RHCOS is based on Red Hat Enterprise Linux (RHEL) 8 and inherits all of its hardware certifications and requirements. See Red Hat Enterprise Linux technology capabilities and limits.
15.7.6.2. Network connectivity requirements
All the Red Hat Enterprise Linux CoreOS (RHCOS) machines require network in initramfs during boot to fetch Ignition config files from the Machine Config Server. The machines are configured with static IP addresses. No DHCP server is required. Additionally, each OpenShift Container Platform node in the cluster must have access to a Network Time Protocol (NTP) server.
15.7.6.3. IBM Z network connectivity requirements
To install on IBM Z under z/VM, you require a single z/VM virtual NIC in layer 2 mode. You also need:
- A direct-attached OSA or RoCE network adapter
- A z/VM VSwitch set up. For a preferred setup, use OSA link aggregation.
15.7.6.4. Minimum resource requirements
Each cluster machine must meet the following minimum requirements:
| Machine | Operating System | vCPU [1] | Virtual RAM | Storage | IOPS |
|---|---|---|---|---|---|
| Bootstrap | RHCOS | 4 | 16 GB | 100 GB | N/A |
| Control plane | RHCOS | 4 | 16 GB | 100 GB | N/A |
| Compute | RHCOS | 2 | 8 GB | 100 GB | N/A |
- One physical core (IFL) provides two logical cores (threads) when SMT-2 is enabled. The hypervisor can provide two or more vCPUs.
15.7.6.5. Certificate signing requests management
Because your cluster has limited access to automatic machine management when you use infrastructure that you provision, you must provide a mechanism for approving cluster certificate signing requests (CSRs) after installation. The kube-controller-manager only approves the kubelet client CSRs. The machine-approver cannot guarantee the validity of a serving certificate that is requested by using kubelet credentials because it cannot confirm that the correct machine issued the request. You must determine and implement a method of verifying the validity of the kubelet serving certificate requests and approving them.
15.7.7. Creating the user-provisioned infrastructure
Before you deploy an OpenShift Container Platform cluster that uses user-provisioned infrastructure, you must create the underlying infrastructure.
Prerequisites
- Review the OpenShift Container Platform 4.x Tested Integrations page before you create the supporting infrastructure for your cluster.
Procedure
- Set up static IP addresses.
- Set up an HTTP or HTTPS server to provide Ignition files to the cluster nodes.
- Provision the required load balancers.
- Configure the ports for your machines.
- Configure DNS.
- Ensure network connectivity.
15.7.7.1. Networking requirements for user-provisioned infrastructure
All the Red Hat Enterprise Linux CoreOS (RHCOS) machines require network in initramfs during boot to fetch Ignition config from the machine config server.
During the initial boot, the machines require an HTTP or HTTPS server to establish a network connection to download their Ignition config files.
Ensure that the machines have persistent IP addresses and host names.
The Kubernetes API server must be able to resolve the node names of the cluster machines. If the API servers and worker nodes are in different zones, you can configure a default DNS search zone to allow the API server to resolve the node names. Another supported approach is to always refer to hosts by their fully-qualified domain names in both the node objects and all DNS requests.
You must configure the network connectivity between machines to allow cluster components to communicate. Each machine must be able to resolve the host names of all other machines in the cluster.
| Protocol | Port | Description |
|---|---|---|
| ICMP | N/A | Network reachability tests |
| TCP |
| Metrics |
|
|
Host level services, including the node exporter on ports | |
|
| The default ports that Kubernetes reserves | |
|
| openshift-sdn | |
| UDP |
| VXLAN and Geneve |
|
| VXLAN and Geneve | |
|
|
Host level services, including the node exporter on ports | |
| TCP/UDP |
| Kubernetes node port |
| Protocol | Port | Description |
|---|---|---|
| TCP |
| Kubernetes API |
| Protocol | Port | Description |
|---|---|---|
| TCP |
| etcd server and peer ports |
Network topology requirements
The infrastructure that you provision for your cluster must meet the following network topology requirements.
OpenShift Container Platform requires all nodes to have internet access to pull images for platform containers and provide telemetry data to Red Hat.
Load balancers
Before you install OpenShift Container Platform, you must provision two load balancers that meet the following requirements:
API load balancer: Provides a common endpoint for users, both human and machine, to interact with and configure the platform. Configure the following conditions:
- Layer 4 load balancing only. This can be referred to as Raw TCP, SSL Passthrough, or SSL Bridge mode. If you use SSL Bridge mode, you must enable Server Name Indication (SNI) for the API routes.
- A stateless load balancing algorithm. The options vary based on the load balancer implementation.
ImportantDo not configure session persistence for an API load balancer.
Configure the following ports on both the front and back of the load balancers:
Expand Table 15.67. API load balancer Port Back-end machines (pool members) Internal External Description 6443Bootstrap and control plane. You remove the bootstrap machine from the load balancer after the bootstrap machine initializes the cluster control plane. You must configure the
/readyzendpoint for the API server health check probe.X
X
Kubernetes API server
22623Bootstrap and control plane. You remove the bootstrap machine from the load balancer after the bootstrap machine initializes the cluster control plane.
X
Machine config server
NoteThe load balancer must be configured to take a maximum of 30 seconds from the time the API server turns off the
/readyzendpoint to the removal of the API server instance from the pool. Within the time frame after/readyzreturns an error or becomes healthy, the endpoint must have been removed or added. Probing every 5 or 10 seconds, with two successful requests to become healthy and three to become unhealthy, are well-tested values.Application Ingress load balancer: Provides an Ingress point for application traffic flowing in from outside the cluster. Configure the following conditions:
- Layer 4 load balancing only. This can be referred to as Raw TCP, SSL Passthrough, or SSL Bridge mode. If you use SSL Bridge mode, you must enable Server Name Indication (SNI) for the Ingress routes.
- A connection-based or session-based persistence is recommended, based on the options available and types of applications that will be hosted on the platform.
Configure the following ports on both the front and back of the load balancers:
Expand Table 15.68. Application Ingress load balancer Port Back-end machines (pool members) Internal External Description 443The machines that run the Ingress router pods, compute, or worker, by default.
X
X
HTTPS traffic
80The machines that run the Ingress router pods, compute, or worker, by default.
X
X
HTTP traffic
If the true IP address of the client can be seen by the load balancer, enabling source IP-based session persistence can improve performance for applications that use end-to-end TLS encryption.
A working configuration for the Ingress router is required for an OpenShift Container Platform cluster. You must configure the Ingress router after the control plane initializes.
NTP configuration
OpenShift Container Platform clusters are configured to use a public Network Time Protocol (NTP) server by default. If you want to use a local enterprise NTP server, or if your cluster is being deployed in a disconnected network, you can configure the cluster to use a specific time server. For more information, see the documentation for Configuring chrony time service.
15.7.7.2. User-provisioned DNS requirements
DNS is used for name resolution and reverse name resolution. DNS A/AAAA or CNAME records are used for name resolution and PTR records are used for reverse name resolution. The reverse records are important because Red Hat Enterprise Linux CoreOS (RHCOS) uses the reverse records to set the host name for all the nodes. Additionally, the reverse records are used to generate the certificate signing requests (CSR) that OpenShift Container Platform needs to operate.
The following DNS records are required for an OpenShift Container Platform cluster that uses user-provisioned infrastructure. In each record, <cluster_name> is the cluster name and <base_domain> is the cluster base domain that you specify in the install-config.yaml file. A complete DNS record takes the form: <component>.<cluster_name>.<base_domain>..
| Component | Record | Description |
|---|---|---|
| Kubernetes API |
| Add a DNS A/AAAA or CNAME record, and a DNS PTR record, to identify the load balancer for the control plane machines. These records must be resolvable by both clients external to the cluster and from all the nodes within the cluster. |
|
| Add a DNS A/AAAA or CNAME record, and a DNS PTR record, to identify the load balancer for the control plane machines. These records must be resolvable from all the nodes within the cluster. Important The API server must be able to resolve the worker nodes by the host names that are recorded in Kubernetes. If the API server cannot resolve the node names, then proxied API calls can fail, and you cannot retrieve logs from pods. | |
| Routes |
| Add a wildcard DNS A/AAAA or CNAME record that refers to the load balancer that targets the machines that run the Ingress router pods, which are the worker nodes by default. These records must be resolvable by both clients external to the cluster and from all the nodes within the cluster. |
| Bootstrap |
| Add a DNS A/AAAA or CNAME record, and a DNS PTR record, to identify the bootstrap machine. These records must be resolvable by the nodes within the cluster. |
| Master hosts |
| DNS A/AAAA or CNAME records and DNS PTR records to identify each machine for the control plane nodes (also known as the master nodes). These records must be resolvable by the nodes within the cluster. |
| Worker hosts |
| Add DNS A/AAAA or CNAME records and DNS PTR records to identify each machine for the worker nodes. These records must be resolvable by the nodes within the cluster. |
You can use the nslookup <hostname> command to verify name resolution. You can use the dig -x <ip_address> command to verify reverse name resolution for the PTR records.
The following example of a BIND zone file shows sample A records for name resolution. The purpose of the example is to show the records that are needed. The example is not meant to provide advice for choosing one name resolution service over another.
Example 15.13. Sample DNS zone database
$TTL 1W
@ IN SOA ns1.example.com. root (
2019070700 ; serial
3H ; refresh (3 hours)
30M ; retry (30 minutes)
2W ; expiry (2 weeks)
1W ) ; minimum (1 week)
IN NS ns1.example.com.
IN MX 10 smtp.example.com.
;
;
ns1 IN A 192.168.1.5
smtp IN A 192.168.1.5
;
helper IN A 192.168.1.5
helper.ocp4 IN A 192.168.1.5
;
; The api identifies the IP of your load balancer.
api.ocp4 IN A 192.168.1.5
api-int.ocp4 IN A 192.168.1.5
;
; The wildcard also identifies the load balancer.
*.apps.ocp4 IN A 192.168.1.5
;
; Create an entry for the bootstrap host.
bootstrap.ocp4 IN A 192.168.1.96
;
; Create entries for the master hosts.
master0.ocp4 IN A 192.168.1.97
master1.ocp4 IN A 192.168.1.98
master2.ocp4 IN A 192.168.1.99
;
; Create entries for the worker hosts.
worker0.ocp4 IN A 192.168.1.11
worker1.ocp4 IN A 192.168.1.7
;
;EOFThe following example BIND zone file shows sample PTR records for reverse name resolution.
Example 15.14. Sample DNS zone database for reverse records
$TTL 1W
@ IN SOA ns1.example.com. root (
2019070700 ; serial
3H ; refresh (3 hours)
30M ; retry (30 minutes)
2W ; expiry (2 weeks)
1W ) ; minimum (1 week)
IN NS ns1.example.com.
;
; The syntax is "last octet" and the host must have an FQDN
; with a trailing dot.
97 IN PTR master0.ocp4.example.com.
98 IN PTR master1.ocp4.example.com.
99 IN PTR master2.ocp4.example.com.
;
96 IN PTR bootstrap.ocp4.example.com.
;
5 IN PTR api.ocp4.example.com.
5 IN PTR api-int.ocp4.example.com.
;
11 IN PTR worker0.ocp4.example.com.
7 IN PTR worker1.ocp4.example.com.
;
;EOF15.7.8. Generating an SSH private key and adding it to the agent
If you want to perform installation debugging or disaster recovery on your cluster, you must provide an SSH key to both your ssh-agent and the installation program. You can use this key to access the bootstrap machine in a public cluster to troubleshoot installation issues.
In a production environment, you require disaster recovery and debugging.
Do not skip this procedure in production environments where disaster recovery and debugging is required.
You can use this key to SSH into the master nodes as the user core. When you deploy the cluster, the key is added to the core user’s ~/.ssh/authorized_keys list.
Procedure
If you do not have an SSH key that is configured for password-less authentication on your computer, create one. For example, on a computer that uses a Linux operating system, run the following command:
$ ssh-keygen -t ed25519 -N '' \ -f <path>/<file_name>1 - 1
- Specify the path and file name, such as
~/.ssh/id_rsa, of the new SSH key. If you have an existing key pair, ensure your public key is in the your~/.sshdirectory.
Running this command generates an SSH key that does not require a password in the location that you specified.
NoteIf you plan to install an OpenShift Container Platform cluster that uses FIPS Validated / Modules in Process cryptographic libraries on the
x86_64architecture, do not create a key that uses theed25519algorithm. Instead, create a key that uses thersaorecdsaalgorithm.Start the
ssh-agentprocess as a background task:$ eval "$(ssh-agent -s)"Example output
Agent pid 31874NoteIf your cluster is in FIPS mode, only use FIPS-compliant algorithms to generate the SSH key. The key must be either RSA or ECDSA.
Add your SSH private key to the
ssh-agent:$ ssh-add <path>/<file_name>1 Example output
Identity added: /home/<you>/<path>/<file_name> (<computer_name>)- 1
- Specify the path and file name for your SSH private key, such as
~/.ssh/id_rsa
Next steps
- When you install OpenShift Container Platform, provide the SSH public key to the installation program. If you install a cluster on infrastructure that you provision, you must provide this key to your cluster’s machines.
15.7.9. Manually creating the installation configuration file
For installations of OpenShift Container Platform that use user-provisioned infrastructure, you manually generate your installation configuration file.
Prerequisites
- Obtain the OpenShift Container Platform installation program and the access token for your cluster.
-
Obtain the
imageContentSourcessection from the output of the command to mirror the repository. - Obtain the contents of the certificate for your mirror registry.
Procedure
Create an installation directory to store your required installation assets in:
$ mkdir <installation_directory>ImportantYou must create a directory. Some installation assets, like bootstrap X.509 certificates have short expiration intervals, so you must not reuse an installation directory. If you want to reuse individual files from another cluster installation, you can copy them into your directory. However, the file names for the installation assets might change between releases. Use caution when copying installation files from an earlier OpenShift Container Platform version.
Customize the following
install-config.yamlfile template and save it in the<installation_directory>.NoteYou must name this configuration file
install-config.yaml.-
Unless you use a registry that RHCOS trusts by default, such as
docker.io, you must provide the contents of the certificate for your mirror repository in theadditionalTrustBundlesection. In most cases, you must provide the certificate for your mirror. -
You must include the
imageContentSourcessection from the output of the command to mirror the repository.
-
Unless you use a registry that RHCOS trusts by default, such as
Back up the
install-config.yamlfile so that you can use it to install multiple clusters.ImportantThe
install-config.yamlfile is consumed during the next step of the installation process. You must back it up now.
15.7.9.1. Sample install-config.yaml file for VMware vSphere
You can customize the install-config.yaml file to specify more details about your OpenShift Container Platform cluster’s platform or modify the values of the required parameters.
apiVersion: v1
baseDomain: example.com
compute:
- hyperthreading: Enabled
name: worker
replicas: 0
controlPlane:
hyperthreading: Enabled
name: master
replicas: 3
metadata:
name: test
platform:
vsphere:
vcenter: your.vcenter.server
username: username
password: password
datacenter: datacenter
defaultDatastore: datastore
folder: "/<datacenter_name>/vm/<folder_name>/<subfolder_name>"
fips: false
pullSecret: '{"auths":{"<local_registry>": {"auth": "<credentials>","email": "you@example.com"}}}'
sshKey: 'ssh-ed25519 AAAA...'
additionalTrustBundle: |
-----BEGIN CERTIFICATE-----
ZZZZZZZZZZZZZZZZZZZZZZZZZZZZZZZZZZZZZZZZZZZZZZZZZZZZZZZZZZZZZZZZ
-----END CERTIFICATE-----
imageContentSources:
- mirrors:
- <local_registry>/<local_repository_name>/release
source: quay.io/openshift-release-dev/ocp-release
- mirrors:
- <local_registry>/<local_repository_name>/release
source: quay.io/openshift-release-dev/ocp-v4.0-art-dev- 1
- The base domain of the cluster. All DNS records must be sub-domains of this base and include the cluster name.
- 2 5
- The
controlPlanesection is a single mapping, but the compute section is a sequence of mappings. To meet the requirements of the different data structures, the first line of thecomputesection must begin with a hyphen,-, and the first line of thecontrolPlanesection must not. Although both sections currently define a single machine pool, it is possible that future versions of OpenShift Container Platform will support defining multiple compute pools during installation. Only one control plane pool is used. - 3 6
- Whether to enable or disable simultaneous multithreading, or
hyperthreading. By default, simultaneous multithreading is enabled to increase the performance of your machines' cores. You can disable it by setting the parameter value toDisabled. If you disable simultaneous multithreading in some cluster machines, you must disable it in all cluster machines.ImportantIf you disable simultaneous multithreading, ensure that your capacity planning accounts for the dramatically decreased machine performance. Your machines must use at least 8 CPUs and 32 GB of RAM if you disable simultaneous multithreading.
- 4
- You must set the value of the
replicasparameter to0. This parameter controls the number of workers that the cluster creates and manages for you, which are functions that the cluster does not perform when you use user-provisioned infrastructure. You must manually deploy worker machines for the cluster to use before you finish installing OpenShift Container Platform. - 7
- The number of control plane machines that you add to the cluster. Because the cluster uses this values as the number of etcd endpoints in the cluster, the value must match the number of control plane machines that you deploy.
- 8
- The cluster name that you specified in your DNS records.
- 9
- The fully-qualified hostname or IP address of the vCenter server.
- 10
- The name of the user for accessing the server. This user must have at least the roles and privileges that are required for static or dynamic persistent volume provisioning in vSphere.
- 11
- The password associated with the vSphere user.
- 12
- The vSphere datacenter.
- 13
- The default vSphere datastore to use.
- 14
- Optional: For installer-provisioned infrastructure, the absolute path of an existing folder where the installation program creates the virtual machines, for example,
/<datacenter_name>/vm/<folder_name>/<subfolder_name>. If you do not provide this value, the installation program creates a top-level folder in the datacenter virtual machine folder that is named with the infrastructure ID. If you are providing the infrastructure for the cluster, omit this parameter. - 15
- Whether to enable or disable FIPS mode. By default, FIPS mode is not enabled. If FIPS mode is enabled, the Red Hat Enterprise Linux CoreOS (RHCOS) machines that OpenShift Container Platform runs on bypass the default Kubernetes cryptography suite and use the cryptography modules that are provided with RHCOS instead.Important
The use of FIPS Validated / Modules in Process cryptographic libraries is only supported on OpenShift Container Platform deployments on the
x86_64architecture. - 16
- For
<local_registry>, specify the registry domain name, and optionally the port, that your mirror registry uses to serve content. For exampleregistry.example.comorregistry.example.com:5000. For<credentials>, specify the base64-encoded user name and password for your mirror registry. - 17
- The public portion of the default SSH key for the
coreuser in Red Hat Enterprise Linux CoreOS (RHCOS).NoteFor production OpenShift Container Platform clusters on which you want to perform installation debugging or disaster recovery, specify an SSH key that your
ssh-agentprocess uses. - 18
- Provide the contents of the certificate file that you used for your mirror registry.
- 19
- Provide the
imageContentSourcessection from the output of the command to mirror the repository.
15.7.9.2. Configuring the cluster-wide proxy during installation
Production environments can deny direct access to the Internet and instead have an HTTP or HTTPS proxy available. You can configure a new OpenShift Container Platform cluster to use a proxy by configuring the proxy settings in the install-config.yaml file.
Prerequisites
-
You have an existing
install-config.yamlfile. You reviewed the sites that your cluster requires access to and determined whether any of them need to bypass the proxy. By default, all cluster egress traffic is proxied, including calls to hosting cloud provider APIs. You added sites to the
Proxyobject’sspec.noProxyfield to bypass the proxy if necessary.NoteThe
Proxyobjectstatus.noProxyfield is populated with the values of thenetworking.machineNetwork[].cidr,networking.clusterNetwork[].cidr, andnetworking.serviceNetwork[]fields from your installation configuration.For installations on Amazon Web Services (AWS), Google Cloud Platform (GCP), Microsoft Azure, and Red Hat OpenStack Platform (RHOSP), the
Proxyobjectstatus.noProxyfield is also populated with the instance metadata endpoint (169.254.169.254).
Procedure
Edit your
install-config.yamlfile and add the proxy settings. For example:apiVersion: v1 baseDomain: my.domain.com proxy: httpProxy: http://<username>:<pswd>@<ip>:<port>1 httpsProxy: https://<username>:<pswd>@<ip>:<port>2 noProxy: example.com3 additionalTrustBundle: |4 -----BEGIN CERTIFICATE----- <MY_TRUSTED_CA_CERT> -----END CERTIFICATE----- ...- 1
- A proxy URL to use for creating HTTP connections outside the cluster. The URL scheme must be
http. - 2
- A proxy URL to use for creating HTTPS connections outside the cluster.
- 3
- A comma-separated list of destination domain names, IP addresses, or other network CIDRs to exclude from proxying. Preface a domain with
.to match subdomains only. For example,.y.commatchesx.y.com, but noty.com. Use*to bypass the proxy for all destinations. You must include vCenter’s IP address and the IP range that you use for its machines. - 4
- If provided, the installation program generates a config map that is named
user-ca-bundlein theopenshift-confignamespace to hold the additional CA certificates. If you provideadditionalTrustBundleand at least one proxy setting, theProxyobject is configured to reference theuser-ca-bundleconfig map in thetrustedCAfield. The Cluster Network Operator then creates atrusted-ca-bundleconfig map that merges the contents specified for thetrustedCAparameter with the RHCOS trust bundle. TheadditionalTrustBundlefield is required unless the proxy’s identity certificate is signed by an authority from the RHCOS trust bundle.
NoteThe installation program does not support the proxy
readinessEndpointsfield.- Save the file and reference it when installing OpenShift Container Platform.
The installation program creates a cluster-wide proxy that is named cluster that uses the proxy settings in the provided install-config.yaml file. If no proxy settings are provided, a cluster Proxy object is still created, but it will have a nil spec.
Only the Proxy object named cluster is supported, and no additional proxies can be created.
15.7.10. Creating the Kubernetes manifest and Ignition config files
Because you must modify some cluster definition files and manually start the cluster machines, you must generate the Kubernetes manifest and Ignition config files that the cluster needs to make its machines.
The installation configuration file transforms into the Kubernetes manifests. The manifests wrap into the Ignition configuration files, which are later used to create the cluster.
The Ignition config files that the installation program generates contain certificates that expire after 24 hours, which are then renewed at that time. If the cluster is shut down before renewing the certificates and the cluster is later restarted after the 24 hours have elapsed, the cluster automatically recovers the expired certificates. The exception is that you must manually approve the pending node-bootstrapper certificate signing requests (CSRs) to recover kubelet certificates. See the documentation for Recovering from expired control plane certificates for more information.
The installation program that generates the manifest and Ignition files is architecture specific and can be obtained from the client image mirror. The Linux version of the installation program runs on s390x only. This installer program is also available as a Mac OS version.
Prerequisites
- You obtained the OpenShift Container Platform installation program. For a restricted network installation, these files are on your mirror host.
-
You created the
install-config.yamlinstallation configuration file.
Procedure
Change to the directory that contains the installation program and generate the Kubernetes manifests for the cluster:
$ ./openshift-install create manifests --dir <installation_directory>1 - 1
- For
<installation_directory>, specify the installation directory that contains theinstall-config.yamlfile you created.
Remove the Kubernetes manifest files that define the control plane machines and compute machine sets:
$ rm -f openshift/99_openshift-cluster-api_master-machines-*.yaml openshift/99_openshift-cluster-api_worker-machineset-*.yamlBecause you create and manage these resources yourself, you do not have to initialize them.
- You can preserve the machine set files to create compute machines by using the machine API, but you must update references to them to match your environment.
WarningIf you are installing a three-node cluster, skip the following step to allow the control plane nodes to be schedulable.
+
ImportantWhen you configure control plane nodes from the default unschedulable to schedulable, additional subscriptions are required. This is because control plane nodes then become worker nodes.
Check that the
mastersSchedulableparameter in the<installation_directory>/manifests/cluster-scheduler-02-config.ymlKubernetes manifest file is set tofalse. This setting prevents pods from being scheduled on the control plane machines:-
Open the
<installation_directory>/manifests/cluster-scheduler-02-config.ymlfile. -
Locate the
mastersSchedulableparameter and ensure that it is set tofalse. - Save and exit the file.
-
Open the
To create the Ignition configuration files, run the following command from the directory that contains the installation program:
$ ./openshift-install create ignition-configs --dir <installation_directory>1 - 1
- For
<installation_directory>, specify the same installation directory.
The following files are generated in the directory:
. ├── auth │ ├── kubeadmin-password │ └── kubeconfig ├── bootstrap.ign ├── master.ign ├── metadata.json └── worker.ign
15.7.11. Extracting the infrastructure name
The Ignition config files contain a unique cluster identifier that you can use to uniquely identify your cluster in VMware Cloud on AWS. If you plan to use the cluster identifier as the name of your virtual machine folder, you must extract it.
Prerequisites
- You obtained the OpenShift Container Platform installation program and the pull secret for your cluster.
- You generated the Ignition config files for your cluster.
-
You installed the
jqpackage.
Procedure
To extract and view the infrastructure name from the Ignition config file metadata, run the following command:
$ jq -r .infraID <installation_directory>/metadata.json1 - 1
- For
<installation_directory>, specify the path to the directory that you stored the installation files in.
Example output
openshift-vw9j61 - 1
- The output of this command is your cluster name and a random string.
15.7.12. Creating Red Hat Enterprise Linux CoreOS (RHCOS) machines in vSphere
Before you install a cluster that contains user-provisioned infrastructure on VMware vSphere, you must create RHCOS machines on vSphere hosts for it to use.
Prerequisites
- You have obtained the Ignition config files for your cluster.
- You have access to an HTTP server that you can access from your computer and that the machines that you create can access.
- You have created a vSphere cluster.
Procedure
-
Upload the bootstrap Ignition config file, which is named
<installation_directory>/bootstrap.ign, that the installation program created to your HTTP server. Note the URL of this file. Save the following secondary Ignition config file for your bootstrap node to your computer as
<installation_directory>/merge-bootstrap.ign:{ "ignition": { "config": { "merge": [ { "source": "<bootstrap_ignition_config_url>",1 "verification": {} } ] }, "timeouts": {}, "version": "3.2.0" }, "networkd": {}, "passwd": {}, "storage": {}, "systemd": {} }- 1
- Specify the URL of the bootstrap Ignition config file that you hosted.
When you create the virtual machine (VM) for the bootstrap machine, you use this Ignition config file.
Locate the following Ignition config files that the installation program created:
-
<installation_directory>/master.ign -
<installation_directory>/worker.ign -
<installation_directory>/merge-bootstrap.ign
-
Convert the Ignition config files to Base64 encoding. Later in this procedure, you must add these files to the extra configuration parameter
guestinfo.ignition.config.datain your VM.For example, if you use a Linux operating system, you can use the
base64command to encode the files.$ base64 -w0 <installation_directory>/master.ign > <installation_directory>/master.64$ base64 -w0 <installation_directory>/worker.ign > <installation_directory>/worker.64$ base64 -w0 <installation_directory>/merge-bootstrap.ign > <installation_directory>/merge-bootstrap.64ImportantIf you plan to add more compute machines to your cluster after you finish installation, do not delete these files.
Obtain the RHCOS OVA image. Images are available from the RHCOS image mirror page.
ImportantThe RHCOS images might not change with every release of OpenShift Container Platform. You must download an image with the highest version that is less than or equal to the OpenShift Container Platform version that you install. Use the image version that matches your OpenShift Container Platform version if it is available.
The filename contains the OpenShift Container Platform version number in the format
rhcos-vmware.<architecture>.ova.In the vSphere Client, create a folder in your datacenter to store your VMs.
- Click the VMs and Templates view.
- Right-click the name of your datacenter.
- Click New Folder → New VM and Template Folder.
-
In the window that is displayed, enter the folder name. If you did not specify an existing folder in the
install-config.yamlfile, then create a folder with the same name as the infrastructure ID. You use this folder name so vCenter dynamically provisions storage in the appropriate location for its Workspace configuration.
In the vSphere Client, create a template for the OVA image and then clone the template as needed.
NoteIn the following steps, you create a template and then clone the template for all of your cluster machines. You then provide the location for the Ignition config file for that cloned machine type when you provision the VMs.
- From the Hosts and Clusters tab, right-click your cluster name and select Deploy OVF Template.
- On the Select an OVF tab, specify the name of the RHCOS OVA file that you downloaded.
-
On the Select a name and folder tab, set a Virtual machine name for your template, such as
Template-RHCOS. Click the name of your vSphere cluster and select the folder you created in the previous step. - On the Select a compute resource tab, click the name of your vSphere cluster.
On the Select storage tab, configure the storage options for your VM.
- Select Thin Provision or Thick Provision, based on your storage preferences.
-
Select the datastore that you specified in your
install-config.yamlfile.
- On the Select network tab, specify the network that you configured for the cluster, if available.
When creating the OVF template, do not specify values on the Customize template tab or configure the template any further.
ImportantDo not start the original VM template. The VM template must remain off and must be cloned for new RHCOS machines. Starting the VM template configures the VM template as a VM on the platform, which prevents it from being used as a template that machine sets can apply configurations to.
After the template deploys, deploy a VM for a machine in the cluster.
- Right-click the template name and click Clone → Clone to Virtual Machine.
-
On the Select a name and folder tab, specify a name for the VM. You might include the machine type in the name, such as
control-plane-0orcompute-1. - On the Select a name and folder tab, select the name of the folder that you created for the cluster.
- On the Select a compute resource tab, select the name of a host in your datacenter.
- Optional: On the Select storage tab, customize the storage options.
- On the Select clone options, select Customize this virtual machine’s hardware.
On the Customize hardware tab, click VM Options → Advanced.
Optional: Override default DHCP networking in vSphere. To enable static IP networking:
Set your static IP configuration:
$ export IPCFG="ip=<ip>::<gateway>:<netmask>:<hostname>:<iface>:none nameserver=srv1 [nameserver=srv2 [nameserver=srv3 [...]]]"Example command
$ export IPCFG="ip=192.168.100.101::192.168.100.254:255.255.255.0:::none nameserver=8.8.8.8"Set the
guestinfo.afterburn.initrd.network-kargsproperty before booting a VM from an OVA in vSphere:$ govc vm.change -vm "<vm_name>" -e "guestinfo.afterburn.initrd.network-kargs=${IPCFG}"
Optional: In the event of cluster performance issues, from the Latency Sensitivity list, select High. Ensure that your VM’s CPU and memory reservation have the following values:
- Memory reservation value must be equal to its configured memory size.
- CPU reservation value must be at least the number of low latency virtual CPUs multiplied by the measured physical CPU speed.
Click Edit Configuration, and on the Configuration Parameters window, click Add Configuration Params. Define the following parameter names and values:
-
guestinfo.ignition.config.data: Locate the base-64 encoded files that you created previously in this procedure, and paste the contents of the base64-encoded Ignition config file for this machine type. -
guestinfo.ignition.config.data.encoding: Specifybase64. -
disk.EnableUUID: SpecifyTRUE.
-
- In the Virtual Hardware panel of the Customize hardware tab, modify the specified values as required. Ensure that the amount of RAM, CPU, and disk storage meets the minimum requirements for the machine type.
- Complete the configuration and power on the VM.
Create the rest of the machines for your cluster by following the preceding steps for each machine.
ImportantYou must create the bootstrap and control plane machines at this time. Because some pods are deployed on compute machines by default, also create at least two compute machines before you install the cluster.
15.7.13. Creating more Red Hat Enterprise Linux CoreOS (RHCOS) machines in vSphere
You can create more compute machines for your cluster that uses user-provisioned infrastructure on VMware vSphere.
Prerequisites
- Obtain the base64-encoded Ignition file for your compute machines.
- You have access to the vSphere template that you created for your cluster.
Procedure
After the template deploys, deploy a VM for a machine in the cluster.
- Right-click the template’s name and click Clone → Clone to Virtual Machine.
-
On the Select a name and folder tab, specify a name for the VM. You might include the machine type in the name, such as
compute-1. - On the Select a name and folder tab, select the name of the folder that you created for the cluster.
- On the Select a compute resource tab, select the name of a host in your datacenter.
- Optional: On the Select storage tab, customize the storage options.
- On the Select clone options, select Customize this virtual machine’s hardware.
On the Customize hardware tab, click VM Options → Advanced.
- From the Latency Sensitivity list, select High.
Click Edit Configuration, and on the Configuration Parameters window, click Add Configuration Params. Define the following parameter names and values:
-
guestinfo.ignition.config.data: Paste the contents of the base64-encoded compute Ignition config file for this machine type. -
guestinfo.ignition.config.data.encoding: Specifybase64. -
disk.EnableUUID: SpecifyTRUE.
-
- In the Virtual Hardware panel of the Customize hardware tab, modify the specified values as required. Ensure that the amount of RAM, CPU, and disk storage meets the minimum requirements for the machine type. Also, make sure to select the correct network under Add network adapter if there are multiple networks available.
- Complete the configuration and power on the VM.
- Continue to create more compute machines for your cluster.
15.7.14. Disk partitioning
In most cases, data partitions are originally created by installing RHCOS, rather than by installing another operating system. In such cases, the OpenShift Container Platform installer should be allowed to configure your disk partitions.
However, there are two cases where you might want to intervene to override the default partitioning when installing an OpenShift Container Platform node:
Create separate partitions: For greenfield installations on an empty disk, you might want to add separate storage to a partition. This is officially supported for making
/varor a subdirectory of/var, such as/var/lib/etcd, a separate partition, but not both.ImportantKubernetes supports only two filesystem partitions. If you add more than one partition to the original configuration, Kubernetes cannot monitor all of them.
-
Retain existing partitions: For a brownfield installation where you are reinstalling OpenShift Container Platform on an existing node and want to retain data partitions installed from your previous operating system, there are both boot arguments and options to
coreos-installerthat allow you to retain existing data partitions.
Creating a separate /var partition
In general, disk partitioning for OpenShift Container Platform should be left to the installer. However, there are cases where you might want to create separate partitions in a part of the filesystem that you expect to grow.
OpenShift Container Platform supports the addition of a single partition to attach storage to either the /var partition or a subdirectory of /var. For example:
-
/var/lib/containers: Holds container-related content that can grow as more images and containers are added to a system. -
/var/lib/etcd: Holds data that you might want to keep separate for purposes such as performance optimization of etcd storage. -
/var: Holds data that you might want to keep separate for purposes such as auditing.
Storing the contents of a /var directory separately makes it easier to grow storage for those areas as needed and reinstall OpenShift Container Platform at a later date and keep that data intact. With this method, you will not have to pull all your containers again, nor will you have to copy massive log files when you update systems.
Because /var must be in place before a fresh installation of Red Hat Enterprise Linux CoreOS (RHCOS), the following procedure sets up the separate /var partition by creating a machine config that is inserted during the openshift-install preparation phases of an OpenShift Container Platform installation.
Procedure
Create a directory to hold the OpenShift Container Platform installation files:
$ mkdir $HOME/clusterconfigRun
openshift-installto create a set of files in themanifestandopenshiftsubdirectories. Answer the system questions as you are prompted:$ openshift-install create manifests --dir $HOME/clusterconfig ? SSH Public Key ... $ ls $HOME/clusterconfig/openshift/ 99_kubeadmin-password-secret.yaml 99_openshift-cluster-api_master-machines-0.yaml 99_openshift-cluster-api_master-machines-1.yaml 99_openshift-cluster-api_master-machines-2.yaml ...Create a
MachineConfigobject and add it to a file in theopenshiftdirectory. For example, name the file98-var-partition.yaml, change the disk device name to the name of the storage device on theworkersystems, and set the storage size as appropriate. This example places the/vardirectory on a separate partition:apiVersion: machineconfiguration.openshift.io/v1 kind: MachineConfig metadata: labels: machineconfiguration.openshift.io/role: worker name: 98-var-partition spec: config: ignition: version: 3.2.0 storage: disks: - device: /dev/<device_name>1 partitions: - label: var startMiB: <partition_start_offset>2 sizeMiB: <partition_size>3 filesystems: - device: /dev/disk/by-partlabel/var path: /var format: xfs systemd: units: - name: var.mount4 enabled: true contents: | [Unit] Before=local-fs.target [Mount] What=/dev/disk/by-partlabel/var Where=/var Options=defaults,prjquota5 [Install] WantedBy=local-fs.target- 1
- The storage device name of the disk that you want to partition.
- 2
- When adding a data partition to the boot disk, a minimum value of 25000 mebibytes is recommended. The root file system is automatically resized to fill all available space up to the specified offset. If no value is specified, or if the specified value is smaller than the recommended minimum, the resulting root file system will be too small, and future reinstalls of RHCOS might overwrite the beginning of the data partition.
- 3
- The size of the data partition in mebibytes.
- 4
- The name of the mount unit must match the directory specified in the
Where=directive. For example, for a filesystem mounted on/var/lib/containers, the unit must be namedvar-lib-containers.mount. - 5
- The
prjquotamount option must be enabled for filesystems used for container storage.
NoteWhen creating a separate
/varpartition, you cannot use different instance types for worker nodes, if the different instance types do not have the same device name.Run
openshift-installagain to create Ignition configs from a set of files in themanifestandopenshiftsubdirectories:$ openshift-install create ignition-configs --dir $HOME/clusterconfig $ ls $HOME/clusterconfig/ auth bootstrap.ign master.ign metadata.json worker.ign
Now you can use the Ignition config files as input to the vSphere installation procedures to install Red Hat Enterprise Linux CoreOS (RHCOS) systems.
15.7.15. Updating the bootloader using bootupd
To update the bootloader by using bootupd, you must either install bootupd on RHCOS machines manually or provide a machine config with the enabled systemd unit. Unlike grubby or other bootloader tools, bootupd does not manage kernel space configuration such as passing kernel arguments.
After you have installed bootupd, you can manage it remotely from the OpenShift Container Platform cluster.
It is recommended that you use bootupd only on bare metal or virtualized hypervisor installations, such as for protection against the BootHole vulnerability.
Manual install method
You can manually install bootupd by using the bootctl command-line tool.
Inspect the system status:
# bootupctl statusExample output
Component EFI Installed: grub2-efi-x64-1:2.04-31.fc33.x86_64,shim-x64-15-8.x86_64 Update: At latest version
RHCOS images created without
bootupdinstalled on them require an explicit adoption phase.If the system status is
Adoptable, perform the adoption:# bootupctl adopt-and-updateExample output
Updated: grub2-efi-x64-1:2.04-31.fc33.x86_64,shim-x64-15-8.x86_64If an update is available, apply the update so that the changes take effect on the next reboot:
# bootupctl updateExample output
Updated: grub2-efi-x64-1:2.04-31.fc33.x86_64,shim-x64-15-8.x86_64
Machine config method
Another way to enable bootupd is by providing a machine config.
Provide a machine config file with the enabled
systemdunit, as shown in the following example:Example output
variant: rhcos version: 1.1.0 systemd: units: - name: custom-bootupd-auto.service enabled: true contents: | [Unit] Description=Bootupd automatic update [Service] ExecStart=/usr/bin/bootupctl update RemainAfterExit=yes [Install] WantedBy=multi-user.target
15.7.16. Creating the cluster
To create the OpenShift Container Platform cluster, you wait for the bootstrap process to complete on the machines that you provisioned by using the Ignition config files that you generated with the installation program.
Prerequisites
- Create the required infrastructure for the cluster.
- You obtained the installation program and generated the Ignition config files for your cluster.
- You used the Ignition config files to create RHCOS machines for your cluster.
Procedure
Monitor the bootstrap process:
$ ./openshift-install --dir <installation_directory> wait-for bootstrap-complete \1 --log-level=info2 Example output
INFO Waiting up to 30m0s for the Kubernetes API at https://api.test.example.com:6443... INFO API v1.20.0 up INFO Waiting up to 30m0s for bootstrapping to complete... INFO It is now safe to remove the bootstrap resourcesThe command succeeds when the Kubernetes API server signals that it has been bootstrapped on the control plane machines.
After bootstrap process is complete, remove the bootstrap machine from the load balancer.
ImportantYou must remove the bootstrap machine from the load balancer at this point. You can also remove or reformat the machine itself.
15.7.17. Logging in to the cluster by using the CLI
You can log in to your cluster as a default system user by exporting the cluster kubeconfig file. The kubeconfig file contains information about the cluster that is used by the CLI to connect a client to the correct cluster and API server. The file is specific to a cluster and is created during OpenShift Container Platform installation.
Prerequisites
- You deployed an OpenShift Container Platform cluster.
-
You installed the
ocCLI.
Procedure
Export the
kubeadmincredentials:$ export KUBECONFIG=<installation_directory>/auth/kubeconfig1 - 1
- For
<installation_directory>, specify the path to the directory that you stored the installation files in.
Verify you can run
occommands successfully using the exported configuration:$ oc whoamiExample output
system:admin
15.7.18. Approving the certificate signing requests for your machines
When you add machines to a cluster, two pending certificate signing requests (CSRs) are generated for each machine that you added. You must confirm that these CSRs are approved or, if necessary, approve them yourself. The client requests must be approved first, followed by the server requests.
Prerequisites
- You added machines to your cluster.
Procedure
Confirm that the cluster recognizes the machines:
$ oc get nodesExample output
NAME STATUS ROLES AGE VERSION master-0 Ready master 63m v1.20.0 master-1 Ready master 63m v1.20.0 master-2 Ready master 64m v1.20.0The output lists all of the machines that you created.
NoteThe preceding output might not include the compute nodes, also known as worker nodes, until some CSRs are approved.
Review the pending CSRs and ensure that you see the client requests with the
PendingorApprovedstatus for each machine that you added to the cluster:$ oc get csrExample output
NAME AGE REQUESTOR CONDITION csr-mddf5 20m system:node:master-01.example.com Approved,Issued csr-z5rln 16m system:node:worker-21.example.com Approved,IssuedIf the CSRs were not approved, after all of the pending CSRs for the machines you added are in
Pendingstatus, approve the CSRs for your cluster machines:NoteBecause the CSRs rotate automatically, approve your CSRs within an hour of adding the machines to the cluster. If you do not approve them within an hour, the certificates will rotate, and more than two certificates will be present for each node. You must approve all of these certificates. Once the client CSR is approved, the Kubelet creates a secondary CSR for the serving certificate, which requires manual approval. Then, subsequent serving certificate renewal requests are automatically approved by the
machine-approverif the Kubelet requests a new certificate with identical parameters.NoteFor clusters running on platforms that are not machine API enabled, such as bare metal and other user-provisioned infrastructure, you must implement a method of automatically approving the kubelet serving certificate requests (CSRs). If a request is not approved, then the
oc exec,oc rsh, andoc logscommands cannot succeed, because a serving certificate is required when the API server connects to the kubelet. Any operation that contacts the Kubelet endpoint requires this certificate approval to be in place. The method must watch for new CSRs, confirm that the CSR was submitted by thenode-bootstrapperservice account in thesystem:nodeorsystem:admingroups, and confirm the identity of the node.To approve them individually, run the following command for each valid CSR:
$ oc adm certificate approve <csr_name>1 - 1
<csr_name>is the name of a CSR from the list of current CSRs.
To approve all pending CSRs, run the following command:
$ oc get csr -o go-template='{{range .items}}{{if not .status}}{{.metadata.name}}{{"\n"}}{{end}}{{end}}' | xargs --no-run-if-empty oc adm certificate approveNoteSome Operators might not become available until some CSRs are approved.
Now that your client requests are approved, you must review the server requests for each machine that you added to the cluster:
$ oc get csrExample output
NAME AGE REQUESTOR CONDITION csr-bfd72 5m26s system:node:ip-10-0-50-126.us-east-2.compute.internal Pending csr-c57lv 5m26s system:node:ip-10-0-95-157.us-east-2.compute.internal Pending ...If the remaining CSRs are not approved, and are in the
Pendingstatus, approve the CSRs for your cluster machines:To approve them individually, run the following command for each valid CSR:
$ oc adm certificate approve <csr_name>1 - 1
<csr_name>is the name of a CSR from the list of current CSRs.
To approve all pending CSRs, run the following command:
$ oc get csr -o go-template='{{range .items}}{{if not .status}}{{.metadata.name}}{{"\n"}}{{end}}{{end}}' | xargs oc adm certificate approve
After all client and server CSRs have been approved, the machines have the
Readystatus. Verify this by running the following command:$ oc get nodesExample output
NAME STATUS ROLES AGE VERSION master-0 Ready master 73m v1.20.0 master-1 Ready master 73m v1.20.0 master-2 Ready master 74m v1.20.0 worker-0 Ready worker 11m v1.20.0 worker-1 Ready worker 11m v1.20.0NoteIt can take a few minutes after approval of the server CSRs for the machines to transition to the
Readystatus.
Additional information
- For more information on CSRs, see Certificate Signing Requests.
15.7.19. Initial Operator configuration
After the control plane initializes, you must immediately configure some Operators so that they all become available.
Prerequisites
- Your control plane has initialized.
Procedure
Watch the cluster components come online:
$ watch -n5 oc get clusteroperatorsExample output
NAME VERSION AVAILABLE PROGRESSING DEGRADED SINCE authentication 4.7.0 True False False 3h56m baremetal 4.7.0 True False False 29h cloud-credential 4.7.0 True False False 29h cluster-autoscaler 4.7.0 True False False 29h config-operator 4.7.0 True False False 6h39m console 4.7.0 True False False 3h59m csi-snapshot-controller 4.7.0 True False False 4h12m dns 4.7.0 True False False 4h15m etcd 4.7.0 True False False 29h image-registry 4.7.0 True False False 3h59m ingress 4.7.0 True False False 4h30m insights 4.7.0 True False False 29h kube-apiserver 4.7.0 True False False 29h kube-controller-manager 4.7.0 True False False 29h kube-scheduler 4.7.0 True False False 29h kube-storage-version-migrator 4.7.0 True False False 4h2m machine-api 4.7.0 True False False 29h machine-approver 4.7.0 True False False 6h34m machine-config 4.7.0 True False False 3h56m marketplace 4.7.0 True False False 4h2m monitoring 4.7.0 True False False 6h31m network 4.7.0 True False False 29h node-tuning 4.7.0 True False False 4h30m openshift-apiserver 4.7.0 True False False 3h56m openshift-controller-manager 4.7.0 True False False 4h36m openshift-samples 4.7.0 True False False 4h30m operator-lifecycle-manager 4.7.0 True False False 29h operator-lifecycle-manager-catalog 4.7.0 True False False 29h operator-lifecycle-manager-packageserver 4.7.0 True False False 3h59m service-ca 4.7.0 True False False 29h storage 4.7.0 True False False 4h30m- Configure the Operators that are not available.
15.7.19.1. Disabling the default OperatorHub sources
Operator catalogs that source content provided by Red Hat and community projects are configured for OperatorHub by default during an OpenShift Container Platform installation. In a restricted network environment, you must disable the default catalogs as a cluster administrator.
Procedure
Disable the sources for the default catalogs by adding
disableAllDefaultSources: trueto theOperatorHubobject:$ oc patch OperatorHub cluster --type json \ -p '[{"op": "add", "path": "/spec/disableAllDefaultSources", "value": true}]'
Alternatively, you can use the web console to manage catalog sources. From the Administration → Cluster Settings → Global Configuration → OperatorHub page, click the Sources tab, where you can create, delete, disable, and enable individual sources.
15.7.19.2. Image registry storage configuration
The Image Registry Operator is not initially available for platforms that do not provide default storage. After installation, you must configure your registry to use storage so that the Registry Operator is made available.
Instructions are shown for configuring a persistent volume, which is required for production clusters. Where applicable, instructions are shown for configuring an empty directory as the storage location, which is available for only non-production clusters.
Additional instructions are provided for allowing the image registry to use block storage types by using the Recreate rollout strategy during upgrades.
15.7.19.2.1. Configuring registry storage for VMware vSphere
As a cluster administrator, following installation you must configure your registry to use storage.
Prerequisites
- Cluster administrator permissions.
- A cluster on VMware vSphere.
Persistent storage provisioned for your cluster, such as Red Hat OpenShift Container Storage.
ImportantOpenShift Container Platform supports
ReadWriteOnceaccess for image registry storage when you have only one replica. To deploy an image registry that supports high availability with two or more replicas,ReadWriteManyaccess is required.- Must have "100Gi" capacity.
Testing shows issues with using the NFS server on RHEL as storage backend for core services. This includes the OpenShift Container Registry and Quay, Prometheus for monitoring storage, and Elasticsearch for logging storage. Therefore, using RHEL NFS to back PVs used by core services is not recommended.
Other NFS implementations on the marketplace might not have these issues. Contact the individual NFS implementation vendor for more information on any testing that was possibly completed against these OpenShift Container Platform core components.
Procedure
To configure your registry to use storage, change the
spec.storage.pvcin theconfigs.imageregistry/clusterresource.NoteWhen using shared storage, review your security settings to prevent outside access.
Verify that you do not have a registry pod:
$ oc get pod -n openshift-image-registry -l docker-registry=defaultExample output
No resourses found in openshift-image-registry namespaceNoteIf you do have a registry pod in your output, you do not need to continue with this procedure.
Check the registry configuration:
$ oc edit configs.imageregistry.operator.openshift.ioExample output
storage: pvc: claim:1 - 1
- Leave the
claimfield blank to allow the automatic creation of animage-registry-storagePVC.
Check the
clusteroperatorstatus:$ oc get clusteroperator image-registryExample output
NAME VERSION AVAILABLE PROGRESSING DEGRADED SINCE MESSAGE image-registry 4.7 True False False 6h50m
15.7.19.2.2. Configuring storage for the image registry in non-production clusters
You must configure storage for the Image Registry Operator. For non-production clusters, you can set the image registry to an empty directory. If you do so, all images are lost if you restart the registry.
Procedure
To set the image registry storage to an empty directory:
$ oc patch configs.imageregistry.operator.openshift.io cluster --type merge --patch '{"spec":{"storage":{"emptyDir":{}}}}'WarningConfigure this option for only non-production clusters.
If you run this command before the Image Registry Operator initializes its components, the
oc patchcommand fails with the following error:Error from server (NotFound): configs.imageregistry.operator.openshift.io "cluster" not foundWait a few minutes and run the command again.
15.7.19.2.3. Configuring block registry storage for VMware vSphere
To allow the image registry to use block storage types such as vSphere Virtual Machine Disk (VMDK) during upgrades as a cluster administrator, you can use the Recreate rollout strategy.
Block storage volumes are supported but not recommended for use with image registry on production clusters. An installation where the registry is configured on block storage is not highly available because the registry cannot have more than one replica.
Procedure
To set the image registry storage as a block storage type, patch the registry so that it uses the
Recreaterollout strategy and runs with only1replica:$ oc patch config.imageregistry.operator.openshift.io/cluster --type=merge -p '{"spec":{"rolloutStrategy":"Recreate","replicas":1}}'Provision the PV for the block storage device, and create a PVC for that volume. The requested block volume uses the ReadWriteOnce (RWO) access mode.
Create a
pvc.yamlfile with the following contents to define a VMware vSpherePersistentVolumeClaimobject:kind: PersistentVolumeClaim apiVersion: v1 metadata: name: image-registry-storage1 namespace: openshift-image-registry2 spec: accessModes: - ReadWriteOnce3 resources: requests: storage: 100Gi4 - 1
- A unique name that represents the
PersistentVolumeClaimobject. - 2
- The namespace for the
PersistentVolumeClaimobject, which isopenshift-image-registry. - 3
- The access mode of the persistent volume claim. With
ReadWriteOnce, the volume can be mounted with read and write permissions by a single node. - 4
- The size of the persistent volume claim.
Create the
PersistentVolumeClaimobject from the file:$ oc create -f pvc.yaml -n openshift-image-registry
Edit the registry configuration so that it references the correct PVC:
$ oc edit config.imageregistry.operator.openshift.io -o yamlExample output
storage: pvc: claim:1 - 1
- Creating a custom PVC allows you to leave the
claimfield blank for the default automatic creation of animage-registry-storagePVC.
For instructions about configuring registry storage so that it references the correct PVC, see Configuring registry storage for VMware vSphere.
15.7.20. Completing installation on user-provisioned infrastructure
After you complete the Operator configuration, you can finish installing the cluster on infrastructure that you provide.
Prerequisites
- Your control plane has initialized.
- You have completed the initial Operator configuration.
Procedure
Confirm that all the cluster components are online with the following command:
$ watch -n5 oc get clusteroperatorsExample output
NAME VERSION AVAILABLE PROGRESSING DEGRADED SINCE authentication 4.7.0 True False False 3h56m baremetal 4.7.0 True False False 29h cloud-credential 4.7.0 True False False 29h cluster-autoscaler 4.7.0 True False False 29h config-operator 4.7.0 True False False 6h39m console 4.7.0 True False False 3h59m csi-snapshot-controller 4.7.0 True False False 4h12m dns 4.7.0 True False False 4h15m etcd 4.7.0 True False False 29h image-registry 4.7.0 True False False 3h59m ingress 4.7.0 True False False 4h30m insights 4.7.0 True False False 29h kube-apiserver 4.7.0 True False False 29h kube-controller-manager 4.7.0 True False False 29h kube-scheduler 4.7.0 True False False 29h kube-storage-version-migrator 4.7.0 True False False 4h2m machine-api 4.7.0 True False False 29h machine-approver 4.7.0 True False False 6h34m machine-config 4.7.0 True False False 3h56m marketplace 4.7.0 True False False 4h2m monitoring 4.7.0 True False False 6h31m network 4.7.0 True False False 29h node-tuning 4.7.0 True False False 4h30m openshift-apiserver 4.7.0 True False False 3h56m openshift-controller-manager 4.7.0 True False False 4h36m openshift-samples 4.7.0 True False False 4h30m operator-lifecycle-manager 4.7.0 True False False 29h operator-lifecycle-manager-catalog 4.7.0 True False False 29h operator-lifecycle-manager-packageserver 4.7.0 True False False 3h59m service-ca 4.7.0 True False False 29h storage 4.7.0 True False False 4h30mAlternatively, the following command notifies you when all of the clusters are available. It also retrieves and displays credentials:
$ ./openshift-install --dir <installation_directory> wait-for install-complete1 - 1
- For
<installation_directory>, specify the path to the directory that you stored the installation files in.
Example output
INFO Waiting up to 30m0s for the cluster to initialize...The command succeeds when the Cluster Version Operator finishes deploying the OpenShift Container Platform cluster from Kubernetes API server.
Important-
The Ignition config files that the installation program generates contain certificates that expire after 24 hours, which are then renewed at that time. If the cluster is shut down before renewing the certificates and the cluster is later restarted after the 24 hours have elapsed, the cluster automatically recovers the expired certificates. The exception is that you must manually approve the pending
node-bootstrappercertificate signing requests (CSRs) to recover kubelet certificates. See the documentation for Recovering from expired control plane certificates for more information. - It is recommended that you use Ignition config files within 12 hours after they are generated because the 24-hour certificate rotates from 16 to 22 hours after the cluster is installed. By using the Ignition config files within 12 hours, you can avoid installation failure if the certificate update runs during installation.
Confirm that the Kubernetes API server is communicating with the pods.
To view a list of all pods, use the following command:
$ oc get pods --all-namespacesExample output
NAMESPACE NAME READY STATUS RESTARTS AGE openshift-apiserver-operator openshift-apiserver-operator-85cb746d55-zqhs8 1/1 Running 1 9m openshift-apiserver apiserver-67b9g 1/1 Running 0 3m openshift-apiserver apiserver-ljcmx 1/1 Running 0 1m openshift-apiserver apiserver-z25h4 1/1 Running 0 2m openshift-authentication-operator authentication-operator-69d5d8bf84-vh2n8 1/1 Running 0 5m ...View the logs for a pod that is listed in the output of the previous command by using the following command:
$ oc logs <pod_name> -n <namespace>1 - 1
- Specify the pod name and namespace, as shown in the output of the previous command.
If the pod logs display, the Kubernetes API server can communicate with the cluster machines.
For an installation with Fibre Channel Protocol (FCP), additional steps are required to enable multipathing. Do not enable multipathing during installation.
See "Enabling multipathing with kernel arguments on RHCOS" in the Post-installation configuration documentation for more information.
All the worker nodes are restarted. To monitor the process, enter the following command:
$ oc get nodes -wNoteIf you have additional machine types such as infrastructure nodes, repeat the process for these types.
- Register your cluster on the Cluster registration page.
You can add extra compute machines after the cluster installation is completed by following Adding compute machines to vSphere.
15.7.21. Backing up VMware vSphere volumes
OpenShift Container Platform provisions new volumes as independent persistent disks to freely attach and detach the volume on any node in the cluster. As a consequence, it is not possible to back up volumes that use snapshots, or to restore volumes from snapshots. See Snapshot Limitations for more information.
Procedure
To create a backup of persistent volumes:
- Stop the application that is using the persistent volume.
- Clone the persistent volume.
- Restart the application.
- Create a backup of the cloned volume.
- Delete the cloned volume.
15.7.22. Telemetry access for OpenShift Container Platform
In OpenShift Container Platform 4.7, the Telemetry service, which runs by default to provide metrics about cluster health and the success of updates, requires internet access. If your cluster is connected to the internet, Telemetry runs automatically, and your cluster is registered to OpenShift Cluster Manager.
After you confirm that your OpenShift Cluster Manager inventory is correct, either maintained automatically by Telemetry or manually by using OpenShift Cluster Manager, use subscription watch to track your OpenShift Container Platform subscriptions at the account or multi-cluster level.
15.7.23. Next steps
- Customize your cluster.
-
Configure image streams for the Cluster Samples Operator and the
must-gathertool. - Learn how to use Operator Lifecycle Manager (OLM) on restricted networks.
- If the mirror registry that you used to install your cluster has a trusted CA, add it to the cluster by configuring additional trust stores.
- If necessary, you can opt out of remote health reporting.
- Optional: View the events from the vSphere Problem Detector Operator to determine if the cluster has permission or storage configuration issues.
15.8. Uninstalling a cluster on VMC
You can remove a cluster installed on VMware vSphere infrastructure that you deployed to VMware Cloud (VMC) on AWS by using installer-provisioned infrastructure.
15.8.1. Removing a cluster that uses installer-provisioned infrastructure
You can remove a cluster that uses installer-provisioned infrastructure from your cloud.
After uninstallation, check your cloud provider for any resources not removed properly, especially with User Provisioned Infrastructure (UPI) clusters. There might be resources that the installer did not create or that the installer is unable to access.
Prerequisites
- Have a copy of the installation program that you used to deploy the cluster.
- Have the files that the installation program generated when you created your cluster.
Procedure
From the directory that contains the installation program on the computer that you used to install the cluster, run the following command:
$ ./openshift-install destroy cluster \ --dir <installation_directory> --log-level info1 2 NoteYou must specify the directory that contains the cluster definition files for your cluster. The installation program requires the
metadata.jsonfile in this directory to delete the cluster.-
Optional: Delete the
<installation_directory>directory and the OpenShift Container Platform installation program.
Chapter 16. Installing on any platform
16.1. Installing a cluster on any platform
In OpenShift Container Platform version 4.7, you can install a cluster on any infrastructure that you provision, including virtualization and cloud environments.
Review the information in the guidelines for deploying OpenShift Container Platform on non-tested platforms before you attempt to install an OpenShift Container Platform cluster in virtualized or cloud environments.
16.1.1. Prerequisites
- Review details about the OpenShift Container Platform installation and update processes.
If you use a firewall, you must configure it to allow the sites that your cluster requires access to.
NoteBe sure to also review this site list if you are configuring a proxy.
16.1.2. Internet access for OpenShift Container Platform
In OpenShift Container Platform 4.7, you require access to the Internet to install your cluster.
You must have Internet access to:
- Access OpenShift Cluster Manager to download the installation program and perform subscription management. If the cluster has internet access and you do not disable Telemetry, that service automatically entitles your cluster.
- Access Quay.io to obtain the packages that are required to install your cluster.
- Obtain the packages that are required to perform cluster updates.
If your cluster cannot have direct Internet access, you can perform a restricted network installation on some types of infrastructure that you provision. During that process, you download the content that is required and use it to populate a mirror registry with the packages that you need to install a cluster and generate the installation program. With some installation types, the environment that you install your cluster in will not require Internet access. Before you update the cluster, you update the content of the mirror registry.
16.1.3. Machine requirements for a cluster with user-provisioned infrastructure
For a cluster that contains user-provisioned infrastructure, you must deploy all of the required machines.
16.1.3.1. Required machines
The smallest OpenShift Container Platform clusters require the following hosts:
- One temporary bootstrap machine
- Three control plane, or master, machines
- At least two compute machines, which are also known as worker machines.
The cluster requires the bootstrap machine to deploy the OpenShift Container Platform cluster on the three control plane machines. You can remove the bootstrap machine after you install the cluster.
To improve high availability of your cluster, distribute the control plane machines over different z/VM instances on at least two physical machines.
The bootstrap and control plane machines must use Red Hat Enterprise Linux CoreOS (RHCOS) as the operating system. However, the compute machines can choose between Red Hat Enterprise Linux CoreOS (RHCOS) or Red Hat Enterprise Linux (RHEL) 7.9.
Note that RHCOS is based on Red Hat Enterprise Linux (RHEL) 8 and inherits all of its hardware certifications and requirements. See Red Hat Enterprise Linux technology capabilities and limits.
16.1.3.2. Network connectivity requirements
All the Red Hat Enterprise Linux CoreOS (RHCOS) machines require network in initramfs during boot to fetch Ignition config files from the Machine Config Server. The machines are configured with static IP addresses. No DHCP server is required. Additionally, each OpenShift Container Platform node in the cluster must have access to a Network Time Protocol (NTP) server.
16.1.3.3. IBM Z network connectivity requirements
To install on IBM Z under z/VM, you require a single z/VM virtual NIC in layer 2 mode. You also need:
- A direct-attached OSA or RoCE network adapter
- A z/VM VSwitch set up. For a preferred setup, use OSA link aggregation.
16.1.3.4. Minimum resource requirements
Each cluster machine must meet the following minimum requirements:
| Machine | Operating System | vCPU [1] | Virtual RAM | Storage | IOPS |
|---|---|---|---|---|---|
| Bootstrap | RHCOS | 4 | 16 GB | 100 GB | N/A |
| Control plane | RHCOS | 4 | 16 GB | 100 GB | N/A |
| Compute | RHCOS | 2 | 8 GB | 100 GB | N/A |
- One physical core (IFL) provides two logical cores (threads) when SMT-2 is enabled. The hypervisor can provide two or more vCPUs.
16.1.3.5. Certificate signing requests management
Because your cluster has limited access to automatic machine management when you use infrastructure that you provision, you must provide a mechanism for approving cluster certificate signing requests (CSRs) after installation. The kube-controller-manager only approves the kubelet client CSRs. The machine-approver cannot guarantee the validity of a serving certificate that is requested by using kubelet credentials because it cannot confirm that the correct machine issued the request. You must determine and implement a method of verifying the validity of the kubelet serving certificate requests and approving them.
16.1.4. Creating the user-provisioned infrastructure
Before you deploy an OpenShift Container Platform cluster that uses user-provisioned infrastructure, you must create the underlying infrastructure.
Prerequisites
- Review the OpenShift Container Platform 4.x Tested Integrations page before you create the supporting infrastructure for your cluster.
Procedure
- Set up static IP addresses.
- Set up an HTTP or HTTPS server to provide Ignition files to the cluster nodes.
- Provision the required load balancers.
- Configure the ports for your machines.
- Configure DNS.
- Ensure network connectivity.
16.1.4.1. Networking requirements for user-provisioned infrastructure
All the Red Hat Enterprise Linux CoreOS (RHCOS) machines require network in initramfs during boot to fetch Ignition config from the machine config server.
During the initial boot, the machines require an HTTP or HTTPS server to establish a network connection to download their Ignition config files.
Ensure that the machines have persistent IP addresses and host names.
The Kubernetes API server must be able to resolve the node names of the cluster machines. If the API servers and worker nodes are in different zones, you can configure a default DNS search zone to allow the API server to resolve the node names. Another supported approach is to always refer to hosts by their fully-qualified domain names in both the node objects and all DNS requests.
You must configure the network connectivity between machines to allow cluster components to communicate. Each machine must be able to resolve the host names of all other machines in the cluster.
| Protocol | Port | Description |
|---|---|---|
| ICMP | N/A | Network reachability tests |
| TCP |
| Metrics |
|
|
Host level services, including the node exporter on ports | |
|
| The default ports that Kubernetes reserves | |
|
| openshift-sdn | |
| UDP |
| VXLAN and Geneve |
|
| VXLAN and Geneve | |
|
|
Host level services, including the node exporter on ports | |
| TCP/UDP |
| Kubernetes node port |
| Protocol | Port | Description |
|---|---|---|
| TCP |
| Kubernetes API |
| Protocol | Port | Description |
|---|---|---|
| TCP |
| etcd server and peer ports |
Network topology requirements
The infrastructure that you provision for your cluster must meet the following network topology requirements.
OpenShift Container Platform requires all nodes to have internet access to pull images for platform containers and provide telemetry data to Red Hat.
Load balancers
Before you install OpenShift Container Platform, you must provision two load balancers that meet the following requirements:
API load balancer: Provides a common endpoint for users, both human and machine, to interact with and configure the platform. Configure the following conditions:
- Layer 4 load balancing only. This can be referred to as Raw TCP, SSL Passthrough, or SSL Bridge mode. If you use SSL Bridge mode, you must enable Server Name Indication (SNI) for the API routes.
- A stateless load balancing algorithm. The options vary based on the load balancer implementation.
ImportantDo not configure session persistence for an API load balancer.
Configure the following ports on both the front and back of the load balancers:
Expand Table 16.5. API load balancer Port Back-end machines (pool members) Internal External Description 6443Bootstrap and control plane. You remove the bootstrap machine from the load balancer after the bootstrap machine initializes the cluster control plane. You must configure the
/readyzendpoint for the API server health check probe.X
X
Kubernetes API server
22623Bootstrap and control plane. You remove the bootstrap machine from the load balancer after the bootstrap machine initializes the cluster control plane.
X
Machine config server
NoteThe load balancer must be configured to take a maximum of 30 seconds from the time the API server turns off the
/readyzendpoint to the removal of the API server instance from the pool. Within the time frame after/readyzreturns an error or becomes healthy, the endpoint must have been removed or added. Probing every 5 or 10 seconds, with two successful requests to become healthy and three to become unhealthy, are well-tested values.Application Ingress load balancer: Provides an Ingress point for application traffic flowing in from outside the cluster. Configure the following conditions:
- Layer 4 load balancing only. This can be referred to as Raw TCP, SSL Passthrough, or SSL Bridge mode. If you use SSL Bridge mode, you must enable Server Name Indication (SNI) for the Ingress routes.
- A connection-based or session-based persistence is recommended, based on the options available and types of applications that will be hosted on the platform.
Configure the following ports on both the front and back of the load balancers:
Expand Table 16.6. Application Ingress load balancer Port Back-end machines (pool members) Internal External Description 443The machines that run the Ingress router pods, compute, or worker, by default.
X
X
HTTPS traffic
80The machines that run the Ingress router pods, compute, or worker, by default.
X
X
HTTP traffic
If the true IP address of the client can be seen by the load balancer, enabling source IP-based session persistence can improve performance for applications that use end-to-end TLS encryption.
A working configuration for the Ingress router is required for an OpenShift Container Platform cluster. You must configure the Ingress router after the control plane initializes.
NTP configuration
OpenShift Container Platform clusters are configured to use a public Network Time Protocol (NTP) server by default. If you want to use a local enterprise NTP server, or if your cluster is being deployed in a disconnected network, you can configure the cluster to use a specific time server. For more information, see the documentation for Configuring chrony time service.
16.1.4.2. User-provisioned DNS requirements
DNS is used for name resolution and reverse name resolution. DNS A/AAAA or CNAME records are used for name resolution and PTR records are used for reverse name resolution. The reverse records are important because Red Hat Enterprise Linux CoreOS (RHCOS) uses the reverse records to set the host name for all the nodes. Additionally, the reverse records are used to generate the certificate signing requests (CSR) that OpenShift Container Platform needs to operate.
The following DNS records are required for an OpenShift Container Platform cluster that uses user-provisioned infrastructure. In each record, <cluster_name> is the cluster name and <base_domain> is the cluster base domain that you specify in the install-config.yaml file. A complete DNS record takes the form: <component>.<cluster_name>.<base_domain>..
| Component | Record | Description |
|---|---|---|
| Kubernetes API |
| Add a DNS A/AAAA or CNAME record, and a DNS PTR record, to identify the load balancer for the control plane machines. These records must be resolvable by both clients external to the cluster and from all the nodes within the cluster. |
|
| Add a DNS A/AAAA or CNAME record, and a DNS PTR record, to identify the load balancer for the control plane machines. These records must be resolvable from all the nodes within the cluster. Important The API server must be able to resolve the worker nodes by the host names that are recorded in Kubernetes. If the API server cannot resolve the node names, then proxied API calls can fail, and you cannot retrieve logs from pods. | |
| Routes |
| Add a wildcard DNS A/AAAA or CNAME record that refers to the load balancer that targets the machines that run the Ingress router pods, which are the worker nodes by default. These records must be resolvable by both clients external to the cluster and from all the nodes within the cluster. |
| Bootstrap |
| Add a DNS A/AAAA or CNAME record, and a DNS PTR record, to identify the bootstrap machine. These records must be resolvable by the nodes within the cluster. |
| Master hosts |
| DNS A/AAAA or CNAME records and DNS PTR records to identify each machine for the control plane nodes (also known as the master nodes). These records must be resolvable by the nodes within the cluster. |
| Worker hosts |
| Add DNS A/AAAA or CNAME records and DNS PTR records to identify each machine for the worker nodes. These records must be resolvable by the nodes within the cluster. |
You can use the nslookup <hostname> command to verify name resolution. You can use the dig -x <ip_address> command to verify reverse name resolution for the PTR records.
The following example of a BIND zone file shows sample A records for name resolution. The purpose of the example is to show the records that are needed. The example is not meant to provide advice for choosing one name resolution service over another.
Example 16.1. Sample DNS zone database
$TTL 1W
@ IN SOA ns1.example.com. root (
2019070700 ; serial
3H ; refresh (3 hours)
30M ; retry (30 minutes)
2W ; expiry (2 weeks)
1W ) ; minimum (1 week)
IN NS ns1.example.com.
IN MX 10 smtp.example.com.
;
;
ns1 IN A 192.168.1.5
smtp IN A 192.168.1.5
;
helper IN A 192.168.1.5
helper.ocp4 IN A 192.168.1.5
;
; The api identifies the IP of your load balancer.
api.ocp4 IN A 192.168.1.5
api-int.ocp4 IN A 192.168.1.5
;
; The wildcard also identifies the load balancer.
*.apps.ocp4 IN A 192.168.1.5
;
; Create an entry for the bootstrap host.
bootstrap.ocp4 IN A 192.168.1.96
;
; Create entries for the master hosts.
master0.ocp4 IN A 192.168.1.97
master1.ocp4 IN A 192.168.1.98
master2.ocp4 IN A 192.168.1.99
;
; Create entries for the worker hosts.
worker0.ocp4 IN A 192.168.1.11
worker1.ocp4 IN A 192.168.1.7
;
;EOFThe following example BIND zone file shows sample PTR records for reverse name resolution.
Example 16.2. Sample DNS zone database for reverse records
$TTL 1W
@ IN SOA ns1.example.com. root (
2019070700 ; serial
3H ; refresh (3 hours)
30M ; retry (30 minutes)
2W ; expiry (2 weeks)
1W ) ; minimum (1 week)
IN NS ns1.example.com.
;
; The syntax is "last octet" and the host must have an FQDN
; with a trailing dot.
97 IN PTR master0.ocp4.example.com.
98 IN PTR master1.ocp4.example.com.
99 IN PTR master2.ocp4.example.com.
;
96 IN PTR bootstrap.ocp4.example.com.
;
5 IN PTR api.ocp4.example.com.
5 IN PTR api-int.ocp4.example.com.
;
11 IN PTR worker0.ocp4.example.com.
7 IN PTR worker1.ocp4.example.com.
;
;EOF16.1.5. Generating an SSH private key and adding it to the agent
If you want to perform installation debugging or disaster recovery on your cluster, you must provide an SSH key to both your ssh-agent and the installation program. You can use this key to access the bootstrap machine in a public cluster to troubleshoot installation issues.
In a production environment, you require disaster recovery and debugging.
Do not skip this procedure in production environments where disaster recovery and debugging is required.
You can use this key to SSH into the master nodes as the user core. When you deploy the cluster, the key is added to the core user’s ~/.ssh/authorized_keys list.
Procedure
If you do not have an SSH key that is configured for password-less authentication on your computer, create one. For example, on a computer that uses a Linux operating system, run the following command:
$ ssh-keygen -t ed25519 -N '' \ -f <path>/<file_name>1 - 1
- Specify the path and file name, such as
~/.ssh/id_rsa, of the new SSH key. If you have an existing key pair, ensure your public key is in the your~/.sshdirectory.
Running this command generates an SSH key that does not require a password in the location that you specified.
NoteIf you plan to install an OpenShift Container Platform cluster that uses FIPS Validated / Modules in Process cryptographic libraries on the
x86_64architecture, do not create a key that uses theed25519algorithm. Instead, create a key that uses thersaorecdsaalgorithm.Start the
ssh-agentprocess as a background task:$ eval "$(ssh-agent -s)"Example output
Agent pid 31874NoteIf your cluster is in FIPS mode, only use FIPS-compliant algorithms to generate the SSH key. The key must be either RSA or ECDSA.
Add your SSH private key to the
ssh-agent:$ ssh-add <path>/<file_name>1 Example output
Identity added: /home/<you>/<path>/<file_name> (<computer_name>)- 1
- Specify the path and file name for your SSH private key, such as
~/.ssh/id_rsa
Next steps
- When you install OpenShift Container Platform, provide the SSH public key to the installation program. If you install a cluster on infrastructure that you provision, you must provide this key to your cluster’s machines.
16.1.6. Obtaining the installation program
Before you install OpenShift Container Platform, download the installation file on your provisioning machine.
Prerequisites
- You have a machine that runs Linux, for example Red Hat Enterprise Linux 8, with 500 MB of local disk space
Procedure
- Access the Infrastructure Provider page on the OpenShift Cluster Manager site. If you have a Red Hat account, log in with your credentials. If you do not, create an account.
- Select your infrastructure provider.
Navigate to the page for your installation type, download the installation program for your operating system, and place the file in the directory where you will store the installation configuration files.
ImportantThe installation program creates several files on the computer that you use to install your cluster. You must keep the installation program and the files that the installation program creates after you finish installing the cluster. Both files are required to delete the cluster.
ImportantDeleting the files created by the installation program does not remove your cluster, even if the cluster failed during installation. To remove your cluster, complete the OpenShift Container Platform uninstallation procedures for your specific cloud provider.
Extract the installation program. For example, on a computer that uses a Linux operating system, run the following command:
$ tar xvf openshift-install-linux.tar.gz- Download your installation pull secret from the Red Hat OpenShift Cluster Manager. This pull secret allows you to authenticate with the services that are provided by the included authorities, including Quay.io, which serves the container images for OpenShift Container Platform components.
16.1.7. Installing the OpenShift CLI by downloading the binary
You can install the OpenShift CLI (oc) to interact with OpenShift Container Platform from a command-line interface. You can install oc on Linux, Windows, or macOS.
If you installed an earlier version of oc, you cannot use it to complete all of the commands in OpenShift Container Platform 4.7. Download and install the new version of oc.
16.1.7.1. Installing the OpenShift CLI on Linux
You can install the OpenShift CLI (oc) binary on Linux by using the following procedure.
Procedure
- Navigate to the OpenShift Container Platform downloads page on the Red Hat Customer Portal.
- Select the appropriate version in the Version drop-down menu.
- Click Download Now next to the OpenShift v4.7 Linux Client entry and save the file.
Unpack the archive:
$ tar xvzf <file>Place the
ocbinary in a directory that is on yourPATH.To check your
PATH, execute the following command:$ echo $PATH
After you install the OpenShift CLI, it is available using the oc command:
$ oc <command>16.1.7.2. Installing the OpenShift CLI on Windows
You can install the OpenShift CLI (oc) binary on Windows by using the following procedure.
Procedure
- Navigate to the OpenShift Container Platform downloads page on the Red Hat Customer Portal.
- Select the appropriate version in the Version drop-down menu.
- Click Download Now next to the OpenShift v4.7 Windows Client entry and save the file.
- Unzip the archive with a ZIP program.
Move the
ocbinary to a directory that is on yourPATH.To check your
PATH, open the command prompt and execute the following command:C:\> path
After you install the OpenShift CLI, it is available using the oc command:
C:\> oc <command>16.1.7.3. Installing the OpenShift CLI on macOS
You can install the OpenShift CLI (oc) binary on macOS by using the following procedure.
Procedure
- Navigate to the OpenShift Container Platform downloads page on the Red Hat Customer Portal.
- Select the appropriate version in the Version drop-down menu.
- Click Download Now next to the OpenShift v4.7 MacOSX Client entry and save the file.
- Unpack and unzip the archive.
Move the
ocbinary to a directory on your PATH.To check your
PATH, open a terminal and execute the following command:$ echo $PATH
After you install the OpenShift CLI, it is available using the oc command:
$ oc <command>16.1.8. Manually creating the installation configuration file
For installations of OpenShift Container Platform that use user-provisioned infrastructure, you manually generate your installation configuration file.
Prerequisites
- Obtain the OpenShift Container Platform installation program and the access token for your cluster.
Procedure
Create an installation directory to store your required installation assets in:
$ mkdir <installation_directory>ImportantYou must create a directory. Some installation assets, like bootstrap X.509 certificates have short expiration intervals, so you must not reuse an installation directory. If you want to reuse individual files from another cluster installation, you can copy them into your directory. However, the file names for the installation assets might change between releases. Use caution when copying installation files from an earlier OpenShift Container Platform version.
Customize the following
install-config.yamlfile template and save it in the<installation_directory>.NoteYou must name this configuration file
install-config.yaml.Back up the
install-config.yamlfile so that you can use it to install multiple clusters.ImportantThe
install-config.yamlfile is consumed during the next step of the installation process. You must back it up now.
16.1.8.1. Sample install-config.yaml file for IBM Z
16.1.8.2. Sample install-config.yaml file for other platforms
You can customize the install-config.yaml file to specify more details about your OpenShift Container Platform cluster’s platform or modify the values of the required parameters.
apiVersion: v1
baseDomain: example.com
compute:
- hyperthreading: Enabled
name: worker
replicas: 0
controlPlane:
hyperthreading: Enabled
name: master
replicas: 3
metadata:
name: test
networking:
clusterNetwork:
- cidr: 10.128.0.0/14
hostPrefix: 23
networkType: OpenShiftSDN
serviceNetwork:
- 172.30.0.0/16
platform:
none: {}
fips: false
pullSecret: '{"auths": ...}'
sshKey: 'ssh-ed25519 AAAA...' - 1
- The base domain of the cluster. All DNS records must be sub-domains of this base and include the cluster name.
- 2 5
- The
controlPlanesection is a single mapping, but thecomputesection is a sequence of mappings. To meet the requirements of the different data structures, the first line of thecomputesection must begin with a hyphen,-, and the first line of thecontrolPlanesection must not. Only one control plane pool is used. - 3 6
- Whether to enable or disable simultaneous multithreading (SMT), or
hyperthreading. By default, SMT is enabled to increase the performance of your machines' cores. You can disable it by setting the parameter value toDisabled. If you disable SMT, you must disable it in all cluster machines; this includes both control plane and compute machines.NoteSimultaneous multithreading (SMT) is enabled by default. If SMT is not enabled in your BIOS settings, the
hyperthreadingparameter has no effect.ImportantIf you disable
hyperthreading, whether in the BIOS or in theinstall-config.yaml, ensure that your capacity planning accounts for the dramatically decreased machine performance. - 4
- You must set the value of the
replicasparameter to0. This parameter controls the number of workers that the cluster creates and manages for you, which are functions that the cluster does not perform when you use user-provisioned infrastructure. You must manually deploy worker machines for the cluster to use before you finish installing OpenShift Container Platform. - 7
- The number of control plane machines that you add to the cluster. Because the cluster uses these values as the number of etcd endpoints in the cluster, the value must match the number of control plane machines that you deploy.
- 8
- The cluster name that you specified in your DNS records.
- 9
- A block of IP addresses from which pod IP addresses are allocated. This block must not overlap with existing physical networks. These IP addresses are used for the pod network. If you need to access the pods from an external network, you must configure load balancers and routers to manage the traffic.Note
Class E CIDR range is reserved for a future use. To use the Class E CIDR range, you must ensure your networking environment accepts the IP addresses within the Class E CIDR range.
- 10
- The subnet prefix length to assign to each individual node. For example, if
hostPrefixis set to23, then each node is assigned a/23subnet out of the givencidr, which allows for 510 (2^(32 - 23) - 2) pod IPs addresses. If you are required to provide access to nodes from an external network, configure load balancers and routers to manage the traffic. - 11
- The IP address pool to use for service IP addresses. You can enter only one IP address pool. This block must not overlap with existing physical networks. If you need to access the services from an external network, configure load balancers and routers to manage the traffic.
- 12
- You must set the platform to
none. You cannot provide additional platform configuration variables for IBM Z infrastructure.WarningRed Hat Virtualization does not currently support installation with user-provisioned infrastructure on the oVirt platform. Therefore, you must set the platform to
none, allowing OpenShift Container Platform to identify each node as a bare-metal node and the cluster as a bare-metal cluster. This is the same as installing a cluster on any platform, and has the following limitations:- There will be no cluster provider so you must manually add each machine and there will be no node scaling capabilities.
- The oVirt CSI driver will not be installed and there will be no CSI capabilities.
- 13
- Whether to enable or disable FIPS mode. By default, FIPS mode is not enabled. If FIPS mode is enabled, the Red Hat Enterprise Linux CoreOS (RHCOS) machines that OpenShift Container Platform runs on bypass the default Kubernetes cryptography suite and use the cryptography modules that are provided with RHCOS instead.Important
The use of FIPS Validated / Modules in Process cryptographic libraries is only supported on OpenShift Container Platform deployments on the
x86_64architecture. - 14
- The pull secret from the Red Hat OpenShift Cluster Manager. This pull secret allows you to authenticate with the services that are provided by the included authorities, including Quay.io, which serves the container images for OpenShift Container Platform components.
- 15
- The public portion of the default SSH key for the
coreuser in Red Hat Enterprise Linux CoreOS (RHCOS).NoteFor production OpenShift Container Platform clusters on which you want to perform installation debugging or disaster recovery, specify an SSH key that your
ssh-agentprocess uses.
16.1.8.3. Configuring the cluster-wide proxy during installation
Production environments can deny direct access to the Internet and instead have an HTTP or HTTPS proxy available. You can configure a new OpenShift Container Platform cluster to use a proxy by configuring the proxy settings in the install-config.yaml file.
Prerequisites
-
You have an existing
install-config.yamlfile. You reviewed the sites that your cluster requires access to and determined whether any of them need to bypass the proxy. By default, all cluster egress traffic is proxied, including calls to hosting cloud provider APIs. You added sites to the
Proxyobject’sspec.noProxyfield to bypass the proxy if necessary.NoteThe
Proxyobjectstatus.noProxyfield is populated with the values of thenetworking.machineNetwork[].cidr,networking.clusterNetwork[].cidr, andnetworking.serviceNetwork[]fields from your installation configuration.For installations on Amazon Web Services (AWS), Google Cloud Platform (GCP), Microsoft Azure, and Red Hat OpenStack Platform (RHOSP), the
Proxyobjectstatus.noProxyfield is also populated with the instance metadata endpoint (169.254.169.254).
Procedure
Edit your
install-config.yamlfile and add the proxy settings. For example:apiVersion: v1 baseDomain: my.domain.com proxy: httpProxy: http://<username>:<pswd>@<ip>:<port>1 httpsProxy: https://<username>:<pswd>@<ip>:<port>2 noProxy: example.com3 additionalTrustBundle: |4 -----BEGIN CERTIFICATE----- <MY_TRUSTED_CA_CERT> -----END CERTIFICATE----- ...- 1
- A proxy URL to use for creating HTTP connections outside the cluster. The URL scheme must be
http. - 2
- A proxy URL to use for creating HTTPS connections outside the cluster.
- 3
- A comma-separated list of destination domain names, IP addresses, or other network CIDRs to exclude from proxying. Preface a domain with
.to match subdomains only. For example,.y.commatchesx.y.com, but noty.com. Use*to bypass the proxy for all destinations. - 4
- If provided, the installation program generates a config map that is named
user-ca-bundlein theopenshift-confignamespace to hold the additional CA certificates. If you provideadditionalTrustBundleand at least one proxy setting, theProxyobject is configured to reference theuser-ca-bundleconfig map in thetrustedCAfield. The Cluster Network Operator then creates atrusted-ca-bundleconfig map that merges the contents specified for thetrustedCAparameter with the RHCOS trust bundle. TheadditionalTrustBundlefield is required unless the proxy’s identity certificate is signed by an authority from the RHCOS trust bundle.
NoteThe installation program does not support the proxy
readinessEndpointsfield.- Save the file and reference it when installing OpenShift Container Platform.
The installation program creates a cluster-wide proxy that is named cluster that uses the proxy settings in the provided install-config.yaml file. If no proxy settings are provided, a cluster Proxy object is still created, but it will have a nil spec.
Only the Proxy object named cluster is supported, and no additional proxies can be created.
16.1.9. Configuring a three-node cluster
You can optionally install and run three-node clusters in OpenShift Container Platform with no workers. This provides smaller, more resource efficient clusters for cluster administrators and developers to use for development, production, and testing.
Procedure
Edit the
install-config.yamlfile to set the number of compute replicas, which are also known as worker replicas, to0, as shown in the followingcomputestanza:compute: - name: worker platform: {} replicas: 0
16.1.10. Creating the Kubernetes manifest and Ignition config files
Because you must modify some cluster definition files and manually start the cluster machines, you must generate the Kubernetes manifest and Ignition config files that the cluster needs to make its machines.
The installation configuration file transforms into the Kubernetes manifests. The manifests wrap into the Ignition configuration files, which are later used to create the cluster.
The Ignition config files that the installation program generates contain certificates that expire after 24 hours, which are then renewed at that time. If the cluster is shut down before renewing the certificates and the cluster is later restarted after the 24 hours have elapsed, the cluster automatically recovers the expired certificates. The exception is that you must manually approve the pending node-bootstrapper certificate signing requests (CSRs) to recover kubelet certificates. See the documentation for Recovering from expired control plane certificates for more information.
The installation program that generates the manifest and Ignition files is architecture specific and can be obtained from the client image mirror. The Linux version of the installation program runs on s390x only. This installer program is also available as a Mac OS version.
Prerequisites
- You obtained the OpenShift Container Platform installation program.
-
You created the
install-config.yamlinstallation configuration file.
Procedure
Change to the directory that contains the installation program and generate the Kubernetes manifests for the cluster:
$ ./openshift-install create manifests --dir <installation_directory>1 - 1
- For
<installation_directory>, specify the installation directory that contains theinstall-config.yamlfile you created.
WarningIf you are installing a three-node cluster, skip the following step to allow the control plane nodes to be schedulable.
ImportantWhen you configure control plane nodes from the default unschedulable to schedulable, additional subscriptions are required. This is because control plane nodes then become worker nodes.
Check that the
mastersSchedulableparameter in the<installation_directory>/manifests/cluster-scheduler-02-config.ymlKubernetes manifest file is set tofalse. This setting prevents pods from being scheduled on the control plane machines:-
Open the
<installation_directory>/manifests/cluster-scheduler-02-config.ymlfile. -
Locate the
mastersSchedulableparameter and ensure that it is set tofalse. - Save and exit the file.
-
Open the
To create the Ignition configuration files, run the following command from the directory that contains the installation program:
$ ./openshift-install create ignition-configs --dir <installation_directory>1 - 1
- For
<installation_directory>, specify the same installation directory.
The following files are generated in the directory:
. ├── auth │ ├── kubeadmin-password │ └── kubeconfig ├── bootstrap.ign ├── master.ign ├── metadata.json └── worker.ign
16.1.11. Installing RHCOS and starting the OpenShift Container Platform bootstrap process
To install OpenShift Container Platform on bare metal infrastructure that you provision, you must install Red Hat Enterprise Linux CoreOS (RHCOS) on the machines. When you install RHCOS, you must provide the Ignition config file that was generated by the OpenShift Container Platform installation program for the type of machine you are installing. If you have configured suitable networking, DNS, and load balancing infrastructure, the OpenShift Container Platform bootstrap process begins automatically after the RHCOS machines have rebooted.
To install RHCOS on the machines, follow either the steps to use an ISO image or network PXE booting.
The compute node deployment steps included in this installation document are RHCOS-specific. If you choose instead to deploy RHEL-based compute nodes, you take responsibility for all operating system life cycle management and maintenance, including performing system updates, applying patches, and completing all other required tasks. Use of RHEL 7 compute machines is deprecated and planned for removal in a future release of OpenShift Container Platform 4.
You can configure RHCOS during ISO and PXE installations by using the following methods:
-
Kernel arguments: You can use kernel arguments to provide installation-specific information. For example, you can specify the locations of the RHCOS installation files that you uploaded to your HTTP server and the location of the Ignition config file for the type of node you are installing. For a PXE installation, you can use the
APPENDparameter to pass the arguments to the kernel of the live installer. For an ISO installation, you can interrupt the live installation boot process to add the kernel arguments. In both installation cases, you can use specialcoreos.inst.*arguments to direct the live installer, as well as standard installation boot arguments for turning standard kernel services on or off. -
Ignition configs: OpenShift Container Platform Ignition config files (
*.ign) are specific to the type of node you are installing. You pass the location of a bootstrap, control plane, or compute node Ignition config file during the RHCOS installation so that it takes effect on first boot. In special cases, you can create a separate, limited Ignition config to pass to the live system. That Ignition config could do a certain set of tasks, such as reporting success to a provisioning system after completing installation. This special Ignition config is consumed by thecoreos-installerto be applied on first boot of the installed system. Do not provide the standard control plane and compute node Ignition configs to the live ISO directly. -
coreos-installer: You can boot the live ISO installer to a shell prompt, which allows you to prepare the permanent system in a variety of ways before first boot. In particular, you can run thecoreos-installercommand to identify various artifacts to include, work with disk partitions, and set up networking. In some cases, you can configure features on the live system and copy them to the installed system.
Whether to use an ISO or PXE install depends on your situation. A PXE install requires an available DHCP service and more preparation, but can make the installation process more automated. An ISO install is a more manual process and can be inconvenient if you are setting up more than a few machines.
As of OpenShift Container Platform 4.6, the RHCOS ISO and other installation artifacts provide support for installation on disks with 4K sectors.
16.1.11.1. Creating Red Hat Enterprise Linux CoreOS (RHCOS) machines using an ISO image
Before you install a cluster on infrastructure that you provision, you must create RHCOS machines for it to use. You can use an ISO image to create the machines.
Prerequisites
- Obtain the Ignition config files for your cluster.
- Have access to an HTTP server that can be accessed from your computer, and from the machines that you create.
Procedure
Upload the control plane, compute, and bootstrap Ignition config files that the installation program created to your HTTP server. Note the URLs of these files.
ImportantIf you plan to add more compute machines to your cluster after you finish installation, do not delete these files.
Obtain the RHCOS images that are required for your preferred method of installing operating system instances from the RHCOS image mirror page.
ImportantThe RHCOS images might not change with every release of OpenShift Container Platform. You must download images with the highest version that is less than or equal to the OpenShift Container Platform version that you install. Use the image versions that match your OpenShift Container Platform version if they are available. Use only ISO images for this procedure. RHCOS qcow2 images are not supported for this installation type.
ISO file names resemble the following example:
rhcos-<version>-live.<architecture>.isoUse the ISO to start the RHCOS installation. Use one of the following installation options:
- Burn the ISO image to a disk and boot it directly.
- Use ISO redirection via a LOM interface.
-
Boot the ISO image. You can interrupt the installation boot process to add kernel arguments. However, for this ISO procedure you should use the
coreos-installercommand instead of adding kernel arguments. If you run the live installer without options or interruption, the installer boots up to a shell prompt on the live system, ready for you to install RHCOS to disk. -
Review the Advanced RHCOS installation reference section for different ways of configuring features, such as networking and disk partitions, before running the
coreos-installer. Run the
coreos-installercommand. At a minimum, you must identify the Ignition config file location for your node type, and the location of the disk you are installing to. Here is an example:$ sudo coreos-installer install \ --ignition-url=https://host/worker.ign /dev/sda- After RHCOS installs, the system reboots. During the system reboot, it applies the Ignition config file that you specified.
Continue to create the other machines for your cluster.
ImportantYou must create the bootstrap and control plane machines at this time. If the control plane machines are not made schedulable, which is the default, also create at least two compute machines before you install the cluster.
16.1.11.2. Creating Red Hat Enterprise Linux CoreOS (RHCOS) machines by PXE or iPXE booting
Before you install a cluster that uses manually-provisioned RHCOS nodes, such as bare metal, you must create RHCOS machines for it to use. You can use PXE or iPXE booting to create the machines.
Prerequisites
- Obtain the Ignition config files for your cluster.
- Configure suitable PXE or iPXE infrastructure.
- Have access to an HTTP server that you can access from your computer.
Procedure
Upload the master, worker, and bootstrap Ignition config files that the installation program created to your HTTP server. Note the URLs of these files.
ImportantYou can add or change configuration settings in your Ignition configs before saving them to your HTTP server. If you plan to add more compute machines to your cluster after you finish installation, do not delete these files.
Obtain the RHCOS
kernel,initramfsandrootfsfiles from the RHCOS image mirror page.ImportantThe RHCOS artifacts might not change with every release of OpenShift Container Platform. You must download artifacts with the highest version that is less than or equal to the OpenShift Container Platform version that you install. Only use the appropriate
kernel,initramfs, androotfsartifacts described below for this procedure. RHCOS qcow2 images are not supported for this installation type.The file names contain the OpenShift Container Platform version number. They resemble the following examples:
-
kernel:rhcos-<version>-live-kernel-<architecture> -
initramfs:rhcos-<version>-live-initramfs.<architecture>.img -
rootfs:rhcos-<version>-live-rootfs.<architecture>.img
-
Upload the additional files that are required for your booting method:
-
For traditional PXE, upload the
kernelandinitramfsfiles to your TFTP server and therootfsfile to your HTTP server. For iPXE, upload the
kernel,initramfs, androotfsfiles to your HTTP server.ImportantIf you plan to add more compute machines to your cluster after you finish installation, do not delete these files.
-
For traditional PXE, upload the
- Configure the network boot infrastructure so that the machines boot from their local disks after RHCOS is installed on them.
Configure PXE or iPXE installation for the RHCOS images.
Modify one of the following example menu entries for your environment and verify that the image and Ignition files are properly accessible:
For PXE:
DEFAULT pxeboot TIMEOUT 20 PROMPT 0 LABEL pxeboot KERNEL http://<HTTP_server>/rhcos-<version>-live-kernel-<architecture>1 APPEND initrd=http://<HTTP_server>/rhcos-<version>-live-initramfs.<architecture>.img coreos.live.rootfs_url=http://<HTTP_server>/rhcos-<version>-live-rootfs.<architecture>.img coreos.inst.install_dev=/dev/sda coreos.inst.ignition_url=http://<HTTP_server>/bootstrap.ign2 3 - 1
- Specify the location of the live
kernelfile that you uploaded to your HTTP server. The URL must be HTTP, TFTP, or FTP; HTTPS and NFS are not supported. - 2
- If you use multiple NICs, specify a single interface in the
ipoption. For example, to use DHCP on a NIC that is namedeno1, setip=eno1:dhcp. - 3
- Specify locations of the RHCOS files that you uploaded to your HTTP server. The
initrdparameter value is the location of theinitramfsfile, thecoreos.live.rootfs_urlparameter value is the location of therootfsfile, and thecoreos.inst.ignition_urlparameter value is the location of the bootstrap Ignition config file. You can also add more kernel arguments to theAPPENDline to configure networking or other boot options.
NoteThis configuration does not enable serial console access on machines with a graphical console. To configure a different console, add one or more
console=arguments to theAPPENDline. For example, addconsole=tty0 console=ttyS0to set the first PC serial port as the primary console and the graphical console as a secondary console. For more information, see How does one set up a serial terminal and/or console in Red Hat Enterprise Linux?.For iPXE:
kernel http://<HTTP_server>/rhcos-<version>-live-kernel-<architecture> initrd=main coreos.live.rootfs_url=http://<HTTP_server>/rhcos-<version>-live-rootfs.<architecture>.img coreos.inst.install_dev=/dev/sda coreos.inst.ignition_url=http://<HTTP_server>/bootstrap.ign1 2 initrd --name main http://<HTTP_server>/rhcos-<version>-live-initramfs.<architecture>.img3 boot- 1
- Specify locations of the RHCOS files that you uploaded to your HTTP server. The
kernelparameter value is the location of thekernelfile, theinitrd=mainargument is needed for booting on UEFI systems, thecoreos.live.rootfs_urlparameter value is the location of therootfsfile, and thecoreos.inst.ignition_urlparameter value is the location of the bootstrap Ignition config file. - 2
- If you use multiple NICs, specify a single interface in the
ipoption. For example, to use DHCP on a NIC that is namedeno1, setip=eno1:dhcp. - 3
- Specify the location of the
initramfsfile that you uploaded to your HTTP server.
NoteThis configuration does not enable serial console access on machines with a graphical console. To configure a different console, add one or more
console=arguments to thekernelline. For example, addconsole=tty0 console=ttyS0to set the first PC serial port as the primary console and the graphical console as a secondary console. For more information, see How does one set up a serial terminal and/or console in Red Hat Enterprise Linux?.
If you use PXE UEFI, perform the following actions:
Provide the
shimx64.efiandgrubx64.efiEFI binaries and thegrub.cfgfile that are required for booting the system.Extract the necessary EFI binaries by mounting the RHCOS ISO to your host and then mounting the
images/efiboot.imgfile to your host:$ mkdir -p /mnt/iso$ mkdir -p /mnt/efiboot$ mount -o loop rhcos-installer.x86_64.iso /mnt/iso$ mount -o loop,ro /mnt/iso/images/efiboot.img /mnt/efibootFrom the
efiboot.imgmount point, copy theEFI/redhat/shimx64.efiandEFI/redhat/grubx64.efifiles to your TFTP server:$ cp /mnt/efiboot/EFI/redhat/shimx64.efi .$ cp /mnt/efiboot/EFI/redhat/grubx64.efi .$ umount /mnt/efiboot$ umount /mnt/iso-
Copy the
EFI/redhat/grub.cfgfile that is included in the RHCOS ISO to your TFTP server.
Edit the
grub.cfgfile to include arguments similar to the following:menuentry 'Install Red Hat Enterprise Linux CoreOS' --class fedora --class gnu-linux --class gnu --class os { linuxefi rhcos-<version>-live-kernel-<architecture> coreos.inst.install_dev=/dev/sda coreos.live.rootfs_url=http://<HTTP_server>/rhcos-<version>-live-rootfs.<architecture>.img coreos.inst.ignition_url=http://<HTTP_server>/bootstrap.ign initrdefi rhcos-<version>-live-initramfs.<architecture>.img }where:
rhcos-<version>-live-kernel-<architecture>-
Specifies the
kernelfile that you uploaded to your TFTP server. http://<HTTP_server>/rhcos-<version>-live-rootfs.<architecture>.img- Specifies the location of the live rootfs image that you uploaded to your HTTP server.
http://<HTTP_server>/bootstrap.ign- Specifies the location of the bootstrap Ignition config file that you uploaded to your HTTP server.
rhcos-<version>-live-initramfs.<architecture>.img-
Specifies the location of the
initramfsfile that you uploaded to your TFTP server.
NoteFor more information on how to configure a PXE server for UEFI boot, see the Red Hat Knowledgebase article: How to configure/setup a PXE server for UEFI boot for Red Hat Enterprise Linux?.
Continue to create the machines for your cluster.
ImportantYou must create the bootstrap and control plane machines at this time. If the control plane machines are not made schedulable, which is the default, also create at least two compute machines before you install the cluster.
16.1.11.3. Advanced Red Hat Enterprise Linux CoreOS (RHCOS) installation configuration
A key benefit for manually provisioning the Red Hat Enterprise Linux CoreOS (RHCOS) nodes for OpenShift Container Platform is to be able to do configuration that is not available through default OpenShift Container Platform installation methods. This section describes some of the configurations that you can do using techniques that include:
- Passing kernel arguments to the live installer
-
Running
coreos-installermanually from the live system - Embedding Ignition configs in an ISO
The advanced configuration topics for manual Red Hat Enterprise Linux CoreOS (RHCOS) installations detailed in this section relate to disk partitioning, networking, and using Ignition configs in different ways.
16.1.11.3.1. Using advanced networking options for PXE and ISO installations
Networking for OpenShift Container Platform nodes uses DHCP by default to gather all necessary configuration settings. To set up static IP addresses or configure special settings, such as bonding, you can do one of the following:
- Pass special kernel parameters when you boot the live installer.
- Use a machine config to copy networking files to the installed system.
- Configure networking from a live installer shell prompt, then copy those settings to the installed system so that they take effect when the installed system first boots.
To configure a PXE or iPXE installation, use one of the following options:
- See the "Advanced RHCOS installation reference" tables.
- Use a machine config to copy networking files to the installed system.
To configure an ISO installation, use the following procedure.
Procedure
- Boot the ISO installer.
-
From the live system shell prompt, configure networking for the live system using available RHEL tools, such as
nmcliornmtui. Run the
coreos-installercommand to install the system, adding the--copy-networkoption to copy networking configuration. For example:$ coreos-installer install --copy-network \ --ignition-url=http://host/worker.ign /dev/sdaImportantThe
--copy-networkoption only copies networking configuration found under/etc/NetworkManager/system-connections. In particular, it does not copy the system hostname.- Reboot into the installed system.
16.1.11.3.2. Disk partitioning
The disk partitions are created on OpenShift Container Platform cluster nodes during the Red Hat Enterprise Linux CoreOS (RHCOS) installation. Each RHCOS node of a particular architecture uses the same partition layout, unless the default partitioning configuration is overridden. During the RHCOS installation, the size of the root file system is increased to use the remaining available space on the target device.
However, there are two cases where you might want to intervene to override the default partitioning when installing an OpenShift Container Platform node:
Create separate partitions: For greenfield installations on an empty disk, you might want to add separate storage to a partition. This is officially supported for making
/varor a subdirectory of/var, such as/var/lib/etcd, a separate partition, but not both.ImportantKubernetes supports only two filesystem partitions. If you add more than one partition to the original configuration, Kubernetes cannot monitor all of them.
-
Retain existing partitions: For a brownfield installation where you are reinstalling OpenShift Container Platform on an existing node and want to retain data partitions installed from your previous operating system, there are both boot arguments and options to
coreos-installerthat allow you to retain existing data partitions.
16.1.11.3.2.1. Creating a separate /var partition
In general, disk partitioning for OpenShift Container Platform should be left to the installer. However, there are cases where you might want to create separate partitions in a part of the filesystem that you expect to grow.
OpenShift Container Platform supports the addition of a single partition to attach storage to either the /var partition or a subdirectory of /var. For example:
-
/var/lib/containers: Holds container-related content that can grow as more images and containers are added to a system. -
/var/lib/etcd: Holds data that you might want to keep separate for purposes such as performance optimization of etcd storage. -
/var: Holds data that you might want to keep separate for purposes such as auditing.
Storing the contents of a /var directory separately makes it easier to grow storage for those areas as needed and reinstall OpenShift Container Platform at a later date and keep that data intact. With this method, you will not have to pull all your containers again, nor will you have to copy massive log files when you update systems.
Because /var must be in place before a fresh installation of Red Hat Enterprise Linux CoreOS (RHCOS), the following procedure sets up the separate /var partition by creating a machine config that is inserted during the openshift-install preparation phases of an OpenShift Container Platform installation.
Procedure
Create a directory to hold the OpenShift Container Platform installation files:
$ mkdir $HOME/clusterconfigRun
openshift-installto create a set of files in themanifestandopenshiftsubdirectories. Answer the system questions as you are prompted:$ openshift-install create manifests --dir $HOME/clusterconfig ? SSH Public Key ... $ ls $HOME/clusterconfig/openshift/ 99_kubeadmin-password-secret.yaml 99_openshift-cluster-api_master-machines-0.yaml 99_openshift-cluster-api_master-machines-1.yaml 99_openshift-cluster-api_master-machines-2.yaml ...Create a
MachineConfigobject and add it to a file in theopenshiftdirectory. For example, name the file98-var-partition.yaml, change the disk device name to the name of the storage device on theworkersystems, and set the storage size as appropriate. This example places the/vardirectory on a separate partition:apiVersion: machineconfiguration.openshift.io/v1 kind: MachineConfig metadata: labels: machineconfiguration.openshift.io/role: worker name: 98-var-partition spec: config: ignition: version: 3.2.0 storage: disks: - device: /dev/<device_name>1 partitions: - label: var startMiB: <partition_start_offset>2 sizeMiB: <partition_size>3 filesystems: - device: /dev/disk/by-partlabel/var path: /var format: xfs systemd: units: - name: var.mount4 enabled: true contents: | [Unit] Before=local-fs.target [Mount] What=/dev/disk/by-partlabel/var Where=/var Options=defaults,prjquota5 [Install] WantedBy=local-fs.target- 1
- The storage device name of the disk that you want to partition.
- 2
- When adding a data partition to the boot disk, a minimum value of 25000 mebibytes is recommended. The root file system is automatically resized to fill all available space up to the specified offset. If no value is specified, or if the specified value is smaller than the recommended minimum, the resulting root file system will be too small, and future reinstalls of RHCOS might overwrite the beginning of the data partition.
- 3
- The size of the data partition in mebibytes.
- 4
- The name of the mount unit must match the directory specified in the
Where=directive. For example, for a filesystem mounted on/var/lib/containers, the unit must be namedvar-lib-containers.mount. - 5
- The
prjquotamount option must be enabled for filesystems used for container storage.
NoteWhen creating a separate
/varpartition, you cannot use different instance types for worker nodes, if the different instance types do not have the same device name.Run
openshift-installagain to create Ignition configs from a set of files in themanifestandopenshiftsubdirectories:$ openshift-install create ignition-configs --dir $HOME/clusterconfig $ ls $HOME/clusterconfig/ auth bootstrap.ign master.ign metadata.json worker.ign
Now you can use the Ignition config files as input to the ISO or PXE manual installation procedures to install Red Hat Enterprise Linux CoreOS (RHCOS) systems.
16.1.11.3.2.2. Retaining existing partitions
For an ISO installation, you can add options to the coreos-installer command line that causes the installer to maintain one or more existing partitions. For a PXE installation, you can APPEND coreos.inst.* options to preserve partitions.
Saved partitions might be partitions from an existing OpenShift Container Platform system that has data partitions that you want to keep. Here are a few tips:
- If you save existing partitions, and those partitions do not leave enough space for RHCOS, installation will fail without damaging the saved partitions.
- Identify the disk partitions you want to keep either by partition label or by number.
For an ISO installation
This example preserves any partition in which the partition label begins with data (data*):
# coreos-installer install --ignition-url http://10.0.2.2:8080/user.ign \
--save-partlabel 'data*' /dev/sda
The following example illustrates running the coreos-installer in a way that preserves the sixth (6) partition on the disk:
# coreos-installer install --ignition-url http://10.0.2.2:8080/user.ign \
--save-partindex 6 /dev/sdaThis example preserves partitions 5 and higher:
# coreos-installer install --ignition-url http://10.0.2.2:8080/user.ign
--save-partindex 5- /dev/sda
In the previous examples where partition saving is used, coreos-installer recreates the partition immediately.
For a PXE installation
This APPEND option preserves any partition in which the partition label begins with 'data' ('data*'):
coreos.inst.save_partlabel=data*
This APPEND option preserves partitions 5 and higher:
coreos.inst.save_partindex=5-
This APPEND option preserves partition 6:
coreos.inst.save_partindex=616.1.11.3.3. Identifying Ignition configs
When doing an RHCOS manual installation, there are two types of Ignition configs that you can provide, with different reasons for providing each one:
Permanent install Ignition config: Every manual RHCOS installation needs to pass one of the Ignition config files generated by
openshift-installer, such asbootstrap.ign,master.ignandworker.ign, to carry out the installation.ImportantIt is not recommended to modify these files.
For PXE installations, you pass the Ignition configs on the
APPENDline using thecoreos.inst.ignition_url=option. For ISO installations, after the ISO boots to the shell prompt, you identify the Ignition config on thecoreos-installercommand line with the--ignition-url=option. In both cases, only HTTP and HTTPS protocols are supported.Live install Ignition config: This type must be created manually and should be avoided if possible, as it is not supported by Red Hat. With this method, the Ignition config passes to the live install medium, runs immediately upon booting, and performs setup tasks before and/or after the RHCOS system installs to disk. This method should only be used for performing tasks that must be performed once and not applied again later, such as with advanced partitioning that cannot be done using a machine config.
For PXE or ISO boots, you can create the Ignition config and
APPENDtheignition.config.url=option to identify the location of the Ignition config. You also need to appendignition.firstboot ignition.platform.id=metalor theignition.config.urloption will be ignored.
16.1.11.3.3.1. Embedding an Ignition config in the RHCOS ISO
You can embed a live install Ignition config directly in an RHCOS ISO image. When the ISO image is booted, the embedded config will be applied automatically.
Procedure
-
Download the
coreos-installerbinary from the following image mirror page: https://mirror.openshift.com/pub/openshift-v4/clients/coreos-installer/latest/. Retrieve the RHCOS ISO image and the Ignition config file, and copy them into an accessible directory, such as
/mnt:# cp rhcos-<version>-live.x86_64.iso bootstrap.ign /mnt/ # chmod 644 /mnt/rhcos-<version>-live.x86_64.isoRun the following command to embed the Ignition config into the ISO:
# ./coreos-installer iso ignition embed -i /mnt/bootstrap.ign \ /mnt/rhcos-<version>-live.x86_64.isoYou can now use that ISO to install RHCOS using the specified live install Ignition config.
ImportantUsing
coreos-installer iso ignition embedto embed a file generated byopenshift-installer, such asbootstrap.ign,master.ignandworker.ign, is unsupported and not recommended.To show the contents of the embedded Ignition config and direct it into a file, run:
# ./coreos-installer iso ignition show /mnt/rhcos-<version>-live.x86_64.iso > mybootstrap.ign# diff -s bootstrap.ign mybootstrap.ignExample output
Files bootstrap.ign and mybootstrap.ign are identicalTo remove the Ignition config and return the ISO to its pristine state so you can reuse it, run:
# ./coreos-installer iso ignition remove /mnt/rhcos-<version>-live.x86_64.isoYou can now embed another Ignition config into the ISO or use the ISO in its pristine state.
16.1.11.3.4. Advanced RHCOS installation reference
This section illustrates the networking configuration and other advanced options that allow you to modify the Red Hat Enterprise Linux CoreOS (RHCOS) manual installation process. The following tables describe the kernel arguments and command-line options you can use with the RHCOS live installer and the coreos-installer command.
Routing and bonding options at RHCOS boot prompt
If you install RHCOS from an ISO image, you can add kernel arguments manually when you boot that image to configure the node’s networking. If no networking arguments are used, the installation defaults to using DHCP.
When adding networking arguments, you must also add the rd.neednet=1 kernel argument.
The following table describes how to use ip=, nameserver=, and bond= kernel arguments for live ISO installs.
Ordering is important when adding kernel arguments: ip=, nameserver=, and then bond=.
Routing and bonding options for ISO
The following table provides examples for configuring networking of your Red Hat Enterprise Linux CoreOS (RHCOS) nodes. These are networking options that are passed to the dracut tool during system boot. For more information about the networking options supported by dracut, see the dracut.cmdline manual page.
| Description | Examples |
|---|---|
|
To configure an IP address, either use DHCP (
|
|
|
Specify multiple network interfaces by specifying multiple |
|
|
Optional: You can configure routes to additional networks by setting an If the additional network gateway is different from the primary network gateway, the default gateway must be the primary network gateway. | To configure the default gateway: To configure the route for the additional network: |
| Disable DHCP on a single interface, such as when there are two or more network interfaces and only one interface is being used. |
|
| You can combine DHCP and static IP configurations on systems with multiple network interfaces. |
|
|
Optional: You can configure VLANs on individual interfaces by using the | To configure a VLAN on a network interface and use a static IP address: To configure a VLAN on a network interface and to use DHCP: |
|
You can provide multiple DNS servers by adding a |
|
|
Optional: Bonding multiple network interfaces to a single interface is supported using the
|
To configure the bonded interface to use DHCP, set the bond’s IP address to To configure the bonded interface to use a static IP address, enter the specific IP address you want and related information. For example: |
|
Optional: You can configure VLANs on bonded interfaces by using the | To configure the bonded interface with a VLAN and to use DHCP: To configure the bonded interface with a VLAN and to use a static IP address: |
|
Optional: Network teaming can be used as an alternative to bonding by using the
Note Teaming is planned to be deprecated when RHCOS switches to an upcoming version of RHEL. For more information, see this Red Hat Knowledgebase Article. | To configure a network team: |
16.1.11.4. Updating the bootloader using bootupd
To update the bootloader by using bootupd, you must either install bootupd on RHCOS machines manually or provide a machine config with the enabled systemd unit. Unlike grubby or other bootloader tools, bootupd does not manage kernel space configuration such as passing kernel arguments.
After you have installed bootupd, you can manage it remotely from the OpenShift Container Platform cluster.
It is recommended that you use bootupd only on bare metal or virtualized hypervisor installations, such as for protection against the BootHole vulnerability.
Manual install method
You can manually install bootupd by using the bootctl command-line tool.
Inspect the system status:
# bootupctl statusExample output
Component EFI Installed: grub2-efi-x64-1:2.04-31.fc33.x86_64,shim-x64-15-8.x86_64 Update: At latest version
RHCOS images created without
bootupdinstalled on them require an explicit adoption phase.If the system status is
Adoptable, perform the adoption:# bootupctl adopt-and-updateExample output
Updated: grub2-efi-x64-1:2.04-31.fc33.x86_64,shim-x64-15-8.x86_64If an update is available, apply the update so that the changes take effect on the next reboot:
# bootupctl updateExample output
Updated: grub2-efi-x64-1:2.04-31.fc33.x86_64,shim-x64-15-8.x86_64
Machine config method
Another way to enable bootupd is by providing a machine config.
Provide a machine config file with the enabled
systemdunit, as shown in the following example:Example output
variant: rhcos version: 1.1.0 systemd: units: - name: custom-bootupd-auto.service enabled: true contents: | [Unit] Description=Bootupd automatic update [Service] ExecStart=/usr/bin/bootupctl update RemainAfterExit=yes [Install] WantedBy=multi-user.target
16.1.12. Creating the cluster
To create the OpenShift Container Platform cluster, you wait for the bootstrap process to complete on the machines that you provisioned by using the Ignition config files that you generated with the installation program.
Prerequisites
- Create the required infrastructure for the cluster.
- You obtained the installation program and generated the Ignition config files for your cluster.
- You used the Ignition config files to create RHCOS machines for your cluster.
- Your machines have direct Internet access or have an HTTP or HTTPS proxy available.
Procedure
Monitor the bootstrap process:
$ ./openshift-install --dir <installation_directory> wait-for bootstrap-complete \1 --log-level=info2 Example output
INFO Waiting up to 30m0s for the Kubernetes API at https://api.test.example.com:6443... INFO API v1.20.0 up INFO Waiting up to 30m0s for bootstrapping to complete... INFO It is now safe to remove the bootstrap resourcesThe command succeeds when the Kubernetes API server signals that it has been bootstrapped on the control plane machines.
After bootstrap process is complete, remove the bootstrap machine from the load balancer.
ImportantYou must remove the bootstrap machine from the load balancer at this point. You can also remove or reformat the machine itself.
16.1.13. Logging in to the cluster by using the CLI
You can log in to your cluster as a default system user by exporting the cluster kubeconfig file. The kubeconfig file contains information about the cluster that is used by the CLI to connect a client to the correct cluster and API server. The file is specific to a cluster and is created during OpenShift Container Platform installation.
Prerequisites
- You deployed an OpenShift Container Platform cluster.
-
You installed the
ocCLI.
Procedure
Export the
kubeadmincredentials:$ export KUBECONFIG=<installation_directory>/auth/kubeconfig1 - 1
- For
<installation_directory>, specify the path to the directory that you stored the installation files in.
Verify you can run
occommands successfully using the exported configuration:$ oc whoamiExample output
system:admin
16.1.14. Approving the certificate signing requests for your machines
When you add machines to a cluster, two pending certificate signing requests (CSRs) are generated for each machine that you added. You must confirm that these CSRs are approved or, if necessary, approve them yourself. The client requests must be approved first, followed by the server requests.
Prerequisites
- You added machines to your cluster.
Procedure
Confirm that the cluster recognizes the machines:
$ oc get nodesExample output
NAME STATUS ROLES AGE VERSION master-0 Ready master 63m v1.20.0 master-1 Ready master 63m v1.20.0 master-2 Ready master 64m v1.20.0The output lists all of the machines that you created.
NoteThe preceding output might not include the compute nodes, also known as worker nodes, until some CSRs are approved.
Review the pending CSRs and ensure that you see the client requests with the
PendingorApprovedstatus for each machine that you added to the cluster:$ oc get csrExample output
NAME AGE REQUESTOR CONDITION csr-mddf5 20m system:node:master-01.example.com Approved,Issued csr-z5rln 16m system:node:worker-21.example.com Approved,IssuedIf the CSRs were not approved, after all of the pending CSRs for the machines you added are in
Pendingstatus, approve the CSRs for your cluster machines:NoteBecause the CSRs rotate automatically, approve your CSRs within an hour of adding the machines to the cluster. If you do not approve them within an hour, the certificates will rotate, and more than two certificates will be present for each node. You must approve all of these certificates. Once the client CSR is approved, the Kubelet creates a secondary CSR for the serving certificate, which requires manual approval. Then, subsequent serving certificate renewal requests are automatically approved by the
machine-approverif the Kubelet requests a new certificate with identical parameters.NoteFor clusters running on platforms that are not machine API enabled, such as bare metal and other user-provisioned infrastructure, you must implement a method of automatically approving the kubelet serving certificate requests (CSRs). If a request is not approved, then the
oc exec,oc rsh, andoc logscommands cannot succeed, because a serving certificate is required when the API server connects to the kubelet. Any operation that contacts the Kubelet endpoint requires this certificate approval to be in place. The method must watch for new CSRs, confirm that the CSR was submitted by thenode-bootstrapperservice account in thesystem:nodeorsystem:admingroups, and confirm the identity of the node.To approve them individually, run the following command for each valid CSR:
$ oc adm certificate approve <csr_name>1 - 1
<csr_name>is the name of a CSR from the list of current CSRs.
To approve all pending CSRs, run the following command:
$ oc get csr -o go-template='{{range .items}}{{if not .status}}{{.metadata.name}}{{"\n"}}{{end}}{{end}}' | xargs --no-run-if-empty oc adm certificate approveNoteSome Operators might not become available until some CSRs are approved.
Now that your client requests are approved, you must review the server requests for each machine that you added to the cluster:
$ oc get csrExample output
NAME AGE REQUESTOR CONDITION csr-bfd72 5m26s system:node:ip-10-0-50-126.us-east-2.compute.internal Pending csr-c57lv 5m26s system:node:ip-10-0-95-157.us-east-2.compute.internal Pending ...If the remaining CSRs are not approved, and are in the
Pendingstatus, approve the CSRs for your cluster machines:To approve them individually, run the following command for each valid CSR:
$ oc adm certificate approve <csr_name>1 - 1
<csr_name>is the name of a CSR from the list of current CSRs.
To approve all pending CSRs, run the following command:
$ oc get csr -o go-template='{{range .items}}{{if not .status}}{{.metadata.name}}{{"\n"}}{{end}}{{end}}' | xargs oc adm certificate approve
After all client and server CSRs have been approved, the machines have the
Readystatus. Verify this by running the following command:$ oc get nodesExample output
NAME STATUS ROLES AGE VERSION master-0 Ready master 73m v1.20.0 master-1 Ready master 73m v1.20.0 master-2 Ready master 74m v1.20.0 worker-0 Ready worker 11m v1.20.0 worker-1 Ready worker 11m v1.20.0NoteIt can take a few minutes after approval of the server CSRs for the machines to transition to the
Readystatus.
Additional information
- For more information on CSRs, see Certificate Signing Requests.
16.1.15. Initial Operator configuration
After the control plane initializes, you must immediately configure some Operators so that they all become available.
Prerequisites
- Your control plane has initialized.
Procedure
Watch the cluster components come online:
$ watch -n5 oc get clusteroperatorsExample output
NAME VERSION AVAILABLE PROGRESSING DEGRADED SINCE authentication 4.7.0 True False False 3h56m baremetal 4.7.0 True False False 29h cloud-credential 4.7.0 True False False 29h cluster-autoscaler 4.7.0 True False False 29h config-operator 4.7.0 True False False 6h39m console 4.7.0 True False False 3h59m csi-snapshot-controller 4.7.0 True False False 4h12m dns 4.7.0 True False False 4h15m etcd 4.7.0 True False False 29h image-registry 4.7.0 True False False 3h59m ingress 4.7.0 True False False 4h30m insights 4.7.0 True False False 29h kube-apiserver 4.7.0 True False False 29h kube-controller-manager 4.7.0 True False False 29h kube-scheduler 4.7.0 True False False 29h kube-storage-version-migrator 4.7.0 True False False 4h2m machine-api 4.7.0 True False False 29h machine-approver 4.7.0 True False False 6h34m machine-config 4.7.0 True False False 3h56m marketplace 4.7.0 True False False 4h2m monitoring 4.7.0 True False False 6h31m network 4.7.0 True False False 29h node-tuning 4.7.0 True False False 4h30m openshift-apiserver 4.7.0 True False False 3h56m openshift-controller-manager 4.7.0 True False False 4h36m openshift-samples 4.7.0 True False False 4h30m operator-lifecycle-manager 4.7.0 True False False 29h operator-lifecycle-manager-catalog 4.7.0 True False False 29h operator-lifecycle-manager-packageserver 4.7.0 True False False 3h59m service-ca 4.7.0 True False False 29h storage 4.7.0 True False False 4h30m- Configure the Operators that are not available.
16.1.15.1. Disabling the default OperatorHub sources
Operator catalogs that source content provided by Red Hat and community projects are configured for OperatorHub by default during an OpenShift Container Platform installation. In a restricted network environment, you must disable the default catalogs as a cluster administrator.
Procedure
Disable the sources for the default catalogs by adding
disableAllDefaultSources: trueto theOperatorHubobject:$ oc patch OperatorHub cluster --type json \ -p '[{"op": "add", "path": "/spec/disableAllDefaultSources", "value": true}]'
Alternatively, you can use the web console to manage catalog sources. From the Administration → Cluster Settings → Global Configuration → OperatorHub page, click the Sources tab, where you can create, delete, disable, and enable individual sources.
16.1.15.2. Image registry removed during installation
On platforms that do not provide shareable object storage, the OpenShift Image Registry Operator bootstraps itself as Removed. This allows openshift-installer to complete installations on these platform types.
After installation, you must edit the Image Registry Operator configuration to switch the managementState from Removed to Managed.
The Prometheus console provides an ImageRegistryRemoved alert, for example:
"Image Registry has been removed. ImageStreamTags, BuildConfigs and DeploymentConfigs which reference ImageStreamTags may not work as expected. Please configure storage and update the config to Managed state by editing configs.imageregistry.operator.openshift.io."
16.1.15.3. Image registry storage configuration
The Image Registry Operator is not initially available for platforms that do not provide default storage. After installation, you must configure your registry to use storage so that the Registry Operator is made available.
Instructions are shown for configuring a persistent volume, which is required for production clusters. Where applicable, instructions are shown for configuring an empty directory as the storage location, which is available for only non-production clusters.
Additional instructions are provided for allowing the image registry to use block storage types by using the Recreate rollout strategy during upgrades.
16.1.15.3.1. Configuring registry storage for IBM Z
As a cluster administrator, following installation you must configure your registry to use storage.
Prerequisites
- Cluster administrator permissions.
- A cluster on IBM Z.
Persistent storage provisioned for your cluster.
ImportantOpenShift Container Platform supports
ReadWriteOnceaccess for image registry storage when you have only one replica. To deploy an image registry that supports high availability with two or more replicas,ReadWriteManyaccess is required.- Must have 100Gi capacity.
Procedure
To configure your registry to use storage, change the
spec.storage.pvcin theconfigs.imageregistry/clusterresource.NoteWhen using shared storage, review your security settings to prevent outside access.
Verify that you do not have a registry pod:
$ oc get pod -n openshift-image-registry -l docker-registry=defaultExample output
No resourses found in openshift-image-registry namespaceNoteIf you do have a registry pod in your output, you do not need to continue with this procedure.
Check the registry configuration:
$ oc edit configs.imageregistry.operator.openshift.ioExample output
storage: pvc: claim:Leave the
claimfield blank to allow the automatic creation of animage-registry-storagePVC.Check the
clusteroperatorstatus:$ oc get clusteroperator image-registryExample output
NAME VERSION AVAILABLE PROGRESSING DEGRADED SINCE MESSAGE image-registry 4.7 True False False 6h50mEnsure that your registry is set to managed to enable building and pushing of images.
Run:
$ oc edit configs.imageregistry/clusterThen, change the line
managementState: Removedto
managementState: Managed
16.1.15.3.2. Configuring storage for the image registry in non-production clusters
You must configure storage for the Image Registry Operator. For non-production clusters, you can set the image registry to an empty directory. If you do so, all images are lost if you restart the registry.
Procedure
To set the image registry storage to an empty directory:
$ oc patch configs.imageregistry.operator.openshift.io cluster --type merge --patch '{"spec":{"storage":{"emptyDir":{}}}}'WarningConfigure this option for only non-production clusters.
If you run this command before the Image Registry Operator initializes its components, the
oc patchcommand fails with the following error:Error from server (NotFound): configs.imageregistry.operator.openshift.io "cluster" not foundWait a few minutes and run the command again.
16.1.15.3.3. Configuring block registry storage
To allow the image registry to use block storage types during upgrades as a cluster administrator, you can use the Recreate rollout strategy.
Block storage volumes are supported but not recommended for use with the image registry on production clusters. An installation where the registry is configured on block storage is not highly available because the registry cannot have more than one replica.
Procedure
To set the image registry storage as a block storage type, patch the registry so that it uses the
Recreaterollout strategy and runs with only one (1) replica:$ oc patch config.imageregistry.operator.openshift.io/cluster --type=merge -p '{"spec":{"rolloutStrategy":"Recreate","replicas":1}}'- Provision the PV for the block storage device, and create a PVC for that volume. The requested block volume uses the ReadWriteOnce (RWO) access mode.
- Edit the registry configuration so that it references the correct PVC.
16.1.16. Completing installation on user-provisioned infrastructure
After you complete the Operator configuration, you can finish installing the cluster on infrastructure that you provide.
Prerequisites
- Your control plane has initialized.
- You have completed the initial Operator configuration.
Procedure
Confirm that all the cluster components are online with the following command:
$ watch -n5 oc get clusteroperatorsExample output
NAME VERSION AVAILABLE PROGRESSING DEGRADED SINCE authentication 4.7.0 True False False 3h56m baremetal 4.7.0 True False False 29h cloud-credential 4.7.0 True False False 29h cluster-autoscaler 4.7.0 True False False 29h config-operator 4.7.0 True False False 6h39m console 4.7.0 True False False 3h59m csi-snapshot-controller 4.7.0 True False False 4h12m dns 4.7.0 True False False 4h15m etcd 4.7.0 True False False 29h image-registry 4.7.0 True False False 3h59m ingress 4.7.0 True False False 4h30m insights 4.7.0 True False False 29h kube-apiserver 4.7.0 True False False 29h kube-controller-manager 4.7.0 True False False 29h kube-scheduler 4.7.0 True False False 29h kube-storage-version-migrator 4.7.0 True False False 4h2m machine-api 4.7.0 True False False 29h machine-approver 4.7.0 True False False 6h34m machine-config 4.7.0 True False False 3h56m marketplace 4.7.0 True False False 4h2m monitoring 4.7.0 True False False 6h31m network 4.7.0 True False False 29h node-tuning 4.7.0 True False False 4h30m openshift-apiserver 4.7.0 True False False 3h56m openshift-controller-manager 4.7.0 True False False 4h36m openshift-samples 4.7.0 True False False 4h30m operator-lifecycle-manager 4.7.0 True False False 29h operator-lifecycle-manager-catalog 4.7.0 True False False 29h operator-lifecycle-manager-packageserver 4.7.0 True False False 3h59m service-ca 4.7.0 True False False 29h storage 4.7.0 True False False 4h30mAlternatively, the following command notifies you when all of the clusters are available. It also retrieves and displays credentials:
$ ./openshift-install --dir <installation_directory> wait-for install-complete1 - 1
- For
<installation_directory>, specify the path to the directory that you stored the installation files in.
Example output
INFO Waiting up to 30m0s for the cluster to initialize...The command succeeds when the Cluster Version Operator finishes deploying the OpenShift Container Platform cluster from Kubernetes API server.
Important-
The Ignition config files that the installation program generates contain certificates that expire after 24 hours, which are then renewed at that time. If the cluster is shut down before renewing the certificates and the cluster is later restarted after the 24 hours have elapsed, the cluster automatically recovers the expired certificates. The exception is that you must manually approve the pending
node-bootstrappercertificate signing requests (CSRs) to recover kubelet certificates. See the documentation for Recovering from expired control plane certificates for more information. - It is recommended that you use Ignition config files within 12 hours after they are generated because the 24-hour certificate rotates from 16 to 22 hours after the cluster is installed. By using the Ignition config files within 12 hours, you can avoid installation failure if the certificate update runs during installation.
Confirm that the Kubernetes API server is communicating with the pods.
To view a list of all pods, use the following command:
$ oc get pods --all-namespacesExample output
NAMESPACE NAME READY STATUS RESTARTS AGE openshift-apiserver-operator openshift-apiserver-operator-85cb746d55-zqhs8 1/1 Running 1 9m openshift-apiserver apiserver-67b9g 1/1 Running 0 3m openshift-apiserver apiserver-ljcmx 1/1 Running 0 1m openshift-apiserver apiserver-z25h4 1/1 Running 0 2m openshift-authentication-operator authentication-operator-69d5d8bf84-vh2n8 1/1 Running 0 5m ...View the logs for a pod that is listed in the output of the previous command by using the following command:
$ oc logs <pod_name> -n <namespace>1 - 1
- Specify the pod name and namespace, as shown in the output of the previous command.
If the pod logs display, the Kubernetes API server can communicate with the cluster machines.
For an installation with Fibre Channel Protocol (FCP), additional steps are required to enable multipathing. Do not enable multipathing during installation.
See "Enabling multipathing with kernel arguments on RHCOS" in the Post-installation configuration documentation for more information.
All the worker nodes are restarted. To monitor the process, enter the following command:
$ oc get nodes -wNoteIf you have additional machine types such as infrastructure nodes, repeat the process for these types.
16.1.17. Telemetry access for OpenShift Container Platform
In OpenShift Container Platform 4.7, the Telemetry service, which runs by default to provide metrics about cluster health and the success of updates, requires internet access. If your cluster is connected to the internet, Telemetry runs automatically, and your cluster is registered to OpenShift Cluster Manager.
After you confirm that your OpenShift Cluster Manager inventory is correct, either maintained automatically by Telemetry or manually by using OpenShift Cluster Manager, use subscription watch to track your OpenShift Container Platform subscriptions at the account or multi-cluster level.
16.1.18. Next steps
- Customize your cluster.
- If necessary, you can opt out of remote health reporting.
- Set up your registry and configure registry storage.
Chapter 17. Installation configuration
17.1. Customizing nodes
Although directly making changes to OpenShift Container Platform nodes is discouraged, there are times when it is necessary to implement a required low-level security, redundancy, networking, or performance feature. Direct changes to OpenShift Container Platform nodes can be done by:
-
Creating machine configs that are included in manifest files to start up a cluster during
openshift-install. - Creating machine configs that are passed to running OpenShift Container Platform nodes via the Machine Config Operator.
-
Creating an Ignition config that is passed to
coreos-installerwhen installing bare-metal nodes.
The following sections describe features that you might want to configure on your nodes in this way.
17.1.1. Adding day-1 kernel arguments
Although it is often preferable to modify kernel arguments as a day-2 activity, you might want to add kernel arguments to all master or worker nodes during initial cluster installation. Here are some reasons you might want to add kernel arguments during cluster installation so they take effect before the systems first boot up:
- You want to disable a feature, such as SELinux, so it has no impact on the systems when they first come up.
Disabling SELinux on RHCOS is not supported.
- You need to do some low-level network configuration before the systems start.
To add kernel arguments to master or worker nodes, you can create a MachineConfig object and inject that object into the set of manifest files used by Ignition during cluster setup.
For a listing of arguments you can pass to a RHEL 8 kernel at boot time, see Kernel.org kernel parameters. It is best to only add kernel arguments with this procedure if they are needed to complete the initial OpenShift Container Platform installation.
Procedure
Change to the directory that contains the installation program and generate the Kubernetes manifests for the cluster:
$ ./openshift-install create manifests --dir <installation_directory>- Decide if you want to add kernel arguments to worker or control plane nodes (also known as the master nodes).
In the
openshiftdirectory, create a file (for example,99-openshift-machineconfig-master-kargs.yaml) to define aMachineConfigobject to add the kernel settings. This example adds aloglevel=7kernel argument to control plane nodes:$ cat << EOF > 99-openshift-machineconfig-master-kargs.yaml apiVersion: machineconfiguration.openshift.io/v1 kind: MachineConfig metadata: labels: machineconfiguration.openshift.io/role: master name: 99-openshift-machineconfig-master-kargs spec: kernelArguments: - loglevel=7 EOFYou can change
mastertoworkerto add kernel arguments to worker nodes instead. Create a separate YAML file to add to both master and worker nodes.
You can now continue on to create the cluster.
17.1.2. Adding kernel modules to nodes
For most common hardware, the Linux kernel includes the device driver modules needed to use that hardware when the computer starts up. For some hardware, however, modules are not available in Linux. Therefore, you must find a way to provide those modules to each host computer. This procedure describes how to do that for nodes in an OpenShift Container Platform cluster.
When a kernel module is first deployed by following these instructions, the module is made available for the current kernel. If a new kernel is installed, the kmods-via-containers software will rebuild and deploy the module so a compatible version of that module is available with the new kernel.
The way that this feature is able to keep the module up to date on each node is by:
- Adding a systemd service to each node that starts at boot time to detect if a new kernel has been installed and
- If a new kernel is detected, the service rebuilds the module and installs it to the kernel
For information on the software needed for this procedure, see the kmods-via-containers github site.
A few important issues to keep in mind:
- This procedure is Technology Preview.
-
Software tools and examples are not yet available in official RPM form and can only be obtained for now from unofficial
github.comsites noted in the procedure. - Third-party kernel modules you might add through these procedures are not supported by Red Hat.
-
In this procedure, the software needed to build your kernel modules is deployed in a RHEL 8 container. Keep in mind that modules are rebuilt automatically on each node when that node gets a new kernel. For that reason, each node needs access to a
yumrepository that contains the kernel and related packages needed to rebuild the module. That content is best provided with a valid RHEL subscription.
17.1.2.1. Building and testing the kernel module container
Before deploying kernel modules to your OpenShift Container Platform cluster, you can test the process on a separate RHEL system. Gather the kernel module’s source code, the KVC framework, and the kmod-via-containers software. Then build and test the module. To do that on a RHEL 8 system, do the following:
Procedure
Register a RHEL 8 system:
# subscription-manager registerAttach a subscription to the RHEL 8 system:
# subscription-manager attach --autoInstall software that is required to build the software and container:
# yum install podman make git -yClone the
kmod-via-containersrepository:Create a folder for the repository:
$ mkdir kmods; cd kmodsClone the repository:
$ git clone https://github.com/kmods-via-containers/kmods-via-containers
Install a KVC framework instance on your RHEL 8 build host to test the module. This adds a
kmods-via-containersystemd service and loads it:Change to the
kmod-via-containersdirectory:$ cd kmods-via-containers/Install the KVC framework instance:
$ sudo make installReload the systemd manager configuration:
$ sudo systemctl daemon-reload
Get the kernel module source code. The source code might be used to build a third-party module that you do not have control over, but is supplied by others. You will need content similar to the content shown in the
kvc-simple-kmodexample that can be cloned to your system as follows:$ cd .. ; git clone https://github.com/kmods-via-containers/kvc-simple-kmodEdit the configuration file,
simple-kmod.conffile, in this example, and change the name of the Dockerfile toDockerfile.rhel:Change to the
kvc-simple-kmoddirectory:$ cd kvc-simple-kmodRename the Dockerfile:
$ cat simple-kmod.confExample Dockerfile
KMOD_CONTAINER_BUILD_CONTEXT="https://github.com/kmods-via-containers/kvc-simple-kmod.git" KMOD_CONTAINER_BUILD_FILE=Dockerfile.rhel KMOD_SOFTWARE_VERSION=dd1a7d4 KMOD_NAMES="simple-kmod simple-procfs-kmod"
Create an instance of
kmods-via-containers@.servicefor your kernel module,simple-kmodin this example:$ sudo make installEnable the
kmods-via-containers@.serviceinstance:$ sudo kmods-via-containers build simple-kmod $(uname -r)Enable and start the systemd service:
$ sudo systemctl enable kmods-via-containers@simple-kmod.service --nowReview the service status:
$ sudo systemctl status kmods-via-containers@simple-kmod.serviceExample output
● kmods-via-containers@simple-kmod.service - Kmods Via Containers - simple-kmod Loaded: loaded (/etc/systemd/system/kmods-via-containers@.service; enabled; vendor preset: disabled) Active: active (exited) since Sun 2020-01-12 23:49:49 EST; 5s ago...
To confirm that the kernel modules are loaded, use the
lsmodcommand to list the modules:$ lsmod | grep simple_Example output
simple_procfs_kmod 16384 0 simple_kmod 16384 0Optional. Use other methods to check that the
simple-kmodexample is working:Look for a "Hello world" message in the kernel ring buffer with
dmesg:$ dmesg | grep 'Hello world'Example output
[ 6420.761332] Hello world from simple_kmod.Check the value of
simple-procfs-kmodin/proc:$ sudo cat /proc/simple-procfs-kmodExample output
simple-procfs-kmod number = 0Run the
spkutcommand to get more information from the module:$ sudo spkut 44Example output
KVC: wrapper simple-kmod for 4.18.0-147.3.1.el8_1.x86_64 Running userspace wrapper using the kernel module container... + podman run -i --rm --privileged simple-kmod-dd1a7d4:4.18.0-147.3.1.el8_1.x86_64 spkut 44 simple-procfs-kmod number = 0 simple-procfs-kmod number = 44
Going forward, when the system boots this service will check if a new kernel is running. If there is a new kernel, the service builds a new version of the kernel module and then loads it. If the module is already built, it will just load it.
17.1.2.2. Provisioning a kernel module to OpenShift Container Platform
Depending on whether or not you must have the kernel module in place when OpenShift Container Platform cluster first boots, you can set up the kernel modules to be deployed in one of two ways:
-
Provision kernel modules at cluster install time (day-1): You can create the content as a
MachineConfigobject and provide it toopenshift-installby including it with a set of manifest files. - Provision kernel modules via Machine Config Operator (day-2): If you can wait until the cluster is up and running to add your kernel module, you can deploy the kernel module software via the Machine Config Operator (MCO).
In either case, each node needs to be able to get the kernel packages and related software packages at the time that a new kernel is detected. There are a few ways you can set up each node to be able to obtain that content.
- Provide RHEL entitlements to each node.
-
Get RHEL entitlements from an existing RHEL host, from the
/etc/pki/entitlementdirectory and copy them to the same location as the other files you provide when you build your Ignition config. -
Inside the Dockerfile, add pointers to a
yumrepository containing the kernel and other packages. This must include new kernel packages as they are needed to match newly installed kernels.
17.1.2.2.1. Provision kernel modules via a MachineConfig object
By packaging kernel module software with a MachineConfig object, you can deliver that software to worker or master nodes at installation time or via the Machine Config Operator.
First create a base Ignition config that you would like to use. At installation time, the Ignition config will contain the ssh public key to add to the authorized_keys file for the core user on the cluster. To add the MachineConfig object later via the MCO instead, the SSH public key is not required. For both type, the example simple-kmod service creates a systemd unit file, which requires a kmods-via-containers@simple-kmod.service.
The systemd unit is a workaround for an upstream bug and makes sure that the kmods-via-containers@simple-kmod.service gets started on boot:
Register a RHEL 8 system:
# subscription-manager registerAttach a subscription to the RHEL 8 system:
# subscription-manager attach --autoInstall software needed to build the software:
# yum install podman make git -yCreate an Ignition config file that creates a systemd unit file:
Create a directory to host the Ignition config file:
$ mkdir kmods; cd kmodsCreate the Ignition config file that creates a systemd unit file:
$ cat <<EOF > ./baseconfig.ign { "ignition": { "version": "3.2.0" }, "passwd": { "users": [ { "name": "core", "groups": ["sudo"], "sshAuthorizedKeys": [ "ssh-rsa AAAA" ] } ] }, "systemd": { "units": [{ "name": "require-kvc-simple-kmod.service", "enabled": true, "contents": "[Unit]\nRequires=kmods-via-containers@simple-kmod.service\n[Service]\nType=oneshot\nExecStart=/usr/bin/true\n\n[Install]\nWantedBy=multi-user.target" }] } } EOFNoteYou must add your public SSH key to the
baseconfig.ignfile to use the file duringopenshift-install. The public SSH key is not needed if you create theMachineConfigobject using the MCO.
Create a base MCO YAML snippet that uses the following configuration:
$ cat <<EOF > mc-base.yaml apiVersion: machineconfiguration.openshift.io/v1 kind: MachineConfig metadata: labels: machineconfiguration.openshift.io/role: worker name: 10-kvc-simple-kmod spec: config: EOFNoteThe
mc-base.yamlis set to deploy the kernel module onworkernodes. To deploy on master nodes, change the role fromworkertomaster. To do both, you could repeat the whole procedure using different file names for the two types of deployments.Get the
kmods-via-containerssoftware:Clone the
kmods-via-containersrepository:$ git clone https://github.com/kmods-via-containers/kmods-via-containersClone the
kvc-simple-kmodrepository:$ git clone https://github.com/kmods-via-containers/kvc-simple-kmod
-
Get your module software. In this example,
kvc-simple-kmodis used: Create a fakeroot directory and populate it with files that you want to deliver via Ignition, using the repositories cloned earlier:
Create the directory:
$ FAKEROOT=$(mktemp -d)Change to the
kmod-via-containersdirectory:$ cd kmods-via-containersInstall the KVC framework instance:
$ make install DESTDIR=${FAKEROOT}/usr/local CONFDIR=${FAKEROOT}/etc/Change to the
kvc-simple-kmoddirectory:$ cd ../kvc-simple-kmodCreate the instance:
$ make install DESTDIR=${FAKEROOT}/usr/local CONFDIR=${FAKEROOT}/etc/
Get a tool called
filetranspilerand dependent software:$ cd .. ; sudo yum install -y python3 git clone https://github.com/ashcrow/filetranspiler.gitGenerate a final machine config YAML (
mc.yaml) and have it include the base Ignition config, base machine config, and the fakeroot directory with files you would like to deliver:$ ./filetranspiler/filetranspile -i ./baseconfig.ign \ -f ${FAKEROOT} --format=yaml --dereference-symlinks \ | sed 's/^/ /' | (cat mc-base.yaml -) > 99-simple-kmod.yamlIf the cluster is not up yet, generate manifest files and add this file to the
openshiftdirectory. If the cluster is already running, apply the file as follows:$ oc create -f 99-simple-kmod.yamlYour nodes will start the
kmods-via-containers@simple-kmod.serviceservice and the kernel modules will be loaded.To confirm that the kernel modules are loaded, you can log in to a node (using
oc debug node/<openshift-node>, thenchroot /host). To list the modules, use thelsmodcommand:$ lsmod | grep simple_Example output
simple_procfs_kmod 16384 0 simple_kmod 16384 0
17.1.3. Encrypting disks during installation
You can enable encryption for the boot disks on the control plane and compute nodes at installation time. OpenShift Container Platform supports the Trusted Platform Module (TPM) v2 and Tang encryption modes.
- TPM v2: This is the preferred mode. TPM v2 stores passphrases in a secure cryptoprocessor contained within a server. You can use this mode to prevent the boot disk data on a cluster node from being decrypted if the disk is removed from the server.
- Tang: Tang and Clevis are server and client components that enable network-bound disk encryption (NBDE). You can bind the boot disk data on your cluster nodes to a Tang server. This prevents the data from being decrypted unless the nodes are on a secure network where the Tang server can be accessed. Clevis is an automated decryption framework that is used to implement the decryption on the client side.
The use of Tang encryption mode to encrypt your disks is only supported for bare metal and vSphere installations on user-provisioned infrastructure.
When the TPM v2 or Tang encryption modes are enabled, the RHCOS boot disks are encrypted using the LUKS2 format.
This feature:
- Is available for installer-provisioned infrastructure and user-provisioned infrastructure deployments
- Is supported on Red Hat Enterprise Linux CoreOS (RHCOS) systems only
- Sets up disk encryption during the manifest installation phase so all data written to disk, from first boot forward, is encrypted
- Requires no user intervention for providing passphrases
- Uses AES-256-CBC encryption
Follow one of the two procedures to enable disk encryption for the nodes in your cluster.
17.1.3.1. Enabling TPM v2 disk encryption
Use the following procedure to enable TPM v2 mode disk encryption during an OpenShift Container Platform installation.
On previous versions of RHCOS, disk encryption was configured by specifying /etc/clevis.json in the Ignition config. That file is not supported in clusters created with OpenShift Container Platform 4.7 or above, and the LUKS device should be configured directly via the Ignition luks section.
Prerequisites
- You have downloaded the OpenShift Container Platform installation program on your installation node.
Procedure
- Check to see if TPM v2 encryption needs to be enabled in the BIOS on each node. This is required on most Dell systems. Check the manual for your computer.
On your installation node, change to the directory that contains the installation program and generate the Kubernetes manifests for the cluster:
$ ./openshift-install create manifests --dir <installation_directory>1 - 1
- Replace
<installation_directory>with the path to the directory that you want to store the installation files in.
Create machine config files to encrypt the boot disks for the control plane or compute nodes using the TPM v2 encryption mode.
ImportantIf you are also configuring boot disk mirroring on the affected nodes, skip this step. You will configure disk encryption when configuring boot disk mirroring.
To configure encryption on the control plane nodes, save the following machine config sample to a file in the
<installation_directory>/openshiftdirectory. For example, name the file99-openshift-master-tpmv2-encryption.yaml:apiVersion: machineconfiguration.openshift.io/v1 kind: MachineConfig metadata: name: master-tpm labels: machineconfiguration.openshift.io/role: master spec: config: ignition: version: 3.2.0 storage: luks: - name: root device: /dev/disk/by-partlabel/root clevis: tpm2: true1 options: [--cipher, aes-cbc-essiv:sha256] wipeVolume: true filesystems: - device: /dev/mapper/root format: xfs wipeFilesystem: true label: root- 1
- Set this attribute to
trueto use a Trusted Platform Module (TPM) secure cryptoprocessor to encrypt the root file system.
To configure encryption on the compute nodes, save the following machine config sample to a file in the
<installation_directory>/openshiftdirectory. For example, name the file99-openshift-worker-tpmv2-encryption.yaml:apiVersion: machineconfiguration.openshift.io/v1 kind: MachineConfig metadata: name: worker-tpm labels: machineconfiguration.openshift.io/role: worker spec: config: ignition: version: 3.2.0 storage: luks: - name: root device: /dev/disk/by-partlabel/root clevis: tpm2: true1 options: [--cipher, aes-cbc-essiv:sha256] wipeVolume: true filesystems: - device: /dev/mapper/root format: xfs wipeFilesystem: true label: root- 1
- Set this attribute to
trueto use a Trusted Platform Module (TPM) secure cryptoprocessor to encrypt the root file system.
- Create a backup copy of the YAML files. The original YAML files are consumed when you create the Ignition config files.
- Continue with the remainder of the OpenShift Container Platform deployment.
If you configure additional data partitions, they will not be encrypted unless encryption is explicitly requested.
17.1.3.2. Enabling Tang disk encryption
Use the following procedure to enable Tang mode disk encryption during an OpenShift Container Platform installation.
On previous versions of RHCOS, disk encryption was configured by specifying /etc/clevis.json in the Ignition config. That file is not supported in clusters created with OpenShift Container Platform 4.7 or above, and the LUKS device should be configured directly via the Ignition luks section.
Prerequisites
- You have downloaded the OpenShift Container Platform installation program on your installation node.
- You have access to a Red Hat Enterprise Linux (RHEL) 8 machine that can be used to generate a thumbprint of the Tang exchange key.
Procedure
- Set up a Tang server or access an existing one. See Network-bound disk encryption for instructions.
Add kernel arguments to configure networking when you do the Red Hat Enterprise Linux CoreOS (RHCOS) installations for your cluster. For example, to configure DHCP networking, identify
ip=dhcp, or set static networking when you add parameters to the kernel command line. For both DHCP and static networking, you also must provide therd.neednet=1kernel argument.ImportantSkipping this step causes the second boot to fail.
Install the
clevispackage on a RHEL 8 machine, if it is not already installed:$ sudo yum install clevis
On the RHEL 8 machine, run the following command to generate a thumbprint of the exchange key. Replace
http://tang.example.com:7500with the URL of your Tang server:$ clevis-encrypt-tang '{"url":"http://tang.example.com:7500"}' < /dev/null > /dev/null1 - 1
- In this example,
tangd.socketis listening on port7500on the Tang server.
NoteThe
clevis-encrypt-tangcommand is used in this step only to generate a thumbprint of the exchange key. No data is being passed to the command for encryption at this point, so/dev/nullis provided as an input instead of plain text. The encrypted output is also sent to/dev/null, because it is not required for this procedure.Example output
The advertisement contains the following signing keys: PLjNyRdGw03zlRoGjQYMahSZGu91 - 1
- The thumbprint of the exchange key.
When the
Do you wish to trust these keys? [ynYN]prompt displays, typeY.NoteRHEL 8 provides Clevis version 15, which uses the SHA-1 hash algorithm to generate thumbprints. Some other distributions provide Clevis version 17 or later, which use the SHA-256 hash algorithm for thumbprints. You must use a Clevis version that uses SHA-1 to create the thumbprint, to prevent Clevis binding issues when you install Red Hat Enterprise Linux CoreOS (RHCOS) on your OpenShift Container Platform cluster nodes.
If you have not yet generated the Kubernetes manifests, change to the directory that contains the installation program on your installation node and create them:
$ ./openshift-install create manifests --dir <installation_directory>1 - 1
- Replace
<installation_directory>with the path to the directory that you want to store the installation files in.
Create machine config files to encrypt the boot disks for the control plane or compute nodes using the Tang encryption mode.
ImportantIf you are also configuring boot disk mirroring on the affected nodes, record the exchange key thumbprint for later use, and skip this step. You will configure disk encryption when configuring boot disk mirroring.
To configure encryption on the control plane nodes, save the following machine config sample to a file in the
<installation_directory>/openshiftdirectory. For example, name the file99-openshift-master-tang-encryption.yaml:apiVersion: machineconfiguration.openshift.io/v1 kind: MachineConfig metadata: name: master-tang labels: machineconfiguration.openshift.io/role: master spec: config: ignition: version: 3.2.0 storage: luks: - name: root device: /dev/disk/by-partlabel/root clevis: tang: - url: http://tang.example.com:75001 thumbprint: PLjNyRdGw03zlRoGjQYMahSZGu92 options: [--cipher, aes-cbc-essiv:sha256] wipeVolume: true filesystems: - device: /dev/mapper/root format: xfs wipeFilesystem: true label: root kernelArguments: - rd.neednet=13 To configure encryption on the compute nodes, save the following machine config sample to a file in the
<installation_directory>/openshiftdirectory. For example, name the file99-openshift-worker-tang-encryption.yaml:apiVersion: machineconfiguration.openshift.io/v1 kind: MachineConfig metadata: name: worker-tang labels: machineconfiguration.openshift.io/role: worker spec: config: ignition: version: 3.2.0 storage: luks: - name: root device: /dev/disk/by-partlabel/root clevis: tang: - url: http://tang.example.com:75001 thumbprint: PLjNyRdGw03zlRoGjQYMahSZGu92 options: [--cipher, aes-cbc-essiv:sha256] wipeVolume: true filesystems: - device: /dev/mapper/root format: xfs wipeFilesystem: true label: root kernelArguments: - rd.neednet=13
- Create a backup copy of the YAML files. The original YAML files are consumed when you create the Ignition config files.
- Continue with the remainder of the OpenShift Container Platform installation.
If you configure additional data partitions, they will not be encrypted unless encryption is explicitly requested.
17.1.4. Mirroring disks during installation
During OpenShift Container Platform installation on control plane and compute nodes, you can enable mirroring of the boot disk to two or more redundant storage devices. A node continues to function after storage device failure as long as one device remains available.
Mirroring does not support replacement of a failed disk. To restore the mirror to a pristine, non-degraded state, reprovision the node.
Mirroring is available only for user-provisioned infrastructure deployments on Red Hat Enterprise Linux CoreOS (RHCOS) systems. Mirroring support is available on x86_64 nodes booted with BIOS or UEFI and on ppc64le nodes.
Procedure
To enable boot disk mirroring during OpenShift Container Platform deployment:
Follow the bare metal install procedure up to the point where you created Ignition configs for your installation.
For example, you should have entered the following command:
$ openshift-install create ignition-configs --dir $HOME/clusterconfigVerify that the Ignition config files were created:
$ ls $HOME/clusterconfig/Example output
auth bootstrap.ign master.ign metadata.json worker.ignCreate a RHCOS Config (RCC) with a reference to your
master.ignorworker.ignconfig, depending on the type of node you are configuring. The RCC must specify the devices to be used for boot disk mirroring. If you want LUKS encryption on the mirrored root filesystem, you must configure it in this RCC.The following RCC example demonstrates how to create
$HOME/clusterconfig/worker-raid.rcc:RCC example
variant: rhcos version: 0.1.0 ignition: config: merge: - local: worker.ign1 boot_device: mirror: devices:2 - /dev/sda - /dev/sdb luks:3 tpm2: true4 tang:5 - url: http://tang.example.com:7500 thumbprint: <tang_thumbprint> storage:6 luks: - name: root options: [--cipher, aes-cbc-essiv:sha256]- 1
- Use the name of the Ignition config for your node type.
- 2
- List all disk devices that should be included in the boot disk mirror, including the disk that RHCOS will be installed onto.
- 3
- Include this section if you want to encrypt the root filesystem. See "Encrypting disks during installation" for more details.
- 4
- Include this field if you want to use a Trusted Platform Module (TPM) to encrypt the root filesystem. See "Enabling TPM v2 disk encryption" for more details.
- 5
- Include this section if you want to use a Tang server. To obtain the server URL and thumbprint, follow the instructions in "Enabling Tang disk encryption".
- 6
- Include this section if you want to encrypt the root filesystem.
Run the Fedora CoreOS Config Transpiler (FCCT) tool to merge your RCC, such as
worker-raid.rcc, with the Ignition config specified in the RCC that you created in the previous step:$ podman run --pull=always --rm --volume $HOME/clusterconfig:/pwd --workdir /pwd \ quay.io/coreos/fcct:release --files-dir . worker-raid.rcc --output worker-raid.ignThis command produces a combined Ignition config in
$HOME/clusterconfig/worker-raid.ign.- Continue with the remainder of the OpenShift Container Platform deployment, using the combined Ignition config to provision nodes.
17.1.4.1. Configuring a RAID-enabled data volume
You can enable software RAID partitioning to provide an external data volume.
Procedure
Create a machine config in the
<installation_directory>/openshiftdirectory that configures a data volume by using software RAID. In this example, it is calledraid1-alt-storage.yaml:Sample RAID 1 on secondary disks configuration file
apiVersion: machineconfiguration.openshift.io/v1 kind: MachineConfig metadata: labels: machineconfiguration.openshift.io/role: worker name: raid1-alt-storage spec: config: ignition: version: 3.2.0 storage: disks: - device: /dev/sdc partitions: - label: data-1 wipeTable: true - device: /dev/sdd partitions: - label: data-2 wipeTable: true filesystems: - device: /dev/md/md-data format: xfs path: /var/lib/containers wipeFilesystem: true raid: - devices: - /dev/disk/by-partlabel/data-1 - /dev/disk/by-partlabel/data-2 level: raid1 name: md-data systemd: units: - contents: |- [Unit] Before=local-fs.target Requires=systemd-fsck@dev-md-md\x2ddata.service After=systemd-fsck@dev-md-md\x2ddata.service [Mount] Where=/var/lib/containers What=/dev/md/md-data Type=xfs [Install] RequiredBy=local-fs.target enabled: true name: var-lib-containers.mount1 - 1
- If you choose a different mount point, you must update the unit name to correspond to your mount point. Otherwise the unit will not activate. You can generate a matching unit name with
echo $(systemd-escape -p $mountpoint).mountwhere$mountpointis your chosen mount point.
17.1.5. Configuring chrony time service
You can set the time server and related settings used by the chrony time service (chronyd) by modifying the contents of the chrony.conf file and passing those contents to your nodes as a machine config.
Procedure
Create the contents of the
chrony.conffile and encode it as base64. For example:$ cat << EOF | base64 pool 0.rhel.pool.ntp.org iburst1 driftfile /var/lib/chrony/drift makestep 1.0 3 rtcsync logdir /var/log/chrony EOF- 1
- Specify any valid, reachable time source, such as the one provided by your DHCP server. Alternately, you can specify any of the following NTP servers:
1.rhel.pool.ntp.org,2.rhel.pool.ntp.org, or3.rhel.pool.ntp.org.
Example output
ICAgIHNlcnZlciBjbG9jay5yZWRoYXQuY29tIGlidXJzdAogICAgZHJpZnRmaWxlIC92YXIvbGli L2Nocm9ueS9kcmlmdAogICAgbWFrZXN0ZXAgMS4wIDMKICAgIHJ0Y3N5bmMKICAgIGxvZ2RpciAv dmFyL2xvZy9jaHJvbnkKCreate the
MachineConfigobject file, replacing the base64 string with the one you just created. This example adds the file tomasternodes. You can change it toworkeror make an additional MachineConfig for theworkerrole. Create MachineConfig files for each type of machine that your cluster uses:$ cat << EOF > ./99-masters-chrony-configuration.yaml apiVersion: machineconfiguration.openshift.io/v1 kind: MachineConfig metadata: labels: machineconfiguration.openshift.io/role: master name: 99-masters-chrony-configuration spec: config: ignition: config: {} security: tls: {} timeouts: {} version: 3.2.0 networkd: {} passwd: {} storage: files: - contents: source: data:text/plain;charset=utf-8;base64,ICAgIHNlcnZlciBjbG9jay5yZWRoYXQuY29tIGlidXJzdAogICAgZHJpZnRmaWxlIC92YXIvbGliL2Nocm9ueS9kcmlmdAogICAgbWFrZXN0ZXAgMS4wIDMKICAgIHJ0Y3N5bmMKICAgIGxvZ2RpciAvdmFyL2xvZy9jaHJvbnkK mode: 4201 overwrite: true path: /etc/chrony.conf osImageURL: "" EOF- 1
- Specify an octal value mode for the
modefield in the machine config file. After creating the file and applying the changes, themodeis converted to a decimal value. You can check the YAML file with the commandoc get mc <mc-name> -o yaml.
- Make a backup copy of the configuration files.
Apply the configurations in one of two ways:
-
If the cluster is not up yet, after you generate manifest files, add this file to the
<installation_directory>/openshiftdirectory, and then continue to create the cluster. If the cluster is already running, apply the file:
$ oc apply -f ./99-masters-chrony-configuration.yaml
-
If the cluster is not up yet, after you generate manifest files, add this file to the
17.2. Configuring your firewall
If you use a firewall, you must configure it so that OpenShift Container Platform can access the sites that it requires to function. You must always grant access to some sites, and you grant access to more if you use Red Hat Insights, the Telemetry service, a cloud to host your cluster, and certain build strategies.
17.2.1. Configuring your firewall for OpenShift Container Platform
Before you install OpenShift Container Platform, you must configure your firewall to grant access to the sites that OpenShift Container Platform requires.
There are no special configuration considerations for services running on only controller nodes versus worker nodes.
Procedure
Allowlist the following registry URLs:
Expand URL Port Function registry.redhat.io443, 80
Provides core container images
quay.io443, 80
Provides core container images
cdn.quay.io443, 80
Provides core container images
cdn01.quay.io443, 80
Provides core container images
cdn02.quay.io443, 80
Provides core container images
cdn03.quay.io443, 80
Provides core container images
sso.redhat.com443, 80
The
https://console.redhat.com/openshiftsite uses authentication fromsso.redhat.comYou can use the wildcard
*.quay.ioinstead ofcdn0[1-3].quay.ioin your allowlist. When you add a site, such asquay.io, to your allowlist, do not add a wildcard entry, such as*.quay.io, to your denylist. In most cases, image registries use a content delivery network (CDN) to serve images. If a firewall blocks access, then image downloads are denied when the initial download request is redirected to a hostname such ascdn01.quay.io.- Allowlist any site that provides resources for a language or framework that your builds require.
If you do not disable Telemetry, you must grant access to the following URLs to access Red Hat Insights:
Expand URL Port Function cert-api.access.redhat.com443, 80
Required for Telemetry
api.access.redhat.com443, 80
Required for Telemetry
infogw.api.openshift.com443, 80
Required for Telemetry
console.redhat.com/api/ingress443, 80
Required for Telemetry and for
insights-operatorIf you use Amazon Web Services (AWS), Microsoft Azure, or Google Cloud Platform (GCP) to host your cluster, you must grant access to the URLs that provide the cloud provider API and DNS for that cloud:
Expand Cloud URL Port Function AWS
*.amazonaws.com443, 80
Required to access AWS services and resources. Review the AWS Service Endpoints in the AWS documentation to determine the exact endpoints to allow for the regions that you use.
GCP
*.googleapis.com443, 80
Required to access GCP services and resources. Review Cloud Endpoints in the GCP documentation to determine the endpoints to allow for your APIs.
accounts.google.com443, 80
Required to access your GCP account.
Azure
management.azure.com443, 80
Required to access Azure services and resources. Review the Azure REST API reference in the Azure documentation to determine the endpoints to allow for your APIs.
*.blob.core.windows.net443, 80
Required to download Ignition files.
login.microsoftonline.com443, 80
Required to access Azure services and resources. Review the Azure REST API reference in the Azure documentation to determine the endpoints to allow for your APIs.
Allowlist the following URLs:
Expand URL Port Function mirror.openshift.com443, 80
Required to access mirrored installation content and images. This site is also a source of release image signatures, although the Cluster Version Operator needs only a single functioning source.
storage.googleapis.com/openshift-release443, 80
A source of release image signatures, although the Cluster Version Operator needs only a single functioning source.
*.apps.<cluster_name>.<base_domain>443, 80
Required to access the default cluster routes unless you set an ingress wildcard during installation.
quayio-production-s3.s3.amazonaws.com443, 80
Required to access Quay image content in AWS.
api.openshift.com443, 80
Required both for your cluster token and to check if updates are available for the cluster.
rhcos-redirector.apps.art.xq1c.p1.openshiftapps.com,rhcos.mirror.openshift.com443, 80
Required to download Red Hat Enterprise Linux CoreOS (RHCOS) images.
console.redhat.com/openshift443, 80
Required for your cluster token.
registry.access.redhat.com443, 80
Required for
odoCLI.sso.redhat.com443, 80
The
https://console.redhat.com/openshiftsite uses authentication fromsso.redhat.comOperators require route access to perform health checks. Specifically, the authentication and web console Operators connect to two routes to verify that the routes work. If you are the cluster administrator and do not want to allow
*.apps.<cluster_name>.<base_domain>, then allow these routes:-
oauth-openshift.apps.<cluster_name>.<base_domain> -
console-openshift-console.apps.<cluster_name>.<base_domain>, or the hostname that is specified in thespec.route.hostnamefield of theconsoles.operator/clusterobject if the field is not empty.
-
Allowlist the following URLs for optional third-party content:
Expand URL Port Function registry.connect.redhat.com443, 80
Required for all third-party images and certified operators.
rhc4tp-prod-z8cxf-image-registry-us-east-1-evenkyleffocxqvofrk.s3.dualstack.us-east-1.amazonaws.com443, 80
Provides access to container images hosted on
registry.connect.redhat.comoso-rhc4tp-docker-registry.s3-us-west-2.amazonaws.com443, 80
Required for Sonatype Nexus, F5 Big IP operators.
If you use a default Red Hat Network Time Protocol (NTP) server allow the following URLs:
-
1.rhel.pool.ntp.org -
2.rhel.pool.ntp.org -
3.rhel.pool.ntp.org
-
If you do not use a default Red Hat NTP server, verify the NTP server for your platform and allow it in your firewall.
Chapter 18. Validating an installation
You can check the status of an OpenShift Container Platform cluster after an installation by following the procedures in this document.
18.1. Reviewing the installation log
You can review a summary of an installation in the OpenShift Container Platform installation log. If an installation succeeds, the information required to access the cluster is included in the log.
Prerequisites
- You have access to the installation host.
Procedure
Review the
.openshift_install.loglog file in the installation directory on your installation host:$ cat <install_dir>/.openshift_install.logExample output
Cluster credentials are included at the end of the log if the installation is successful, as outlined in the following example:
... time="2020-12-03T09:50:47Z" level=info msg="Install complete!" time="2020-12-03T09:50:47Z" level=info msg="To access the cluster as the system:admin user when using 'oc', run 'export KUBECONFIG=/home/myuser/install_dir/auth/kubeconfig'" time="2020-12-03T09:50:47Z" level=info msg="Access the OpenShift web-console here: https://console-openshift-console.apps.mycluster.example.com" time="2020-12-03T09:50:47Z" level=info msg="Login to the console with user: \"kubeadmin\", and password: \"6zYIx-ckbW3-4d2Ne-IWvDF\"" time="2020-12-03T09:50:47Z" level=debug msg="Time elapsed per stage:" time="2020-12-03T09:50:47Z" level=debug msg=" Infrastructure: 6m45s" time="2020-12-03T09:50:47Z" level=debug msg="Bootstrap Complete: 11m30s" time="2020-12-03T09:50:47Z" level=debug msg=" Bootstrap Destroy: 1m5s" time="2020-12-03T09:50:47Z" level=debug msg=" Cluster Operators: 17m31s" time="2020-12-03T09:50:47Z" level=info msg="Time elapsed: 37m26s"
18.2. Viewing the image pull source
For clusters with unrestricted network connectivity, you can view the source of your pulled images by using a command on a node, such as crictl images.
However, for disconnected installations, to view the source of pulled images, you must review the CRI-O logs to locate the Trying to access log entry, as shown in the following procedure. Other methods to view the image pull source, such as the crictl images command, show the non-mirrored image name, even though the image is pulled from the mirrored location.
Prerequisites
-
You have access to the cluster as a user with the
cluster-adminrole.
Procedure
Review the CRI-O logs for a master or worker node:
$ oc adm node-logs <node_name> -u crioExample output
The
Trying to accesslog entry indicates where the image is being pulled from.... Mar 17 02:52:50 ip-10-0-138-140.ec2.internal crio[1366]: time="2021-08-05 10:33:21.594930907Z" level=info msg="Pulling image: quay.io/openshift-release-dev/ocp-release:4.8.4-ppc64le" id=abcd713b-d0e1-4844-ac1c-474c5b60c07c name=/runtime.v1alpha2.ImageService/PullImage Mar 17 02:52:50 ip-10-0-138-140.ec2.internal crio[1484]: time="2021-03-17 02:52:50.194341109Z" level=info msg="Trying to access \"li0317gcp1.mirror-registry.qe.gcp.devcluster.openshift.com:5000/ocp/release@sha256:1926eae7cacb9c00f142ec98b00628970e974284b6ddaf9a6a086cb9af7a6c31\"" Mar 17 02:52:50 ip-10-0-138-140.ec2.internal crio[1484]: time="2021-03-17 02:52:50.226788351Z" level=info msg="Trying to access \"li0317gcp1.mirror-registry.qe.gcp.devcluster.openshift.com:5000/ocp/release@sha256:1926eae7cacb9c00f142ec98b00628970e974284b6ddaf9a6a086cb9af7a6c31\"" ...The log might show the image pull source twice, as shown in the preceding example.
If your
ImageContentSourcePolicyobject lists multiple mirrors, OpenShift Container Platform attempts to pull the images in the order listed in the configuration, for example:Trying to access \"li0317gcp1.mirror-registry.qe.gcp.devcluster.openshift.com:5000/ocp/release@sha256:1926eae7cacb9c00f142ec98b00628970e974284b6ddaf9a6a086cb9af7a6c31\" Trying to access \"li0317gcp2.mirror-registry.qe.gcp.devcluster.openshift.com:5000/ocp/release@sha256:1926eae7cacb9c00f142ec98b00628970e974284b6ddaf9a6a086cb9af7a6c31\"
18.3. Getting cluster version, status, and update details
You can view the cluster version and status by running the oc get clusterversion command. If the status shows that the installation is still progressing, you can review the status of the Operators for more information.
You can also list the current update channel and review the available cluster updates.
Prerequisites
-
You have access to the cluster as a user with the
cluster-adminrole. -
You have installed the OpenShift CLI (
oc).
Procedure
Obtain the cluster version and overall status:
$ oc get clusterversionExample output
NAME VERSION AVAILABLE PROGRESSING SINCE STATUS version 4.6.4 True False 6m25s Cluster version is 4.6.4The example output indicates that the cluster has been installed successfully.
If the cluster status indicates that the installation is still progressing, you can obtain more detailed progress information by checking the status of the Operators:
$ oc get clusteroperators.config.openshift.ioView a detailed summary of cluster specifications, update availability, and update history:
$ oc describe clusterversionList the current update channel:
$ oc get clusterversion -o jsonpath='{.items[0].spec}{"\n"}'Example output
{"channel":"stable-4.6","clusterID":"245539c1-72a3-41aa-9cec-72ed8cf25c5c"}Review the available cluster updates:
$ oc adm upgradeExample output
Cluster version is 4.6.4 Updates: VERSION IMAGE 4.6.6 quay.io/openshift-release-dev/ocp-release@sha256:c7e8f18e8116356701bd23ae3a23fb9892dd5ea66c8300662ef30563d7104f39
18.4. Querying the status of the cluster nodes by using the CLI
You can verify the status of the cluster nodes after an installation.
Prerequisites
-
You have access to the cluster as a user with the
cluster-adminrole. -
You have installed the OpenShift CLI (
oc).
Procedure
List the status of the cluster nodes. Verify that the output lists all of the expected control plane and compute nodes and that each node has a
Readystatus:$ oc get nodesExample output
NAME STATUS ROLES AGE VERSION compute-1.example.com Ready worker 33m v1.19.0+9f84db3 control-plane-1.example.com Ready master 41m v1.19.0+9f84db3 control-plane-2.example.com Ready master 45m v1.19.0+9f84db3 compute-2.example.com Ready worker 38m v1.19.0+9f84db3 compute-3.example.com Ready worker 33m v1.19.0+9f84db3 control-plane-3.example.com Ready master 41m v1.19.0+9f84db3Review CPU and memory resource availability for each cluster node:
$ oc adm top nodesExample output
NAME CPU(cores) CPU% MEMORY(bytes) MEMORY% compute-1.example.com 128m 8% 1132Mi 16% control-plane-1.example.com 801m 22% 3471Mi 23% control-plane-2.example.com 1718m 49% 6085Mi 40% compute-2.example.com 935m 62% 5178Mi 75% compute-3.example.com 111m 7% 1131Mi 16% control-plane-3.example.com 942m 26% 4100Mi 27%
18.5. Reviewing the cluster status from the OpenShift Container Platform web console
You can review the following information in the Overview page in the OpenShift Container Platform web console:
- The general status of your cluster
- The status of the control plane, cluster Operators, and storage
- CPU, memory, file system, network transfer, and pod availability
- The API address of the cluster, the cluster ID, and the name of the provider
- Cluster version information
- Cluster update status, including details of the current update channel and available updates
- A cluster inventory detailing node, pod, storage class, and persistent volume claim (PVC) information
- A list of ongoing cluster activities and recent events
Prerequisites
-
You have access to the cluster as a user with the
cluster-adminrole.
Procedure
- In the Administrator perspective, navigate to Home → Overview.
18.6. Reviewing the cluster status from Red Hat OpenShift Cluster Manager
You can review detailed information about the status of your cluster in the OpenShift Cluster Manager.
Prerequisites
-
You have access to the cluster as a user with the
cluster-adminrole.
Procedure
In the Administrator perspective, navigate to Home → Overview → Details → OpenShift Cluster Manager to open the Overview page for the cluster in OpenShift Cluster Manager.
NoteAlternatively, you can navigate to OpenShift Cluster Manager directly and select your cluster ID from the list of available clusters.
In the Overview page, review the following information about your cluster:
- vCPU and memory availability and resource usage
- The cluster ID, status, type, location, and the provider name
- Node counts by node type
- Cluster version details, the creation date of the cluster, and the name of the cluster owner
- The life cycle support status of the cluster
- Subscription information, including the service level agreement (SLA) status, the subscription unit type, the production status of the cluster, the subscription obligation, and the service level
- A cluster history
Navigate to the Monitoring page to review the following information:
- A list of any issues that have been detected
- A list of alerts that are firing
- The cluster Operator status and version
- Cluster resource usage
Navigate to the Insights page to review the following information provided by Red Hat Insights:
- Potential issues that your cluster might be exposed to, categorized by risk level
- Health-check status by category
18.7. Checking cluster resource availability and utilization
OpenShift Container Platform provides a comprehensive set of monitoring dashboards that help you understand the state of cluster components.
In the Administrator perspective, you can access dashboards for core OpenShift Container Platform components, including:
- etcd
- Kubernetes compute resources
- Kubernetes network resources
- Prometheus
- Dashboards relating to cluster and node performance
Figure 18.1. Example compute resources dashboard
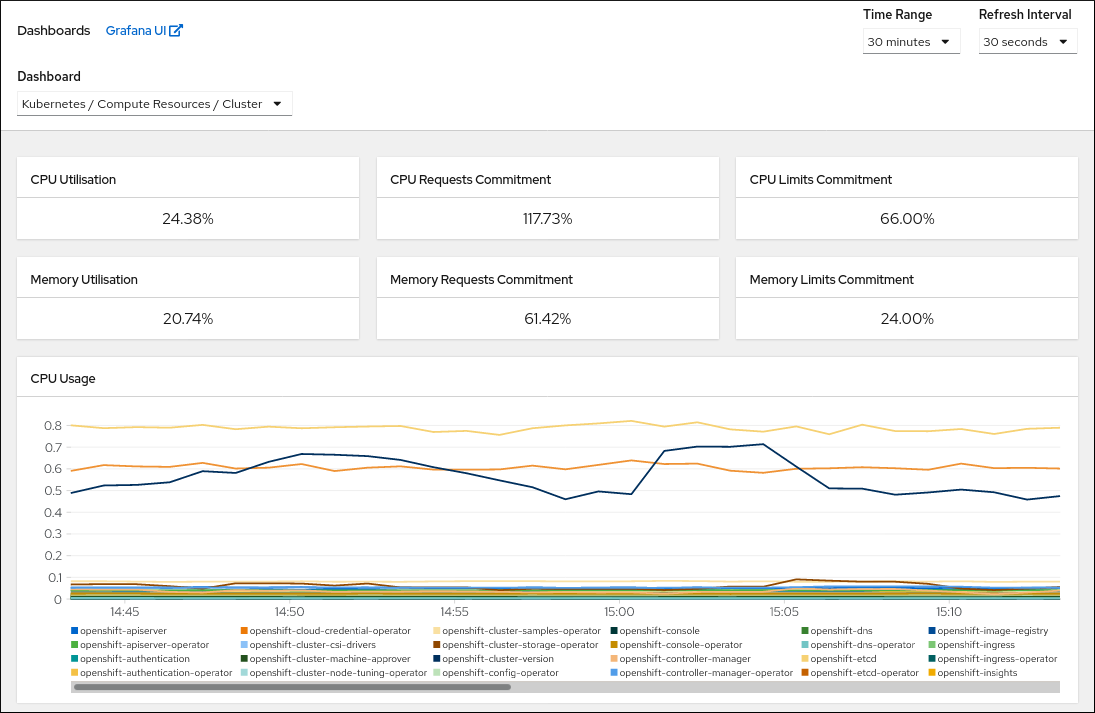
Prerequisites
-
You have access to the cluster as a user with the
cluster-adminrole.
Procedure
- In the Administrator perspective in the OpenShift Container Platform web console, navigate to Monitoring → Dashboards.
- Choose a dashboard in the Dashboard list. Some dashboards, such as the etcd dashboard, produce additional sub-menus when selected.
- Optional: Select a time range for the graphs in the Time Range list.
- Optional: Select a Refresh Interval.
- Hover over each of the graphs within a dashboard to display detailed information about specific items.
18.8. Listing alerts that are firing
Alerts provide notifications when a set of defined conditions are true in an OpenShift Container Platform cluster. You can review the alerts that are firing in your cluster by using the Alerting UI in the OpenShift Container Platform web console.
Prerequisites
-
You have access to the cluster as a user with the
cluster-adminrole.
Procedure
- In the Administrator perspective, navigate to the Monitoring → Alerting → Alerts page.
- Review the alerts that are firing, including their Severity, State, and Source.
- Select an alert to view more detailed information in the Alert Details page.
18.9. Next steps
- See Troubleshooting installations if you experience issues when installing your cluster.
- After installing OpenShift Container Platform, you can further expand and customize your cluster.
Chapter 19. Troubleshooting installation issues
To assist in troubleshooting a failed OpenShift Container Platform installation, you can gather logs from the bootstrap and control plane, or master, machines. You can also get debug information from the installation program.
19.1. Prerequisites
- You attempted to install an OpenShift Container Platform cluster, and installation failed.
19.2. Gathering logs from a failed installation
If you gave an SSH key to your installation program, you can gather data about your failed installation.
You use a different command to gather logs about an unsuccessful installation than to gather logs from a running cluster. If you must gather logs from a running cluster, use the oc adm must-gather command.
Prerequisites
- Your OpenShift Container Platform installation failed before the bootstrap process finished. The bootstrap node is running and accessible through SSH.
-
The
ssh-agentprocess is active on your computer, and you provided the same SSH key to both thessh-agentprocess and the installation program. - If you tried to install a cluster on infrastructure that you provisioned, you must have the fully qualified domain names of the bootstrap and control plane nodes (also known as the master nodes).
Procedure
Generate the commands that are required to obtain the installation logs from the bootstrap and control plane machines:
If you used installer-provisioned infrastructure, change to the directory that contains the installation program and run the following command:
$ ./openshift-install gather bootstrap --dir <installation_directory>1 - 1
installation_directoryis the directory you specified when you ran./openshift-install create cluster. This directory contains the OpenShift Container Platform definition files that the installation program creates.
For installer-provisioned infrastructure, the installation program stores information about the cluster, so you do not specify the hostnames or IP addresses.
If you used infrastructure that you provisioned yourself, change to the directory that contains the installation program and run the following command:
$ ./openshift-install gather bootstrap --dir <installation_directory> \1 --bootstrap <bootstrap_address> \2 --master <master_1_address> \3 --master <master_2_address> \4 --master <master_3_address>"5 - 1
- For
installation_directory, specify the same directory you specified when you ran./openshift-install create cluster. This directory contains the OpenShift Container Platform definition files that the installation program creates. - 2
<bootstrap_address>is the fully qualified domain name or IP address of the cluster’s bootstrap machine.- 3 4 5
- For each control plane, or master, machine in your cluster, replace
<master_*_address>with its fully qualified domain name or IP address.
NoteA default cluster contains three control plane machines. List all of your control plane machines as shown, no matter how many your cluster uses.
Example output
INFO Pulling debug logs from the bootstrap machine INFO Bootstrap gather logs captured here "<installation_directory>/log-bundle-<timestamp>.tar.gz"If you open a Red Hat support case about your installation failure, include the compressed logs in the case.
19.3. Manually gathering logs with SSH access to your host(s)
Manually gather logs in situations where must-gather or automated collection methods do not work.
By default, SSH access to the OpenShift Container Platform nodes is disabled on the Red Hat OpenStack Platform (RHOSP) based installations.
Prerequisites
- You must have SSH access to your host(s).
Procedure
Collect the
bootkube.serviceservice logs from the bootstrap host using thejournalctlcommand by running:$ journalctl -b -f -u bootkube.serviceCollect the bootstrap host’s container logs using the podman logs. This is shown as a loop to get all of the container logs from the host:
$ for pod in $(sudo podman ps -a -q); do sudo podman logs $pod; doneAlternatively, collect the host’s container logs using the
tailcommand by running:# tail -f /var/lib/containers/storage/overlay-containers/*/userdata/ctr.logCollect the
kubelet.serviceandcrio.serviceservice logs from the master and worker hosts using thejournalctlcommand by running:$ journalctl -b -f -u kubelet.service -u crio.serviceCollect the master and worker host container logs using the
tailcommand by running:$ sudo tail -f /var/log/containers/*
19.4. Manually gathering logs without SSH access to your host(s)
Manually gather logs in situations where must-gather or automated collection methods do not work.
If you do not have SSH access to your node, you can access the systems journal to investigate what is happening on your host.
Prerequisites
- Your OpenShift Container Platform installation must be complete.
- Your API service is still functional.
- You have system administrator privileges.
Procedure
Access
journaldunit logs under/var/logby running:$ oc adm node-logs --role=master -u kubeletAccess host file paths under
/var/logby running:$ oc adm node-logs --role=master --path=openshift-apiserver
19.5. Getting debug information from the installation program
You can use any of the following actions to get debug information from the installation program.
Look at debug messages from a past installation in the hidden
.openshift_install.logfile. For example, enter:$ cat ~/<installation_directory>/.openshift_install.log1 - 1
- For
installation_directory, specify the same directory you specified when you ran./openshift-install create cluster.
Change to the directory that contains the installation program and re-run it with
--log-level=debug:$ ./openshift-install create cluster --dir <installation_directory> --log-level debug1 - 1
- For
installation_directory, specify the same directory you specified when you ran./openshift-install create cluster.
19.6. Reinstalling the OpenShift Container Platform cluster
If you are unable to debug and resolve issues in the failed OpenShift Container Platform installation, consider installing a new OpenShift Container Platform cluster. Before starting the installation process again, you must complete thorough cleanup. For a user-provisioned infrastructure (UPI) installation, you must manually destroy the cluster and delete all associated resources. The following procedure is for an installer-provisioned infrastructure (IPI) installation.
Procedure
Destroy the cluster and remove all the resources associated with the cluster, including the hidden installer state files in the installation directory:
$ ./openshift-install destroy cluster --dir <installation_directory>1 - 1
installation_directoryis the directory you specified when you ran./openshift-install create cluster. This directory contains the OpenShift Container Platform definition files that the installation program creates.
Before reinstalling the cluster, delete the installation directory:
$ rm -rf <installation_directory>- Follow the procedure for installing a new OpenShift Container Platform cluster.
Chapter 20. Support for FIPS cryptography
You can install an OpenShift Container Platform cluster that uses FIPS Validated / Modules in Process cryptographic libraries on the x86_64 architecture.
For the Red Hat Enterprise Linux CoreOS (RHCOS) machines in your cluster, this change is applied when the machines are deployed based on the status of an option in the install-config.yaml file, which governs the cluster options that a user can change during cluster deployment. With Red Hat Enterprise Linux (RHEL) machines, you must enable FIPS mode when you install the operating system on the machines that you plan to use as worker machines. These configuration methods ensure that your cluster meet the requirements of a FIPS compliance audit: only FIPS Validated / Modules in Process cryptography packages are enabled before the initial system boot.
Because FIPS must be enabled before the operating system that your cluster uses boots for the first time, you cannot enable FIPS after you deploy a cluster.
20.1. FIPS validation in OpenShift Container Platform
OpenShift Container Platform uses certain FIPS Validated / Modules in Process modules within RHEL and RHCOS for the operating system components that it uses. See RHEL7 core crypto components. For example, when users SSH into OpenShift Container Platform clusters and containers, those connections are properly encrypted.
OpenShift Container Platform components are written in Go and built with Red Hat’s golang compiler. When you enable FIPS mode for your cluster, all OpenShift Container Platform components that require cryptographic signing call RHEL and RHCOS cryptographic libraries.
| Attributes | Limitations |
|---|---|
| FIPS support in RHEL 7 operating systems. | The FIPS implementation does not offer a single function that both computes hash functions and validates the keys that are based on that hash. This limitation will continue to be evaluated and improved in future OpenShift Container Platform releases. |
| FIPS support in CRI-O runtimes. | |
| FIPS support in OpenShift Container Platform services. | |
| FIPS Validated / Modules in Process cryptographic module and algorithms that are obtained from RHEL 7 and RHCOS binaries and images. | |
| Use of FIPS compatible golang compiler. | TLS FIPS support is not complete but is planned for future OpenShift Container Platform releases. |
| FIPS support across multiple architectures. |
FIPS is currently only supported on OpenShift Container Platform deployments using the |
20.2. FIPS support in components that the cluster uses
Although the OpenShift Container Platform cluster itself uses FIPS Validated / Modules in Process modules, ensure that the systems that support your OpenShift Container Platform cluster use FIPS Validated / Modules in Process modules for cryptography.
20.2.1. etcd
To ensure that the secrets that are stored in etcd use FIPS Validated / Modules in Process encryption, boot the node in FIPS mode. After you install the cluster in FIPS mode, you can encrypt the etcd data by using the FIPS-approved aes cbc cryptographic algorithm.
20.2.2. Storage
For local storage, use RHEL-provided disk encryption or Container Native Storage that uses RHEL-provided disk encryption. By storing all data in volumes that use RHEL-provided disk encryption and enabling FIPS mode for your cluster, both data at rest and data in motion, or network data, are protected by FIPS Validated / Modules in Process encryption. You can configure your cluster to encrypt the root filesystem of each node, as described in Customizing nodes.
20.2.3. Runtimes
To ensure that containers know that they are running on a host that is using FIPS Validated / Modules in Process cryptography modules, use CRI-O to manage your runtimes. CRI-O supports FIPS mode, in that it configures the containers to know that they are running in FIPS mode.
20.3. Installing a cluster in FIPS mode
To install a cluster in FIPS mode, follow the instructions to install a customized cluster on your preferred infrastructure. Ensure that you set fips: true in the install-config.yaml file before you deploy your cluster.
If you are using Azure File storage, you cannot enable FIPS mode.
To apply AES CBC encryption to your etcd data store, follow the Encrypting etcd data process after you install your cluster.
If you add RHEL nodes to your cluster, ensure that you enable FIPS mode on the machines before their initial boot. See Adding RHEL compute machines to an OpenShift Container Platform cluster and Enabling FIPS Mode in the RHEL 7 documentation.
Legal Notice
Copyright © Red Hat
OpenShift documentation is licensed under the Apache License 2.0 (https://www.apache.org/licenses/LICENSE-2.0).
Modified versions must remove all Red Hat trademarks.
Portions adapted from https://github.com/kubernetes-incubator/service-catalog/ with modifications by Red Hat.
Red Hat, Red Hat Enterprise Linux, the Red Hat logo, the Shadowman logo, JBoss, OpenShift, Fedora, the Infinity logo, and RHCE are trademarks of Red Hat, Inc., registered in the United States and other countries.
Linux® is the registered trademark of Linus Torvalds in the United States and other countries.
Java® is a registered trademark of Oracle and/or its affiliates.
XFS® is a trademark of Silicon Graphics International Corp. or its subsidiaries in the United States and/or other countries.
MySQL® is a registered trademark of MySQL AB in the United States, the European Union and other countries.
Node.js® is an official trademark of the OpenJS Foundation.
The OpenStack® Word Mark and OpenStack logo are either registered trademarks/service marks or trademarks/service marks of the OpenStack Foundation, in the United States and other countries and are used with the OpenStack Foundation’s permission. We are not affiliated with, endorsed or sponsored by the OpenStack Foundation, or the OpenStack community.
All other trademarks are the property of their respective owners.