Chapter 9. Block devices
9.1. Block devices introduction
The block device functions of the dashboard allow you to manage and monitor block device images. The functionality is divided between generic image functions, mirroring functions, iSCSI functions, and Quality of Service configuration. For example, you can create new images, view the state of images mirrored across clusters, manage or monitor iSCSI targets, and set IOPS limits on an image.
9.2. Images functions
The dashboard provides several functions related to managing and monitoring images.
9.2.1. Prerequisites
- A running Red Hat Ceph Storage cluster.
- Dashboard is installed.
9.2.2. Creating images
The dashboard allows you to create images.
Prerequisites
- A running Red Hat Ceph Storage cluster.
- Dashboard is installed.
- A pool with the rbd application enabled is created.
Procedure
- Log in to the Dashboard.
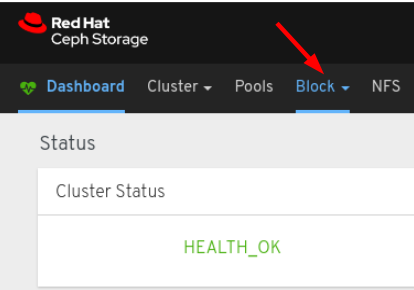
On the navigation bar, click the Block:
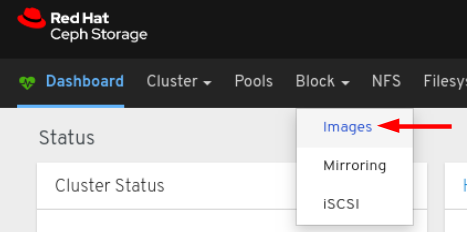
Select Images from the drop-down:
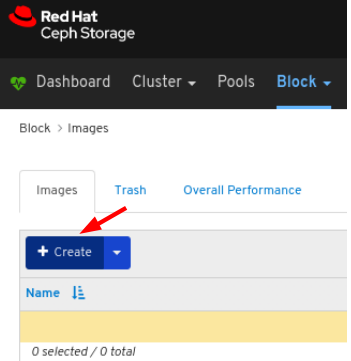
In the Images tab, Click the Create button:
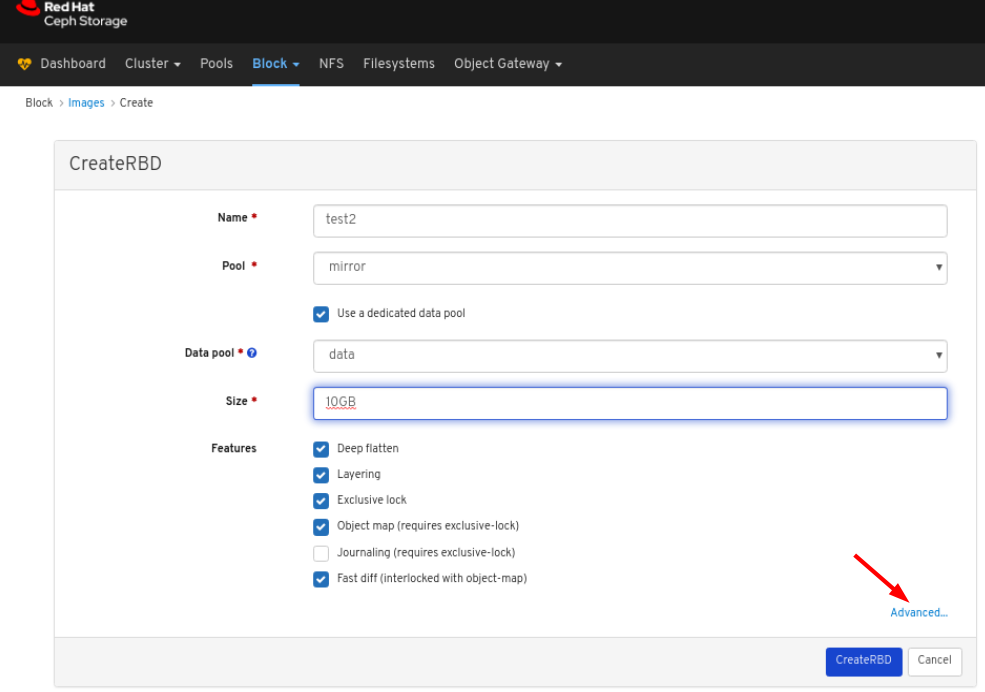
In the CreateRBD window, enter the parameters:
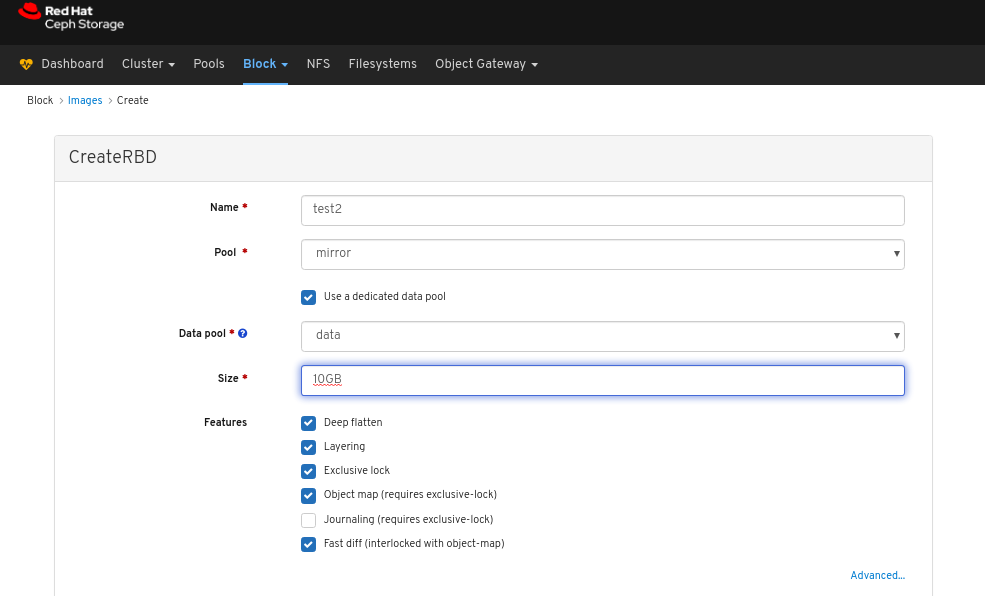
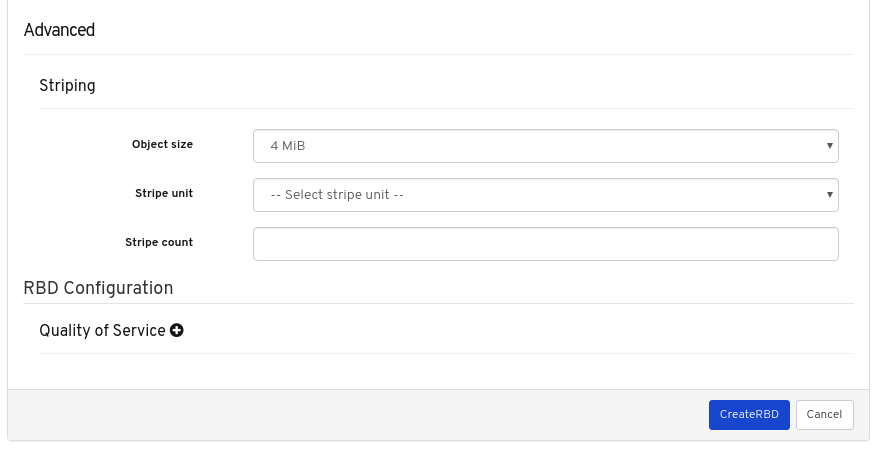
Optional: Click Advanced and set the parameters:
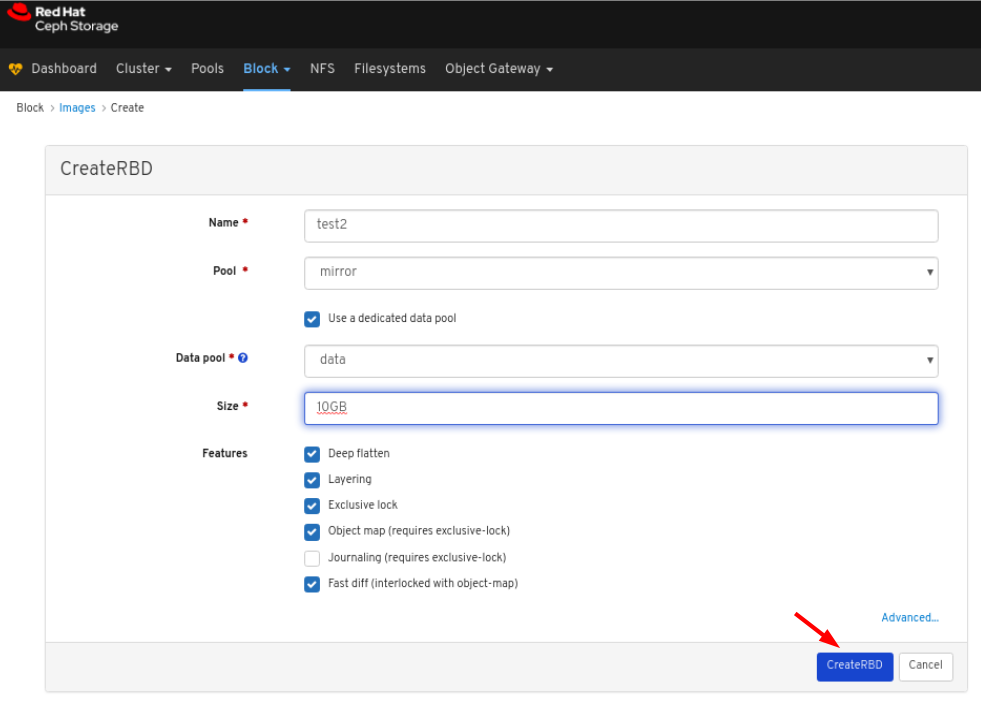
Click the CreateRBD button:
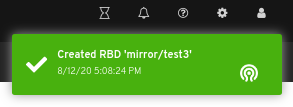
Notifications towards the top right corner of the page indicate the image was created successfully.
Additional Resources
- See the Red Hat Ceph Storage Block Device Guide for more information on Images.
- See the Creating pools section in the Red Hat Ceph Storage Dashboard Guide for more details on creating RBD pools.
9.2.3. Viewing images
The dashboard allows you to view images.
Prerequisites
- A running Red Hat Ceph Storage cluster.
- Dashboard is installed.
- An image is in the cluster.
Procedure
- Log in to the Dashboard.
- On the navigation bar, click Block.
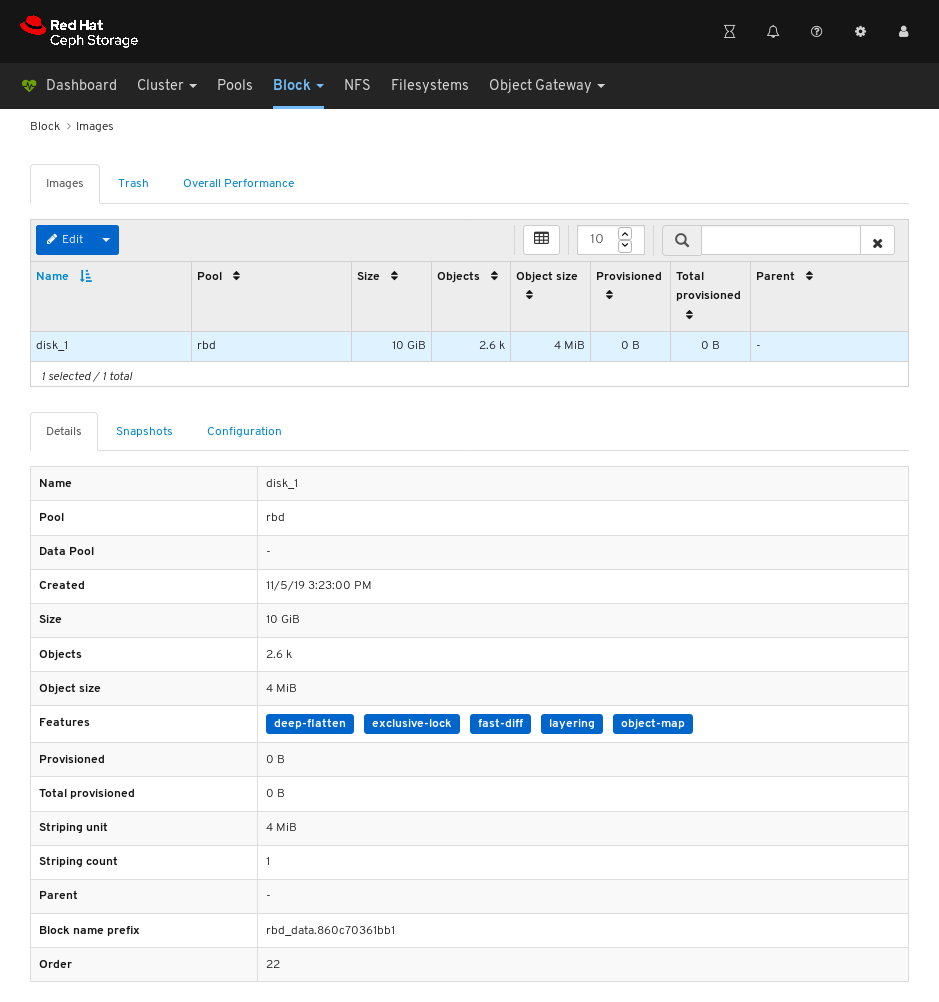
Click Images:
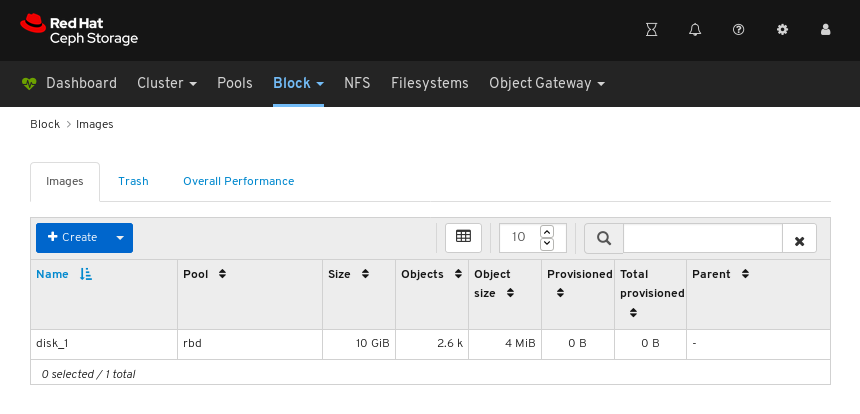
In the above example, you can see a 10 GiB image named disk_1.
To view details, select the image by clicking the row for disk_1:
Additional Resources
- For more information on images, see the Block Device Guide.
9.2.4. Editing images
The dashboard allows you to edit images
Prerequisites
- A running Red Hat Ceph Storage cluster.
- Dashboard is installed.
- A pool with the rbd application enabled is created.
- An image is created.
Procedure
- Log in to the Dashboard.
On the navigation bar, click Block:
Select Images from the drop-down:
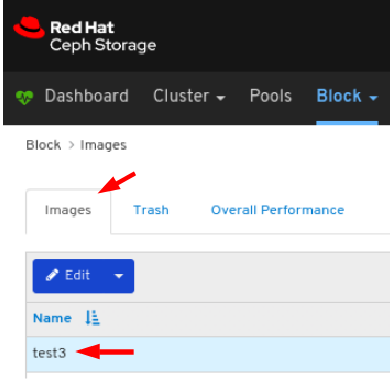
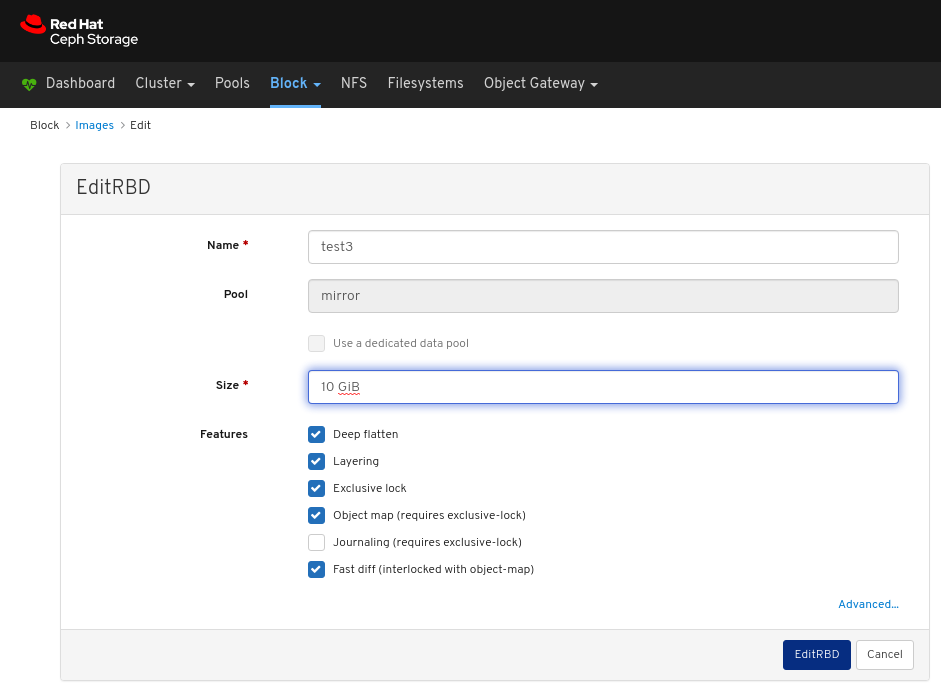
To edit the image, in the Images tab, click its row:
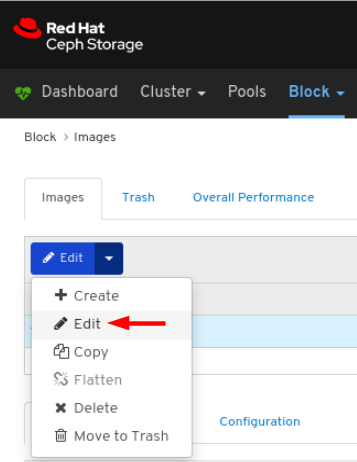
Select Edit In the Edit drop-down:
In the EditRBD dialog, edit the required parameters and click the EditRBD button:
A notification towards the top right corner of the page indicates the image was updated successfully.

Additional Resources
- See the Creating Images section in the Red Hat Ceph Storage Dashboard Guide for more information.
9.2.5. Copying images
The dashboard allows you to copy images.
Prerequisites
- A running Red Hat Ceph Storage cluster.
- Dashboard is installed.
- A pool with the rbd application enabled is created.
- An image is created.
Procedure
- Log in to the Dashboard.
On the navigation bar, click Block:
Select Images from the drop-down:
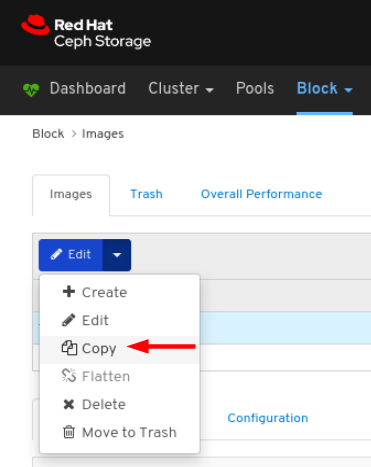
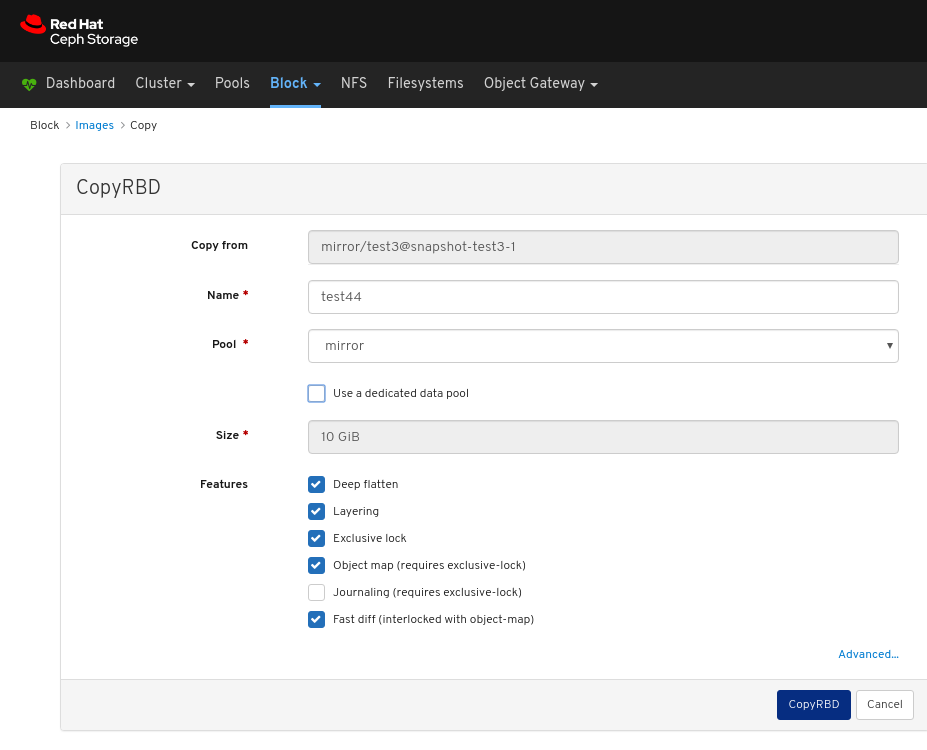
To copy the image, in the Images tab, click its row:
Select Copy In the Edit drop-down:
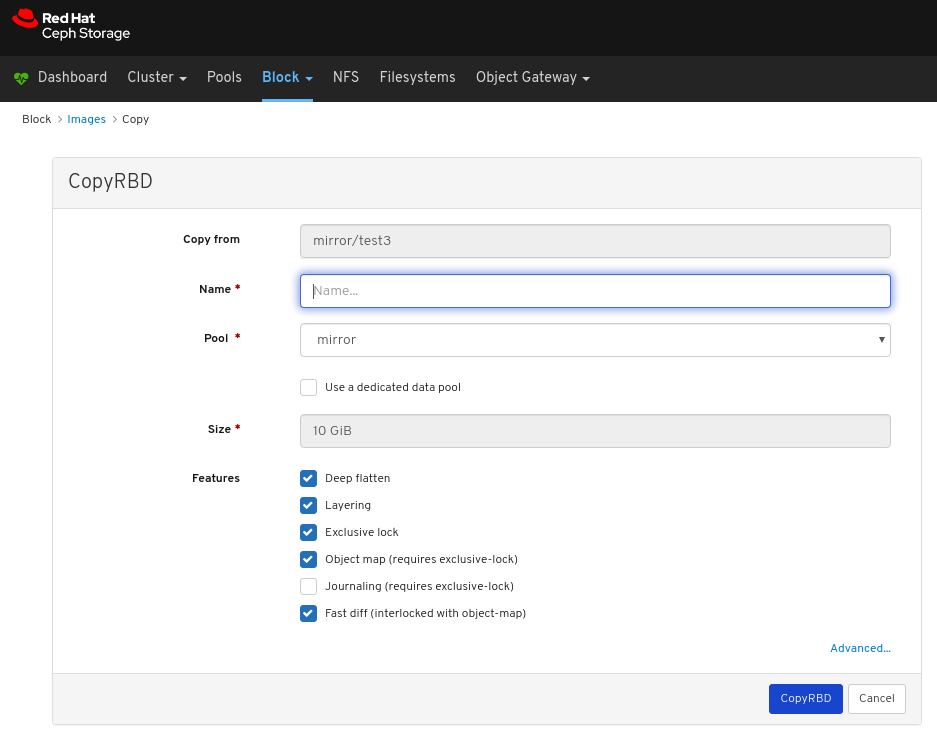
In the CopyRBD window, edit the required parameters and click the CopyRBD button:
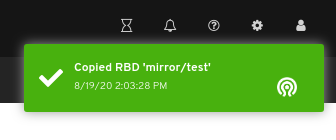
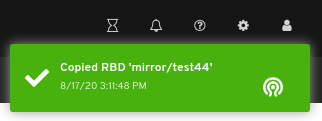
A notification towards the top right corner of the page indicates the image was updated successfully.
Additional Resources
- See the Creating Images section in the Red Hat Ceph Storage Dashboard Guide for more information.
9.2.6. Moving images to trash
The dashboard allows you to move images to trash.
Prerequisites
- A running Red Hat Ceph Storage cluster.
- Dashboard is installed.
- A pool with the rbd application enabled is created.
- An image is created.
Procedure
- Log in to the Dashboard.
On the navigation bar, click Block:
Select Images from the drop-down:
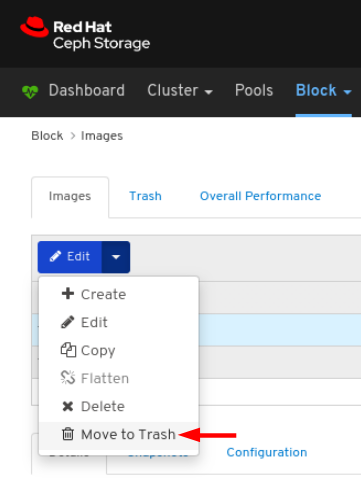
To move the image to Trash, in the Images tab, click its row:
Select Move to Trash In the Edit drop-down:
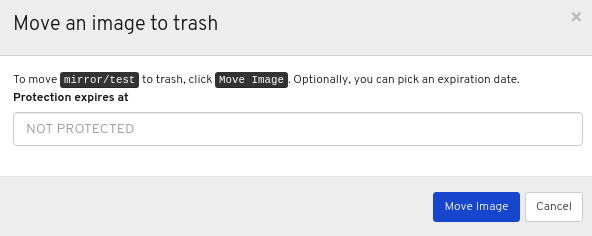
In the Moving an image to trash window, edit the date till which the image needs protection, and then click the Move Image button:
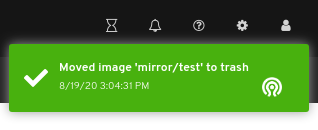
A notification towards the top right corner of the page indicates the image was moved to trash successfully.
9.2.7. Purging trash
The dashboard allows you to purge trash of images.
Prerequisites
- A running Red Hat Ceph Storage cluster.
- Dashboard is installed.
- A pool with the rbd application enabled is created.
- An image is trashed.
Procedure
- Log in to the Dashboard.
On the navigation bar, click Block:
Select Images from the drop-down:
In the Trash tab, click the Purge Trash button:
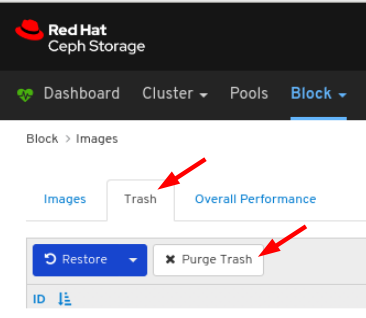
In the Purge Trash window, select the pool, and then click the Purge Trash button:

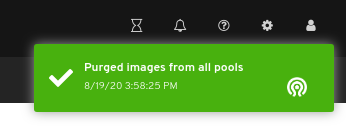
A notification towards the top right corner of the page indicates the images were purged from the selected pools successfully.
Additional resources
- See the Purging the Block Device Snapshots section in the Red Hat Ceph Storage Block Device Guide for more details.
9.2.8. Restoring images from trash
The dashboard allows you to restore images from trash.
Prerequisites
- A running Red Hat Ceph Storage cluster.
- Dashboard is installed.
- A pool with the rbd application enabled is created.
- An image is trashed.
Procedure
- Log in to the Dashboard.
On the navigation bar, click Block:
Select Images from the drop-down:
To restore the image from Trash, in the Trash tab, click its row:
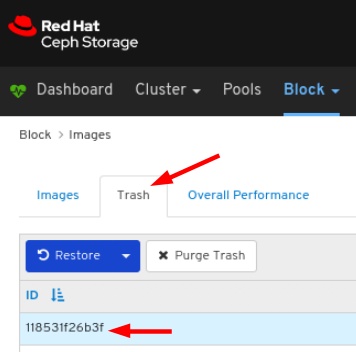
Select Restore in the Restore drop-down:

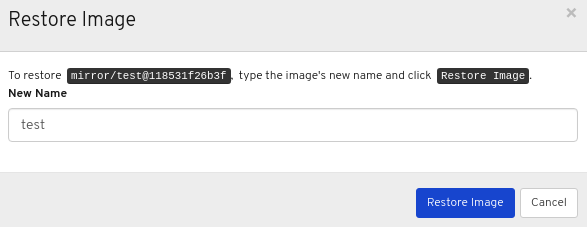
In the Restore Image window, enter the name of the image , and then click the Restore Image button:
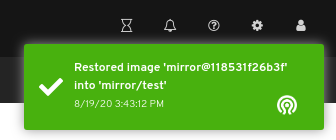
Notification towards the top right corner of the page indicate the image was restored from trash successfully.
Additional resources
- See the Creating images section in the Red Hat Ceph Storage Dashboard Guide for more details on creating images in an RBD pool.
9.2.9. Deleting images
The dashboard allows you to delete images.
Prerequisites
- A running Red Hat Ceph Storage cluster.
- Dashboard is installed.
- A pool with the rbd application enabled is created.
- An image is created.
Procedure
- Log in to the Dashboard.
On the navigation bar, click Block:
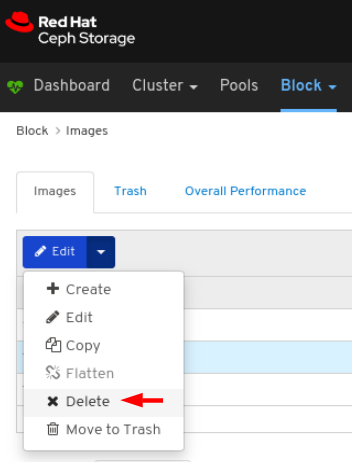
Select Images from the drop-down:
To edit the image, in the Images tab, click its row:
Select Delete In the Edit drop-down:
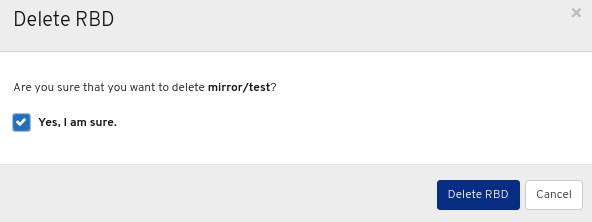
In the Delete RBD dialog window, Click the Yes, I am sure box and then Click Delete RBD to save the settings:
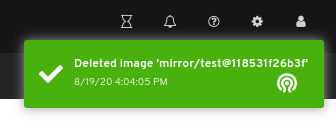
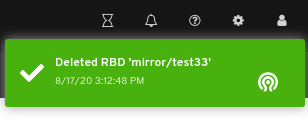
A notification towards the top right corner of the page indicates the image was moved to trash successfully.
9.2.10. Creating snapshots of images
The dashboard allows you to take snapshots of Ceph block device images.
Prerequisites
- A running Red Hat Ceph Storage cluster.
- Dashboard is installed.
- A pool with the rbd application enabled is created.
- An image is created.
Procedure
- Log in to the Dashboard.
On the navigation bar, click Block:
Select Images from the drop-down:
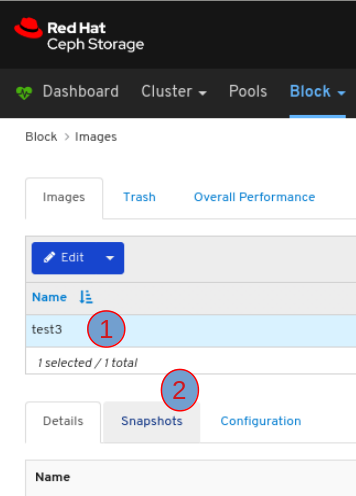
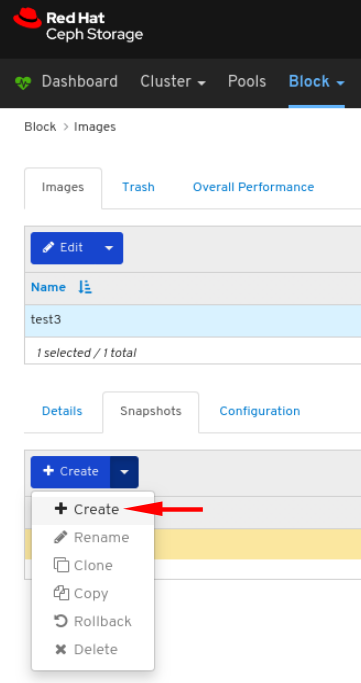
To take the snapshot of the image, in the Images tab, click its row, and then click the Snapshots tab:
Select Create in the Create drop-down:
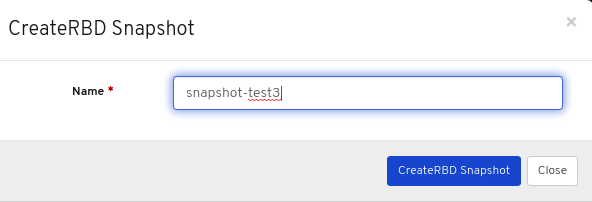
In the CreateRBD Snapshot dialog, enter the parameters and click the CreateRBD Snapshot button:
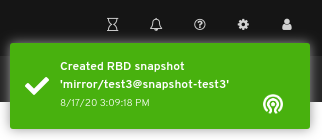
A notification towards the top right corner of the page indicates the snapshot of the image was created successfully.
Additional Resources
- See the Creating a block device snapshot section in the Red Hat Ceph Storage Block Device Guide] for more information on creating snapshots.
- See the Creating pools section in the Red Hat Ceph Storage Dashboard Guide for more details on creating RBD pools.
- See the Creating images section in the Red Hat Ceph Storage Dashboard Guide for more details.
9.2.11. Renaming snapshots of images
The dashboard allows you to rename snapshots of Ceph block device images.
Prerequisites
- A running Red Hat Ceph Storage cluster.
- Dashboard is installed.
- A pool with the rbd application enabled is created.
- An image is created.
- A snapshot of the image is created.
Procedure
- Log in to the Dashboard.
On the navigation bar, click Block:
Select Images from the drop-down:
To rename the snapshot of the image, in the Images tab, click its row, and then click the Snapshots tab:
Select Rename in the the Rename drop-down:

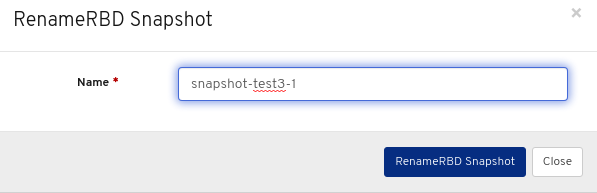
In the RenameRBD Snapshot dialog, enter the parameters and click the RenameRBD Snapshot button:
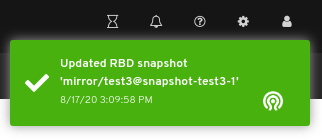
A notification towards the top right corner of the page indicates the snapshot of the image was updated successfully.
Additional Resources
- See the Renaming a block device snapshot section in the Red Hat Ceph Storage Block Device Guide] for more information.
- See the Creating pools section in the Red Hat Ceph Storage Dashboard Guide for more details on creating RBD pools.
- See the Creating images section in the Red Hat Ceph Storage Dashboard Guide for more details on creating images in an RBD pool.
9.2.12. Protecting snapshots of images
The dashboard allows you to protect snapshots of Ceph block device images. This is required when you need to clone the snapshots.
Prerequisites
- A running Red Hat Ceph Storage cluster.
- Dashboard is installed.
- A pool with the rbd application enabled is created.
- An image is created.
- A snapshot of the image is created.
Procedure
- Log in to the Dashboard.
On the navigation bar, click Block:
Select Images from the drop-down:
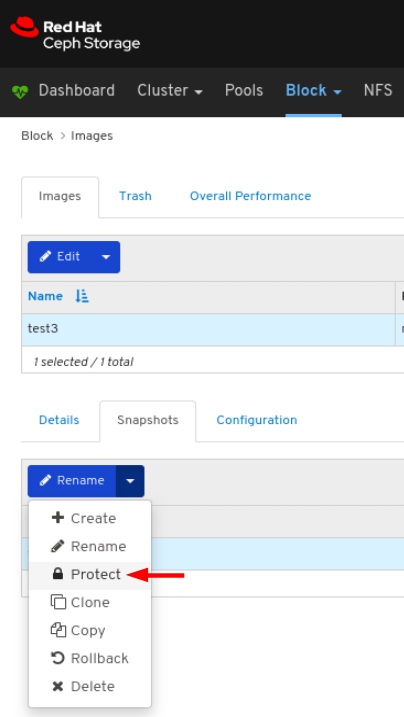
To protect the snapshot of the image, in the Images tab, click its row, and then click the Snapshots tab:
Select Protect in the the Rename drop-down:
A notification towards the top right corner of the page indicates the snapshot of the image was updated successfully.
Additional Resources
- See the Protecting a block device snapshot section in the Red Hat Ceph Storage Block Device Guide] for more information.
- See the Creating pools section in the Red Hat Ceph Storage Dashboard Guide for more details on creating RBD pools.
- See the Creating images section in the Red Hat Ceph Storage Dashboard Guide for more details on creating images in an RBD pool.
9.2.13. Cloning snapshots of images
The dashboard allows you to clone snapshots of Ceph block device images.
Prerequisites
- A running Red Hat Ceph Storage cluster.
- Dashboard is installed.
- A pool with the rbd application enabled is created.
- An image is created.
- A snapshot of the image is created.
- A snapshot of the image is protected.
Procedure
- Log in to the Dashboard.
On the navigation bar, click Block:
Select Images from the drop-down:
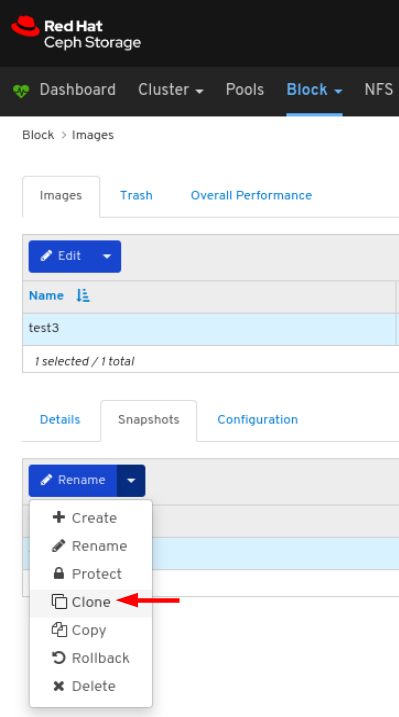
To clone the snapshot of the image, in the Images tab, click its row, and then click the Snapshots tab:
Select Clone in the the Rename drop-down:
In the CloneRBD dialog, enter the parameters and click the CloneRBD button:

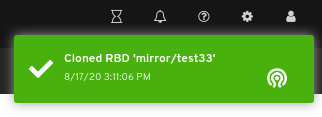
A notification towards the top right corner of the page indicates the snapshot of the image was cloned successfully.
Additional Resources
- See the Renaming a block device snapshot section in the Red Hat Ceph Storage Block Device Guide] for more information.
- See the Protecting a Block device Snapshot section in the Red Hat Ceph Storage Block Device Guide for more information.
- See the Creating pools section in the Red Hat Ceph Storage Dashboard Guide for more details on creating RBD pools.
- See the Creating images section in the Red Hat Ceph Storage Dashboard Guide for more details on creating images in an RBD pool.
- See the Protecting snapshots of images section in the Red Hat Ceph Storage Dashboard Guide for more details.
9.2.14. Copying snapshots of images
The dashboard allows you to copy snapshots of Ceph block device images.
Prerequisites
- A running Red Hat Ceph Storage cluster.
- Dashboard is installed.
- A pool with the rbd application enabled is created.
- An image is created.
- A snapshot of the image is created.
Procedure
- Log in to the Dashboard.
On the navigation bar, click Block:
Select Images from the drop-down:
To copy the snapshot of the image, in the Images tab, click its row, and then click the Snapshots tab:
Select Copy in the the Rename drop-down:

In the CopyRBD dialog, enter the parameters and click the CopyRBD button:
A notification towards the top right corner of the page indicates the snapshot of the image was updated successfully.
Additional Resources
- See the Creating pools section in the Red Hat Ceph Storage Dashboard Guide for more details on creating RBD pools.
- See the Creating images section in the Red Hat Ceph Storage Dashboard Guide for more details on creating images in an RBD pool.
9.2.15. Rolling back snapshots of images
The dashboard allows you to rollback snapshots of Ceph block device images.
Prerequisites
- A running Red Hat Ceph Storage cluster.
- Dashboard is installed.
- A pool with the rbd application enabled is created.
- An image is created.
- A snapshot of the image is created.
Procedure
- Log in to the Dashboard.
On the navigation bar, click Block:
Select Images from the drop-down:
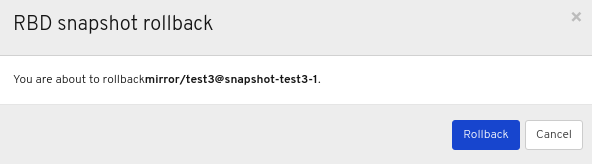
To rollback the snapshot of the image, in the Images tab, click its row, and then click the Snapshots tab:
Select Rollback in the the Rename drop-down:

In the RBD snapshot rollback window, click the Rollback button:
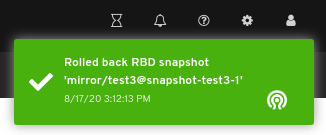
A notification towards the top right corner of the page indicates the snapshot of the image was rolled back successfully.
Additional Resources
- See the Rolling a block device snapshot section in the Red Hat Ceph Storage Block Device Guide] for more information.
- See the Creating pools section in the Red Hat Ceph Storage Dashboard Guide for more details.
- See the Creating images section in the Red Hat Ceph Storage Dashboard Guide for more details.
9.2.16. Unprotecting snapshots of images
The dashboard allows you to unprotect snapshots of Ceph block device images. This is required when you need to delete the snapshots.
Prerequisites
- A running Red Hat Ceph Storage cluster.
- Dashboard is installed.
- A pool with the rbd application enabled is created.
- An image is created.
- A snapshot of the image is created.
- A snapshot of the image is protected.
Procedure
- Log in to the Dashboard.
On the navigation bar, click Block:
Select Images from the drop-down:
To unprotect the snapshot of the image, in the Images tab, click its row, and then click the Snapshots tab:
Select UnProtect in the the Rename drop-down:
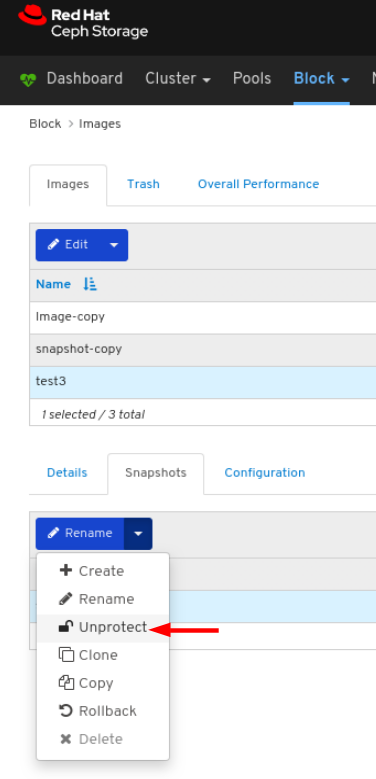
A notification towards the top right corner of the page indicates the snapshot of the image was updated successfully.
Additional Resources
- See the Unprotecting a block device snapshot section in the Red Hat Ceph Storage Block Device Guide for more information.
- See the Creating pools section in the Red Hat Ceph Storage Dashboard Guide for more details on creating RBD pools.
- See the Creating images section in the Red Hat Ceph Storage Dashboard Guide for more details on creating images in an RBD pool.
- See the Protecting snapshots of Images section in the Red Hat Ceph Storage Dashboard Guide for more details.
9.2.17. Deleting snapshots of images
The dashboard allows you to delete snapshots of Ceph block device images.
Prerequisites
- A running Red Hat Ceph Storage cluster.
- Dashboard is installed.
- A pool with the rbd application enabled is created.
- An image is created.
- A snapshot of the image is created.
- A snapshot of the image is unprotected.
Procedure
- Log in to the Dashboard.
On the navigation bar, click Block:
Select Images from the drop-down:
To delete the snapshot of the image, in the Images tab, click its row, and then click the Snapshots tab:
Select Delete in the the Rename drop-down:

A notification towards the top right corner of the page indicates the snapshot of the image was updated successfully.
Additional Resources
- See the Deleting a block device snapshot section in the Red Hat Ceph Storage Block Device Guide] for more information.
- See the Unprotecting snapshots of Images section in the Red Hat Ceph Storage Dashboard Guide for more details.
9.3. Mirroring functions
The dashboard allows you to manage and monitor mirroring functions.
9.3.1. Prerequisites
- A running Red Hat Ceph Storage cluster.
- Dashboard is installed.
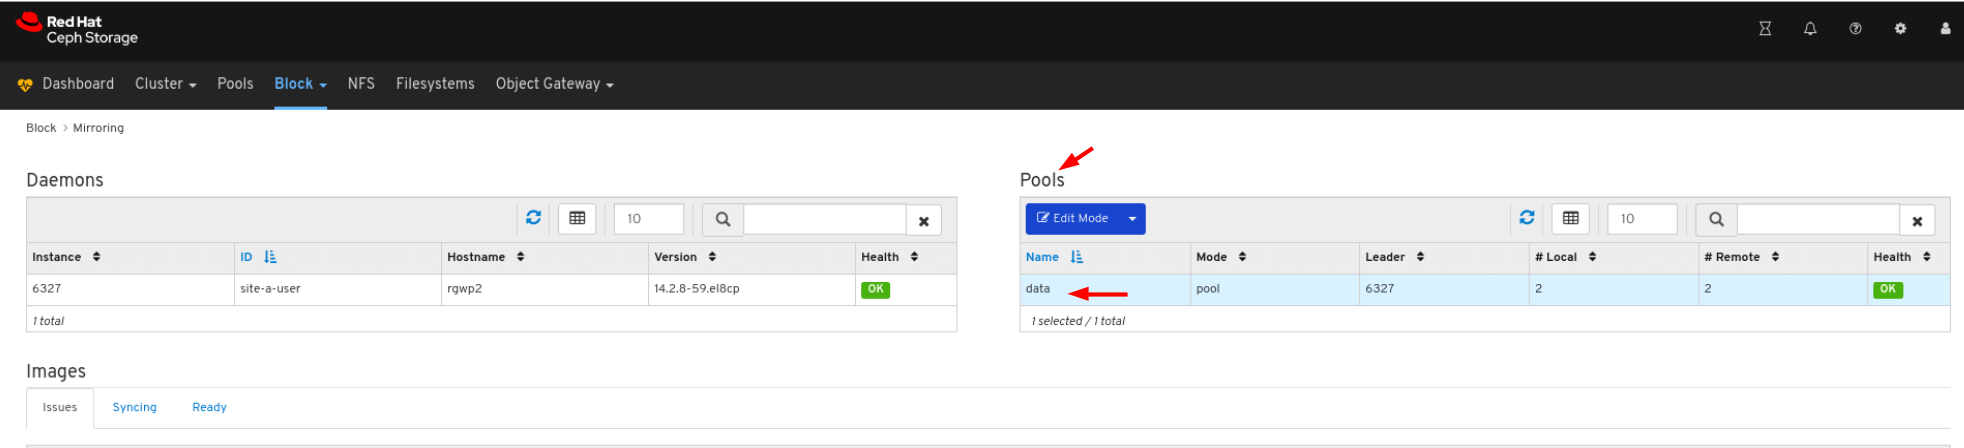
9.3.2. Mirroring view
The dashboard allows you to view the overall state of mirroring functions.
Prerequisites
- A running Red Hat Ceph Storage cluster.
- Dashboard is installed.
- Mirroring is configured.
Procedure
- Log in to the Dashboard.
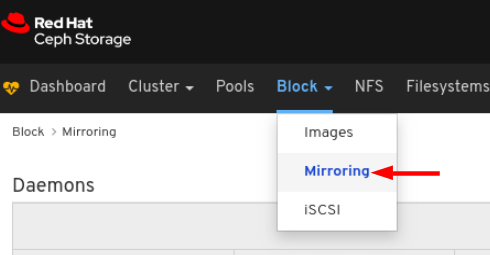
- On the navigation bar, click Block.
Click Mirroring:

In the above example, you can see mirroring information categorized into tables labeled Daemons, Pools, and Images.
Additional Resources
- For more information on mirroring, see Block Device Mirroring in the Block Device Guide.
9.3.3. Editing mode
The dashboard allows you to edit mode of the overall state of mirroring functions, which includes pools and images.
Prerequisites
- A running Red Hat Ceph Storage cluster.
- Dashboard is installed.
- A pool with the rbd application enabled is created.
- An image is created.
- Mirroring is configured.
Procedure
- Log in to the Dashboard.
On the navigation bar, click Block:
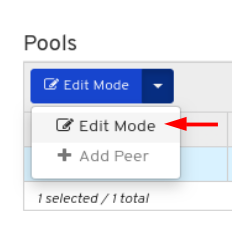
Click Mirroring from the drop-down:
In the Pools tab, click the row:
In the Edit Mode drop-down, select Edit Mode:
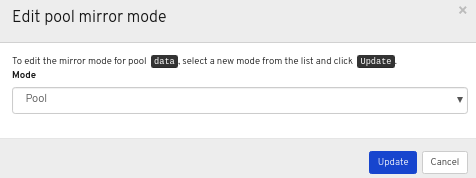
In the Edit Pool mirror mode window, select the mode from the drop-down, and then click the Update button:
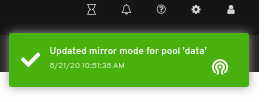
A notification towards the top right corner of the page indicates the mirror mode was updated successfully.
Additional Resources
- See the Ceph Block Device Mirroring section in the Red Hat Ceph Storage Block Device Guide for more information.
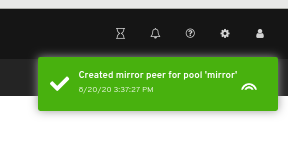
9.3.4. Adding peer in mirroring
The dashboard allows you to add storage cluster peer for the`rbd-daemon` mirror to discover its peer storage cluster.
Prerequisites
- A running Red Hat Ceph Storage cluster.
- Dashboard is installed.
- A pool with the rbd application enabled is created.
- An image is created.
- Mirroring is configured.
Procedure
- Log in to the Dashboard.
On the navigation bar, click Block:
Click Mirroring from the drop-down:
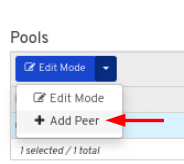
In the Pools tab, click the row
In the Edit Mode drop-down, select Add peer:
In the Add pool mirror peer window, enter the parameters, and then click the Submit button:

A notification towards the top right corner of the page indicates the mirror peer was created successfully.
Additional Resources
- See the Adding a storage cluster peer section in the Red Hat Ceph Storage Block Device Guide for more information.
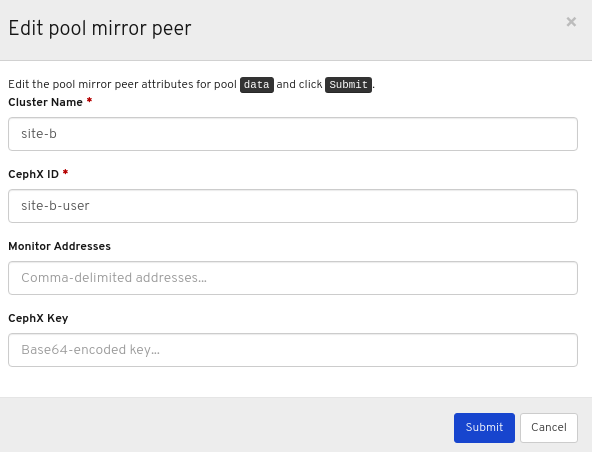
9.3.5. Editing peer in mirroring
The dashboard allows you to edit storage cluster peer for the`rbd-daemon` mirror to discover its peer storage cluster.
Prerequisites
- A running Red Hat Ceph Storage cluster.
- Dashboard is installed.
- A pool with the rbd application enabled is created.
- An image is created.
- Mirroring is configured.
- A peer is added.
Procedure
- Log in to the Dashboard.
On the navigation bar, click Block.
Click Mirroring from the drop-down:
In the Pools tab, click the row
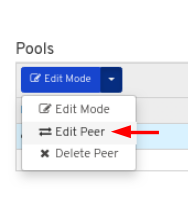
In the Edit Mode drop-down, select Edit peer:
In the Edit pool mirror peer window, edit the parameters, and then click the Submit button:
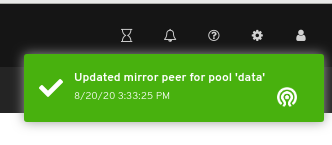
A notification towards the top right corner of the page indicates the mirror peer was updated successfully.
Additional Resources
- See the Adding peer in mirroring section in the Red Hat Ceph Storage Dashboard Guide for more information.
9.3.6. Deleting peer in mirroring
The dashboard allows you to edit storage cluster peer for the`rbd-daemon` mirror to discover its peer storage cluster.
Prerequisites
- A running Red Hat Ceph Storage cluster.
- Dashboard is installed.
- A pool with the rbd application enabled is created.
- An image is created.
- Mirroring is configured.
- A peer is added.
Procedure
- Log in to the Dashboard.
On the navigation bar, click Block.
Click Mirroring from the drop-down:
In the Pools tab, click the row:
In the Edit Mode drop-down, select Delete peer:

In the Delete mirror peer dialog window, Click the Yes, I am sure box and then Click Delete mirror peer to save the settings:
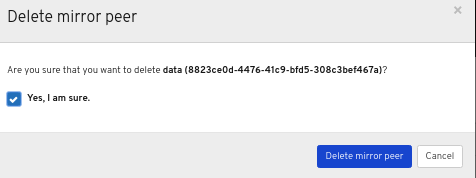
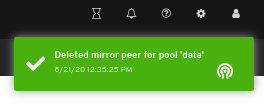
A notification towards the top right corner of the page indicates the image was moved to trash successfully.
Additional Resources
- See the Adding peer in mirroring section in the Red Hat Ceph Storage Dashboard Guide for more information.
9.4. iSCSI functions (Limited Availability)
The dashboard allows you to manage and monitor iSCSI images and targets. Before you can use the dashboard to manage and monitor iSCSI images and targets, you must add gateways to it and enable the dashboard iSCSI feature.
This technology is Limited Availability. See the Deprecated functionality chapter for additional information.
9.4.1. Prerequisites
- A running Red Hat Ceph Storage cluster.
- Dashboard is installed.
- iSCSI gateways are added to the dashboard.
9.4.2. Manually adding iSCSI gateways to the dashboard
The Red Hat Ceph Storage Dashboard can manage iSCSI targets using the REST API provided by the rbd-target-api service of the Ceph iSCSI Gateway. You must add the API address to the dashboard before the dashboard can access it.
Prerequisites
- A running Red Hat Ceph Storage cluster.
- Dashboard is installed.
- The Ceph iSCSI Gateway is installed.
The Ceph iSCSI gateway requires at lest two gateways to provide high availability.
Procedure
- Log in to a Monitor node.
Optional: If the REST API for the iSCSI gateway is configured in HTTPS mode using a self-signed certificate, you must configure the dashboard to avoid SSL certificate verification when accessing the API. Run the following command to disable SSL verification.
# ceph dashboard set-iscsi-api-ssl-verification falseExample:
[root@mon ~]# ceph dashboard set-iscsi-api-ssl-verification false
Option ISCSI_API_SSL_VERIFICATION updated
Create two files for the gateways:
# echo "SCHEME :// USERNAME : PASSWORD @ HOST [: PORT ]" > FILE_CONTAINING_GATEWAY_URLExample:
[root@mon ~]# echo "http://admin:admin@192.168.122.157:5000" > /tmp/first_gateway [root@mon ~]# echo "http://admin:admin@192.168.122.193:5000" > /tmp/second_gatewayNoteThe USERNAME and PASSWORD were set when you configured the iSCSI target. The credentials can be retrieved from the
iscsi-gateway.cfgfile on the iSCSI Gateway node.Add the two gateways to the dashboard:
# ceph dashboard iscsi-gateway-add -i FILE_CONTAINING_GATEWAY_URLExample:
[root@mon ~]# ceph dashboard iscsi-gateway-add -i /tmp/first_gateway
Success
[root@mon ~]# ceph dashboard iscsi-gateway-add -i /tmp/second_gateway
Success
Verify the gateways were added correctly:
# ceph dashboard iscsi-gateway-listExample:
[root@mon ~]# ceph dashboard iscsi-gateway-list
{"gateways": {"ceph4": {"service_url": "http://admin:admin@192.168.122.193:5000"}, "ceph4": {"service_url": "http://admin:admin@192.168.122.193:5000"}}}
Optional: If you make a mistake adding a gateway you can remove it by specifying its hostname as mentioned in the command
iscsi-gateway-list:# ceph dashboard iscsi-gateway-rm GATEWAY_NAMEExample:
[root@mon ~]# ceph dashboard iscsi-gateway-rm ceph4
Success
Additional Resources
- For information on how to install the Ceph iSCSI Gateway, see Installing the iSCSI gateway in the Block Device Guide.
9.4.3. iSCSI overview
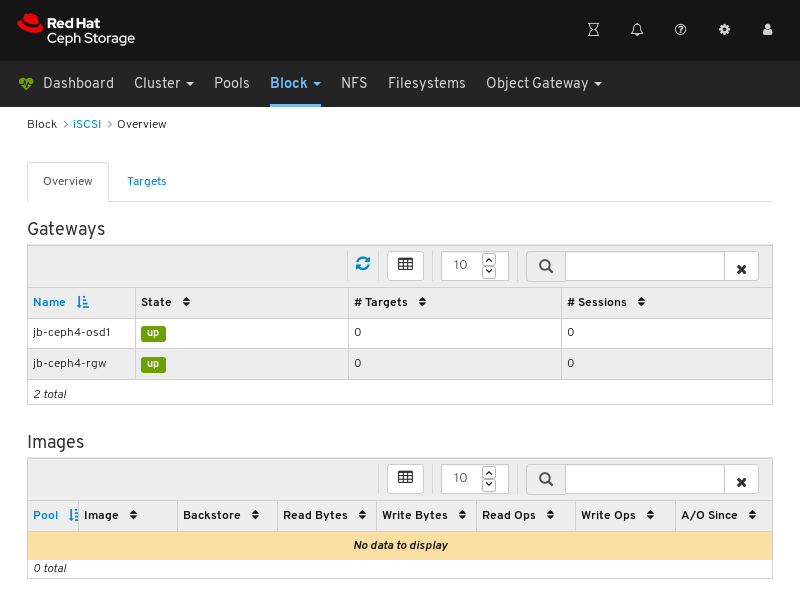
The dashboard provides an overview that displays iSCSI gateway hosts and images exported over iSCSI.
Prerequisites
- A running Red Hat Ceph Storage cluster.
- Dashboard is installed.
- The Ceph iSCSI gateway is installed.
- iSCSI gateways are added to the dashboard.
- The dashboard iSCSI feature is enabled.
Procedure
- Log in to the Dashboard.
- On the navigation bar, click Block.
Click iSCSI:
Additional Resources
- For information on how to install the Ceph iSCSI Gateway, see Installing the iSCSI gateway in the Block Device Guide.
- For information on how to add iSCSI gateways to the dashboard, see Manually adding iSCSI gateways to the dashboard in the Dashboard Guide.
- For information on how to enable the dashboard iSCSI feature see Enabling the dashboard iSCSI feature in the dashboard in the Dashboard Guide.
9.4.4. Creating iSCSI targets
The dashboard allows you to create iSCSI targets.
Prerequisites
- A running Red Hat Ceph Storage cluster.
- Dashboard is installed.
- The Ceph iSCSI gateway is installed with at least two gateways.
- iSCSI gateways are added to the dashboard.
- The dashboard iSCSI feature is enabled.
- A replicated pool with the RBD application enabled.
- An erasure coded pool with the RBD application enabled.
Procedure
- Log in to the Dashboard.
- On the navigation bar, click Block.
Click iSCSI:
Towards the upper left corner of the page, click the Targets tab:

Towards the upper left corner of the page, click the Add button:
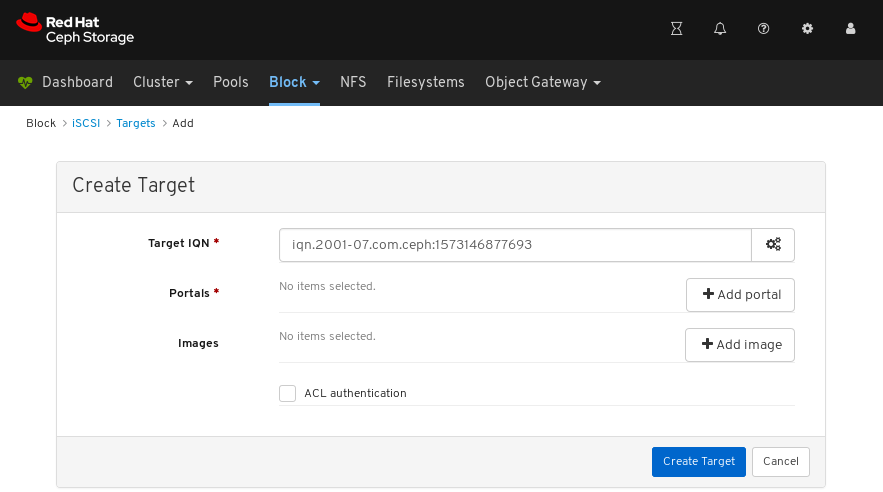
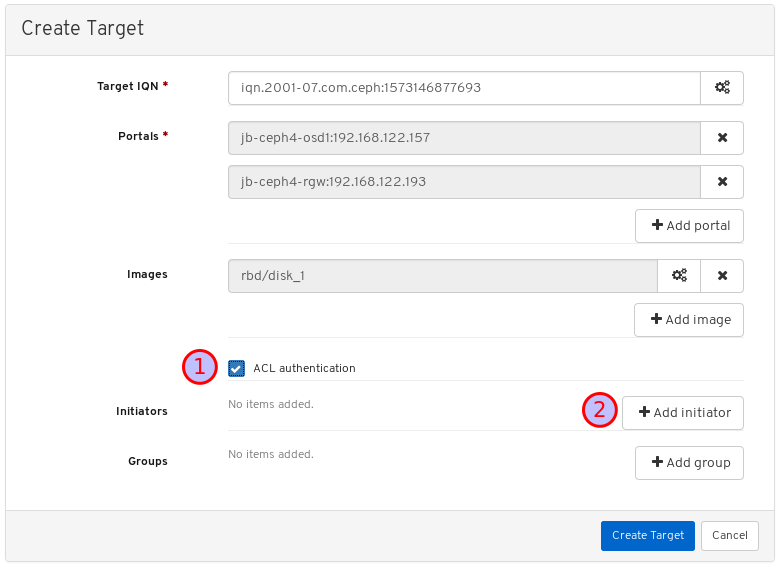
Optional: Modify the Target IQN.

Optional: Set advanced settings for the target.
Click the gear to set advanced settings for the target.

Set advanced settings in the Advanced Settings dialog window.
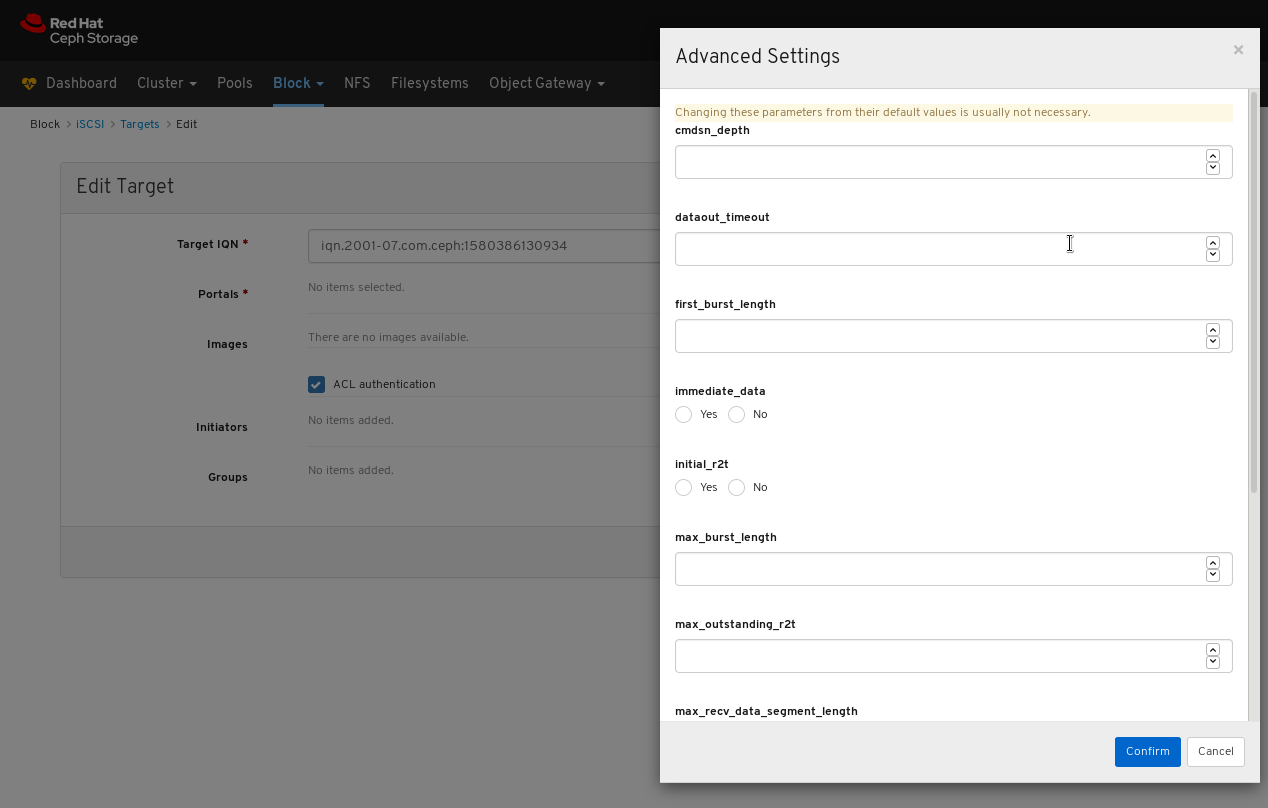
- Click Confirm to save the settings.
Click the Add portal button and select the first of at least two gateways:
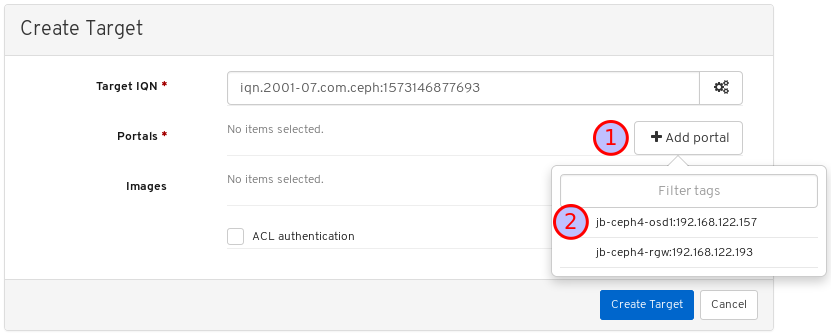
Click the Add portal button and select the second of at least two gateways:
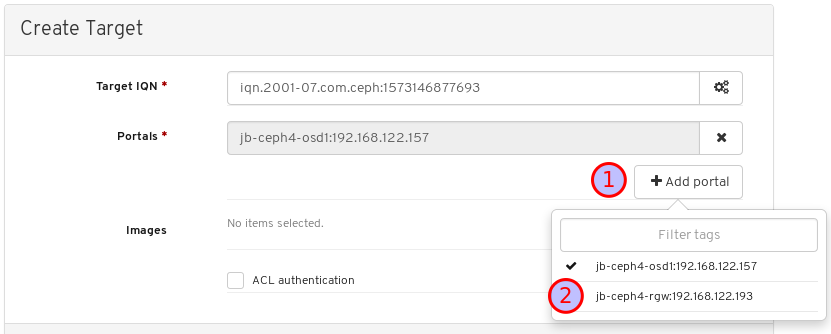
Repeat this step for any additional gateways.
Click the Add image button and select an image to be exported by the target:
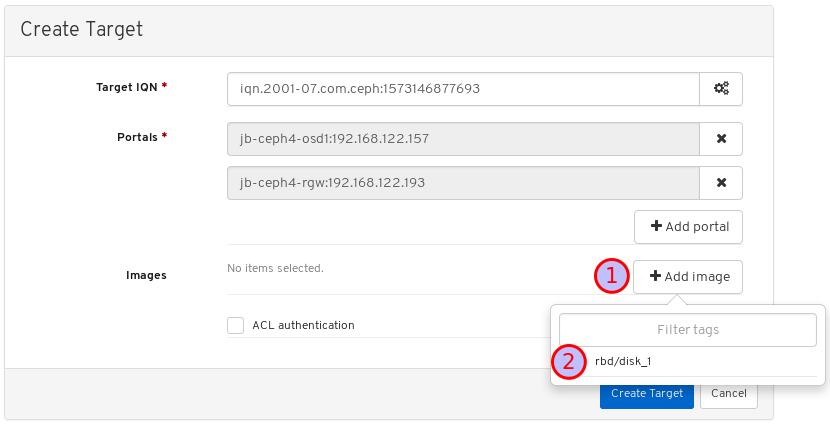
Repeat this step for any additional images.
Optional: Modify the Images.
Click the gear to the right of the image

Modify image settings in the Configure dialog window:
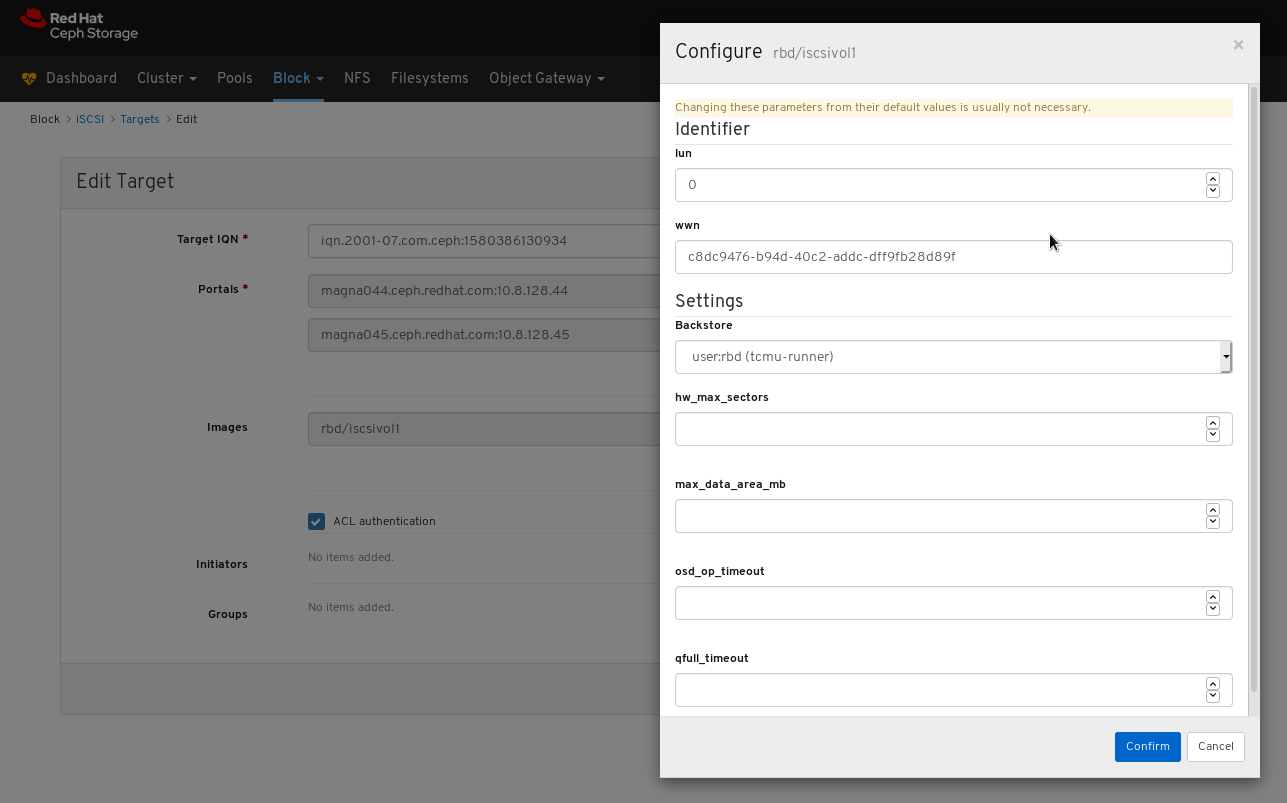
- Click Confirm to save the settings.
Click the ACL authentication box and then click the Add initiator button:
Enter the IQN from your client in the first text box:
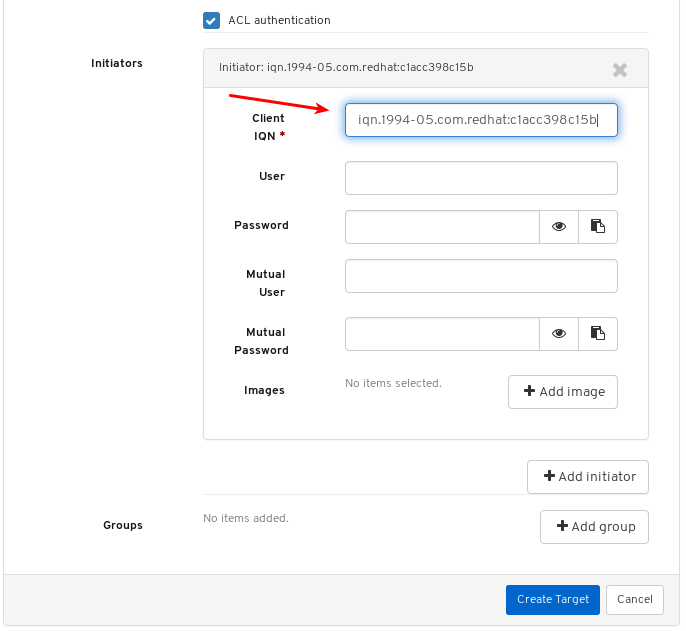
Retrieve the client IQN from the system where the initiator software runs. See Configuring the iSCSI initiator in the Block Device Guide for more information.
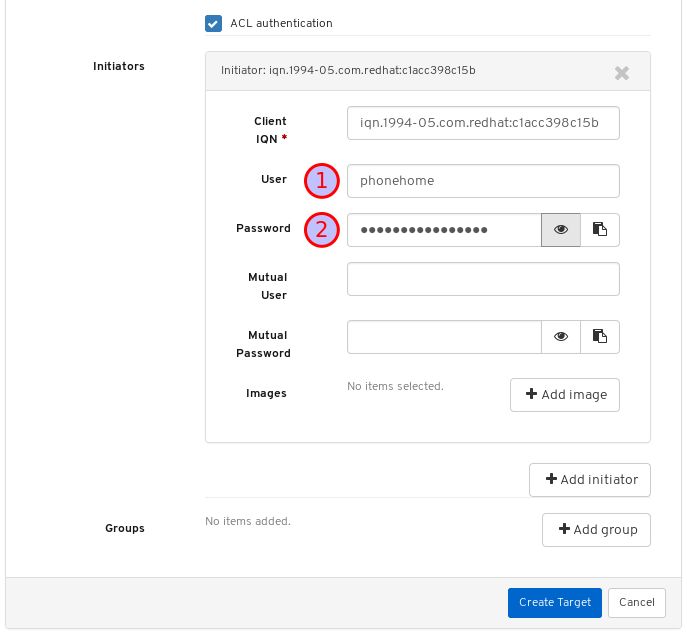
Enter a user name and password details for the target:
Click Add image and select an image:

Repeat this step for any additional images.
Finish the procedure by clicking the Create Target button:

Verify the target was added by looking for it on the Targets page.
To locate the Targets page, follow the procedure Viewing iSCSI targets in the Dashboard guide.
Additional Resources
- For information on how to install the Ceph iSCSI Gateway, see Installing the iSCSI gateway in the Block Device Guide.
- For information on how to add iSCSI gateways to the dashboard, see Manually adding iSCSI gateways to the dashboard in the Dashboard Guide.
- For information on how to enable the dashboard iSCSI feature see Enabling the dashboard iSCSI feature in the dashboard in the Dashboard Guide.
- For information on how to create a pool with the RBD application enabled, see Creating Block Device Pools in the Block Device Guide
- For information on how to create images see Creating block device images in the Block Device Guide.
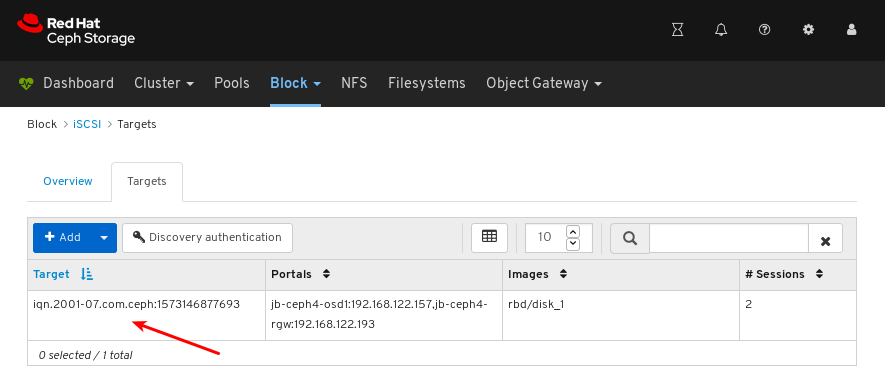
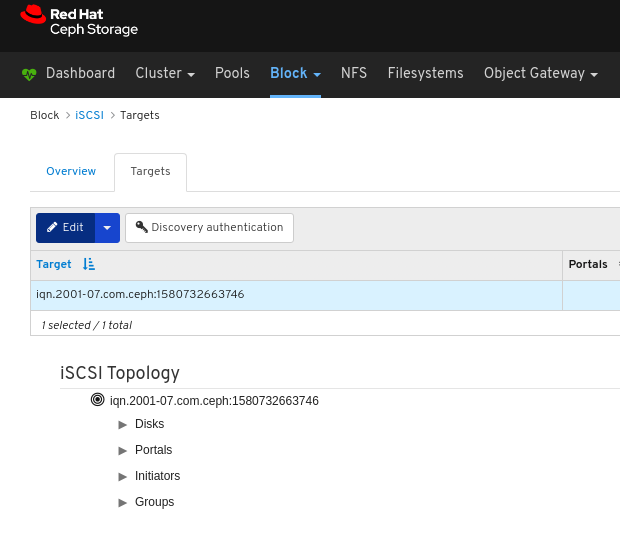
9.4.5. Viewing iSCSI targets
The dashboard allows you to view iSCSI targets.
Prerequisites
- A running Red Hat Ceph Storage cluster.
- Dashboard is installed.
- The Ceph iSCSI gateway is installed.
- An iSCSI target is created.
Procedure
- Log in to the Dashboard.
On the navigation bar, click Block and then click iSCSI:

Towards the upper left corner of the page, click the Targets tab:

To view details about a target, click on its row:
You can see the iSCSI topology, including whether an initiator is logged in:
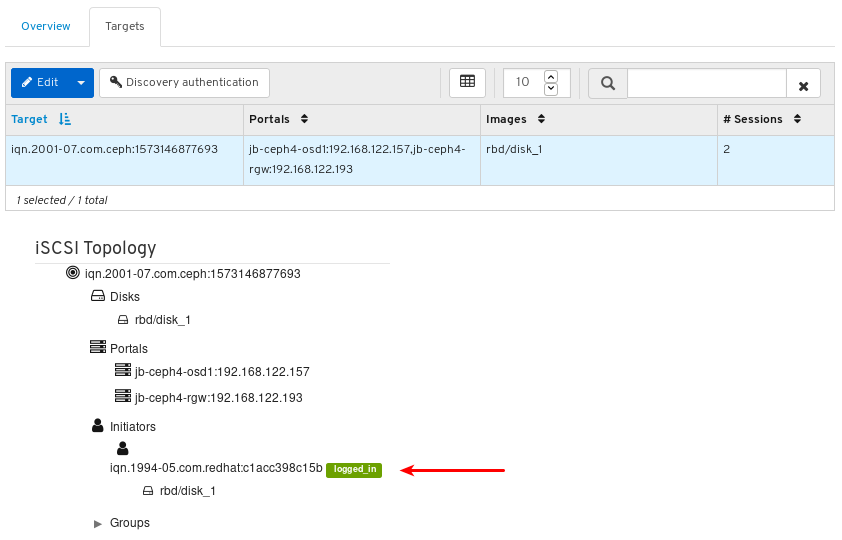
Click an object to view detailed information about it:
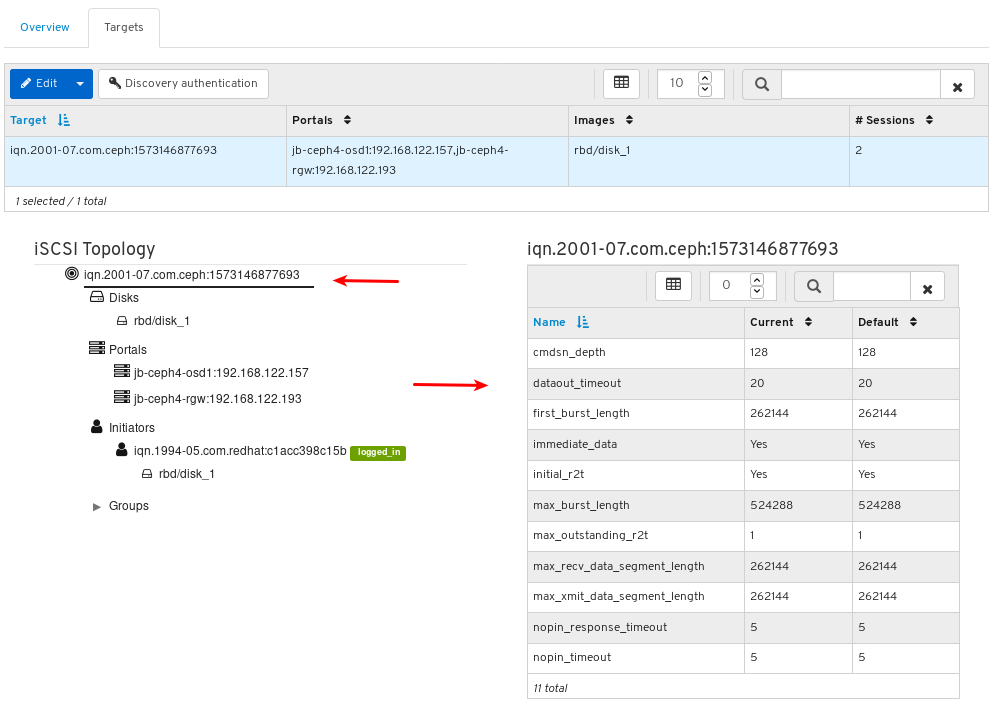
Note: Only some objects display detailed information when clicked.
Additional Resources
- For information on how to install the Ceph iSCSI gateway, see Installing the iSCSI gateway in the Block Device Guide.
- For information on how to create iSCSI targets in dashboard, see Creating iSCSI targets in the Dashboard guide.
9.4.6. Editing iSCSI targets
The dashboard allows you to edit iSCSI targets.
Prerequisites
- A running Red Hat Ceph Storage cluster.
- Dashboard is installed.
- The Ceph iSCSI gateway is installed with at least two gateways.
- iSCSI gateways are added to the dashboard.
- The dashboard iSCSI feature is enabled.
- A replicated pool with the RBD application enabled.
- An erasure coded pool with the RBD application enabled.
- An iSCSI target is created.
Procedure
- Log in to the Dashboard.
- On the navigation bar, click Block.
Click iSCSI:
Towards the upper left corner of the page, click the Targets tab:
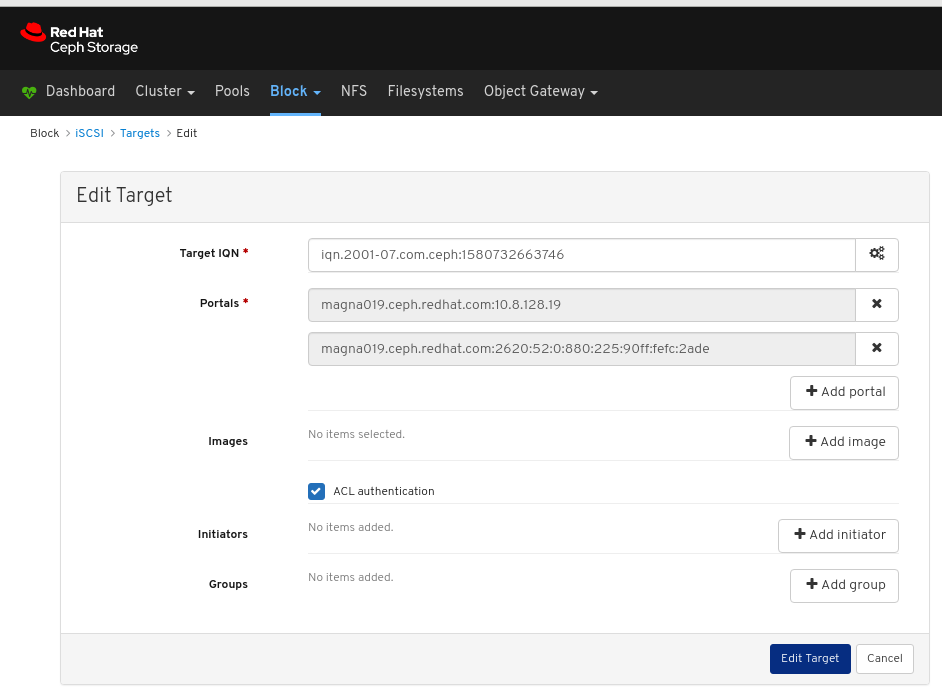
To edit a target, click on its row:
Towards the upper left corner of the page, click the Edit button.
Edit the parameters and click the Edit Target button.
Verify the target was edited by looking for it on the Targets page.
To locate the Targets page, follow the procedure Viewing iSCSI targets in the Dashboard guide.
Additional Resources
- For information on how to install the Ceph iSCSI Gateway, see Installing the iSCSI gateway in the Block Device Guide.
- For information on how to add iSCSI gateways to the dashboard, see Manually adding iSCSI gateways to the dashboard in the Dashboard Guide.
- For information on how to enable the dashboard iSCSI feature see Enabling the dashboard iSCSI feature in the dashboard in the Dashboard Guide.
- For information on how to create a pool with the RBD application enabled, see Creating Block Device Pools in the Block Device Guide
- For information on how to create images see Creating block device images in the Block Device Guide.
9.4.7. Deleting iSCSI targets
The dashboard allows you to delete iSCSI targets.
Prerequisites
- A running Red Hat Ceph Storage cluster.
- Dashboard is installed.
- The Ceph iSCSI gateway is installed with at least two gateways.
- iSCSI gateways are added to the dashboard.
- The dashboard iSCSI feature is enabled.
- An iSCSI target is created.
- Disconnect all iSCSI Initiators. See Disconnecting iSCSI initiators.
Procedure
- Log in to the Dashboard.
- On the navigation bar, click Block.
Click iSCSI:
Towards the upper left corner of the page, click the Targets tab:
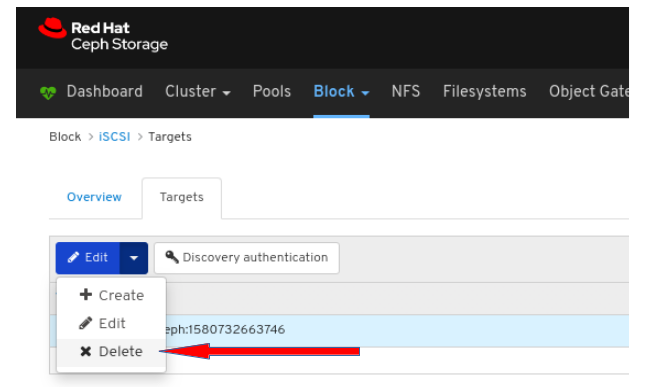
To delete a target, click on its row:
- Towards the upper left corner of the page, click the Edit drop down.
From the drop-down, select Delete:
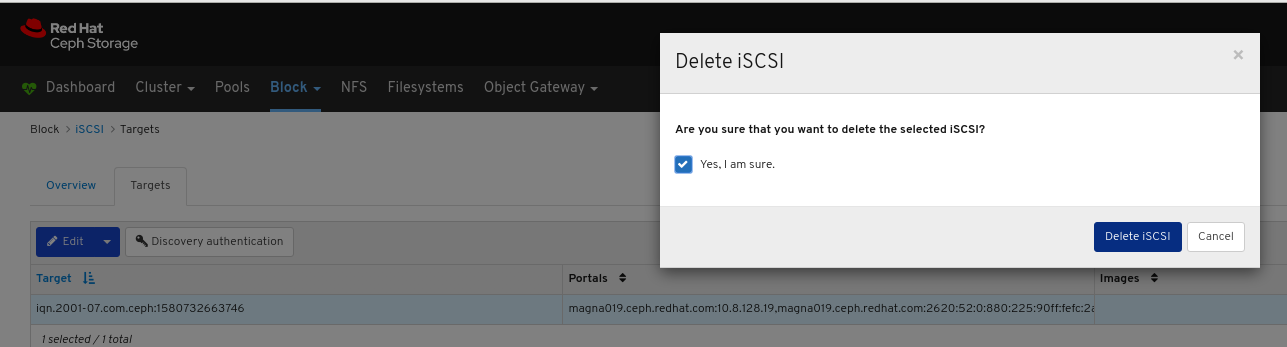
Click the Yes, I am sure box and then Click Delete iSCSI to save the settings.
Additional Resources
- For information on how to install the Ceph iSCSI Gateway, see Installing the iSCSI gateway in the Block Device Guide.
- For information on how to add iSCSI gateways to the dashboard, see Manually adding iSCSI gateways to the dashboard in the Dashboard Guide.
- For information on how to disconnect iSCSI initiators see Disconnecting iSCSI initiators in the Block Device Guide.
9.4.8. Setting Discovery Authentication
The dashboard allows Discovery Authentication by using CHAP/CHAP_MUTUAL.
Prerequisites
- A running Red Hat Ceph Storage cluster.
- Dashboard is installed.
- The Ceph iSCSI gateway is installed with at least two gateways.
- iSCSI gateways are added to the dashboard.
- The dashboard iSCSI feature is enabled.
- A replicated pool with the RBD application enabled.
- An erasure coded pool with the RBD application enabled.
Procedure
- Log in to the Dashboard.
- On the navigation bar, click Block.
Click iSCSI:
Towards the upper left corner of the page, click the Targets tab.
Towards the upper left corner of the page, click the Discovery authentication button.

in Discovery Authentication window, provide the details and then Click the Submit button.

9.5. Quality of Service configuration
As a storage administrator, you can use Quality of Service (QoS) limits to prioritize or deprioritize the performance of pools or images so all images get the resources they need to meet specific business needs.
9.5.1. Prerequisites
- A running Red Hat Ceph Storage cluster.
- Dashboard is installed.
9.5.2. Configuring Quality of Service on an existing image
As a storage administrator, you can use Quality of Service (QoS) limits to priortize or deprioritize the performance of an existing image.
Prerequisites
- A running Red Hat Ceph Storage cluster.
- Dashboard is installed.
- A replicated pool with the RBD application enabled.
- An erasure coded pool with the RBD application enabled.
- An existing image.
Procedure
- Log in to the dashboard.
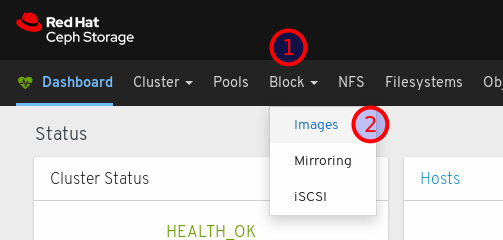
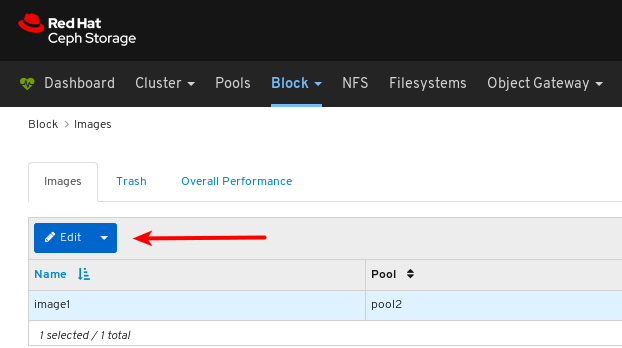
On the navigation bar, click Block and then click Images:
Click the row of an image to select it for editing:

Click the Edit button:
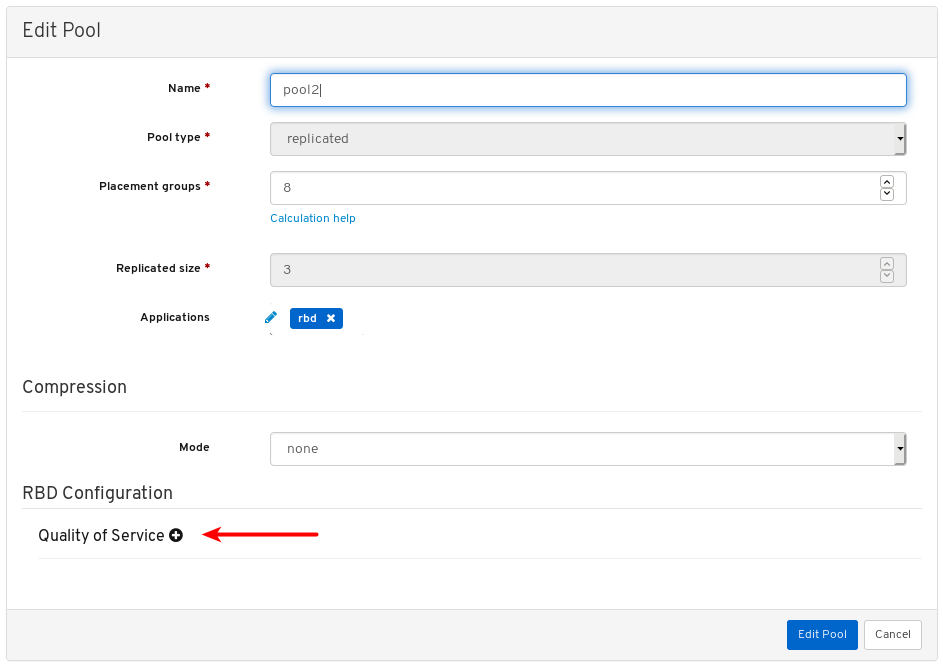
Click Advanced towards the bottom right corner of the dialog:
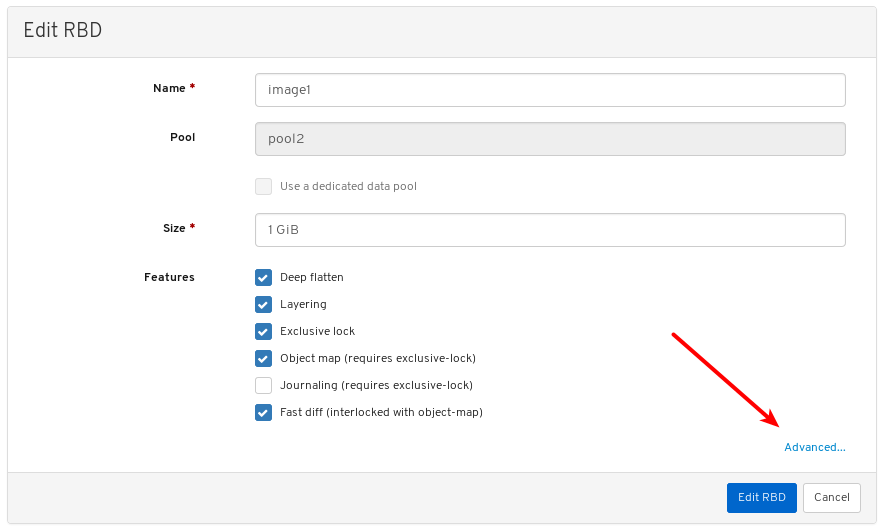
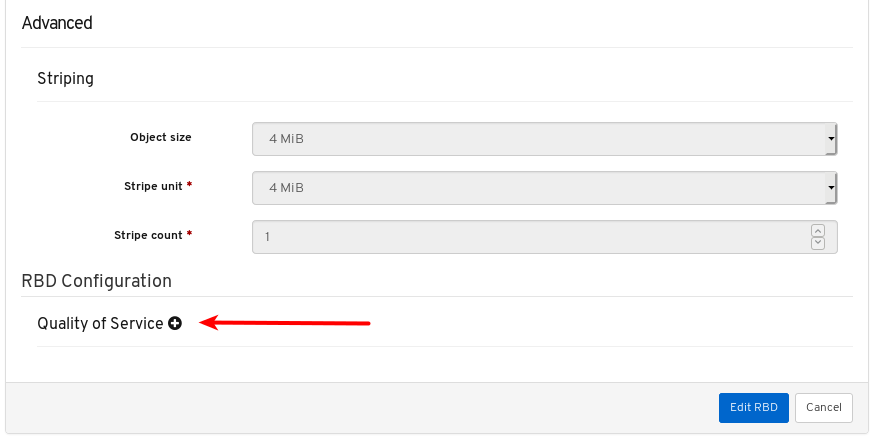
Click the plus symbol next to Quality of Service to open the QoS settings:
Optional: Click the question mark symbol next to an individual setting to find out more about it.
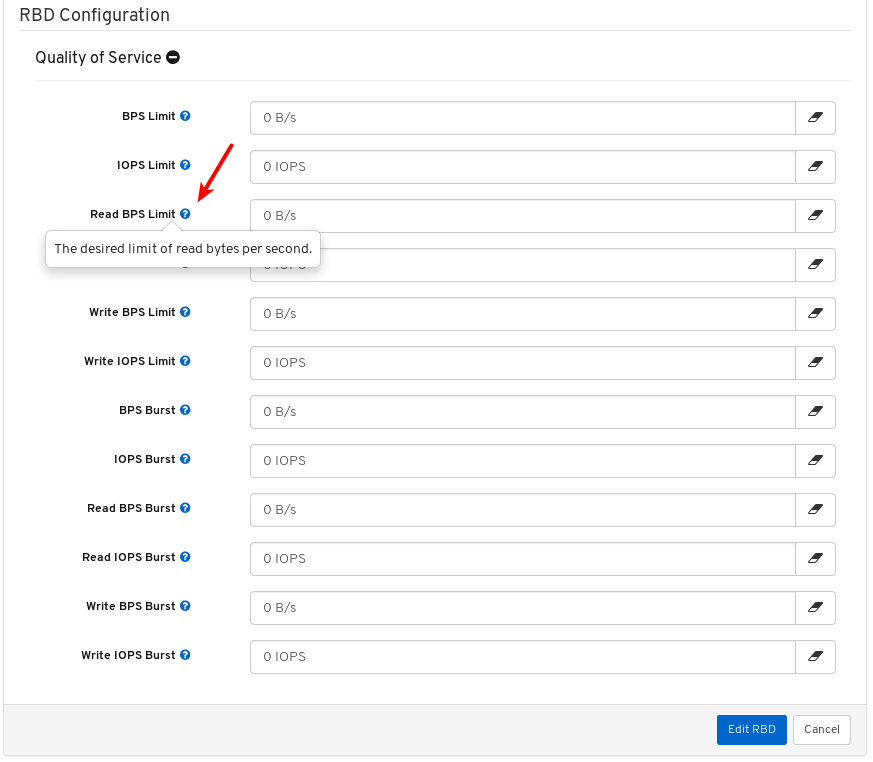
Enter or edit values for the QoS settings you want to change:
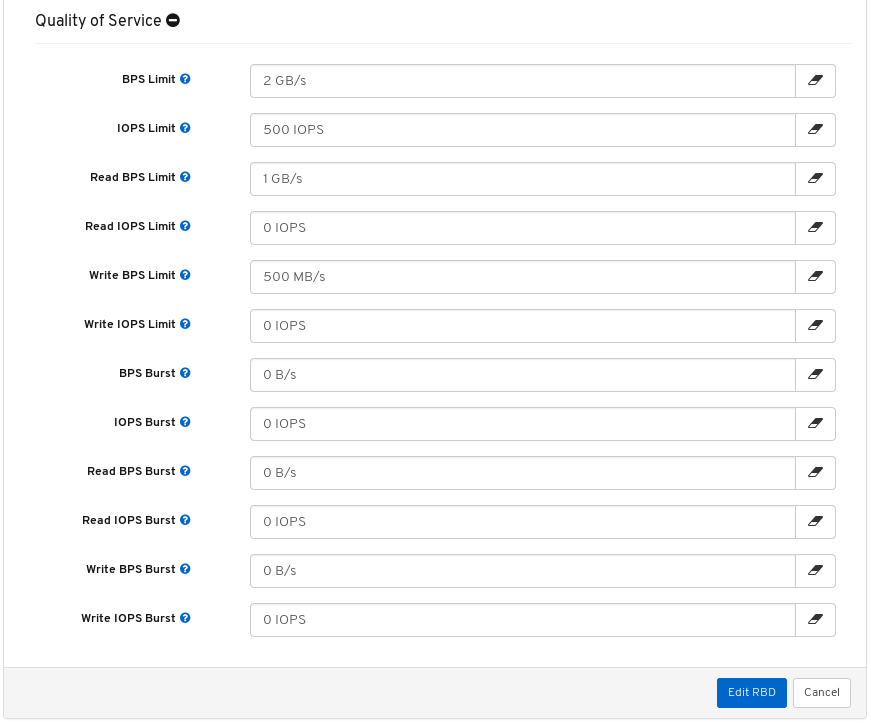
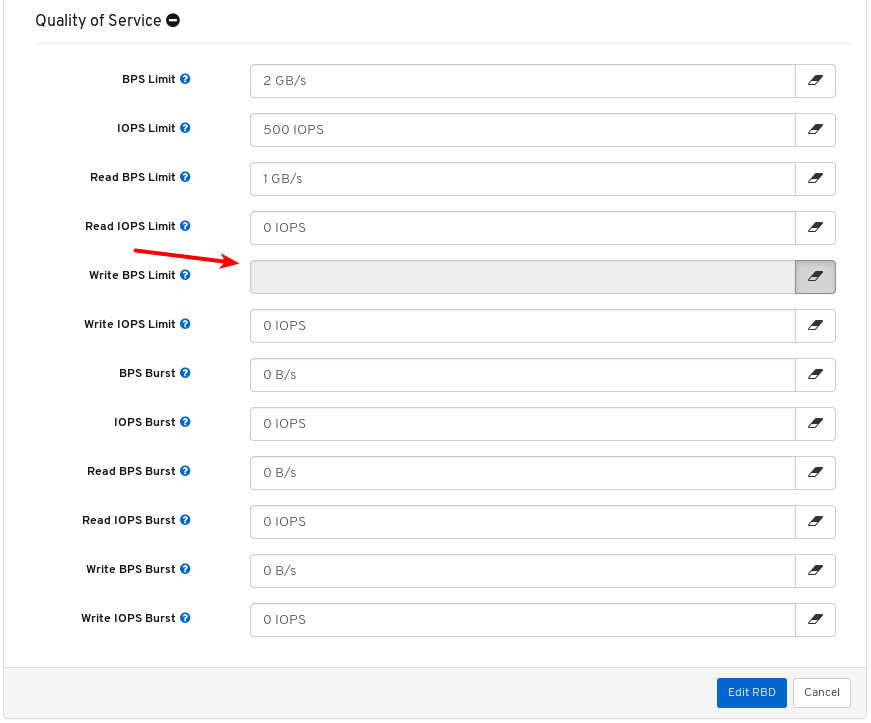
Optional: Click the eraser symbol for any setting to remove the local value and inherit the value from the parent pool or global configuration.

The field for the setting is disabled to indicate it is inheriting the value from the parent.
Click the Edit button to save the changes.

9.5.3. Configuring Quality of Service on an existing pool
As a storage administrator, you can configure Quality of Service (QoS) on an existing pool.
Prerequisites
- A running Red Hat Ceph Storage cluster.
- Dashboard is installed.
- A replicated pool with the RBD application enabled.
- An erasure coded pool with the RBD application enabled.
Procedure
- Log in to the dashboard.
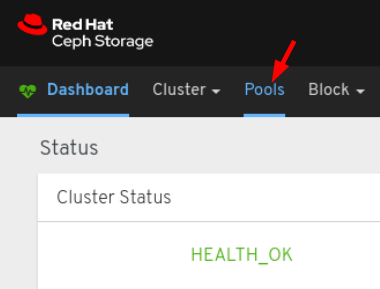
On the navigation bar, click Pools.
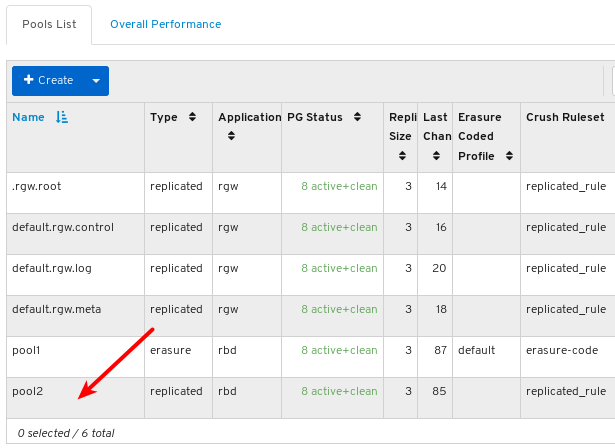
Click the row of a replicated pool with the RBD application to select it for editing:
Click the Edit button:

Click the plus symbol next to Quality of Service to open the QoS settings:
Optional: Click the question mark symbol next to an individual setting to find out more about it.

Enter or edit values for the QoS settings you want to change:

Optional: Click the eraser symbol for any setting to remove the local value and inherit the value from the parent global configuration.

The field for the setting is disabled to indicate it is inheriting the value from the parent.

Click the Edit button to save the changes.

9.5.4. Configuring Quality of Service when creating an image
As a storage administrator, you can configure Quality of Service (QoS) limits when creating an image.
Prerequisites
- A running Red Hat Ceph Storage cluster.
- Dashboard is installed.
- A replicated pool with the RBD application enabled.
- An erasure coded pool with the RBD application enabled.
Procedure
- Log in to the dashboard.
On the navigation bar, click Block and then click Images:
Click the Create button:

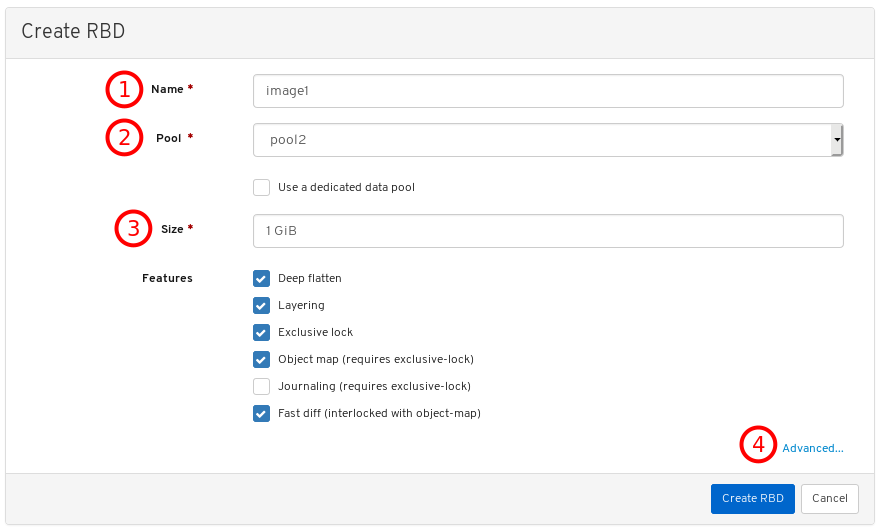
At 1, set the name, at 2, set the pool, at 3, set the size, and at 4, click Advanced.
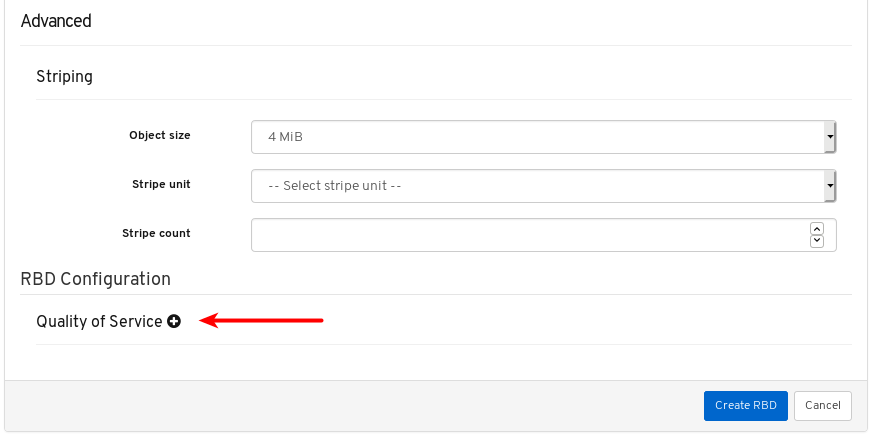
Click the plus symbol next to Quality of Service to open the QoS settings:
Optional: Click the question mark symbol next to an individual setting to find out more about it.

Enter or edit values for the QoS settings you want to change:

Optional: Click the eraser symbol for any setting to remove the local value and inherit the value from the parent pool configuration.

The field for the setting is disabled to indicate it is inheriting the value from the parent.

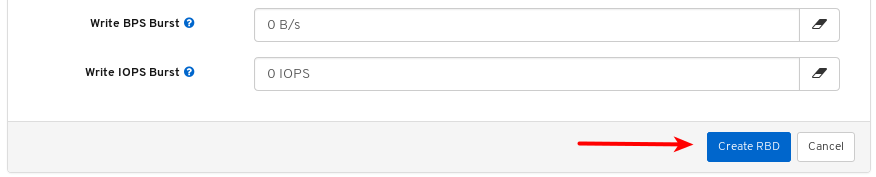
Click the Create RBD button:
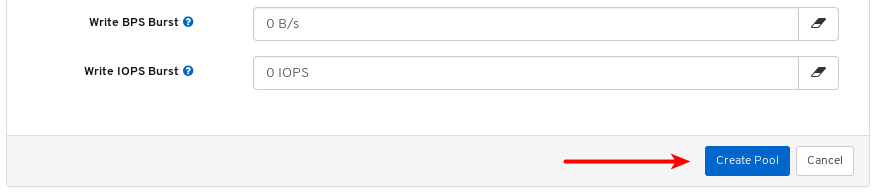
9.5.5. Configuring Quality of Service when creating a pool
As a storage administrator, you can configure Quality of Service (QoS) when creating a pool.
Prerequisites
- A running Red Hat Ceph Storage cluster.
- Dashboard is installed.
- A replicated pool with the RBD application enabled.
- An erasure coded pool with the RBD application enabled.
Procedure
- Log in to the dashboard.
On the navigation bar, click Pools.
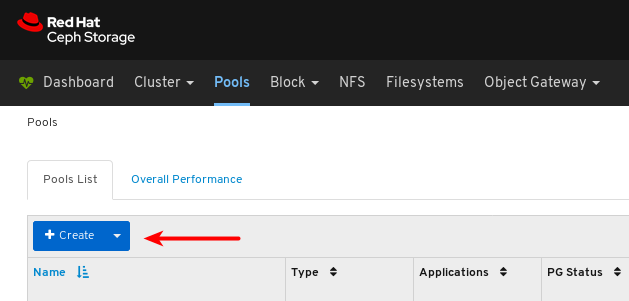
Click the Create button towards the top left corner of the page:
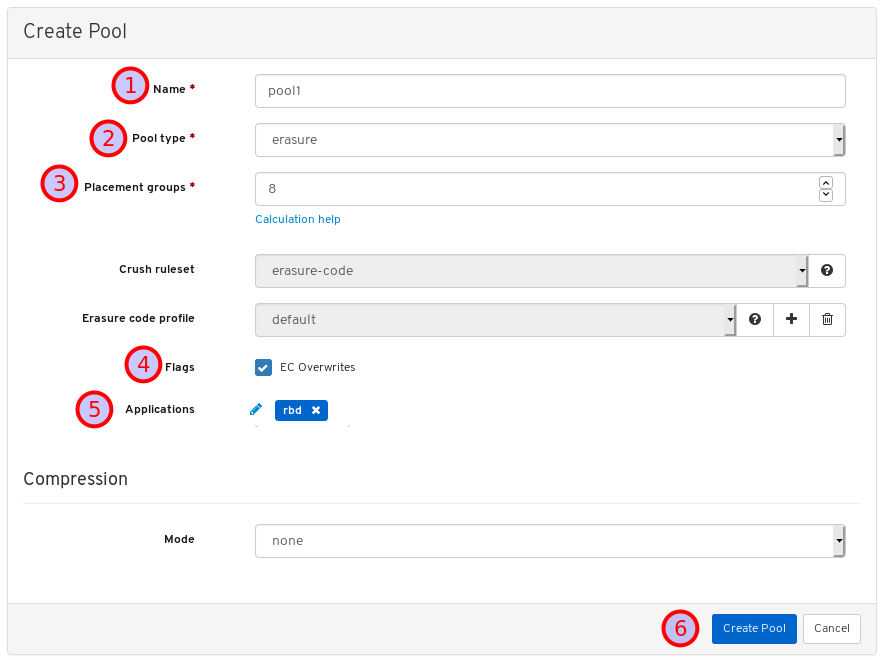
In the dialog box, at 1, set the pool name, at 2, set the pool type to erasure, at 3, set the number of placement groups, at 4, enable EC Overwrites, at 5, set the rbd application, finally, at 6, click Create Pool.
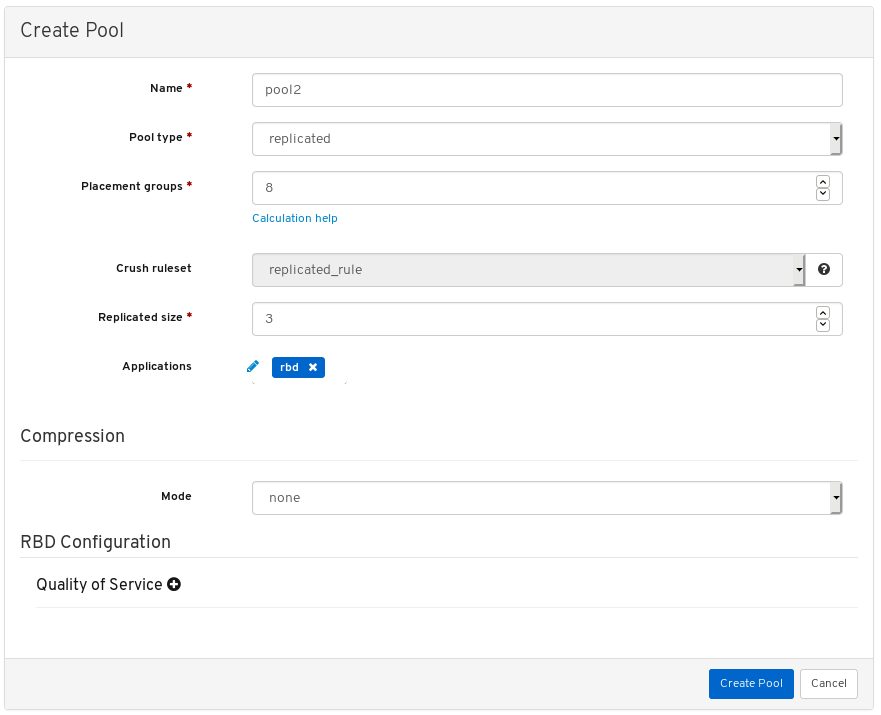
Create another pool but this time set its type to replicated:
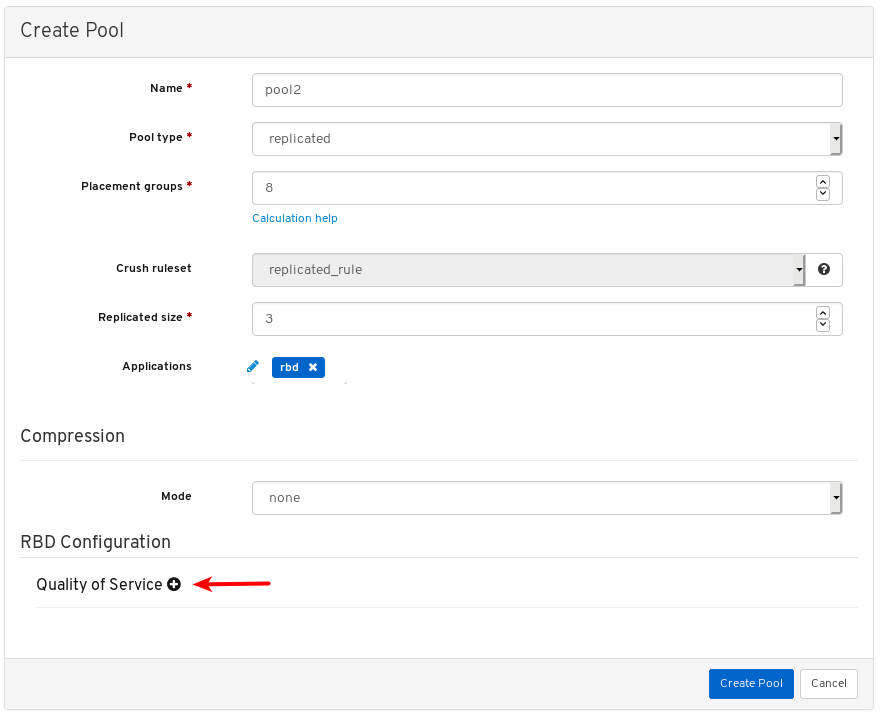
Click the plus symbol next to Quality of Service to open the QoS settings:
Optional: Click the question mark symbol next to an individual setting to find out more about it.

Enter or edit values for the QoS settings you want to change:

Optional: Click the eraser symbol for any setting to remove the local value and inherit the value from the parent global configuration.

The field for the setting is disabled to indicate it is inheriting the value from the parent.

Click the Create Pool button:
9.5.6. Additional Resources
- For more information on block devices, see the Block Device guide.