Chapter 8. Object gateway
As a storage administrator, the object gateway functions of the dashboard allow you to manage and monitor the Ceph Object Gateway.
For example, monitoring functions allow you to view details about a gateway daemon such as its zone name, or performance graphs of GET and PUT rates. Management functions allow you to view, create, and edit both users and buckets.
Object gateway functions are divided between daemon functions, user functions, and bucket functions.
8.1. Prerequisites
- A running Red Hat Ceph Storage cluster.
- Dashboard is installed.
- Ceph Object Gateway is installed.
8.2. Object gateway daemon functions
As a storage administrator, the Red Hat Ceph Storage Dashboard allows you to view and monitor information about Ceph Object Gateway daemons.
8.2.1. Prerequisites
- A running Red Hat Ceph Storage cluster.
- Dashboard is installed.
- The Ceph Object Gateway is installed.
- Object gateway login credentials are added to the dashboard.
8.2.2. Viewing object gateway daemons
The dashboard allows you to view a list of all Ceph Object Gateway daemons.
Prerequisites
- A running Red Hat Ceph Storage cluster.
- Dashboard is installed.
- The Ceph Object Gateway is installed.
- Object gateway login credentials are added to the dashboard.
Procedure
- Log in to the Dashboard.
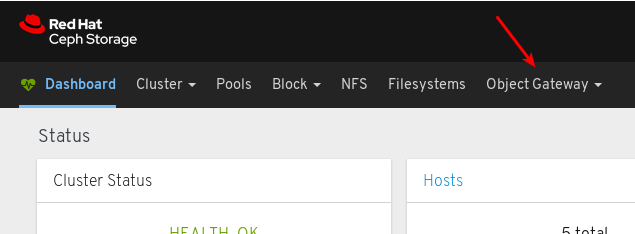
On the navigation bar, click Object Gateway.
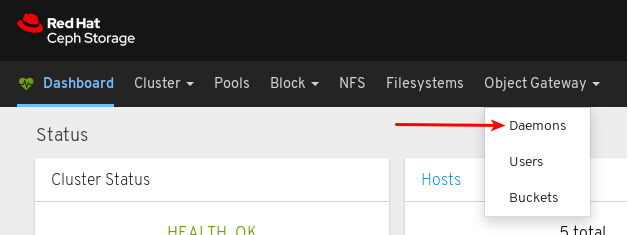
Click Daemons.
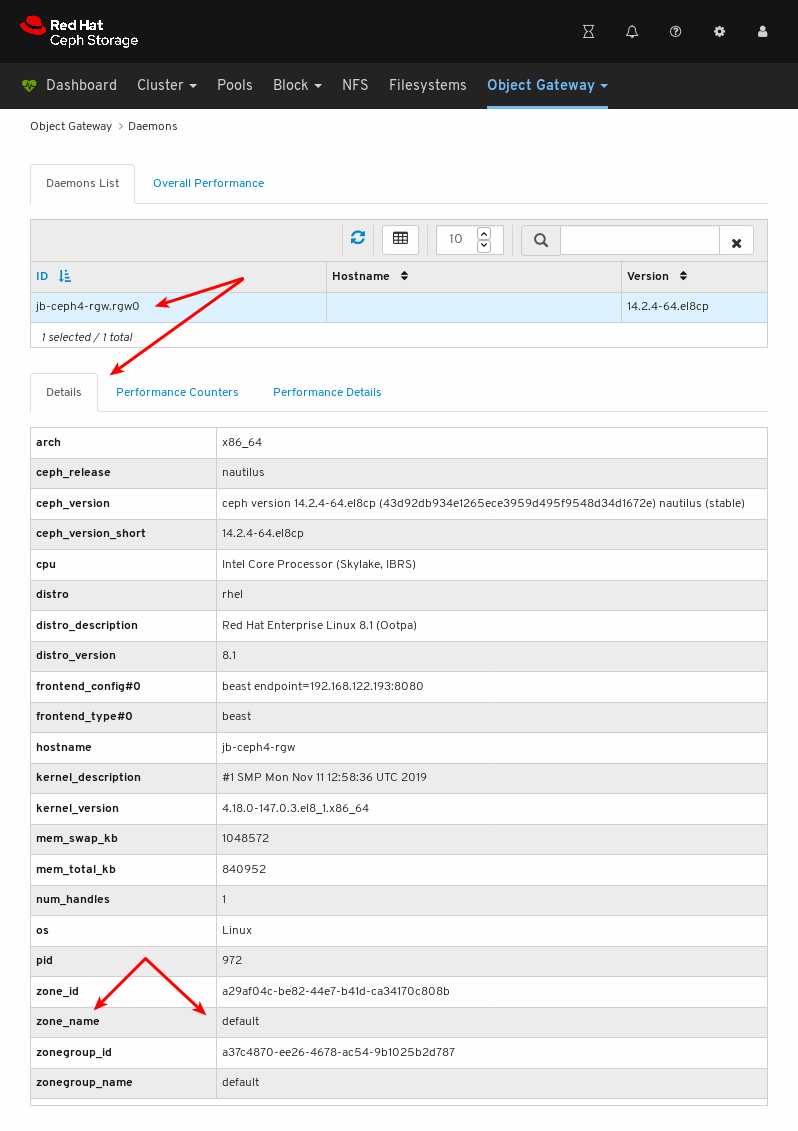
In the example below, you can see a daemon with the ID
jb-ceph4-rgw.rgw0in the Daemons List.To view details, select the daemon by clicking the row for
jb-ceph4-rgw.rgw0:You can see the zone name the daemon is serving is
default.
Additional Resources
- For information on how to install the Ceph Object Gateway, see Installing the Ceph Object Gateway in the Installation Guide.
- For information on how to add object gateway login credentials to the dashboard, see Adding object gateway login credentials to the dashboard in the Dashboard guide.
8.3. Object gateway user functions
As a storage administrator, the Red Hat Ceph Storage Dashboard allows you to view and manage Ceph Object Gateway users.
8.3.1. Prerequisites
- A running Red Hat Ceph Storage cluster.
- Dashboard is installed.
- The Ceph Object Gateway is installed.
- Object gateway login credentials are added to the dashboard.
8.3.2. Viewing object gateway users
The dashboard allows you to view a list of all Ceph Object Gateway users.
Prerequisites
- A running Red Hat Ceph Storage cluster.
- Dashboard is installed.
- The Ceph Object Gateway is installed.
- Object gateway login credentials are added to the dashboard.
Procedure
- Log in to the Dashboard.
On the navigation bar, click Object Gateway.
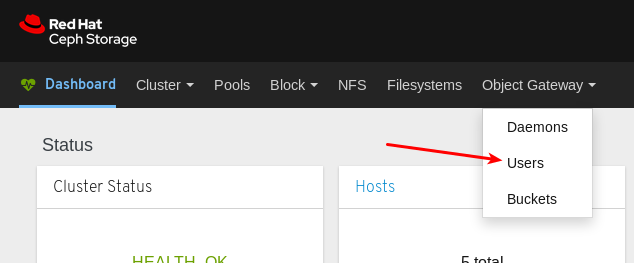
Click Users.
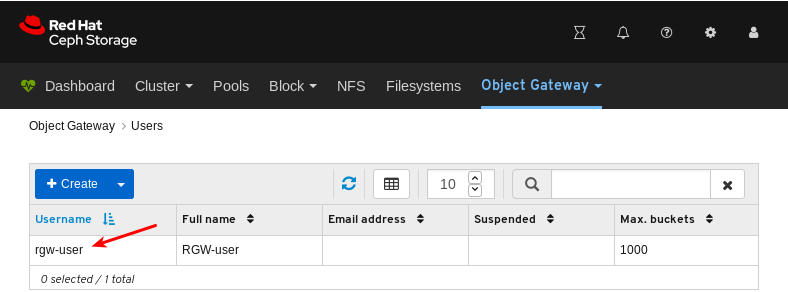
In the example below, you can see a user named
rgw-userin the table.To view details, select the user by clicking the row for
rgw-user:
Additional Resources
- For information on how to install the Ceph Object Gateway, see Installing the Ceph Object Gateway in the Installation Guide.
- For information on how to add object gateway login credentials to the dashboard, see Adding object gateway login credentials to the dashboard in the Dashboard guide.
- For more information on the Ceph Object Gateway, see the Object Gateway Configuration and Administration Guide.
8.3.3. Creating object gateway users
The dashboard allows you to create Ceph Object Gateway users.
Prerequisites
- A running Red Hat Ceph Storage cluster.
- Dashboard is installed.
- The Ceph Object Gateway is installed.
- Object gateway login credentials are added to the dashboard.
Procedure
- Log in to the Dashboard.
On the navigation bar, click Object Gateway.
Click Users.
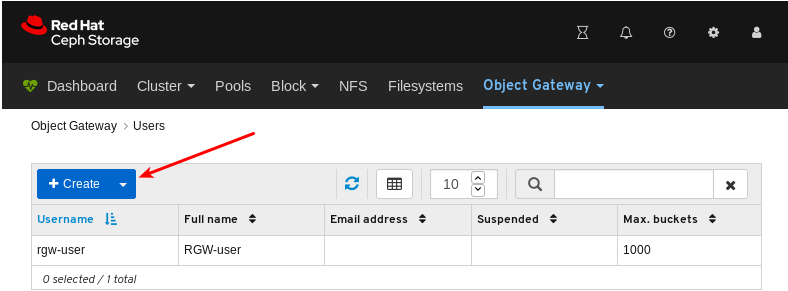
Click Create.
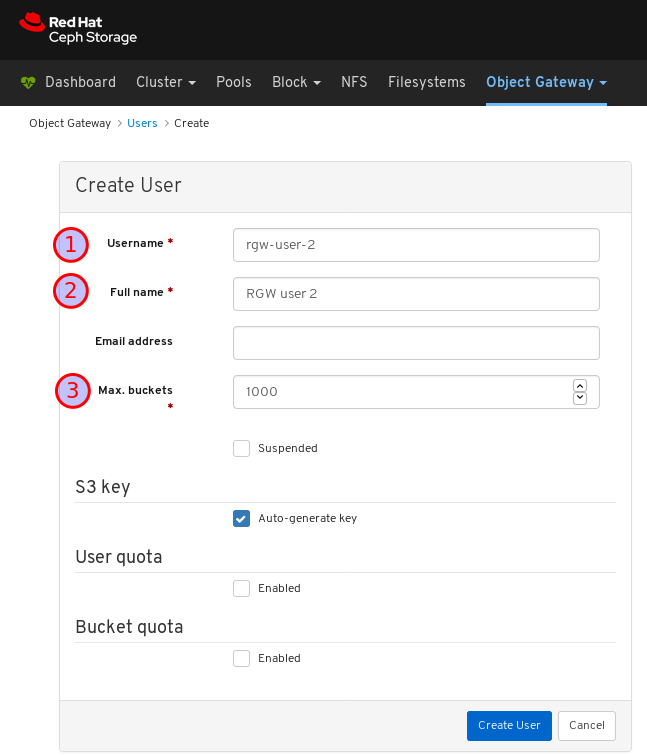
Set the user name, full name, and edit the maximum number of buckets if required.
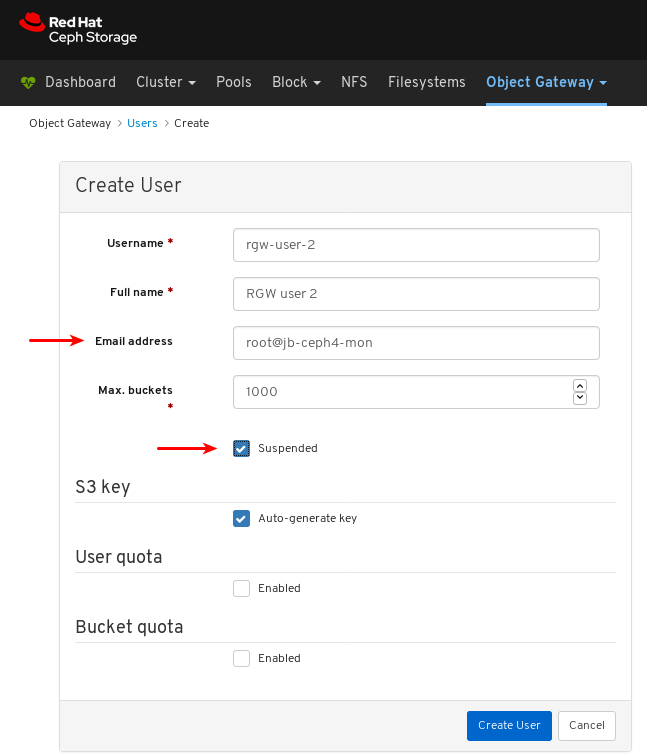
Optional: Set an email address or suspended status.
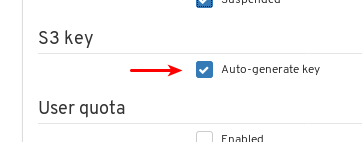
Optional: Set a custom access key and secret key by unchecking Auto-generate key.
Uncheck Auto-generate key:
Set the access key and secret key:
Optional: Set a user quota.
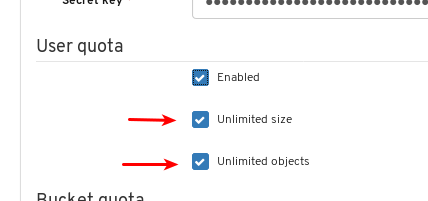
Check Enabled under User quota:
Uncheck Unlimited size or Unlimited objects:
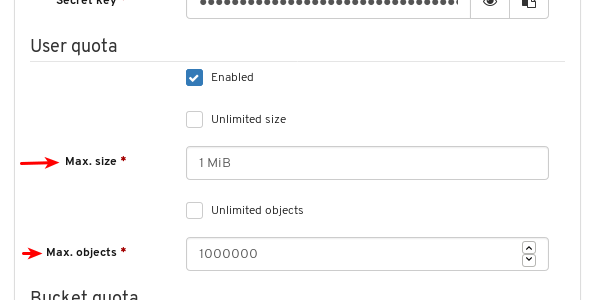
Enter the required values for Max. size or Max. objects:
Optional: Set a bucket quota.
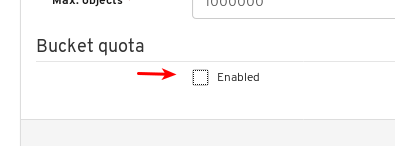
Check Enabled under Bucket quota:
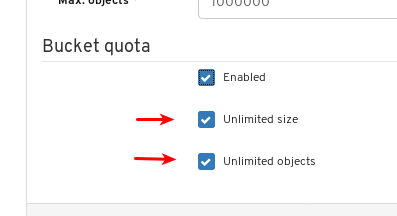
Uncheck Unlimited size or Unlimited objects:
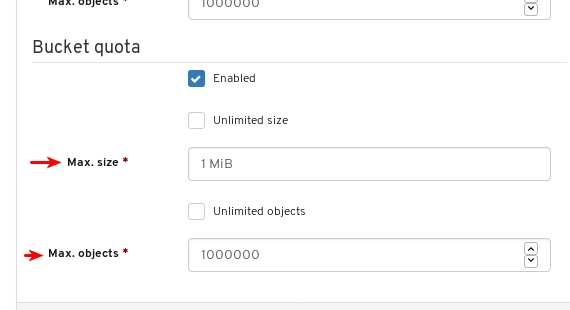
Enter the required values for Max. size or Max. objects:
Finalize the user creation by clicking Create User.
Verify the user creation was successful. A notification confirms the user was created and the user can be seen in the table of users.
Additional Resources
- For information on how to install the Ceph Object Gateway, see Installing the Ceph Object Gateway in the Installation Guide.
- For information on how to add object gateway login credentials to the dashboard, see Adding object gateway login credentials to the dashboard in the Dashboard guide.
- For more information on the Ceph Object Gateway, see the Object Gateway Configuration and Administration Guide.
8.3.4. Editing object gateway users
The dashboard allows you to edit Ceph Object Gateway users.
Prerequisites
- A running Red Hat Ceph Storage cluster.
- Dashboard is installed.
- The Ceph Object Gateway is installed.
- Object gateway login credentials are added to the dashboard.
- A Ceph Object Gateway user created.
Procedure
- Log in to the Dashboard.
On the navigation bar, click Object Gateway:
Click Users:
To edit the user capabilities, click its row:
Select Edit In the Edit drop-down:
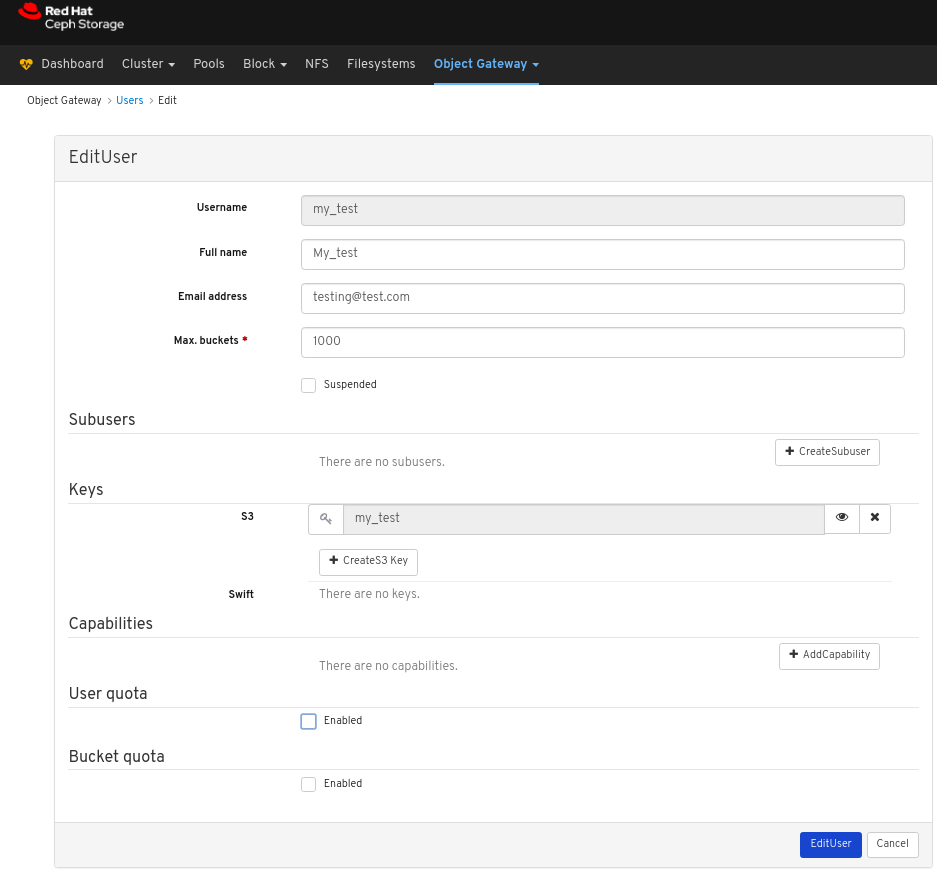
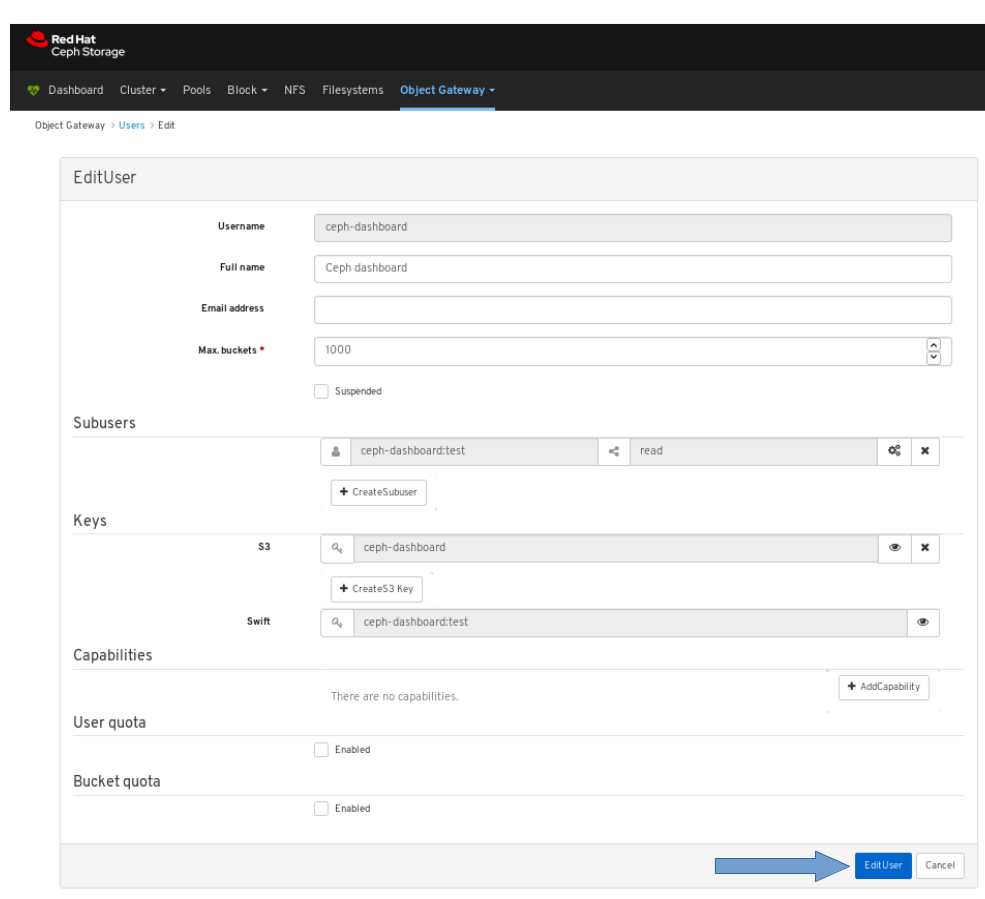
In the EditUser window, edit the required parameters and click the EditUser button:
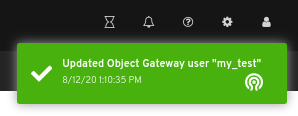
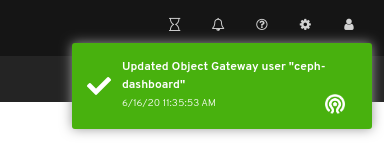
A notification towards the top right corner of the page indicates the user was updated successfully.
8.3.5. Deleting object gateway users
The dashboard allows you to delete Ceph Object Gateway users.
Prerequisites
- A running Red Hat Ceph Storage cluster.
- Dashboard is installed.
- The Ceph Object Gateway is installed.
- Object gateway login credentials are added to the dashboard.
- A Ceph Object Gateway user created.
Procedure
- Log in to the Dashboard.
On the navigation bar, click Object Gateway:
Click Users:
To delete the user, click its row:
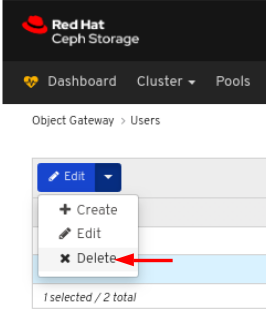
Select Delete In the Edit drop-down:
In the Delete User dialog window, Click the Yes, I am sure box and then Click Delete User to save the settings:
8.3.6. Creating object gateway subusers
A subuser is associated with a user of the S3 interface. The dashboard allows you to create Ceph Object Gateway subusers.
Prerequisites
- A running Red Hat Ceph Storage cluster.
- Dashboard is installed.
- The Ceph Object Gateway is installed.
- Object gateway login credentials are added to the dashboard.
- Object gateway user is created.
Procedure
- Log in to the Dashboard.
On the navigation bar, click Object Gateway.
Click Users from the drop-down menu.
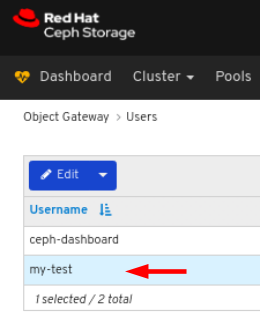
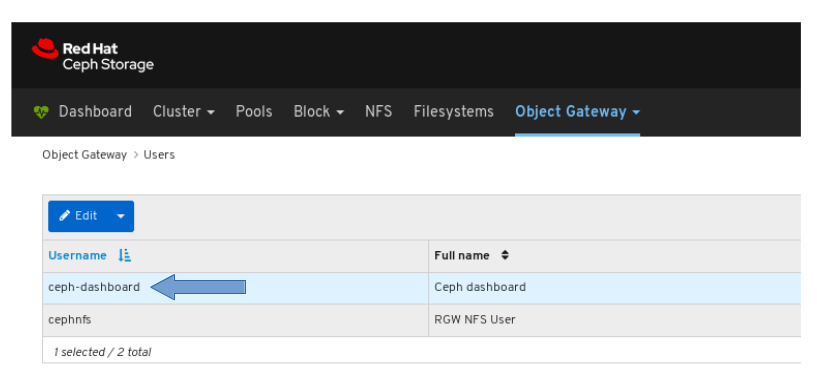
In the example below, you can see a user named
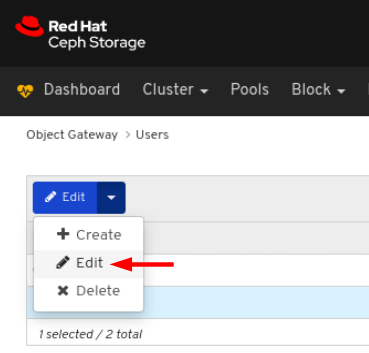
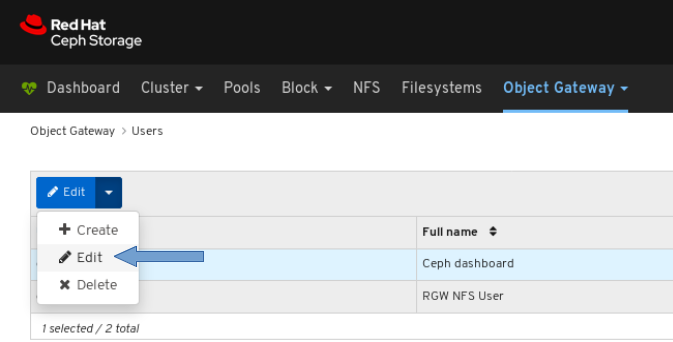
ceph-dashboardin the table. Select the user by clicking its row.Click Edit drop-down menu, and then select Edit.
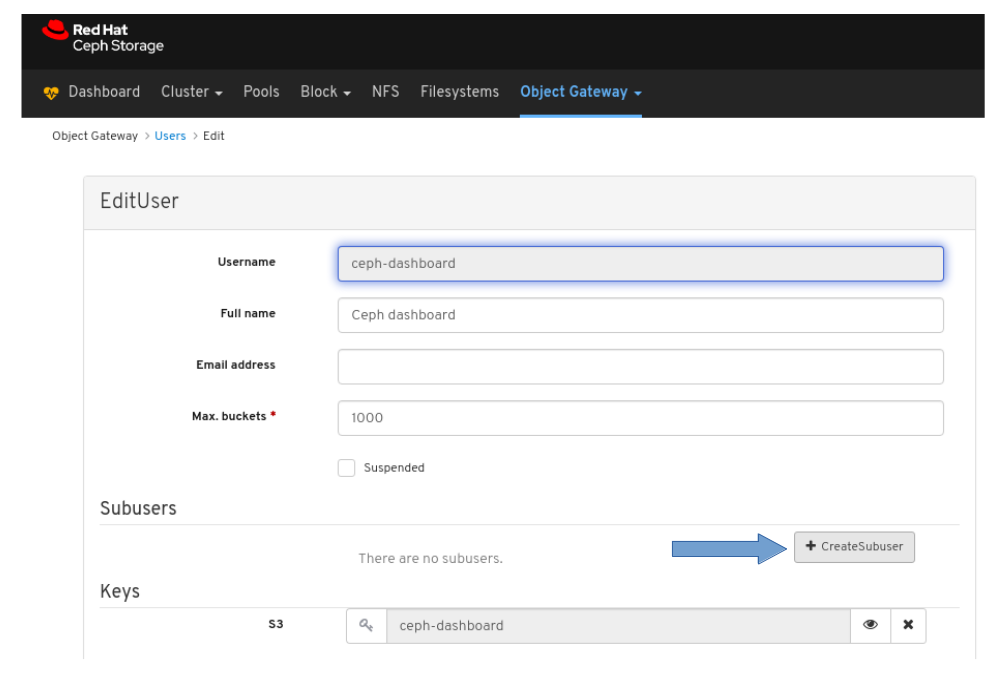
Click the +CreateSubuser button.
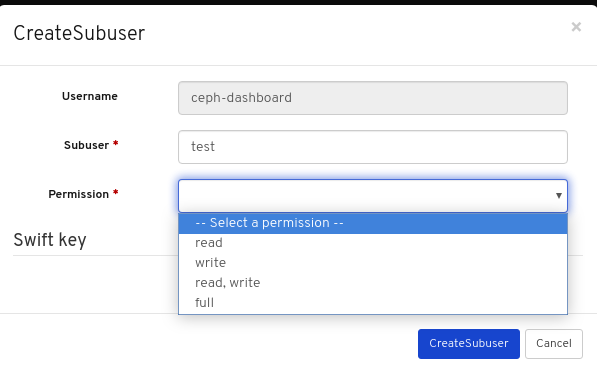
Enter a Subuser name and select the appropriate permissions.
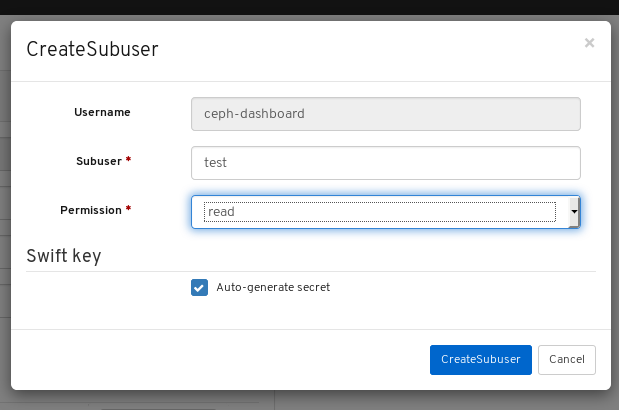
Click the Auto-generate secret box and then click the Create Subuser button.
NoteBy clicking Auto-generate-secret checkbox, the secret key for object gateway is generated automatically.
Click the Edit user button in the Edit User window.
Verify the subuser creation was successful. A notification towards the top right corner of the page pops up indicating that the Object Gateway user was updated successfully.
Additional Resources
- For information on how to install the Ceph Object Gateway, see the Installing the Ceph Object Gateway in the Red Hat Ceph Storage Installation Guide.
- For information on how to manually add object gateway login credentials to the dashboard, see the Manually adding object gateway login credentials to the dashboard in the Dashboard guide.
- For more information on the Ceph Object Gateway, see the Object Gateway Configuration and Administration Guide.
8.4. Object gateway bucket functions
As a storage administrator, the Red Hat Ceph Storage Dashboard allows you to view and manage Ceph Object Gateway buckets.
8.4.1. Prerequisites
- A running Red Hat Ceph Storage cluster.
- Dashboard is installed.
- The Ceph Object Gateway is installed.
- Object gateway login credentials are added to the dashboard.
8.4.2. Viewing object gateway buckets
The dashboard allows you to view and manage Ceph Object Gateway buckets.
Prerequisites
- A running Red Hat Ceph Storage cluster.
- Dashboard is installed.
- The Ceph Object Gateway is installed.
- Object gateway login credentials are added to the dashboard.
- An object gateway bucket is created.
Procedure
- Log in to the Dashboard.
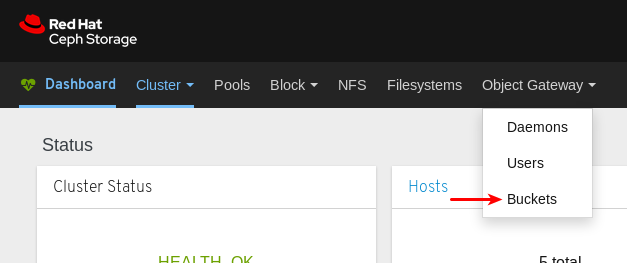
On the navigation bar, click Object Gateway.
Click Buckets.
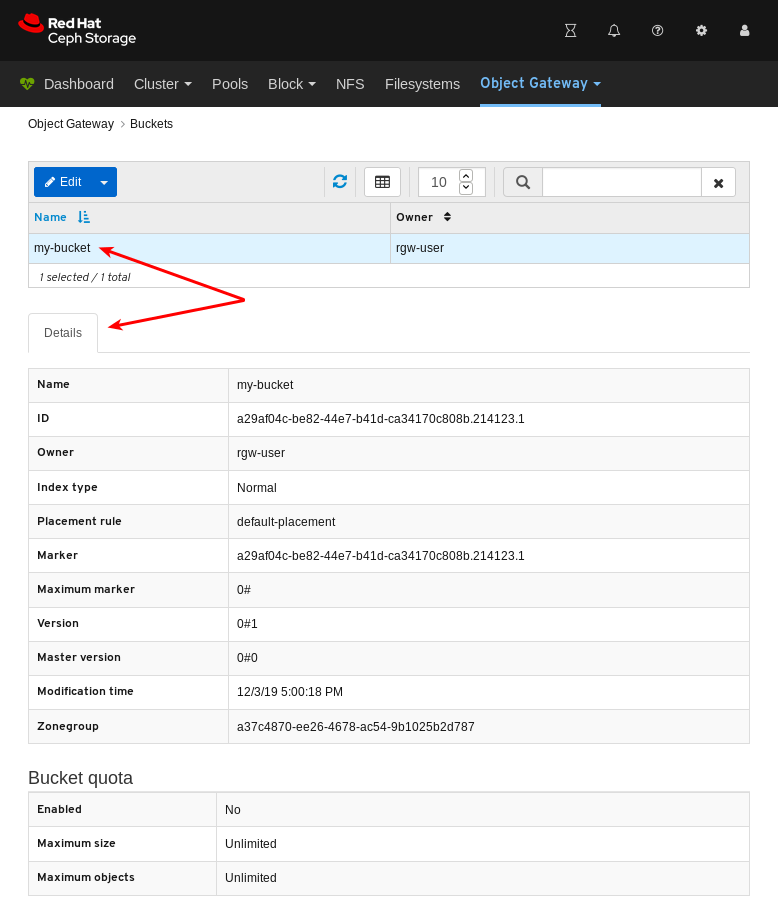
In the example below, you can see a bucket named
my-bucketin the table.To view details, select the bucket by clicking the row for
my-bucket.
Additional Resources
- For information on how to install the Ceph Object Gateway, see Installing the Ceph Object Gateway in the Installation Guide.
- For information on how to add object gateway login credentials to the dashboard, see Adding object gateway login credentials to the dashboard in the Dashboard guide.
- For more information on the Ceph Object Gateway, see the Object Gateway Configuration and Administration Guide.
8.4.3. Creating object gateway buckets
The dashboard allows you to create Ceph Object Gateway buckets.
Prerequisites
- A running Red Hat Ceph Storage cluster.
- Dashboard is installed.
- The Ceph Object Gateway is installed.
- Object gateway login credentials are added to the dashboard.
- An object gateway user that is not suspended is created.
Procedure
- Log in to the Dashboard.
On the navigation bar, click Object Gateway.
Click Buckets.
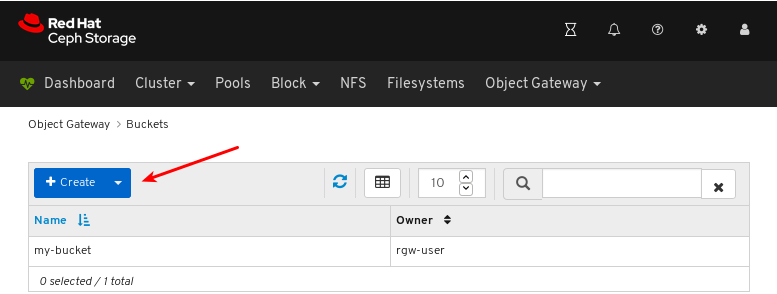
Click Create.
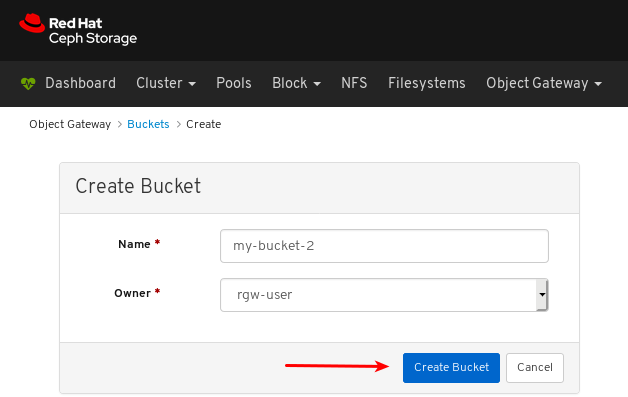
Enter a value for Name and select a user that is not suspended.
Click Create bucket.
Verify the bucket creation was successful. A notification confirms the bucket was created and the bucket can be seen in the table of buckets.
Additional Resources
- For information on how to install the Ceph Object Gateway, see Installing the Ceph Object Gateway in the Installation Guide.
- For information on how to add object gateway login credentials to the dashboard, see Adding object gateway login credentials to the dashboard in the Dashboard guide.
- For more information on the Ceph Object Gateway, see the Object Gateway Configuration and Administration Guide.
8.4.4. Editing object gateway buckets
The dashboard allows you to edit Ceph Object Gateway buckets.
Prerequisites
- A running Red Hat Ceph Storage cluster.
- Dashboard is installed.
- The Ceph Object Gateway is installed.
- Object gateway login credentials are added to the dashboard.
- A Ceph Object Gateway user that is not suspended is created.
- A Ceph Object Gateway bucket created.
Procedure
- Log in to the Dashboard.
On the navigation bar, click Object Gateway:
Click Buckets:
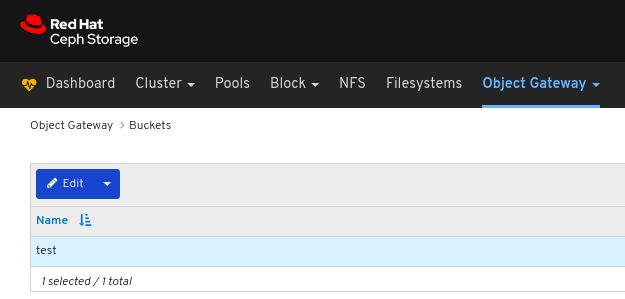
To edit the bucket, click its row:
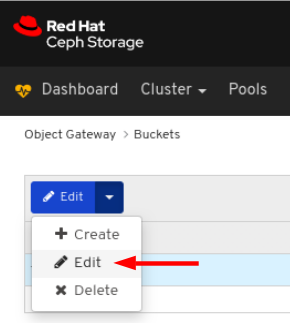
Select Edit In the Edit drop-down:
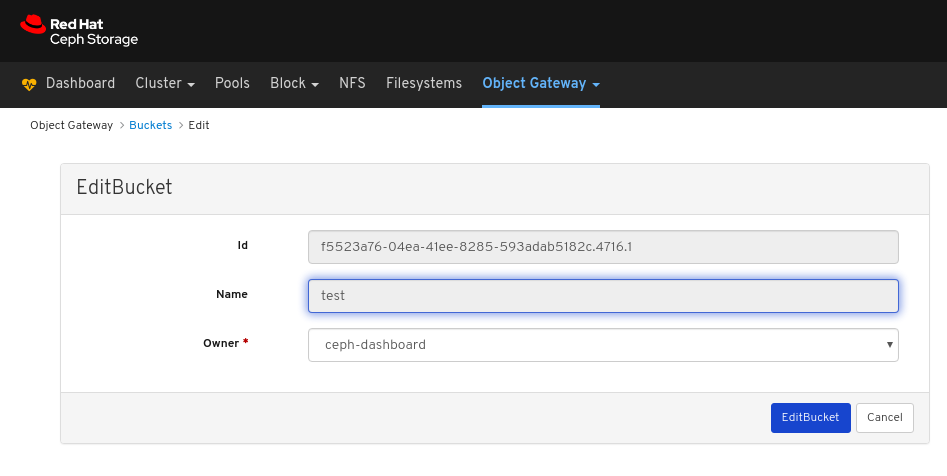
In the EditBucket window, edit the required parameters and click the EditBucket button:
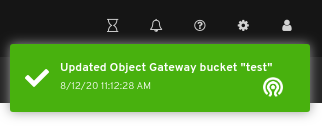
A notification towards the top right corner of the page indicates the bucket was updated successfully.
Additional Resources
- See the Installing the Ceph Object Gateway section in the Red Hat Ceph Storage Installation Guide for more information.
- See the Adding object gateway login credentials to the dashboard section in the Red Hat Ceph Storage Dashboard Guide for more information.
8.4.5. Deleting object gateway buckets
The dashboard allows you to delete Ceph Object Gateway buckets.
Prerequisites
- A running Red Hat Ceph Storage cluster.
- Dashboard is installed.
- The Ceph Object Gateway is installed.
- Object gateway login credentials are added to the dashboard.
- A Ceph Object Gateway user that is not suspended is created.
- A Ceph Object Gateway bucket created.
Procedure
- Log in to the Dashboard.
On the navigation bar, click Object Gateway:
Click Buckets:
To delete the bucket, click its row:
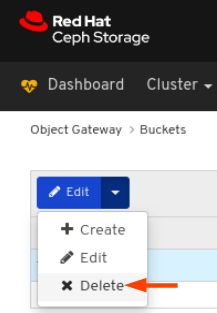
Select Delete In the Edit drop-down:
In the Delete Bucket dialog window, Click the Yes, I am sure box and then Click Delete bucket to save the settings:
8.5. Manually adding object gateway login credentials to the dashboard
The Red Hat Ceph Storage Dashboard can manage the Ceph Object Gateway, also known as the RADOS Gateway, or RGW. To manage the Ceph Object Gateway, the dashboard must connect to it using login credentials of an RGW user with the system flag. When the Object Gateway is installed using ceph-ansible, it automatically adds the login credentials to the dashboard. It is also possible to set the login credentials manually.
Prerequisites
- A running Red Hat Ceph Storage cluster.
- Dashboard is installed.
- Ceph Object Gateway is installed.
Procedure
Obtain the
access_keyandsecret_keyof an RGW user with thesystemflag enabled:If you do not have an RGW user with the
systemflag enabled, create one.radosgw-admin user create --uid=USER_ID --display-name=DISPLAY_NAME --system
radosgw-admin user create --uid=USER_ID --display-name=DISPLAY_NAME --systemCopy to Clipboard Copied! Toggle word wrap Toggle overflow Example:
Copy to Clipboard Copied! Toggle word wrap Toggle overflow Take note of the values for
access_keyandsecret_key. In the example above,access_keyisBYC5SWQQH24A2BFHS2RCandsecret_keyis159d94uHK9ADiWZrGsNYWYjRXCDrhL2xVi8PO6kT.If an RGW user with the
systemflag enabled is already created, obtain the credentials using theuser infocommand of theradosgw-adminutility.radosgw-admin user info --uid=USER_ID
radosgw-admin user info --uid=USER_IDCopy to Clipboard Copied! Toggle word wrap Toggle overflow Example:
Copy to Clipboard Copied! Toggle word wrap Toggle overflow Take note of the values for
access_keyandsecret_key. In the example above,access_keyisBYC5SWQQH24A2BFHS2RCandsecret_keyis159d94uHK9ADiWZrGsNYWYjRXCDrhL2xVi8PO6kT.
Provide the
access_keyandsecret_keycredentials to the dashboard:Provide the
access_keyto the dashboard.ceph dashboard set-rgw-api-access-key ACCESS_KEY
ceph dashboard set-rgw-api-access-key ACCESS_KEYCopy to Clipboard Copied! Toggle word wrap Toggle overflow Example:
ceph dashboard set-rgw-api-access-key BYC5SWQQH24A2BFHS2RC
Option RGW_API_ACCESS_KEY updated
[root@mon ~]# ceph dashboard set-rgw-api-access-key BYC5SWQQH24A2BFHS2RC
Option RGW_API_ACCESS_KEY updated
Copy to Clipboard Copied! Toggle word wrap Toggle overflow Provide the
secret_keyto the dashboard.ceph dashboard set-rgw-api-secret-key SECRET_KEY
ceph dashboard set-rgw-api-secret-key SECRET_KEYCopy to Clipboard Copied! Toggle word wrap Toggle overflow Example:
ceph dashboard set-rgw-api-secret-key 159d94uHK9ADiWZrGsNYWYjRXCDrhL2xVi8PO6kT
Option RGW_API_SECRET_KEY updated
[root@mon ~]# ceph dashboard set-rgw-api-secret-key 159d94uHK9ADiWZrGsNYWYjRXCDrhL2xVi8PO6kT
Option RGW_API_SECRET_KEY updated
Copy to Clipboard Copied! Toggle word wrap Toggle overflow
Provide the host name and port of the object gateway to the dashboard:
Provide the host name to the dashboard.
ceph dashboard set-rgw-api-host HOST_NAME
ceph dashboard set-rgw-api-host HOST_NAMECopy to Clipboard Copied! Toggle word wrap Toggle overflow Example:
ceph dashboard set-rgw-api-host 192.168.122.193
Option RGW_API_HOST updated
[root@mon ~]# ceph dashboard set-rgw-api-host 192.168.122.193
Option RGW_API_HOST updated
Copy to Clipboard Copied! Toggle word wrap Toggle overflow Provide the port to the dashboard.
ceph dashboard set-rgw-api-port PORT
ceph dashboard set-rgw-api-port PORTCopy to Clipboard Copied! Toggle word wrap Toggle overflow Example:
ceph dashboard set-rgw-api-port 8080
Option RGW_API_PORT updated
[root@mon ~]# ceph dashboard set-rgw-api-port 8080
Option RGW_API_PORT updated
Copy to Clipboard Copied! Toggle word wrap Toggle overflow
Optional: If you are using HTTPS with a self-signed certificate, disable certificate verification in the dashboard to avoid refused connections.
Refused connections can happen when the certificate is signed by an unknown Certificate Authority, or if the host name used does not match the host name in the certificate.
ceph dashboard set-rgw-api-ssl-verify false
ceph dashboard set-rgw-api-ssl-verify falseCopy to Clipboard Copied! Toggle word wrap Toggle overflow Example:
ceph dashboard set-rgw-api-ssl-verify false
Option RGW_API_SSL_VERIFY updated
[root@mon ~]# ceph dashboard set-rgw-api-ssl-verify false
Option RGW_API_SSL_VERIFY updated
Copy to Clipboard Copied! Toggle word wrap Toggle overflow
Additional Resources
- For information on how to install the Ceph Object Gateway, see Installing the Ceph Object Gateway in the Installation Guide.
- For more information on the Ceph Object Gateway, see the Object Gateway Configuration and Administration Guide.
