Chapter 17. Getting started with ROSA
17.1. Tutorial: What is ROSA
Red Hat OpenShift Service on AWS (ROSA) is a fully-managed turnkey application platform that allows you to focus on what matters most, delivering value to your customers by building and deploying applications. Red Hat and AWS SRE experts manage the underlying platform so you do not have to worry about infrastructure management. ROSA provides seamless integration with a wide range of AWS compute, database, analytics, machine learning, networking, mobile, and other services to further accelerate the building and delivering of differentiating experiences to your customers.
ROSA makes use of AWS Security Token Service (STS) to obtain credentials to manage infrastructure in your AWS account. AWS STS is a global web service that creates temporary credentials for IAM users or federated users. ROSA uses this to assign short-term, limited-privilege, security credentials. These credentials are associated with IAM roles that are specific to each component that makes AWS API calls. This method aligns with the principals of least privilege and secure practices in cloud service resource management. The ROSA command line interface (CLI) tool manages the STS credentials that are assigned for unique tasks and takes action on AWS resources as part of OpenShift functionality.
17.1.1. Key features of ROSA
- Native AWS service: Access and use Red Hat OpenShift on-demand with a self-service onboarding experience through the AWS management console.
- Flexible, consumption-based pricing: Scale to your business needs and pay as you go with flexible pricing and an on-demand hourly or annual billing model.
- Single bill for Red Hat OpenShift and AWS usage: Customers will receive a single bill from AWS for both Red Hat OpenShift and AWS consumption.
- Fully integrated support experience: Installation, management, maintenance, and upgrades are performed by Red Hat site reliability engineers (SREs) with joint Red Hat and Amazon support and a 99.95% service-level agreement (SLA).
- AWS service integration: AWS has a robust portfolio of cloud services, such as compute, storage, networking, database, analytics, and machine learning. All of these services are directly accessible through ROSA. This makes it easier to build, operate, and scale globally and on-demand through a familiar management interface.
- Maximum Availability: Deploy clusters across multiple availability zones in supported regions to maximize availability and maintain high availability for your most demanding mission-critical applications and data.
- Cluster node scaling: Easily add or remove compute nodes to match resource demand.
- Optimized clusters: Choose from memory-optimized, compute-optimized, or general purpose EC2 instance types with clusters sized to meet your needs.
- Global availability: Refer to the product regional availability page to see where ROSA is available globally.
17.1.2. ROSA and Kubernetes
In ROSA, everything you need to deploy and manage containers is bundled, including container management, Operators, networking, load balancing, service mesh, CI/CD, firewall, monitoring, registry, authentication, and authorization capabilities. These components are tested together for unified operations as a complete platform. Automated cluster operations, including over-the-air platform upgrades, further enhance your Kubernetes experience.
17.1.3. Basic responsibilities
In general, cluster deployment and upkeep is Red Hat’s or AWS’s responsibility, while applications, users, and data is the customer’s responsibility. For a more detailed breakdown of responsibilities, see the responsibility matrix.
17.1.4. Roadmap and feature requests
Visit the ROSA roadmap to stay up-to-date with the status of features currently in development. Open a new issue if you have any suggestions for the product team.
17.1.5. AWS region availability
Refer to the product regional availability page for an up-to-date view of where ROSA is available.
17.1.6. Compliance certifications
ROSA is currently compliant with SOC-2 type 2, SOC 3, ISO-27001, ISO 27017, ISO 27018, HIPAA, GDPR, and PCI-DSS. We are also currently working towards FedRAMP High.
17.1.7. Nodes
17.1.7.1. Worker nodes across multiple AWS regions
All nodes in a ROSA cluster must be located in the same AWS region. For clusters configured for multiple availability zones, control plane nodes and worker nodes will be distributed across the availability zones.
17.1.7.2. Minimum number of worker nodes
For a ROSA cluster, the minimum is 2 worker nodes for single availability zone and 3 worker nodes for multiple availability zones.
17.1.7.3. Underlying node operating system
As with all OpenShift v4.x offerings, the control plane, infra and worker nodes run Red Hat Enterprise Linux CoreOS (RHCOS).
17.1.7.4. Node hibernation or shut-down
At this time, ROSA does not have a hibernation or shut-down feature for nodes. The shutdown and hibernation feature is an OpenShift platform feature that is not yet mature enough for widespread cloud services use.
17.1.7.5. Supported instances for worker nodes
For a complete list of supported instances for worker nodes see AWS instance types. Spot instances are also supported.
17.1.7.6. Node autoscaling
Autoscaling allows you to automatically adjust the size of the cluster based on the current workload. See About autoscaling nodes on a cluster for more details.
17.1.7.7. Maximum number of worker nodes
The maximum number of worker nodes in ROSA clusters versions 4.14.14 and later is 249. For earlier versions, the limit is 180 nodes.
A list of the account-wide and per-cluster roles is provided in the ROSA documentation.
17.1.8. Administrators
A ROSA customer’s administrator can manage users and quotas in addition to accessing all user-created projects.
17.1.9. OpenShift versions and upgrades
ROSA is a managed service which is based on OpenShift Container Platform. You can view the current version and life cycle dates in the ROSA documentation.
Customers can upgrade to the newest version of OpenShift and use the features from that version of OpenShift. For more information, see life cycle dates. Not all OpenShift features are be available on ROSA. Review the Service Definition for more information.
17.1.10. Support
You can open a ticket directly from the OpenShift Cluster Manager. See the ROSA support documentation for more details about obtaining support.
You can also visit the Red Hat Customer Portal to search or browse through the Red Hat knowledge base of articles and solutions relating to Red Hat products or submit a support case to Red Hat Support.
17.1.10.1. Limited support
If a ROSA cluster is not upgraded before the "end of life" date, the cluster continues to operate in a limited support status. The SLA for that cluster will no longer be applicable, but you can still get support for that cluster. See the limited support status documentation for more details.
Additional support resources
- Red Hat Support
AWS support customers must have a valid AWS support contract
17.1.11. Service-level agreement (SLA)
Refer to the ROSA SLA page for details.
17.1.12. Notifications and communication
Red Hat will provide notifications regarding new Red Hat and AWS features, updates, and scheduled maintenance through email and the Hybrid Cloud Console service log.
17.1.13. Open Service Broker for AWS (OBSA)
You can use OSBA with ROSA. However, the preferred method is the more recent AWS Controller for Kubernetes. See Open Service Broker for AWS for more information on OSBA.
17.1.14. Offboarding
Customers can stop using ROSA at any time and move their applications to on-premise, a private cloud, or other cloud providers. Standard reserved instances (RI) policy applies for unused RI.
17.1.15. Authentication
ROSA supports the following authentication mechanisms: OpenID Connect (a profile of OAuth2), Google OAuth, GitHub OAuth, GitLab, and LDAP.
17.1.16. SRE cluster access
All SRE cluster access is secured by MFA. See SRE access for more details.
17.1.17. Encryption
17.1.17.1. Encryption keys
ROSA uses a key stored in KMS to encrypt EBS volumes. Customers also have the option to provide their own KMS keys at cluster creation.
17.1.17.2. KMS keys
If you specify a KMS key, the control plane, infrastructure and worker node root volumes and the persistent volumes are encrypted with the key.
17.1.17.3. Data encryption
By default, there is encryption at rest. The AWS Storage platform automatically encrypts your data before persisting it and decrypts the data before retrieval. See AWS EBS Encryption for more details.
You can also encrypt etcd in the cluster, combining it with AWS storage encryption. This results in double the encryption which adds up to a 20% performance hit. For more details see the etcd encryption documentation.
17.1.17.4. etcd encryption
etcd encryption can only be enabled at cluster creation.
etcd encryption incurs additional overhead with negligible security risk mitigation.
17.1.17.5. etcd encryption configuration
etcd encryption is configured the same as in OpenShift Container Platform. The aescbc cypher is used and the setting is patched during cluster deployment. For more details, see the Kubernetes documentation.
17.1.17.6. Multi-region KMS keys for EBS encryption
Currently, the ROSA CLI does not accept multi-region KMS keys for EBS encryption. This feature is in our backlog for product updates. The ROSA CLI accepts single region KMS keys for EBS encryption if it is defined at cluster creation.
17.1.18. Infrastructure
ROSA uses several different cloud services such as virtual machines, storage, and load balancers. You can see a defined list in the AWS prerequisites.
17.1.19. Credential methods
There are two credential methods to grant Red Hat the permissions needed to perform the required actions in your AWS account: AWS with STS or an IAM user with admin permissions. AWS with STS is the preferred method, and the IAM user method will eventually be deprecated. AWS with STS better aligns with the principles of least privilege and secure practices in cloud service resource management.
17.1.20. Prerequisite permission or failure errors
Check for a newer version of the ROSA CLI. Every release of the ROSA CLI is located in two places: Github and the Red Hat signed binary releases.
17.1.21. Storage
Refer to the storage section of the service definition.
OpenShift includes the CSI driver for AWS EFS. For more information, see Setting up AWS EFS for Red Hat OpenShift Service on AWS.
17.1.22. Using a VPC
At installation you can select to deploy to an existing VPC or bring your own VPC. You can then select the required subnets and provide a valid CIDR range that encompasses the subnets for the installation program when using those subnets.
ROSA allows multiple clusters to share the same VPC. The number of clusters on one VPC is limited by the remaining AWS resource quota and CIDR ranges that cannot overlap. See CIDR Range Definitions for more information.
17.1.23. Network plugin
ROSA uses the OpenShift OVN-Kubernetes default CNI network provider.
17.1.24. Cross-namespace networking
Cluster admins can customize, and deny, cross-namespace on a project basis using NetworkPolicy objects. Refer to Configuring multitenant isolation with network policy for more information.
17.1.25. Using Prometheus and Grafana
You can use Prometheus and Grafana to monitor containers and manage capacity using OpenShift User Workload Monitoring. This is a check-box option in the OpenShift Cluster Manager.
17.1.26. Audit logs output from the cluster control-plane
If the Cluster Logging Operator Add-on has been added to the cluster then audit logs are available through CloudWatch. If it has not, then a support request would allow you to request some audit logs. Small targeted and time-boxed logs can be requested for export and sent to a customer. The selection of audit logs available are at the discretion of SRE in the category of platform security and compliance. Requests for exports of a cluster’s entirety of logs will be rejected.
17.1.27. AWS Permissions Boundary
You can use an AWS Permissions Boundary around the policies for your cluster.
17.1.28. AMI
ROSA worker nodes use a different AMI from OSD and OpenShift Container Platform. Control Plane and Infra node AMIs are common across products in the same version.
17.1.29. Cluster backups
ROSA STS clusters do not have backups. Users must have their own backup policies for applications and data. See our backup policy for more information.
17.1.30. Custom domain
You can define a custom domain for your applications. See Configuring custom domains for applications for more information.
17.1.31. ROSA domain certificates
Red Hat infrastructure (Hive) manages certificate rotation for default application ingress.
17.1.32. Disconnected environments
ROSA does not support an air-gapped, disconnected environment. The ROSA cluster must have egress to the internet to access our registry, S3, and send metrics. The service requires a number of egress endpoints. Ingress can be limited to a PrivateLink for Red Hat SREs and a VPN for customer access.
Additional resources
ROSA product pages:
ROSA specific resources
- Learn about OpenShift
- OpenShift Cluster Manager
- Red Hat Support
17.2. Tutorial: ROSA with AWS STS explained
This tutorial outlines the two options for allowing Red Hat OpenShift Service on AWS (ROSA) to interact with resources in a user’s Amazon Web Service (AWS) account. It details the components and processes that ROSA with Security Token Service (STS) uses to obtain the necessary credentials. It also reviews why ROSA with STS is the more secure, preferred method.
This content currently covers ROSA Classic with AWS STS. For ROSA with hosted control planes (HCP) with AWS STS, see AWS STS and ROSA with HCP explained.
This tutorial will:
Enumerate two of the deployment options:
- ROSA with IAM Users
- ROSA with STS
- Explain the differences between the two options
- Explain why ROSA with STS is more secure and the preferred option
- Explain how ROSA with STS works
17.2.1. Different credential methods to deploy ROSA
As part of ROSA, Red Hat manages infrastructure resources in your AWS account and must be granted the necessary permissions. There are currently two supported methods for granting those permissions:
Using static IAM user credentials with an
AdministratorAccesspolicyThis is referred to as "ROSA with IAM Users" in this tutorial. It is not the preferred credential method.
Using AWS STS with short-lived, dynamic tokens
This is referred to as “ROSA with STS” in this tutorial. It is the preferred credential method.
17.2.1.1. Rosa with IAM Users
When ROSA was first released, the only credential method was ROSA with IAM Users. This method grants IAM users with an AdministratorAccess policy full access to create the necessary resources in the AWS account that uses ROSA. The cluster can then create and expand its credentials as needed.
17.2.1.2. ROSA with STS
ROSA with STS grants users limited, short-term access to resources in your AWS account. The STS method uses predefined roles and policies to grant temporary, least-privilege permissions to IAM users or authenticated federated users. The credentials typically expire an hour after being requested. Once expired, they are no longer recognized by AWS and no longer have account access from API requests made with them. For more information, see the AWS documentation. While both ROSA with IAM Users and ROSA with STS are currently enabled, ROSA with STS is the preferred and recommended option.
17.2.2. ROSA with STS security
Several crucial components make ROSA with STS more secure than ROSA with IAM Users:
- An explicit and limited set of roles and policies that the user creates ahead of time. The user knows every requested permission and every role used.
- The service cannot do anything outside of those permissions.
- Whenever the service needs to perform an action, it obtains credentials that expire in one hour or less. This means that there is no need to rotate or revoke credentials. Additionally, credential expiration reduces the risks of credentials leaking and being reused.
17.2.3. AWS STS explained
ROSA uses AWS STS to grant least-privilege permissions with short-term security credentials to specific and segregated IAM roles. The credentials are associated with IAM roles specific to each component and cluster that makes AWS API calls. This method aligns with principles of least-privilege and secure practices in cloud service resource management. The ROSA command line interface (CLI) tool manages the STS roles and policies that are assigned for unique tasks and takes action upon AWS resources as part of OpenShift functionality.
STS roles and policies must be created for each ROSA cluster. To make this easier, the installation tools provide all the commands and files needed to create the roles as policies and an option to allow the CLI to automatically create the roles and policies. See Creating a ROSA cluster with STS using customizations for more information about the different --mode options.
17.2.4. Components specific to ROSA with STS
- AWS infrastructure - This provides the infrastructure required for the cluster. It contains the actual EC2 instances, storage, and networking components. See AWS compute types to see supported instance types for compute nodes and provisioned AWS infrastructure for control plane and infrastructure node configuration.
- AWS STS - See the credential method section above.
- OpenID Connect (OIDC) - This provides a mechanism for cluster Operators to authenticate with AWS, assume the cluster roles through a trust policy, and obtain temporary credentials from STS to make the required API calls.
Roles and policies - The roles and policies are one of the main differences between ROSA with STS and ROSA with IAM Users. For ROSA with STS, the roles and policies used by ROSA are broken into account-wide roles and policies and Operator roles and policies.
The policies determine the allowed actions for each of the roles. See About IAM resources for more details about the individual roles and policies.
The following account-wide roles are required:
- ManagedOpenShift-Installer-Role
- ManagedOpenShift-ControlPlane-Role
- ManagedOpenShift-Worker-Role
- ManagedOpenShift-Support-Role
The following account-wide policies are required:
- ManagedOpenShift-Installer-Role-Policy
- ManagedOpenShift-ControlPlane-Role-Policy
- ManagedOpenShift-Worker-Role-Policy
- ManagedOpenShift-Support-Role-Policy
- ManagedOpenShift-openshift-ingress-operator-cloud-credentials [1]
- ManagedOpenShift-openshift-cluster-csi-drivers-ebs-cloud-credent [1]
- ManagedOpenShift-openshift-cloud-network-config-controller-cloud [1]
- ManagedOpenShift-openshift-machine-api-aws-cloud-credentials [1]
- ManagedOpenShift-openshift-cloud-credential-operator-cloud-crede [1]
ManagedOpenShift-openshift-image-registry-installer-cloud-creden [1]
- This policy is used by the cluster Operator roles, listed below. The Operator roles are created in a second step because they are dependent on an existing cluster name and cannot be created at the same time as the account-wide roles.
The Operator roles are:
- <cluster-name\>-xxxx-openshift-cluster-csi-drivers-ebs-cloud-credent
- <cluster-name\>-xxxx-openshift-cloud-network-config-controller-cloud
- <cluster-name\>-xxxx-openshift-machine-api-aws-cloud-credentials
- <cluster-name\>-xxxx-openshift-cloud-credential-operator-cloud-crede
- <cluster-name\>-xxxx-openshift-image-registry-installer-cloud-creden
- <cluster-name\>-xxxx-openshift-ingress-operator-cloud-credentials
- Trust policies are created for each account-wide and Operator role.
17.2.5. Deploying a ROSA STS cluster
You are not expected to create the resources listed in the below steps from scratch. The ROSA CLI creates the required JSON files for you and outputs the commands you need. The ROSA CLI can also take this a step further and run the commands for you, if desired.
Steps to deploy a ROSA with STS cluster
- Create the account-wide roles and policies.
- Assign the permissions policy to the corresponding account-wide role.
- Create the cluster.
- Create the Operator roles and policies.
- Assign the permission policy to the corresponding Operator role.
- Create the OIDC provider.
The roles and policies can be created automatically by the ROSA CLI, or they can be manually created by utilizing the --mode manual or --mode auto flags in the ROSA CLI. For further details about deployment, see Creating a cluster with customizations or the Deploying the cluster tutorial.
17.2.6. ROSA with STS workflow
The user creates the required account-wide roles and account-wide policies. For more information, see the components section in this tutorial. During role creation, a trust policy, known as a cross-account trust policy, is created which allows a Red Hat-owned role to assume the roles. Trust policies are also created for the EC2 service, which allows workloads on EC2 instances to assume roles and obtain credentials. The user can then assign a corresponding permissions policy to each role.
After the account-wide roles and policies are created, the user can create a cluster. Once cluster creation is initiated, the Operator roles are created so that cluster Operators can make AWS API calls. These roles are then assigned to the corresponding permission policies that were created earlier and a trust policy with an OIDC provider. The Operator roles differ from the account-wide roles in that they ultimately represent the pods that need access to AWS resources. Because a user cannot attach IAM roles to pods, they must create a trust policy with an OIDC provider so that the Operator, and therefore the pods, can access the roles they need.
Once the user assigns the roles to the corresponding policy permissions, the final step is creating the OIDC provider.
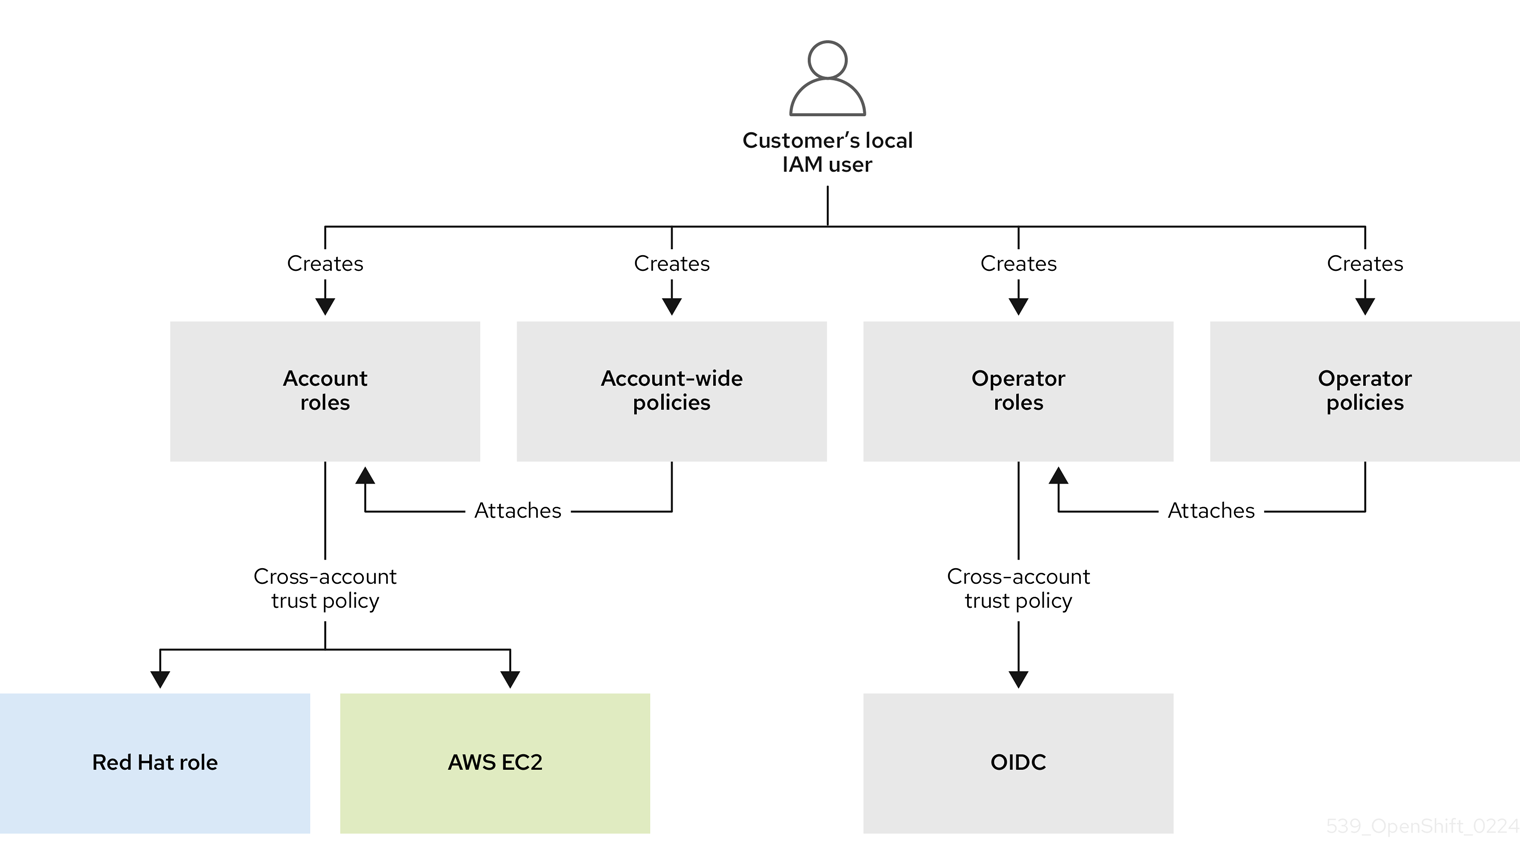
When a new role is needed, the workload currently using the Red Hat role will assume the role in the AWS account, obtain temporary credentials from AWS STS, and begin performing the actions using API calls within the customer’s AWS account as permitted by the assumed role’s permissions policy. The credentials are temporary and have a maximum duration of one hour.

The entire workflow is depicted in the following graphic:
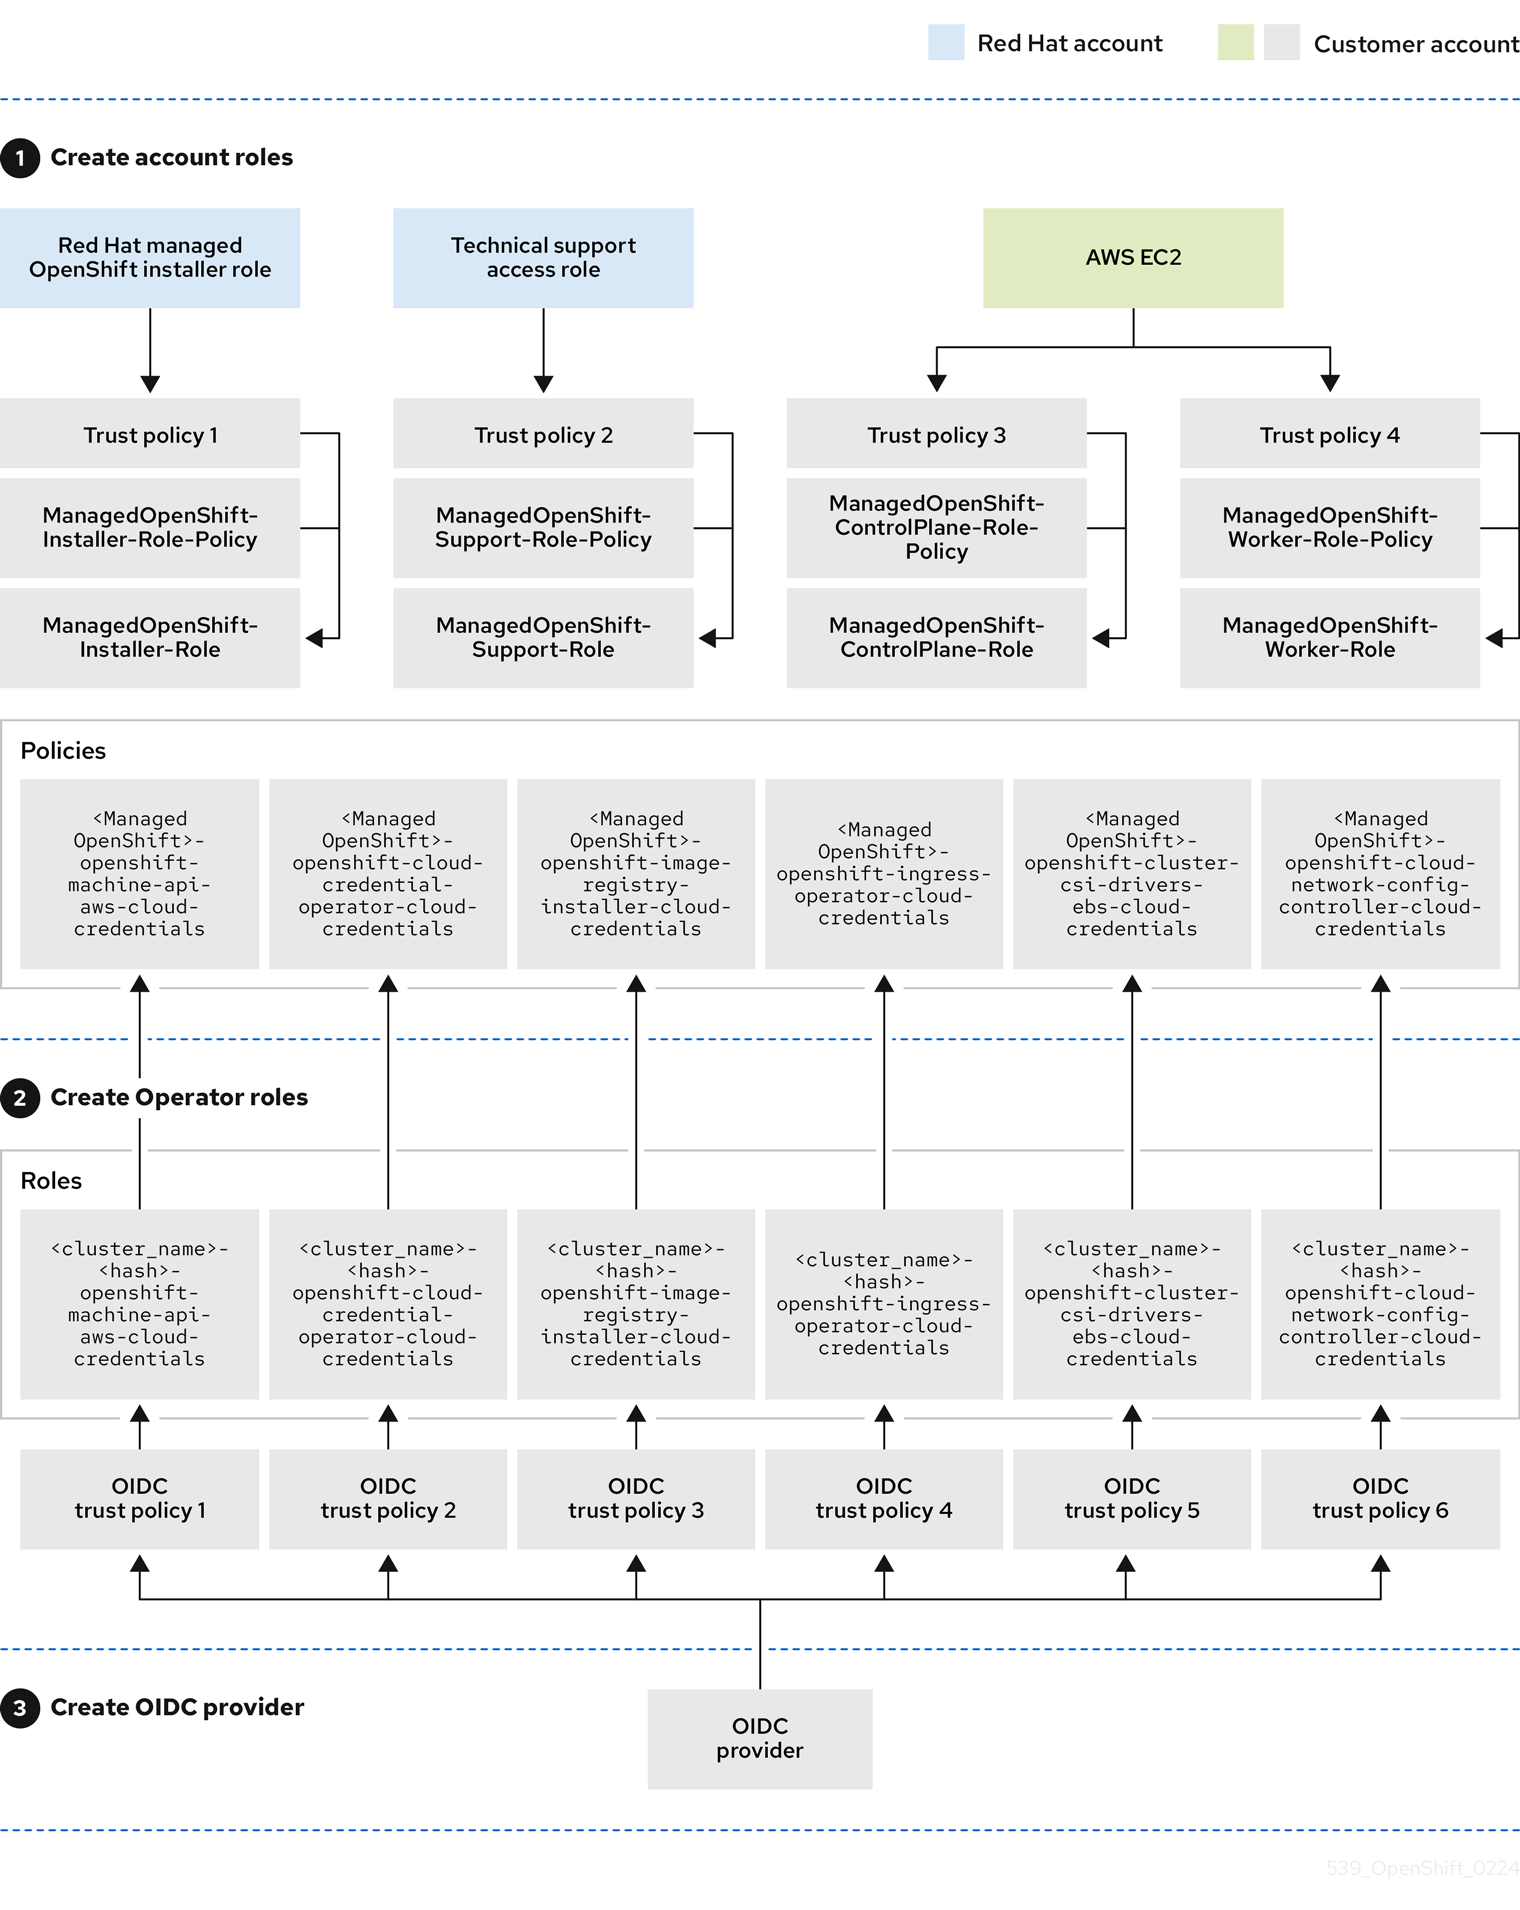
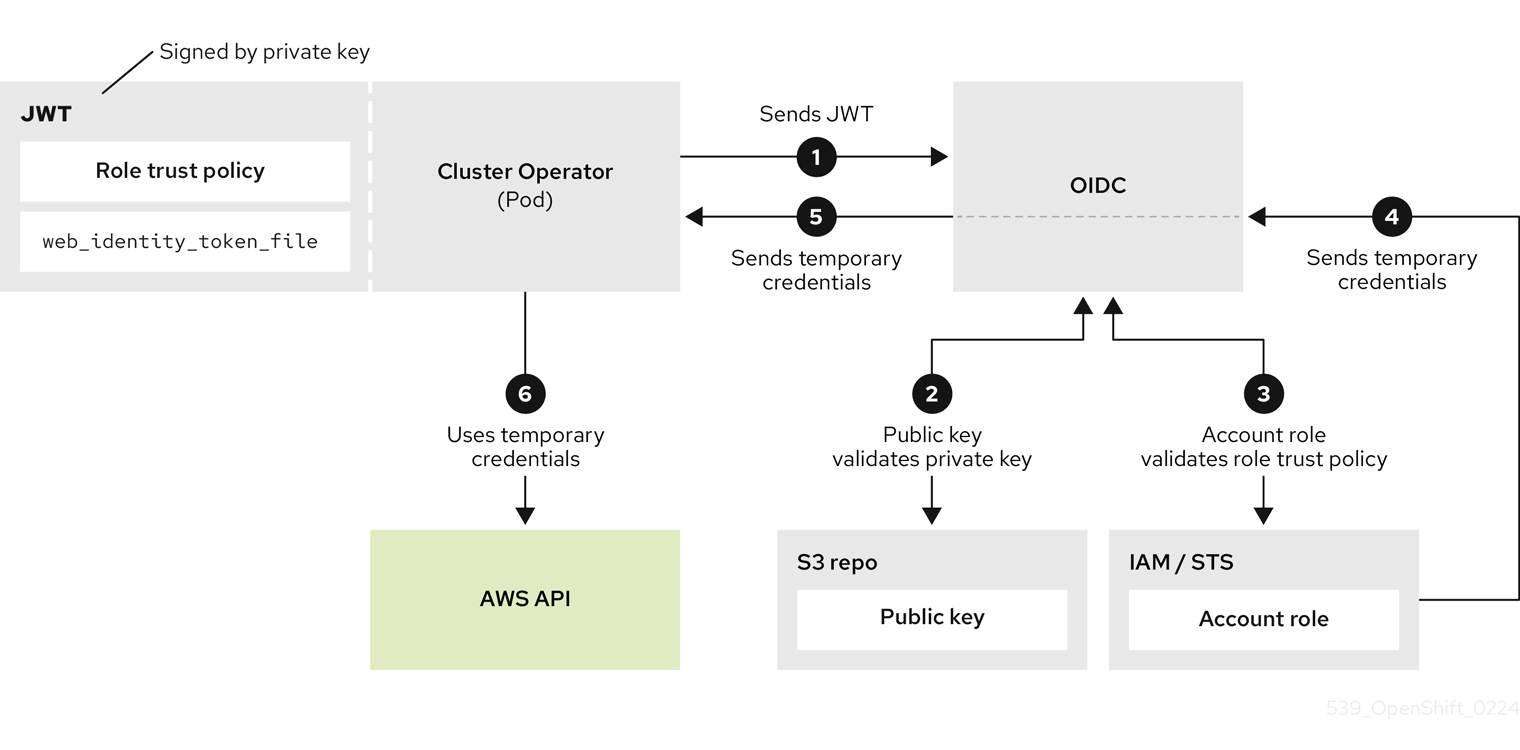
Operators use the following process to obtain the requisite credentials to perform their tasks. Each Operator is assigned an Operator role, a permissions policy, and a trust policy with an OIDC provider. The Operator will assume the role by passing a JSON web token that contains the role and a token file (web_identity_token_file) to the OIDC provider, which then authenticates the signed key with a public key. The public key is created during cluster creation and stored in an S3 bucket. The Operator then confirms that the subject in the signed token file matches the role in the role trust policy which ensures that the OIDC provider can only obtain the allowed role. The OIDC provider then returns the temporary credentials to the Operator so that the Operator can make AWS API calls. For a visual representation, see below:
17.2.7. ROSA with STS use cases
Creating nodes at cluster install
The Red Hat installation program uses the RH-Managed-OpenShift-Installer role and a trust policy to assume the Managed-OpenShift-Installer-Role role in the customer’s account. This process returns temporary credentials from AWS STS. The installation program begins making the required API calls with the temporary credentials just received from STS. The installation program creates the required infrastructure in AWS. The credentials expire within an hour and the installation program no longer has access to the customer’s account.
The same process also applies for support cases. In support cases, a Red Hat site reliability engineer (SRE) replaces the installation program.
Scaling the cluster
The machine-api-operator uses AssumeRoleWithWebIdentity to assume the machine-api-aws-cloud-credentials role. This launches the sequence for the cluster Operators to receive the credentials. The machine-api-operator role can now make the relevant API calls to add more EC2 instances to the cluster.
17.3. Tutorial: OpenShift concepts
17.3.1. Source-to-Image (S2I)
Source-to-Image (S2I) is a toolkit and workflow for building reproducible container images from source code. S2I produces ready-to-run images by inserting source code into a container image and letting the container prepare the source code. By creating self-assembling builder images, you can version and control your build environments exactly like you use container images to version your runtime environments.
Additional resources
17.3.1.1. How it works
For a dynamic language such as Ruby, the build time and run time environments are typically the same. Assuming that Ruby, Bundler, Rake, Apache, GCC, and all other packages needed to set up and run a Ruby application are already installed, a builder image performs the following steps:
- The builder image starts a container with the application source injected into a known directory.
- The container process transforms that source code into the appropriate runnable setup. For example, it installs dependencies with Bundler and moves the source code into a directory where Apache has been preconfigured to look for the Ruby configuration file.
- It then commits the new container and sets the image entrypoint to be a script that will start Apache to host the Ruby application.
For compiled languages such as C, C++, Go, or Java, the necessary dependencies for compilation might outweigh the size of the runtime artifacts. To keep runtime images small, S2I enables a multiple-step build process, where a binary artifact such as an executable file is created in the first builder image, extracted, and injected into a second runtime image that simply places the executable program in the correct location.
For example, to create a reproducible build pipeline for Tomcat and Maven:
- Create a builder image containing OpenJDK and Tomcat that expects to have a WAR file injected.
- Create a second image that layers on top of the first image Maven and any other standard dependencies, and expects to have a Maven project injected.
- Start S2I using the Java application source and the Maven image to create the desired application WAR.
- Start S2I a second time using the WAR file from the earlier step and the initial Tomcat image to create the runtime image.
By placing build logic inside of images and combining the images into multiple steps, the runtime environment is close to the build environment without requiring the deployment of build tools to production.
17.3.1.2. S2I benefits
- Reproducibility
- Allow build environments to be tightly versioned by encapsulating them within a container image and defining a simple interface of injected source code for callers. Reproducible builds are a key requirement for enabling security updates and continuous integration in containerized infrastructure, and builder images help ensure repeatability and the ability to swap run times.
- Flexibility
- Any existing build system that can run on Linux can run inside of a container, and each individual builder can also be part of a larger pipeline. The scripts that process the application source code can be injected into the builder image, allowing authors to adapt existing images to enable source handling.
- Speed
- Instead of building multiple layers in a single Dockerfile, S2I encourages authors to represent an application in a single image layer. This saves time during creation and deployment and allows for better control over the output of the final image.
- Security
- Dockerfiles are run without many of the normal operational controls of containers. They usually run as root and have access to the container network. S2I can control what permissions and privileges are available to the builder image since the build is launched in a single container. In concert with platforms like OpenShift, S2I allows administrators to control what privileges developers have at build time.
17.3.2. Routes
An OpenShift route exposes a service at a hostname so that external clients can reach it by name. When a Route object is created on OpenShift, it gets picked up by the built-in HAProxy load balancer to expose the requested service and make it externally available with the given configuration.
Similar to the Kubernetes Ingress object, Red Hat created the concept of route to fill a need and then contributed the design principles behind it to the community, which heavily influenced the Ingress design. A route does have some additional features as can be seen in the following chart:
| Feature | Ingress on OpenShift | Route on OpenShift |
|---|---|---|
| Standard Kubernetes object | X | |
| External access to services | X | X |
| Persistent (sticky) sessions | X | X |
| Load-balancing strategies (e.g. round robin) | X | X |
| Rate-limit and throttling | X | X |
| IP whitelisting | X | X |
| TLS edge termination for improved security | X | X |
| TLS re-encryption for improved security | X | |
| TLS passhtrough for improved security | X | |
| Multiple weighted backends (split traffic) | X | |
| Generated pattern-based hostnames | X | |
| Wildcard domains | X |
DNS resolution for a hostname is handled separately from routing. Your administrator might have configured a cloud domain that will always correctly resolve to the router or modify your unrelated hostname DNS records independently to resolve to the router.
An individual route can override some defaults by providing specific configurations in its annotations.
Additional resources
17.3.3. Image streams
An image stream stores a mapping of tags to images, metadata overrides that are applied when images are tagged in a stream, and an optional reference to a Docker image repository on a registry.
17.3.3.1. Image stream benefits
Using an image stream makes it easier to change a tag for a container image. Otherwise, to manually change a tag, you must download the image, change it locally, then push it all back. Promoting applications by manually changing a tag and then updating the deployment object entails many steps.
With image streams, you upload a container image once and then you manage its virtual tags internally in OpenShift. In one project you might use the developer tag and only change a reference to it internally, while in production you might use a production tag and also manage it internally. You do not have to deal with the registry.
You can also use image streams in conjunction with deployment configs to set a trigger that will start a deployment as soon as a new image appears or a tag changes its reference.
17.3.4. Builds
A build is the process of transforming input parameters into a resulting object. Most often, the process is used to transform input parameters or source code into a runnable image. A BuildConfig object is the definition of the entire build process.
OpenShift Container Platform leverages Kubernetes by creating Docker-formatted containers from build images and pushing them to a container image registry.
Build objects share common characteristics:
- Inputs for a build
- Requirements to complete a build process
- Logging the build process
- Publishing resources from successful builds
- Publishing the final status of the build
Builds take advantage of resource restrictions, specifying limitations on resources such as CPU usage, memory usage, and build or pod execution time.
Additional resources
17.4. Deploying a cluster
17.4.1. Tutorial: Choosing a deployment method
This tutorial outlines the different ways to deploy a cluster. Choose the deployment method that best fits your preferences and needs.
17.4.1.1. Deployment options
If you want:
- Only the necessary CLI commands - Simple CLI guide
- A user interface - Simple UI guide
- The CLI commands with details - Detailed CLI guide
- A user interface with details - Detailed UI guide
All of the above deployment options work well for this tutorial. If you are doing this tutorial for the first time, the Simple CLI guide is the simplest and recommended method.
17.4.2. Tutorial: Simple CLI guide
This page outlines the minimum list of commands to deploy a Red Hat OpenShift Service on AWS (ROSA) cluster using the command line interface (CLI).
While this simple deployment works well for a tutorial setting, clusters used in production should be deployed with a more detailed method.
17.4.2.1. Prerequisites
- You have completed the prerequisites in the Setup tutorial.
17.4.2.2. Creating account roles
Run the following command once for each AWS account and y-stream OpenShift version:
rosa create account-roles --mode auto --yes
17.4.2.3. Deploying the cluster
Create the cluster with the default configuration by running the following command substituting your own cluster name:
rosa create cluster --cluster-name <cluster-name> --sts --mode auto --yes
Check the status of your cluster by running the following command:
rosa list clusters
17.4.3. Tutorial: Detailed CLI guide
This tutorial outlines the detailed steps to deploy a ROSA cluster using the ROSA CLI.
17.4.3.1. CLI deployment modes
There are two modes with which to deploy a ROSA cluster. One is automatic, which is quicker and performs the manual work for you. The other is manual, requires you to run extra commands, and allows you to inspect the roles and policies being created. This tutorial documents both options.
If you want to create a cluster quickly, use the automatic option. If you prefer exploring the roles and policies being created, use the manual option.
Choose the deployment mode by using the --mode flag in the relevant commands.
Valid options for --mode are:
-
manual: Role and policies are created and saved in the current directory. You must manually run the provided commands as the next step. This option allows you to review the policy and roles before creating them. -
auto: Roles and policies are created and applied automatically using the current AWS account.
You can use either deployment method for this tutorial. The auto mode is faster and has less steps.
17.4.3.2. Deployment workflow
The overall deployment workflow follows these steps:
-
rosa create account-roles- This is executed only once for each account. Once created, the account roles do not need to be created again for more clusters of the same y-stream version. -
rosa create cluster -
rosa create operator-roles- For manual mode only. -
rosa create oidc-provider- For manual mode only.
For each additional cluster in the same account for the same y-stream version, only step 2 is needed for automatic mode. Steps 2 through 4 are needed for manual mode.
17.4.3.3. Automatic mode
Use this method if you want the ROSA CLI to automate the creation of the roles and policies to create your cluster quickly.
17.4.3.3.1. Creating account roles
If this is the first time you are deploying ROSA in this account and you have not yet created the account roles, then create the account-wide roles and policies, including Operator policies.
Run the following command to create the account-wide roles:
rosa create account-roles --mode auto --yes
Example output
I: Creating roles using 'arn:aws:iam::000000000000:user/rosa-user'
I: Created role 'ManagedOpenShift-ControlPlane-Role' with ARN 'arn:aws:iam::000000000000:role/ManagedOpenShift-ControlPlane-Role'
I: Created role 'ManagedOpenShift-Worker-Role' with ARN 'arn:aws:iam::000000000000:role/ManagedOpenShift-Worker-Role'
I: Created role 'ManagedOpenShift-Support-Role' with ARN 'arn:aws:iam::000000000000:role/ManagedOpenShift-Support-Role'
I: Created role 'ManagedOpenShift-Installer-Role' with ARN 'arn:aws:iam::000000000000:role/ManagedOpenShift-Installer-Role'
I: Created policy with ARN 'arn:aws:iam::000000000000:policy/ManagedOpenShift-openshift-machine-api-aws-cloud-credentials'
I: Created policy with ARN 'arn:aws:iam::000000000000:policy/ManagedOpenShift-openshift-cloud-credential-operator-cloud-crede'
I: Created policy with ARN 'arn:aws:iam::000000000000:policy/ManagedOpenShift-openshift-image-registry-installer-cloud-creden'
I: Created policy with ARN 'arn:aws:iam::000000000000:policy/ManagedOpenShift-openshift-ingress-operator-cloud-credentials'
I: Created policy with ARN 'arn:aws:iam::000000000000:policy/ManagedOpenShift-openshift-cluster-csi-drivers-ebs-cloud-credent'
I: To create a cluster with these roles, run the following command:
    rosa create cluster --sts
17.4.3.3.2. Creating a cluster
Run the following command to create a cluster with all the default options:
rosa create cluster --cluster-name <cluster-name> --sts --mode auto --yes
This will also create the required Operator roles and OIDC provider. If you want to see all available options for your cluster use the --help flag or --interactive for interactive mode.
Example input
$ rosa create cluster --cluster-name my-rosa-cluster --sts --mode auto --yes
Example output
I: Creating cluster 'my-rosa-cluster'
I: To view a list of clusters and their status, run 'rosa list clusters'
I: Cluster 'my-rosa-cluster' has been created.
I: Once the cluster is installed you will need to add an Identity Provider before you can login into the cluster. See 'rosa create idp --help' for more information.
I: To determine when your cluster is Ready, run 'rosa describe cluster -c my-rosa-cluster'.
I: To watch your cluster installation logs, run 'rosa logs install -c my-rosa-cluster --watch'.
Name:                       my-rosa-cluster
ID:                         1mlhulb3bo0l54ojd0ji000000000000
External ID:
OpenShift Version:
Channel Group:              stable
DNS:                        my-rosa-cluster.ibhp.p1.openshiftapps.com
AWS Account:                000000000000
API URL:
Console URL:
Region:                     us-west-2
Multi-AZ:                   false
Nodes:
- Master:                  3
- Infra:                   2
- Compute:                 2
Network:
- Service CIDR:            172.30.0.0/16
- Machine CIDR:            10.0.0.0/16
- Pod CIDR:                10.128.0.0/14
- Host Prefix:             /23
STS Role ARN:               arn:aws:iam::000000000000:role/ManagedOpenShift-Installer-Role
Support Role ARN:           arn:aws:iam::000000000000:role/ManagedOpenShift-Support-Role
Instance IAM Roles:
- Master:                  arn:aws:iam::000000000000:role/ManagedOpenShift-ControlPlane-Role
- Worker:                  arn:aws:iam::000000000000:role/ManagedOpenShift-Worker-Role
Operator IAM Roles:
- arn:aws:iam::000000000000:role/my-rosa-cluster-openshift-image-registry-installer-cloud-credentials
- arn:aws:iam::000000000000:role/my-rosa-cluster-openshift-ingress-operator-cloud-credentials
- arn:aws:iam::000000000000:role/my-rosa-cluster-openshift-cluster-csi-drivers-ebs-cloud-credentials
- arn:aws:iam::000000000000:role/my-rosa-cluster-openshift-machine-api-aws-cloud-credentials
- arn:aws:iam::000000000000:role/my-rosa-cluster-openshift-cloud-credential-operator-cloud-credential-oper
State:                      waiting (Waiting for OIDC configuration)
Private:                    No
Created:                    Oct 28 2021 20:28:09 UTC
Details Page:               https://console.redhat.com/openshift/details/s/1wupmiQy45xr1nN000000000000
OIDC Endpoint URL:          https://rh-oidc.s3.us-east-1.amazonaws.com/1mlhulb3bo0l54ojd0ji000000000000
17.4.3.3.2.1. Default configuration
The default settings are as follows:
Nodes:
- 3 control plane nodes
- 2 infrastructure nodes
- 2 worker nodes
- No autoscaling
- See the documentation on ec2 instances for more details.
-
Region: As configured for the
awsCLI Networking IP ranges:
- Machine CIDR: 10.0.0.0/16
- Service CIDR: 172.30.0.0/16
- Pod CIDR: 10.128.0.0/14
- New VPC
- Default AWS KMS key for encryption
-
The most recent version of OpenShift available to
rosa - A single availability zone
- Public cluster
17.4.3.3.3. Checking the installation status
Run one of the following commands to check the status of your cluster:
For a detailed view of the status, run:
rosa describe cluster --cluster <cluster-name>
For an abridged view of the status, run:
rosa list clusters
- The cluster state will change from “waiting” to “installing” to "ready". This will take about 40 minutes.
- Once the state changes to “ready” your cluster is installed.
17.4.3.4. Manual Mode
If you want to review the roles and policies before applying them to a cluster, use the manual method. This method requires running a few extra commands to create the roles and policies.
This section uses the --interactive mode. See the documentation on interactive mode for a description of the fields in this section.
17.4.3.4.1. Creating account roles
If this is the first time you are deploying ROSA in this account and you have not yet created the account roles, create the account-wide roles and policies, including the Operator policies. The command creates the needed JSON files for the required roles and policies for your account in the current directory. It also outputs the
awsCLI commands that you need to run to create these objects.Run the following command to create the needed files and output the additional commands:
rosa create account-roles --mode manual
Example output
I: All policy files saved to the current directory
I: Run the following commands to create the account roles and policies:
aws iam create-role \
--role-name ManagedOpenShift-Worker-Role \
--assume-role-policy-document file://sts_instance_worker_trust_policy.json \
--tags Key=rosa_openshift_version,Value=4.8 Key=rosa_role_prefix,Value=ManagedOpenShift Key=rosa_role_type,Value=instance_worker
aws iam put-role-policy \
--role-name ManagedOpenShift-Worker-Role \
--policy-name ManagedOpenShift-Worker-Role-Policy \
--policy-document file://sts_instance_worker_permission_policy.json
Check the contents of your current directory to see the new files. Use the
awsCLI to create each of these objects.Example output
$ ls
openshift_cloud_credential_operator_cloud_credential_operator_iam_ro_creds_policy.json
sts_instance_controlplane_permission_policy.json
openshift_cluster_csi_drivers_ebs_cloud_credentials_policy.json        sts_instance_controlplane_trust_policy.json
openshift_image_registry_installer_cloud_credentials_policy.json          sts_instance_worker_permission_policy.json
openshift_ingress_operator_cloud_credentials_policy.json                 sts_instance_worker_trust_policy.json
openshift_machine_api_aws_cloud_credentials_policy.json                   sts_support_permission_policy.json
sts_installer_permission_policy.json                                      sts_support_trust_policy.json
sts_installer_trust_policy.json
Optional: Open the files to review what you will create. For example, opening the
sts_installer_permission_policy.jsonshows:Example output
$ cat sts_installer_permission_policy.json
        {
        "Version": "2012-10-17",
        "Statement": [
        {
            "Effect": "Allow",
            "Action": [
                "autoscaling:DescribeAutoScalingGroups",
                "ec2:AllocateAddress",
                "ec2:AssociateAddress",
                "ec2:AssociateDhcpOptions",
                "ec2:AssociateRouteTable",
                "ec2:AttachInternetGateway",
                "ec2:AttachNetworkInterface",
                "ec2:AuthorizeSecurityGroupEgress",
                "ec2:AuthorizeSecurityGroupIngress",
                [...]
You can also see the contents in the About IAM resources for ROSA clusters documentation.
-
Run the
awscommands listed in step 1. You can copy and paste if you are in the same directory as the JSON files you created.
17.4.3.4.2. Creating a cluster
After the
awscommands are executed successfully, run the following command to begin ROSA cluster creation in interactive mode:rosa create cluster --interactive --sts
See the ROSA documentation for a description of the fields.
For the purpose of this tutorial, copy and then input the following values:
Cluster name: my-rosa-cluster
OpenShift version: <choose version>
External ID (optional): <leave blank>
Operator roles prefix: <accept default>
Multiple availability zones: No
AWS region: <choose region>
PrivateLink cluster: No
Install into an existing VPC: No
Enable Customer Managed key: No
Compute nodes instance type: m5.xlarge
Enable autoscaling: No
Compute nodes: 2
Machine CIDR: <accept default>
Service CIDR: <accept default>
Pod CIDR: <accept default>
Host prefix: <accept default>
Encrypt etcd data (optional): No
Disable Workload monitoring: No
Example output
I: Creating cluster 'my-rosa-cluster'
I: To create this cluster again in the future, you can run:
rosa create cluster --cluster-name my-rosa-cluster --role-arn arn:aws:iam::000000000000:role/ManagedOpenShift-Installer-Role --support-role-arn arn:aws:iam::000000000000:role/ManagedOpenShift-Support-Role --master-iam-role arn:aws:iam::000000000000:role/ManagedOpenShift-ControlPlane-Role --worker-iam-role arn:aws:iam::000000000000:role/ManagedOpenShift-Worker-Role --operator-roles-prefix my-rosa-cluster --region us-west-2 --version 4.8.13 --compute-nodes 2 --machine-cidr 10.0.0.0/16 --service-cidr 172.30.0.0/16 --pod-cidr 10.128.0.0/14 --host-prefix 23
I: To view a list of clusters and their status, run 'rosa list clusters'
I: Cluster 'my-rosa-cluster' has been created.
I: Once the cluster is installed you will need to add an Identity Provider before you can login into the cluster. See 'rosa create idp --help' for more information.
Name:                       my-rosa-cluster
ID:                         1t6i760dbum4mqltqh6o000000000000
External ID:
OpenShift Version:
Channel Group:              stable
DNS:                        my-rosa-cluster.abcd.p1.openshiftapps.com
AWS Account:                000000000000
API URL:
Console URL:
Region:                     us-west-2
Multi-AZ:                   false
Nodes:
- Control plane:           3
- Infra:                   2
- Compute:                 2
Network:
- Service CIDR:            172.30.0.0/16
- Machine CIDR:            10.0.0.0/16
- Pod CIDR:                10.128.0.0/14
- Host Prefix:             /23
STS Role ARN:               arn:aws:iam::000000000000:role/ManagedOpenShift-Installer-Role
Support Role ARN:           arn:aws:iam::000000000000:role/ManagedOpenShift-Support-Role
Instance IAM Roles:
- Control plane:           arn:aws:iam::000000000000:role/ManagedOpenShift-ControlPlane-Role
- Worker:                  arn:aws:iam::000000000000:role/ManagedOpenShift-Worker-Role
Operator IAM Roles:
- arn:aws:iam::000000000000:role/my-rosa-cluster-w7i6-openshift-ingress-operator-cloud-credentials
- arn:aws:iam::000000000000:role/my-rosa-cluster-w7i6-openshift-cluster-csi-drivers-ebs-cloud-credentials
- arn:aws:iam::000000000000:role/my-rosa-cluster-w7i6-openshift-cloud-network-config-controller-cloud-cre
- arn:aws:iam::000000000000:role/my-rosa-cluster-openshift-machine-api-aws-cloud-credentials
- arn:aws:iam::000000000000:role/my-rosa-cluster-openshift-cloud-credential-operator-cloud-credentia
- arn:aws:iam::000000000000:role/my-rosa-cluster-openshift-image-registry-installer-cloud-credential
State:                      waiting (Waiting for OIDC configuration)
Private:                    No
Created:                    Jul  1 2022 22:13:50 UTC
Details Page:               https://console.redhat.com/openshift/details/s/2BMQm8xz8Hq5yEN000000000000
OIDC Endpoint URL:          https://rh-oidc.s3.us-east-1.amazonaws.com/1t6i760dbum4mqltqh6o000000000000
I: Run the following commands to continue the cluster creation:
rosa create operator-roles --cluster my-rosa-cluster
rosa create oidc-provider --cluster my-rosa-cluster
I: To determine when your cluster is Ready, run 'rosa describe cluster -c my-rosa-cluster'.
I: To watch your cluster installation logs, run 'rosa logs install -c my-rosa-cluster --watch'.
NoteThe cluster state will remain as “waiting” until the next two steps are completed.
17.4.3.4.3. Creating Operator roles
The above step outputs the next commands to run. These roles need to be created once for each cluster. To create the roles run the following command:
rosa create operator-roles --mode manual --cluster <cluster-name>
Example output
I: Run the following commands to create the operator roles: aws iam create-role \ --role-name my-rosa-cluster-openshift-image-registry-installer-cloud-credentials \ --assume-role-policy-document file://operator_image_registry_installer_cloud_credentials_policy.json \ --tags Key=rosa_cluster_id,Value=1mkesci269png3tck000000000000000 Key=rosa_openshift_version,Value=4.8 Key=rosa_role_prefix,Value= Key=operator_namespace,Value=openshift-image-registry Key=operator_name,Value=installer-cloud-credentials aws iam attach-role-policy \ --role-name my-rosa-cluster-openshift-image-registry-installer-cloud-credentials \ --policy-arn arn:aws:iam::000000000000:policy/ManagedOpenShift-openshift-image-registry-installer-cloud-creden [...]-
Run each of the
awscommands.
17.4.3.4.4. Creating the OIDC provider
Run the following command to create the OIDC provider:
rosa create oidc-provider --mode manual --cluster <cluster-name>
This displays the
awscommands that you need to run.Example output
I: Run the following commands to create the OIDC provider:
$ aws iam create-open-id-connect-provider \
--url https://rh-oidc.s3.us-east-1.amazonaws.com/1mkesci269png3tckknhh0rfs2da5fj9 \
--client-id-list openshift sts.amazonaws.com \
--thumbprint-list a9d53002e97e00e043244f3d170d000000000000

$ aws iam create-open-id-connect-provider \
--url https://rh-oidc.s3.us-east-1.amazonaws.com/1mkesci269png3tckknhh0rfs2da5fj9 \
--client-id-list openshift sts.amazonaws.com \
--thumbprint-list a9d53002e97e00e043244f3d170d000000000000
- Your cluster will now continue the installation process.
17.4.3.4.5. Checking the installation status
Run one of the following commands to check the status of your cluster:
For a detailed view of the status, run:
rosa describe cluster --cluster <cluster-name>
For an abridged view of the status, run:
rosa list clusters
- The cluster state will change from “waiting” to “installing” to "ready". This will take about 40 minutes.
- Once the state changes to “ready” your cluster is installed.
17.4.3.5. Obtaining the Red Hat Hybrid Cloud Console URL
To obtain the Hybrid Cloud Console URL, run the following command:
rosa describe cluster -c <cluster-name> | grep Console
The cluster has now been successfully deployed. The next tutorial shows how to create an admin user to be able to use the cluster immediately.
17.4.4. Tutorial: Simple UI guide
This page outlines the minimum list of commands to deploy a ROSA cluster using the user interface (UI).
While this simple deployment works well for a tutorial setting, clusters used in production should be deployed with a more detailed method.
17.4.4.1. Prerequisites
- You have completed the prerequisites in the Setup tutorial.
17.4.4.2. Creating account roles
Run the following command once for each AWS account and y-stream OpenShift version:
rosa create account-roles --mode auto --yes
17.4.4.3. Creating Red Hat OpenShift Cluster Manager roles
Create one OpenShift Cluster Manager role for each AWS account by running the following command:
rosa create ocm-role --mode auto --admin --yes
Create one OpenShift Cluster Manager user role for each AWS account by running the following command:
rosa create user-role --mode auto --yes
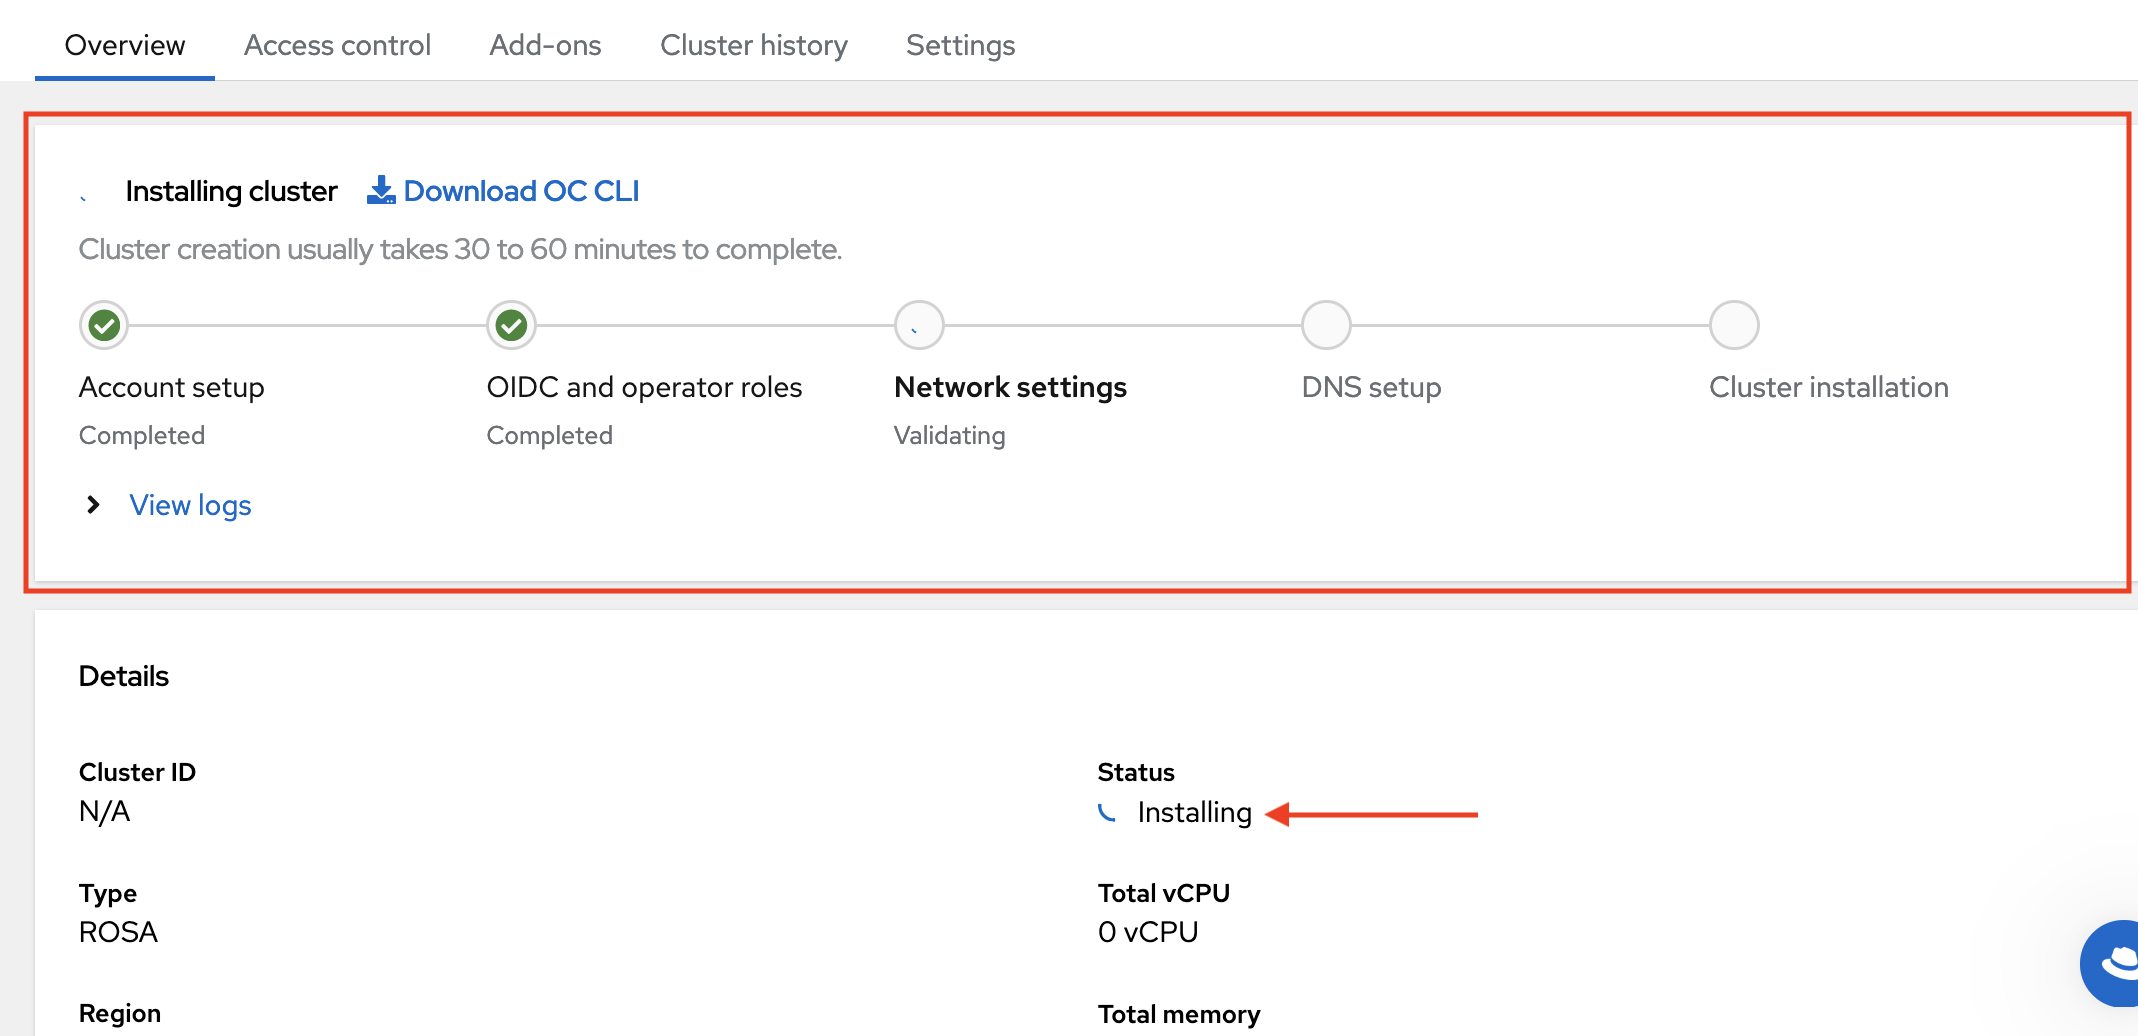
- Use the OpenShift Cluster Manager to select your AWS account, cluster options, and begin deployment.
OpenShift Cluster Manager UI displays cluster status.
17.4.5. Tutorial: Detailed UI guide
This tutorial outlines the detailed steps to deploy a Red Hat OpenShift Service on AWS (ROSA) cluster using the Red Hat OpenShift Cluster Manager user interface (UI).
17.4.5.1. Deployment workflow
The overall deployment workflow follows these steps:
- Create the account wide roles and policies.
Associate your AWS account with your Red Hat account.
- Create and link the Red Hat OpenShift Cluster Manager role.
- Create and link the user role.
- Create the cluster.
Step 1 only needs to be performed the first time you are deploying into an AWS account. Step 2 only needs to be performed the first time you are using the UI. For successive clusters of the same y-stream version, you only need to create the cluster.
17.4.5.2. Creating account wide roles
If you already have account roles from an earlier deployment, skip this step. The UI will detect your existing roles after you select an associated AWS account.
If this is the first time you are deploying ROSA in this account and you have not yet created the account roles, create the account-wide roles and policies, including the Operator policies.
In your terminal, run the following command to create the account-wide roles:
$ rosa create account-roles --mode auto --yes
Example output
I: Creating roles using 'arn:aws:iam::000000000000:user/rosa-user'
I: Created role 'ManagedOpenShift-ControlPlane-Role' with ARN 'arn:aws:iam::000000000000:role/ManagedOpenShift-ControlPlane-Role'
I: Created role 'ManagedOpenShift-Worker-Role' with ARN 'arn:aws:iam::000000000000:role/ManagedOpenShift-Worker-Role'
I: Created role 'ManagedOpenShift-Support-Role' with ARN 'arn:aws:iam::000000000000:role/ManagedOpenShift-Support-Role'
I: Created role 'ManagedOpenShift-Installer-Role' with ARN 'arn:aws:iam::000000000000:role/ManagedOpenShift-Installer-Role'
I: Created policy with ARN 'arn:aws:iam::000000000000:policy/ManagedOpenShift-openshift-machine-api-aws-cloud-credentials'
I: Created policy with ARN 'arn:aws:iam::000000000000:policy/ManagedOpenShift-openshift-cloud-credential-operator-cloud-crede'
I: Created policy with ARN 'arn:aws:iam::000000000000:policy/ManagedOpenShift-openshift-image-registry-installer-cloud-creden'
I: Created policy with ARN 'arn:aws:iam::000000000000:policy/ManagedOpenShift-openshift-ingress-operator-cloud-credentials'
I: Created policy with ARN 'arn:aws:iam::000000000000:policy/ManagedOpenShift-openshift-cluster-csi-drivers-ebs-cloud-credent'
I: To create a cluster with these roles, run the following command:
rosa create cluster --sts
17.4.5.3. Associating your AWS account with your Red Hat account
This step tells the OpenShift Cluster Manager what AWS account you want to use when deploying ROSA.
If you have already associated your AWS accounts, skip this step.
- Open the Red Hat Hybrid Cloud Console by visiting the OpenShift Cluster Manager and logging in to your Red Hat account.
- Click Create Cluster.
Scroll down to the Red Hat OpenShift Service on AWS (ROSA) row and click Create Cluster.
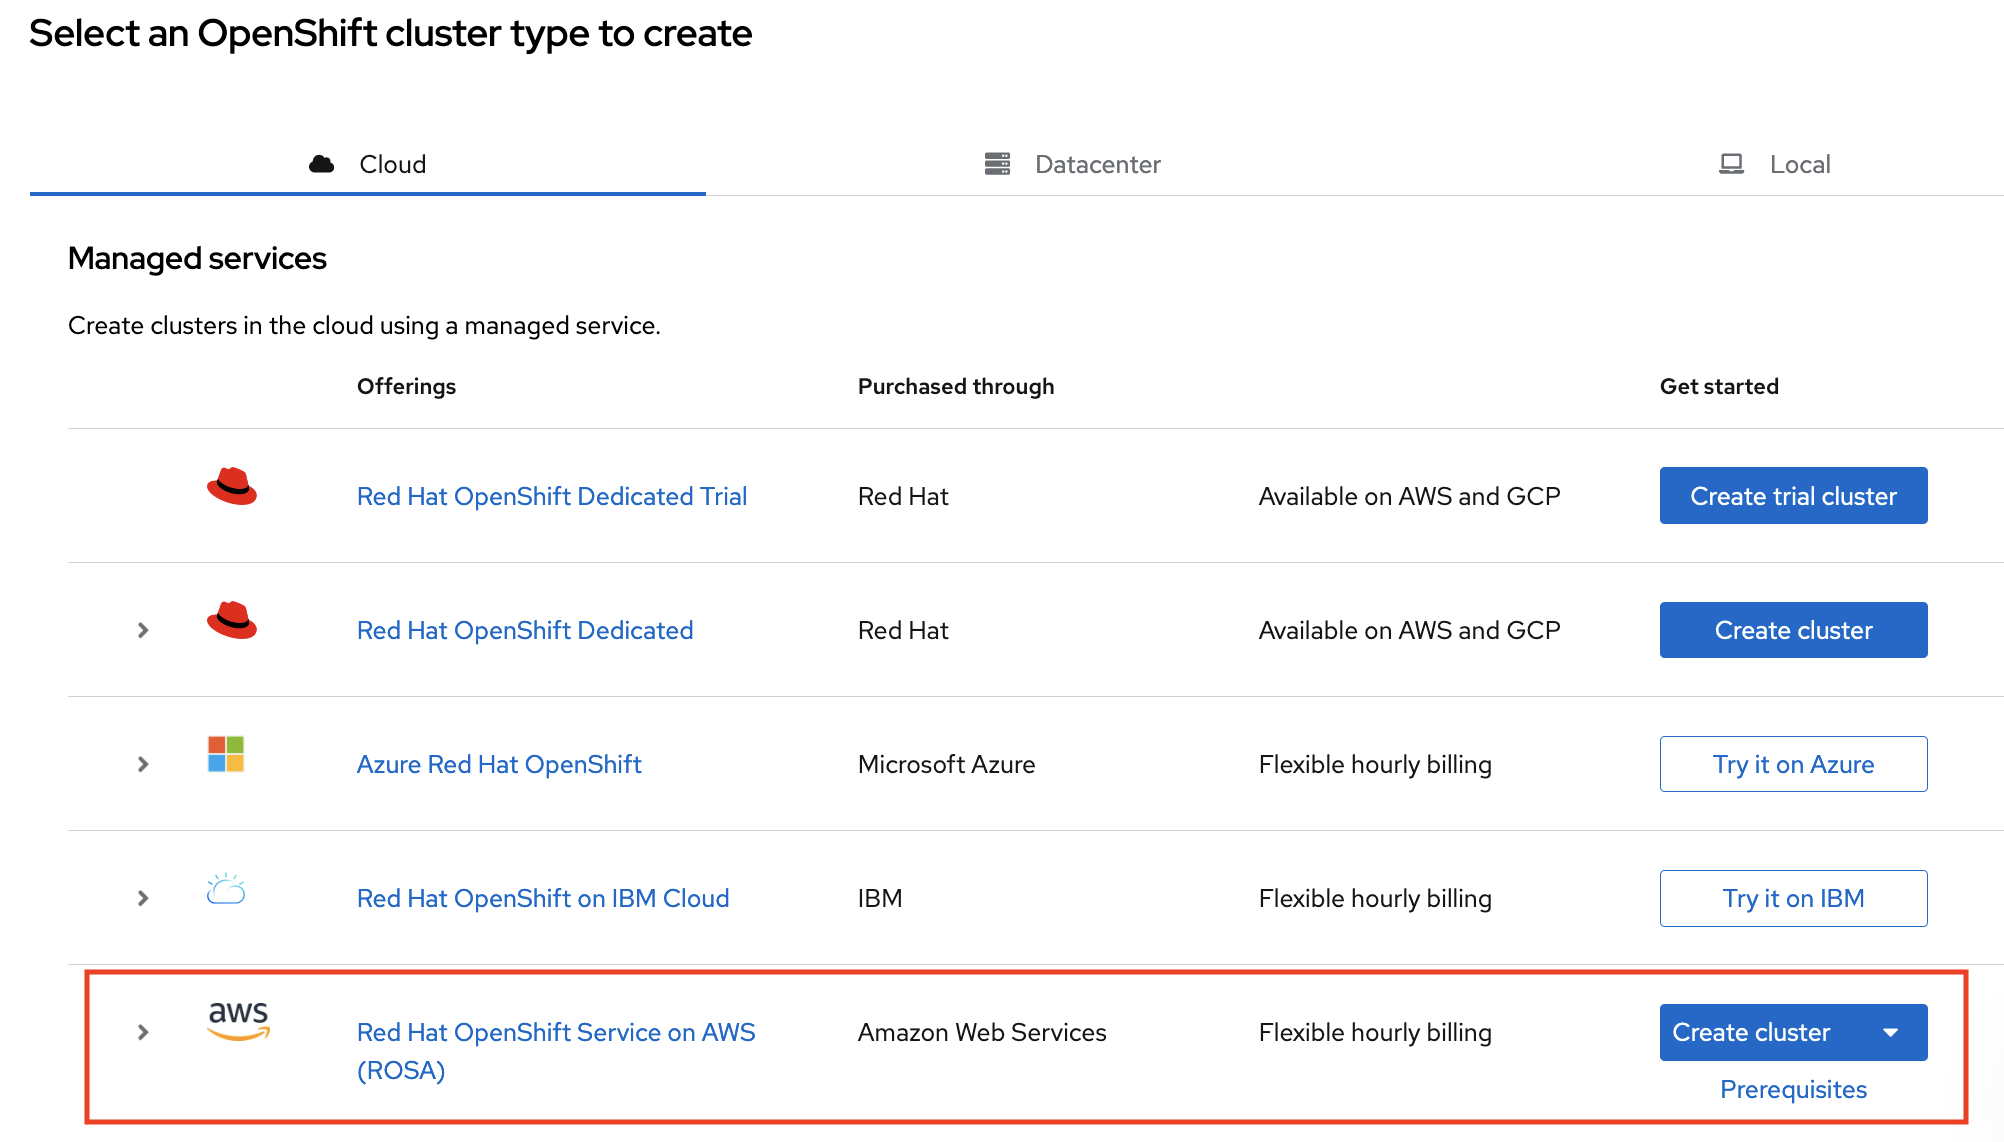
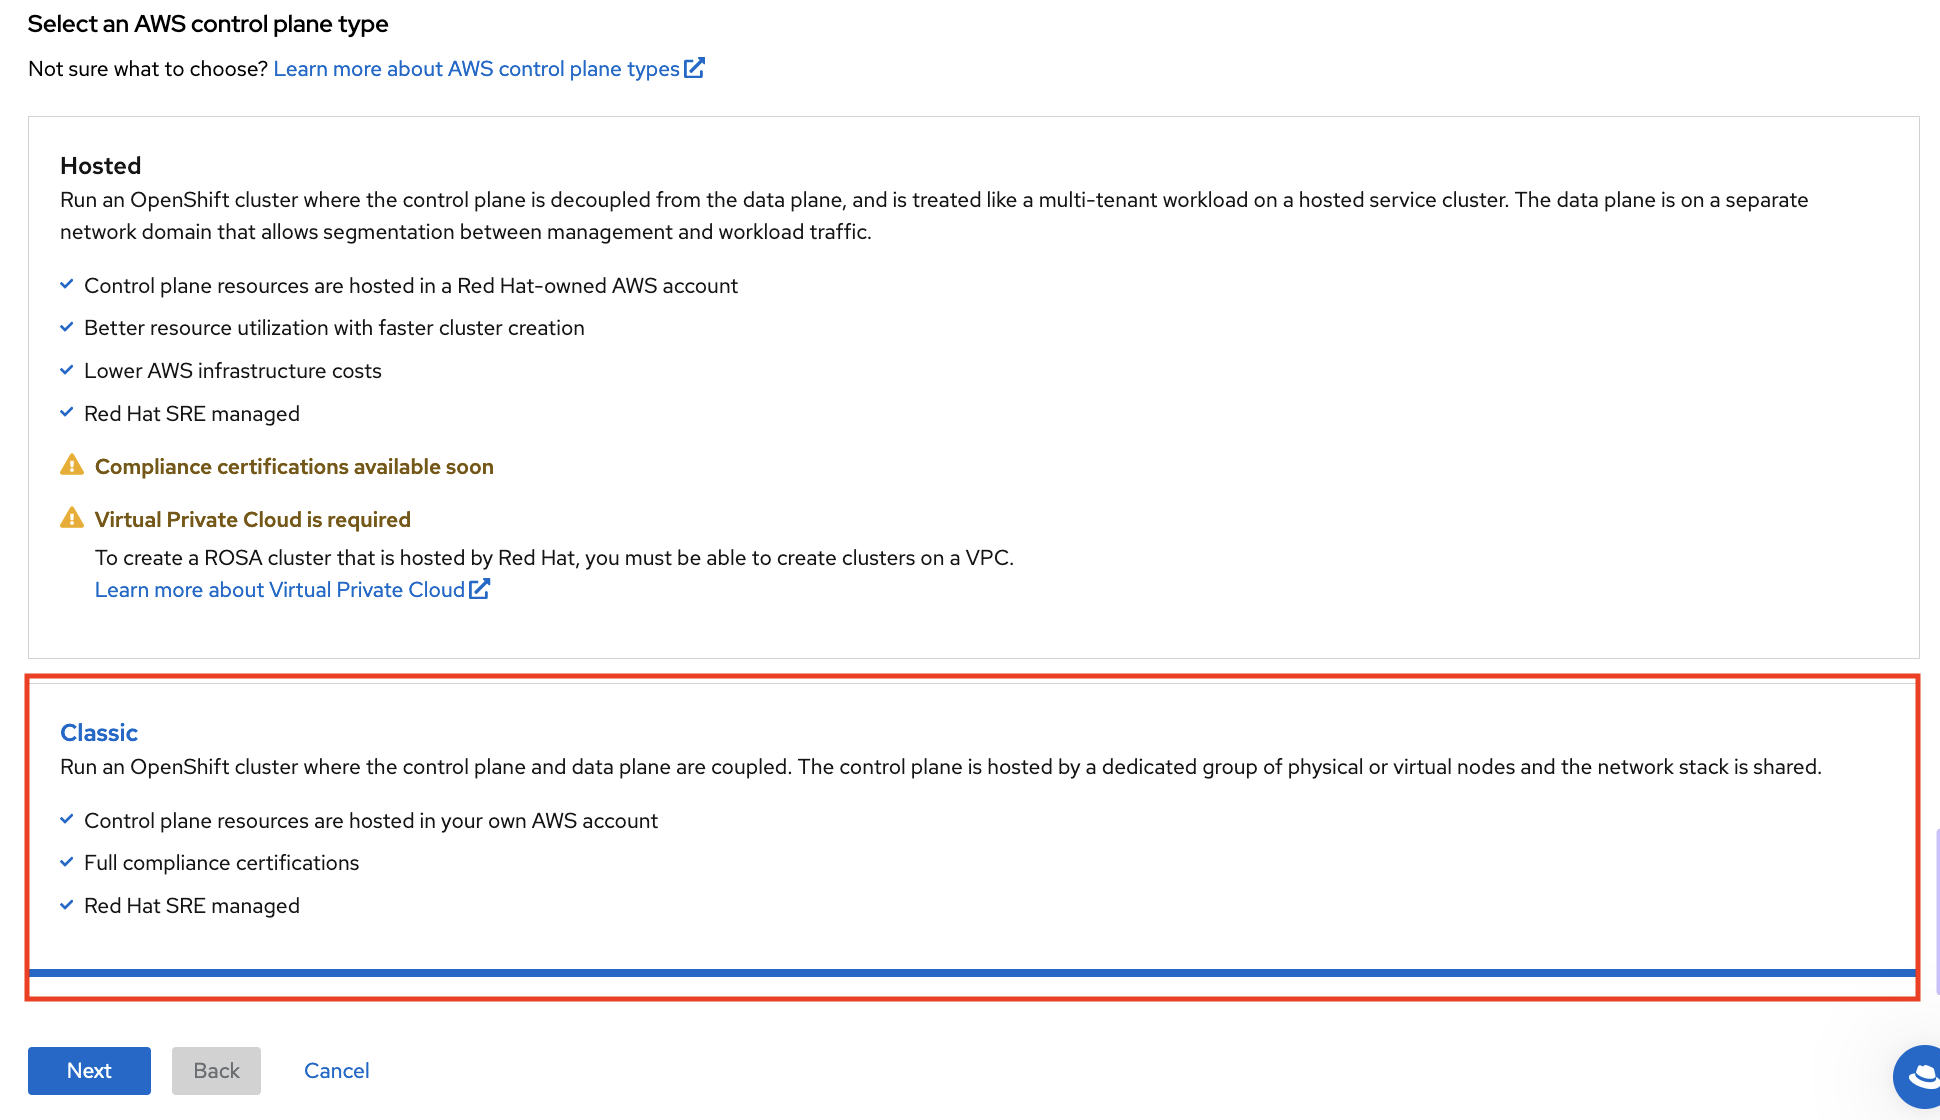
A dropdown menu appears. Click With web interface.

Under "Select an AWS control plane type," choose Classic. Then click Next.
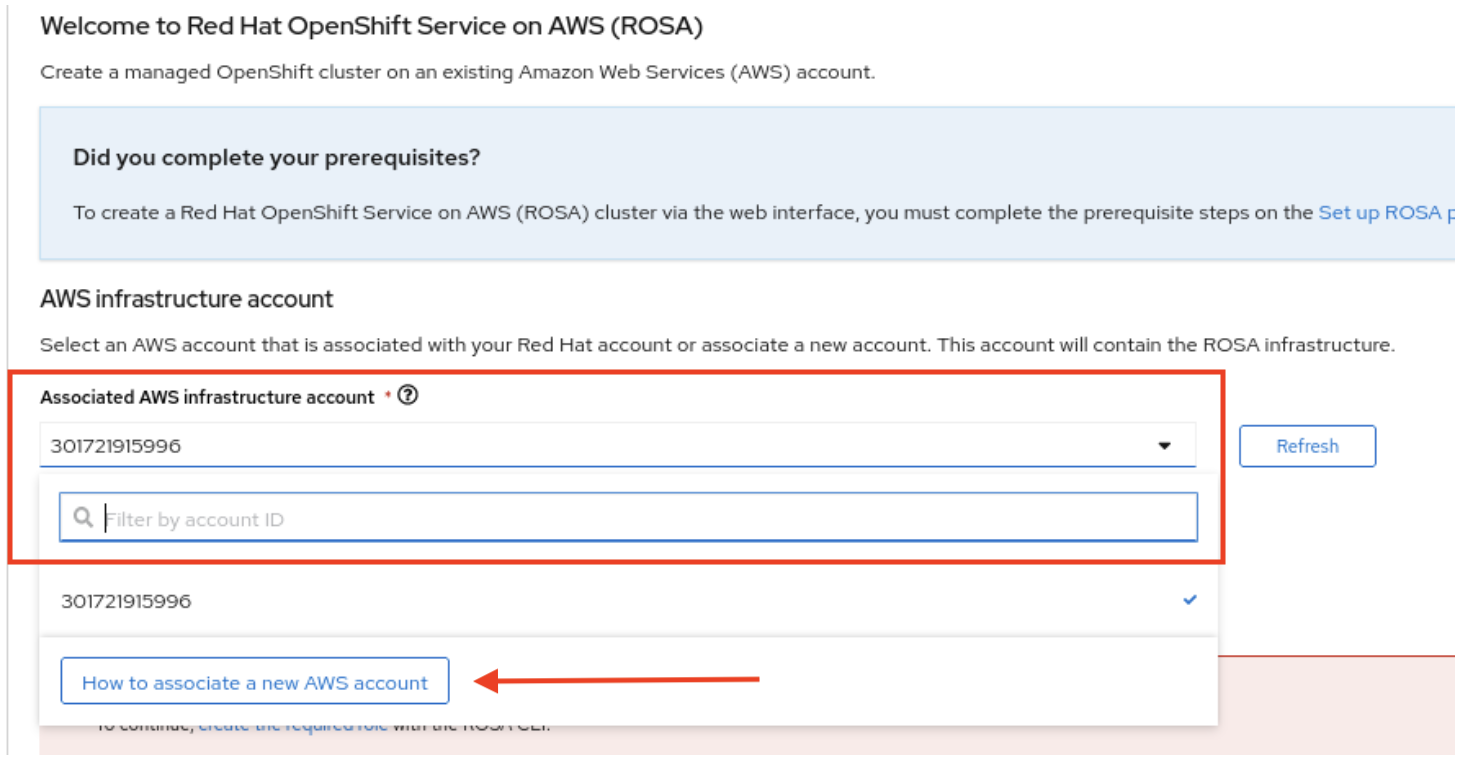
- Click the dropbox under Associated AWS infrastructure account. If you have not yet associated any AWS accounts, the dropbox may be empty.
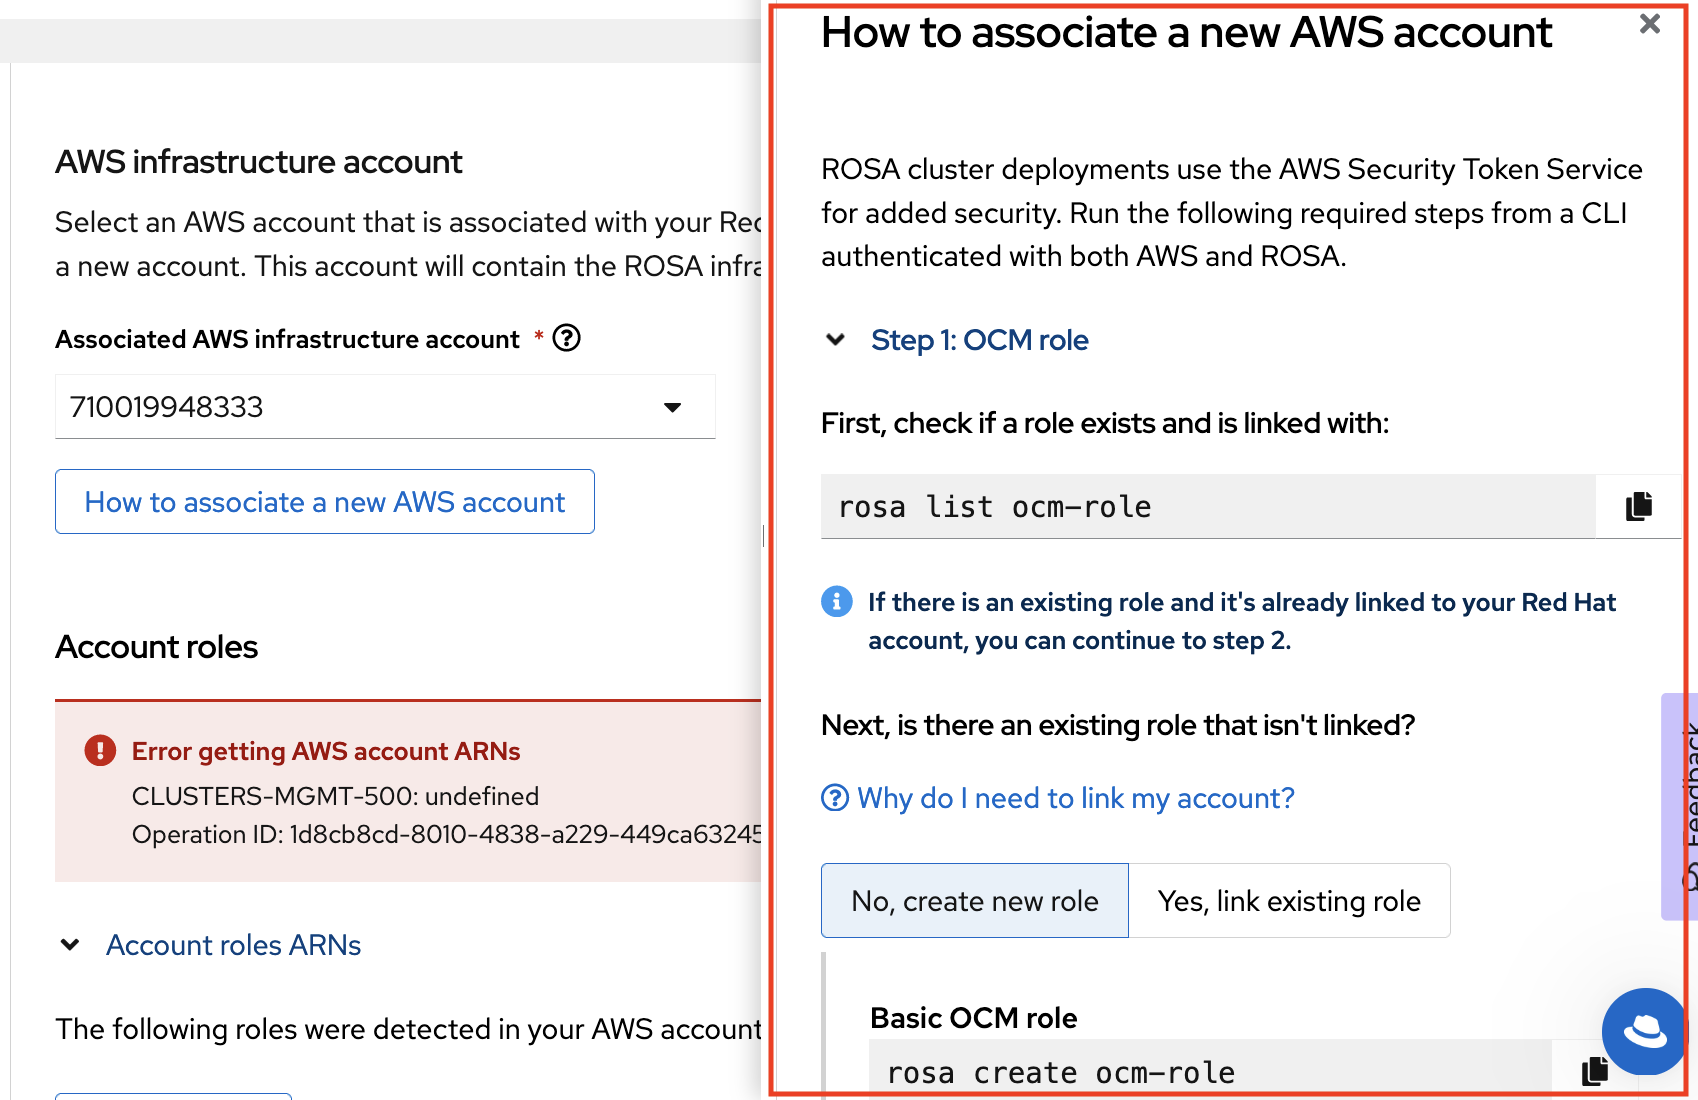
Click How to associate a new AWS account.
A sidebar appears with instructions for associating a new AWS account.
17.4.5.4. Creating and associating an OpenShift Cluster Manager role
Run the following command to see if an OpenShift Cluster Manager role exists:
$ rosa list ocm-role
The UI displays the commands to create an OpenShift Cluster Manager role with two different levels of permissions:
- Basic OpenShift Cluster Manager role: Allows the OpenShift Cluster Manager to have read-only access to the account to check if the roles and policies that are required by ROSA are present before creating a cluster. You will need to manually create the required roles, policies, and OIDC provider using the CLI.
Admin OpenShift Cluster Manager role: Grants the OpenShift Cluster Manager additional permissions to create the required roles, policies, and OIDC provider for ROSA. Using this makes the deployment of a ROSA cluster quicker since the OpenShift Cluster Manager will be able to create the required resources for you.
To read more about these roles, see the OpenShift Cluster Manager roles and permissions section of the documentation.
For the purposes of this tutorial, use the Admin OpenShift Cluster Manager role for the simplest and quickest approach.
Copy the command to create the Admin OpenShift Cluster Manager role from the sidebar or switch to your terminal and enter the following command:
$ rosa create ocm-role --mode auto --admin --yes
This command creates the OpenShift Cluster Manager role and associates it with your Red Hat account.
Example output
I: Creating ocm role
I: Creating role using 'arn:aws:iam::000000000000:user/rosa-user'
I: Created role 'ManagedOpenShift-OCM-Role-12561000' with ARN 'arn:aws:iam::000000000000:role/ManagedOpenShift-OCM-Role-12561000'
I: Linking OCM role
I: Successfully linked role-arn 'arn:aws:iam::000000000000:role/ManagedOpenShift-OCM-Role-12561000' with organization account '1MpZfntsZeUdjWHg7XRgP000000'
- Click Step 2: User role.
17.4.5.4.1. Other OpenShift Cluster Manager role creation options
Manual mode: If you prefer to run the AWS CLI commands yourself, you can define the mode as
manualrather thanauto. The CLI will output the AWS commands and the relevant JSON files are created in the current directory.Use the following command to create the OpenShift Cluster Manager role in manual mode:
$ rosa create ocm-role --mode manual --admin --yes
Basic OpenShift Cluster Manager role: If you prefer that the OpenShift Cluster Manager has read only access to the account, create a basic OpenShift Cluster Manager role. You will then need to manually create the required roles, policies, and OIDC provider using the CLI.
Use the following command to create a Basic OpenShift Cluster Manager role:
$ rosa create ocm-role --mode auto --yes
17.4.5.5. Creating an OpenShift Cluster Manager user role
As defined in the user role documentation, the user role needs to be created so that ROSA can verify your AWS identity. This role has no permissions, and it is only used to create a trust relationship between the installation program account and your OpenShift Cluster Manager role resources.
Check if a user role already exists by running the following command:
$ rosa list user-role
Run the following command to create the user role and to link it to your Red Hat account:
$ rosa create user-role --mode auto --yes
Example output
I: Creating User role
I: Creating ocm user role using 'arn:aws:iam::000000000000:user/rosa-user'
I: Created role 'ManagedOpenShift-User-rosa-user-Role' with ARN 'arn:aws:iam::000000000000:role/ManagedOpenShift-User-rosa-user-Role'
I: Linking User role
I: Successfully linked role ARN 'arn:aws:iam::000000000000:role/ManagedOpenShift-User-rosa-user-Role' with account '1rbOQez0z5j1YolInhcXY000000'
NoteAs before, you can define
--mode manualif you’d prefer to run the AWS CLI commands yourself. The CLI outputs the AWS commands and the relevant JSON files are created in the current directory. Make sure to link the role.- Click Step 3: Account roles.
17.4.5.6. Creating account roles
Create your account roles by running the following command:
$ rosa create account-roles --mode auto
- Click OK to close the sidebar.
17.4.5.7. Confirming successful account association
- You should now see your AWS account in the Associated AWS infrastructure account dropdown menu. If you see your account, account association was successful.
- Select the account.
You will see the account role ARNs populated below.
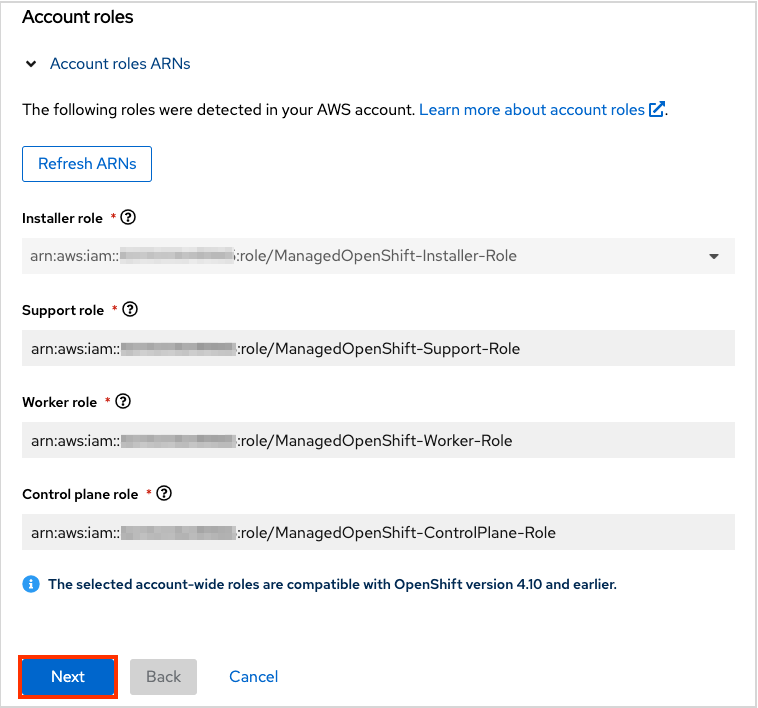
- Click Next.
17.4.5.8. Creating the cluster
For the purposes of this tutorial make the following selections:
Cluster settings
- Cluster name: <pick a name\>
- Version: <select latest version\>
- Region: <select region\>
- Availability: Single zone
- Enable user workload monitoring: leave checked
- Enable additional etcd encryption: leave unchecked
- Encrypt persistent volumes with customer keys: leave unchecked
- Click Next.
Leave the default settings on for the machine pool:
Default machine pool settings
- Compute node instance type: m5.xlarge - 4 vCPU 16 GiB RAM
- Enable autoscaling: unchecked
- Compute node count: 2
- Leave node labels blank
- Click Next.
17.4.5.8.1. Networking
- Leave all the default values for configuration.
- Click Next.
- Leave all the default values for CIDR ranges.
- Click Next.
17.4.5.8.2. Cluster roles and policies
For this tutorial, leave Auto selected. It will make the cluster deployment process simpler and quicker.
If you selected a Basic OpenShift Cluster Manager role earlier, you can only use manual mode. You must manually create the operator roles and OIDC provider. See the "Basic OpenShift Cluster Manager role" section below after you have completed the "Cluster updates" section and started cluster creation.
17.4.5.8.3. Cluster updates
- Leave all the options at default in this section.
17.4.5.8.4. Reviewing and creating your cluster
- Review the content for the cluster configuration.
- Click Create cluster.
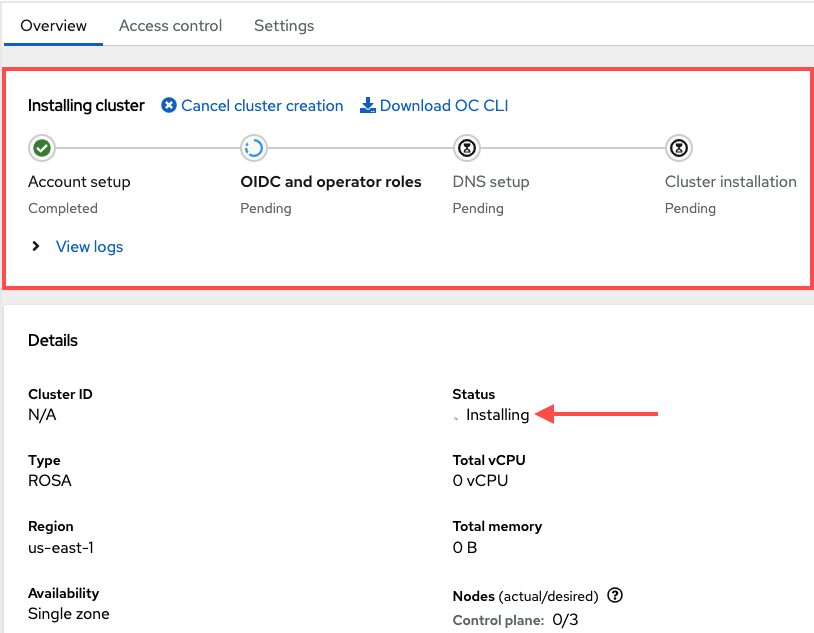
17.4.5.8.5. Monitoring the installation progress
Stay on the current page to monitor the installation progress. It should take about 40 minutes.
17.4.5.9. Basic OpenShift Cluster Manager Role
If you created an Admin OpenShift Cluster Manager role as directed above ignore this entire section. The OpenShift Cluster Manager will create the resources for you.
If you created a Basic OpenShift Cluster Manager role earlier, you will need to manually create two more elements before cluster installation can continue:
- Operator roles
- OIDC provider
17.4.5.9.1. Creating Operator roles
A pop up window will show you the commands to run.
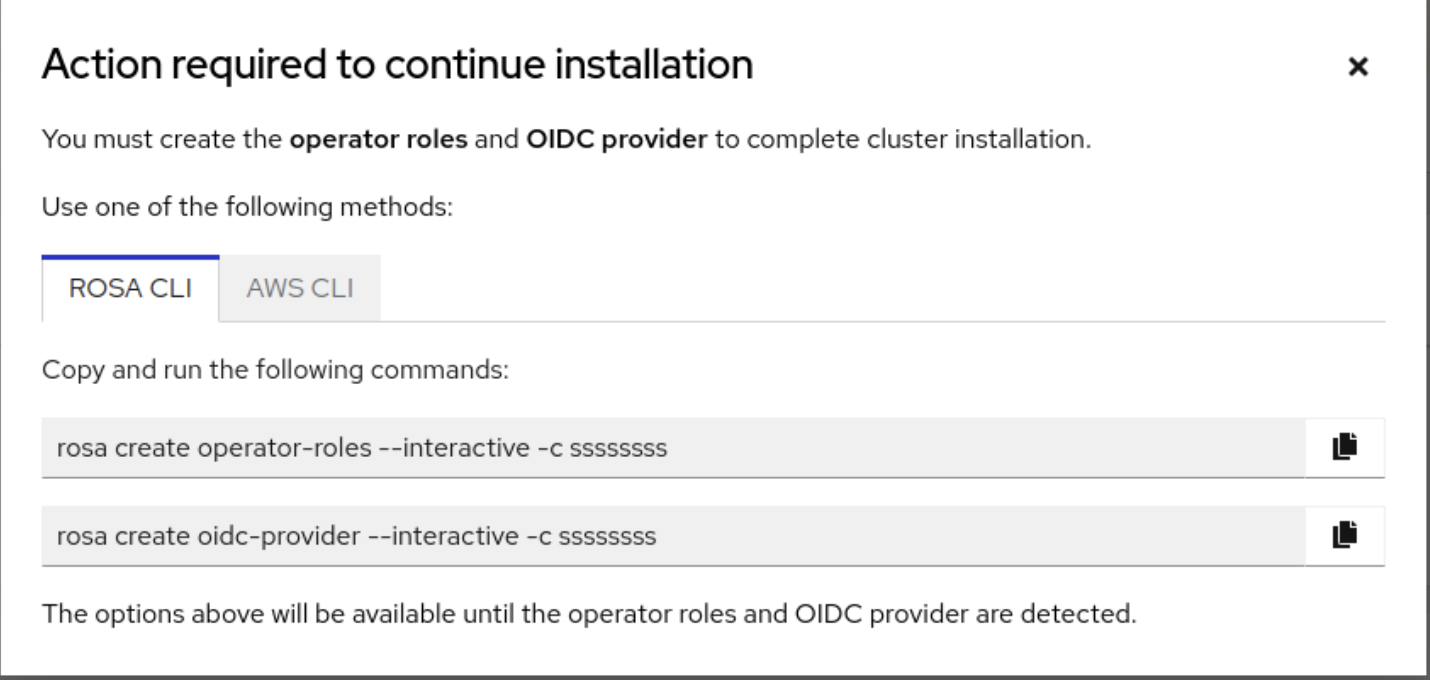
Run the commands from the window in your terminal to launch interactive mode. Or, for simplicity, run the following command to create the Operator roles:
$ rosa create operator-roles --mode auto --cluster <cluster-name> --yes
Example output
I: Creating roles using 'arn:aws:iam::000000000000:user/rosauser'
I: Created role 'rosacluster-b736-openshift-ingress-operator-cloud-credentials' with ARN 'arn:aws:iam::000000000000:role/rosacluster-b736-openshift-ingress-operator-cloud-credentials'
I: Created role 'rosacluster-b736-openshift-cluster-csi-drivers-ebs-cloud-credent' with ARN 'arn:aws:iam::000000000000:role/rosacluster-b736-openshift-cluster-csi-drivers-ebs-cloud-credent'
I: Created role 'rosacluster-b736-openshift-cloud-network-config-controller-cloud' with ARN 'arn:aws:iam::000000000000:role/rosacluster-b736-openshift-cloud-network-config-controller-cloud'
I: Created role 'rosacluster-b736-openshift-machine-api-aws-cloud-credentials' with ARN 'arn:aws:iam::000000000000:role/rosacluster-b736-openshift-machine-api-aws-cloud-credentials'
I: Created role 'rosacluster-b736-openshift-cloud-credential-operator-cloud-crede' with ARN 'arn:aws:iam::000000000000:role/rosacluster-b736-openshift-cloud-credential-operator-cloud-crede'
I: Created role 'rosacluster-b736-openshift-image-registry-installer-cloud-creden' with ARN 'arn:aws:iam::000000000000:role/rosacluster-b736-openshift-image-registry-installer-cloud-creden'
17.4.5.9.2. Creating the OIDC provider
In your terminal, run the following command to create the OIDC provider:
$ rosa create oidc-provider --mode auto --cluster <cluster-name> --yes
Example output
I: Creating OIDC provider using 'arn:aws:iam::000000000000:user/rosauser'
I: Created OIDC provider with ARN 'arn:aws:iam::000000000000:oidc-provider/rh-oidc.s3.us-east-1.amazonaws.com/1tt4kvrr2kha2rgs8gjfvf0000000000'
17.4.6. Tutorial: Hosted control plane (HCP) guide
Follow this workshop to deploy a sample Red Hat OpenShift Service on AWS (ROSA) with hosted control planes (HCP) cluster. You can then use your cluster in the next tutorials.
Tutorial objectives
Learn to create your cluster prerequisites:
- Create a sample virtual private cloud (VPC)
- Create sample OpenID Connect (OIDC) resources
- Create sample environment variables
- Deploy a sample ROSA cluster
Prerequisites
- ROSA version 1.2.31 or later
- Amazon Web Service (AWS) command line interface (CLI)
-
ROSA CLI (
rosa)
17.4.6.1. Creating your cluster prerequisites
Before deploying a ROSA with HCP cluster, you must have both a VPC and OIDC resources. We will create these resources first. ROSA uses the bring your own VPC (BYO-VPC) model.
17.4.6.1.1. Creating a VPC
Make sure your AWS CLI (
aws) is configured to use a region where ROSA is available. See the regions supported by the AWS CLI by running the following command:$ rosa list regions --hosted-cp
Create the VPC. For this tutorial, the following script creates the VPC and its required components. It uses the region configured in your
awsCLI.#!/bin/bash set -e ########## # This script will create the network requirements for a ROSA cluster. This will be # a public cluster. This creates: # - VPC # - Public and private subnets # - Internet Gateway # - Relevant route tables # - NAT Gateway # # This will automatically use the region configured for the aws cli # ########## VPC_CIDR=10.0.0.0/16 PUBLIC_CIDR_SUBNET=10.0.1.0/24 PRIVATE_CIDR_SUBNET=10.0.0.0/24 # Create VPC echo -n "Creating VPC..." VPC_ID=$(aws ec2 create-vpc --cidr-block $VPC_CIDR --query Vpc.VpcId --output text) # Create tag name aws ec2 create-tags --resources $VPC_ID --tags Key=Name,Value=$CLUSTER_NAME # Enable dns hostname aws ec2 modify-vpc-attribute --vpc-id $VPC_ID --enable-dns-hostnames echo "done." # Create Public Subnet echo -n "Creating public subnet..." PUBLIC_SUBNET_ID=$(aws ec2 create-subnet --vpc-id $VPC_ID --cidr-block $PUBLIC_CIDR_SUBNET --query Subnet.SubnetId --output text) aws ec2 create-tags --resources $PUBLIC_SUBNET_ID --tags Key=Name,Value=$CLUSTER_NAME-public echo "done." # Create private subnet echo -n "Creating private subnet..." PRIVATE_SUBNET_ID=$(aws ec2 create-subnet --vpc-id $VPC_ID --cidr-block $PRIVATE_CIDR_SUBNET --query Subnet.SubnetId --output text) aws ec2 create-tags --resources $PRIVATE_SUBNET_ID --tags Key=Name,Value=$CLUSTER_NAME-private echo "done." # Create an internet gateway for outbound traffic and attach it to the VPC. echo -n "Creating internet gateway..." IGW_ID=$(aws ec2 create-internet-gateway --query InternetGateway.InternetGatewayId --output text) echo "done." aws ec2 create-tags --resources $IGW_ID --tags Key=Name,Value=$CLUSTER_NAME aws ec2 attach-internet-gateway --vpc-id $VPC_ID --internet-gateway-id $IGW_ID > /dev/null 2>&1 echo "Attached IGW to VPC." # Create a route table for outbound traffic and associate it to the public subnet. echo -n "Creating route table for public subnet..." PUBLIC_ROUTE_TABLE_ID=$(aws ec2 create-route-table --vpc-id $VPC_ID --query RouteTable.RouteTableId --output text) aws ec2 create-tags --resources $PUBLIC_ROUTE_TABLE_ID --tags Key=Name,Value=$CLUSTER_NAME echo "done." aws ec2 create-route --route-table-id $PUBLIC_ROUTE_TABLE_ID --destination-cidr-block 0.0.0.0/0 --gateway-id $IGW_ID > /dev/null 2>&1 echo "Created default public route." aws ec2 associate-route-table --subnet-id $PUBLIC_SUBNET_ID --route-table-id $PUBLIC_ROUTE_TABLE_ID > /dev/null 2>&1 echo "Public route table associated" # Create a NAT gateway in the public subnet for outgoing traffic from the private network. echo -n "Creating NAT Gateway..." NAT_IP_ADDRESS=$(aws ec2 allocate-address --domain vpc --query AllocationId --output text) NAT_GATEWAY_ID=$(aws ec2 create-nat-gateway --subnet-id $PUBLIC_SUBNET_ID --allocation-id $NAT_IP_ADDRESS --query NatGateway.NatGatewayId --output text) aws ec2 create-tags --resources $NAT_IP_ADDRESS --resources $NAT_GATEWAY_ID --tags Key=Name,Value=$CLUSTER_NAME sleep 10 echo "done." # Create a route table for the private subnet to the NAT gateway. echo -n "Creating a route table for the private subnet to the NAT gateway..." PRIVATE_ROUTE_TABLE_ID=$(aws ec2 create-route-table --vpc-id $VPC_ID --query RouteTable.RouteTableId --output text) aws ec2 create-tags --resources $PRIVATE_ROUTE_TABLE_ID $NAT_IP_ADDRESS --tags Key=Name,Value=$CLUSTER_NAME-private aws ec2 create-route --route-table-id $PRIVATE_ROUTE_TABLE_ID --destination-cidr-block 0.0.0.0/0 --gateway-id $NAT_GATEWAY_ID > /dev/null 2>&1 aws ec2 associate-route-table --subnet-id $PRIVATE_SUBNET_ID --route-table-id $PRIVATE_ROUTE_TABLE_ID > /dev/null 2>&1 echo "done." # echo "***********VARIABLE VALUES*********" # echo "VPC_ID="$VPC_ID # echo "PUBLIC_SUBNET_ID="$PUBLIC_SUBNET_ID # echo "PRIVATE_SUBNET_ID="$PRIVATE_SUBNET_ID # echo "PUBLIC_ROUTE_TABLE_ID="$PUBLIC_ROUTE_TABLE_ID # echo "PRIVATE_ROUTE_TABLE_ID="$PRIVATE_ROUTE_TABLE_ID # echo "NAT_GATEWAY_ID="$NAT_GATEWAY_ID # echo "IGW_ID="$IGW_ID # echo "NAT_IP_ADDRESS="$NAT_IP_ADDRESS echo "Setup complete." echo "" echo "To make the cluster create commands easier, please run the following commands to set the environment variables:" echo "export PUBLIC_SUBNET_ID=$PUBLIC_SUBNET_ID" echo "export PRIVATE_SUBNET_ID=$PRIVATE_SUBNET_ID"
Additional resources
- For more about VPC requirements, see the VPC documentation.
The script outputs commands. Set the commands as environment variables to store the subnet IDs for later use. Copy and run the commands:
$ export PUBLIC_SUBNET_ID=$PUBLIC_SUBNET_ID
$ export PRIVATE_SUBNET_ID=$PRIVATE_SUBNET_ID
Confirm your environment variables by running the following command:
$ echo "Public Subnet: $PUBLIC_SUBNET_ID"; echo "Private Subnet: $PRIVATE_SUBNET_ID"
Example output
Public Subnet: subnet-0faeeeb0000000000
Private Subnet: subnet-011fe340000000000
17.4.6.1.2. Creating your OIDC configuration
In this tutorial, we will use the automatic mode when creating the OIDC configuration. We will also store the OIDC ID as an environment variable for later use. The command uses the ROSA CLI to create your cluster’s unique OIDC configuration.
Create the OIDC configuration by running the following command:
$ export OIDC_ID=$(rosa create oidc-config --mode auto --managed --yes -o json | jq -r '.id')
17.4.6.2. Creating additional environment variables
Run the following command to set up environment variables. These variables make it easier to run the command to create a ROSA cluster:
$ export CLUSTER_NAME=<cluster_name>
$ export REGION=<VPC_region>
TipRun
rosa whoamito find the VPC region.
17.4.6.3. Creating a cluster
Optional: Run the following command to create the account-wide roles and policies, including the Operator policies and the AWS IAM roles and policies:
ImportantOnly complete this step if this is the first time you are deploying ROSA in this account and you have not yet created your account roles and policies.
$ rosa create account-roles --mode auto --yes
Run the following command to create the cluster:
$ rosa create cluster --cluster-name $CLUSTER_NAME \
--subnet-ids ${PUBLIC_SUBNET_ID},${PRIVATE_SUBNET_ID} \
--hosted-cp \
--region $REGION \
--oidc-config-id $OIDC_ID \
--sts --mode auto --yes
The cluster is ready after about 10 minutes. The cluster will have a control plane across three AWS availability zones in your selected region and create two worker nodes in your AWS account.
17.4.6.4. Checking the installation status
Run one of the following commands to check the status of the cluster:
For a detailed view of the cluster status, run:
$ rosa describe cluster --cluster $CLUSTER_NAME
For an abridged view of the cluster status, run:
$ rosa list clusters
To watch the log as it progresses, run:
$ rosa logs install --cluster $CLUSTER_NAME --watch
- Once the state changes to “ready” your cluster is installed. It might take a few more minutes for the worker nodes to come online.
17.5. Tutorial: Creating an admin user
Creating an administration (admin) user allows you to access your cluster quickly. Follow these steps to create an admin user.
An admin user works well in this tutorial setting. For actual deployment, use a formal identity provider to access the cluster and grant the user admin privileges.
Run the following command to create the admin user:
rosa create admin --cluster=<cluster-name>
Example output
W: It is recommended to add an identity provider to login to this cluster. See 'rosa create idp --help' for more information.
I: Admin account has been added to cluster 'my-rosa-cluster'. It may take up to a minute for the account to become active.
I: To login, run the following command:
oc login https://api.my-rosa-cluster.abcd.p1.openshiftapps.com:6443 \
--username cluster-admin \
--password FWGYL-2mkJI-00000-00000
Copy the log in command returned to you in the previous step and paste it into your terminal. This will log you in to the cluster using the CLI so you can start using the cluster.
$ oc login https://api.my-rosa-cluster.abcd.p1.openshiftapps.com:6443 \
>    --username cluster-admin \
>    --password FWGYL-2mkJI-00000-00000
Example output
Login successful.

You have access to 79 projects, the list has been suppressed. You can list all projects with ' projects'

Using project "default".
To check that you are logged in as the admin user, run one of the following commands:
Option 1:
$ oc whoami
Example output
cluster-admin
Option 2:
oc get all -n openshift-apiserver
Only an admin user can run this command without errors.
- You can now use the cluster as an admin user, which will suffice for this tutorial. For actual deployment, it is highly recommended to set up an identity provider, which is explained in the next tutorial.
17.6. Tutorial: Setting up an identity provider
To log in to your cluster, set up an identity provider (IDP). This tutorial uses GitHub as an example IDP. See the full list of IDPs supported by ROSA.
To view all IDP options, run the following command:
rosa create idp --help
17.6.1. Setting up an IDP with GitHub
- Log in to your GitHub account.
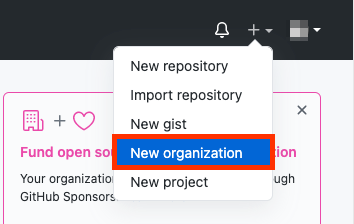
Create a new GitHub organization where you are an administrator.
TipIf you are already an administrator in an existing organization and you want to use that organization, skip to step 9.
Click the + icon, then click New Organization.
- Choose the most applicable plan for your situation or click Join for free.
Enter an organization account name, an email, and whether it is a personal or business account. Then, click Next.
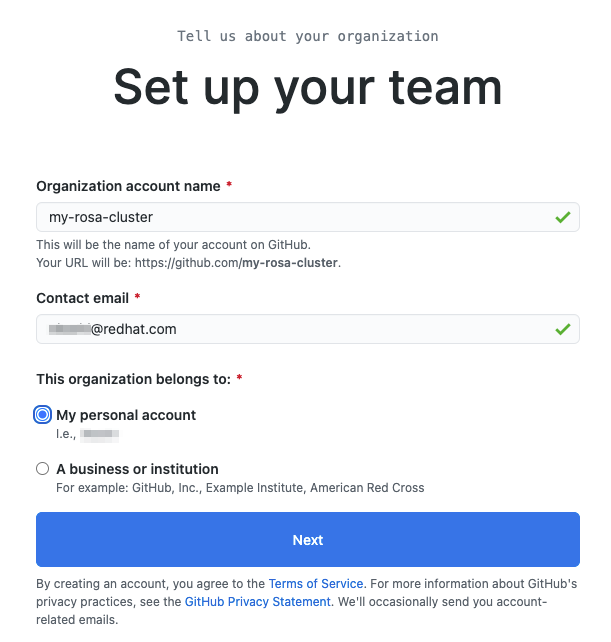
- Optional: Add the GitHub IDs of other users to grant additional access to your ROSA cluster. You can also add them later.
- Click Complete Setup.
- Optional: Enter the requested information on the following page.
- Click Submit.
Go back to the terminal and enter the following command to set up the GitHub IDP:
rosa create idp --cluster=<cluster name> --interactive
Enter the following values:
Type of identity provider: github
Identity Provider Name: <IDP-name>
Restrict to members of: organizations
GitHub organizations: <organization-account-name>
The CLI will provide you with a link. Copy and paste the link into a browser and press Enter. This will fill the required information to register this application for OAuth. You do not need to modify any of the information.

Click Register application.
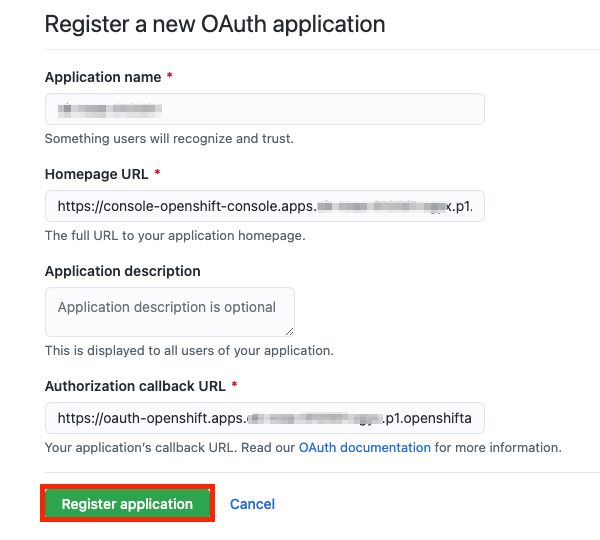
The next page displays a Client ID. Copy the ID and paste it in the terminal where it asks for Client ID.
NoteDo not close the tab.
The CLI will ask for a Client Secret. Go back in your browser and click Generate a new client secret.
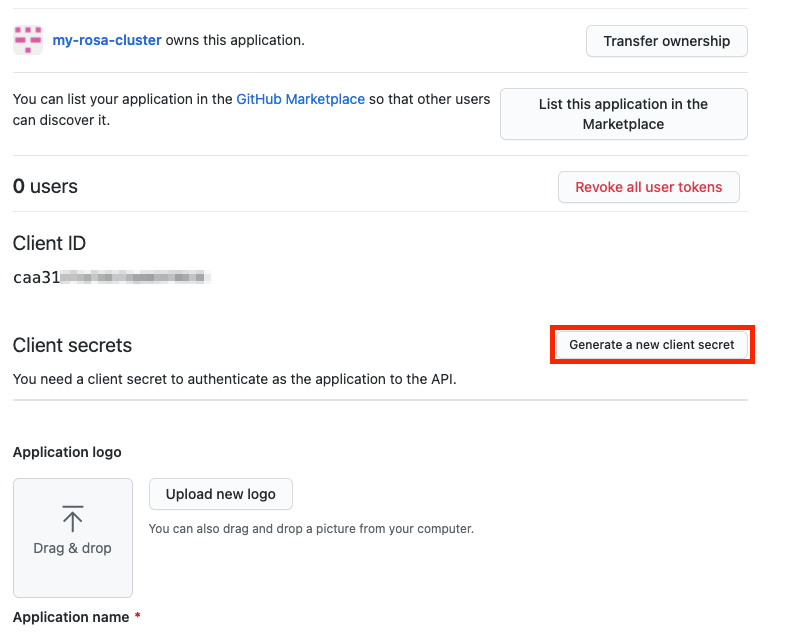
- A secret is generated for you. Copy your secret because it will never be visible again.
- Paste your secret into the terminal and press Enter.
- Leave GitHub Enterprise Hostname blank.
- Select claim.
Wait approximately 1 minute for the IDP to be created and the configuration to land on your cluster.
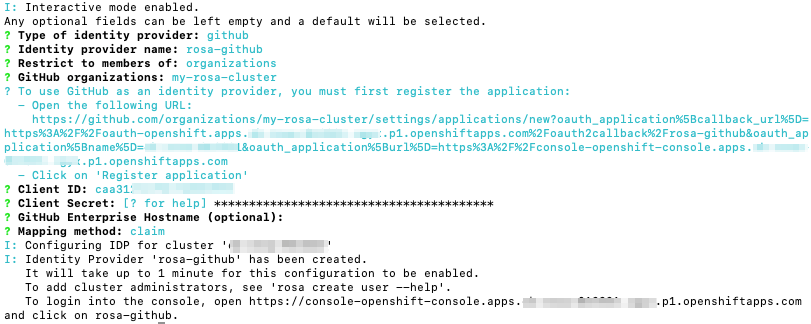
Copy the returned link and paste it into your browser. The new IDP should be available under your chosen name. Click your IDP and use your GitHub credentials to access the cluster.

17.6.2. Granting other users access to the cluster
To grant access to other cluster user you will need to add their GitHub user ID to the GitHub organization used for this cluster.
- In GitHub, go to the Your organizations page.
Click your profile icon, then Your organizations. Then click <your-organization-name>. In our example, it is
my-rosa-cluster.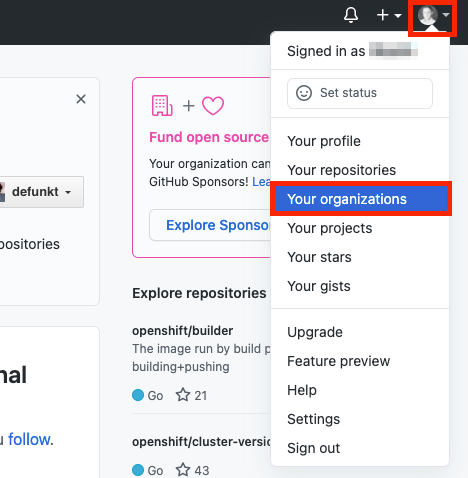
Click Invite someone.
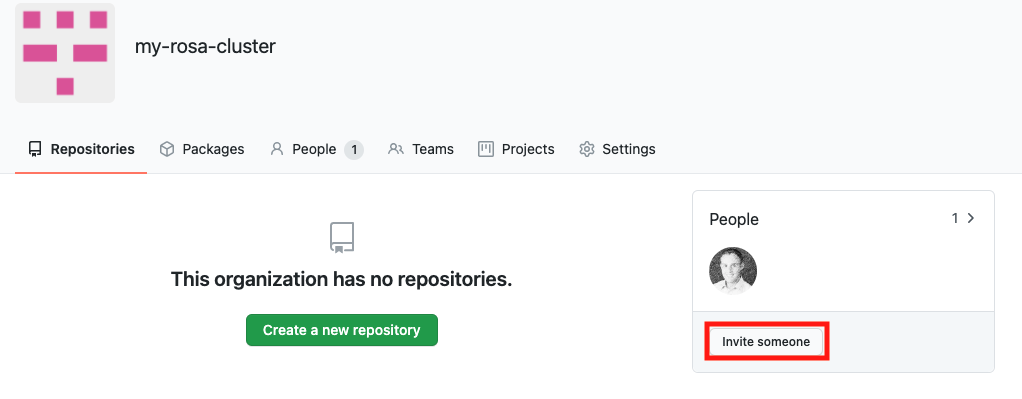
- Enter the GitHub ID of the new user, select the correct user, and click Invite.
- Once the new user accepts the invitation, they will be able to log in to the ROSA cluster using the Hybrid Cloud Console link and their GitHub credentials.
17.7. Tutorial: Granting admin privileges
Administration (admin) privileges are not automatically granted to users that you add to your cluster. If you want to grant admin-level privileges to certain users, you will need to manually grant them to each user. You can grant admin privileges from either the ROSA command line interface (CLI) or the Red Hat OpenShift Cluster Manager web user interface (UI).
Red Hat offers two types of admin privileges:
-
cluster-admin:cluster-adminprivileges give the admin user full privileges within the cluster. -
dedicated-admin:dedicated-adminprivileges allow the admin user to complete most administrative tasks with certain limitations to prevent cluster damage. It is best practice to usededicated-adminwhen elevated privileges are needed.
For more information on admin privileges, see the administering a cluster documentation.
17.7.1. Using the ROSA CLI
Assuming you are the user who created the cluster, run one of the following commands to grant admin privileges:
For
cluster-admin:$ rosa grant user cluster-admin --user <idp_user_name> --cluster=<cluster-name>
For
dedicated-admin:$ rosa grant user dedicated-admin --user <idp_user_name> --cluster=<cluster-name>
Verify that the admin privileges were added by running the following command:
$ rosa list users --cluster=<cluster-name>
Example output
$ rosa list users --cluster=my-rosa-cluster
ID                 GROUPS
<idp_user_name>    cluster-admins
If you are currently logged into the Red Hat Hybrid Cloud Console, log out of the console and log back in to the cluster to see a new perspective with the "Administrator Panel". You might need an incognito or private window.
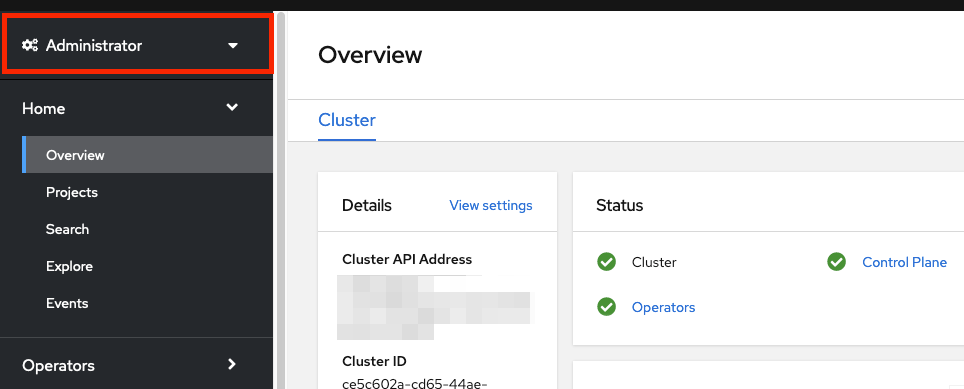
You can also test that admin privileges were added to your account by running the following command. Only a
cluster-adminusers can run this command without errors.$ oc get all -n openshift-apiserver
17.7.2. Using the Red Hat OpenShift Cluster Manager UI
- Log in to the OpenShift Cluster Manager.
- Select your cluster.
- Click the Access Control tab.
- Click the Cluster roles and Access tab in the sidebar.
Click Add user.
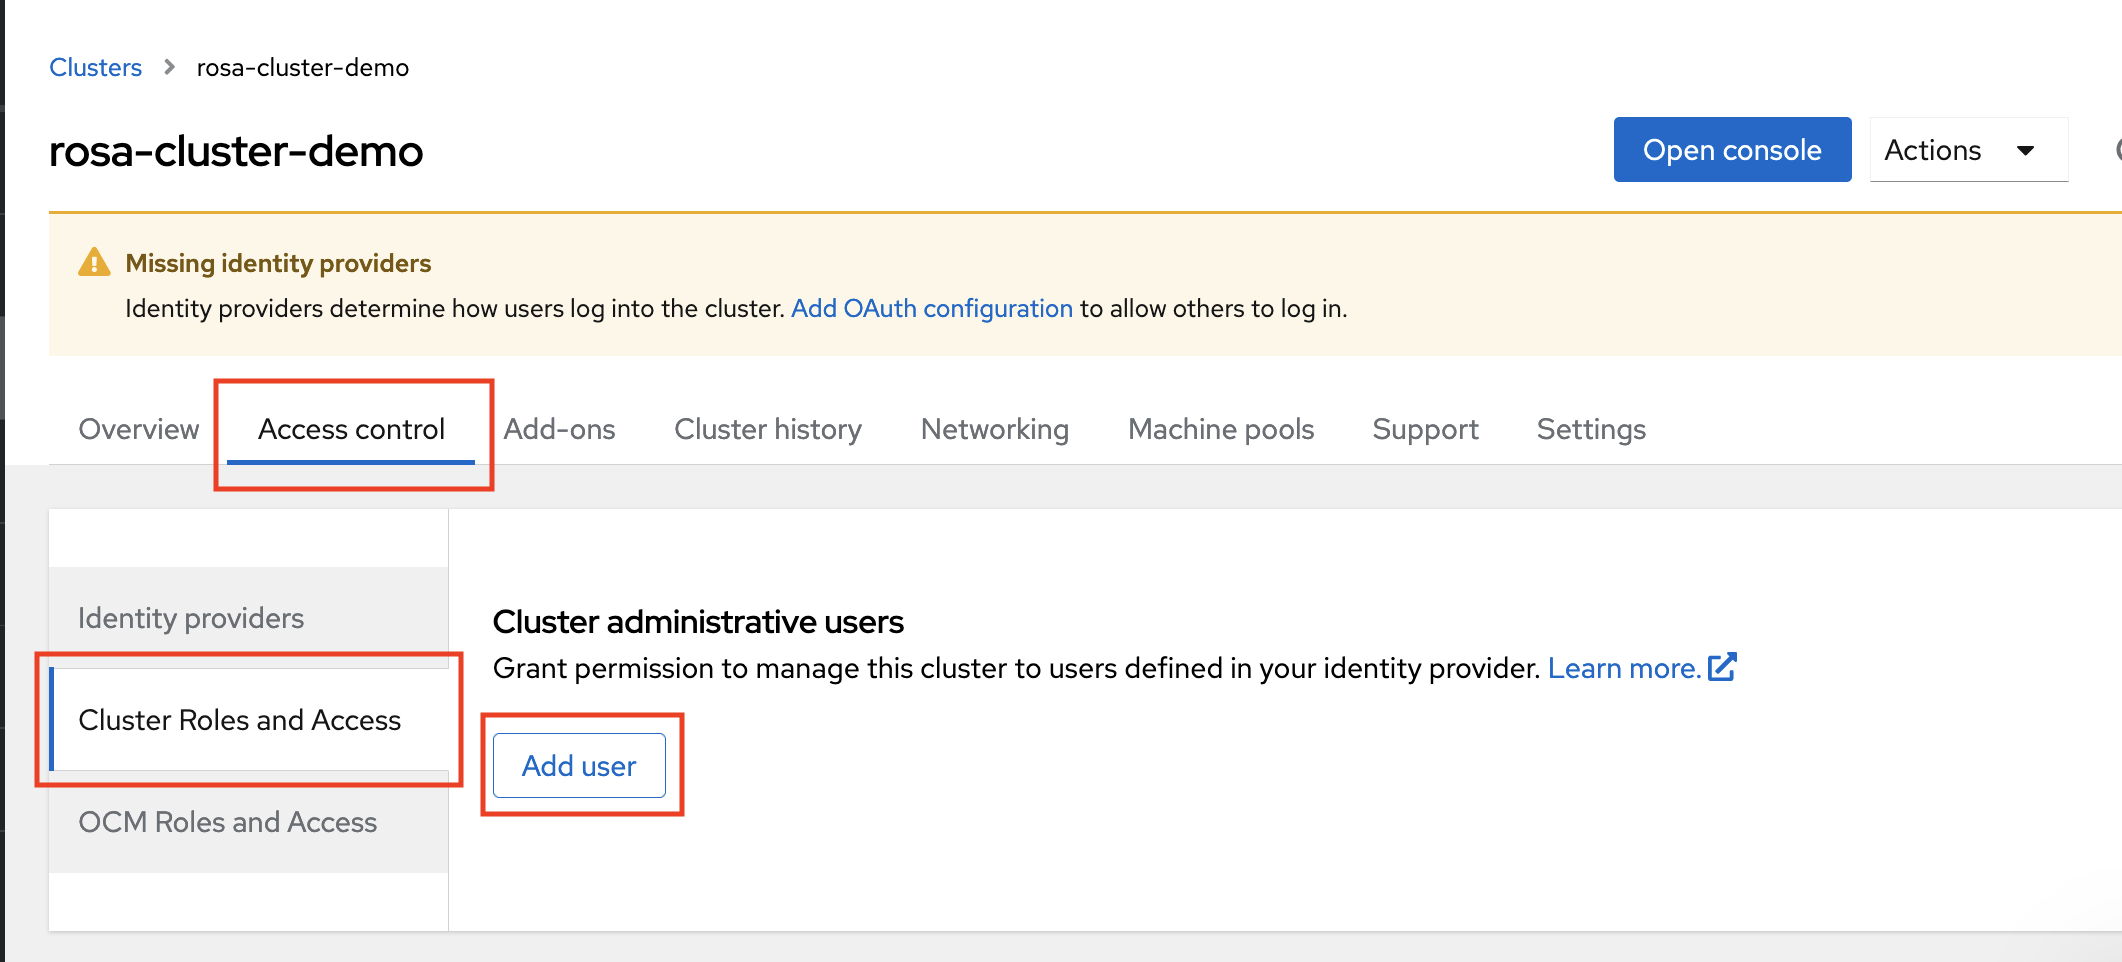
- On the pop-up screen, enter the user ID.
Select whether you want to grant the user
cluster-adminsordedicated-adminsprivileges.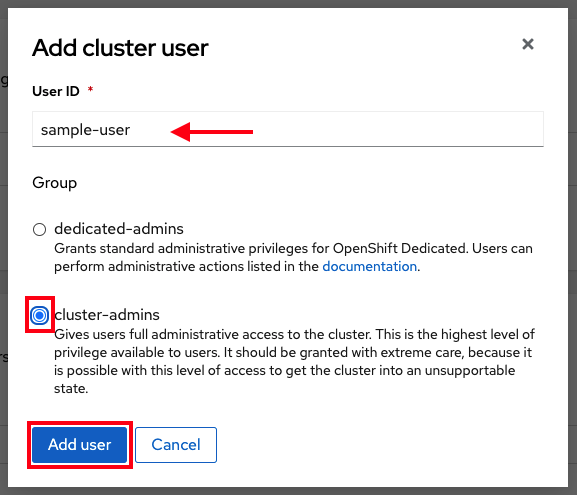
17.8. Tutorial: Accessing your cluster
You can connect to your cluster using the command line interface (CLI) or the Red Hat Hybrid Cloud Console user interface (UI).
17.8.1. Accessing your cluster using the CLI
To access the cluster using the CLI, you must have the oc CLI installed. If you are following the tutorials, you already installed the oc CLI.
- Log in to the OpenShift Cluster Manager.
- Click your username in the top right corner.
Click Copy Login Command.
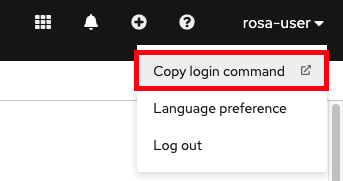
This opens a new tab with a choice of identity providers (IDPs). Click the IDP you want to use. For example, "rosa-github".
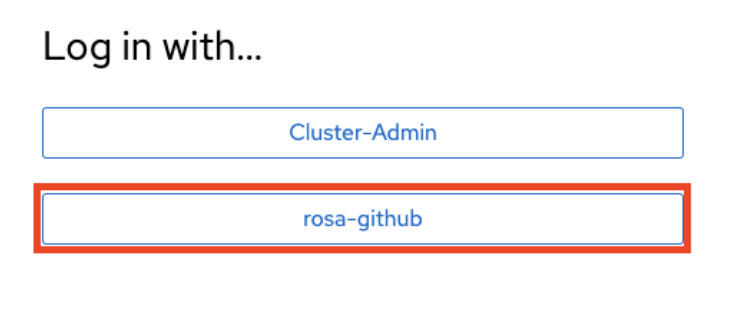
- A new tab opens. Click Display token.
Run the following command in your terminal:
$ oc login --token=sha256~GBAfS4JQ0t1UTKYHbWAK6OUWGUkdMGz000000000000 --server=https://api.my-rosa-cluster.abcd.p1.openshiftapps.com:6443
Example output
Logged into "https://api.my-rosa-cluster.abcd.p1.openshiftapps.com:6443" as "rosa-user" using the token provided.

You have access to 79 projects, the list has been suppressed. You can list all projects with ' projects'

Using project "default".
Confirm that you are logged in by running the following command:
$ oc whoami
Example output
rosa-user
- You can now access your cluster.
17.8.2. Accessing the cluster via the Hybrid Cloud Console
Log in to the OpenShift Cluster Manager.
To retrieve the Hybrid Cloud Console URL run:
rosa describe cluster -c <cluster-name> | grep Console
Click your IDP. For example, "rosa-github".

- Enter your user credentials.
You should be logged in. If you are following the tutorials, you will be a cluster-admin and should see the Hybrid Cloud Console webpage with the Administrator panel visible.
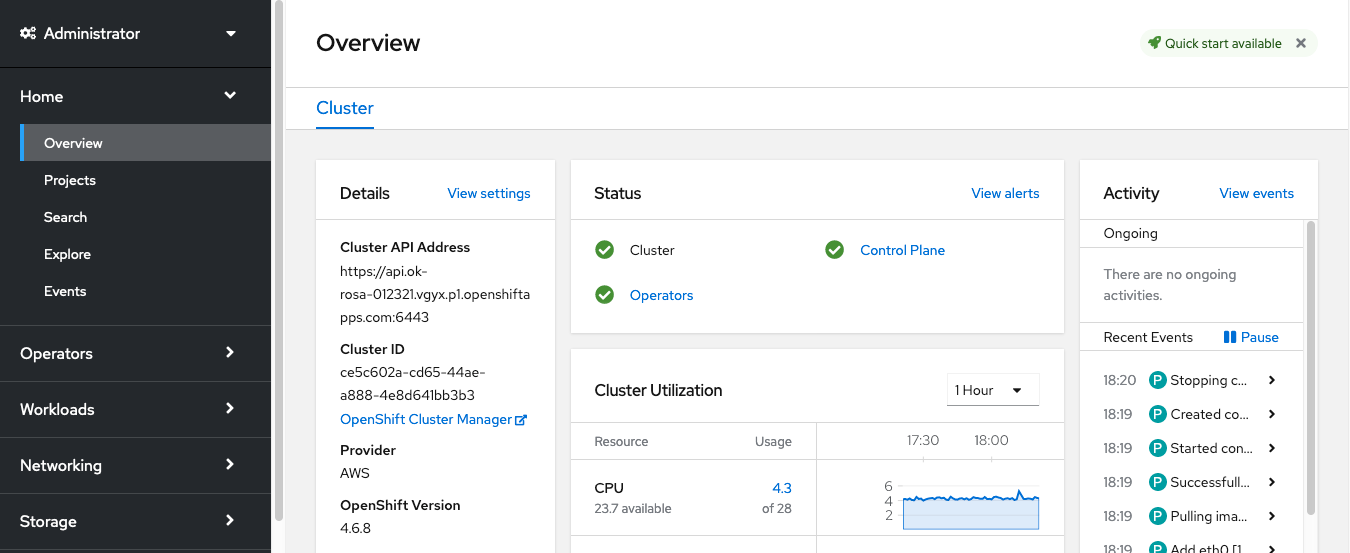
17.9. Tutorial: Managing worker nodes
In Red Hat OpenShift Service on AWS (ROSA), changing aspects of your worker nodes is performed through the use of machine pools. A machine pool allows users to manage many machines as a single entity. Every ROSA cluster has a default machine pool that is created when the cluster is created. For more information, see the machine pool documentation.
17.9.1. Creating a machine pool
You can create a machine pool with either the command line interface (CLI) or the user interface (UI).
17.9.1.1. Creating a machine pool with the CLI
Run the following command:
rosa create machinepool --cluster=<cluster-name> --name=<machinepool-name> --replicas=<number-nodes>
Example input
 $ rosa create machinepool --cluster=my-rosa-cluster --name=new-mp
 --replicas=2
Example output
I: Machine pool 'new-mp' created successfully on cluster 'my-rosa-cluster'
I: To view all machine pools, run 'rosa list machinepools -c my-rosa-cluster'
Optional: Add node labels or taints to specific nodes in a new machine pool by running the following command:
rosa create machinepool --cluster=<cluster-name> --name=<machinepool-name> --replicas=<number-nodes> --labels=`<key=pair>`
Example input
$ rosa create machinepool --cluster=my-rosa-cluster --name=db-nodes-mp --replicas=2 --labels='app=db','tier=backend'
Example output
I: Machine pool 'db-nodes-mp' created successfully on cluster 'my-rosa-cluster'
This creates an additional 2 nodes that can be managed as a unit and also assigns them the labels shown.
Run the following command to confirm machine pool creation and the assigned labels:
rosa list machinepools --cluster=<cluster-name>
Example output
ID          AUTOSCALING  REPLICAS  INSTANCE TYPE  LABELS            TAINTS    AVAILABILITY ZONES
Default     No           2         m5.xlarge                                  us-east-1a
17.9.1.2. Creating a machine pool with the UI
Log in to the OpenShift Cluster Manager and click your cluster.
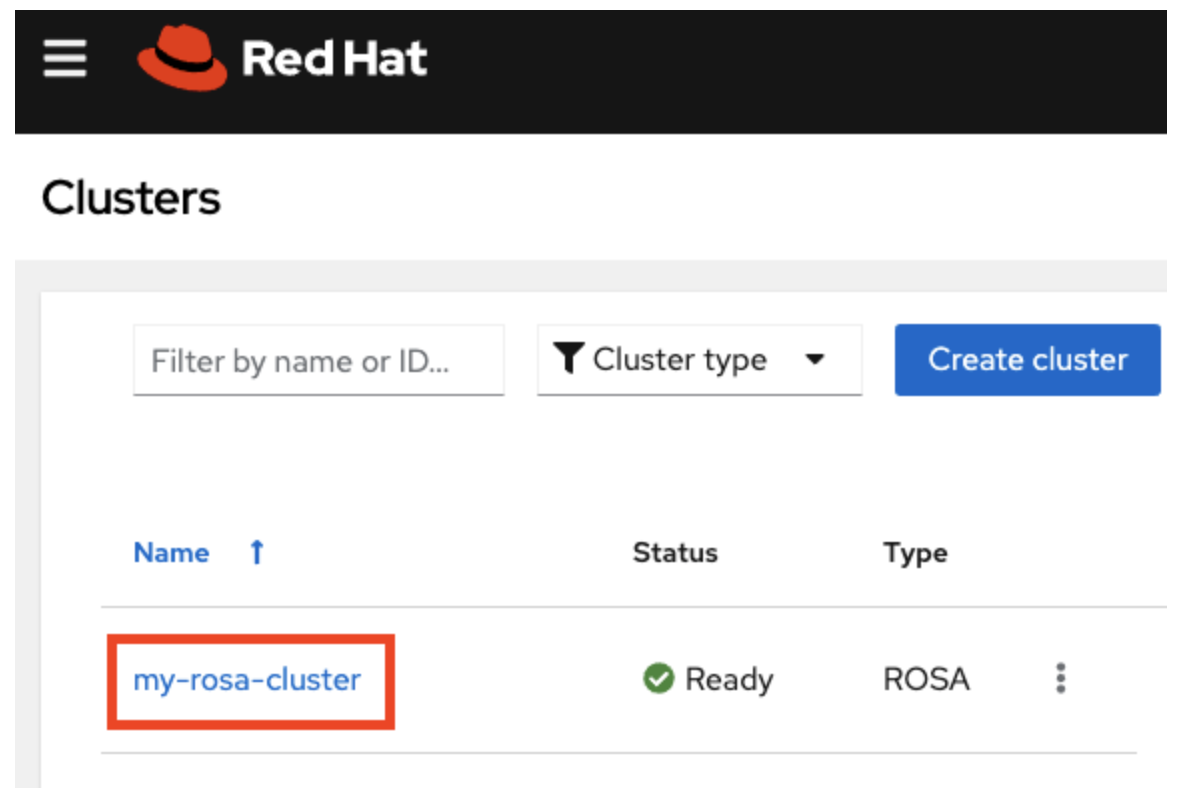
Click Machine pools.

- Click Add machine pool.
Enter the desired configuration.
TipYou can also and expand the Edit node labels and taints section to add node labels and taints to the nodes in the machine pool.
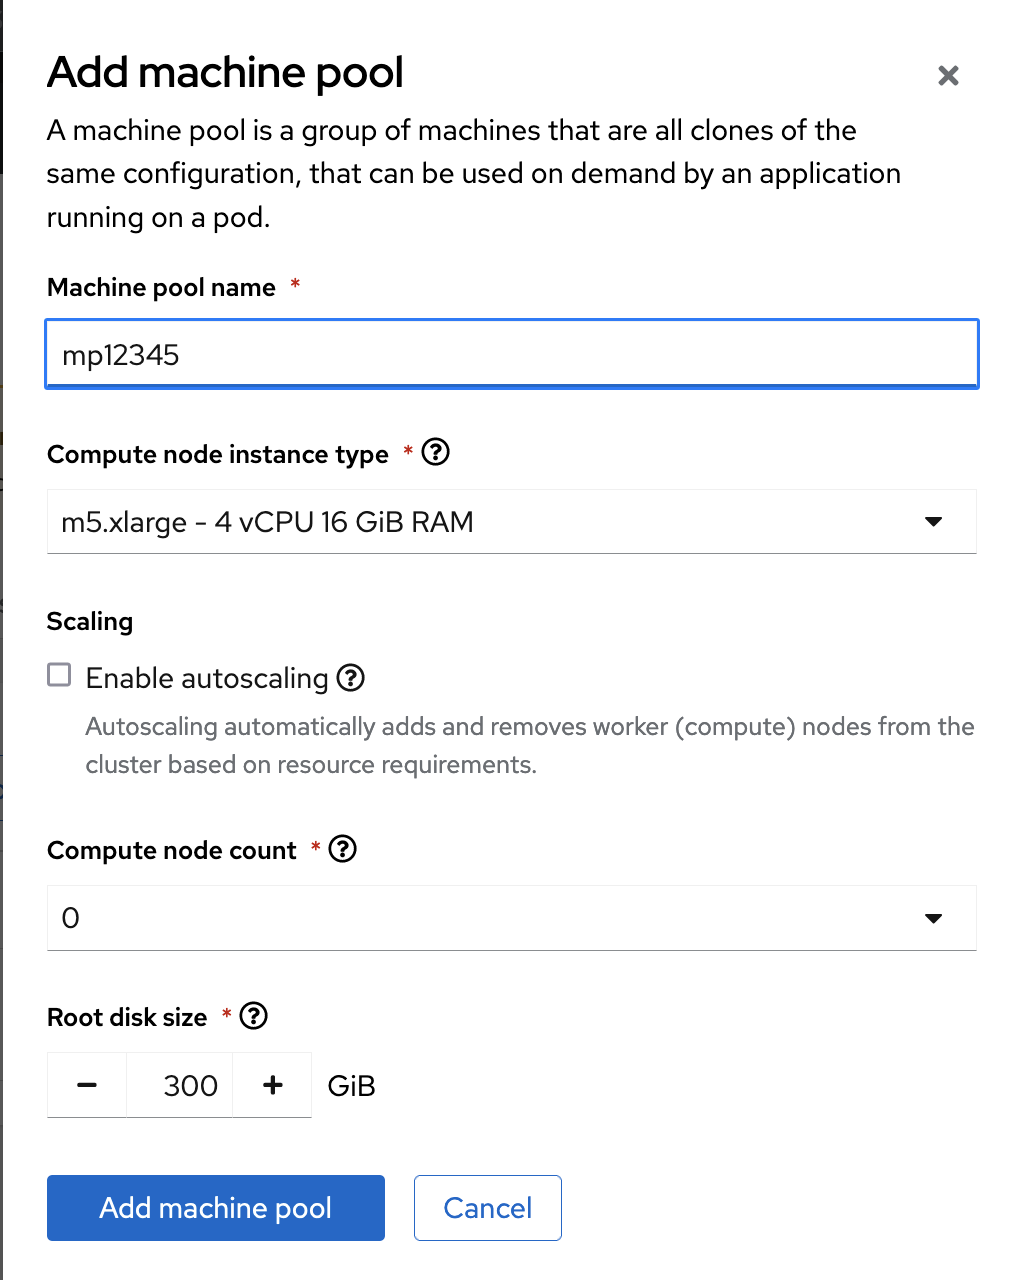
You will see the new machine pool you created.
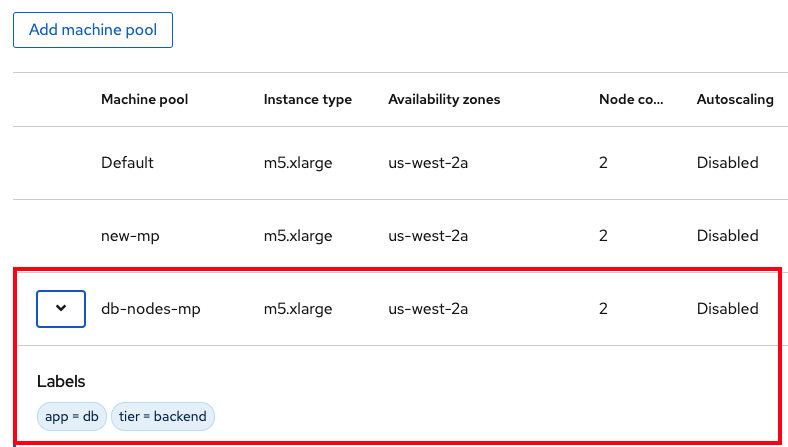
17.9.2. Scaling worker nodes
Edit a machine pool to scale the number of worker nodes in that specific machine pool. You can use either the CLI or the UI to scale worker nodes.
17.9.2.1. Scaling worker nodes using the CLI
Run the following command to see the default machine pool that is created with each cluster:
rosa list machinepools --cluster=<cluster-name>
Example output
ID          AUTOSCALING  REPLICAS  INSTANCE TYPE  LABELS            TAINTS    AVAILABILITY ZONES
Default     No           2         m5.xlarge                                  us-east-1a
To scale the default machine pool out to a different number of nodes, run the following command:
rosa edit machinepool --cluster=<cluster-name> --replicas=<number-nodes> <machinepool-name>
Example input
rosa edit machinepool --cluster=my-rosa-cluster --replicas 3 Default
Run the following command to confirm that the machine pool has scaled:
rosa describe cluster --cluster=<cluster-name> | grep Compute
Example input
$ rosa describe cluster --cluster=my-rosa-cluster | grep Compute
Example output
- Compute: 3 (m5.xlarge)
17.9.2.2. Scaling worker nodes using the UI
- Click the three dots to the right of the machine pool you want to edit.
- Click Edit.
- Enter the desired number of nodes, and click Save.
Confirm that the cluster has scaled by selecting the cluster, clicking the Overview tab, and scrolling to Compute listing. The compute listing should equal the scaled nodes. For example, 3/3.
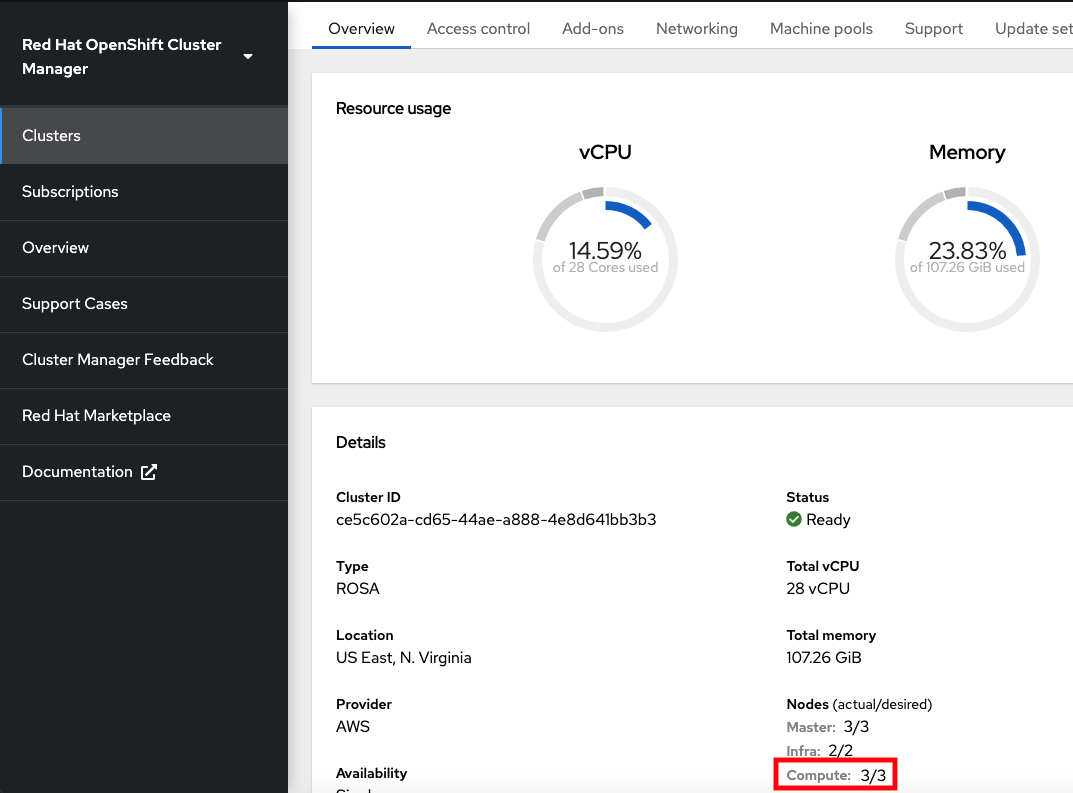
17.9.2.3. Adding node labels
Use the following command to add node labels:
rosa edit machinepool --cluster=<cluster-name> --replicas=<number-nodes> --labels='key=value' <machinepool-name>
Example input
rosa edit machinepool --cluster=my-rosa-cluster --replicas=2 --labels 'foo=bar','baz=one' new-mp
This adds 2 labels to the new machine pool.
This command replaces all machine pool configurations with the newly defined configuration. If you want to add another label and keep the old label, you must state both the new and preexisting the label. Otherwise the command will replace all preexisting labels with the one you wanted to add. Similarly, if you want to delete a label, run the command and state the ones you want, excluding the one you want to delete.
17.9.3. Mixing node types
You can also mix different worker node machine types in the same cluster by using new machine pools. You cannot change the node type of a machine pool once it is created, but you can create a new machine pool with different nodes by adding the --instance-type flag.
For example, to change the database nodes to a different node type, run the following command:
rosa create machinepool --cluster=<cluster-name> --name=<mp-name> --replicas=<number-nodes> --labels='<key=pair>' --instance-type=<type>
Example input
rosa create machinepool --cluster=my-rosa-cluster --name=db-nodes-large-mp --replicas=2 --labels='app=db','tier=backend' --instance-type=m5.2xlarge
To see all the instance types available, run the following command:
rosa list instance-types
To make step-by-step changes, use the
--interactiveflag:rosa create machinepool -c <cluster-name> --interactive
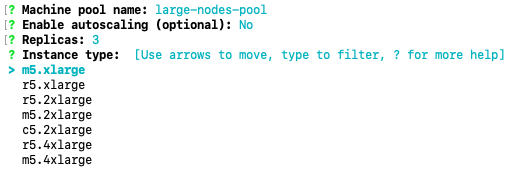
Run the following command to list the machine pools and see the new, larger instance type:
rosa list machinepools -c <cluster-name>

17.10. Tutorial: Autoscaling
The cluster autoscaler adds or removes worker nodes from a cluster based on pod resources.
The cluster autoscaler increases the size of the cluster when:
- Pods fail to schedule on the current nodes due to insufficient resources.
- Another node is necessary to meet deployment needs.
The cluster autoscaler does not increase the cluster resources beyond the limits that you specify.
The cluster autoscaler decreases the size of the cluster when:
- Some nodes are consistently not needed for a significant period. For example, when a node has low resource use and all of its important pods can fit on other nodes.
17.10.1. Enabling autoscaling for an existing machine pool using the CLI
Cluster autoscaling can be enabled at cluster creation and when creating a new machine pool by using the --enable-autoscaling option.
Autoscaling is set based on machine pool availability. To find out which machine pools are available for autoscaling, run the following command:
$ rosa list machinepools -c <cluster-name>
Example output
ID         AUTOSCALING  REPLICAS  INSTANCE TYPE  LABELS     TAINTS    AVAILABILITY ZONES
Default    No           2         m5.xlarge                           us-east-1a
Run the following command to add autoscaling to an available machine pool:
$ rosa edit machinepool -c <cluster-name> --enable-autoscaling <machinepool-name> --min-replicas=<num> --max-replicas=<num>
Example input
$ rosa edit machinepool -c my-rosa-cluster --enable-autoscaling Default --min-replicas=2 --max-replicas=4
The above command creates an autoscaler for the worker nodes that scales between 2 and 4 nodes depending on the resources.
17.10.2. Enabling autoscaling for an existing machine pool using the UI
Cluster autoscaling can be enabled at cluster creation by checking the Enable autoscaling checkbox when creating machine pools.
- Go to the Machine pools tab and click the three dots in the right..
- Click Scale, then Enable autoscaling.
Run the following command to confirm that autoscaling was added:
$ rosa list machinepools -c <cluster-name>
Example output
ID         AUTOSCALING  REPLICAS  INSTANCE TYPE  LABELS     TAINTS    AVAILABILITY ZONES
Default    Yes          2-4       m5.xlarge                           us-east-1a
17.11. Tutorial: Upgrading your cluster
Red Hat OpenShift Service on AWS (ROSA) executes all cluster upgrades as part of the managed service. You do not need to run any commands or make changes to the cluster. You can schedule the upgrades at a convenient time.
Ways to schedule a cluster upgrade include:
- Manually using the command line interface (CLI): Start a one-time immediate upgrade or schedule a one-time upgrade for a future date and time.
- Manually using the Red Hat OpenShift Cluster Manager user interface (UI): Start a one-time immediate upgrade or schedule a one-time upgrade for a future date and time.
- Automated upgrades: Set an upgrade window for recurring y-stream upgrades whenever a new version is available without needing to manually schedule it. Minor versions have to be manually scheduled.
For more details about cluster upgrades, run the following command:
$ rosa upgrade cluster --help
17.11.1. Manually upgrading your cluster using the CLI
Check if there is an upgrade available by running the following command:
$ rosa list upgrade -c <cluster-name>
Example output
$ rosa list upgrade -c <cluster-name>
VERSION  NOTES
4.14.7   recommended
4.14.6
...
In the above example, versions 4.14.7 and 4.14.6 are both available.
Schedule the cluster to upgrade within the hour by running the following command:
$ rosa upgrade cluster -c <cluster-name> --version <desired-version>
Optional: Schedule the cluster to upgrade at a later date and time by running the following command:
$ rosa upgrade cluster -c <cluster-name> --version <desired-version> --schedule-date <future-date-for-update> --schedule-time <future-time-for-update>
17.11.2. Manually upgrading your cluster using the UI
- Log in to the OpenShift Cluster Manager, and select the cluster you want to upgrade.
- Click Settings.
If an upgrade is available, click Update.
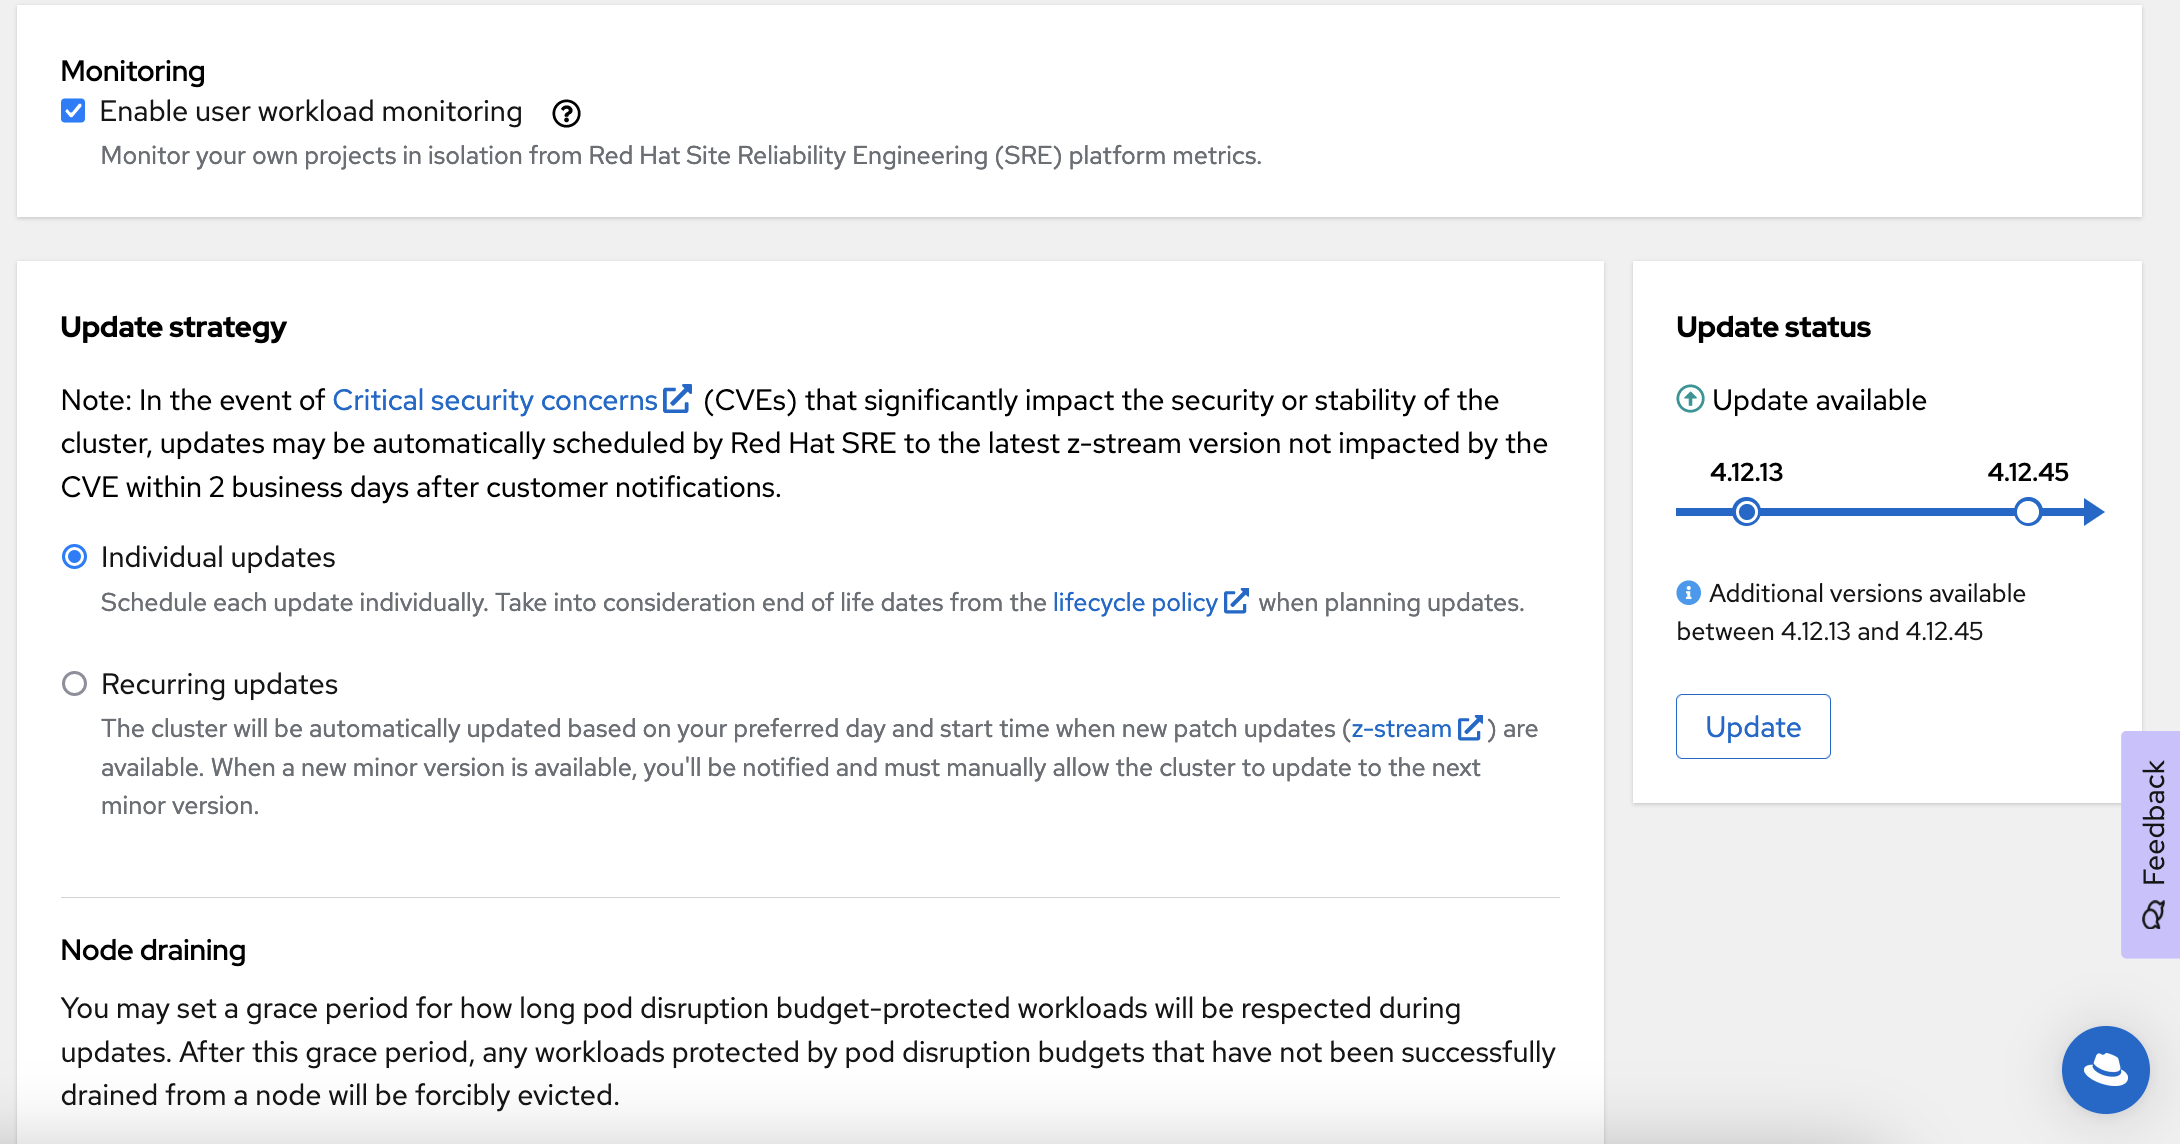
- Select the version to which you want to upgrade in the new window.
- Schedule a time for the upgrade or begin it immediately.
17.11.3. Setting up automatic recurring upgrades
- Log in to the OpenShift Cluster Manager, and select the cluster you want to upgrade.
Click Settings.
- Under Update Strategy, click Recurring updates.
- Set the day and time for the upgrade to occur.
- Under Node draining, select a grace period to allow the nodes to drain before pod eviction.
- Click Save.
17.12. Tutorial: Deleting your cluster
You can delete your Red Hat OpenShift Service on AWS (ROSA) cluster using either the command line interface (CLI) or the user interface (UI).
17.12.1. Deleting a ROSA cluster using the CLI
Optional: List your clusters to make sure you are deleting the correct one by running the following command:
$ rosa list clusters
Delete a cluster by running the following command:
$ rosa delete cluster --cluster <cluster-name>
WarningThis command is non-recoverable.
The CLI prompts you to confirm that you want to delete the cluster. Press y and then Enter. The cluster and all its associated infrastructure will be deleted.
NoteAll AWS STS and IAM roles and policies will remain and must be deleted manually once the cluster deletion is complete by following the steps below.
The CLI outputs the commands to delete the OpenID Connect (OIDC) provider and Operator IAM roles resources that were created. Wait until the cluster finishes deleting before deleting these resources. Perform a quick status check by running the following command:
$ rosa list clusters
Once the cluster is deleted, delete the OIDC provider by running the following command:
$ rosa delete oidc-provider -c <clusterID> --mode auto --yes
Delete the Operator IAM roles by running the following command:
$ rosa delete operator-roles -c <clusterID> --mode auto --yes
NoteThis command requires the cluster ID and not the cluster name.
Only remove the remaining account roles if they are no longer needed by other clusters in the same account. If you want to create other ROSA clusters in this account, do not perform this step.
To delete the account roles, you need to know the prefix used when creating them. The default is "ManagedOpenShift" unless you specified otherwise.
Delete the account roles by running the following command:
$ rosa delete account-roles --prefix <prefix> --mode auto --yes
17.12.2. Deleting a ROSA cluster using the UI
- Log in to the OpenShift Cluster Manager, and locate the cluster you want to delete.
Click the three dots to the right of the cluster.

In the dropdown menu, click Delete cluster.
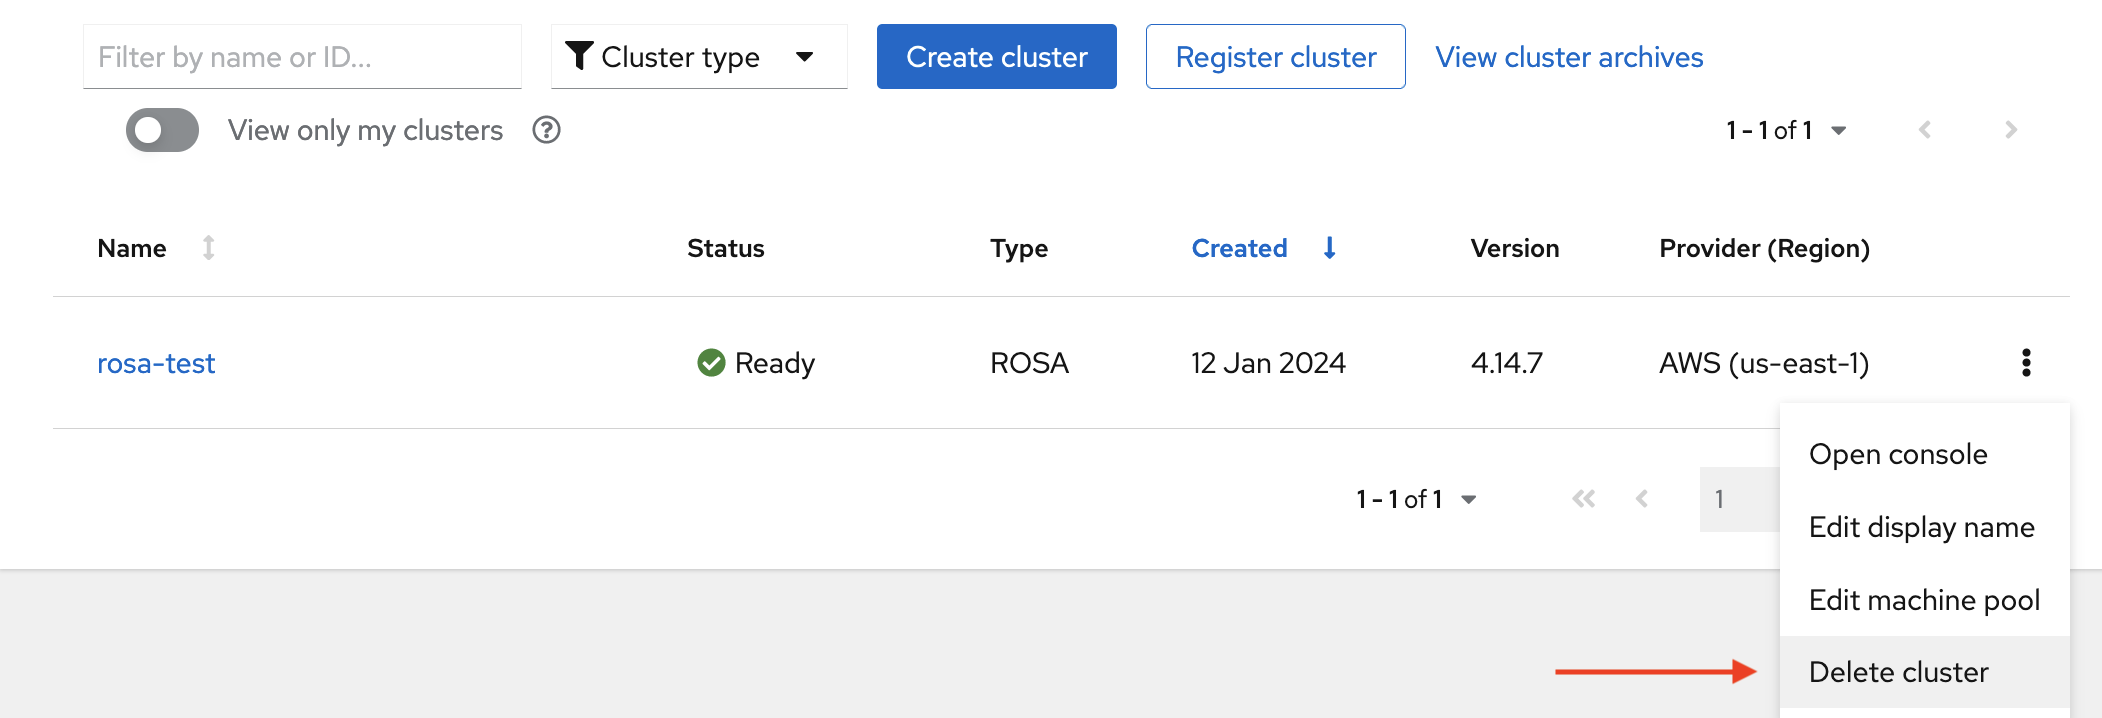
- Enter the name of the cluster to confirm deletion, and click Delete.
17.13. Tutorial: Obtaining support
Finding the right help when you need it is important. These are some of the resources at your disposal when you need assistance.
17.13.1. Adding support contacts
You can add additional email addresses for communications about your cluster.
- On the Red Hat OpenShift Cluster Manager user interface (UI), click select cluster.
- Click the Support tab.
- Click Add notification contact, and enter the additional email addresses.
17.13.2. Contacting Red Hat for support using the UI
- On the OpenShift Cluster Manager UI, click the Support tab.
- Click Open support case.
17.13.3. Contacting Red Hat for support using the support page
- Go to the Red Hat support page.
Click Open a new Case.
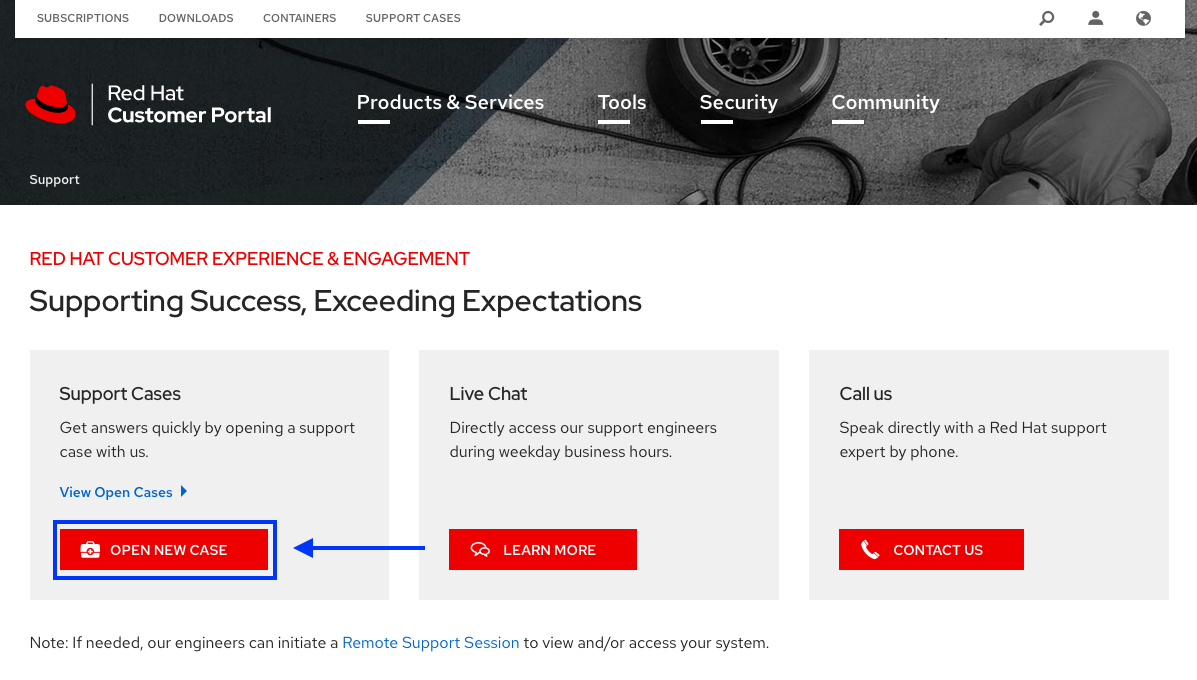
- Log in to your Red Hat account.
Select the reason for contacting support.
- Select Red Hat OpenShift Service on AWS.
- Click continue.
Enter a summary of the issue and the details of your request. Upload any files, logs, and screenshots. The more details you provide, the better Red Hat support can help your case.
NoteRelevant suggestions that might help with your issue will appear at the bottom of this page.

- Click Continue.
- Answer the questions in the new fields.
- Click Continue.
Enter the following information about your case:
- Support level: Premium
- Severity: Review the Red Hat Support Severity Level Definitions to choose the correct one.
- Group: If this is related to a few other cases you can select the corresponding group.
- Language
- Send notifications: Add any additional email addresses to keep notified of activity.
- Red Hat associates: If you are working with anyone from Red Hat and want to keep them in the loop you can enter their email address here.
- Alternate Case ID: If you want to attach your own ID to it you can enter it here.
- Click Continue.
On the review screen make sure you select the correct cluster ID that you are contacting support about.
- Click Submit.
- You will be contacted based on the response time committed to for the indicated severity level.