CLI ツール
OpenShift Container Platform コマンドラインツールの使用方法
概要
第1章 OpenShift Container Platform CLI ツールの概要
OpenShift Container Platform での作業中に、次のようなさまざまな操作を実行します。
- クラスターの管理
- アプリケーションのビルド、デプロイ、および管理
- デプロイメントプロセスの管理
- Operator の開発
- Operator カタログの作成と保守
OpenShift Container Platform には、一連のコマンドラインインターフェイス (CLI) ツールが同梱されており、ユーザーがターミナルからさまざまな管理および開発操作を実行できるようにしてこれらのタスクを簡素化します。これらのツールでは、アプリケーションの管理だけでなく、システムの各コンポーネントを操作する簡単なコマンドを利用できます。
1.1. CLI ツールのリスト
OpenShift Container Platform では、以下の CLI ツールのセットを使用できます。
-
OpenShift CLI (
oc): これは OpenShift Container Platform ユーザーが最も一般的に使用する CLI ツールです。これは、クラスター管理者と開発者の両方が、ターミナルを使用して OpenShift Container Platform 全体でエンドツーエンドの操作が行えるようにします。Web コンソールとは異なり、ユーザーはコマンドスクリプトを使用してプロジェクトのソースコードを直接操作できます。 -
Knative CLI (kn): (
kn) CLI ツールは、Knative Serving や Eventing などの OpenShift サーバーレスコンポーネントの操作に使用できるシンプルで直感的なターミナルコマンドを提供します。 -
Pipelines CLI (tkn):OpenShift Pipelines は、内部で Tekton を使用する OpenShift Container Platform の継続的インテグレーションおよび継続的デリバリー (CI / CD) ソリューションです。
tknCLI ツールには、シンプルで直感的なコマンドが同梱されており、ターミナルを使用して OpenShift パイプラインを操作できます。 -
opm CLI:
opmCLI ツールは、Operator 開発者とクラスター管理者がターミナルから Operator のカタログを作成および保守するのに役立ちます。 - Operator SDK: Operator Framework のコンポーネントである Operator SDK は、Operator 開発者がターミナルから Operator のビルド、テストおよびデプロイに使用できる CLI ツールを提供します。これにより、Kubernetes ネイティブアプリケーションを構築するプロセスが簡素化されます。これには、アプリケーション固有の深い運用知識が必要になる場合があります。
第2章 OpenShift CLI (oc)
2.1. OpenShift CLI のスタートガイド
2.1.1. OpenShift CLI について
OpenShift CLI (oc) を使用すると、ターミナルからアプリケーションを作成し、OpenShift Container Platform プロジェクトを管理できます。OpenShift CLI は以下の状況に適しています。
- プロジェクトソースコードを直接使用している。
- OpenShift Container Platform 操作をスクリプト化する。
- 帯域幅リソースによる制限があり、Web コンソールが利用できない状況でのプロジェクトの管理
2.1.2. OpenShift CLI のインストール
OpenShift CLI(oc) をインストールするには、バイナリーをダウンロードするか、RPM を使用します。
2.1.2.1. バイナリーのダウンロードによる OpenShift CLI のインストール
コマンドラインインターフェイスを使用して OpenShift Container Platform と対話するために CLI (oc) をインストールすることができます。oc は Linux、Windows、または macOS にインストールできます。
以前のバージョンの oc をインストールしている場合、これを使用して OpenShift Container Platform 4.15 のすべてのコマンドを実行することはできません。新規バージョンの oc をダウンロードし、インストールします。
2.1.2.1.1. Linux への OpenShift CLI のインストール
以下の手順を使用して、OpenShift CLI (oc) バイナリーを Linux にインストールできます。
手順
- Red Hat カスタマーポータルの OpenShift Container Platform ダウンロードページ に移動します。
- Product Variant ドロップダウンリストからアーキテクチャーを選択します。
- バージョン ドロップダウンリストから適切なバージョンを選択します。
- OpenShift v4.15 Linux Clients エントリーの横にある Download Now をクリックして、ファイルを保存します。
アーカイブを展開します。
$ tar xvf <file>ocバイナリーを、PATHにあるディレクトリーに配置します。PATHを確認するには、以下のコマンドを実行します。$ echo $PATH
検証
OpenShift CLI のインストール後に、
ocコマンドを使用して利用できます。$ oc <command>
2.1.2.1.2. Windows への OpenShift CLI のインストール
以下の手順を使用して、OpenShift CLI (oc) バイナリーを Windows にインストールできます。
手順
- Red Hat カスタマーポータルの OpenShift Container Platform ダウンロードページ に移動します。
- バージョン ドロップダウンリストから適切なバージョンを選択します。
- OpenShift v4.15 Windows Client エントリーの横にある Download Now をクリックして、ファイルを保存します。
- ZIP プログラムでアーカイブを展開します。
ocバイナリーを、PATHにあるディレクトリーに移動します。PATHを確認するには、コマンドプロンプトを開いて以下のコマンドを実行します。C:\> path
検証
OpenShift CLI のインストール後に、
ocコマンドを使用して利用できます。C:\> oc <command>
2.1.2.1.3. macOS への OpenShift CLI のインストール
以下の手順を使用して、OpenShift CLI (oc) バイナリーを macOS にインストールできます。
手順
- Red Hat カスタマーポータルの OpenShift Container Platform ダウンロードページ に移動します。
- バージョン ドロップダウンリストから適切なバージョンを選択します。
OpenShift v4.15 macOS Clients エントリーの横にある Download Now をクリックして、ファイルを保存します。
注記macOS arm64 の場合は、OpenShift v4.15 macOS arm64 Client エントリーを選択します。
- アーカイブを展開し、解凍します。
ocバイナリーをパスにあるディレクトリーに移動します。PATHを確認するには、ターミナルを開き、以下のコマンドを実行します。$ echo $PATH
検証
ocコマンドを使用してインストールを確認します。$ oc <command>
2.1.2.2. Web コンソールを使用した OpenShift CLI のインストール
OpenShift CLI(oc) をインストールして、Web コンソールから OpenShift Container Platform と対話できます。oc は Linux、Windows、または macOS にインストールできます。
以前のバージョンの oc をインストールしている場合、これを使用して OpenShift Container Platform 4.15 のすべてのコマンドを実行することはできません。新しいバージョンの oc をダウンロードしてインストールしてください。
2.1.2.2.1. Web コンソールを使用した Linux への OpenShift CLI のインストール
以下の手順を使用して、OpenShift CLI (oc) バイナリーを Linux にインストールできます。
手順
Web コンソールで ? をクリックします。
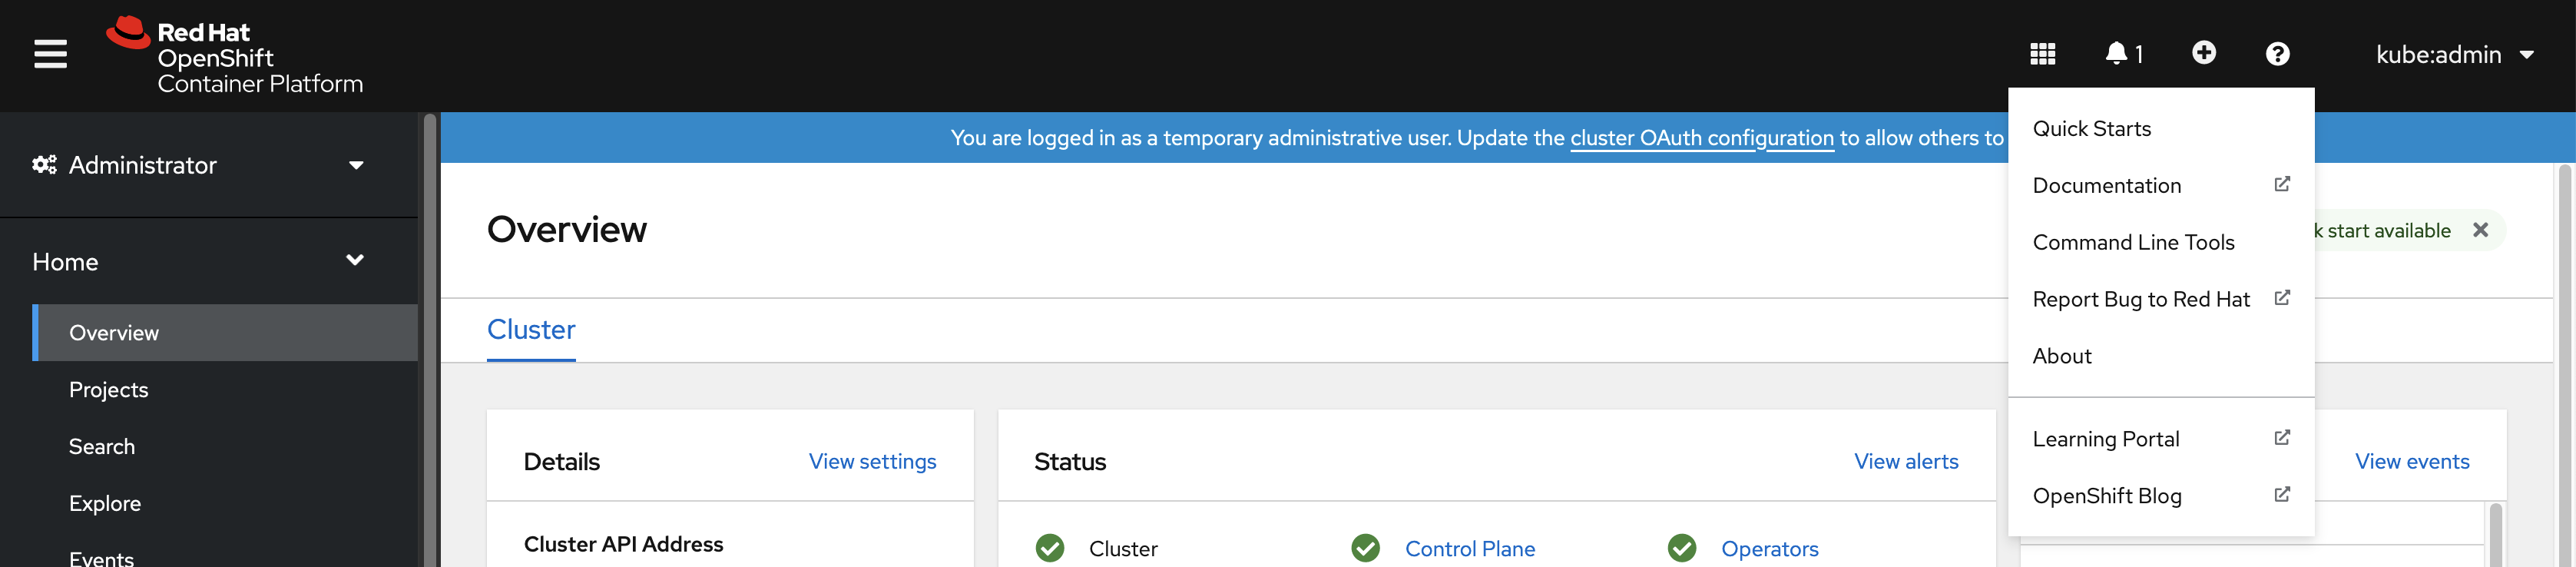
コマンドラインツール をクリックします。
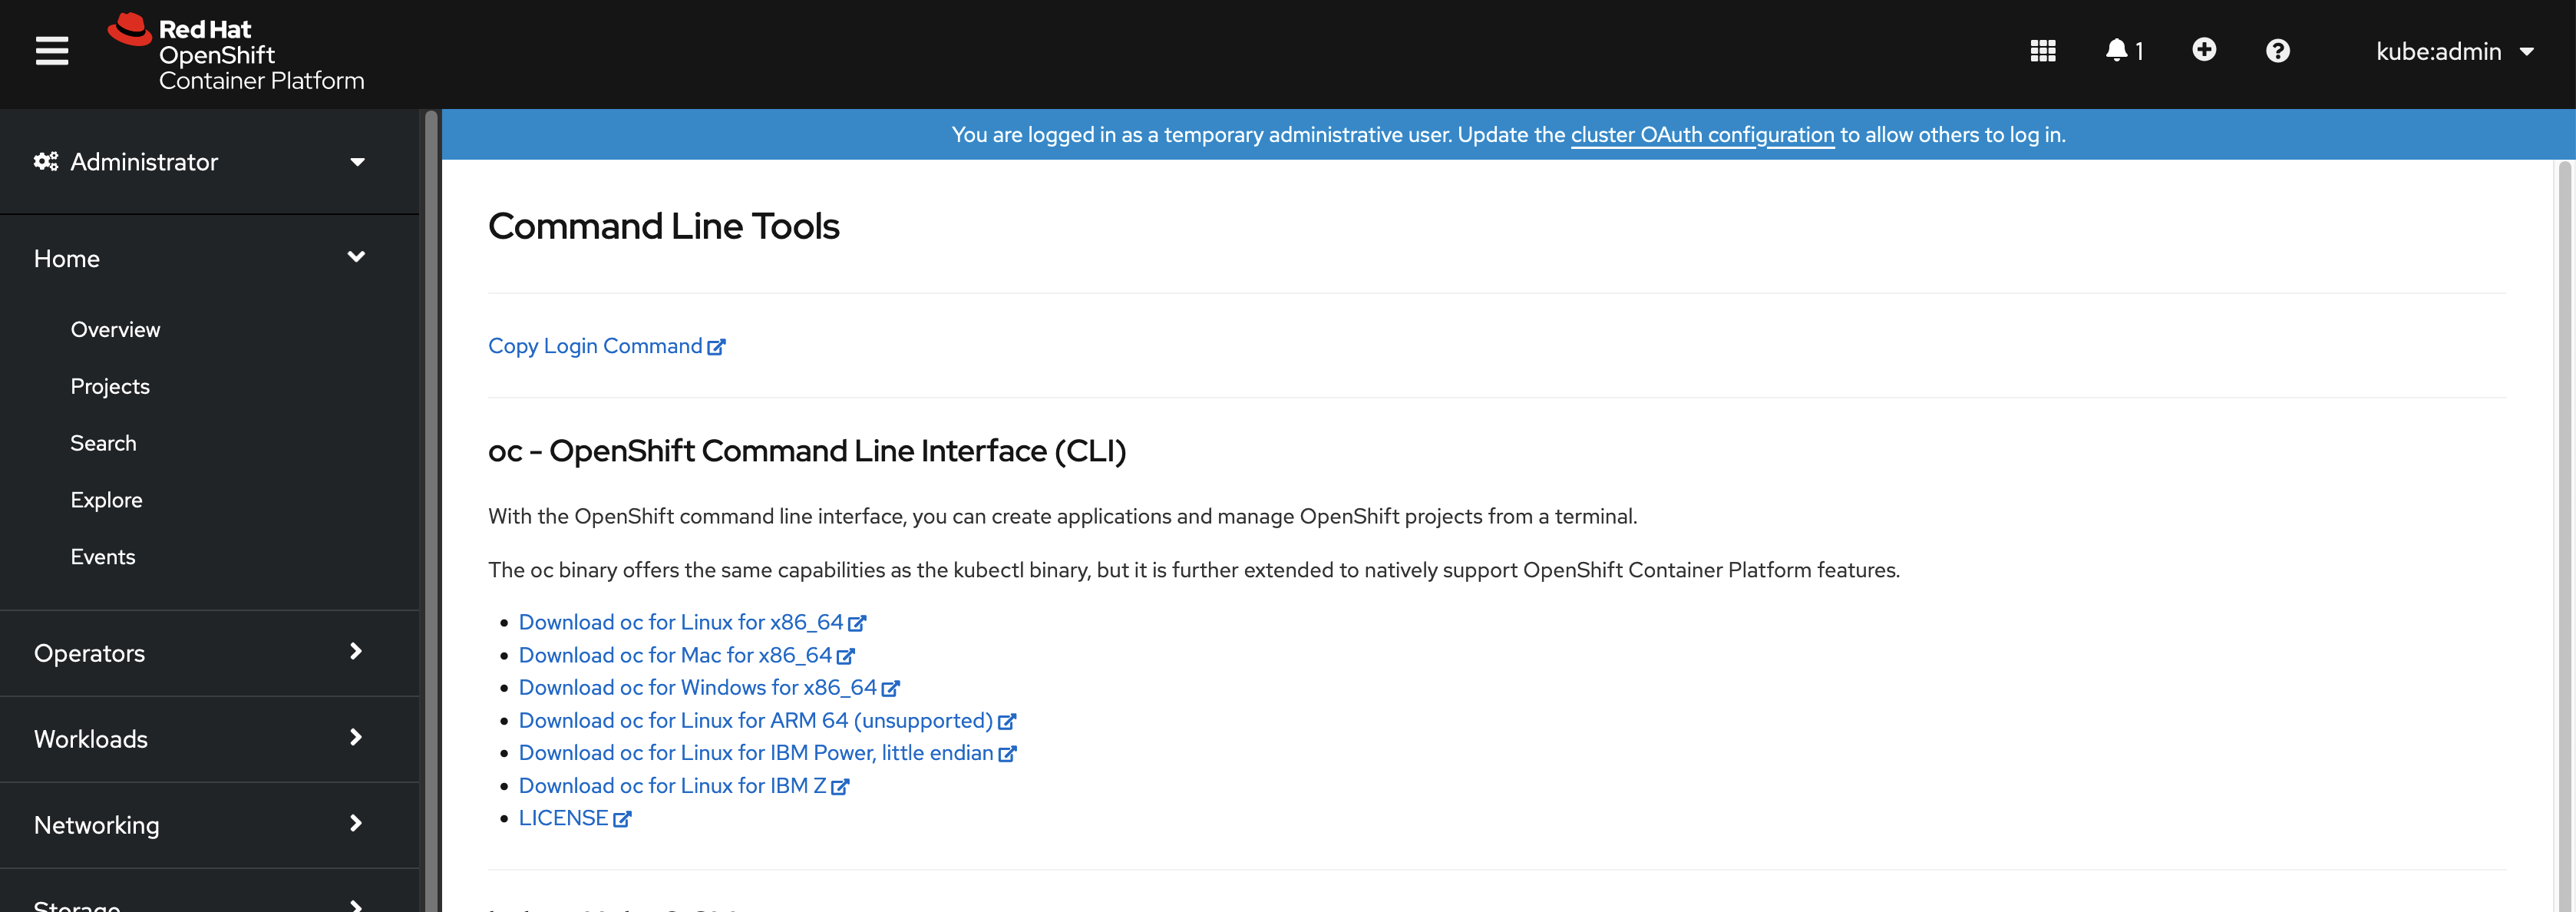
-
Linux プラットフォームに適した
ocbinary を選択してから、Download oc for Linux をクリックします。 - ファイルを保存します。
アーカイブを展開します。
$ tar xvf <file>ocバイナリーを、PATHにあるディレクトリーに移動します。PATHを確認するには、以下のコマンドを実行します。$ echo $PATH
OpenShift CLI のインストール後に、oc コマンドを使用して利用できます。
$ oc <command>2.1.2.2.2. Web コンソールを使用した Windows への OpenShift CLI のインストール
以下の手順を使用して、OpenShift CLI (oc) バイナリーを Windows にインストールできます。
手順
Web コンソールで ? をクリックします。
コマンドラインツール をクリックします。
-
Windows プラットフォームの
ocバイナリーを選択してから、Download oc for Windows for x86_64 をクリックします。 - ファイルを保存します。
- ZIP プログラムでアーカイブを展開します。
ocバイナリーを、PATHにあるディレクトリーに移動します。PATHを確認するには、コマンドプロンプトを開いて以下のコマンドを実行します。C:\> path
OpenShift CLI のインストール後に、oc コマンドを使用して利用できます。
C:\> oc <command>2.1.2.2.3. Web コンソールを使用した macOS への OpenShift CLI のインストール
以下の手順を使用して、OpenShift CLI (oc) バイナリーを macOS にインストールできます。
手順
Web コンソールで ? をクリックします。
コマンドラインツール をクリックします。
macOS プラットフォームの
ocバイナリーを選択し、Download oc for Mac for x86_64 をクリックします。注記macOS arm64 の場合は、Download oc for Mac for ARM 64 をクリックします。
- ファイルを保存します。
- アーカイブを展開し、解凍します。
ocバイナリーをパスにあるディレクトリーに移動します。PATHを確認するには、ターミナルを開き、以下のコマンドを実行します。$ echo $PATH
OpenShift CLI のインストール後に、oc コマンドを使用して利用できます。
$ oc <command>2.1.2.3. RPM を使用した OpenShift CLI のインストール
Red Hat Enterprise Linux (RHEL) の場合、Red Hat アカウントに有効な OpenShift Container Platform サブスクリプションがある場合は、OpenShift CLI (oc) を RPM としてインストールできます。
バイナリーをダウンロードして、RHEL 9 用の oc をインストールする必要があります。RPM パッケージを使用した oc のインストールは、Red Hat Enterprise Linux (RHEL) 9 ではサポートされていません。
前提条件
- root または sudo の権限がある。
手順
Red Hat Subscription Manager に登録します。
# subscription-manager register最新のサブスクリプションデータをプルします。
# subscription-manager refresh利用可能なサブスクリプションをリストします。
# subscription-manager list --available --matches '*OpenShift*'直前のコマンドの出力で、OpenShift Container Platform サブスクリプションのプール ID を見つけ、これを登録されたシステムにアタッチします。
# subscription-manager attach --pool=<pool_id>OpenShift Container Platform 4.15 で必要なリポジトリーを有効にします。
# subscription-manager repos --enable="rhocp-4.15-for-rhel-8-x86_64-rpms"openshift-clientsパッケージをインストールします。# yum install openshift-clients
検証
-
ocコマンドを使用してインストールを確認します。
$ oc <command>2.1.2.4. Homebrew を使用した OpenShift CLI のインストール
macOS の場合は、Homebrew パッケージマネージャーを使用して OpenShift CLI (oc) をインストールできます。
前提条件
-
Homebrew (
brew) がインストールされている。
手順
以下のコマンドを実行して openshift-cli パッケージをインストールします。
$ brew install openshift-cli
検証
-
ocコマンドを使用してインストールを確認します。
$ oc <command>2.1.3. OpenShift CLI へのログイン
OpenShift CLI (oc) にログインしてクラスターにアクセスし、これを管理できます。
前提条件
- OpenShift Container Platform クラスターへのアクセス。
-
OpenShift CLI (
oc) がインストールされている。
HTTP プロキシーサーバー上でのみアクセスできるクラスターにアクセスするには、HTTP_PROXY、HTTPS_PROXY および NO_PROXY 変数を設定できます。これらの環境変数は、クラスターとのすべての通信が HTTP プロキシーを経由するように oc CLI で使用されます。
認証ヘッダーは、HTTPS トランスポートを使用する場合にのみ送信されます。
手順
oc loginコマンドを入力し、ユーザー名を渡します。$ oc login -u user1プロンプトが表示されたら、必要な情報を入力します。
出力例
Server [https://localhost:8443]: https://openshift.example.com:64431 The server uses a certificate signed by an unknown authority. You can bypass the certificate check, but any data you send to the server could be intercepted by others. Use insecure connections? (y/n): y2 Authentication required for https://openshift.example.com:6443 (openshift) Username: user1 Password:3 Login successful. You don't have any projects. You can try to create a new project, by running oc new-project <projectname> Welcome! See 'oc help' to get started.
Web コンソールにログインしている場合には、トークンおよびサーバー情報を含む oc login コマンドを生成できます。このコマンドを使用して、対話プロンプトなしに OpenShift Container Platform CLI にログインできます。コマンドを生成するには、Web コンソールの右上にあるユーザー名のドロップダウンメニューから Copy login command を選択します。
これで、プロジェクトを作成でき、クラスターを管理するための他のコマンドを実行することができます。
2.1.4. Web ブラウザーを使用した OpenShift CLI へのログイン
Web ブラウザーを使用して OpenShift CLI (oc) にログインし、クラスターにアクセスして管理できます。これにより、ユーザーはアクセストークンをコマンドラインに挿入する必要がなくなります。
Web ブラウザー経由で CLI にログインすると、HTTPS ではなく HTTP を使用してローカルホスト上のサーバーが実行します。マルチユーザーワークステーションでは注意して使用してください。
前提条件
- OpenShift Container Platform クラスターへのアクセス。
-
OpenShift CLI (
oc) がインストールされている。 - ブラウザーがインストールされている。
手順
--webフラグを指定してoc loginコマンドを入力します。$ oc login <cluster_url> --web1 - 1
- オプションで、サーバー URL とコールバックポートを指定できます。たとえば、
oc login <cluster_url> --web --callback-port 8280 localhost:8443です。
Web ブラウザーが自動的に開きます。表示されない場合は、コマンド出力内のリンクをクリックします。OpenShift Container Platform サーバーを指定しない場合、
ocは現在のoc設定ファイルで指定されているクラスターの Web コンソールを開こうとします。oc設定が存在しない場合、ocはサーバー URL を対話的に要求します。出力例
Opening login URL in the default browser: https://openshift.example.com Opening in existing browser session.- 複数の認証プロバイダーが使用できる場合は、提供されるオプションから選択します。
-
ユーザー名とパスワードをブラウザーの対応するフィールドに入力します。ログインすると、ブラウザーには
access token received successfully; please return to your terminalと表示されます。 CLI でログイン確認を確認します。
出力例
Login successful. You don't have any projects. You can try to create a new project, by running oc new-project <projectname>
Web コンソールのデフォルトは、前のセッションで使用されたプロファイルになります。管理者プロファイルと開発者プロファイルを切り替えるには、OpenShift Container Platform Web コンソールからログアウトし、キャッシュをクリアします。
これで、プロジェクトを作成でき、クラスターを管理するための他のコマンドを実行することができます。
2.1.5. OpenShift CLI の使用
以下のセクションで、CLI を使用して一般的なタスクを実行する方法を確認します。
2.1.5.1. プロジェクトの作成
新規プロジェクトを作成するには、oc new-project コマンドを使用します。
$ oc new-project my-project出力例
Now using project "my-project" on server "https://openshift.example.com:6443".2.1.5.2. 新しいアプリケーションの作成
新規アプリケーションを作成するには、oc new-app コマンドを使用します。
$ oc new-app https://github.com/sclorg/cakephp-ex出力例
--> Found image 40de956 (9 days old) in imagestream "openshift/php" under tag "7.2" for "php"
...
Run 'oc status' to view your app.2.1.5.3. Pod の表示
現在のプロジェクトの Pod を表示するには、oc get pods コマンドを使用します。
Pod 内で oc を実行し、namespace を指定しない場合は、Pod の namespace がデフォルトで使用されます。
$ oc get pods -o wide出力例
NAME READY STATUS RESTARTS AGE IP NODE NOMINATED NODE
cakephp-ex-1-build 0/1 Completed 0 5m45s 10.131.0.10 ip-10-0-141-74.ec2.internal <none>
cakephp-ex-1-deploy 0/1 Completed 0 3m44s 10.129.2.9 ip-10-0-147-65.ec2.internal <none>
cakephp-ex-1-ktz97 1/1 Running 0 3m33s 10.128.2.11 ip-10-0-168-105.ec2.internal <none>2.1.5.4. Pod ログの表示
特定の Pod のログを表示するには、oc logs コマンドを使用します。
$ oc logs cakephp-ex-1-deploy出力例
--> Scaling cakephp-ex-1 to 1
--> Success2.1.5.5. 現在のプロジェクトの表示
現在のプロジェクトを表示するには、oc project コマンドを使用します。
$ oc project出力例
Using project "my-project" on server "https://openshift.example.com:6443".2.1.5.6. 現在のプロジェクトのステータスの表示
サービス、デプロイメント、およびビルド設定などの現在のプロジェクトに関する情報を表示するには、oc status コマンドを使用します。
$ oc status出力例
In project my-project on server https://openshift.example.com:6443
svc/cakephp-ex - 172.30.236.80 ports 8080, 8443
dc/cakephp-ex deploys istag/cakephp-ex:latest <-
bc/cakephp-ex source builds https://github.com/sclorg/cakephp-ex on openshift/php:7.2
deployment #1 deployed 2 minutes ago - 1 pod
3 infos identified, use 'oc status --suggest' to see details.2.1.5.7. サポートされる API のリソースのリスト表示
サーバー上でサポートされる API リソースのリストを表示するには、oc api-resources コマンドを使用します。
$ oc api-resources出力例
NAME SHORTNAMES APIGROUP NAMESPACED KIND
bindings true Binding
componentstatuses cs false ComponentStatus
configmaps cm true ConfigMap
...2.1.6. ヘルプの表示
CLI コマンドおよび OpenShift Container Platform リソースに関するヘルプを以下の方法で表示することができます。
利用可能なすべての CLI コマンドのリストおよび説明を表示するには、
oc helpを使用します。例: CLI に関する一般的なヘルプの表示
$ oc help出力例
OpenShift Client This client helps you develop, build, deploy, and run your applications on any OpenShift or Kubernetes compatible platform. It also includes the administrative commands for managing a cluster under the 'adm' subcommand. Usage: oc [flags] Basic Commands: login Log in to a server new-project Request a new project new-app Create a new application ...特定の CLI コマンドに関するヘルプを表示するには、
--helpフラグを使用します。例:
oc createコマンドに関するヘルプの表示$ oc create --help出力例
Create a resource by filename or stdin JSON and YAML formats are accepted. Usage: oc create -f FILENAME [flags] ...特定リソースに関する説明およびフィールドを表示するには、
oc explainコマンドを使用します。例:
Podリソースのドキュメントの表示$ oc explain pods出力例
KIND: Pod VERSION: v1 DESCRIPTION: Pod is a collection of containers that can run on a host. This resource is created by clients and scheduled onto hosts. FIELDS: apiVersion <string> APIVersion defines the versioned schema of this representation of an object. Servers should convert recognized schemas to the latest internal value, and may reject unrecognized values. More info: https://git.k8s.io/community/contributors/devel/api-conventions.md#resources ...
2.1.7. OpenShift CLI からのログアウト
OpenShift CLI からログアウトし、現在のセッションを終了することができます。
oc logoutコマンドを使用します。$ oc logout出力例
Logged "user1" out on "https://openshift.example.com"
これにより、サーバーから保存された認証トークンが削除され、設定ファイルから除去されます。
2.2. OpenShift CLI の設定
2.2.1. タブ補完の有効化
Bash または Zsh シェルのタブ補完を有効にできます。
2.2.1.1. Bash のタブ補完の有効化
OpenShift CLI (oc) ツールをインストールした後に、タブ補完を有効にして oc コマンドの自動補完を実行するか、Tab キーを押す際にオプションの提案が表示されるようにできます。次の手順では、Bash シェルのタブ補完を有効にします。
前提条件
-
OpenShift CLI (
oc) がインストールされている。 -
bash-completionパッケージがインストールされている。
手順
Bash 補完コードをファイルに保存します。
$ oc completion bash > oc_bash_completionファイルを
/etc/bash_completion.d/にコピーします。$ sudo cp oc_bash_completion /etc/bash_completion.d/さらにファイルをローカルディレクトリーに保存した後に、これを
.bashrcファイルから取得できるようにすることができます。
タブ補完は、新規ターミナルを開くと有効になります。
2.2.1.2. Zsh のタブ補完の有効化
OpenShift CLI (oc) ツールをインストールした後に、タブ補完を有効にして oc コマンドの自動補完を実行するか、Tab キーを押す際にオプションの提案が表示されるようにできます。次の手順では、Zsh シェルのタブ補完を有効にします。
前提条件
-
OpenShift CLI (
oc) がインストールされている。
手順
ocのタブ補完を.zshrcファイルに追加するには、次のコマンドを実行します。$ cat >>~/.zshrc<<EOF autoload -Uz compinit compinit if [ $commands[oc] ]; then source <(oc completion zsh) compdef _oc oc fi EOF
タブ補完は、新規ターミナルを開くと有効になります。
2.3. oc および kubectl コマンドの使用
Kubernetes のコマンドラインインターフェイス (CLI) kubectl は、Kubernetes クラスターに対してコマンドを実行するのに使用されます。OpenShift Container Platform は認定 Kubernetes ディストリビューションであるため、OpenShift Container Platform に同梱されるサポート対象の kubectl バイナリーを使用するか、または oc バイナリーを使用して拡張された機能を取得できます。
2.3.1. oc バイナリー
oc バイナリーは kubectl バイナリーと同じ機能を提供しますが、これは、以下を含む OpenShift Container Platform 機能をネイティブにサポートするように拡張されています。
OpenShift Container Platform リソースの完全サポート
DeploymentConfig、BuildConfig、Route、ImageStream、およびImageStreamTagオブジェクトなどのリソースは OpenShift Container Platform ディストリビューションに固有のリソースであり、標準の Kubernetes プリミティブにビルドされます。認証
ocバイナリーは、認証用の組み込みloginコマンドを提供し、Kubernetes namespace を認証済みユーザーにマップするプロジェクトを操作できるようにします。詳細は、認証について を参照してください。追加コマンド
追加コマンドの
oc new-appなどは、既存のソースコードまたは事前にビルドされたイメージを使用して新規アプリケーションを起動することを容易にします。同様に、追加コマンドのoc new-projectにより、デフォルトとして切り替えることができるプロジェクトを簡単に開始できるようになります。
以前のバージョンの oc バイナリーをインストールしている場合、これを使用して OpenShift Container Platform 4.15 のすべてのコマンドを実行することはできません。最新の機能が必要な場合は、お使いの OpenShift Container Platform サーバーバージョンに対応する最新バージョンの oc バイナリーをダウンロードし、インストールする必要があります。
セキュリティー以外の API の変更は、古い oc バイナリーの更新を可能にするために、2 つ以上のマイナーリリース (例: 4.1 から 4.2、そして 4.3 へ) が必要です。新機能を使用するには新規の oc バイナリーが必要になる場合があります。4.3 サーバーには、4.2 oc バイナリーが使用できない機能が追加されている場合や、4.3 oc バイナリーには 4.2 サーバーでサポートされていない追加機能が含まれる場合があります。
|
X.Y ( |
X.Y+N footnote:versionpolicyn[N は 1 以上の数値です] ( | |
| X.Y (サーバー) |
|
|
| X.Y+N footnote:versionpolicyn[] (サーバー) |
|
|
 完全に互換性がある。

oc クライアントは、サーバー機能にアクセスできない場合があります。

oc クライアントは、アクセスされるサーバーと互換性のないオプションおよび機能を提供する可能性があります。
2.3.2. kubectl バイナリー
kubectl バイナリーは、標準の Kubernetes 環境を使用する新規 OpenShift Container Platform ユーザー、または kubectl CLI を優先的に使用するユーザーの既存ワークフローおよびスクリプトをサポートする手段として提供されます。kubectl の既存ユーザーはバイナリーを引き続き使用し、OpenShift Container Platform クラスターへの変更なしに Kubernetes のプリミティブと対話できます。
OpenShift CLI のインストール 手順に従って、サポートされている kubectl バイナリーをインストールできます。kubectl バイナリーは、バイナリーをダウンロードする場合にアーカイブに含まれます。または RPM を使用して CLI のインストール時にインストールされます。
詳細は、kubectl のドキュメント を参照してください。
2.4. CLI プロファイルの管理
CLI 設定ファイルでは、CLI ツールの概要 で使用するさまざまなプロファイルまたはコンテキストを設定できます。コンテキストは、ユーザー認証 および ニックネーム と関連付けられた OpenShift Container Platform サーバー情報から構成されます。
2.4.1. CLI プロファイル間のスイッチについて
CLI 操作を使用する場合に、コンテキストを使用すると、複数の OpenShift Container Platform サーバーまたはクラスターにまたがって、複数ユーザー間の切り替えが簡単になります。ニックネームを使用すると、コンテキスト、ユーザーの認証情報およびクラスターの詳細情報の省略された参照を提供することで、CLI 設定の管理が容易になります。ユーザーが oc CLI を使用して初めてログインした後、OpenShift Container Platform は ~/.kube/config ファイルを作成します (まだ存在しない場合)。oc login 操作中に自動的に、または CLI プロファイルを手動で設定することにより、より多くの認証と接続の詳細が CLI に提供されると、更新された情報が設定ファイルに保存されます。
CLI 設定ファイル
apiVersion: v1
clusters:
- cluster:
insecure-skip-tls-verify: true
server: https://openshift1.example.com:8443
name: openshift1.example.com:8443
- cluster:
insecure-skip-tls-verify: true
server: https://openshift2.example.com:8443
name: openshift2.example.com:8443
contexts:
- context:
cluster: openshift1.example.com:8443
namespace: alice-project
user: alice/openshift1.example.com:8443
name: alice-project/openshift1.example.com:8443/alice
- context:
cluster: openshift1.example.com:8443
namespace: joe-project
user: alice/openshift1.example.com:8443
name: joe-project/openshift1/alice
current-context: joe-project/openshift1.example.com:8443/alice
kind: Config
preferences: {}
users:
- name: alice/openshift1.example.com:8443
user:
token: xZHd2piv5_9vQrg-SKXRJ2Dsl9SceNJdhNTljEKTb8k- 1
clustersセクションは、マスターサーバーのアドレスを含む OpenShift Container Platform クラスターの接続の詳細を定義します。この例では、1 つのクラスターのニックネームはopenshift1.example.com:8443で、もう 1 つのクラスターのニックネームはopenshift2.example.com:8443となっています。- 2
- この
contextsセクションでは、2 つのコンテキストを定義します。1 つはalice-project/openshift1.example.com:8443/aliceというニックネームで、alice-projectプロジェクト、openshift1.example.com:8443クラスター、およびaliceユーザーを使用します。もう 1 つはjoe-project/openshift1.example.com:8443/aliceというニックネームで、joe-projectプロジェクト、openshift1.example.com:8443クラスター、およびaliceユーザーを使用します。 - 3
current-contextパラメーターは、joe-project/openshift1.example.com:8443/aliceコンテキストが現在使用中であることを示しています。これにより、aliceユーザーはopenshift1.example.com:8443クラスターのjoe-projectプロジェクトで作業することが可能になります。- 4
usersセクションは、ユーザーの認証情報を定義します。この例では、ユーザーニックネームalice/openshift1.example.com:8443は、アクセストークンを使用します。
CLI は、実行時にロードされ、コマンドラインから指定されたオーバーライドオプションとともにマージされる複数の設定ファイルをサポートできます。ログイン後に、oc status または oc project コマンドを使用して、現在の作業環境を確認できます。
現在の作業環境の確認
$ oc status出力例
oc status
In project Joe's Project (joe-project)
service database (172.30.43.12:5434 -> 3306)
database deploys docker.io/openshift/mysql-55-centos7:latest
#1 deployed 25 minutes ago - 1 pod
service frontend (172.30.159.137:5432 -> 8080)
frontend deploys origin-ruby-sample:latest <-
builds https://github.com/openshift/ruby-hello-world with joe-project/ruby-20-centos7:latest
#1 deployed 22 minutes ago - 2 pods
To see more information about a service or deployment, use 'oc describe service <name>' or 'oc describe dc <name>'.
You can use 'oc get all' to see lists of each of the types described in this example.現在のプロジェクトのリスト表示
$ oc project出力例
Using project "joe-project" from context named "joe-project/openshift1.example.com:8443/alice" on server "https://openshift1.example.com:8443".
oc login コマンドを再度実行し、対話式プロセス中に必要な情報を指定して、ユーザー認証情報およびクラスターの詳細の他の組み合わせを使用してログインできます。コンテキストが存在しない場合は、コンテキストが指定される情報に基づいて作成されます。すでにログインしている場合で、現行ユーザーがアクセス可能な別のプロジェクトに切り替える場合には、oc project コマンドを使用してプロジェクトの名前を入力します。
$ oc project alice-project出力例
Now using project "alice-project" on server "https://openshift1.example.com:8443".
出力に示されるように、いつでも oc config view コマンドを使用して、現在の CLI 設定を表示できます。高度な使用方法で利用できる CLI 設定コマンドが他にもあります。
管理者の認証情報にアクセスできるが、デフォルトのシステムユーザー system:admin としてログインしていない場合は、CLI 設定ファイルに認証情報が残っている限り、いつでもこのユーザーとして再度ログインできます。以下のコマンドはログインを実行し、デフォルトプロジェクトに切り替えます。
$ oc login -u system:admin -n default2.4.2. CLI プロファイルの手動設定
このセクションでは、CLI 設定の高度な使用方法を説明します。ほとんどの場合、oc login コマンドおよび oc project コマンドを使用してログインし、コンテキスト間とプロジェクト間の切り替えを実行できます。
CLI 設定ファイルを手動で設定する必要がある場合は、ファイルを直接変更せずに oc config コマンドを使用することができます。oc config コマンドには、この目的で役立ついくつかのサブコマンドが含まれています。
| サブコマンド | 使用法 |
|---|---|
|
| CLI 設定ファイルにクラスターエントリーを設定します。参照されるクラスターのニックネームがすでに存在する場合、指定情報はマージされます。 |
|
| CLI 設定ファイルにコンテキストエントリーを設定します。参照されるコンテキストのニックネームがすでに存在する場合、指定情報はマージされます。 |
|
| 指定されたコンテキストのニックネームを使用して、現在のコンテキストを設定します。 |
|
| CLI 設定ファイルに個別の値を設定します。
|
|
| CLI 設定ファイルでの個別の値の設定を解除します。
|
|
| 現在使用中のマージされた CLI 設定を表示します。 指定された CLI 設定ファイルの結果を表示します。 |
使用例
-
アクセストークンを使用するユーザーとしてログインします。このトークンは
aliceユーザーによって使用されます。
$ oc login https://openshift1.example.com --token=ns7yVhuRNpDM9cgzfhhxQ7bM5s7N2ZVrkZepSRf4LC0- 自動的に作成されたクラスターエントリーを表示します。
$ oc config view出力例
apiVersion: v1
clusters:
- cluster:
insecure-skip-tls-verify: true
server: https://openshift1.example.com
name: openshift1-example-com
contexts:
- context:
cluster: openshift1-example-com
namespace: default
user: alice/openshift1-example-com
name: default/openshift1-example-com/alice
current-context: default/openshift1-example-com/alice
kind: Config
preferences: {}
users:
- name: alice/openshift1.example.com
user:
token: ns7yVhuRNpDM9cgzfhhxQ7bM5s7N2ZVrkZepSRf4LC0- 現在のコンテキストを更新して、ユーザーが必要な namespace にログインできるようにします。
$ oc config set-context `oc config current-context` --namespace=<project_name>- 現在のコンテキストを調べて、変更が実装されていることを確認します。
$ oc whoami -c後続のすべての CLI 操作は、オーバーライドする CLI オプションにより特に指定されていない限り、またはコンテキストが切り替わるまで、新しいコンテキストを使用します。
2.4.3. ルールの読み込みおよびマージ
CLI 設定のロードおよびマージ順序の CLI 操作を実行する際に、以下のルールを実行できます。
CLI 設定ファイルは、以下の階層とマージルールを使用してワークステーションから取得されます。
-
--configオプションが設定されている場合、そのファイルのみが読み込まれます。フラグは一度設定され、マージは実行されません。 -
$KUBECONFIG環境変数が設定されている場合は、これが使用されます。変数はパスの一覧である可能性があり、その場合、パスは 1 つにマージされます。値が変更される場合は、スタンザを定義するファイルで変更されます。値が作成される場合は、存在する最初のファイルで作成されます。ファイルがチェーン内に存在しない場合は、一覧の最後のファイルが作成されます。 -
または、
~/.kube/configファイルが使用され、マージは実行されません。
-
使用するコンテキストは、以下のフローの最初の一致に基づいて決定されます。
-
--contextオプションの値。 -
CLI 設定ファイルの
current-context値。 - この段階では空の値が許可されます。
-
使用するユーザーおよびクラスターが決定されます。この時点では、コンテキストがある場合とない場合があります。コンテキストは、以下のフローの最初の一致に基づいて作成されます。このフローは、ユーザー用に 1 回、クラスター用に 1 回実行されます。
-
ユーザー名の
--userの値、およびクラスター名の--clusterオプション。 -
--contextオプションがある場合は、コンテキストの値を使用します。 - この段階では空の値が許可されます。
-
ユーザー名の
使用する実際のクラスター情報が決定されます。この時点では、クラスター情報がある場合とない場合があります。各クラスター情報は、以下のフローの最初の一致に基づいて構築されます。
以下のコマンドラインオプションのいずれかの値。
-
--server -
--api-version -
--certificate-authority -
--insecure-skip-tls-verify
-
- クラスター情報および属性の値がある場合は、それを使用します。
- サーバーロケーションがない場合は、エラーが生じます。
使用する実際のユーザー情報が決定されます。ユーザーは、クラスターと同じルールを使用して作成されます。ただし、複数の手法が競合することによって操作が失敗することから、ユーザーごとの 1 つの認証手法のみを使用できます。コマンドラインのオプションは、設定ファイルの値よりも優先されます。以下は、有効なコマンドラインのオプションです。
-
--auth-path -
--client-certificate -
--client-key -
--token
-
- 欠落している情報がある場合には、デフォルト値が使用され、追加情報を求めるプロンプトが出されます。
2.5. プラグインによる OpenShift CLI の拡張
デフォルトの oc コマンドを拡張するためにプラグインを作成およびインストールし、これを使用して OpenShift Container Platform CLI で新規および追加の複雑なタスクを実行できます。
2.5.1. CLI プラグインの作成
コマンドラインのコマンドを作成できる任意のプログラミング言語またはスクリプトで、OpenShift Container Platform CLI のプラグインを作成できます。既存の oc コマンドを上書きするプラグインを使用することはできない点に注意してください。
手順
以下の手順では、oc foo コマンドの実行時にターミナルにメッセージを出力する単純な Bash プラグインを作成します。
oc-fooというファイルを作成します。プラグインファイルの名前を付ける際には、以下の点に留意してください。
-
プログインとして認識されるように、ファイルの名前は
oc-またはkubectl-で開始する必要があります。 -
ファイル名は、プラグインを起動するコマンドを判別するものとなります。たとえば、ファイル名が
oc-foo-barのプラグインは、oc foo barのコマンドで起動します。また、コマンドにダッシュを含める必要がある場合には、アンダースコアを使用することもできます。たとえば、ファイル名がoc-foo_barのプラグインは、oc foo-barのコマンドで起動します。
-
プログインとして認識されるように、ファイルの名前は
以下の内容をファイルに追加します。
#!/bin/bash # optional argument handling if [[ "$1" == "version" ]] then echo "1.0.0" exit 0 fi # optional argument handling if [[ "$1" == "config" ]] then echo $KUBECONFIG exit 0 fi echo "I am a plugin named kubectl-foo"
OpenShift Container Platform CLI のこのプラグインをインストールした後に、oc foo コマンドを使用してこれを起動できます。
2.5.2. CLI プラグインのインストールおよび使用
OpenShift Container Platform CLI のカスタムプラグインを作成した後、使用する前にプラグインをインストールする必要があります。
前提条件
-
ocCLI ツールをインストールしていること。 -
oc-またはkubectl-で始まる CLI プラグインファイルがあること。
手順
必要に応じて、プラグインファイルを更新して実行可能にします。
$ chmod +x <plugin_file>ファイルを
PATHの任意の場所に置きます (例:/usr/local/bin/)。$ sudo mv <plugin_file> /usr/local/bin/.oc plugin listを実行し、プラグインが一覧表示されることを確認します。$ oc plugin list出力例
The following compatible plugins are available: /usr/local/bin/<plugin_file>プラグインがここに一覧表示されていない場合、ファイルが
oc-またはkubectl-で開始されるものであり、実行可能な状態でPATH上にあることを確認します。プラグインによって導入される新規コマンドまたはオプションを起動します。
たとえば、
kubectl-nsプラグインを サンプルのプラグインリポジトリー からビルドし、インストールしている場合、以下のコマンドを使用して現在の namespace を表示できます。$ oc nsプラグインを呼び出すコマンドは、プラグインのファイル名に依存することに注意してください。たとえば、ファイル名が
oc-foo-barのプラグインはoc foo barコマンドによって起動します。
2.6. Krew を使用した CLI プラグインの管理
Krew を使用して、OpenShift CLI (oc) のプラグインをインストールおよび管理できます。
Krew を使用して OpenShift CLI のプラグインをインストールおよび管理することは、テクノロジープレビュー機能のみです。テクノロジープレビュー機能は、Red Hat 製品のサービスレベルアグリーメント (SLA) の対象外であり、機能的に完全ではないことがあります。Red Hat は、実稼働環境でこれらを使用することを推奨していません。テクノロジープレビュー機能は、最新の製品機能をいち早く提供して、開発段階で機能のテストを行い、フィードバックを提供していただくことを目的としています。
Red Hat のテクノロジープレビュー機能のサポート範囲に関する詳細は、テクノロジープレビュー機能のサポート範囲 を参照してください。
2.6.1. Krew を使用した CLI プラグインのインストール
Krew を使用して、OpenShift CLI (oc) のプラグインをインストールできます。
前提条件
- Krew のドキュメントの インストール手順 に従って、Krew をインストールしました。
手順
使用可能なすべてのプラグインを一覧表示するには、次のコマンドを実行します。
$ oc krew searchプラグインに関する情報を取得するには、次のコマンドを実行します。
$ oc krew info <plugin_name>プラグインをインストールするには、次のコマンドを実行します。
$ oc krew install <plugin_name>Krew によってインストールされたすべてのプラグインを一覧表示するには、次のコマンドを実行します。
$ oc krew list
2.6.2. Krew を使用した CLI プラグインの更新
OpenShift CLI (oc) 用にインストールされたプラグインを Krew で更新できます。
前提条件
- Krew のドキュメントの インストール手順 に従って、Krew をインストールしました。
- Krew を使用して OpenShift CLI のプラグインをインストールしました。
手順
単一のプラグインを更新するには、次のコマンドを実行します。
$ oc krew upgrade <plugin_name>Krew によってインストールされたすべてのプラグインを更新するには、次のコマンドを実行します。
$ oc krew upgrade
2.6.3. Krew を使用した CLI プラグインのアンインストール
Krew を使用して、OpenShift CLI (oc) 用にインストールされたプラグインをアンインストールできます。
前提条件
- Krew のドキュメントの インストール手順 に従って、Krew をインストールしました。
- Krew を使用して OpenShift CLI のプラグインをインストールしました。
手順
プラグインをアンインストールするには、次のコマンドを実行します。
$ oc krew uninstall <plugin_name>
2.7. OpenShift CLI 開発者コマンドリファレンス
このリファレンスは、OpenShift CLI (oc) 開発者コマンドの説明とコマンド例を示しています。管理者コマンドは、OpenShift CLI 管理者コマンドリファレンス を参照してください。
oc help を実行して、すべてのコマンドを表示するか、oc <command> --help を実行して、特定のコマンドに関する追加情報を取得します。
2.7.1. OpenShift CLI (oc) 開発者コマンド
2.7.1.1. oc annotate
リソースへのアノテーションを更新します。
使用例
# Update pod 'foo' with the annotation 'description' and the value 'my frontend'
# If the same annotation is set multiple times, only the last value will be applied
oc annotate pods foo description='my frontend'
# Update a pod identified by type and name in "pod.json"
oc annotate -f pod.json description='my frontend'
# Update pod 'foo' with the annotation 'description' and the value 'my frontend running nginx', overwriting any existing value
oc annotate --overwrite pods foo description='my frontend running nginx'
# Update all pods in the namespace
oc annotate pods --all description='my frontend running nginx'
# Update pod 'foo' only if the resource is unchanged from version 1
oc annotate pods foo description='my frontend running nginx' --resource-version=1
# Update pod 'foo' by removing an annotation named 'description' if it exists
# Does not require the --overwrite flag
oc annotate pods foo description-2.7.1.2. oc api-resources
サーバー上のサポートされている API リソースを出力します。
使用例
# Print the supported API resources
oc api-resources
# Print the supported API resources with more information
oc api-resources -o wide
# Print the supported API resources sorted by a column
oc api-resources --sort-by=name
# Print the supported namespaced resources
oc api-resources --namespaced=true
# Print the supported non-namespaced resources
oc api-resources --namespaced=false
# Print the supported API resources with a specific APIGroup
oc api-resources --api-group=rbac.authorization.k8s.io2.7.1.3. oc api-versions
"group/version" という形式で、サーバー上でサポートされる API バージョンを出力します。
使用例
# Print the supported API versions
oc api-versions2.7.1.4. oc apply
設定をファイル名または標準入力 (stdin) 別のリソースに適用します。
使用例
# Apply the configuration in pod.json to a pod
oc apply -f ./pod.json
# Apply resources from a directory containing kustomization.yaml - e.g. dir/kustomization.yaml
oc apply -k dir/
# Apply the JSON passed into stdin to a pod
cat pod.json | oc apply -f -
# Apply the configuration from all files that end with '.json'
oc apply -f '*.json'
# Note: --prune is still in Alpha
# Apply the configuration in manifest.yaml that matches label app=nginx and delete all other resources that are not in the file and match label app=nginx
oc apply --prune -f manifest.yaml -l app=nginx
# Apply the configuration in manifest.yaml and delete all the other config maps that are not in the file
oc apply --prune -f manifest.yaml --all --prune-allowlist=core/v1/ConfigMap2.7.1.5. oc apply edit-last-applied
リソース/オブジェクトの最新の last-applied-configuration アノテーションを編集します。
使用例
# Edit the last-applied-configuration annotations by type/name in YAML
oc apply edit-last-applied deployment/nginx
# Edit the last-applied-configuration annotations by file in JSON
oc apply edit-last-applied -f deploy.yaml -o json2.7.1.6. oc apply set-last-applied
ファイルの内容に一致するように、ライブオブジェクトに last-applied-configuration アノテーションを設定します。
使用例
# Set the last-applied-configuration of a resource to match the contents of a file
oc apply set-last-applied -f deploy.yaml
# Execute set-last-applied against each configuration file in a directory
oc apply set-last-applied -f path/
# Set the last-applied-configuration of a resource to match the contents of a file; will create the annotation if it does not already exist
oc apply set-last-applied -f deploy.yaml --create-annotation=true2.7.1.7. oc apply view-last-applied
リソース/オブジェクトの最新の last-applied-configuration アノテーションを表示します。
使用例
# View the last-applied-configuration annotations by type/name in YAML
oc apply view-last-applied deployment/nginx
# View the last-applied-configuration annotations by file in JSON
oc apply view-last-applied -f deploy.yaml -o json2.7.1.8. oc attach
実行中のコンテナーに割り当てます。
使用例
# Get output from running pod mypod; use the 'oc.kubernetes.io/default-container' annotation
# for selecting the container to be attached or the first container in the pod will be chosen
oc attach mypod
# Get output from ruby-container from pod mypod
oc attach mypod -c ruby-container
# Switch to raw terminal mode; sends stdin to 'bash' in ruby-container from pod mypod
# and sends stdout/stderr from 'bash' back to the client
oc attach mypod -c ruby-container -i -t
# Get output from the first pod of a replica set named nginx
oc attach rs/nginx2.7.1.9. oc auth can-i
アクションが可能かどうかを確認します。
使用例
# Check to see if I can create pods in any namespace
oc auth can-i create pods --all-namespaces
# Check to see if I can list deployments in my current namespace
oc auth can-i list deployments.apps
# Check to see if service account "foo" of namespace "dev" can list pods
# in the namespace "prod".
# You must be allowed to use impersonation for the global option "--as".
oc auth can-i list pods --as=system:serviceaccount:dev:foo -n prod
# Check to see if I can do everything in my current namespace ("*" means all)
oc auth can-i '*' '*'
# Check to see if I can get the job named "bar" in namespace "foo"
oc auth can-i list jobs.batch/bar -n foo
# Check to see if I can read pod logs
oc auth can-i get pods --subresource=log
# Check to see if I can access the URL /logs/
oc auth can-i get /logs/
# List all allowed actions in namespace "foo"
oc auth can-i --list --namespace=foo2.7.1.10. oc auth reconcile
RBAC ロール、ロールバインディング、クラスターロール、およびクラスターロールバインディングオブジェクトのルールを調整します。
使用例
# Reconcile RBAC resources from a file
oc auth reconcile -f my-rbac-rules.yaml2.7.1.11. oc auth whoami
実験的: 自己サブジェクトの属性を確認します。
使用例
# Get your subject attributes.
oc auth whoami
# Get your subject attributes in JSON format.
oc auth whoami -o json2.7.1.12. oc autoscale
デプロイメント設定、デプロイメント、レプリカセット、ステートフルセット、またはレプリケーションコントローラーを自動スケーリングします。
使用例
# Auto scale a deployment "foo", with the number of pods between 2 and 10, no target CPU utilization specified so a default autoscaling policy will be used
oc autoscale deployment foo --min=2 --max=10
# Auto scale a replication controller "foo", with the number of pods between 1 and 5, target CPU utilization at 80%
oc autoscale rc foo --max=5 --cpu-percent=802.7.1.13. oc cancel-build
実行中、保留中、または新規のビルドを取り消します。
使用例
# Cancel the build with the given name
oc cancel-build ruby-build-2
# Cancel the named build and print the build logs
oc cancel-build ruby-build-2 --dump-logs
# Cancel the named build and create a new one with the same parameters
oc cancel-build ruby-build-2 --restart
# Cancel multiple builds
oc cancel-build ruby-build-1 ruby-build-2 ruby-build-3
# Cancel all builds created from the 'ruby-build' build config that are in the 'new' state
oc cancel-build bc/ruby-build --state=new2.7.1.14. oc cluster-info
クラスター情報を表示します。
使用例
# Print the address of the control plane and cluster services
oc cluster-info2.7.1.15. oc cluster-info dump
デバッグおよび診断に関する関連情報をダンプします。
使用例
# Dump current cluster state to stdout
oc cluster-info dump
# Dump current cluster state to /path/to/cluster-state
oc cluster-info dump --output-directory=/path/to/cluster-state
# Dump all namespaces to stdout
oc cluster-info dump --all-namespaces
# Dump a set of namespaces to /path/to/cluster-state
oc cluster-info dump --namespaces default,kube-system --output-directory=/path/to/cluster-state2.7.1.16. oc completion
指定されたシェル (bash、zsh、fish、または powershell) のシェル補完コードを出力します。
使用例
# Installing bash completion on macOS using homebrew
## If running Bash 3.2 included with macOS
brew install bash-completion
## or, if running Bash 4.1+
brew install bash-completion@2
## If oc is installed via homebrew, this should start working immediately
## If you've installed via other means, you may need add the completion to your completion directory
oc completion bash > $(brew --prefix)/etc/bash_completion.d/oc
# Installing bash completion on Linux
## If bash-completion is not installed on Linux, install the 'bash-completion' package
## via your distribution's package manager.
## Load the oc completion code for bash into the current shell
source <(oc completion bash)
## Write bash completion code to a file and source it from .bash_profile
oc completion bash > ~/.kube/completion.bash.inc
printf "
# oc shell completion
source '$HOME/.kube/completion.bash.inc'
" >> $HOME/.bash_profile
source $HOME/.bash_profile
# Load the oc completion code for zsh[1] into the current shell
source <(oc completion zsh)
# Set the oc completion code for zsh[1] to autoload on startup
oc completion zsh > "${fpath[1]}/_oc"
# Load the oc completion code for fish[2] into the current shell
oc completion fish | source
# To load completions for each session, execute once:
oc completion fish > ~/.config/fish/completions/oc.fish
# Load the oc completion code for powershell into the current shell
oc completion powershell | Out-String | Invoke-Expression
# Set oc completion code for powershell to run on startup
## Save completion code to a script and execute in the profile
oc completion powershell > $HOME\.kube\completion.ps1
Add-Content $PROFILE "$HOME\.kube\completion.ps1"
## Execute completion code in the profile
Add-Content $PROFILE "if (Get-Command oc -ErrorAction SilentlyContinue) {
oc completion powershell | Out-String | Invoke-Expression
}"
## Add completion code directly to the $PROFILE script
oc completion powershell >> $PROFILE2.7.1.17. oc config current-context
current-context を表示します。
使用例
# Display the current-context
oc config current-context2.7.1.18. oc config delete-cluster
kubeconfig から指定されたクラスターを削除します。
使用例
# Delete the minikube cluster
oc config delete-cluster minikube2.7.1.19. oc config delete-context
kubeconfig から指定されたコンテキストを削除します。
使用例
# Delete the context for the minikube cluster
oc config delete-context minikube2.7.1.20. oc config delete-user
kubeconfig から指定されたユーザーを削除します。
使用例
# Delete the minikube user
oc config delete-user minikube2.7.1.21. oc config get-clusters
kubeconfig に定義されるクラスターを表示します。
使用例
# List the clusters that oc knows about
oc config get-clusters2.7.1.22. oc config get-contexts
コンテキストを 1 つまたは複数記述します。
使用例
# List all the contexts in your kubeconfig file
oc config get-contexts
# Describe one context in your kubeconfig file
oc config get-contexts my-context2.7.1.23. oc config get-users
kubeconfig で定義されるユーザーを表示します。
使用例
# List the users that oc knows about
oc config get-users2.7.1.24. oc config new-admin-kubeconfig
新しい admin.kubeconfig を生成してサーバーを信頼させ、表示します。
使用例
# Generate a new admin kubeconfig
oc config new-admin-kubeconfig2.7.1.25. oc config new-kubelet-bootstrap-kubeconfig
新しい kubelet /etc/kubernetes/kubeconfig を生成し、サーバーを信頼させて表示します。
使用例
# Generate a new kubelet bootstrap kubeconfig
oc config new-kubelet-bootstrap-kubeconfig2.7.1.26. oc config refresh-ca-bundle
apiserver に接続して、OpenShift CA バンドルを更新します。
使用例
# Refresh the CA bundle for the current context's cluster
oc config refresh-ca-bundle
# Refresh the CA bundle for the cluster named e2e in your kubeconfig
oc config refresh-ca-bundle e2e
# Print the CA bundle from the current OpenShift cluster's apiserver.
oc config refresh-ca-bundle --dry-run2.7.1.27. oc config rename-context
kubeconfig ファイルからのコンテキストの名前を変更します。
使用例
# Rename the context 'old-name' to 'new-name' in your kubeconfig file
oc config rename-context old-name new-name2.7.1.28. oc config set
kubeconfig ファイルに個別の値を設定します。
使用例
# Set the server field on the my-cluster cluster to https://1.2.3.4
oc config set clusters.my-cluster.server https://1.2.3.4
# Set the certificate-authority-data field on the my-cluster cluster
oc config set clusters.my-cluster.certificate-authority-data $(echo "cert_data_here" | base64 -i -)
# Set the cluster field in the my-context context to my-cluster
oc config set contexts.my-context.cluster my-cluster
# Set the client-key-data field in the cluster-admin user using --set-raw-bytes option
oc config set users.cluster-admin.client-key-data cert_data_here --set-raw-bytes=true2.7.1.29. oc config set-cluster
kubeconfig でクラスターエントリーを設定します。
使用例
# Set only the server field on the e2e cluster entry without touching other values
oc config set-cluster e2e --server=https://1.2.3.4
# Embed certificate authority data for the e2e cluster entry
oc config set-cluster e2e --embed-certs --certificate-authority=~/.kube/e2e/kubernetes.ca.crt
# Disable cert checking for the e2e cluster entry
oc config set-cluster e2e --insecure-skip-tls-verify=true
# Set the custom TLS server name to use for validation for the e2e cluster entry
oc config set-cluster e2e --tls-server-name=my-cluster-name
# Set the proxy URL for the e2e cluster entry
oc config set-cluster e2e --proxy-url=https://1.2.3.42.7.1.30. oc config set-context
kubeconfig のコンテキストエントリーを設定します。
使用例
# Set the user field on the gce context entry without touching other values
oc config set-context gce --user=cluster-admin2.7.1.31. oc config set-credentials
kubeconfig のユーザーエントリーを設定します。
使用例
# Set only the "client-key" field on the "cluster-admin"
# entry, without touching other values
oc config set-credentials cluster-admin --client-key=~/.kube/admin.key
# Set basic auth for the "cluster-admin" entry
oc config set-credentials cluster-admin --username=admin --password=uXFGweU9l35qcif
# Embed client certificate data in the "cluster-admin" entry
oc config set-credentials cluster-admin --client-certificate=~/.kube/admin.crt --embed-certs=true
# Enable the Google Compute Platform auth provider for the "cluster-admin" entry
oc config set-credentials cluster-admin --auth-provider=gcp
# Enable the OpenID Connect auth provider for the "cluster-admin" entry with additional arguments
oc config set-credentials cluster-admin --auth-provider=oidc --auth-provider-arg=client-id=foo --auth-provider-arg=client-secret=bar
# Remove the "client-secret" config value for the OpenID Connect auth provider for the "cluster-admin" entry
oc config set-credentials cluster-admin --auth-provider=oidc --auth-provider-arg=client-secret-
# Enable new exec auth plugin for the "cluster-admin" entry
oc config set-credentials cluster-admin --exec-command=/path/to/the/executable --exec-api-version=client.authentication.k8s.io/v1beta1
# Define new exec auth plugin arguments for the "cluster-admin" entry
oc config set-credentials cluster-admin --exec-arg=arg1 --exec-arg=arg2
# Create or update exec auth plugin environment variables for the "cluster-admin" entry
oc config set-credentials cluster-admin --exec-env=key1=val1 --exec-env=key2=val2
# Remove exec auth plugin environment variables for the "cluster-admin" entry
oc config set-credentials cluster-admin --exec-env=var-to-remove-2.7.1.32. oc config unset
kubeconfig ファイルの個別の値の設定を解除します。
使用例
# Unset the current-context
oc config unset current-context
# Unset namespace in foo context
oc config unset contexts.foo.namespace2.7.1.33. oc config use-context
kubeconfig ファイルで current-context を設定します。
使用例
# Use the context for the minikube cluster
oc config use-context minikube2.7.1.34. oc config view
マージされた kubeconfig 設定または指定された kubeconfig ファイルを表示します。
使用例
# Show merged kubeconfig settings
oc config view
# Show merged kubeconfig settings, raw certificate data, and exposed secrets
oc config view --raw
# Get the password for the e2e user
oc config view -o jsonpath='{.users[?(@.name == "e2e")].user.password}'2.7.1.35. oc cp
ファイルおよびディレクトリーのコンテナーへの/からのコピーを実行します。
使用例
# !!!Important Note!!!
# Requires that the 'tar' binary is present in your container
# image. If 'tar' is not present, 'oc cp' will fail.
#
# For advanced use cases, such as symlinks, wildcard expansion or
# file mode preservation, consider using 'oc exec'.
# Copy /tmp/foo local file to /tmp/bar in a remote pod in namespace <some-namespace>
tar cf - /tmp/foo | oc exec -i -n <some-namespace> <some-pod> -- tar xf - -C /tmp/bar
# Copy /tmp/foo from a remote pod to /tmp/bar locally
oc exec -n <some-namespace> <some-pod> -- tar cf - /tmp/foo | tar xf - -C /tmp/bar
# Copy /tmp/foo_dir local directory to /tmp/bar_dir in a remote pod in the default namespace
oc cp /tmp/foo_dir <some-pod>:/tmp/bar_dir
# Copy /tmp/foo local file to /tmp/bar in a remote pod in a specific container
oc cp /tmp/foo <some-pod>:/tmp/bar -c <specific-container>
# Copy /tmp/foo local file to /tmp/bar in a remote pod in namespace <some-namespace>
oc cp /tmp/foo <some-namespace>/<some-pod>:/tmp/bar
# Copy /tmp/foo from a remote pod to /tmp/bar locally
oc cp <some-namespace>/<some-pod>:/tmp/foo /tmp/bar2.7.1.36. oc create
ファイルまたは標準入力 (stdin) からリソースを作成します。
使用例
# Create a pod using the data in pod.json
oc create -f ./pod.json
# Create a pod based on the JSON passed into stdin
cat pod.json | oc create -f -
# Edit the data in registry.yaml in JSON then create the resource using the edited data
oc create -f registry.yaml --edit -o json2.7.1.37. oc create build
新規ビルドを作成します。
使用例
# Create a new build
oc create build myapp2.7.1.38. oc create clusterresourcequota
クラスターリソースクォータを作成します。
使用例
# Create a cluster resource quota limited to 10 pods
oc create clusterresourcequota limit-bob --project-annotation-selector=openshift.io/requester=user-bob --hard=pods=102.7.1.39. oc create clusterrole
クラスターロールを作成します。
使用例
# Create a cluster role named "pod-reader" that allows user to perform "get", "watch" and "list" on pods
oc create clusterrole pod-reader --verb=get,list,watch --resource=pods
# Create a cluster role named "pod-reader" with ResourceName specified
oc create clusterrole pod-reader --verb=get --resource=pods --resource-name=readablepod --resource-name=anotherpod
# Create a cluster role named "foo" with API Group specified
oc create clusterrole foo --verb=get,list,watch --resource=rs.apps
# Create a cluster role named "foo" with SubResource specified
oc create clusterrole foo --verb=get,list,watch --resource=pods,pods/status
# Create a cluster role name "foo" with NonResourceURL specified
oc create clusterrole "foo" --verb=get --non-resource-url=/logs/*
# Create a cluster role name "monitoring" with AggregationRule specified
oc create clusterrole monitoring --aggregation-rule="rbac.example.com/aggregate-to-monitoring=true"2.7.1.40. oc create clusterrolebinding
特定のクラスターロールのクラスターロールバインディングを作成します。
使用例
# Create a cluster role binding for user1, user2, and group1 using the cluster-admin cluster role
oc create clusterrolebinding cluster-admin --clusterrole=cluster-admin --user=user1 --user=user2 --group=group12.7.1.41. oc create configmap
ローカルファイル、ディレクトリー、またはリテラル値から config map を作成します。
使用例
# Create a new config map named my-config based on folder bar
oc create configmap my-config --from-file=path/to/bar
# Create a new config map named my-config with specified keys instead of file basenames on disk
oc create configmap my-config --from-file=key1=/path/to/bar/file1.txt --from-file=key2=/path/to/bar/file2.txt
# Create a new config map named my-config with key1=config1 and key2=config2
oc create configmap my-config --from-literal=key1=config1 --from-literal=key2=config2
# Create a new config map named my-config from the key=value pairs in the file
oc create configmap my-config --from-file=path/to/bar
# Create a new config map named my-config from an env file
oc create configmap my-config --from-env-file=path/to/foo.env --from-env-file=path/to/bar.env2.7.1.42. oc create cronjob
指定の名前で cron job を作成します。
使用例
# Create a cron job
oc create cronjob my-job --image=busybox --schedule="*/1 * * * *"
# Create a cron job with a command
oc create cronjob my-job --image=busybox --schedule="*/1 * * * *" -- date2.7.1.43. oc create deployment
指定の名前のデプロイメントを作成します。
使用例
# Create a deployment named my-dep that runs the busybox image
oc create deployment my-dep --image=busybox
# Create a deployment with a command
oc create deployment my-dep --image=busybox -- date
# Create a deployment named my-dep that runs the nginx image with 3 replicas
oc create deployment my-dep --image=nginx --replicas=3
# Create a deployment named my-dep that runs the busybox image and expose port 5701
oc create deployment my-dep --image=busybox --port=57012.7.1.44. oc create deploymentconfig
デフォルトのオプションを指定して特定のイメージを使用するデプロイメント設定を作成します。
使用例
# Create an nginx deployment config named my-nginx
oc create deploymentconfig my-nginx --image=nginx2.7.1.45. oc create identity
アイデンティティーを手動で作成します (自動作成が無効になっている場合のみが必要)。
使用例
# Create an identity with identity provider "acme_ldap" and the identity provider username "adamjones"
oc create identity acme_ldap:adamjones2.7.1.46. oc create imagestream
空のイメージストリームを新たに作成します。
使用例
# Create a new image stream
oc create imagestream mysql2.7.1.47. oc create imagestreamtag
新規イメージストリームタグを作成します。
使用例
# Create a new image stream tag based on an image in a remote registry
oc create imagestreamtag mysql:latest --from-image=myregistry.local/mysql/mysql:5.02.7.1.48. oc create ingress
指定の名前で Ingress を作成します。
使用例
# Create a single ingress called 'simple' that directs requests to foo.com/bar to svc
# svc1:8080 with a TLS secret "my-cert"
oc create ingress simple --rule="foo.com/bar=svc1:8080,tls=my-cert"
# Create a catch all ingress of "/path" pointing to service svc:port and Ingress Class as "otheringress"
oc create ingress catch-all --class=otheringress --rule="/path=svc:port"
# Create an ingress with two annotations: ingress.annotation1 and ingress.annotations2
oc create ingress annotated --class=default --rule="foo.com/bar=svc:port" \
--annotation ingress.annotation1=foo \
--annotation ingress.annotation2=bla
# Create an ingress with the same host and multiple paths
oc create ingress multipath --class=default \
--rule="foo.com/=svc:port" \
--rule="foo.com/admin/=svcadmin:portadmin"
# Create an ingress with multiple hosts and the pathType as Prefix
oc create ingress ingress1 --class=default \
--rule="foo.com/path*=svc:8080" \
--rule="bar.com/admin*=svc2:http"
# Create an ingress with TLS enabled using the default ingress certificate and different path types
oc create ingress ingtls --class=default \
--rule="foo.com/=svc:https,tls" \
--rule="foo.com/path/subpath*=othersvc:8080"
# Create an ingress with TLS enabled using a specific secret and pathType as Prefix
oc create ingress ingsecret --class=default \
--rule="foo.com/*=svc:8080,tls=secret1"
# Create an ingress with a default backend
oc create ingress ingdefault --class=default \
--default-backend=defaultsvc:http \
--rule="foo.com/*=svc:8080,tls=secret1"2.7.1.49. oc create job
指定の名前でジョブを作成します。
使用例
# Create a job
oc create job my-job --image=busybox
# Create a job with a command
oc create job my-job --image=busybox -- date
# Create a job from a cron job named "a-cronjob"
oc create job test-job --from=cronjob/a-cronjob2.7.1.50. oc create namespace
指定の名前で namespace を作成します。
使用例
# Create a new namespace named my-namespace
oc create namespace my-namespace2.7.1.51. oc create poddisruptionbudget
指定の名前で Pod Disruption Budget を作成します。
使用例
# Create a pod disruption budget named my-pdb that will select all pods with the app=rails label
# and require at least one of them being available at any point in time
oc create poddisruptionbudget my-pdb --selector=app=rails --min-available=1
# Create a pod disruption budget named my-pdb that will select all pods with the app=nginx label
# and require at least half of the pods selected to be available at any point in time
oc create pdb my-pdb --selector=app=nginx --min-available=50%2.7.1.52. oc create priorityclass
指定の名前で priority class を作成します。
使用例
# Create a priority class named high-priority
oc create priorityclass high-priority --value=1000 --description="high priority"
# Create a priority class named default-priority that is considered as the global default priority
oc create priorityclass default-priority --value=1000 --global-default=true --description="default priority"
# Create a priority class named high-priority that cannot preempt pods with lower priority
oc create priorityclass high-priority --value=1000 --description="high priority" --preemption-policy="Never"2.7.1.53. oc create quota
指定の名前でクォータを作成します。
使用例
# Create a new resource quota named my-quota
oc create quota my-quota --hard=cpu=1,memory=1G,pods=2,services=3,replicationcontrollers=2,resourcequotas=1,secrets=5,persistentvolumeclaims=10
# Create a new resource quota named best-effort
oc create quota best-effort --hard=pods=100 --scopes=BestEffort2.7.1.54. oc create role
単一ルールでロールを作成します。
使用例
# Create a role named "pod-reader" that allows user to perform "get", "watch" and "list" on pods
oc create role pod-reader --verb=get --verb=list --verb=watch --resource=pods
# Create a role named "pod-reader" with ResourceName specified
oc create role pod-reader --verb=get --resource=pods --resource-name=readablepod --resource-name=anotherpod
# Create a role named "foo" with API Group specified
oc create role foo --verb=get,list,watch --resource=rs.apps
# Create a role named "foo" with SubResource specified
oc create role foo --verb=get,list,watch --resource=pods,pods/status2.7.1.55. oc create rolebinding
特定のロールまたはクラスターロールのロールバインディングを作成します。
使用例
# Create a role binding for user1, user2, and group1 using the admin cluster role
oc create rolebinding admin --clusterrole=admin --user=user1 --user=user2 --group=group1
# Create a role binding for serviceaccount monitoring:sa-dev using the admin role
oc create rolebinding admin-binding --role=admin --serviceaccount=monitoring:sa-dev2.7.1.56. oc create route edge
edge TLS termination を使用するルートを作成します。
使用例
# Create an edge route named "my-route" that exposes the frontend service
oc create route edge my-route --service=frontend
# Create an edge route that exposes the frontend service and specify a path
# If the route name is omitted, the service name will be used
oc create route edge --service=frontend --path /assets2.7.1.57. oc create route passthrough
passthrough TLS Termination を使用するルートを作成します。
使用例
# Create a passthrough route named "my-route" that exposes the frontend service
oc create route passthrough my-route --service=frontend
# Create a passthrough route that exposes the frontend service and specify
# a host name. If the route name is omitted, the service name will be used
oc create route passthrough --service=frontend --hostname=www.example.com2.7.1.58. oc create route reencrypt
reencrypt TLS Termination を使用するルートを作成します。
使用例
# Create a route named "my-route" that exposes the frontend service
oc create route reencrypt my-route --service=frontend --dest-ca-cert cert.cert
# Create a reencrypt route that exposes the frontend service, letting the
# route name default to the service name and the destination CA certificate
# default to the service CA
oc create route reencrypt --service=frontend2.7.1.59. oc create secret docker-registry
Docker レジストリーで使用するシークレットを作成します。
使用例
# If you do not already have a .dockercfg file, create a dockercfg secret directly
oc create secret docker-registry my-secret --docker-server=DOCKER_REGISTRY_SERVER --docker-username=DOCKER_USER --docker-password=DOCKER_PASSWORD --docker-email=DOCKER_EMAIL
# Create a new secret named my-secret from ~/.docker/config.json
oc create secret docker-registry my-secret --from-file=.dockerconfigjson=path/to/.docker/config.json2.7.1.60. oc create secret generic
ローカルファイル、ディレクトリー、またはリテラル値からシークレットを作成します。
使用例
# Create a new secret named my-secret with keys for each file in folder bar
oc create secret generic my-secret --from-file=path/to/bar
# Create a new secret named my-secret with specified keys instead of names on disk
oc create secret generic my-secret --from-file=ssh-privatekey=path/to/id_rsa --from-file=ssh-publickey=path/to/id_rsa.pub
# Create a new secret named my-secret with key1=supersecret and key2=topsecret
oc create secret generic my-secret --from-literal=key1=supersecret --from-literal=key2=topsecret
# Create a new secret named my-secret using a combination of a file and a literal
oc create secret generic my-secret --from-file=ssh-privatekey=path/to/id_rsa --from-literal=passphrase=topsecret
# Create a new secret named my-secret from env files
oc create secret generic my-secret --from-env-file=path/to/foo.env --from-env-file=path/to/bar.env2.7.1.61. oc create secret tls
TLS シークレットを作成します。
使用例
# Create a new TLS secret named tls-secret with the given key pair
oc create secret tls tls-secret --cert=path/to/tls.cert --key=path/to/tls.key2.7.1.62. oc create service clusterip
ClusterIP サービスを作成します。
使用例
# Create a new ClusterIP service named my-cs
oc create service clusterip my-cs --tcp=5678:8080
# Create a new ClusterIP service named my-cs (in headless mode)
oc create service clusterip my-cs --clusterip="None"2.7.1.63. oc create service externalname
ExternalName サービスを作成します。
使用例
# Create a new ExternalName service named my-ns
oc create service externalname my-ns --external-name bar.com2.7.1.64. oc create service loadbalancer
LoadBalancer サービスを作成します。
使用例
# Create a new LoadBalancer service named my-lbs
oc create service loadbalancer my-lbs --tcp=5678:80802.7.1.65. oc create service nodeport
NodePort サービスを作成します。
使用例
# Create a new NodePort service named my-ns
oc create service nodeport my-ns --tcp=5678:80802.7.1.66. oc create serviceaccount
指定の名前でサービスアカウントを作成します。
使用例
# Create a new service account named my-service-account
oc create serviceaccount my-service-account2.7.1.67. oc create token
サービスアカウントトークンをリクエストします。
使用例
# Request a token to authenticate to the kube-apiserver as the service account "myapp" in the current namespace
oc create token myapp
# Request a token for a service account in a custom namespace
oc create token myapp --namespace myns
# Request a token with a custom expiration
oc create token myapp --duration 10m
# Request a token with a custom audience
oc create token myapp --audience https://example.com
# Request a token bound to an instance of a Secret object
oc create token myapp --bound-object-kind Secret --bound-object-name mysecret
# Request a token bound to an instance of a Secret object with a specific UID
oc create token myapp --bound-object-kind Secret --bound-object-name mysecret --bound-object-uid 0d4691ed-659b-4935-a832-355f77ee47cc2.7.1.68. oc create user
ユーザーを手動で作成します (自動作成が無効になっている場合のみ必要)。
使用例
# Create a user with the username "ajones" and the display name "Adam Jones"
oc create user ajones --full-name="Adam Jones"2.7.1.69. oc create useridentitymapping
アイデンティティーをユーザーに手動でマップします。
使用例
# Map the identity "acme_ldap:adamjones" to the user "ajones"
oc create useridentitymapping acme_ldap:adamjones ajones2.7.1.70. oc debug
デバッグ用に Pod の新規インスタンスを起動します。
使用例
# Start a shell session into a pod using the OpenShift tools image
oc debug
# Debug a currently running deployment by creating a new pod
oc debug deploy/test
# Debug a node as an administrator
oc debug node/master-1
# Debug a Windows Node
# Note: the chosen image must match the Windows Server version (2019, 2022) of the Node
oc debug node/win-worker-1 --image=mcr.microsoft.com/powershell:lts-nanoserver-ltsc2022
# Launch a shell in a pod using the provided image stream tag
oc debug istag/mysql:latest -n openshift
# Test running a job as a non-root user
oc debug job/test --as-user=1000000
# Debug a specific failing container by running the env command in the 'second' container
oc debug daemonset/test -c second -- /bin/env
# See the pod that would be created to debug
oc debug mypod-9xbc -o yaml
# Debug a resource but launch the debug pod in another namespace
# Note: Not all resources can be debugged using --to-namespace without modification. For example,
# volumes and service accounts are namespace-dependent. Add '-o yaml' to output the debug pod definition
# to disk. If necessary, edit the definition then run 'oc debug -f -' or run without --to-namespace
oc debug mypod-9xbc --to-namespace testns2.7.1.71. oc delete
ファイル名、stdin、リソースおよび名前、またはリソースおよびラベルセレクター別にリソースを削除します。
使用例
# Delete a pod using the type and name specified in pod.json
oc delete -f ./pod.json
# Delete resources from a directory containing kustomization.yaml - e.g. dir/kustomization.yaml
oc delete -k dir
# Delete resources from all files that end with '.json'
oc delete -f '*.json'
# Delete a pod based on the type and name in the JSON passed into stdin
cat pod.json | oc delete -f -
# Delete pods and services with same names "baz" and "foo"
oc delete pod,service baz foo
# Delete pods and services with label name=myLabel
oc delete pods,services -l name=myLabel
# Delete a pod with minimal delay
oc delete pod foo --now
# Force delete a pod on a dead node
oc delete pod foo --force
# Delete all pods
oc delete pods --all2.7.1.72. oc describe
特定のリソースまたはリソースのグループの詳細を表示します。
使用例
# Describe a node
oc describe nodes kubernetes-node-emt8.c.myproject.internal
# Describe a pod
oc describe pods/nginx
# Describe a pod identified by type and name in "pod.json"
oc describe -f pod.json
# Describe all pods
oc describe pods
# Describe pods by label name=myLabel
oc describe pods -l name=myLabel
# Describe all pods managed by the 'frontend' replication controller
# (rc-created pods get the name of the rc as a prefix in the pod name)
oc describe pods frontend2.7.1.73. oc diff
ライブバージョンと適用バージョンとの差異を確認します。
使用例
# Diff resources included in pod.json
oc diff -f pod.json
# Diff file read from stdin
cat service.yaml | oc diff -f -2.7.1.74. oc edit
サーバーのリソースを編集します。
使用例
# Edit the service named 'registry'
oc edit svc/registry
# Use an alternative editor
KUBE_EDITOR="nano" oc edit svc/registry
# Edit the job 'myjob' in JSON using the v1 API format
oc edit job.v1.batch/myjob -o json
# Edit the deployment 'mydeployment' in YAML and save the modified config in its annotation
oc edit deployment/mydeployment -o yaml --save-config
# Edit the 'status' subresource for the 'mydeployment' deployment
oc edit deployment mydeployment --subresource='status'2.7.1.75. oc events
イベントを一覧表示します。
使用例
# List recent events in the default namespace
oc events
# List recent events in all namespaces
oc events --all-namespaces
# List recent events for the specified pod, then wait for more events and list them as they arrive
oc events --for pod/web-pod-13je7 --watch
# List recent events in YAML format
oc events -oyaml
# List recent only events of type 'Warning' or 'Normal'
oc events --types=Warning,Normal2.7.1.76. oc exec
コンテナーでコマンドを実行します。
使用例
# Get output from running the 'date' command from pod mypod, using the first container by default
oc exec mypod -- date
# Get output from running the 'date' command in ruby-container from pod mypod
oc exec mypod -c ruby-container -- date
# Switch to raw terminal mode; sends stdin to 'bash' in ruby-container from pod mypod
# and sends stdout/stderr from 'bash' back to the client
oc exec mypod -c ruby-container -i -t -- bash -il
# List contents of /usr from the first container of pod mypod and sort by modification time
# If the command you want to execute in the pod has any flags in common (e.g. -i),
# you must use two dashes (--) to separate your command's flags/arguments
# Also note, do not surround your command and its flags/arguments with quotes
# unless that is how you would execute it normally (i.e., do ls -t /usr, not "ls -t /usr")
oc exec mypod -i -t -- ls -t /usr
# Get output from running 'date' command from the first pod of the deployment mydeployment, using the first container by default
oc exec deploy/mydeployment -- date
# Get output from running 'date' command from the first pod of the service myservice, using the first container by default
oc exec svc/myservice -- date2.7.1.77. oc explain
リソースのドキュメントを取得します。
使用例
# Get the documentation of the resource and its fields
oc explain pods
# Get all the fields in the resource
oc explain pods --recursive
# Get the explanation for deployment in supported api versions
oc explain deployments --api-version=apps/v1
# Get the documentation of a specific field of a resource
oc explain pods.spec.containers
# Get the documentation of resources in different format
oc explain deployment --output=plaintext-openapiv22.7.1.78. oc expose
複製されたアプリケーションをサービスまたはルートとして公開します。
使用例
# Create a route based on service nginx. The new route will reuse nginx's labels
oc expose service nginx
# Create a route and specify your own label and route name
oc expose service nginx -l name=myroute --name=fromdowntown
# Create a route and specify a host name
oc expose service nginx --hostname=www.example.com
# Create a route with a wildcard
oc expose service nginx --hostname=x.example.com --wildcard-policy=Subdomain
# This would be equivalent to *.example.com. NOTE: only hosts are matched by the wildcard; subdomains would not be included
# Expose a deployment configuration as a service and use the specified port
oc expose dc ruby-hello-world --port=8080
# Expose a service as a route in the specified path
oc expose service nginx --path=/nginx2.7.1.79. oc extract
シークレットまたは config map をディスクに抽出します。
使用例
# Extract the secret "test" to the current directory
oc extract secret/test
# Extract the config map "nginx" to the /tmp directory
oc extract configmap/nginx --to=/tmp
# Extract the config map "nginx" to STDOUT
oc extract configmap/nginx --to=-
# Extract only the key "nginx.conf" from config map "nginx" to the /tmp directory
oc extract configmap/nginx --to=/tmp --keys=nginx.conf2.7.1.80. oc get
1 つ以上のリソースを表示します。
使用例
# List all pods in ps output format
oc get pods
# List all pods in ps output format with more information (such as node name)
oc get pods -o wide
# List a single replication controller with specified NAME in ps output format
oc get replicationcontroller web
# List deployments in JSON output format, in the "v1" version of the "apps" API group
oc get deployments.v1.apps -o json
# List a single pod in JSON output format
oc get -o json pod web-pod-13je7
# List a pod identified by type and name specified in "pod.yaml" in JSON output format
oc get -f pod.yaml -o json
# List resources from a directory with kustomization.yaml - e.g. dir/kustomization.yaml
oc get -k dir/
# Return only the phase value of the specified pod
oc get -o template pod/web-pod-13je7 --template={{.status.phase}}
# List resource information in custom columns
oc get pod test-pod -o custom-columns=CONTAINER:.spec.containers[0].name,IMAGE:.spec.containers[0].image
# List all replication controllers and services together in ps output format
oc get rc,services
# List one or more resources by their type and names
oc get rc/web service/frontend pods/web-pod-13je7
# List the 'status' subresource for a single pod
oc get pod web-pod-13je7 --subresource status2.7.1.81. oc get-token
実験的機能: 認証情報実行プラグインとして外部の OIDC 発行者からトークンを取得します。
使用例
# Starts an auth code flow to the issuer url with the client id and the given extra scopes
oc get-token --client-id=client-id --issuer-url=test.issuer.url --extra-scopes=email,profile
# Starts an authe code flow to the issuer url with a different callback address.
oc get-token --client-id=client-id --issuer-url=test.issuer.url --callback-address=127.0.0.1:83432.7.1.82. oc idle
スケーラブルなリソースをアイドリングします。
使用例
# Idle the scalable controllers associated with the services listed in to-idle.txt
$ oc idle --resource-names-file to-idle.txt2.7.1.83. oc image append
イメージにレイヤーを追加してレジストリーにプッシュします。
使用例
# Remove the entrypoint on the mysql:latest image
oc image append --from mysql:latest --to myregistry.com/myimage:latest --image '{"Entrypoint":null}'
# Add a new layer to the image
oc image append --from mysql:latest --to myregistry.com/myimage:latest layer.tar.gz
# Add a new layer to the image and store the result on disk
# This results in $(pwd)/v2/mysql/blobs,manifests
oc image append --from mysql:latest --to file://mysql:local layer.tar.gz
# Add a new layer to the image and store the result on disk in a designated directory
# This will result in $(pwd)/mysql-local/v2/mysql/blobs,manifests
oc image append --from mysql:latest --to file://mysql:local --dir mysql-local layer.tar.gz
# Add a new layer to an image that is stored on disk (~/mysql-local/v2/image exists)
oc image append --from-dir ~/mysql-local --to myregistry.com/myimage:latest layer.tar.gz
# Add a new layer to an image that was mirrored to the current directory on disk ($(pwd)/v2/image exists)
oc image append --from-dir v2 --to myregistry.com/myimage:latest layer.tar.gz
# Add a new layer to a multi-architecture image for an os/arch that is different from the system's os/arch
# Note: The first image in the manifest list that matches the filter will be returned when --keep-manifest-list is not specified
oc image append --from docker.io/library/busybox:latest --filter-by-os=linux/s390x --to myregistry.com/myimage:latest layer.tar.gz
# Add a new layer to a multi-architecture image for all the os/arch manifests when keep-manifest-list is specified
oc image append --from docker.io/library/busybox:latest --keep-manifest-list --to myregistry.com/myimage:latest layer.tar.gz
# Add a new layer to a multi-architecture image for all the os/arch manifests that is specified by the filter, while preserving the manifestlist
oc image append --from docker.io/library/busybox:latest --filter-by-os=linux/s390x --keep-manifest-list --to myregistry.com/myimage:latest layer.tar.gz2.7.1.84. oc image extract
イメージからファイルシステムにファイルをコピーします。
使用例
# Extract the busybox image into the current directory
oc image extract docker.io/library/busybox:latest
# Extract the busybox image into a designated directory (must exist)
oc image extract docker.io/library/busybox:latest --path /:/tmp/busybox
# Extract the busybox image into the current directory for linux/s390x platform
# Note: Wildcard filter is not supported with extract; pass a single os/arch to extract
oc image extract docker.io/library/busybox:latest --filter-by-os=linux/s390x
# Extract a single file from the image into the current directory
oc image extract docker.io/library/centos:7 --path /bin/bash:.
# Extract all .repo files from the image's /etc/yum.repos.d/ folder into the current directory
oc image extract docker.io/library/centos:7 --path /etc/yum.repos.d/*.repo:.
# Extract all .repo files from the image's /etc/yum.repos.d/ folder into a designated directory (must exist)
# This results in /tmp/yum.repos.d/*.repo on local system
oc image extract docker.io/library/centos:7 --path /etc/yum.repos.d/*.repo:/tmp/yum.repos.d
# Extract an image stored on disk into the current directory ($(pwd)/v2/busybox/blobs,manifests exists)
# --confirm is required because the current directory is not empty
oc image extract file://busybox:local --confirm
# Extract an image stored on disk in a directory other than $(pwd)/v2 into the current directory
# --confirm is required because the current directory is not empty ($(pwd)/busybox-mirror-dir/v2/busybox exists)
oc image extract file://busybox:local --dir busybox-mirror-dir --confirm
# Extract an image stored on disk in a directory other than $(pwd)/v2 into a designated directory (must exist)
oc image extract file://busybox:local --dir busybox-mirror-dir --path /:/tmp/busybox
# Extract the last layer in the image
oc image extract docker.io/library/centos:7[-1]
# Extract the first three layers of the image
oc image extract docker.io/library/centos:7[:3]
# Extract the last three layers of the image
oc image extract docker.io/library/centos:7[-3:]2.7.1.85. oc image info
イメージに関する情報を表示します。
使用例
# Show information about an image
oc image info quay.io/openshift/cli:latest
# Show information about images matching a wildcard
oc image info quay.io/openshift/cli:4.*
# Show information about a file mirrored to disk under DIR
oc image info --dir=DIR file://library/busybox:latest
# Select which image from a multi-OS image to show
oc image info library/busybox:latest --filter-by-os=linux/arm642.7.1.86. oc image mirror
別のリポジトリーにイメージをミラーリングします。
次の例には、OpenShift Container Platform on AWS に固有の値がいくつか含まれています。
使用例
# Copy image to another tag
oc image mirror myregistry.com/myimage:latest myregistry.com/myimage:stable
# Copy image to another registry
oc image mirror myregistry.com/myimage:latest docker.io/myrepository/myimage:stable
# Copy all tags starting with mysql to the destination repository
oc image mirror myregistry.com/myimage:mysql* docker.io/myrepository/myimage
# Copy image to disk, creating a directory structure that can be served as a registry
oc image mirror myregistry.com/myimage:latest file://myrepository/myimage:latest
# Copy image to S3 (pull from <bucket>.s3.amazonaws.com/image:latest)
oc image mirror myregistry.com/myimage:latest s3://s3.amazonaws.com/<region>/<bucket>/image:latest
# Copy image to S3 without setting a tag (pull via @<digest>)
oc image mirror myregistry.com/myimage:latest s3://s3.amazonaws.com/<region>/<bucket>/image
# Copy image to multiple locations
oc image mirror myregistry.com/myimage:latest docker.io/myrepository/myimage:stable \
docker.io/myrepository/myimage:dev
# Copy multiple images
oc image mirror myregistry.com/myimage:latest=myregistry.com/other:test \
myregistry.com/myimage:new=myregistry.com/other:target
# Copy manifest list of a multi-architecture image, even if only a single image is found
oc image mirror myregistry.com/myimage:latest=myregistry.com/other:test \
--keep-manifest-list=true
# Copy specific os/arch manifest of a multi-architecture image
# Run 'oc image info myregistry.com/myimage:latest' to see available os/arch for multi-arch images
# Note that with multi-arch images, this results in a new manifest list digest that includes only
# the filtered manifests
oc image mirror myregistry.com/myimage:latest=myregistry.com/other:test \
--filter-by-os=os/arch
# Copy all os/arch manifests of a multi-architecture image
# Run 'oc image info myregistry.com/myimage:latest' to see list of os/arch manifests that will be mirrored
oc image mirror myregistry.com/myimage:latest=myregistry.com/other:test \
--keep-manifest-list=true
# Note the above command is equivalent to
oc image mirror myregistry.com/myimage:latest=myregistry.com/other:test \
--filter-by-os=.*
# Copy specific os/arch manifest of a multi-architecture image
# Run 'oc image info myregistry.com/myimage:latest' to see available os/arch for multi-arch images
# Note that the target registry may reject a manifest list if the platform specific images do not all
# exist. You must use a registry with sparse registry support enabled.
oc image mirror myregistry.com/myimage:latest=myregistry.com/other:test \
--filter-by-os=linux/386 \
--keep-manifest-list=true2.7.1.87. oc import-image
コンテナーイメージレジストリーからイメージをインポートします。
使用例
# Import tag latest into a new image stream
oc import-image mystream --from=registry.io/repo/image:latest --confirm
# Update imported data for tag latest in an already existing image stream
oc import-image mystream
# Update imported data for tag stable in an already existing image stream
oc import-image mystream:stable
# Update imported data for all tags in an existing image stream
oc import-image mystream --all
# Update imported data for a tag that points to a manifest list to include the full manifest list
oc import-image mystream --import-mode=PreserveOriginal
# Import all tags into a new image stream
oc import-image mystream --from=registry.io/repo/image --all --confirm
# Import all tags into a new image stream using a custom timeout
oc --request-timeout=5m import-image mystream --from=registry.io/repo/image --all --confirm2.7.1.88. oc kustomize
ディレクトリーまたは URL から kustomization ターゲットをビルドします。
使用例
# Build the current working directory
oc kustomize
# Build some shared configuration directory
oc kustomize /home/config/production
# Build from github
oc kustomize https://github.com/kubernetes-sigs/kustomize.git/examples/helloWorld?ref=v1.0.62.7.1.89. oc label
リソースのラベルを更新します。
使用例
# Update pod 'foo' with the label 'unhealthy' and the value 'true'
oc label pods foo unhealthy=true
# Update pod 'foo' with the label 'status' and the value 'unhealthy', overwriting any existing value
oc label --overwrite pods foo status=unhealthy
# Update all pods in the namespace
oc label pods --all status=unhealthy
# Update a pod identified by the type and name in "pod.json"
oc label -f pod.json status=unhealthy
# Update pod 'foo' only if the resource is unchanged from version 1
oc label pods foo status=unhealthy --resource-version=1
# Update pod 'foo' by removing a label named 'bar' if it exists
# Does not require the --overwrite flag
oc label pods foo bar-2.7.1.90. oc login
サーバーにログインします。
使用例
# Log in interactively
oc login --username=myuser
# Log in to the given server with the given certificate authority file
oc login localhost:8443 --certificate-authority=/path/to/cert.crt
# Log in to the given server with the given credentials (will not prompt interactively)
oc login localhost:8443 --username=myuser --password=mypass
# Log in to the given server through a browser
oc login localhost:8443 --web --callback-port 82802.7.1.91. oc logout
現在のサーバーセッションを終了します。
使用例
# Log out
oc logout2.7.1.92. oc logs
Pod 内のコンテナーのログを出力します。
使用例
# Start streaming the logs of the most recent build of the openldap build config
oc logs -f bc/openldap
# Start streaming the logs of the latest deployment of the mysql deployment config
oc logs -f dc/mysql
# Get the logs of the first deployment for the mysql deployment config. Note that logs
# from older deployments may not exist either because the deployment was successful
# or due to deployment pruning or manual deletion of the deployment
oc logs --version=1 dc/mysql
# Return a snapshot of ruby-container logs from pod backend
oc logs backend -c ruby-container
# Start streaming of ruby-container logs from pod backend
oc logs -f pod/backend -c ruby-container2.7.1.93. oc new-app
新規アプリケーションを作成します。
使用例
# List all local templates and image streams that can be used to create an app
oc new-app --list
# Create an application based on the source code in the current git repository (with a public remote) and a container image
oc new-app . --image=registry/repo/langimage
# Create an application myapp with Docker based build strategy expecting binary input
oc new-app --strategy=docker --binary --name myapp
# Create a Ruby application based on the provided [image]~[source code] combination
oc new-app centos/ruby-25-centos7~https://github.com/sclorg/ruby-ex.git
# Use the public container registry MySQL image to create an app. Generated artifacts will be labeled with db=mysql
oc new-app mysql MYSQL_USER=user MYSQL_PASSWORD=pass MYSQL_DATABASE=testdb -l db=mysql
# Use a MySQL image in a private registry to create an app and override application artifacts' names
oc new-app --image=myregistry.com/mycompany/mysql --name=private
# Use an image with the full manifest list to create an app and override application artifacts' names
oc new-app --image=myregistry.com/mycompany/image --name=private --import-mode=PreserveOriginal
# Create an application from a remote repository using its beta4 branch
oc new-app https://github.com/openshift/ruby-hello-world#beta4
# Create an application based on a stored template, explicitly setting a parameter value
oc new-app --template=ruby-helloworld-sample --param=MYSQL_USER=admin
# Create an application from a remote repository and specify a context directory
oc new-app https://github.com/youruser/yourgitrepo --context-dir=src/build
# Create an application from a remote private repository and specify which existing secret to use
oc new-app https://github.com/youruser/yourgitrepo --source-secret=yoursecret
# Create an application based on a template file, explicitly setting a parameter value
oc new-app --file=./example/myapp/template.json --param=MYSQL_USER=admin
# Search all templates, image streams, and container images for the ones that match "ruby"
oc new-app --search ruby
# Search for "ruby", but only in stored templates (--template, --image-stream and --image
# can be used to filter search results)
oc new-app --search --template=ruby
# Search for "ruby" in stored templates and print the output as YAML
oc new-app --search --template=ruby --output=yaml2.7.1.94. oc new-build
新規ビルド設定を作成します。
使用例
# Create a build config based on the source code in the current git repository (with a public
# remote) and a container image
oc new-build . --image=repo/langimage
# Create a NodeJS build config based on the provided [image]~[source code] combination
oc new-build centos/nodejs-8-centos7~https://github.com/sclorg/nodejs-ex.git
# Create a build config from a remote repository using its beta2 branch
oc new-build https://github.com/openshift/ruby-hello-world#beta2
# Create a build config using a Dockerfile specified as an argument
oc new-build -D $'FROM centos:7\nRUN yum install -y httpd'
# Create a build config from a remote repository and add custom environment variables
oc new-build https://github.com/openshift/ruby-hello-world -e RACK_ENV=development
# Create a build config from a remote private repository and specify which existing secret to use
oc new-build https://github.com/youruser/yourgitrepo --source-secret=yoursecret
# Create a build config using an image with the full manifest list to create an app and override application artifacts' names
oc new-build --image=myregistry.com/mycompany/image --name=private --import-mode=PreserveOriginal
# Create a build config from a remote repository and inject the npmrc into a build
oc new-build https://github.com/openshift/ruby-hello-world --build-secret npmrc:.npmrc
# Create a build config from a remote repository and inject environment data into a build
oc new-build https://github.com/openshift/ruby-hello-world --build-config-map env:config
# Create a build config that gets its input from a remote repository and another container image
oc new-build https://github.com/openshift/ruby-hello-world --source-image=openshift/jenkins-1-centos7 --source-image-path=/var/lib/jenkins:tmp2.7.1.95. oc new-project
新規プロジェクトを要求します。
使用例
# Create a new project with minimal information
oc new-project web-team-dev
# Create a new project with a display name and description
oc new-project web-team-dev --display-name="Web Team Development" --description="Development project for the web team."2.7.1.96. oc observe
リソースの変更を確認し、リソースに対応します (実験的)。
使用例
# Observe changes to services
oc observe services
# Observe changes to services, including the clusterIP and invoke a script for each
oc observe services --template '{ .spec.clusterIP }' -- register_dns.sh
# Observe changes to services filtered by a label selector
oc observe services -l regist-dns=true --template '{ .spec.clusterIP }' -- register_dns.sh2.7.1.97. oc patch
リソースのフィールドを更新します。
使用例
# Partially update a node using a strategic merge patch, specifying the patch as JSON
oc patch node k8s-node-1 -p '{"spec":{"unschedulable":true}}'
# Partially update a node using a strategic merge patch, specifying the patch as YAML
oc patch node k8s-node-1 -p $'spec:\n unschedulable: true'
# Partially update a node identified by the type and name specified in "node.json" using strategic merge patch
oc patch -f node.json -p '{"spec":{"unschedulable":true}}'
# Update a container's image; spec.containers[*].name is required because it's a merge key
oc patch pod valid-pod -p '{"spec":{"containers":[{"name":"kubernetes-serve-hostname","image":"new image"}]}}'
# Update a container's image using a JSON patch with positional arrays
oc patch pod valid-pod --type='json' -p='[{"op": "replace", "path": "/spec/containers/0/image", "value":"new image"}]'
# Update a deployment's replicas through the 'scale' subresource using a merge patch
oc patch deployment nginx-deployment --subresource='scale' --type='merge' -p '{"spec":{"replicas":2}}'2.7.1.98. oc plugin list
ユーザーの PATH にあるすべての表示可能なプラグイン実行可能ファイルをリスト表示します。
使用例
# List all available plugins
oc plugin list2.7.1.99. oc policy add-role-to-user
現在のプロジェクトのユーザーまたはサービスアカウントをロールに追加します。
使用例
# Add the 'view' role to user1 for the current project
oc policy add-role-to-user view user1
# Add the 'edit' role to serviceaccount1 for the current project
oc policy add-role-to-user edit -z serviceaccount12.7.1.100. oc policy scc-review
Pod を作成できるサービスアカウントを確認します。
使用例
# Check whether service accounts sa1 and sa2 can admit a pod with a template pod spec specified in my_resource.yaml
# Service Account specified in myresource.yaml file is ignored
oc policy scc-review -z sa1,sa2 -f my_resource.yaml
# Check whether service accounts system:serviceaccount:bob:default can admit a pod with a template pod spec specified in my_resource.yaml
oc policy scc-review -z system:serviceaccount:bob:default -f my_resource.yaml
# Check whether the service account specified in my_resource_with_sa.yaml can admit the pod
oc policy scc-review -f my_resource_with_sa.yaml
# Check whether the default service account can admit the pod; default is taken since no service account is defined in myresource_with_no_sa.yaml
oc policy scc-review -f myresource_with_no_sa.yaml2.7.1.101. oc policy scc-subject-review
ユーザーまたはサービスアカウントが Pod を作成できるかどうかを確認します。
使用例
# Check whether user bob can create a pod specified in myresource.yaml
oc policy scc-subject-review -u bob -f myresource.yaml
# Check whether user bob who belongs to projectAdmin group can create a pod specified in myresource.yaml
oc policy scc-subject-review -u bob -g projectAdmin -f myresource.yaml
# Check whether a service account specified in the pod template spec in myresourcewithsa.yaml can create the pod
oc policy scc-subject-review -f myresourcewithsa.yaml2.7.1.102. oc port-forward
1 つ以上のローカルポートを Pod に転送します。
使用例
# Listen on ports 5000 and 6000 locally, forwarding data to/from ports 5000 and 6000 in the pod
oc port-forward pod/mypod 5000 6000
# Listen on ports 5000 and 6000 locally, forwarding data to/from ports 5000 and 6000 in a pod selected by the deployment
oc port-forward deployment/mydeployment 5000 6000
# Listen on port 8443 locally, forwarding to the targetPort of the service's port named "https" in a pod selected by the service
oc port-forward service/myservice 8443:https
# Listen on port 8888 locally, forwarding to 5000 in the pod
oc port-forward pod/mypod 8888:5000
# Listen on port 8888 on all addresses, forwarding to 5000 in the pod
oc port-forward --address 0.0.0.0 pod/mypod 8888:5000
# Listen on port 8888 on localhost and selected IP, forwarding to 5000 in the pod
oc port-forward --address localhost,10.19.21.23 pod/mypod 8888:5000
# Listen on a random port locally, forwarding to 5000 in the pod
oc port-forward pod/mypod :50002.7.1.103. oc process
リソースのリストに対してテンプレートを処理します。
使用例
# Convert the template.json file into a resource list and pass to create
oc process -f template.json | oc create -f -
# Process a file locally instead of contacting the server
oc process -f template.json --local -o yaml
# Process template while passing a user-defined label
oc process -f template.json -l name=mytemplate
# Convert a stored template into a resource list
oc process foo
# Convert a stored template into a resource list by setting/overriding parameter values
oc process foo PARM1=VALUE1 PARM2=VALUE2
# Convert a template stored in different namespace into a resource list
oc process openshift//foo
# Convert template.json into a resource list
cat template.json | oc process -f -2.7.1.104. oc project
別のプロジェクトに切り替えます。
使用例
# Switch to the 'myapp' project
oc project myapp
# Display the project currently in use
oc project2.7.1.105. oc projects
既存プロジェクトを表示します。
使用例
# List all projects
oc projects2.7.1.106. oc proxy
Kubernetes API サーバーに対してプロキシーを実行します。
使用例
# To proxy all of the Kubernetes API and nothing else
oc proxy --api-prefix=/
# To proxy only part of the Kubernetes API and also some static files
# You can get pods info with 'curl localhost:8001/api/v1/pods'
oc proxy --www=/my/files --www-prefix=/static/ --api-prefix=/api/
# To proxy the entire Kubernetes API at a different root
# You can get pods info with 'curl localhost:8001/custom/api/v1/pods'
oc proxy --api-prefix=/custom/
# Run a proxy to the Kubernetes API server on port 8011, serving static content from ./local/www/
oc proxy --port=8011 --www=./local/www/
# Run a proxy to the Kubernetes API server on an arbitrary local port
# The chosen port for the server will be output to stdout
oc proxy --port=0
# Run a proxy to the Kubernetes API server, changing the API prefix to k8s-api
# This makes e.g. the pods API available at localhost:8001/k8s-api/v1/pods/
oc proxy --api-prefix=/k8s-api2.7.1.107. oc registry login
統合レジストリーにログインします。
使用例
# Log in to the integrated registry
oc registry login
# Log in to different registry using BASIC auth credentials
oc registry login --registry quay.io/myregistry --auth-basic=USER:PASS2.7.1.108. oc replace
リソースをファイル名または標準入力 (stdin) に置き換えます。
使用例
# Replace a pod using the data in pod.json
oc replace -f ./pod.json
# Replace a pod based on the JSON passed into stdin
cat pod.json | oc replace -f -
# Update a single-container pod's image version (tag) to v4
oc get pod mypod -o yaml | sed 's/\(image: myimage\):.*$/\1:v4/' | oc replace -f -
# Force replace, delete and then re-create the resource
oc replace --force -f ./pod.json2.7.1.109. oc rollback
アプリケーションの一部を以前のデプロイメントに戻します。
使用例
# Perform a rollback to the last successfully completed deployment for a deployment config
oc rollback frontend
# See what a rollback to version 3 will look like, but do not perform the rollback
oc rollback frontend --to-version=3 --dry-run
# Perform a rollback to a specific deployment
oc rollback frontend-2
# Perform the rollback manually by piping the JSON of the new config back to oc
oc rollback frontend -o json | oc replace dc/frontend -f -
# Print the updated deployment configuration in JSON format instead of performing the rollback
oc rollback frontend -o json2.7.1.110. oc rollout cancel
進行中のデプロイメントをキャンセルします。
使用例
# Cancel the in-progress deployment based on 'nginx'
oc rollout cancel dc/nginx2.7.1.111. oc rollout history
ロールアウト履歴を表示します。
使用例
# View the rollout history of a deployment
oc rollout history dc/nginx
# View the details of deployment revision 3
oc rollout history dc/nginx --revision=32.7.1.112. oc rollout latest
トリガーからの最新状態を使用して、デプロイメント設定の新規ロールアウトを開始します。
使用例
# Start a new rollout based on the latest images defined in the image change triggers
oc rollout latest dc/nginx
# Print the rolled out deployment config
oc rollout latest dc/nginx -o json2.7.1.113. oc rollout pause
提供されたリソースを一時停止としてマークします。
使用例
# Mark the nginx deployment as paused. Any current state of
# the deployment will continue its function, new updates to the deployment will not
# have an effect as long as the deployment is paused
oc rollout pause dc/nginx2.7.1.114. oc rollout restart
リソースを再起動します。
使用例
# Restart a deployment
oc rollout restart deployment/nginx
# Restart a daemon set
oc rollout restart daemonset/abc
# Restart deployments with the app=nginx label
oc rollout restart deployment --selector=app=nginx2.7.1.115. oc rollout resume
一時停止したリソースを再開します。
使用例
# Resume an already paused deployment
oc rollout resume dc/nginx2.7.1.116. oc rollout retry
失敗したロールアウトを再試行します。
使用例
# Retry the latest failed deployment based on 'frontend'
# The deployer pod and any hook pods are deleted for the latest failed deployment
oc rollout retry dc/frontend2.7.1.117. oc rollout status
ロールアウトのステータスを表示します。
使用例
# Watch the status of the latest rollout
oc rollout status dc/nginx2.7.1.118. oc rollout undo
以前のロールアウトを元に戻します。
使用例
# Roll back to the previous deployment
oc rollout undo dc/nginx
# Roll back to deployment revision 3. The replication controller for that version must exist
oc rollout undo dc/nginx --to-revision=32.7.1.119. oc rsh
コンテナーでシェルセッションを開始します。
使用例
# Open a shell session on the first container in pod 'foo'
oc rsh foo
# Open a shell session on the first container in pod 'foo' and namespace 'bar'
# (Note that oc client specific arguments must come before the resource name and its arguments)
oc rsh -n bar foo
# Run the command 'cat /etc/resolv.conf' inside pod 'foo'
oc rsh foo cat /etc/resolv.conf
# See the configuration of your internal registry
oc rsh dc/docker-registry cat config.yml
# Open a shell session on the container named 'index' inside a pod of your job
oc rsh -c index job/scheduled2.7.1.120. oc rsync
ローカルファイルシステムと Pod 間でファイルをコピーします。
使用例
# Synchronize a local directory with a pod directory
oc rsync ./local/dir/ POD:/remote/dir
# Synchronize a pod directory with a local directory
oc rsync POD:/remote/dir/ ./local/dir2.7.1.121. oc run
クラスターで特定のイメージを実行します。
使用例
# Start a nginx pod
oc run nginx --image=nginx
# Start a hazelcast pod and let the container expose port 5701
oc run hazelcast --image=hazelcast/hazelcast --port=5701
# Start a hazelcast pod and set environment variables "DNS_DOMAIN=cluster" and "POD_NAMESPACE=default" in the container
oc run hazelcast --image=hazelcast/hazelcast --env="DNS_DOMAIN=cluster" --env="POD_NAMESPACE=default"
# Start a hazelcast pod and set labels "app=hazelcast" and "env=prod" in the container
oc run hazelcast --image=hazelcast/hazelcast --labels="app=hazelcast,env=prod"
# Dry run; print the corresponding API objects without creating them
oc run nginx --image=nginx --dry-run=client
# Start a nginx pod, but overload the spec with a partial set of values parsed from JSON
oc run nginx --image=nginx --overrides='{ "apiVersion": "v1", "spec": { ... } }'
# Start a busybox pod and keep it in the foreground, don't restart it if it exits
oc run -i -t busybox --image=busybox --restart=Never
# Start the nginx pod using the default command, but use custom arguments (arg1 .. argN) for that command
oc run nginx --image=nginx -- <arg1> <arg2> ... <argN>
# Start the nginx pod using a different command and custom arguments
oc run nginx --image=nginx --command -- <cmd> <arg1> ... <argN>2.7.1.122. oc scale
デプロイメント、レプリカセット、またはレプリケーションコントローラーに新規サイズを設定します。
使用例
# Scale a replica set named 'foo' to 3
oc scale --replicas=3 rs/foo
# Scale a resource identified by type and name specified in "foo.yaml" to 3
oc scale --replicas=3 -f foo.yaml
# If the deployment named mysql's current size is 2, scale mysql to 3
oc scale --current-replicas=2 --replicas=3 deployment/mysql
# Scale multiple replication controllers
oc scale --replicas=5 rc/example1 rc/example2 rc/example3
# Scale stateful set named 'web' to 3
oc scale --replicas=3 statefulset/web2.7.1.123. oc secrets link
サービスアカウントにシークレットをリンクします。
使用例
# Add an image pull secret to a service account to automatically use it for pulling pod images
oc secrets link serviceaccount-name pull-secret --for=pull
# Add an image pull secret to a service account to automatically use it for both pulling and pushing build images
oc secrets link builder builder-image-secret --for=pull,mount2.7.1.124. oc secrets unlink
サービスアカウントからシークレットをデタッチします。
使用例
# Unlink a secret currently associated with a service account
oc secrets unlink serviceaccount-name secret-name another-secret-name ...2.7.1.125. oc set build-hook
ビルド設定のビルドフックを更新します。
使用例
# Clear post-commit hook on a build config
oc set build-hook bc/mybuild --post-commit --remove
# Set the post-commit hook to execute a test suite using a new entrypoint
oc set build-hook bc/mybuild --post-commit --command -- /bin/bash -c /var/lib/test-image.sh
# Set the post-commit hook to execute a shell script
oc set build-hook bc/mybuild --post-commit --script="/var/lib/test-image.sh param1 param2 && /var/lib/done.sh"2.7.1.126. oc set build-secret
ビルド設定のビルドシークレットを更新します。
使用例
# Clear the push secret on a build config
oc set build-secret --push --remove bc/mybuild
# Set the pull secret on a build config
oc set build-secret --pull bc/mybuild mysecret
# Set the push and pull secret on a build config
oc set build-secret --push --pull bc/mybuild mysecret
# Set the source secret on a set of build configs matching a selector
oc set build-secret --source -l app=myapp gitsecret2.7.1.127. oc set data
config map またはシークレット内のデータを更新します。
使用例
# Set the 'password' key of a secret
oc set data secret/foo password=this_is_secret
# Remove the 'password' key from a secret
oc set data secret/foo password-
# Update the 'haproxy.conf' key of a config map from a file on disk
oc set data configmap/bar --from-file=../haproxy.conf
# Update a secret with the contents of a directory, one key per file
oc set data secret/foo --from-file=secret-dir2.7.1.128. oc set deployment-hook
デプロイメント設定のデプロイメントフックを更新します。
使用例
# Clear pre and post hooks on a deployment config
oc set deployment-hook dc/myapp --remove --pre --post
# Set the pre deployment hook to execute a db migration command for an application
# using the data volume from the application
oc set deployment-hook dc/myapp --pre --volumes=data -- /var/lib/migrate-db.sh
# Set a mid deployment hook along with additional environment variables
oc set deployment-hook dc/myapp --mid --volumes=data -e VAR1=value1 -e VAR2=value2 -- /var/lib/prepare-deploy.sh2.7.1.129. oc set env
Pod テンプレートの環境変数を更新します。
使用例
# Update deployment config 'myapp' with a new environment variable
oc set env dc/myapp STORAGE_DIR=/local
# List the environment variables defined on a build config 'sample-build'
oc set env bc/sample-build --list
# List the environment variables defined on all pods
oc set env pods --all --list
# Output modified build config in YAML
oc set env bc/sample-build STORAGE_DIR=/data -o yaml
# Update all containers in all replication controllers in the project to have ENV=prod
oc set env rc --all ENV=prod
# Import environment from a secret
oc set env --from=secret/mysecret dc/myapp
# Import environment from a config map with a prefix
oc set env --from=configmap/myconfigmap --prefix=MYSQL_ dc/myapp
# Remove the environment variable ENV from container 'c1' in all deployment configs
oc set env dc --all --containers="c1" ENV-
# Remove the environment variable ENV from a deployment config definition on disk and
# update the deployment config on the server
oc set env -f dc.json ENV-
# Set some of the local shell environment into a deployment config on the server
oc set env | grep RAILS_ | oc env -e - dc/myapp2.7.1.130. oc set image
Pod テンプレートのイメージを更新します。
使用例
# Set a deployment config's nginx container image to 'nginx:1.9.1', and its busybox container image to 'busybox'.
oc set image dc/nginx busybox=busybox nginx=nginx:1.9.1
# Set a deployment config's app container image to the image referenced by the imagestream tag 'openshift/ruby:2.3'.
oc set image dc/myapp app=openshift/ruby:2.3 --source=imagestreamtag
# Update all deployments' and rc's nginx container's image to 'nginx:1.9.1'
oc set image deployments,rc nginx=nginx:1.9.1 --all
# Update image of all containers of daemonset abc to 'nginx:1.9.1'
oc set image daemonset abc *=nginx:1.9.1
# Print result (in YAML format) of updating nginx container image from local file, without hitting the server
oc set image -f path/to/file.yaml nginx=nginx:1.9.1 --local -o yaml2.7.1.131. oc set image-lookup
アプリケーションのデプロイ時にイメージを解決する方法を変更します。
使用例
# Print all of the image streams and whether they resolve local names
oc set image-lookup
# Use local name lookup on image stream mysql
oc set image-lookup mysql
# Force a deployment to use local name lookup
oc set image-lookup deploy/mysql
# Show the current status of the deployment lookup
oc set image-lookup deploy/mysql --list
# Disable local name lookup on image stream mysql
oc set image-lookup mysql --enabled=false
# Set local name lookup on all image streams
oc set image-lookup --all2.7.1.132. oc set probe
Pod テンプレートでプローブを更新します。
使用例
# Clear both readiness and liveness probes off all containers
oc set probe dc/myapp --remove --readiness --liveness
# Set an exec action as a liveness probe to run 'echo ok'
oc set probe dc/myapp --liveness -- echo ok
# Set a readiness probe to try to open a TCP socket on 3306
oc set probe rc/mysql --readiness --open-tcp=3306
# Set an HTTP startup probe for port 8080 and path /healthz over HTTP on the pod IP
oc set probe dc/webapp --startup --get-url=http://:8080/healthz
# Set an HTTP readiness probe for port 8080 and path /healthz over HTTP on the pod IP
oc set probe dc/webapp --readiness --get-url=http://:8080/healthz
# Set an HTTP readiness probe over HTTPS on 127.0.0.1 for a hostNetwork pod
oc set probe dc/router --readiness --get-url=https://127.0.0.1:1936/stats
# Set only the initial-delay-seconds field on all deployments
oc set probe dc --all --readiness --initial-delay-seconds=302.7.1.133. oc set resources
オブジェクトのリソース要求/制限を Pod テンプレートで更新します。
使用例
# Set a deployments nginx container CPU limits to "200m and memory to 512Mi"
oc set resources deployment nginx -c=nginx --limits=cpu=200m,memory=512Mi
# Set the resource request and limits for all containers in nginx
oc set resources deployment nginx --limits=cpu=200m,memory=512Mi --requests=cpu=100m,memory=256Mi
# Remove the resource requests for resources on containers in nginx
oc set resources deployment nginx --limits=cpu=0,memory=0 --requests=cpu=0,memory=0
# Print the result (in YAML format) of updating nginx container limits locally, without hitting the server
oc set resources -f path/to/file.yaml --limits=cpu=200m,memory=512Mi --local -o yaml2.7.1.134. oc set route-backends
ルートのバックエンドを更新します。
使用例
# Print the backends on the route 'web'
oc set route-backends web
# Set two backend services on route 'web' with 2/3rds of traffic going to 'a'
oc set route-backends web a=2 b=1
# Increase the traffic percentage going to b by 10%% relative to a
oc set route-backends web --adjust b=+10%%
# Set traffic percentage going to b to 10%% of the traffic going to a
oc set route-backends web --adjust b=10%%
# Set weight of b to 10
oc set route-backends web --adjust b=10
# Set the weight to all backends to zero
oc set route-backends web --zero2.7.1.135. oc set selector
リソースにセレクターを設定します。
使用例
# Set the labels and selector before creating a deployment/service pair.
oc create service clusterip my-svc --clusterip="None" -o yaml --dry-run | oc set selector --local -f - 'environment=qa' -o yaml | oc create -f -
oc create deployment my-dep -o yaml --dry-run | oc label --local -f - environment=qa -o yaml | oc create -f -2.7.1.136. oc set serviceaccount
リソースのサービスアカウントを更新します。
使用例
# Set deployment nginx-deployment's service account to serviceaccount1
oc set serviceaccount deployment nginx-deployment serviceaccount1
# Print the result (in YAML format) of updated nginx deployment with service account from a local file, without hitting the API server
oc set sa -f nginx-deployment.yaml serviceaccount1 --local --dry-run -o yaml2.7.1.137. oc set subject
ロールバインディングまたはクラスターロールバインディングでユーザー、グループ、またはサービスアカウントを更新します。
使用例
# Update a cluster role binding for serviceaccount1
oc set subject clusterrolebinding admin --serviceaccount=namespace:serviceaccount1
# Update a role binding for user1, user2, and group1
oc set subject rolebinding admin --user=user1 --user=user2 --group=group1
# Print the result (in YAML format) of updating role binding subjects locally, without hitting the server
oc create rolebinding admin --role=admin --user=admin -o yaml --dry-run | oc set subject --local -f - --user=foo -o yaml2.7.1.138. oc set triggers
1 つ以上のオブジェクトでトリガーを更新します。
使用例
# Print the triggers on the deployment config 'myapp'
oc set triggers dc/myapp
# Set all triggers to manual
oc set triggers dc/myapp --manual
# Enable all automatic triggers
oc set triggers dc/myapp --auto
# Reset the GitHub webhook on a build to a new, generated secret
oc set triggers bc/webapp --from-github
oc set triggers bc/webapp --from-webhook
# Remove all triggers
oc set triggers bc/webapp --remove-all
# Stop triggering on config change
oc set triggers dc/myapp --from-config --remove
# Add an image trigger to a build config
oc set triggers bc/webapp --from-image=namespace1/image:latest
# Add an image trigger to a stateful set on the main container
oc set triggers statefulset/db --from-image=namespace1/image:latest -c main2.7.1.139. oc set volumes
Pod テンプレートでボリュームを更新します。
使用例
# List volumes defined on all deployment configs in the current project
oc set volume dc --all
# Add a new empty dir volume to deployment config (dc) 'myapp' mounted under
# /var/lib/myapp
oc set volume dc/myapp --add --mount-path=/var/lib/myapp
# Use an existing persistent volume claim (PVC) to overwrite an existing volume 'v1'
oc set volume dc/myapp --add --name=v1 -t pvc --claim-name=pvc1 --overwrite
# Remove volume 'v1' from deployment config 'myapp'
oc set volume dc/myapp --remove --name=v1
# Create a new persistent volume claim that overwrites an existing volume 'v1'
oc set volume dc/myapp --add --name=v1 -t pvc --claim-size=1G --overwrite
# Change the mount point for volume 'v1' to /data
oc set volume dc/myapp --add --name=v1 -m /data --overwrite
# Modify the deployment config by removing volume mount "v1" from container "c1"
# (and by removing the volume "v1" if no other containers have volume mounts that reference it)
oc set volume dc/myapp --remove --name=v1 --containers=c1
# Add new volume based on a more complex volume source (AWS EBS, GCE PD,
# Ceph, Gluster, NFS, ISCSI, ...)
oc set volume dc/myapp --add -m /data --source=<json-string>2.7.1.140. oc start-build
新しいビルドを開始します。
使用例
# Starts build from build config "hello-world"
oc start-build hello-world
# Starts build from a previous build "hello-world-1"
oc start-build --from-build=hello-world-1
# Use the contents of a directory as build input
oc start-build hello-world --from-dir=src/
# Send the contents of a Git repository to the server from tag 'v2'
oc start-build hello-world --from-repo=../hello-world --commit=v2
# Start a new build for build config "hello-world" and watch the logs until the build
# completes or fails
oc start-build hello-world --follow
# Start a new build for build config "hello-world" and wait until the build completes. It
# exits with a non-zero return code if the build fails
oc start-build hello-world --wait2.7.1.141. oc status
現在のプロジェクトの概要を表示します。
使用例
# See an overview of the current project
oc status
# Export the overview of the current project in an svg file
oc status -o dot | dot -T svg -o project.svg
# See an overview of the current project including details for any identified issues
oc status --suggest2.7.1.142. oc tag
既存のイメージをイメージストリームにタグ付けします。
使用例
# Tag the current image for the image stream 'openshift/ruby' and tag '2.0' into the image stream 'yourproject/ruby with tag 'tip'
oc tag openshift/ruby:2.0 yourproject/ruby:tip
# Tag a specific image
oc tag openshift/ruby@sha256:6b646fa6bf5e5e4c7fa41056c27910e679c03ebe7f93e361e6515a9da7e258cc yourproject/ruby:tip
# Tag an external container image
oc tag --source=docker openshift/origin-control-plane:latest yourproject/ruby:tip
# Tag an external container image and request pullthrough for it
oc tag --source=docker openshift/origin-control-plane:latest yourproject/ruby:tip --reference-policy=local
# Tag an external container image and include the full manifest list
oc tag --source=docker openshift/origin-control-plane:latest yourproject/ruby:tip --import-mode=PreserveOriginal
# Remove the specified spec tag from an image stream
oc tag openshift/origin-control-plane:latest -d2.7.1.143. oc version
クライアントおよびサーバーのバージョン情報を出力します。
使用例
# Print the OpenShift client, kube-apiserver, and openshift-apiserver version information for the current context
oc version
# Print the OpenShift client, kube-apiserver, and openshift-apiserver version numbers for the current context in json format
oc version --output json
# Print the OpenShift client version information for the current context
oc version --client2.7.1.144. oc wait
実験的: 1 つ以上のリソースの特定の条件を待機します。
使用例
# Wait for the pod "busybox1" to contain the status condition of type "Ready"
oc wait --for=condition=Ready pod/busybox1
# The default value of status condition is true; you can wait for other targets after an equal delimiter (compared after Unicode simple case folding, which is a more general form of case-insensitivity)
oc wait --for=condition=Ready=false pod/busybox1
# Wait for the pod "busybox1" to contain the status phase to be "Running"
oc wait --for=jsonpath='{.status.phase}'=Running pod/busybox1
# Wait for the service "loadbalancer" to have ingress.
oc wait --for=jsonpath='{.status.loadBalancer.ingress}' service/loadbalancer
# Wait for the pod "busybox1" to be deleted, with a timeout of 60s, after having issued the "delete" command
oc delete pod/busybox1
oc wait --for=delete pod/busybox1 --timeout=60s2.7.1.145. oc whoami
現行セッションに関する情報を返します。
使用例
# Display the currently authenticated user
oc whoami2.8. OpenShift CLI 管理者コマンドリファレンス
このリファレンスは、OpenShift CLI (oc) 管理者コマンドの説明およびコマンド例を示しています。これらのコマンドを使用するには、cluster-admin または同等のパーミッションが必要です。
開発者コマンドは、OpenShift CLI 開発者コマンドリファレンス を参照してください。
oc adm -h を実行して、すべての管理者コマンドを表示するか、oc <command> --help を実行して、特定のコマンドに関する追加情報を取得します。
2.8.1. OpenShift CLI (oc) 管理者コマンド
2.8.1.1. oc adm build-chain
ビルドの入力と依存関係を出力します。
使用例
# Build the dependency tree for the 'latest' tag in <image-stream>
oc adm build-chain <image-stream>
# Build the dependency tree for the 'v2' tag in dot format and visualize it via the dot utility
oc adm build-chain <image-stream>:v2 -o dot | dot -T svg -o deps.svg
# Build the dependency tree across all namespaces for the specified image stream tag found in the 'test' namespace
oc adm build-chain <image-stream> -n test --all2.8.1.2. oc adm catalog mirror
operator-registry カタログをミラーリングします。
使用例
# Mirror an operator-registry image and its contents to a registry
oc adm catalog mirror quay.io/my/image:latest myregistry.com
# Mirror an operator-registry image and its contents to a particular namespace in a registry
oc adm catalog mirror quay.io/my/image:latest myregistry.com/my-namespace
# Mirror to an airgapped registry by first mirroring to files
oc adm catalog mirror quay.io/my/image:latest file:///local/index
oc adm catalog mirror file:///local/index/my/image:latest my-airgapped-registry.com
# Configure a cluster to use a mirrored registry
oc apply -f manifests/imageDigestMirrorSet.yaml
# Edit the mirroring mappings and mirror with "oc image mirror" manually
oc adm catalog mirror --manifests-only quay.io/my/image:latest myregistry.com
oc image mirror -f manifests/mapping.txt
# Delete all ImageDigestMirrorSets generated by oc adm catalog mirror
oc delete imagedigestmirrorset -l operators.openshift.org/catalog=true2.8.1.3. oc adm certificate approve
証明書署名リクエストを承認します。
使用例
# Approve CSR 'csr-sqgzp'
oc adm certificate approve csr-sqgzp2.8.1.4. oc adm certificate deny
証明書署名リクエストを拒否します。
使用例
# Deny CSR 'csr-sqgzp'
oc adm certificate deny csr-sqgzp2.8.1.5. oc adm copy-to-node
指定されたファイルをノードにコピーします。
2.8.1.6. oc adm cordon
ノードにスケジュール対象外 (unschedulable) のマークを付けます。
使用例
# Mark node "foo" as unschedulable
oc adm cordon foo2.8.1.7. oc adm create-bootstrap-project-template
ブートストラッププロジェクトテンプレートを作成します。
使用例
# Output a bootstrap project template in YAML format to stdout
oc adm create-bootstrap-project-template -o yaml2.8.1.8. oc adm create-error-template
エラーページのテンプレートを作成します。
使用例
# Output a template for the error page to stdout
oc adm create-error-template2.8.1.9. oc adm create-login-template
ログインテンプレートを作成します。
使用例
# Output a template for the login page to stdout
oc adm create-login-template2.8.1.10. oc adm create-provider-selection-template
プロバイダー選択のテンプレートを作成します。
使用例
# Output a template for the provider selection page to stdout
oc adm create-provider-selection-template2.8.1.11. oc adm drain
ノードをドレイン (解放) してメンテナンスを準備します。
使用例
# Drain node "foo", even if there are pods not managed by a replication controller, replica set, job, daemon set, or stateful set on it
oc adm drain foo --force
# As above, but abort if there are pods not managed by a replication controller, replica set, job, daemon set, or stateful set, and use a grace period of 15 minutes
oc adm drain foo --grace-period=9002.8.1.12. oc adm groups add-users
ユーザーをグループに追加します。
使用例
# Add user1 and user2 to my-group
oc adm groups add-users my-group user1 user22.8.1.13. oc adm groups new
新規グループを作成します。
使用例
# Add a group with no users
oc adm groups new my-group
# Add a group with two users
oc adm groups new my-group user1 user2
# Add a group with one user and shorter output
oc adm groups new my-group user1 -o name2.8.1.14. oc adm groups prune
外部プロバイダーから欠落しているレコードを参照する以前の OpenShift グループを削除します。
使用例
# Prune all orphaned groups
oc adm groups prune --sync-config=/path/to/ldap-sync-config.yaml --confirm
# Prune all orphaned groups except the ones from the denylist file
oc adm groups prune --blacklist=/path/to/denylist.txt --sync-config=/path/to/ldap-sync-config.yaml --confirm
# Prune all orphaned groups from a list of specific groups specified in an allowlist file
oc adm groups prune --whitelist=/path/to/allowlist.txt --sync-config=/path/to/ldap-sync-config.yaml --confirm
# Prune all orphaned groups from a list of specific groups specified in a list
oc adm groups prune groups/group_name groups/other_name --sync-config=/path/to/ldap-sync-config.yaml --confirm2.8.1.15. oc adm groups remove-users
グループからユーザーを削除します。
使用例
# Remove user1 and user2 from my-group
oc adm groups remove-users my-group user1 user22.8.1.16. oc adm groups sync
OpenShift グループと外部プロバイダーからのレコードを同期します。
使用例
# Sync all groups with an LDAP server
oc adm groups sync --sync-config=/path/to/ldap-sync-config.yaml --confirm
# Sync all groups except the ones from the blacklist file with an LDAP server
oc adm groups sync --blacklist=/path/to/blacklist.txt --sync-config=/path/to/ldap-sync-config.yaml --confirm
# Sync specific groups specified in an allowlist file with an LDAP server
oc adm groups sync --whitelist=/path/to/allowlist.txt --sync-config=/path/to/sync-config.yaml --confirm
# Sync all OpenShift groups that have been synced previously with an LDAP server
oc adm groups sync --type=openshift --sync-config=/path/to/ldap-sync-config.yaml --confirm
# Sync specific OpenShift groups if they have been synced previously with an LDAP server
oc adm groups sync groups/group1 groups/group2 groups/group3 --sync-config=/path/to/sync-config.yaml --confirm2.8.1.17. oc adm inspect
指定のリソースのデバッグデータを収集します。
使用例
# Collect debugging data for the "openshift-apiserver" clusteroperator
oc adm inspect clusteroperator/openshift-apiserver
# Collect debugging data for the "openshift-apiserver" and "kube-apiserver" clusteroperators
oc adm inspect clusteroperator/openshift-apiserver clusteroperator/kube-apiserver
# Collect debugging data for all clusteroperators
oc adm inspect clusteroperator
# Collect debugging data for all clusteroperators and clusterversions
oc adm inspect clusteroperators,clusterversions2.8.1.18. oc adm migrate icsp
imagecontentsourcepolicy ファイルを imagedigestmirrorset ファイルに更新します。
使用例
# Update the imagecontentsourcepolicy.yaml file to a new imagedigestmirrorset file under the mydir directory
oc adm migrate icsp imagecontentsourcepolicy.yaml --dest-dir mydir2.8.1.19. oc adm migrate template-instances
テンプレートインスタンスを更新して、最新の group-version-kinds を参照するようにします。
使用例
# Perform a dry-run of updating all objects
oc adm migrate template-instances
# To actually perform the update, the confirm flag must be appended
oc adm migrate template-instances --confirm2.8.1.20. oc adm must-gather
Pod の新規インスタンスを起動してデバッグ情報を収集します。
使用例
# Gather information using the default plug-in image and command, writing into ./must-gather.local.<rand>
oc adm must-gather
# Gather information with a specific local folder to copy to
oc adm must-gather --dest-dir=/local/directory
# Gather audit information
oc adm must-gather -- /usr/bin/gather_audit_logs
# Gather information using multiple plug-in images
oc adm must-gather --image=quay.io/kubevirt/must-gather --image=quay.io/openshift/origin-must-gather
# Gather information using a specific image stream plug-in
oc adm must-gather --image-stream=openshift/must-gather:latest
# Gather information using a specific image, command, and pod directory
oc adm must-gather --image=my/image:tag --source-dir=/pod/directory -- myspecial-command.sh2.8.1.21. oc adm new-project
新規プロジェクトを作成します。
使用例
# Create a new project using a node selector
oc adm new-project myproject --node-selector='type=user-node,region=east'2.8.1.22. oc adm node-logs
ノードのログを表示し、フィルターします。
使用例
# Show kubelet logs from all masters
oc adm node-logs --role master -u kubelet
# See what logs are available in masters in /var/log
oc adm node-logs --role master --path=/
# Display cron log file from all masters
oc adm node-logs --role master --path=cron2.8.1.23. oc adm ocp-certificates monitor-certificates
プラットフォーム証明書を監視します。
使用例
# Watch platform certificates.
oc adm ocp-certificates monitor-certificates2.8.1.24. oc adm ocp-certificates regenerate-leaf
OpenShift クラスターのクライアント証明書とサービング証明書を再生成する
2.8.1.25. oc adm ocp-certificates regenerate-machine-config-server-serving-cert
OpenShift クラスターで Machine Config Operator 証明書を再生成する
2.8.1.26. oc adm ocp-certificates regenerate-top-level
OpenShift クラスター内のトップレベルの証明書を再生成する
2.8.1.27. oc adm ocp-certificates remove-old-trust
OpenShift クラスター内のプラットフォーム信頼バンドルを表す ConfigMap から古い CA を削除する
使用例
# Remove only CA certificates created before a certain date from all trust bundles
oc adm ocp-certificates remove-old-trust configmaps -A --all --created-before 2023-06-05T14:44:06Z2.8.1.28. oc adm ocp-certificates update-ignition-ca-bundle-for-machine-config-server
更新された MCO 証明書を使用するように OpenShift クラスター内のユーザーデータシークレットを更新する
使用例
# Regenerate the MCO certs without modifying user-data secrets
oc adm certificates regenerate-machine-config-server-serving-cert --update-ignition=false
# Update the user-data secrets to use new MCS certs
oc adm certificates update-ignition-ca-bundle-for-machine-config-server2.8.1.29. oc adm pod-network isolate-projects
プロジェクトネットワークを分離します。
使用例
# Provide isolation for project p1
oc adm pod-network isolate-projects <p1>
# Allow all projects with label name=top-secret to have their own isolated project network
oc adm pod-network isolate-projects --selector='name=top-secret'2.8.1.30. oc adm pod-network join-projects
プロジェクトネットワークに参加します。
使用例
# Allow project p2 to use project p1 network
oc adm pod-network join-projects --to=<p1> <p2>
# Allow all projects with label name=top-secret to use project p1 network
oc adm pod-network join-projects --to=<p1> --selector='name=top-secret'2.8.1.31. oc adm pod-network make-projects-global
プロジェクトネットワークをグローバルにします。
使用例
# Allow project p1 to access all pods in the cluster and vice versa
oc adm pod-network make-projects-global <p1>
# Allow all projects with label name=share to access all pods in the cluster and vice versa
oc adm pod-network make-projects-global --selector='name=share'2.8.1.32. oc adm policy add-role-to-user
現在のプロジェクトのユーザーまたはサービスアカウントをロールに追加します。
使用例
# Add the 'view' role to user1 for the current project
oc adm policy add-role-to-user view user1
# Add the 'edit' role to serviceaccount1 for the current project
oc adm policy add-role-to-user edit -z serviceaccount12.8.1.33. oc adm policy add-scc-to-group
Security Context Constraint オブジェクトをグループに追加します。
使用例
# Add the 'restricted' security context constraint to group1 and group2
oc adm policy add-scc-to-group restricted group1 group22.8.1.34. oc adm policy add-scc-to-user
Security Context Constraint をユーザーまたはサービスアカウントに追加します。
使用例
# Add the 'restricted' security context constraint to user1 and user2
oc adm policy add-scc-to-user restricted user1 user2
# Add the 'privileged' security context constraint to serviceaccount1 in the current namespace
oc adm policy add-scc-to-user privileged -z serviceaccount12.8.1.35. oc adm policy scc-review
Pod を作成できるサービスアカウントを確認します。
使用例
# Check whether service accounts sa1 and sa2 can admit a pod with a template pod spec specified in my_resource.yaml
# Service Account specified in myresource.yaml file is ignored
oc adm policy scc-review -z sa1,sa2 -f my_resource.yaml
# Check whether service accounts system:serviceaccount:bob:default can admit a pod with a template pod spec specified in my_resource.yaml
oc adm policy scc-review -z system:serviceaccount:bob:default -f my_resource.yaml
# Check whether the service account specified in my_resource_with_sa.yaml can admit the pod
oc adm policy scc-review -f my_resource_with_sa.yaml
# Check whether the default service account can admit the pod; default is taken since no service account is defined in myresource_with_no_sa.yaml
oc adm policy scc-review -f myresource_with_no_sa.yaml2.8.1.36. oc adm policy scc-subject-review
ユーザーまたはサービスアカウントが Pod を作成できるかどうかを確認します。
使用例
# Check whether user bob can create a pod specified in myresource.yaml
oc adm policy scc-subject-review -u bob -f myresource.yaml
# Check whether user bob who belongs to projectAdmin group can create a pod specified in myresource.yaml
oc adm policy scc-subject-review -u bob -g projectAdmin -f myresource.yaml
# Check whether a service account specified in the pod template spec in myresourcewithsa.yaml can create the pod
oc adm policy scc-subject-review -f myresourcewithsa.yaml2.8.1.37. oc adm prune builds
以前の完了済みおよび失敗したビルドを削除します。
使用例
# Dry run deleting older completed and failed builds and also including
# all builds whose associated build config no longer exists
oc adm prune builds --orphans
# To actually perform the prune operation, the confirm flag must be appended
oc adm prune builds --orphans --confirm2.8.1.38. oc adm prune deployments
以前の完了済みおよび失敗したデプロイメント設定を削除します。
使用例
# Dry run deleting all but the last complete deployment for every deployment config
oc adm prune deployments --keep-complete=1
# To actually perform the prune operation, the confirm flag must be appended
oc adm prune deployments --keep-complete=1 --confirm2.8.1.39. oc adm prune groups
外部プロバイダーから欠落しているレコードを参照する以前の OpenShift グループを削除します。
使用例
# Prune all orphaned groups
oc adm prune groups --sync-config=/path/to/ldap-sync-config.yaml --confirm
# Prune all orphaned groups except the ones from the denylist file
oc adm prune groups --blacklist=/path/to/denylist.txt --sync-config=/path/to/ldap-sync-config.yaml --confirm
# Prune all orphaned groups from a list of specific groups specified in an allowlist file
oc adm prune groups --whitelist=/path/to/allowlist.txt --sync-config=/path/to/ldap-sync-config.yaml --confirm
# Prune all orphaned groups from a list of specific groups specified in a list
oc adm prune groups groups/group_name groups/other_name --sync-config=/path/to/ldap-sync-config.yaml --confirm2.8.1.40. oc adm prune images
参照されていないイメージを削除します。
使用例
# See what the prune command would delete if only images and their referrers were more than an hour old
# and obsoleted by 3 newer revisions under the same tag were considered
oc adm prune images --keep-tag-revisions=3 --keep-younger-than=60m
# To actually perform the prune operation, the confirm flag must be appended
oc adm prune images --keep-tag-revisions=3 --keep-younger-than=60m --confirm
# See what the prune command would delete if we are interested in removing images
# exceeding currently set limit ranges ('openshift.io/Image')
oc adm prune images --prune-over-size-limit
# To actually perform the prune operation, the confirm flag must be appended
oc adm prune images --prune-over-size-limit --confirm
# Force the insecure HTTP protocol with the particular registry host name
oc adm prune images --registry-url=http://registry.example.org --confirm
# Force a secure connection with a custom certificate authority to the particular registry host name
oc adm prune images --registry-url=registry.example.org --certificate-authority=/path/to/custom/ca.crt --confirm2.8.1.41. oc adm reboot-machine-config-pool
指定された MachineConfigPool の再起動を開始します。
使用例
# Reboot all MachineConfigPools
oc adm reboot-machine-config-pool mcp/worker mcp/master
# Reboot all MachineConfigPools that inherit from worker. This include all custom MachineConfigPools and infra.
oc adm reboot-machine-config-pool mcp/worker
# Reboot masters
oc adm reboot-machine-config-pool mcp/master2.8.1.42. oc adm release extract
更新ペイロードの内容をディスクに抽出します。
次の例には、OpenShift Container Platform on AWS に固有の値がいくつか含まれています。
使用例
# Use git to check out the source code for the current cluster release to DIR
oc adm release extract --git=DIR
# Extract cloud credential requests for AWS
oc adm release extract --credentials-requests --cloud=aws
# Use git to check out the source code for the current cluster release to DIR from linux/s390x image
# Note: Wildcard filter is not supported; pass a single os/arch to extract
oc adm release extract --git=DIR quay.io/openshift-release-dev/ocp-release:4.11.2 --filter-by-os=linux/s390x2.8.1.43. oc adm release info
リリースに関する情報を表示します。
使用例
# Show information about the cluster's current release
oc adm release info
# Show the source code that comprises a release
oc adm release info 4.11.2 --commit-urls
# Show the source code difference between two releases
oc adm release info 4.11.0 4.11.2 --commits
# Show where the images referenced by the release are located
oc adm release info quay.io/openshift-release-dev/ocp-release:4.11.2 --pullspecs
# Show information about linux/s390x image
# Note: Wildcard filter is not supported; pass a single os/arch to extract
oc adm release info quay.io/openshift-release-dev/ocp-release:4.11.2 --filter-by-os=linux/s390x2.8.1.44. oc adm release mirror
リリースを別のイメージレジストリーの場所にミラーリングします。
使用例
# Perform a dry run showing what would be mirrored, including the mirror objects
oc adm release mirror 4.11.0 --to myregistry.local/openshift/release \
--release-image-signature-to-dir /tmp/releases --dry-run
# Mirror a release into the current directory
oc adm release mirror 4.11.0 --to file://openshift/release \
--release-image-signature-to-dir /tmp/releases
# Mirror a release to another directory in the default location
oc adm release mirror 4.11.0 --to-dir /tmp/releases
# Upload a release from the current directory to another server
oc adm release mirror --from file://openshift/release --to myregistry.com/openshift/release \
--release-image-signature-to-dir /tmp/releases
# Mirror the 4.11.0 release to repository registry.example.com and apply signatures to connected cluster
oc adm release mirror --from=quay.io/openshift-release-dev/ocp-release:4.11.0-x86_64 \
--to=registry.example.com/your/repository --apply-release-image-signature2.8.1.45. oc adm release new
新しい OpenShift リリースを作成します。
使用例
# Create a release from the latest origin images and push to a DockerHub repository
oc adm release new --from-image-stream=4.11 -n origin --to-image docker.io/mycompany/myrepo:latest
# Create a new release with updated metadata from a previous release
oc adm release new --from-release registry.ci.openshift.org/origin/release:v4.11 --name 4.11.1 \
--previous 4.11.0 --metadata ... --to-image docker.io/mycompany/myrepo:latest
# Create a new release and override a single image
oc adm release new --from-release registry.ci.openshift.org/origin/release:v4.11 \
cli=docker.io/mycompany/cli:latest --to-image docker.io/mycompany/myrepo:latest
# Run a verification pass to ensure the release can be reproduced
oc adm release new --from-release registry.ci.openshift.org/origin/release:v4.112.8.1.46. oc adm restart-kubelet
指定されたノードで kubelet を再起動します
使用例
# Restart all the nodes, 10% at a time
oc adm restart-kubelet nodes --all --directive=RemoveKubeletKubeconfig
# Restart all the nodes, 20 nodes at a time
oc adm restart-kubelet nodes --all --parallelism=20 --directive=RemoveKubeletKubeconfig
# Restart all the nodes, 15% at a time
oc adm restart-kubelet nodes --all --parallelism=15% --directive=RemoveKubeletKubeconfig
# Restart all the masters at the same time
oc adm restart-kubelet nodes -l node-role.kubernetes.io/master --parallelism=100% --directive=RemoveKubeletKubeconfig2.8.1.47. oc adm taint
1 つ以上のノードでテイントを更新します。
使用例
# Update node 'foo' with a taint with key 'dedicated' and value 'special-user' and effect 'NoSchedule'
# If a taint with that key and effect already exists, its value is replaced as specified
oc adm taint nodes foo dedicated=special-user:NoSchedule
# Remove from node 'foo' the taint with key 'dedicated' and effect 'NoSchedule' if one exists
oc adm taint nodes foo dedicated:NoSchedule-
# Remove from node 'foo' all the taints with key 'dedicated'
oc adm taint nodes foo dedicated-
# Add a taint with key 'dedicated' on nodes having label myLabel=X
oc adm taint node -l myLabel=X dedicated=foo:PreferNoSchedule
# Add to node 'foo' a taint with key 'bar' and no value
oc adm taint nodes foo bar:NoSchedule2.8.1.48. oc adm top images
イメージの使用状況の統計を表示します。
使用例
# Show usage statistics for images
oc adm top images2.8.1.49. oc adm top imagestreams
イメージストリームの使用状況の統計を表示します。
使用例
# Show usage statistics for image streams
oc adm top imagestreams2.8.1.50. oc adm top node
ノードのリソース (CPU/メモリー) の使用状況を表示します。
使用例
# Show metrics for all nodes
oc adm top node
# Show metrics for a given node
oc adm top node NODE_NAME2.8.1.51. oc adm top pod
Pod のリソース (CPU/メモリー) の使用状況を表示します。
使用例
# Show metrics for all pods in the default namespace
oc adm top pod
# Show metrics for all pods in the given namespace
oc adm top pod --namespace=NAMESPACE
# Show metrics for a given pod and its containers
oc adm top pod POD_NAME --containers
# Show metrics for the pods defined by label name=myLabel
oc adm top pod -l name=myLabel2.8.1.52. oc adm uncordon
ノードにスケジュール対象 (schedulable) のマークを付けます。
使用例
# Mark node "foo" as schedulable
oc adm uncordon foo2.8.1.53. oc adm upgrade
クラスターをアップグレードするか、アップグレードチャネルを調整する
使用例
# View the update status and available cluster updates
oc adm upgrade
# Update to the latest version
oc adm upgrade --to-latest=true2.8.1.54. oc adm verify-image-signature
イメージ署名に含まれるイメージ ID を確認します。
使用例
# Verify the image signature and identity using the local GPG keychain
oc adm verify-image-signature sha256:c841e9b64e4579bd56c794bdd7c36e1c257110fd2404bebbb8b613e4935228c4 \
--expected-identity=registry.local:5000/foo/bar:v1
# Verify the image signature and identity using the local GPG keychain and save the status
oc adm verify-image-signature sha256:c841e9b64e4579bd56c794bdd7c36e1c257110fd2404bebbb8b613e4935228c4 \
--expected-identity=registry.local:5000/foo/bar:v1 --save
# Verify the image signature and identity via exposed registry route
oc adm verify-image-signature sha256:c841e9b64e4579bd56c794bdd7c36e1c257110fd2404bebbb8b613e4935228c4 \
--expected-identity=registry.local:5000/foo/bar:v1 \
--registry-url=docker-registry.foo.com
# Remove all signature verifications from the image
oc adm verify-image-signature sha256:c841e9b64e4579bd56c794bdd7c36e1c257110fd2404bebbb8b613e4935228c4 --remove-all2.8.1.55. oc adm wait-for-node-reboot
oc adm reboot-machine-config-pool の実行後、ノードが再起動するまで待ちます。
使用例
# Wait for all nodes to complete a requested reboot from 'oc adm reboot-machine-config-pool mcp/worker mcp/master'
oc adm wait-for-node-reboot nodes --all
# Wait for masters to complete a requested reboot from 'oc adm reboot-machine-config-pool mcp/master'
oc adm wait-for-node-reboot nodes -l node-role.kubernetes.io/master
# Wait for masters to complete a specific reboot
oc adm wait-for-node-reboot nodes -l node-role.kubernetes.io/master --reboot-number=42.8.1.56. oc adm wait-for-stable-cluster
プラットフォーム Operator が安定するまで待機します。
使用例
# Wait for all clusteroperators to become stable
oc adm wait-for-stable-cluster
# Consider operators to be stable if they report as such for 5 minutes straight
oc adm wait-for-stable-cluster --minimum-stable-period 5m第3章 odoでの重要な更新
Red Hat は、OpenShift Container Platform ドキュメントサイトで odo に関する情報を提供していません。odo に関連するドキュメント情報は、Red Hat およびアップストリームコミュニティーによって管理されている ドキュメント を参照してください。
アップストリームコミュニティーによって維持される資料は、Red Hat は Cooperative Community Support の下でサポートを提供します。
第4章 OpenShift Serverless で使用する Knative CLI
Knative (kn) CLI は、OpenShift Container Platform の Knative コンポーネントとの簡単な対話を有効にします。
4.1. 主な特長
Knative (kn) CLI は、サーバーレスコンピューティングタスクを単純かつ簡潔にするように設計されています。Knative CLI の主な機能は次のとおりです。
- コマンドラインからサーバーレスアプリケーションをデプロイします。
- サービス、リビジョン、およびトラフィック分割などの Knative Serving の機能を管理します。
- イベントソースおよびトリガーなどの Knative Eventing コンポーネントを作成し、管理します。
- 既存の Kubernetes アプリケーションおよび Knative サービスを接続するために、sink binding を作成します。
-
kubectlCLI と同様に、柔軟性のあるプラグインアーキテクチャーで Knative CLI を拡張します。 - Knative サービスの自動スケーリングパラメーターを設定します。
- 操作の結果を待機したり、カスタムロールアウトおよびロールバックストラテジーのデプロイなどのスクリプト化された使用。
4.2. Knative CLI のインストール
Knative CLI のインストール を参照してください。
第5章 Pipelines CLI (tkn)
5.1. tkn のインストール
CLI ツールを使用して、ターミナルから Red Hat OpenShift Pipeline を管理します。以下のセクションでは、各種の異なるプラットフォームに CLI ツール をインストールする方法を説明します。
また、OpenShift Container Platform Web コンソールから最新のバイナリーへの URL を見つけるには、右上隅の ? アイコンをクリックし、Command Line Tools を選択します。
アーカイブと RPM の両方に、次の実行可能ファイルが含まれています。
-
tkn -
tkn-pac -
opc
opc CLI ツールを使用した Red Hat OpenShift Pipelines の実行は、テクノロジープレビュー機能です。テクノロジープレビュー機能は、Red Hat 製品のサービスレベルアグリーメント (SLA) の対象外であり、機能的に完全ではないことがあります。Red Hat は、実稼働環境でこれらを使用することを推奨していません。テクノロジープレビュー機能は、最新の製品機能をいち早く提供して、開発段階で機能のテストを行い、フィードバックを提供していただくことを目的としています。
Red Hat のテクノロジープレビュー機能のサポート範囲に関する詳細は、テクノロジープレビュー機能のサポート範囲 を参照してください。
5.1.1. Linux への Red Hat OpenShift Pipelines CLI のインストール
Linux ディストリビューションの場合は、CLI を tar.gz アーカイブとしてダウンロードできます。
手順
関連する CLI ツールをダウンロードします。
アーカイブを展開します。
$ tar xvzf <file>-
tkn、tkn-pac、およびopcファイルの場所をPATH環境変数に追加します。 PATHを確認するには、以下のコマンドを実行します。$ echo $PATH
5.1.2. RPM を使用した Linux への Red Hat OpenShift Pipelines CLI のインストール
Red Hat Enterprise Linux (RHEL) バージョン 8 の場合は、Red Hat OpenShift Pipelines CLI を RPM としてインストールできます。
前提条件
- お使いの Red Hat アカウントに有効な OpenShift Container Platform サブスクリプションがある。
- ローカルシステムに root または sudo 権限がある。
手順
Red Hat Subscription Manager に登録します。
# subscription-manager register最新のサブスクリプションデータをプルします。
# subscription-manager refresh利用可能なサブスクリプションをリストします。
# subscription-manager list --available --matches '*pipelines*'直前のコマンドの出力で、OpenShift Container Platform サブスクリプションのプール ID を見つけ、これを登録されたシステムにアタッチします。
# subscription-manager attach --pool=<pool_id>Red Hat OpenShift Pipelines で必要なリポジトリーを有効にします。
Linux (x86_64, amd64)
# subscription-manager repos --enable="pipelines-1.18-for-rhel-8-x86_64-rpms"IBM Z® および IBM® LinuxONE (s390x) 上の Linux
# subscription-manager repos --enable="pipelines-1.18-for-rhel-8-s390x-rpms"IBM Power® 上の Linux (ppc64le)
# subscription-manager repos --enable="pipelines-1.18-for-rhel-8-ppc64le-rpms"ARM 上の Linux (aarch64、arm64)
# subscription-manager repos --enable="pipelines-1.18-for-rhel-8-aarch64-rpms"
openshift-pipelines-clientパッケージをインストールします。# yum install openshift-pipelines-client
CLI のインストール後は、tkn コマンドを使用して利用できます。
$ tkn version5.1.3. Windows への Red Hat OpenShift Pipelines CLI のインストール
Windows の場合は、CLI を zip アーカイブとしてダウンロードできます。
手順
- CLI ツール をダウンロードします。
- ZIP プログラムでアーカイブを展開します。
-
tkn、tkn-pac、およびopcファイルの場所をPATH環境変数に追加します。 PATHを確認するには、以下のコマンドを実行します。C:\> path
5.1.4. macOS への Red Hat OpenShift Pipelines CLI のインストール
macOS の場合は、CLI を tar.gz アーカイブとしてダウンロードできます。
手順
関連する CLI ツールをダウンロードします。
- アーカイブを解凍して解凍します。
-
tkn、tkn-pac、およびopcファイルの場所をPATH環境変数に追加します。 PATHを確認するには、以下のコマンドを実行します。$ echo $PATH
5.2. OpenShift Pipelines tkn CLI の設定
タブ補完を有効にするように Red Hat OpenShift Pipelines tkn CLI を設定します。
5.2.1. タブ補完の有効化
tkn CLI ツールのインストール後、タブ補完を有効にして tkn コマンドの自動補完を実行するか、Tab キーを押す際にオプションの提案が表示されるようにすることができます。
前提条件
-
tknCLI ツールがインストールされている。 -
ローカルシステムに
bash-completionがインストールされている。
手順
以下の手順では、Bash のタブ補完を有効にします。
Bash 補完コードをファイルに保存します。
$ tkn completion bash > tkn_bash_completionファイルを
/etc/bash_completion.d/にコピーします。$ sudo cp tkn_bash_completion /etc/bash_completion.d/または、ファイルをローカルディレクトリーに保存してから、これを
.bashrcファイルから取得できるようにすることができます。
タブ補完は、新規ターミナルを開くと有効になります。
5.3. OpenShift Pipelines tkn リファレンス
このセクションでは、基本的な tkn CLI コマンドのリストを紹介します。
5.3.1. 基本的な構文
tkn [command or options] [arguments…]
5.3.2. グローバルオプション
--help, -h
5.3.3. ユーティリティーコマンド
5.3.3.1. tkn
tkn CLI の親コマンド。
例: すべてのオプションを表示する
$ tkn5.3.3.2. completion [shell]
インタラクティブな補完を提供するために評価する必要があるシェル補完コードを出力します。サポートされるシェルは bash および zsh です。
例: bash シェルの補完コード
$ tkn completion bash5.3.3.3. version
tkn CLI のバージョン情報を出力します。
例: tkn バージョンを確認する
$ tkn version5.3.4. Pipelines 管理コマンド
5.3.4.1. pipeline
パイプラインを管理します。
例: ヘルプを表示する
$ tkn pipeline --help5.3.4.2. pipeline delete
パイプラインを削除します。
例: namespace から mypipeline パイプラインを削除します。
$ tkn pipeline delete mypipeline -n myspace5.3.4.3. pipeline describe
パイプラインを記述します。
例: mypipeline パイプラインを記述します。
$ tkn pipeline describe mypipeline5.3.4.4. pipeline list
パイプラインのリストを表示します。
例: パイプラインのリストを表示する
$ tkn pipeline list5.3.4.5. pipeline logs
特定のパイプラインのログを表示します。
例: mypipeline パイプラインのライブログのストリーミング
$ tkn pipeline logs -f mypipeline5.3.4.6. pipeline start
パイプラインを起動します。
例: mypipeline パイプラインを起動します。
$ tkn pipeline start mypipeline5.3.5. パイプラインの実行コマンド
5.3.5.1. pipelinerun
パイプラインの実行を管理します。
例: ヘルプを表示する
$ tkn pipelinerun -h5.3.5.2. pipelinerun cancel
パイプラインの実行をキャンセルします。
例: namespace からの mypipelinerun パイプラインの実行を取り消します。
$ tkn pipelinerun cancel mypipelinerun -n myspace5.3.5.3. pipelinerun delete
パイプラインの実行を削除します。
例: namespace からパイプラインの実行を削除する
$ tkn pipelinerun delete mypipelinerun1 mypipelinerun2 -n myspace例: 最近実行された 5 つのパイプラインの実行を除き、namespace からすべてのパイプラインの実行を削除する
$ tkn pipelinerun delete -n myspace --keep 5 - 1
5を、保持する最近実行されたパイプラインの実行の数に置き換えます。
例: すべての Pipeline を削除する
$ tkn pipelinerun delete --all
Red Hat OpenShift Pipelines 1.6 以降では、tkn pipelinerun delete --all コマンドは、running 状態のリソースを削除しません。
5.3.5.4. pipelinerun describe
パイプラインの実行を記述します。
例: namespace での mypipelinerun パイプラインの実行を記述します。
$ tkn pipelinerun describe mypipelinerun -n myspace5.3.5.5. pipelinerun list
パイプラインの実行をリストします。
例: namespace でのパイプラインの実行のリストを表示する
$ tkn pipelinerun list -n myspace5.3.5.6. pipelinerun logs
パイプラインの実行のログを表示します。
例: namespace のすべてのタスクおよび手順を含む mypipelinerun パイプラインの実行のログを表示します。
$ tkn pipelinerun logs mypipelinerun -a -n myspace5.3.6. タスク管理コマンド
5.3.6.1. task
タスクを管理します。
例: ヘルプを表示する
$ tkn task -h5.3.6.2. task delete
タスクを削除します。
例: namespace からの mytask1 および mytask2 タスクを削除します。
$ tkn task delete mytask1 mytask2 -n myspace5.3.6.3. task describe
タスクを記述します。
例: namespace の mytask タスクを記述します。
$ tkn task describe mytask -n myspace5.3.6.4. task list
タスクをリストします。
例: namespace のすべてのタスクをリスト表示します。
$ tkn task list -n myspace5.3.6.5. task logs
タスクログを表示します。
例: mytask タスクの mytaskrun タスク実行のログを表示します。
$ tkn task logs mytask mytaskrun -n myspace5.3.6.6. task start
タスクを開始します。
例: namespace の mytask タスクを開始します。
$ tkn task start mytask -s <ServiceAccountName> -n myspace5.3.7. タスク実行コマンド
5.3.7.1. taskrun
タスク実行を管理します。
例: ヘルプを表示する
$ tkn taskrun -h5.3.7.2. taskrun cancel
タスク実行をキャンセルします。
例: namespace からの mytaskrun タスク実行を取り消します。
$ tkn taskrun cancel mytaskrun -n myspace5.3.7.3. taskrun delete
TaskRun を削除します。
例: namespace からの mytaskrun1 および mytaskrun2 タスク実行を削除します。
$ tkn taskrun delete mytaskrun1 mytaskrun2 -n myspace例: namespace から最近実行された 5 つのタスク以外のすべてのタスクを削除します。
$ tkn taskrun delete -n myspace --keep 5 - 1
5を、保持する最近実行したタスク実行の数に置き換えます。
5.3.7.4. taskrun describe
タスク実行を記述します。
例: namespace での mytaskrun タスク実行を記述します。
$ tkn taskrun describe mytaskrun -n myspace5.3.7.5. taskrun list
タスク実行をリストします。
例: namespace のすべてのタスク実行をリストする
$ tkn taskrun list -n myspace5.3.7.6. taskrun logs
タスク実行ログを表示します。
例: namespace での mytaskrun タスク実行のライブログを表示します。
$ tkn taskrun logs -f mytaskrun -n myspace5.3.8. 条件管理コマンド
5.3.8.1. condition
条件を管理します。
例: ヘルプを表示する
$ tkn condition --help5.3.8.2. condition delete
条件を削除します。
例: namespace からの mycondition1 条件の削除
$ tkn condition delete mycondition1 -n myspace5.3.8.3. condition describe
条件を記述します。
例: namespace での mycondition1 条件の記述
$ tkn condition describe mycondition1 -n myspace5.3.8.4. condition list
条件をリスト表示します。
例: namespace での条件のリスト表示
$ tkn condition list -n myspace5.3.9. Pipeline リソース管理コマンド
5.3.9.1. resource
Pipeline リソースを管理します。
例: ヘルプを表示する
$ tkn resource -h5.3.9.2. resource create
Pipeline リソースを作成します。
例: namespace に Pipeline リソースを作成する
$ tkn resource create -n myspaceこれは、リソースの名前、リソースのタイプ、およびリソースのタイプに基づく値の入力を要求するインタラクティブなコマンドです。
5.3.9.3. resource delete
Pipeline リソースを削除します。
例: namespace から myresource Pipeline リソースを削除する
$ tkn resource delete myresource -n myspace5.3.9.4. resource describe
Pipeline リソースを記述します。
例: myresource Pipeline リソースを記述する
$ tkn resource describe myresource -n myspace5.3.9.5. resource list
Pipeline リソースをリストします。
例: namespace のすべての Pipeline リソースのリスト表示
$ tkn resource list -n myspace5.3.10. ClusterTask 管理コマンド
Red Hat OpenShift Pipelines 1.10 では、tkn コマンドラインユーティリティーの ClusterTask 機能が非推奨となり、今後のリリースで削除される予定です。
5.3.10.1. clustertask
ClusterTask を管理します。
例: ヘルプを表示する
$ tkn clustertask --help5.3.10.2. clustertask delete
クラスターの ClusterTask リソースを削除します。
例: mytask1 および mytask2 ClusterTask の削除
$ tkn clustertask delete mytask1 mytask25.3.10.3. clustertask describe
ClusterTask を記述します。
例: mytask ClusterTask の記述
$ tkn clustertask describe mytask15.3.10.4. clustertask list
ClusterTask をリスト表示します。
例: ClusterTask のリスト表示
$ tkn clustertask list5.3.10.5. clustertask start
ClusterTask を開始します。
例: mytask ClusterTask の開始
$ tkn clustertask start mytask5.3.11. 管理コマンドのトリガー
5.3.11.1. eventlistener
EventListener を管理します。
例: ヘルプを表示する
$ tkn eventlistener -h5.3.11.2. eventlistener delete
EventListener を削除します。
例: namespace の mylistener1 および mylistener2 EventListener を削除する
$ tkn eventlistener delete mylistener1 mylistener2 -n myspace5.3.11.3. eventlistener describe
EventListener を記述します。
例: namespace の mylistener EventListener を記述する
$ tkn eventlistener describe mylistener -n myspace5.3.11.4. eventlistener list
EventListener をリストします。
例: namespace のすべての EventListener をリストする
$ tkn eventlistener list -n myspace5.3.11.5. eventlistener ログ
EventListener のログを表示します。
例: namespace に mylistener EventListener のログを表示する
$ tkn eventlistener logs mylistener -n myspace5.3.11.6. triggerbinding
TriggerBinding を管理します。
例: TriggerBindings ヘルプを表示する
$ tkn triggerbinding -h5.3.11.7. triggerbinding delete
TriggerBinding を削除します。
例: namespace の mybinding1 および mybinding2 TriggerBinding を削除する
$ tkn triggerbinding delete mybinding1 mybinding2 -n myspace5.3.11.8. triggerbinding describe
TriggerBinding を記述します。
例: namespace の mybinding TriggerBinding を記述する
$ tkn triggerbinding describe mybinding -n myspace5.3.11.9. triggerbinding list
TriggerBinding をリストします。
例: namespace のすべての TriggerBinding をリストする
$ tkn triggerbinding list -n myspace5.3.11.10. triggertemplate
TriggerTemplate を管理します。
例: TriggerTemplate ヘルプを表示する
$ tkn triggertemplate -h5.3.11.11. triggertemplate delete
TriggerTemplate を削除します。
例: namespace の mytemplate1 および mytemplate2 TriggerTemplate を削除する
$ tkn triggertemplate delete mytemplate1 mytemplate2 -n `myspace`5.3.11.12. triggertemplate describe
TriggerTemplate を記述します。
例: namespace の mytemplate TriggerTemplate を記述する
$ tkn triggertemplate describe mytemplate -n `myspace`5.3.11.13. triggertemplate list
TriggerTemplate をリストします。
例: namespace のすべての TriggerTemplate をリストする
$ tkn triggertemplate list -n myspace5.3.11.14. clustertriggerbinding
ClusterTriggerBinding を管理します。
例: ClusterTriggerBinding のヘルプを表示する
$ tkn clustertriggerbinding -h5.3.11.15. clustertriggerbinding delete
ClusterTriggerBinding を削除します。
例: myclusterbinding1 および myclusterbinding2 ClusterTriggerBinding を削除する
$ tkn clustertriggerbinding delete myclusterbinding1 myclusterbinding25.3.11.16. clustertriggerbinding describe
ClusterTriggerBinding を記述します。
例: myclusterbinding ClusterTriggerBinding を記述する
$ tkn clustertriggerbinding describe myclusterbinding5.3.11.17. clustertriggerbinding list
ClusterTriggerBinding のリストを表示します。
例: すべての ClusterTriggerBinding をリストする
$ tkn clustertriggerbinding list5.3.12. hub 対話コマンド
タスクやパイプラインなど、リソースの Tekton Hub と対話します。
5.3.12.1. hub
ハブと対話します。
例: ヘルプを表示する
$ tkn hub -h例: ハブ API サーバーと対話する
$ tkn hub --api-server https://api.hub.tekton.dev
それぞれの例で、対応するサブコマンドとフラグを取得するには、tkn hub <command> --help を実行します。
5.3.12.2. hub downgrade
インストール済みのリソースをダウングレードします。
例: mynamespace namespace の mytask タスクを古いバージョンにダウングレードする
$ tkn hub downgrade task mytask --to version -n mynamespace5.3.12.3. hub get
名前、種類、カタログ、およびバージョン別に、リソースマニフェストを取得します。
例: tekton カタログからの特定バージョンの myresource パイプラインまたはタスクのマニフェストを取得する
$ tkn hub get [pipeline | task] myresource --from tekton --version version5.3.12.4. hub info
名前、種類、カタログ、およびバージョン別に、リソースに関する情報を表示します。
例: tekton カタログからの特定バージョンの mytask タスクに関する情報を表示する
$ tkn hub info task mytask --from tekton --version version5.3.12.5. hub install
種類、名前、バージョンごとにカタログからのリソースをインストールします。
例: mynamespace namespace の tekton カタログから mytask タスクの特定バージョンをインストールする
$ tkn hub install task mytask --from tekton --version version -n mynamespace5.3.12.6. hub reinstall
種類および名前ごとにリソースを再インストールします。
例: mynamespace namespace の tekton カタログから mytask タスクの特定バージョンを再インストールする
$ tkn hub reinstall task mytask --from tekton --version version -n mynamespace5.3.12.7. hub search
名前、種類、およびタグの組み合わせでリソースを検索します。
例: タグ cli でリソースを検索する
$ tkn hub search --tags cli5.3.12.8. hub upgrade
インストール済みのリソースをアップグレードします。
例: mynamespace namespace のインストールされた mytask タスクの新規バージョンへのアップグレード
$ tkn hub upgrade task mytask --to version -n mynamespace第6章 Red Hat OpenShift GitOps で使用するための GitOps CLI
GitOps argocd CLI は、ターミナルから Red Hat OpenShift GitOps と Argo CD リソースを設定および管理するためのツールです。
GitOps CLI を使用すると、GitOps コンピューティングタスクを単純かつ簡潔に実行できます。この CLI ツールはさまざまなプラットフォームにインストールできます。
6.1. GitOps CLI のインストール
GitOps CLI のインストール を参照してください。
第7章 opm CLI
7.1. opm CLI のインストール
7.1.1. opm CLI について
opm CLI ツールは、Operator Bundle Format で使用するために Operator Framework によって提供されます。このツールを使用して、ソフトウェアリポジトリーに相当する Operator バンドルのリストから Operators のカタログを作成し、維持することができます。結果として、コンテナーイメージをコンテナーレジストリーに保存し、その後にクラスターにインストールできます。
カタログには、コンテナーイメージの実行時に提供される組み込まれた API を使用してクエリーできる、Operator マニフェストコンテンツへのポインターのデータベースが含まれます。OpenShift Container Platform では、Operator Lifecycle Manager (OLM) は、CatalogSource オブジェクトが定義したカタログソース内のイメージ参照できます。これにより、クラスター上にインストールされた Operator への頻度の高い更新を可能にするためにイメージを一定の間隔でポーリングできます。
7.1.2. opm CLI のインストール
opm CLI ツールは、Linux、macOS、または Windows ワークステーションにインストールできます。
前提条件
Linux の場合は、以下のパッケージを指定する必要があります。
-
podmanバージョン 1.9.3 以降 (バージョン 2.0 以降を推奨) -
glibcバージョン 2.28 以降
-
手順
OpenShift mirror site に移動し、お使いのオペレーティングシステムに一致する最新バージョンの tarball をダウンロードします。
重要現在、OpenShift Container Platform 4.15 でリリースされた
opmCLI ツールのバージョンが RHEL 8 をサポートしないという既知の問題があります。回避策として、RHEL 8 ユーザーは OpenShift ミラーサイト に移動し、OpenShift Container Platform 4.14 でリリースされた tarball の最新バージョンをダウンロードできます。アーカイブを展開します。
Linux または macOS の場合:
$ tar xvf <file>- Windows の場合、ZIP プログラムでアーカイブを展開します。
ファイルを
PATHの任意の場所に置きます。Linux または macOS の場合:
PATHを確認します。$ echo $PATHファイルを移動します。以下に例を示します。
$ sudo mv ./opm /usr/local/bin/
Windows の場合:
PATHを確認します。C:\> pathファイルを移動します。
C:\> move opm.exe <directory>
検証
opmCLI のインストール後に、これが利用可能であることを確認します。$ opm version
7.2. opm CLI リファレンス
opm コマンドラインインターフェイス (CLI) は、Operator カタログを作成して保守するためのツールです。
opm CLI 構文
$ opm <command> [<subcommand>] [<argument>] [<flags>]
opm CLI には前方互換性がありません。カタログコンテンツの生成に使用される opm CLI のバージョンは、クラスター上でコンテンツを提供するために使用されるバージョンと同じかそれより前である必要があります。
| フラグ | 説明 |
|---|---|
|
| バンドルまたはインデックスをプルする時に、コンテナーイメージレジストリーの TLS 証明書の検証を省略します。 |
|
| バンドルをプルするときは、コンテナーイメージレジストリーにプレーン HTTP を使用します。 |
関連する CLI コマンドを含む、SQLite ベースのカタログ形式は非推奨の機能です。非推奨の機能は依然として OpenShift Container Platform に含まれており、引き続きサポートされますが、本製品の今後のリリースで削除されるため、新規デプロイメントでの使用は推奨されません。
OpenShift Container Platform で非推奨となったか、削除された主な機能の最新の一覧は、OpenShift Container Platform リリースノートの 非推奨および削除された機能 セクションを参照してください。
7.2.1. generate
宣言型設定インデックスのさまざまなアーティファクトを生成します。
コマンド構文
$ opm generate <subcommand> [<flags>]| サブコマンド | 説明 |
|---|---|
|
| 宣言型設定インデックスの Dockerfile を生成します。 |
| フラグ | 説明 |
|---|---|
|
| generate のヘルプ。 |
7.2.1.1. dockerfile
宣言型設定インデックスの Dockerfile を生成します。
このコマンドは、インデックスの構築に使用される Dockerfile を <dcRootDir> と同じディレクトリーに作成します (<dcDirName>.Dockerfile という名前)。同じ名前の Dockerfile がすでに存在する場合、このコマンドは失敗します。
追加のラベルを指定するときに重複キーが存在する場合、各重複キーの最後の値のみが生成された Dockerfile に追加されます。
コマンド構文
$ opm generate dockerfile <dcRootDir> [<flags>]| フラグ | 説明 |
|---|---|
|
|
カタログを作成するイメージ。デフォルト値は |
|
|
生成された Dockerfile に含める追加のラベル。ラベルの形式は |
|
| Dockerfile のヘルプ。 |
公式の Red Hat イメージを使用してビルドするには、registry.redhat.io/openshift4/ose-operator-registry-rhel9:v4.20 値と -i フラグを使用します。
7.2.2. index
既存の Operator バンドルから SQLite データベース形式のコンテナーイメージに Operator インデックスを生成します。
OpenShift Container Platform 4.11 の時点で、デフォルトの Red Hat が提供する Operator カタログは、ファイルベースのカタログ形式でリリースされます。OpenShift Container Platform 4.6 から 4.10 までのデフォルトの Red Hat が提供する Operator カタログは、非推奨の SQLite データベース形式でリリースされました。
opm サブコマンド、フラグ、および SQLite データベース形式に関連する機能も非推奨となり、今後のリリースで削除されます。機能は引き続きサポートされており、非推奨の SQLite データベース形式を使用するカタログに使用する必要があります。
opm index prune などの SQLite データベース形式を使用する opm サブコマンドおよびフラグの多くは、ファイルベースのカタログ形式では機能しません。
ファイルベースのカタログの操作の詳細は、「関連情報」を参照してください。
コマンド構文
$ opm index <subcommand> [<flags>]| サブコマンド | 説明 |
|---|---|
|
| Operator バンドルをインデックスに追加します。 |
|
| 指定されたパッケージ以外の全パッケージのインデックスをプルーニングします。 |
|
| 特定のイメージに関連付けられていない標準バンドルのインデックスをプルーニングします。 |
|
| Operator 全体をインデックスから削除します。 |
7.2.2.1. add
Operator バンドルをインデックスに追加します。
コマンド構文
$ opm index add [<flags>]| フラグ | 説明 |
|---|---|
|
|
on-image |
|
|
コンテナーイメージをビルドするツール: |
|
| 追加するバンドルのコンマ区切りのリスト。 |
|
|
保存およびビルドなど、コンテナーイメージと対話するためのツール: |
|
| 追加する以前のインデックス。 |
|
| 有効な場合には、Dockerfile のみを作成してローカルディスクに保存します。 |
|
|
チャネルグラフの更新方法を定義するグラフ更新モード: |
|
| オプション: Dockerfile を生成する場合は、ファイル名を指定します。 |
|
| レジストリーの読み込みエラーを許可します。 |
|
|
コンテナーイメージをプルするツール: |
|
| ビルドするコンテナーイメージのカスタムタグ。 |
7.2.2.2. prune
指定されたパッケージ以外の全パッケージのインデックスをプルーニングします。
コマンド構文
$ opm index prune [<flags>]| フラグ | 説明 |
|---|---|
|
|
on-image |
|
|
保存およびビルドなど、コンテナーイメージと対話するためのツール: |
|
| プルーニングするインデックス。 |
|
| 有効な場合には、Dockerfile のみを作成してローカルディスクに保存します。 |
|
| オプション: Dockerfile を生成する場合は、ファイル名を指定します。 |
|
| 保持するパッケージのコンマ区切りリスト。 |
|
| レジストリーの読み込みエラーを許可します。 |
|
| ビルドするコンテナーイメージのカスタムタグ。 |
7.2.2.3. prune-stranded
特定のイメージに関連付けられていない標準バンドルのインデックスをプルーニングします。
コマンド構文
$ opm index prune-stranded [<flags>]| フラグ | 説明 |
|---|---|
|
|
on-image |
|
|
保存およびビルドなど、コンテナーイメージと対話するためのツール: |
|
| プルーニングするインデックス。 |
|
| 有効な場合には、Dockerfile のみを作成してローカルディスクに保存します。 |
|
| オプション: Dockerfile を生成する場合は、ファイル名を指定します。 |
|
| 保持するパッケージのコンマ区切りリスト。 |
|
| レジストリーの読み込みエラーを許可します。 |
|
| ビルドするコンテナーイメージのカスタムタグ。 |
7.2.2.4. rm
Operator 全体をインデックスから削除します。
コマンド構文
$ opm index rm [<flags>]| フラグ | 説明 |
|---|---|
|
|
on-image |
|
|
コンテナーイメージをビルドするツール: |
|
|
保存およびビルドなど、コンテナーイメージと対話するためのツール: |
|
| 削除する以前のインデックス。 |
|
| 有効な場合には、Dockerfile のみを作成してローカルディスクに保存します。 |
|
| 削除する Operator のコンマ区切りのリスト。 |
|
| オプション: Dockerfile を生成する場合は、ファイル名を指定します。 |
|
| 保持するパッケージのコンマ区切りリスト。 |
|
| レジストリーの読み込みエラーを許可します。 |
|
|
コンテナーイメージをプルするツール: |
|
| ビルドするコンテナーイメージのカスタムタグ。 |
7.2.3. init
olm.package 宣言型設定 blob を生成します。
コマンド構文
$ opm init <package_name> [<flags>]| フラグ | 説明 |
|---|---|
|
| 指定されていない場合に、サブスクリプションがデフォルトで設定されるチャネル。 |
|
|
Operator の |
|
| パッケージのアイコンへのパス。 |
|
|
出力形式: |
7.2.4. migrate
SQLite データベース形式のインデックスイメージまたはデータベースファイルをファイルベースのカタログに移行します。
関連する CLI コマンドを含む、SQLite ベースのカタログ形式は非推奨の機能です。非推奨の機能は依然として OpenShift Container Platform に含まれており、引き続きサポートされますが、本製品の今後のリリースで削除されるため、新規デプロイメントでの使用は推奨されません。
OpenShift Container Platform で非推奨となったか、削除された主な機能の最新の一覧は、OpenShift Container Platform リリースノートの 非推奨および削除された機能 セクションを参照してください。
コマンド構文
$ opm migrate <index_ref> <output_dir> [<flags>]| フラグ | 説明 |
|---|---|
|
|
出力形式: |
7.2.5. render
提供されるインデックスイメージ、バンドルイメージ、および SQLite データベースファイルから宣言型の設定 Blob を生成します。
コマンド構文
$ opm render <index_image | bundle_image | sqlite_file> [<flags>]| フラグ | 説明 |
|---|---|
|
|
出力形式: |
7.2.6. serve
GRPC サーバーを介して宣言型の設定を提供します。
宣言的な config ディレクトリーは、起動時に serve コマンドで読み込まれます。このコマンド開始後に宣言型設定に加えられた変更は、提供されるコンテンツには反映されません。
コマンド構文
$ opm serve <source_path> [<flags>]| フラグ | 説明 |
|---|---|
|
| このフラグが設定されている場合、サーバーキャッシュディレクトリーを同期して永続化します。 |
|
|
キャッシュが存在しないか無効化されている場合、エラーで終了します。 |
|
| サービスキャッシュを同期し、サービスを提供せずに終了します。 |
|
| デバッグロギングを有効にします。 |
|
| serve のヘルプ。 |
|
|
サービスのポート番号。デフォルト値は |
|
|
起動プロファイリングエンドポイントのアドレス。形式は |
|
|
コンテナー終了ログファイルへのパス。デフォルト値は |
7.2.7. validate
指定されたディレクトリーの宣言型設定 JSON ファイルを検証します。
コマンド構文
$ opm validate <directory> [<flags>]第8章 Operator SDK
8.1. Operator SDK CLI のインストール
Operator SDK は、Operator 開発者が Operator のビルド、テストおよびデプロイに使用できるコマンドラインインターフェイス (CLI) ツールを提供します。ワークステーションに Operator SDK CLI をインストールして、独自の Operator のオーサリングを開始する準備を整えることができます。
Kubernetes ベースのクラスター (OpenShift Container Platform など) へのクラスター管理者のアクセスのある Operator の作成者は、Operator SDK CLI を使用して Go、Ansible、Java、または Helm をベースに独自の Operator を開発できます。Kubebuilder は Go ベースの Operator のスキャフォールディングソリューションとして Operator SDK に組み込まれます。つまり、既存の Kubebuilder プロジェクトは Operator SDK でそのまま使用でき、引き続き機能します。Operator SDK の詳細は、Operator の開発 を参照してください。
OpenShift Container Platform 4.15 は Operator SDK 1.31.0 をサポートします。
8.1.1. Linux での Operator SDK CLI のインストール
OpenShift SDK CLI ツールは Linux にインストールできます。
前提条件
- Go v1.19 以降
-
dockerv17.03+、podmanv1.9.3+、またはbuildahv1.7+
手順
- OpenShift ミラーサイト に移動します。
- 最新の 4.15 ディレクトリーから、Linux 用 tarball の最新バージョンをダウンロードします。
アーカイブを展開します。
$ tar xvf operator-sdk-v1.31.0-ocp-linux-x86_64.tar.gzファイルを実行可能にします。
$ chmod +x operator-sdkデプロイメントされた
operator-sdkバイナリーをPATHにあるディレクトリーに移動します。ヒントPATHを確認するには、以下を実行します。$ echo $PATH$ sudo mv ./operator-sdk /usr/local/bin/operator-sdk
検証
Operator SDK CLI のインストール後に、これが利用可能であることを確認します。
$ operator-sdk version出力例
operator-sdk version: "v1.31.0-ocp", ...
8.1.2. macOS への Operator SDK CLI のインストール
macOS に OpenShift SDK CLI ツールをインストールできます。
前提条件
- Go v1.19 以降
-
dockerv17.03+、podmanv1.9.3+、またはbuildahv1.7+
手順
-
amd64およびarm64アーキテクチャーの場合は、amd64アーキテクチャーの OpenShift ミラーサイト およびarm64アーキテクチャーの OpenShift ミラーサイト にそれぞれ移動します。 - 最新の 4.15 ディレクトリーから、macOS 用 tarball の最新バージョンをダウンロードします。
以下のコマンドを実行して、
amd64アーキテクチャー用の Operator SDK アーカイブを解凍します。$ tar xvf operator-sdk-v1.31.0-ocp-darwin-x86_64.tar.gz以下のコマンドを実行して、
arm64アーキテクチャー用の Operator SDK アーカイブを解凍します。$ tar xvf operator-sdk-v1.31.0-ocp-darwin-aarch64.tar.gz次のコマンドを実行して、ファイルを実行可能にします。
$ chmod +x operator-sdk次のコマンドを実行して、抽出した
operator-sdkバイナリーをPATH上のディレクトリーに移動します。ヒント次のコマンドを実行して、
PATHを確認します。$ echo $PATH$ sudo mv ./operator-sdk /usr/local/bin/operator-sdk
検証
Operator SDK CLI をインストールしたら、次のコマンドを実行して、それが使用可能であることを確認します。
$ operator-sdk version出力例
operator-sdk version: "v1.31.0-ocp", ...
8.2. Operator SDK CLI リファレンス
Operator SDK コマンドラインインターフェイス (CLI) は、Operator の作成を容易にするために設計された開発キットです。
Operator SDK CLI 構文
$ operator-sdk <command> [<subcommand>] [<argument>] [<flags>]Operator SDK の詳細は、Operator の開発 を参照してください。
8.2.1. bundle
operator-sdk bundle コマンドは Operator バンドルメタデータを管理します。
8.2.1.1. validate
bundle validate サブコマンドは Operator バンドルを検証します。
| フラグ | 説明 |
|---|---|
|
|
|
|
|
バンドルイメージをプルして展開するためのツール。バンドルイメージを検証する場合にのみ使用されます。使用できるオプションは、 |
|
| 利用可能なすべてのオプションのバリデーターをリスト表示します。これが設定されている場合、バリデーターは実行されません。 |
|
|
実行するオプションのバリデーターを選択するラベルセレクター。 |
8.2.2. cleanup
operator-sdk cleanup コマンドは、run コマンドでデプロイされた Operator 用に作成されたリソースを破棄し、削除します。
| フラグ | 説明 |
|---|---|
|
|
|
|
|
CLI 要求に使用する |
|
| CLI 要求がある場合の CLI 要求を実行する namespace。 |
|
|
コマンドが失敗せずに完了するまでの待機時間。デフォルト値は |
8.2.3. completion
operator-sdk completion コマンドは、CLI コマンドをより迅速に、より容易に実行できるようにシェル補完を生成します。
| サブコマンド | 説明 |
|---|---|
|
| bash 補完を生成します。 |
|
| zsh 補完を生成します。 |
| フラグ | 説明 |
|---|---|
|
| 使用方法に関するヘルプの出力。 |
以下に例を示します。
$ operator-sdk completion bash出力例
# bash completion for operator-sdk -*- shell-script -*-
...
# ex: ts=4 sw=4 et filetype=sh8.2.4. create
operator-sdk create コマンドは、Kubernetes API の作成または スキャフォールディング に使用されます。
8.2.4.1. api
create api サブコマンドは Kubernetes API をスキャフォールディングします。サブコマンドは、init コマンドで初期化されたプロジェクトで実行する必要があります。
| フラグ | 説明 |
|---|---|
|
|
|
8.2.5. generate
operator-sdk generate コマンドは特定のジェネレーターを起動して、必要に応じてコードを生成します。
8.2.5.1. bundle
generate bundle サブコマンドは、Operator プロジェクトのバンドルマニフェスト、メタデータ、および bundle.Dockerfile ファイルのセットを生成します。
通常は、最初に generate kustomize manifests サブコマンドを実行して、generate bundle サブコマンドで使用される入力された Kustomize ベースを生成します。ただし、初期化されたプロジェクトで make bundle コマンドを使用して、これらのコマンドの順次の実行を自動化できます。
| フラグ | 説明 |
|---|---|
|
|
バンドルが属するチャネルのコンマ区切りリスト。デフォルト値は |
|
|
|
|
| バンドルのデフォルトチャネル。 |
|
|
デプロイメントや RBAC などの Operator マニフェストのルートディレクトリー。このディレクトリーは、 |
|
|
|
|
|
既存のバンドルを読み取るディレクトリー。このディレクトリーは、バンドル |
|
|
バンドルマニフェストの Kustomize ベースおよび |
|
| バンドルマニフェストを生成します。 |
|
| バンドルメタデータと Dockerfile を生成します。 |
|
| バンドルを書き込むディレクトリー。 |
|
|
バンドルメタデータおよび Dockerfile を上書きします (ある場合)。デフォルト値は |
|
| バンドルのパッケージ名。 |
|
| quiet モードで実行します。 |
|
| バンドルマニフェストを標準出力に書き込みます。 |
|
| 生成されたバンドルの Operator のセマンティックバージョン。新規バンドルを作成するか、Operator をアップグレードする場合にのみ設定します。 |
8.2.5.2. kustomize
generate kustomize サブコマンドには、Operator の Kustomize データを生成するサブコマンドが含まれます。
8.2.5.2.1. manifests
generate kustomize manifests は Kustomize ベースを生成または再生成し、kustomization.yaml ファイルを config/manifests ディレクトリーに生成または再生成します。これは、他の Operator SDK コマンドでバンドルマニフェストをビルドするために使用されます。このコマンドは、ベースがすでに存在しない場合や --interactive=false フラグが設定されていない場合に、デフォルトでマニフェストベースの重要なコンポーネントである UI メタデータを対話的に要求します。
| フラグ | 説明 |
|---|---|
|
| API タイプ定義のルートディレクトリー。 |
|
|
|
|
| 既存の Kustomize ファイルを含むディレクトリー。 |
|
|
|
|
| Kustomize ファイルを書き込むディレクトリー。 |
|
| パッケージ名。 |
|
| quiet モードで実行します。 |
8.2.6. init
operator-sdk init コマンドは Operator プロジェクトを初期化し、指定されたプラグインのデフォルトのプロジェクトディレクトリーレイアウトを生成または スキャフォールド します。
このコマンドは、以下のファイルを作成します。
- ボイラープレートライセンスファイル
-
ドメインおよびリポジトリーを含む
PROJECTファイル -
プロジェクトをビルドする
Makefile -
プロジェクト依存関係のある
go.modファイル -
マニフェストをカスタマイズするための
kustomization.yamlファイル - マネージャーマニフェストのイメージをカスタマイズするためのパッチファイル
- Prometheus メトリクスを有効にするためのパッチファイル
-
実行する
main.goファイル
| フラグ | 説明 |
|---|---|
|
|
|
|
|
プロジェクトを初期化するプラグインの名前およびオプションのバージョン。利用可能なプラグインは |
|
|
プロジェクトのバージョン。使用できる値は |
8.2.7. run
operator-sdk run コマンドは、さまざまな環境で Operator を起動できるオプションを提供します。
8.2.7.1. bundle
run bundle サブコマンドは、Operator Lifecycle Manager (OLM) を使用してバンドル形式で Operator をデプロイします。
| フラグ | 説明 |
|---|---|
|
|
バンドルを挿入するインデックスイメージ。デフォルトのイメージは |
|
|
Operator のクラスターサービスバージョン (CSV) によってサポートされるインストールモード (例: |
|
|
インストールのタイムアウト。デフォルト値は |
|
|
CLI 要求に使用する |
|
| CLI 要求がある場合の CLI 要求を実行する namespace。 |
|
|
カタログ Pod に使用するセキュリティーコンテキストを指定します。許可される値には、 |
|
|
|
-
restrictedセキュリティーコンテキストは、defaultnamespace と互換性がありません。実稼働環境で Operator の Pod セキュリティーアドミッションを設定する場合は、「Pod セキュリティーアドミッションに準拠」を参照してください。Pod セキュリティーアドミッションの詳細は、「Pod セキュリティーアドミッションの理解と管理」を参照してください。
8.2.7.2. bundle-upgrade
run bundle-upgrade サブコマンドは、以前に Operator Lifecycle Manager (OLM) を使用してバンドル形式でインストールされた Operator をアップグレードします。
| フラグ | 説明 |
|---|---|
|
|
アップグレードのタイムアウト。デフォルト値は |
|
|
CLI 要求に使用する |
|
| CLI 要求がある場合の CLI 要求を実行する namespace。 |
|
|
カタログ Pod に使用するセキュリティーコンテキストを指定します。許可される値には、 |
|
|
|
-
restrictedセキュリティーコンテキストは、defaultnamespace と互換性がありません。実稼働環境で Operator の Pod セキュリティーアドミッションを設定する場合は、「Pod セキュリティーアドミッションに準拠」を参照してください。Pod セキュリティーアドミッションの詳細は、「Pod セキュリティーアドミッションの理解と管理」を参照してください。
8.2.8. scorecard
operator-sdk scorecard コマンドは、スコアカードツールを実行して Operator バンドルを検証し、改善に向けた提案を提供します。このコマンドは、バンドルイメージまたはマニフェストおよびメタデータを含むディレクトリーのいずれかの引数を取ります。引数がイメージタグを保持する場合は、イメージはリモートに存在する必要があります。
| フラグ | 説明 |
|---|---|
|
|
スコアカード設定ファイルへのパス。デフォルトのパスは |
|
|
|
|
|
|
|
| 実行可能なテストをリスト表示します。 |
|
| テストイメージを実行する namespace。 |
|
|
結果の出力形式。使用できる値はデフォルトの |
|
|
指定されたセキュリティーコンテキストでスコアカードを実行するオプション。許可される値には、 |
|
| 実行されるテストを決定するラベルセレクター。 |
|
|
テストに使用するサービスアカウント。デフォルト値は |
|
| テストの実行後にリソースクリーンアップを無効にします。 |
|
|
テストが完了するのを待つ秒数 (例: |
-
restrictedセキュリティーコンテキストは、defaultnamespace と互換性がありません。実稼働環境で Operator の Pod セキュリティーアドミッションを設定する場合は、「Pod セキュリティーアドミッションに準拠」を参照してください。Pod セキュリティーアドミッションの詳細は、「Pod セキュリティーアドミッションの理解と管理」を参照してください。
Legal Notice
Copyright © Red Hat
OpenShift documentation is licensed under the Apache License 2.0 (https://www.apache.org/licenses/LICENSE-2.0).
Modified versions must remove all Red Hat trademarks.
Portions adapted from https://github.com/kubernetes-incubator/service-catalog/ with modifications by Red Hat.
Red Hat, Red Hat Enterprise Linux, the Red Hat logo, the Shadowman logo, JBoss, OpenShift, Fedora, the Infinity logo, and RHCE are trademarks of Red Hat, Inc., registered in the United States and other countries.
Linux® is the registered trademark of Linus Torvalds in the United States and other countries.
Java® is a registered trademark of Oracle and/or its affiliates.
XFS® is a trademark of Silicon Graphics International Corp. or its subsidiaries in the United States and/or other countries.
MySQL® is a registered trademark of MySQL AB in the United States, the European Union and other countries.
Node.js® is an official trademark of the OpenJS Foundation.
The OpenStack® Word Mark and OpenStack logo are either registered trademarks/service marks or trademarks/service marks of the OpenStack Foundation, in the United States and other countries and are used with the OpenStack Foundation’s permission. We are not affiliated with, endorsed or sponsored by the OpenStack Foundation, or the OpenStack community.
All other trademarks are the property of their respective owners.