此内容没有您所选择的语言版本。
10.7. Managing Host Groups
Host groups are a way of centralizing control over important management tasks, particularly access control.
All groups in Identity Management are essentially static groups, meaning that the members of the group are manually and explicitly added to the group. Tangentially, IdM allows nested groups, where a group is a member of another group. In that case, all of the group members of the member group automatically belong to the parent group, as well.
Because groups are easy to create, it is possible to be very flexible in what groups to create and how they are organized. Groups can be defined around organizational divisions like departments, physical locations, or IdM or infrastructure usage guidelines for access controls.
10.7.1. Creating Host Groups
复制链接链接已复制到粘贴板!
10.7.1.1. Creating Host Groups from the Web UI
复制链接链接已复制到粘贴板!
- Open the Identity tab, and select the Host Groups subtab.
- Click the Add link at the top of the groups list.
- Enter the name and a description for the group.
- Click the button to go immediately to the member selection page.
- Select the members, as described in Section 10.7.2.2, “Adding Host Group Members from the Web UI”.
10.7.1.2. Creating Host Groups from the Command Line
复制链接链接已复制到粘贴板!
New groups are created using the
hostgroup-add command. (This adds only the group; members are added separately.)
Two attributes are always required: the group name and the group description. If those attributes are not given as arguments, then the script prompts for them.
ipa hostgroup-add groupName --desc="description"
$ ipa hostgroup-add groupName --desc="description"10.7.2. Adding Host Group Members
复制链接链接已复制到粘贴板!
10.7.2.1. Showing and Changing Group Members
复制链接链接已复制到粘贴板!
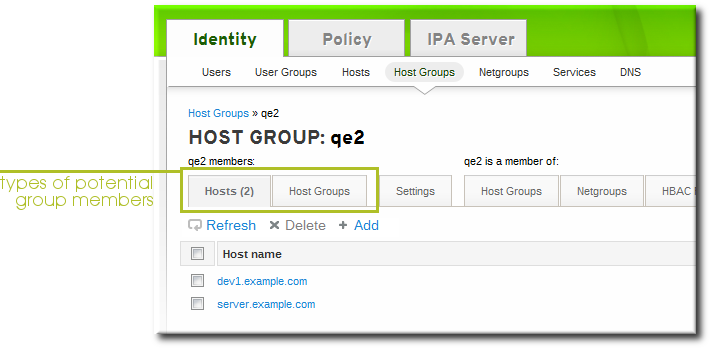
Members can be added to a group through the group configuration. There are tabs for all the member types which can belong to the group, and an administrator picks all of the matching entries and adds them as members.
However, it is also possible for an entity to be added to a group through its own configuration. Each entry has a list of tabs that displays group types that the entry can join. The list of all groups of that type is displayed, and the entity can be added to multiple groups at the same time.
10.7.2.2. Adding Host Group Members from the Web UI
复制链接链接已复制到粘贴板!
- Open the Identity tab, and select the Host Groups subtab.
- Click the name of the group to which to add members.
- Click the Add link at the top of the task area.
- Click the checkbox by the names of the hosts to add, and click the right arrows button, , to move the hosts to the selection box.
- Click the button.
Members are added to a host group using the
hostgroup-add-member command. This command can add both hosts as group members and other groups as group members.
The syntax of the
hostgroup-add-member command requires only the group name and a comma-separated list of hosts to add:
ipa hostgroup-add-member groupName [--hosts=list] [--hostgroups=list]
$ ipa hostgroup-add-member groupName [--hosts=list] [--hostgroups=list]
For example, this adds three hosts to the
caligroup group:
Likewise, other groups can be added as members, which creates nested groups:


