32.4. Partition Information
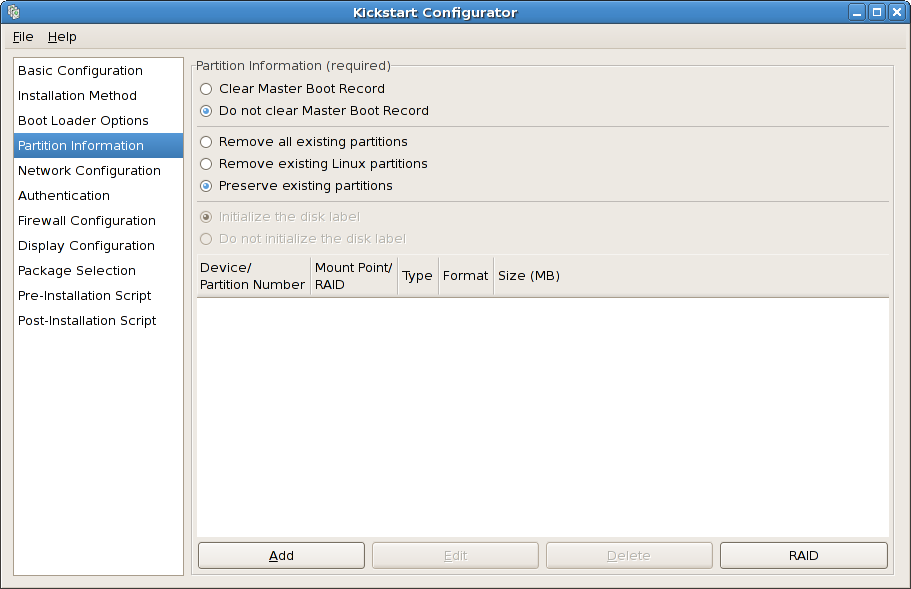
Figure 32.4. Partition Information
Select whether or not to clear the Master Boot Record (MBR). Choose to remove all existing partitions, remove all existing Linux partitions, or preserve existing partitions.
To initialize the disk label to the default for the architecture of the system (for example,
msdos for x86 and gpt for Itanium), select Initialize the disk label if you are installing on a brand new hard drive.
Note
Although
anaconda and kickstart support Logical Volume Management (LVM), at present there is no mechanism for configuring this using the Kickstart Configurator.
32.4.1. Creating Partitions
Copy linkLink copied to clipboard!
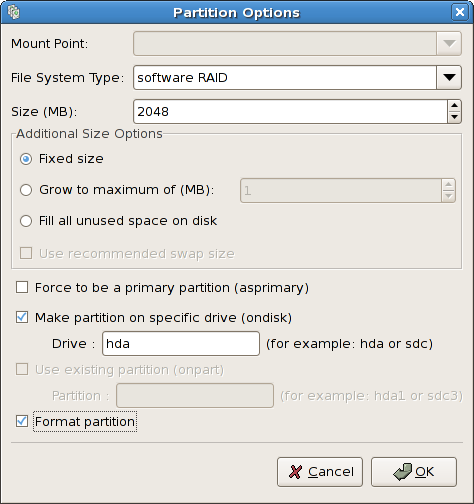
To create a partition, click the button. The Partition Options window shown in Figure 32.5, “Creating Partitions” appears. Choose the mount point, file system type, and partition size for the new partition. Optionally, you can also choose from the following:
- In the Additional Size Options section, choose to make the partition a fixed size, up to a chosen size, or fill the remaining space on the hard drive. If you selected swap as the file system type, you can select to have the installation program create the swap partition with the recommended size instead of specifying a size.
- Force the partition to be created as a primary partition.
- Create the partition on a specific hard drive. For example, to make the partition on the first IDE hard disk (
/dev/hda), specifyhdaas the drive. Do not include/devin the drive name. - Use an existing partition. For example, to make the partition on the first partition on the first IDE hard disk (
/dev/hda1), specifyhda1as the partition. Do not include/devin the partition name. - Format the partition as the chosen file system type.
Figure 32.5. Creating Partitions
To edit an existing partition, select the partition from the list and click the button. The same Partition Options window appears as when you chose to add a partition as shown in Figure 32.5, “Creating Partitions”, except it reflects the values for the selected partition. Modify the partition options and click .
To delete an existing partition, select the partition from the list and click the button.
32.4.1.1. Creating Software RAID Partitions
Copy linkLink copied to clipboard!
To create a software RAID partition, use the following steps:
- Click the button.
- Select Create a software RAID partition.
- Configure the partitions as previously described, except select Software RAID as the file system type. Also, you must specify a hard drive on which to make the partition or specify an existing partition to use.
Figure 32.6. Creating a Software RAID Partition
Repeat these steps to create as many partitions as needed for your RAID setup. All of your partitions do not have to be RAID partitions.
After creating all the partitions needed to form a RAID device, follow these steps:
- Click the button.
- Select Create a RAID device.
- Select a mount point, file system type, RAID device name, RAID level, RAID members, number of spares for the software RAID device, and whether to format the RAID device.
Figure 32.7. Creating a Software RAID Device
- Click to add the device to the list.


