18.19. The Configuration Menu and Progress Screen
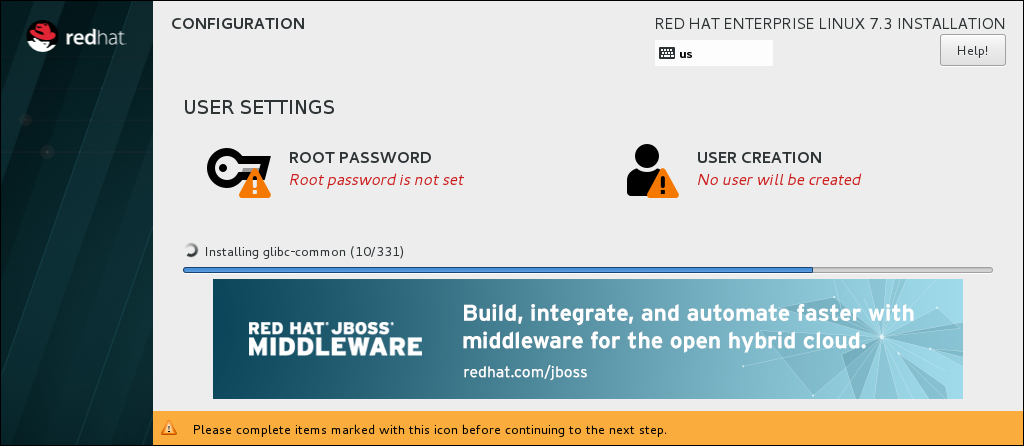
Once you click Begin Installation at the Installation Summary screen, the progress screen appears. Red Hat Enterprise Linux reports the installation progress on the screen as it writes the selected packages to your system.
Figure 18.37. Installing Packages
For your reference, a complete log of your installation can be found in the
/var/log/anaconda/anaconda.packaging.log file, once you reboot your system.
If you chose to encrypt one or more partitions during partitioning setup, a dialog window with a progress bar will be displayed during the early stage of the installation process. This window informs that the installer is attempting to gather enough entropy (random data) to ensure that the encryption is secure. This window will disappear after 256 bits of entropy are gathered, or after 10 minutes. You can speed up the gathering process by moving your mouse or randomly typing on the keyboard. After the window disappears, the installation process will continue.
Figure 18.38. Gathering Entropy for Encryption
While the packages are being installed, more configuration is required. Above the installation progress bar are the Root Password and User Creation menu items.
The Root Password screen is used to configure the system's
root account. This account can be used to perform critical system management and administration tasks. The same tasks can also be performed with a user account with the wheel group membership; if such an user account is created during installation, setting up a root password is not mandatory.
Creating a user account is optional and can be done after installation, but it is recommended to do it on this screen. A user account is used for normal work and to access the system. Best practice suggests that you always access the system through a user account, not the root account.
It is possible to disable access to the Root Password or Create User screens. To do so, use a Kickstart file which includes the
rootpw --lock or user --lock commands. See Section 27.3.1, “Kickstart Commands and Options” for more information these commands.
18.19.1. Set the Root Password
Copy linkLink copied to clipboard!
Setting up a root account and password is an important step during your installation. The root account (also known as the superuser) is used to install packages, upgrade RPM packages, and perform most system maintenance. The root account gives you complete control over your system. For this reason, the root account is best used only to perform system maintenance or administration. See the Red Hat Enterprise Linux 7 System Administrator's Guide for more information about becoming root.
Figure 18.39. Root Password Screen
Note
You must always set up at least one way to gain root privileges to the installed system: either using a
root account, or by creating a user account with administrative privileges (member of the wheel group), or both.
Click the Root Password menu item and enter your new password into the Root Password field. Red Hat Enterprise Linux displays the characters as asterisks for security. Type the same password into the Confirm field to ensure it is set correctly. After you set the root password, click Done to return to the User Settings screen.
The following are the requirements and recommendations for creating a strong root password:
- must be at least eight characters long
- may contain numbers, letters (upper and lower case) and symbols
- is case-sensitive and should contain a mix of cases
- something you can remember but that is not easily guessed
- should not be a word, abbreviation, or number associated with you, your organization, or found in a dictionary (including foreign languages)
- should not be written down; if you must write it down keep it secure
Note
To change your root password after you have completed the installation, run the
passwd command as root. If you forget the root password, see Section 32.1.3, “Resetting the Root Password” for instructions on how to use the rescue mode to set a new one.
18.19.2. Create a User Account
Copy linkLink copied to clipboard!
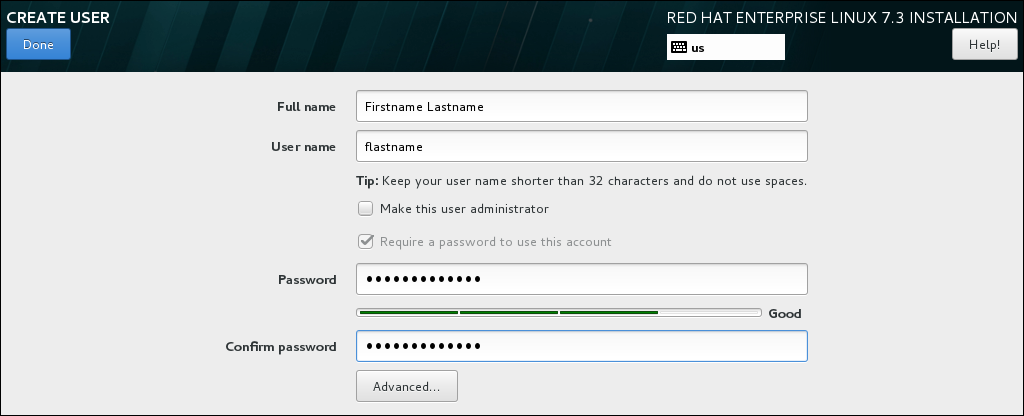
To create a regular (non-root) user account during the installation, click User Settings on the progress screen. The Create User screen appears, allowing you to set up the regular user account and configure its parameters. Though recommended to do during installation, this step is optional and can be performed after the installation is complete.
Note
You must always set up at least one way to gain root privileges to the installed system: either using a
root account, or by creating a user account with administrative privileges (member of the wheel group), or both.
To leave the user creation screen after you have entered it, without creating a user, leave all the fields empty and click Done.
Figure 18.40. User Account Configuration Screen
Enter the full name and the user name in their respective fields. Note that the system user name must be shorter than 32 characters and cannot contain spaces. It is highly recommended to set up a password for the new account.
When setting up a strong password even for a non-root user, follow the guidelines described in Section 18.19.1, “Set the Root Password”.
Click the Advanced button to open a new dialog with additional settings.
Figure 18.41. Advanced User Account Configuration
By default, each user gets a home directory corresponding to their user name. In most scenarios, there is no need to change this setting.
You can also manually define a system identification number for the new user and their default group by selecting the check boxes. The range for regular user IDs starts at the number
1000. At the bottom of the dialog, you can enter the comma-separated list of additional groups, to which the new user shall belong. The new groups will be created in the system. To customize group IDs, specify the numbers in parenthesis.
Note
Consider setting IDs of regular users and their default groups at range starting at
5000 instead of 1000. That is because the range reserved for system users and groups, 0-999, might increase in the future and thus overlap with IDs of regular users.
For creating users with custom IDs using kickstart, see
user (optional) .
For changing the minimum UID and GID limits after the installation, which ensures that your chosen UID and GID ranges are applied automatically on user creation, see the Users and Groups chapter of the System Administrator's Guide.
Once you have customized the user account, click Save Changes to return to the User Settings screen.


