9.2. Trouble During the Installation
9.2.1. No Disks Detected
9.2.2. Reporting Traceback Messages
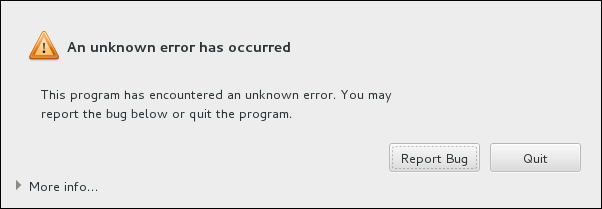
Figure 9.1. The Crash Reporting Dialog Box
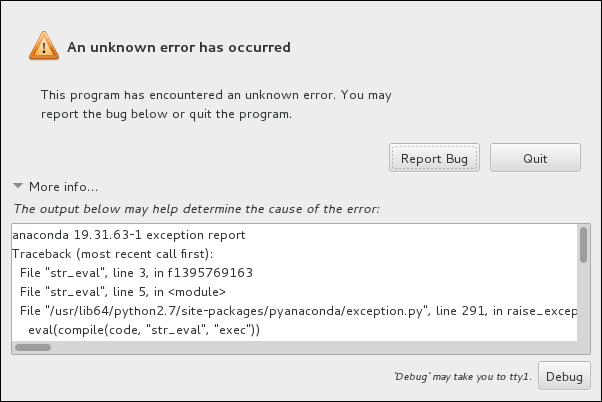
tty1, where you can request more precise information that will enhance the bug report. To return to the graphical interface from tty1, use the continue command.
Figure 9.2. The Expanded Crash Reporting Dialog Box
Procedure 9.3. Reporting Errors to Red Hat Customer Support
- In the menu that appears, select Report a bug to Red Hat Customer Portal.
- To report the bug to Red Hat, you first need to provide your Customer Portal credentials. Click .
Figure 9.3. Customer Portal Credentials
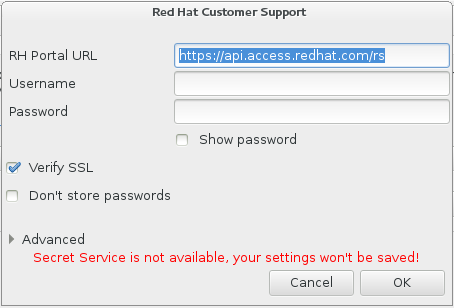
- A new window is now open, prompting you to enter your Customer Portal user name and password. Enter your Red Hat Customer Portal credentials.
Figure 9.4. Configure Red Hat Customer Support
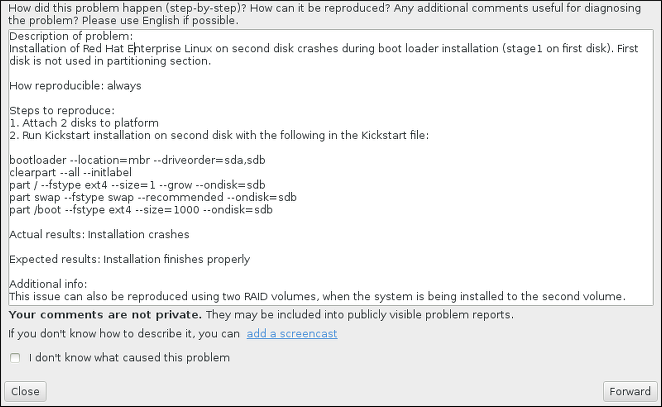
If your network settings require you to use aHTTPorHTTPSproxy, you can configure it by expanding the Advanced menu and entering the address of the proxy server.When you put in all required credentials, click OK to proceed. - A new window appears, containing a text field. Write down any useful information and comments here. Describe how the error can be reproduced by explaining each step you took before the crash reporting dialog appeared. Provide as much relevant detail as possible, including any information you acquired when debugging. Be aware that the information you provide here can become publicly visible on the Customer Portal.If you do not know what caused the error, check the box labeled I don't know what caused this problem at the bottom of the dialog.Then, click .
Figure 9.5. Describe the Problem
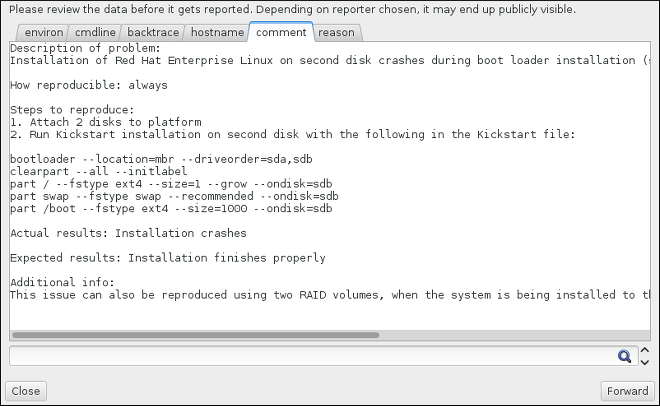
- Next, review the information that will be sent to the Customer Portal. The explanation you provided is in the comment tab. Other tabs include such information as your system's host name and other details about the installation environment. You can remove any items you do not want sent to Red Hat, but be aware that providing less detail can affect the investigation of the issue.Click when you finish reviewing the information to be sent.
Figure 9.6. Review the Data to Be Sent
- Review the list of files that will be sent and included in the bug report as individual attachments. These files provide system information that will assist the investigation. If you do not want to send certain files, uncheck the box next to each one. To provide additional files that can help find the problem, click .Once you have reviewed the files to be sent, check the box labeled I have reviewed the data and agree with submitting it. Then, click to send the report and attachments to the Customer Portal.
Figure 9.7. Review the Files to Be Sent
- When the dialog reports that processing has finished, you can click Show log to view details of the reporting process or Close to return to the initial crash reporting dialog box. There, click Quit to exit the installation.
9.2.3. Creating Pre-installation Log Files
inst.debug option to create log files from the environment before the installation starts. These log files contain, for example, the current storage configuration.
- Select the entry.
- Press the Tab key to edit the boot options.
- Append
inst.debugto the options. For example:> vmlinuz ... inst.debug
> vmlinuz ... inst.debugCopy to Clipboard Copied! Toggle word wrap Toggle overflow For further details, see Chapter 23, Boot Options. - Press Enter to start the setup.
/tmp/pre-anaconda-logs/ directory before Anaconda starts. To access the log files:
- Switch to the console. See Section 8.2.1, “Accessing Consoles”.
- Change into the
/tmp/pre-anaconda-logs/directory:cd /tmp/pre-anaconda-logs/
# cd /tmp/pre-anaconda-logs/Copy to Clipboard Copied! Toggle word wrap Toggle overflow
